crowe-t
-
Posts
1,965 -
Joined
-
Last visited
Content Type
Profiles
Forums
Events
Gallery
Everything posted by crowe-t
-
 Is the Hemi in the Revell '41 Willys Street Rod a 392?
 -
Magic Sculpt vs. Aves epoxy Putty?
crowe-t replied to crowe-t's topic in Model Building Questions and Answers
I live very close to New Park. I got some pizza from there recently. -
Is Magic Sculpt basically the same stuff as Aves Apoxy Sculpt?
-
I just came across this build. This is incredible!
-
Amt/Mpc 72 Chevelle query
crowe-t replied to br67's topic in General Automotive Talk (Trucks and Cars)
I still have my original MPC '72 that I built when I was about 12. It's molded in black and came with a very large hood scoop. I think it's the SSlasher but I could be wrong. I painted the body with black enamel spray can paint back then. Maybe one day I'll rebuild it. -
Amt/Mpc 72 Chevelle query
crowe-t replied to br67's topic in General Automotive Talk (Trucks and Cars)
It's a shame since the AMT's body looks very accurate in shape, except for the side bulges. -
Chevy Orange Engine color hobby paint alternative?
crowe-t replied to crowe-t's topic in Model Building Questions and Answers
I need a paint for Chevy Orange. The Testors Chevy Engine Red is red. -
Is there a good hobby acrylic that looks like Chevy Orange engine paint? Is Testors International Orange close?
-
Excellent work on this one!
-
Amt/Mpc 72 Chevelle query
crowe-t replied to br67's topic in General Automotive Talk (Trucks and Cars)
Do any of the AMT '72 Chevelle kits have correct side bulges on the fenders and quarter panels? I know the MPC '72 Chevelle had the correct bulges. -
I have a body that I broke the passenger side A - pillar loose from where it connects to the fender. I glued it twice and finally it held. I had to strip the body today and when I was scrubbing it with a tooth brush it broke again. I have a feeling this is going to keep happening. It's such a fragile connection. Am I better off buying another kit and starting with a new body? This is what I'm leaning towards doing.
-
The Monte Carlo chassis and floor are much better detailed and are separate pieces. The Chevelle's chassis and floor are one piece and not very detailed. The Monte also has nice engine compartment.
-
Thanks guys! A few years ago a friend had a 1970 Chevelle SS 396 in Autumn Gold with a black vinyl top and black stripes. The Autumn Gold looked great with the vinyl top. This is my favorite color for a '70 Chevelle.
-
This looks real nice so far!
-
Great job on this build! The paint and color look real nice.
-
Here's an AMT 1970 Chevelle SS 454 I'm working on. I'm combining an AMT 1970 Chevelle with parts from an AMT 1970 Monte Carlo. I started by shortening the chassis and floor from the Monte Carlo. I removed the engine compartment from the Monte's body and glued it into the Chevelle. In order to get the Chevelle's interior tub to fit onto the Monte's floor I had to remove the transmission tunnel. I still have to glue it in place. I considered using the Monte's interior but it was different from the Chevelle's. I also removed the center console from the Chevelle's seats. I did my best to correct the sides of the fenders and quarter panels. I forgot to take before pictures. This car will be painted Autumn Gold with black stripes and a black vinyl top. I got the Autumn Gold as a custom order from Splash and I'll be using black textured paint from Model Car World for the vinyl top. I sprayed some of the textured paint on a spoon and it looks like an in scale vinyl top. I got some paint on the body and will spray some clear so I can apply the stripe decals which I got from Keith Marks. The emblems will be photo etch from Model Car Garage.

-
Black Bare Metal Foil(BMF)?
crowe-t replied to crowe-t's topic in Model Building Questions and Answers
I'll just mask and paint the trim black. Thanks everyone. -
Is Black Bare Metal Foil(BMF) any good? Does the black rub off easily?
-
Does Molotow Chrome ever fully cure or does it stay soft when airbrushed?
-
Scooby Doo, Where Are You...Polar Lights Mystery Machine
crowe-t replied to crowe-t's topic in Model Cars
Thanks! I'd rather use decals so I can clear coat over them. -
Scooby Doo, Where Are You...Polar Lights Mystery Machine
crowe-t replied to crowe-t's topic in Model Cars
Thanks everyone for the nice words. -
Scooby Doo, Where Are You...Polar Lights Mystery Machine
crowe-t replied to crowe-t's topic in Model Cars
I had the decals printed by Tango Papa Decals. -
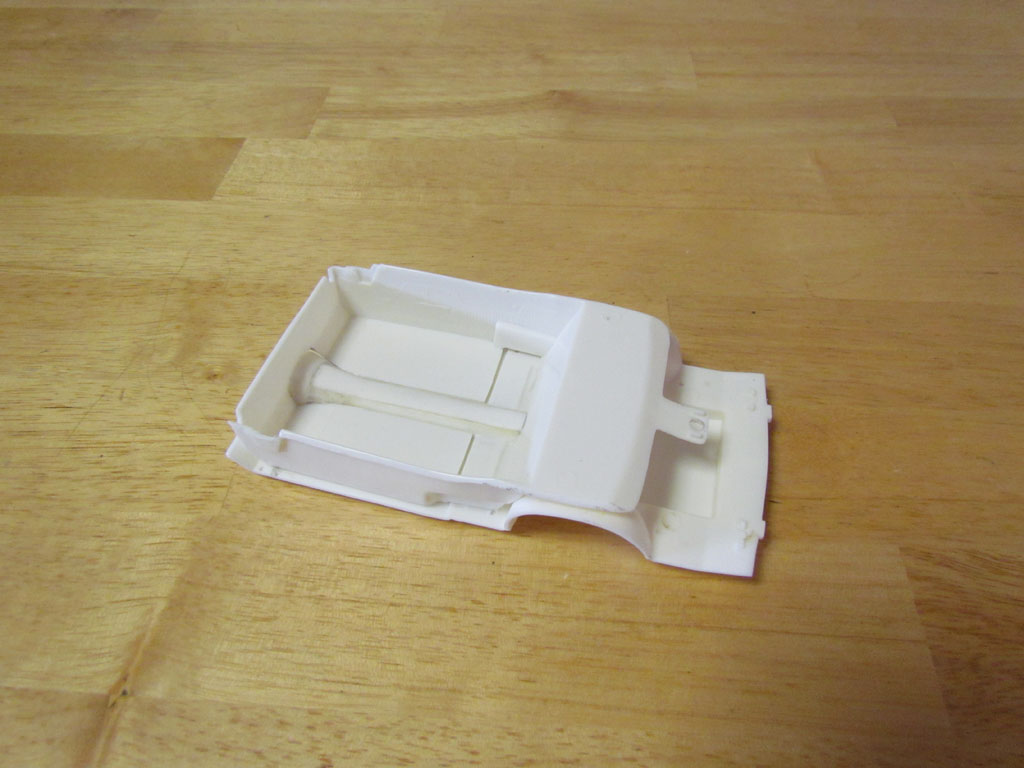
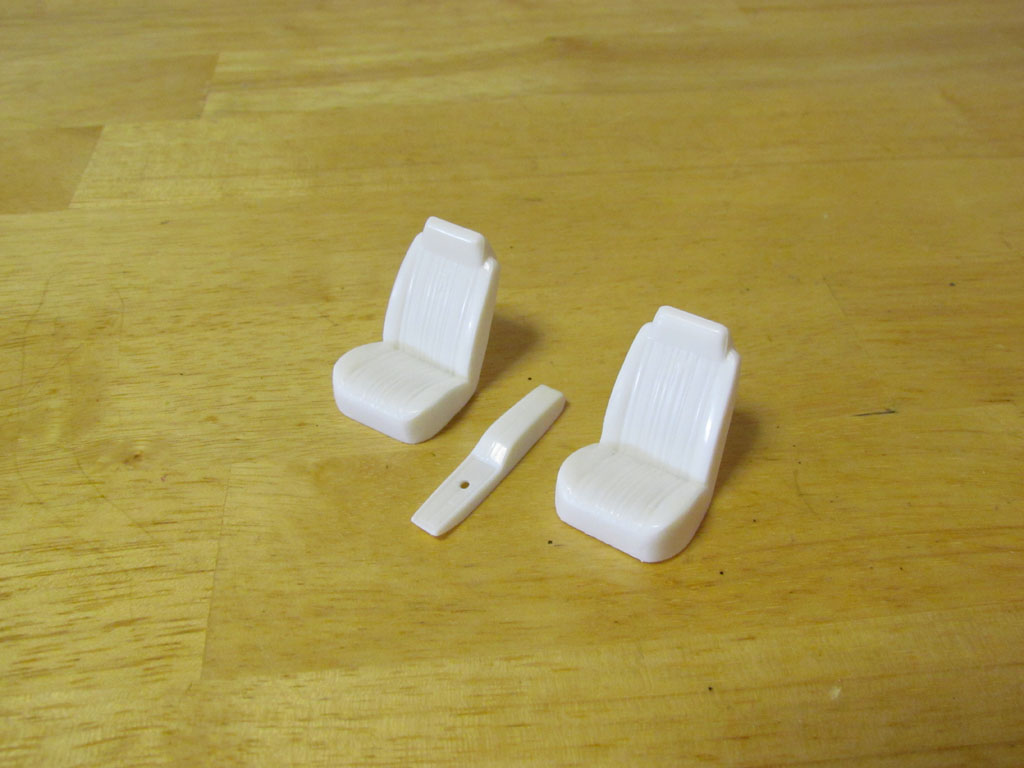
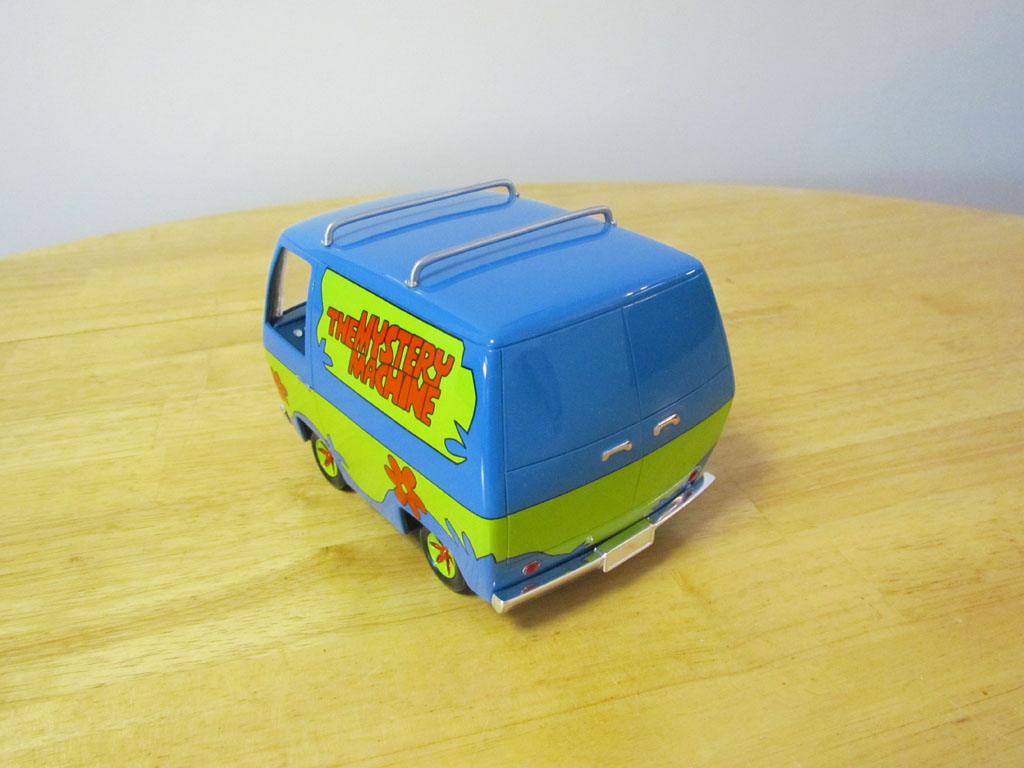
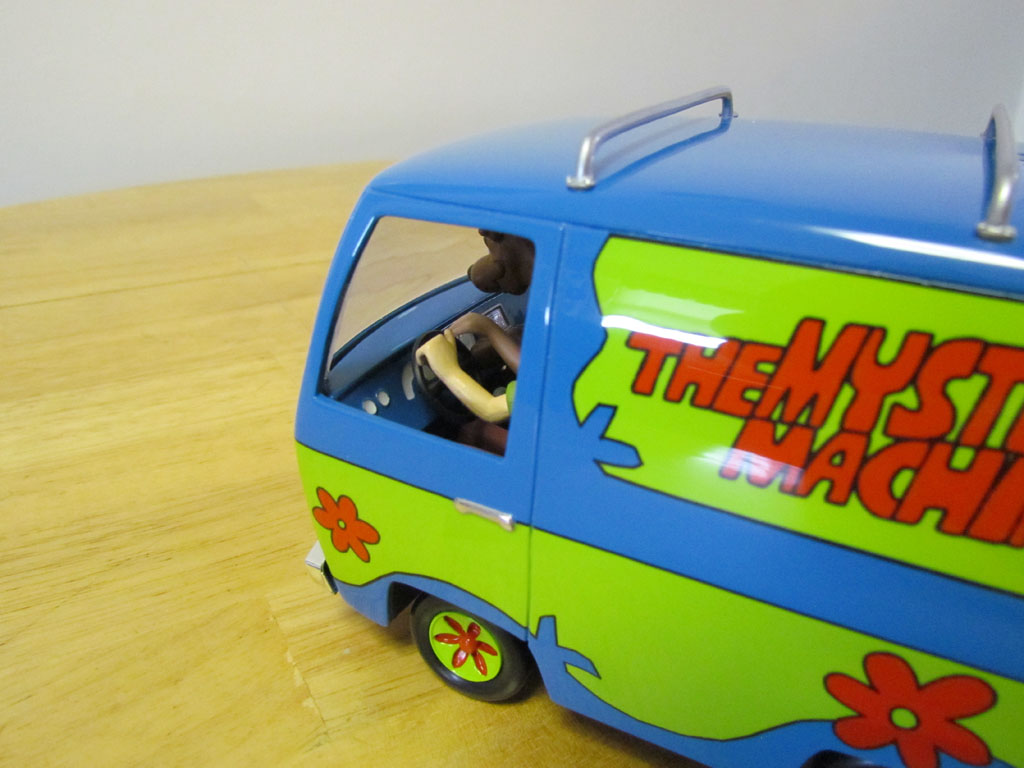
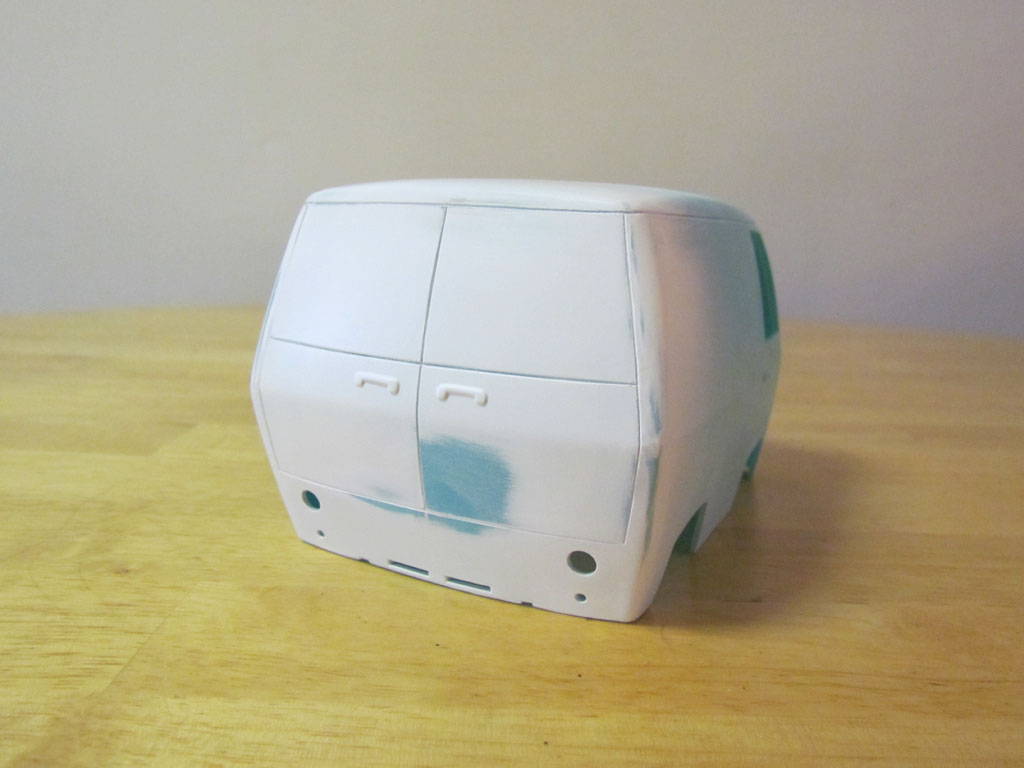
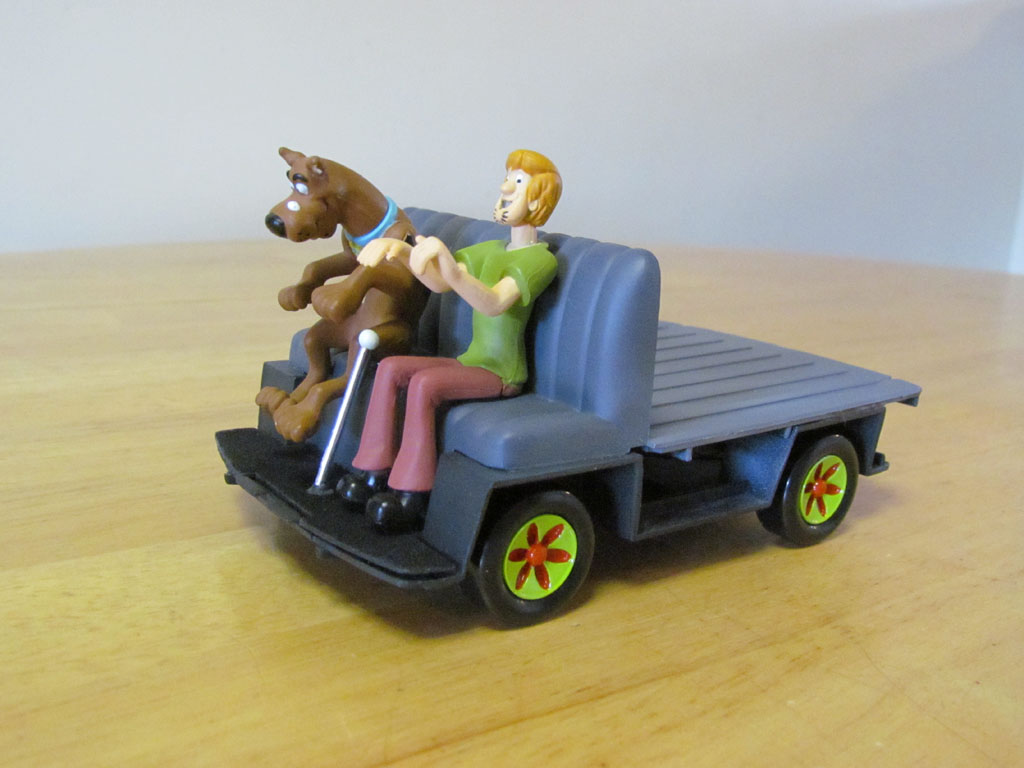
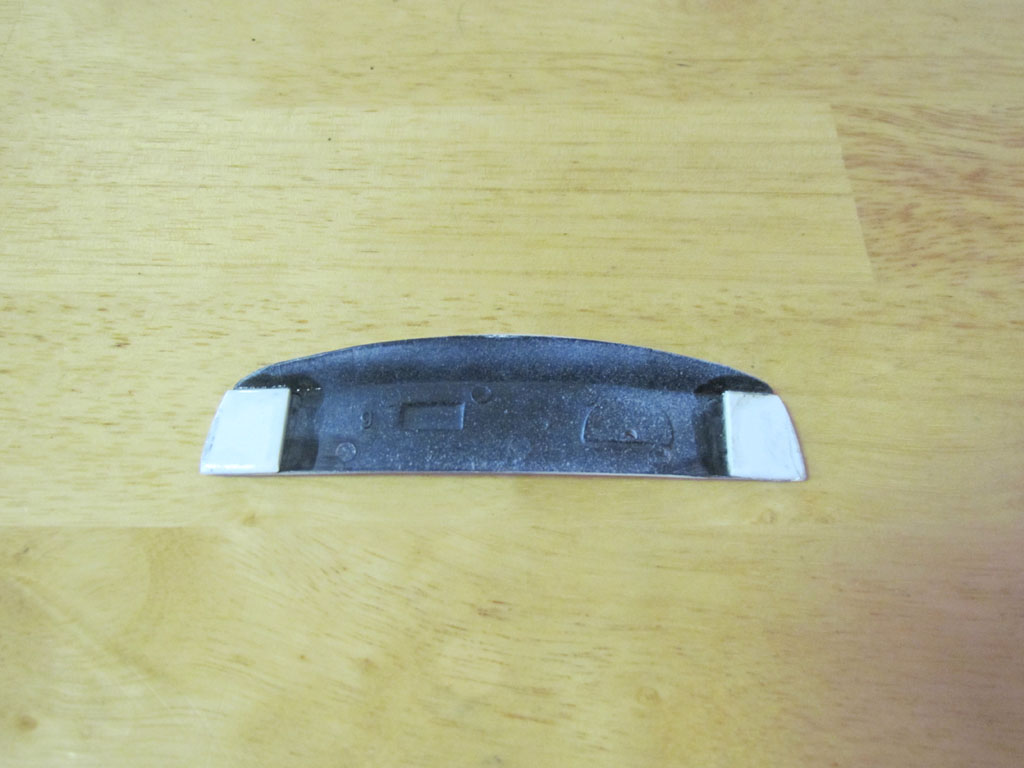
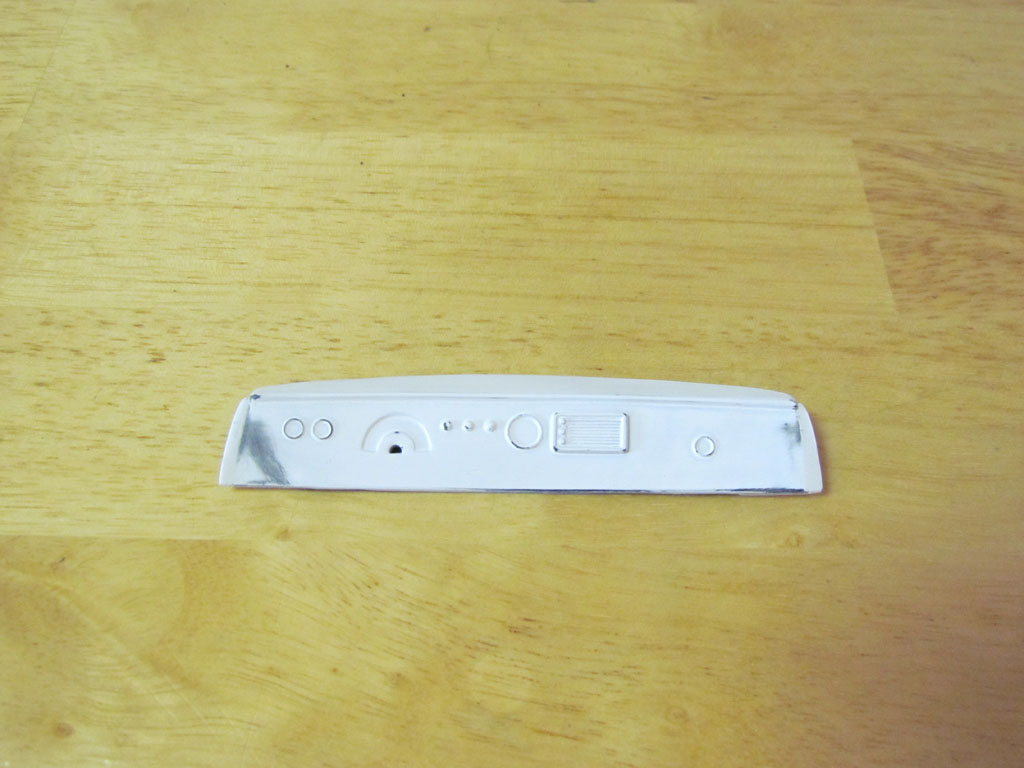
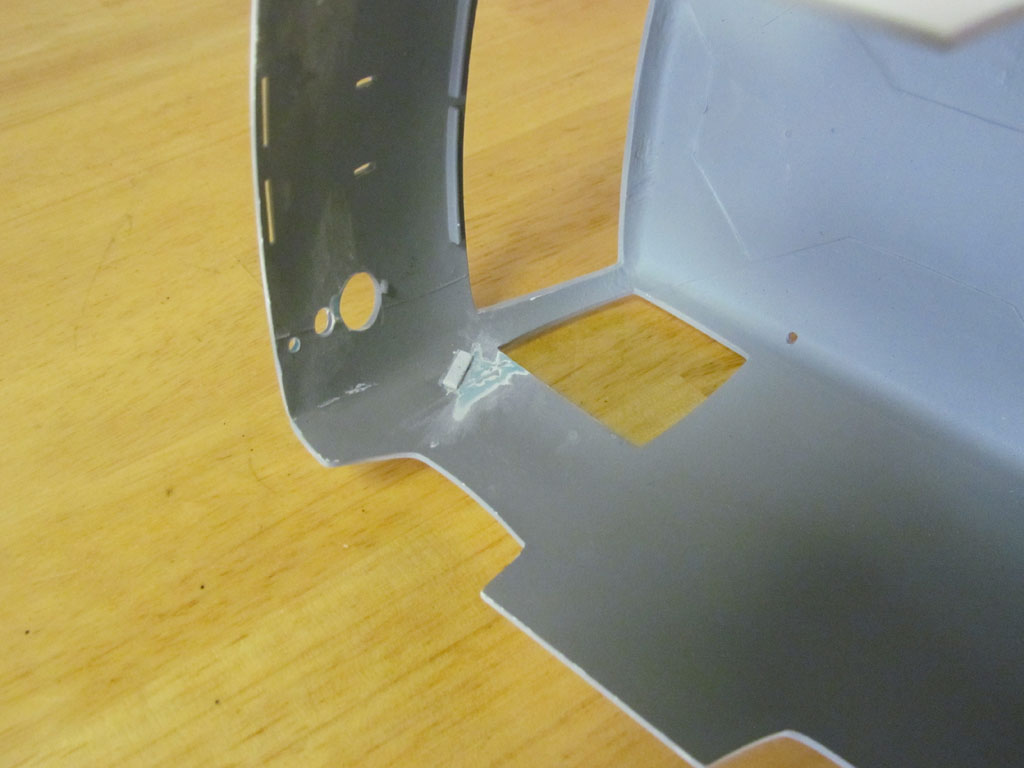
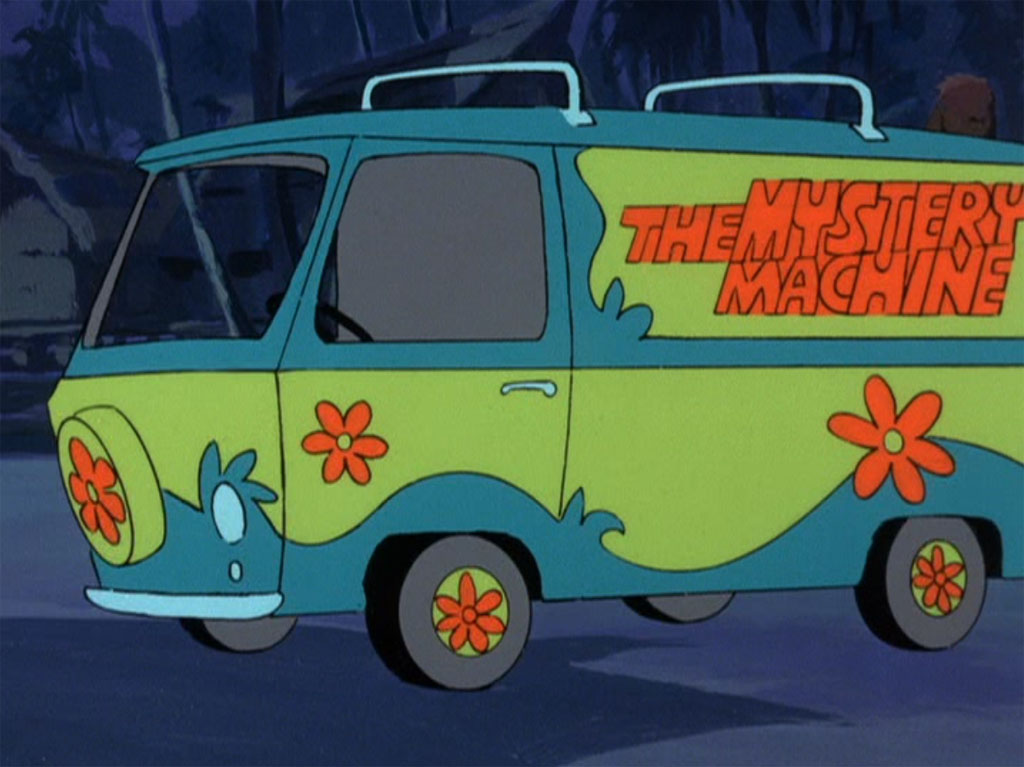
Here's a Polar Lights Mystery Machine I finished a while ago. I had to have the rear bumper re-chromed so I just took some pictures of it completed. This is the older 1 piece body before Round 2 re-tooled it. I felt the opening rear doors looked toy-like so I glued them closed, filled in the seams and re-scribed them. This one had side window 'glass' that I removed. The dashboard was supposed to be held in place with 2 tubes coming up from the floor. Again I felt this looked toy-like so I removed the tubes, put styrene strips inside the body to hold the dashboard and widened it to fit the body better. This did pose a problem after I glued Scooby and Shaggy onto the seat. When I tried putting the chassis into the body Scooby was in the way of the dashboard so I removed him and just stuck him in after I got it together. I hadn't thought that one all the way through. LOL It's painted with Gravity Colors paints. A couple of years ago I contacted Gravity Colors and they got me the original Dodge Sublime Green and made a custom blue using screen shots from the original 'Scooby Doo, Where Are You' cartoon I sent them. In the original 'Scooby Doo, Where Are You' cartoon the van's blue color was darker, even in the daytime scenes so I went with the darker blue. 'The Mystery Machine' and 'flowers' are water slide decals and the black outline around the green areas are decals I cut from a MicroScale Black Trim Film water slide decal sheet. Here are finished pictures and some in-progress pictures as well as screen shots from the original 'Scooby Doo, Where Are You' cartoon.
-
Will this work? https://vent-works.com/collections/all/products/window-dryer-vent?variant=7081975349306
-
Does anyone make an attachment that I could put in a window to attach the duct hose to?