crowe-t
-
Posts
1,965 -
Joined
-
Last visited
Content Type
Profiles
Forums
Events
Gallery
Everything posted by crowe-t
-
What paint and clear did you use?
-
A friend had said he thought black with clear looked a bit out of scale. I like how clear looks if it's not too thick. From what I see above in all these pictures clear over black looks great. I'm used to spraying base coat/clear coat lacquers. I think I'll use the clear.
-
 Hey thanks guys for the nice words and the welcome! I'm glad to be back on this build. It's been too long and I'm really excited to get this one done. I'm still deciding whether to use gloss black lacquer or black base coat lacquer with clear lacquer for the body. I've been exclusively using base coat/clear coat on my other builds and I'm used to it so I'll most likely go that route.
 -
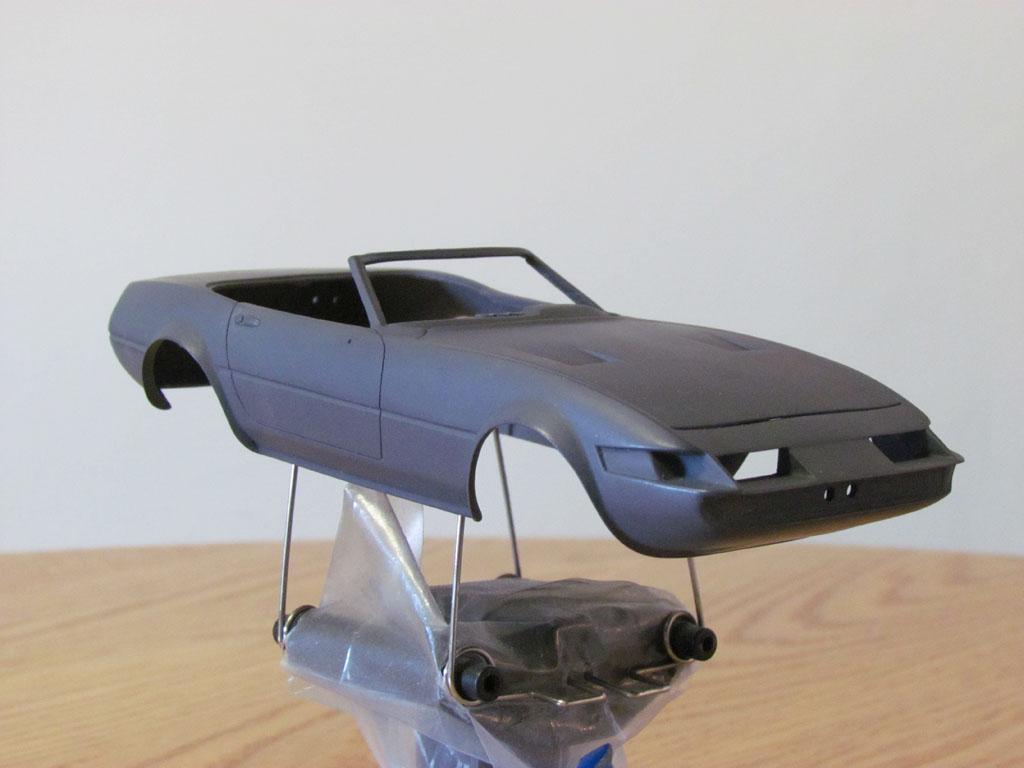
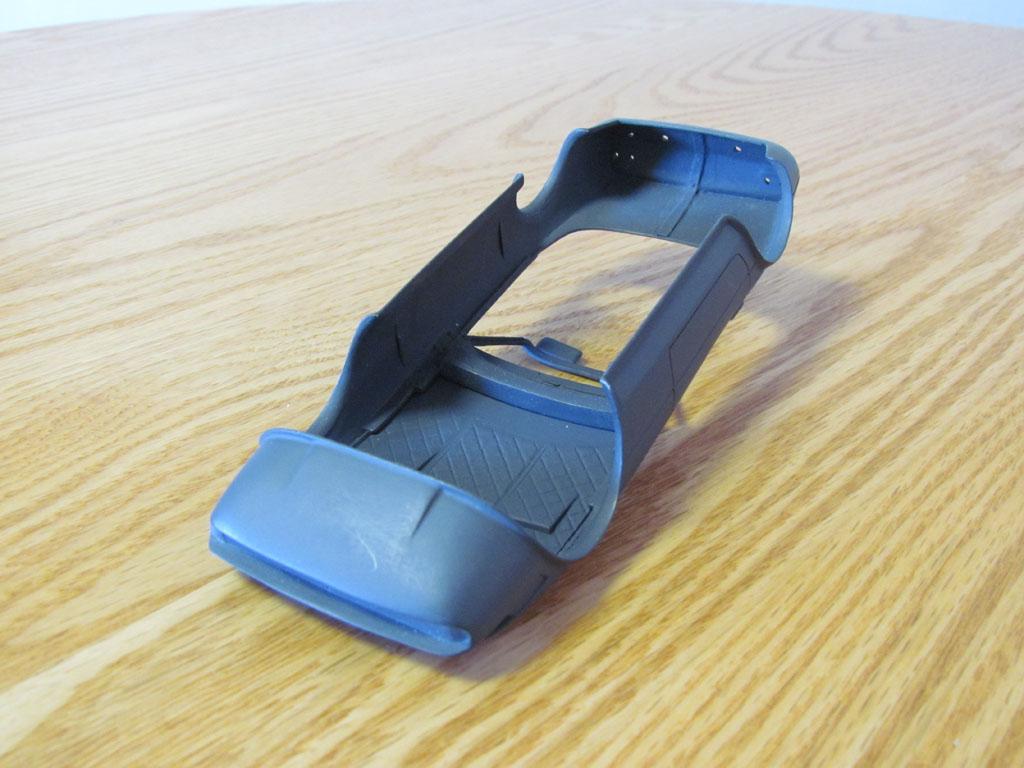
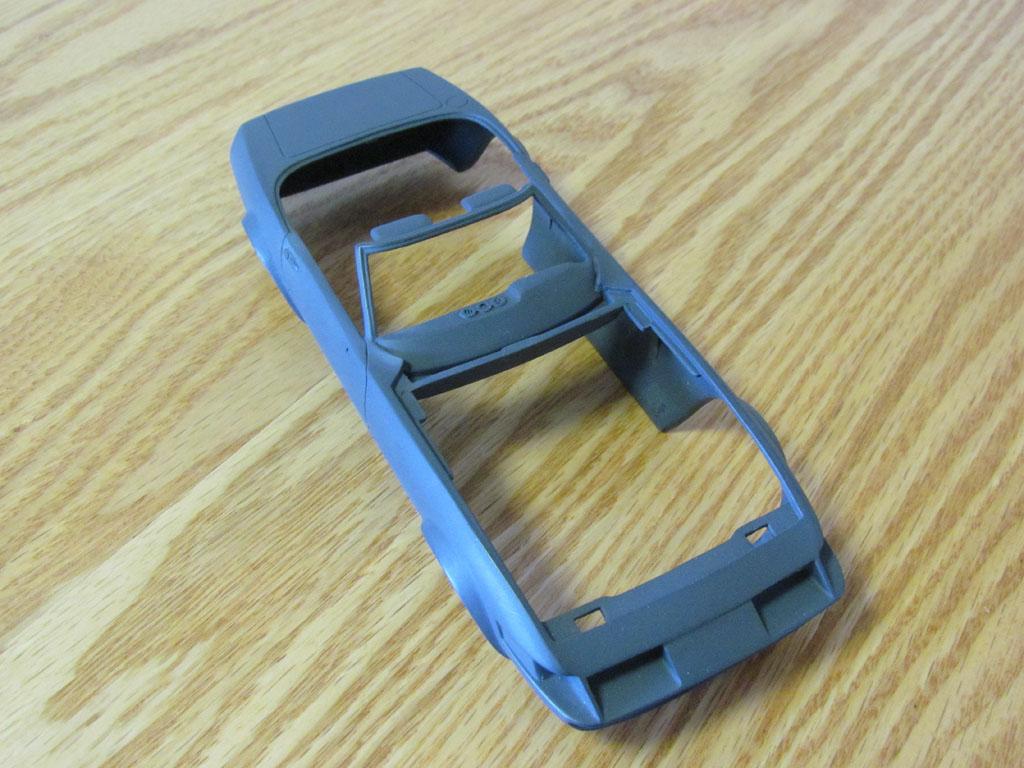
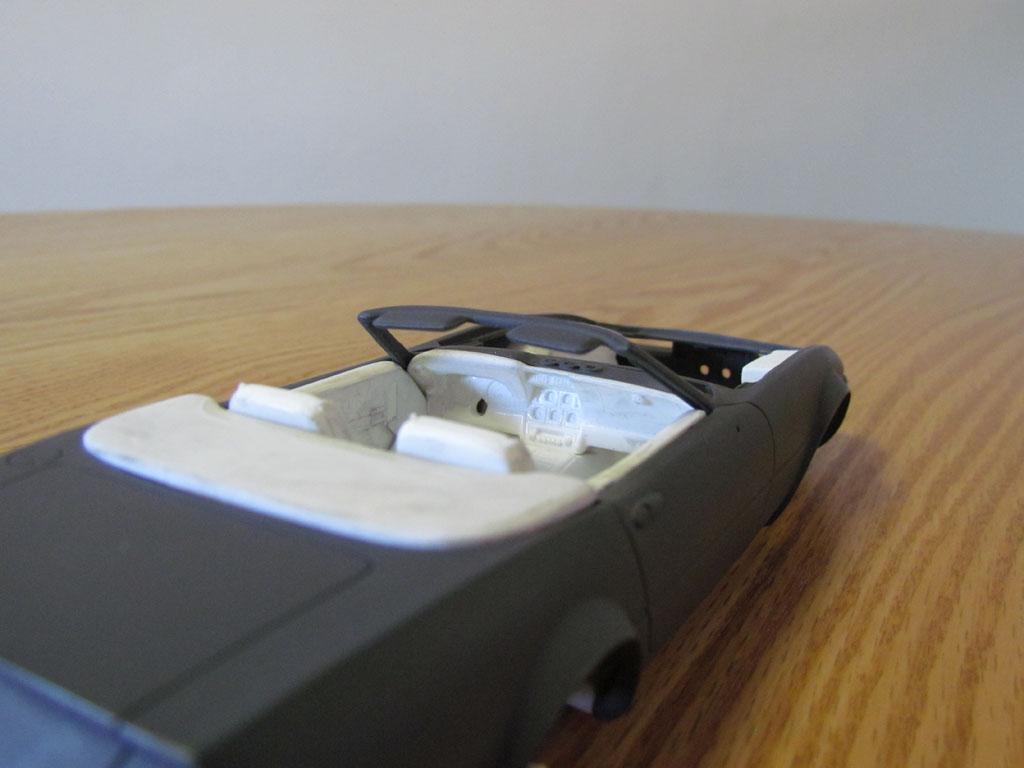
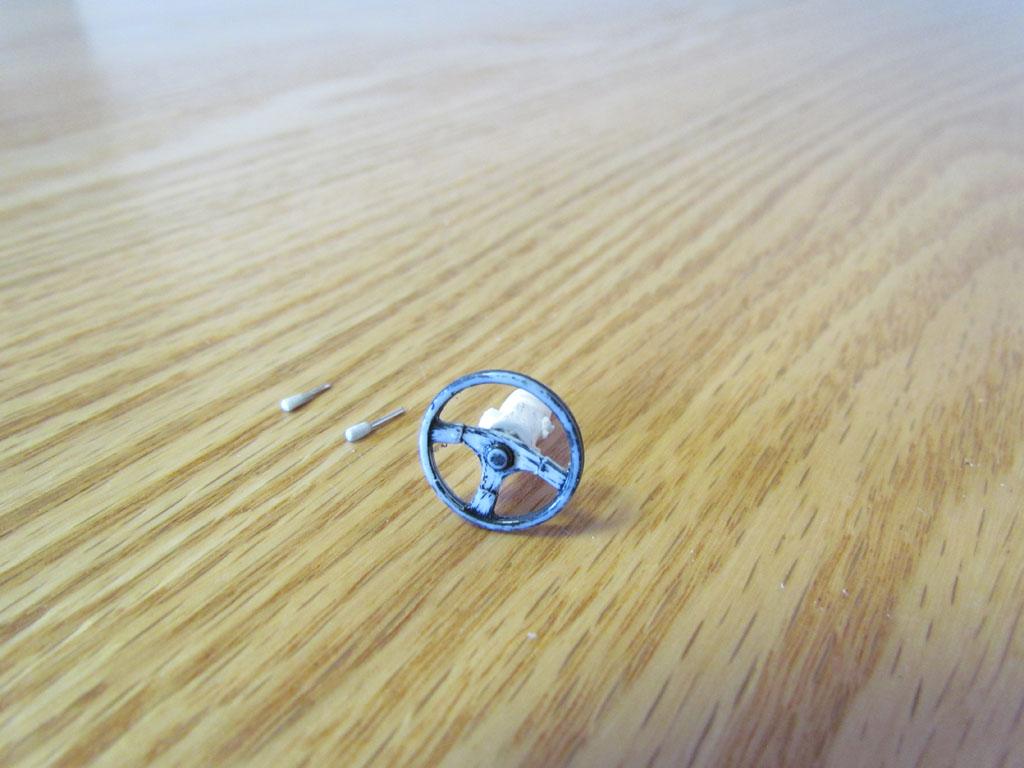
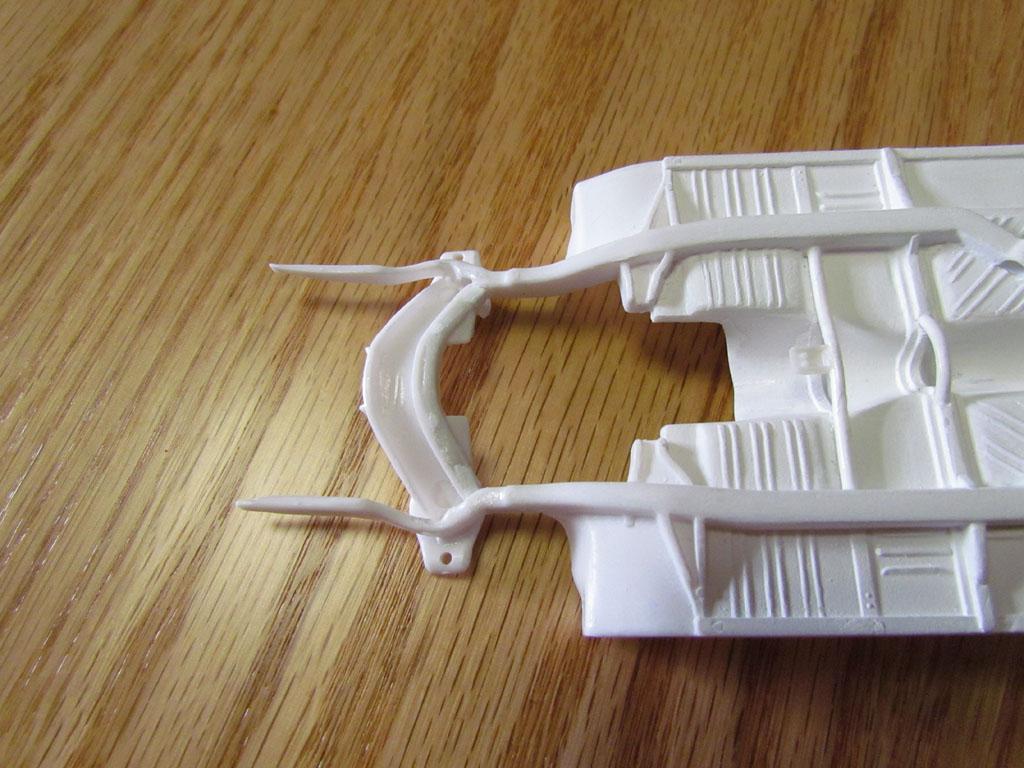
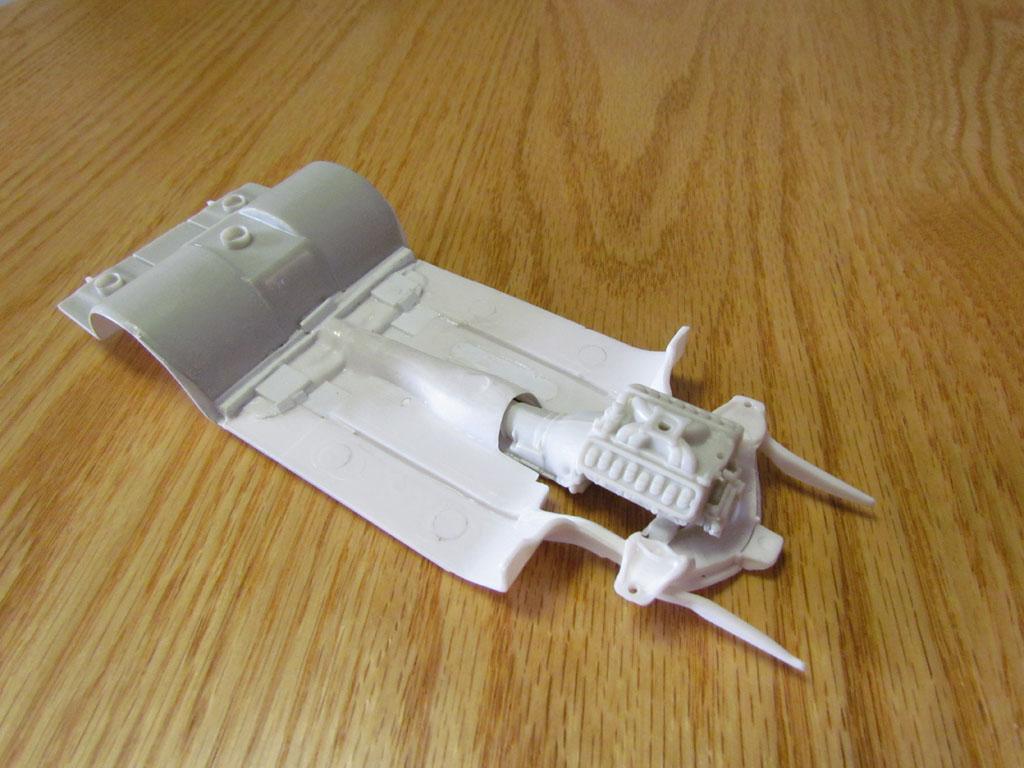
It's been 7 years since I posted in this build thread. I didn't realize it was that long. I put this one down and haven't done any work on it until recently. Finally here's an update. I finished the body. All the emblems were removed, the fender flares are finished, the lower front pan is in and I scratch built the Alpha Romeo door handles that were on the Daytona. I removed the open scoop on the lower pan and put a slight raised piece in it's place. The front fender flares now wrap around the underside. I forgot to take before pictures of the lower pan. The headlight openings are all boxed in. I have a set of square headlights I got from a member here(MsDano85gt) back in 2013 that are from a Mustang kit I'll put inside after it's painted. I modified the dashboard, scratch built pedals and door panels. I doesn't show too well in the pictures but I scribed more horizontal lines in the seats and then put 1mm half round pieces, upside down, into the lines. These will have black decals applied to represent the stripes on the tan seats. I shortened the tonneau cover 5mm to match the width of the now shortened body. I also cut the tonneau cover behind the seats to see in the back. The interior of the Daytona on the show looked like this. I have a Momo steering wheel a member here(LokisTyro) sent back in 2013. I don't know what kit it's from. I made levers for the steering column with straight pins. I think they look a bit better than the molded in plastic ones. Under the hood of the McBurnie Daytonas there's flat box like pieces added to the tops of the inner wheel wells. Using reference pictures I added these in. The last picture shows the front bumpers and grill. The grill is now shortened. It's been a while since I worked on this and posted any updates. My first post explains the work I did to the body and interior to get it to fit right. I'll be working on the exhaust system and will post an update in a few days. Thanks for looking in!

-
I understand. I've read a few posts regarding black paint and some guys have said black looks better without clear. All my builds have clear over the color which I polish. I just wanted to get an idea of how black looks with clear. I like what I'm seeing in these pictures.
-
Thanks Roger and Eric for the pictures! They look great.
-
I'll be painting a body soon in black. I have base coat lacquer and gloss clear which I'm used to spraying. I see a lot of black cars without clear. I'd like to see how black comes out with clear.
-
Nice build! How is the suspension's ride height out of box? I often have to adjust the suspension on many models.
-
Gluing ABS? Acetone or Methyl Ethyl Ketone(MEK)?
crowe-t replied to crowe-t's topic in Tips, Tricks, and Tutorials
I tried Acetone and it works well. I did order some Bondene and sheet ABS to add some support. This is actually an ABS plastic cover for a door of a microwave oven. It says it's ABS on the backside. -
What works best for bonding ABS, Acetone or Methyl Ethyl Ketone(MEK)?
-
Daisy Dukes '74 Road Runner Has Been Released!
crowe-t replied to Custom Hearse's topic in Car Kit News & Reviews
The most recent MPC 74 Roadrunner has a different chassis than the MPC Daisy Duke kit? -
Gravity Colors, amazing service!
crowe-t replied to aurfalien's topic in Car Aftermarket / Resin / 3D Printed
How is the shipping/service of Gravity Colors Spain to the United States? Is the Gravity Colors Spain paint as good as the Gravity Colors USA paint? -
Boss Hogg '70 Cadillac Deville Convertible
crowe-t replied to Andrew D the Jolly Roger's topic in WIP: Model Cars
Absolutely beautiful job! -
I made a great trade with Sam I Am.
-
When mounting wheelbacks to the axles what's the preferred way? Glue the wheelbacks solid so the wheels/tires don't spin or allow the wheels/tires to spin freely? I've mounted wheelbacks on a few models so the wheels/tires can spin but the wheels don't always sit straight.
-
Is there any tricks to paint parts of an interior to look like cloth?
-
I sanded the details off the 55's seats and scribed them to more closely match the Cheez Whiz 55's seats. I can't find any other pictures of the interior but I think what I did is close. I also removed the details off the door panels. I started making new door, rear and kick panels from .040" sheet styrene to resemble what's in the Cheez Whiz 55. As soon as they are done and glued in I'll post pictures.
-
Thanks! I looked up pictures of a GM 4L80E and they match the 57's transmission.
-
Does anyone know what transmission this is supposed to be on the AMT 57 Bel Air Street Machine's engine? In the January 89 issue of Hot Rod Magazine it says the transmission in the Cheez Whiz 55 is a Turbo 400. I'll use the resin Turbo 400 I have. I'm still curious what transmission is on the AMT 57 Bel Air Street Machine's engine. I think it's just a generic automatic and nothing specific but I could be wrong.
-
No problem! I bought the 2 magazines on E-Bay and they arrived today.
-
I got some more work done on the chassis. I didn't want to totally rebuild the chassis. Removing the molded on exhaust and parts of the chassis rails was tedious and needed to be filled in and re-shaped. As the chassis is now with the 55 front suspension and the tubbed rear it sits at the correct height. I cut off the backs of the 55 chassis rails and angled them in to meet with the extensions I added to the tubbed area. I think now it more closely resembles the Cheez Whiz 55 and looks more realistic than in my earlier pictures when I first attached the tubbed area. I also added some round tubes in the angled chassis rails for the exhaust to go through. I'm using the engine from the AMT 57 Bel Air Street Machine kit. I cut off the rear of the engine cross member from the 57's chassis that has the mounts for the engine and attached it to the 55 chassis' cross member. I added the plate where the back of the transmission attaches to a cross member I made with 1.6 mm rod. I'm not sure what transmission it's supposed to represent that's on the 57's engine. I have a resin Turbo 400 I might use instead. I bought the issues of Hot Rod magazine, December 1988 and January 1989, that the Cheeze Whiz 55 appears in. It should tell what transmission is in the car. I should have them in a few days.
-
Thanks Paul!
-
You might want to try running a sanding stick along the tops of the bulges. If the sanding stick has a nice sharp edge you'll be able to shape the tops of the bulges and the groove above them.
-
I used a 100 grit sanding stick from Stevens International. I find these are the best sanding sticks. I ran the sanding stick, going slowly, along the top of the bulges holding it on an angle until I felt the groove looked about right. Under the bulges I filled in with putty. It's hard to fully explain but this about what I did. You need a good sanding stick with sharp edges. The ones from Stevens International do a great job. Mega Hobby sells them. I hope this helps.
-
Paint Strippers - What to Use?
crowe-t replied to pbj59's topic in Model Building Questions and Answers
I'm not sure priming over the yellow and then painting will work out so well especially since you don't know what type of paint the yellow is. The EZ Off Yellow can is better for removing paint although I have used the EZ Off Blue can with no problems. However I mostly use 91% Isopropyl Alcohol for stripping paint. It's much safer to be around. If you use the EZ Off wear gloves. It's burns the skin.