crowe-t
-
Posts
1,965 -
Joined
-
Last visited
Content Type
Profiles
Forums
Events
Gallery
Everything posted by crowe-t
-
 I see there are some economically priced miter boxes from X-Acto, Midwest and Zona. Are these any good? The Easy Miter Box from Midwest looks nice.
 -
Futurattraction.com has a really nice B&M Pro Stick shifter that's resin and photoetch. 2 shifters come in the pack for a great price too.
-
Revell 1/20 Scooby-Doo Mystery Machine Review 85-1994
crowe-t replied to hpiguy's topic in Truck Kit News & Reviews
Chris, Excellent review! You were informative and kept it moving along. I wish all reviews were this good. It seems like a nice kit but a bit too toy-like but I'm sure that's what Revell is going for. I have a Polar Lights Mystery Machine I just finished that I'll post some pictures of soon. Now having seen the Revell Mystery Machine I feel the shape of the original tooled Polar Lights kit looks a bit closer to how it looked on the cartoon. However I do like that the rear doors aren't hinged on the Revell kit. When I built mine I sealed the doors closed to look less toy-like. Maybe the Mystery Machine was a lighter blue-green color in later episodes but in the original Scooby Do Where Are You series it was a darker blue, even in the daytime shots. Toys and models of the Mystery Machine always seem to be a light blue-green color. -
Finally,thanks TDR. (Pro mod 66 Nova body)
crowe-t replied to NYLIBUD's topic in WIP: Drag Racing Models
What brand of primer did you use? I used Duplicolor Filler Primer and was able to start sanding later the same day. I used 400 grit wet/dry paper. -
I had a little problem with the paint and had to strip the body. I'm waiting for the new paint to arrive. The hood and trunk are OK so I didn't strip those. As soon as the paint arrives I'll paint the body and put the decals on.
-
GMC Box Truck
crowe-t replied to kruleworld's topic in WIP: Model Trucks: Pickups, Vans, SUVs, Light Commercial
I just found this one! You are doing an excellent job on this Walter! Any updates? -
Beautiful job! The paint shines like glass. What color is it painted? Can you post pictures of the chassis and interior?
-
Thanks!
-
David, You did a beautiful job on Drag-U-La! What 'gold' paint/color did you use on the body? What paint/color did you use on the frame? Mike.
-
Finally,thanks TDR. (Pro mod 66 Nova body)
crowe-t replied to NYLIBUD's topic in WIP: Drag Racing Models
Ron, The body looks real cool! Get a can of Filler primer and shoot a few heavy coats on and start sanding with 320 or 400 grit paper. You will have to repeat this over a few times. I talked with some guys on the TDR facebook page and they said using superglue is harder and details will get lost. A high build filler primer is easier to use. You actually don't need to clean the White Strong & Flexible(nylon). Tim who runs TDR said you only have to clean the Frosted Ultra Detail material. Don't bother sanding it until you apply the primer. The nylon doesn't take well to sanding. -
This is such an impressive build!
-
Beautiful job Paul! Lee Shepherd is my all time favorite Pro Stock Driver.
-
Really nice paint job!
-
Food Dehydrators & Paint Dryers
crowe-t replied to JayVee's topic in Model Building Questions and Answers
Thanks for letting me know! -
I need to install a plastic DC Power jack in a model. I picked up Plastic Surgery CA that's formulated for dissimilar plastics to glue it in and I would like to pack either Aves Epoxy Sculpt or JB Weld around the jack for reinforcement. What's a stronger bond? Aves Epoxy Sculpt or JB Weld?
-
Dave, Thanks for all these great pictures! These definitely help. Mike.
-
Finally,thanks TDR. (Pro mod 66 Nova body)
crowe-t replied to NYLIBUD's topic in WIP: Drag Racing Models
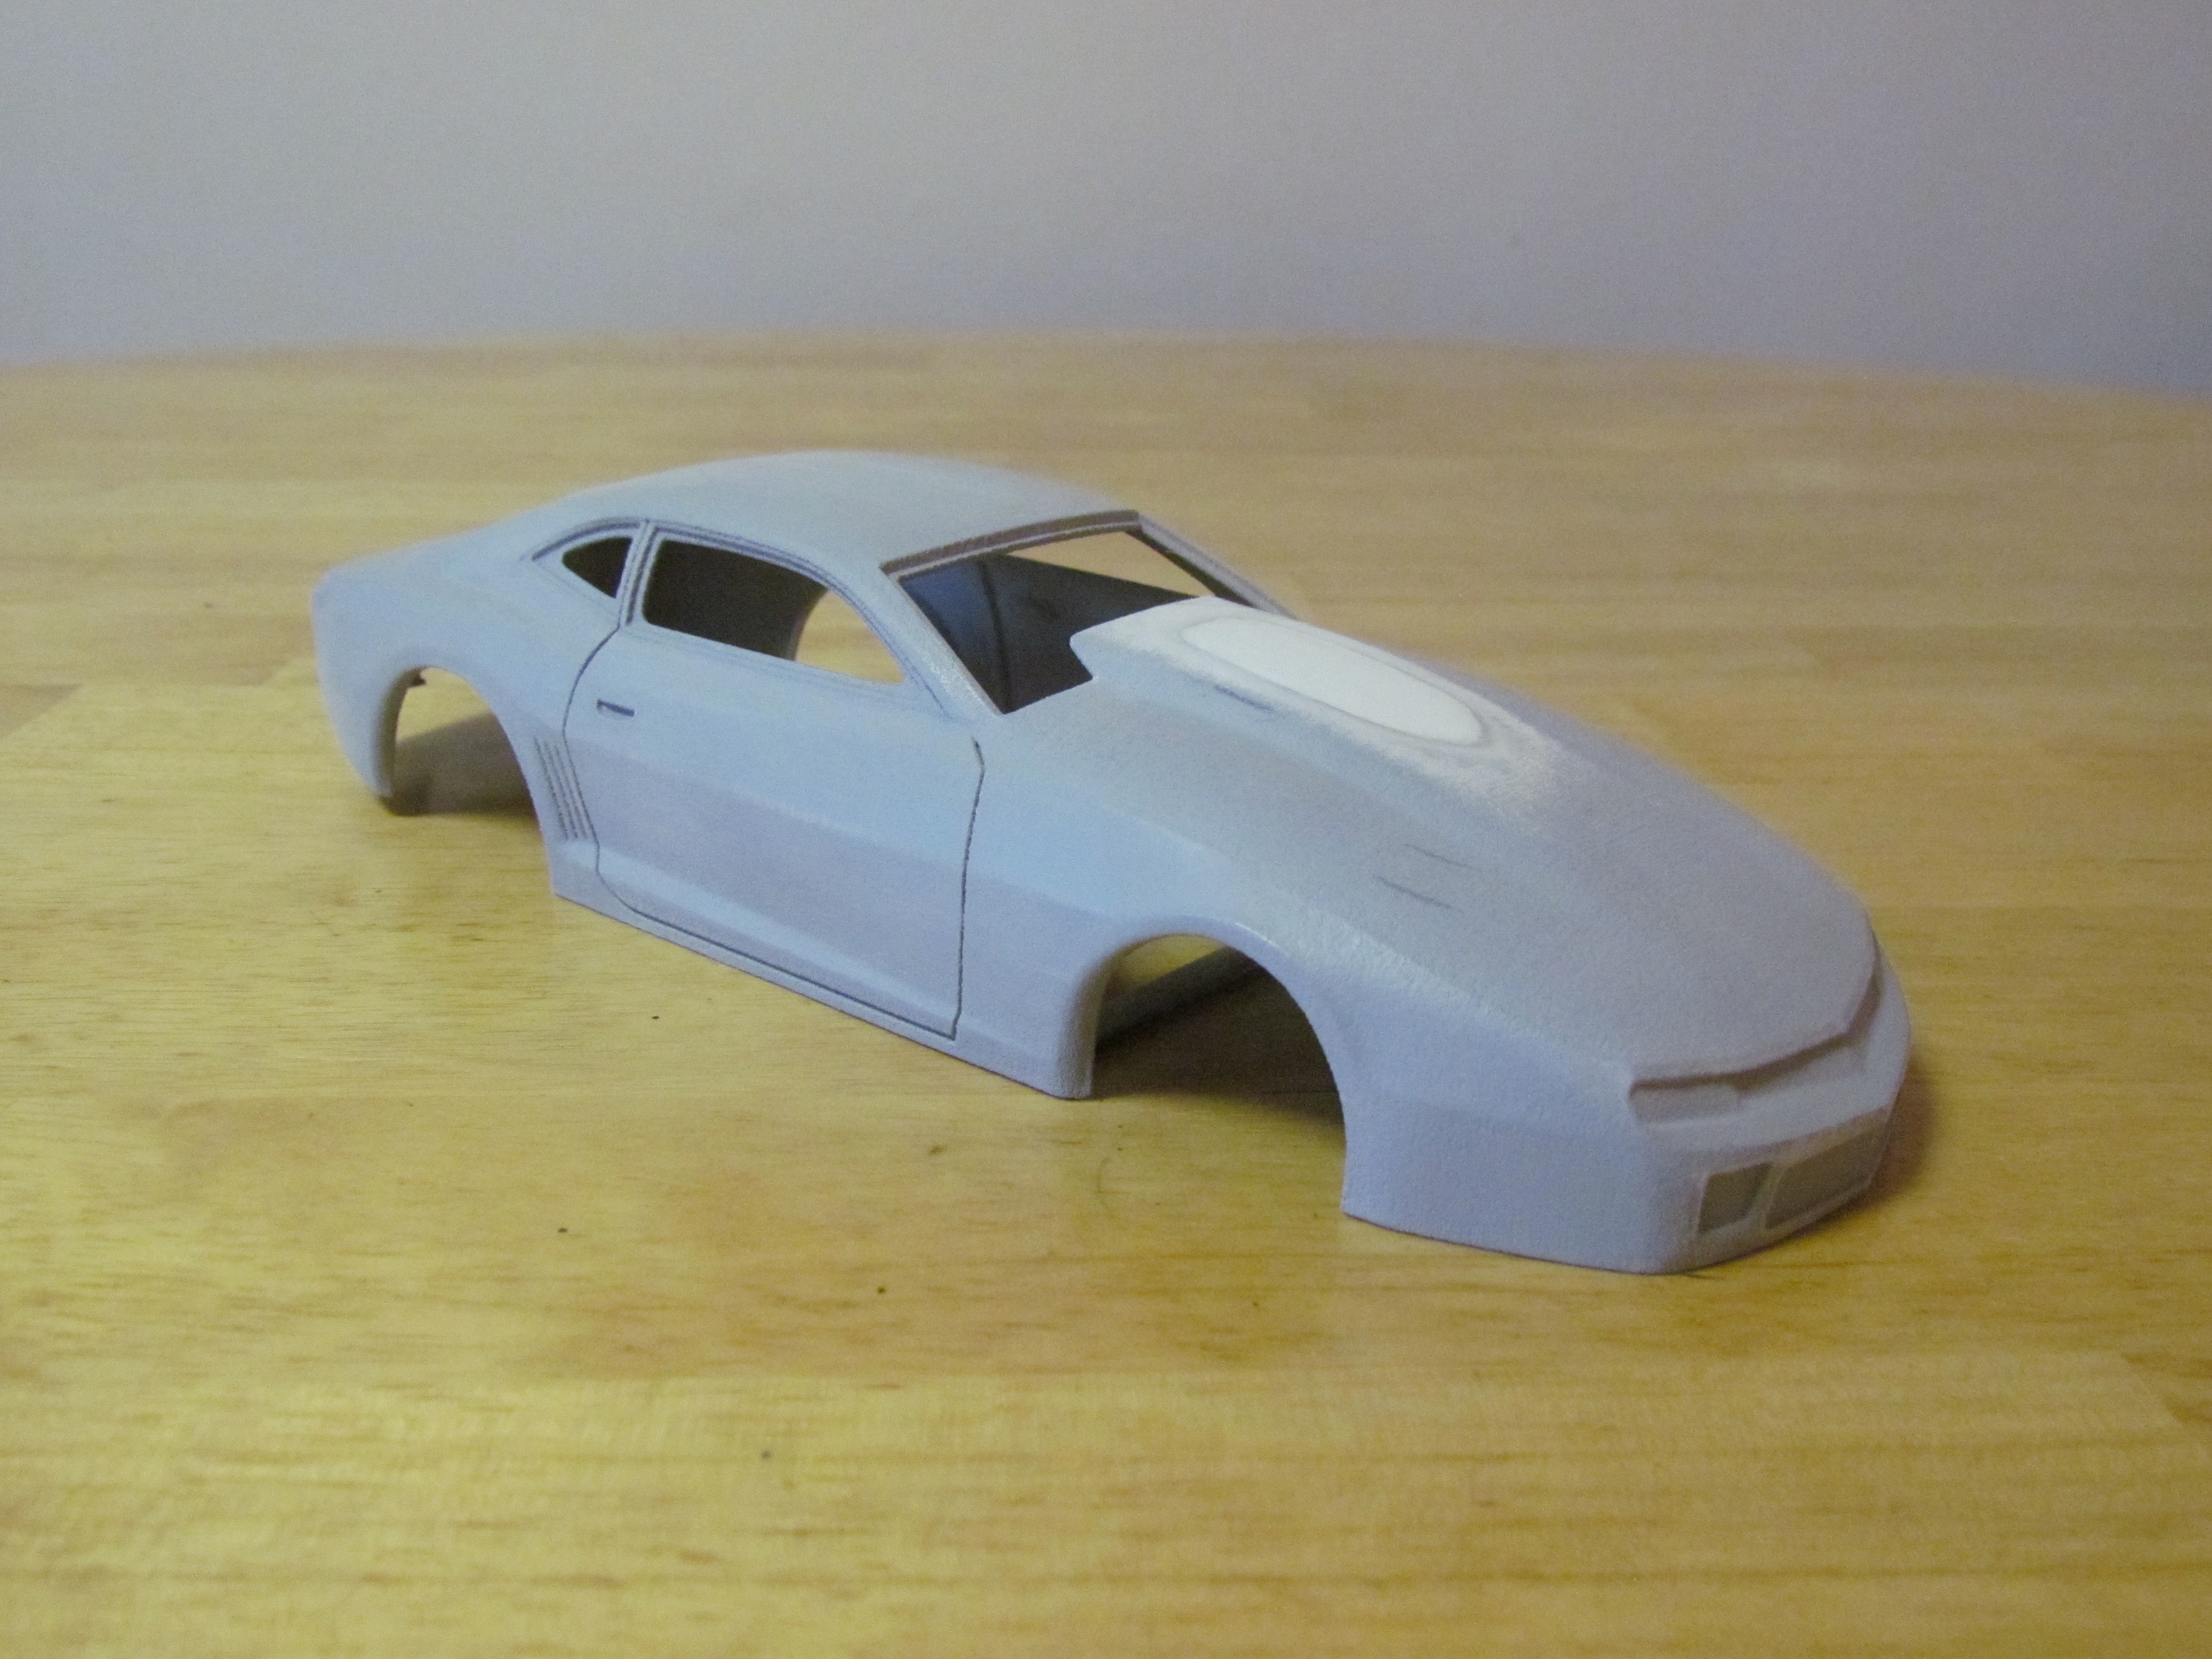
Ron, The TDR 2013 Pro Stock Camaro I posted above is the 1st 3D printed body I got. The White Strong & Flexible(WSF) material does have a grainy surface. This attached picture shows the grain. I am using Duplicolor Filler primer on the body. If you also got the WSF material you don't have to clean it. Just spray on high build filler primer and sand. Don't even bother sanding the body first, just spray the primer on and after it cures sand the primer. I am using 400 grit paper and wet sanding. This procedure(priming and sanding) will have to be done a few times depending on how much grain is on the body. As long as you follow the body lines while sanding the details will stay. The 3D printed WSF bodies aren't as easy to work with as a styrene body but after you start priming and sanding you'll see it start smoothing out. My 2013 Pro Stock Camaro is just about all smoothed out and looks good. I'll take more pictures over the weekend and post some.
-
Finally,thanks TDR. (Pro mod 66 Nova body)
crowe-t replied to NYLIBUD's topic in WIP: Drag Racing Models
It's 3d printed White Strong & Flexible nylon. -
Finally,thanks TDR. (Pro mod 66 Nova body)
crowe-t replied to NYLIBUD's topic in WIP: Drag Racing Models
Thanks! -
Finally,thanks TDR. (Pro mod 66 Nova body)
crowe-t replied to NYLIBUD's topic in WIP: Drag Racing Models
I recently got a body from TDR! I got the 2013 Pro Stock Camaro in White Strong & Flexible material. It has a grainy surface so I'm using Duplicolor Filler primer to smooth it out. It takes some priming and sanding a few times but smooths out nicely. The picture in primer is almost done. I still have to finish sanding and maybe another coat or so of primer.
-
Erica's car had the hood scoop. I'm building Bo Butner's car as it appears now and showed the pictures to give Alan an idea.
-
I'd like the front end to be able to go on and off but I'd still like it to look accurate.
-
Thanks Bill and Scott! Scott, I like your idea of pinning the front end before it's cut off. Everything on your Fairmont seems to line up nicely this way. I have a 1/24 3D printed 2013 Pro Stock Camaro body from TDR Innovations that I'll be building as Bo Butner's current Pro Stock Camaro. I'll most likely not make the doors open but since the modern Pro Stocks don't have a removable hood I think making the front end removable to see the motor is a good idea. The 3D printed body is in the White Strong & Flexible material and is quite strong. As soon as I finish smoothing out the body I'll start attaching it to a 1/24 Revell Firebird Pro Stock Chassis.
-
Thanks Scott! I still have to work out a few things. I'll start a thread then.
-
Thanks Henry! It's a little further on now and is smoothing out nicely. Once a couple of coats of high build filler primer is sprayed on and it's sanded it already starts smoothing out. It's a bit more work but definitely worth it. This Pro Stock Camaro from TDR is real nice and accurate looking.