crowe-t
-
Posts
1,965 -
Joined
-
Last visited
Content Type
Profiles
Forums
Events
Gallery
Everything posted by crowe-t
-
I posted this here since it's more of a drag car feature. For a 1/25-1/24 scale build what's a good way to make a front end clip removable? Where is best to attach it? Any tips, advice or pictures will be appreciated.
-
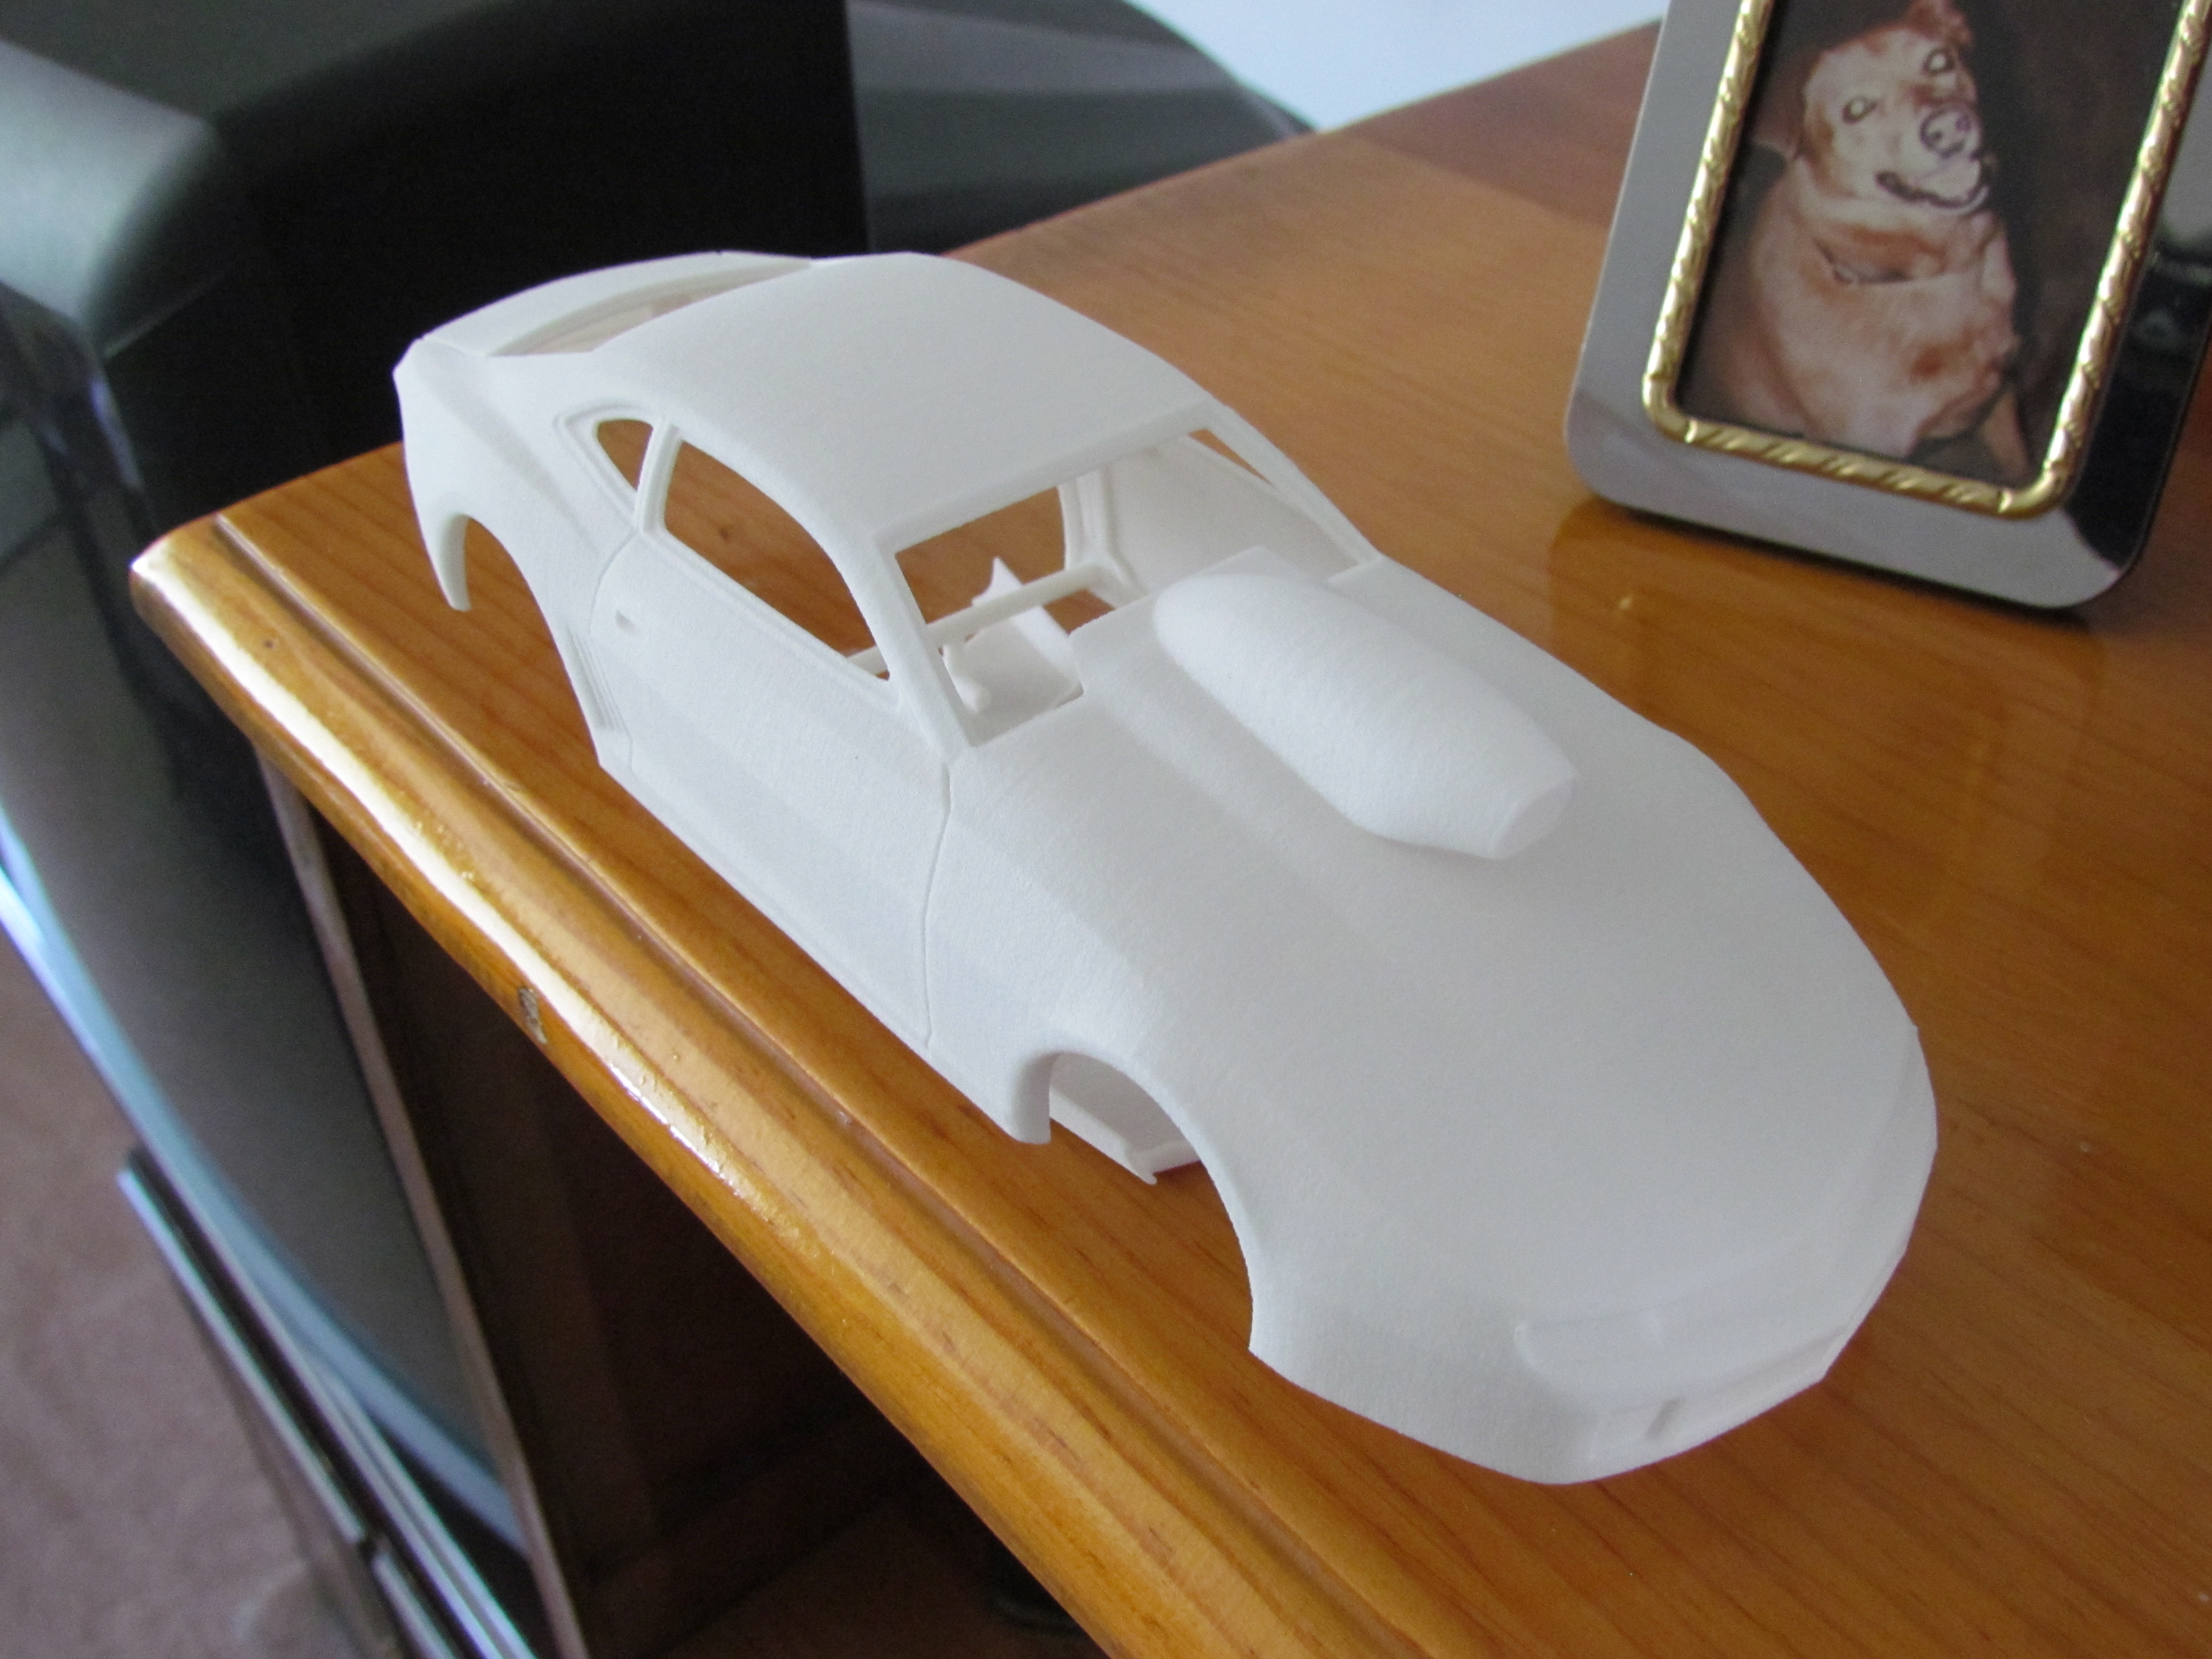
Comp Resins makes a 2012 Pro Stock Camaro in 1/25 scale but it won't be accurate to Erica Enders 2015 Camaro. http://www.compresins.com/site/751597/product/CR-5025 TDR Innovations makes a 2013 Pro Stock Camaro that is far more accurate to Erica's 2015 Camaro. It's available in a variety of scales. https://sites.google.com/site/tdrhtmllearn/home/body-shop/all-tdr-drag-racing-bodies/2013-pro-stock-camaro I'm currently working on a build of Bo Butner's Pro Stock Camaro that he's driving this season. I'm using the Revell/Monogram 1/24 Firebird Pro Stock kit for the chassis, engine... I recently got a TDR Innovations 3D printed 2013 Pro Stock Camaro body in 1/24 scale which is the same wheelbase as the 1/24 Firebird Pro Stock chassis. It's printed in White, Strong & Flexible and does have a sand like texture. The FUD material would have been too brittle for a body and cost twice as much so I got the WSF material. I picked up a can of Duplicolor Filler Primer and started applying some coats and wet sanding with 400 grit sandpaper. After 2 sandings it's almost all smooth. Another couple of coats of primer and one more time sanding should smooth it all out. I also removed the hood scoop and filled in the opening with sheet styrene and some Squadron white putty. It's actually a bit further along than the picture(in primer) I posted but it should give you an idea.

-

Food Dehydrators & Paint Dryers
crowe-t replied to JayVee's topic in Model Building Questions and Answers
Is it OK to use a dehydrator if the body has body work(i.e. - modifications, added plastic, putty...) The reason I ask is I once tried using a hair dryer on a part that had putty and some plastic added and an impression of the puttied area came through the paint layers. -
Pro Stock wheels? 1/24 - 1/25 scale.
crowe-t replied to crowe-t's topic in Car Aftermarket / Resin / 3D Printed
Scott, I'll keep a look out on your web site. However I still need the Weld Delta 1 rears. I should be able to get the set of 4 from Micro Nitro but if I can't I'll contact you. -
Pro Stock wheels? 1/24 - 1/25 scale.
crowe-t replied to crowe-t's topic in Car Aftermarket / Resin / 3D Printed
Thanks guys! After I posted this I found the name of the front wheels. The Pro Track wheels are close but not spindle mount. JDS makes fronts but the wheels are about 2 mm too large in diameter. 3D Model Specialties makes the Delta 1 that are 3D printed. The new owner of Micro Nitro has been posting and said he's getting up to speed and to send him a PM to let him know what is needed. They have the Weld Delta 1 and Aluma Star fronts offered as a set and are made for regular models. If he can't make them then I'll get the Delta 1's from 3D Model Specialties(Shapeways) and I'll have to make the JDS wheels work. -
Thanks guys! I'll do some more detail painting on the motor but it's not as important on this build. I had to do a touch up on the body's clear coat so it'll be a few more days till I can finish polishing it.
-
Does anyone make Pro Stock wheels in 1/24-1/25 scale? I'm looking for the wheels that are on Bo Butner's Pro Stock Camaro. The rear wheels are Weld Delta-1 but I can't figure out what make the front wheels are.
-
Thanks David! I've seen that 'box'(voltage regulator) on top of the generator in both black and silver in pictures of different 63's so I'll most likely leave it the way it is. I do have to do some more detail painting on the engine but I'm not going too crazy with it. Mike.
-
Steve & Bill, thanks for the nice words! I painted the interior and started gluing it all together. The seats, roll bar, door panels and dashboard are painted Testors Acryl Neutral Gray. I added a couple of drops of Aircraft Interior Black to the Neutral Gray for the floor mats and lightened the Neutral Gray with Flat White for the carpeting. The carpeting is embossing powder. I added Bare Metal Foil to the door handles, arm rest... I foiled the steering wheel and the moldings on the dashboard. For the speedometer I first painted it Testors Acryl Silver. After it dried I sprayed on some Tamiya Flat Black and then used a toothpick dabbed in Windex to expose the silver on the raised details. Windex will remove Tamiya acrylic paint but doesn't remove Testors acrylic. The speedometer's numbers were made by dipping the end of a toothpick in some flat white and dabbing it on, sort of like dry brushing, just to give a slight indication of the numbers. Testors Clear Parts Cement was applied over the speedometer to make a lens. It's not too noticeable in the picture but it's there. I removed the chrome from the exhaust and heater exchange pipes and painted them with lightened Neutral gray. A friend who has a VW Beetle said these pipes should be a light gray. I removed the tail pipes and replaced them with 1.6mm styrene rods which I drilled holes in the ends. The kit's tail pipes had a seam down the middle and weren't quite round. The tail pipes are painted with Alclad Aluminum but I might cover them with BMF. The engine is also painted Alclad Aluminum. The details in the trunk are painted. I'm in the process of polishing the clear coat on the body so it should be done soon. Thanks for looking in! Mike. IMG_8358 Small by Michael Scarola, on Flickr IMG_8370 Small by Michael Scarola, on Flickr IMG_8363 Small by Michael Scarola, on Flickr IMG_8367 Small by Michael Scarola, on Flickr IMG_8372 Small by Michael Scarola, on Flickr IMG_8374 Small by Michael Scarola, on Flickr
-
QUICKIE DRAGULA TRAILER - Done Deal - 4/23/17
crowe-t replied to Nytrozilla's topic in WIP: Model Cars
Thanks Joe for letting me know! Mike. -
QUICKIE DRAGULA TRAILER - Done Deal - 4/23/17
crowe-t replied to Nytrozilla's topic in WIP: Model Cars
Joe, Is the purple you used Tamiya X-16? Mike. -
QUICKIE DRAGULA TRAILER - Done Deal - 4/23/17
crowe-t replied to Nytrozilla's topic in WIP: Model Cars
Hey Joe, Sorry I missed this one. This is incredible and imaginative! I like the blown Hemi in Dragula. Where is the wing from on Dragula and what about the Good Fear on the rear slicks? Is it a decal? What gold paint did you use on Dragula? Mike. -
Thanks guys for the nice words! Greg - There were so many different year VW's used in the production which could also explain the fuel gauge not being on the dash board. I'm trying to match what was actually seen in the movie so I removed the fuel gauge. I also painted the whole interior gray like it is seen in the movie. A real VW's dash board and the other metal interior parts would have been painted the body color but I painted everything a medium gray(Testors Acryl Neutral Gray) to match the movie car(s). I'll post more pictures in a day or so. This week I'll also polish the clear coat.
-
Tim, Great job on the stance and the open doors/trunk lid. The use of magnets seems to work well and the doors shut nice a snug. Thanks for the video demo. BTW did you get the paint from Gravity Colors in the US? I have quite a few paints from Gravity Colors and they all come in plastic jars. I never saw their paint in a can. I'm just curious. Mike.
-
2013 Pro Stock Camaro body(TDR)
crowe-t replied to crowe-t's topic in Car Aftermarket / Resin / 3D Printed
I saw that same post on the TDR Facebook page. Has anyone else bought one of the TDR bodies? -
Can Mr. Super Clear be sprayed over decals?
crowe-t replied to crowe-t's topic in Model Building Questions and Answers
I tested Mr. Super Clear Gloss over decals and it works. I first sprayed a light mist coat and waited about 30 minutes before spraying a 2nd mist coat. Then after another 20 minutes or so I started with some wet coats. I did this from the spray can and also tried it using an airbrush. -
Can someone measure the width of a Revell 55 Chevy Pro Sportsman's chassis(floor pan) in millimeters? If possible tell me the length of the wheelbase in millimeters? I'm trying to figure out what chassis I should use use for a Pro Stock project, either the chassis from a Revell/Monogram Pro Stock Firebird or a Revell 55 Chevy Pro Sportsman.
-
Thanks David! Bob - A friend who owns a VW told me the square gauge is a fuel gauge. I wasn't sure how the fuel was monitored. Thanks for the information about the reserve tank.
-
Thanks Fabrizio! Today I made some floor mats for the interior. I was originally going to just have the floor carpeted but in the movie Herbie had floor mats and I looked at pictures of VW's and most have floor mats. I made these with Evergreen V-Groove Sheet(.64mm spacing/.5mm thick) I had. They are simple but once glued in and painted and the car is together they should look OK. IMG_8338 Small by Michael Scarola, on Flickr IMG_8344 Small by Michael Scarola, on Flickr
-
A friend made the decals for me a while ago. I only have enough to make 2 cars. I'll be making another Herbie eventually from a Tamiya kit.
-
Thanks guys! I applied the decals on the body. Most of the stripe on the roof will be covered by the rag top but it helped to line up the front and rear by applying it as one decal. I'll try and spray the clear on tomorrow. IMG_8329 Small by Michael Scarola, on Flickr IMG_8330 Small by Michael Scarola, on Flickr IMG_8331 Small by Michael Scarola, on Flickr IMG_8333 Small by Michael Scarola, on Flickr
-
Sad Sad Sad News: Our Harry Passed Away
crowe-t replied to Gregg's topic in General Automotive Talk (Trucks and Cars)
RIP Harry, you will be missed! -
Awesome job!
-
This is just a small update. I painted the Pearl White color on the body and the various parts today. I also sprayed Future on the rag top for the stripe decal. I'll apply the decals tomorrow and take pictures. The interior is also painted but I haven't taken any pictures yet. I'll post more pictures soon. Mike. IMG_8322 Small by Michael Scarola, on Flickr IMG_8321 Small by Michael Scarola, on Flickr IMG_8327 Small by Michael Scarola, on Flickr
-
The paint color really looks good on this car. Very nicely done Dominik!