
JasonFL
-
Posts
966 -
Joined
-
Last visited
Content Type
Profiles
Forums
Events
Gallery
Everything posted by JasonFL
-
Wasn't sure where to post this but I saw this on another forum and thought it would work well on this forum. I go through a lot of different topics, as I'm sure a lot of you do, and I noticed more then most topics have 5-7 pages, especially the build pages. So wouldn't it be great if when we entered the topic there was a "view all" button on the left side next to where the page numbers are that would allow you to load all the pages at once giving you the option to keep on flowing through the topic without having to to keep loading page after page? Just a thought.
-
Just for fun - first pics
JasonFL replied to jcbigpaw's topic in General Automotive Talk (Trucks and Cars)
Great topic, wish I had some old photos, I wouldn't even know where to look. It's fun seeing everyone else's photos tho. -
Wow bob that vette is in amazing condition for 35 years worth of moves and done so beautifully. That red looks great especially for being shot right out of the can without primer and you only paid $2.39 for the kit. Overall it was a win win. Nice build
-
I've never seen the mixer one before. That thing is so cool and you did a great job with it. I would love to see some more shots of it if you have any. Nice build
-
That is one clean Tahoe. Great color and I like how the undercarriage matches. I also really like that grill and mesh. Nice build, looking forward to seeing the motor stuffed in there.
-
I love this rod. Just the overall look with the rims, channeled and not chopped with that different grill really seperate it from the rest. I'm pretty sure I've seen this somewhere else but not sure. Nice work,keep it going, I can't wait to see it done.
-
Some really nice detail Greg. Always loved the Chevelle and that yellow is beautiful. Nice work.
-
My wife gave me some of her old nail polish, a lot of great colors. Unfortunately I don't have an airbrush so I was thinking of maybe doing some detail work like motors and other misc parts, or maybe using them for pinstriping. My thoughts were that it was to runny or wouldn't coat nicely. Any advice on how to go about using it?
-
Hey Erik, you've really done a great job so far integrating the two bodies. I really love the flow of the roof and I like what your doing with those corner tail lights. The only thing that kinda bothers my eyes is how nice and round the front fenders, roof, and trunk are but the rear fenders have that sharp edge to it. I know the tail lights have a sharp edge to them but if you were to round them off and the fender edges, to me it would personally make it all flow a little better. Just a suggestion, I still think everything is looking great. Keep it up
-
Project: "Inferno" 49 Merc - *Update p17* 3/13/15
JasonFL replied to JasonFL's topic in WIP: Model Cars
I thought about it but I didn't want to mess the flow of the trunk. Still not sure yet Thanks Chris. I may widen them out a bit, not sure. Thats what I was thinking, I didn't want to much on the trunk. -
Project: "Inferno" 49 Merc - *Update p17* 3/13/15
JasonFL replied to JasonFL's topic in WIP: Model Cars
Thanks Erik. Tape work should be lots o fun...haha. I'll look for your merc Thanks Greg. -
Project: "Inferno" 49 Merc - *Update p17* 3/13/15
JasonFL replied to JasonFL's topic in WIP: Model Cars
Thanks a lot Mike. I'll be sure to show steps, I've never masked flames that small. Should be fun...haha. It will be a driver, still not sure about the plate, maybe back window. -
Project: "Inferno" 49 Merc - *Update p17* 3/13/15
JasonFL replied to JasonFL's topic in WIP: Model Cars
Thanks Samuel. Thanks Billy. -
Project: "Inferno" 49 Merc - *Update p17* 3/13/15
JasonFL replied to JasonFL's topic in WIP: Model Cars
Thanks Ken. It will be a driver so I'm still not sure what to do. Maybe throw it in the back window -
Project: "Inferno" 49 Merc - *Update p17* 3/13/15
JasonFL replied to JasonFL's topic in WIP: Model Cars
Haha...no such thing bart, if it were up to me I would drive everything but thanks for the compliment. Good point about the magnets, I could just throw it in the rear window if need be. That's 2 for no plate -
Project: "Inferno" 49 Merc - *Update p17* 3/13/15
JasonFL replied to JasonFL's topic in WIP: Model Cars
Thanks Bryan. Appreciate it -
Project: "Inferno" 49 Merc - *Update p17* 3/13/15
JasonFL replied to JasonFL's topic in WIP: Model Cars
Thanks Carl. Thanks Randall. That's one vote for no plate. -
That's a shame Jared, I like the old f150's especially with the step side. Here's photos of my full size, when gas went through the roof I couldn't afford it so I traded it for a bd blazer. It was a fast trade and didn't realize all the mechanical stuff that needed to be done so it ended up being a bad deal. The blazer ended up just sitting there like the full size, sucks, wish I had it back.
-
Project: "Inferno" 49 Merc - *Update p17* 3/13/15
JasonFL replied to JasonFL's topic in WIP: Model Cars
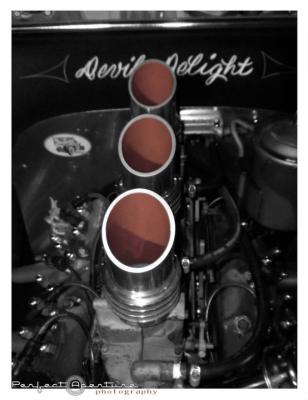
Wanted to keep the chrome look so I had to carefully cut the bumpers and mod them up. Here's the bumper and the exhaust opening I found off a chrome tree I took the rear bumper, cut it in half, shortened them up, brought them a little closer to the body, and then dropped them down just a hair or two. Then I sanded the sides of the chrome cones down and I'm able to hide it behind the bumpers so it all looks connected. Here it is all together kinda just sitting there but you get the idea. A little more tightening up and it should be there. Any opinions on weather I should move the tailpipes out further and make room for a license plate? -
Project: "Inferno" 49 Merc - *Update p17* 3/13/15
JasonFL replied to JasonFL's topic in WIP: Model Cars
Thanks Will. It will be a while until I can get the flames in color, I need to get me some sealer and clear. Thanks again for coming to the rescue with some knowledge. I talk to Bart (Bartster) a lot through email and he was telling me the same thing. I was hoping there would be another way. I'll just have to leave them until I get some supplies. -
Project: "Inferno" 49 Merc - *Update p17* 3/13/15
JasonFL replied to JasonFL's topic in WIP: Model Cars
Thanks James. I was thinking the same thing about the trunk line, I was shocked when I couldn't find one person who changed it. Same with the hood lines, I made the corners more straight edged to match the line of the trunk opening. I'm trying to make this the "simple" build as to not get overwhelmed. So far so good, thanks again. Wow! Thanks Glenn. That is one heck of a compliment, I'm glad you like them so far. Hopefully they come out that good with paint. -
Project: "Inferno" 49 Merc - *Update p17* 3/13/15
JasonFL replied to JasonFL's topic in WIP: Model Cars
Thanks Jim. Thanks Bart I appreciate the compliments. I figured I'd stop jamming your email up with photos and share with everyone..haha. Which one of the 20 emails are you referring to? I'm guessing the one about the clearence issue. -
Project: "Inferno" 49 Merc - *Update p17* 3/13/15
JasonFL replied to JasonFL's topic in WIP: Model Cars
Thanks Tom. I've jumped the lines here and there but I find if you put a piece of tape down and do your first few lines REALLY slow it's well worth it. It's teaching me a lot about patients...lol. Do to funds I only have two colors, flat black and lime ice. Im going to do something a little different and do the body lime ice and the flames flat black. Not sure what color pin stripe, maybe orange. Thanks Rob, appreciate it. I just use the back of my exacto knife, I'm not even sure what size I use.(everyone on the forum seem to all suggest a #11 blade) I just start with the thinnest blade and go thicker if I need to. Then I just hit the edges with some sandpaper when I'm finished to dull them down a little. -
Project: "Inferno" 49 Merc - *Update p17* 3/13/15
JasonFL replied to JasonFL's topic in WIP: Model Cars
Thanks Doc. I figured with all the inspirational mercs you build I'd better at least give it a shot. I will admit it has been a lot of fun so far.