59 Impala
-
Posts
1,734 -
Joined
-
Last visited
Content Type
Profiles
Forums
Events
Gallery
Everything posted by 59 Impala
-
Thanks Greg, I like trying to fix broken models like this just to see if I can. I really enjoy this type of building. Dan
-
Thanks Dennis, I'm trying to save as much of the original kit as I possibly can and the glass is one part that I really wanted to save. Dan
-
Tutorial on using a mold made from another car
59 Impala replied to 59 Impala's topic in Tips, Tricks, and Tutorials
Yer very welcome Steve. I hope that someone can use this method. It works fer me. Dan -
Thanks guys for the kind comments. This was fun to build. Dan
-
Another good thing about this model is that I have another original that I rebuilt a few years ago and it didn't have the radiator and horns, so I made copies of the ones from this kit and now the older one has the parts that were missing. Dan
-
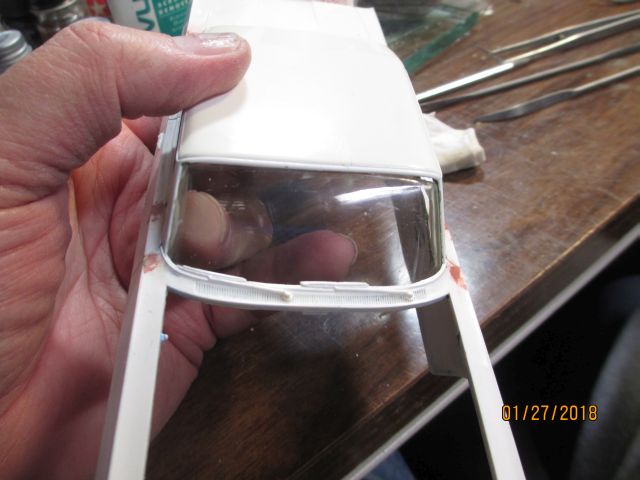
I got a little done on the windows. I think that I will be able to use this glass. I had to sand and polish the whole unit a couple of times and it doesn't look to bad. I'm trying to use as much of the kit parts that I can. I have to come up with the two 4's, manifold and headers plus the air cleaner. This won't be an exact replica cause I don't have a bench seat and maybe other stuff that I don't know about. That's Ok though. Thanks fer lookin. Dan

-
I got this in the mail yesterday and I've started on it already. The first picture is what it looked like when I got it. The glass is in pretty bad shape as far as the glue goes. I will try and remove it and save the glass. The rest of the pictures show how it is now after a bath in the Purple pond. I had to fill in the holes that were used for the mirrors, antennas and spot lights. I plan on rebuilding this as Dave Stricklers "Old Reliable IV" drag car. Thanks fer lookin. Dan
-
I also use the UV glue. It works great on the headlights and tail lights as well. I also use Testors clear parts glue. Dan
-
Tutorial on using a mold made from another car
59 Impala replied to 59 Impala's topic in Tips, Tricks, and Tutorials
Thanks guys and thanks Ricky for the explanation. In the case of the Corvette fenders I had to add the resin and liquid a few times to get the results that I wanted and you can see in the last picture of the Vette , the repair looks great. You can't see the repair. I was very happy with this result. Sd with anything you have to experiment and have a lot of patience. The ending result is amazing in my opinion. Dan -
Thanks Ron. I copied this post and posted it in the tutorial section for others to see and use. Dan
-
Tutorial on using a mold made from another car
59 Impala replied to 59 Impala's topic in Tips, Tricks, and Tutorials
Thanks for all the responses guys. For me this stuff works great and it is strong. It bonds very well to the plastic. This stuff is almost like the dental resin, just a tad different and not so potent as far as the smell goes. It does have a good smell to it though. Here is a couple pictures of the fender wells of a 1/16 Corvette that I used this stuff with and I'm very impressed with how it turned out. I'm really sold on this stuff for repairs. The last picture is the car as I rebuilt it and painted it the same as it was before. Dan
-
I copied my last post and moved it to the tutorial section if anyone wants to go there and gander at the pics. Dan
-
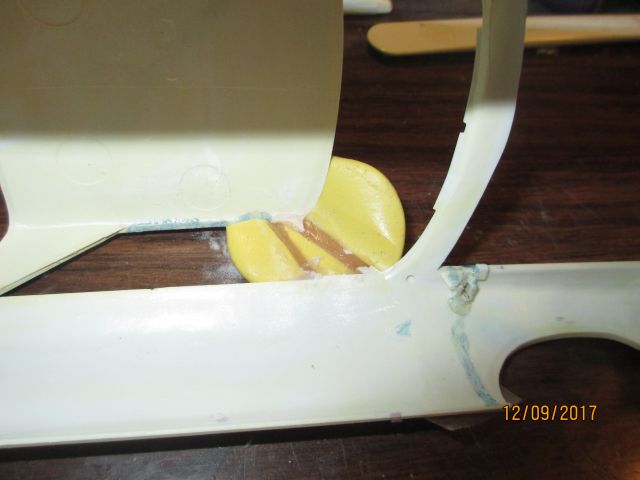
Posted Wednesday at 11:14 PM (edited) I was asked to do this and I posted it in the wrong place. So I copied it and pasted it here. I hope that someone can get some use out of this cause it does work. Ok, I'll try my best here with these pictures and my words. LOL Here you can see what I started with. This is another Dodge that I used for the mold. What I used is Amazing Mold Putty that I got at Micheal's craft store. It's a two part putty that you mix 50 50 and place it over what you want to make a mold of. Here you can see the results of making the mold. It only takes a few minutes for this to harden up so you can use it. Now, here I taped the mold to the broken body. Here you can see the fingernail resin that I use to fill in the mold. The resin I got at Sally's Beauty Supply store. It's a powder and liquid that you mix together to make the part. This liquid has a real strong smell and should be used in a well ventilated area. This cures pretty quick. I made a few passes with the powder and liquid until it filled up the mold. Here is the results after the resin sets up. There is some clean up to do and it is pretty easy to do. This resin is hard but is easy to work with. At least for me it is. Here it is after clean up. Looks like the original. After priming, you can't tell it from the original. That's about it fellas. I hope this helps someone in restoring missing parts. Thanks fer lookin. Dan
-
Thanks Steve. I get more fun out of rebuilding this type of build. To me, it's more challenging than building a new kit. Dan
-
Ok, I'll try my best here with these pictures and my words. LOL Here you can see what I started with. This is another Dodge that I used for the mold. What I used is Amazing Mold Putty that I got at Micheal's craft store. It's a two part putty that you mix 50 50 and place it over what you want to make a mold of. Here you can see the results of making the mold. It only takes a few minutes for this to harden up so you can use it. Now, here I taped the mold to the broken body. Here you can see the fingernail resin that I use to fill in the mold. The resin I got at Sally's Beauty Supply store. It's a powder and liquid that you mix together to make the part. This liquid has a real strong smell and should be used in a well ventilated area. This cures pretty quick. I made a few passes with the powder and liquid until it filled up the mold. Here is the results after the resin sets up. There is some clean up to do and it is pretty easy to do. This resin is hard but is easy to work with. At least for me it is. Here it is after clean up. Looks like the original. After priming, you can't tell it from the original. That's about it fellas. I hope this helps someone in restoring missing parts. Thanks fer lookin. Dan
-
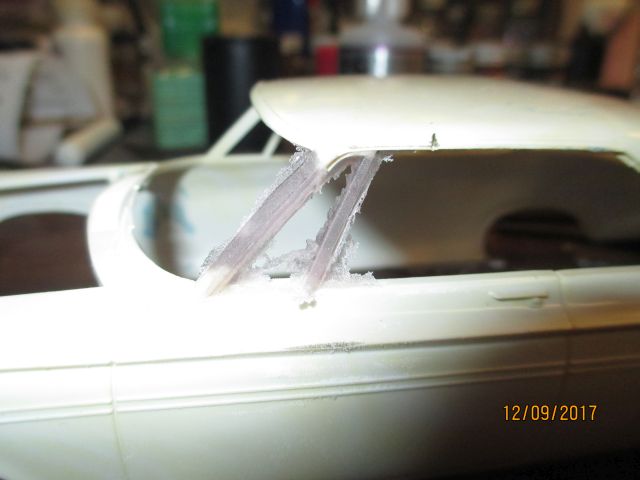
Well, I sprayed the clear coat on and had to sand it and do it all over again. I used Testors one coat clear decanted and sprayed thru my air brush. I don't know if there was something wrong with the brush or the clear. Anyway, I sprayed the clear again and had the same result. Sanded it again and then I polished it and it turned out just fine. I got all the tiny blobs of clear sanded out and it looks Ok now. Next is the BMF and I'm not looking forward to this cause there's a lot of it on this car. Dan
-
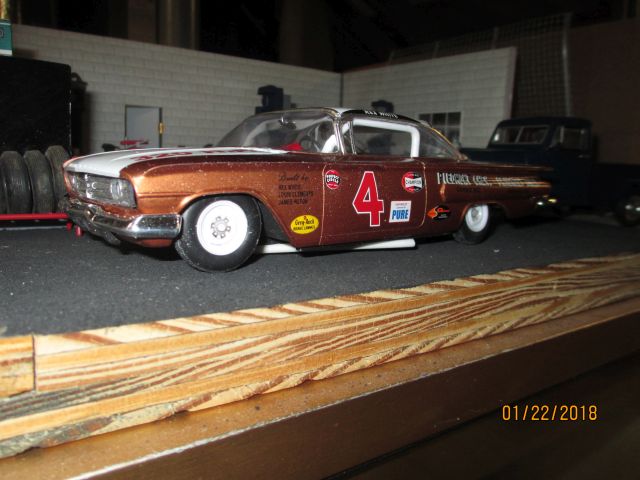
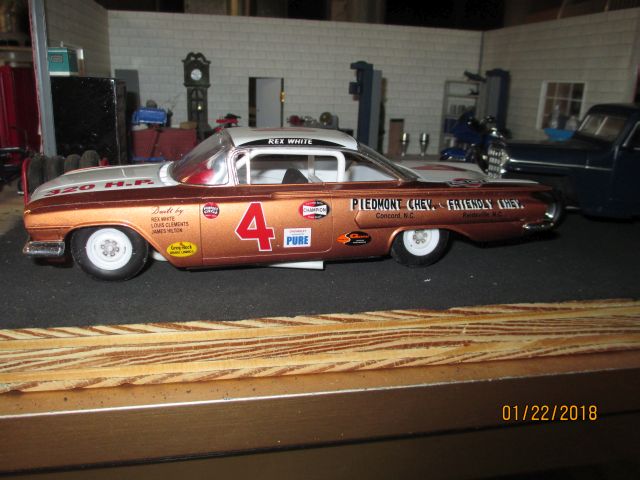
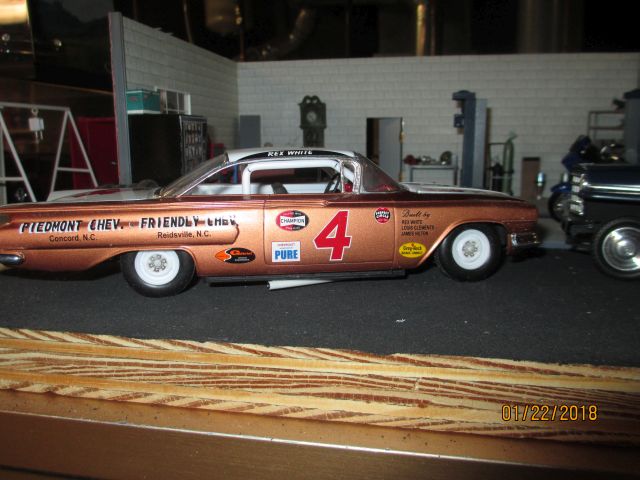
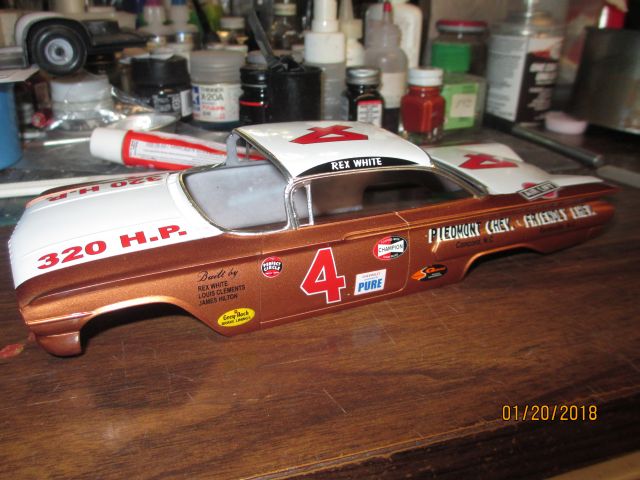
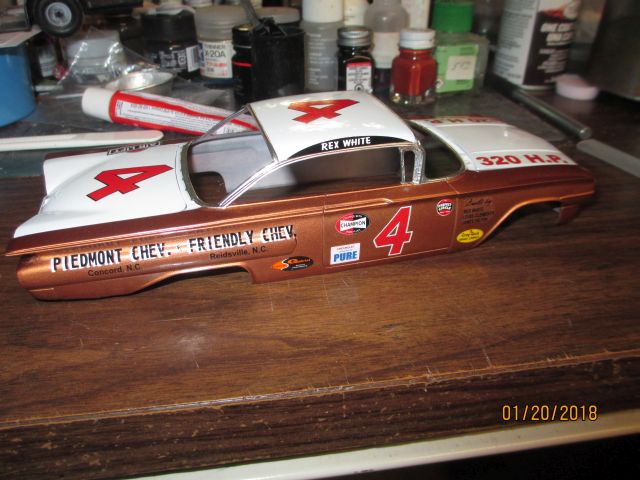
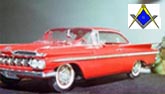
Rex White's 60 Impala
59 Impala replied to 59 Impala's topic in WIP: Stock Cars (NASCAR, Super Stock, Late Model, etc.)
I finally got-er-done today. It's not perfect but it's Ok for me. I worked and worked on the chassis and interior to try and get the chassis to fit where it's supposed to but after installing everything , it still sticks out on the bottom. I just gave up of trying to fix that. Thanks fer lookin. Dan
-
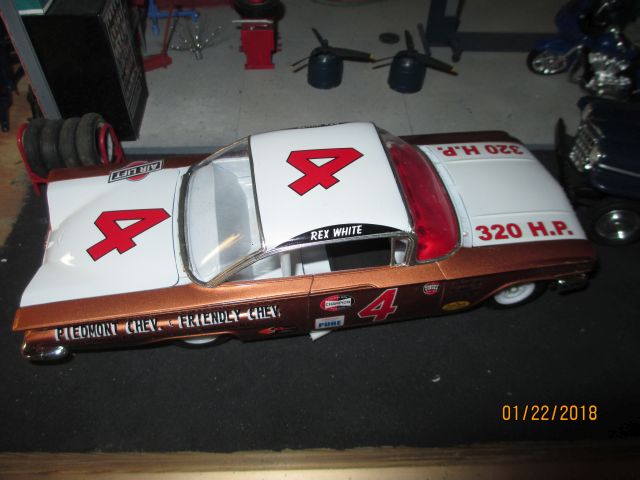
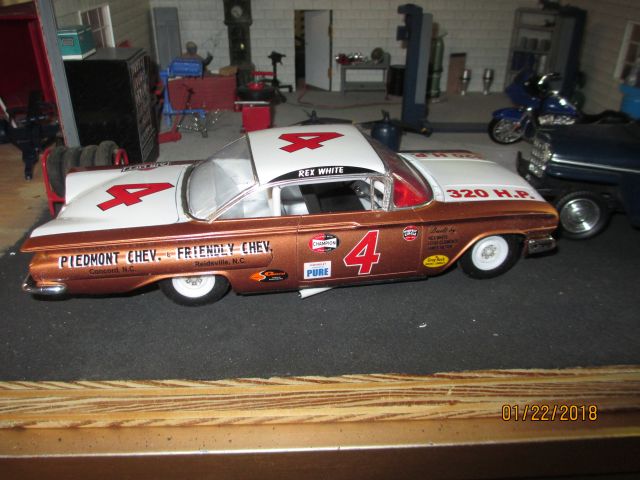
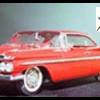
Rex White's 60 Impala
59 Impala replied to 59 Impala's topic in WIP: Stock Cars (NASCAR, Super Stock, Late Model, etc.)
I finally got a little work done on this car. I got the BMF and decals on today.
-
Nellybelle
59 Impala replied to 59 Impala's topic in WIP: Model Trucks: Pickups, Vans, SUVs, Light Commercial
Thanks Brian. I had fun researching and building this kit. This is the first build that I did a lot of research before building the kit. I don't know if you know that the club now meets at Hobbyland on the first Thursday of every month now. Most of us also meet there every Friday night for NERD night. The new owner wants to also start a second NERD night on Tuesdays. So, if ya can, come on out and build, talk or just visit. Dan -
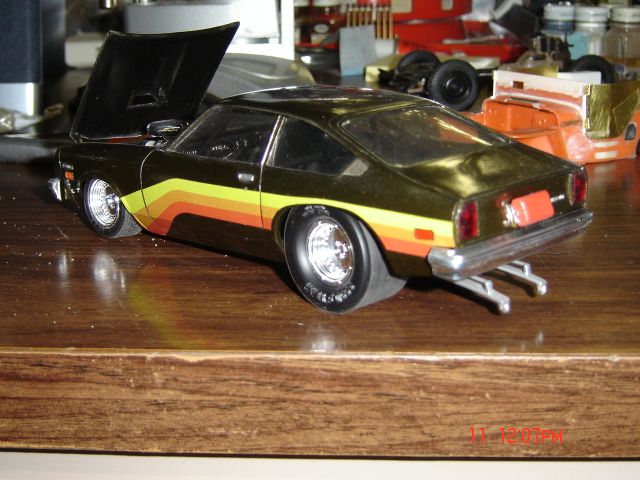
Thanks guys for the kind comments. This is the first issue of the Twister Vega that was molded in Black and I think you can still find the re-issue Twister Vega that is molded in White. I also believe that you can get the Bruce Larson decals on e-bay. Dan
-
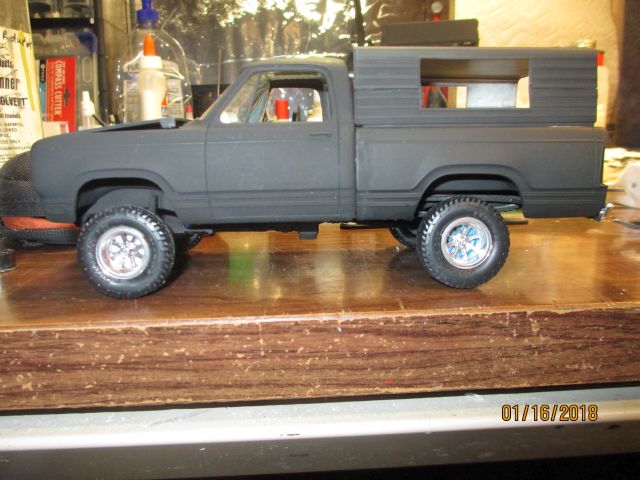
Dodge 4x4 truck
59 Impala replied to 59 Impala's topic in WIP: Model Trucks: Pickups, Vans, SUVs, Light Commercial
Thanks Mark and I agree with ya on the camper stuff. Dan -
Thanks guys for the kind words. kind of a hokie kit, but I like it. Dan
-
I built this awhile back. It's the MPC kit. I painted it Lime Gold over the Black plastic.It turned out a kinda Green metallic. It's built out of the box with the exception of the windows. I used Black Acetate for them. I also used the kit decals. It looks Ok on the shelf. Thanks fer lookin. Dan
-
Dodge 4x4 truck
59 Impala replied to 59 Impala's topic in WIP: Model Trucks: Pickups, Vans, SUVs, Light Commercial
A small update for the Dodge. It's now all one color, but, this is just the beginning for more work to be done. Thanks fer lookin. Dan
-
Dodge 4x4 truck
59 Impala replied to 59 Impala's topic in WIP: Model Trucks: Pickups, Vans, SUVs, Light Commercial
I agree Mark. I'd like to see them from the 70's to late 80's. Dan