

Repstock
-
Posts
1,195 -
Joined
-
Last visited
Content Type
Profiles
Forums
Events
Gallery
Everything posted by Repstock
-
Dump all your paint, tools and parts in a pile. My workbench!
-

How Stable Is The Plastic Used In 3D Printing?
Repstock replied to oldcarfan's topic in Model Building Questions and Answers
My problem has been spongy bodies. Some distort just by handling them. I've had to back bodies with styrene to help it keep it's shape. I've also noticed the resin will distort at lower temperatures than two-part resin. I'm amazed at the fidelity that can be had with 3D printing. Perhaps the next step is to improve the material used to print. -
Ford W Series cab 3D printed. Interested?
Repstock replied to Oldmopars's topic in Truck Aftermarket / Resin / 3D Printed
That WT-9000 might be the best rendition of the truck I've seen yet. I'll know for sure once I see the parts assembled. The grille bars are a little thick, but if that keeps them straight, it's worth it. -
Moebius 1970 F100 who has built one
Repstock replied to JerseeJerry55's topic in Model Building Questions and Answers
It installs from the outside, and is kind of a tight fit. Don't want to screw up the paint trying to get it in. Careful sanding on the windshield edges solves the problem. -
Moebius 1970 F100 who has built one
Repstock replied to JerseeJerry55's topic in Model Building Questions and Answers
I fixed a lot of shape issues on mine, but it went together just fine. The hardest part for me was the windshield installation. -
Dodge Cabover
Repstock replied to Repstock's topic in WIP: Model Trucks: Big Rigs and Heavy Equipment
I know I don't say it very often, but I appreciate all the feedback. I really don't know that much about these trucks, and I've learned quite a bit on this project. -
Dodge Cabover
Repstock replied to Repstock's topic in WIP: Model Trucks: Big Rigs and Heavy Equipment
Pardon the clutter, I have a few projects going, but I'm trying to keep this one alive. Here is my progress. The cab just happened to balance on the chassis for me to take the cab-on shot. I used the wheels and tires from the CO-4070A. Most of the rest is Freightliner cabover. I probably shouldn't have used the flash feature.
-
That blue Ford looks so familiar. Pole barn is great idea!
-
Anyone deal with Motor City Resin Casters?
Repstock replied to gbtr6's topic in Car Aftermarket / Resin / 3D Printed
I'd like to have had a couple more 1974 Econolines...gone forever, I guess. -
Any postal employees on here? I don't understand this.
Repstock replied to Monty's topic in The Off-Topic Lounge
I've never had anything lost by the USPS in over 25 years. I had two cases where something took a very long time, but i always got it. I had a magazine ping pong between Detroit and Columbus several times. It took 21 days to travel 200 miles. -
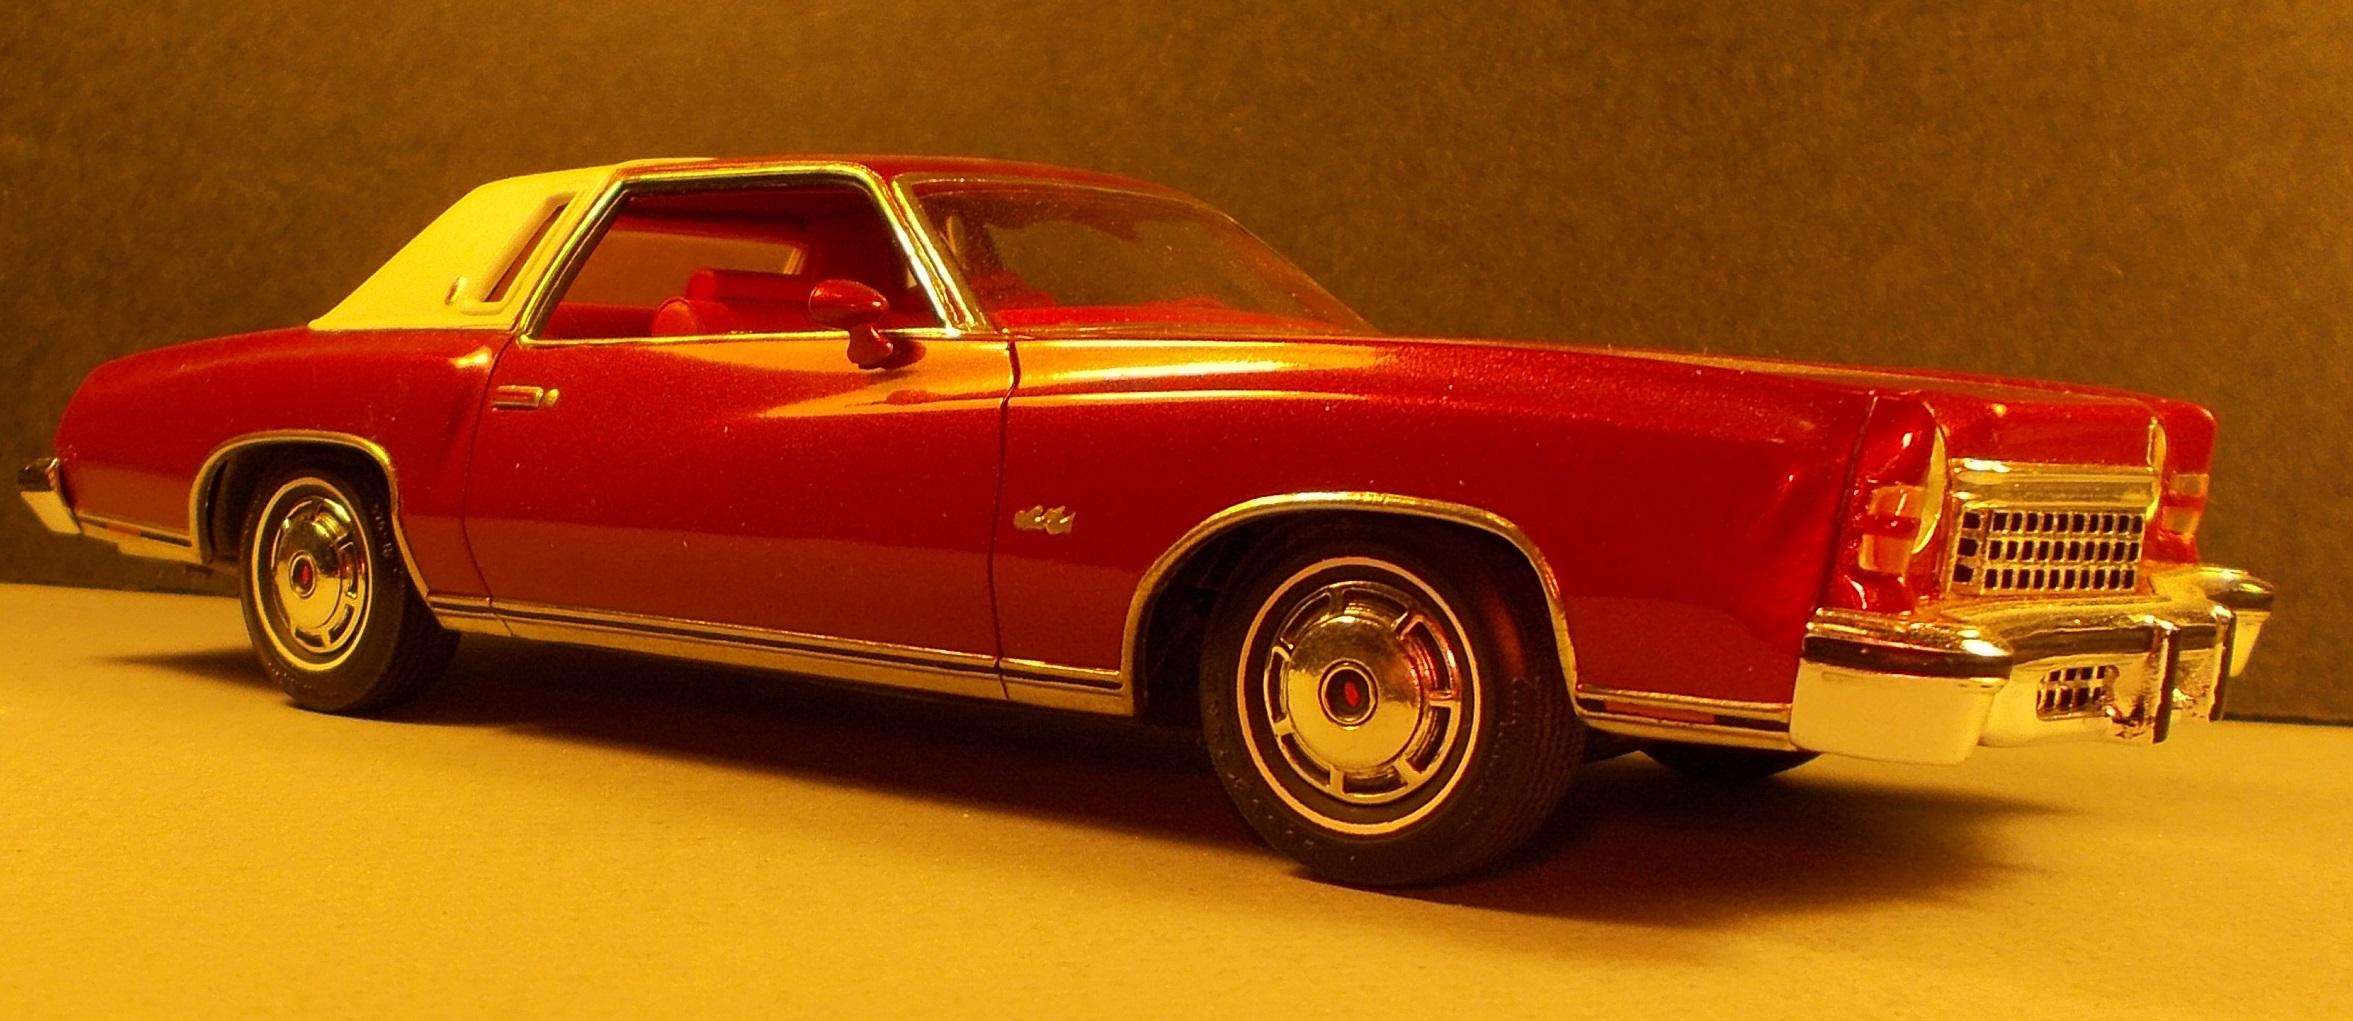
Revell '77 Chevrolet Monte Carlo Opinions
Repstock replied to ranma's topic in Model Building Questions and Answers
Here's an older conversion of the '77 to a '73. The 1970 Monte Carlo was used for the chassis and engine compartment. You have to do some work to make it fit well, but it's not that hard. I'm a big fan of the mirrors that come with the '77 Monte Carlo.
-
Revell '77 Chevrolet Monte Carlo Opinions
Repstock replied to ranma's topic in Model Building Questions and Answers
Yes, but I don't want to hijack the thread. Ranma can use the 1970 Monte Carlo chassis with some work. I used the engine compartment, too. Thanks for the kind words. -
Revell '77 Chevrolet Monte Carlo Opinions
Repstock replied to ranma's topic in Model Building Questions and Answers
The '70 Monte Carlo chassis worked well on mine.
- 15 replies
-
- 11
-

-
Dodge Cabover
Repstock replied to Repstock's topic in WIP: Model Trucks: Big Rigs and Heavy Equipment
The engine is pretty much done. I will try to keep moving forward on this. Thank you, those who have stuck with it so far.
-
What transmission is represented on the AMT 1/25 scale White Freightliner (with NHC 250) ?
-
Dodge Cabover
Repstock replied to Repstock's topic in WIP: Model Trucks: Big Rigs and Heavy Equipment
I'm done with the cab for now, and moving on to the engine. Most of the subtle weathering doesn't appear to show up in photos, but can be seen in person.
-
I'd like to find some 2 holes to fit the AMT trucks.
-
Dodge Cabover
Repstock replied to Repstock's topic in WIP: Model Trucks: Big Rigs and Heavy Equipment
I've got the decals drawn and printed. Progress continues.
-
Dodge Cabover
Repstock replied to Repstock's topic in WIP: Model Trucks: Big Rigs and Heavy Equipment
PAINT! A stage I rarely reach in a build these days! I decided on an old, tired Central Transport truck. I know Central is known for their yellow livery, but there was a time...Hopefully soon I can get a chance to draw up some decals. This is a s clean as she'll ever be. The red is darker than these pictures make it appear.
-
Scroll down the page: Maybe my build will help you (?)
-
Dodge Cabover
Repstock replied to Repstock's topic in WIP: Model Trucks: Big Rigs and Heavy Equipment
I may add a few items strewn about the interior, but the base interior is done. I have some work to do for a client before I continue, but I'll be back to this soon.
-
Dodge Cabover
Repstock replied to Repstock's topic in WIP: Model Trucks: Big Rigs and Heavy Equipment
I'm getting close to assembling the interior. I use Tamiya TS-75 for that bare-bones look. Nothing plush about this truck!
-
What was your first model car?
Repstock replied to Kit Karson's topic in General Automotive Talk (Trucks and Cars)
The MPC 1973 Vega. This is before I discovered the world of vintage kits, shows, and such. I was 13 at the time. -
Dodge Cabover
Repstock replied to Repstock's topic in WIP: Model Trucks: Big Rigs and Heavy Equipment
All I need are pedals, and I'm calling the dash done. Moving on to other areas.
-
Dodge Cabover
Repstock replied to Repstock's topic in WIP: Model Trucks: Big Rigs and Heavy Equipment
I've been working on the dash. The upper surfaces are just about done, but there's just as much below the dash as above, so that's next.
.JPG.cd04b93a8eaaf859375d677747219117.JPG)
.JPG.36855c73ffb1ba8bf3746825f98f79b8.JPG)
.JPG.8184e25e93aff040c049dc618f99a34e.JPG)


.JPG.2b4a487f54a91a8a5ae64d25065341aa.JPG)
.JPG.6265f25f51da9bdeb1ccdb53b4884041.JPG)
.JPG.3d88074004ad439b3206c70e8dab313d.JPG)
.JPG.556a26eb1f80090cd4b8f4ed8d76c4f6.JPG)
.JPG.7821655a559a0ddfa86dc0c746303be2.JPG)
.JPG.f4dc71e83b657229a4fbb7a48bb17b78.JPG)
.JPG.3eb6fcc3f454d802e78b954e023d9cef.JPG)
.JPG.63cf48d07970c02d10ae7e80bed22d68.JPG)

.JPG.f8140325019ee32850c5c09174464621.JPG)
.JPG.d75c65db01f98df8cbf2357a9e47c441.JPG)
.JPG.dc395d60d8d53752f250b5edd84c5948.JPG)
.JPG.add315647455c5e99850548e17297595.JPG)
.JPG.d061e9a222147199d38b9334a77fc360.JPG)
.JPG.afba18428a1aa56b094381a683681e85.JPG)
.JPG.53c4d4e585635b9fc6ba8b5b93d2c6ef.JPG)


.JPG.bbe9000539f3dbe5d087794740e90f5f.JPG)
.JPG.825a1a5ae5acf321c7dd9c94be64cb16.JPG)