Ace-Garageguy
-
Posts
39,267 -
Joined
-
Last visited
Content Type
Profiles
Forums
Events
Gallery
Everything posted by Ace-Garageguy
-
He was...ummmm...certainly a guy who gave his audience what they wanted.
-

Thanks To AMT For The New Technology Old Kits
Ace-Garageguy replied to oldcarfan's topic in Car Kit News & Reviews
Yup yup yup. And this is the kind of thinking that could bring the models of older vehicles up to today's expectations cost-effectively. Of course, where no decent pre-tooled chassis donors exist, you'd still have to do fresh tooling...more expensive (though intelligent utilization of current tech to design and cut tooling could save a large percentage of the cost of doing it the old way)...but I'd stand in line for hours in the rain listening to 100-decibel rap to get a few full-detail, accurate-engine-and-chassis AMX kits. -
-
What...no phone app to do the dishes ??
-
Thank you sir. Space coal and ether indeed. I'm going to set aside some time to sit back and really enjoy this one. Thanks again.
-
Amen.
-
The Official EBay Discussion Thread
Ace-Garageguy replied to iamsuperdan's topic in General Automotive Talk (Trucks and Cars)
Yup. -
Manwich rhymes with glamwitch, kinda Vampirella without the fangs.
-
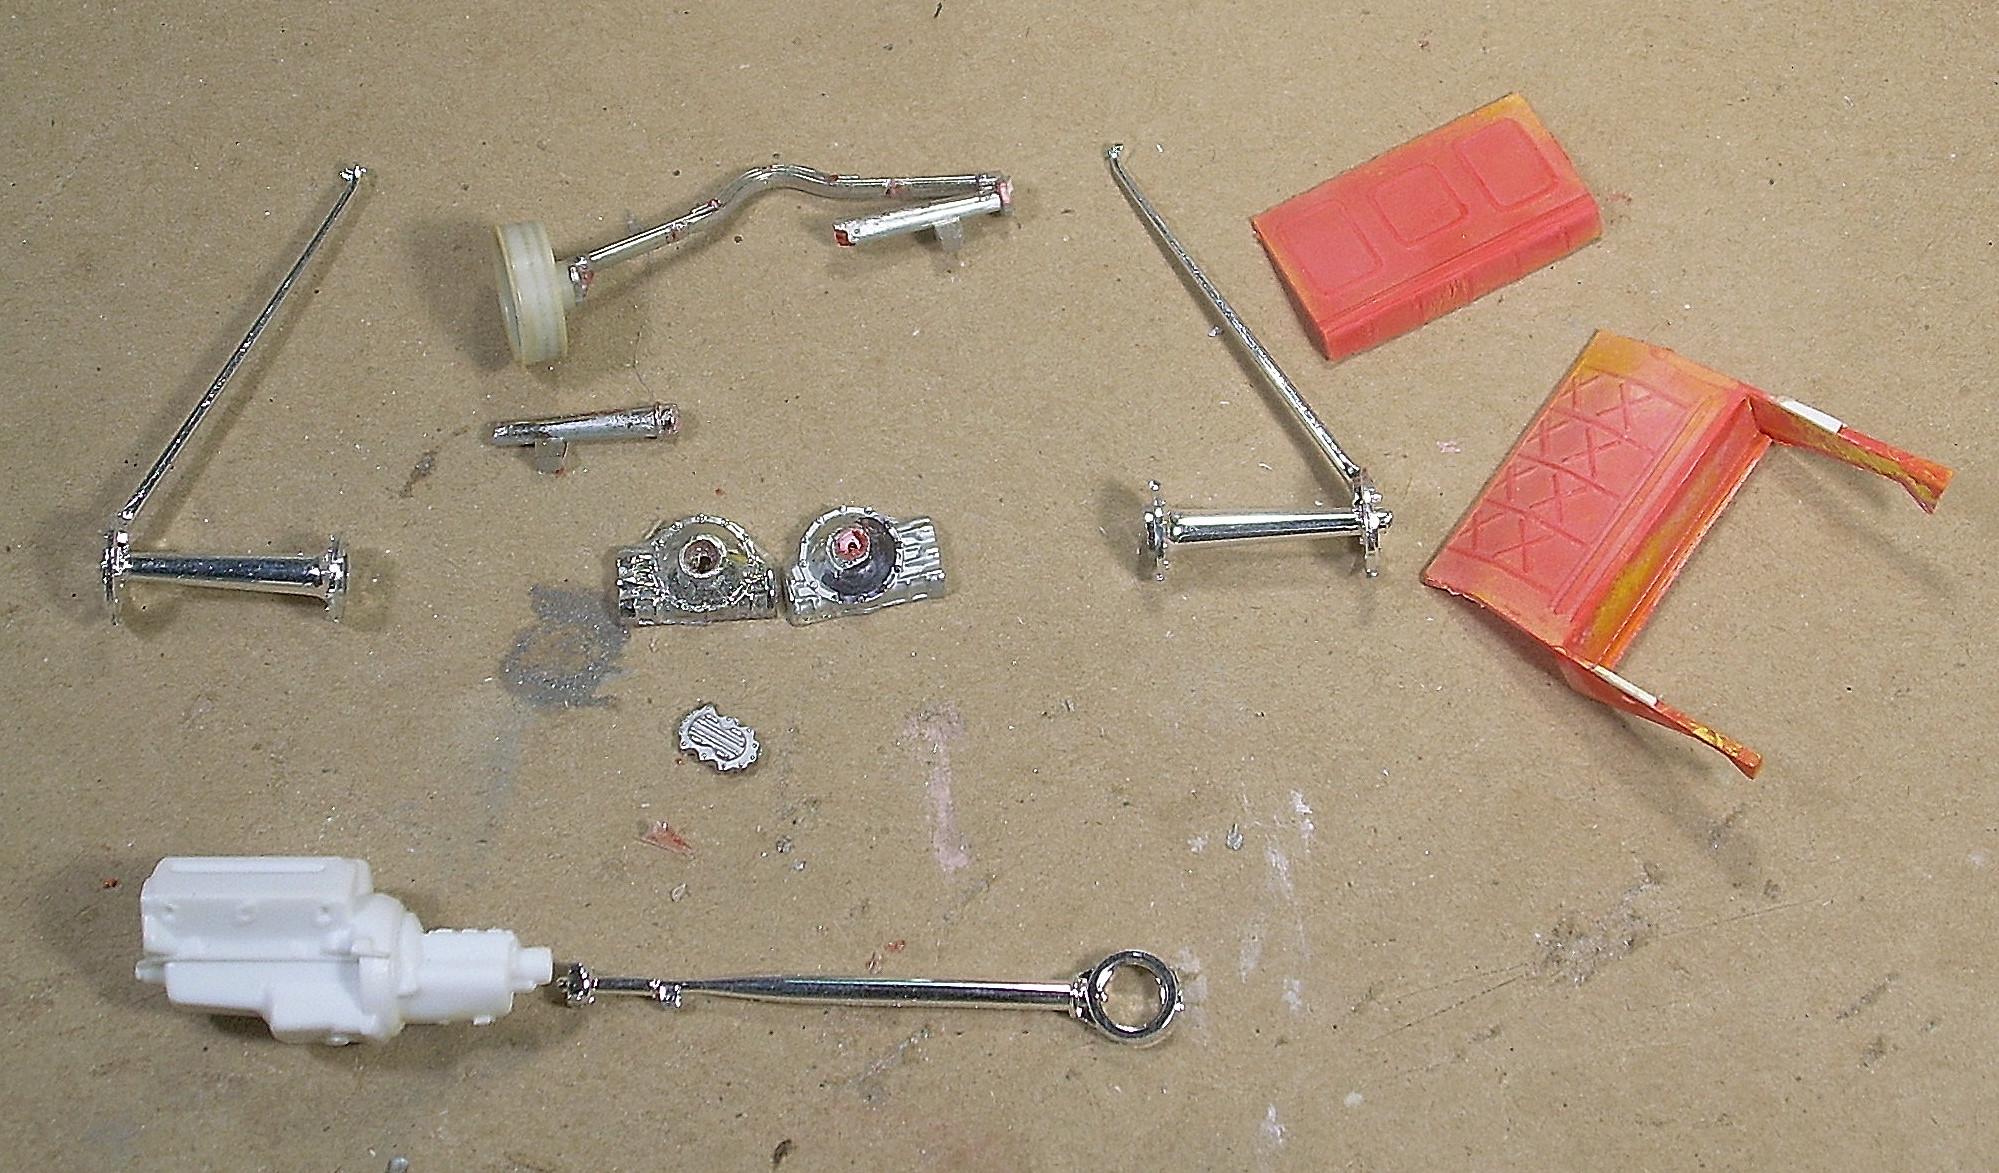
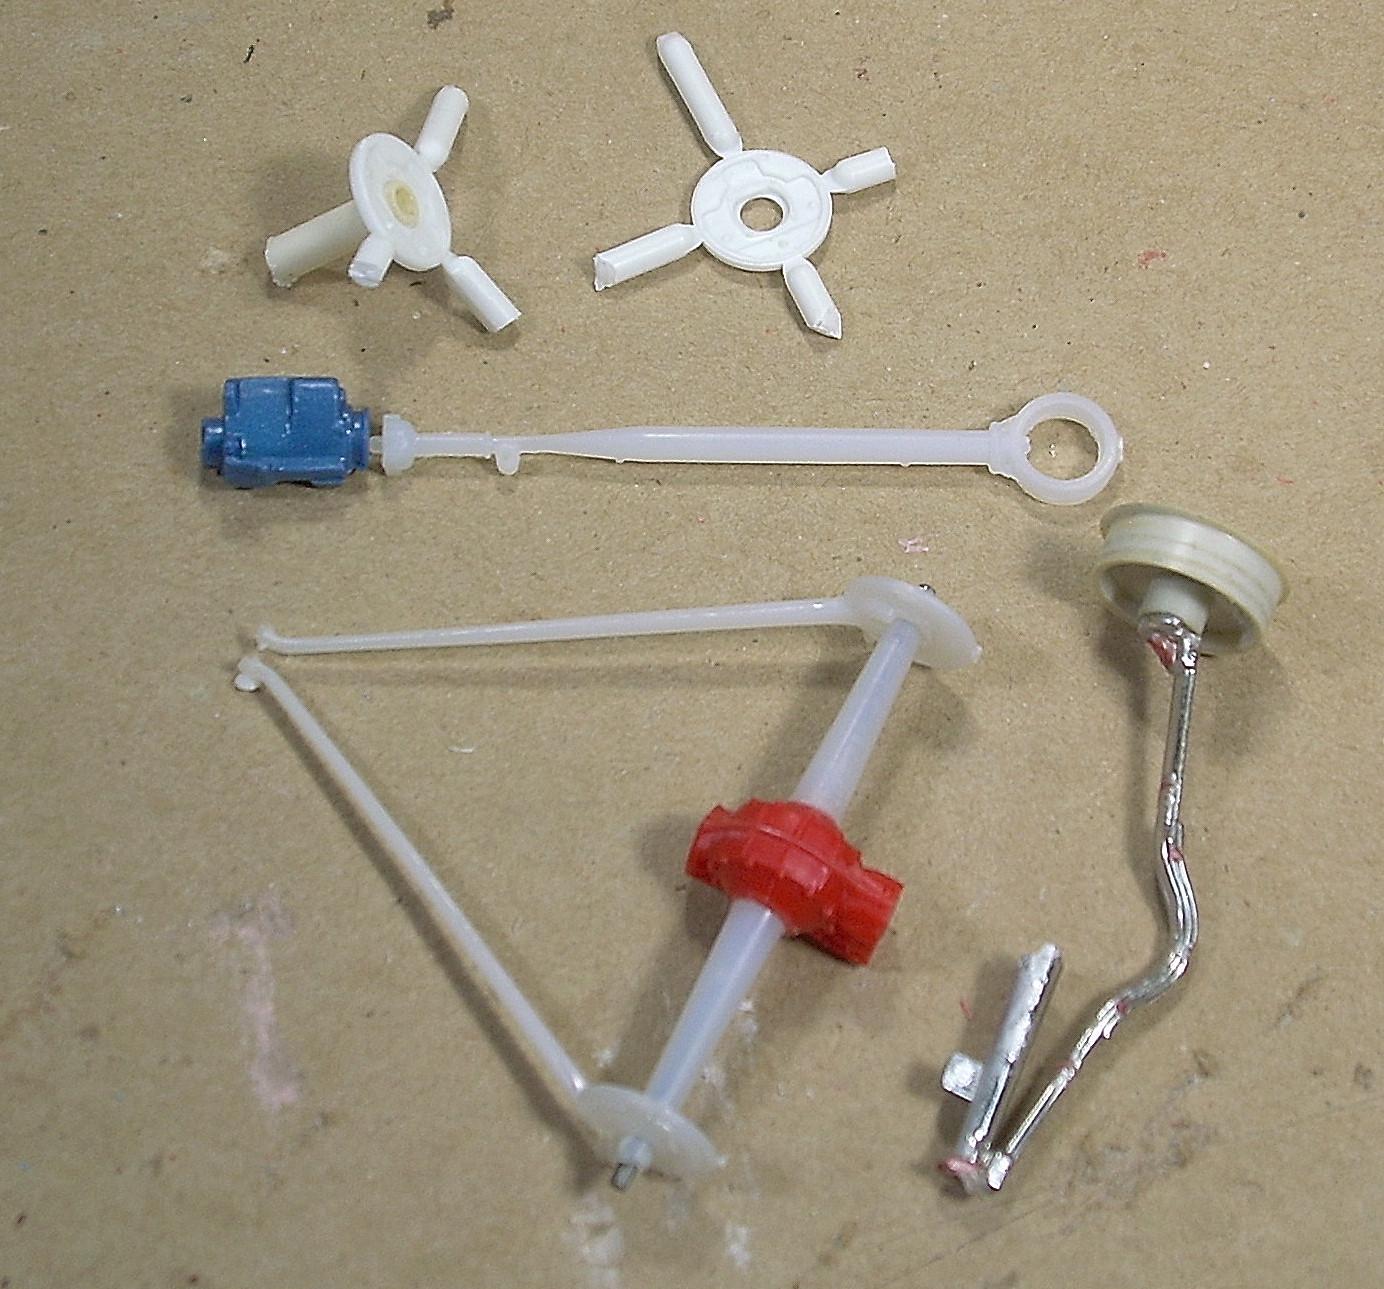
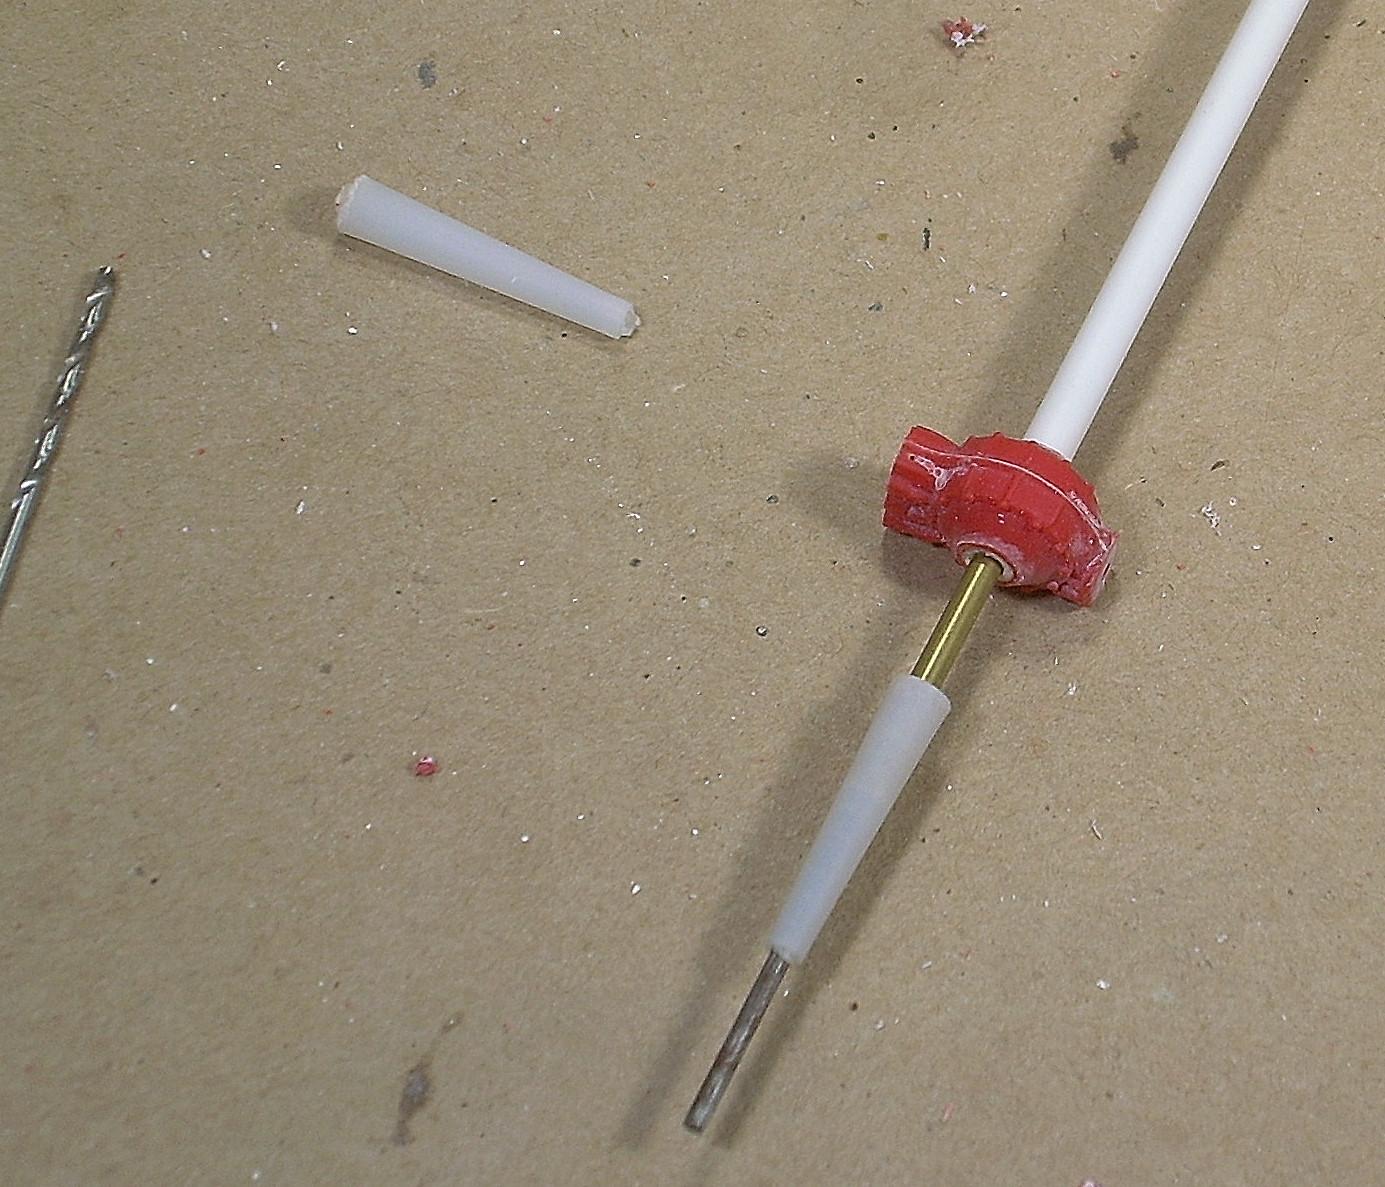
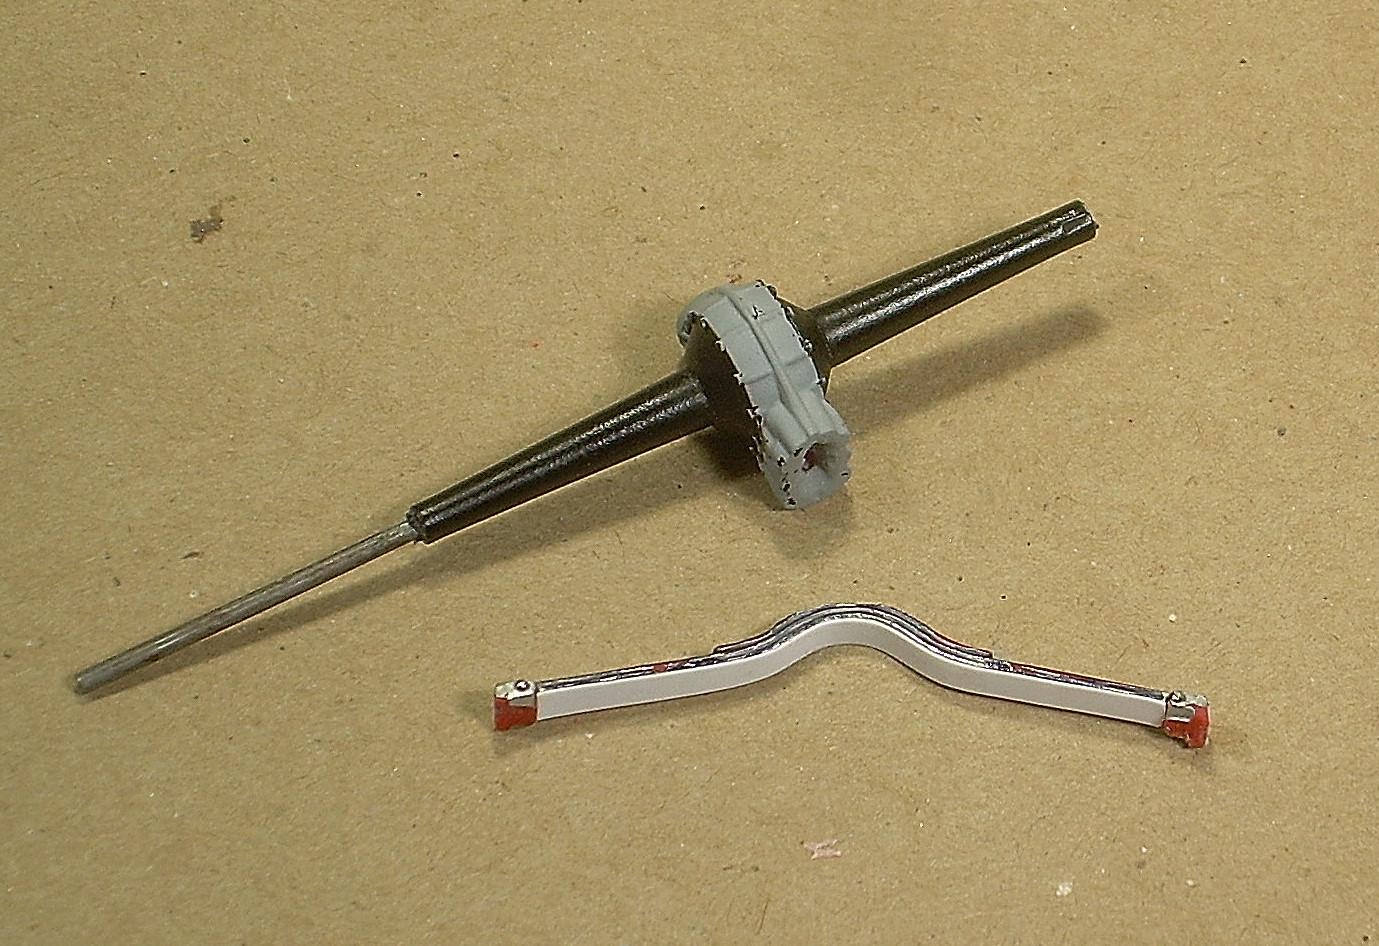
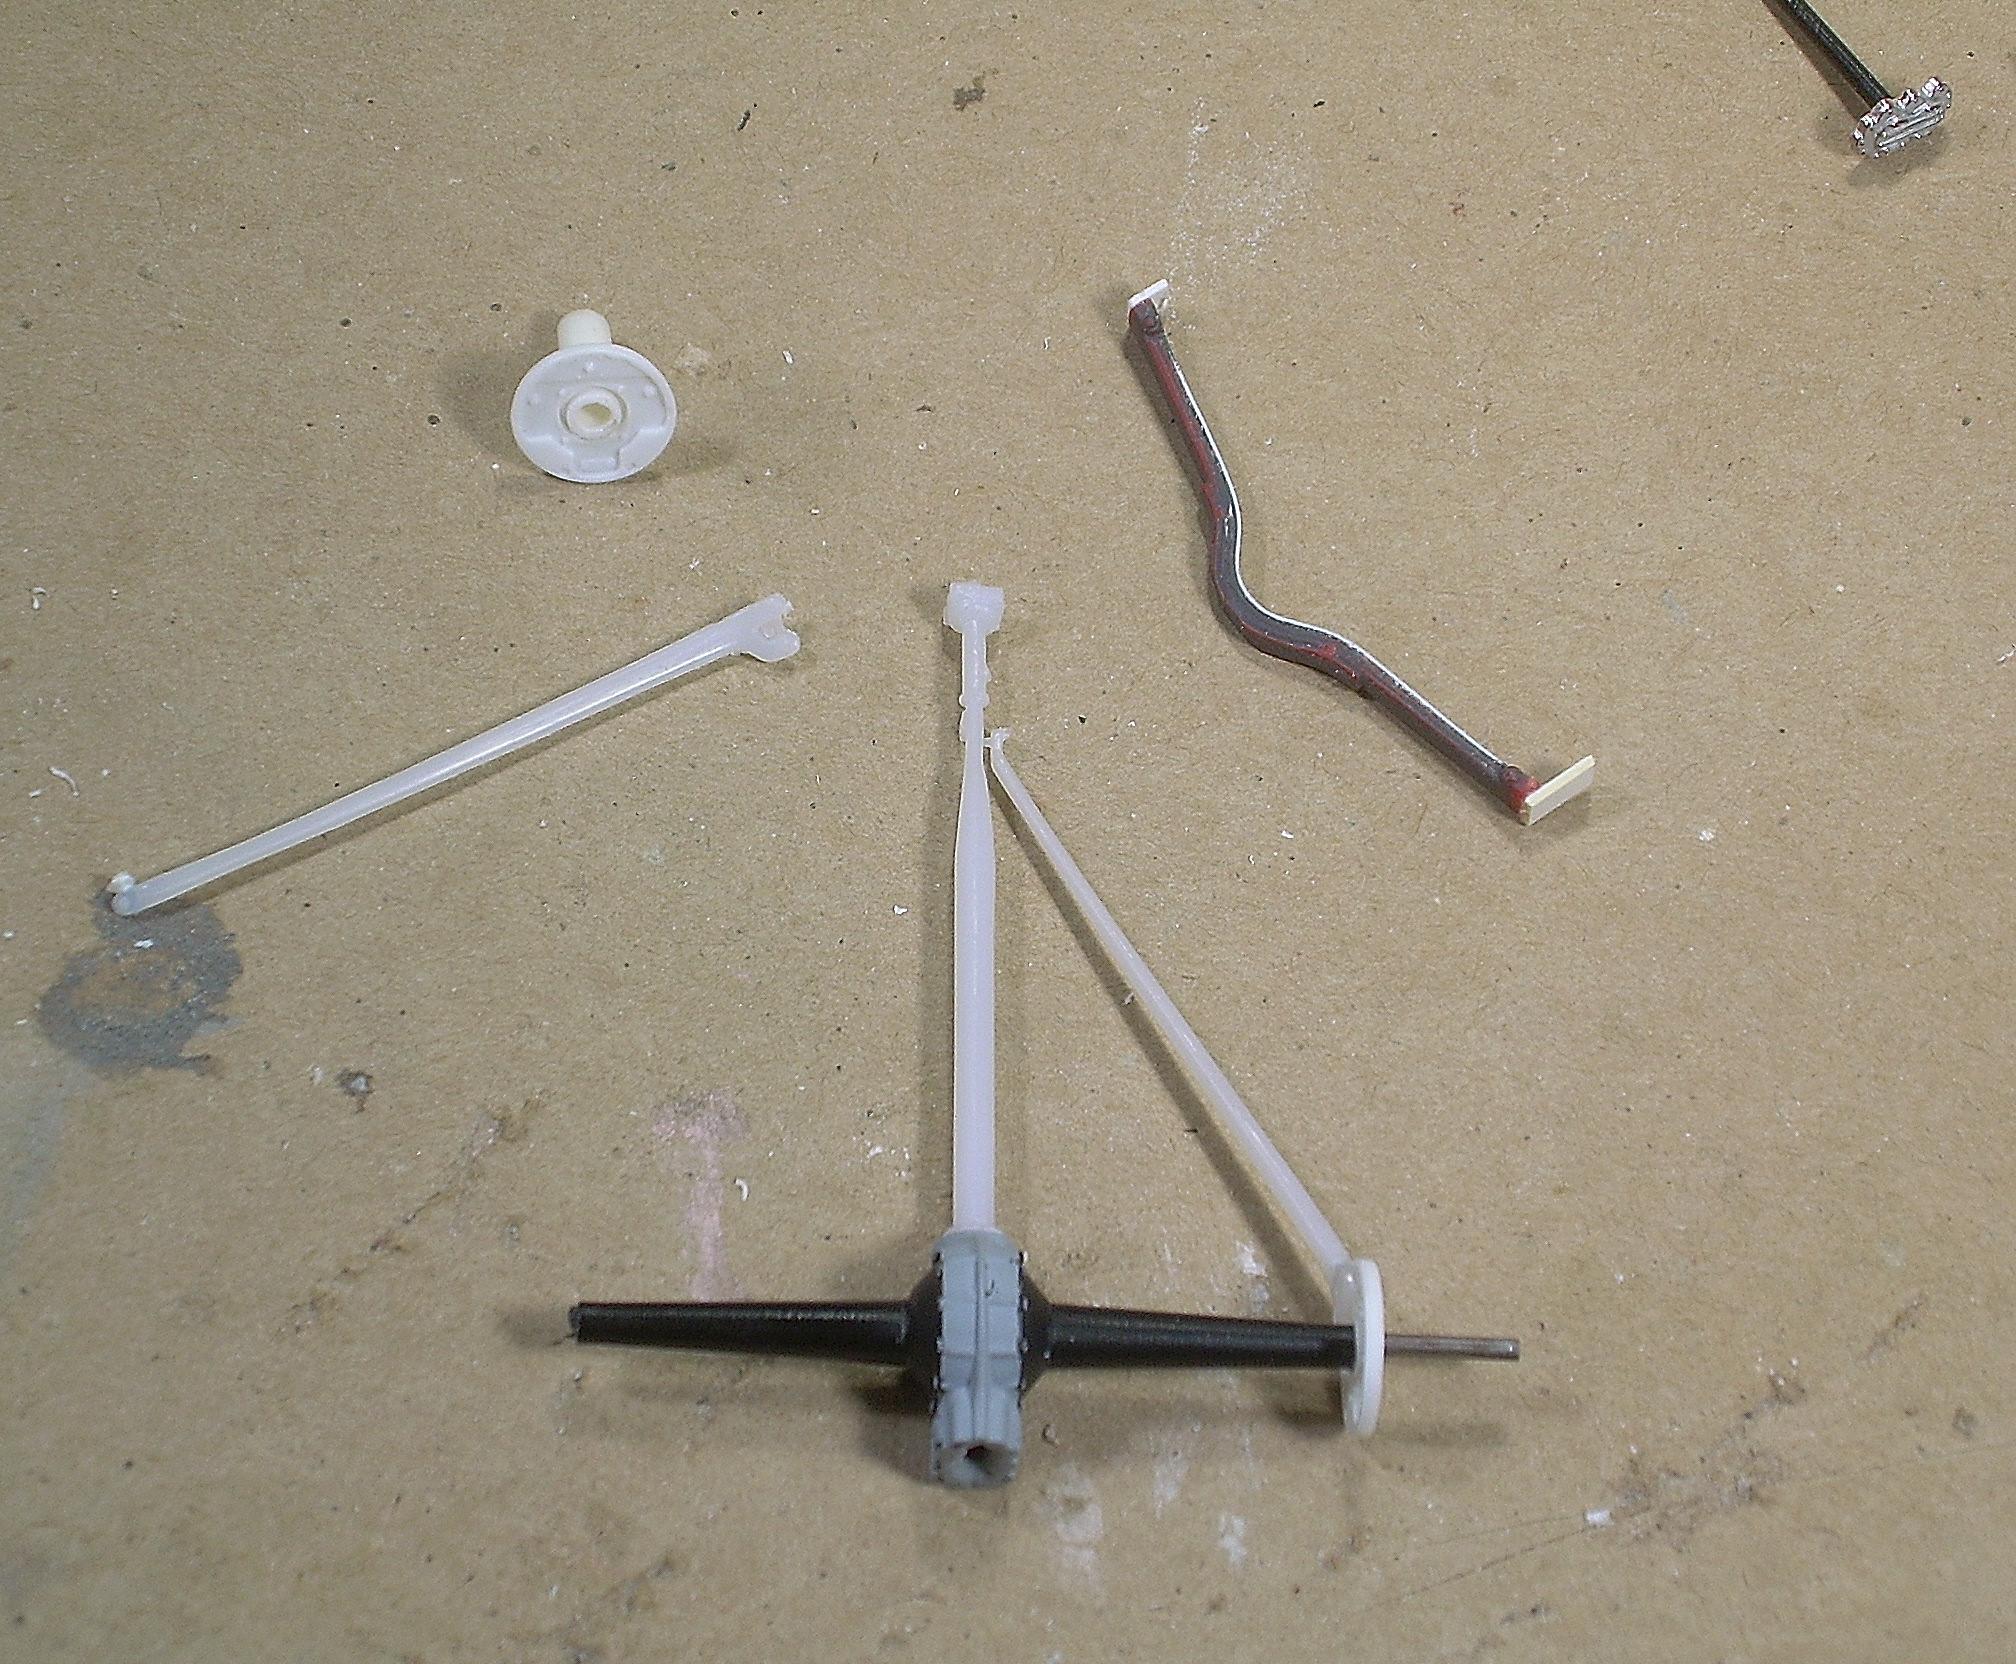
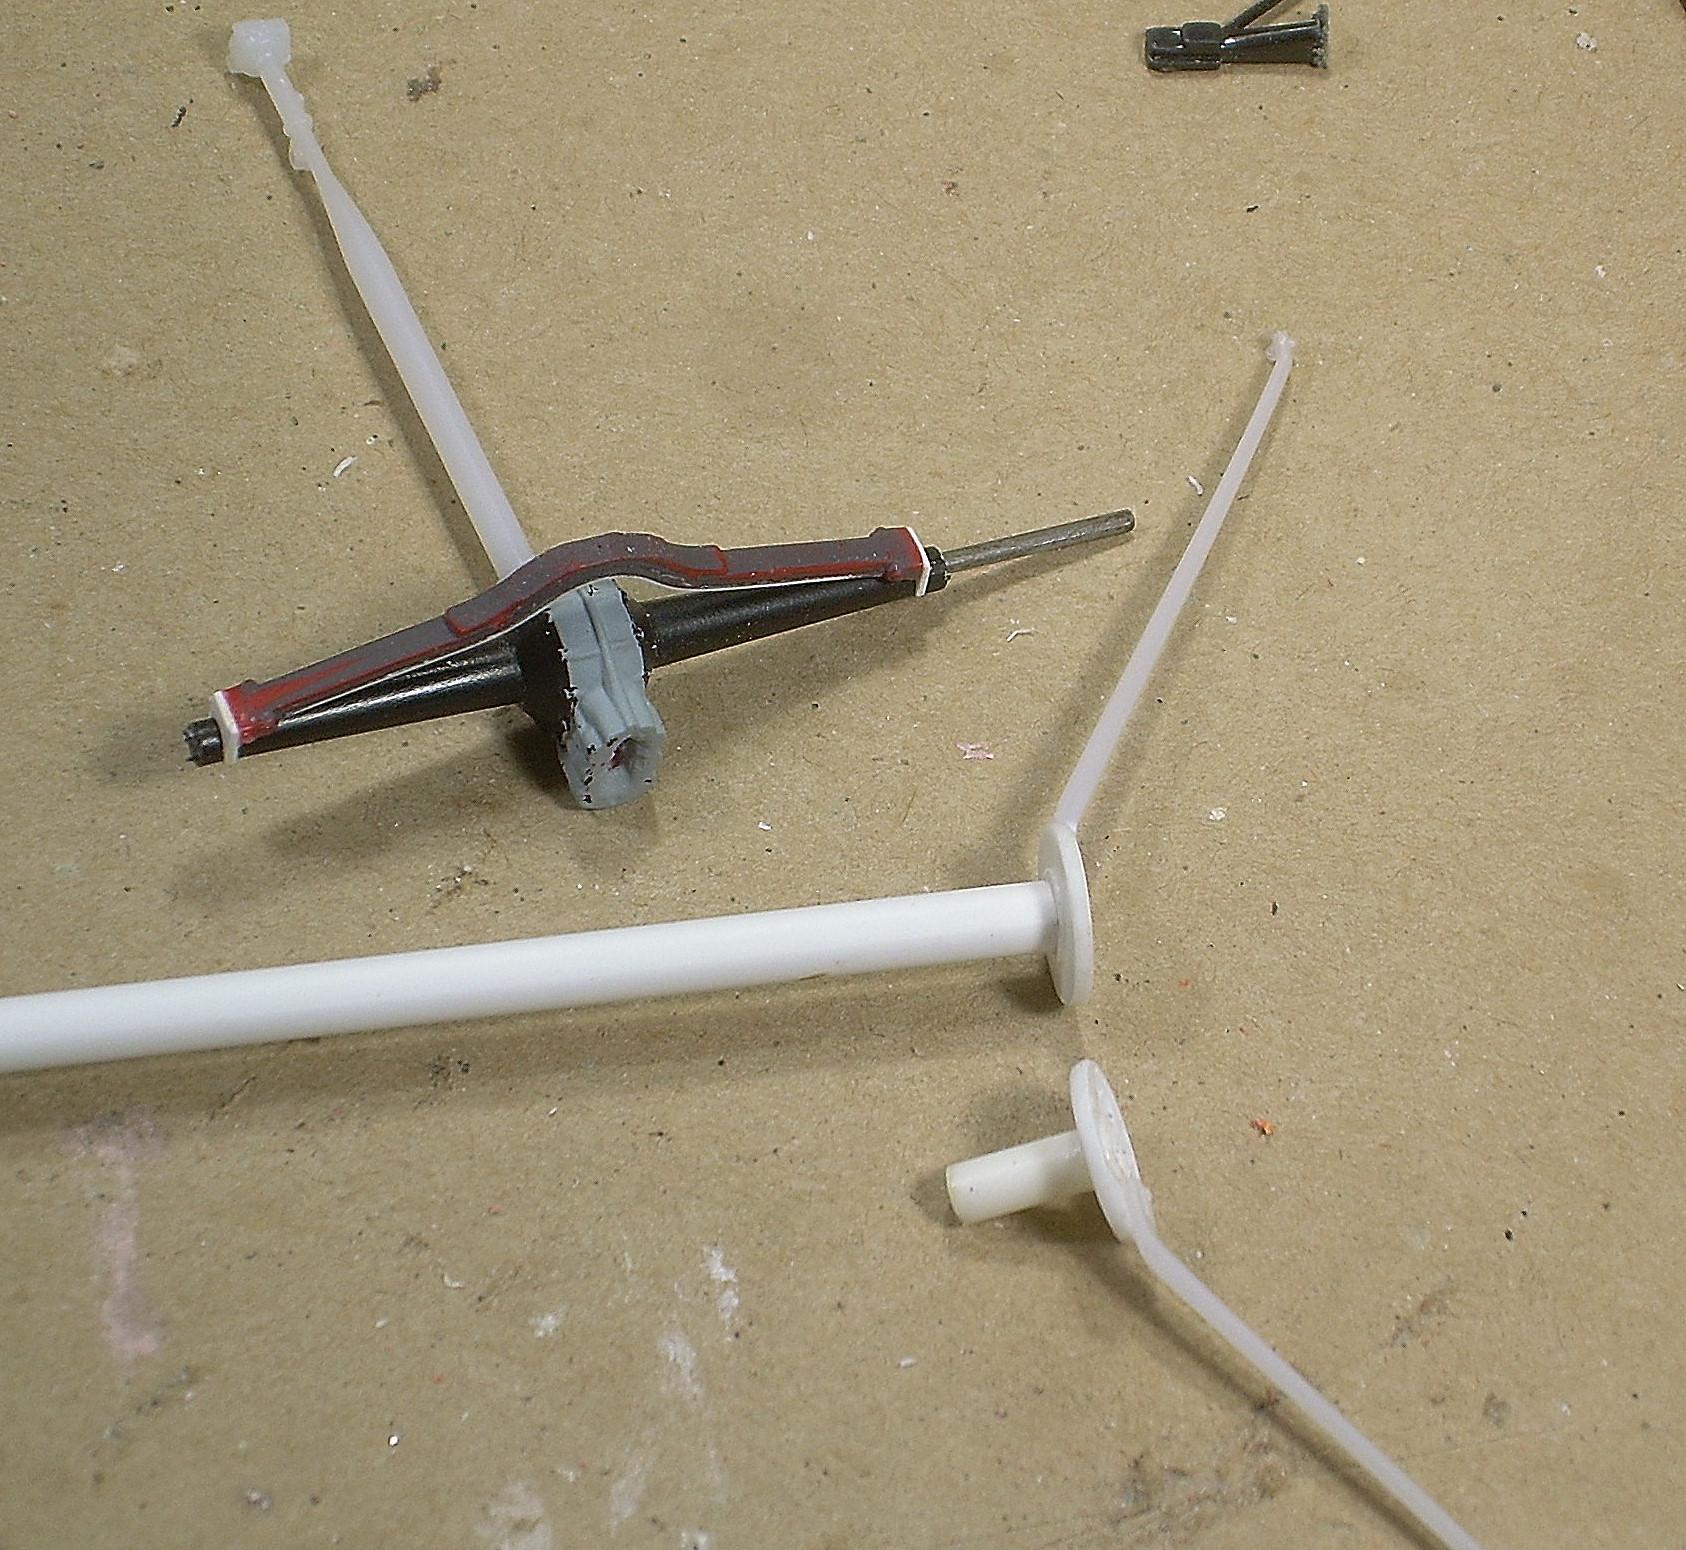
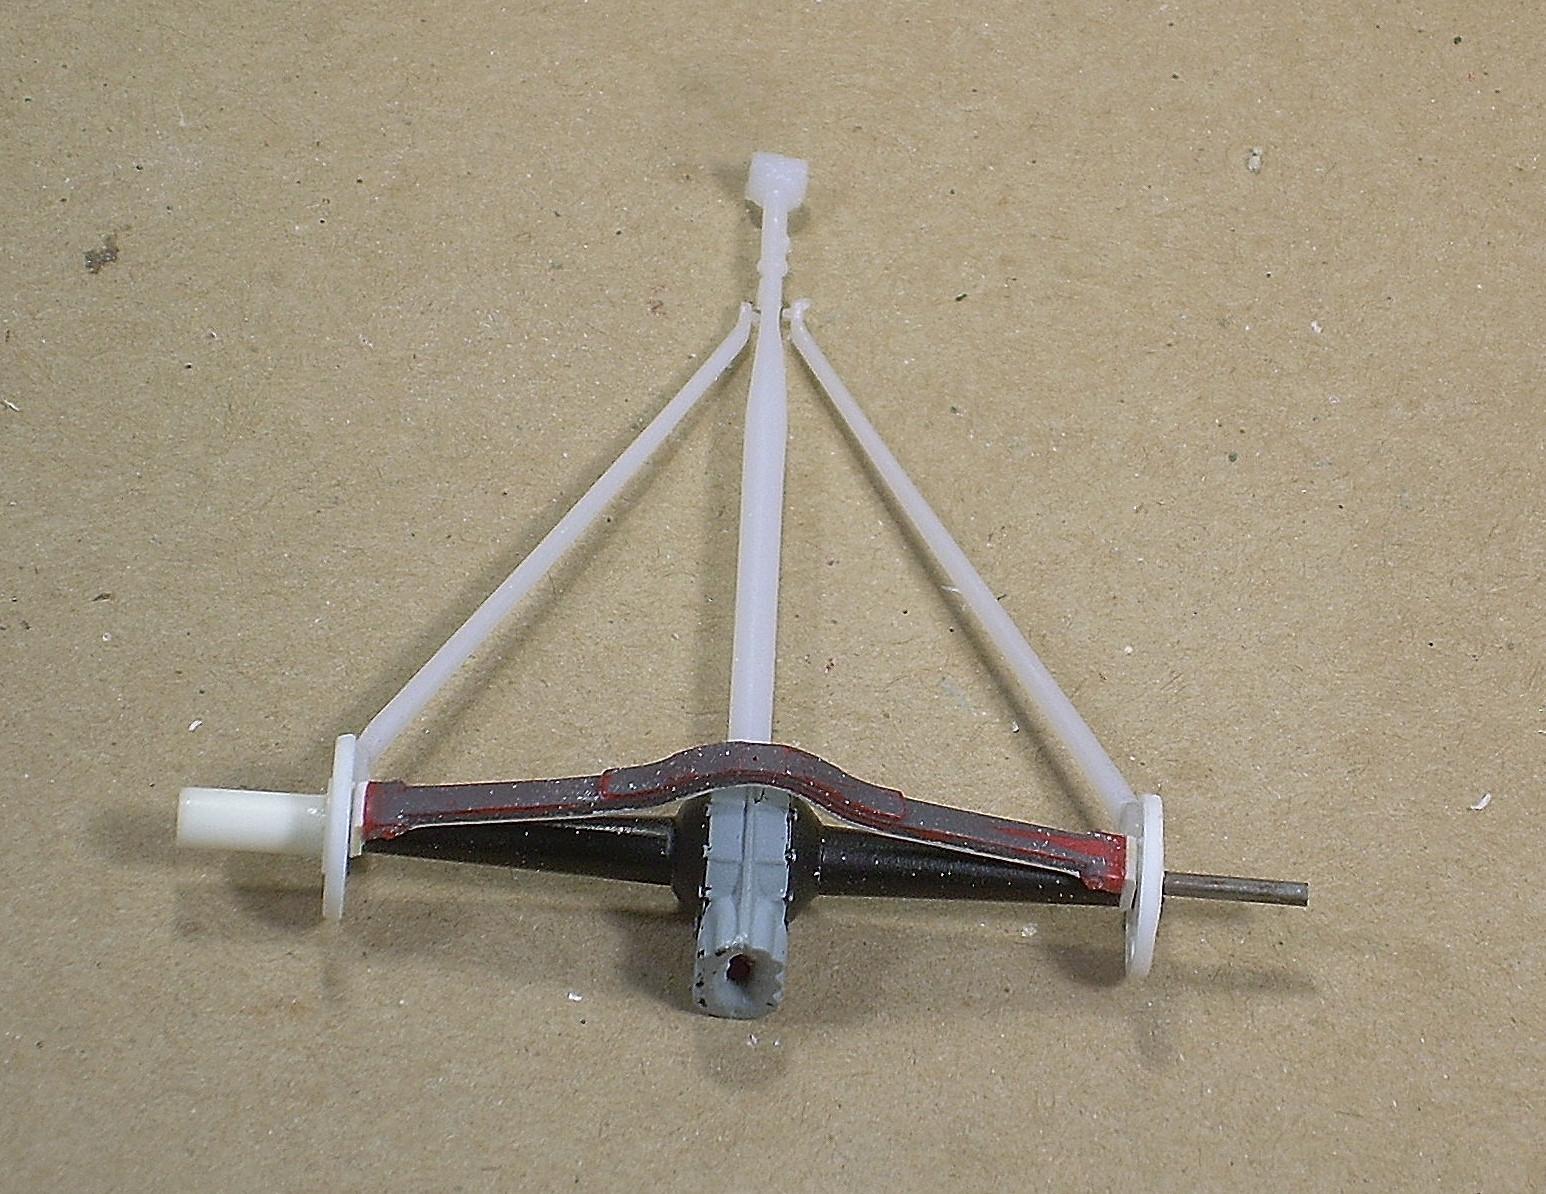
Bunch of bits for the next few rounds include the glooey spring and axles I used on the mockup; the quickchange center section, carefully split apart; the chrome driveshaft, axle bells and radius arms from the old Revell '30 Model A kit; an engine assembly from the Revell '37 Ford pickup; and the red parts are sections of the floor removed earlier. I stripped the floor sections with oven cleaner as an experiment, as the paint that was on the little car had the appearance of lacquer that had crazed slightly, and eaten into the plastic. I was kinda surprised it came off without too much trouble. I stripped the chrome from the center section halves, "machined" the mating surfaces flat, glued 'em back together with the casting ribs in alignment, then cleaned up the side-cover holes and installed the de-chromed old Revell '30 axle tubes (after also removing the inboard "bell" sections from them). This is going to be a kinda "fiddly" big deal, because I want the rear end exactly the right width to allow the slicks I'm using to align correctly with the rear fenders with clearance for suspension travel, so little car would work in reality. I replaced the axle tubes because the ones I'd used for the mockup were kinda grotty, glooy, and would need several mods to do what I want them to do. Any self-respecting A-V8 builder would have swapped the old mechanical brakes for later Ford "juice" (hydraulic) brakes, and the white backing plates are '40 or '48 Ford juice pieces. The axle is shown loosely assembled with the old-style mechanical backing plates still attached to the radius arms from the early Revell '30 Ford. This will change. The trans is a '37 LaSalle unit from a Challenger One kit. Adapting these gearboxes to work with the Ford "closed" driveshaft was pretty common, and that's what's being considered here. Keeping the axle tubes straight is important to having the tires end up in the right places, so before gluing the rear end together, I bored it for a plastic centering bushing that would hold everything square and parallel, with a brass sleeve and a steel axle installed to jig the ends in place. It also makes the assembly much stronger, as the different plastics back here weren't playing very nice together. The axle housing assembly was primed, masked, and painted with the center left primer gray...a reasonable representation of an oxidized aluminum casting (though I'm going to try to get it a little better). I used Microscale "MicroMask" for the first time here, and I'm really happy with it. Whatever doesn't easily peel off is water soluble, and scrubbing with a toothbrush yields a nice crisp edge. The black on the axle tubes is a little grainier than I wanted, but so many of these were rust pitted by this time in their lives (and just painted over), I'm not going to sweat it. The buggy spring was liberated from the mystery parts I used for the mockup, cleaned up, and treated to a reinforcing leaf of .020" styrene strip...which made a huge difference in strength, believe it or not. Next shot shows the buggy spring with ears on the ends, representing the shackle brackets as shown in an earlier reference shot. Not going for rivet-counting perfection, just a reasonable representation I can live with. The radius arms have been carefully separated from the mechanical-style backing plates and the RH side has been mated with a correctly "clocked" juice-style backing plate ("clocking" just means the locations of the brake lines and parking brake cable inlets were considered, so if I decide to represent all that stuff, it'll be in the right places to work with this spring setup). These later style plates had so be sleeved with styrene tube to keep the axle tubes centered, and the one above the axle shows the sleeve sticking out prior to trimming. The driveshaft has been drilled and pinned to mate with the QC housing, and general alignment is being considered here. The radius arm doesn't hit the driveshaft housing in the right place with the QC center section installed, but, as the driveshaft will need to be modded to fit the engine anyway, it doesn't matter. The QC cover has been glued to a piece of styrene rod so I wouldn't lose it down the drain during stripping, but I decided to leave it chrome as it looks more like polished aluminum. I had to get a little fancier with the sleeves in the juice-style backing plates to keep them square with the axle tube, and this shot also shows the LH backing plate assembled to its radius arm. If my measuring is correct, the ears on the ends of the buggy spring will locate the backing plates at the right width for the tires to fit the fenders, and the radius arms to just clear the tire edges. Everything loosely assembled (prior to trimming the LH sleeve). Now to check it with wheels and tires against the chassis and fenders...

-
In case you never thought this through...
-
Oh man...you reminded me of one of my exes who'd go off on me if I tried to explain logical dishwasher loading to her. Hard to believe the names I got called too. So glad she left to make the next sucker's life a living hell, and if he's not a "yes dear, whatever you say dear" kinda guy, I'm sure she's left him too by now. Some women should have warning tattoos on their foreheads, something like "HERE BE DRAGONS". Or just: She sure was cute, though.
-
Oh boy. Maybe I can get two for an even grand.
-
I like the rose metallic, but I really liked the green. The AMT lacquer line (back when dinosaurs roamed the earth) had a very similar color. Really like this body style too, particularly when it's done as a period NASCAR piece.
-
Resumes don't always accurately reflect a job applicant's qualifications, and I've read some doozies that were pure fiction.
-
Autoquiz #577 - Finished
Ace-Garageguy replied to carsntrucks4you's topic in Real or Model? / Auto ID Quiz
PM'd -
Autoquiz #576 - Finished
Ace-Garageguy replied to carsntrucks4you's topic in Real or Model? / Auto ID Quiz
You forgot me. I have your April 10 confirmation PM. -
Closest thing to a "grail" at the moment...I understand there's a resin kit of Dean Jeffries' Mantaray, possibly based on a slotcar body shell.
-
Others may have opinions or beliefs that have no similarity to the truth, and may also refuse to listen to reason.
-
I liked him both as an actor and a musician. 96 years is a pretty good run. Godspeed.
-
Well, ya know, when somebody will pony up 2.2 MILLION bucks for somebody else's sweaty sneakers, the decals seem like a downright sweet deal.
-
I understand there's a push in some quarters to move Disney World to Puerto Rico. Aren't they afraid something so heavy might make it capsize and sink? Asking for a friend.
-
What non-auto model did you get today?
Ace-Garageguy replied to chunkypeanutbutter's topic in The Off-Topic Lounge
Red Bull Trimotor-class pylon racer? Or maybe a racing class where every plane is required to carry a cow that has to be milked in flight? Moo-sport class perhaps? Here's some logos. Or one used for hauling meat, painted like the Porsche "Pink Pig" and named "Swine Flew" or "When Pigs Fly" or "Miss Piggy"? -
Cool idea, nice paint this time. I always like seeing period "what if" cars built to actual class specs, as potential competition to real cars.
-
What non-auto model did you get today?
Ace-Garageguy replied to chunkypeanutbutter's topic in The Off-Topic Lounge
Check this one out...cream and burgundy. https://jakepetersonphoto.com/2015/06/18/the-ford-trimotor/ http://cyberplasticmodeler.blogspot.com/2016/11/aircraft-walkaround-vol71-ford-5-at.html