Ace-Garageguy
-
Posts
38,189 -
Joined
-
Last visited
Content Type
Profiles
Forums
Events
Gallery
Everything posted by Ace-Garageguy
-
Then... and now...

-
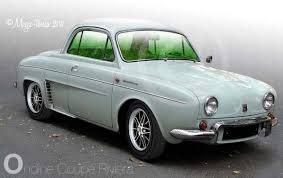
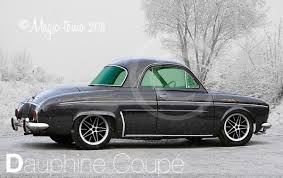
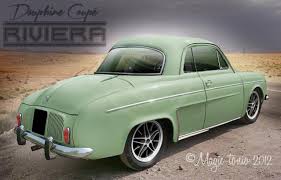
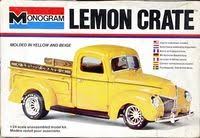
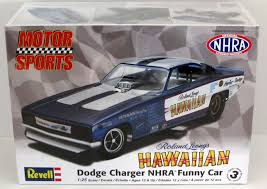
 Picked up another glooey 1/24 Renault Dauphine a while back. Now I have 2...one to restore, one to hack up. I've always liked them, ever since I bought one with a blown head gasket for about $35 back in the mid 1970s. Good little car. Slow but willing, and hard to beat an honest 40MPG. There were a few 2-door cars built. There were also some custom-bodied cars, and though I think those below are P'shopped, something similar is what I have in mind...but with a hot Porsche 4-banger. I'm also considering pulling molds, and doing at least one altered or gasser. About the same time, I scored a clean unbuilt one of these. I chopped and channeled a gluebomb some time back, and liked the kit so much, I've been after a virgin. One of these followed me home too. After answering a tech question here, I realized I had nothing like the blower on this car. Now I do. Found a complete kit cheap.
-
tri-power for a Y-block
Ace-Garageguy replied to Jantrix's topic in Model Building Questions and Answers
It's blatantly obvious to anyone interested in accuracy, and anyone who's familiar with the real engines. An FE manifold can NOT possibly be of any use whatsoever to someone building a Y-block. The manifolds are ENTIRELY DIFFERENT DESIGNS, which is fully illustrated by the photos I posted above. Posting incorrect information HELPS NO ONE. If you have a problem with a polite FACTUAL correction, please, by all means REPORT ME. -
tri-power for a Y-block
Ace-Garageguy replied to Jantrix's topic in Model Building Questions and Answers
The 406 is an FE engine. The Y-block and FE engines have zero similarity, and the intake manifolds are as different as different can be. The FE manifold has even port spacing, and the casting forms the upper valve-cover gasket sealing rail as well. -
tri-power for a Y-block
Ace-Garageguy replied to Jantrix's topic in Model Building Questions and Answers
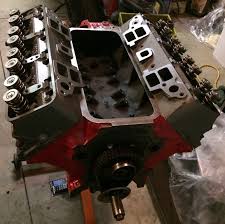
It's an odd manifold / cylinder head design, with stacked intake ports as opposed to the usual side-by-side ports of most engines. Even in the dim recesses of time, there wasn't as much speed equipment made for the Y as there was for more popular engines like smallblock Chebbys and Chrysler hemi engines. The manifolds below are all 3X2 Y-block parts. You see how far apart the port runners are on the casting, compared to anything else. There's also a forward coolant crossover, with the thermostat housing integral, and a center coolant crossover passage as well. I've been looking for something to use myself, and both the AMT '56 Ford and '57 Ford kits get the manifold layout wrong, incorporating the front water crossover passage into the too-wide front ports. For the two AMT kits mentioned, the single-4bbl manifold in the '56 would be the easiest to modify into a pretty correct tri-power. The Revell '57 Ford single 4bbl manifold gets the ports and water crossovers pretty OK (though the front bolt-hole ears are missing). Modifying it into a decent 3X2 manifold would be straightforward. File the top flat, make three flanges as shown, glue them on, and fill. The ancient Revell '56 Ford pickup has a Y, as does one of the AMT '57 T-birds, but I haven't been able to dig them out for comparison yet. EDIT: The Revell 2X4bbl manifold is also a contender as a starting point (and has better front bolt hole ears). File off the two carbs, fill the space between the flanges with a small piece of styrene, let dry, and file flat again. Then make up three 2bbl flanges, etc. Either way will give you a decent 3X2.
-
Rear suspension for '50s rods?
Ace-Garageguy replied to Richard Bartrop's topic in General Automotive Talk (Trucks and Cars)
You're very welcome. Glad to help. -
If You Could Only Have One?
Ace-Garageguy replied to jaxenro's topic in General Automotive Talk (Trucks and Cars)
I agree. And in my case, combining multiple kit parts into something new is my primary interest. "One" kit just wouldn't get it. -
Rear suspension for '50s rods?
Ace-Garageguy replied to Richard Bartrop's topic in General Automotive Talk (Trucks and Cars)
For the '50s, split wishbones and the torque tube are going to be the most prevalent setup. The forward wishbone ends are "split" away from the front of the tube, and relocated to brackets on the frame rails or a crossmember. The rear ends of the wishbones may be relocated inboard on the axle housing as well, to eliminate interference between the bones and frame rails when lowering the car. In this instance, both the torque tube and the bones still resist axle torque, as Henry intended, but there's often binding interference between the pivot points of the bones and the front joint of the torque tube. The quick-change center sections were available with either a "closed" driveline coupling to a torque-tube, or an "open" driveline coupling to a universal joint. When a universal-equipped driveshaft is used (for example, an engine and gearbox swap from a car that had an open driveline), the wishbones still resist axle torque, but they're not strong enough to do it alone. Breakage was common. Reinforced or completely redesigned and fabricated wishbones (or trailing arms) were fabricated to cure the problem. In many instances, the buggy spring and shackle setup is not sufficient to control side-to-side motion when the car is lowered, and "sway bars" or Panhard rods have to be employed to control same. Parallel quarter-elliptic springs in the rear are another possible solution, for an open driveline. When you get into swapping rear crossmembers and springs for QC clearance, and the actual suspension itself (including coil springs, which were indeed coming into use) it gets complex, and there's enough to know and consider to easily fill a book. Have a look at this thread for some more info on a period open driveline with a QC and buggy spring: -
Nada.
-
I bought a small boat load a couple years back when somebody was blowing out old stock cheap with unassembled boxes, no PE. It's a fantastic kit.
-
Large diameter steel wheels ??
Ace-Garageguy replied to Ace-Garageguy's topic in Model Building Questions and Answers
Thank you sir! Perfect. Much appreciated. -
I really used to like Jessica Rabbit... ...but she's kinda gone to pot.
-
Lindburgh 1/12th fiat
Ace-Garageguy replied to willieman's topic in General Automotive Talk (Trucks and Cars)
You're welcome. The AMT double-dragster Fiat represents a rectangular tube chassis, with the rear end solidly mounted to the frame. That's entirely acceptable for an early car. The large diameter tubular front axle would be appropriate for a car without a whole lotta engine setback, especially a heavy early Chrysler hemi (over 700 pounds), as it would have to carry more static weight than a later, longer car with more setback (and possibly a lighter engine). A larger diameter mild-steel axle would also be likely on an earlier car, with a lighter chrome-moly axle on a later one. -
Large diameter steel wheels ??
Ace-Garageguy replied to Ace-Garageguy's topic in Model Building Questions and Answers
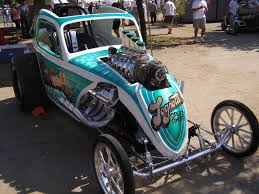
This is what I'm lookin' for, at least 18s, maybe 20s. And the guy who built it says they're in this kit: -
Lindburgh 1/12th fiat
Ace-Garageguy replied to willieman's topic in General Automotive Talk (Trucks and Cars)
While the chassis could be reworked into something less toylike, possibly appropriate to a '50s sports car, as mentioned above, it is absolutely wrong for an "altered" class drag car. A perusal of the google image results for "Fiat Altered" will demonstrate this quite conclusively. Furthermore, the kit does NOT come with the blower or the wire wheels shown in the photo of the built one. Note the front suspension on all of these: a simple, straight tube axle, chosen for being light. IFS (independent front suspension) is absolutely NOT required on this type of car. Neither is independent rear suspension. Too fragile, and moves around too much for the application. An equally simple parallel tube frame would be appropriate for an altered class car, not the unnecessarily complex thing in the kit. The engine in the kit is also not representative of anything real. It's a mashup of smallblock Chevy and Y-block Ford, with some other stuff thrown in.
-
Large diameter steel wheels ??
Ace-Garageguy replied to Ace-Garageguy's topic in Model Building Questions and Answers
Well...bummer. -
Large diameter steel wheels ??
Ace-Garageguy replied to Ace-Garageguy's topic in Model Building Questions and Answers
Thank you, gentlemen. As I've been getting around to snagging the '57 post for a gasser, and the '56 Nomad as well, I'll go ahead and get both of them coming. Thanks again. -
For a time, anything weighing over 1500 pounds had to have fenders.
-
Hokay, I've looked for over an hour. A few days ago, I could have sworn I saw a pickup build with a set of 18" or 20" steelies, and I could have sworn the builder mentioned they came from this kit: I could remember incorrectly, as I don't seem to be able to find the thread. Does anyone know if the kit shown has a set of largish steelies, or if not, where I might find a set?
-
When you're ready to get tricky...
-
I assume you're talking about using LEDs for your lights. Where you put your resistors and how many you use depends entirely what you're trying to accomplish. You can run several LEDs in parallel through a single resistor, or you can run one resistor for each one. Some LEDs come with resistors already installed, but you may still need to run another one to control brightness. You will need to understand some things about electronics. Here's a good overview to get you started, including sources. https://www.instructables.com/id/LED-Lighting-in-Plastic-Models/
-
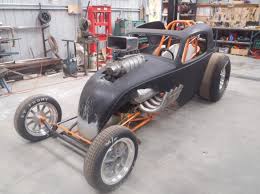
Particularly interesting on the car above is the lengthened hood, and the cut-away hood sides to clear the frame rails due to the deep channeling job.
-
Isdera Imperator.....98% scratch build!
Ace-Garageguy replied to Dann Tier's topic in WIP: Model Cars
Looks great so far. An ambitious project, for sure, but you seem to be up to it. Interesting, unusual subject, too. I also approve of laying out the interior and developing space for occupants first. I usually do the same thing, on models as well as full-size vehicles. -
A very wise and satisfying approach. Looks really good, too.
-
1956 Ford F-100
Ace-Garageguy replied to Rusty92's topic in Model Trucks: Pickups, Vans, SUVs, Light Commercial
Very nice job on a much (and unfairly) maligned kit. Goes to show it can be built into a fine model with some applied skill and intelligence.