Search the Community
Showing results for tags '1970'.
-
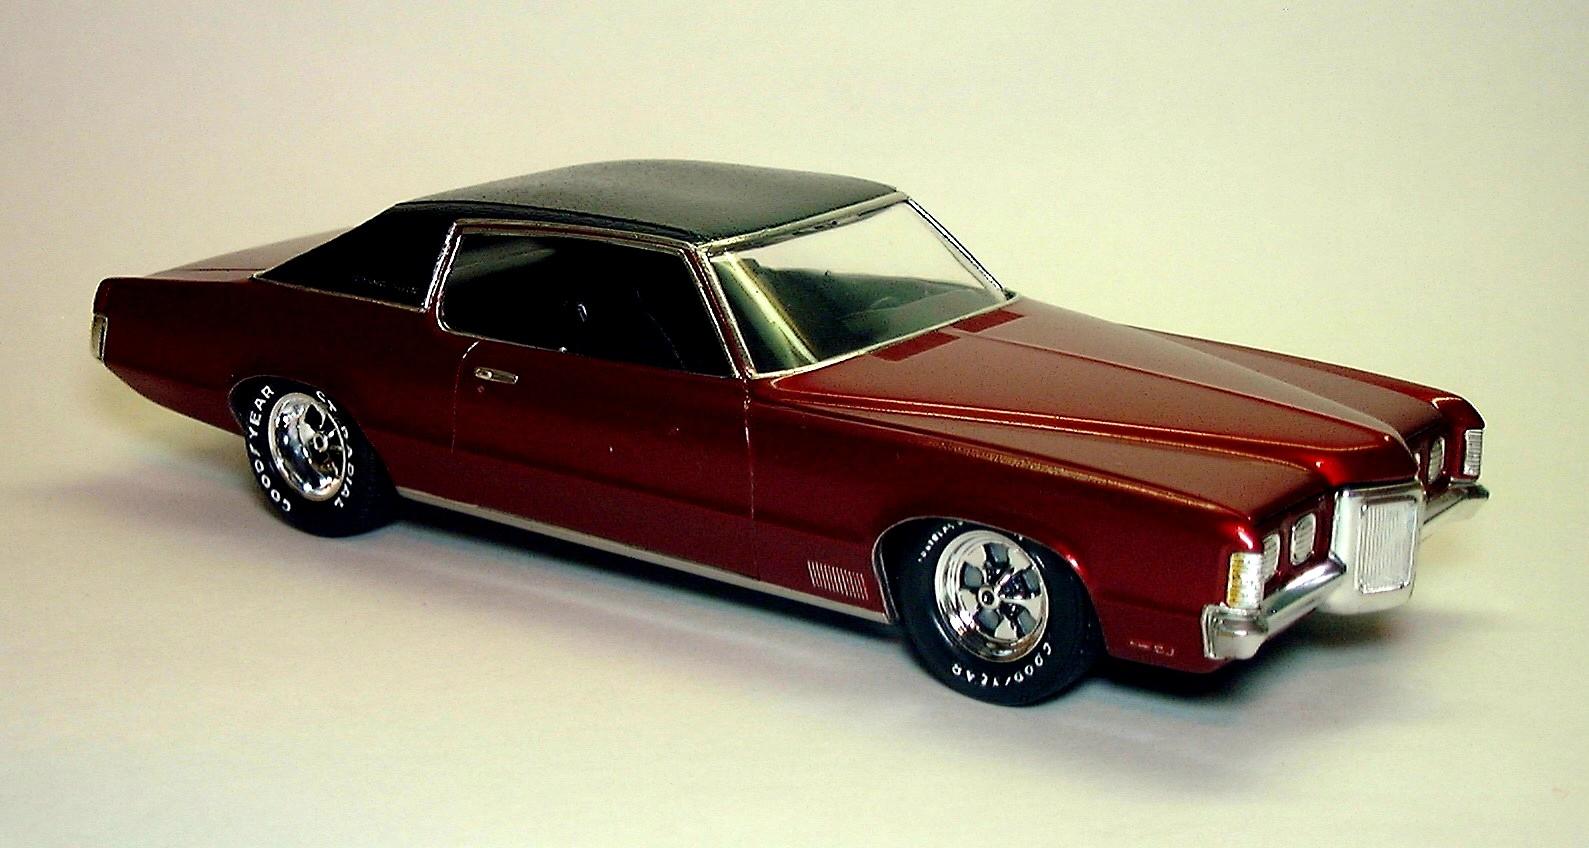
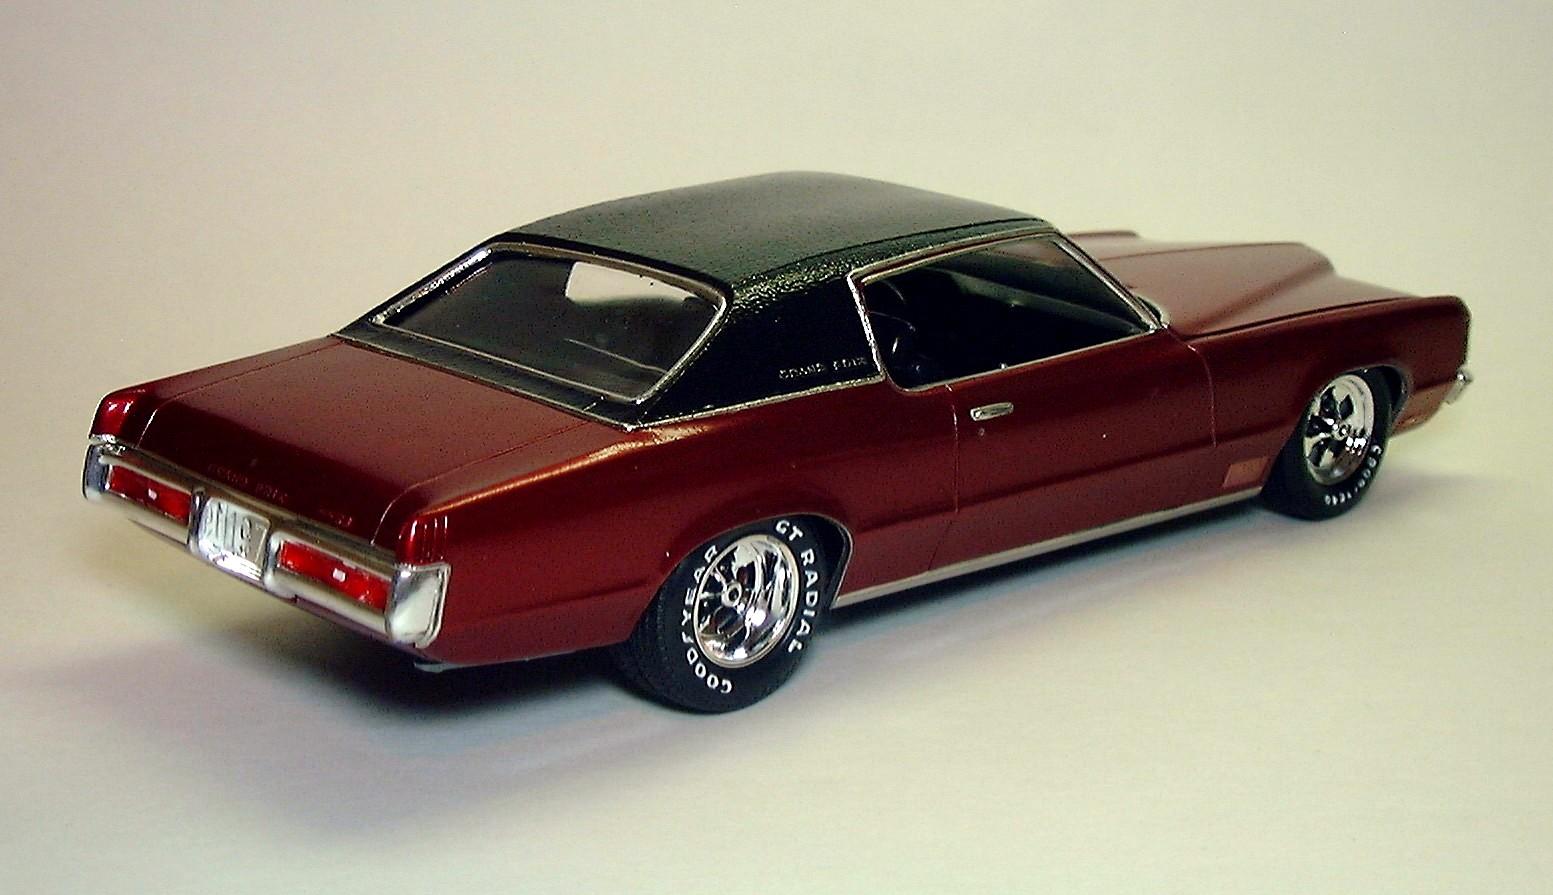
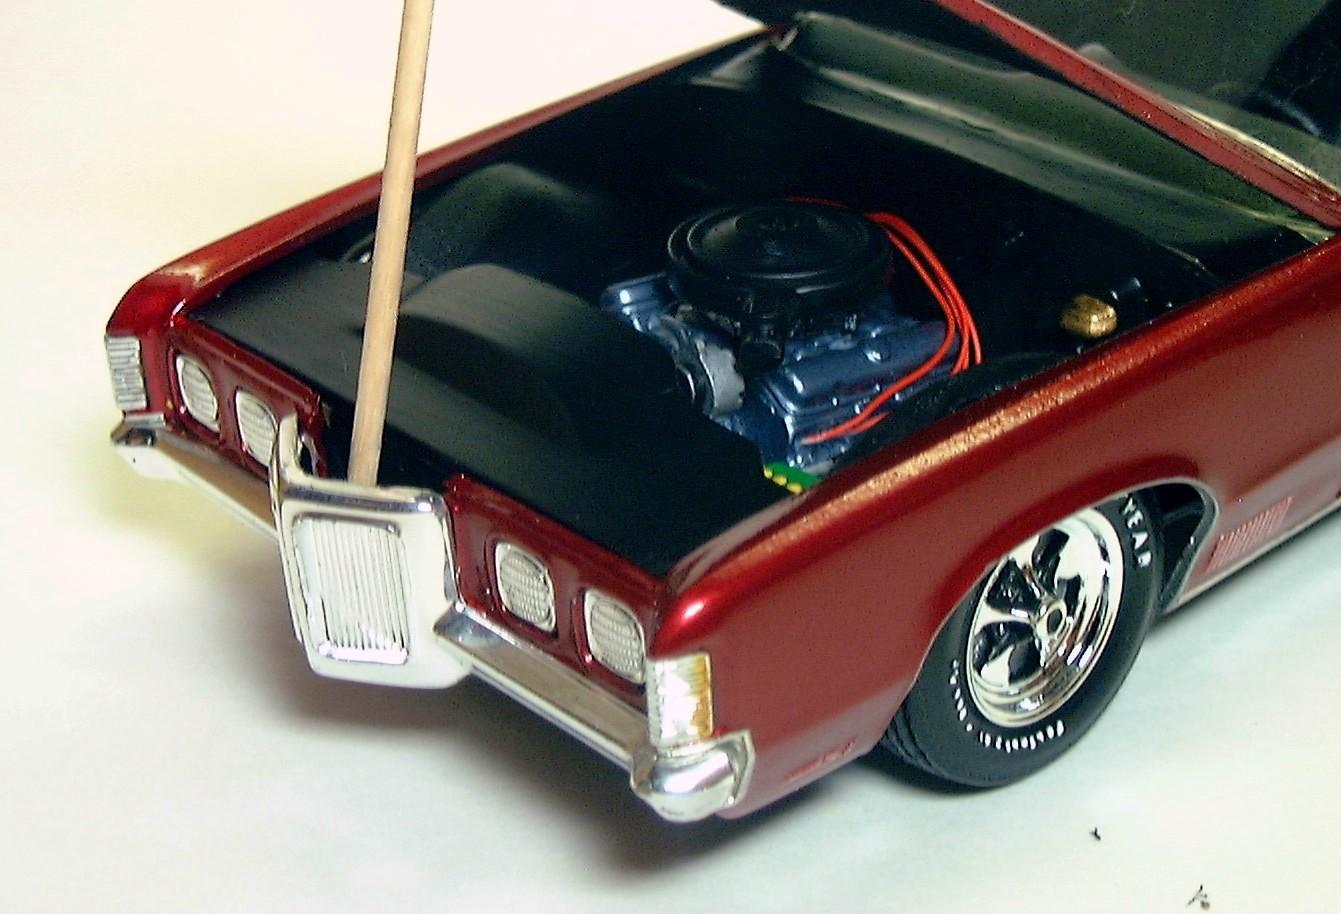
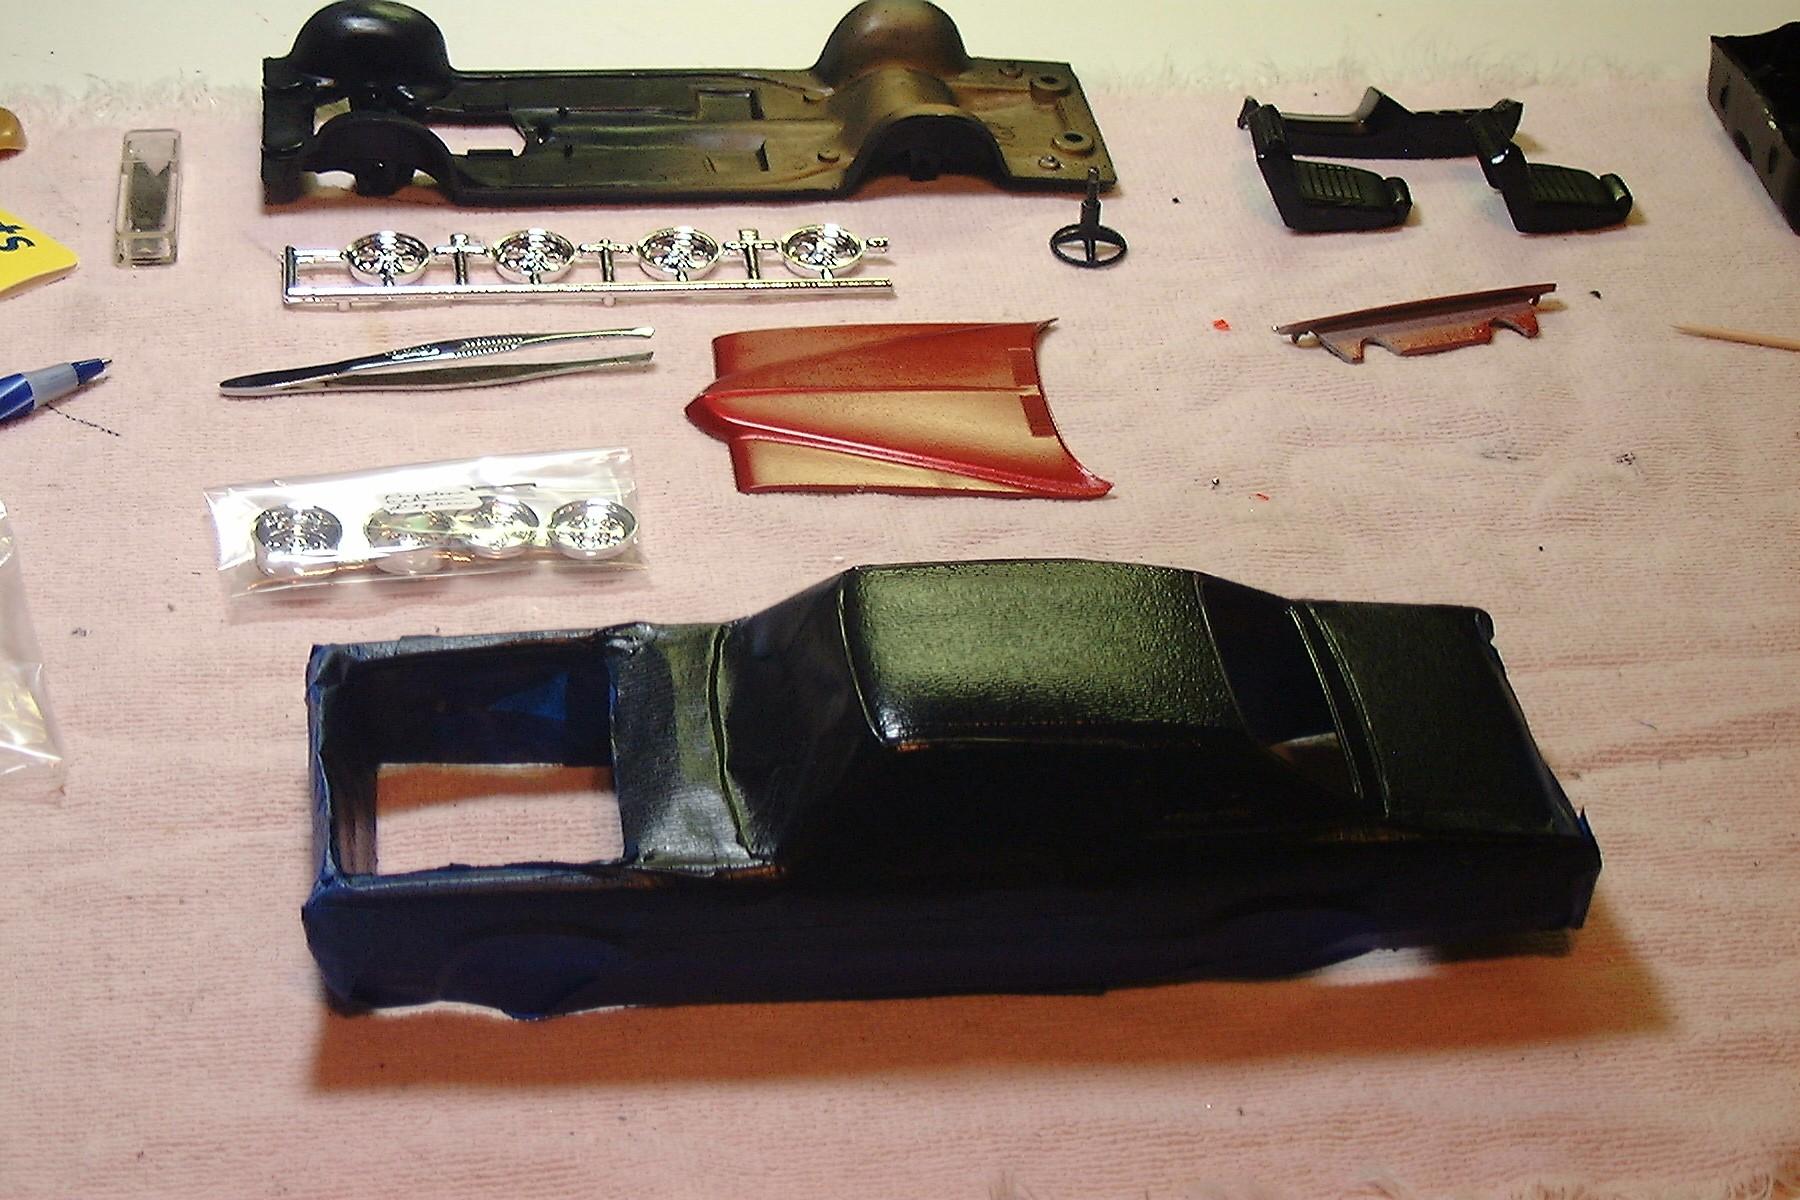
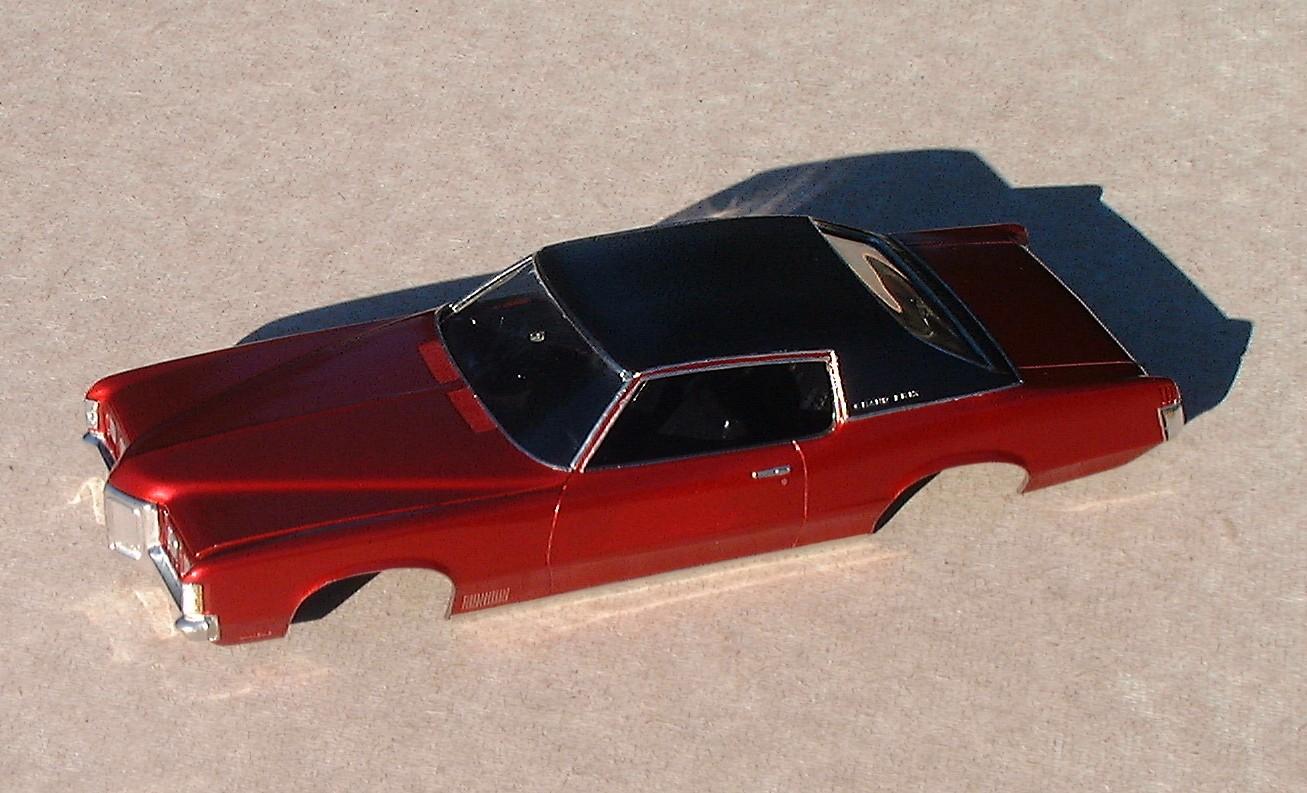
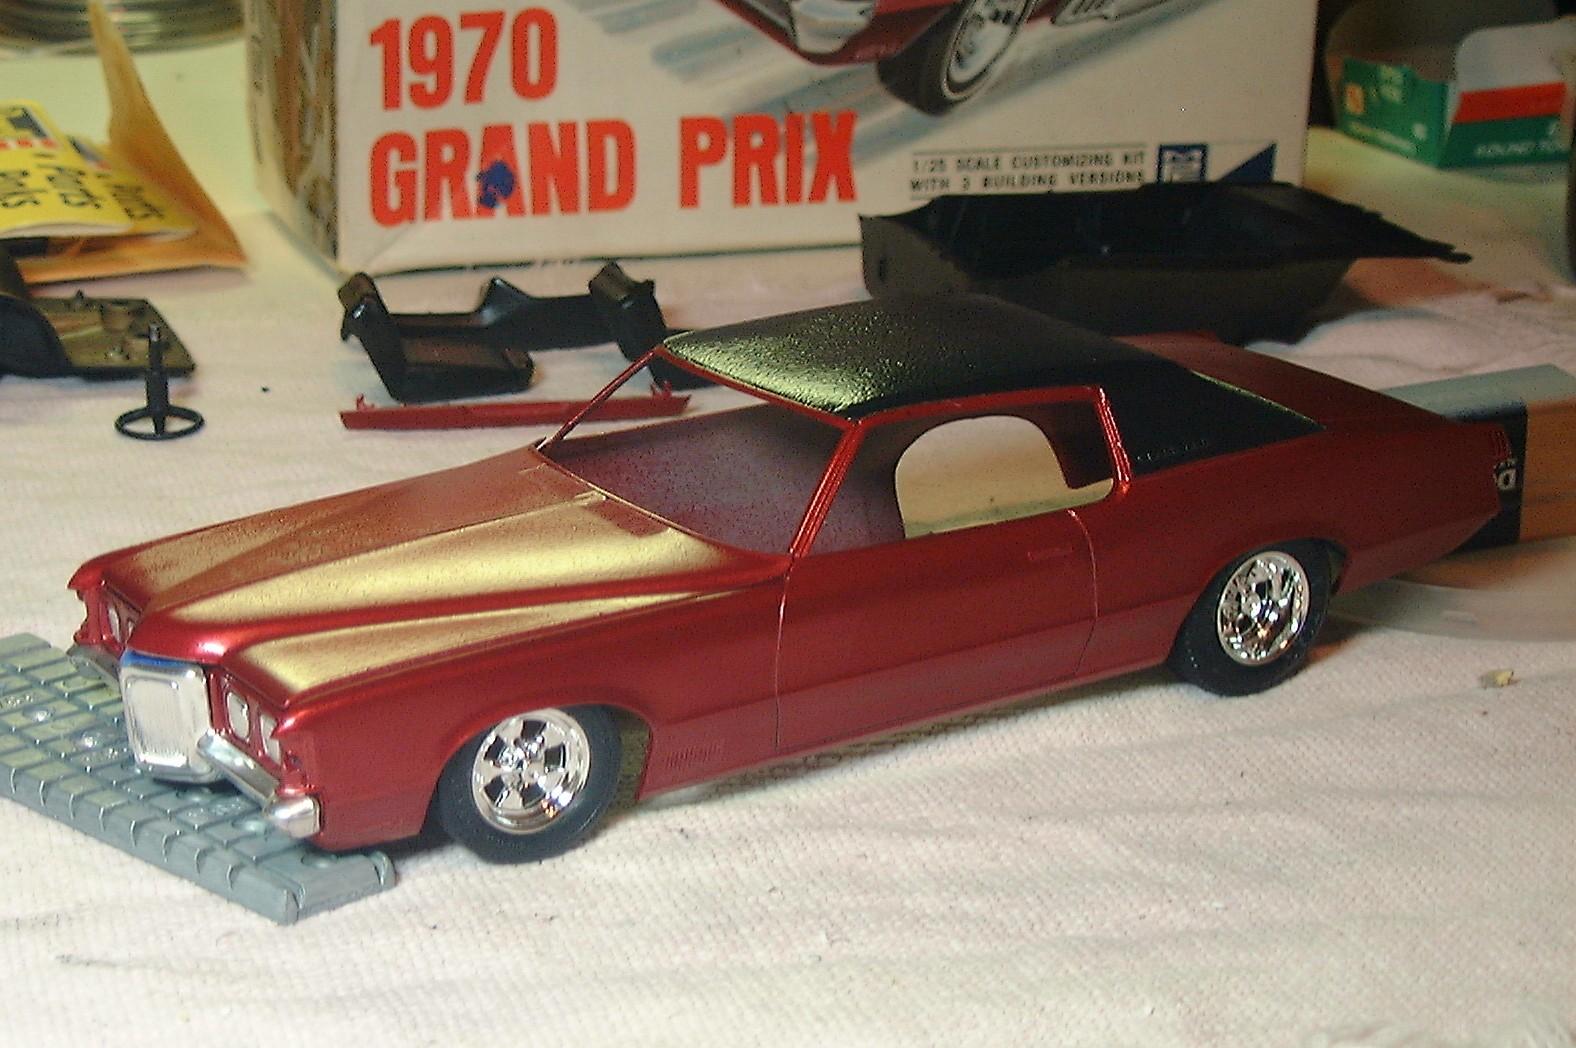
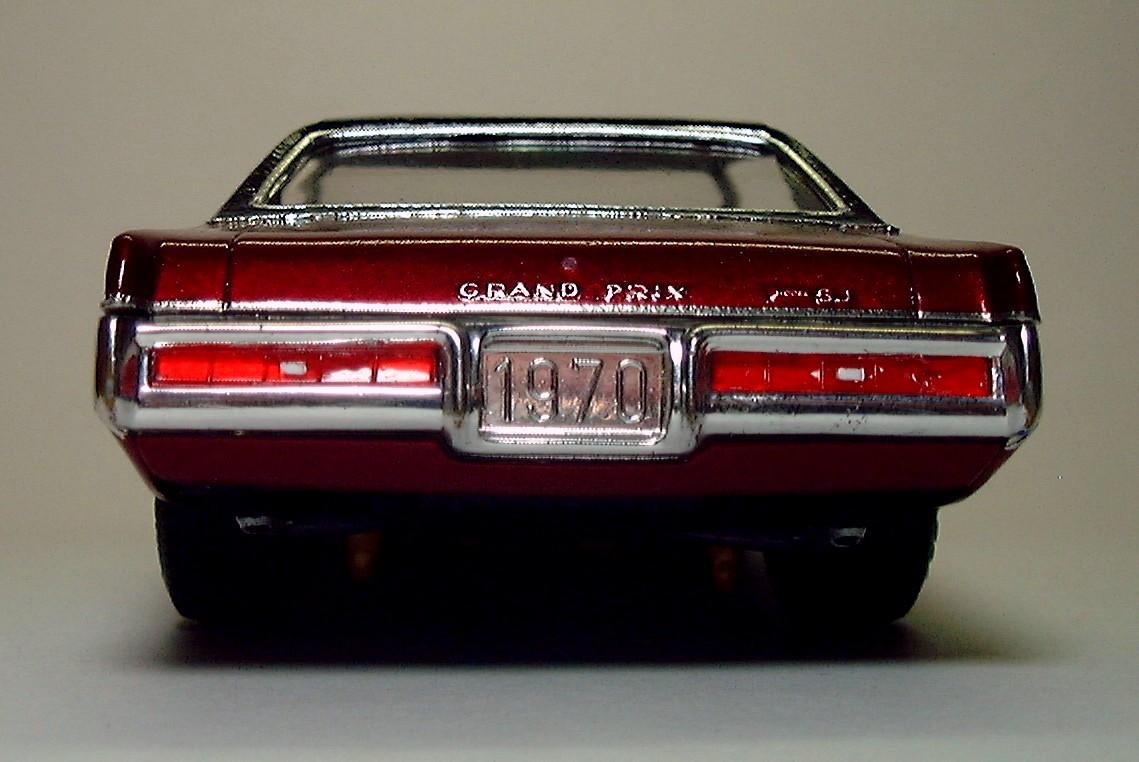
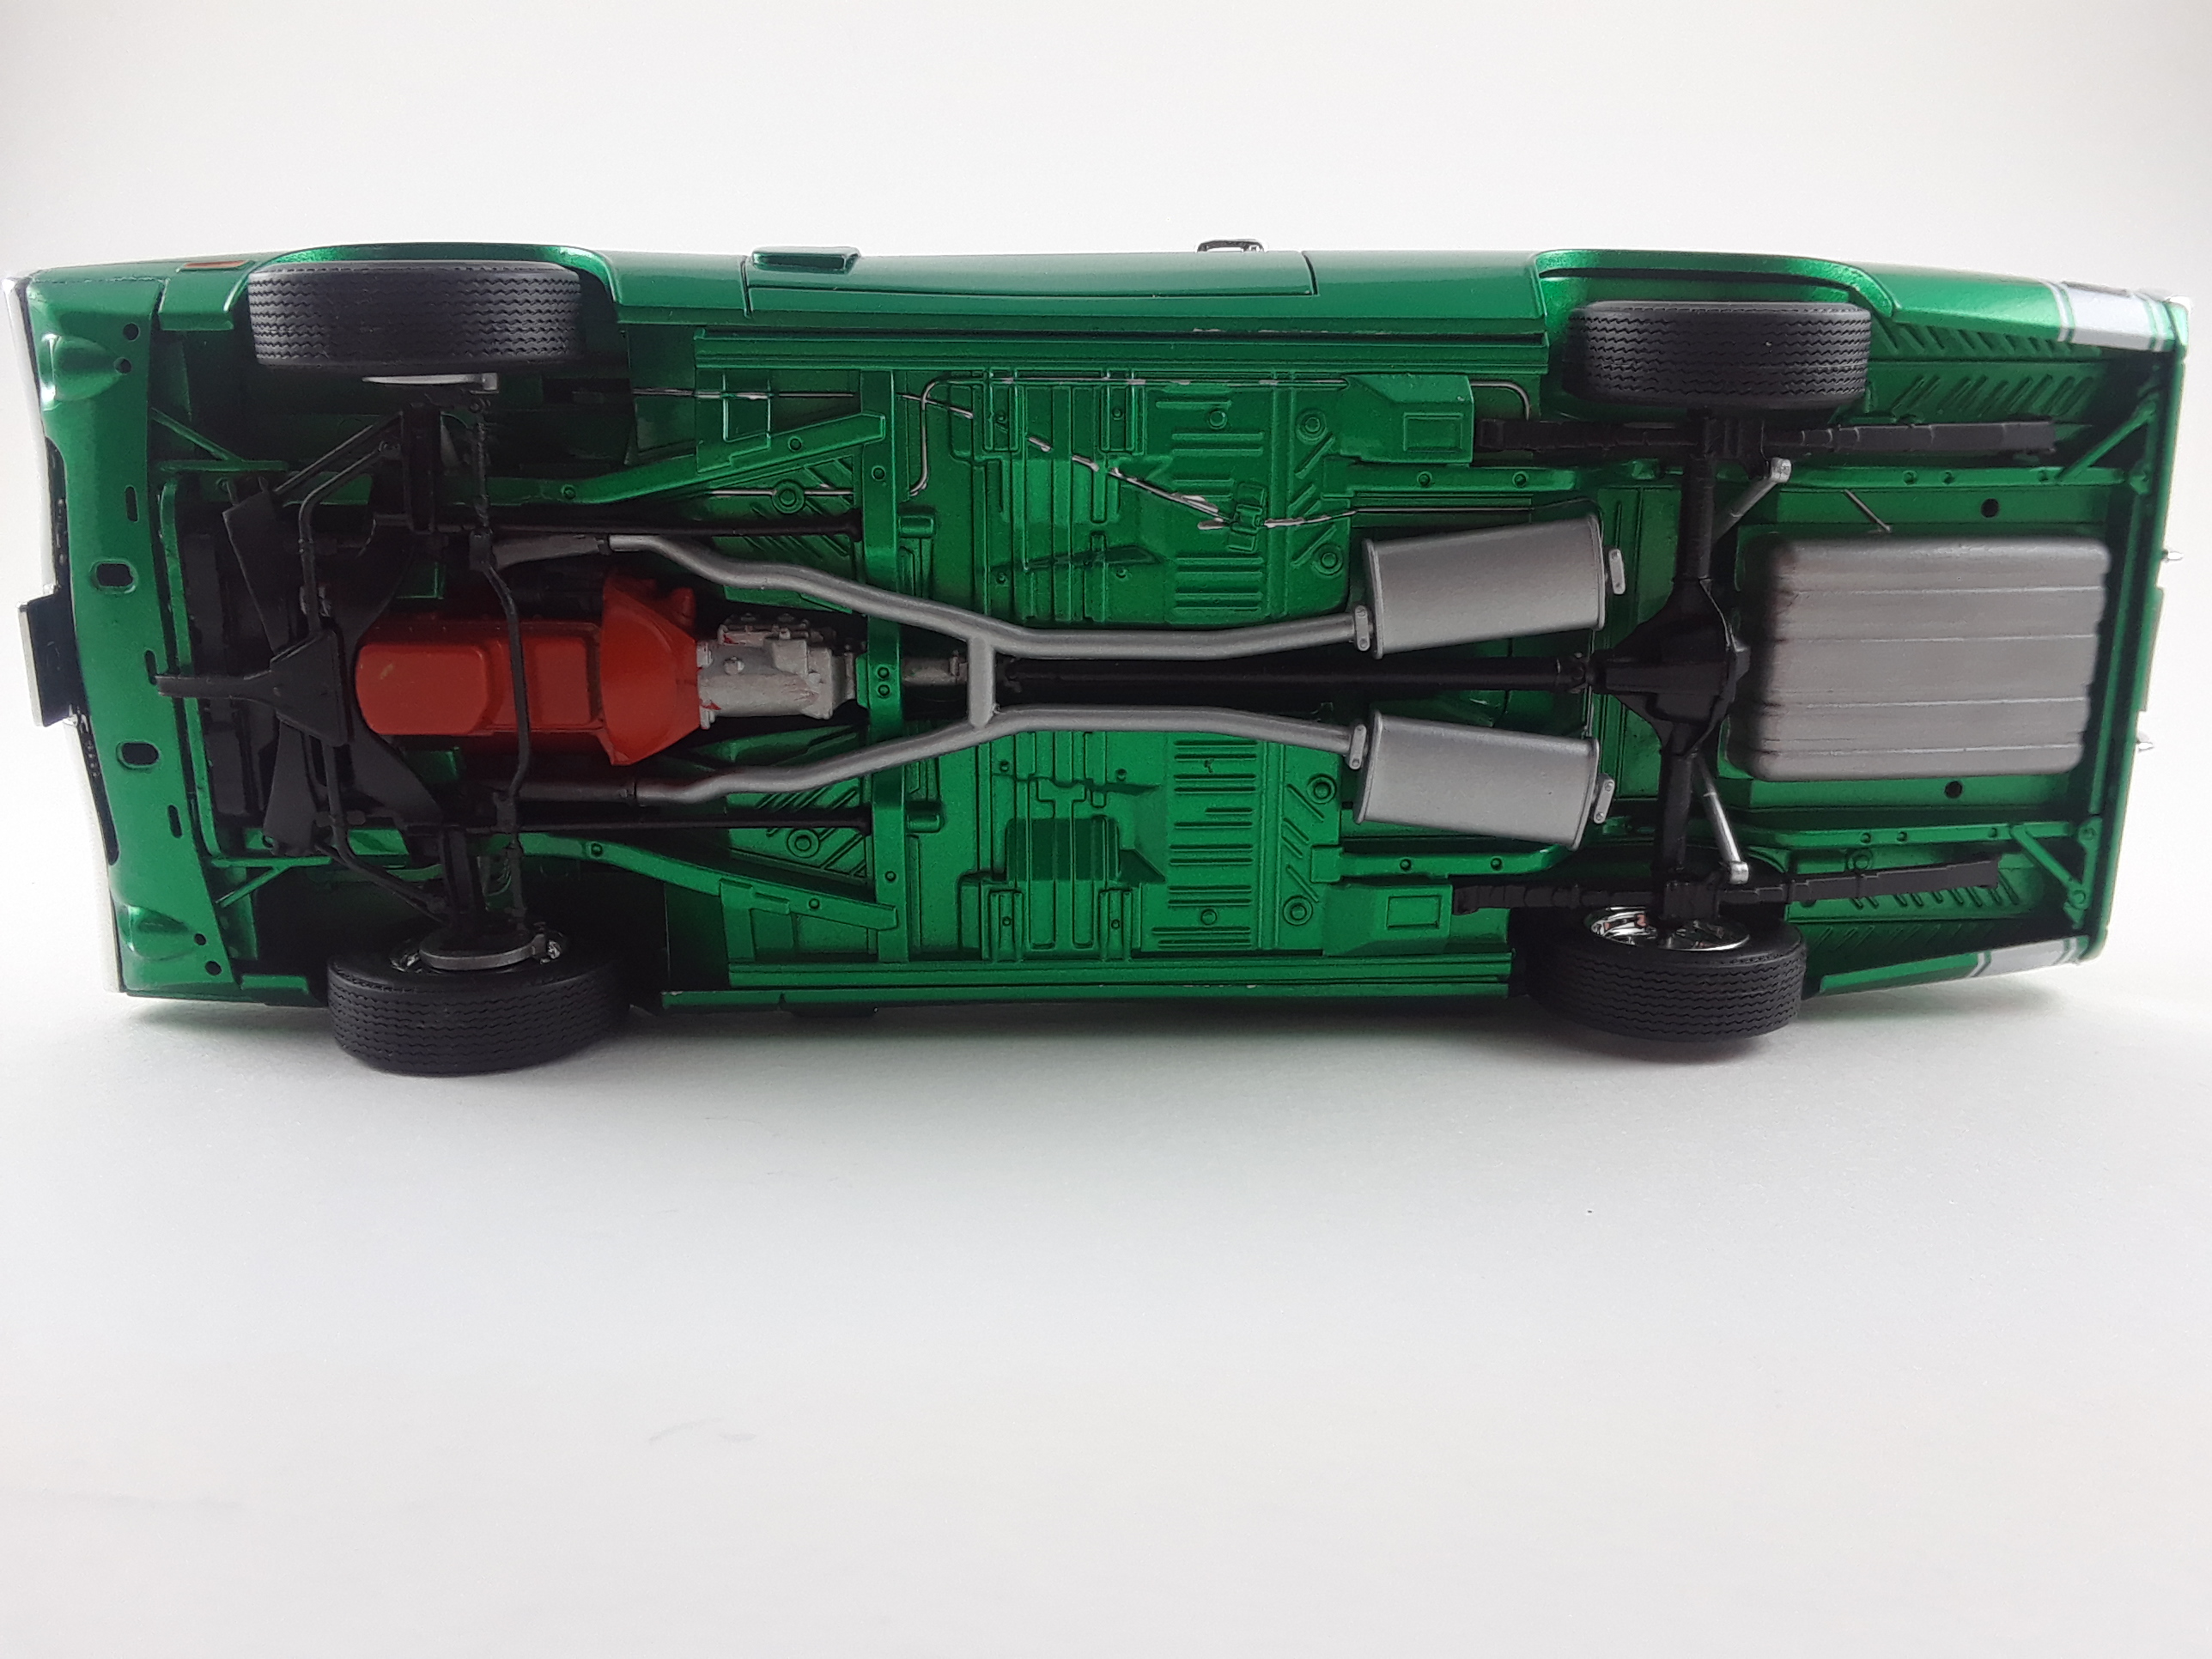
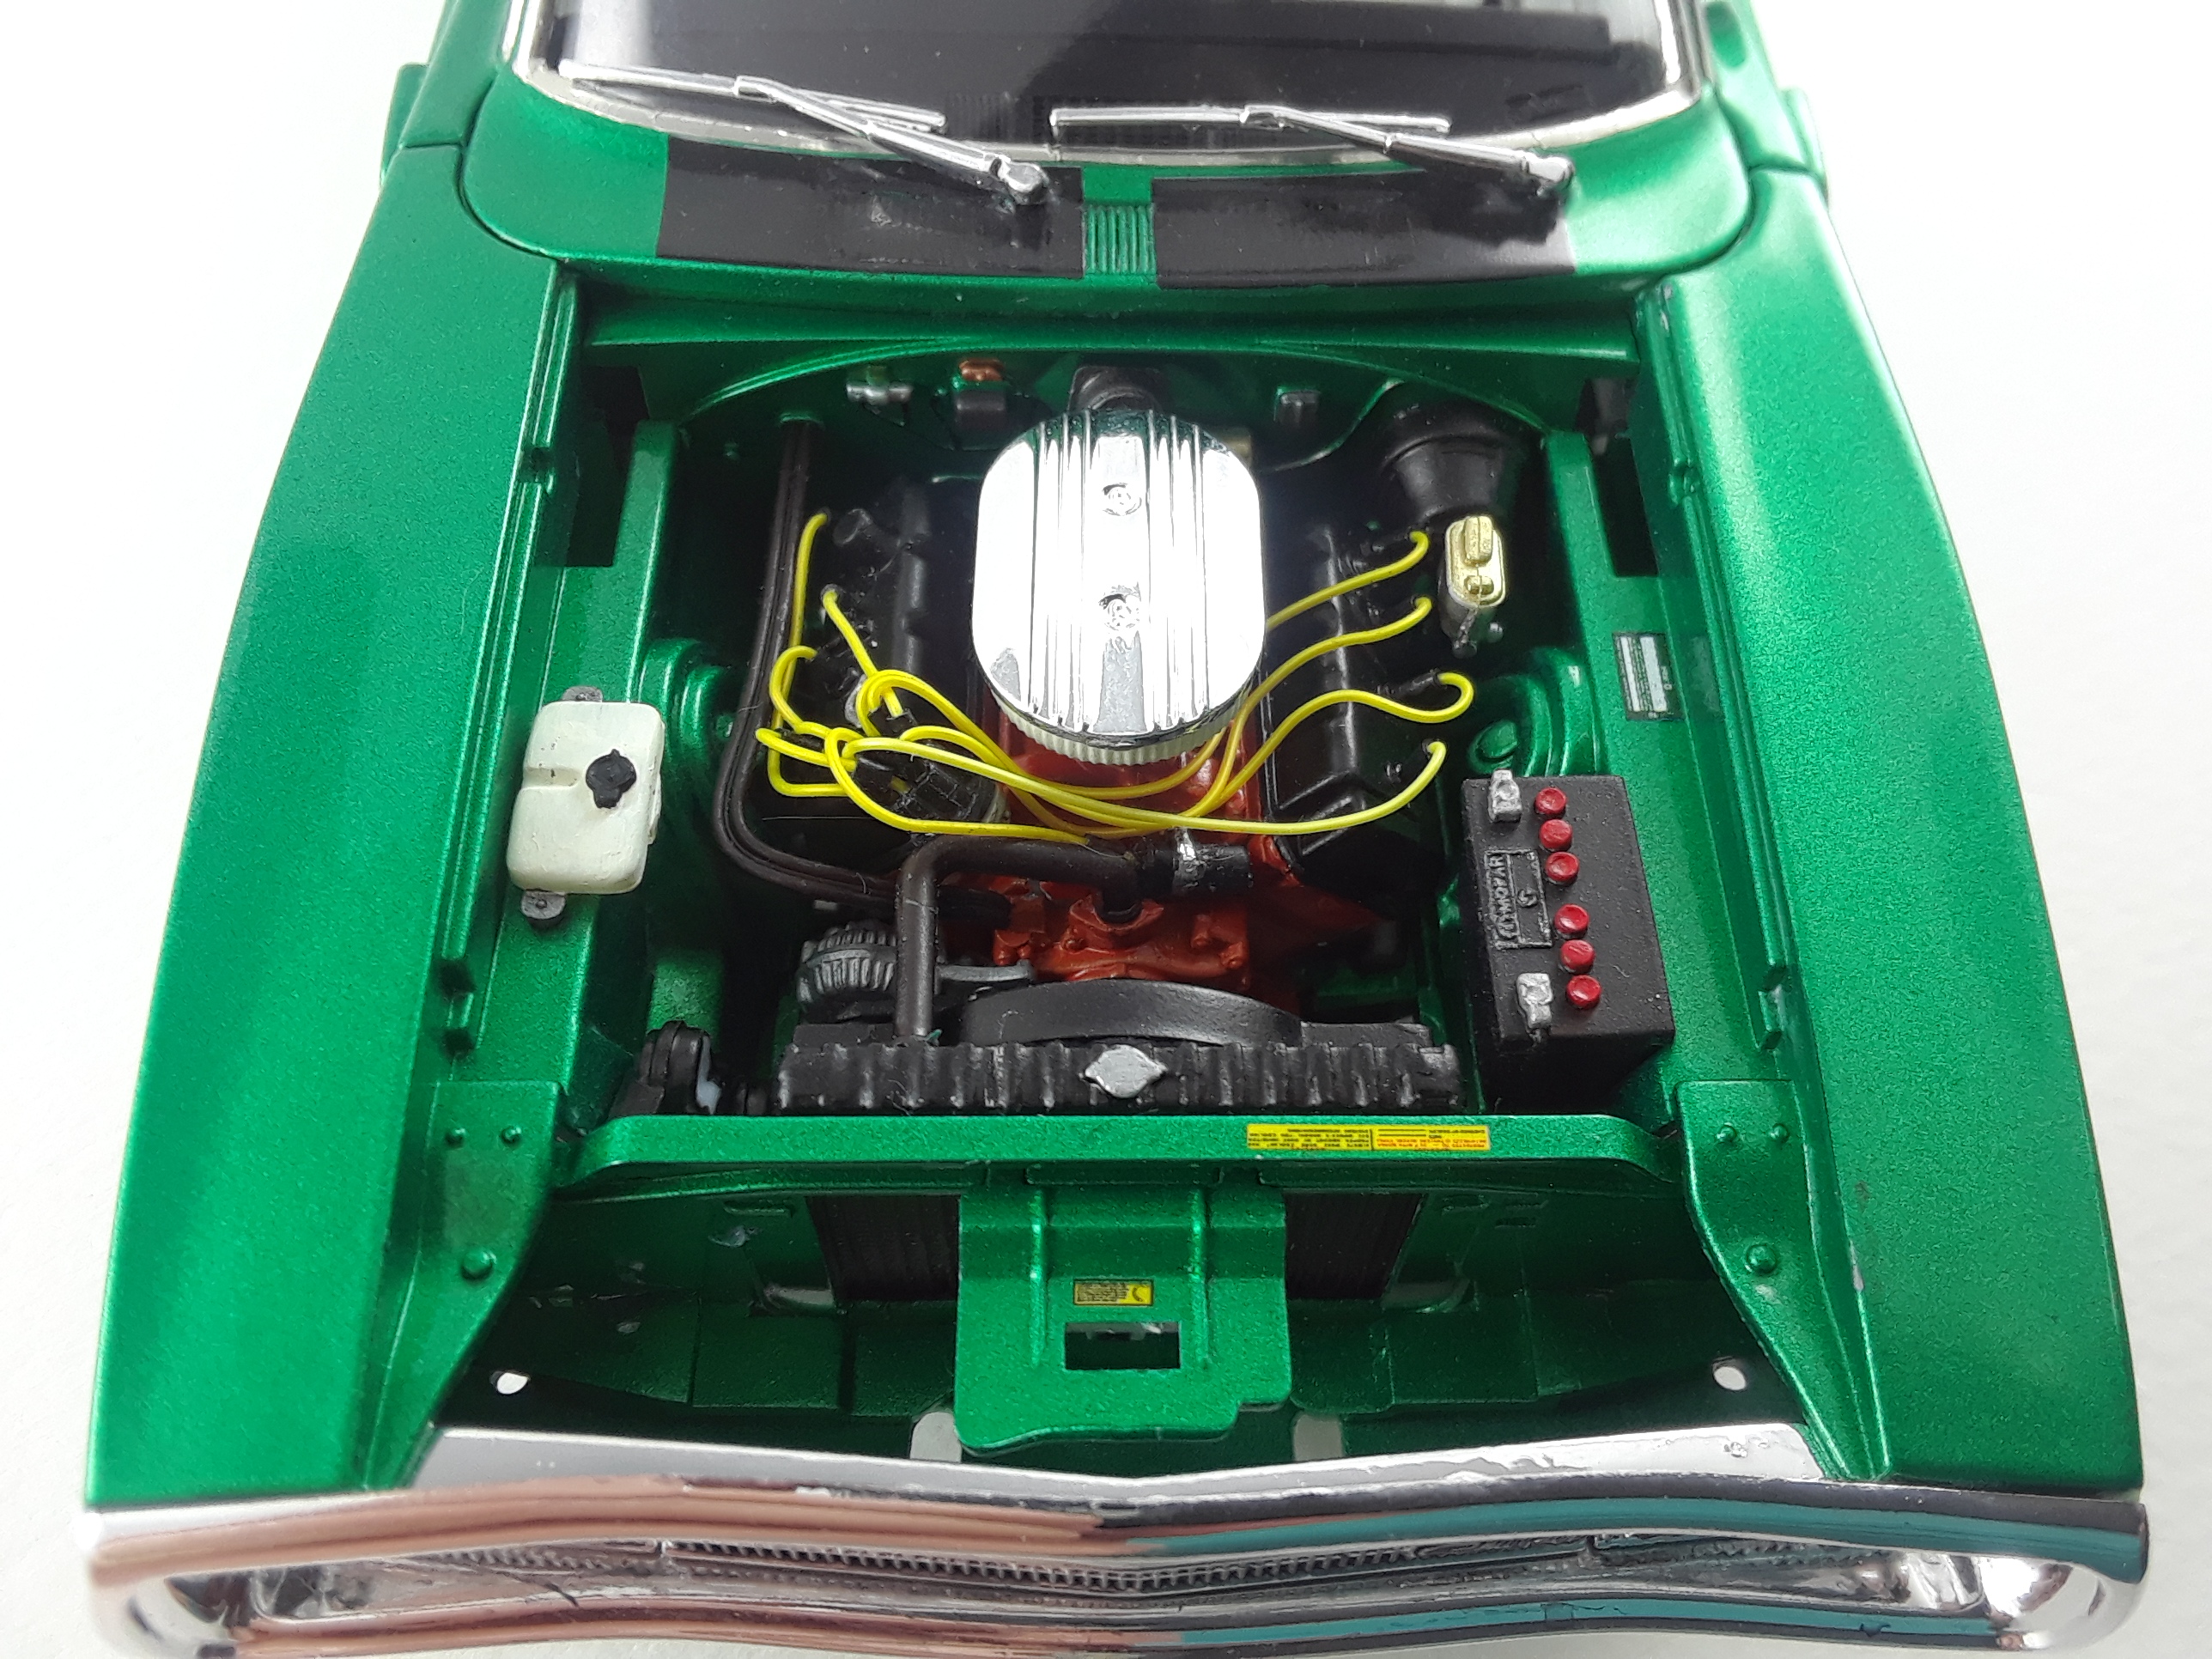
This model was built to loosely resemble a black over red 70 Grand Prix I owned for a number of years in the late 90's. It started out as a built-up glue bomb purchased on ebay. It was brush painted blue and looked pretty bad at first. After a dip in the "purple lake" I surveyed what was salvageable. The body, bumpers and interior were fair but the engine was a blob. Fortunately, I had a Revell Parts-Pack Pontiac 421. I soaked it in Westly's to dechrome it and sourced the stock air cleaner and other items from the parts bin. I actually made my own wired distributor from supplies picked up at Radio Shack and Hobbytown USA. I used a technique I learned on Drastics about BMFing emblems BEFORE painting and then scraping off the paint on the raised areas to expose the letters. It actually worked quite well. Especially since the "Grand Prix" emblems are separate block letters. It did a fair job on the front fender louvers as well. The interior is pretty basic, with just some minor detailing. The underside being an old MPC offering with chassis screws, is nothing to write home about. I did do my signature red mufflers (a throw back to the Cherry Bomb glass pack days). The engine compartment is anatomically all wrong compared to a real GP. Especially in the fan shroud/radiator areas. I did not have the parts to correct it though, so it is what it is. The mags are Modelhaus Keystone Klassics which have been painstakingly detailed. I performed my signature rear tire widening technique to fill in the rear wheel wells. The tires have been lettered with a "Gelly Roll" pen from a local stationary store. The windows were boogered up but, using progressively finer grit polishing cloths, finished off with a coat of Future, they look as good as new. Sharpie markers applied here and there round out the small details. I am pretty pleased at how my first restoration turned out.

-
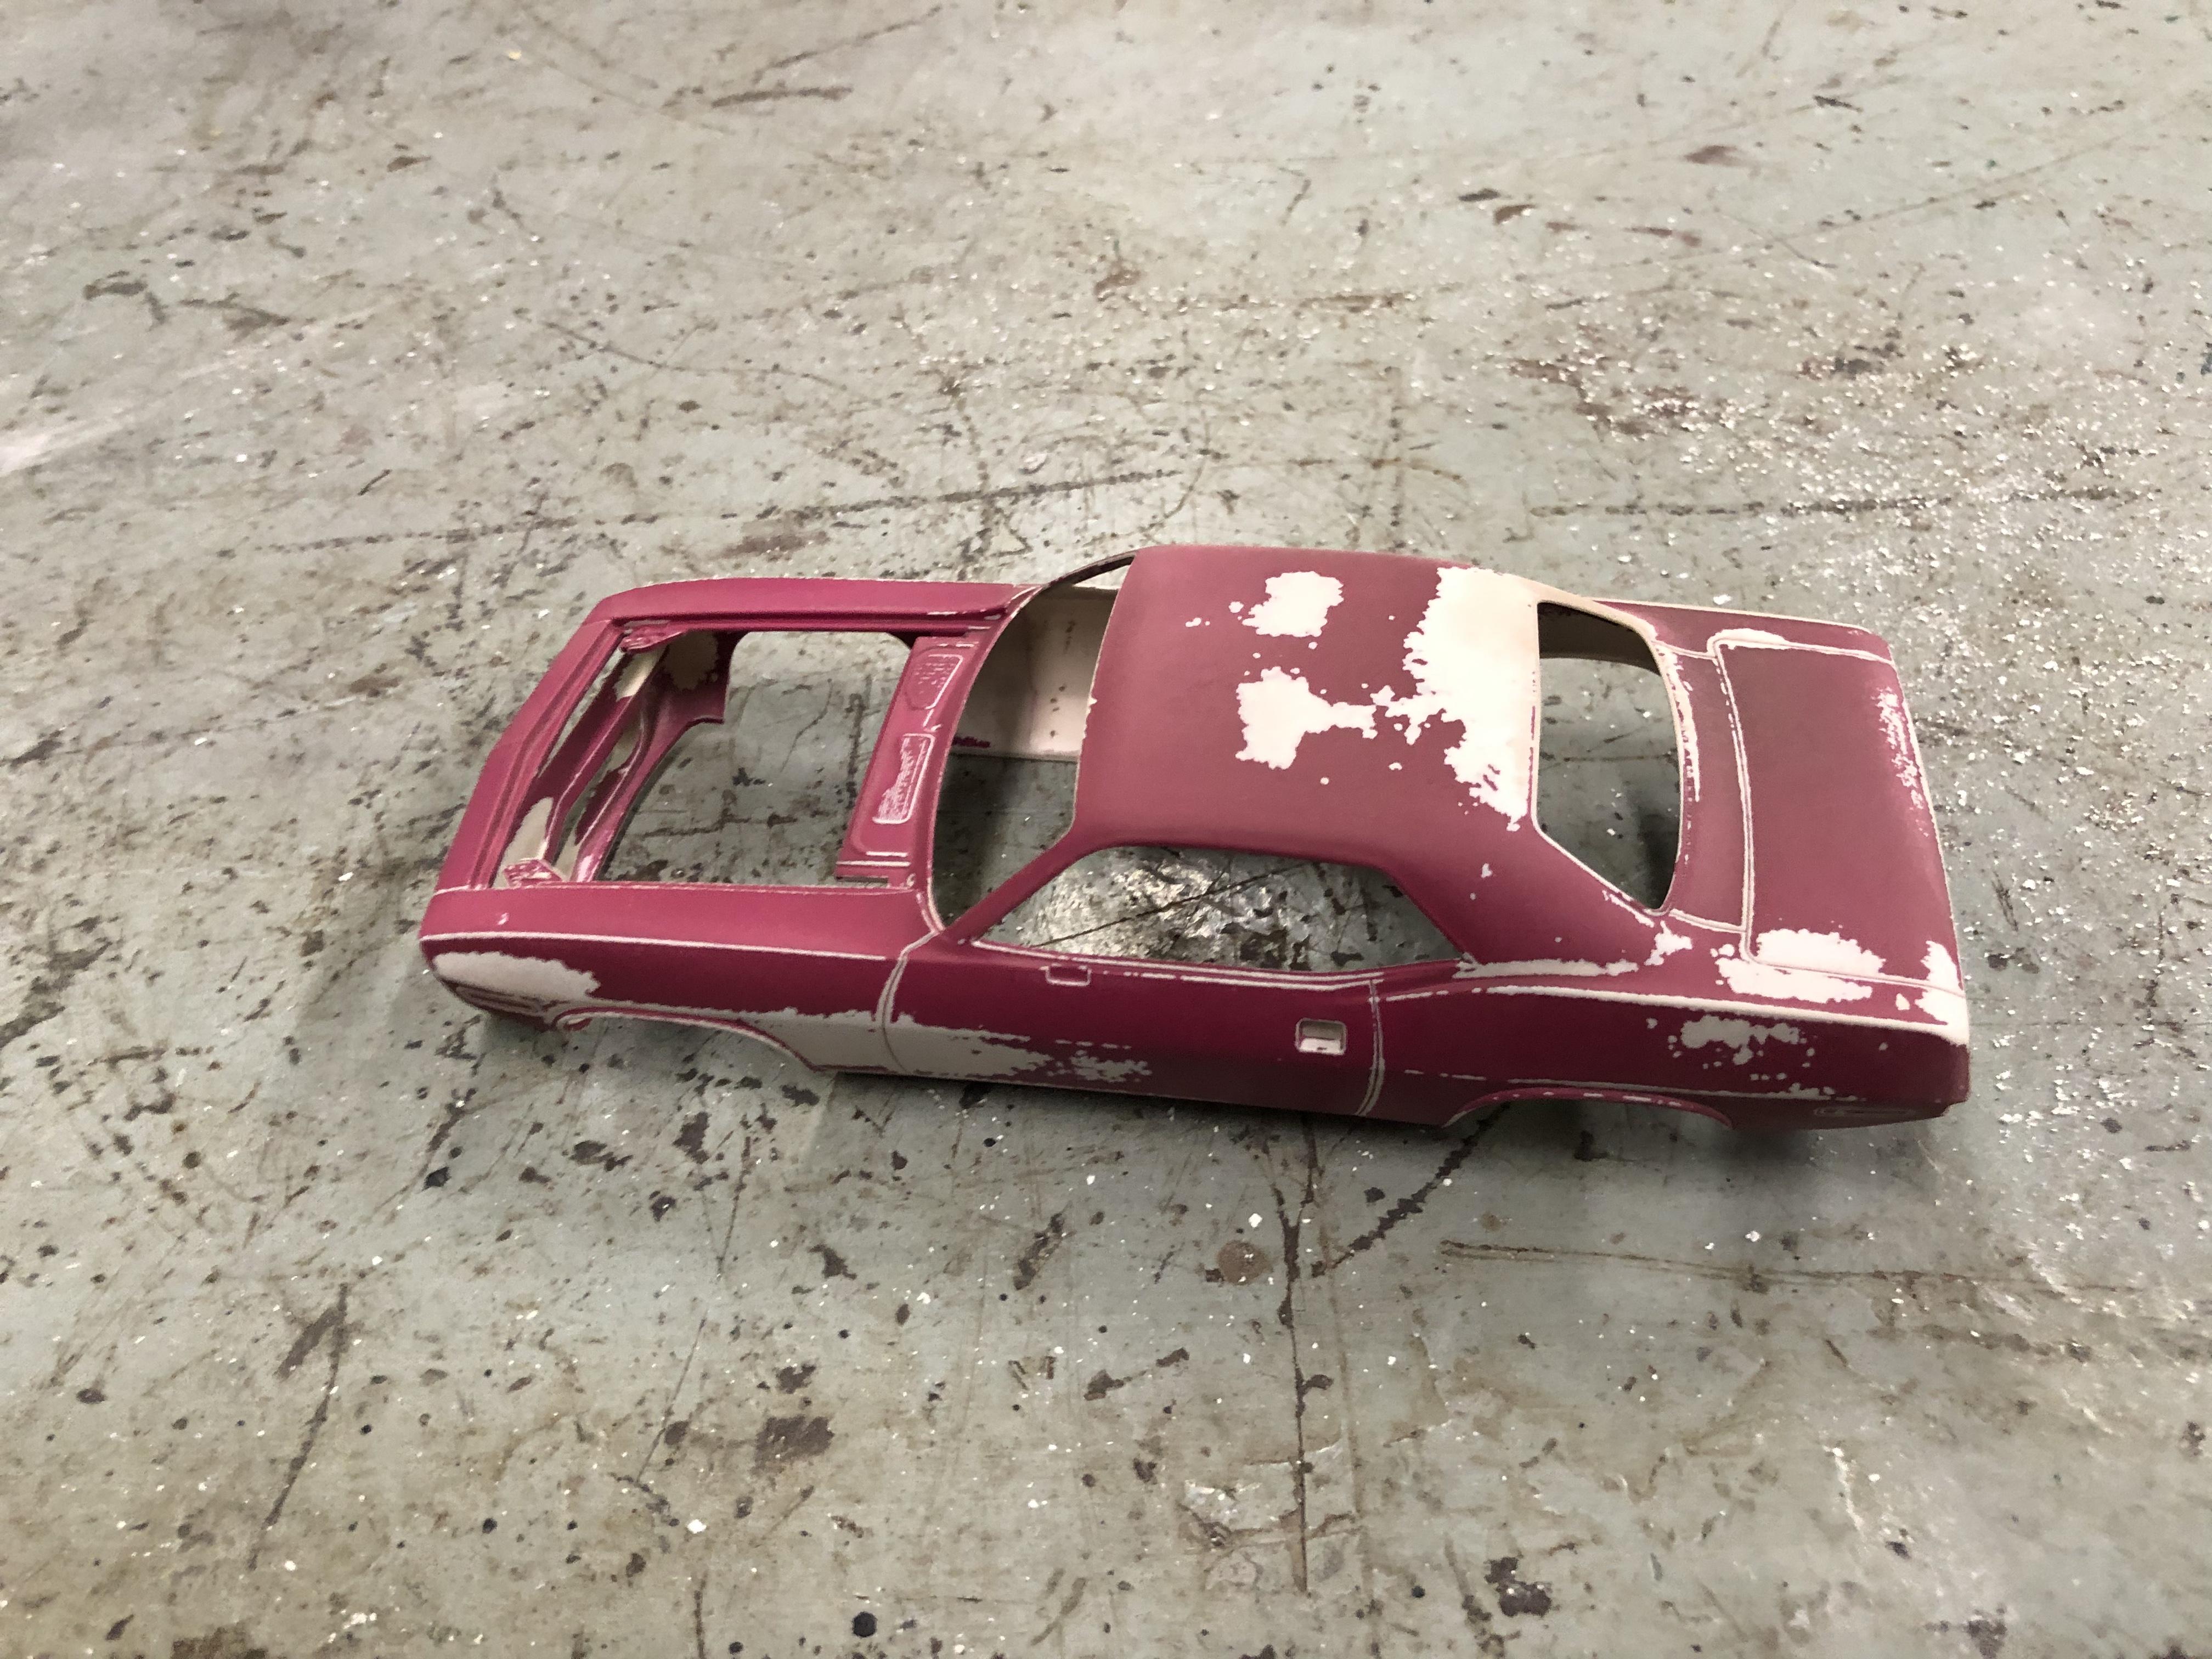
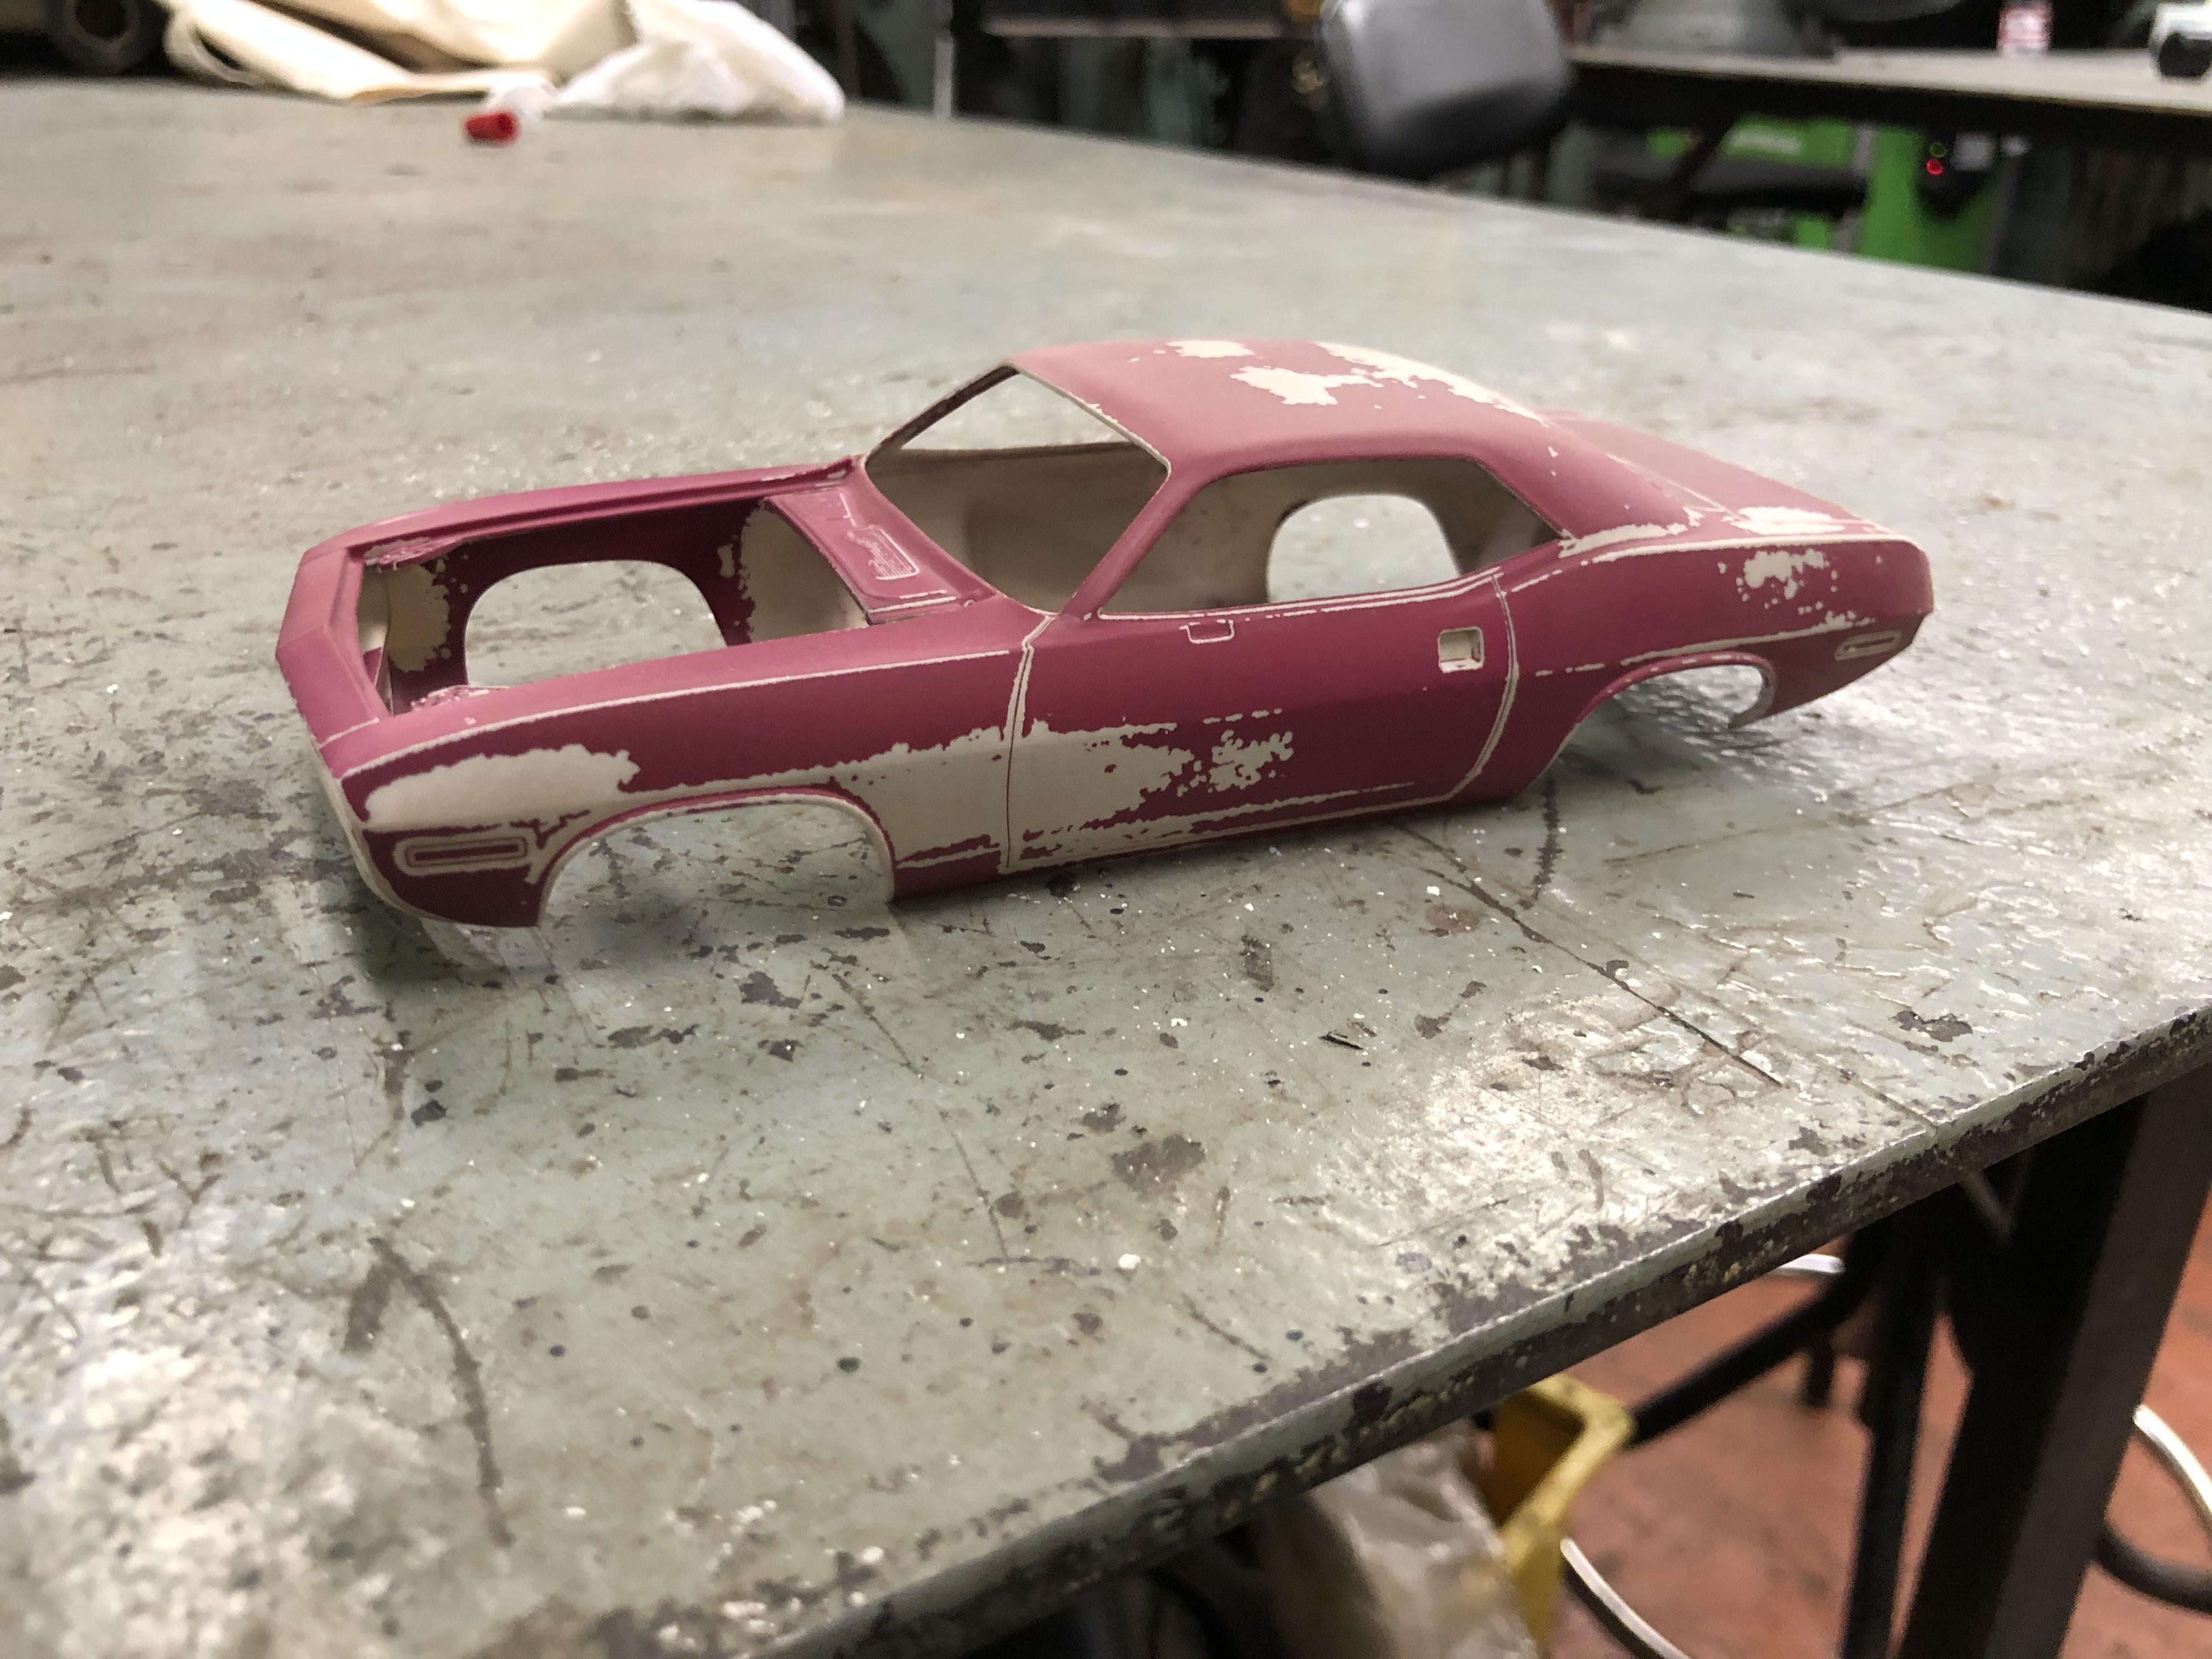
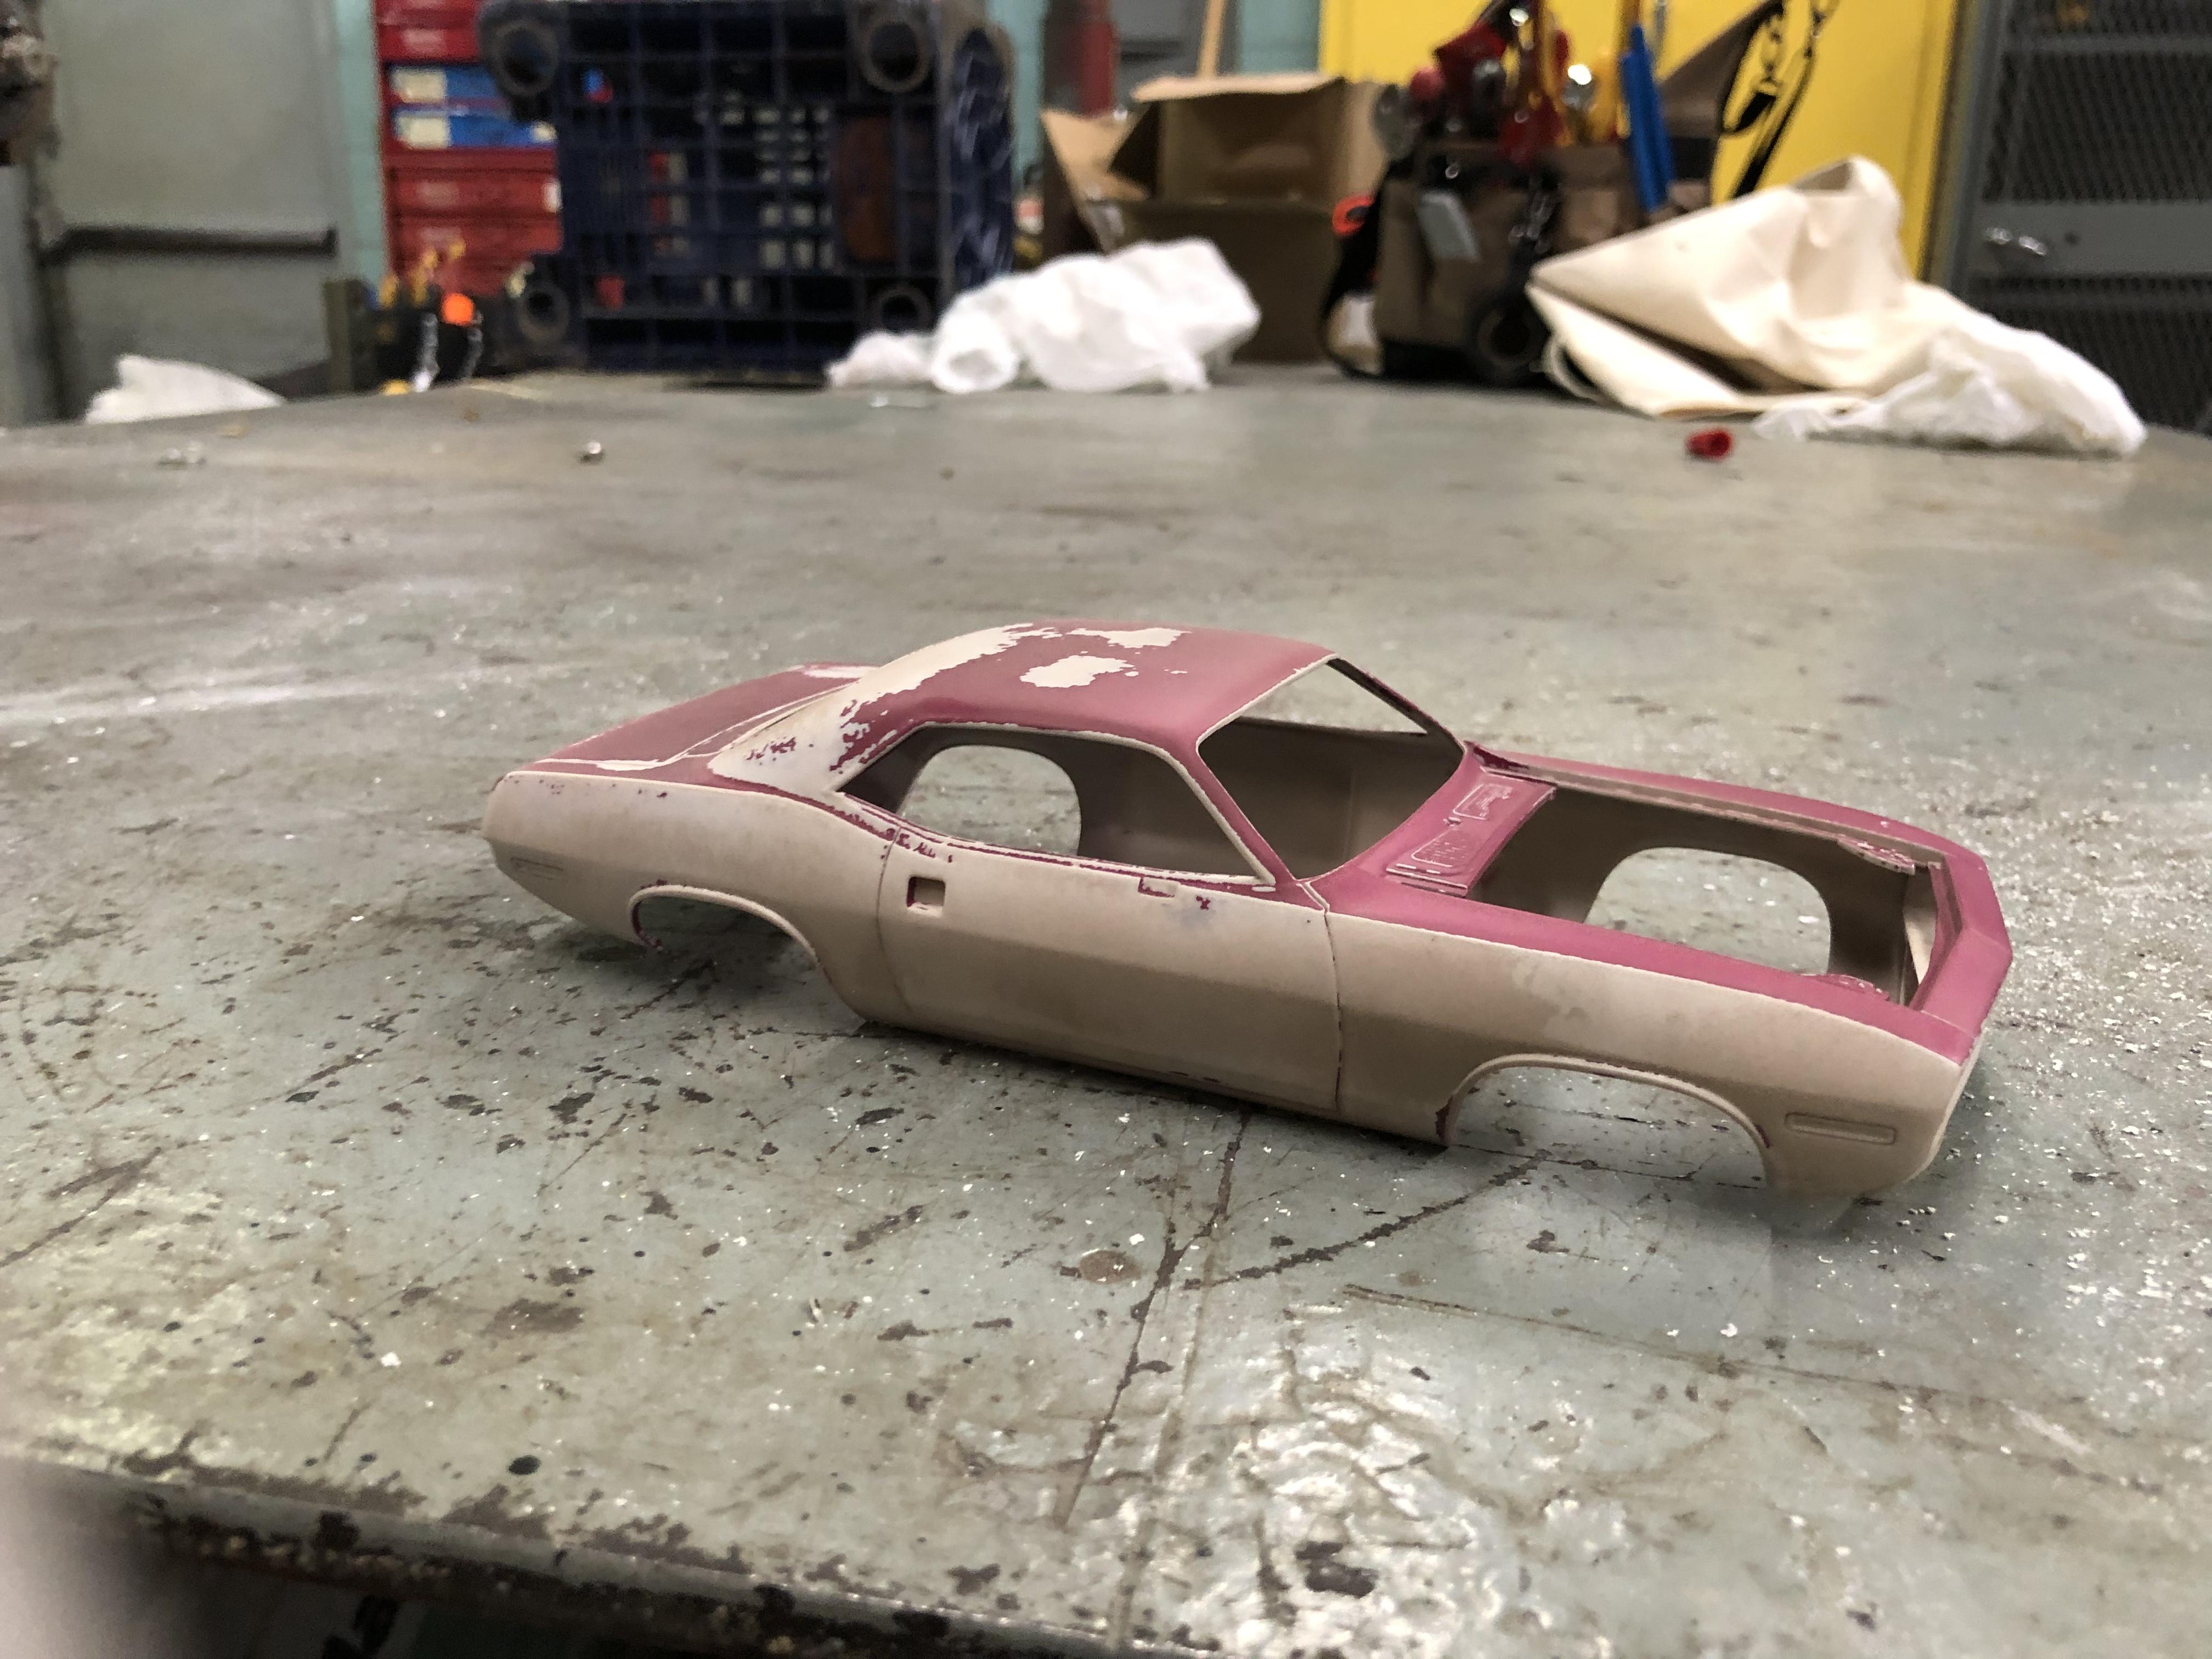
Recently I painted an AAR ‘cuda in Panther Pink. I went to apply clearcoat the other day and it went horribly wrong. The paint built up too much in certain areas are then hardly any in others. So I decided to strip it with Easy-Off. Well, that didn’t work. Clearcoat was hard as nails! I was about to trash it when I thought I’ve got nothing to lose by putting it in the bead blaster. I really expected it just to get blown apart. But to my surprise it worked! And quite well I made it. A day later the car is back in prime. And waiting for more Panther Pink! Halfway through I considered doing a barn find! Maybe next time!
-
This is a project that was in the running for my next “Bring out your Dead” subject. But while I was waiting for voting to close I decided to see if I could knock it out in 3 days. And I did!
-
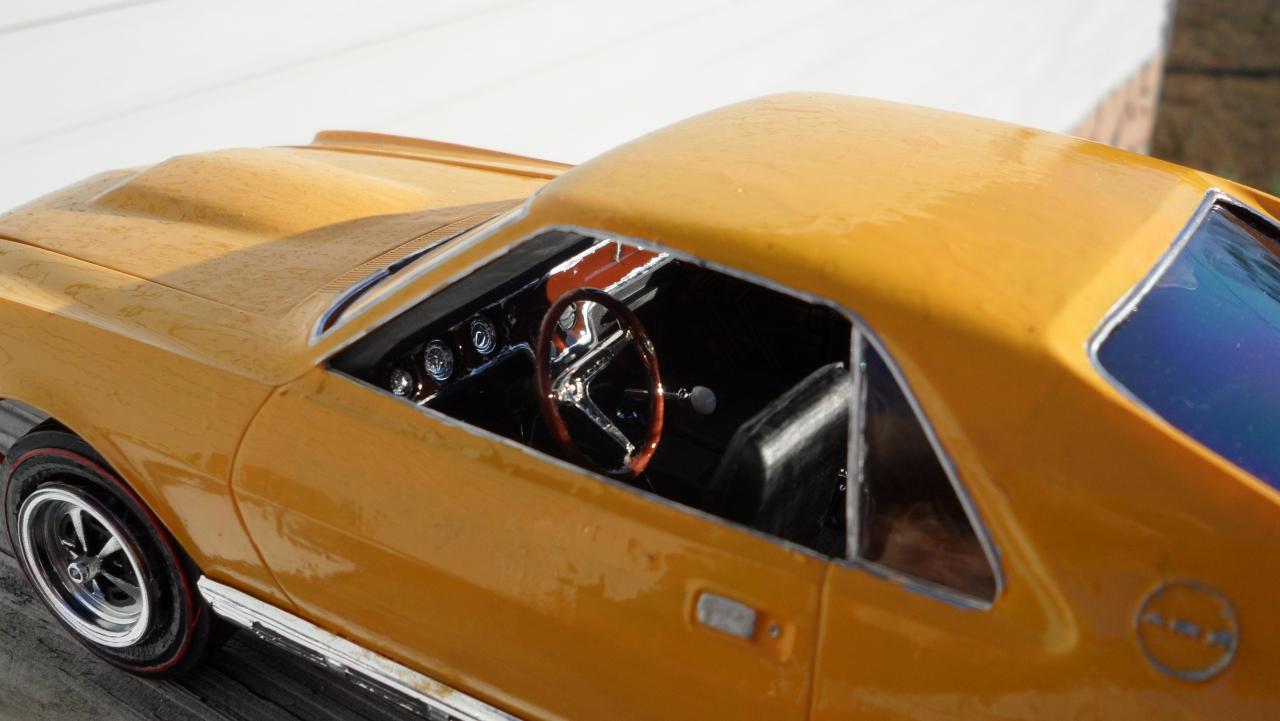
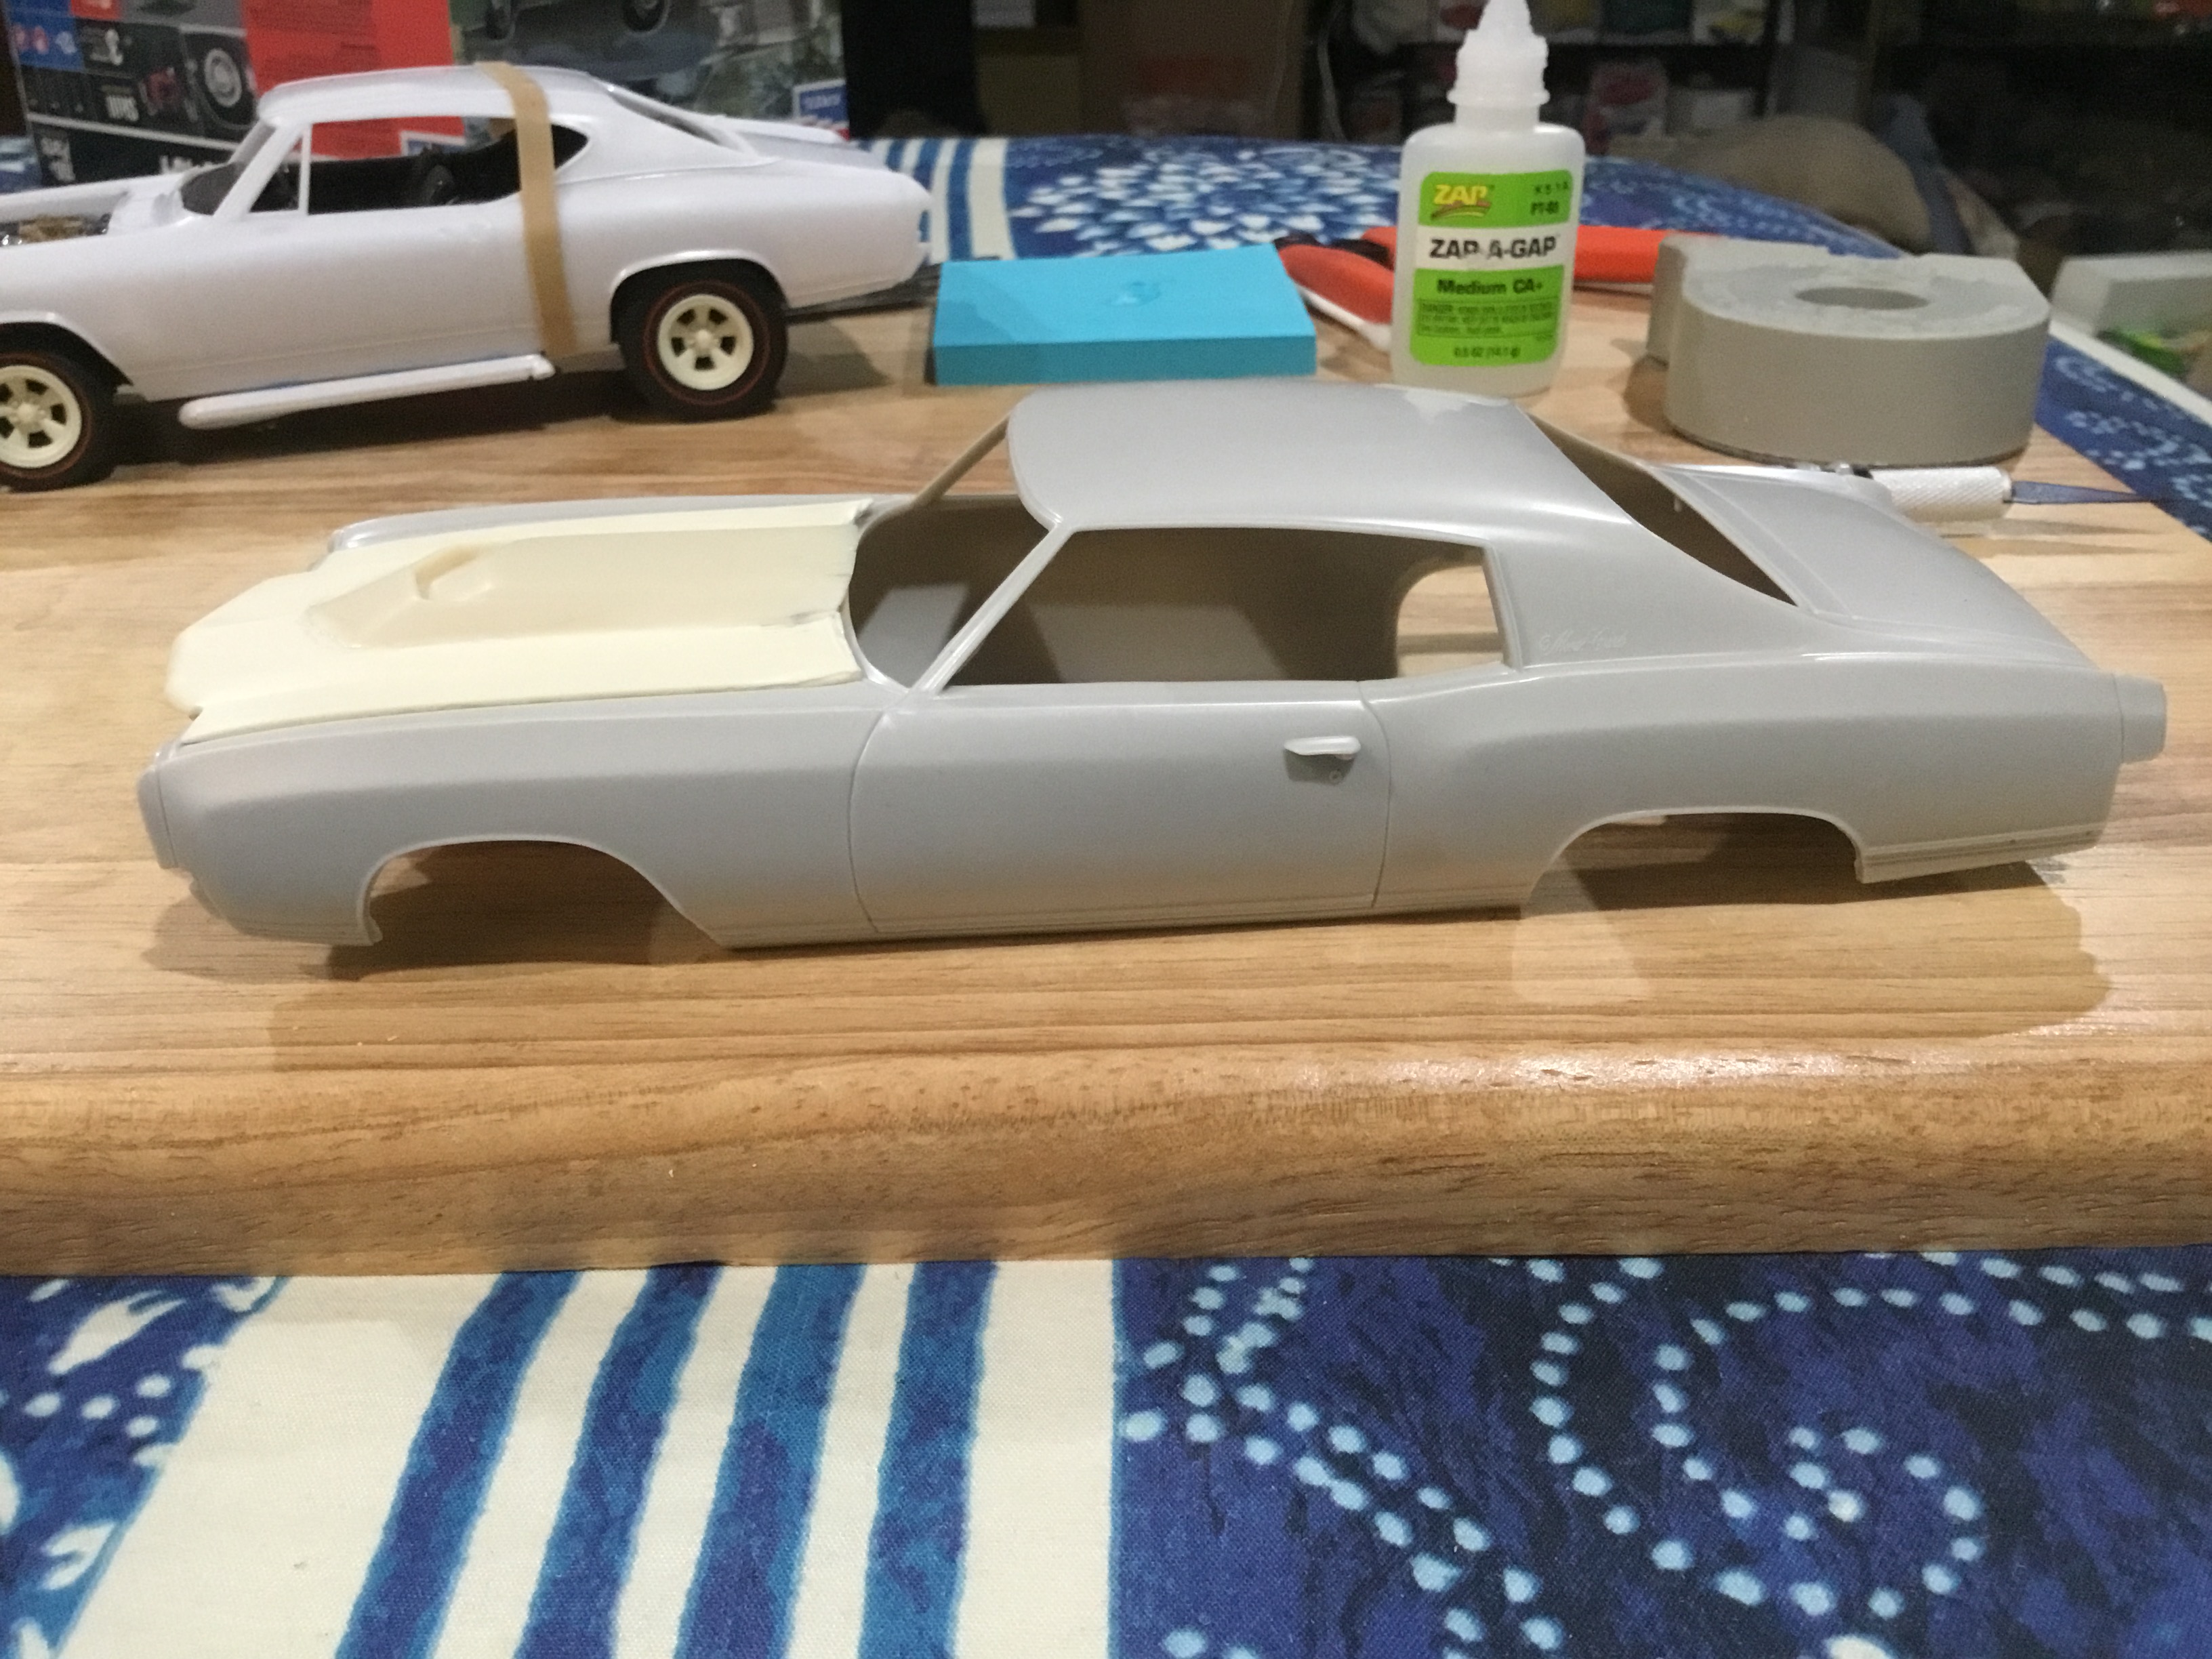
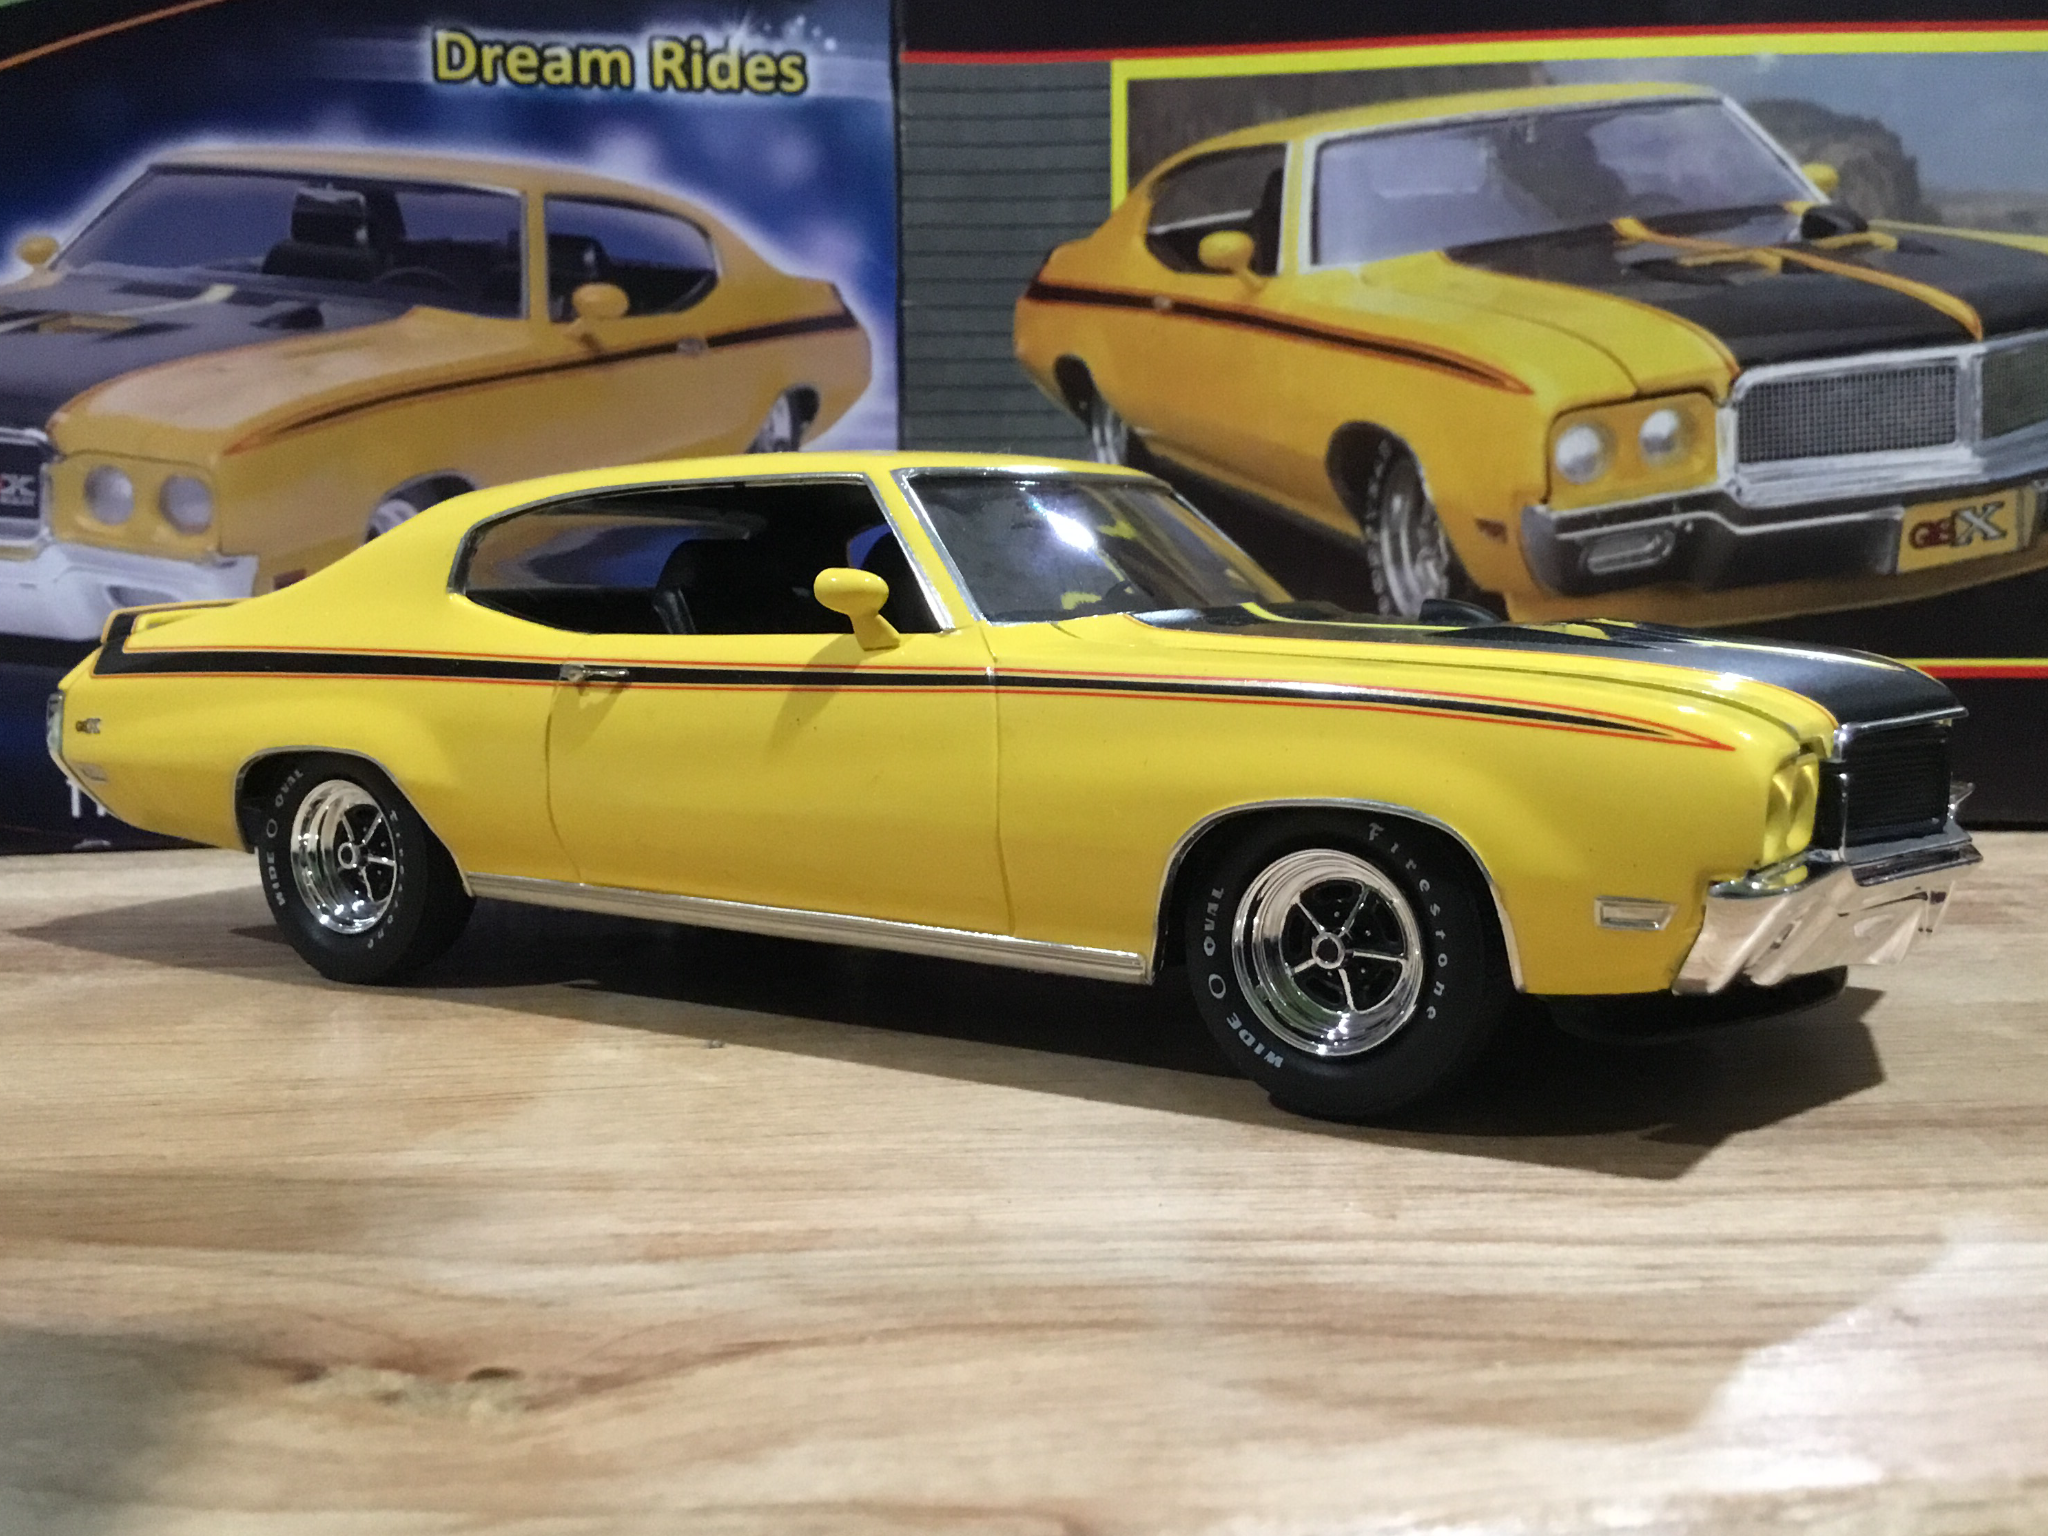
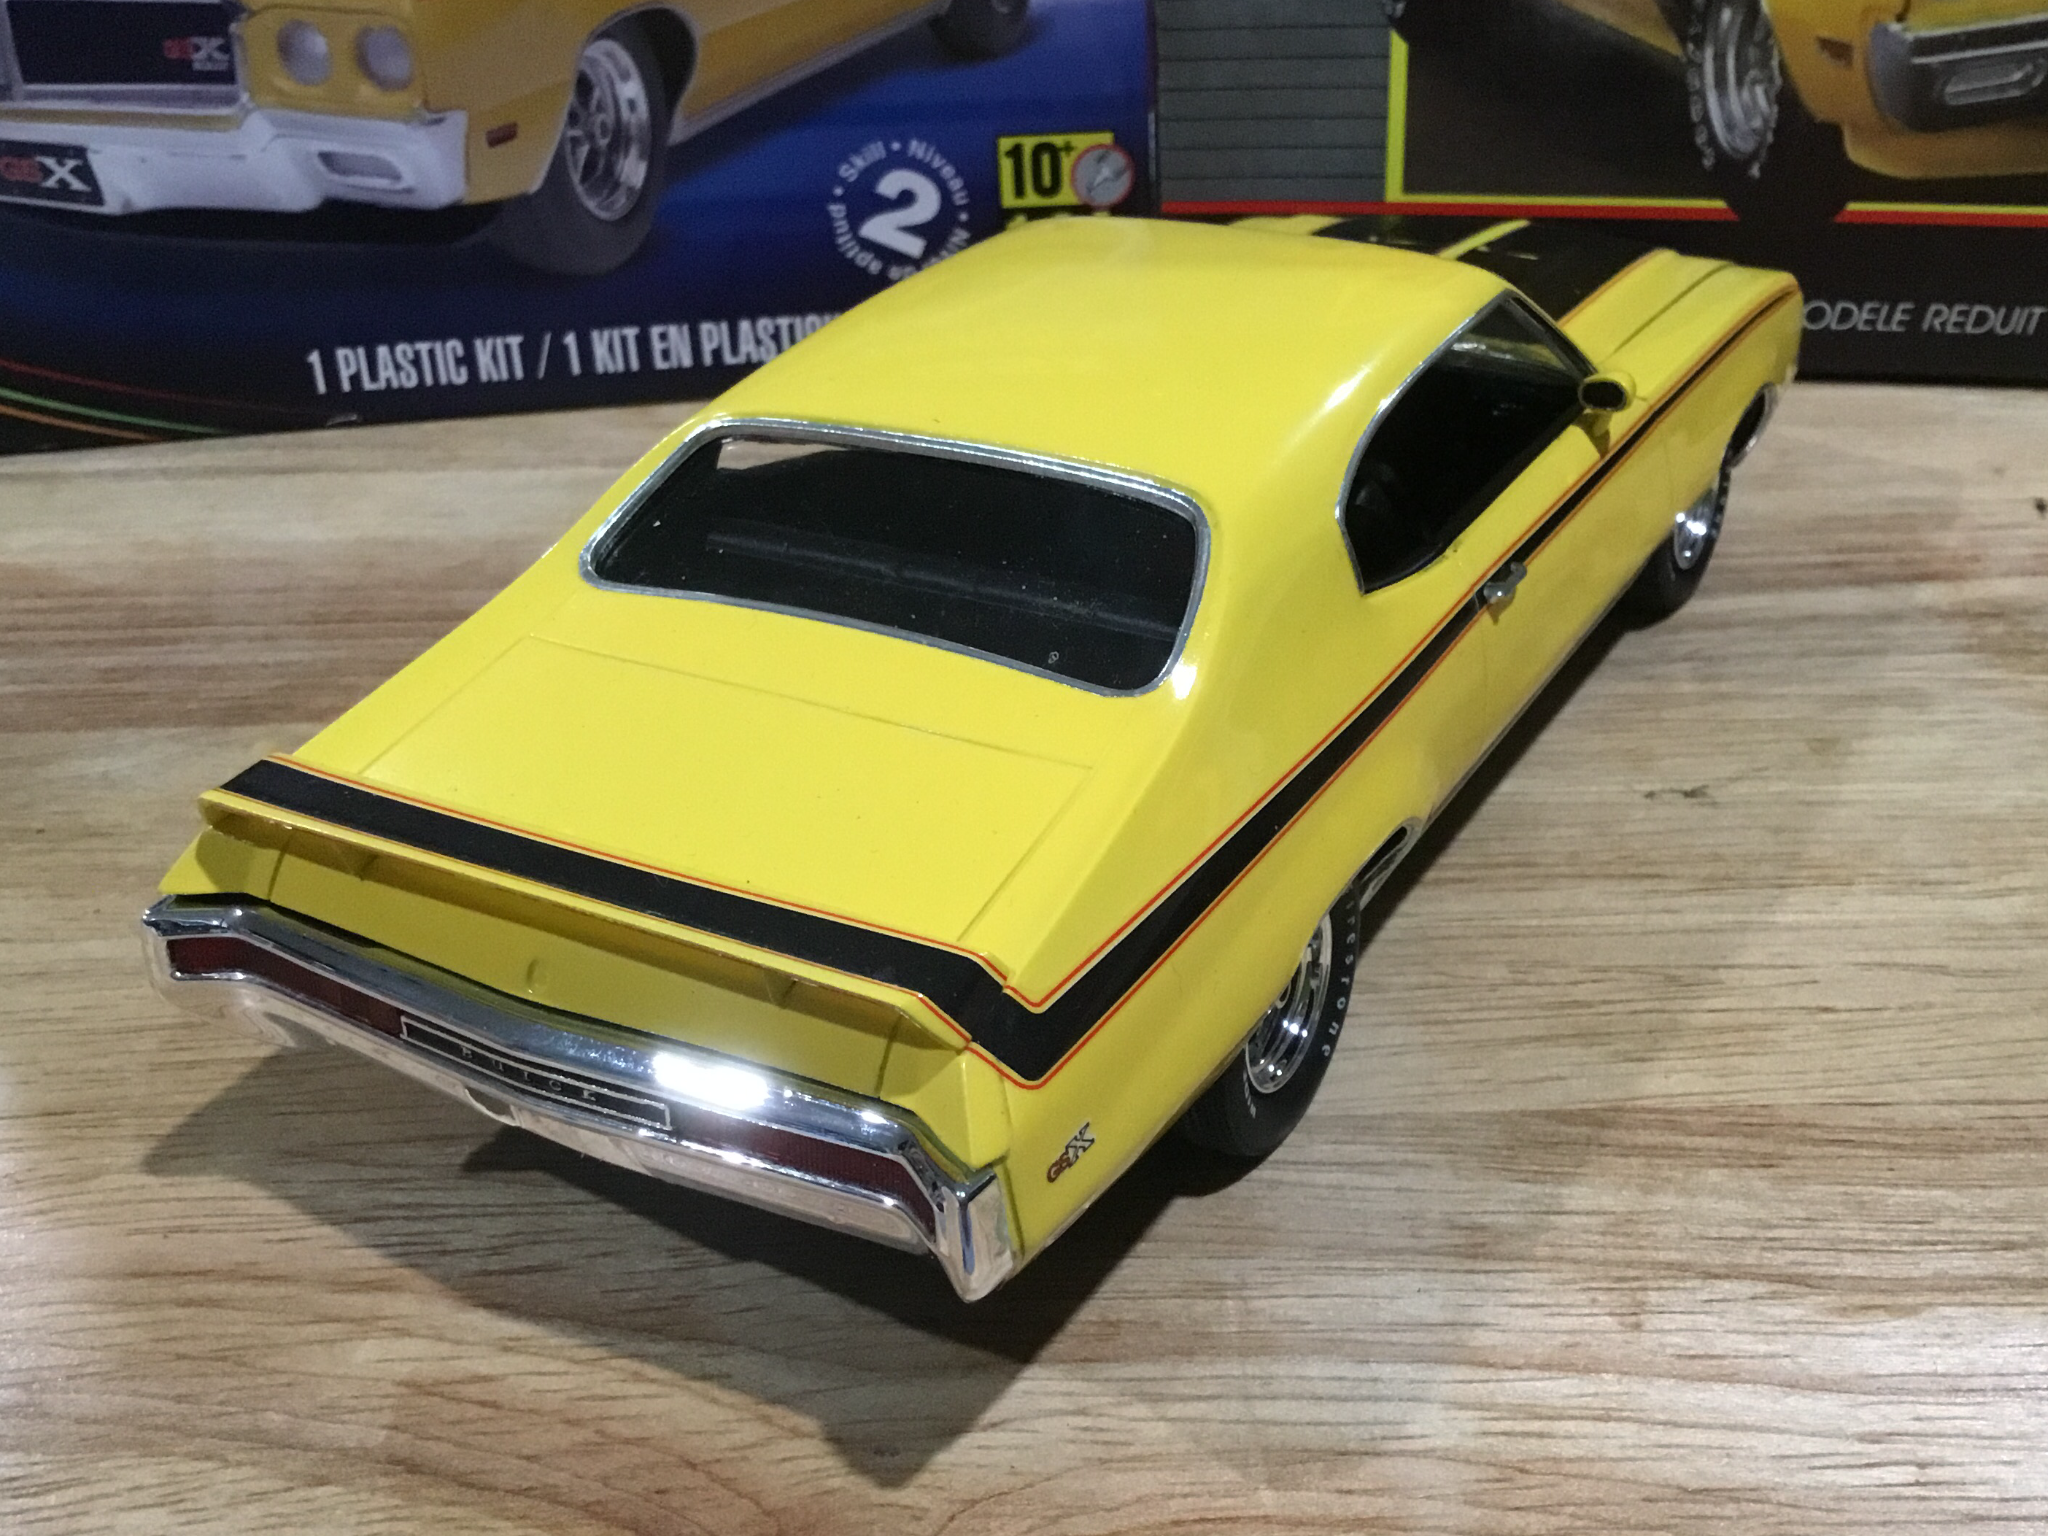
 Ever since I mastered and cast this L88 hood for the 1970-72 Monte Carlo, I’ve been itching to build a “what if” Baldwin Motion Monte Carlo. I know Baldwin Motion never offered to modify the Monte Carlo when they were due. I’m hoping this will follow in the spirit of a Motion type build. The tires are from the Baldwin Motion 1971 Camaro. I cast these slotted wheels for my Baldwin Motion Phase III Corvettes. I felt that the Buick GSX deck lid spoiler fit the Monte Carlo pretty well! I’m thinking of using the GSX chin spoiler too. I look at it this way, if Baldwin Motion could get a Chevrolet Biscayne to do the quarter mile in 11 1/2 seconds, the Monte Carlo could’ve been done too. I’m going to send these pictures to Joel tonight and see what he thinks. I’m also going to ask him if there was a reason behind excluding the Monte Carlo from the line up. As always questions and comments are welcome.
-
Hey, everyone!, I recently had an old friend move here from Santa Cruz, California. We use to build together over a decade ago, and now he wants to start it up again! I asked him which car he wanted to build, and he chose AMT's 1970 Baldwin Motion Camaro, so that's what we're doing. I mostly build exotics, but I do have a TON of muscle car kits, this however, will be my very first GM build.....i'm pretty stoked!! The 1970 Camaro is my favorite year for that car, in fact, 1970 was the BEST year for muscle cars from ALL the manufacturers! If you are familiar with how I build, this will come as no surprise....its almost imposable for me to NOT change things. This is no exception, lol. He will build his in a more traditional Hot rod way, which I will also post here as we go. Heres a riddle for mine; what do you get when mix the following cars, and styles together?...
-
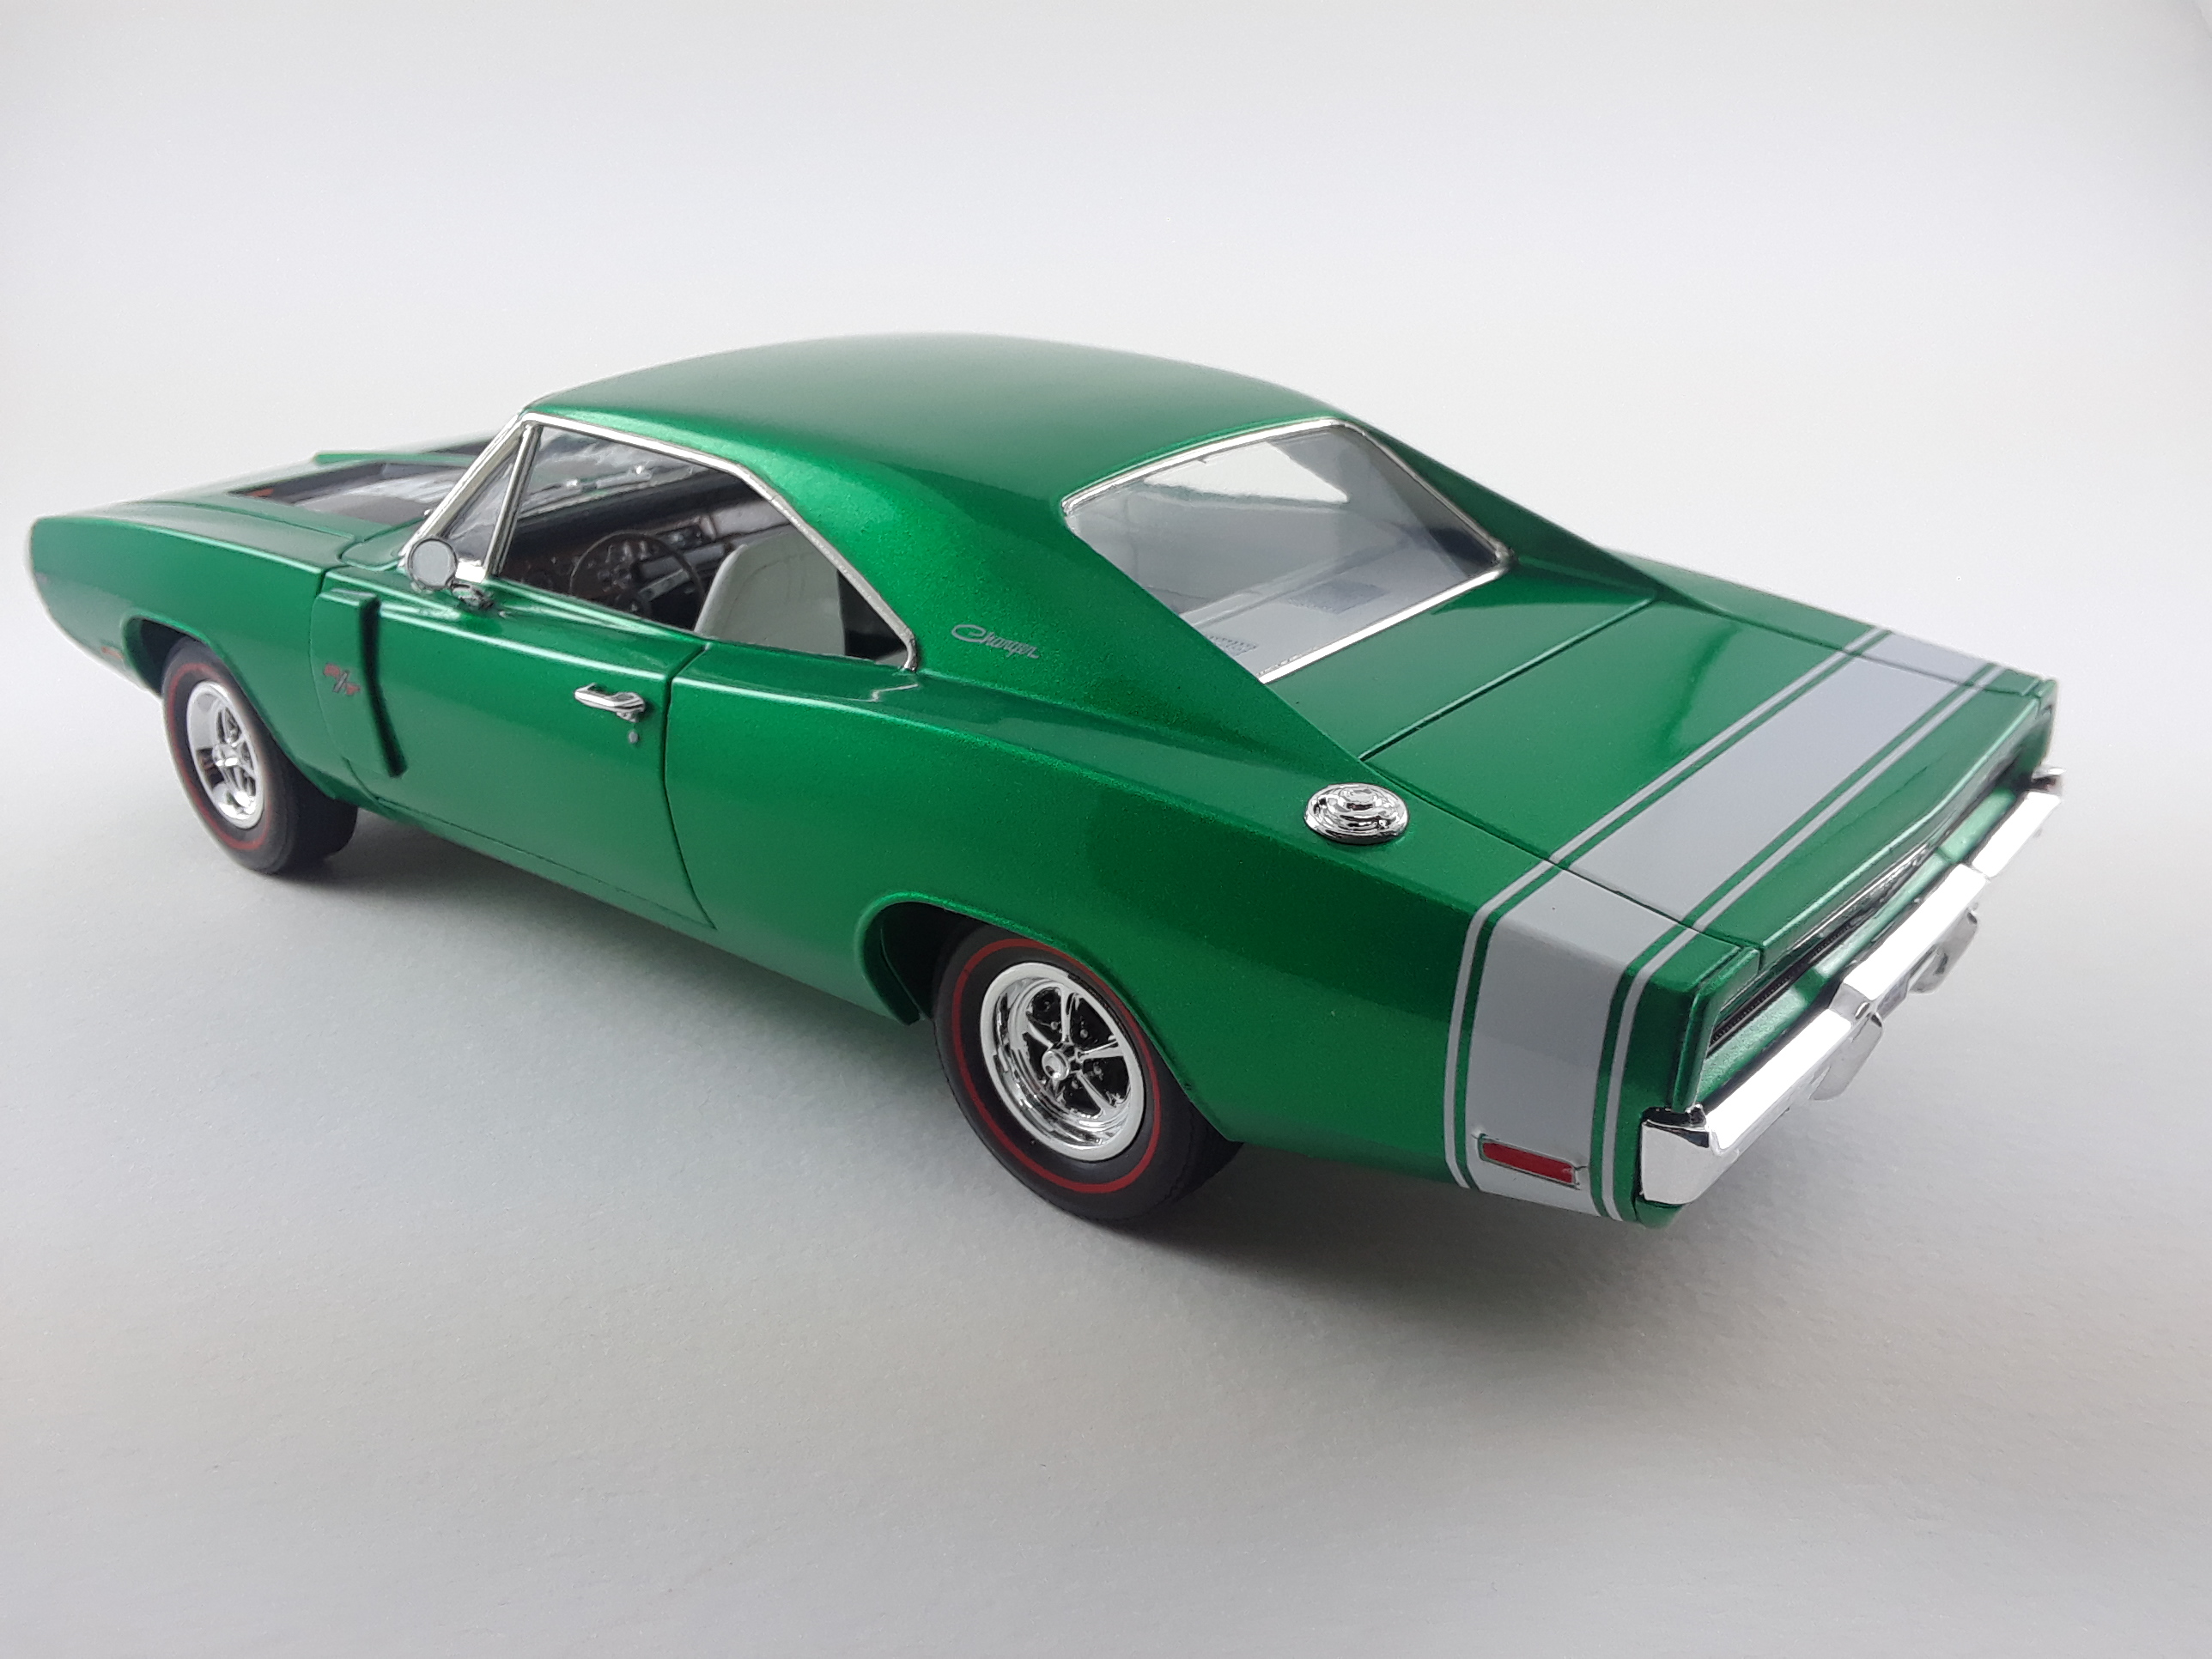
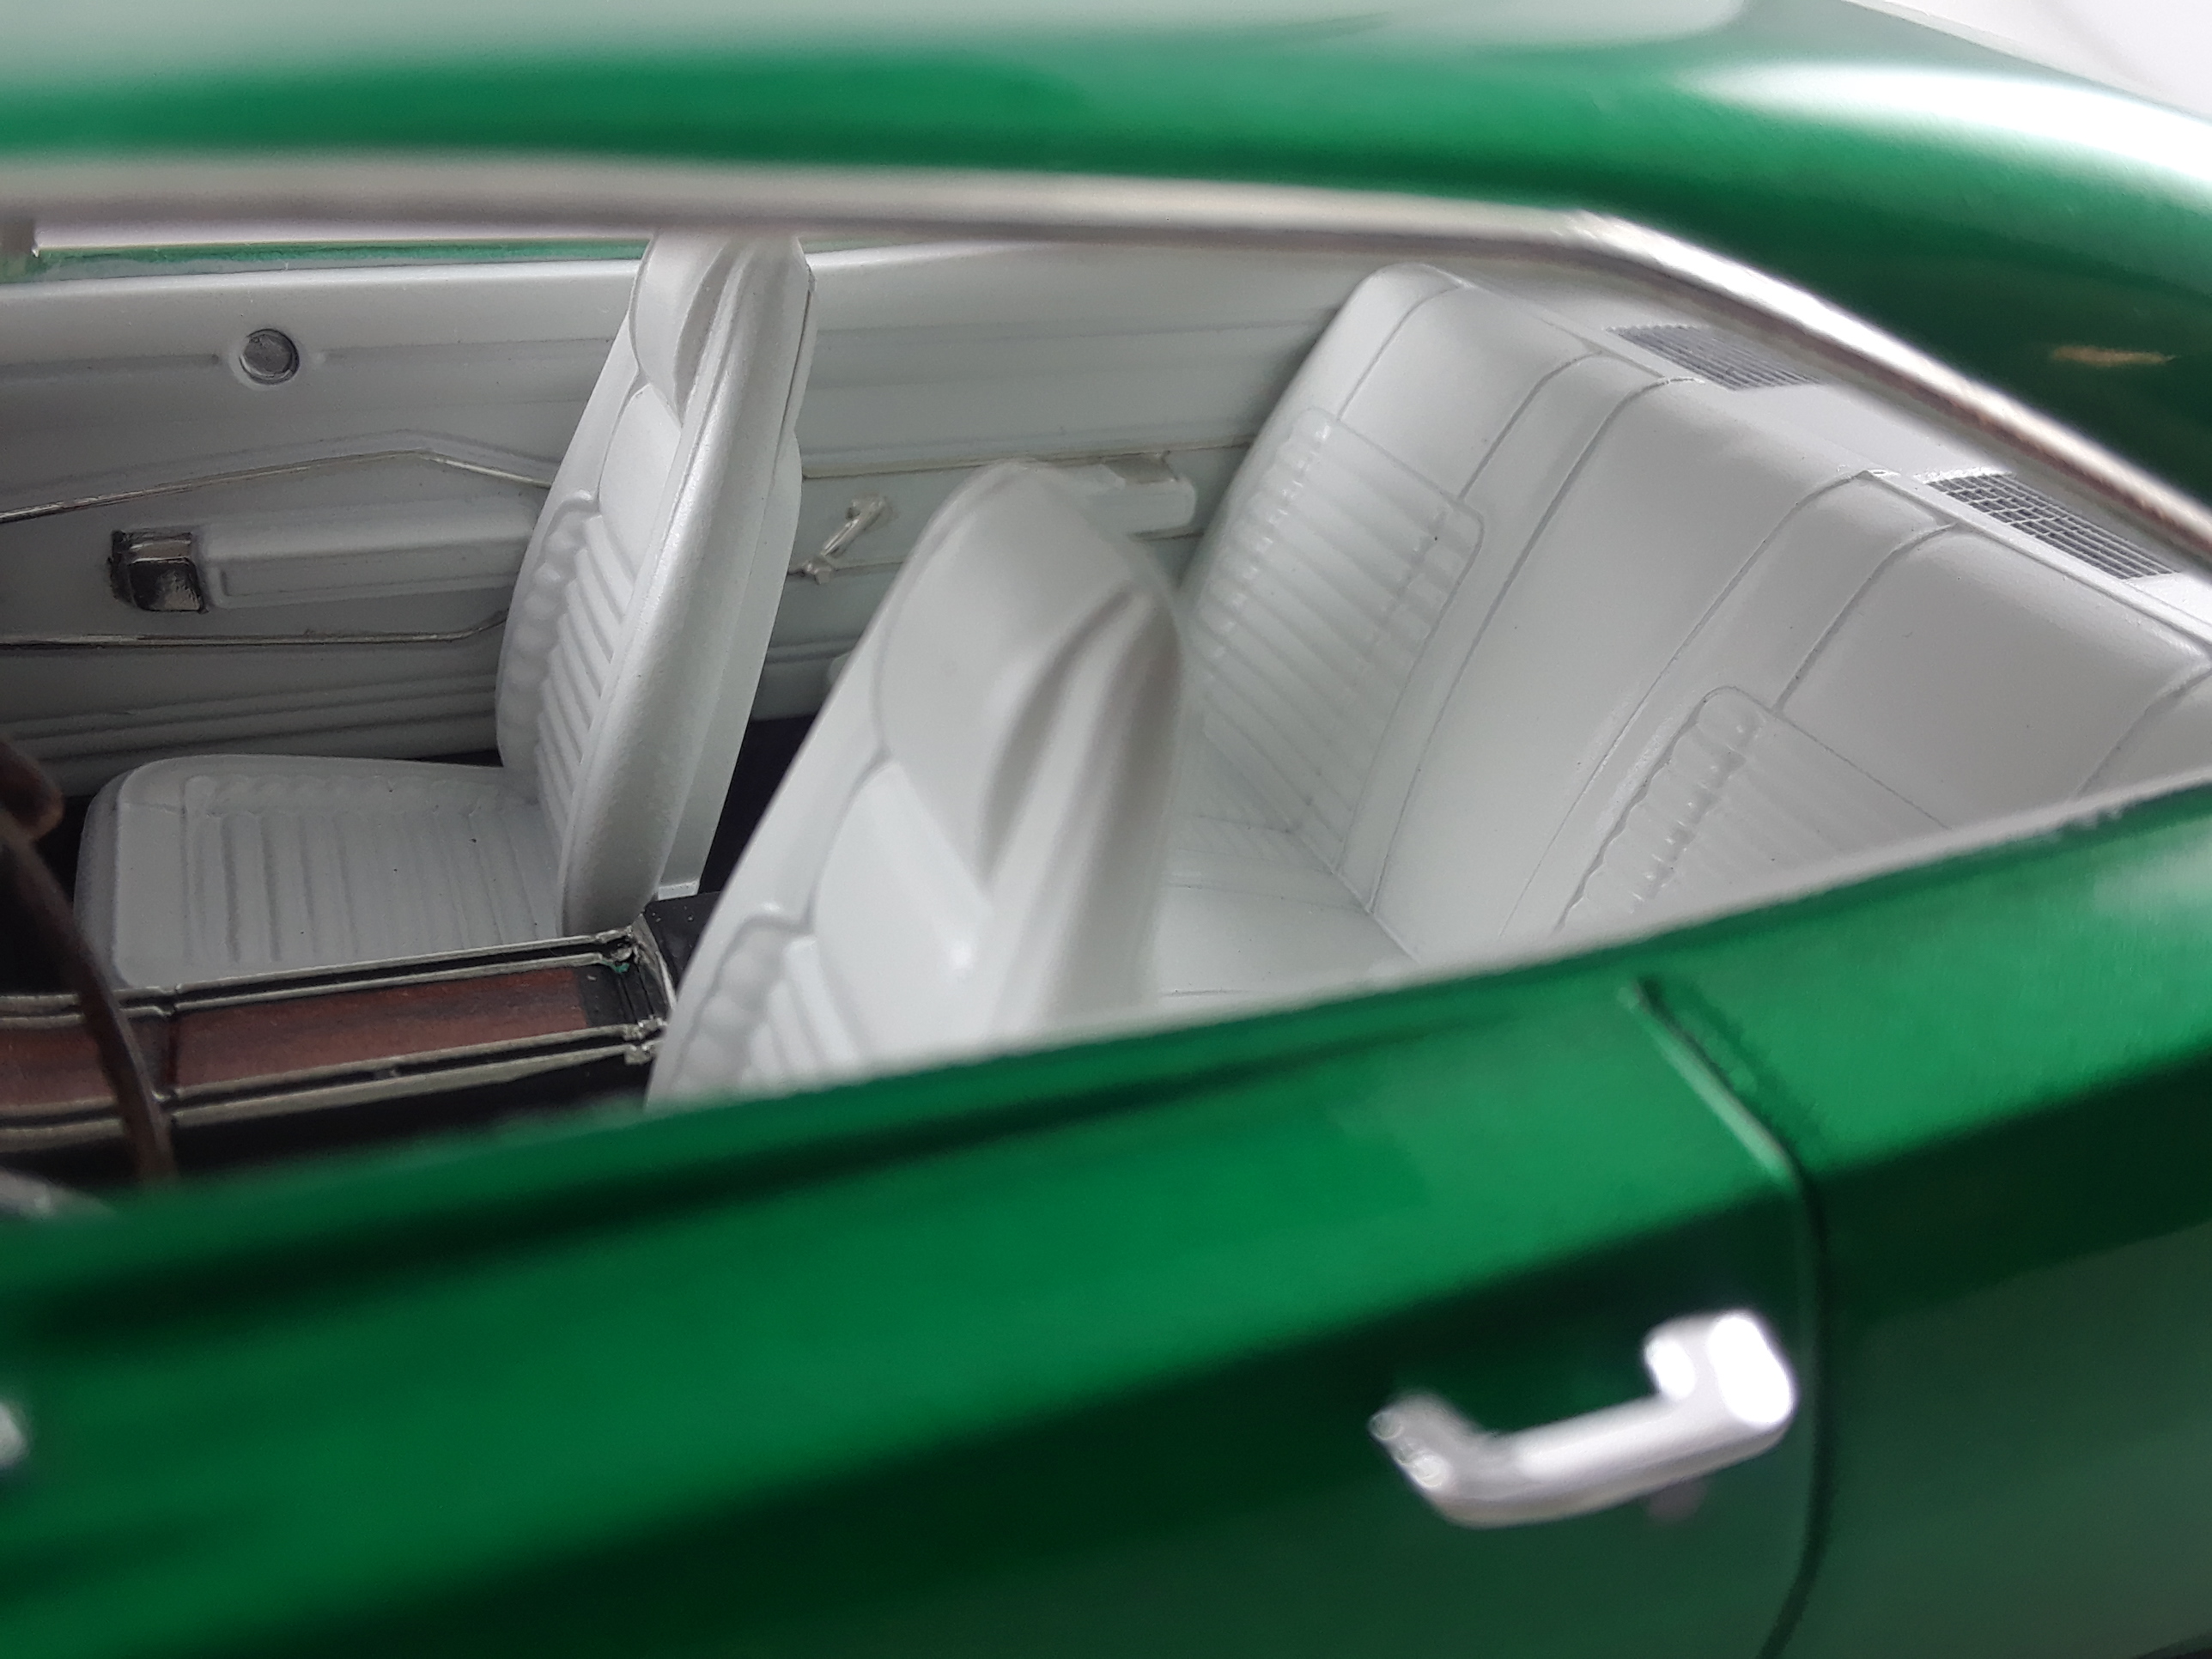
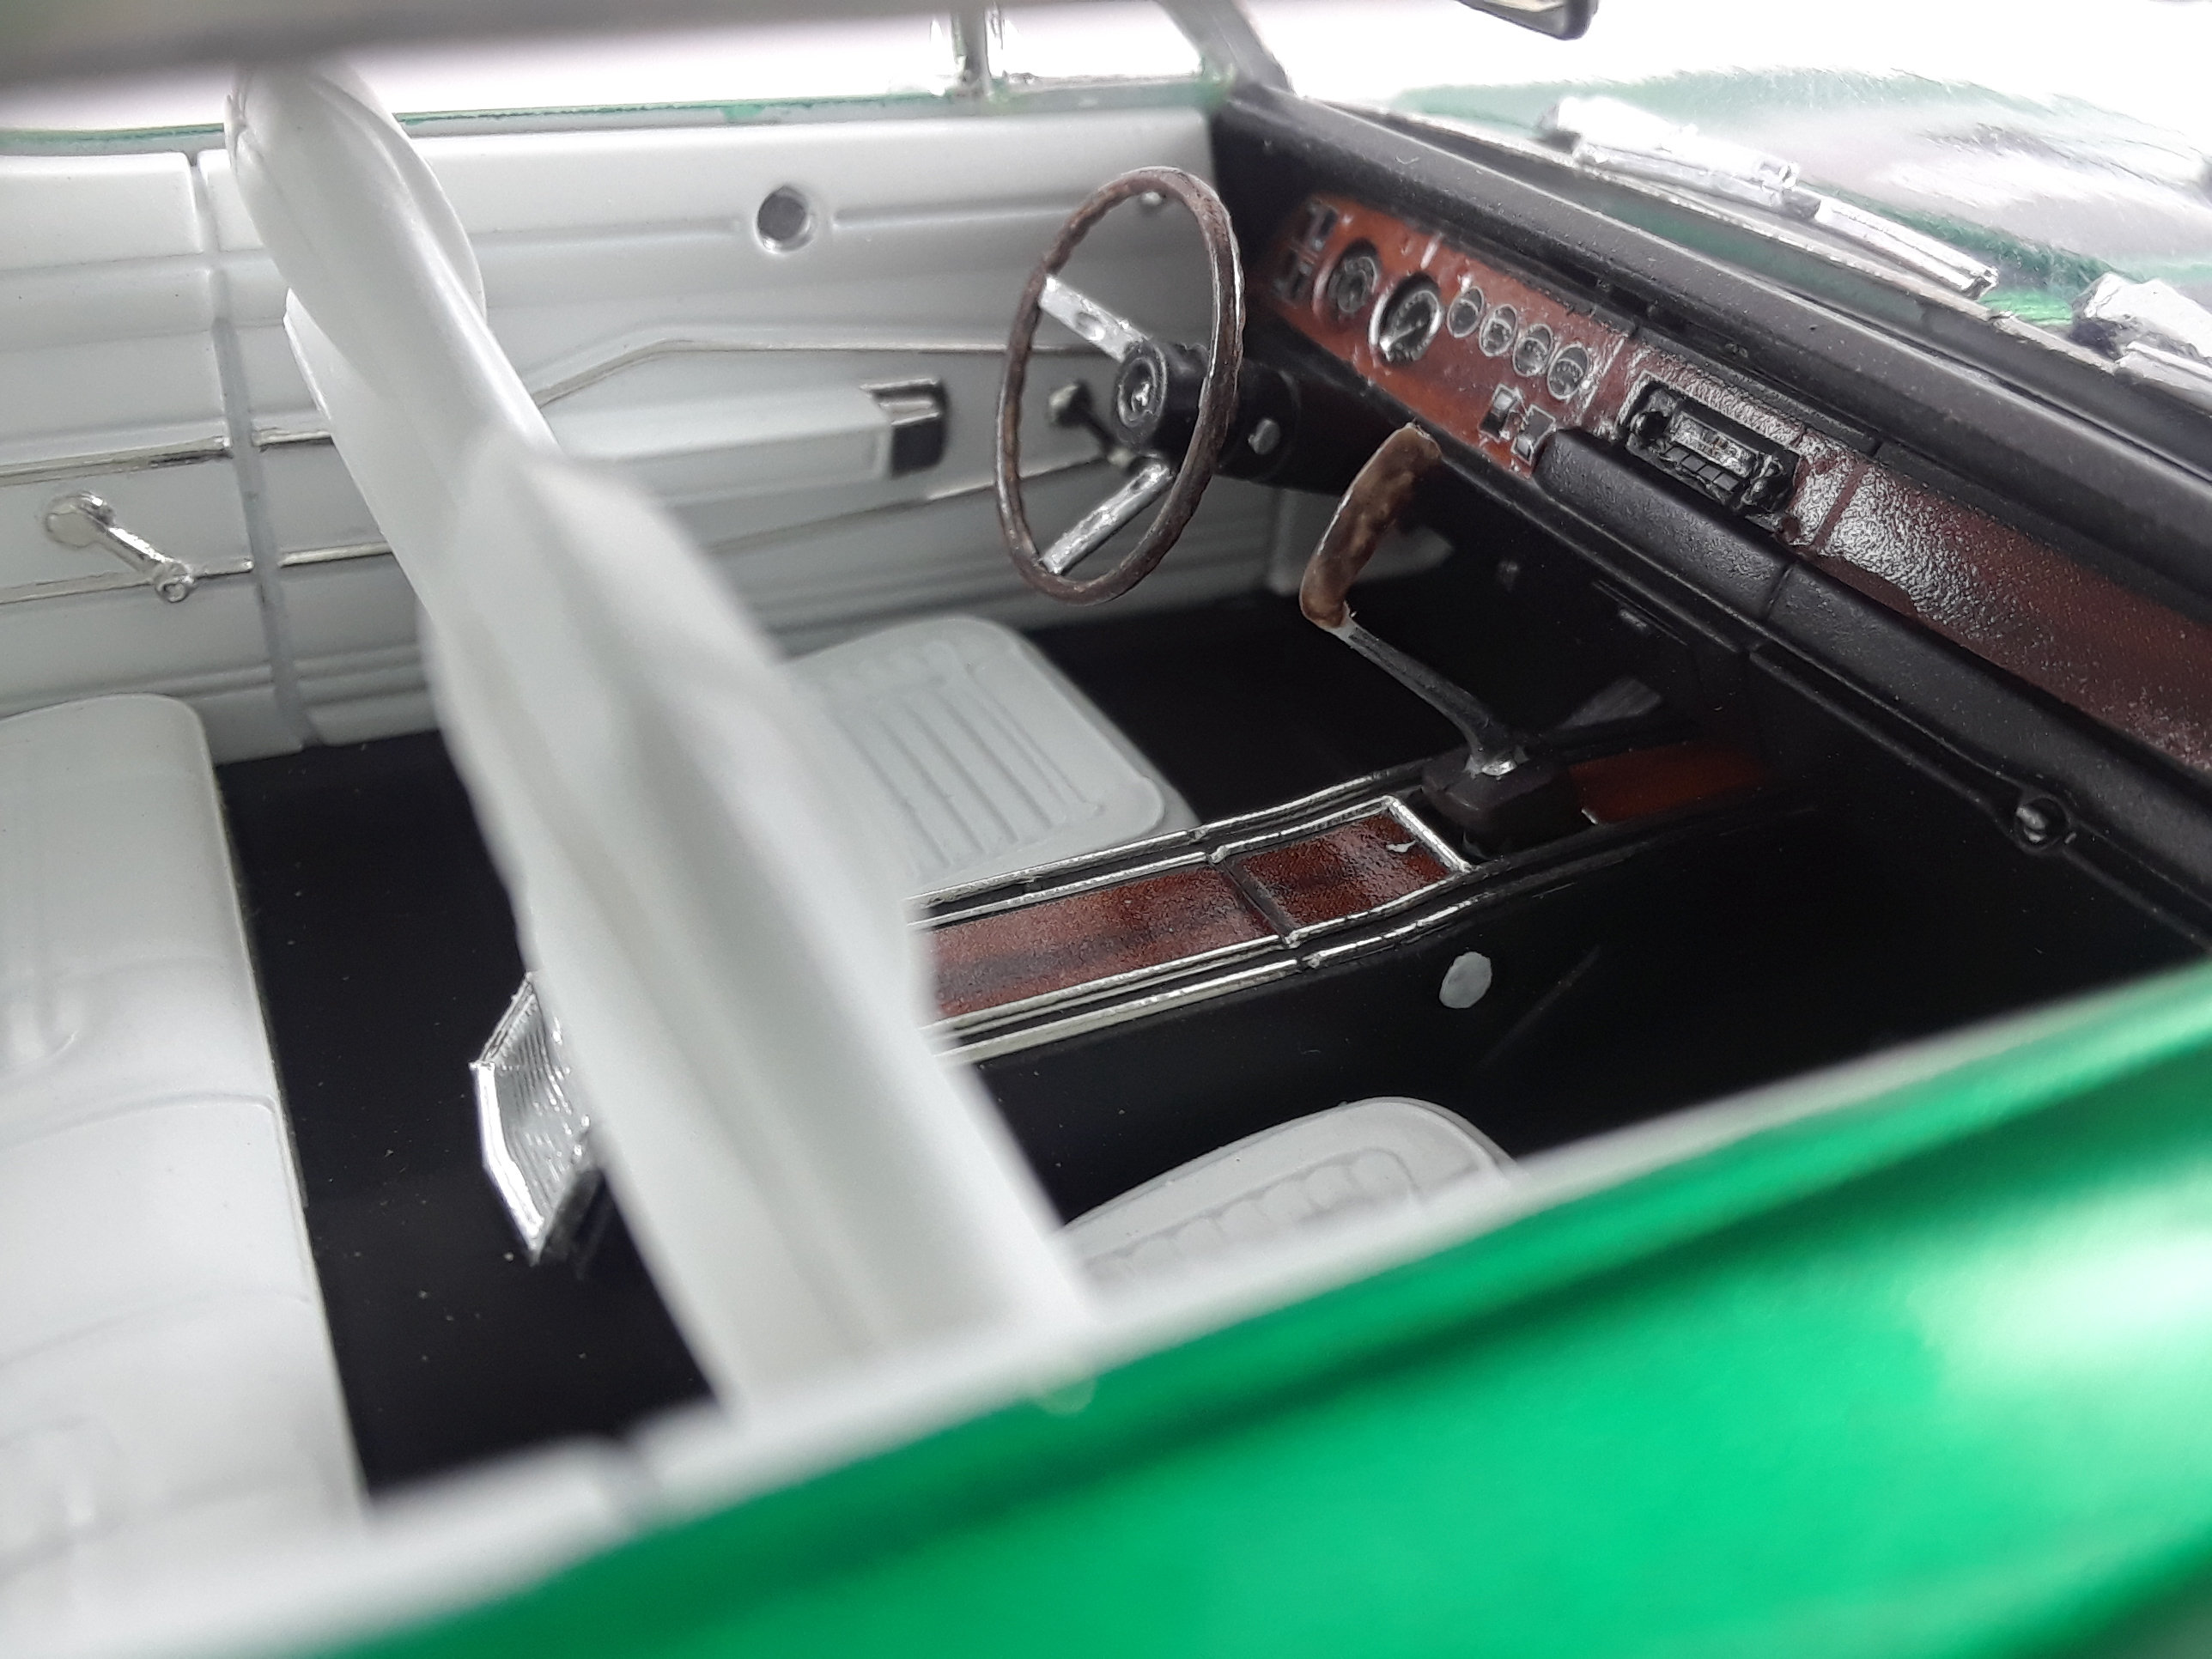
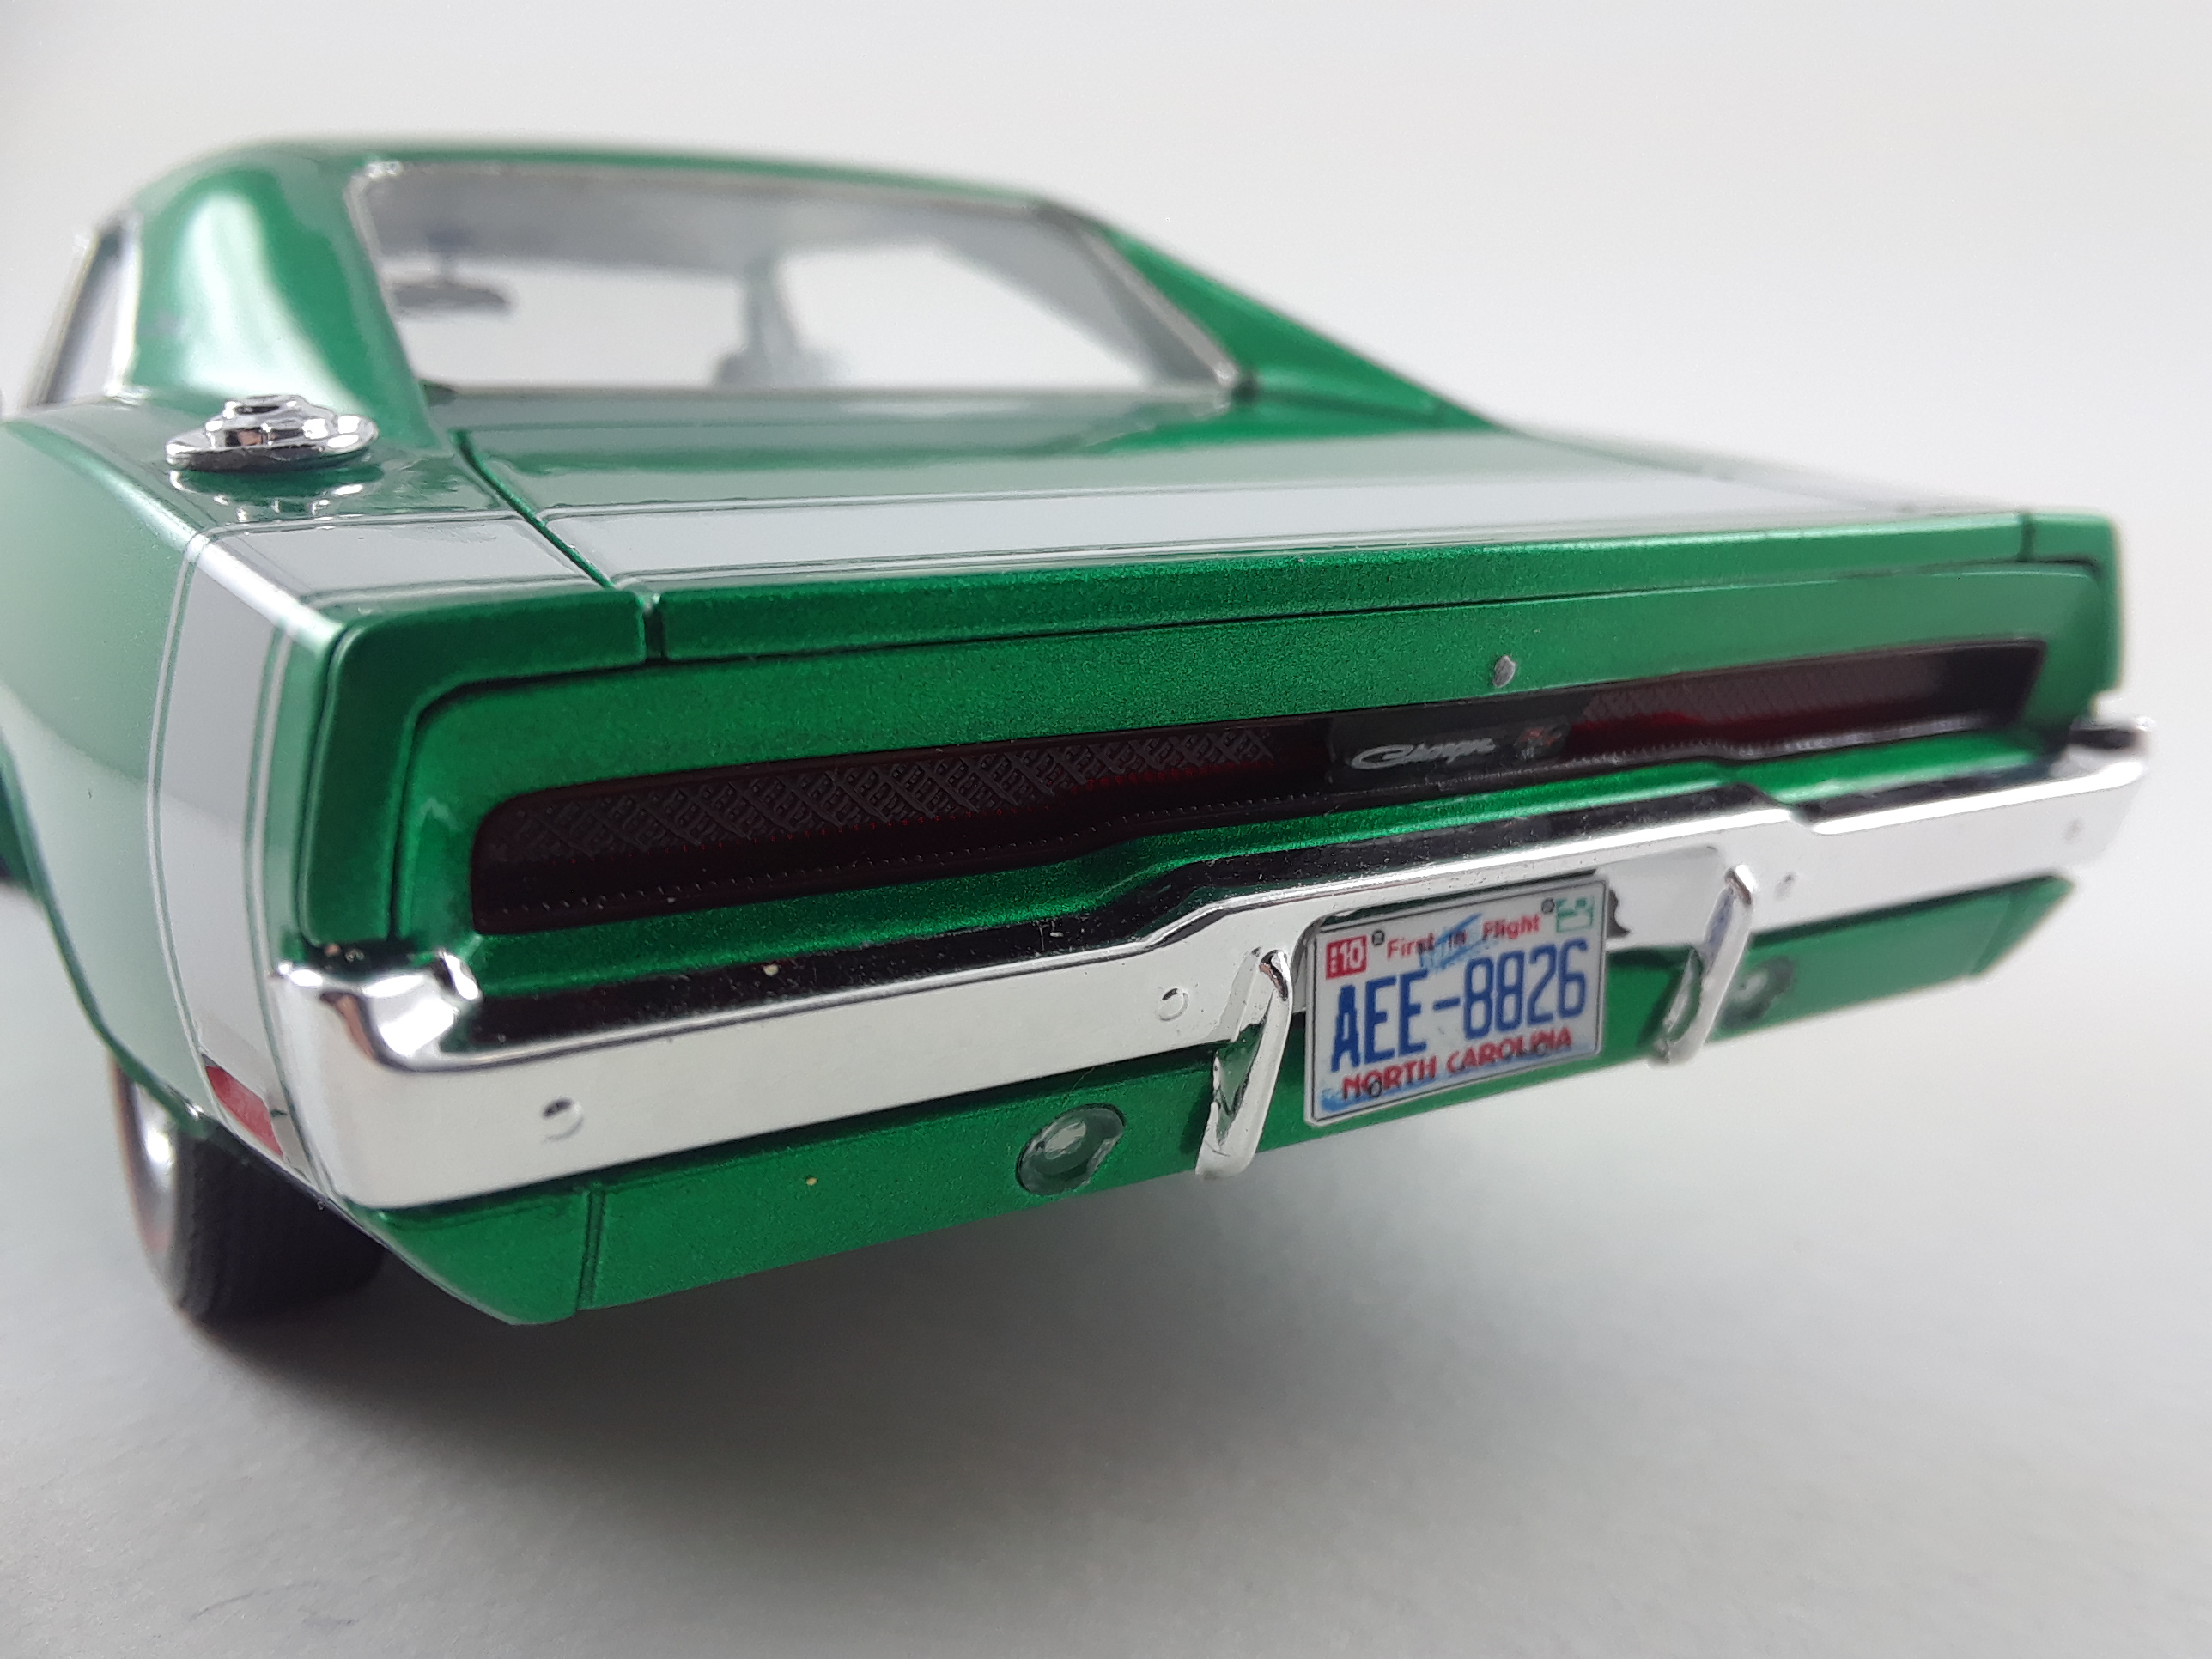
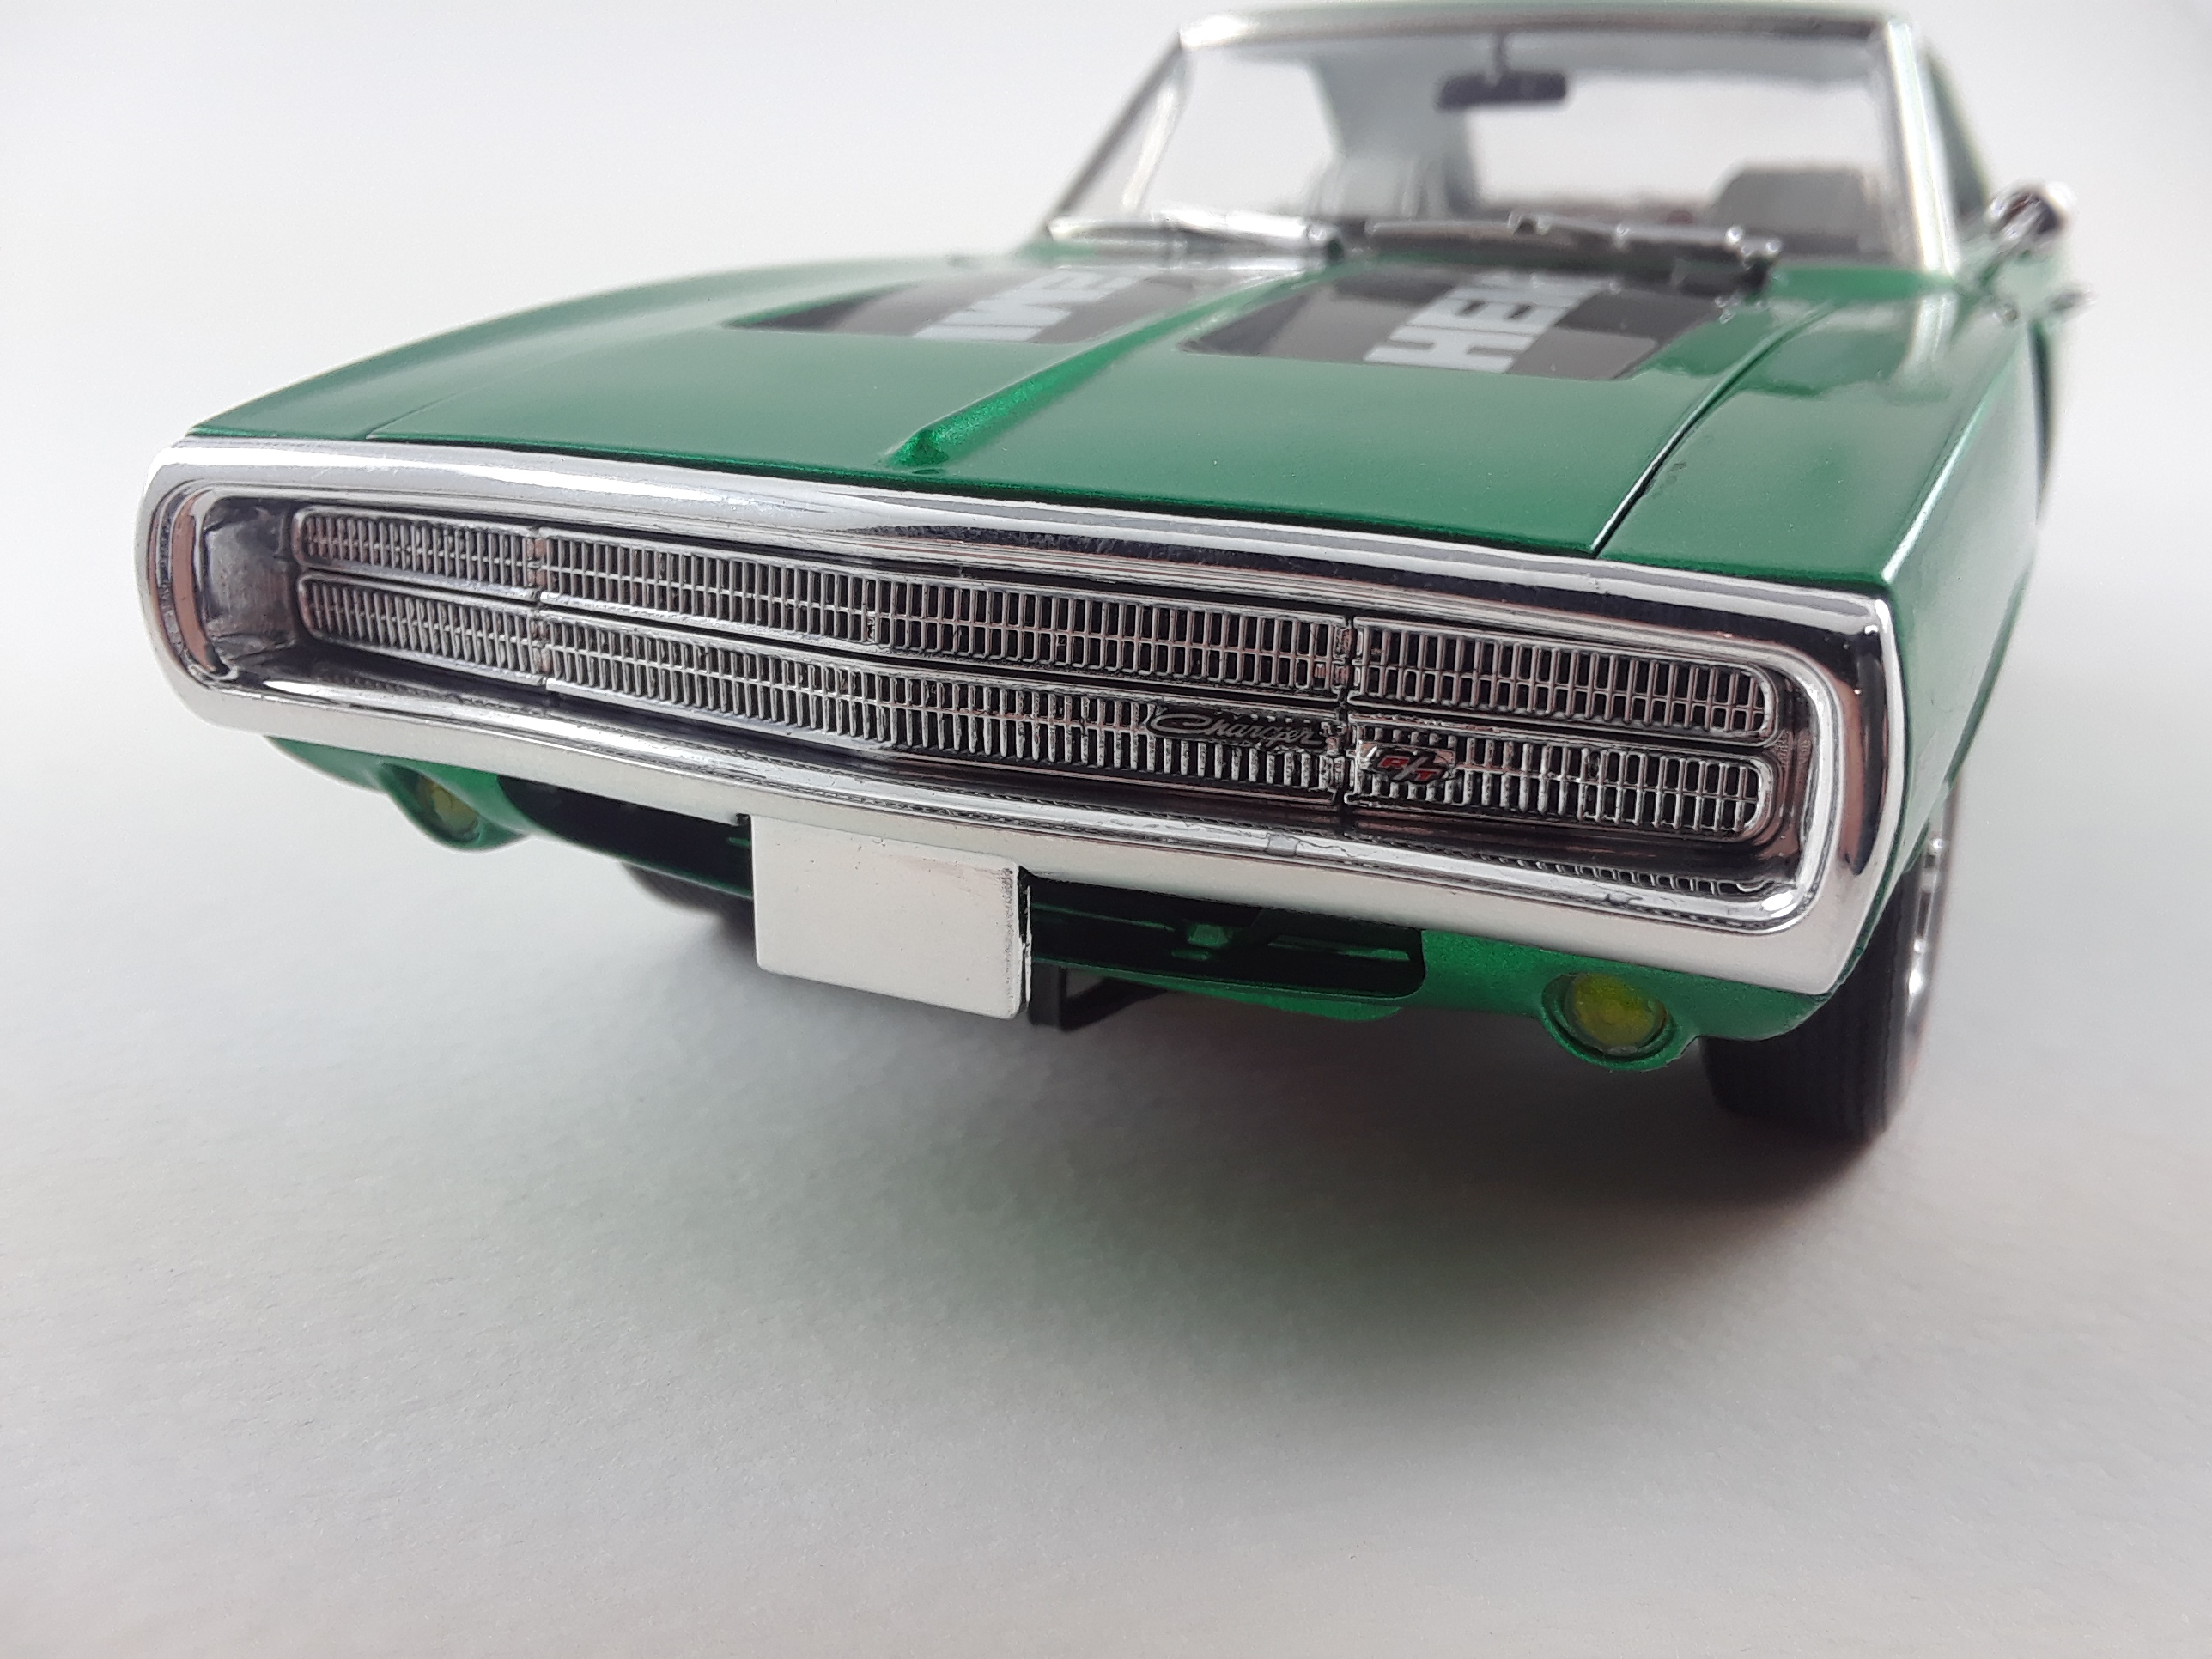
Revell 1970 Dodge Charger R/T, painted with Testors mystic green one coat lacquer and Testors wet look clear. White interior, basically box stock except for plug wires. Thanks for looking
-
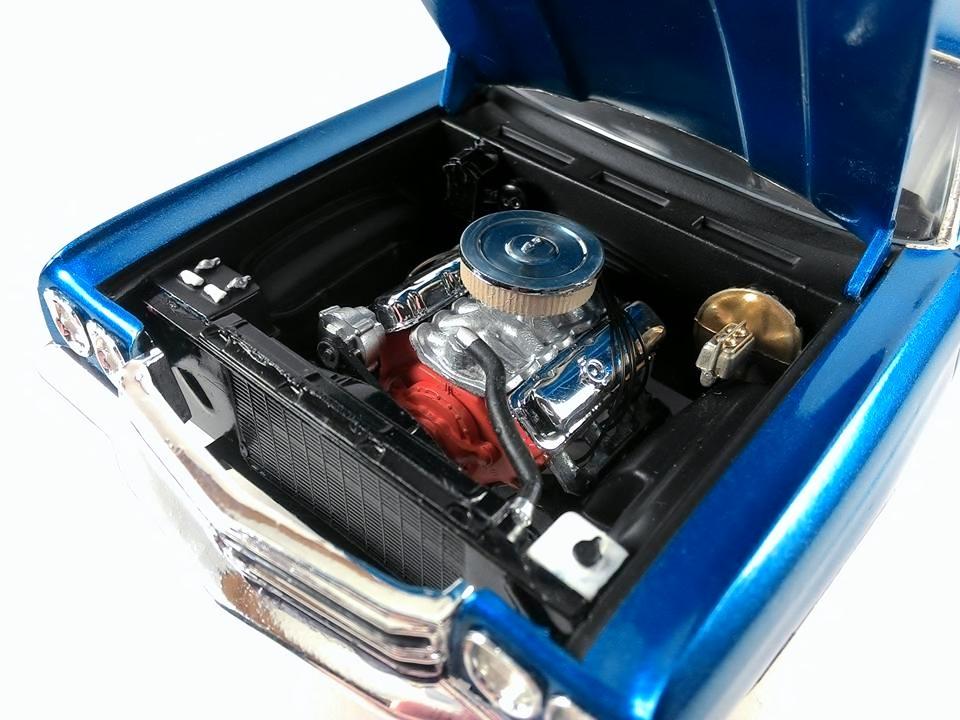
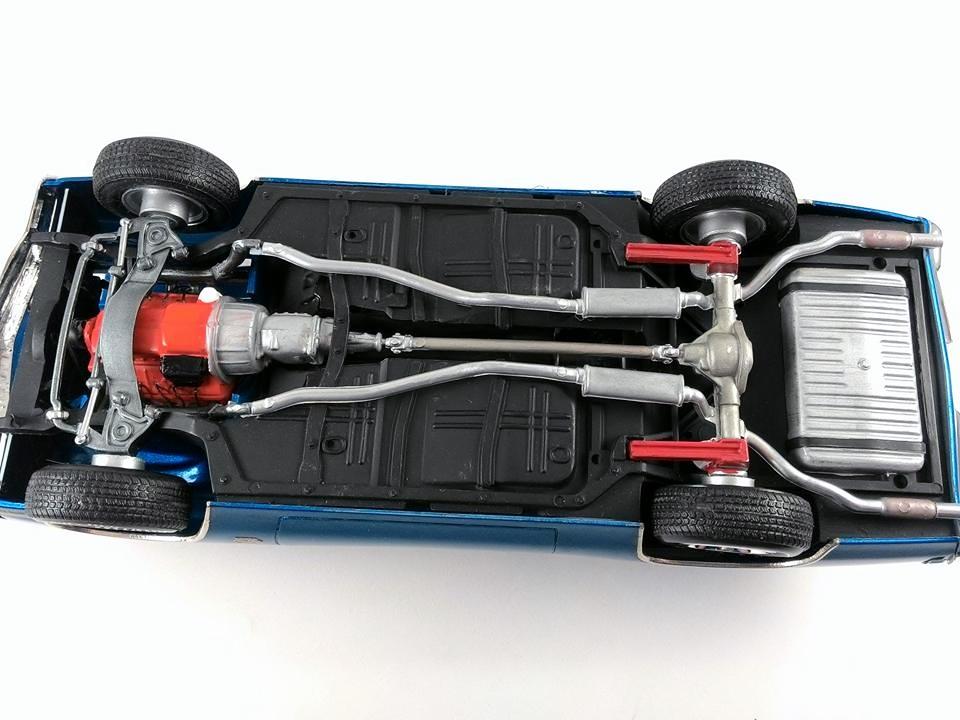
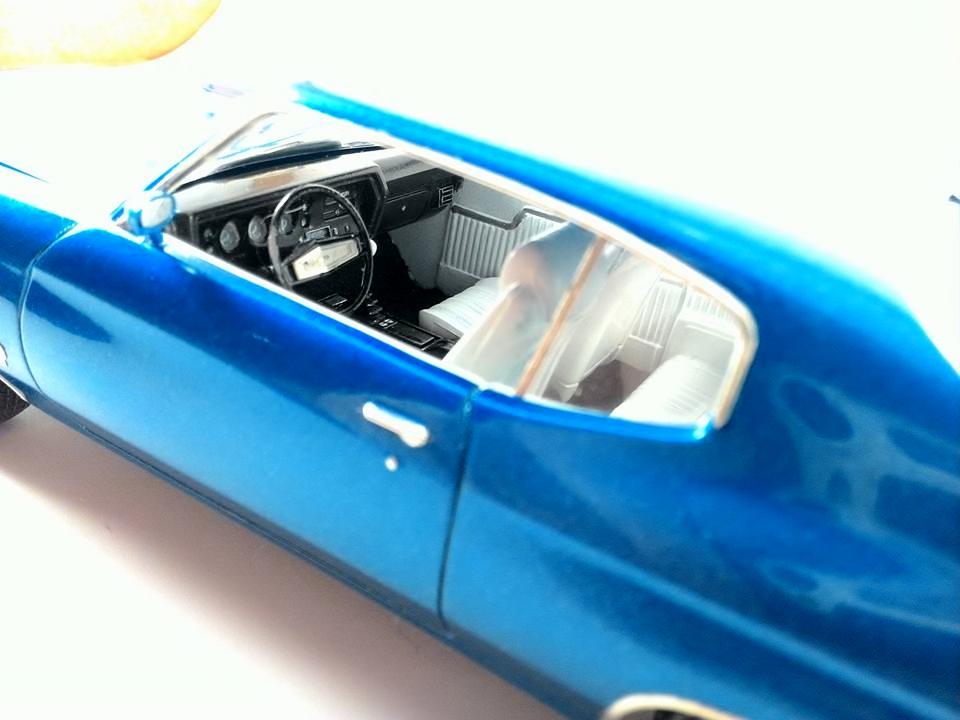
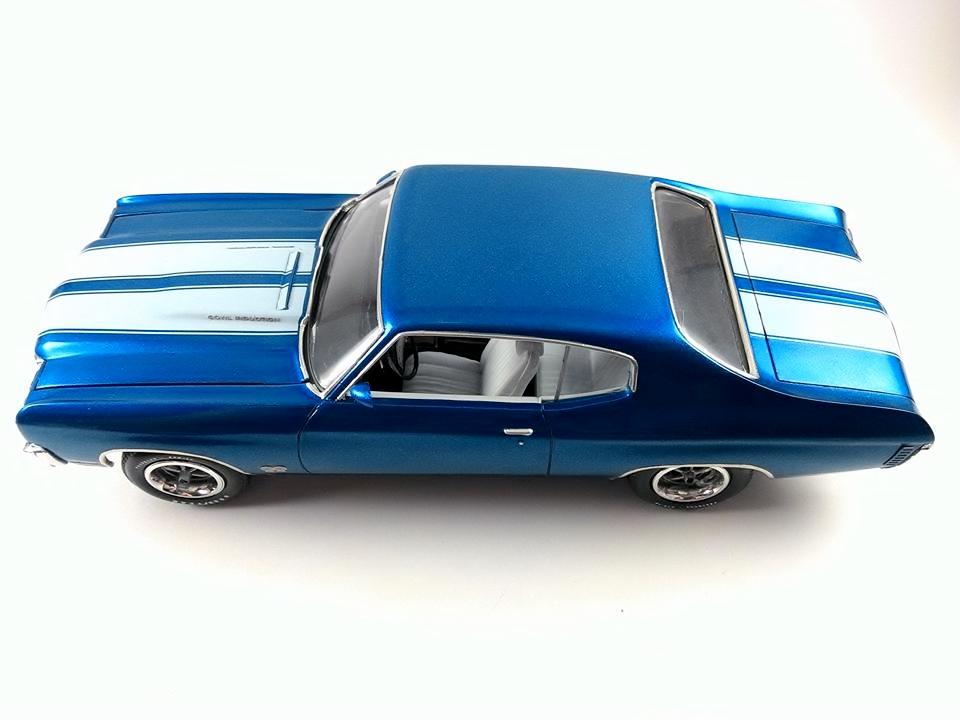
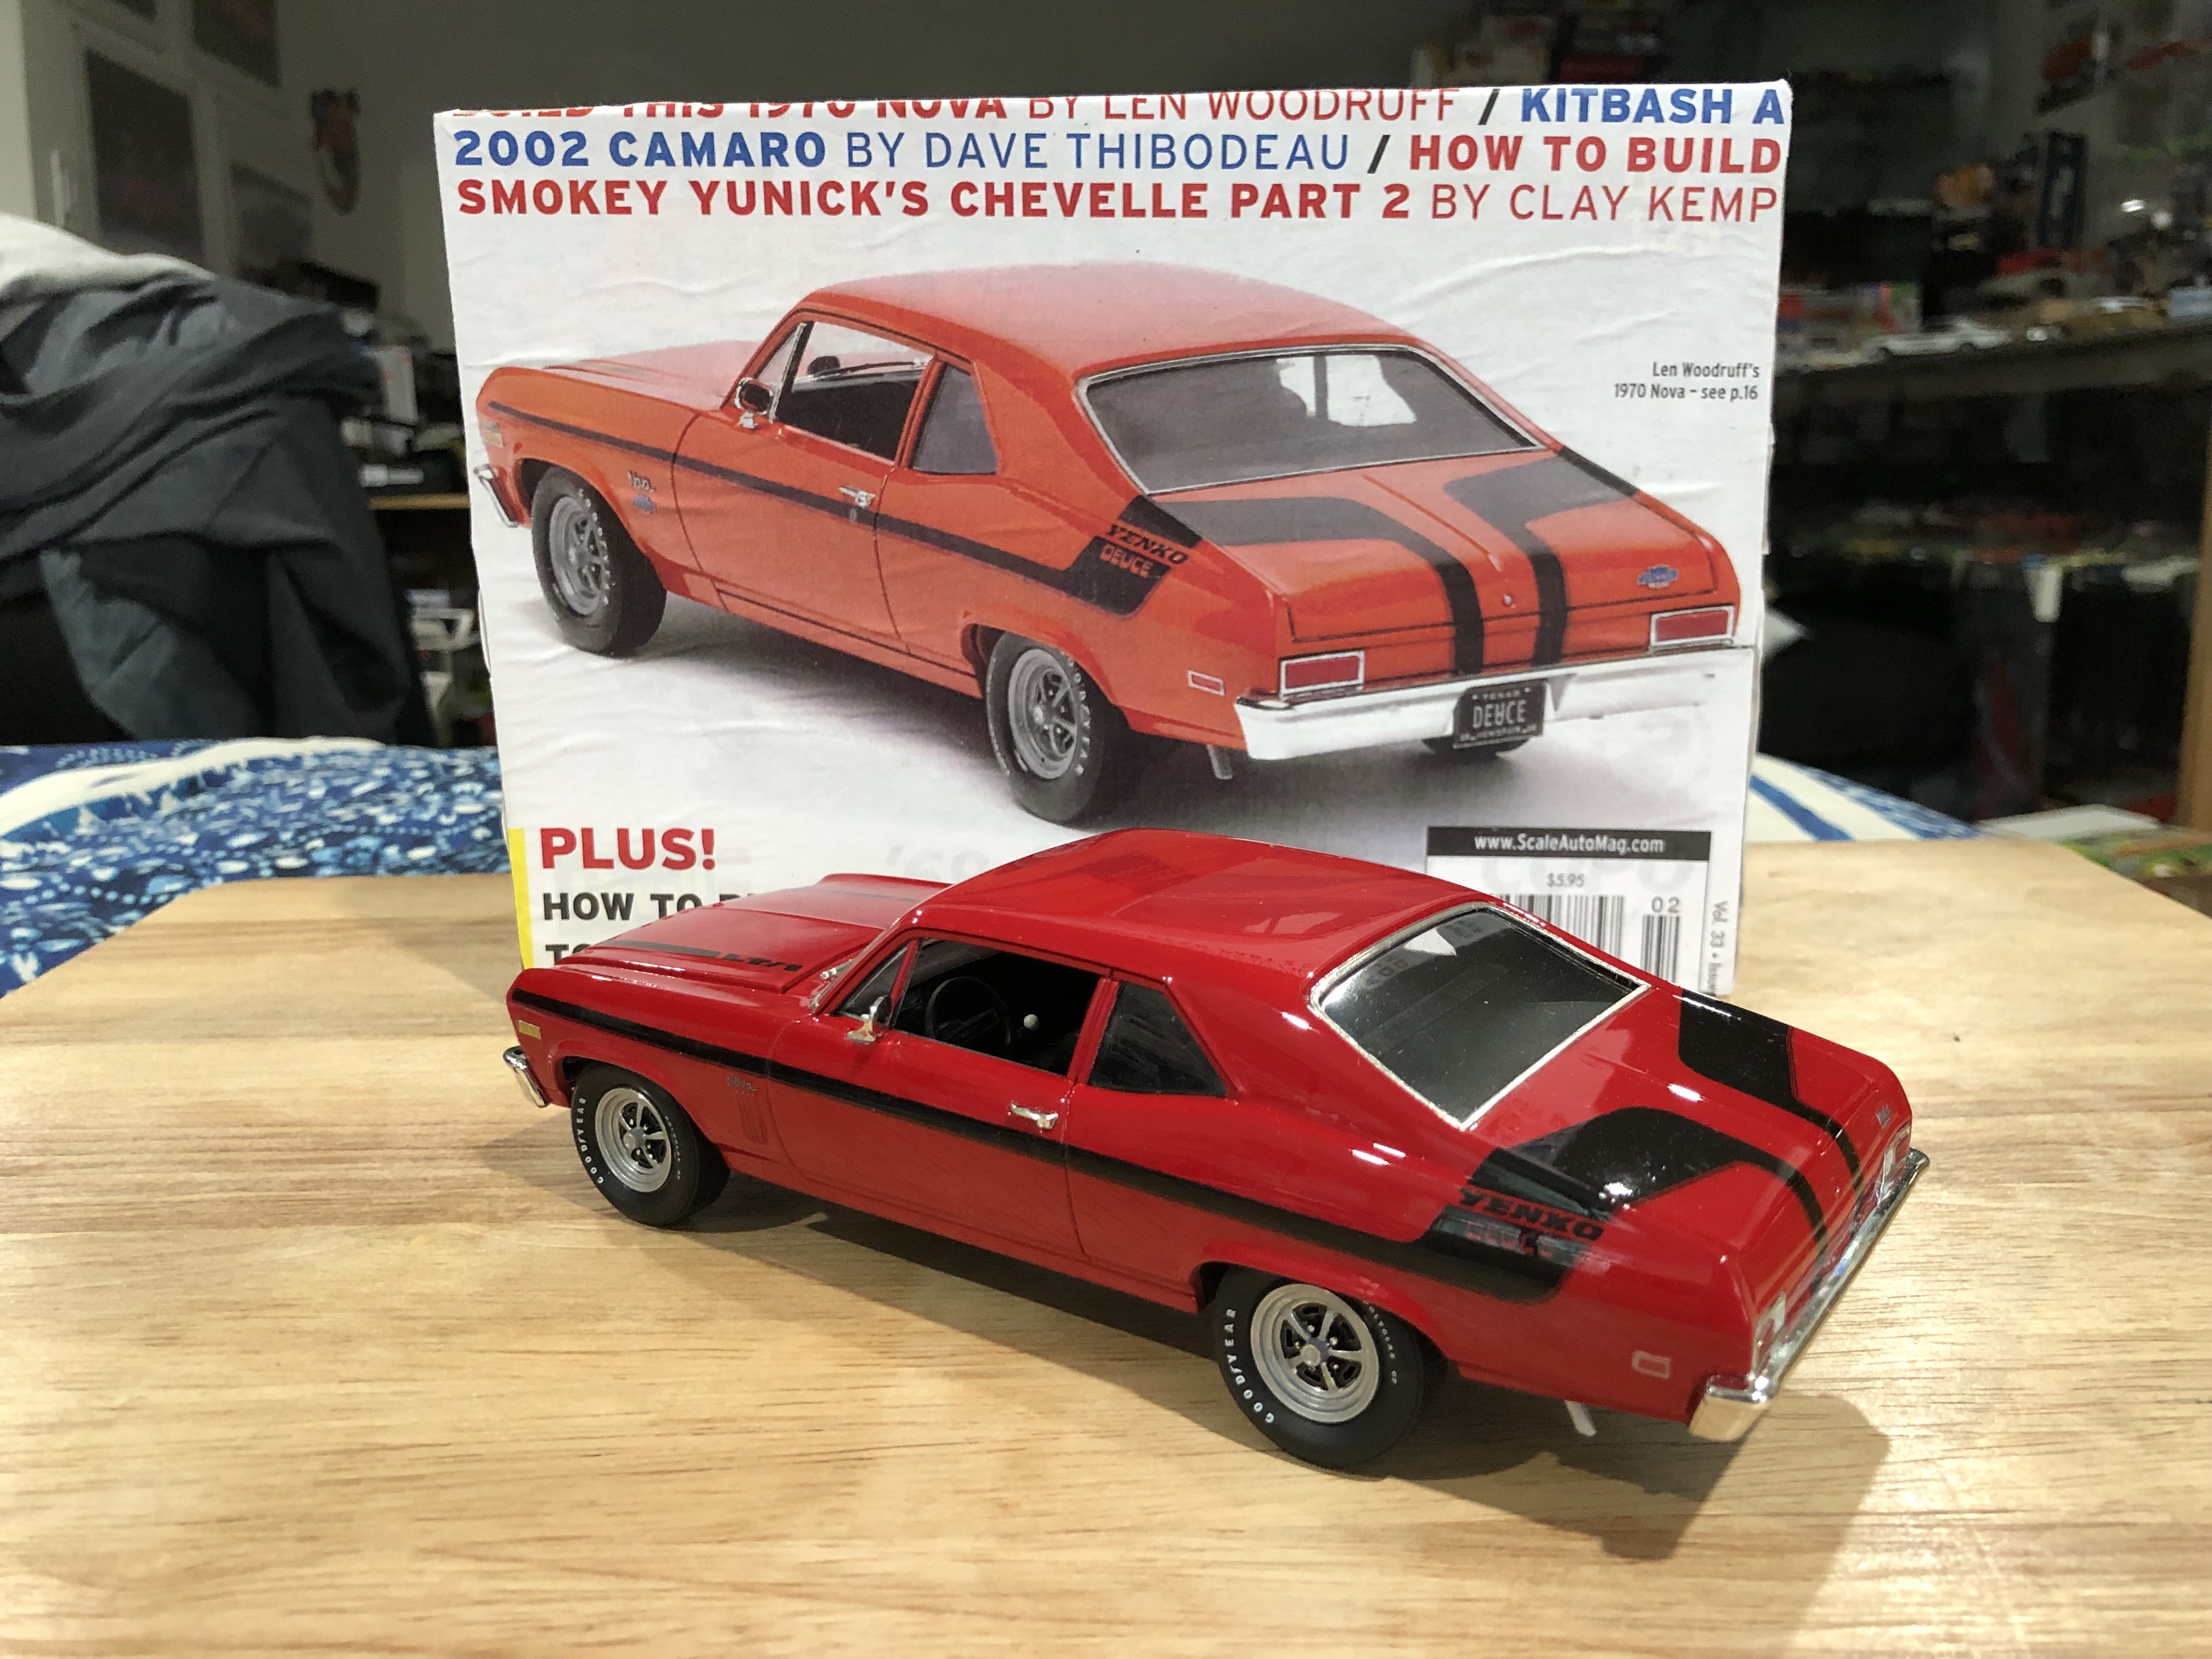
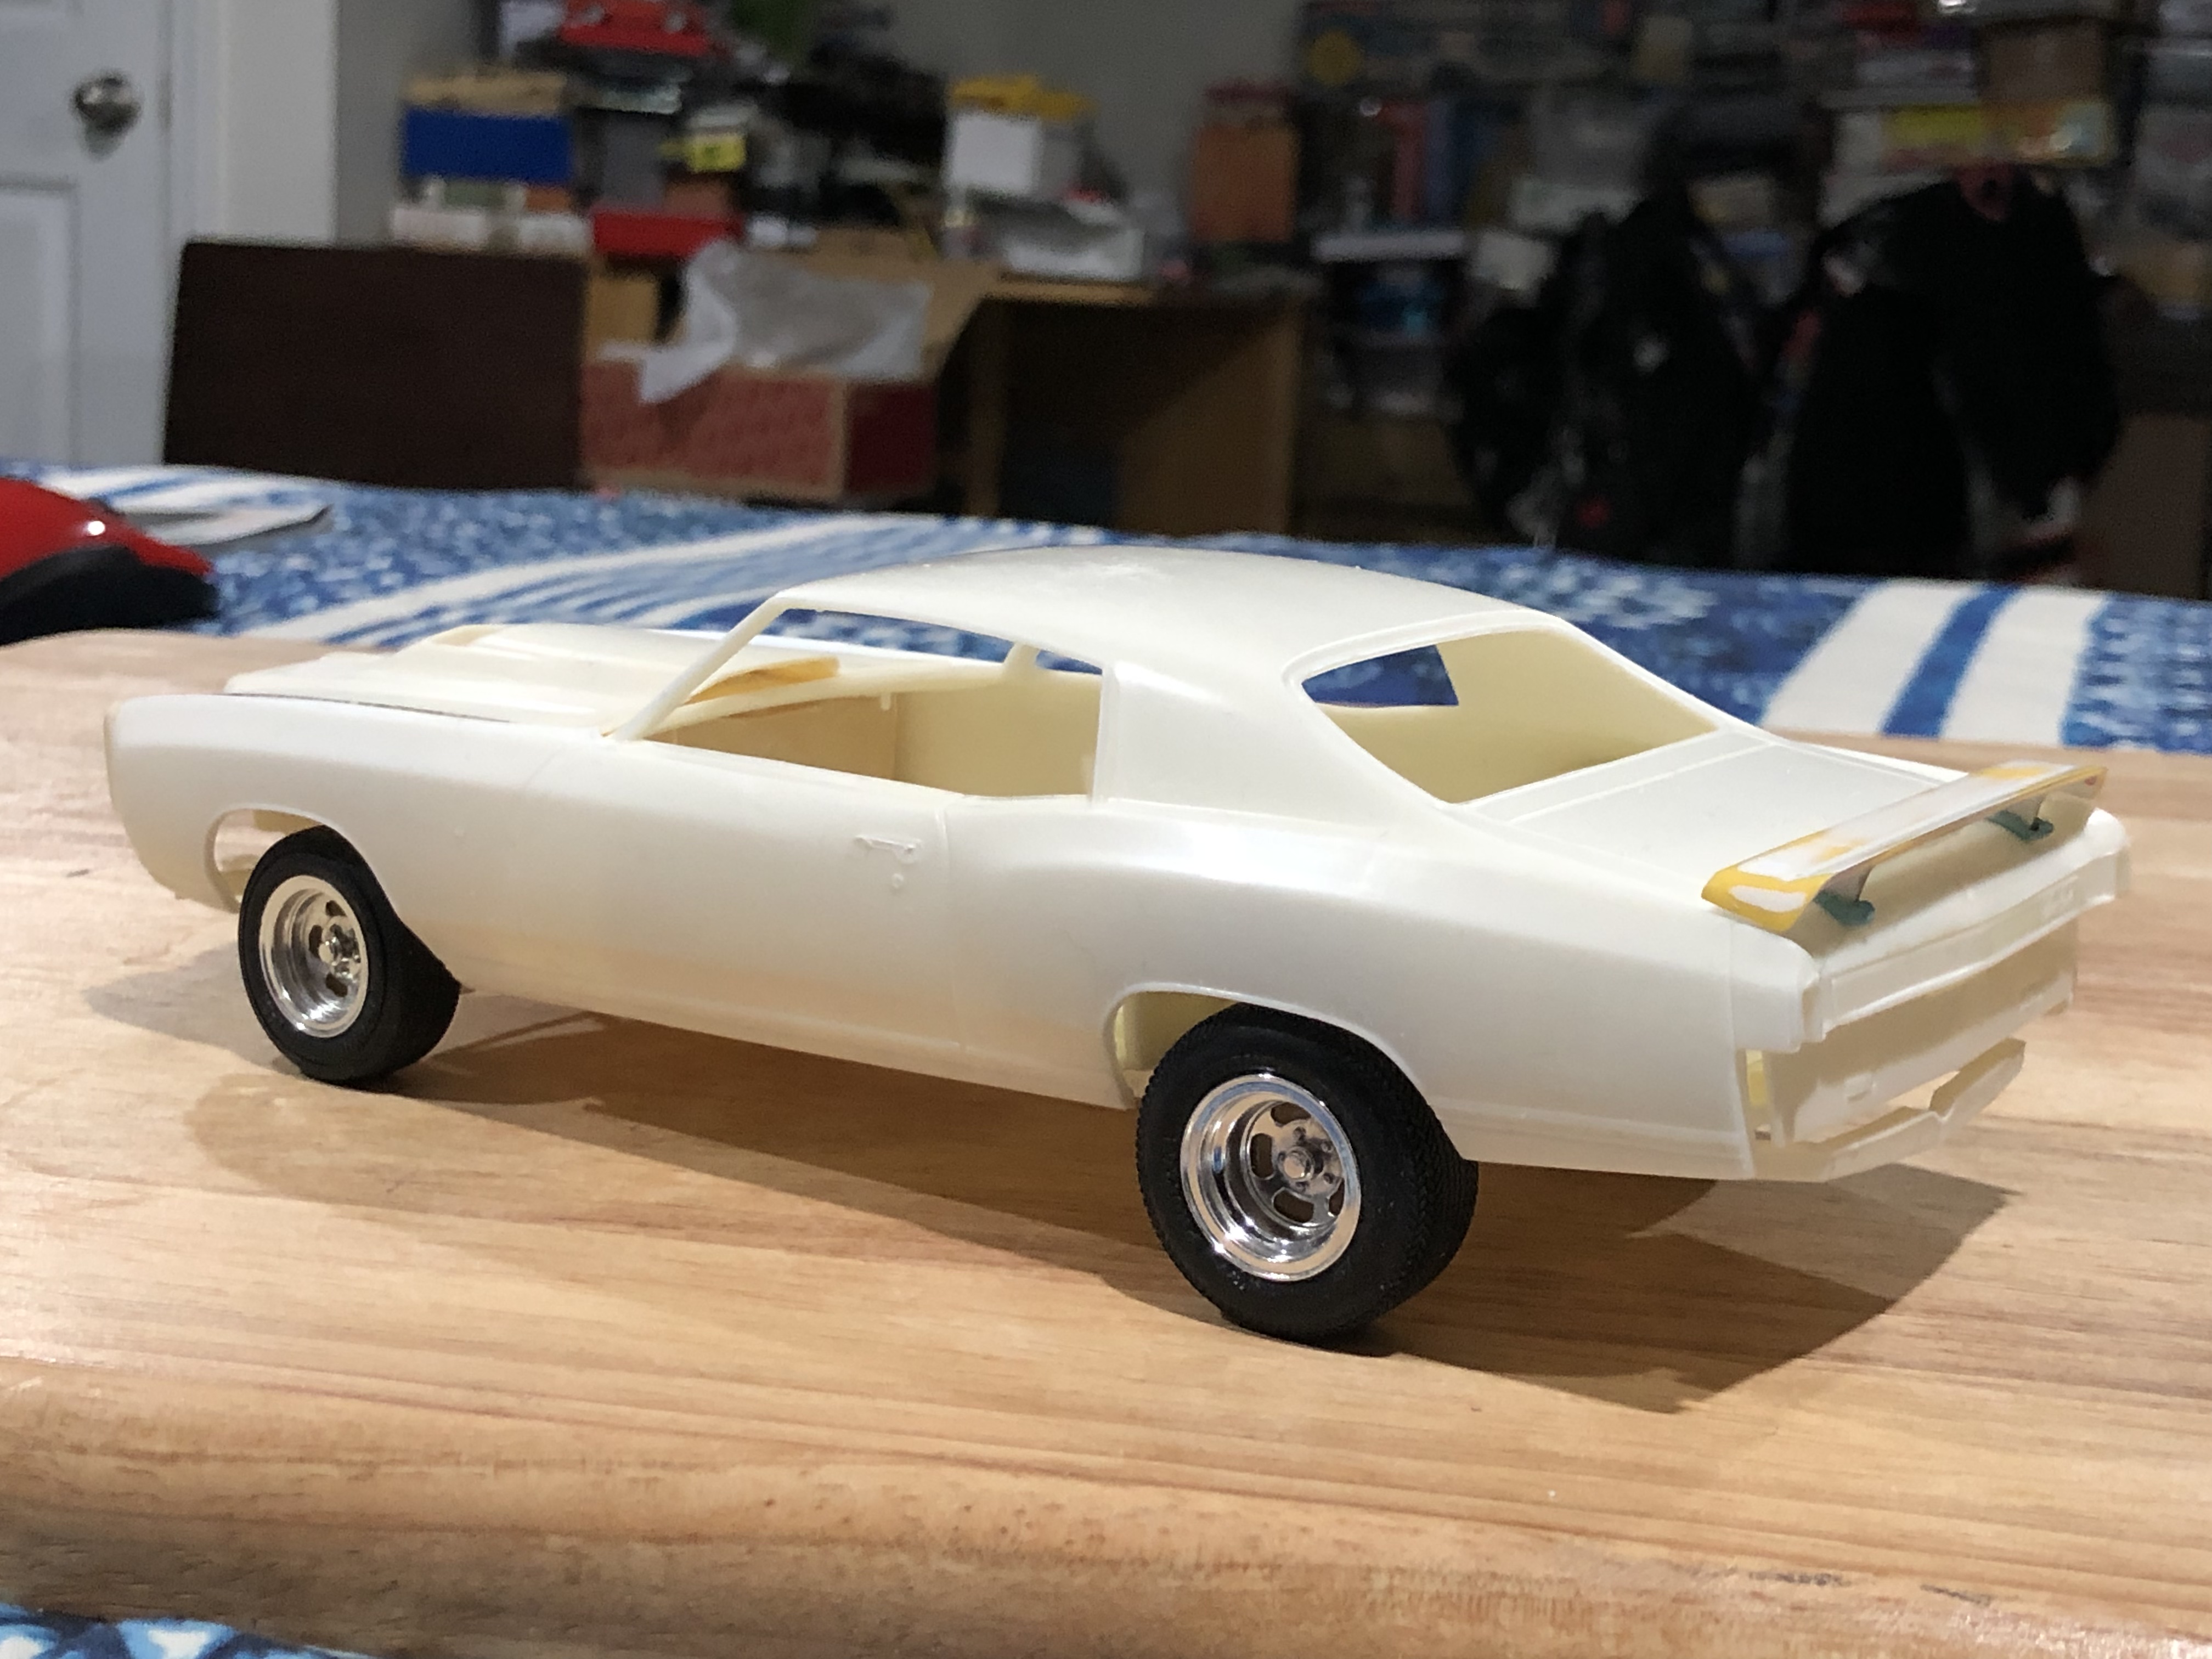
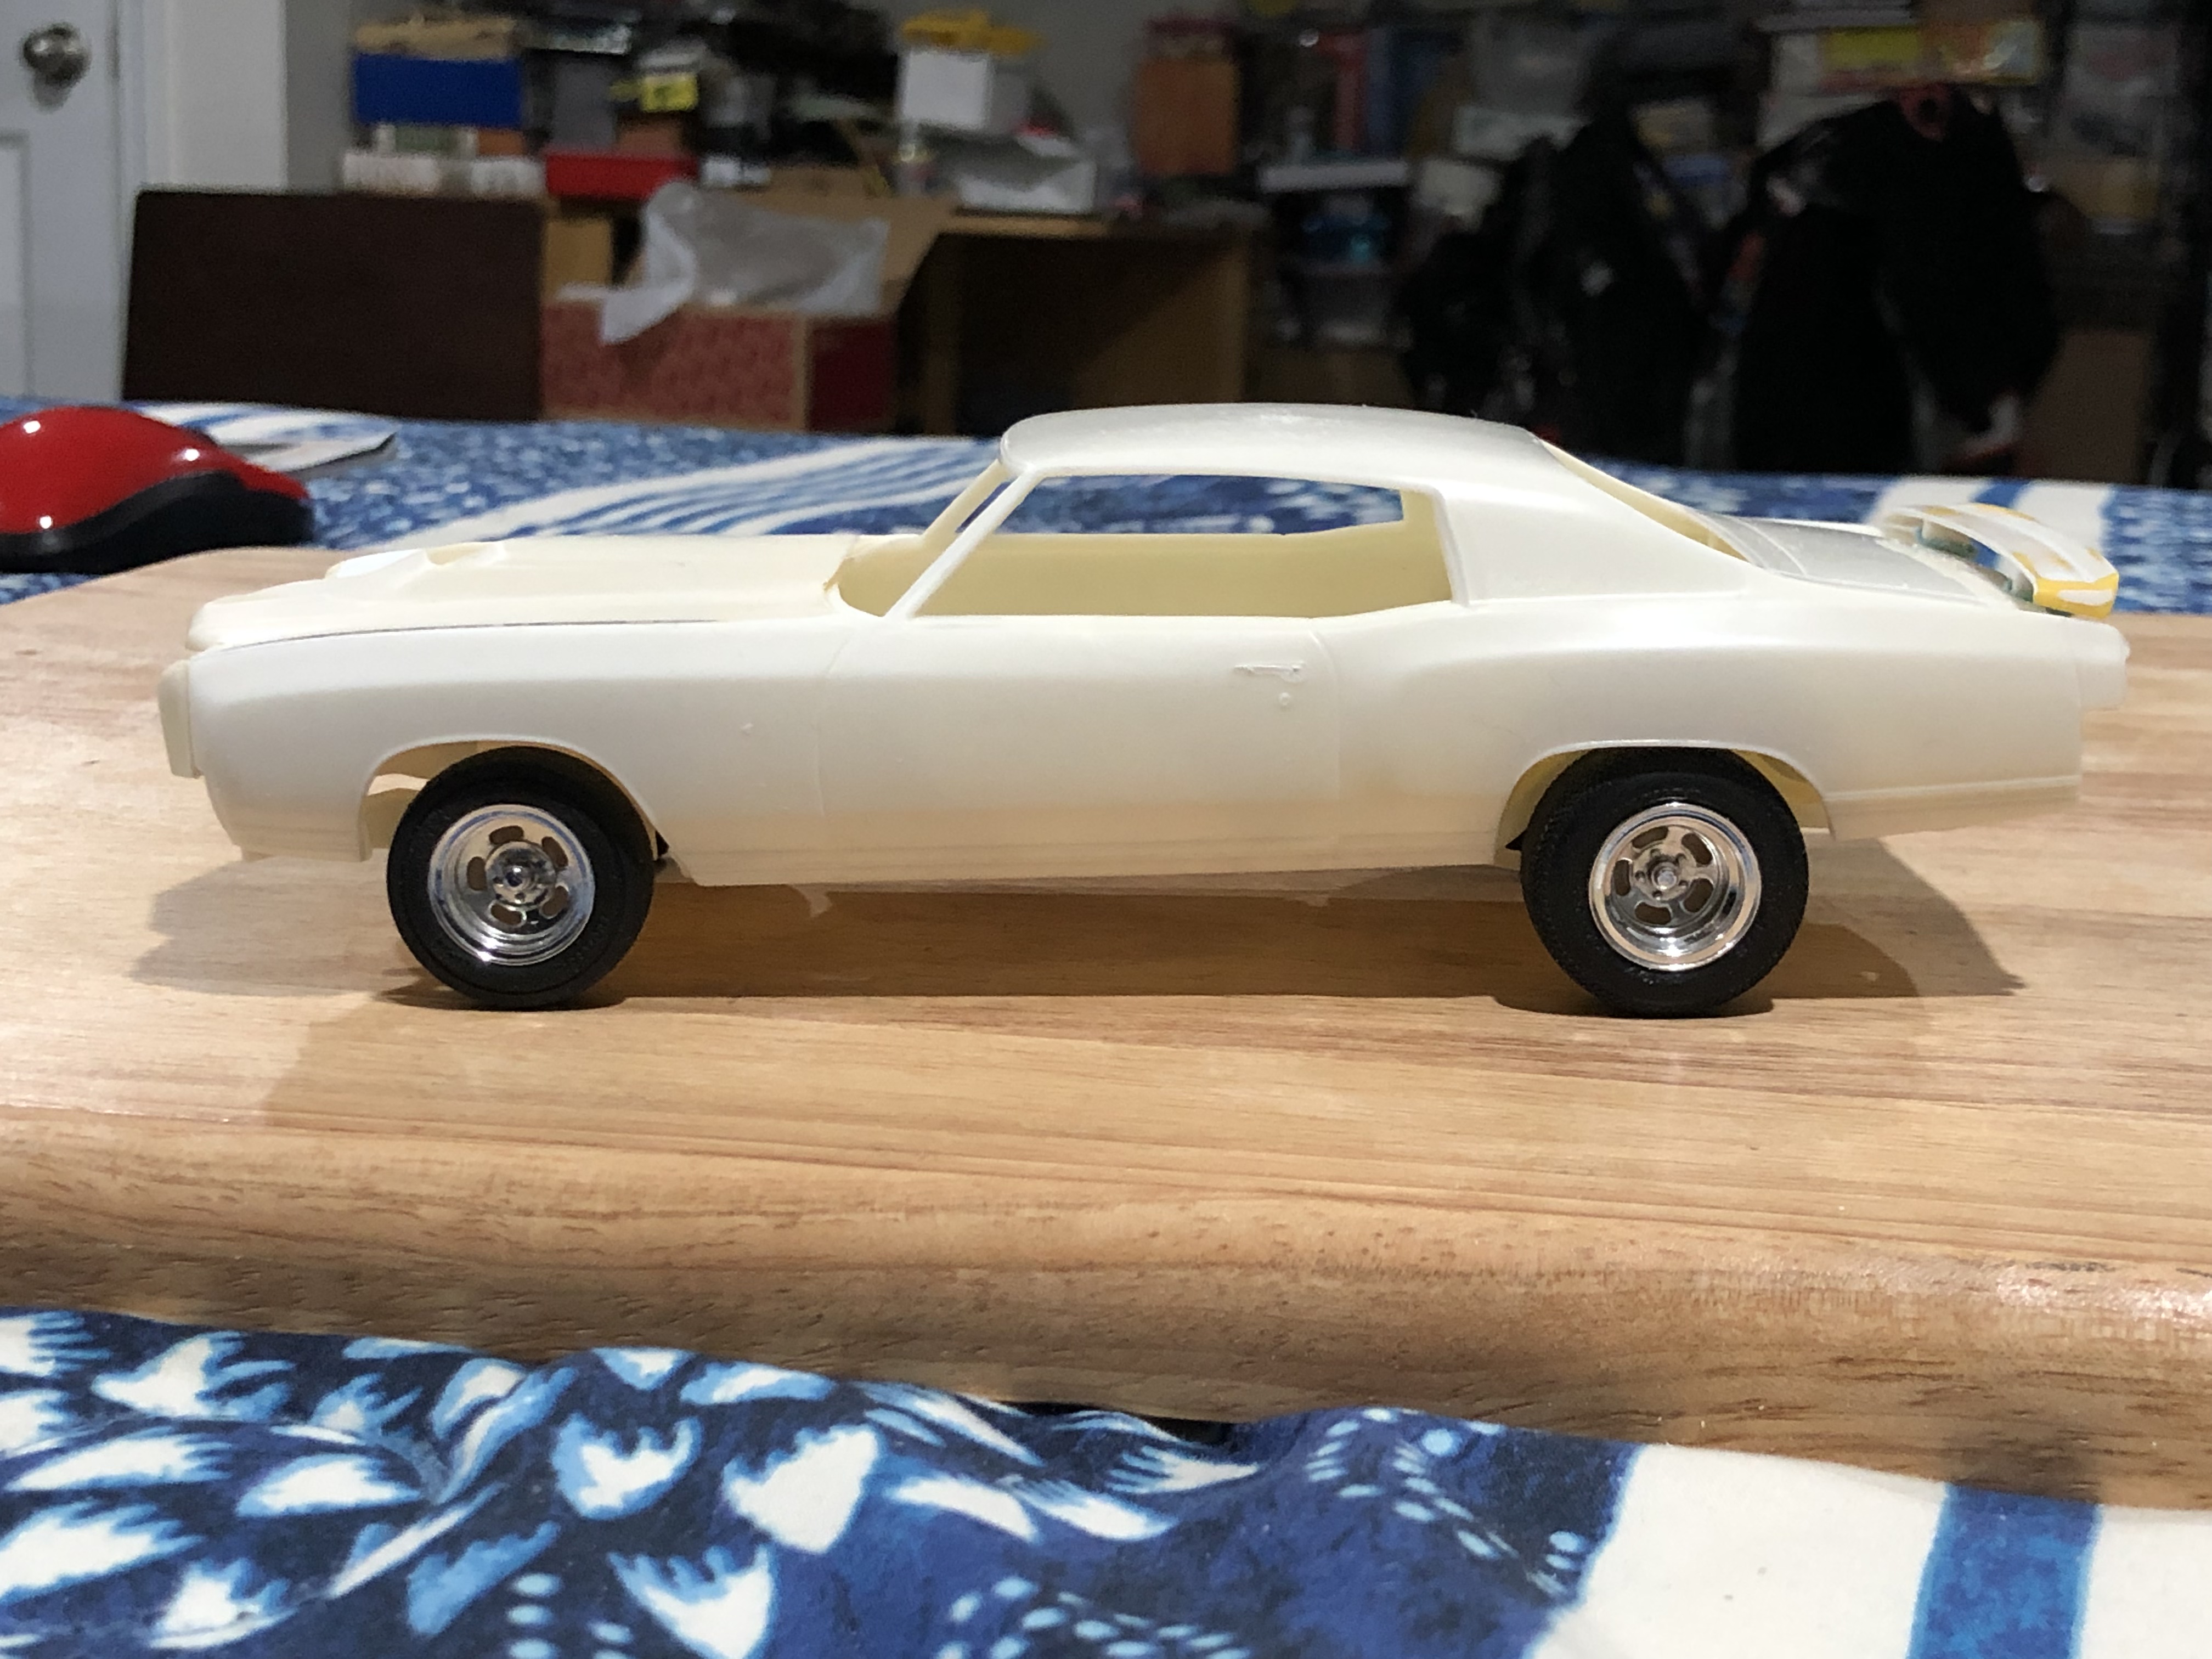
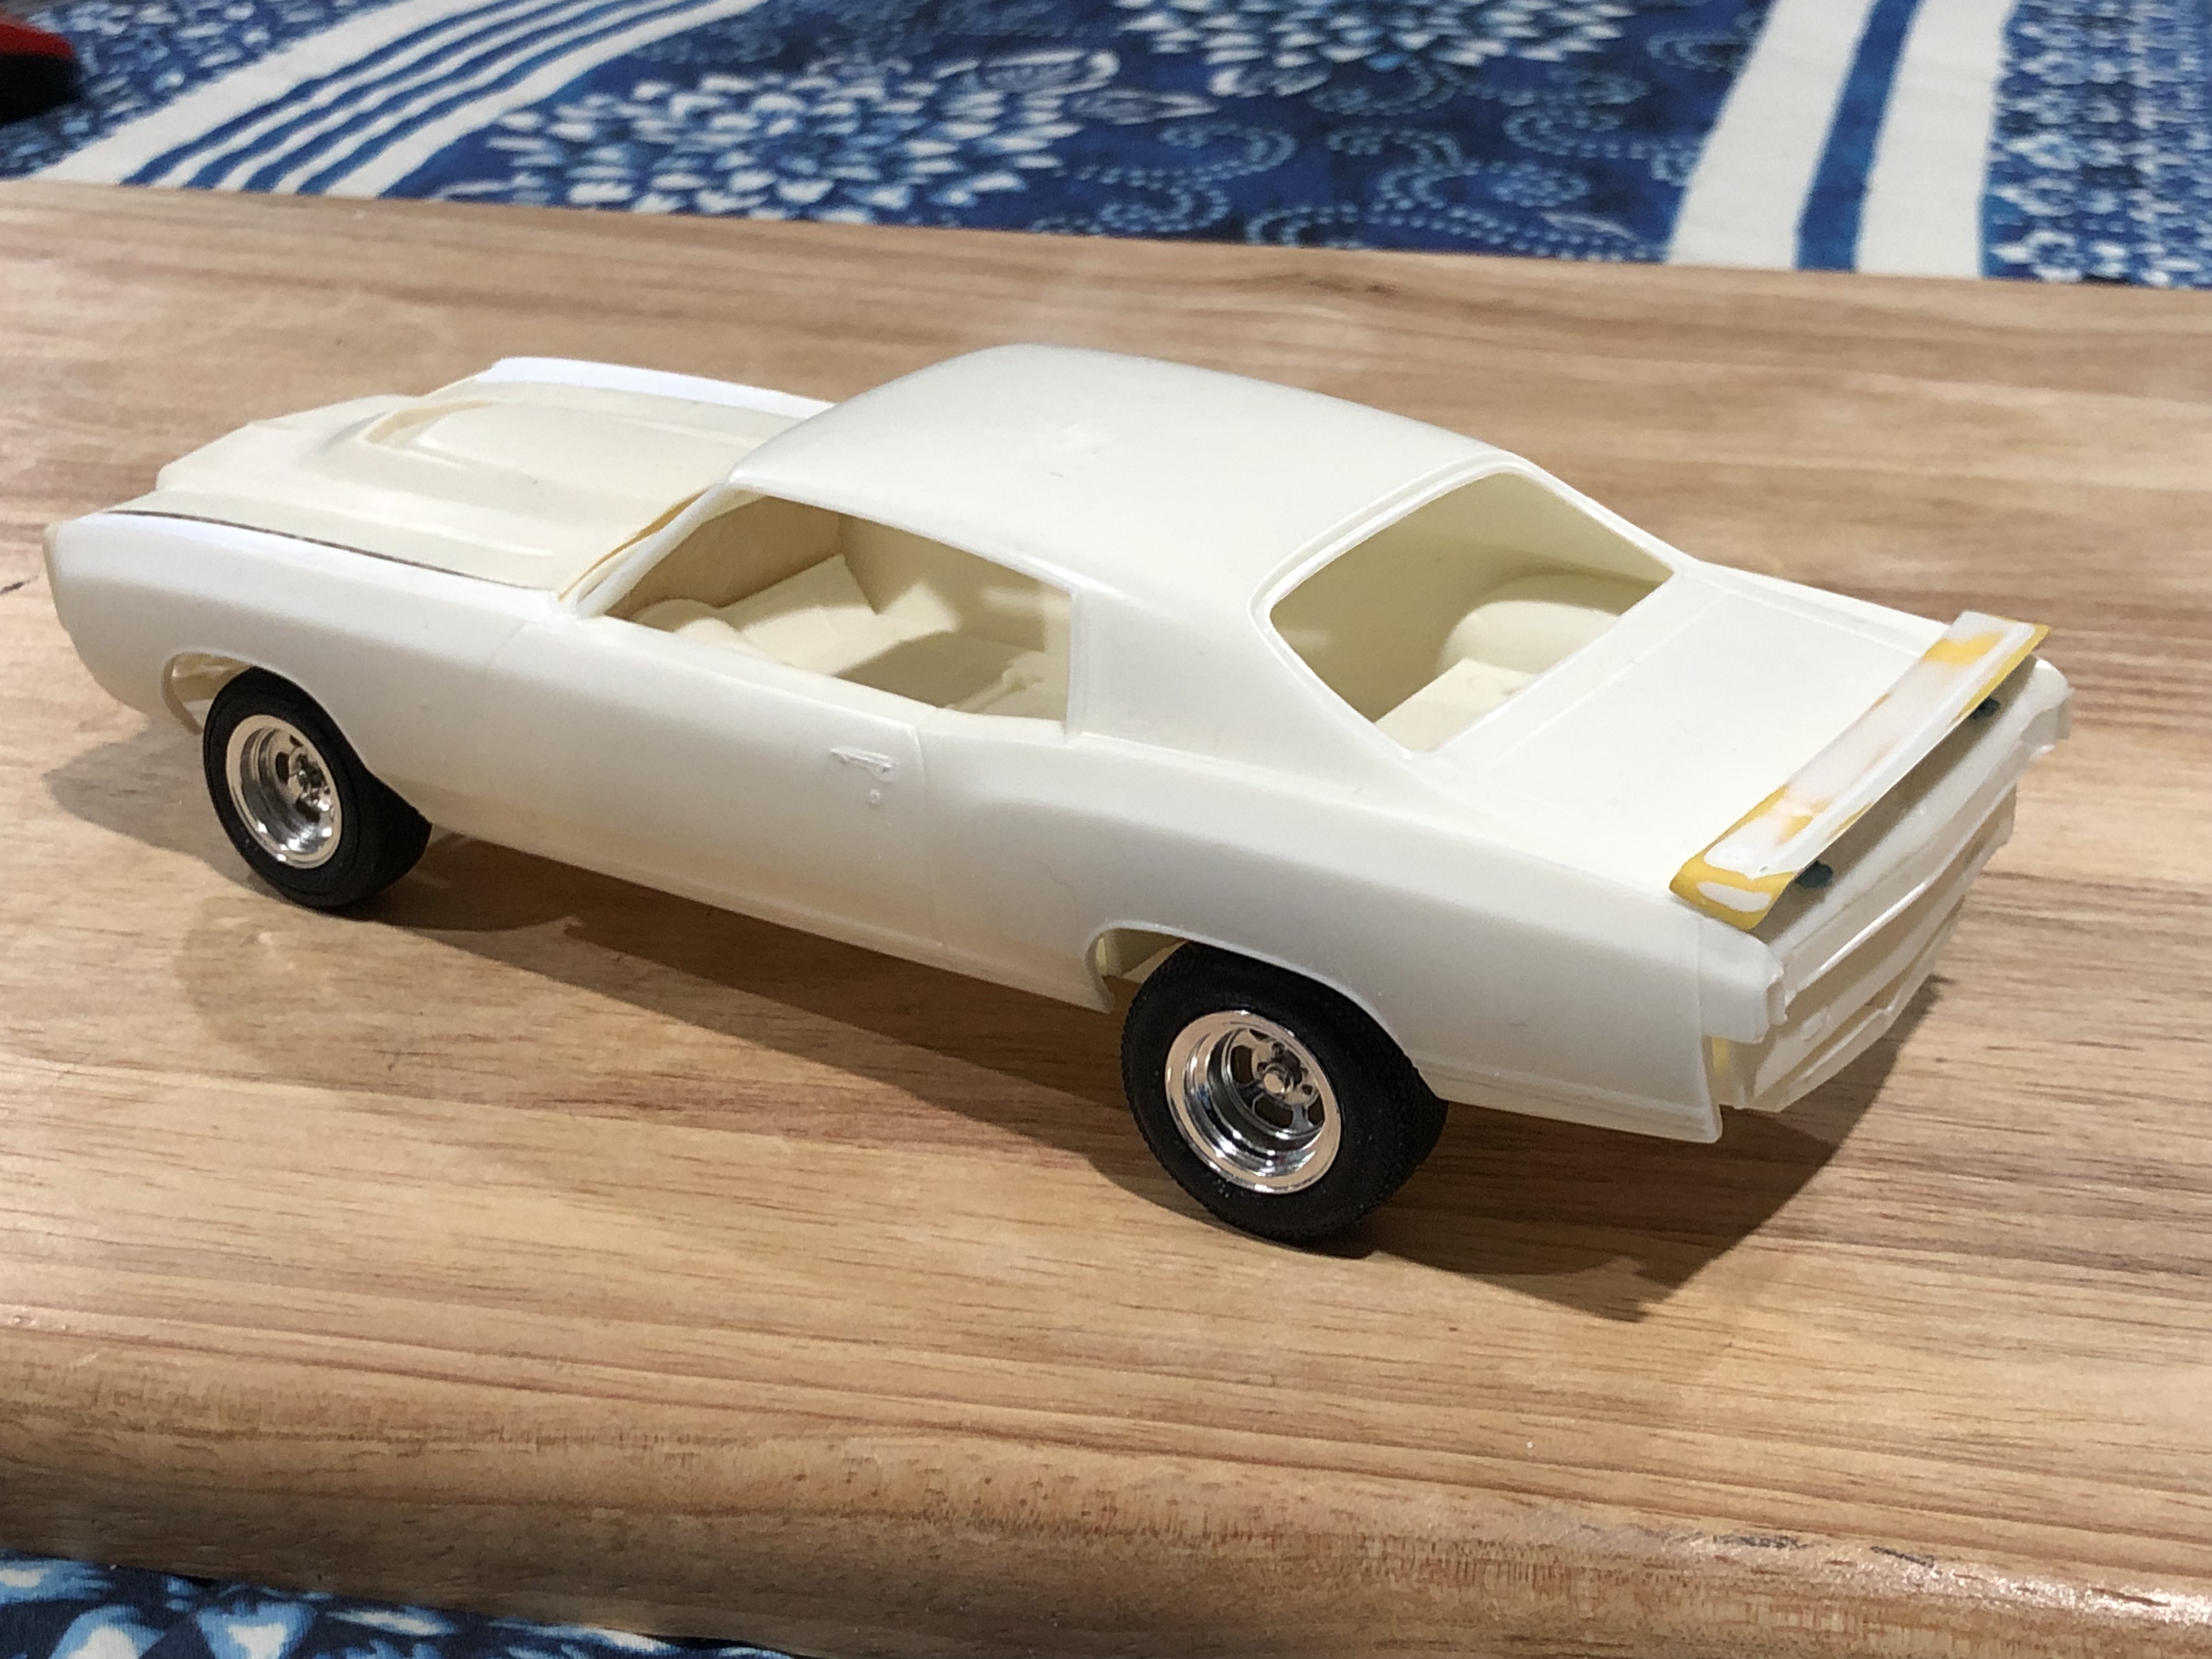
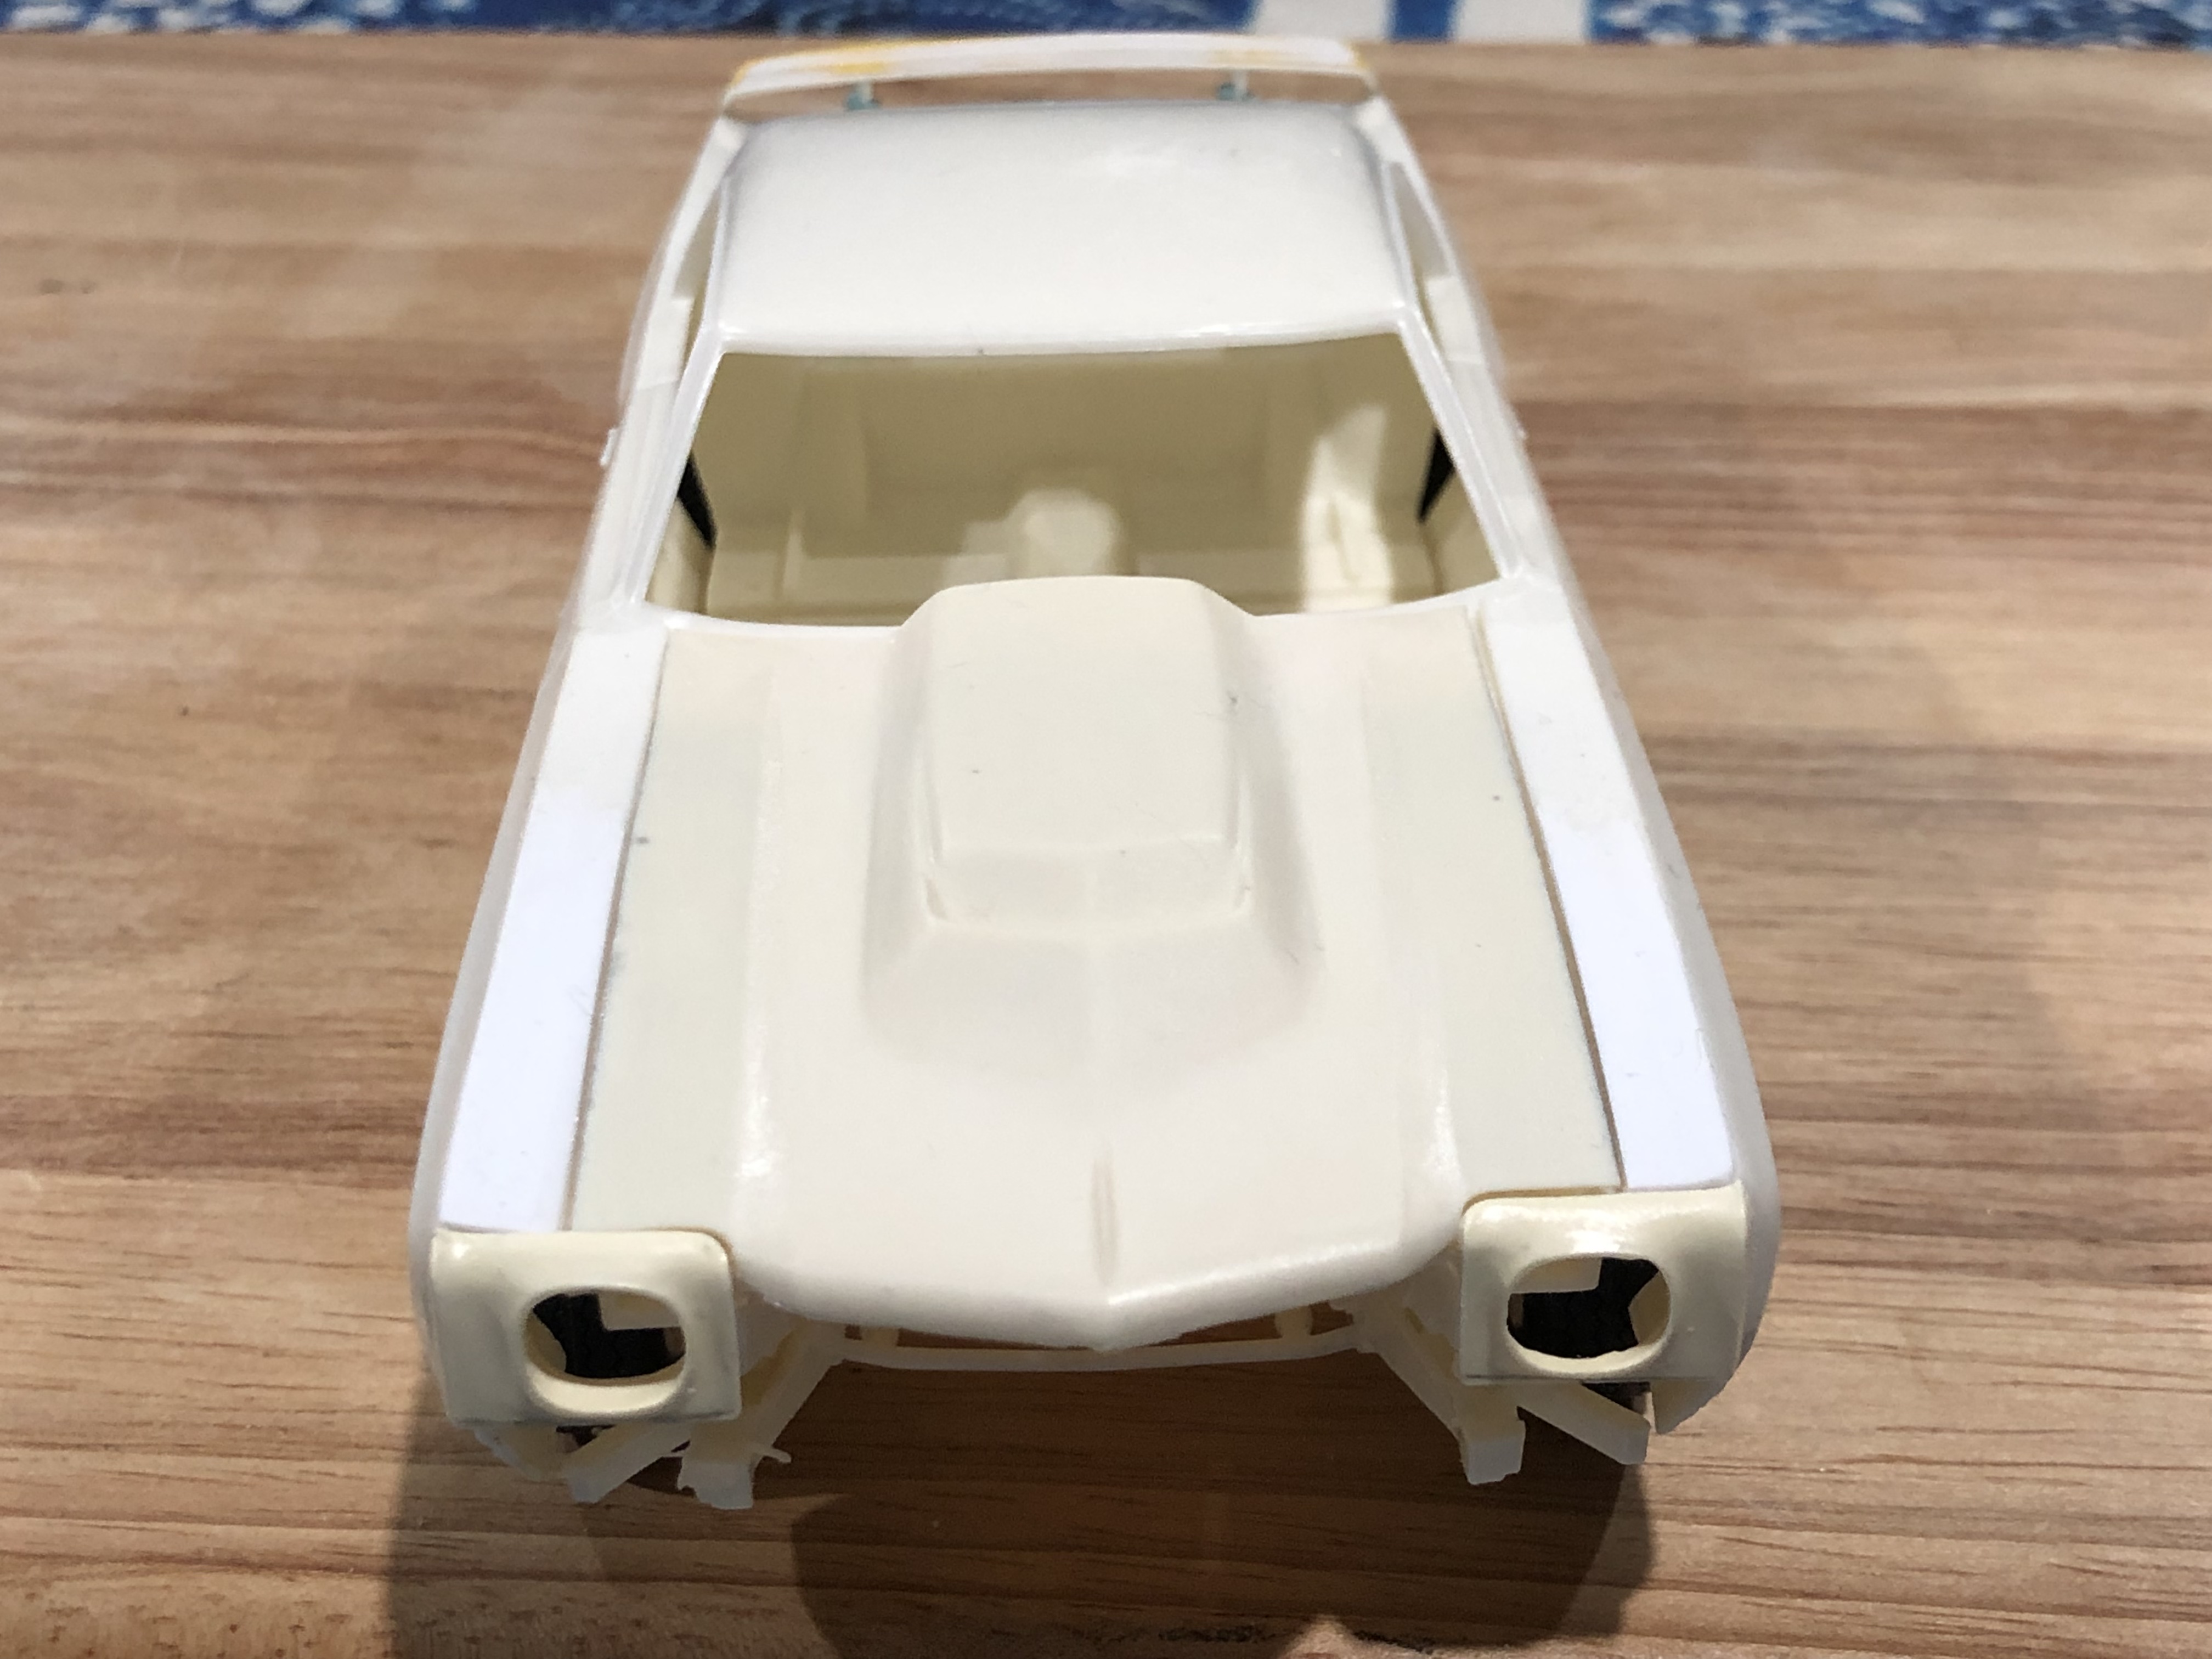
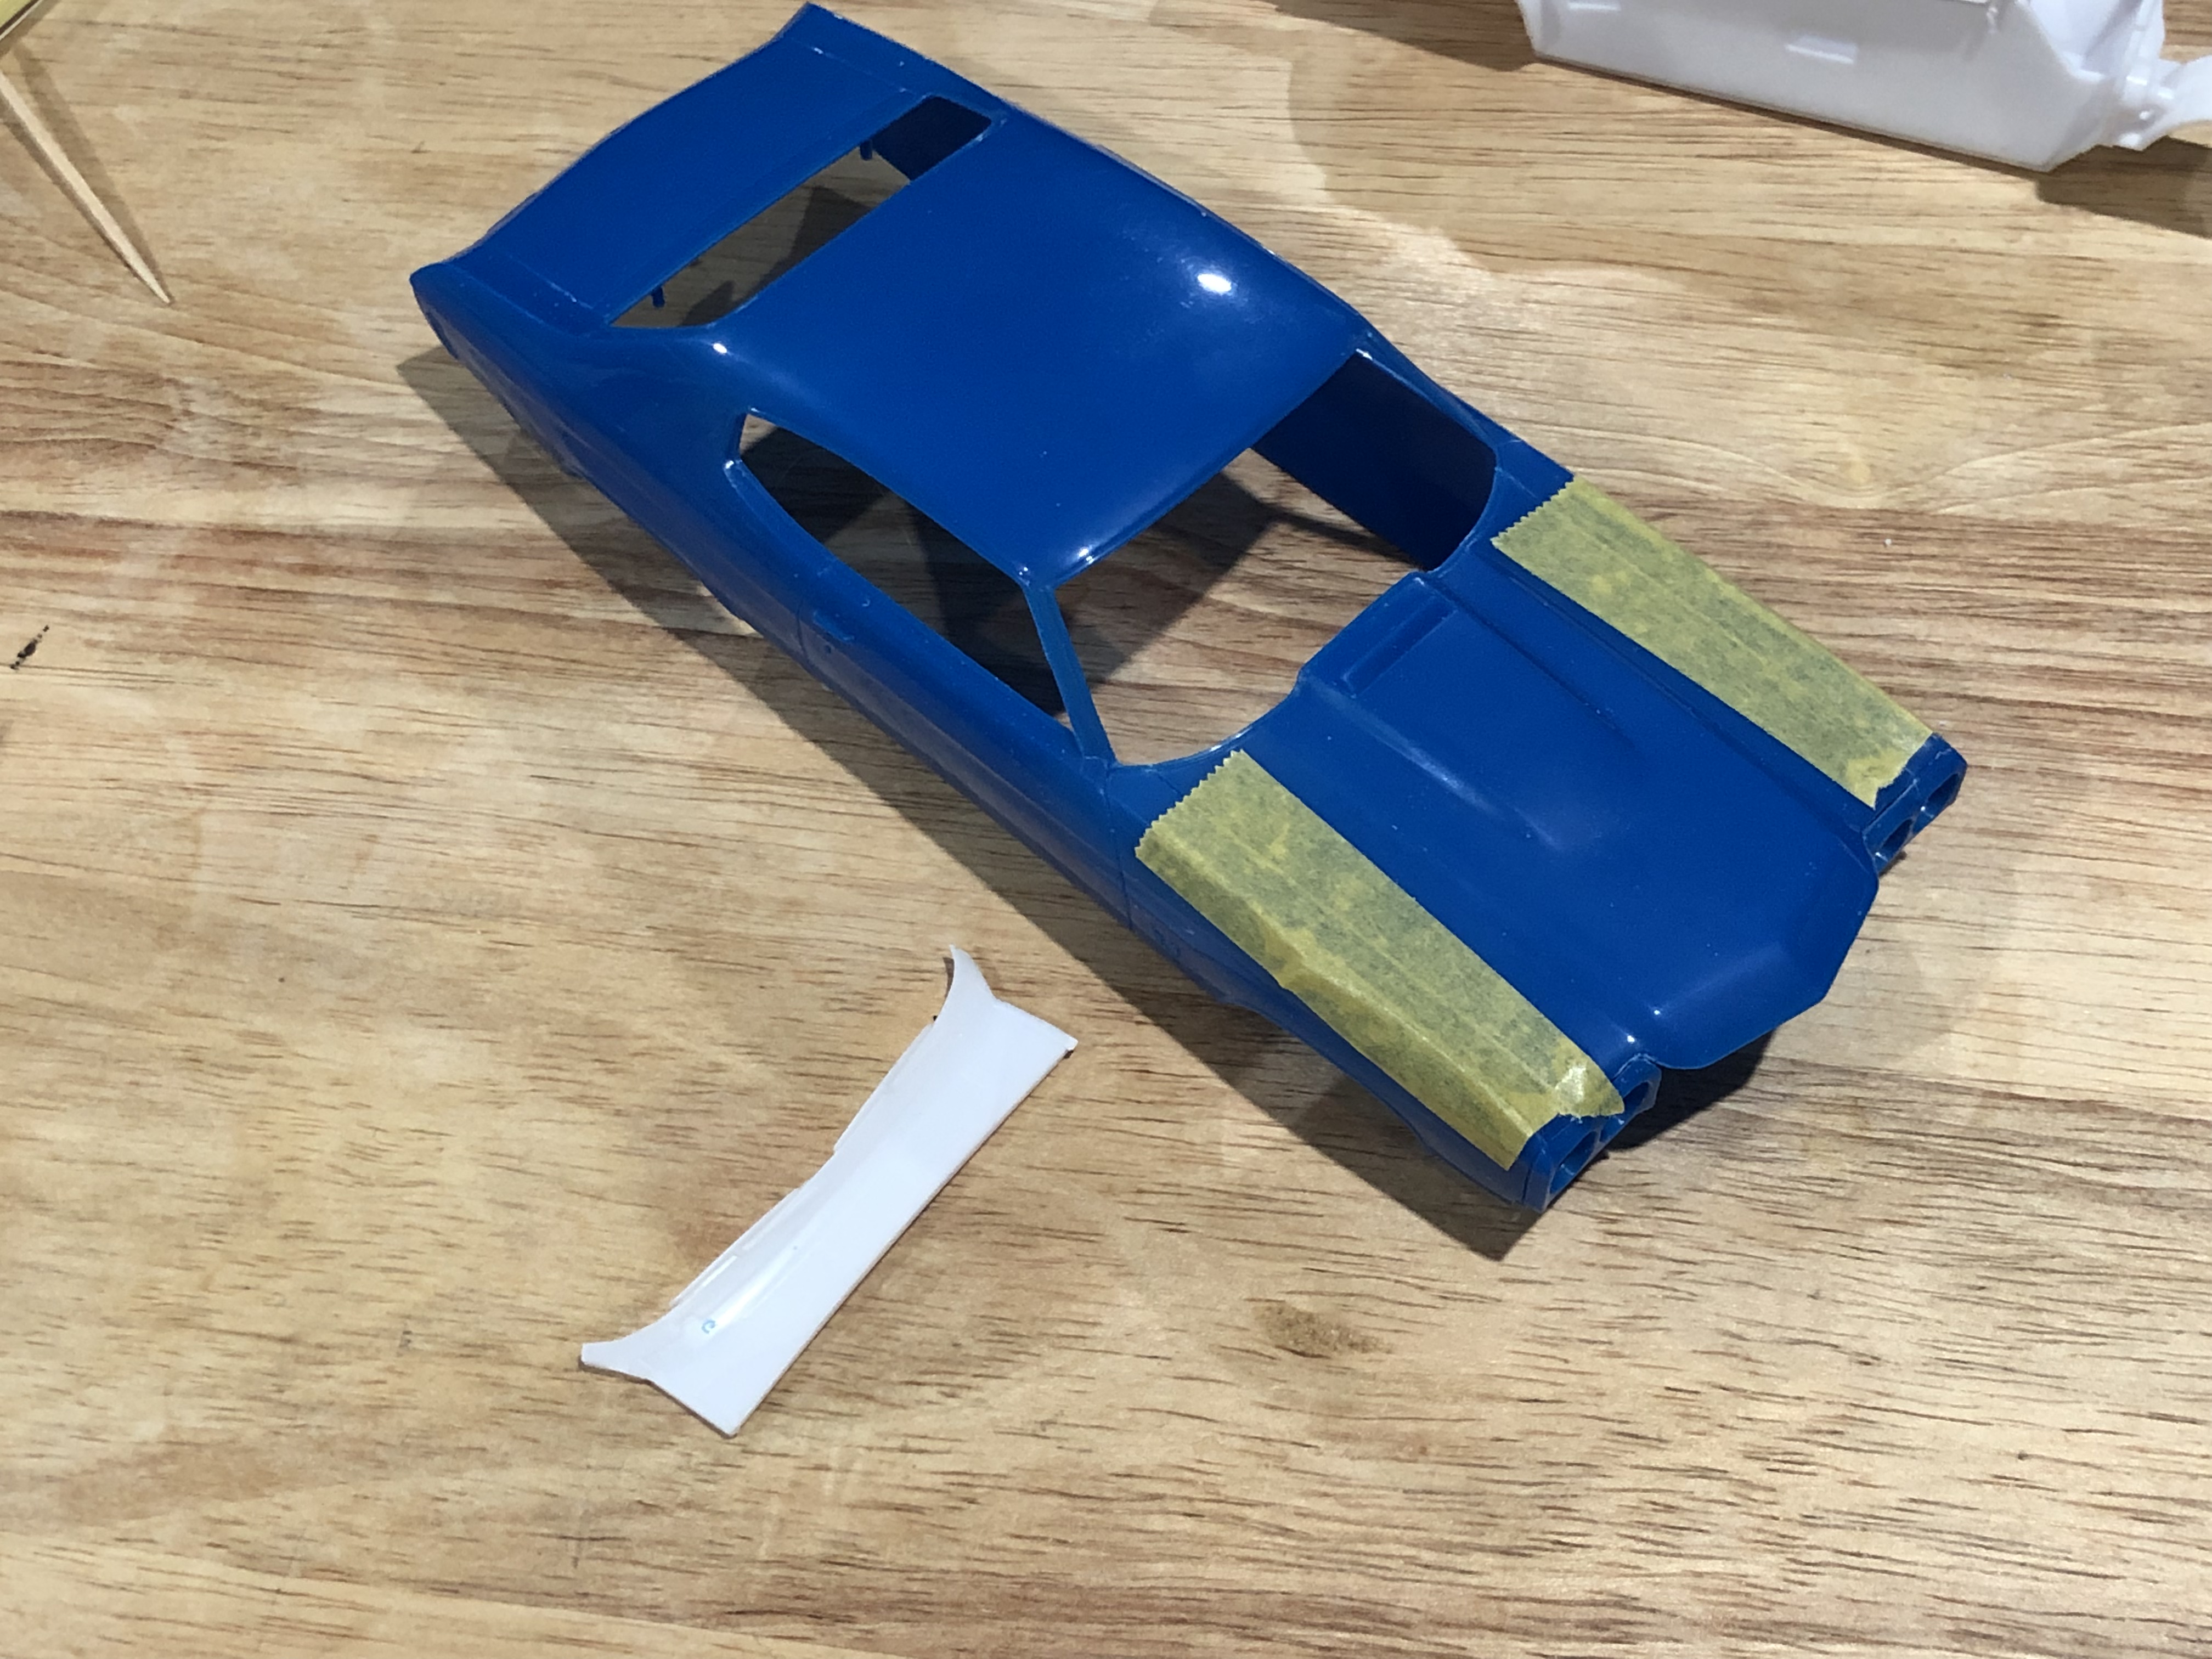
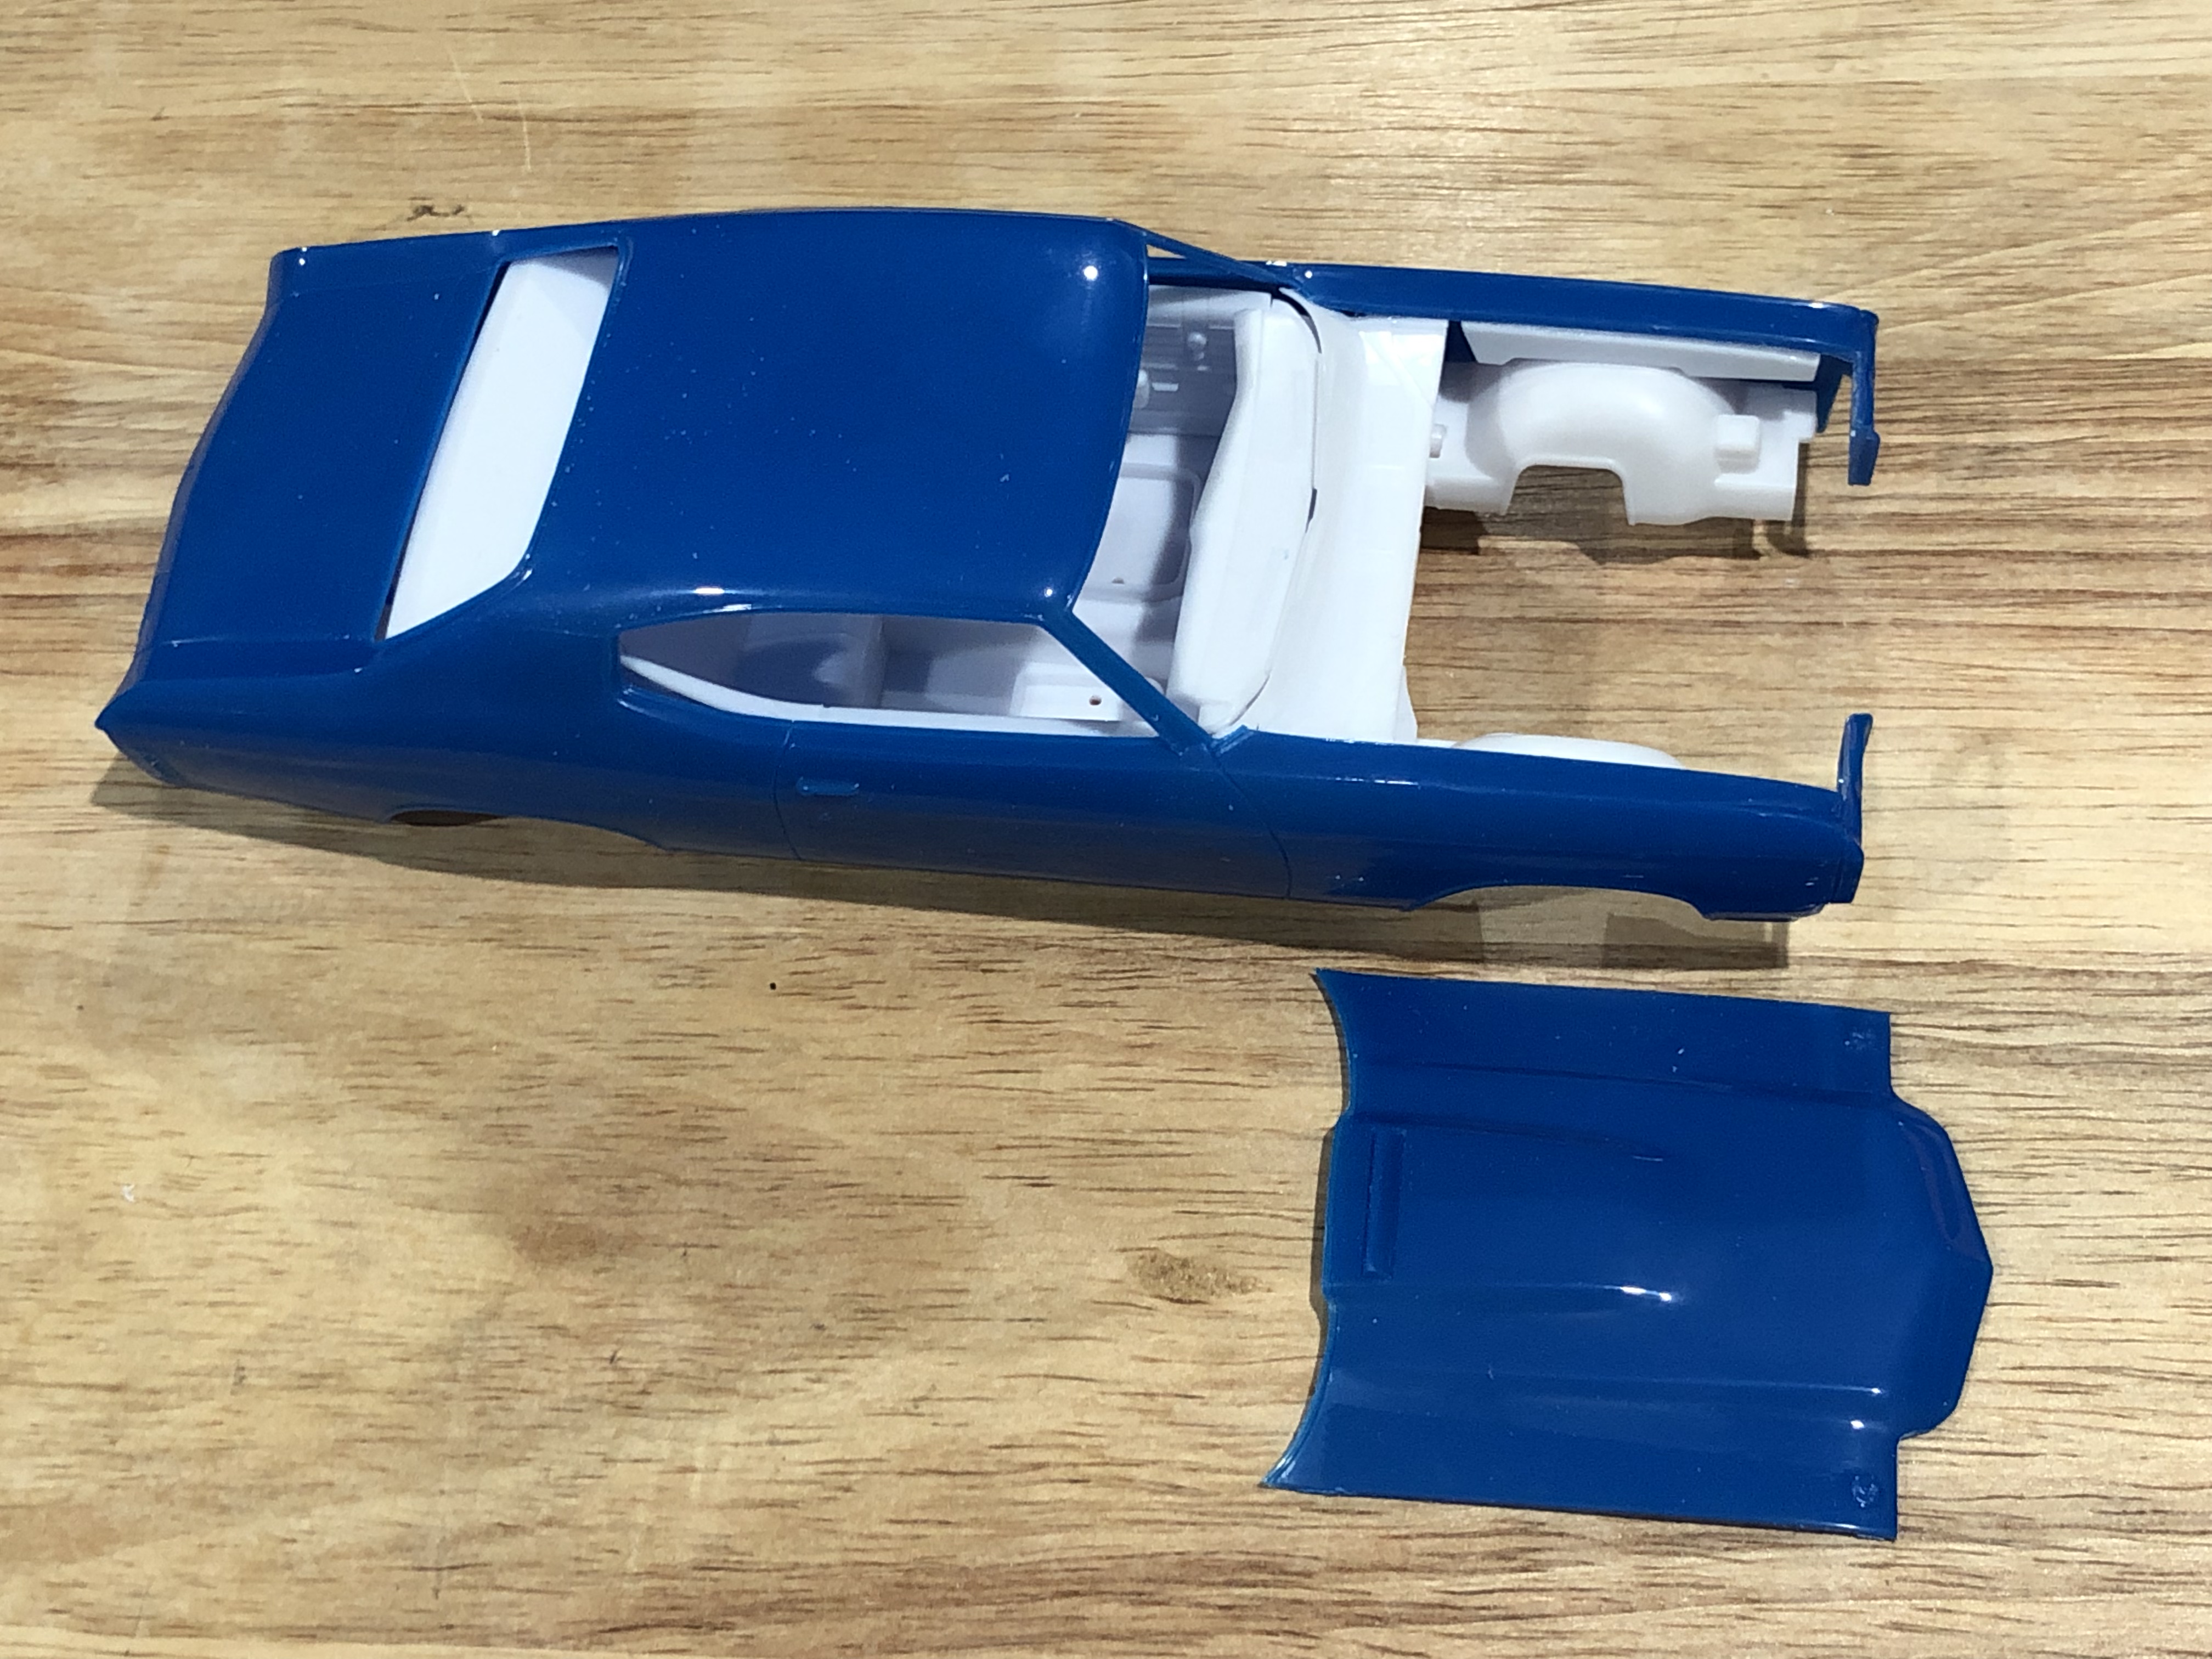
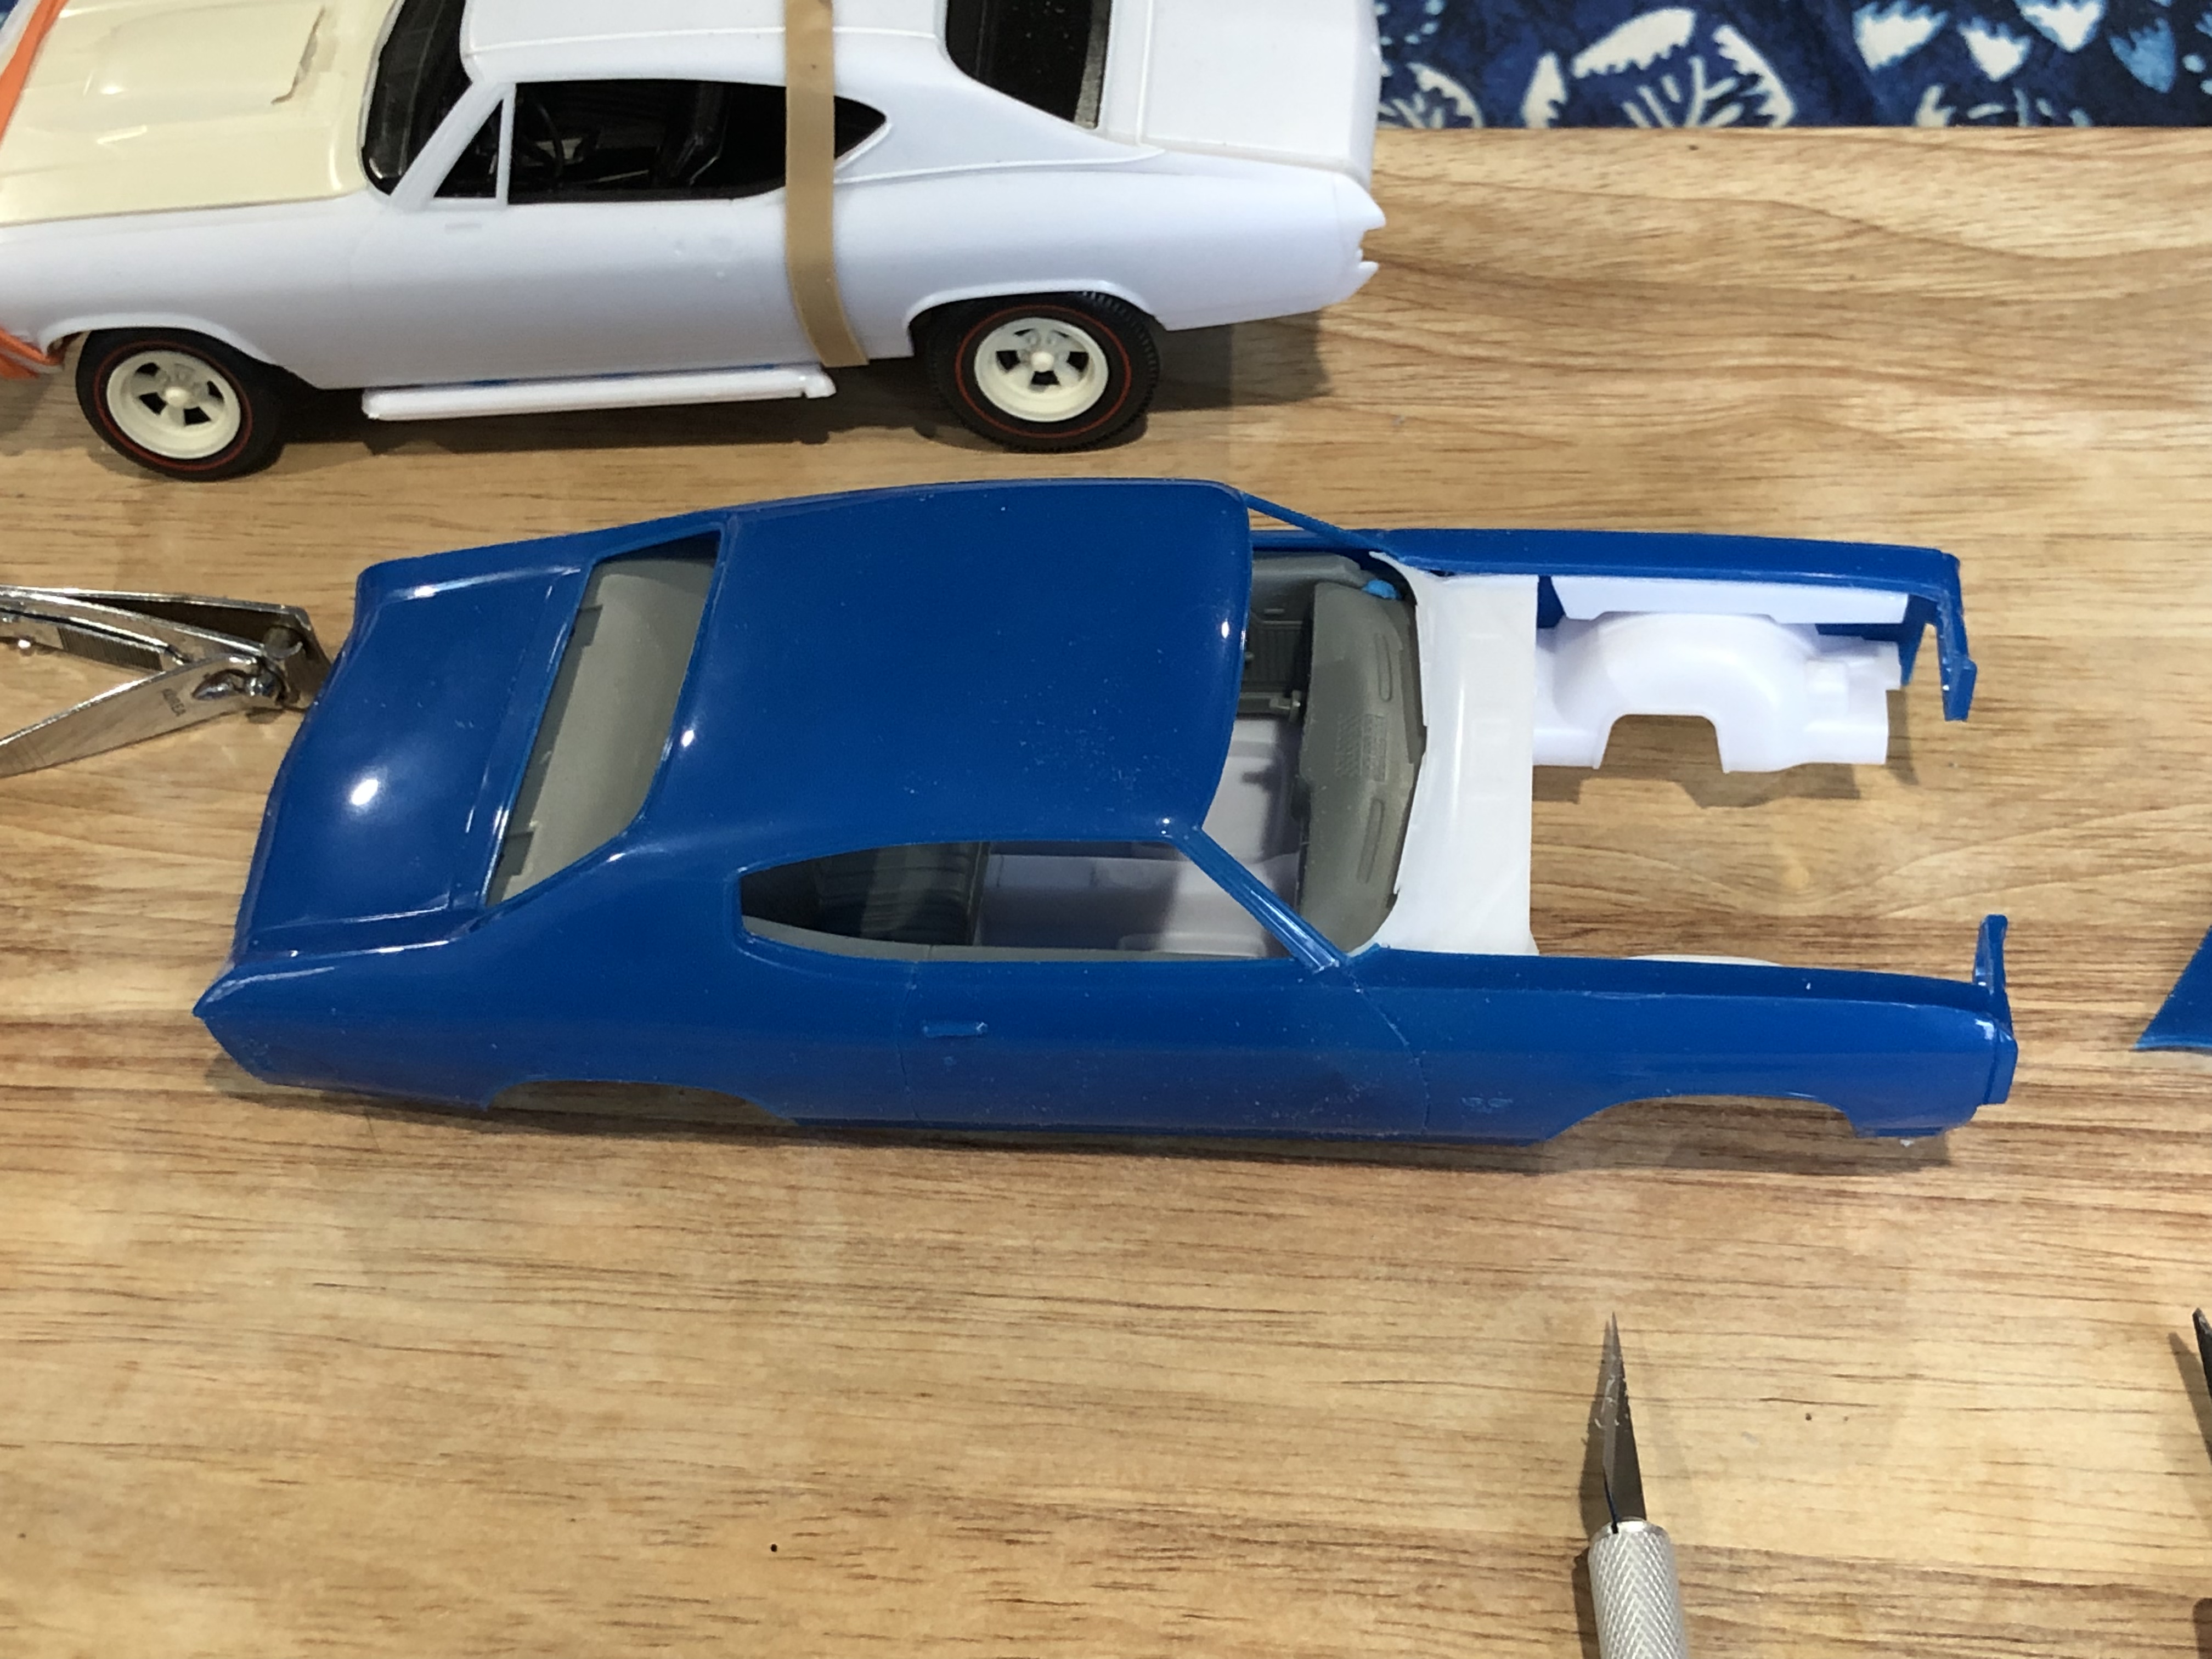
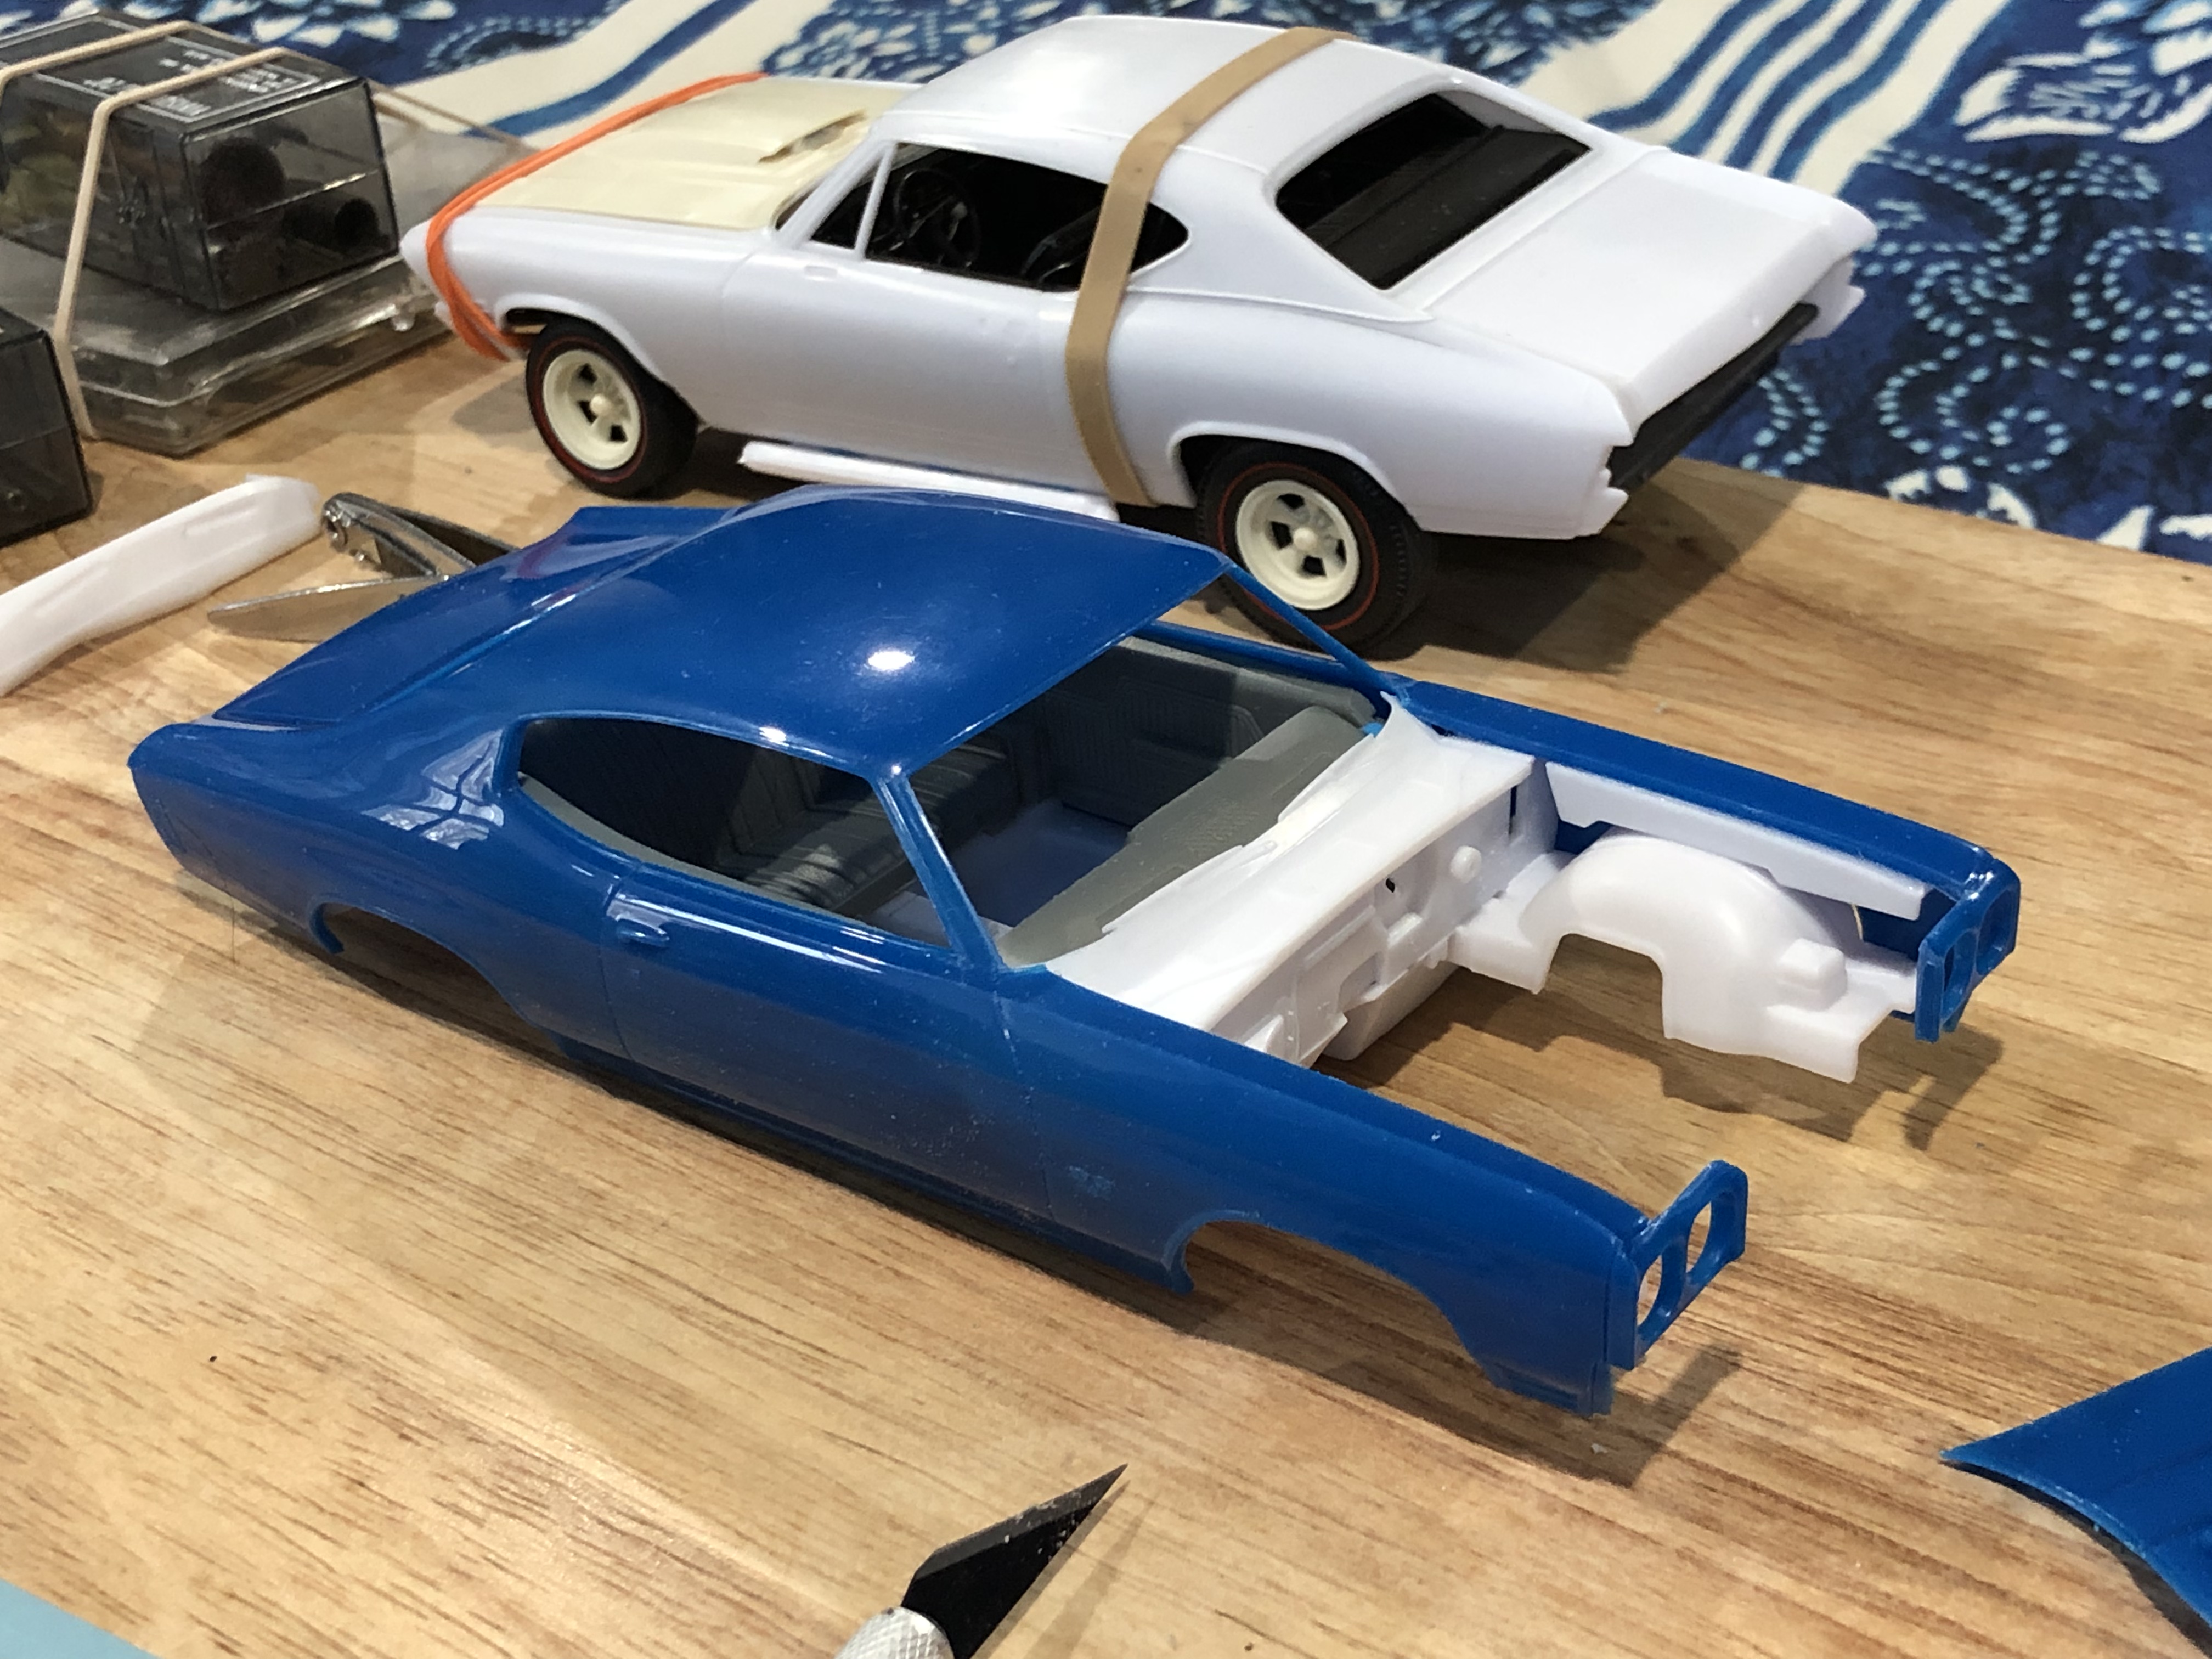
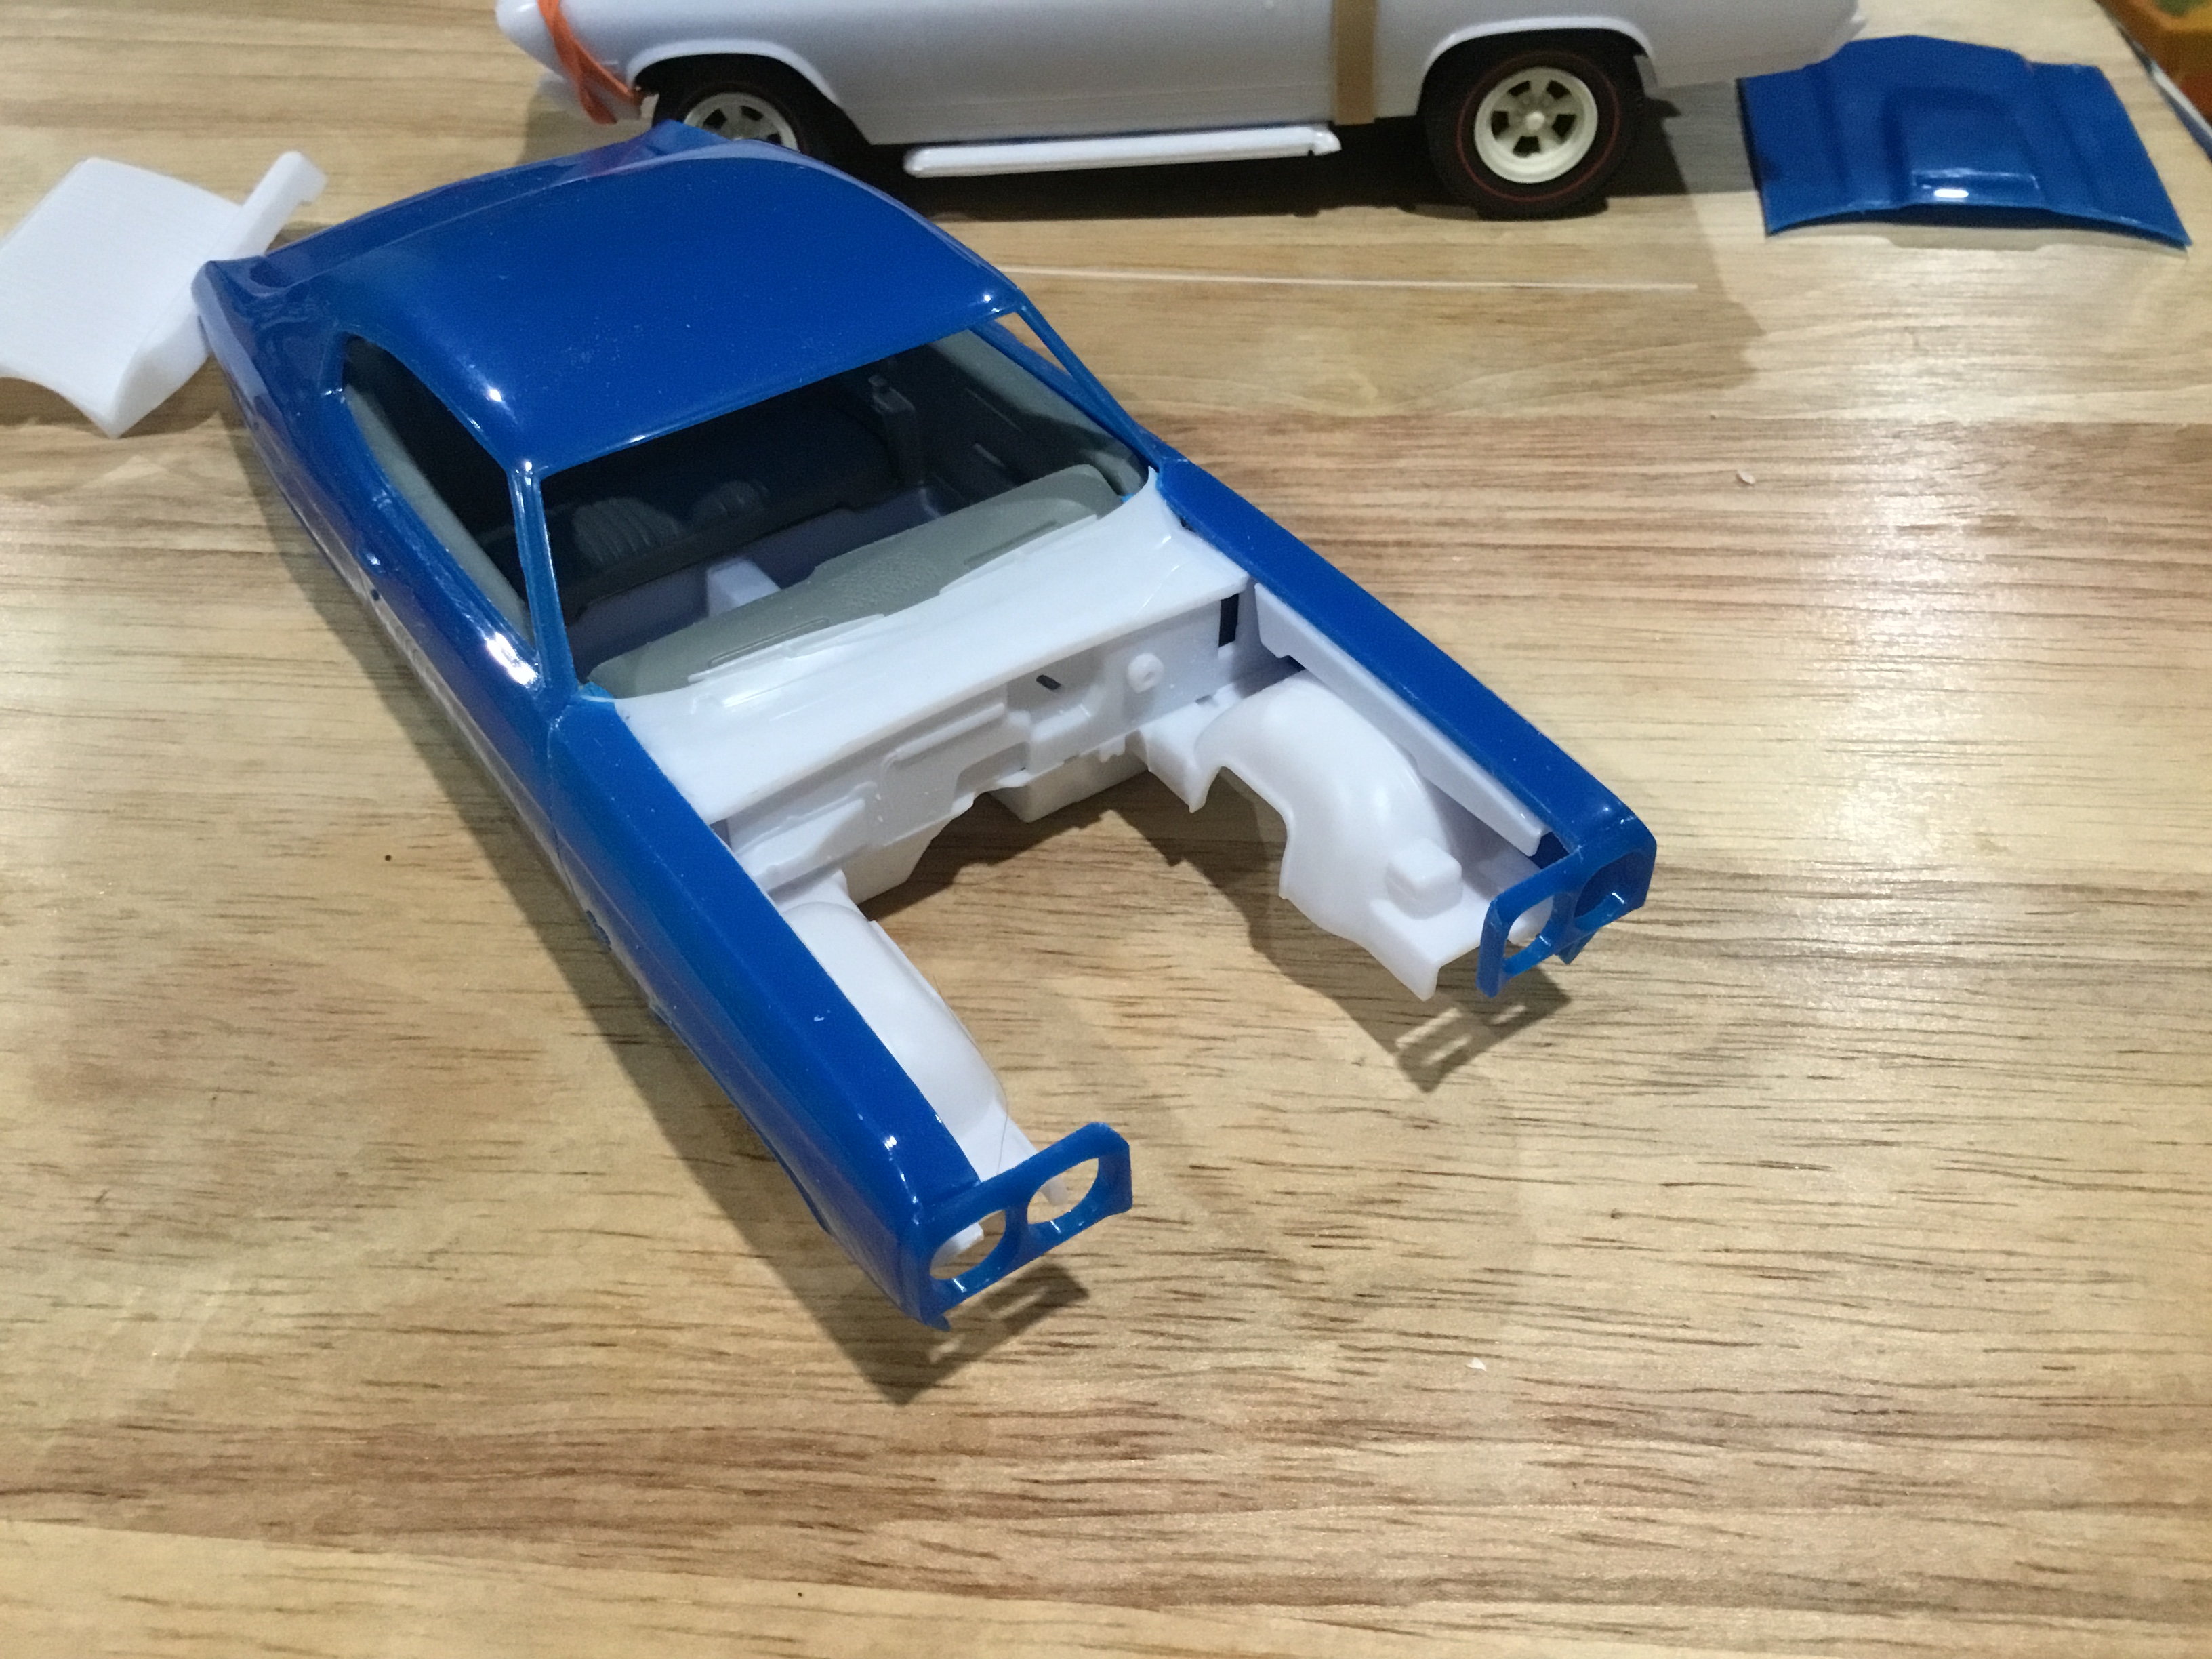
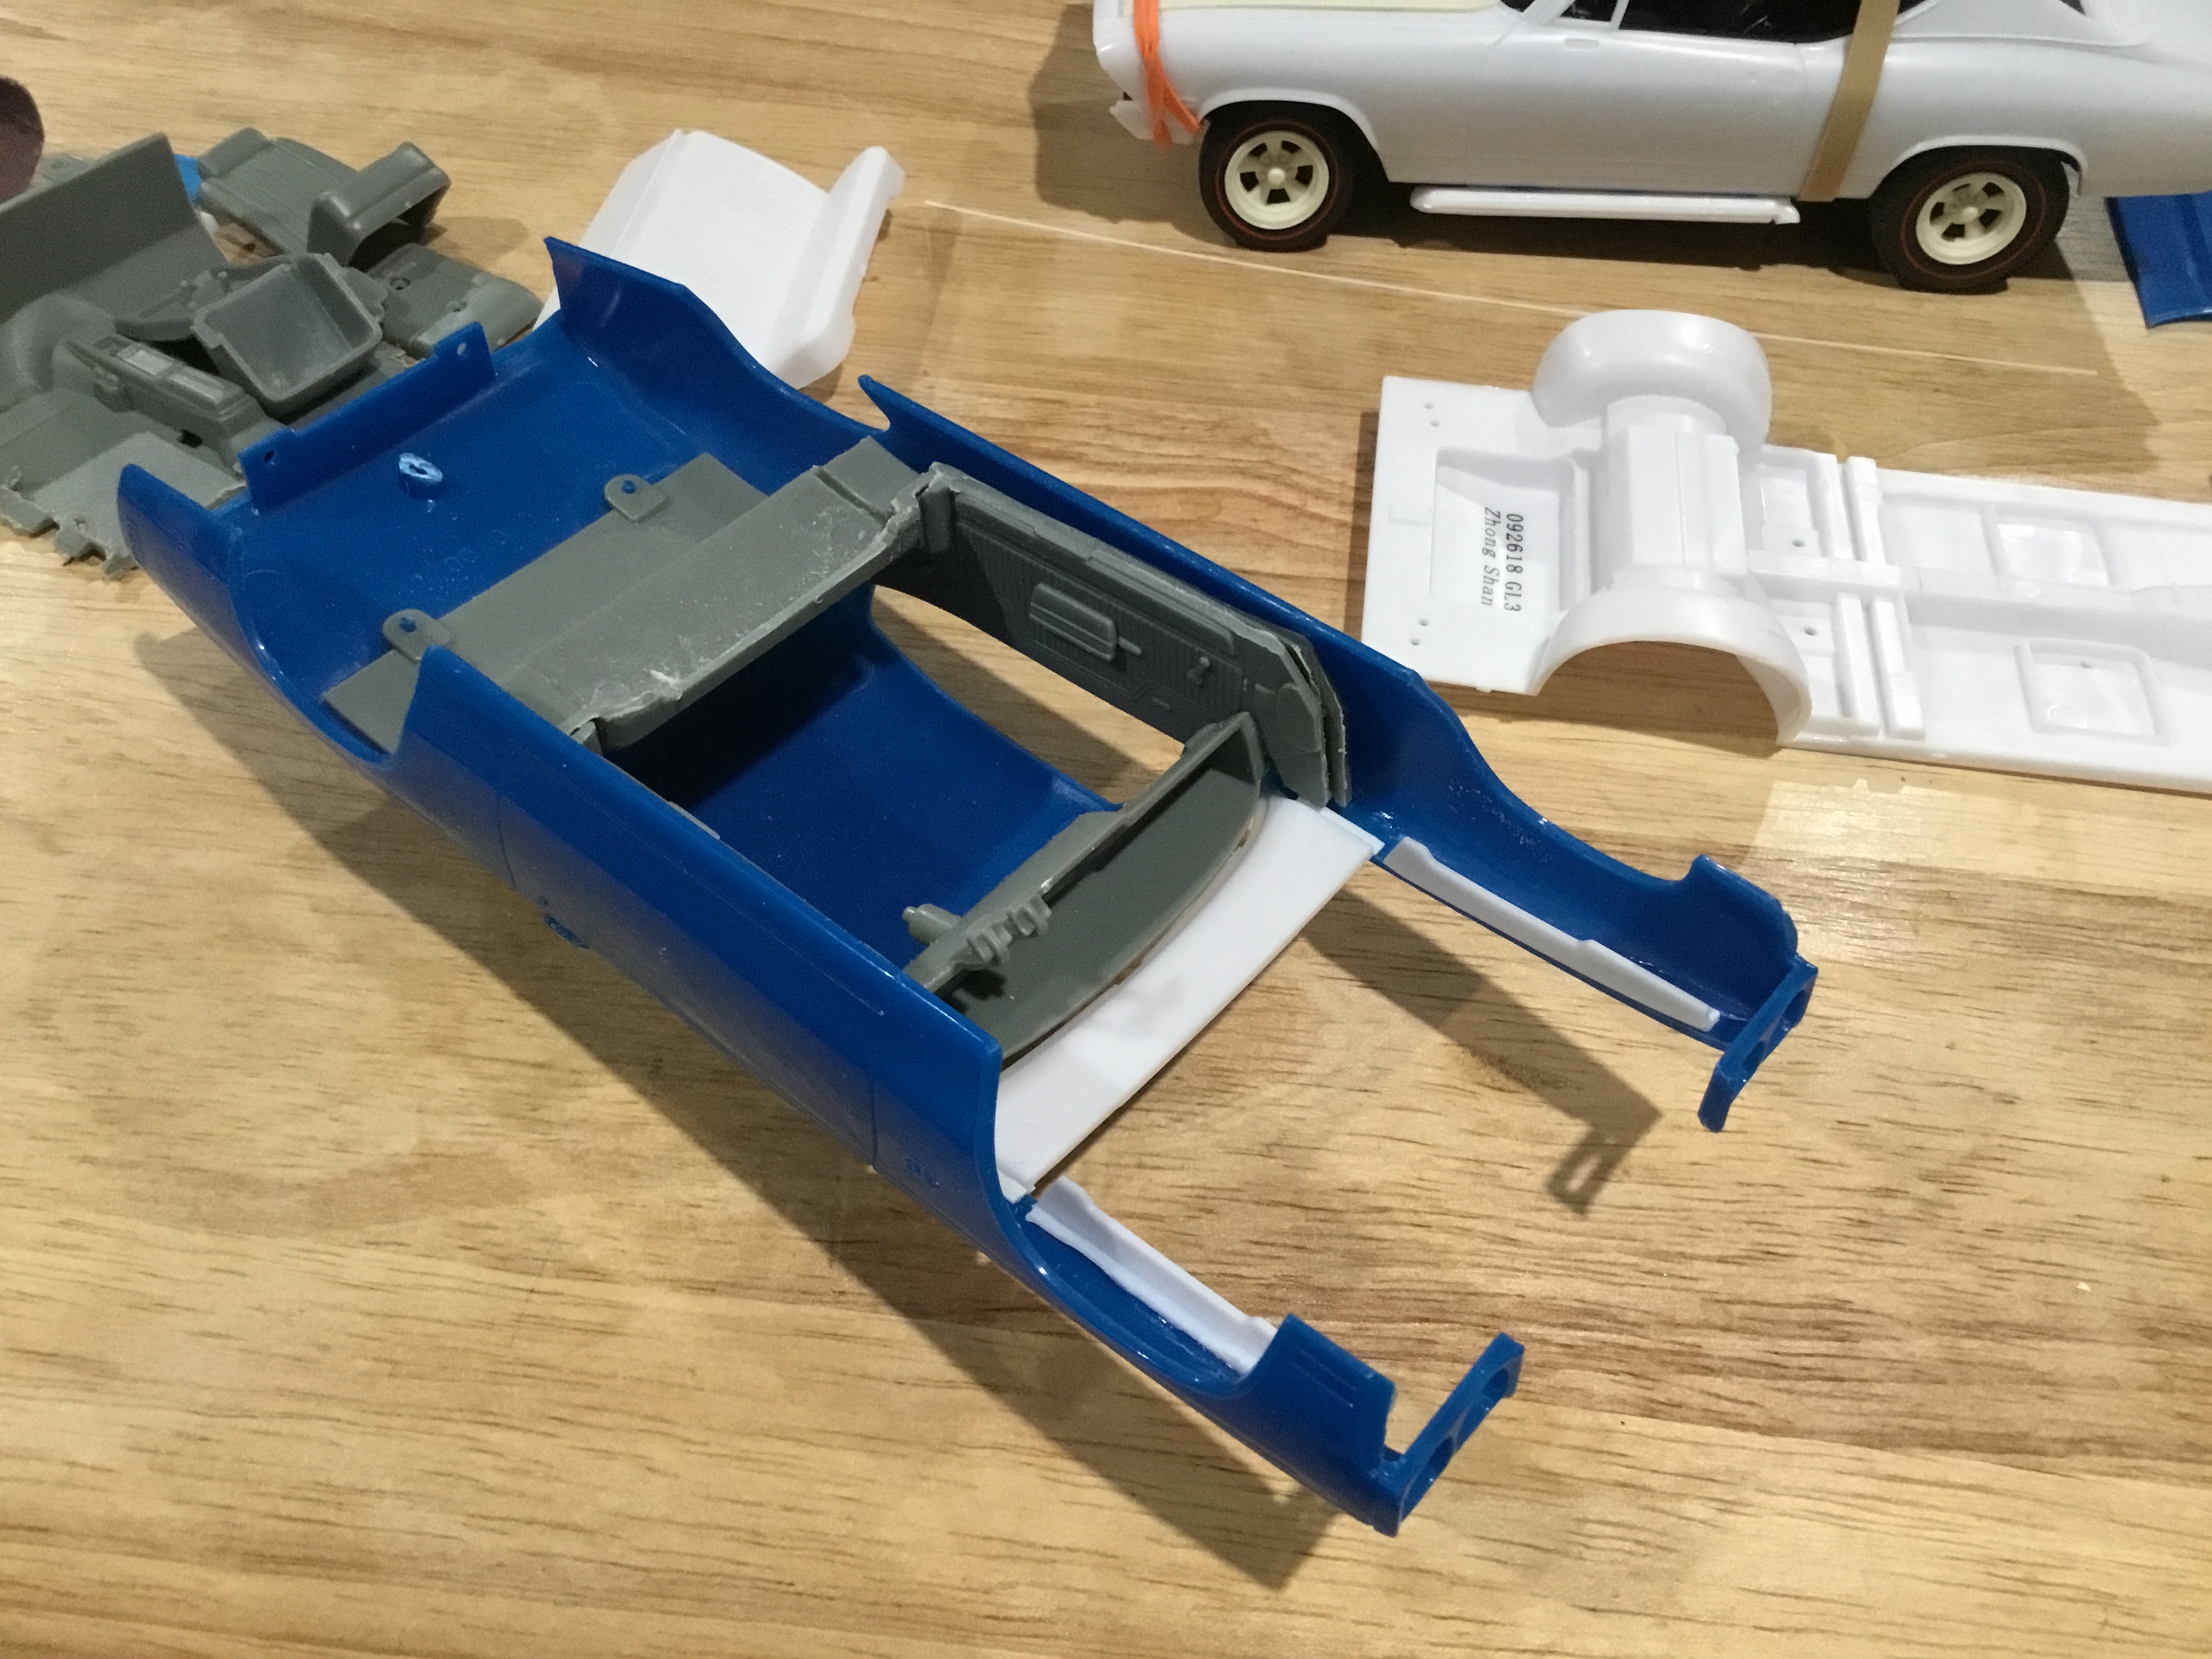
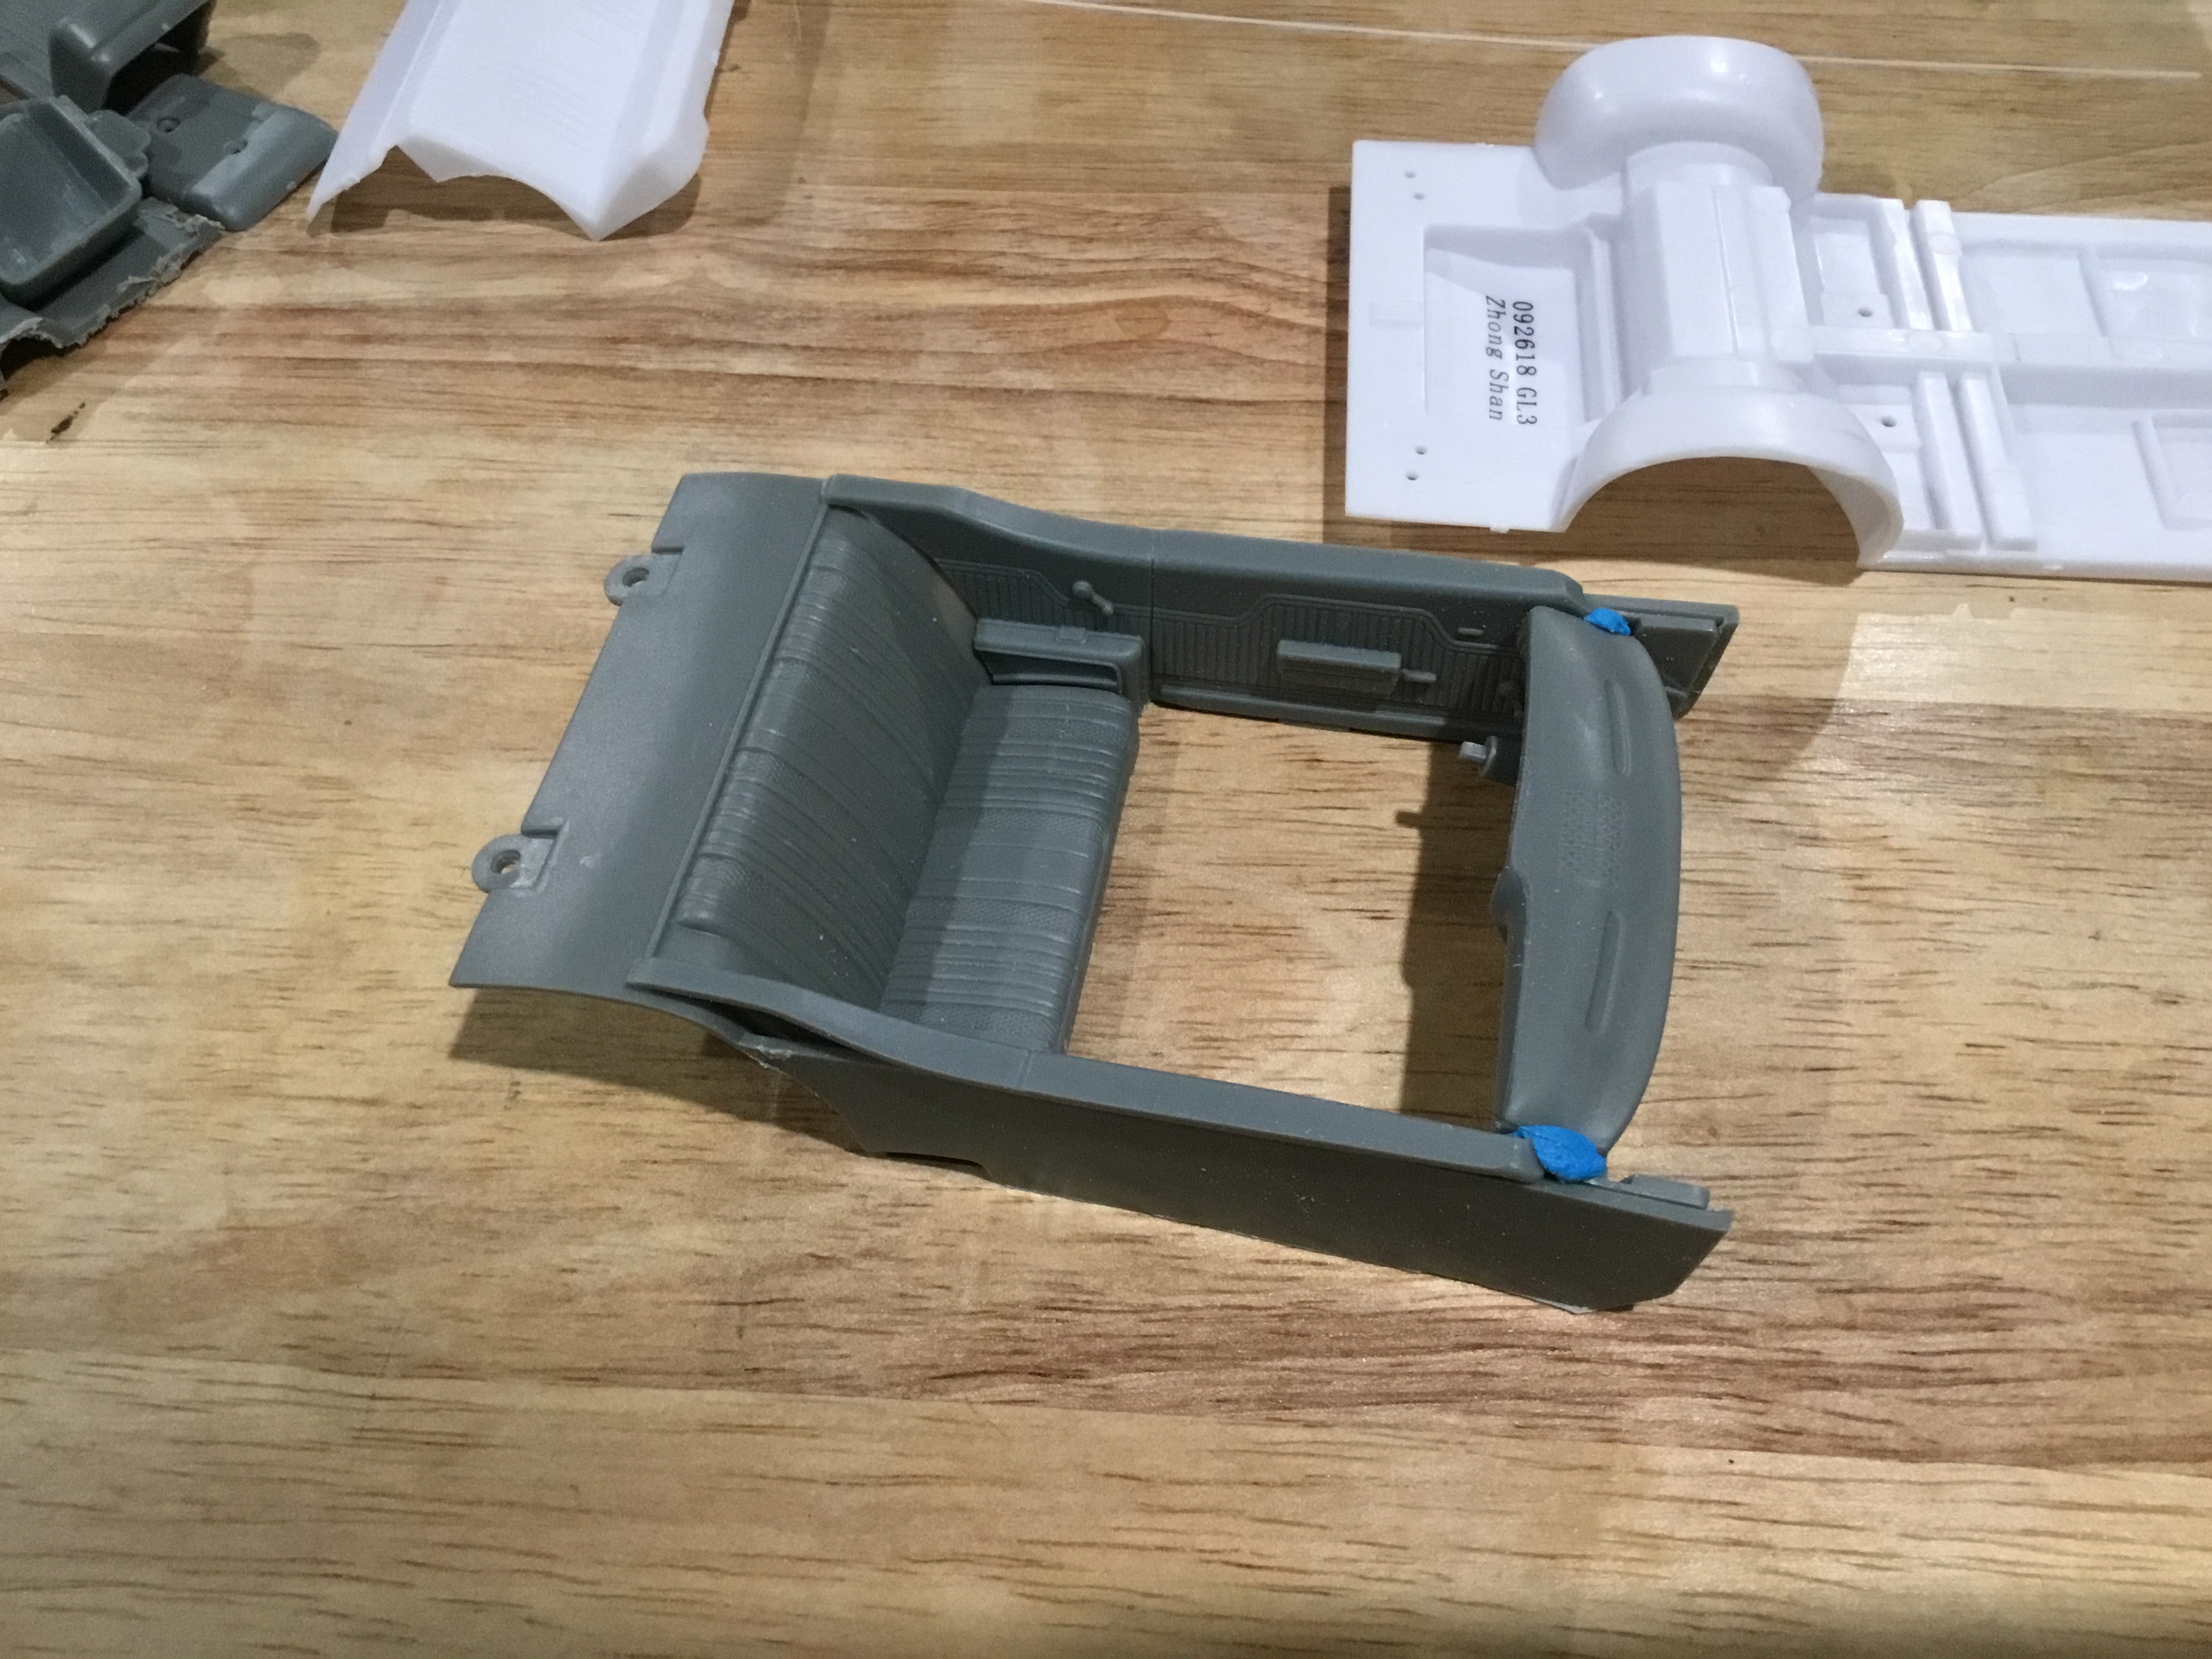
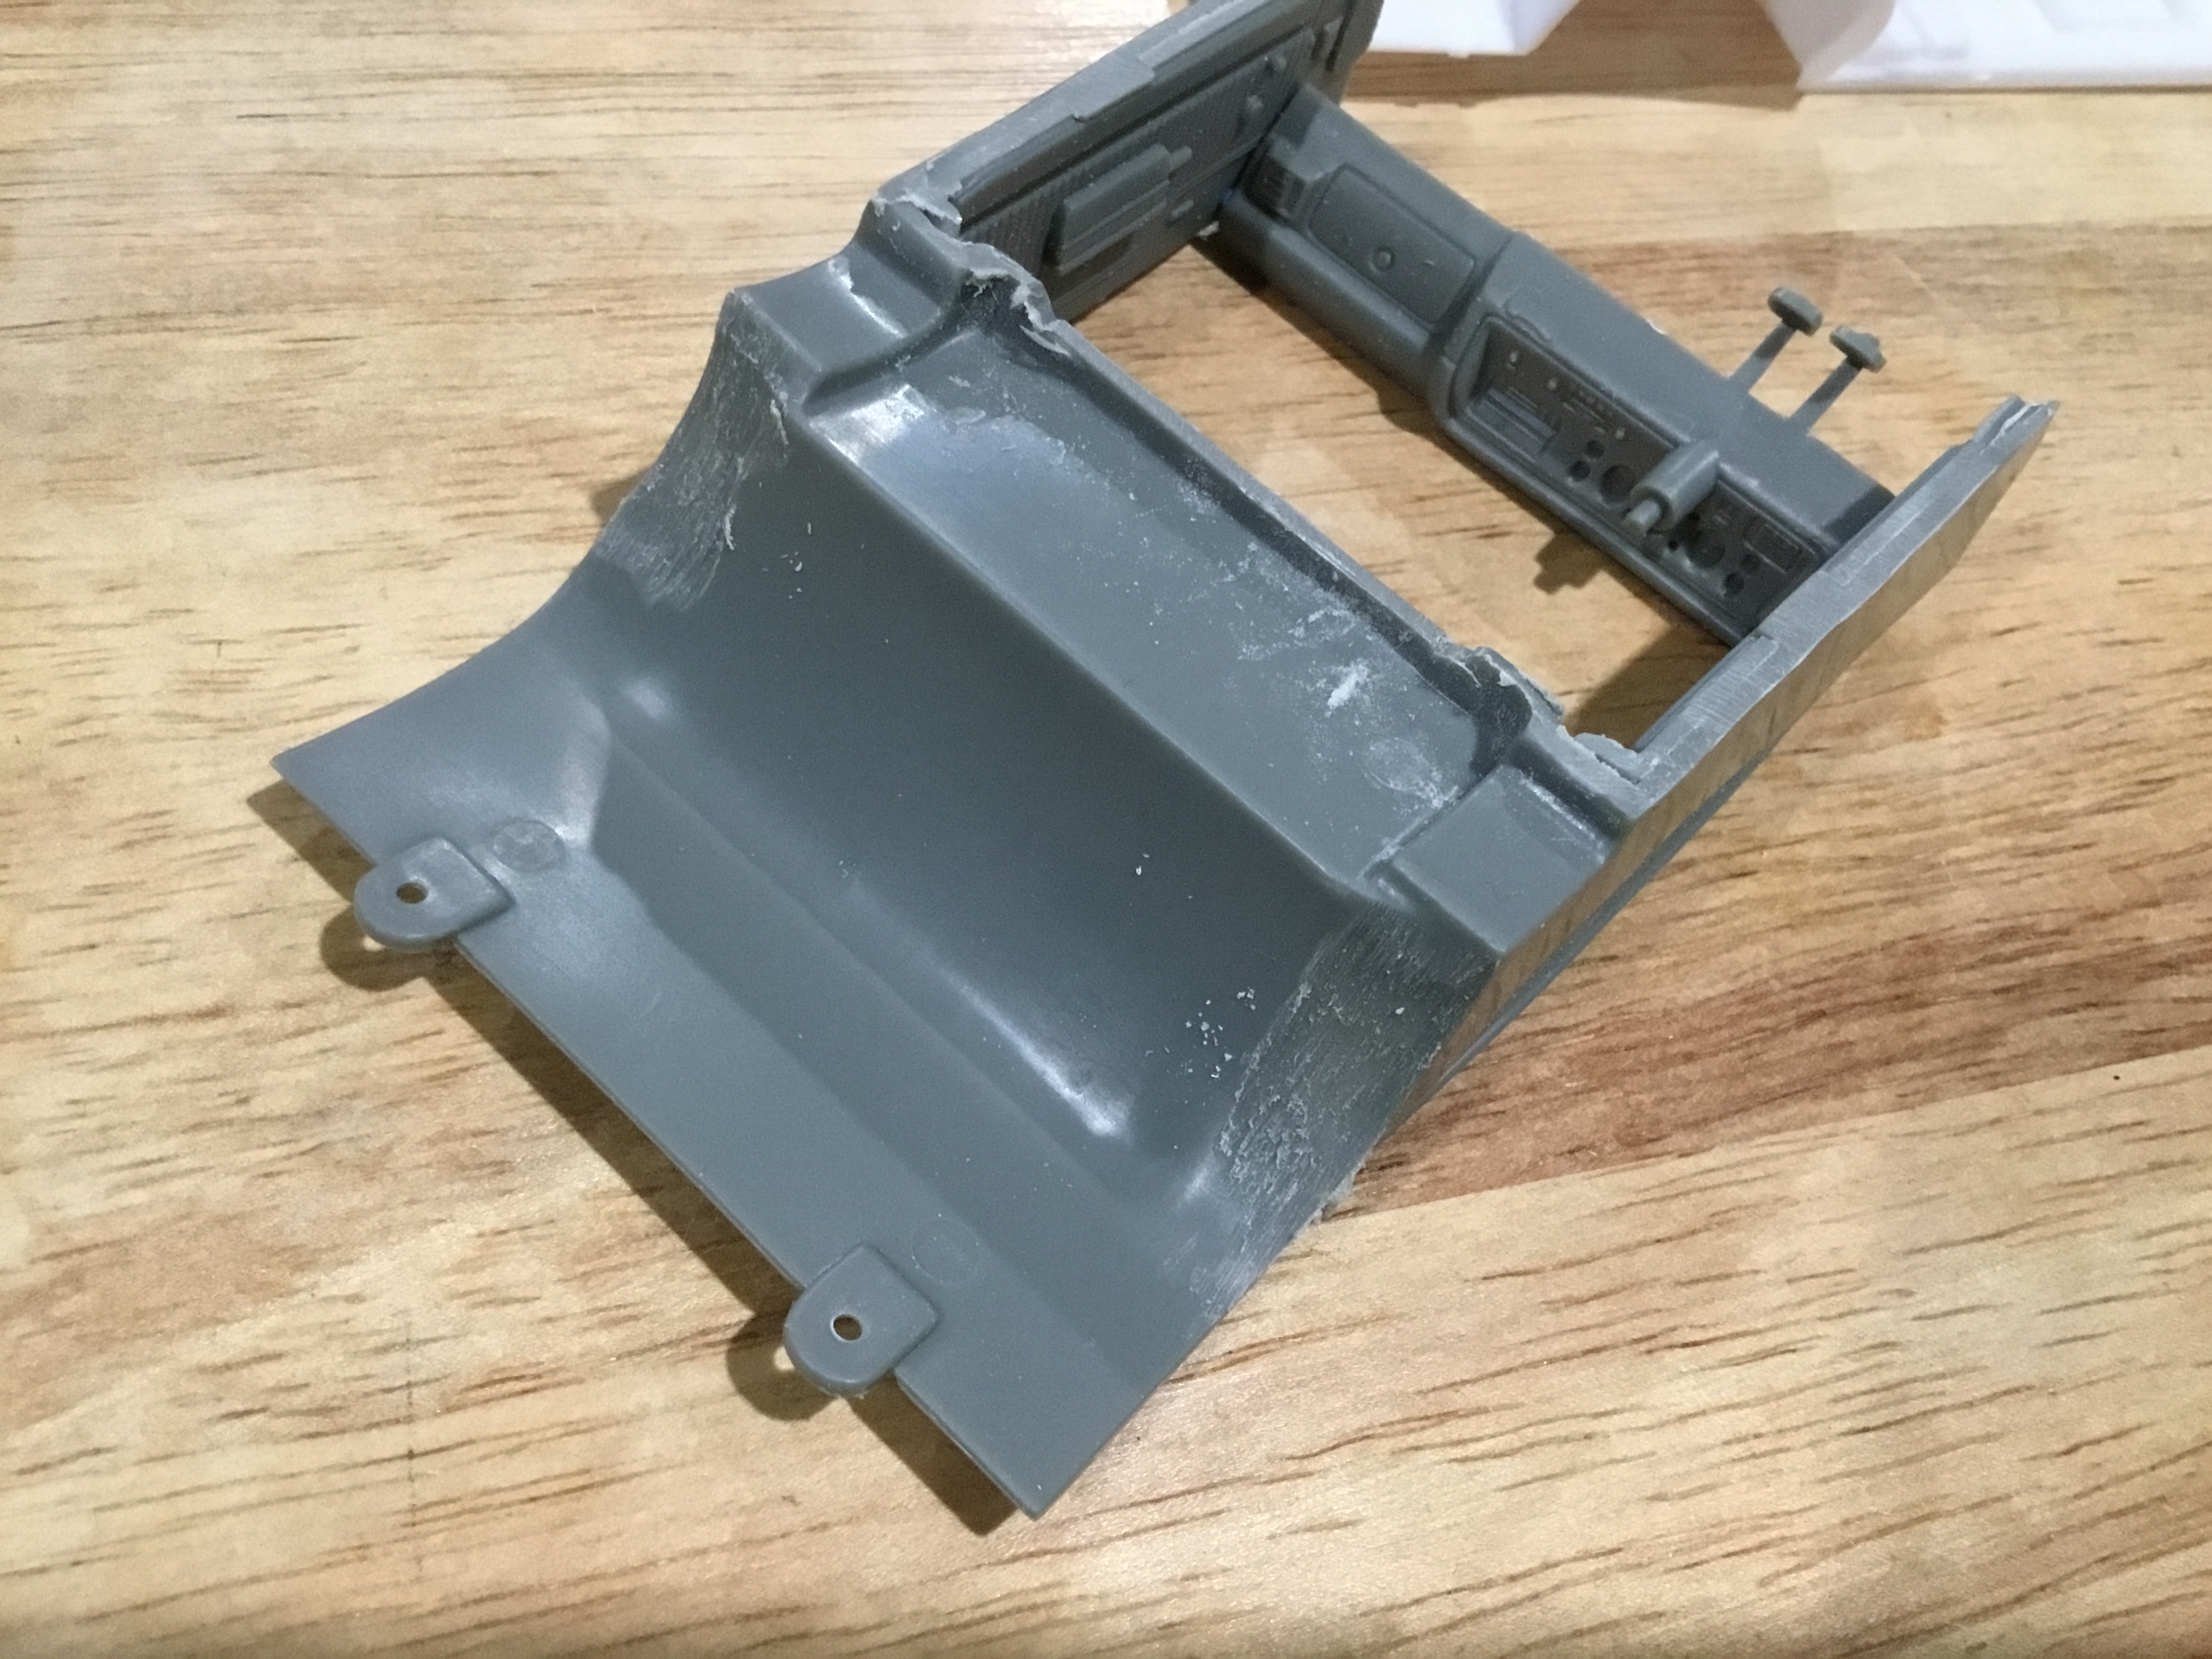
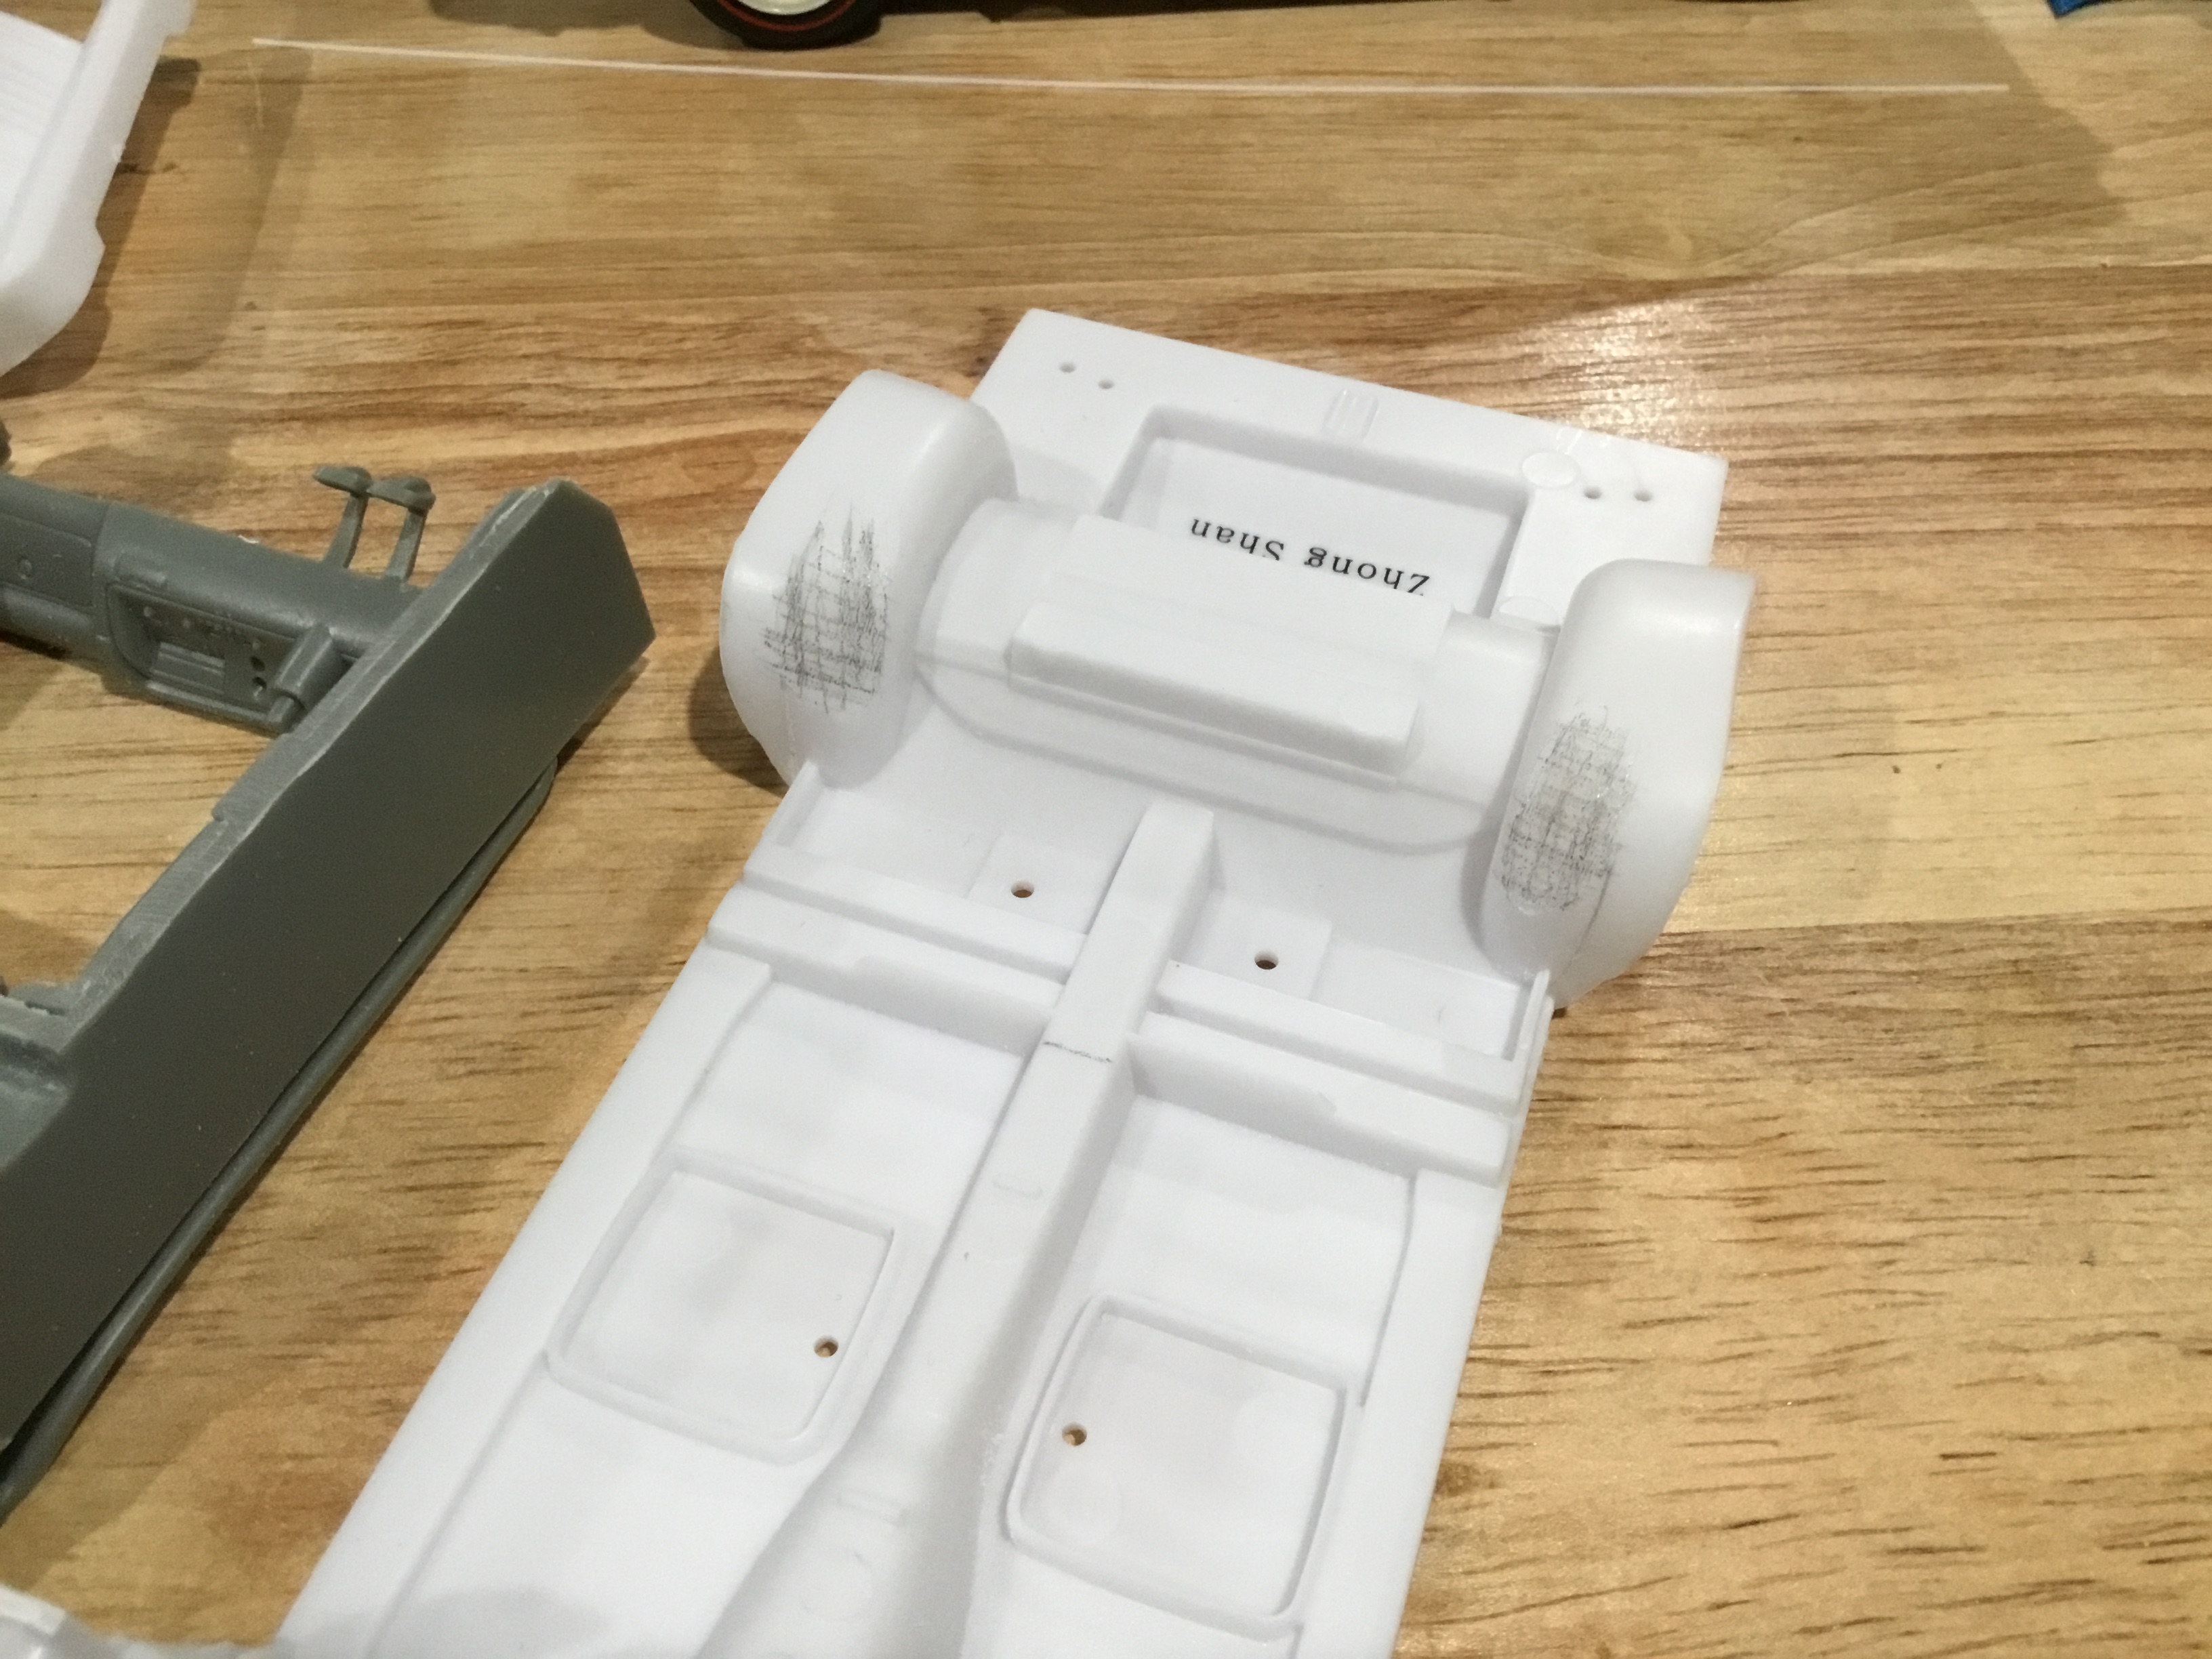
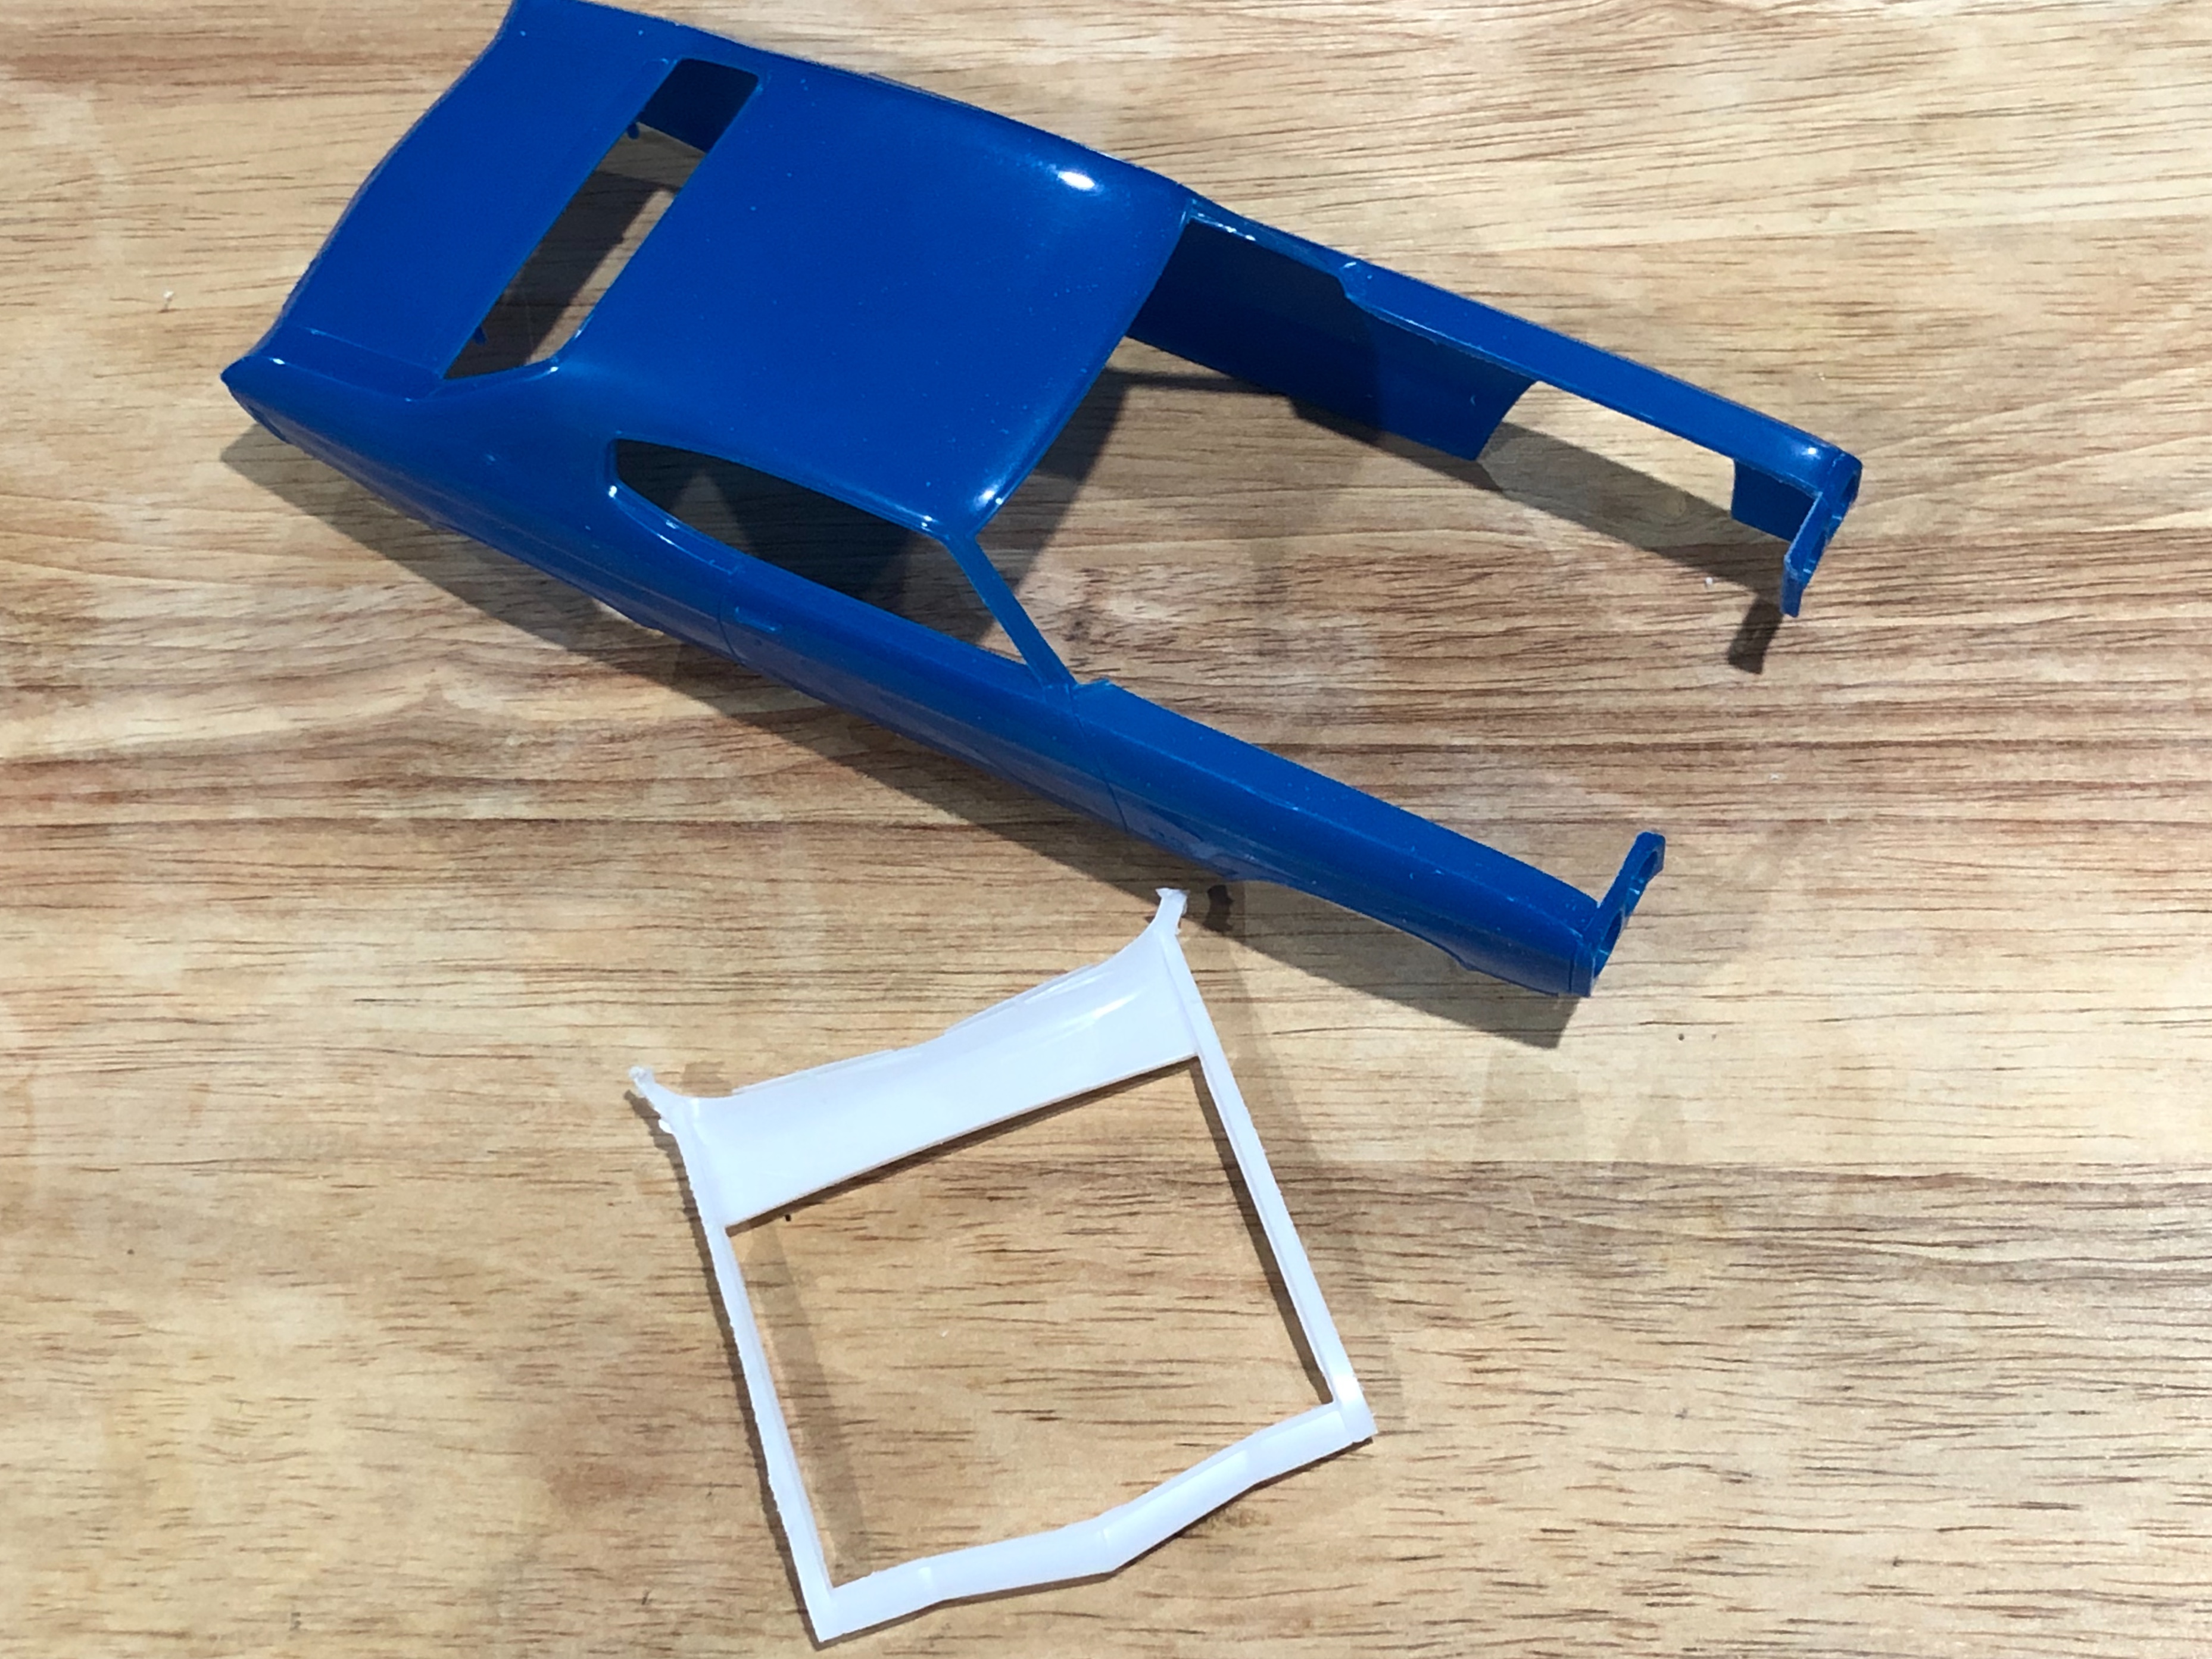
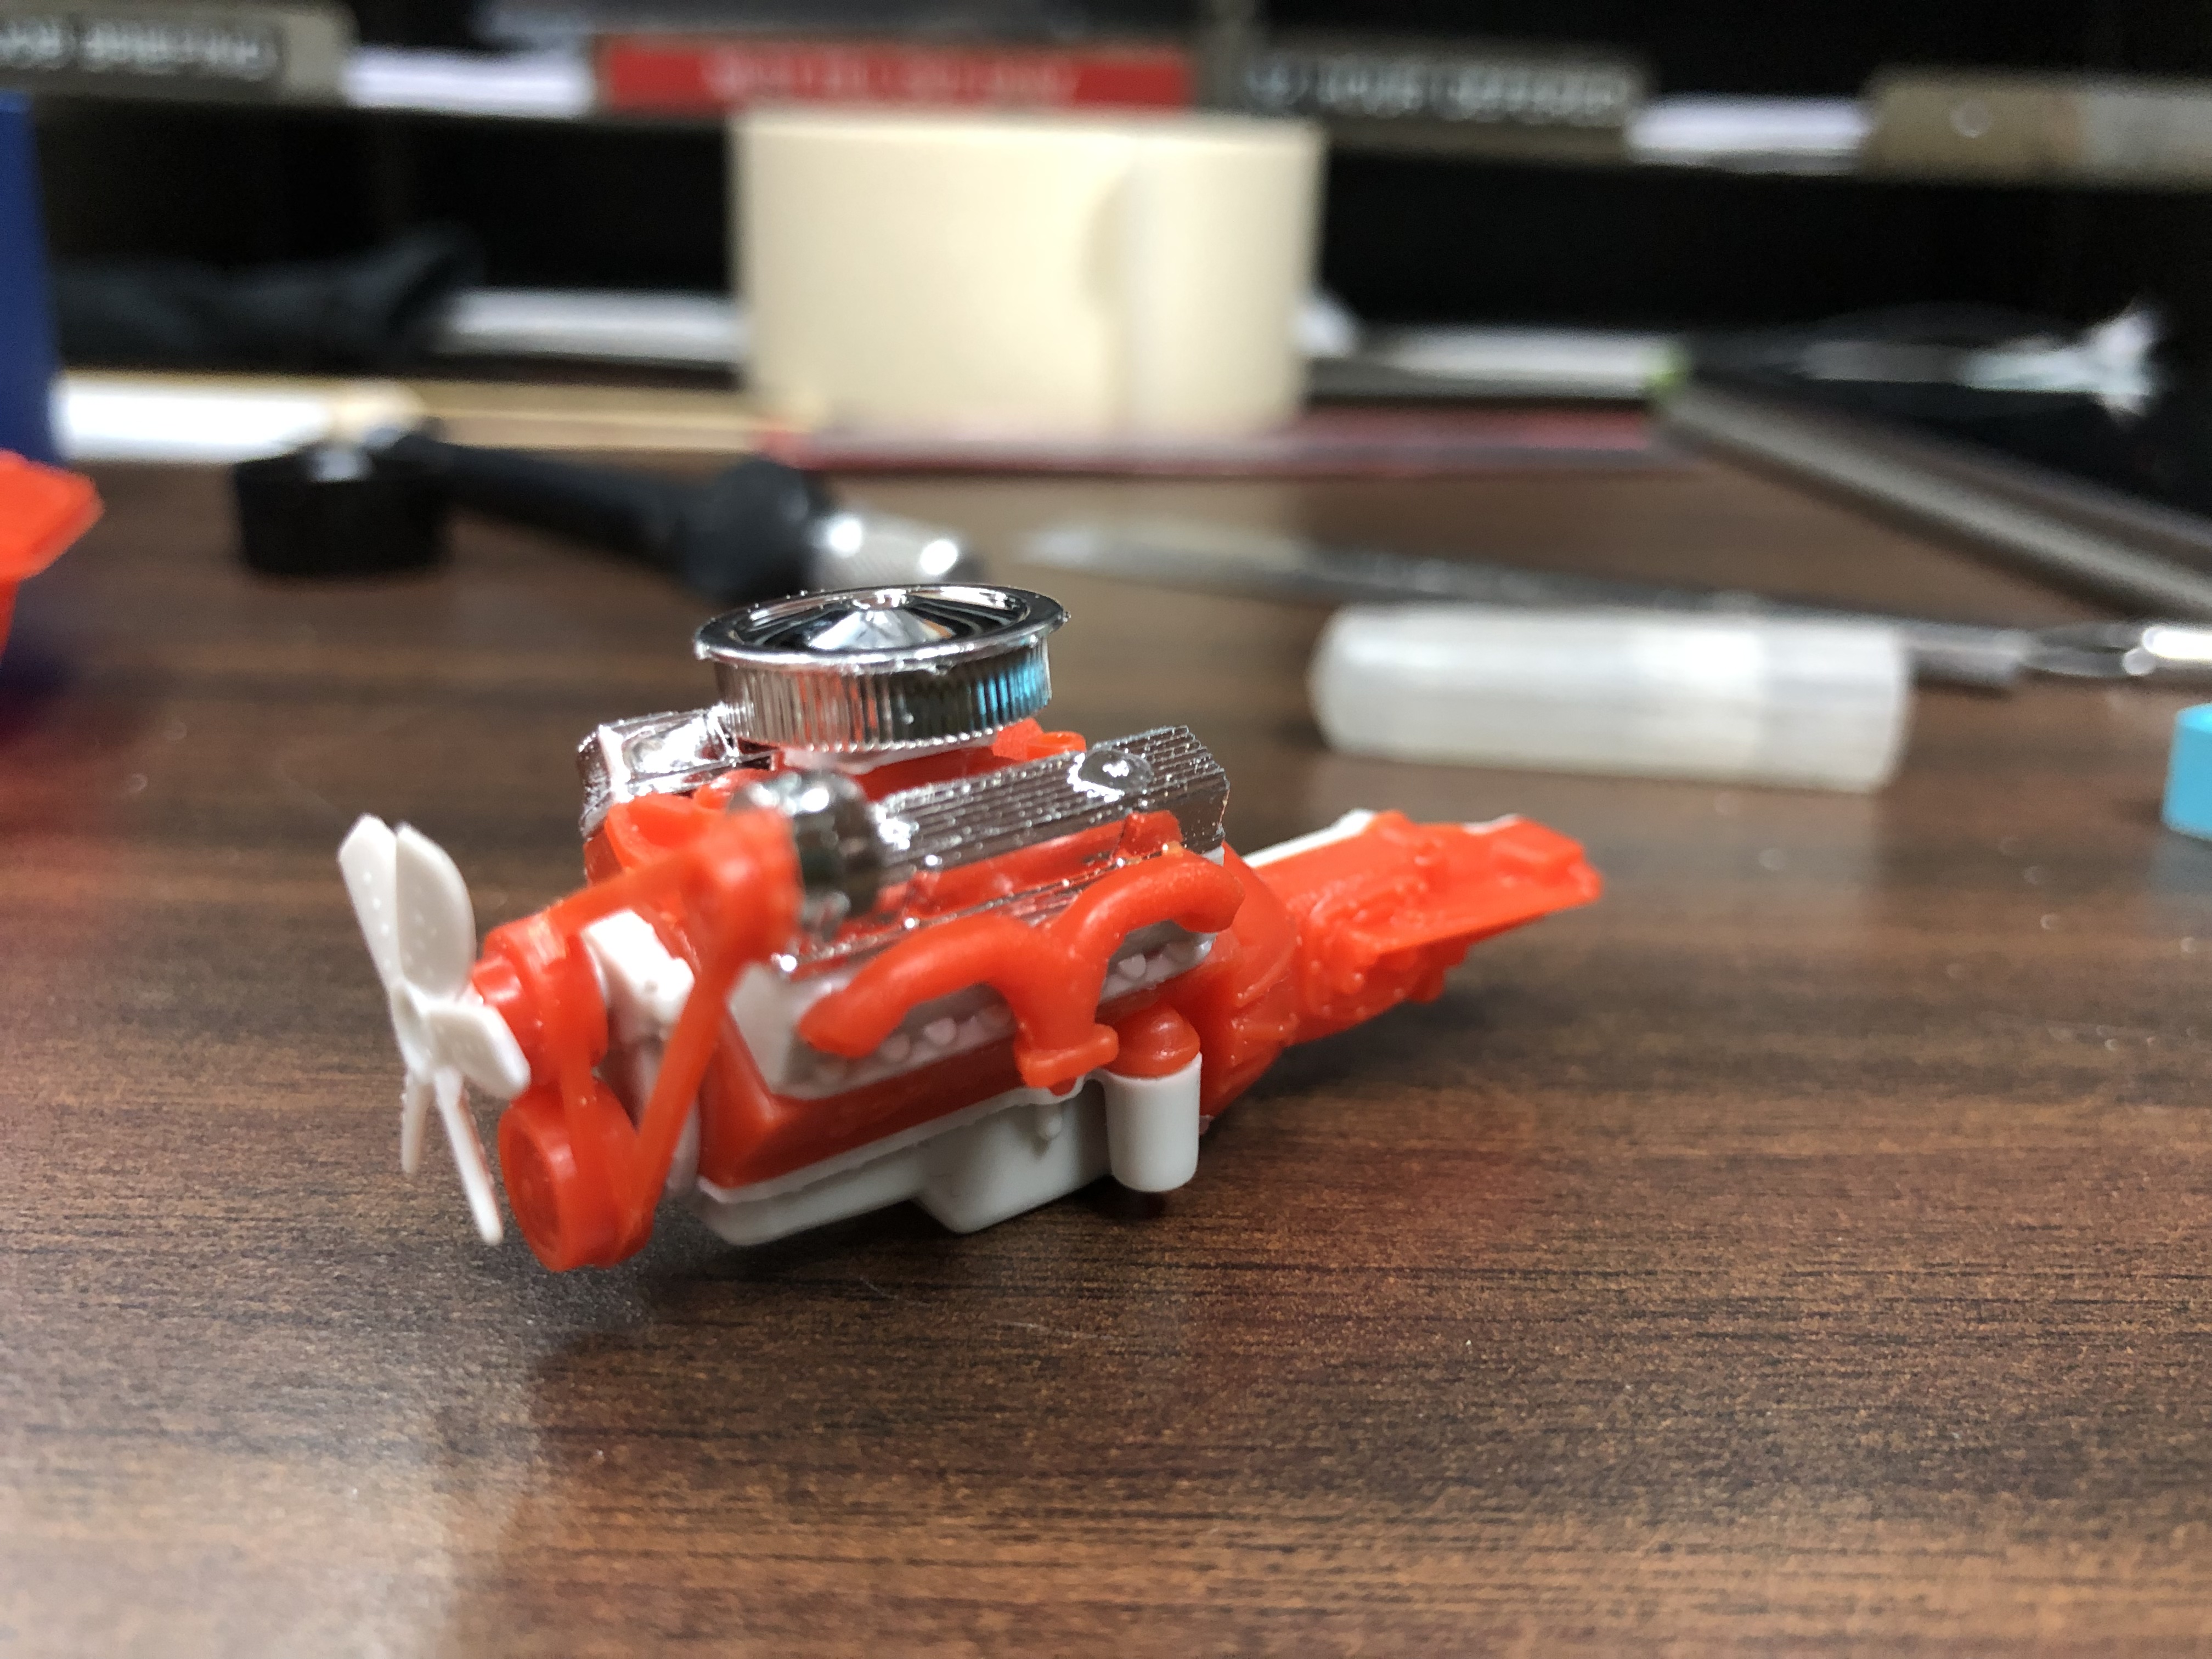
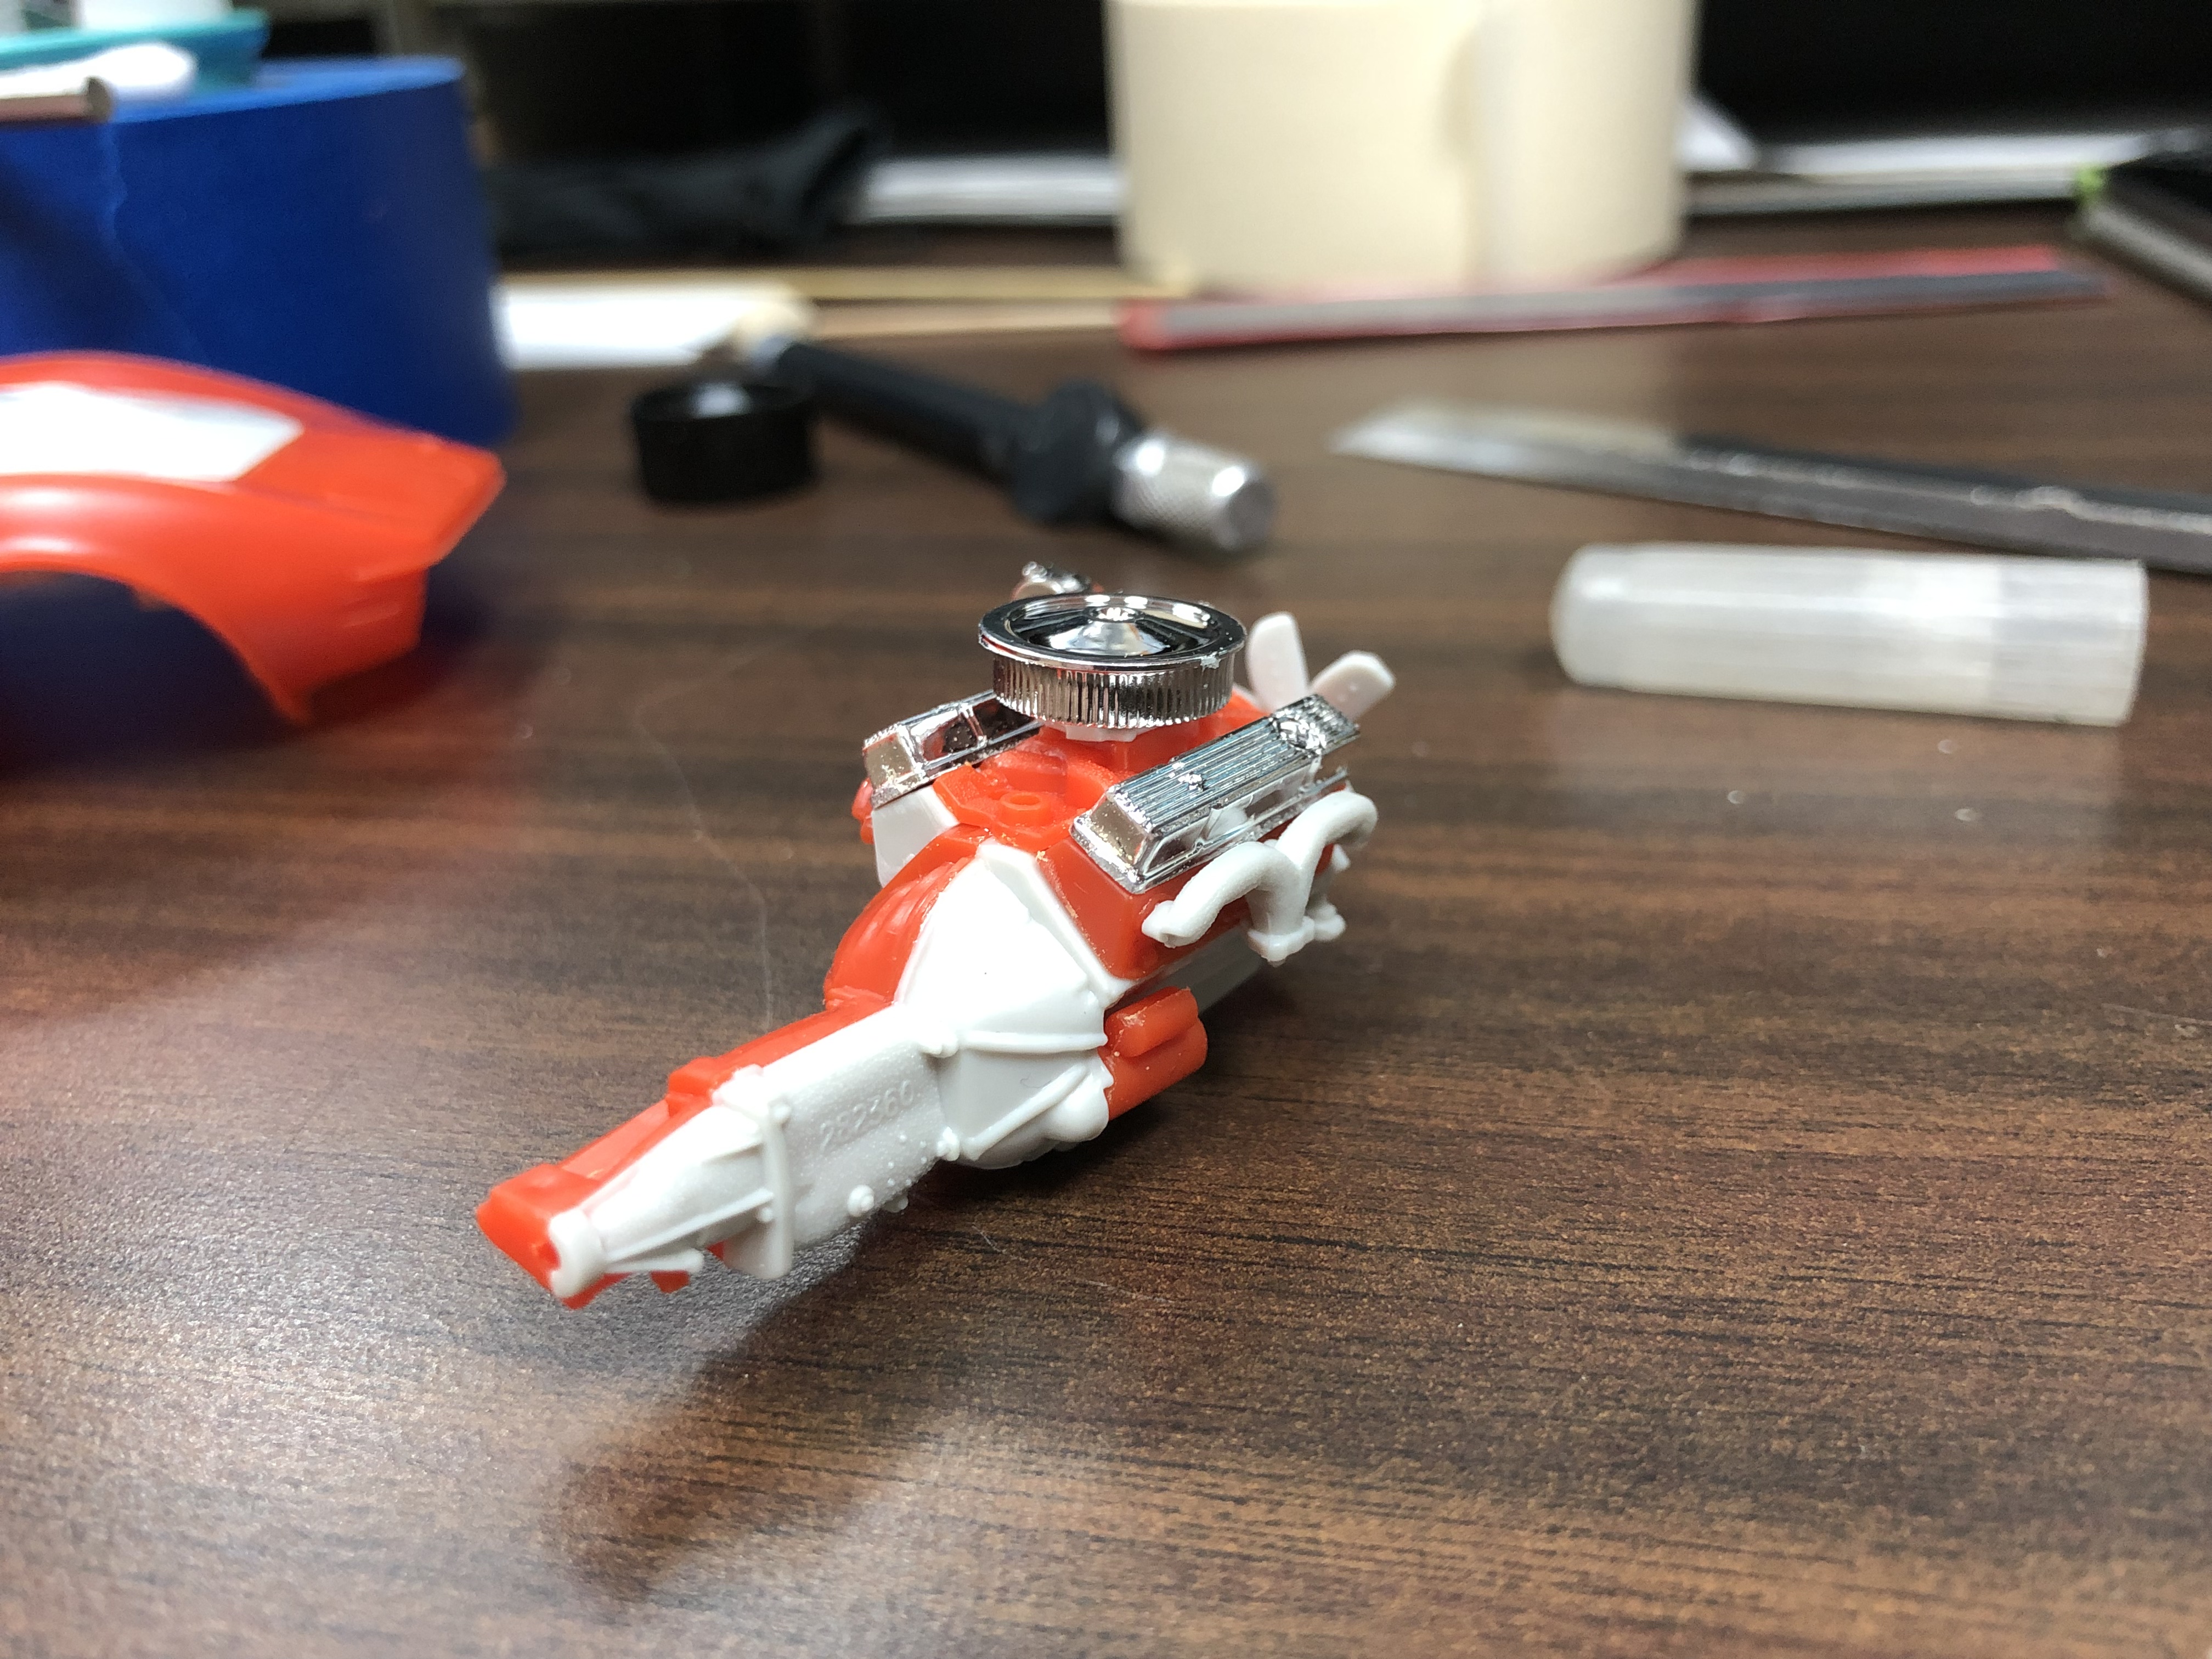
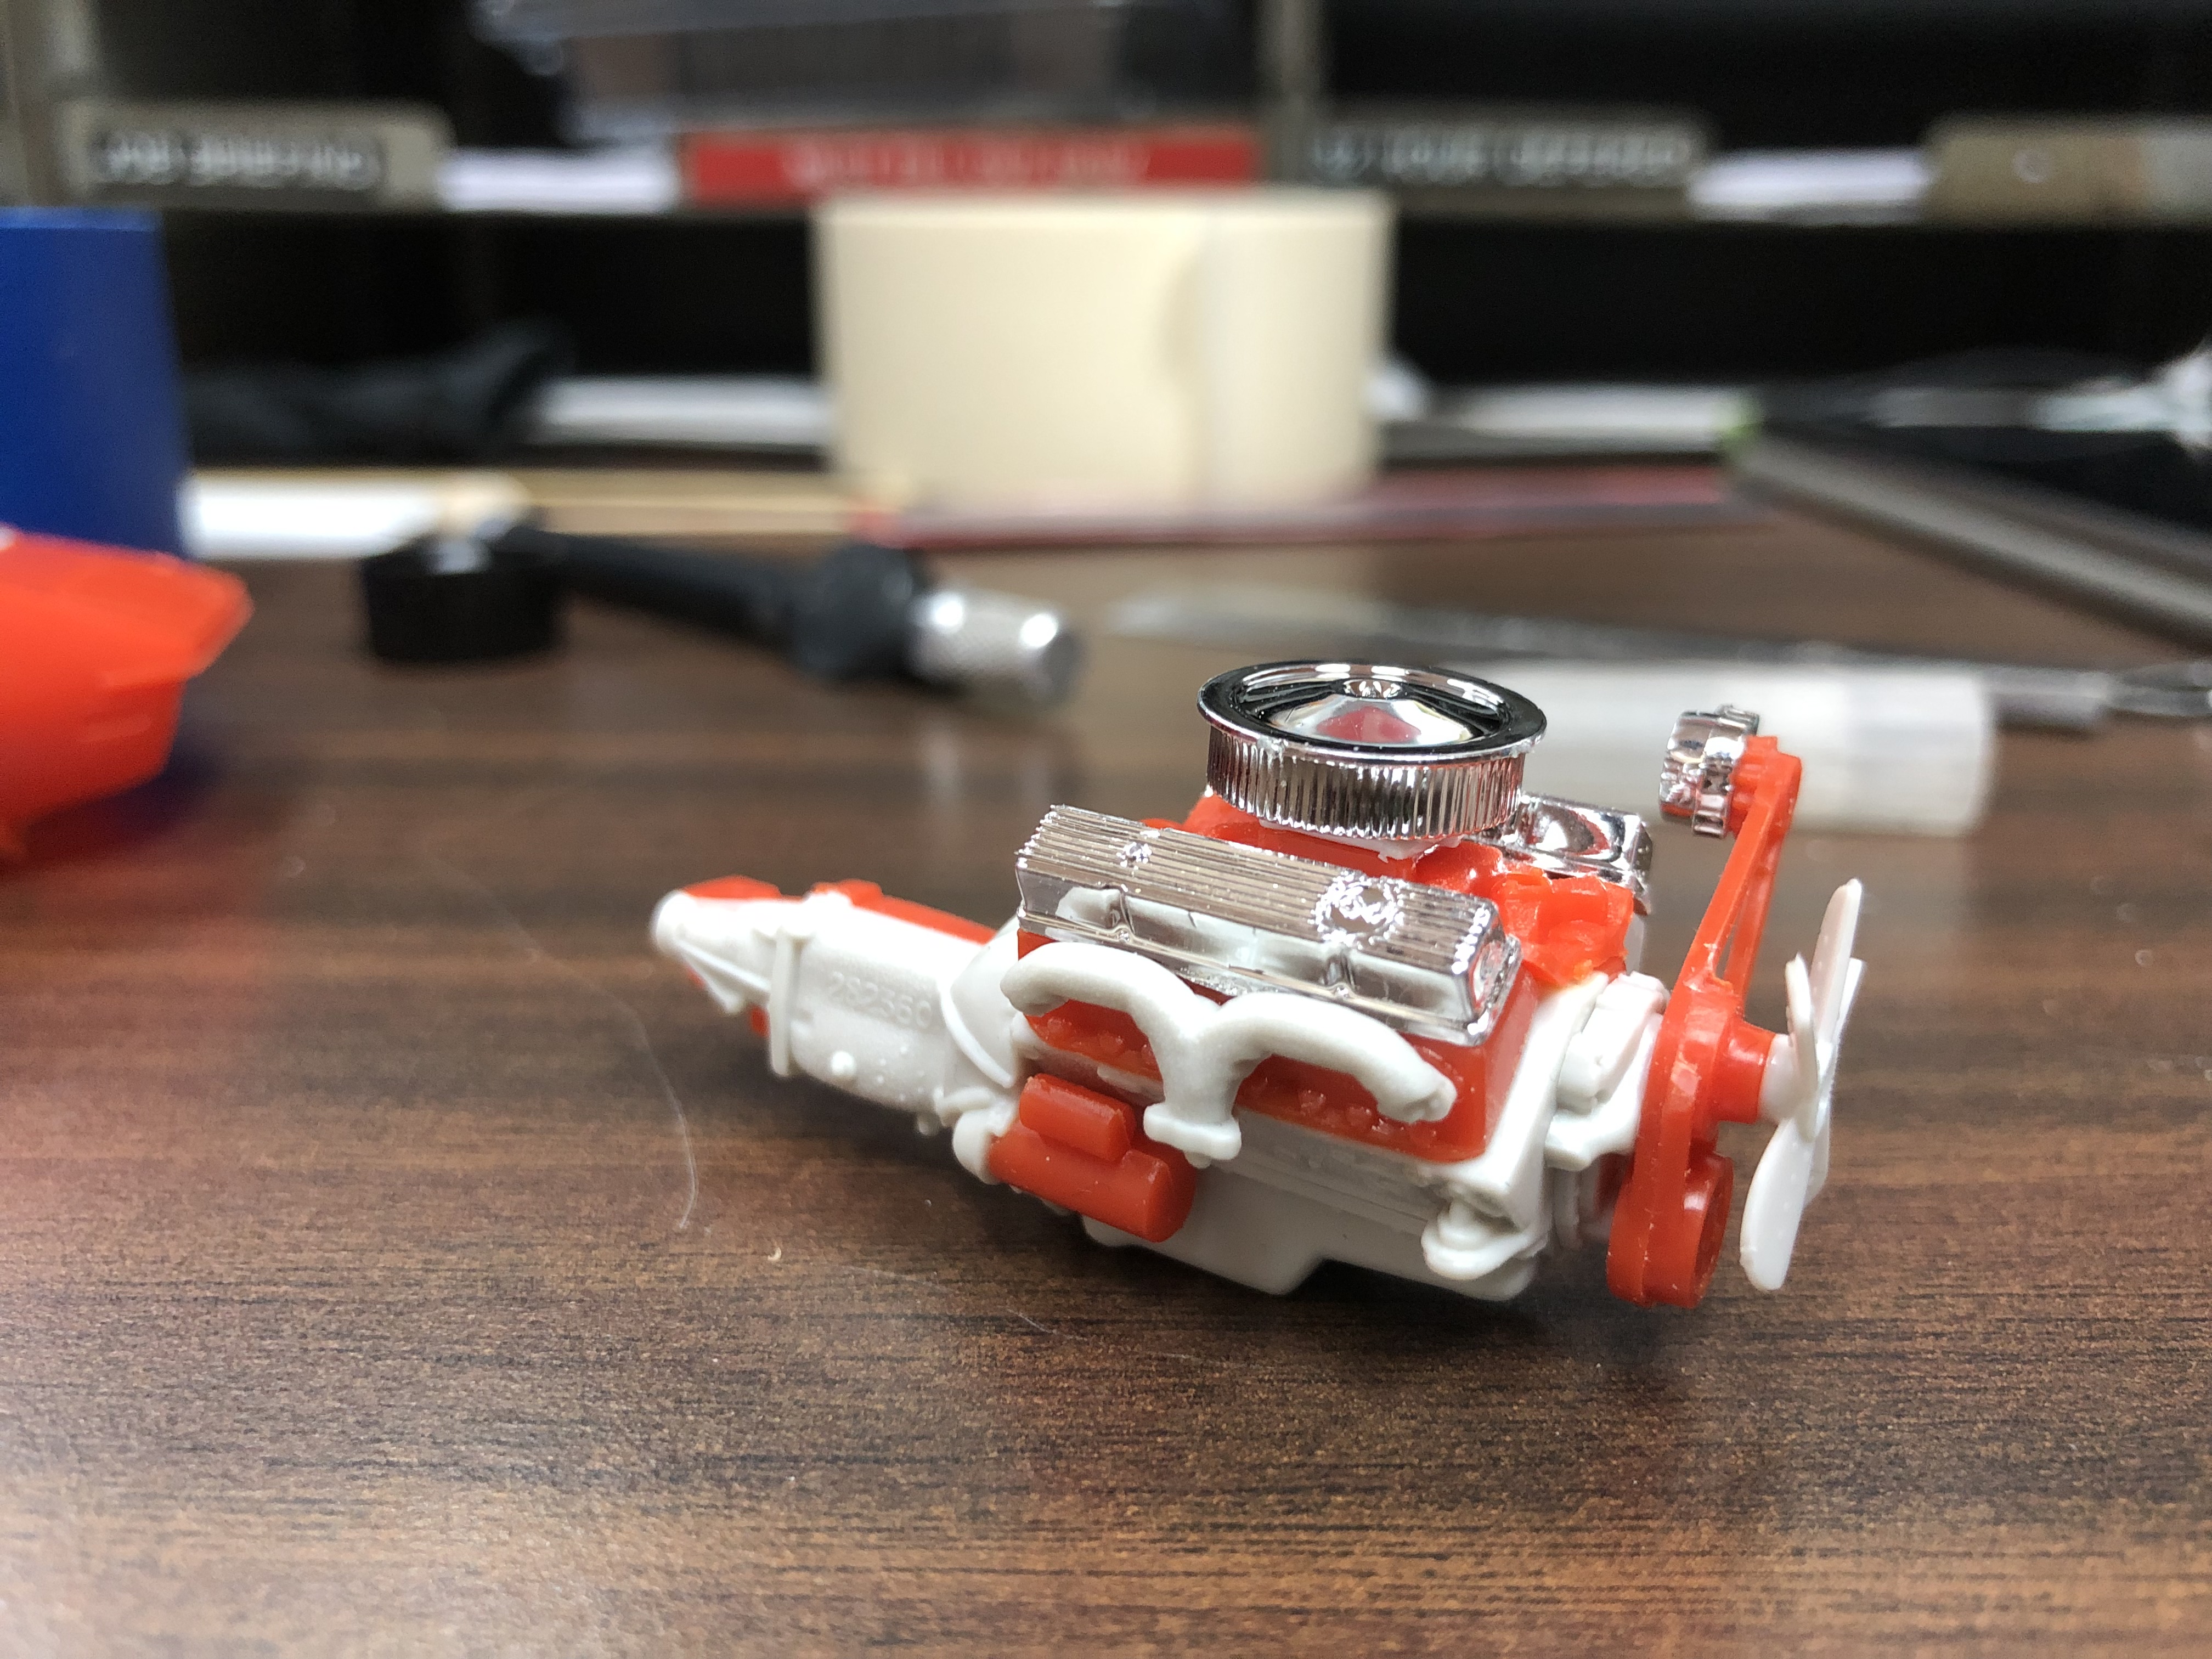
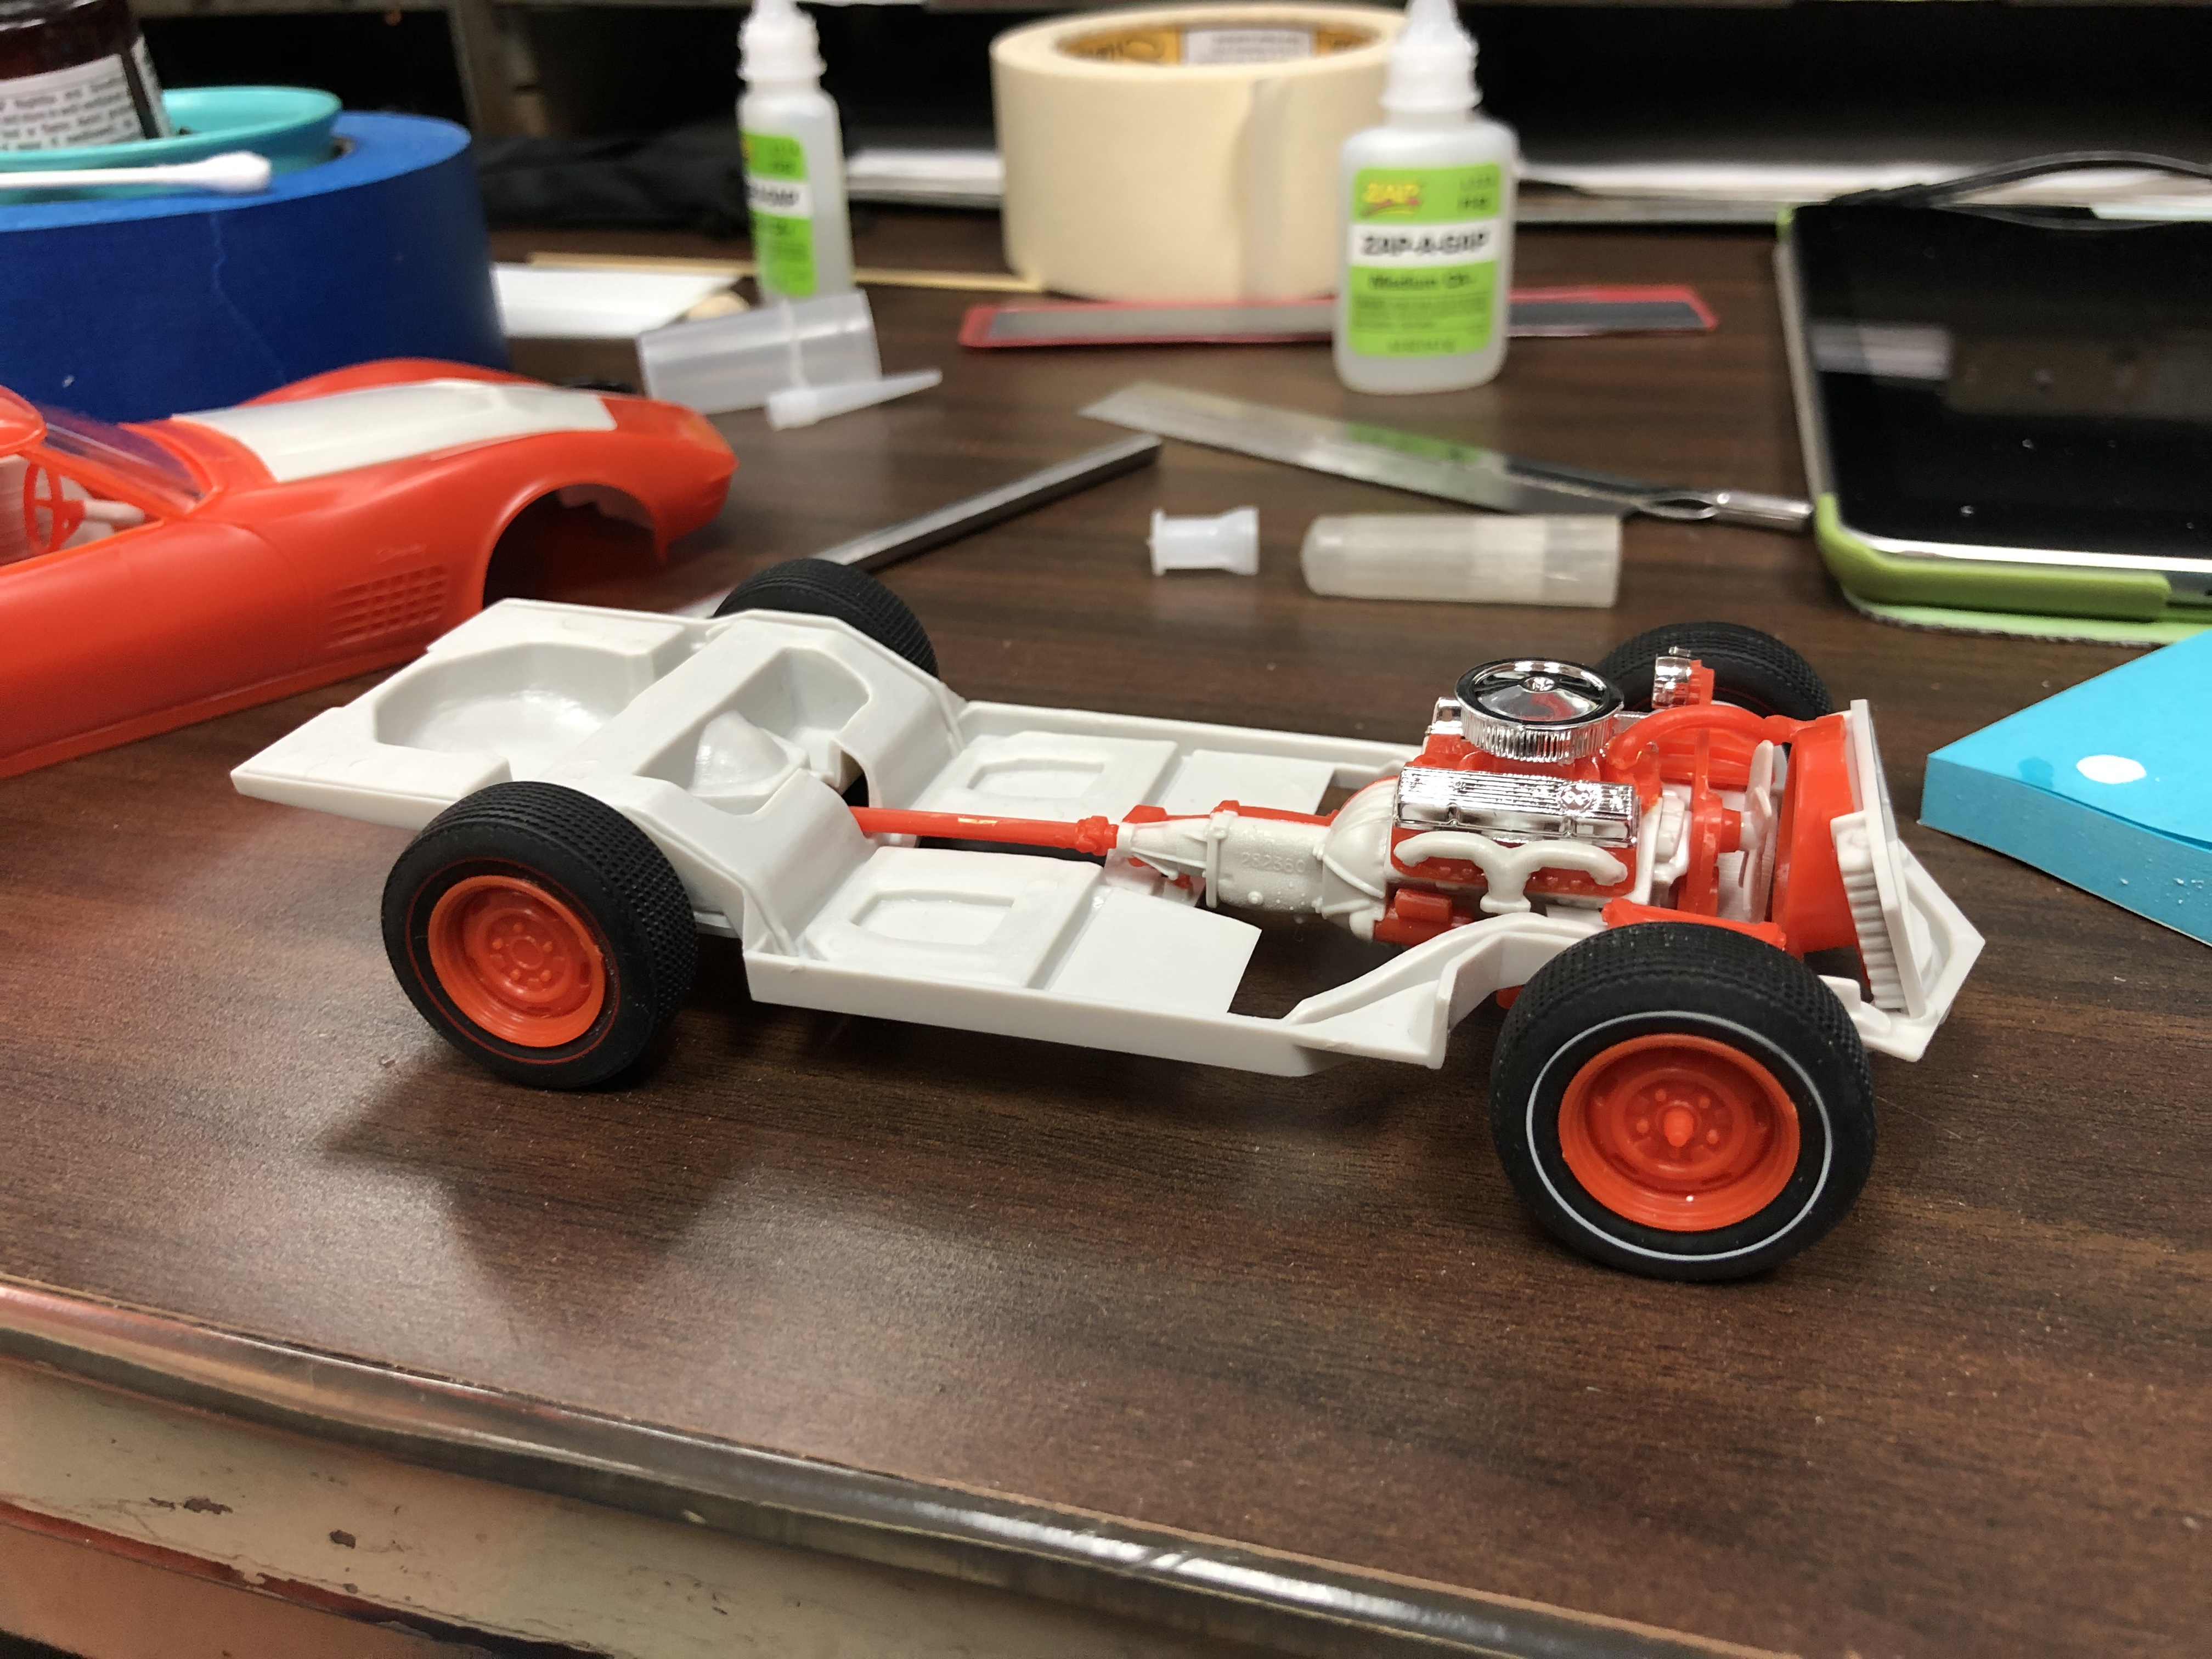
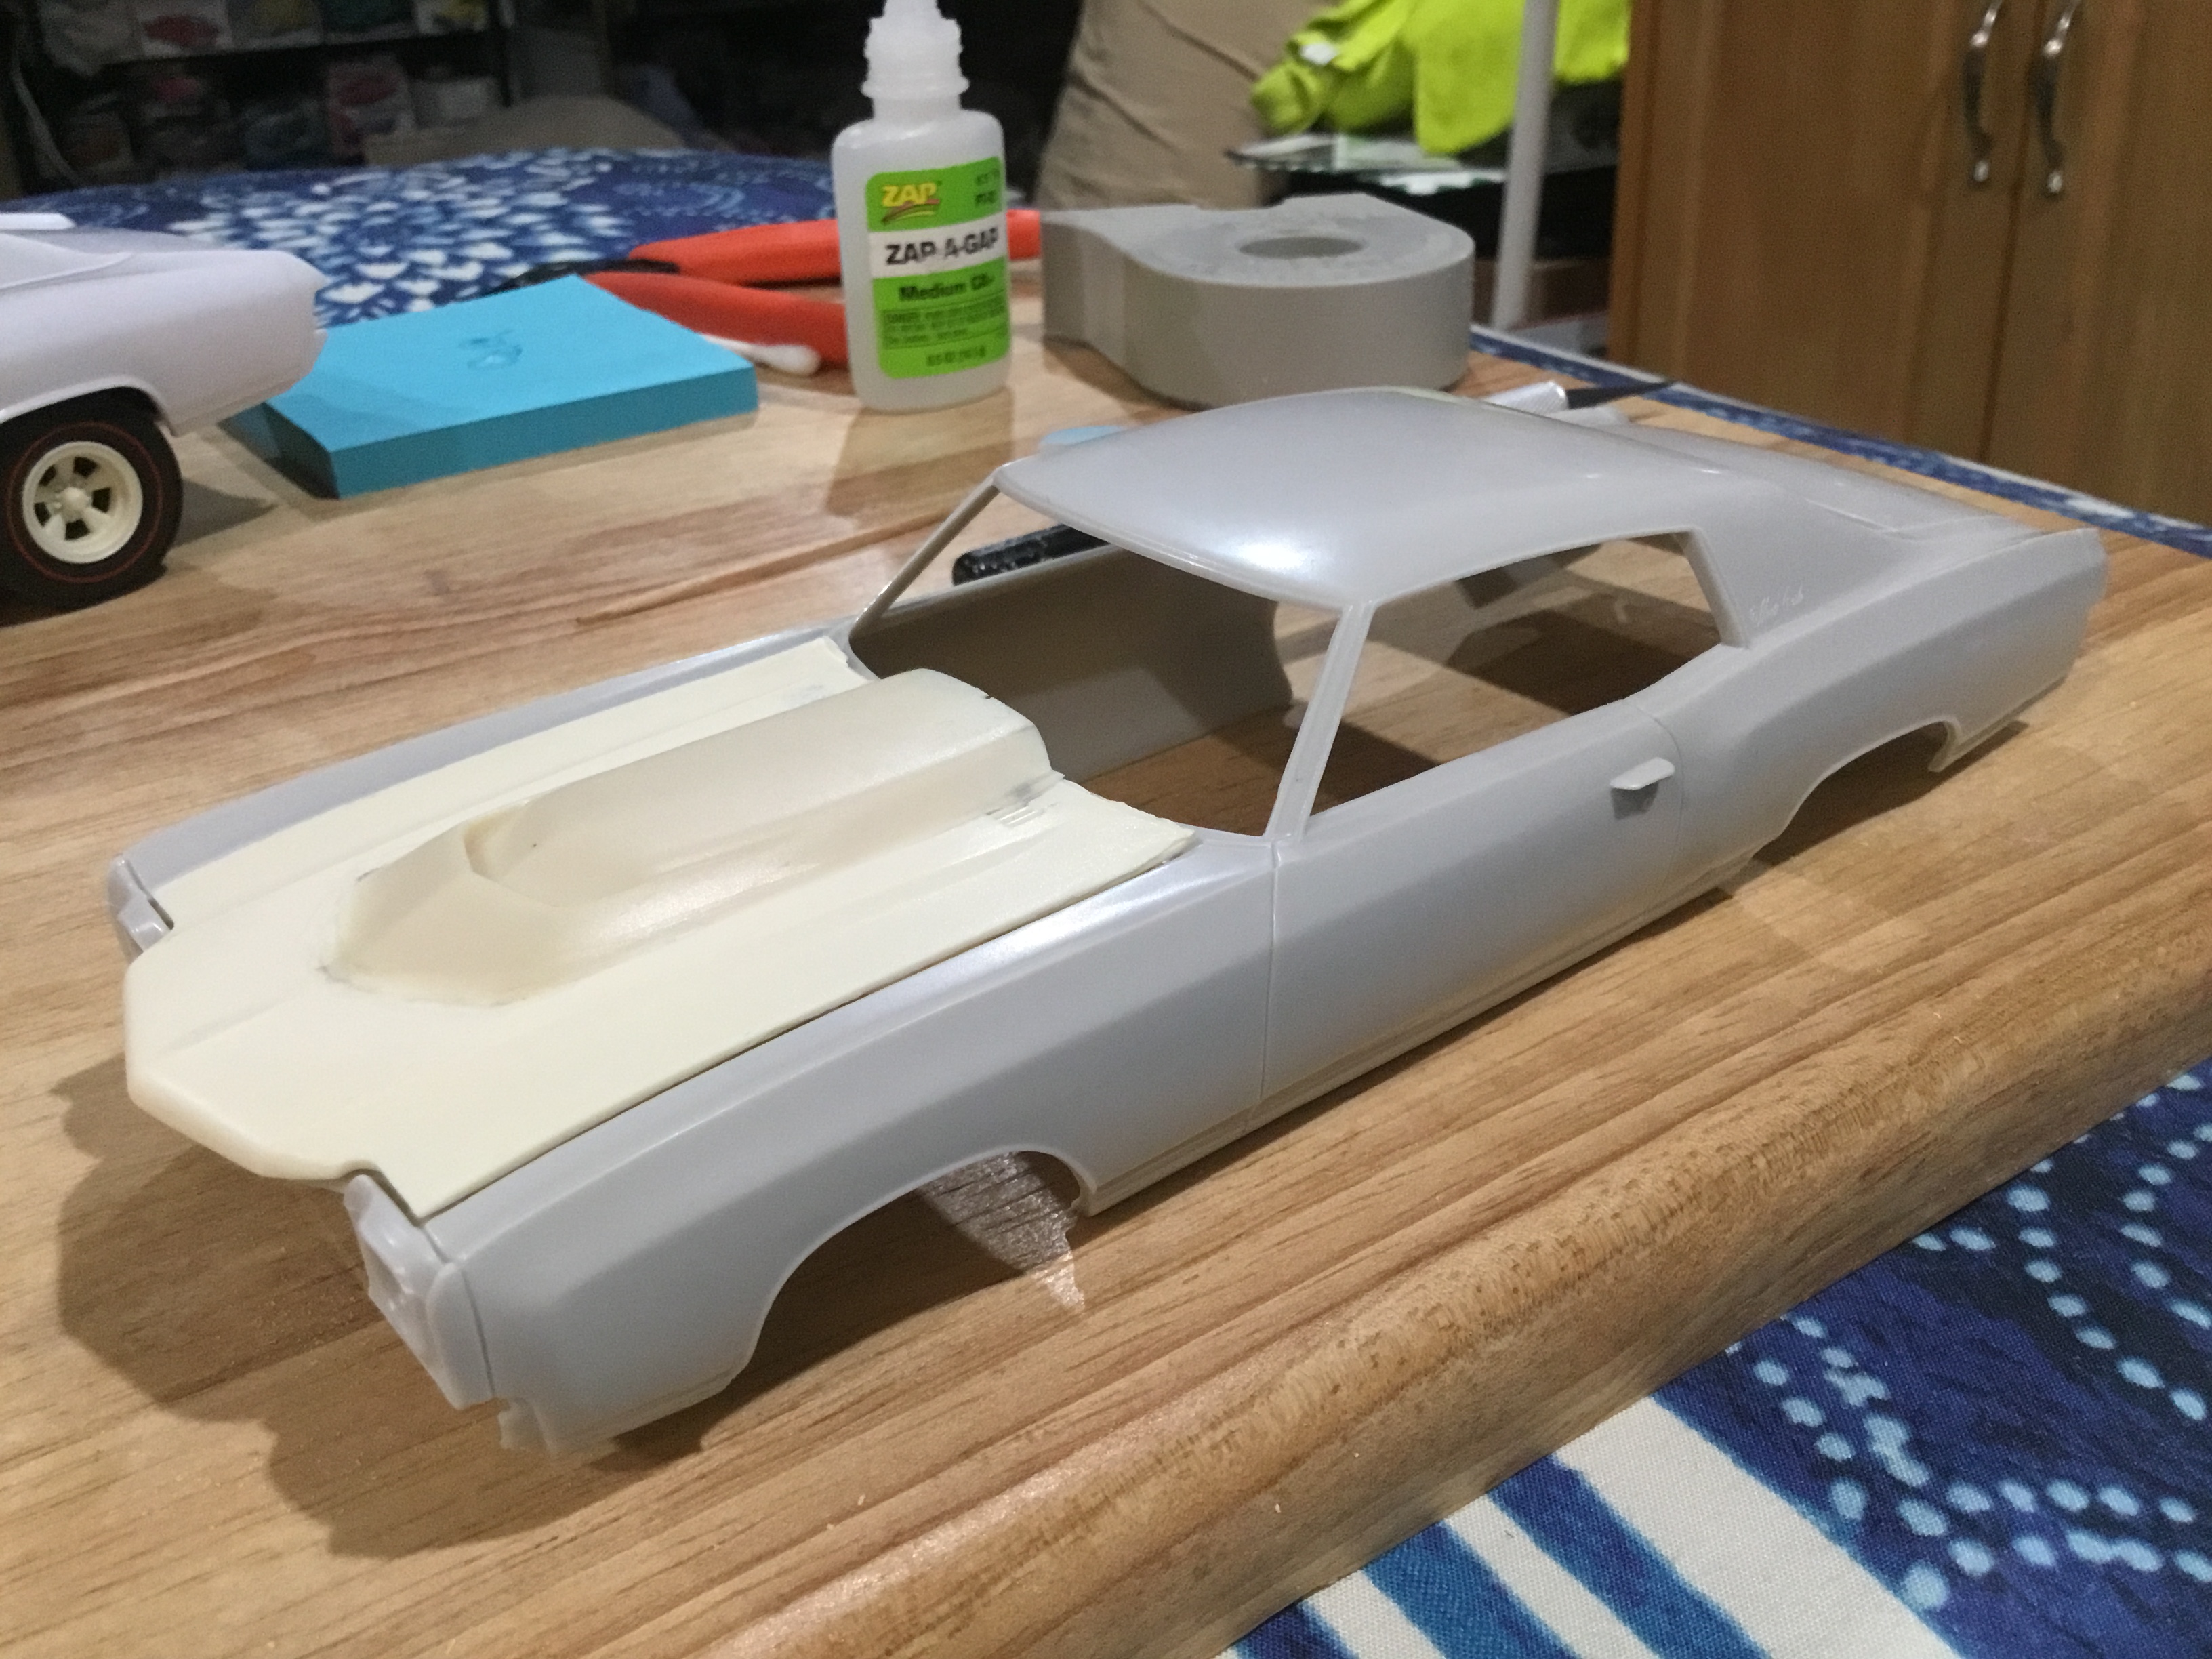
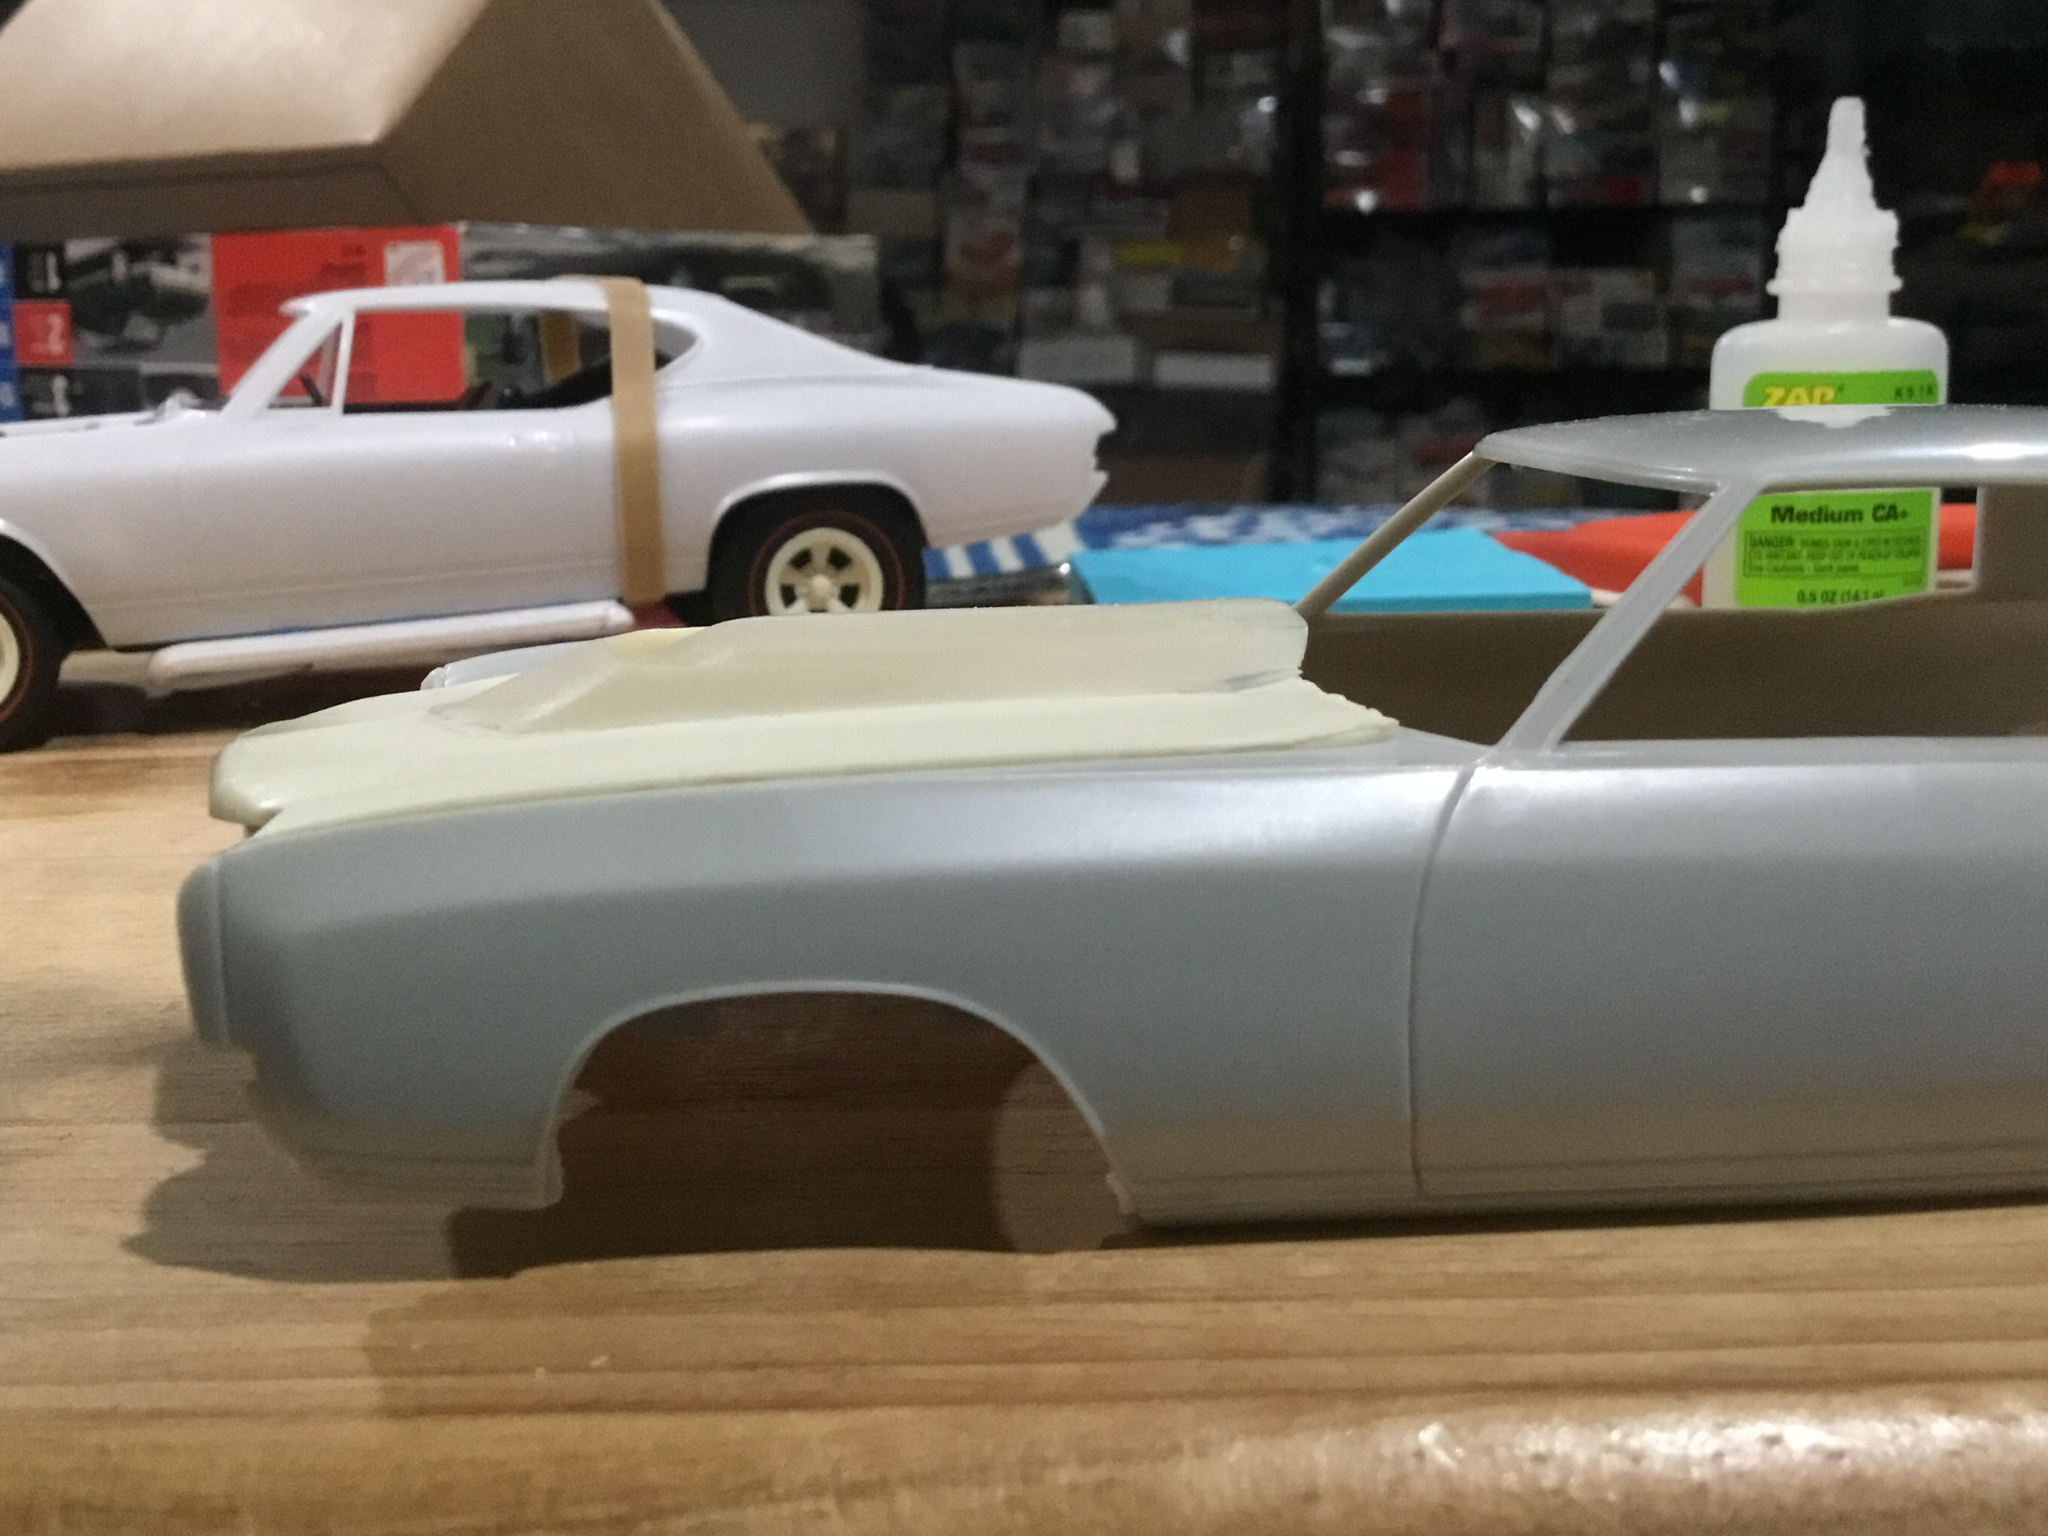
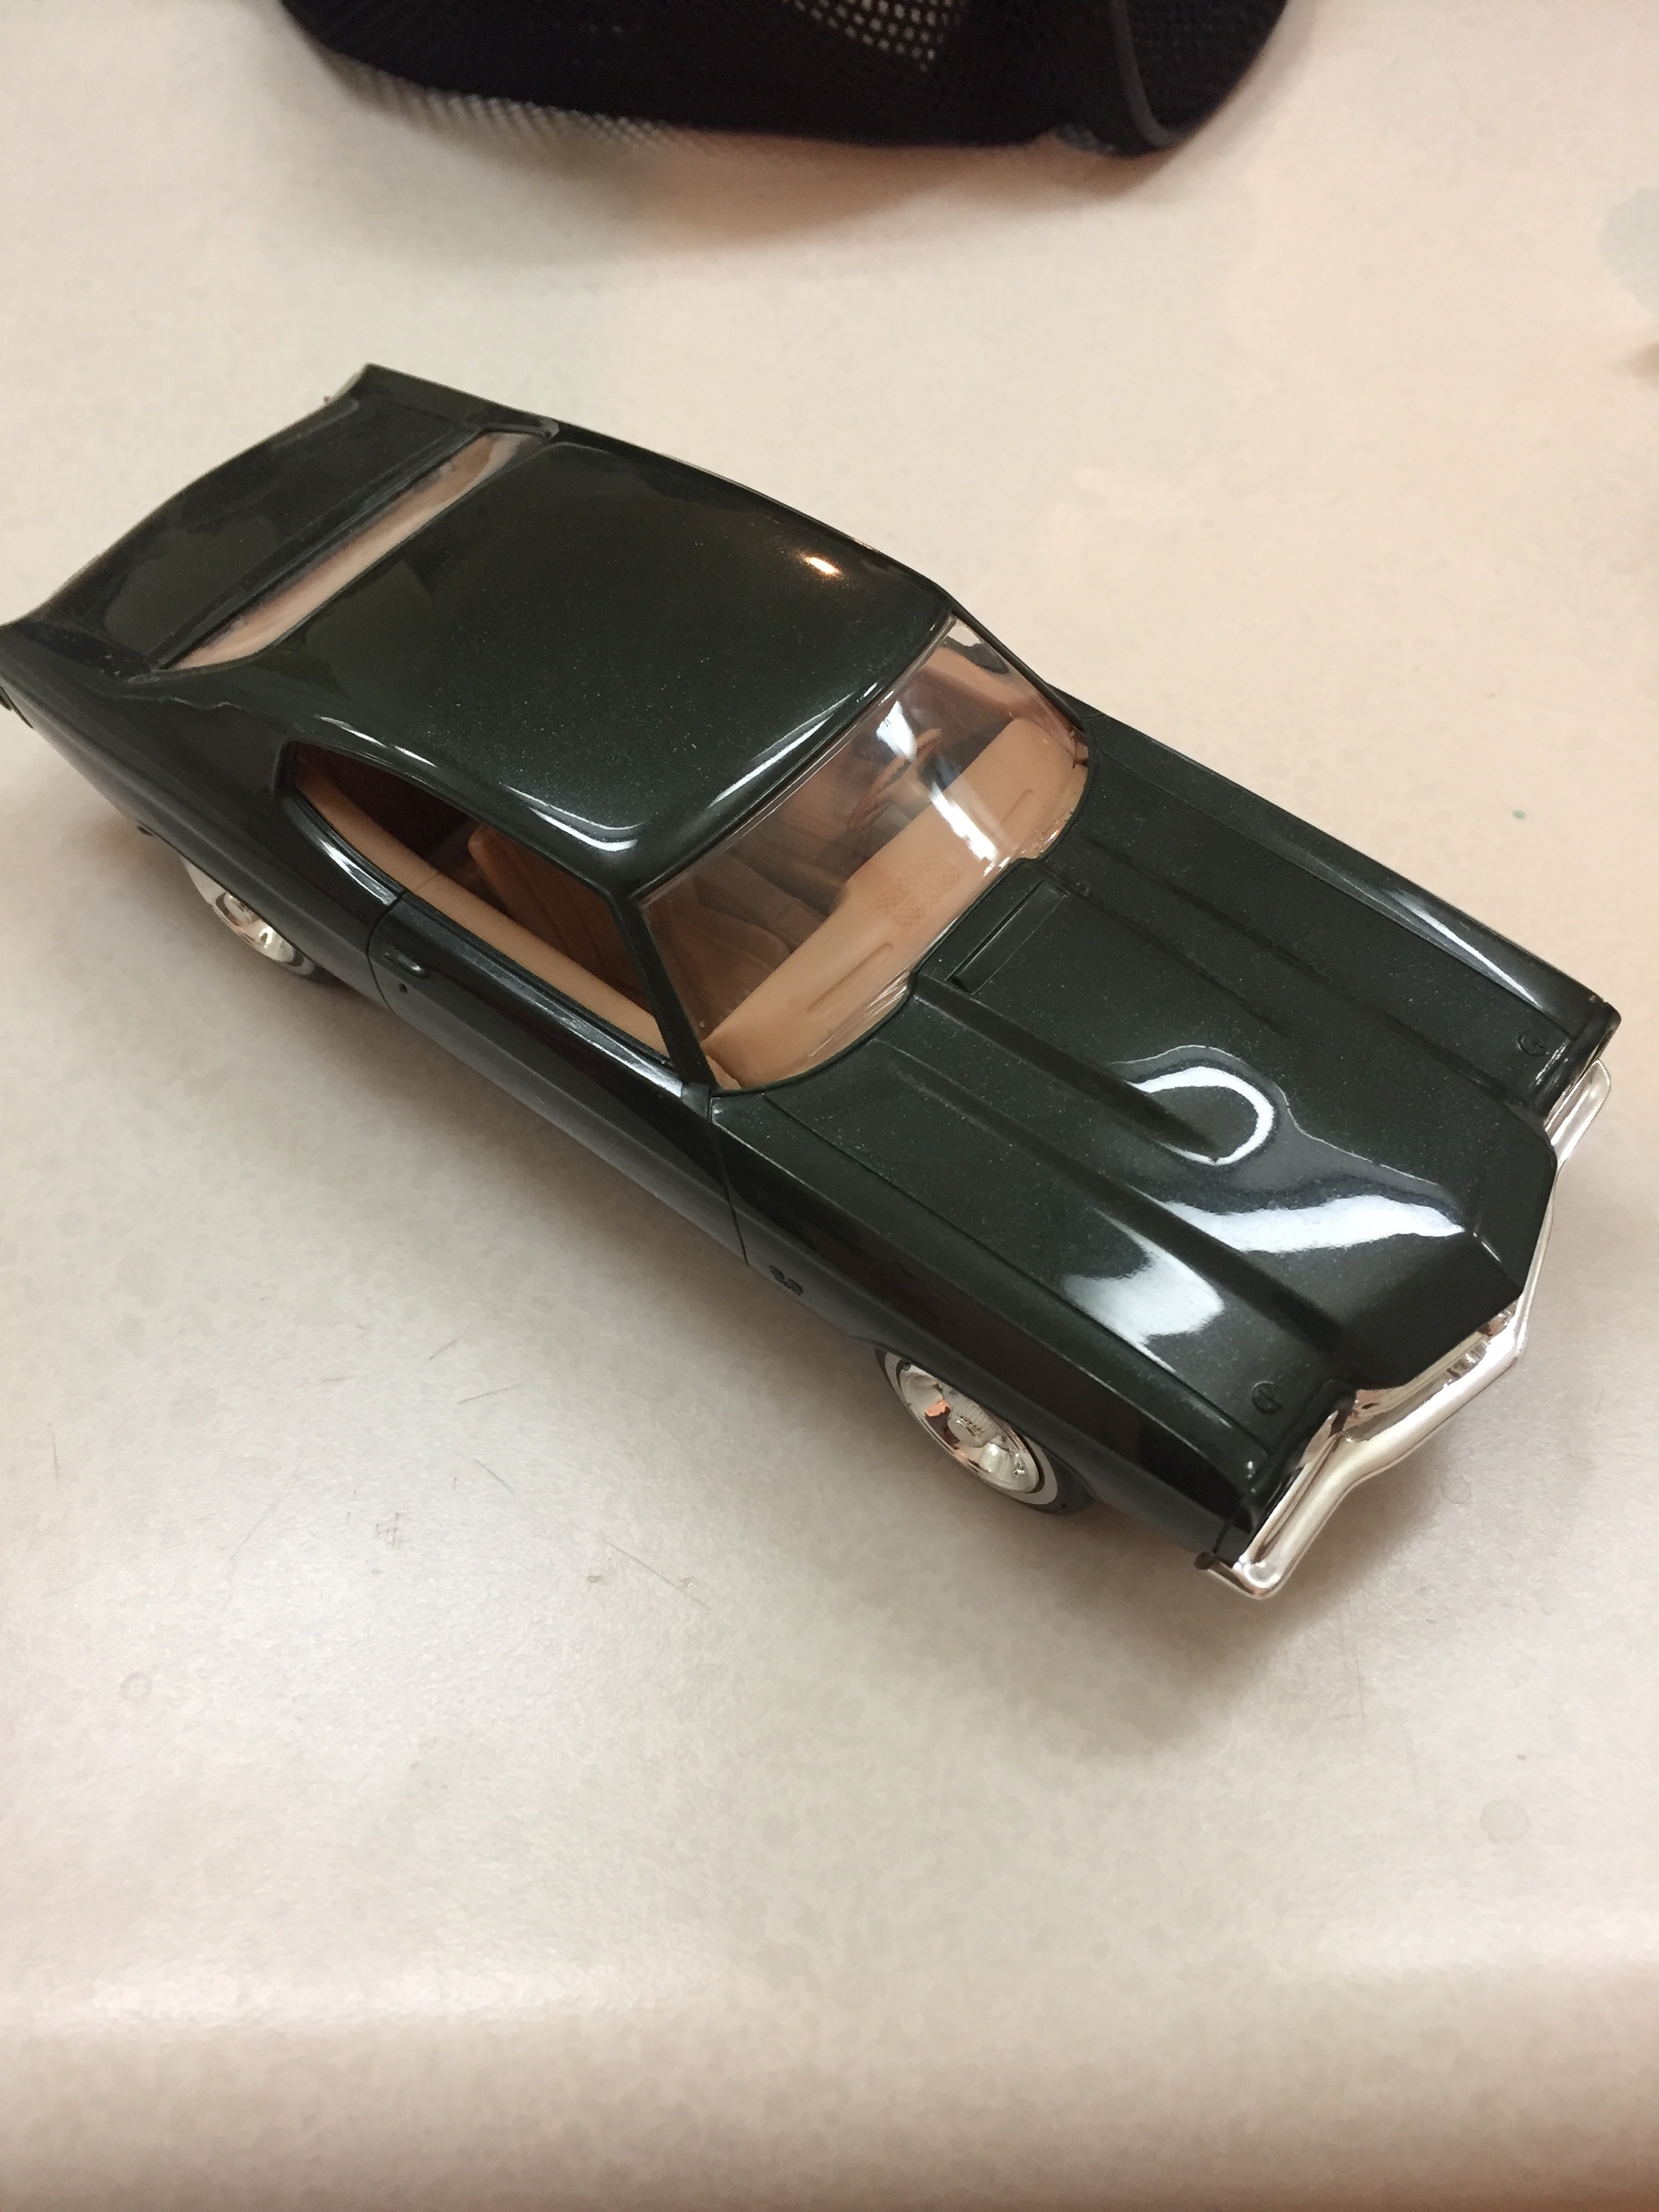
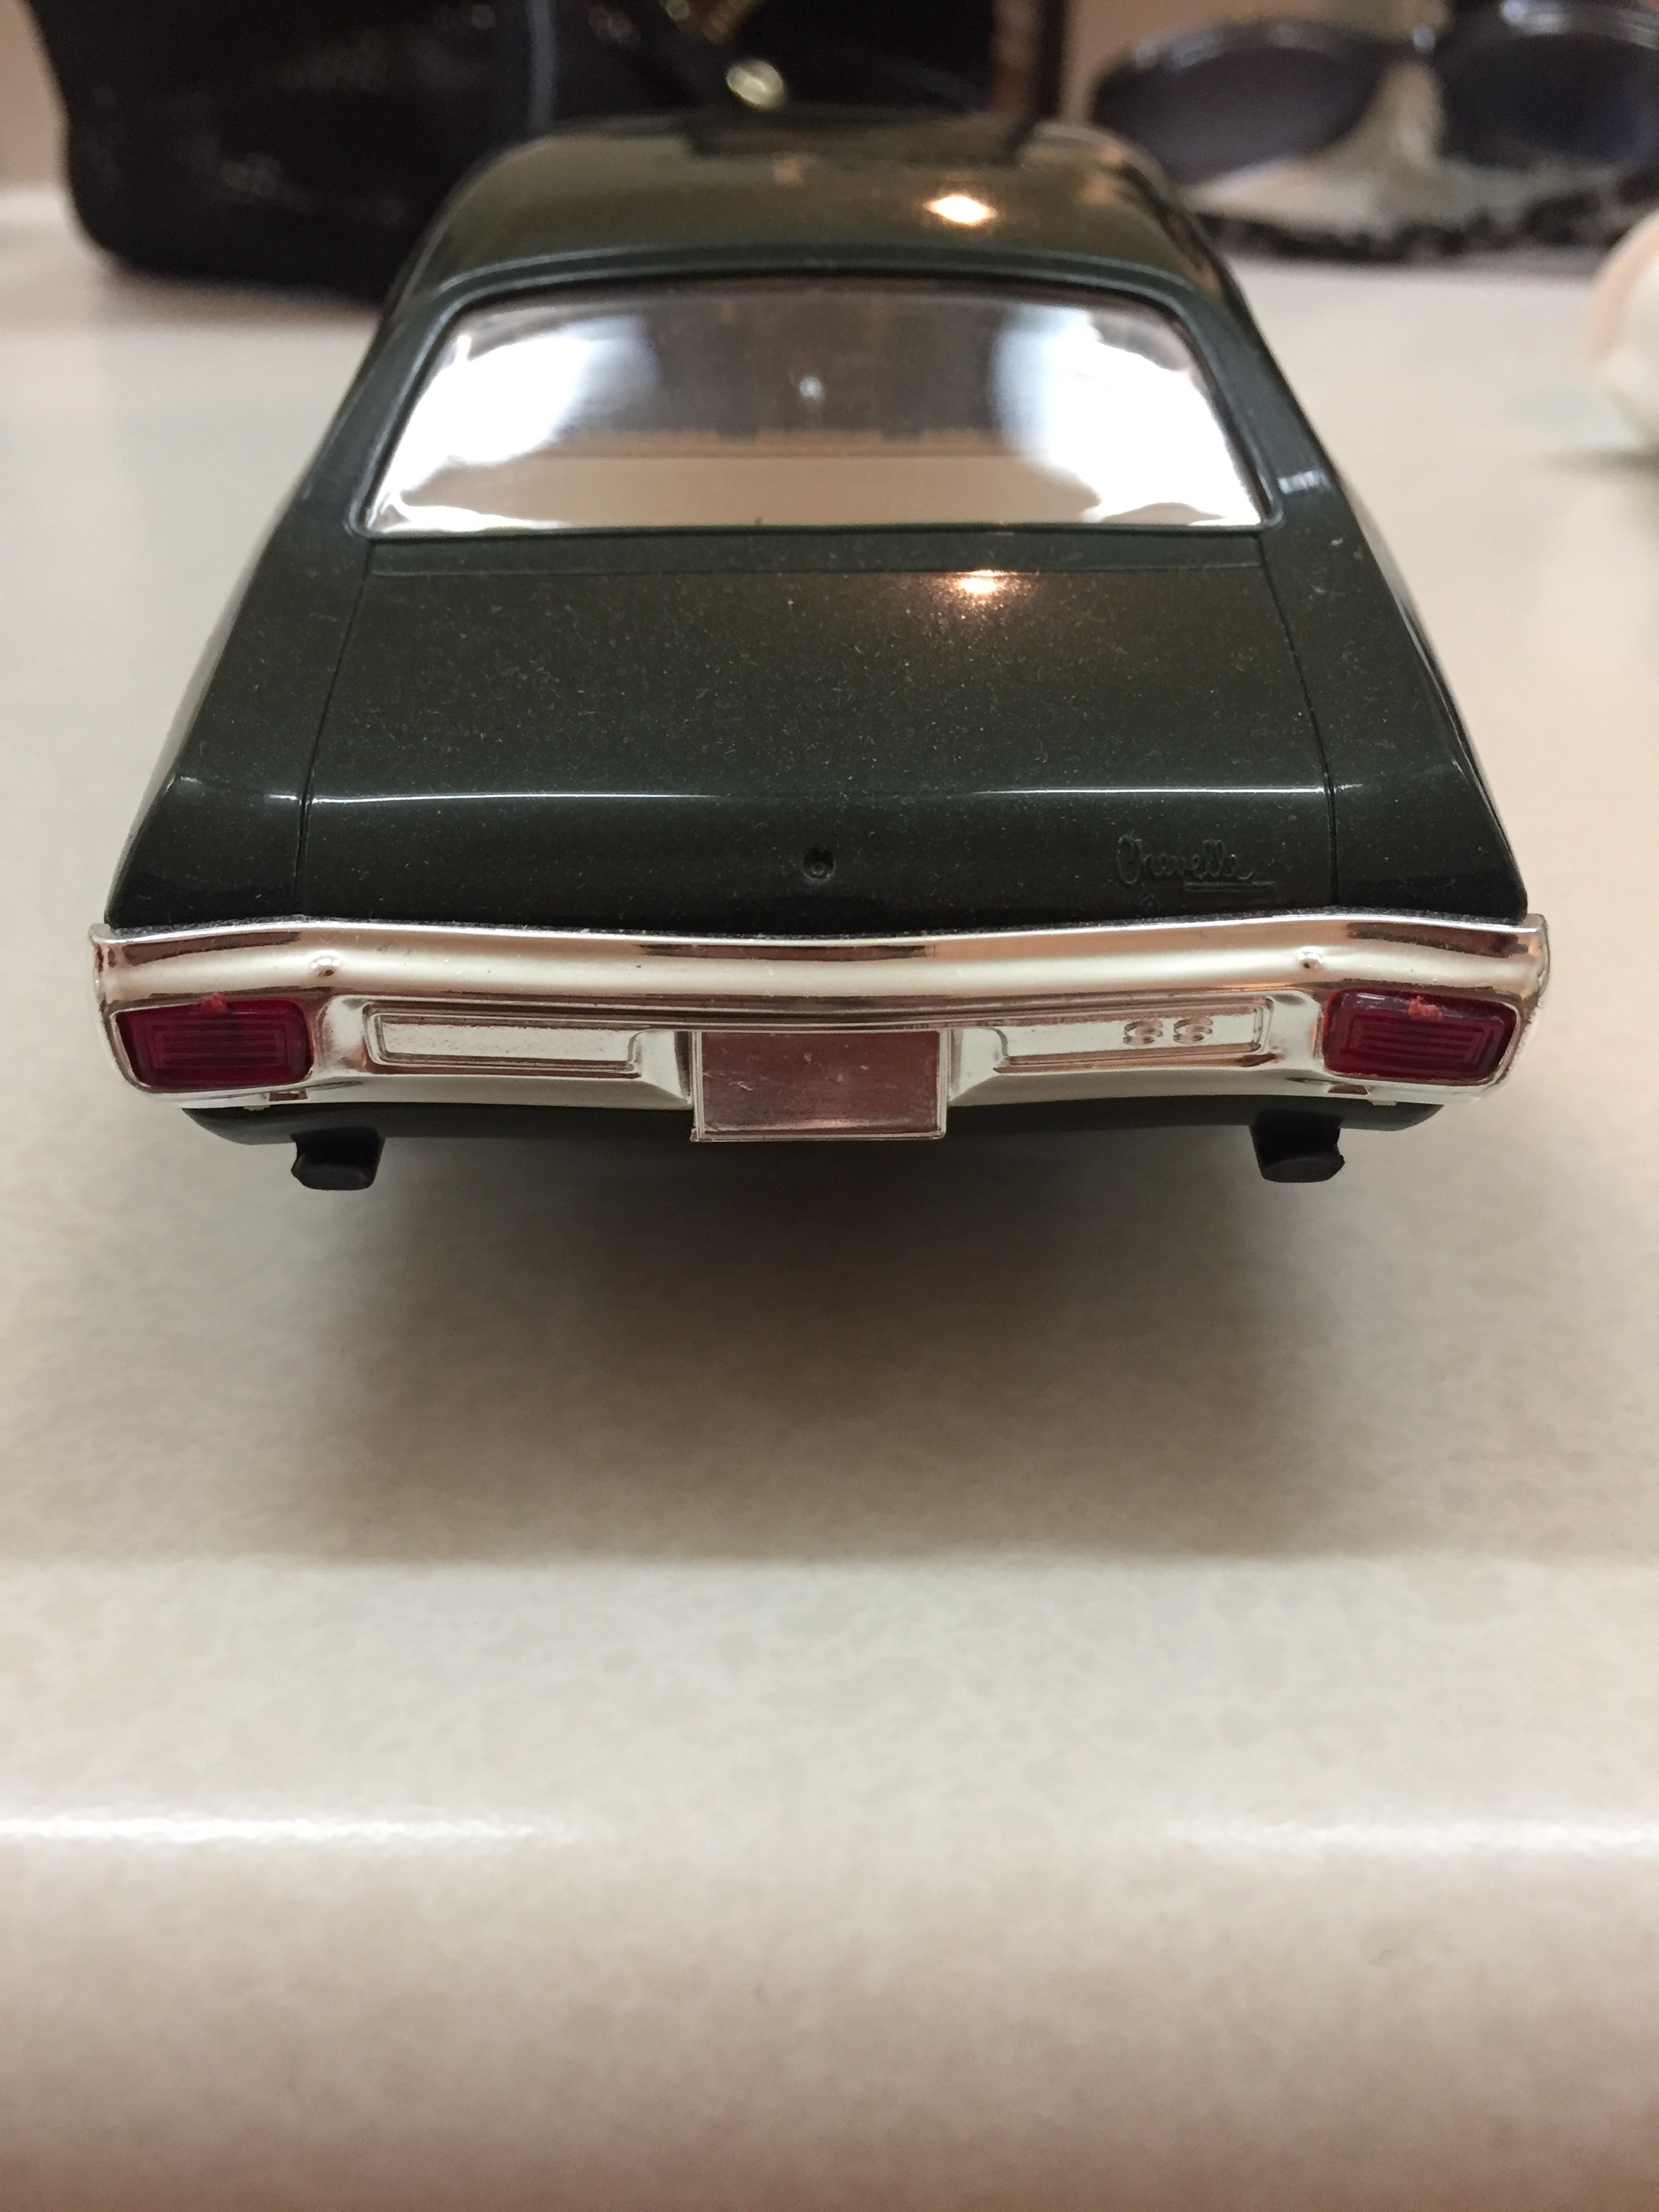
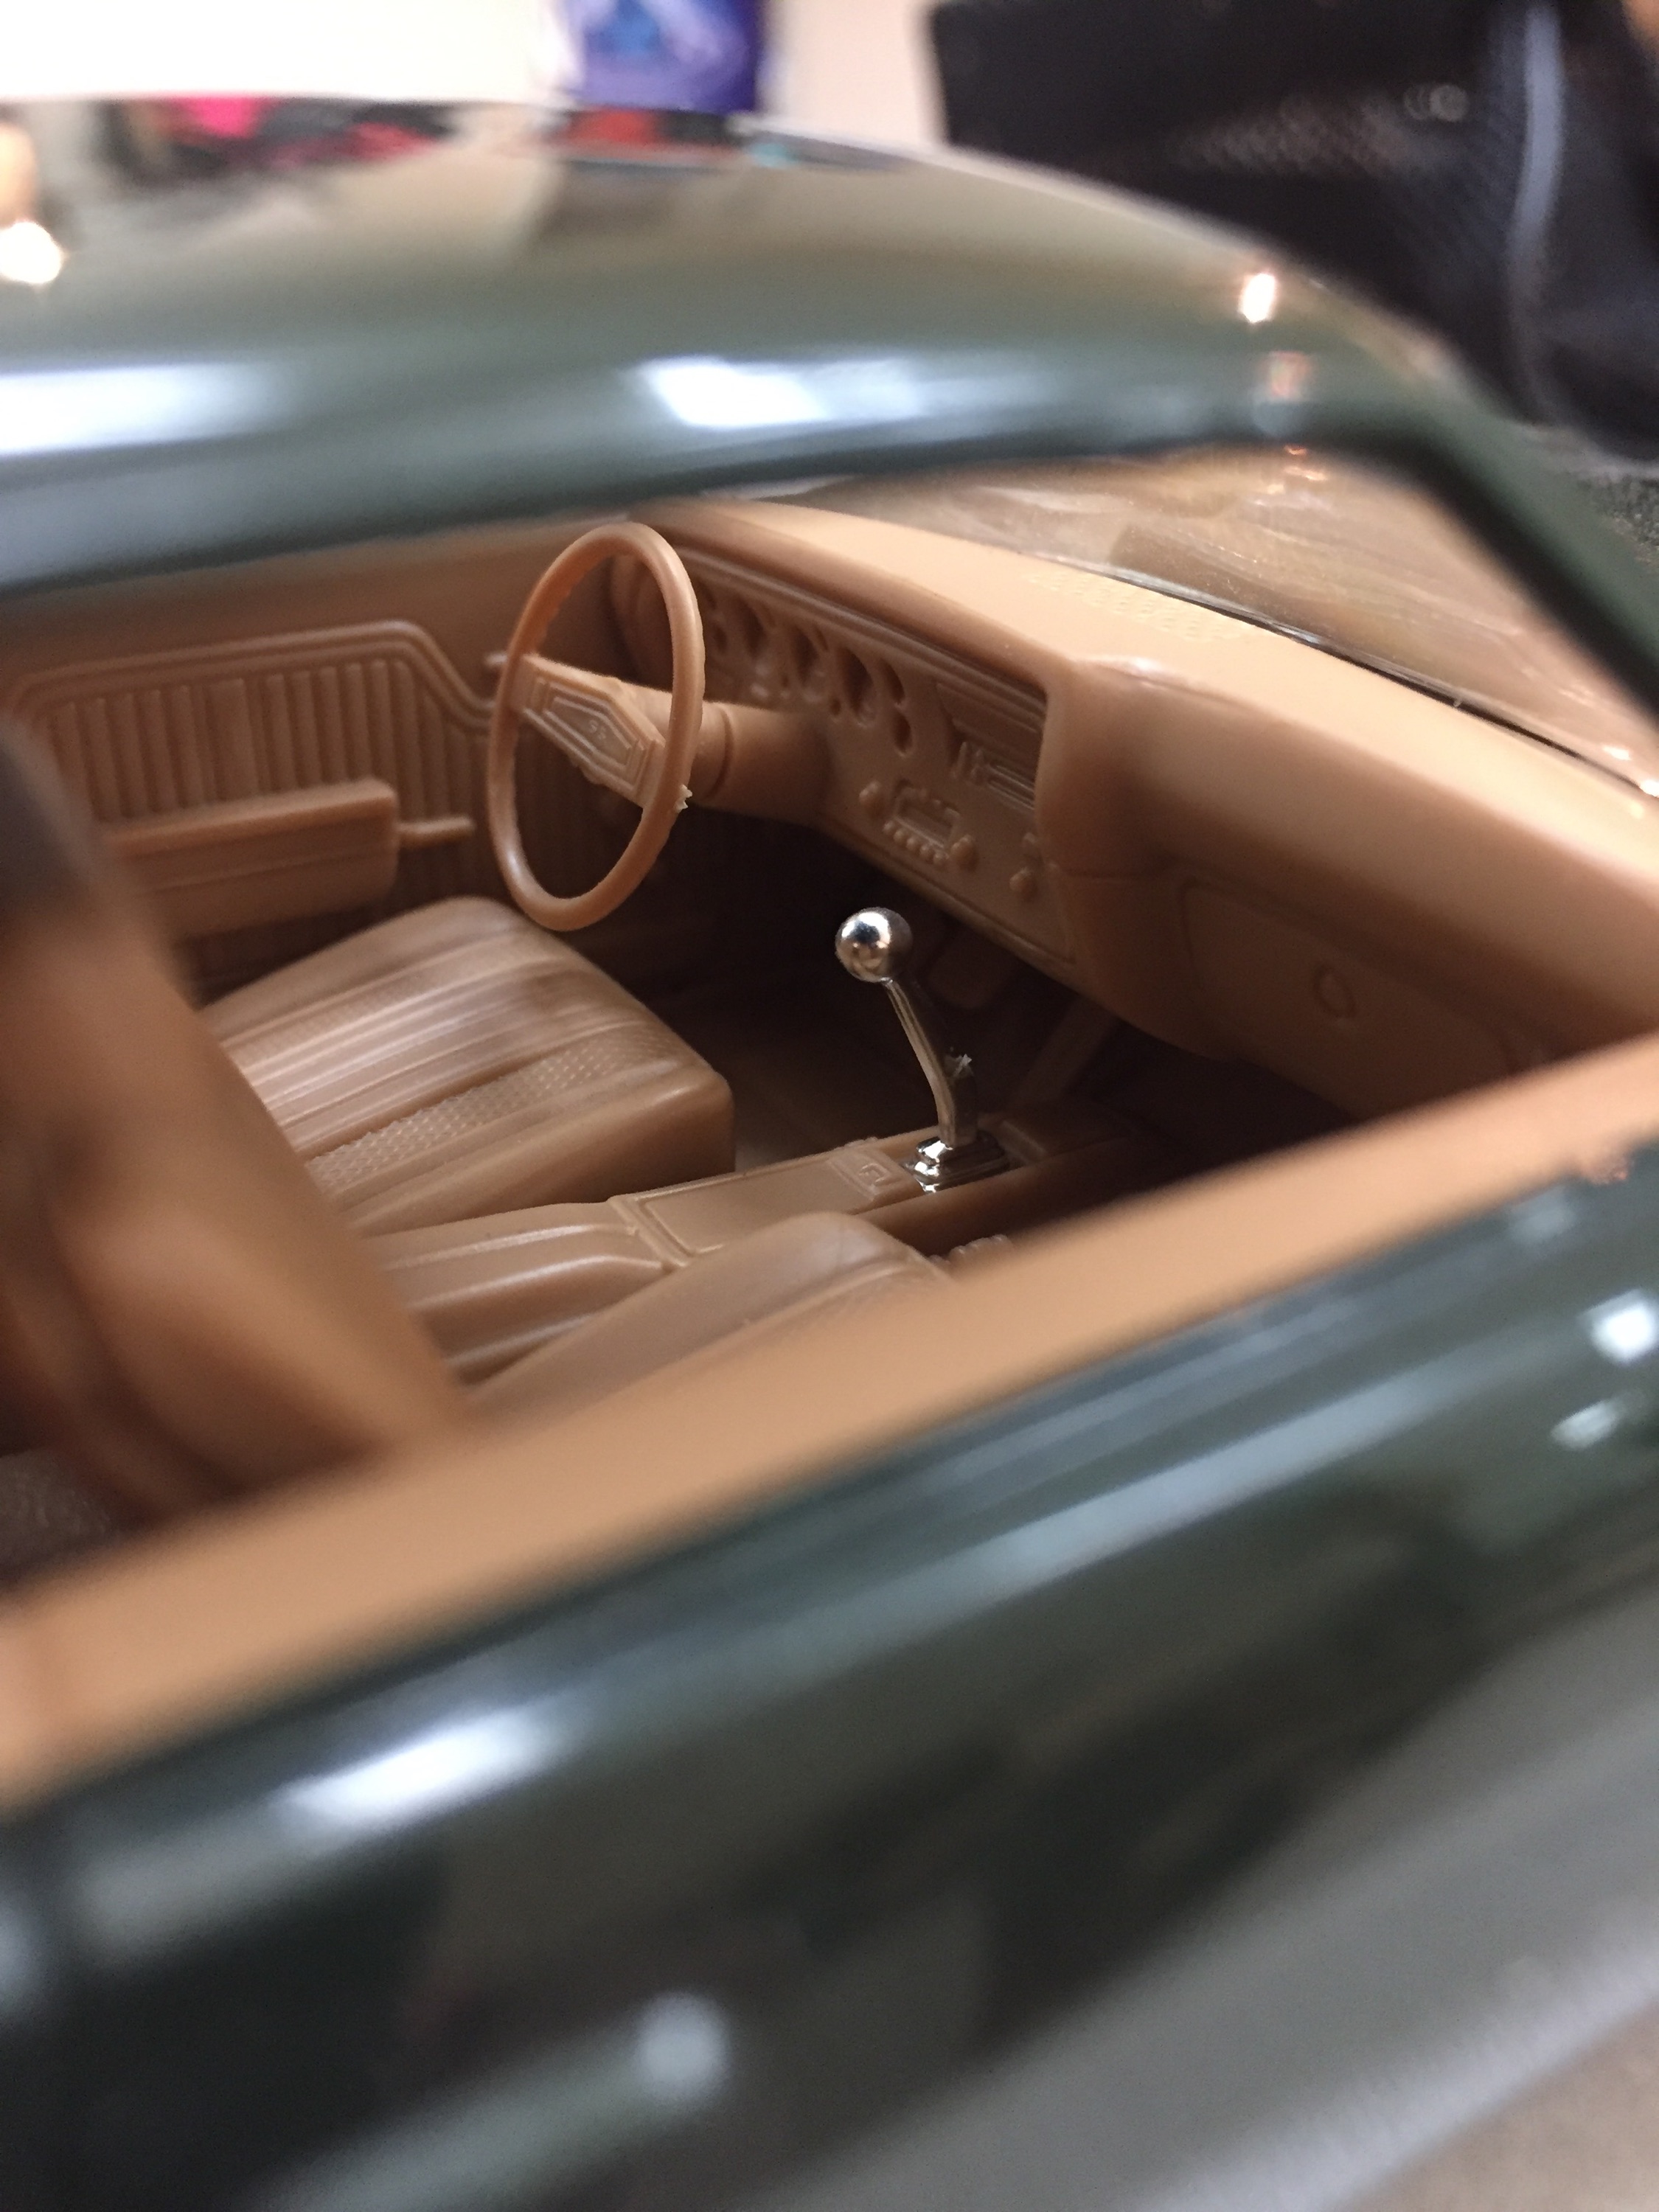
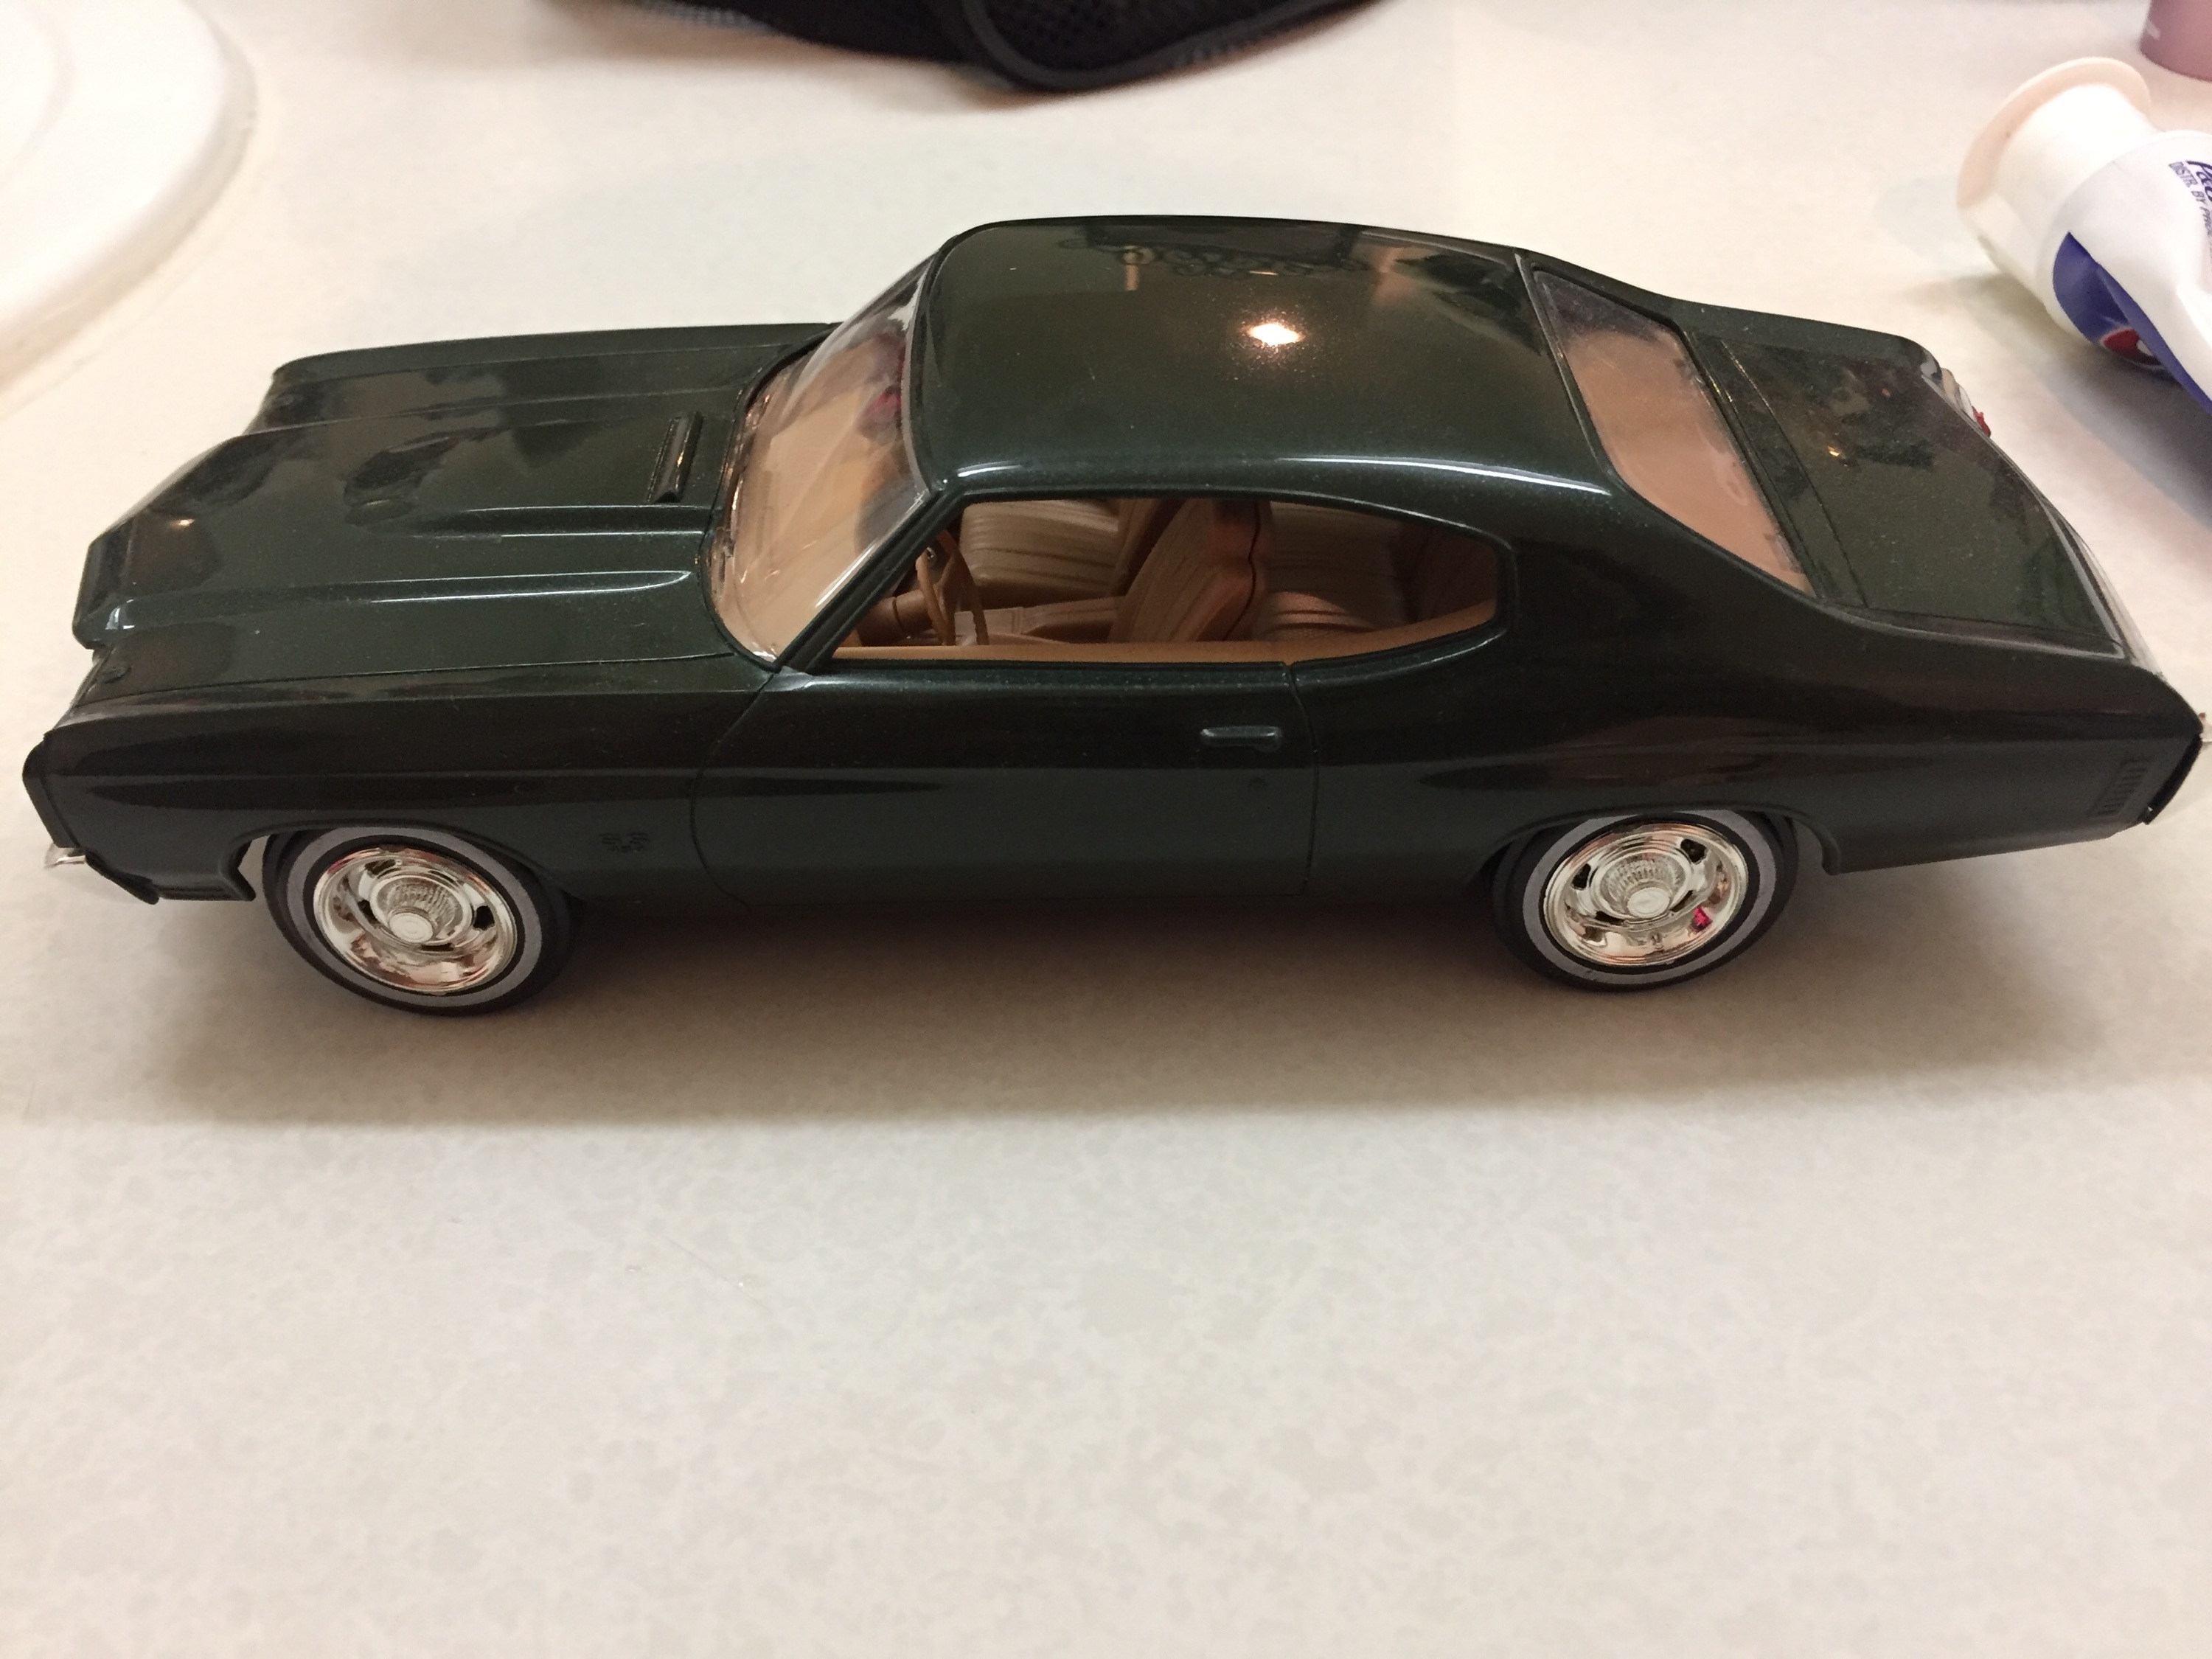
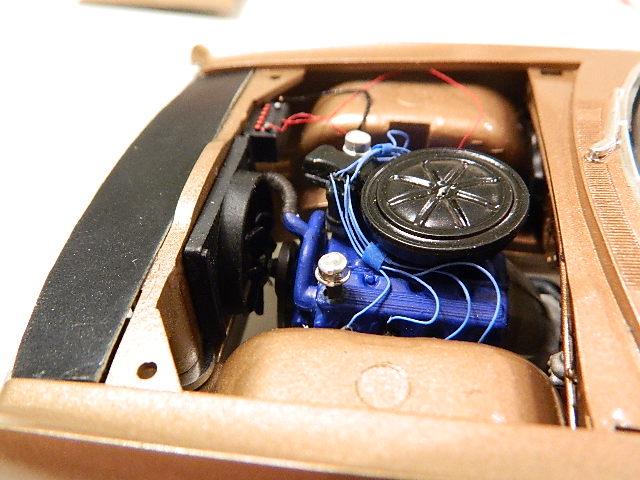
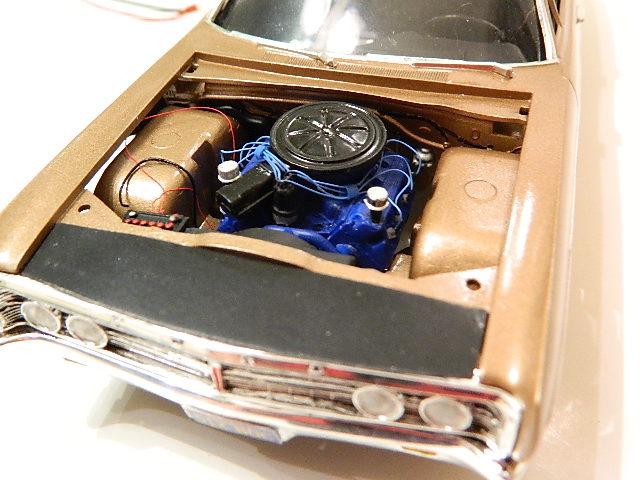
Everything under the skin of the new Revell 68 Chevelle is so nice, I figured I would beat Revell to the punch and use it to make a decent 1970 Chevelle. I’ve always thought the Revell snaps-tight Chevelle had a wel proportioned body, high detail door panels, and its super smooth! So out came my cut off wheel, razor saws and sanding sticks! Here is where I’m at so far. I started by checking the fit of the floor pan assembly. It fit like a glove! Then, I carefully removed the hood with the back of a #11 technique. I removed the upper cowl from the 68 and mounted it in the 70. To locate it properly, I tacked the 68 interior together with the firewall in place too. Positioned the upper cowl in line with the firewall and tacked it to the fenders. Then I swapped out in the inner fender sides to give the hood something to sit on. Satisfied with that start, I moved to the interior. I cut out the floor of the 70 first, then slowly started sanding the bottom of the rear seat until it sat in the right position. I built off the rear seat with the interior sides to the dashboard. Then after numerous test fits with the 68 floor, sanding, fitting and sanding some more.... I got it in place and in line with the firewall again! That’s where it stands right now. I have to find my L88 hood for the 70 now. I mastered and cast it for the AMT 70 Chevelle years ago and I think it will fit with a little modification. If not, it will give up it’s scoop to make a new one. Hope you like it, and maybe try this yourself! Questions and comments always welcome.
-
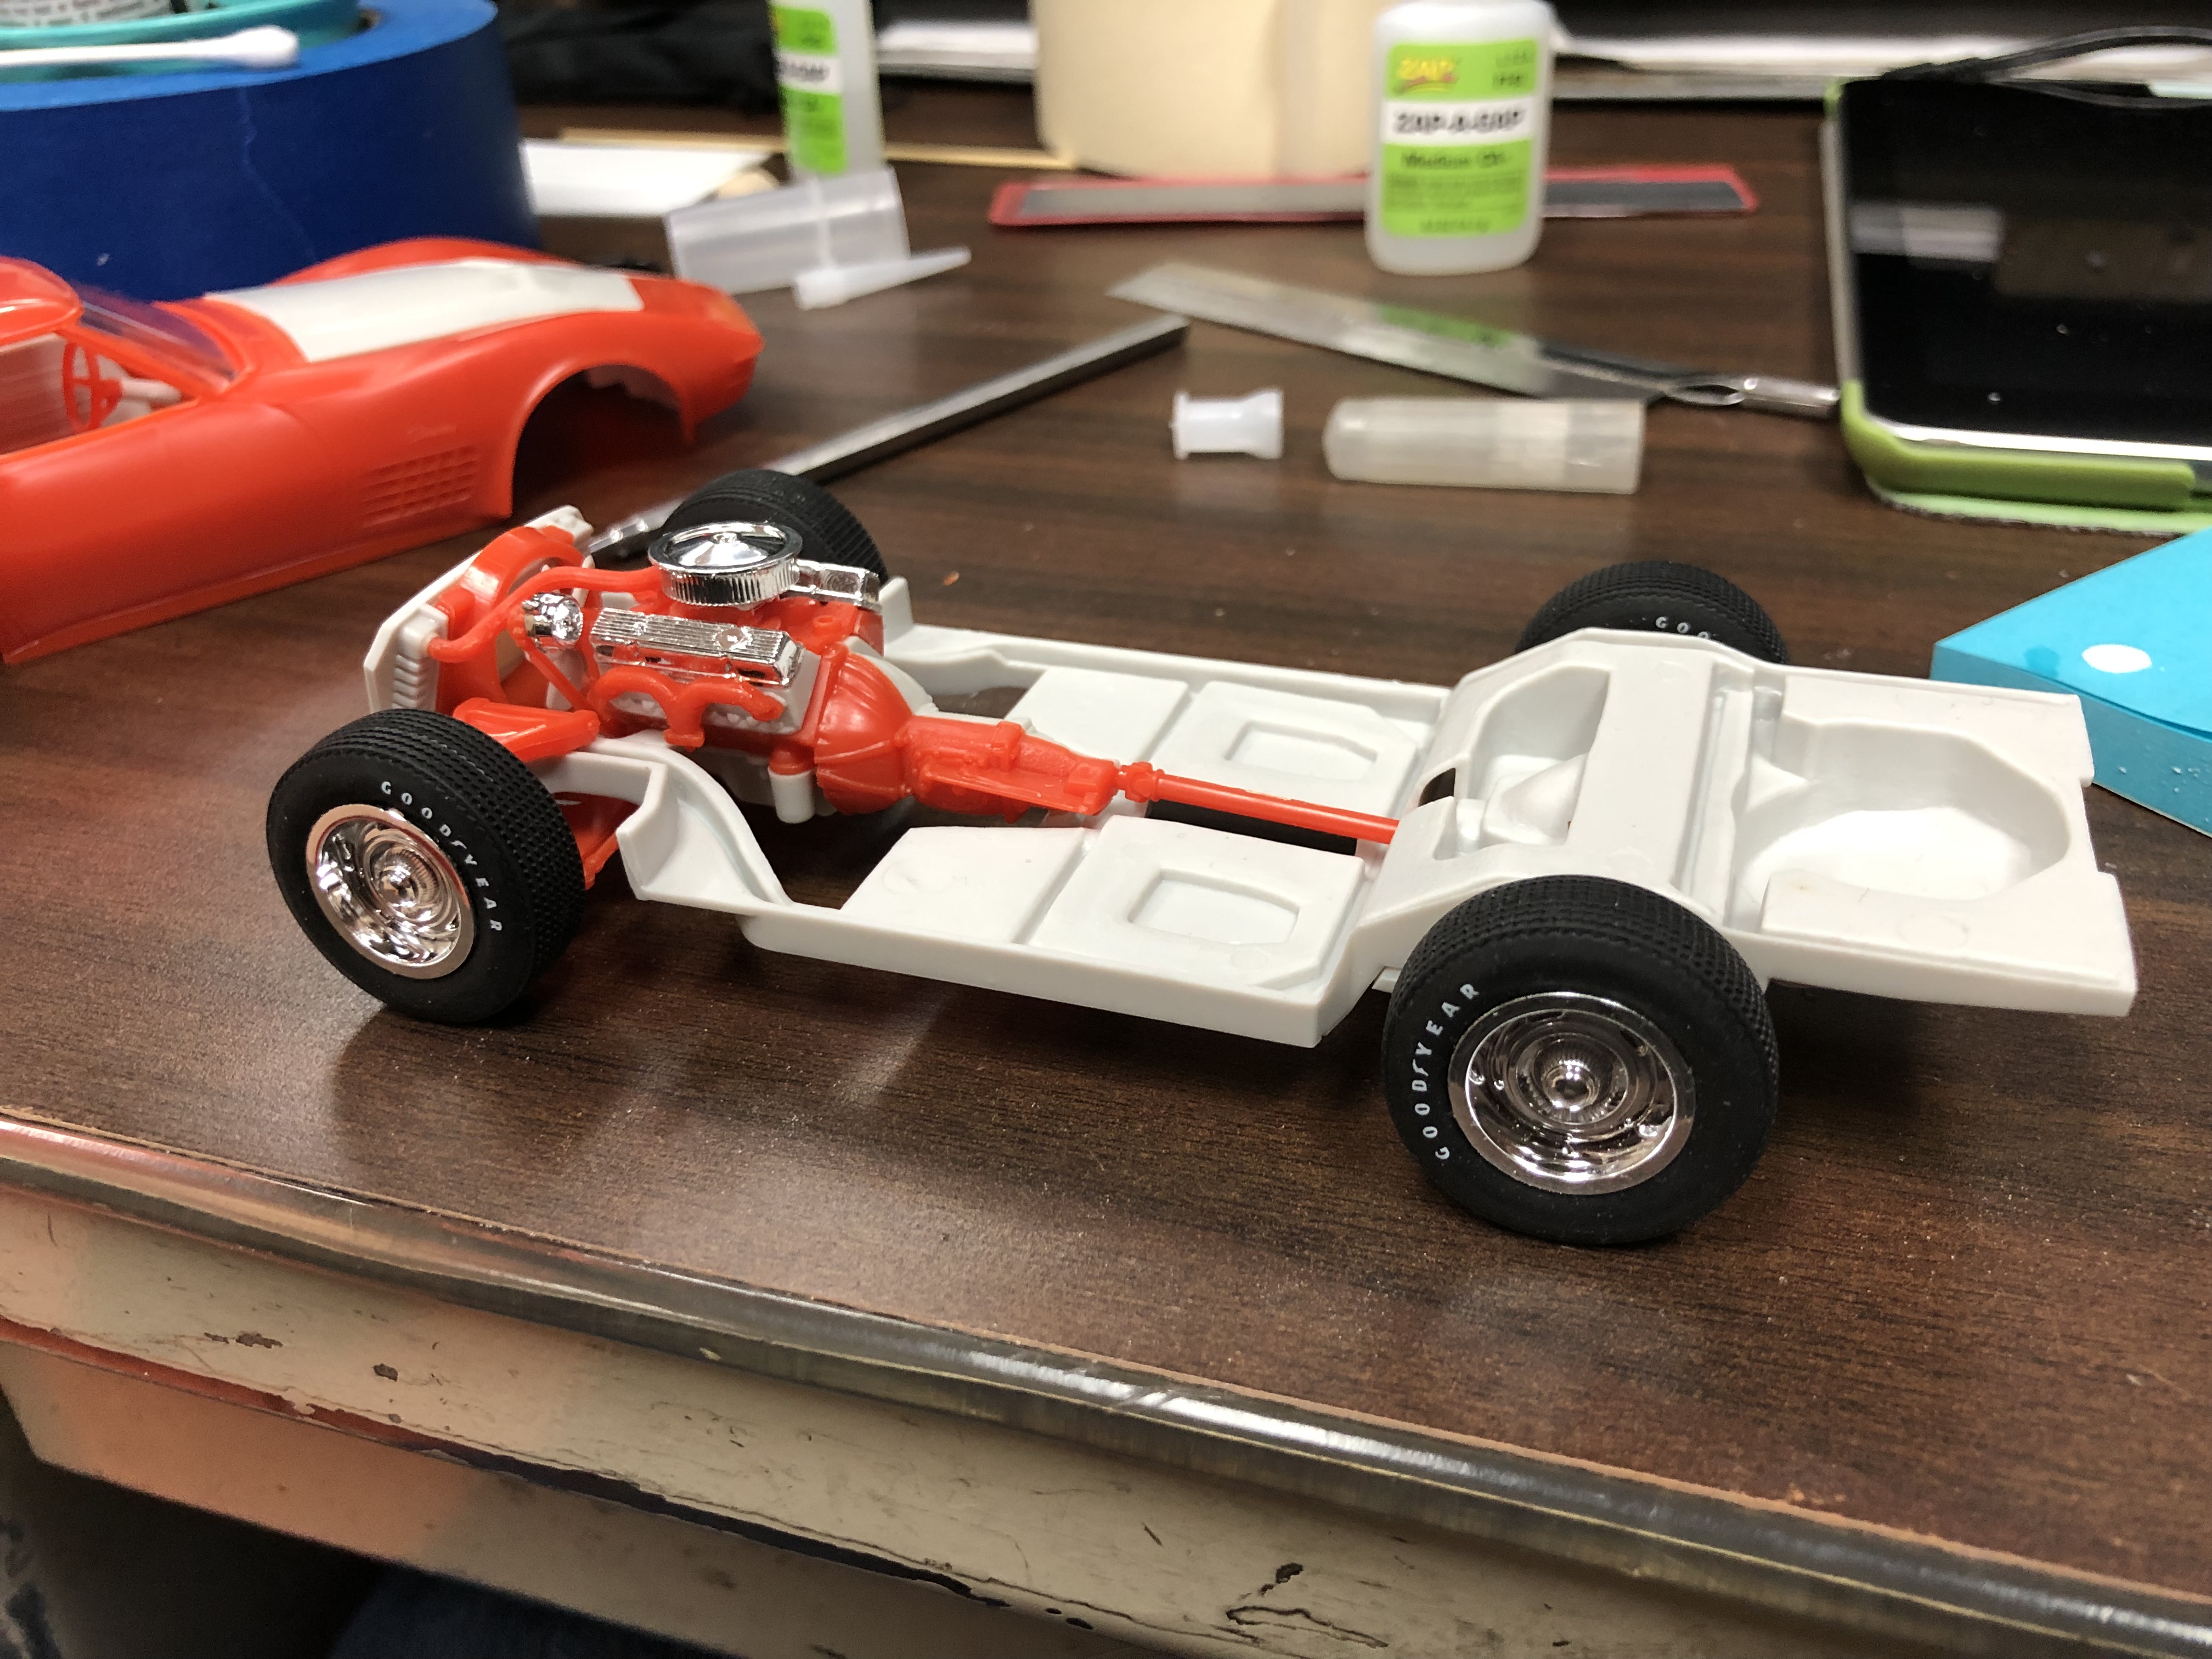
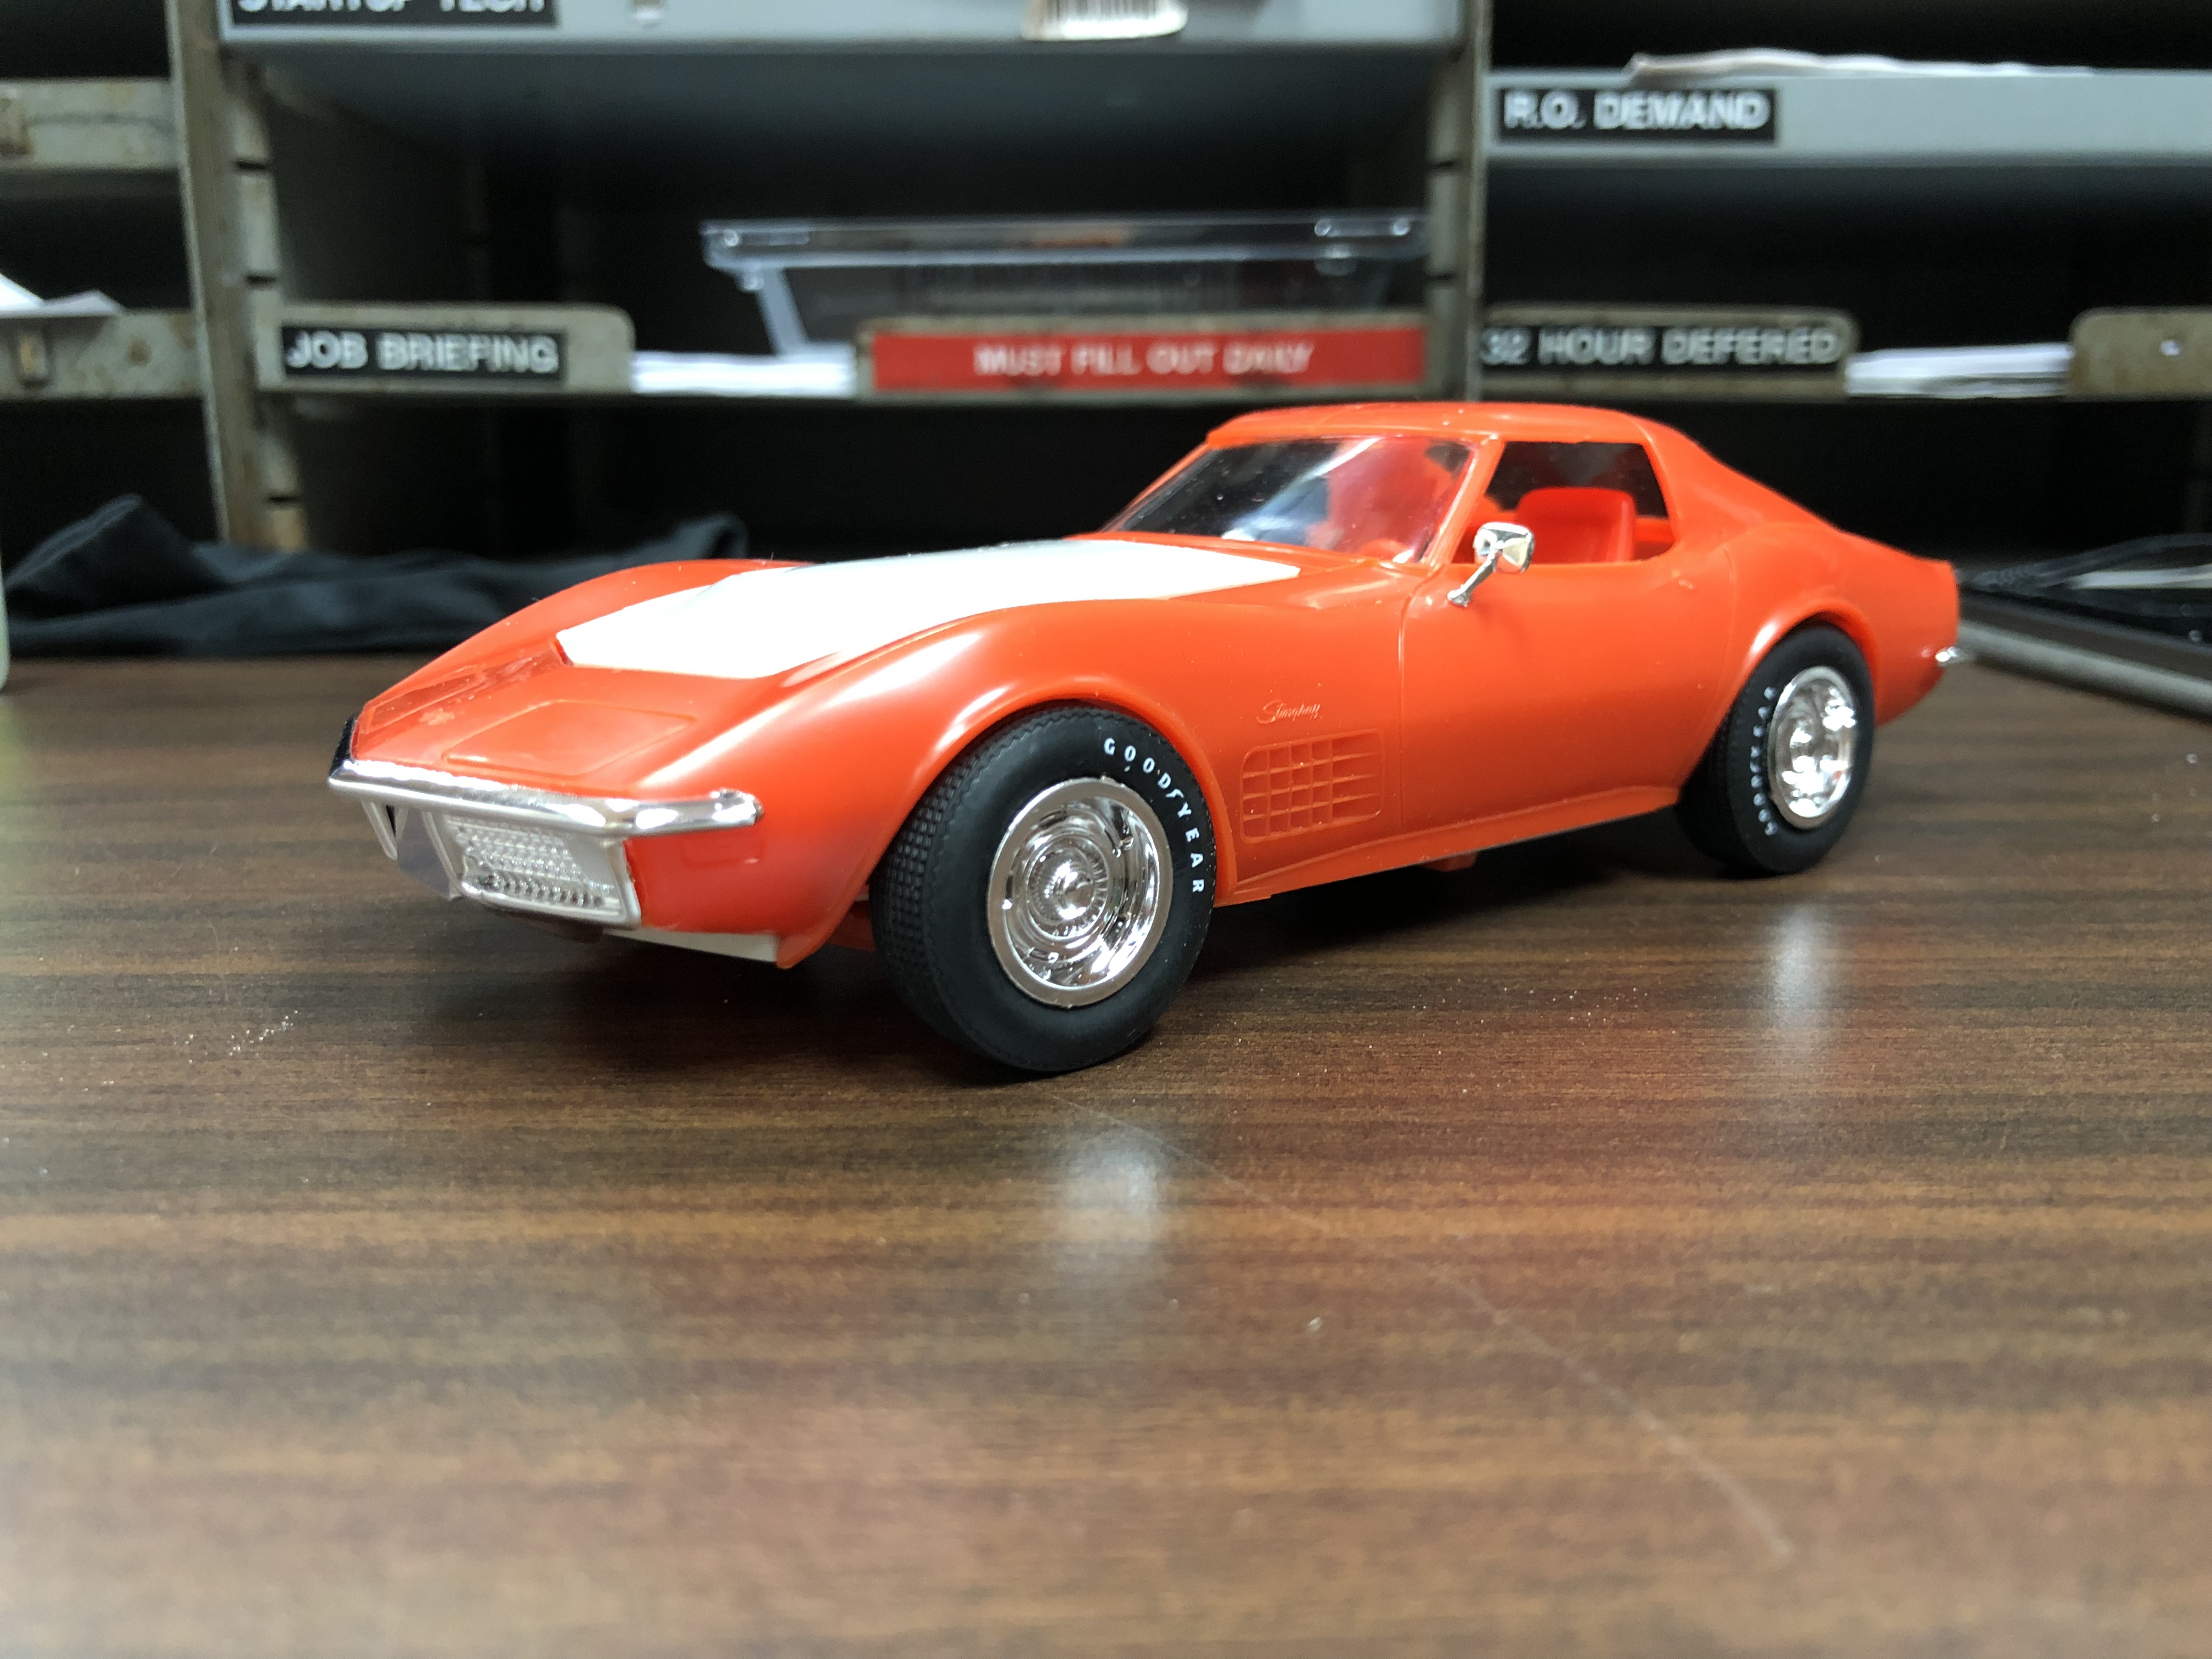
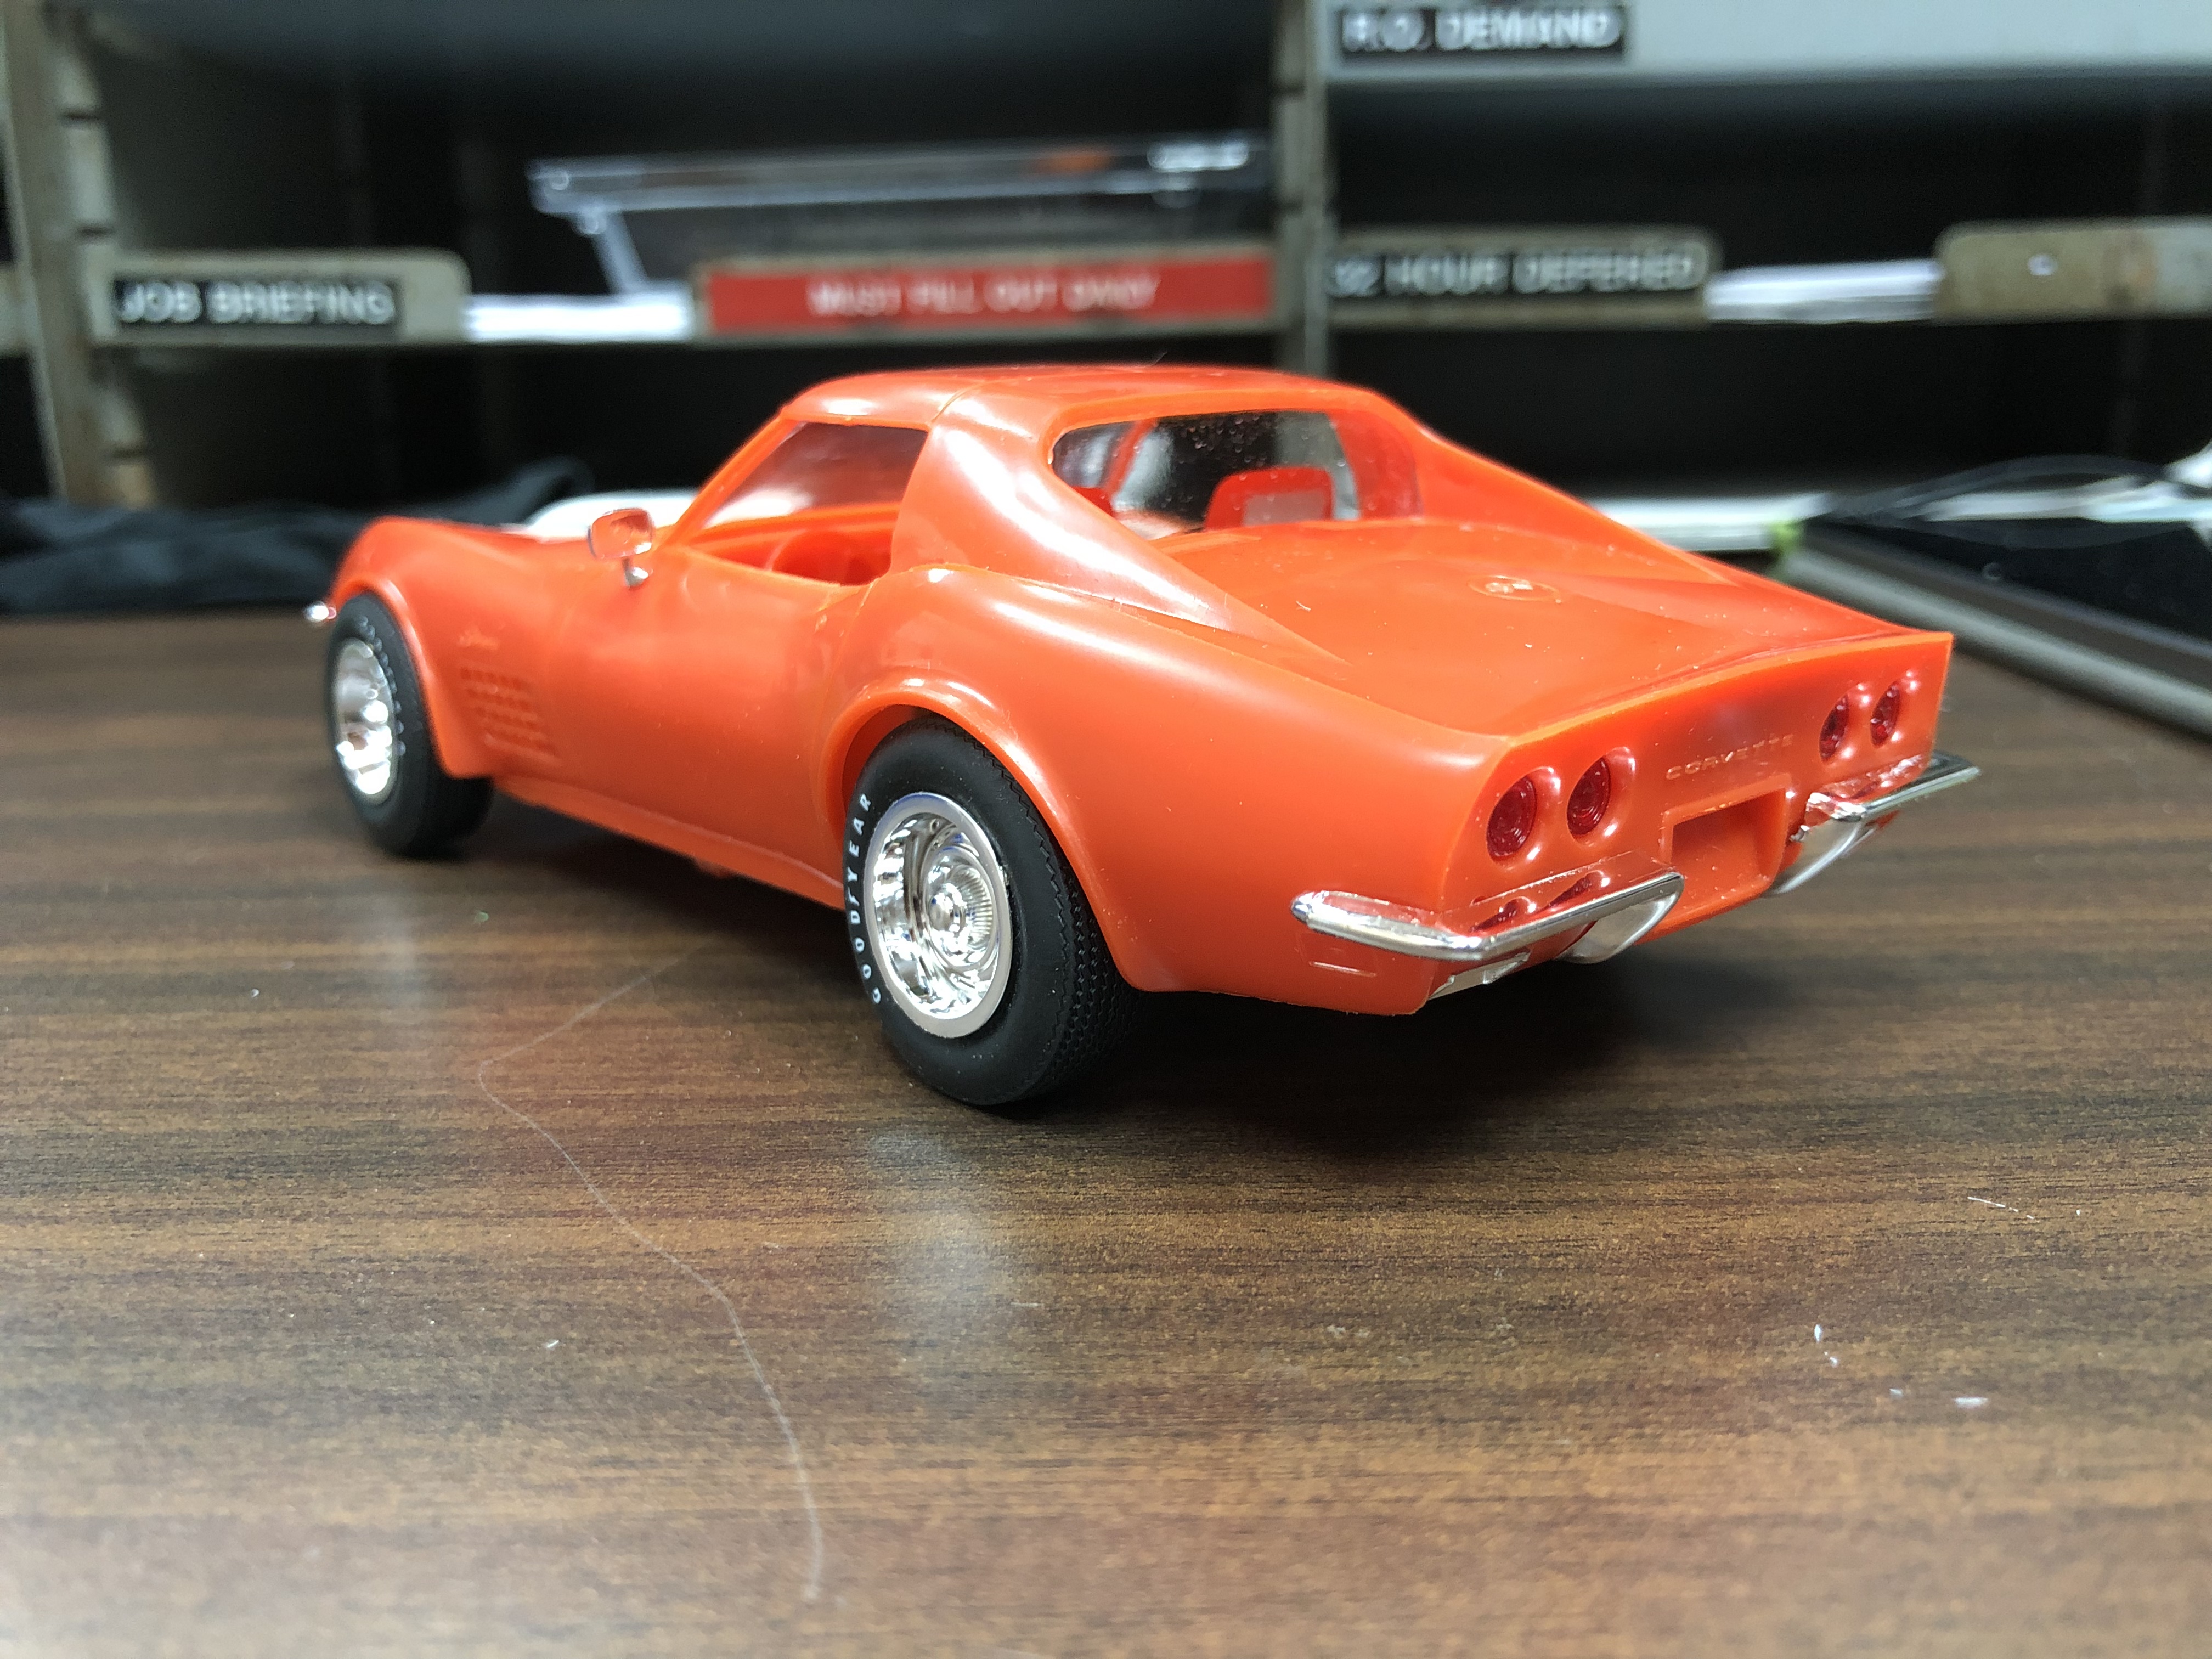
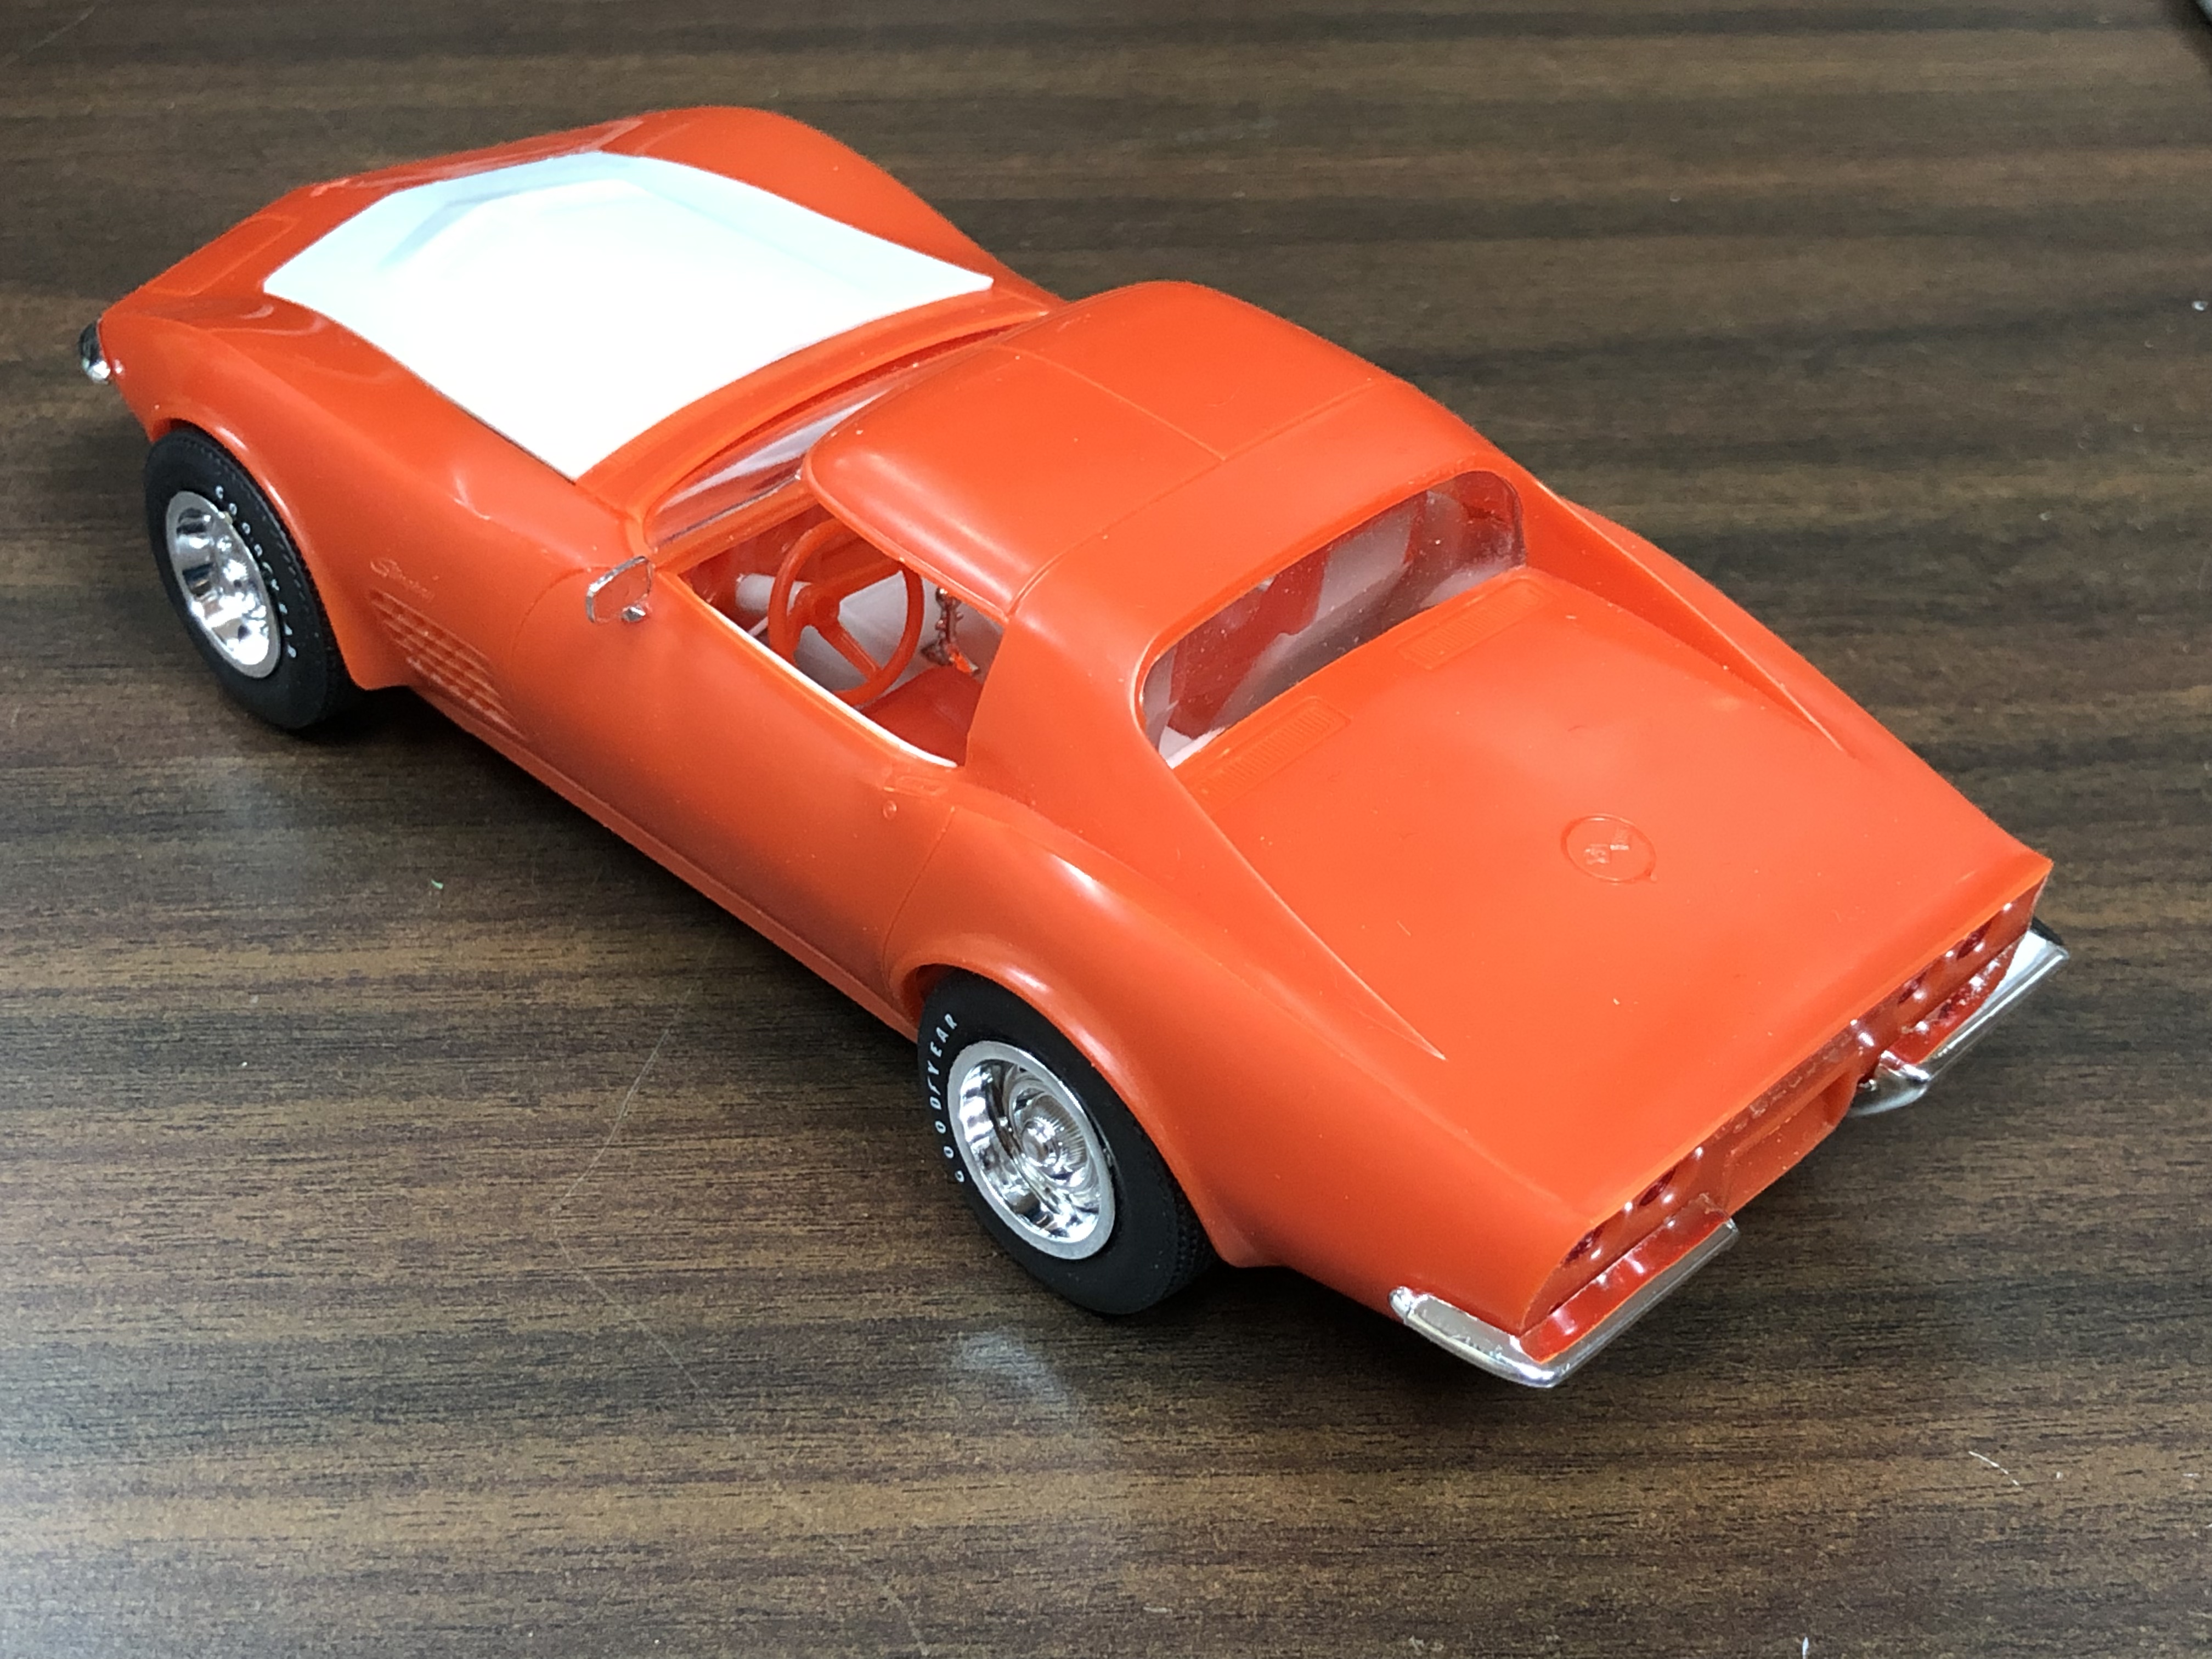
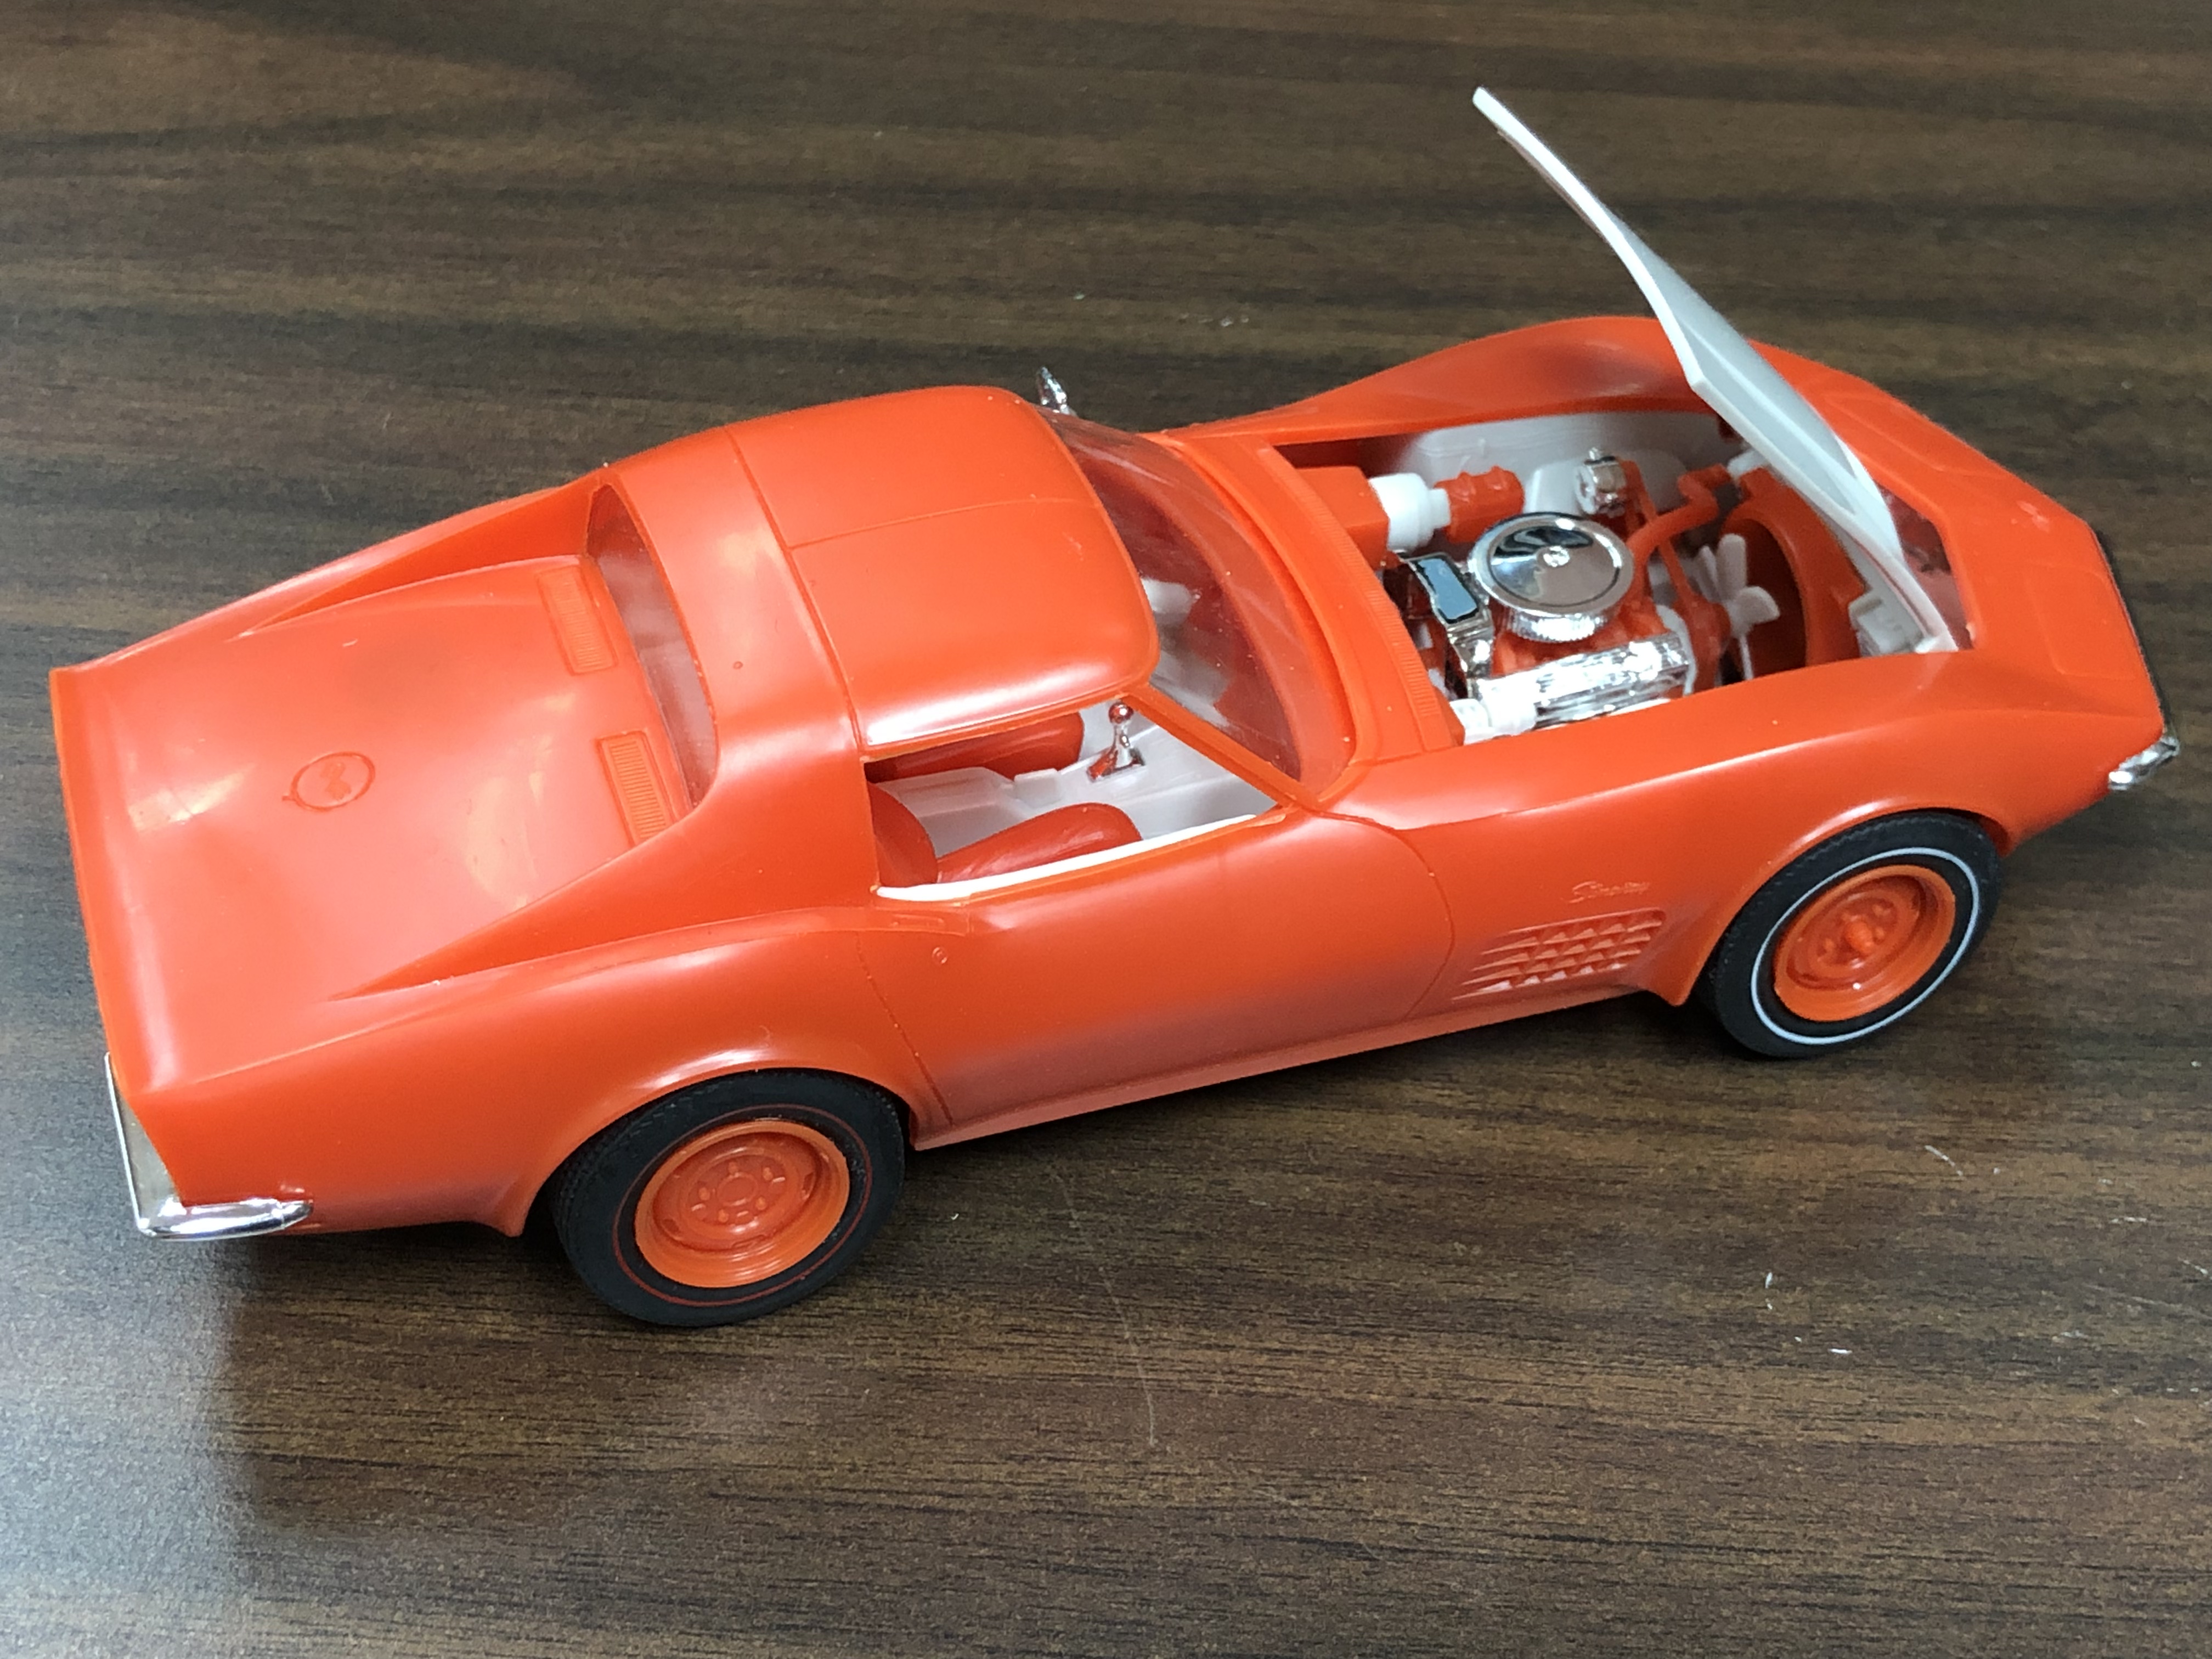
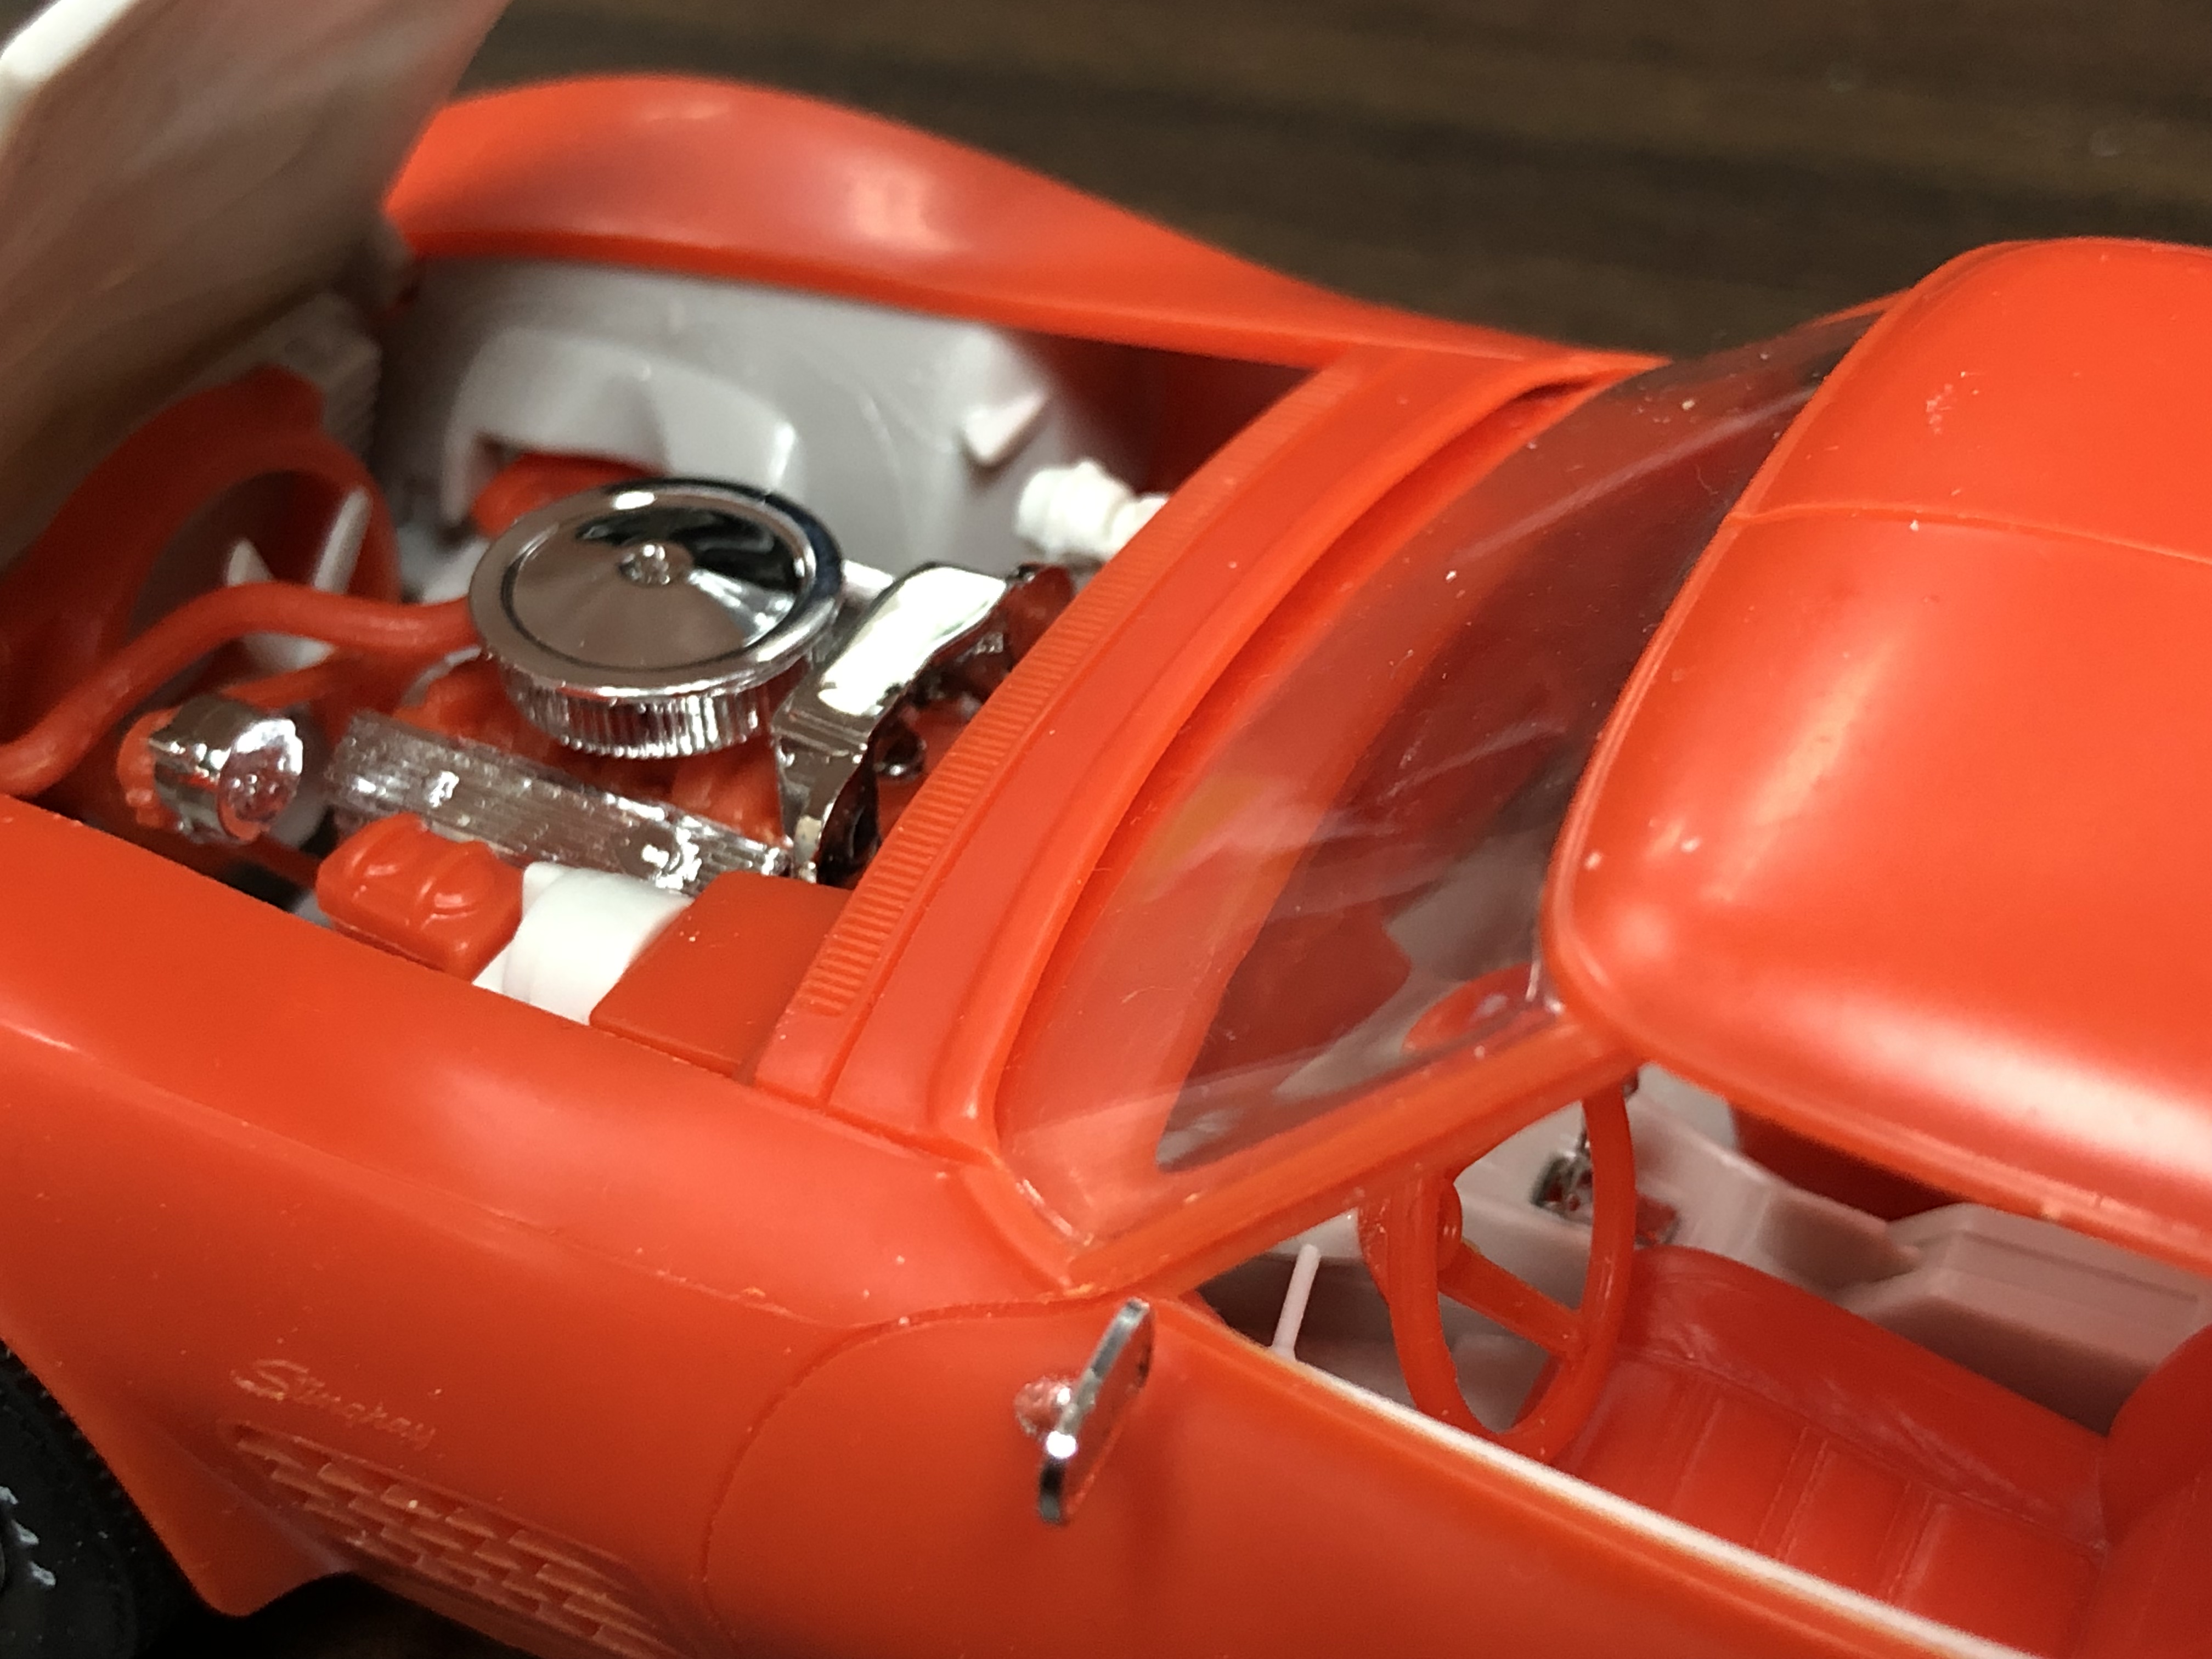
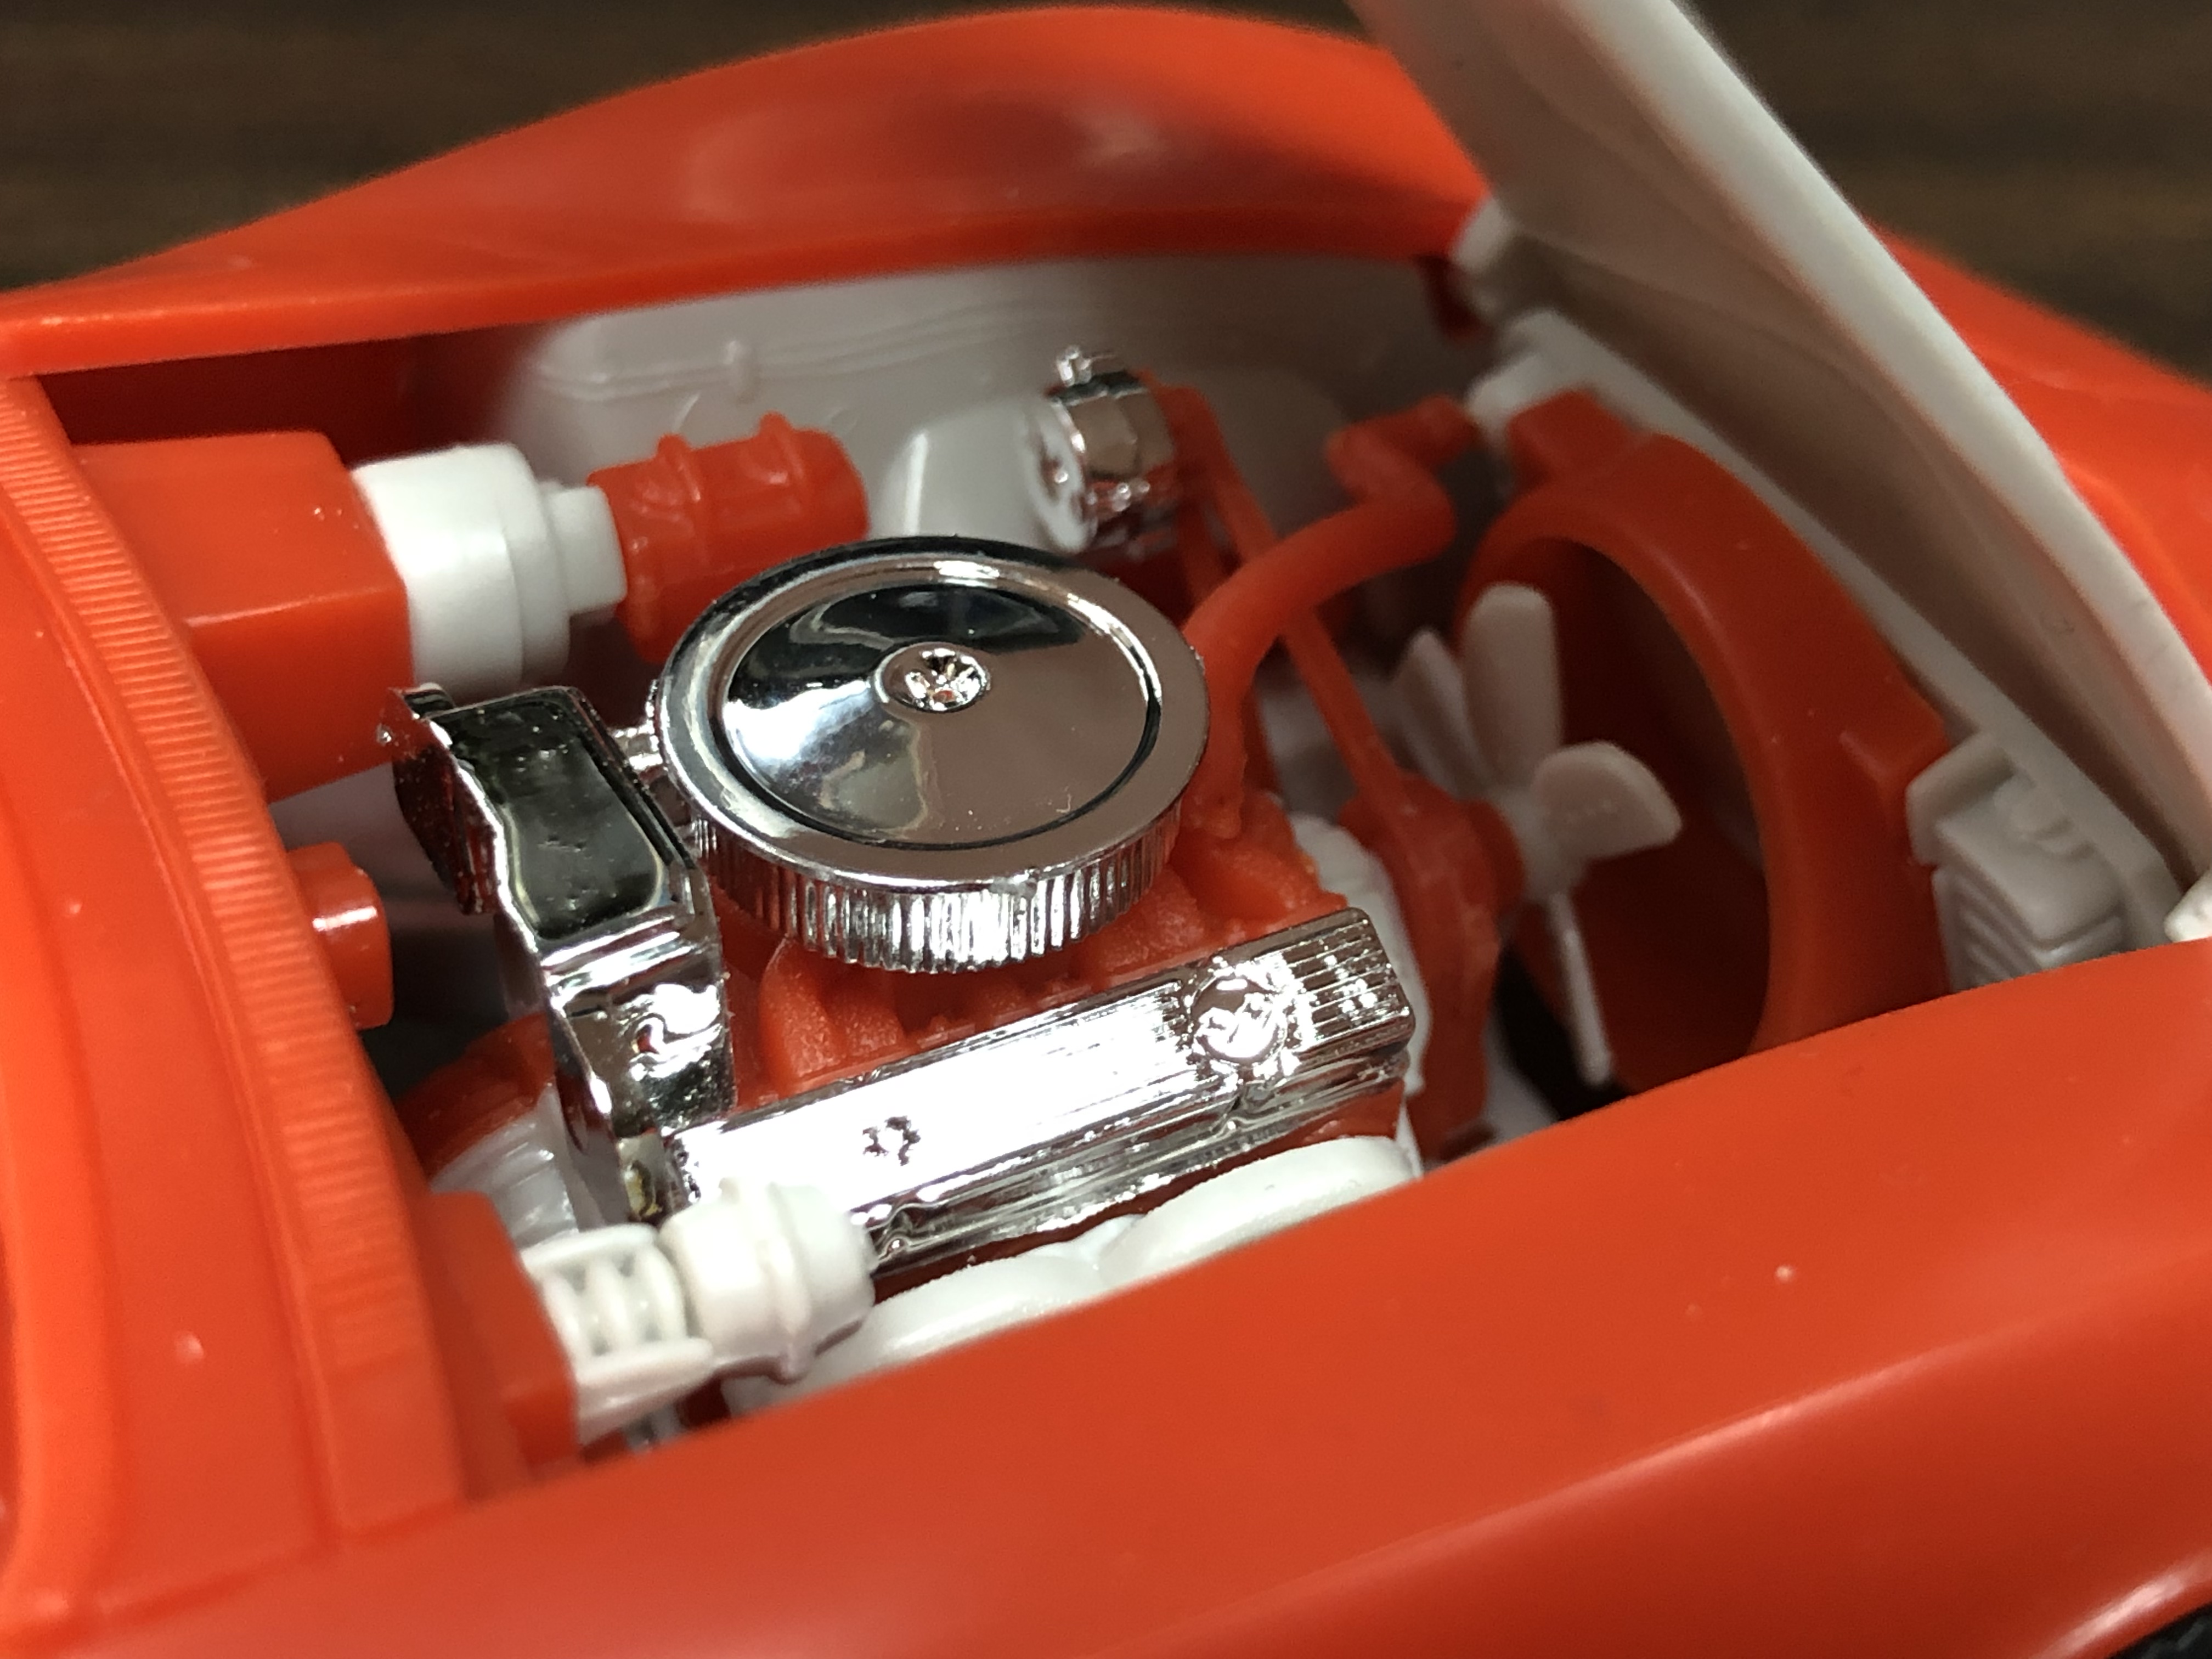
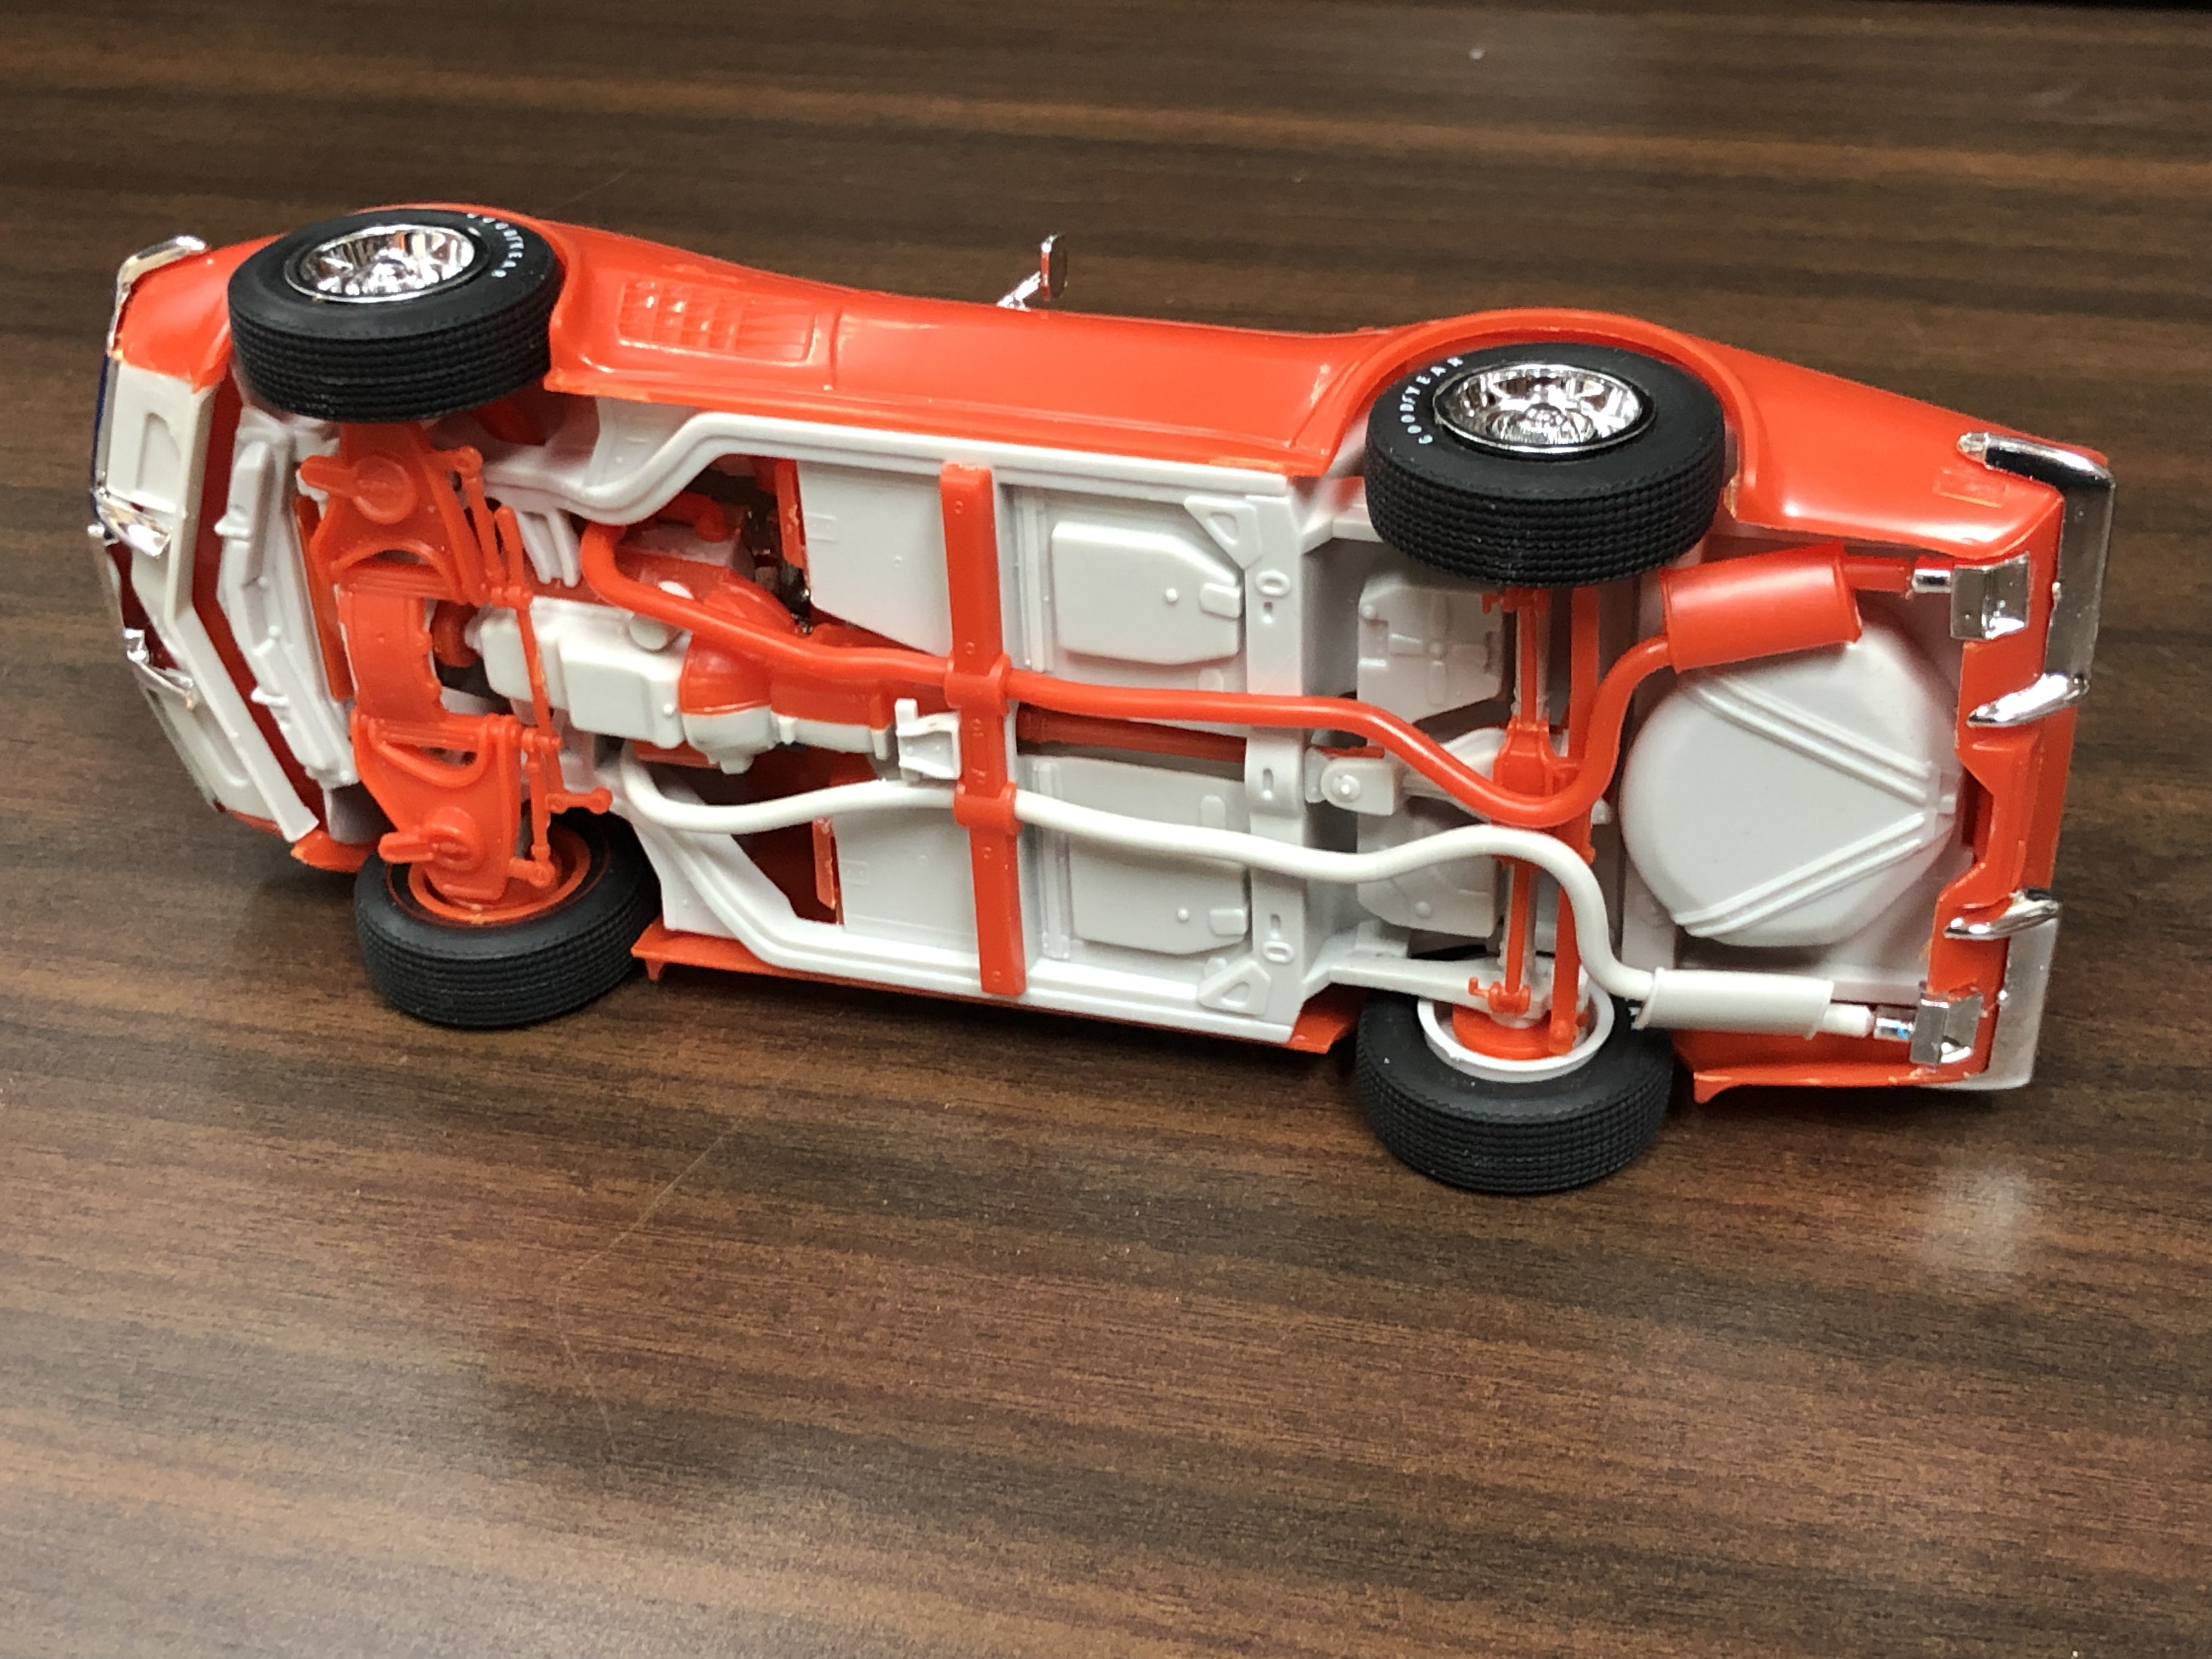
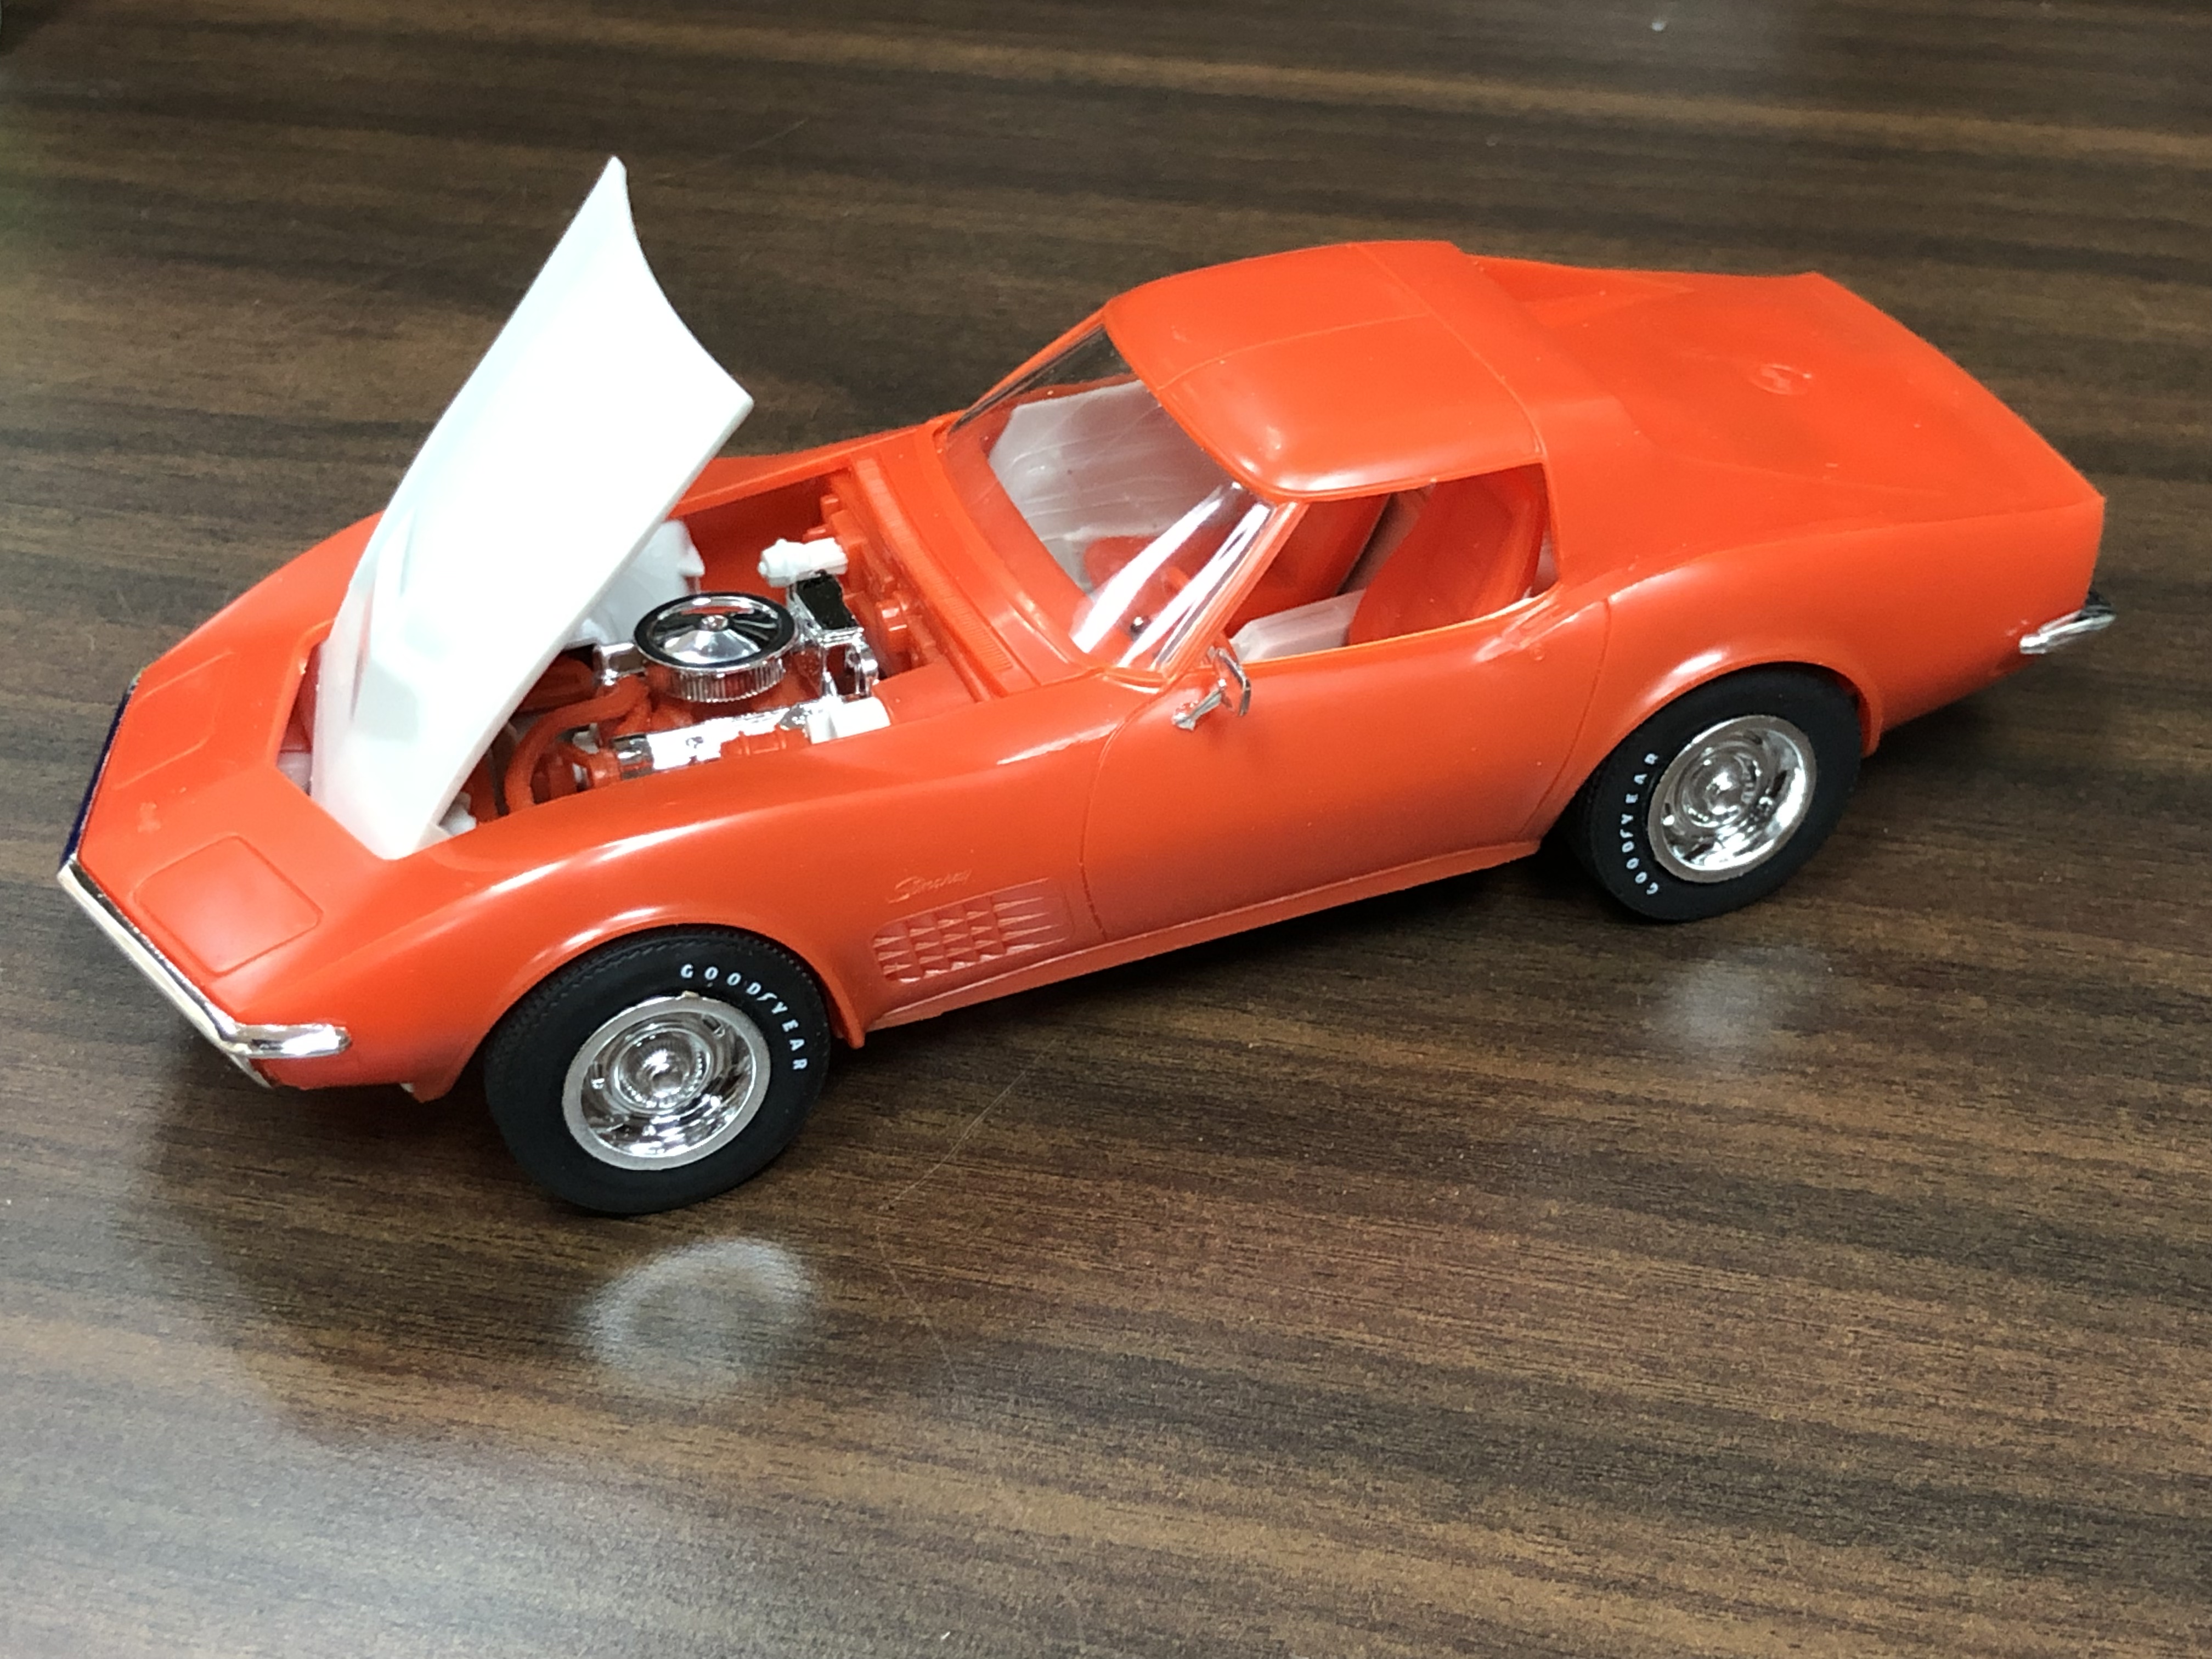
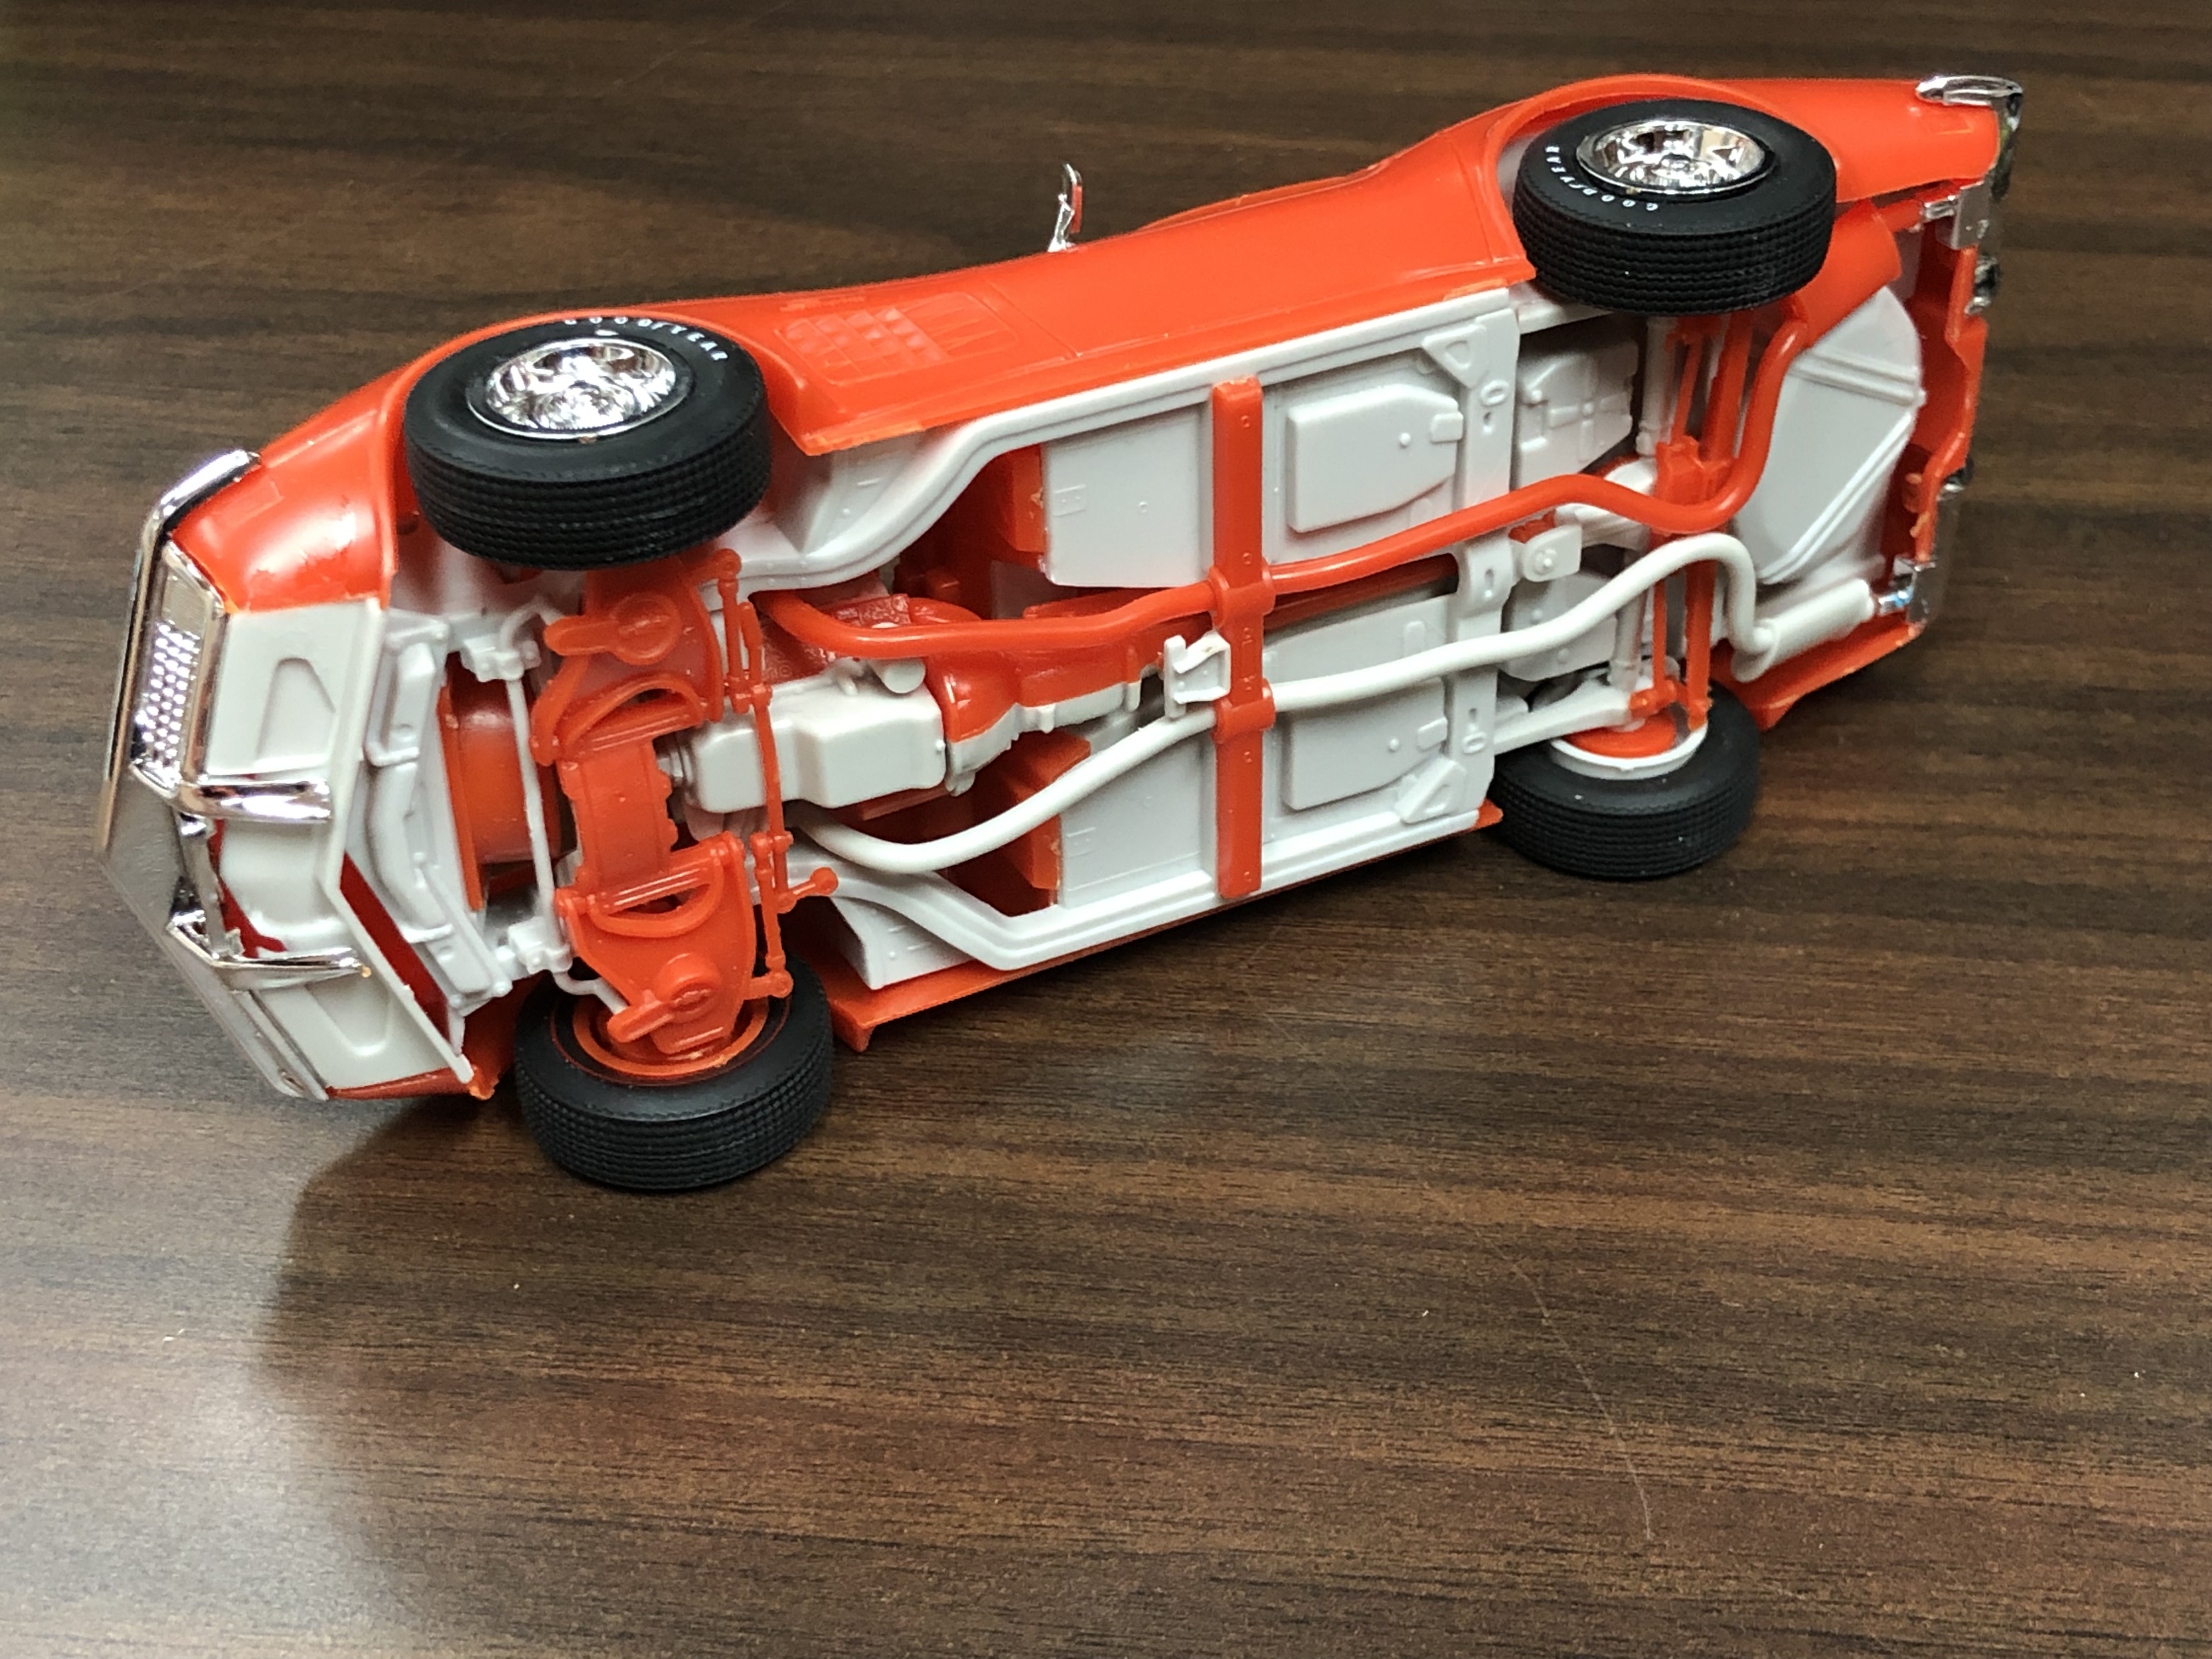
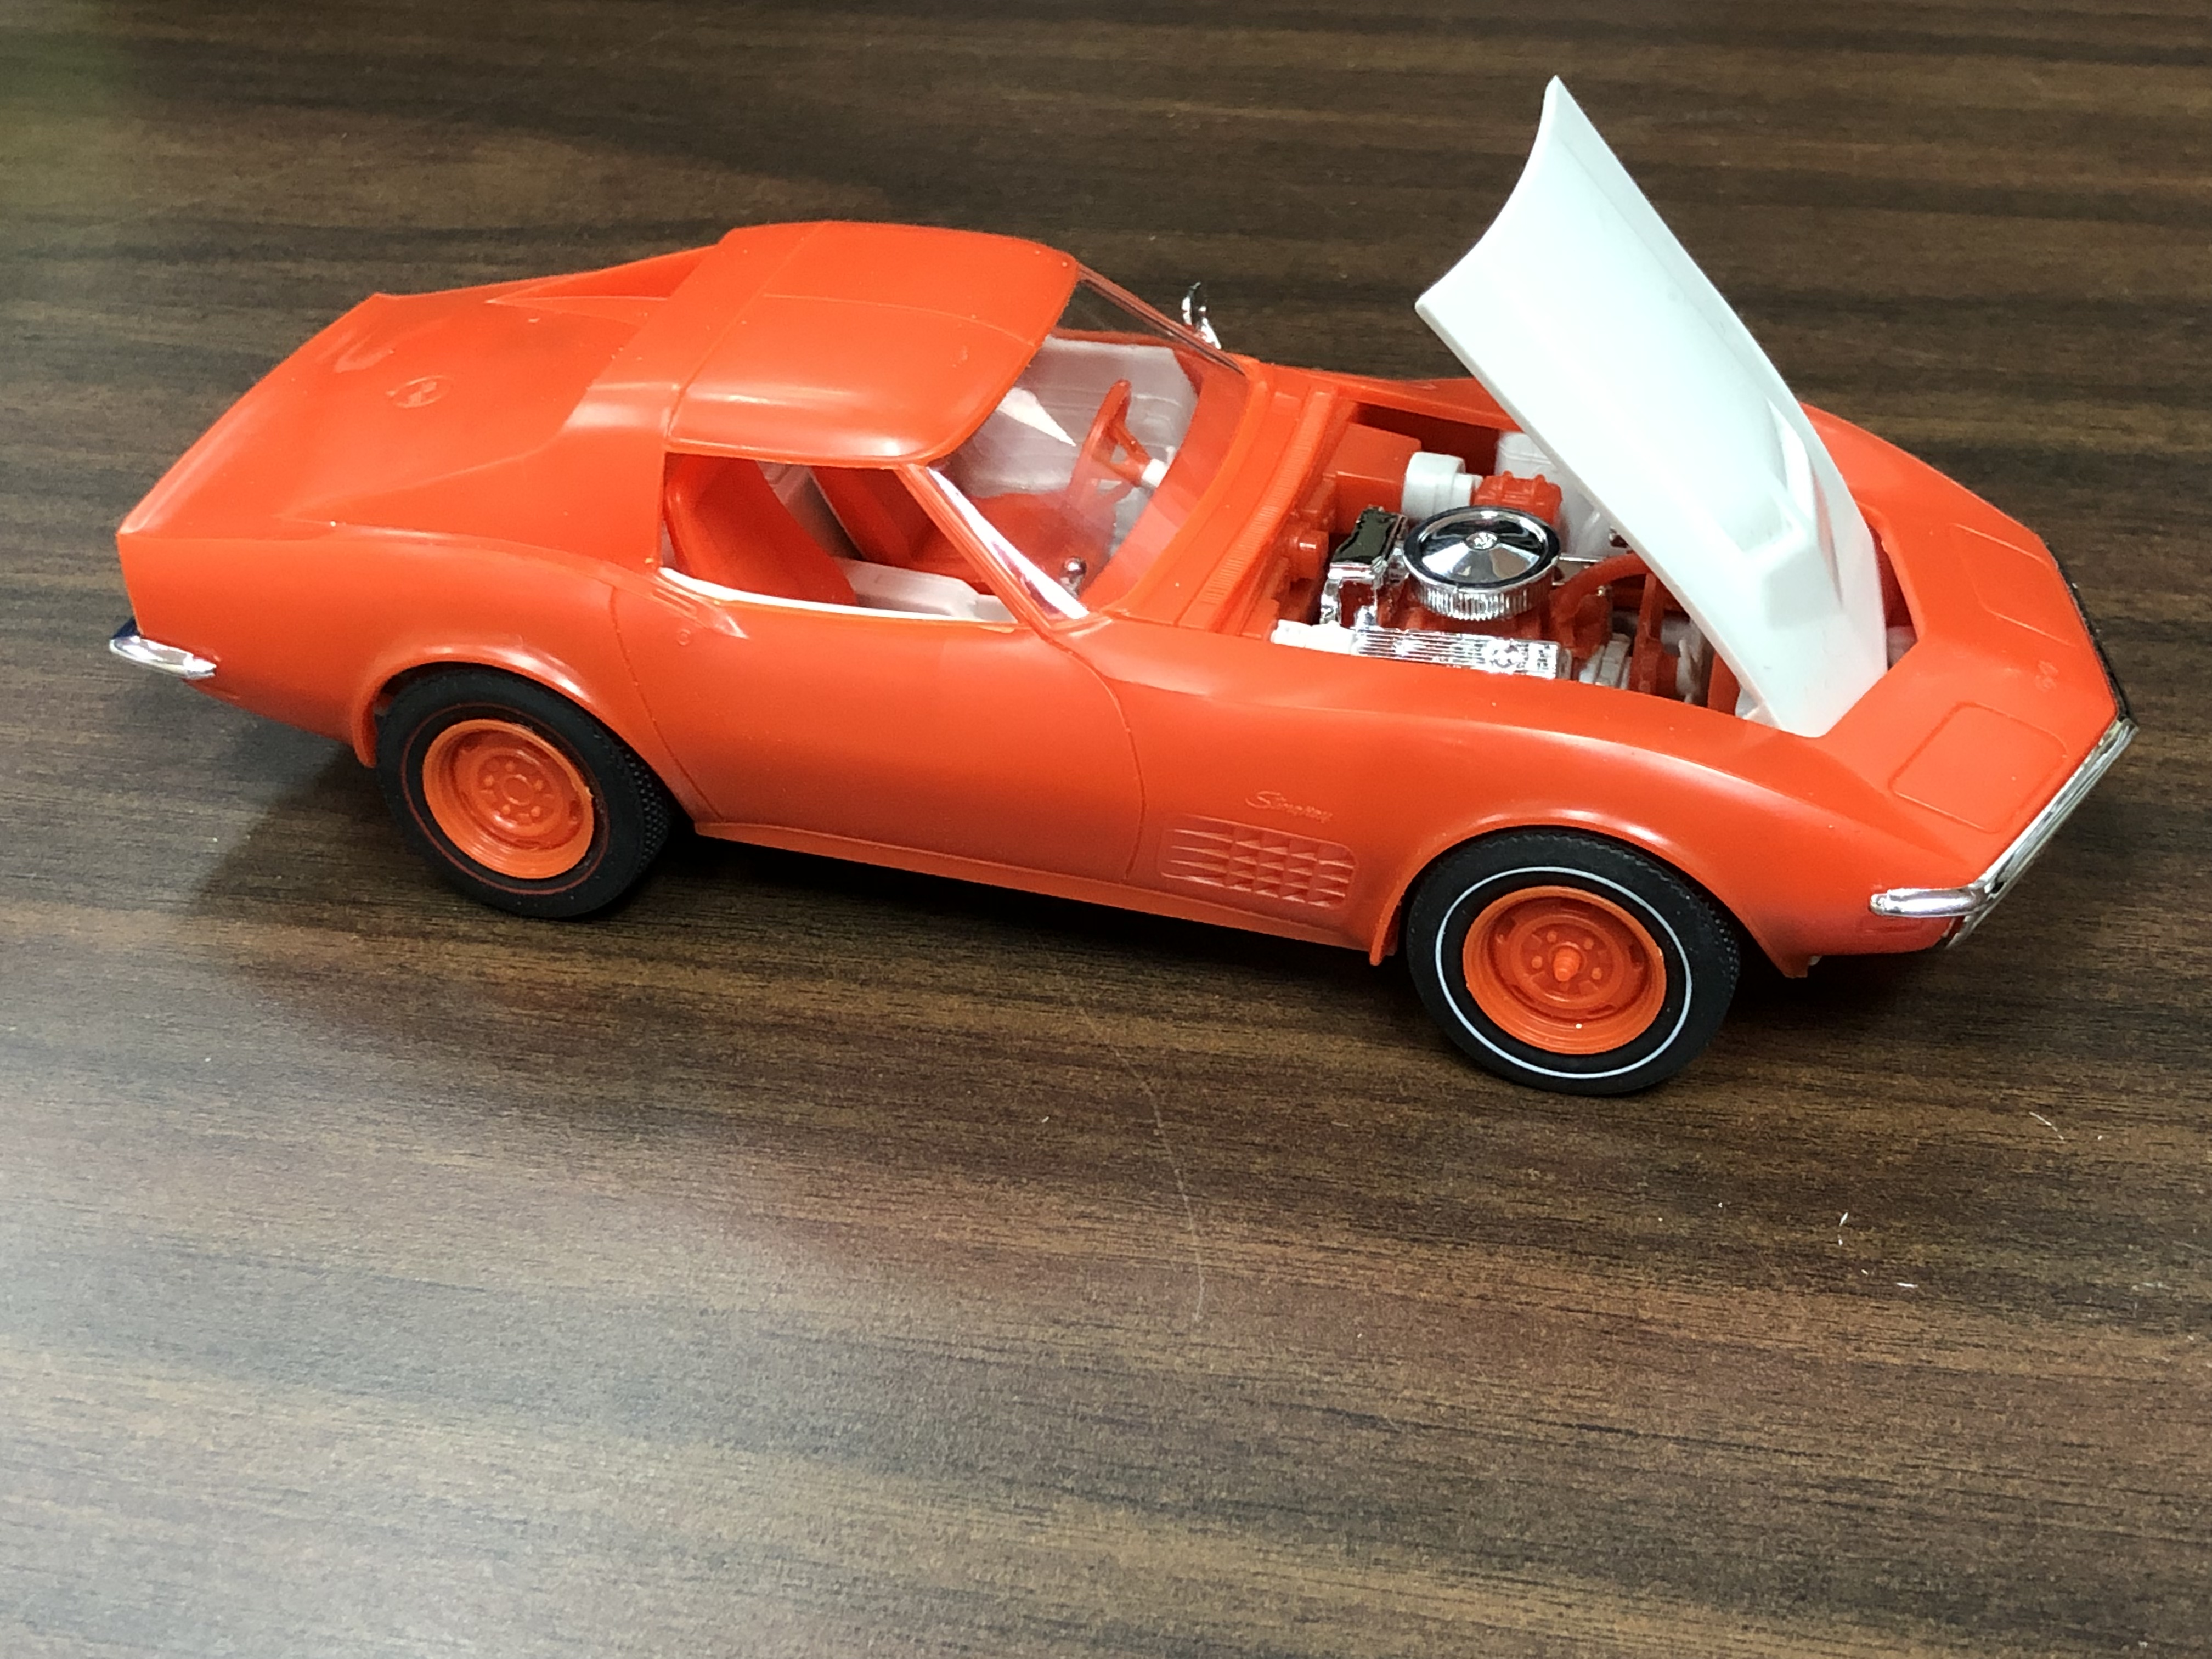
I happen to be working nights right now, and sleeping during the day proves a little bit difficult at times. This afternoon while trying to sleep I noticed I had duplicates of the 1970 Corvette. When I went to combine the two kids into one box, I noticed one was molded in gray and the other in orange. I thought to myself it might look cool if I built the Corvette using different color parts for all the assemblies. So I tried it this afternoon. The results look better in my head then the actual model. It might come off a little better as a convertible. I do have a convertible kit and a whole bunch of orange pieces. The convertible kit is turquoise. So I might just do this again. Honestly this would’ve looked a little better if the T tops and the doors were gray. The interior engine and chassis came out pretty much the way I had envisioned. What do you think? In the end, I had a lot of fun! And that’s what it’s all about!
-
The 1968 Baldwin Motion hood is in a mold box and awaiting silicon molding. But that won’t happen until Wednesday night. In the meantime, since I will be pouring silicone, I figured I would pop out another custom hood for casting. As you may have guessed from the title, it’s a hood for a First Generation Monte Carlo. Baldwin Motion never offered the Monte Carlo as a package in their Phase III line up, but I have always wanted to build a “what if“. The L88 hood was and natural choice for me since that’s what they put on the 1970 Chevelle. Plus the Monte Carlo has such long hood, the could be made longer, as on the 1973 and later Corvettes. I would also like to put the 1969 Camaro cowl induction hood on a Monte Carlo hood. It too will need a little lengthening.
-
This one was completed due to in joining the “Dring out your dead” thread in the On the Workbench. Thanks to Snake45 for starting this thread and helping me to “Gitter done” Thaks for looking!
-
Decided to do a base hood version of the Cuda. Blue Angels Yellow paint. SAM_0355 by Eric Lucas, on Flickr SAM_0360 by Eric Lucas, on Flickr SAM_0367 by Eric Lucas, on Flickr SAM_0368 by Eric Lucas, on Flickr
-
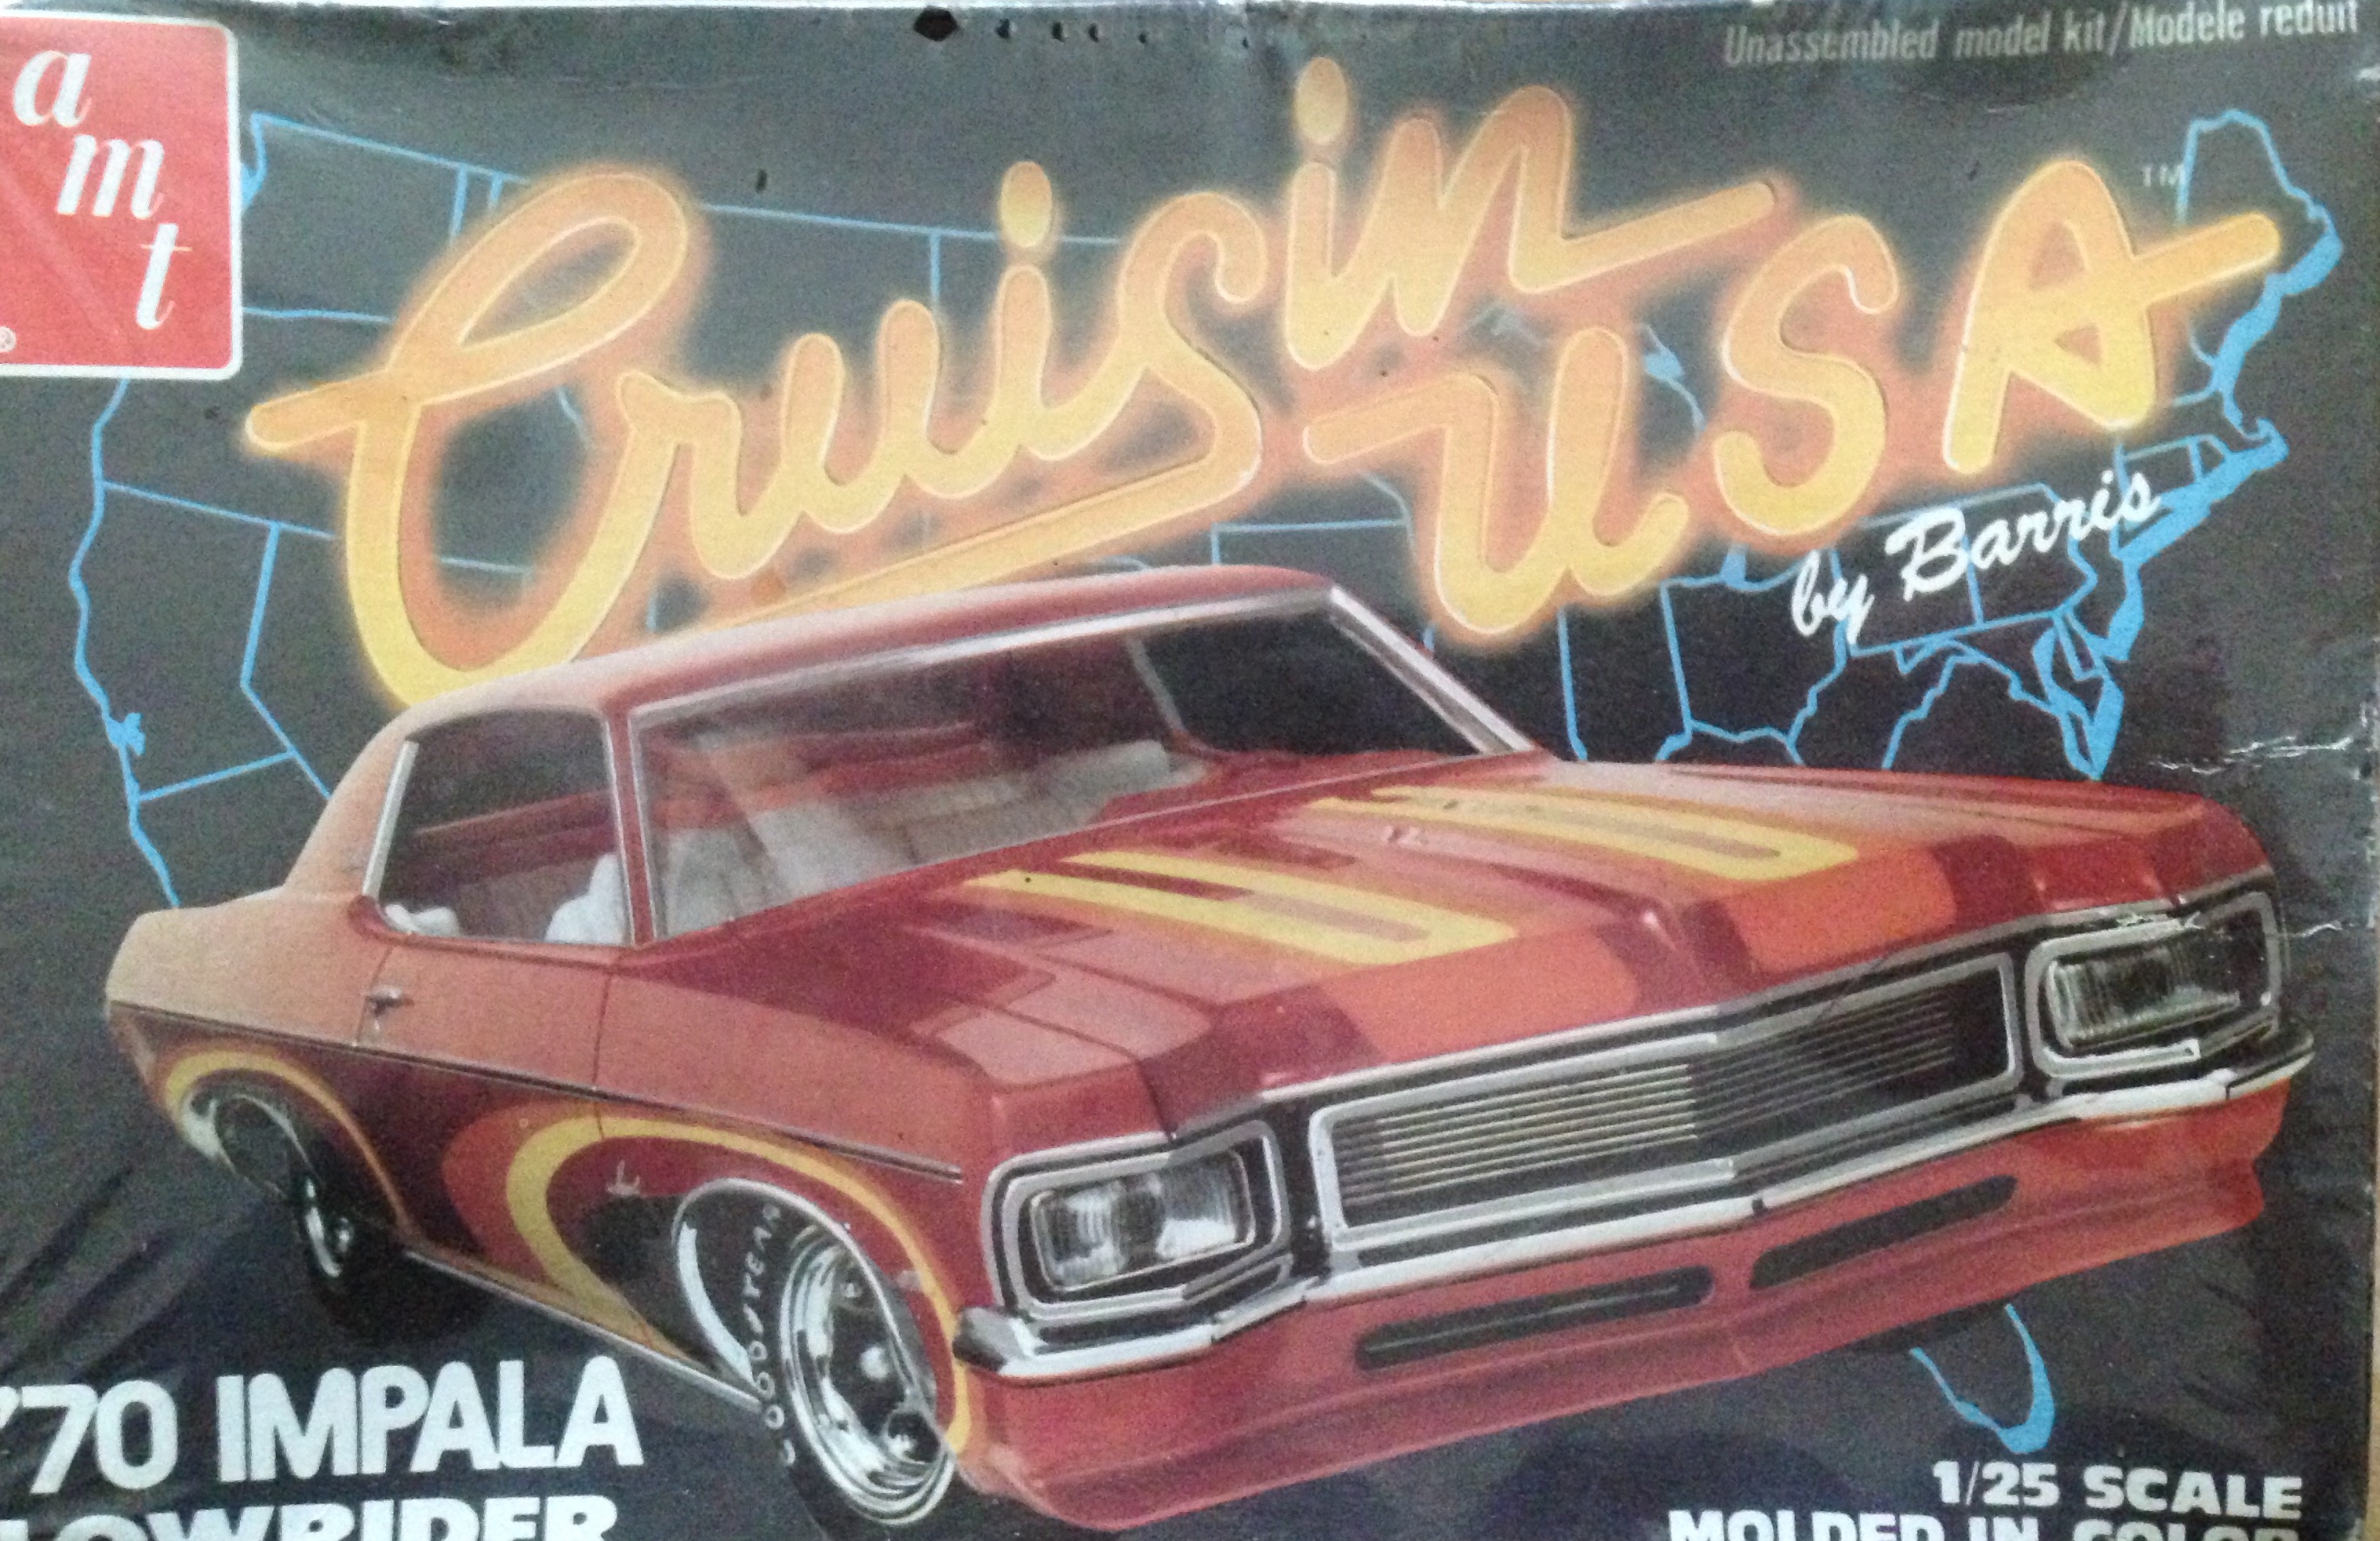
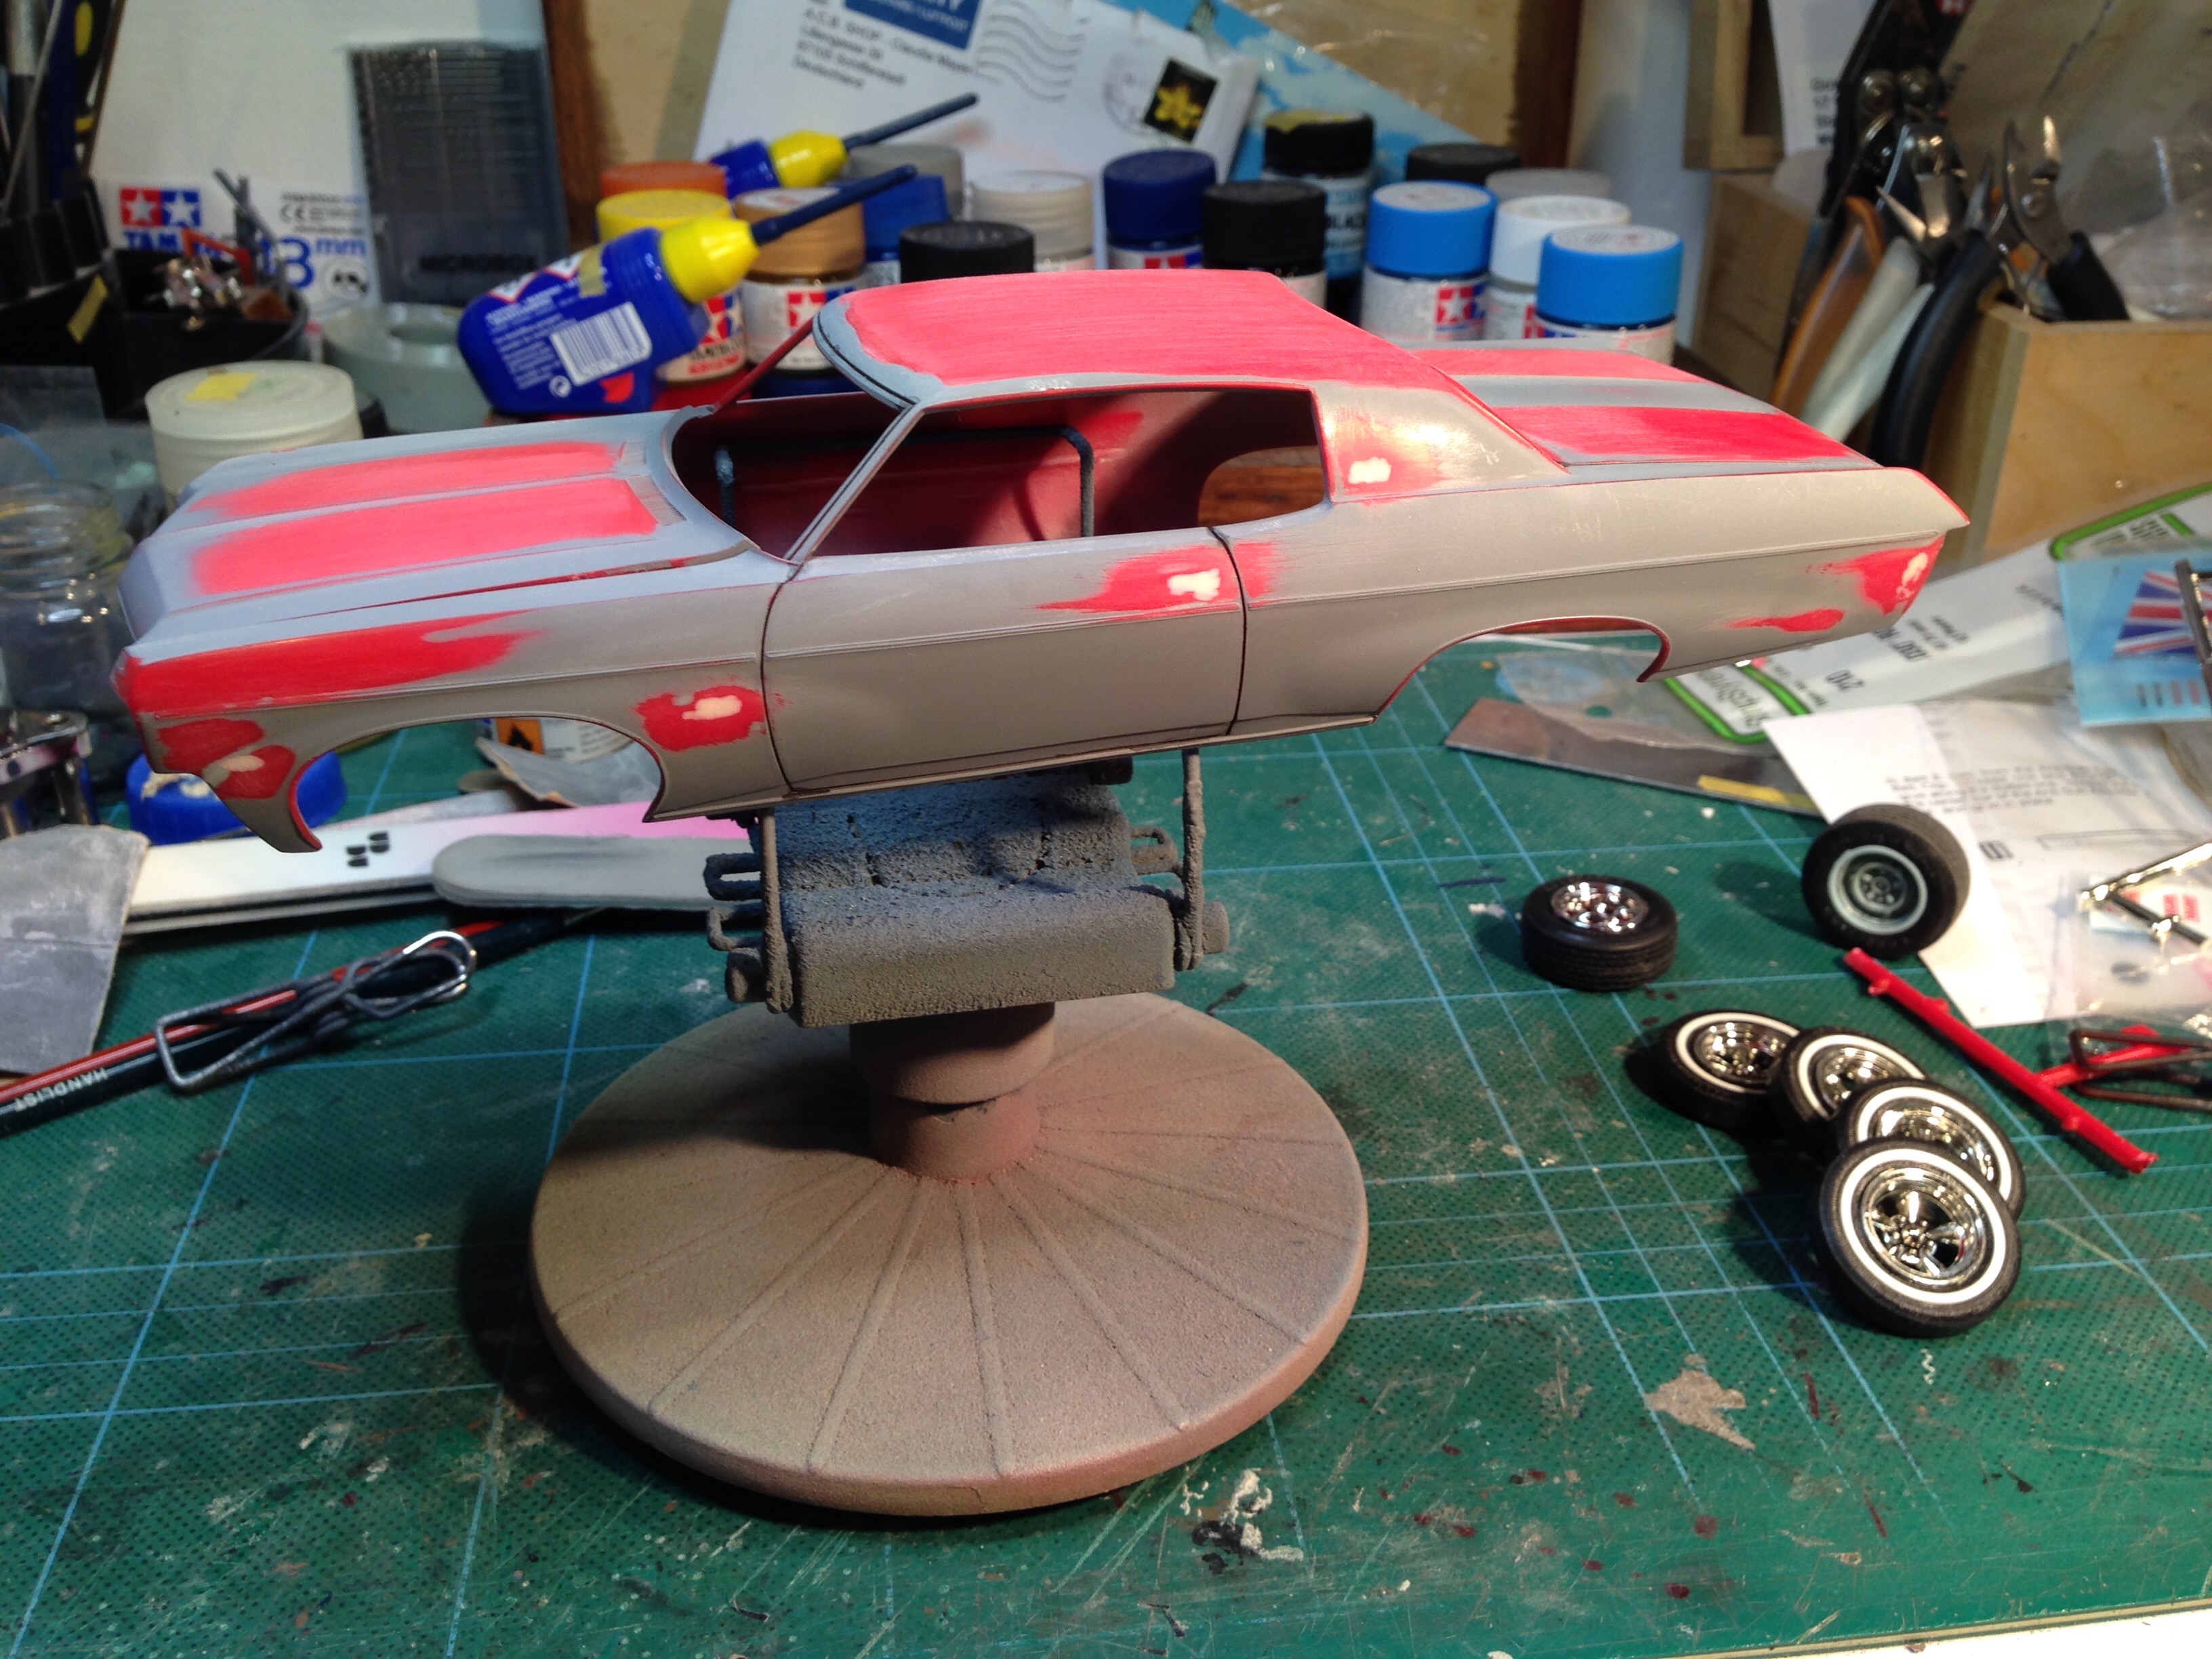
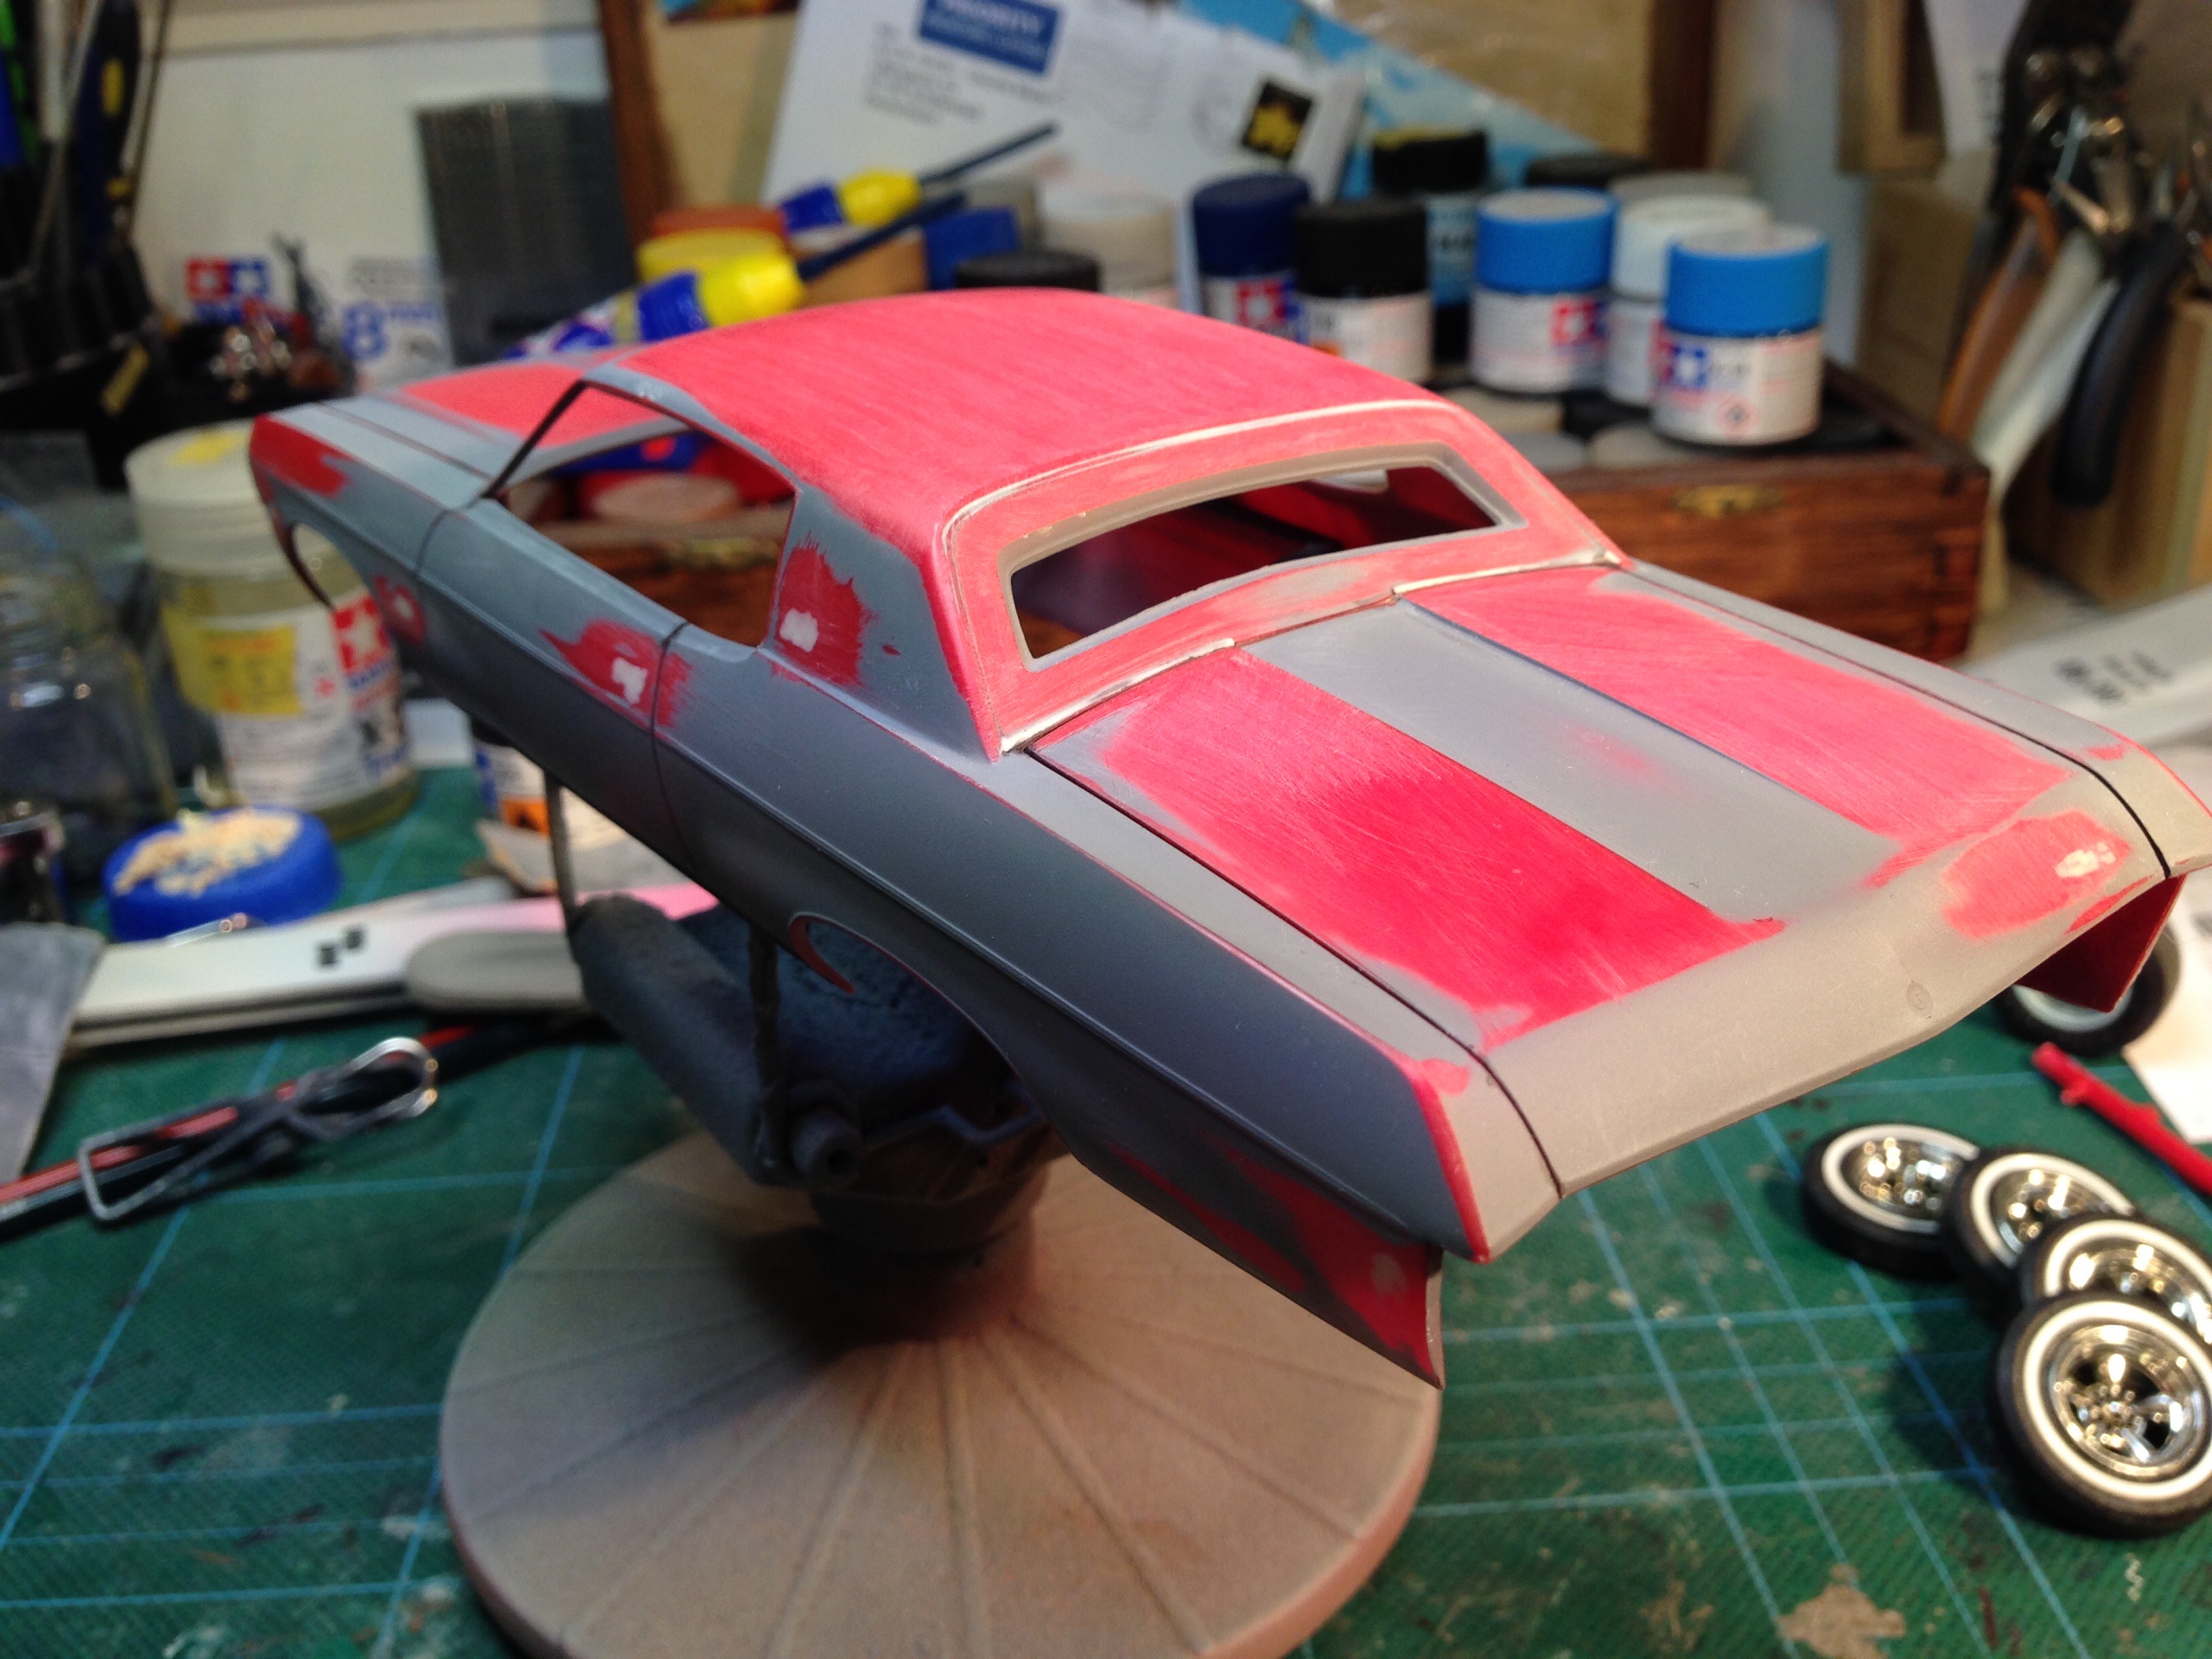
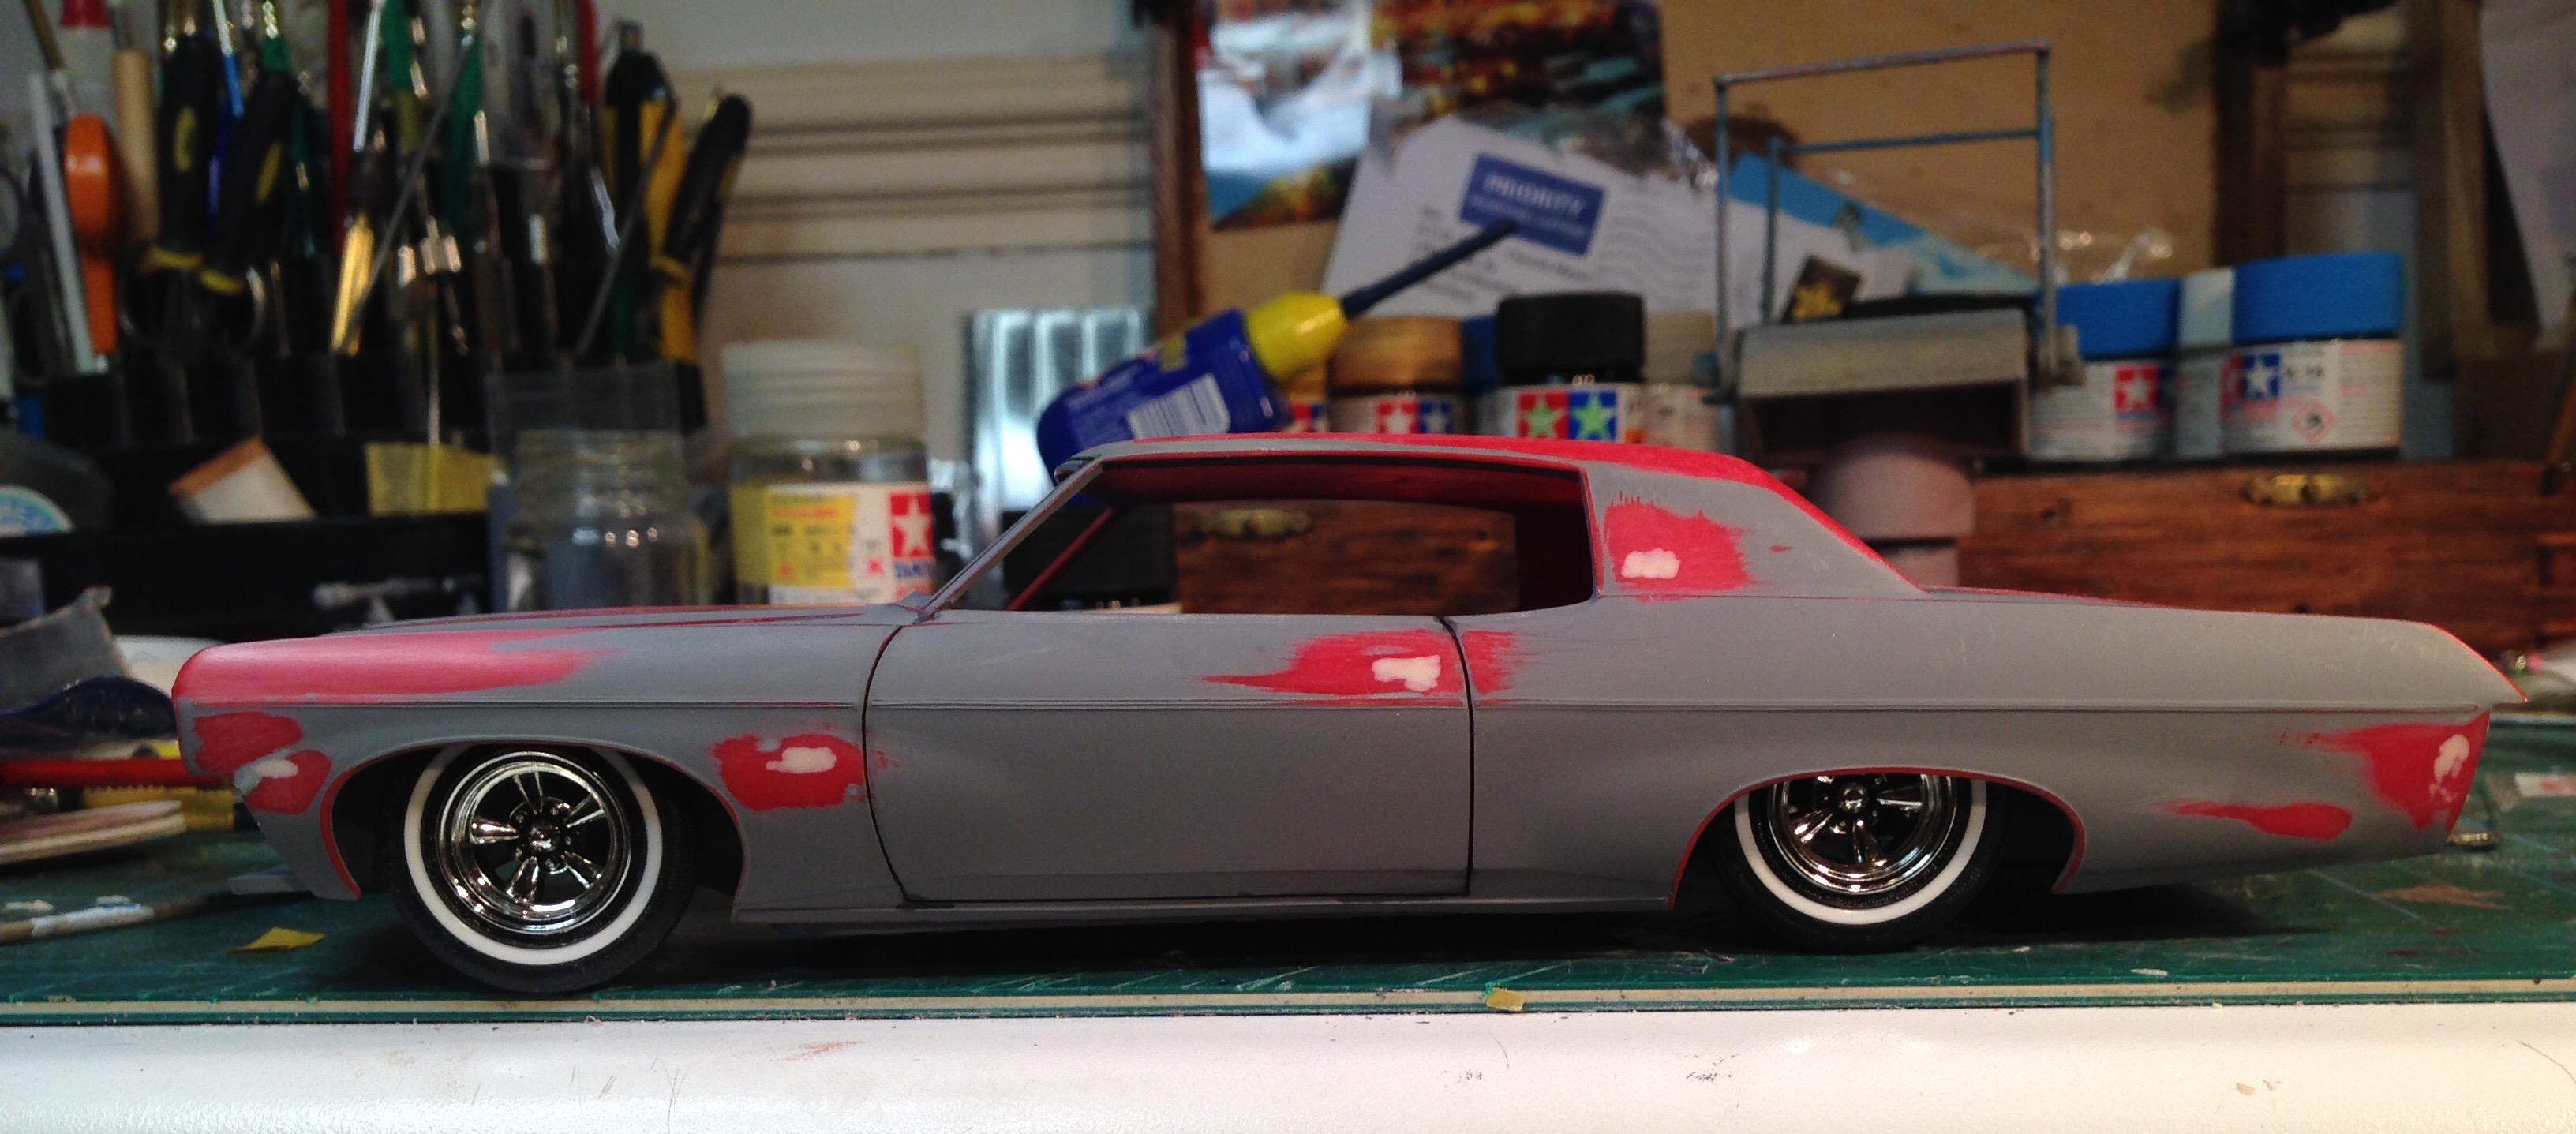
I was thinking of improving my airbrush skills and wanted to build something more or less OOB, and concentrate on trying out paint techniques. This popped up on eBay for £20. 38 years old and stil in cellophane! The box interior had that 'old' smell. The Barris decals are rub-on transfers and there's a sheet of self adhesive prismatic sticker material. I'm not going to use either of these, as I intend to paint designs on the body. I removed all the scripts and door handles. The mould seams n the body were feint but there were a few sink marks to deal with. I used the custom rear window and filled the gaps After a fruitless search for Pegasus wheels online, I opted for some nice rims from the AMT 60 Starliner kit, shod with narrow whites from the sorely missed Modelhaus.. A big canvas for some creativity!
-
Re-painted the grill and did some touch ups. SAM_2543 by Eric Lucas, on Flickr SAM_2544 by Eric Lucas, on Flickr SAM_2545 by Eric Lucas, on Flickr
-
Gonna start posting some of my older stuff since my old photos are lost from photobucket. 1 (2) by Eric Lucas, on Flickr 1 (3) by Eric Lucas, on Flickr 1 (4) by Eric Lucas, on Flickr 1 (5) by Eric Lucas, on Flickr
-
Couldn't wait for this kit to come out, and when it did I bought one immediately. Been waiting for some time to build it and since I just lost my job I have a lot of new found time on my hands for some builds. SAM_1831 by Eric Lucas, on Flickr SAM_1832 by Eric Lucas, on Flickr SAM_1833 by Eric Lucas, on Flickr SAM_1834 by Eric Lucas, on Flickr SAM_1836 by Eric Lucas, on Flickr SAM_1837 by Eric Lucas, on Flickr SAM_1838 by Eric Lucas, on Flickr SAM_1839 by Eric Lucas, on Flickr SAM_1840 by Eric Lucas, on Flickr SAM_1841 by Eric Lucas, on Flickr
-
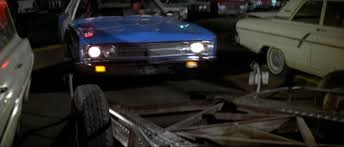
 I have the AMT 1970 Ford Galaxie police car kit and I want to make it in the Las Vegas version. There aren't many stickers for this version which is fine, but there isn't anything in the kit that tells you where to put the numbers for the squad car. I have looked at the pictures on the internet for "Diamonds are Forever" cop cars, but since it is all night time scenes it is really hard to see where the number might be. I think there is a number on the passenger side trunk near the tail light, correct me if I'm wrong. If anyone out there knows the correct location of the squad car numbers, please let me know.
-
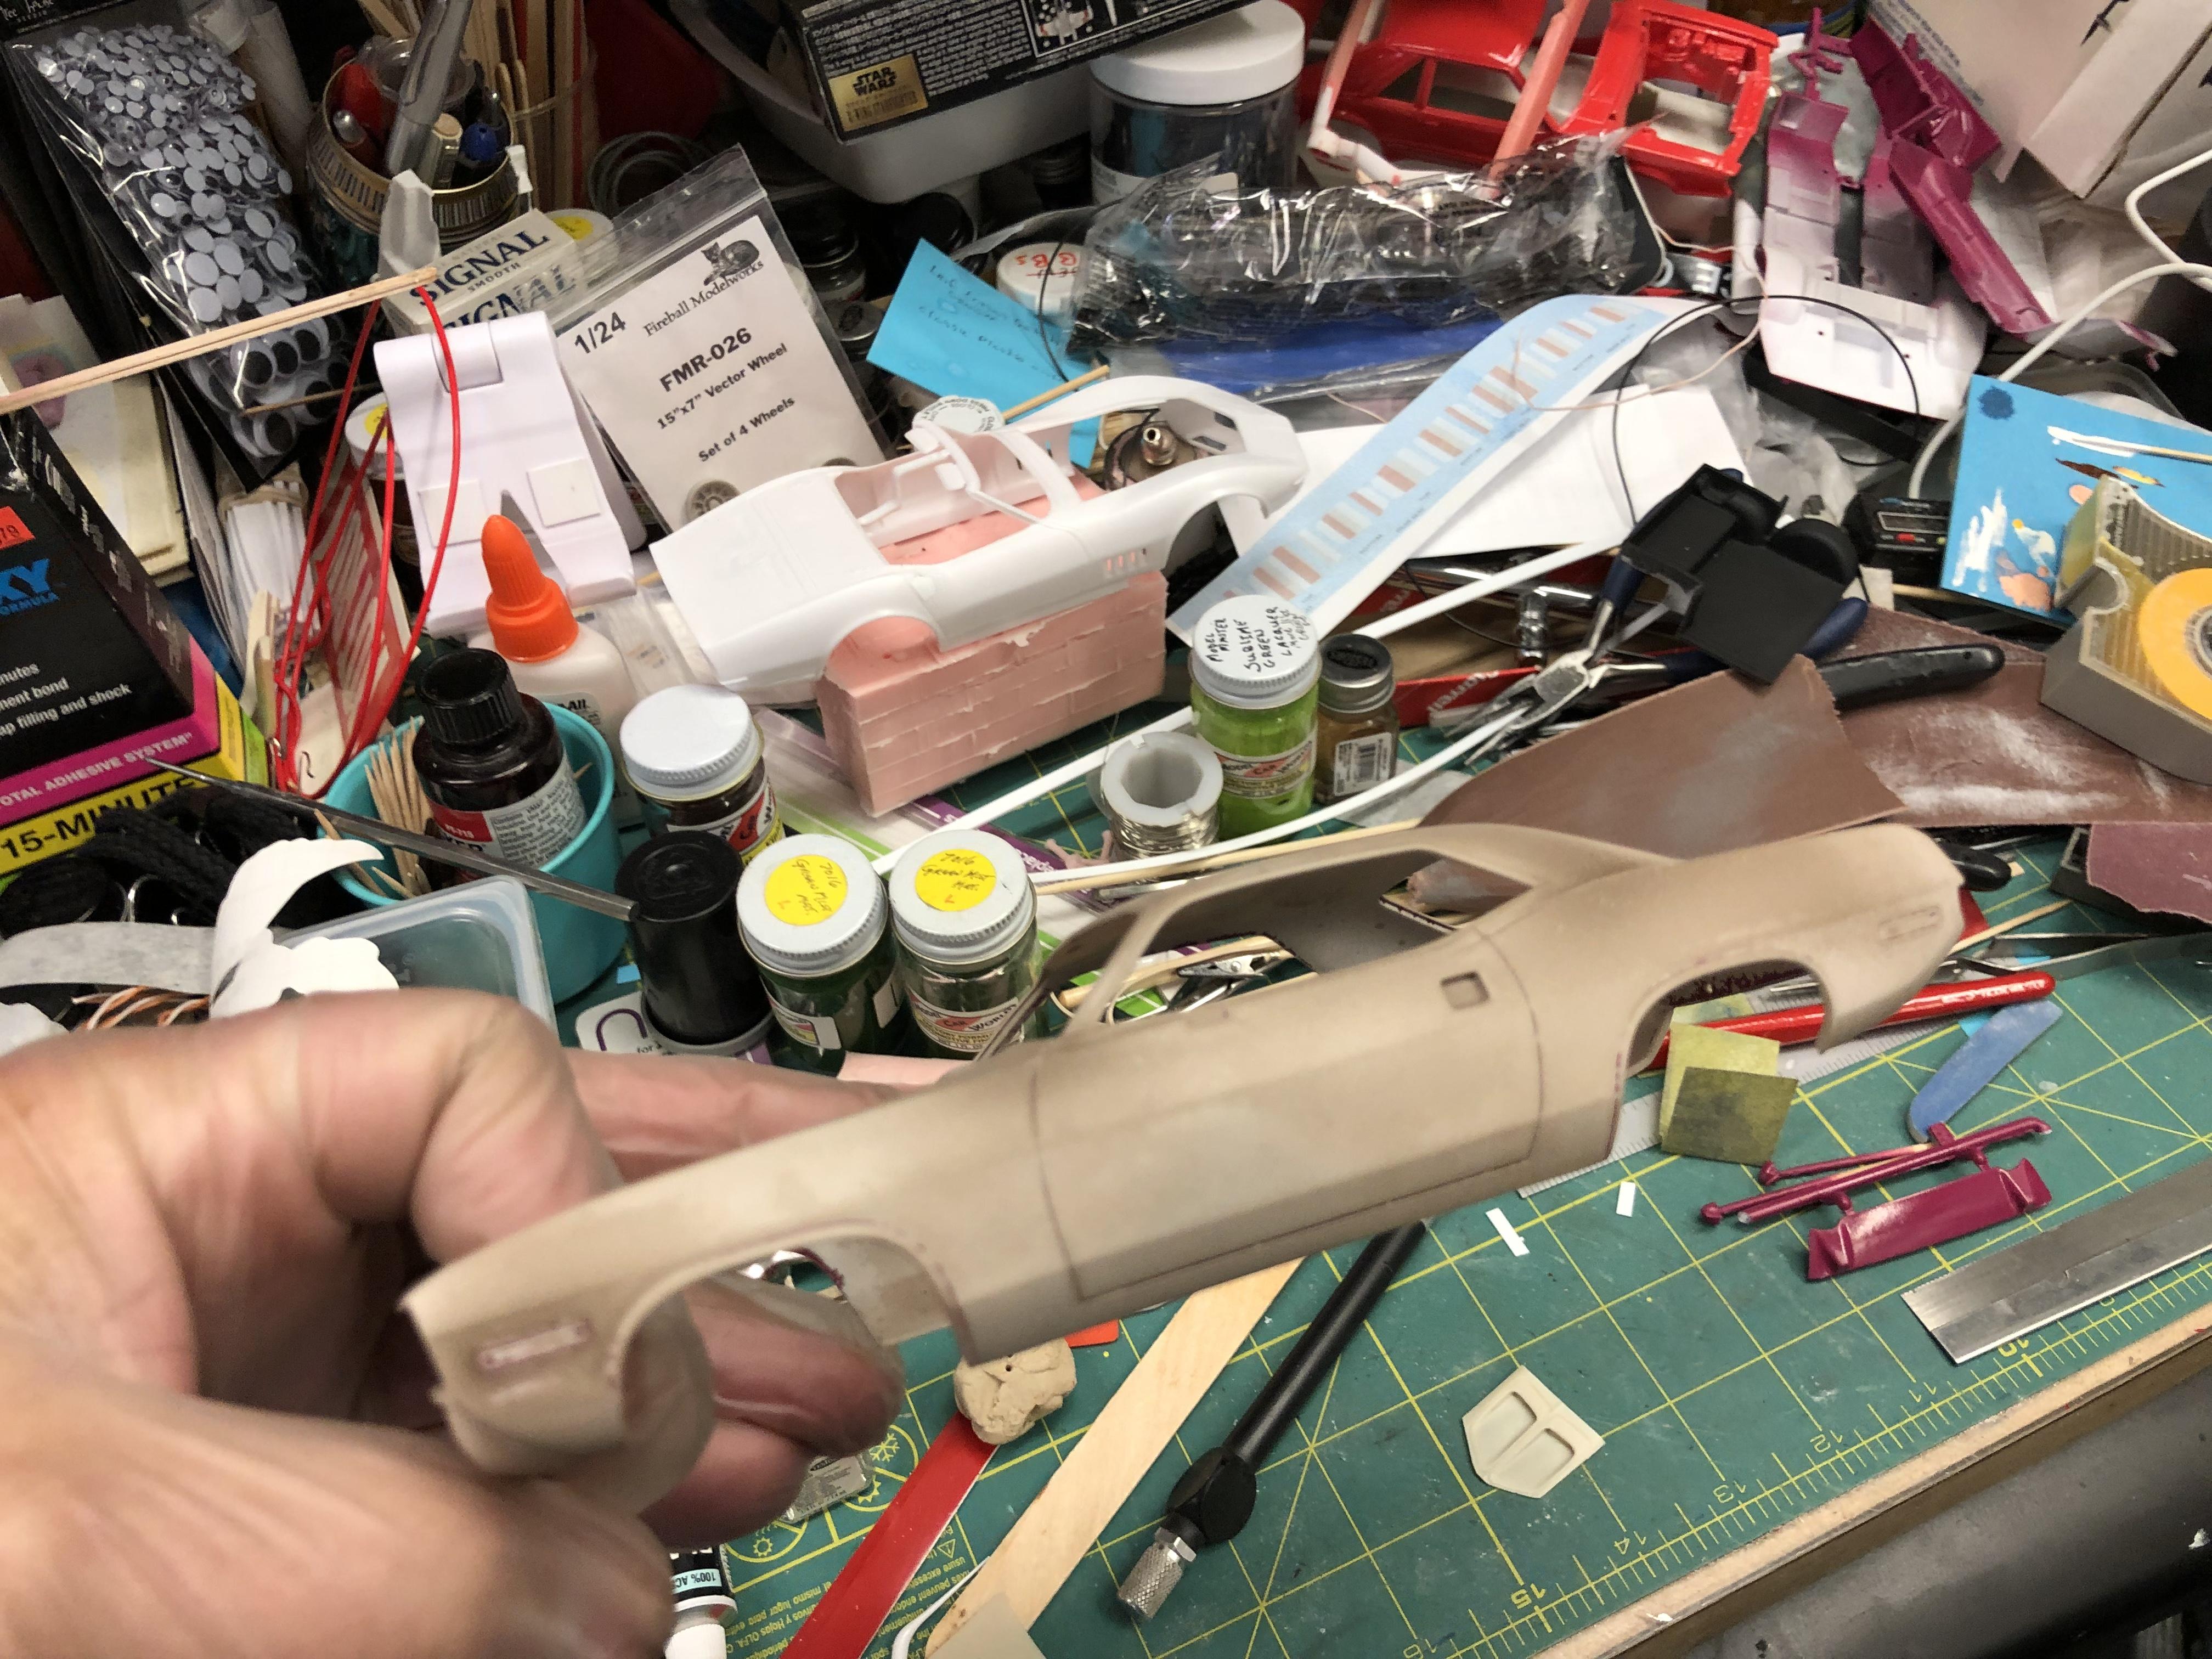
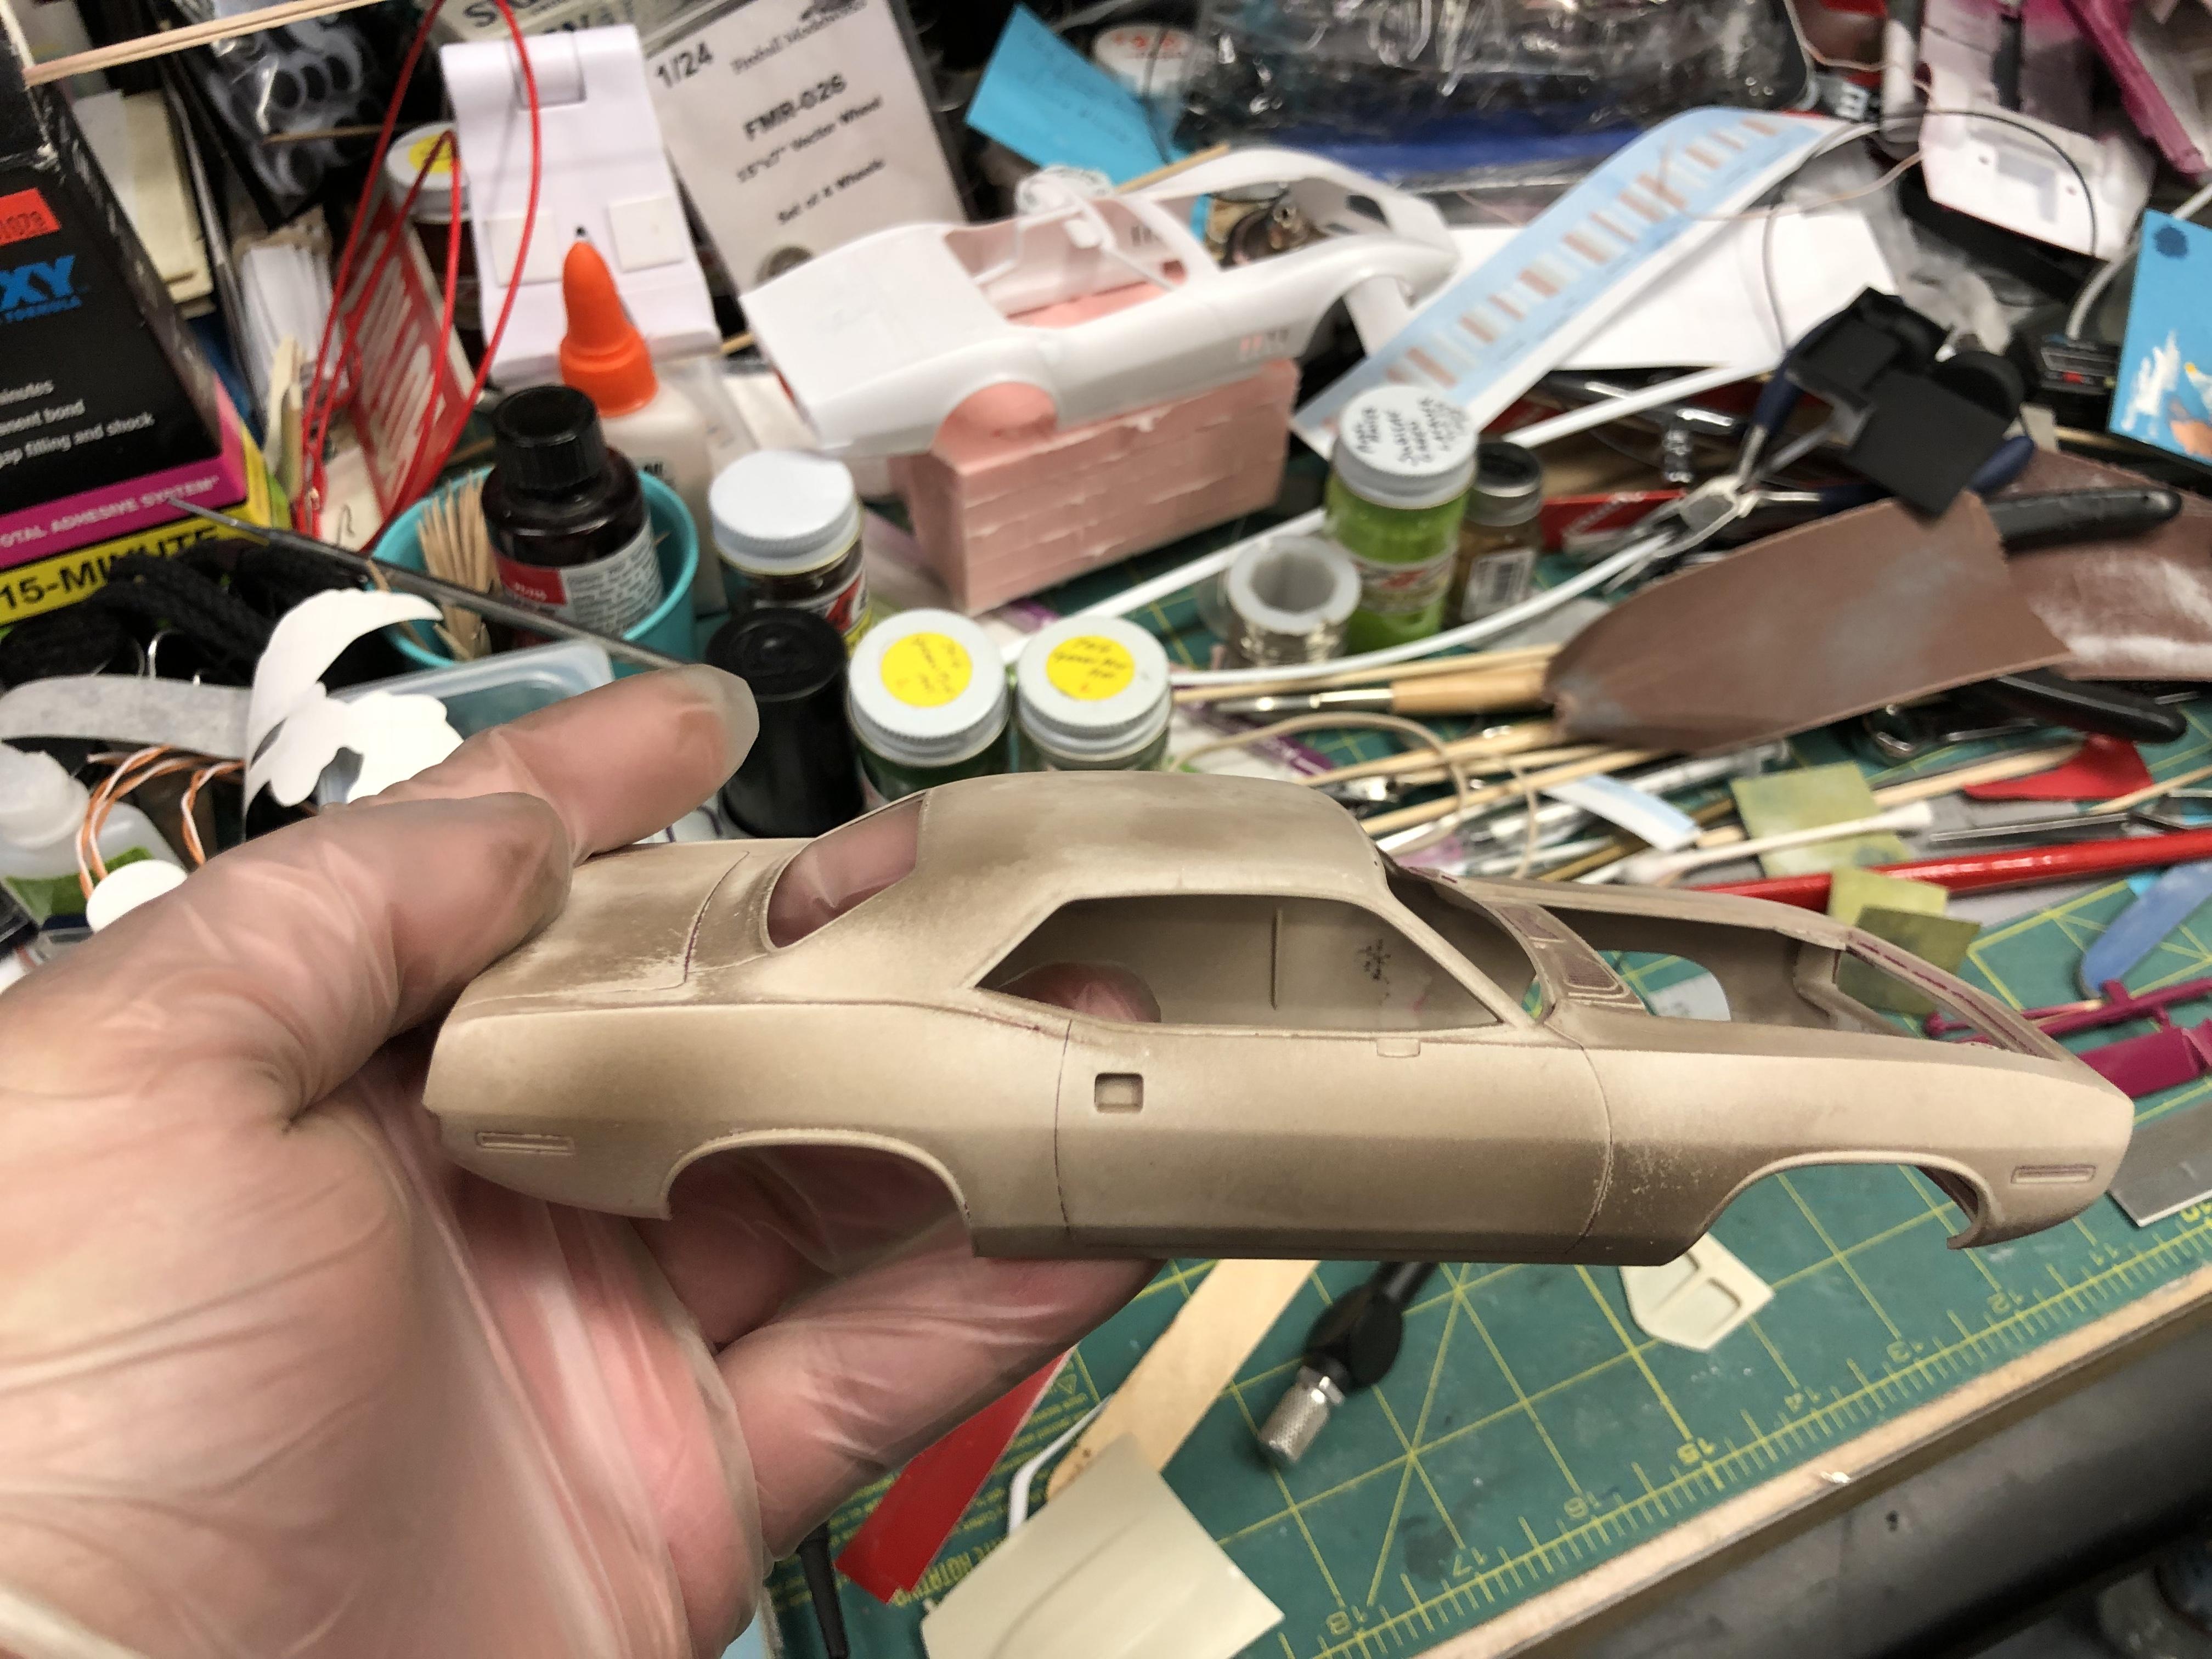
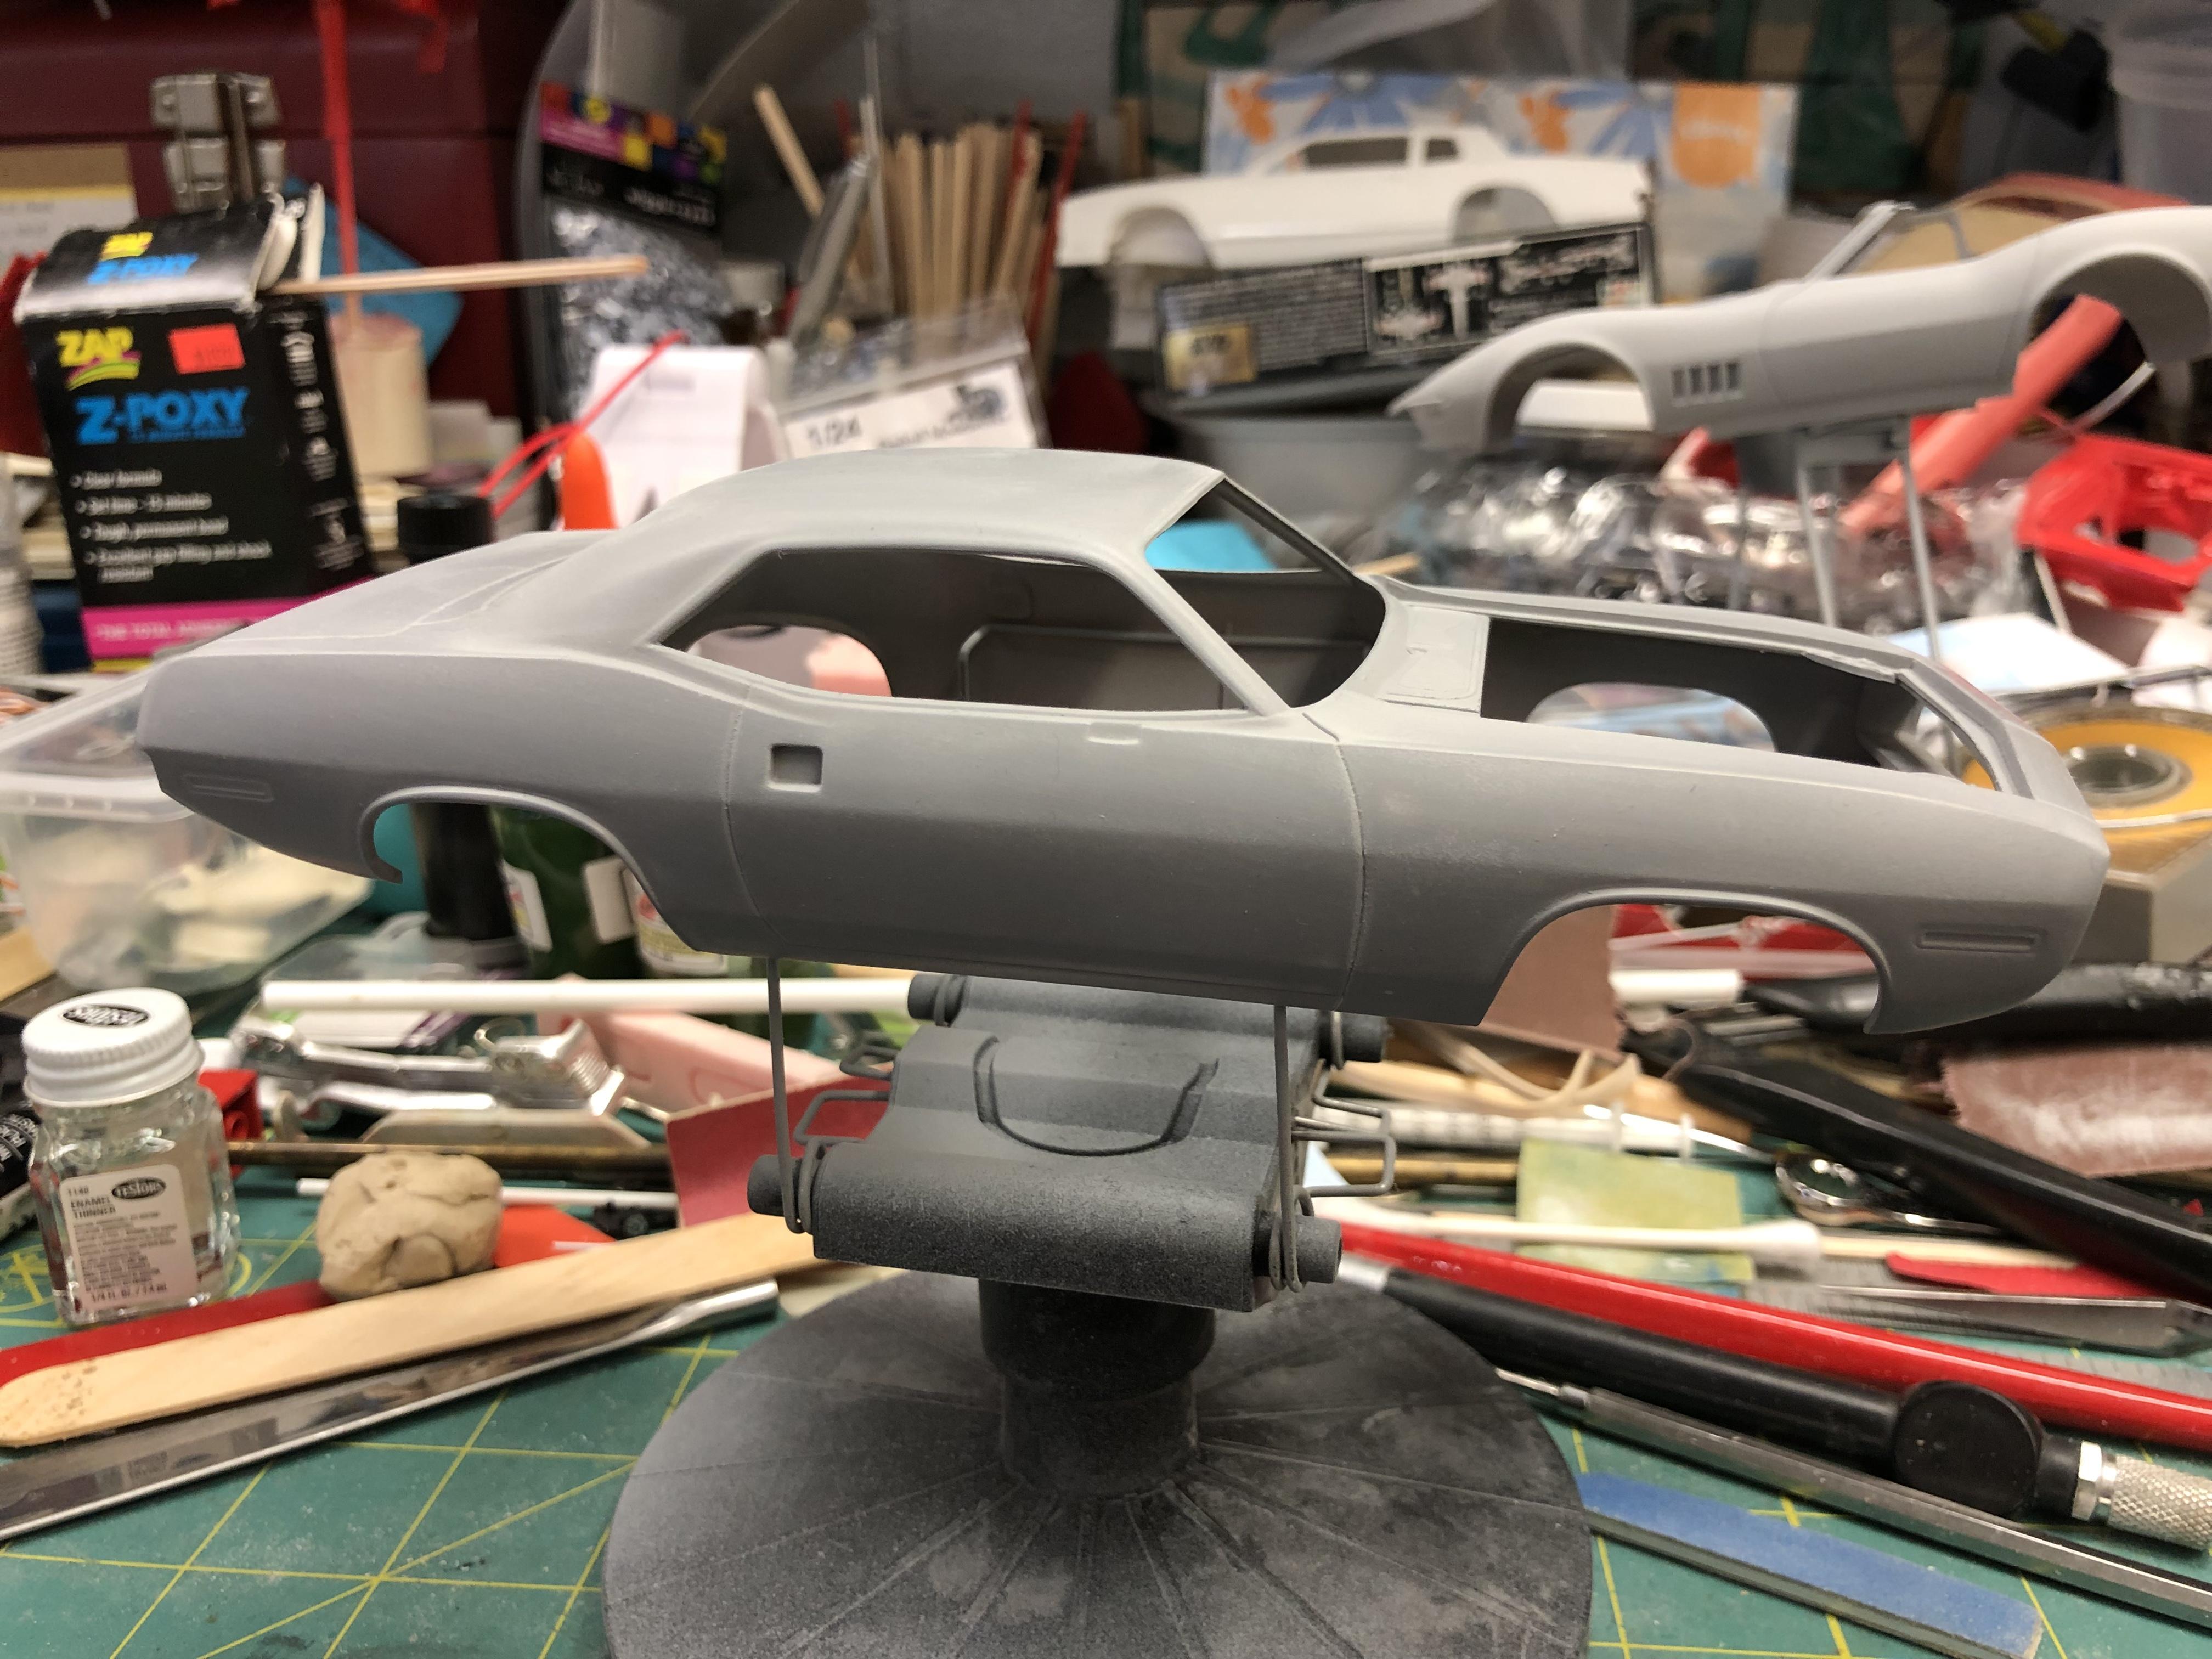
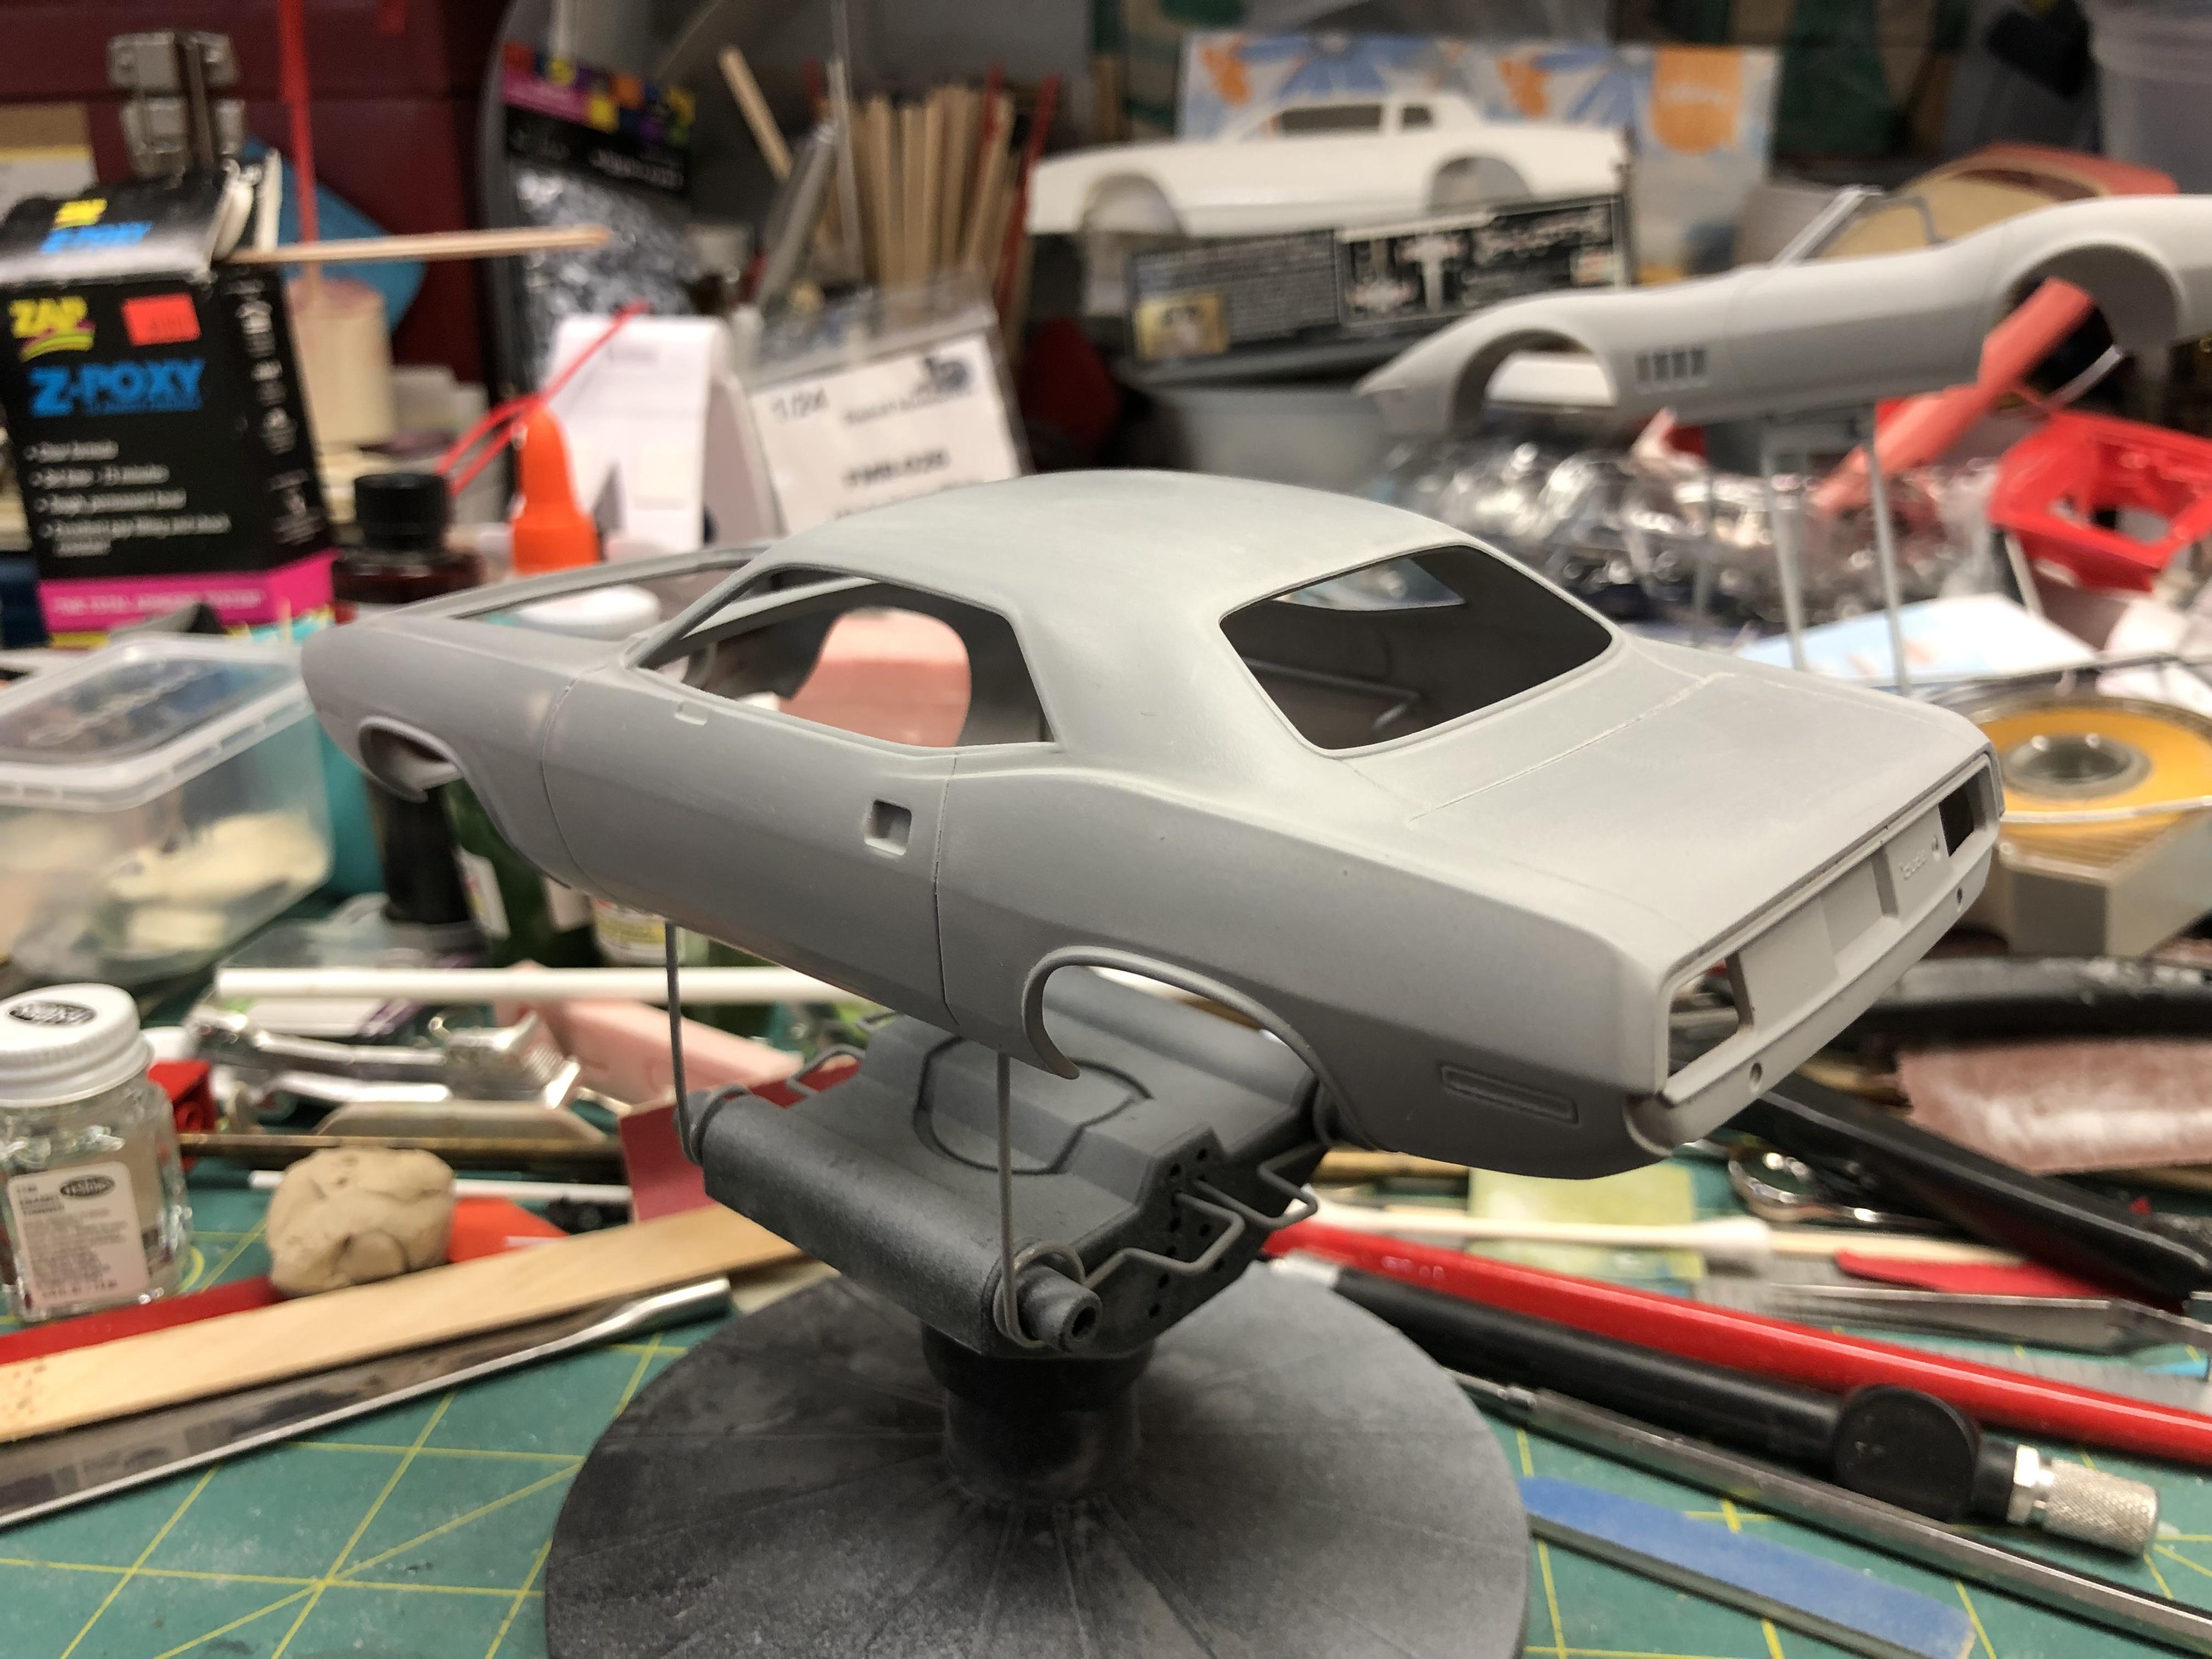
Third ever build was a 1970 Plymouth barracuda. I'm pretty happy with the way it turned out. Missed some spots with paint in the engine since I don't have an airburish. There's also a very small gap at the top of the windshield but I'll take it. On to the next one.
-
Hi all! It's been quite a while since I posted any progress on any of my models. I recently set up a new model desk and finally finished up my Dodge Challenger, so here are some studio pictures of the finished build. Enjoy!
-
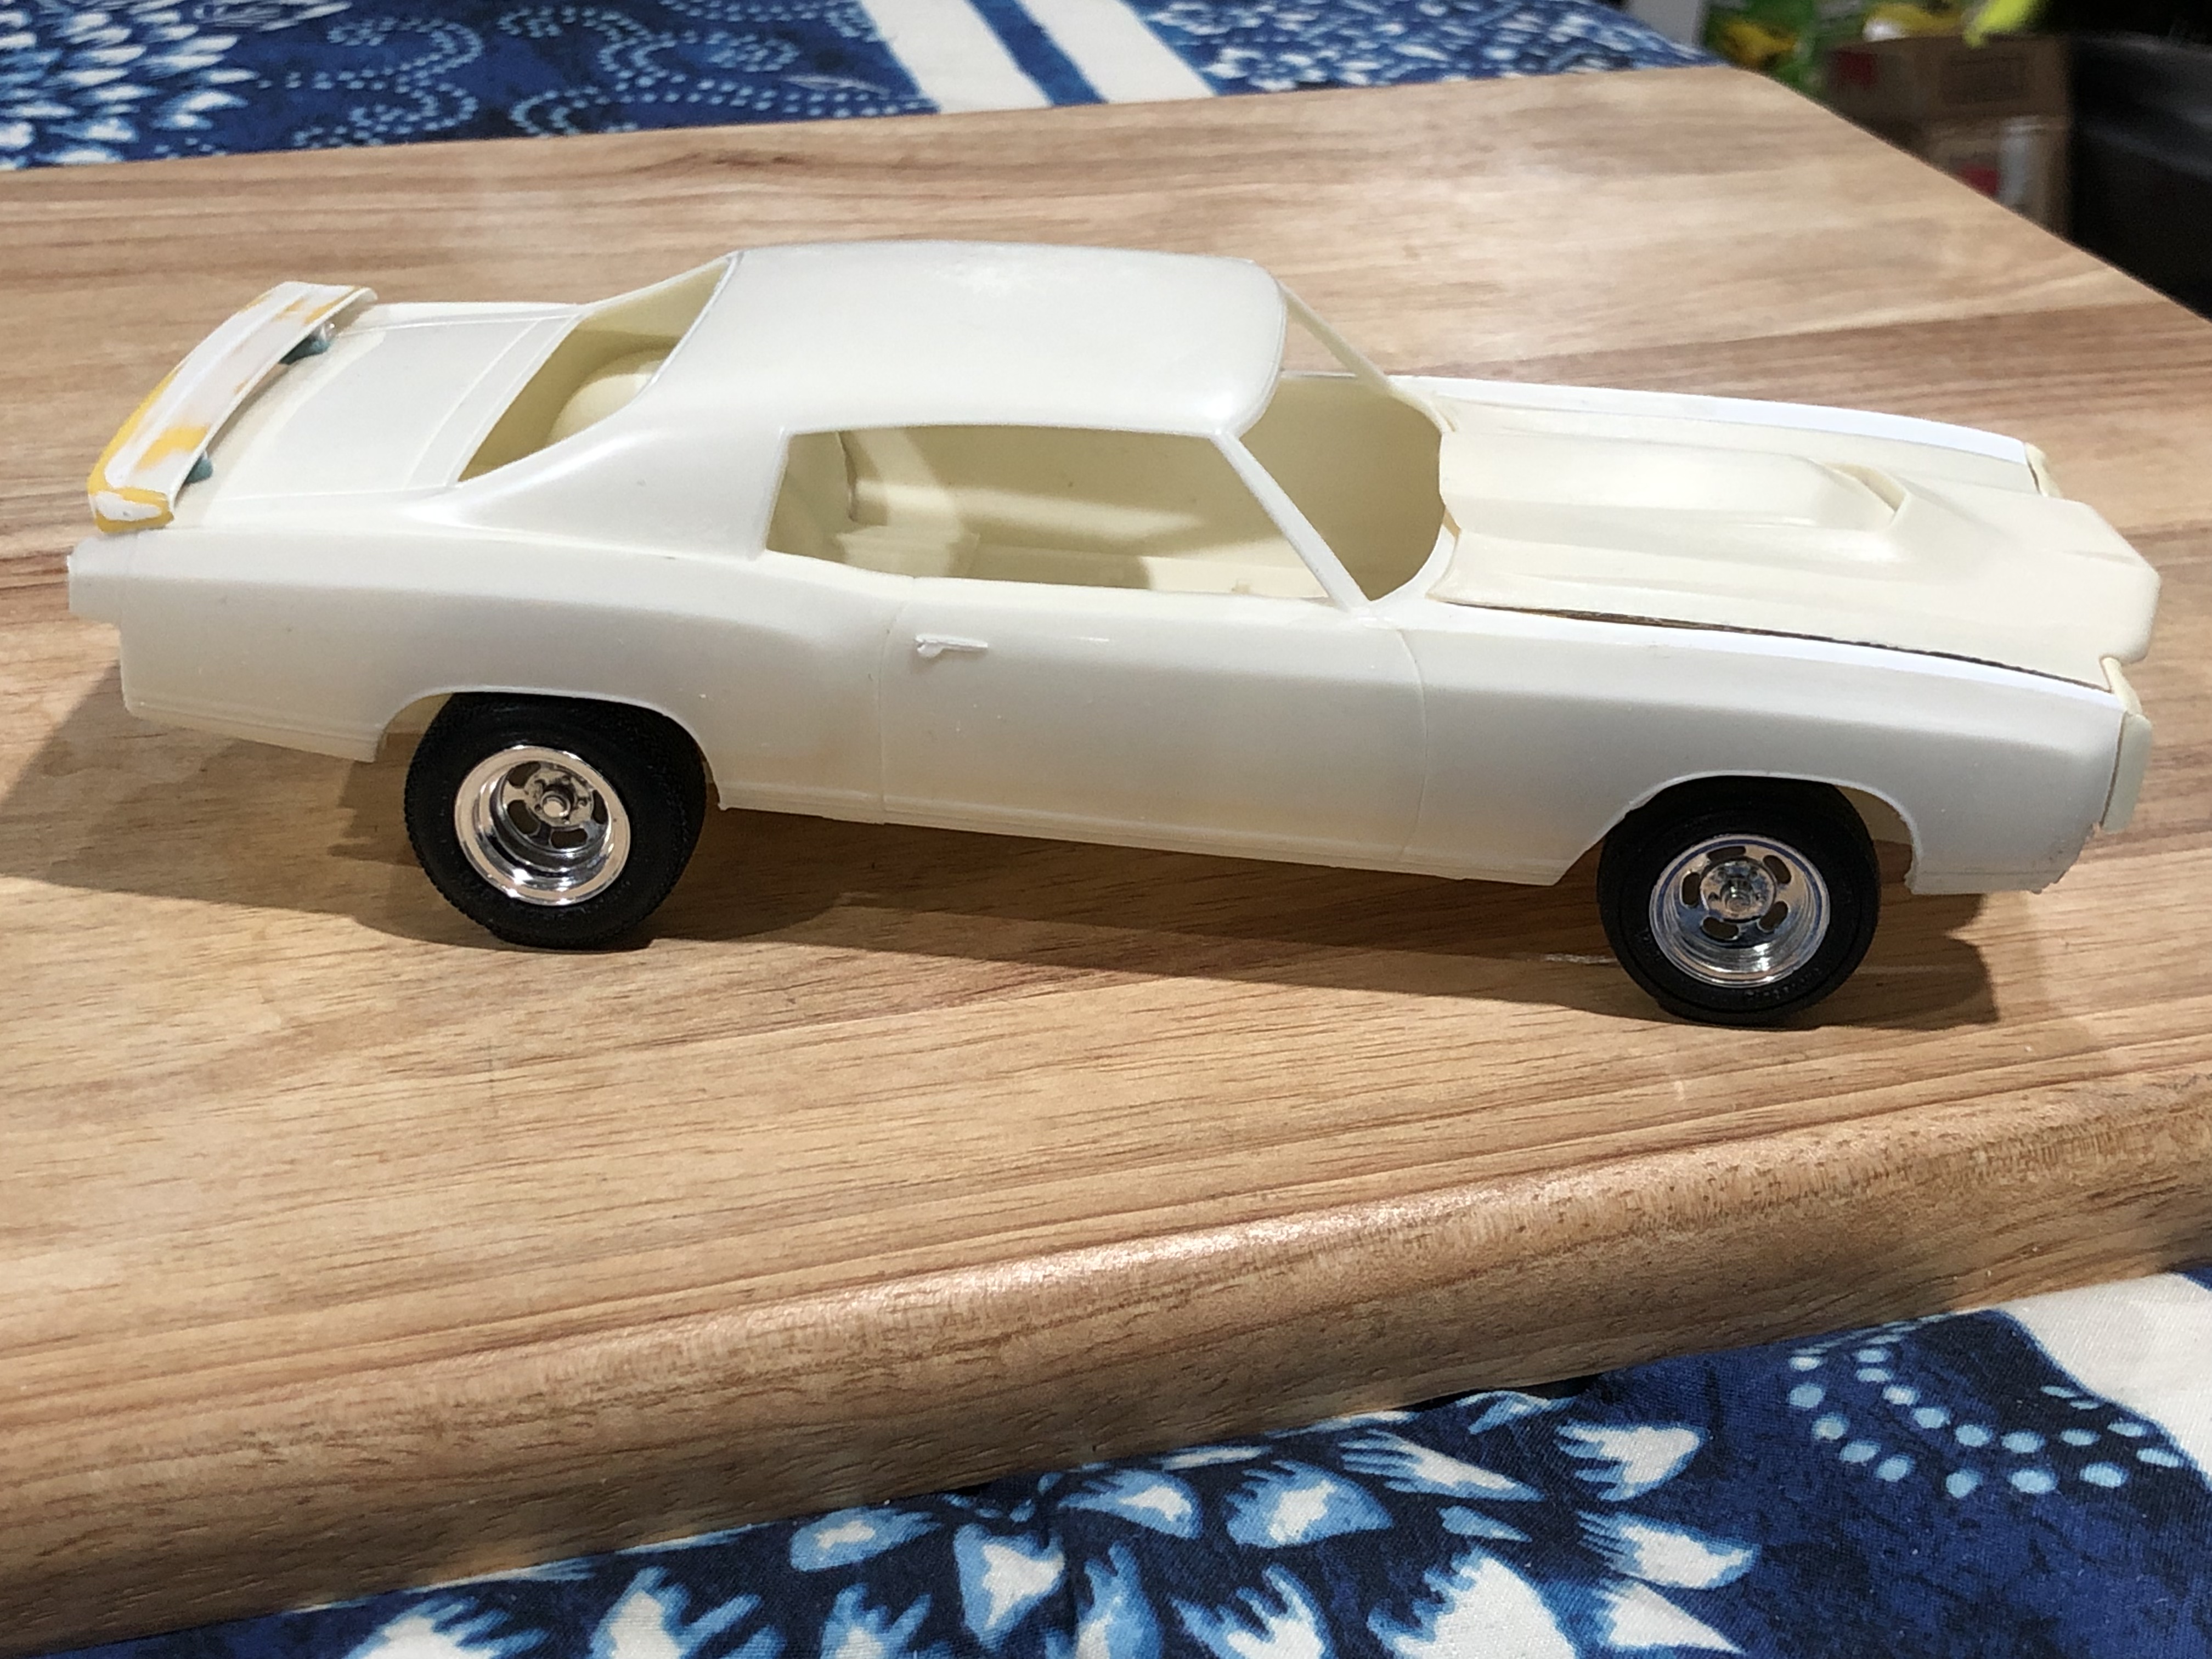
So i got some stuff from a good buddy of mine and he passed me on this what looks like a PROMO kit but i'm not too sure cause i've searched on ebay and can't seem to find one close enough promo wise to it. Can anyone help me out here and let me know what this actually is? It's a really nice clean car, well kept.
-
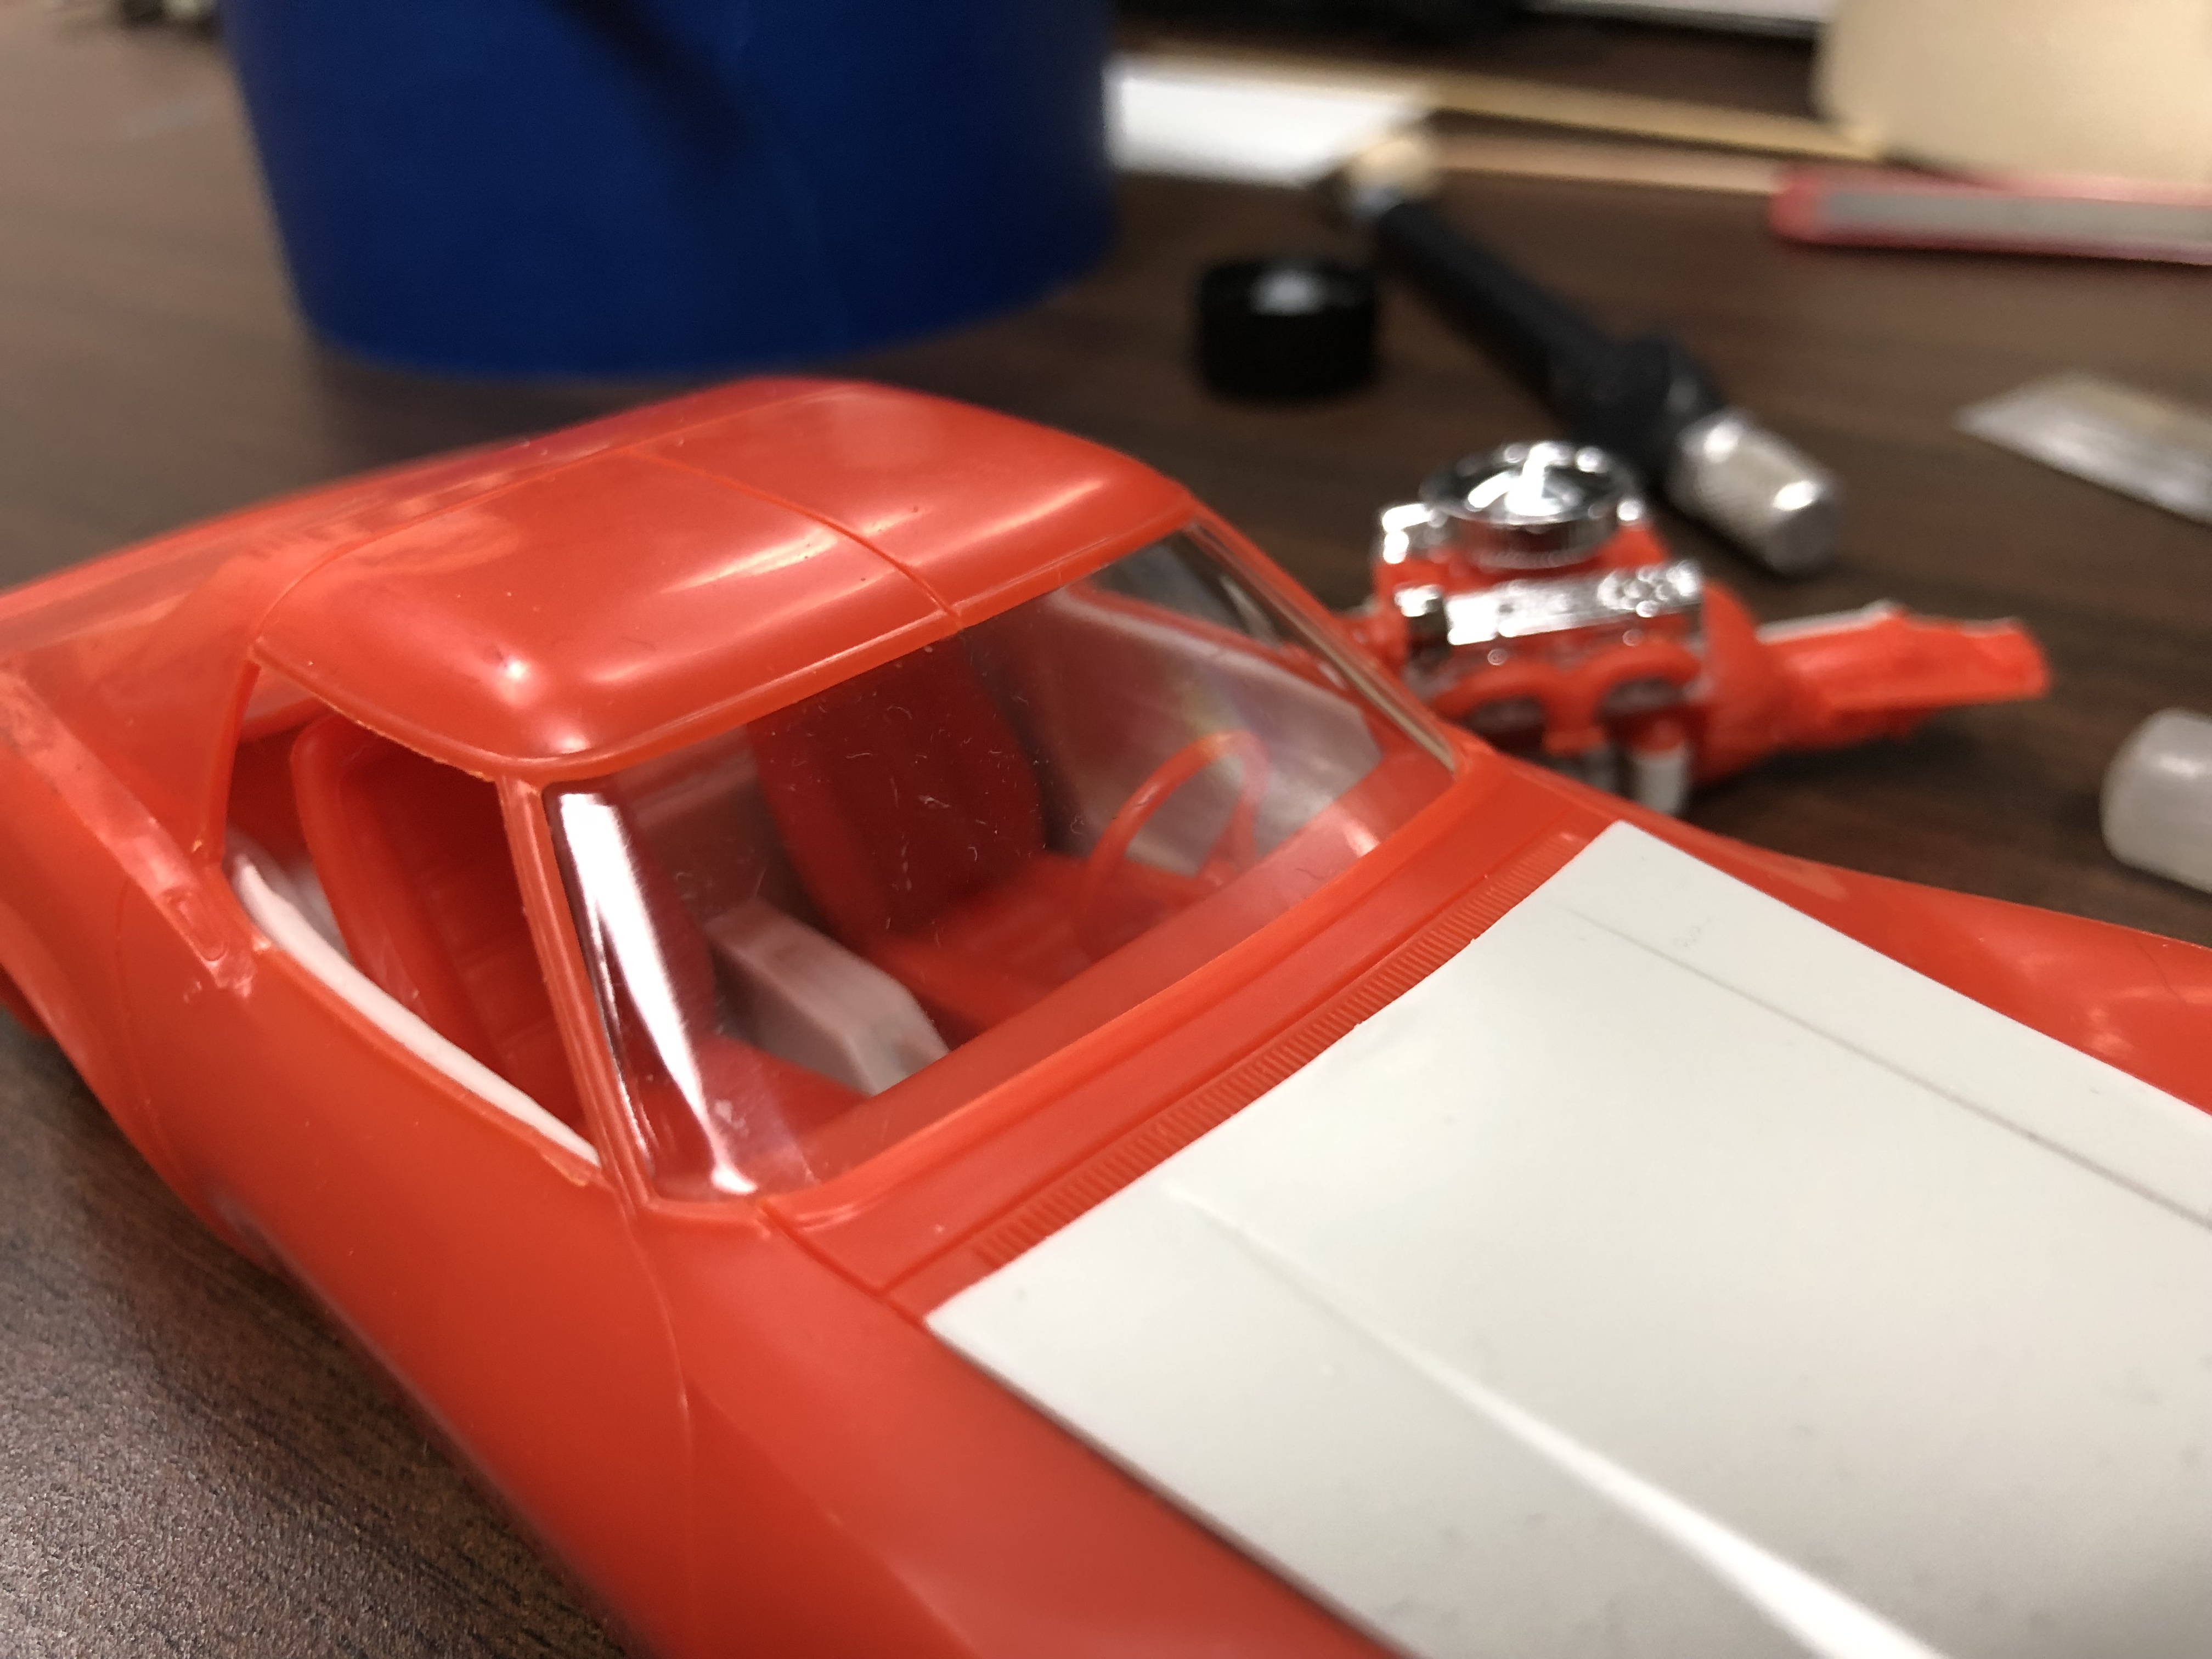
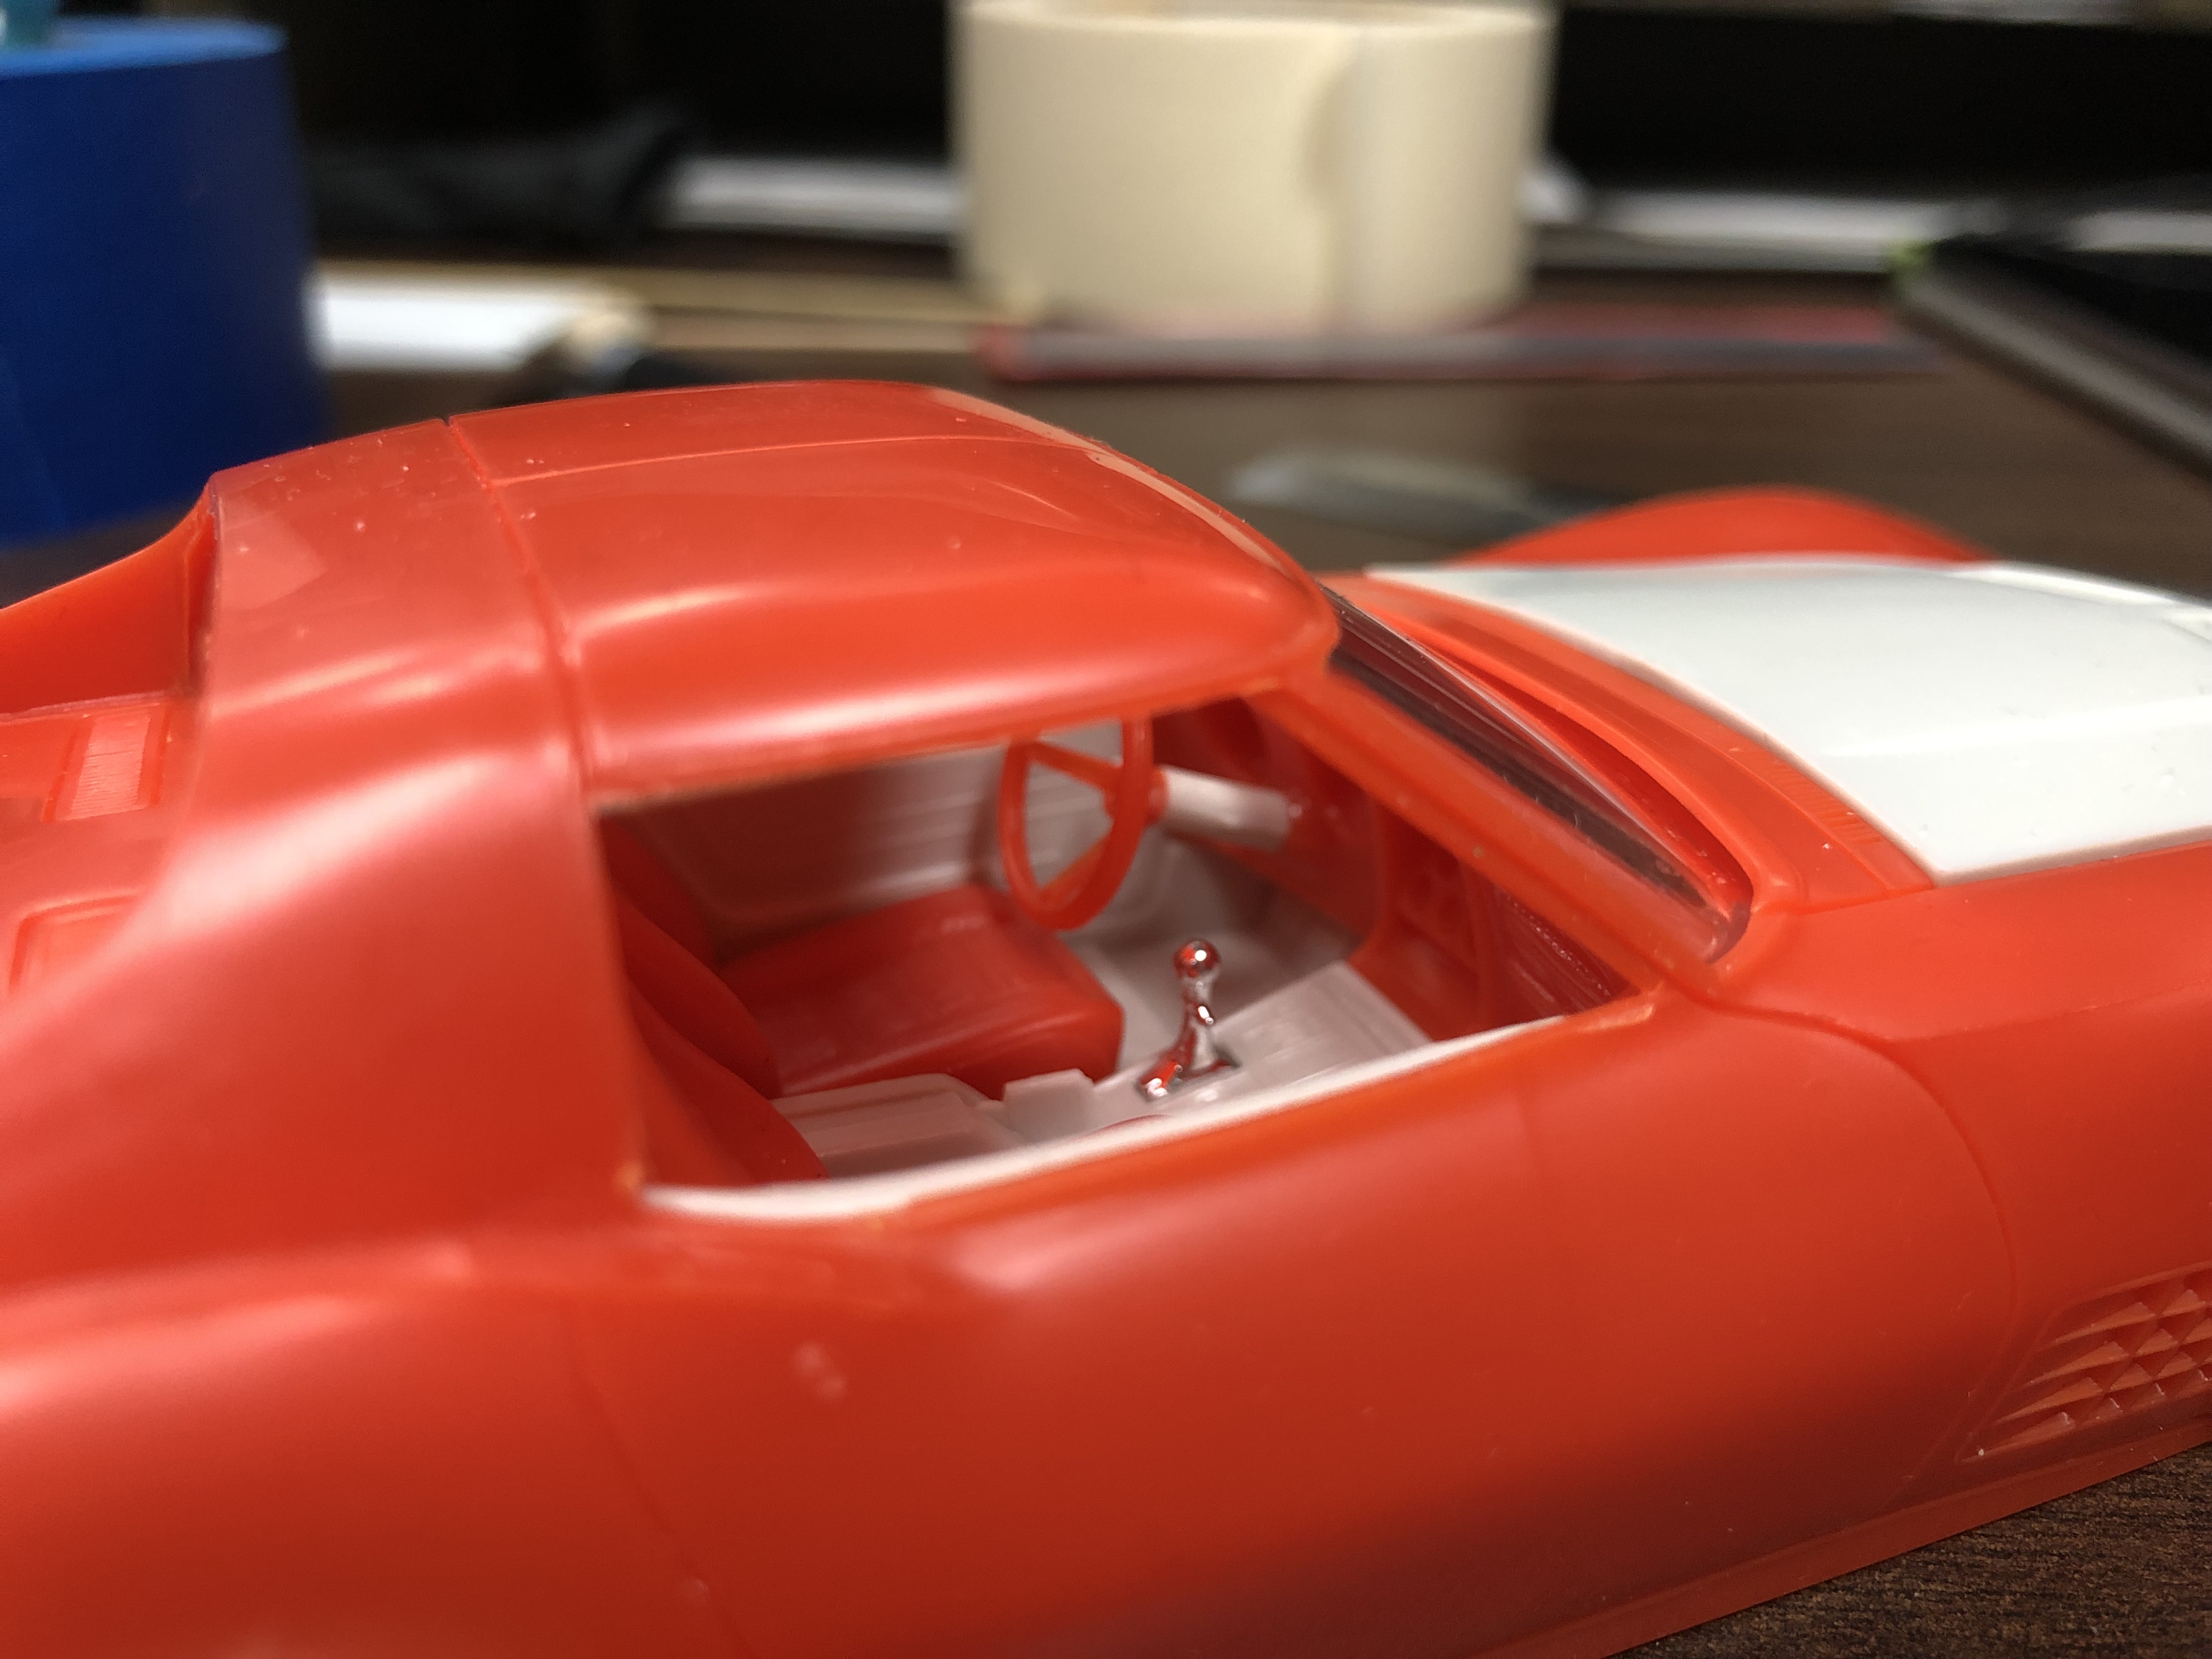
This is the Mustang 1970 Boss 429 I just finished. First model in 20+ year for me and I must admit that I'm quite happy with the result. Far from perfect but I've learnt so many things while doing it, it's only going to make the next model better. Body Color: Testor Competition Orange/Flat Black, Tamiya Clear Coat. (all rattle can...don't have an airbush yet...) Scratchbuilt the battery (and cables),front shocks and spring, windshield washer fluid tank, wired the engine ignition...(well partially...) IMG_9573 IMG_9579 IMG_9545 IMG_9568
-
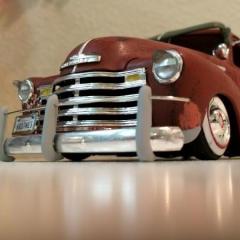
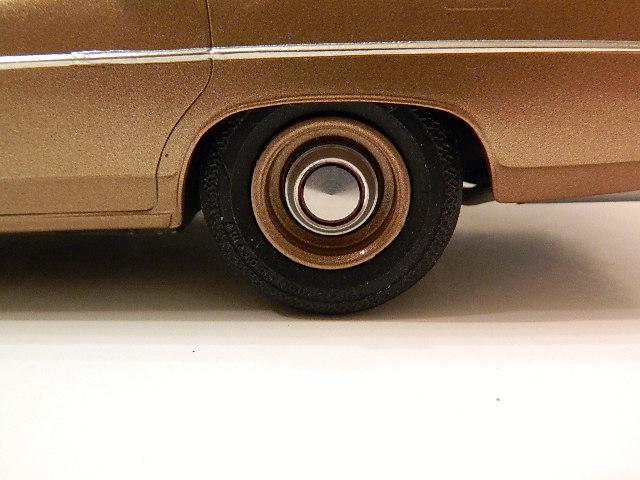
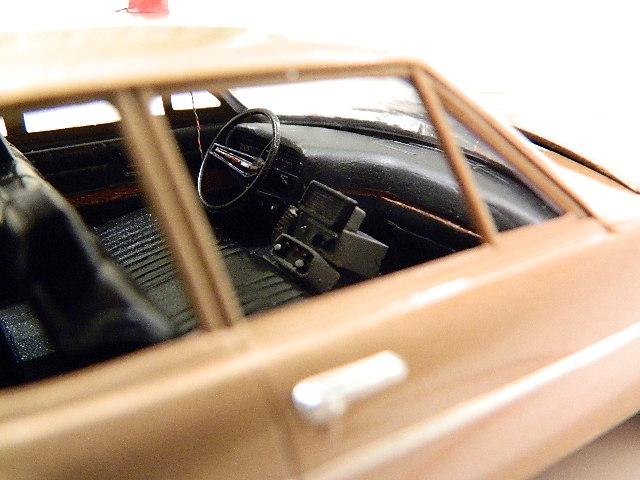
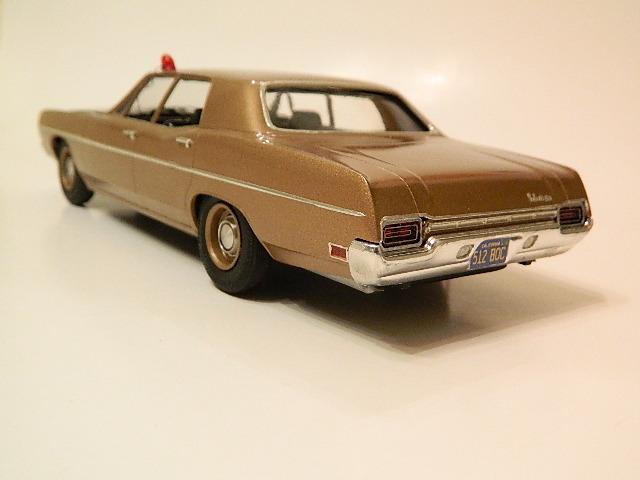
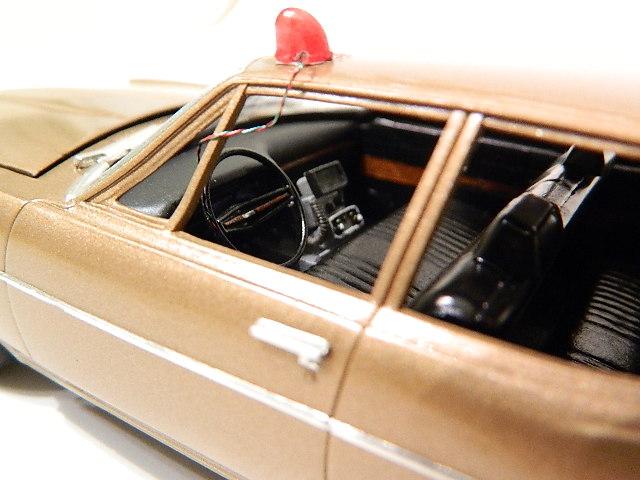
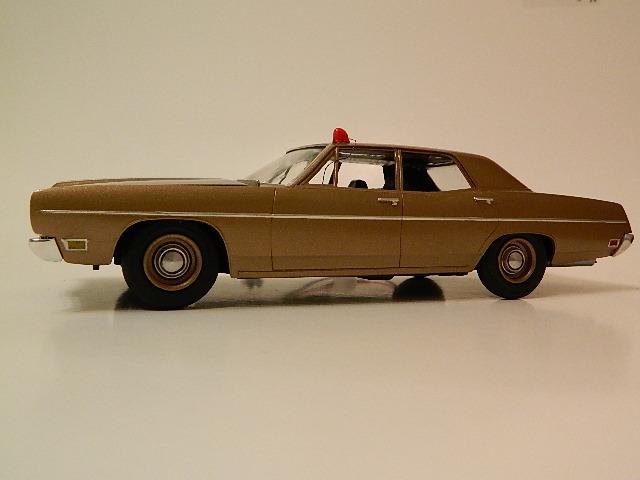
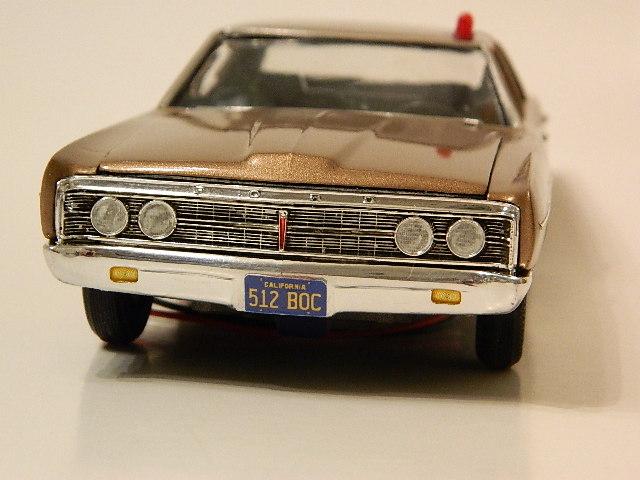
Here is my Hobby Heaven 1/25th scale Custom 500. I was inspired by the film "Magnum Force" and wanted to build a 1970's police inspector's car like Harry Callahan's. I decided to paint the car a Ford Medium Brown Metallic, a correct color for that model and year. The paint is actual auto paint - a two part finish with a color base and a clear coat. I did not like the dog dish hubcaps that came with the car, so ordered a set of aluminum hub caps from Park's Parts. I detailed the interior and dash, using authentic gauge images supplied by Best Model, along with the correct license plates for that period. I added a strobe light, courtesy of the Starsky and Hutch kit, and ordered a pico LED from Police Models. I also wired the engine to make it more realistic. The engine supplied with the kit is not the correct one, but used it anyway. The air cleaner came from another kit.
-
-
Thought the car looked pretty cool, plus you never see many kits of the full size cars, so I picked it up.
-
Just got the kit a couple weeks ago. It's not a bad kit, though I don't like the thin metal emblems. Almost lost them, and on top of that I bent the metal that goes over the tail lights. Over all though it came out good.
-
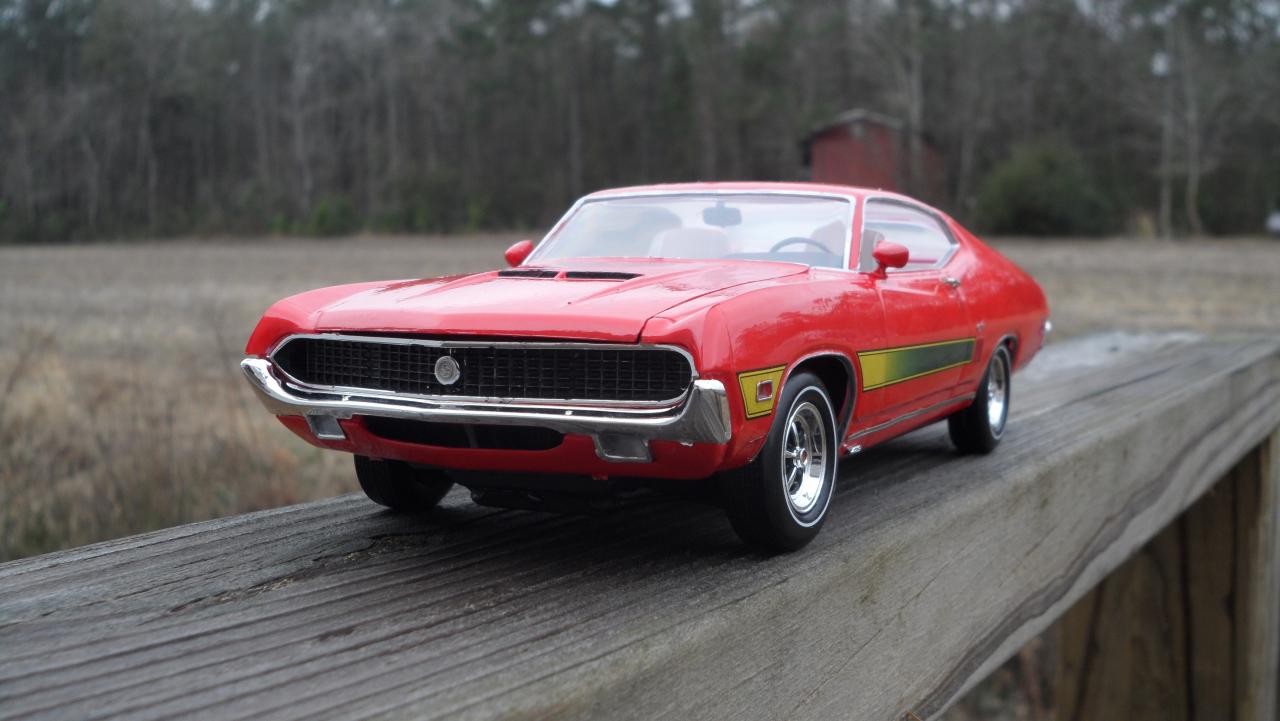
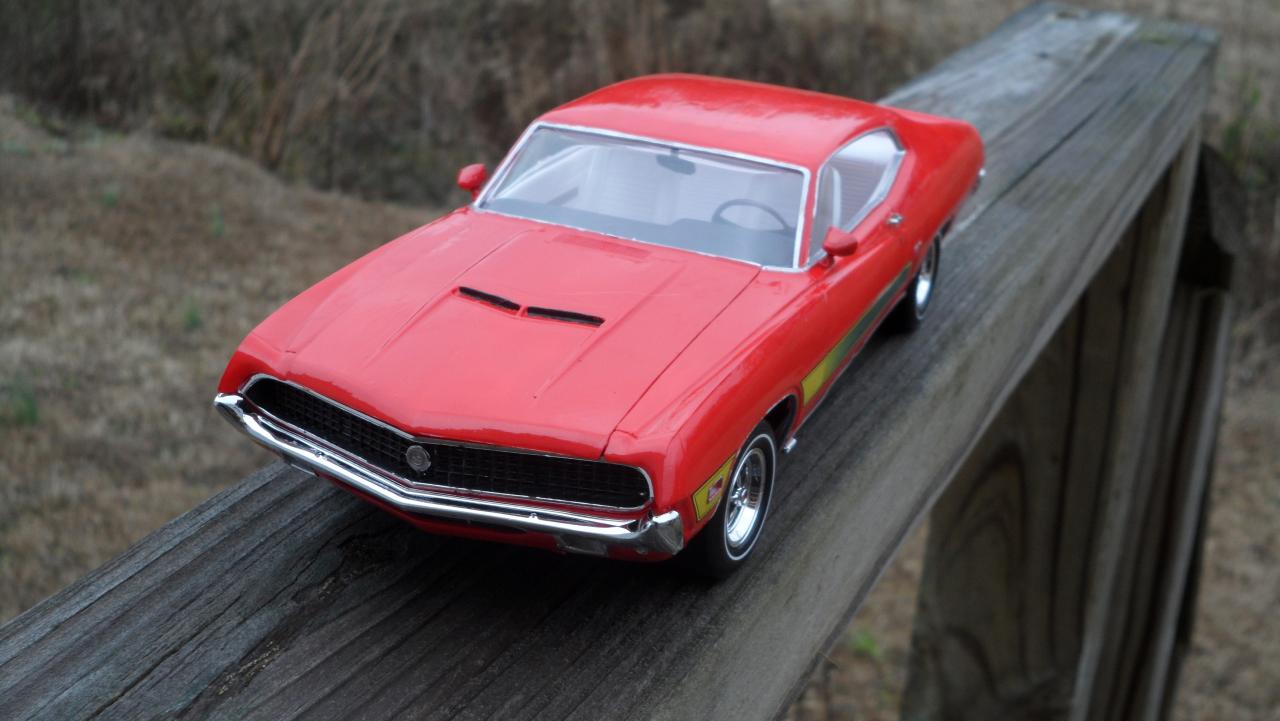
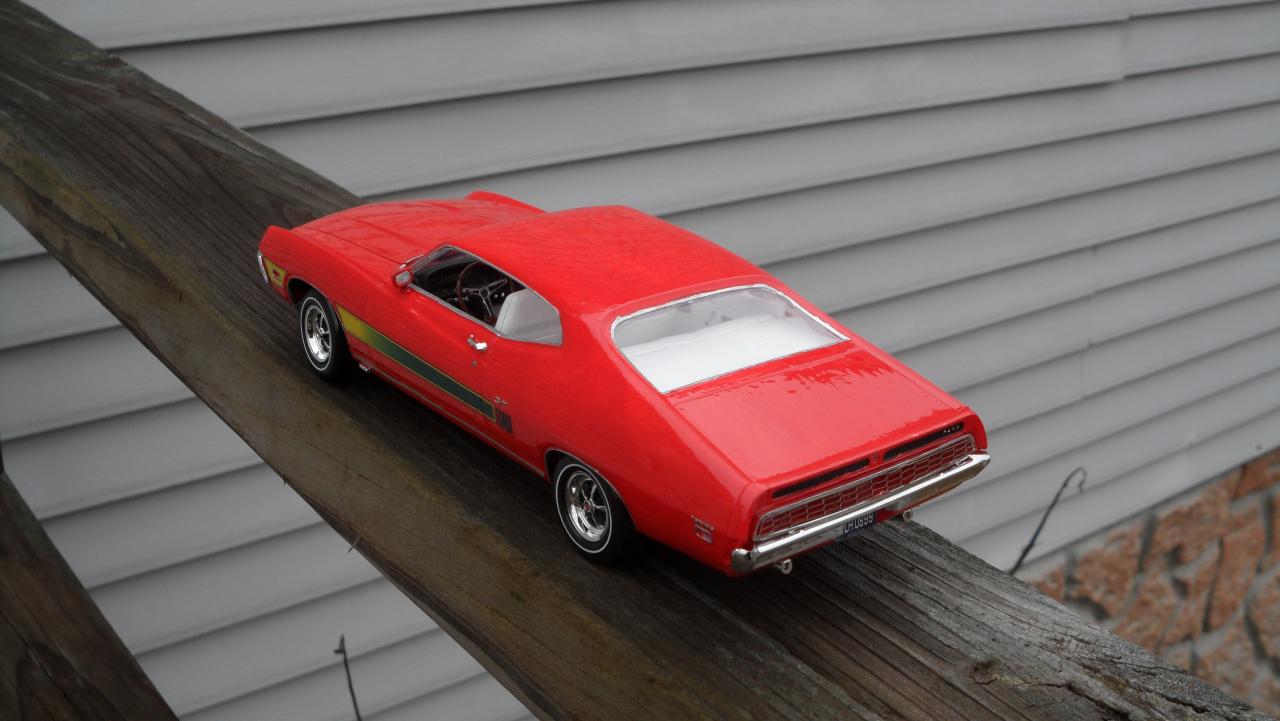
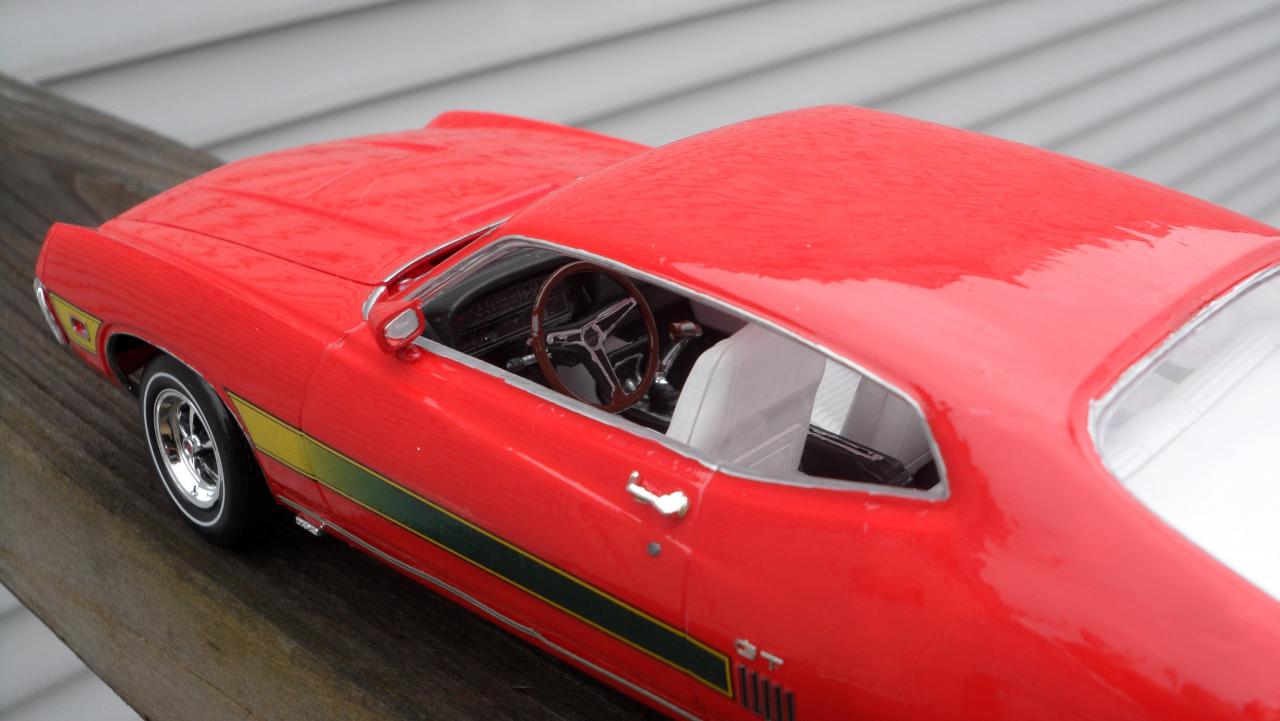
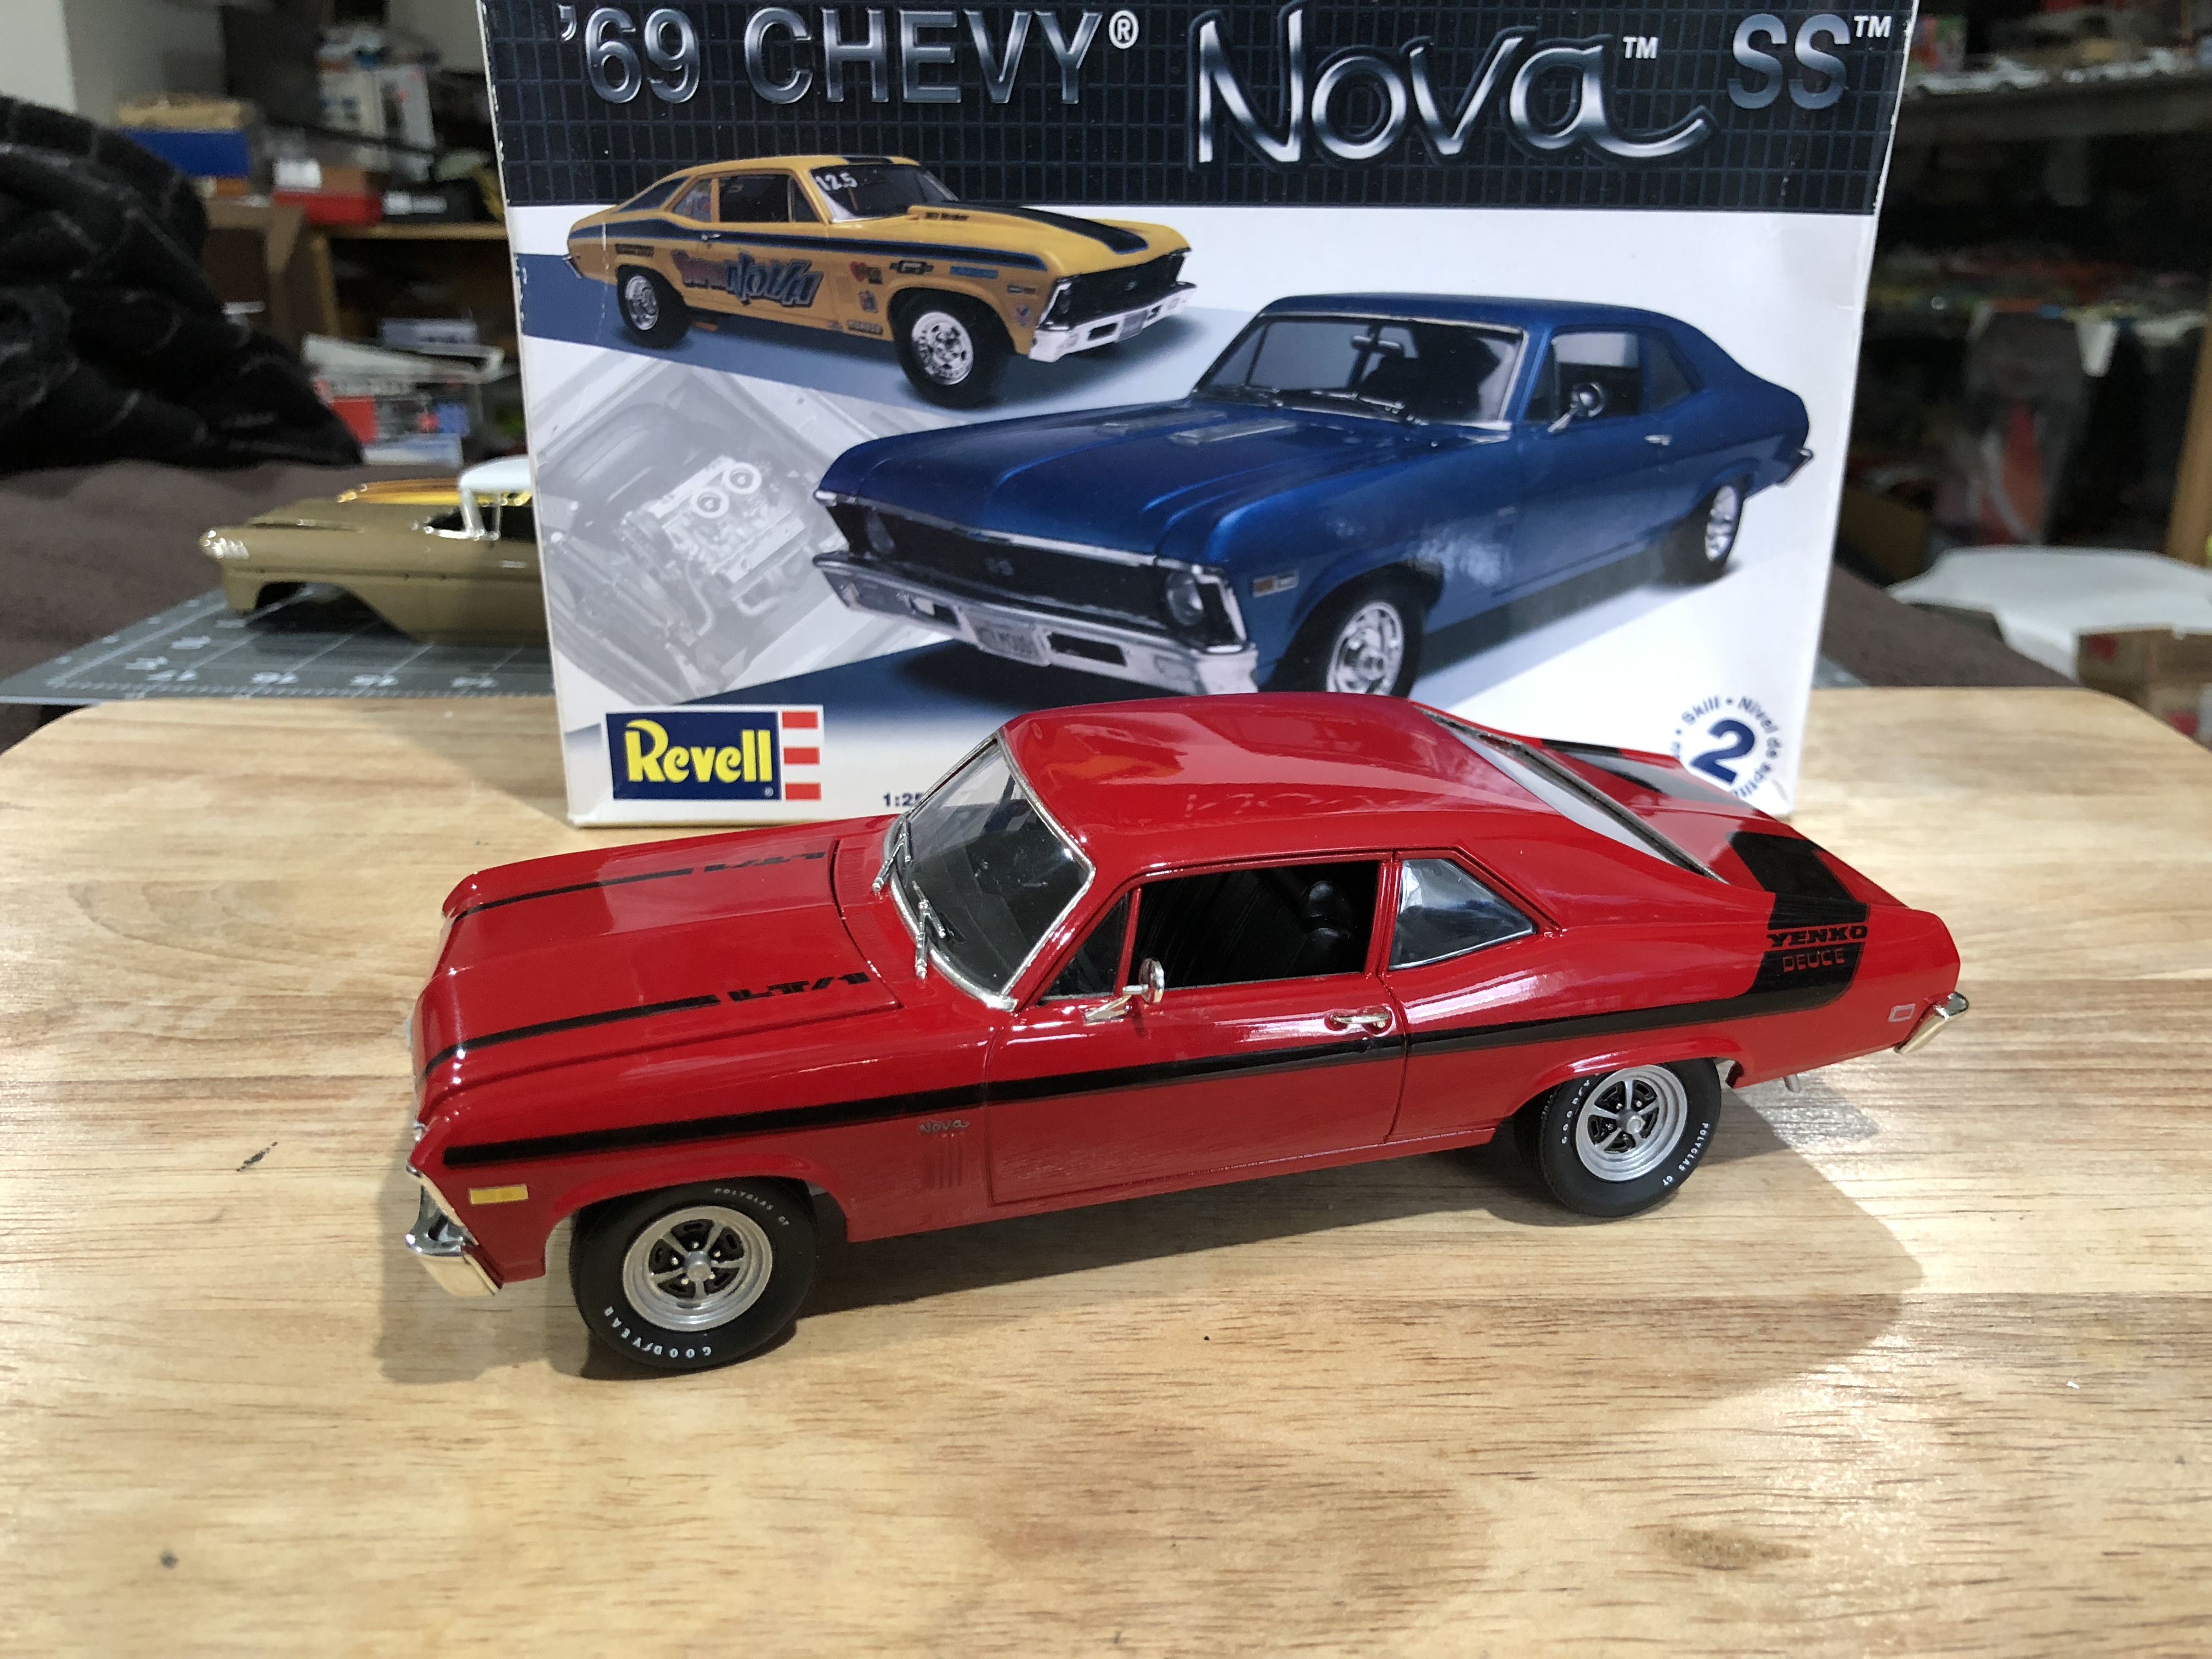
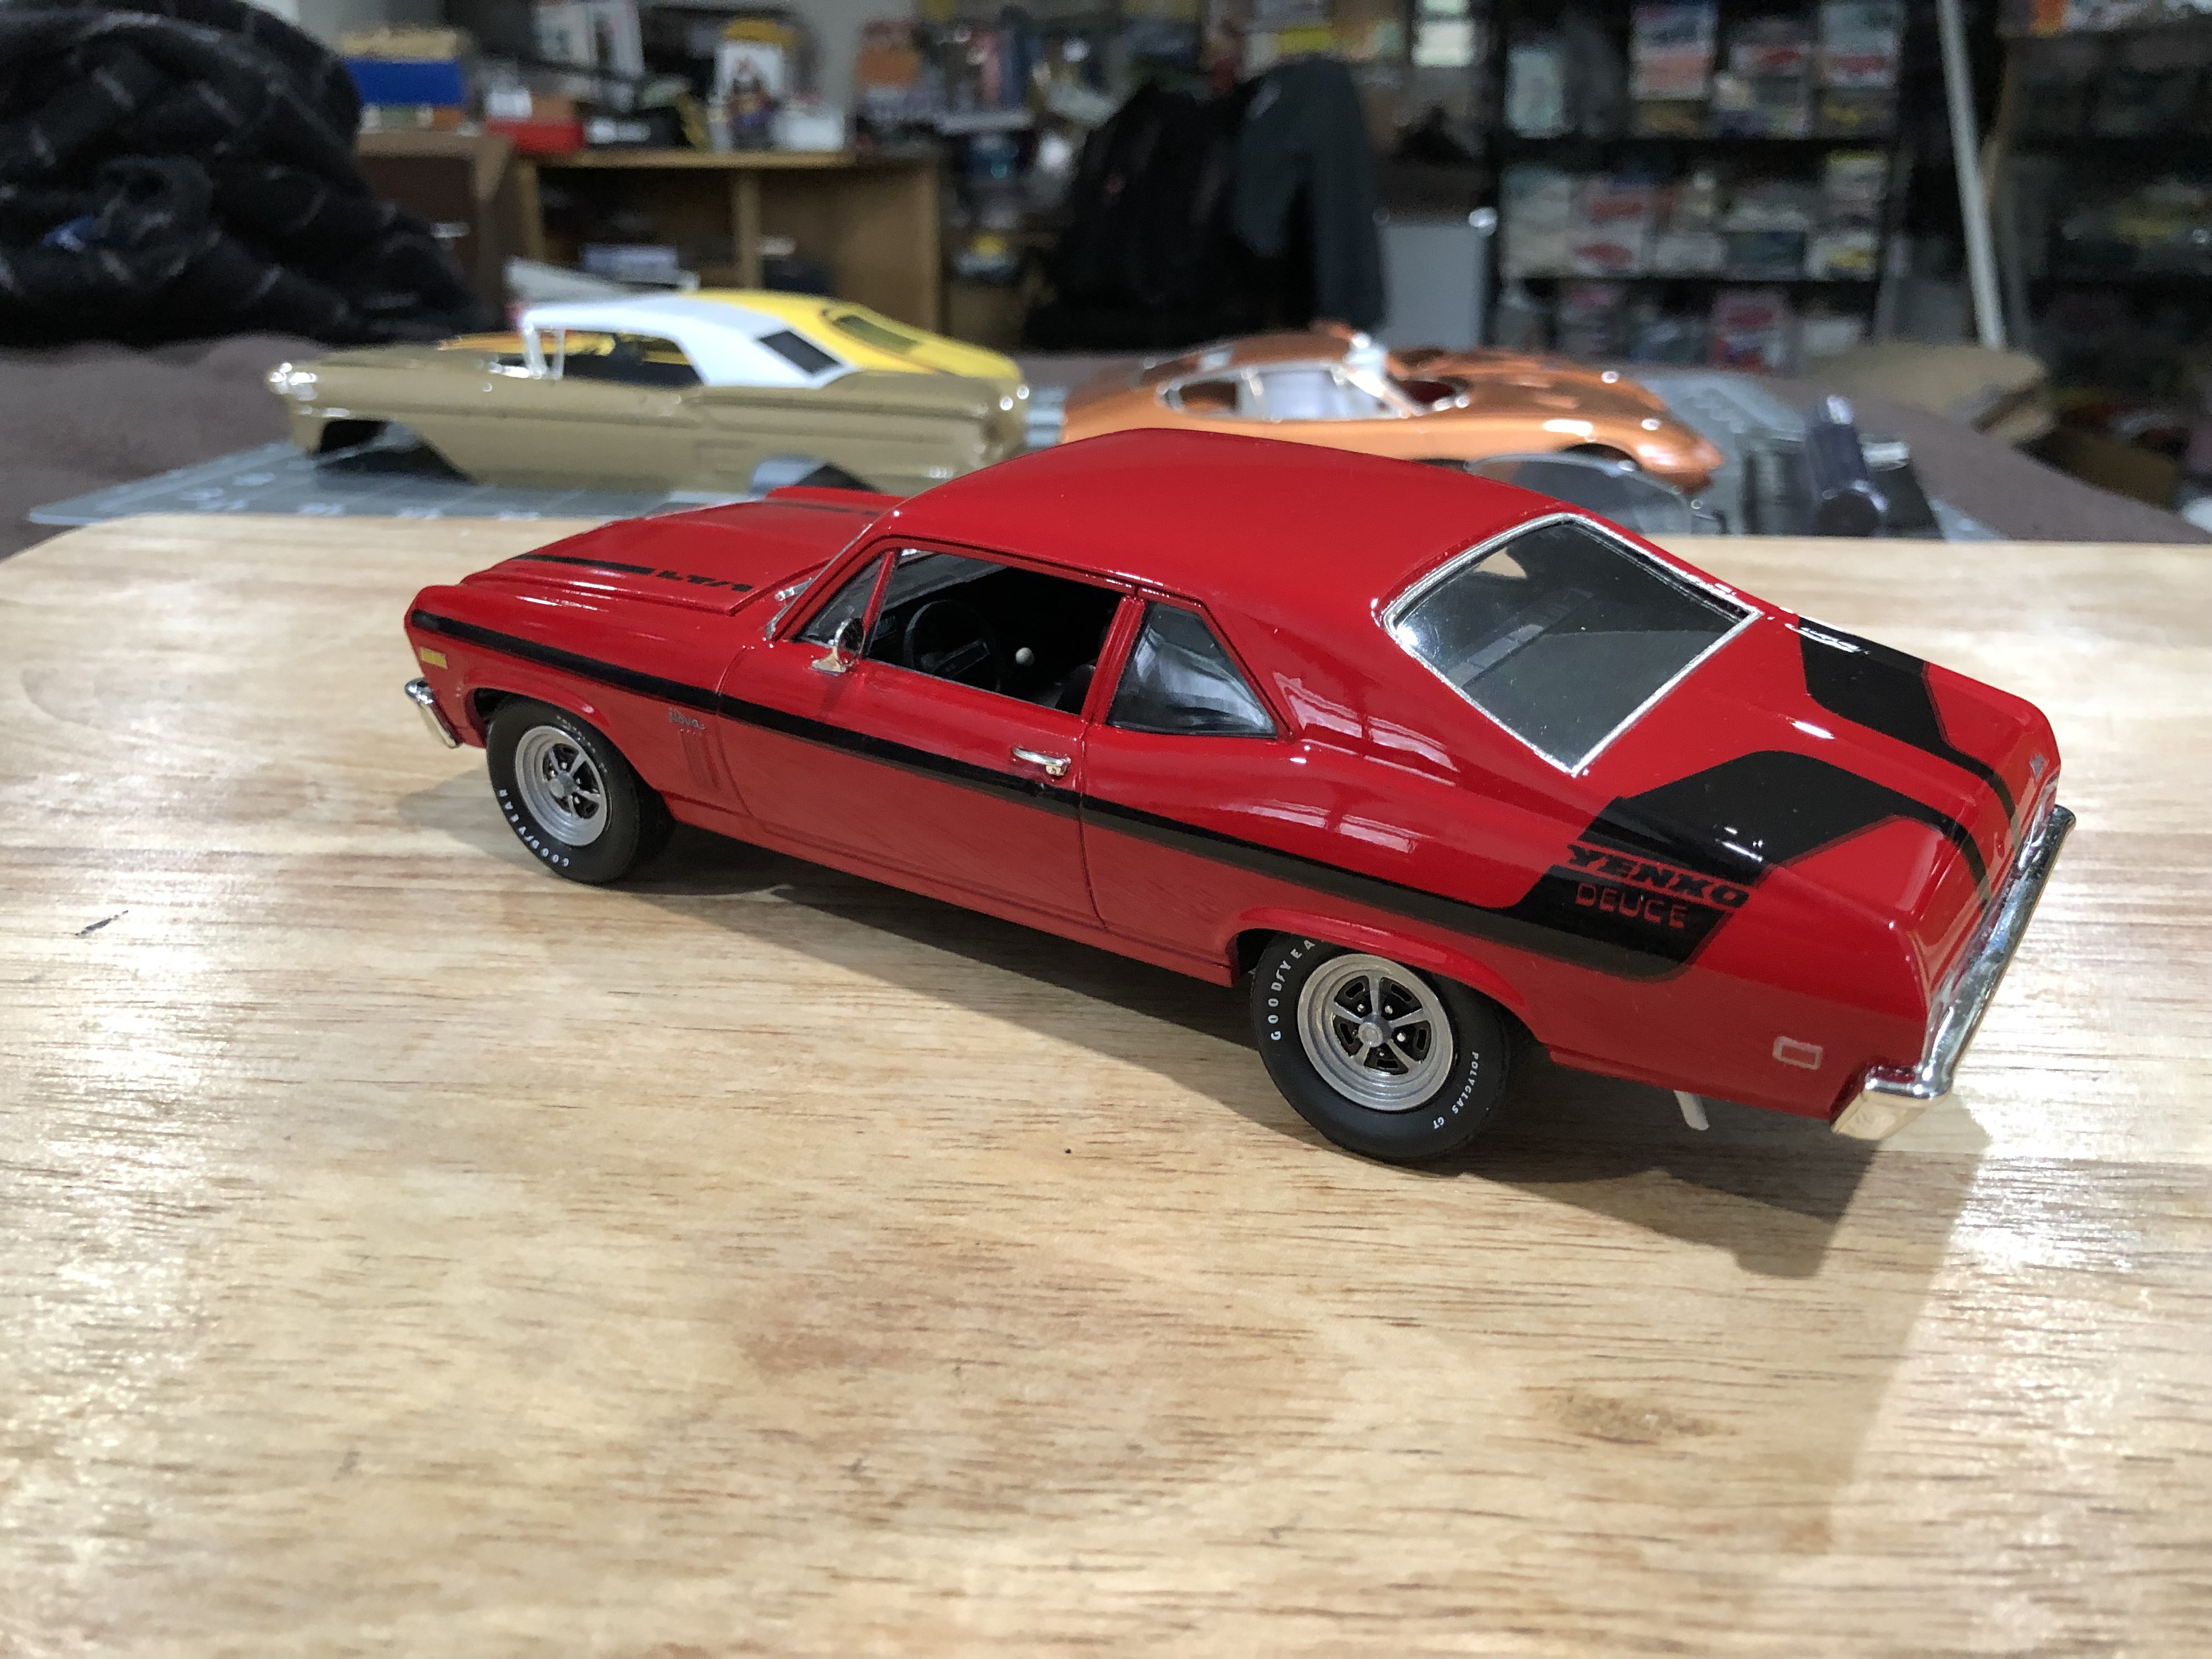
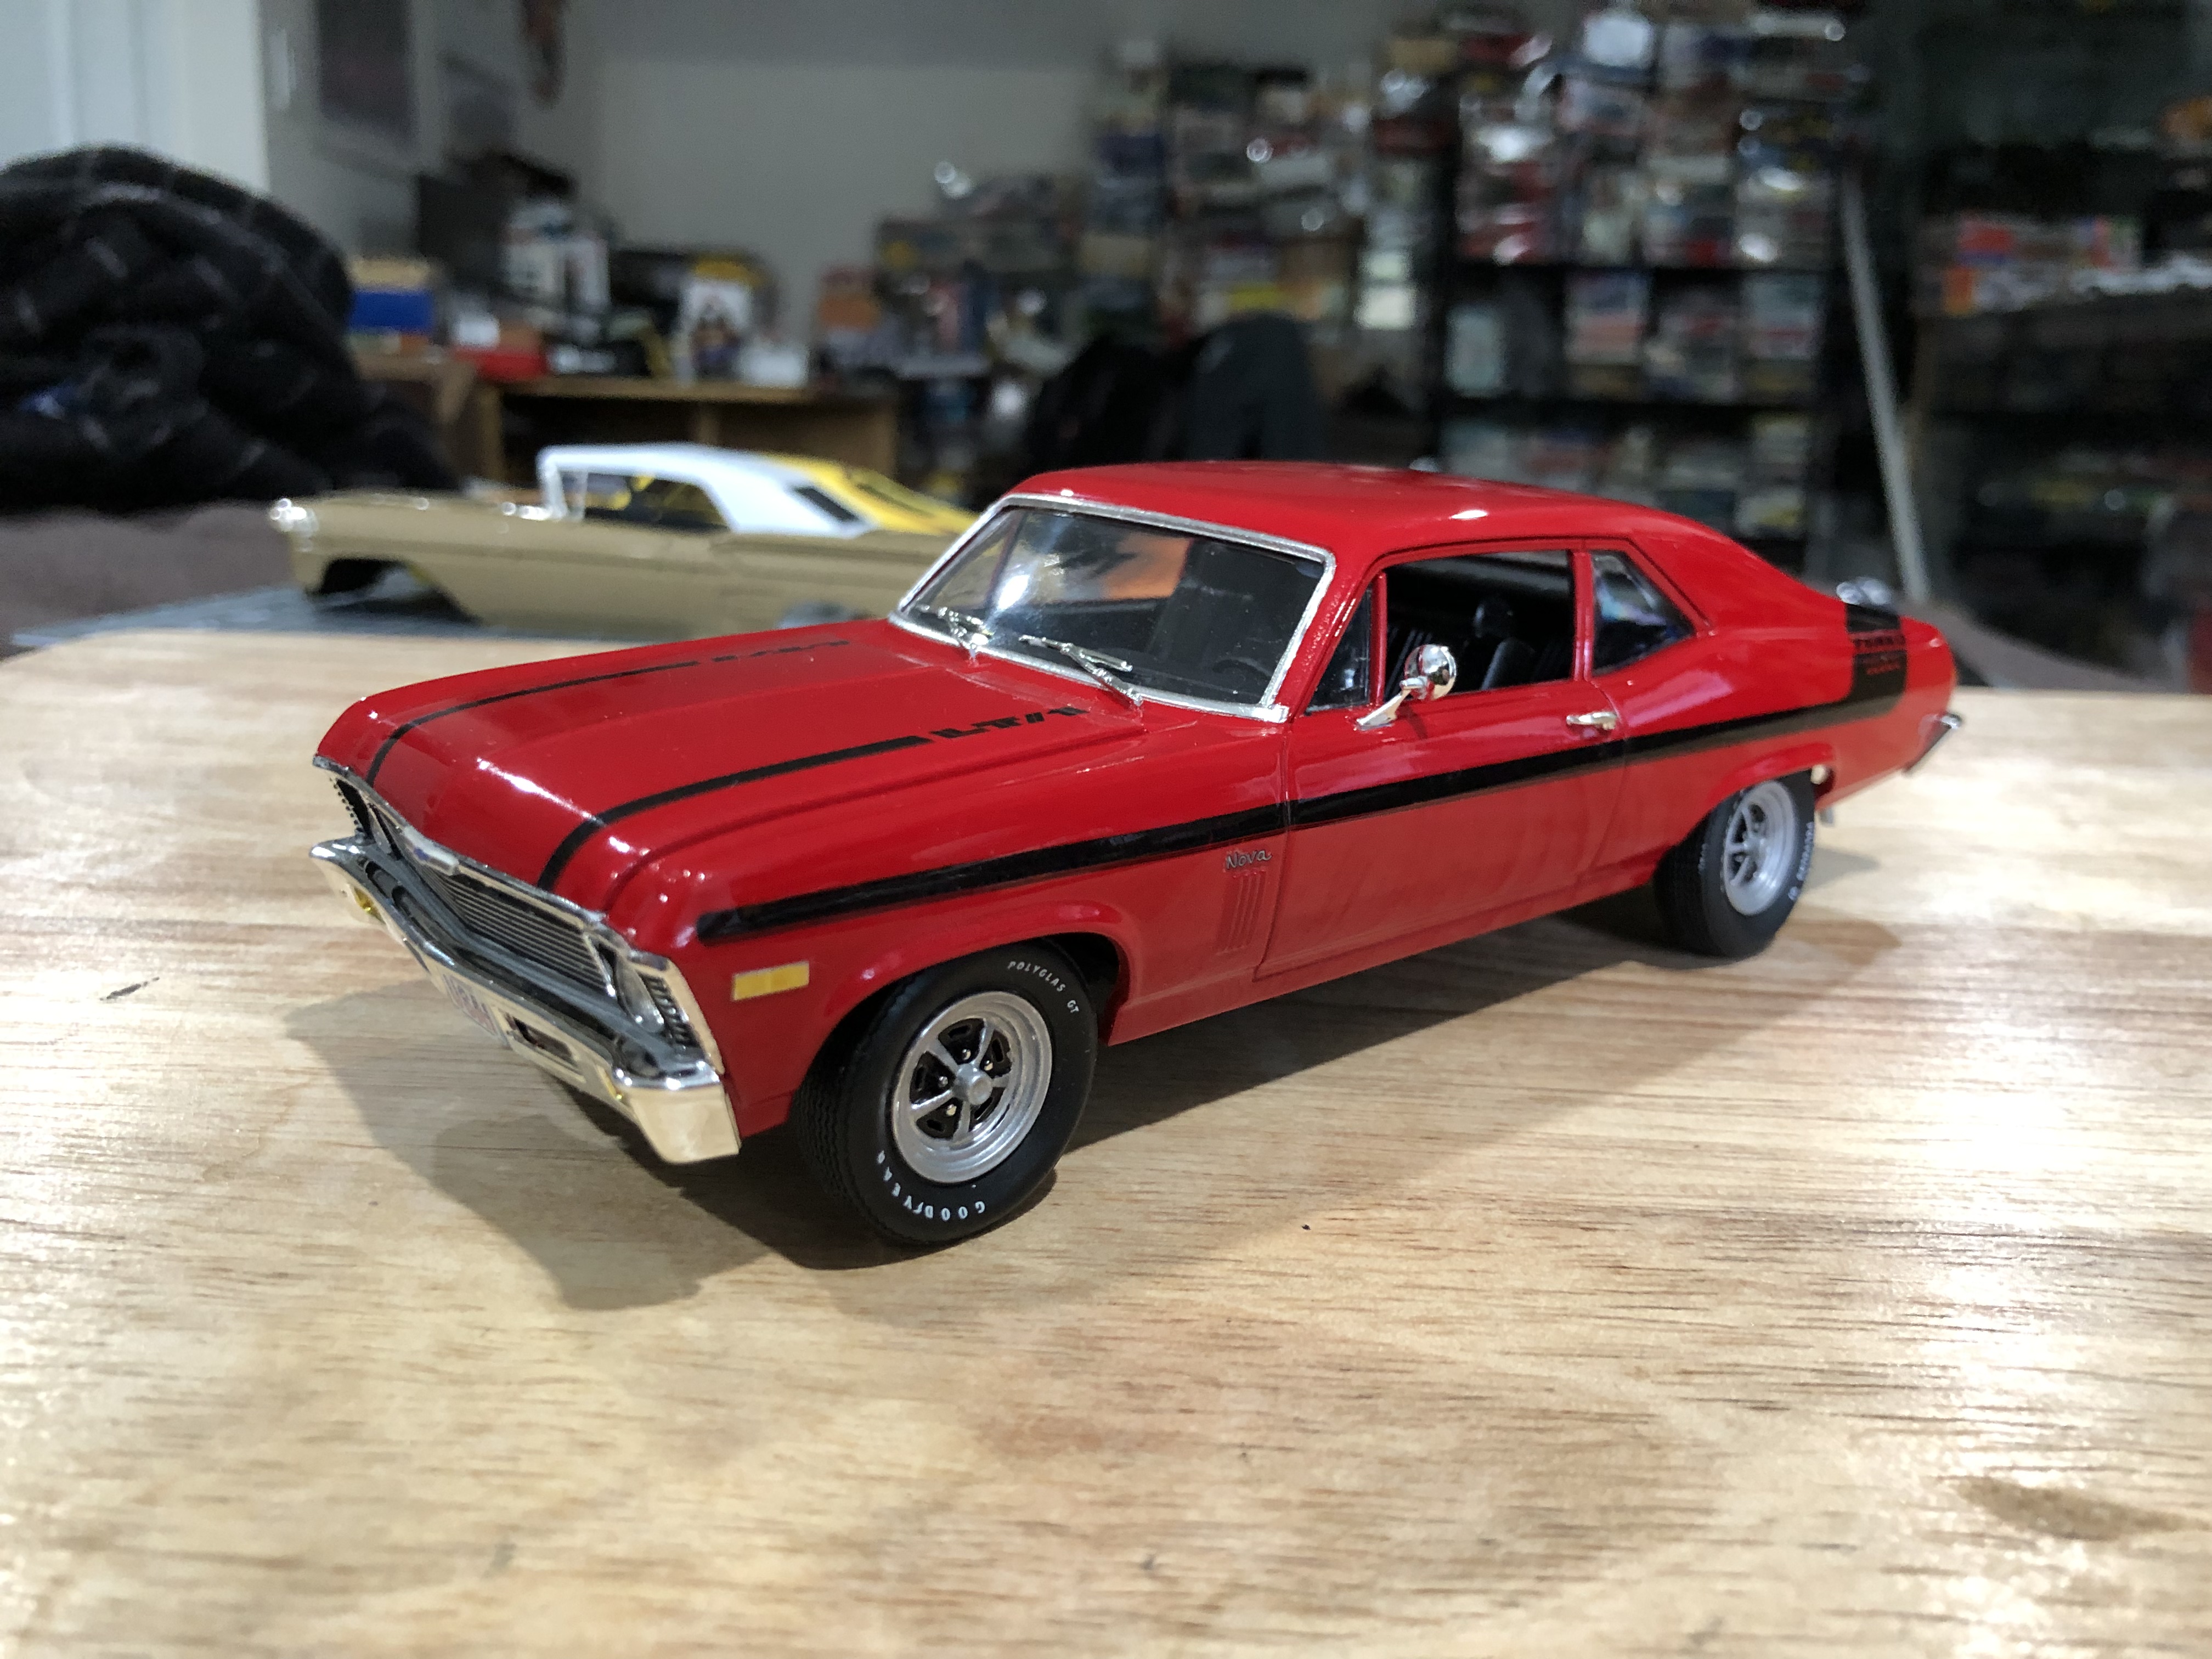
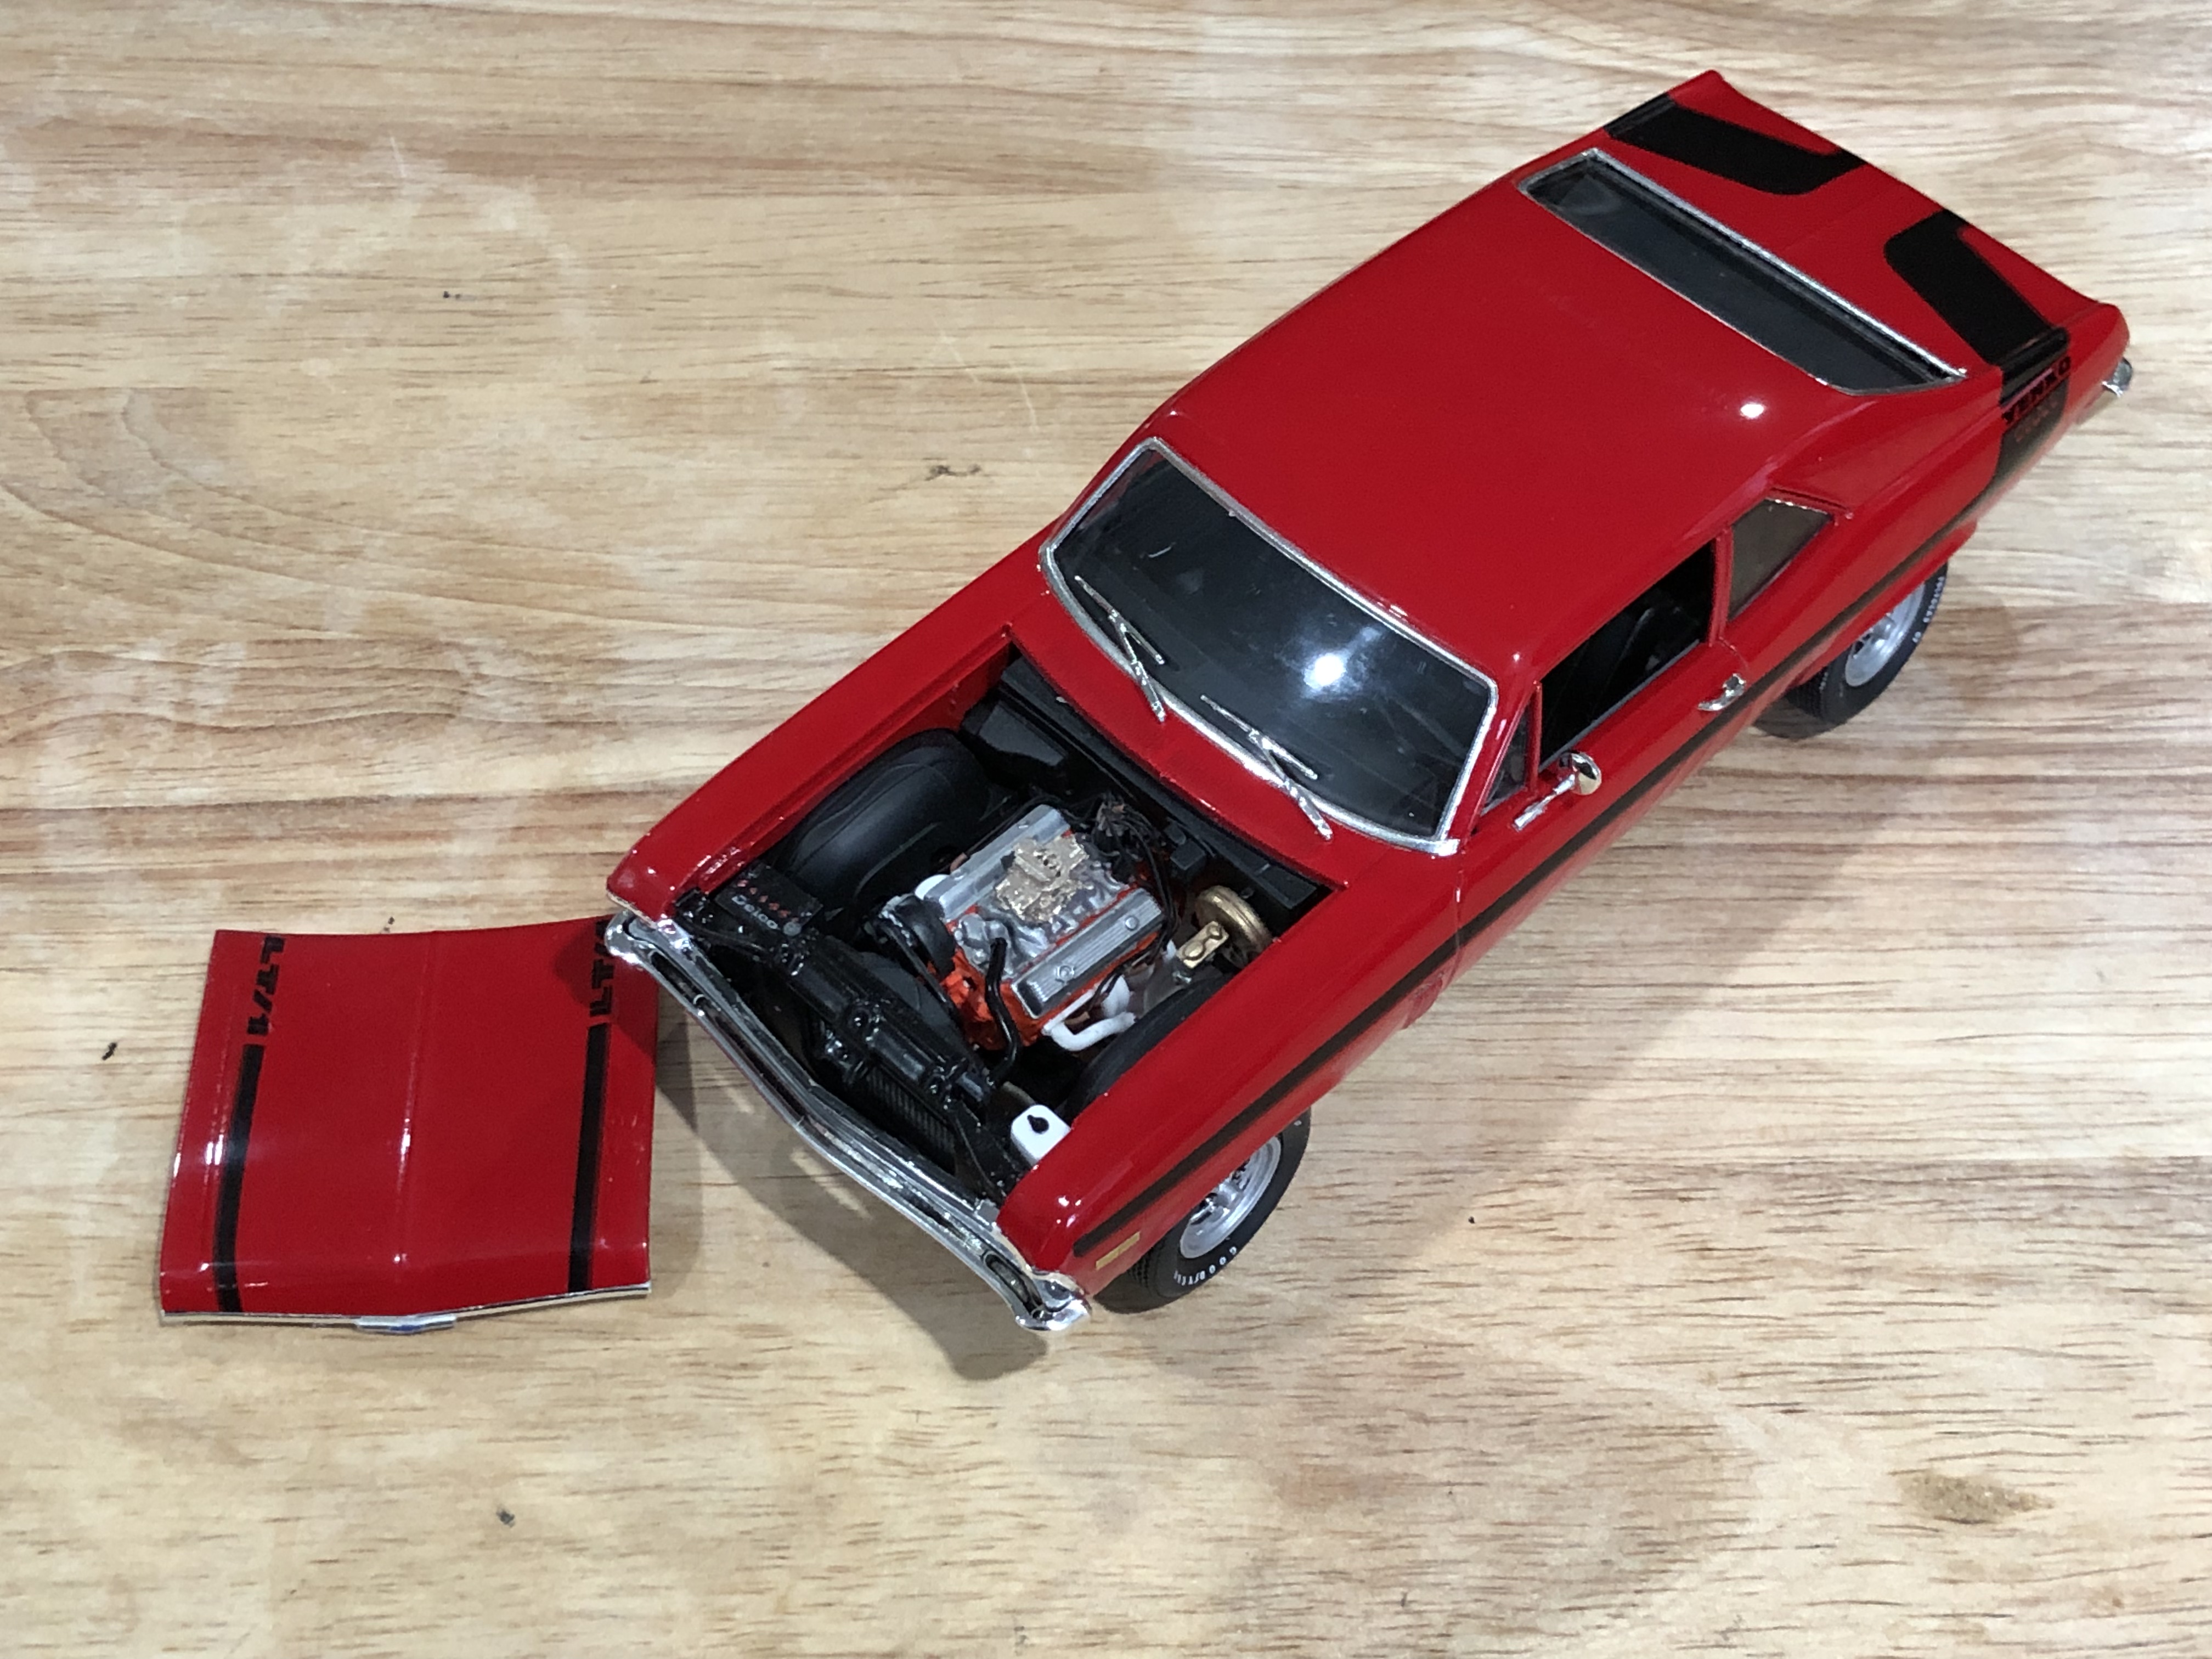
Could have been better, but the kit isn't that great. Wish it had the stock stripes too.


.jpg.7cd706354e0f409f78d2c96e6a274f60.jpg)