All Activity
- Past hour
-
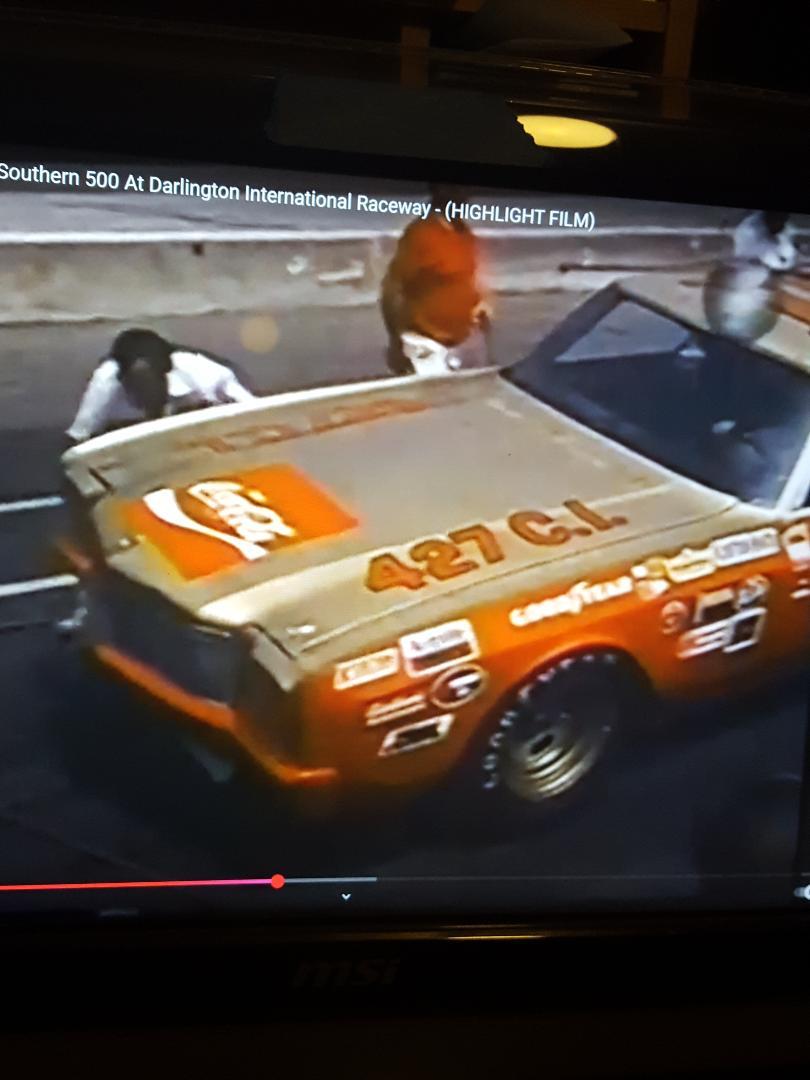
Steve, you are right. that zoom you posted there looks like it could easily be the mystery decal, but I know for sure the one above the edelbrock is a zoom too. I wonder if the car had two zoom decals. I believe the decal below the winston cup decal is a small coke decal. Edgar, that also looks like it could be the mystery decal, but I don't think the car had those kind of headers on it. Thanks for your input though. We shall see eventually what it is if someone could just find a real photograph of this car. I even asked Smyle Media on twitter, who has helped me a lot, if he had a photo of it but he said he did not. Strange that the winning car at the 1972 Southern 500 does not have a photograph somewhere to be found on the internet. If it's a correct photo it will have red bumpers.

-
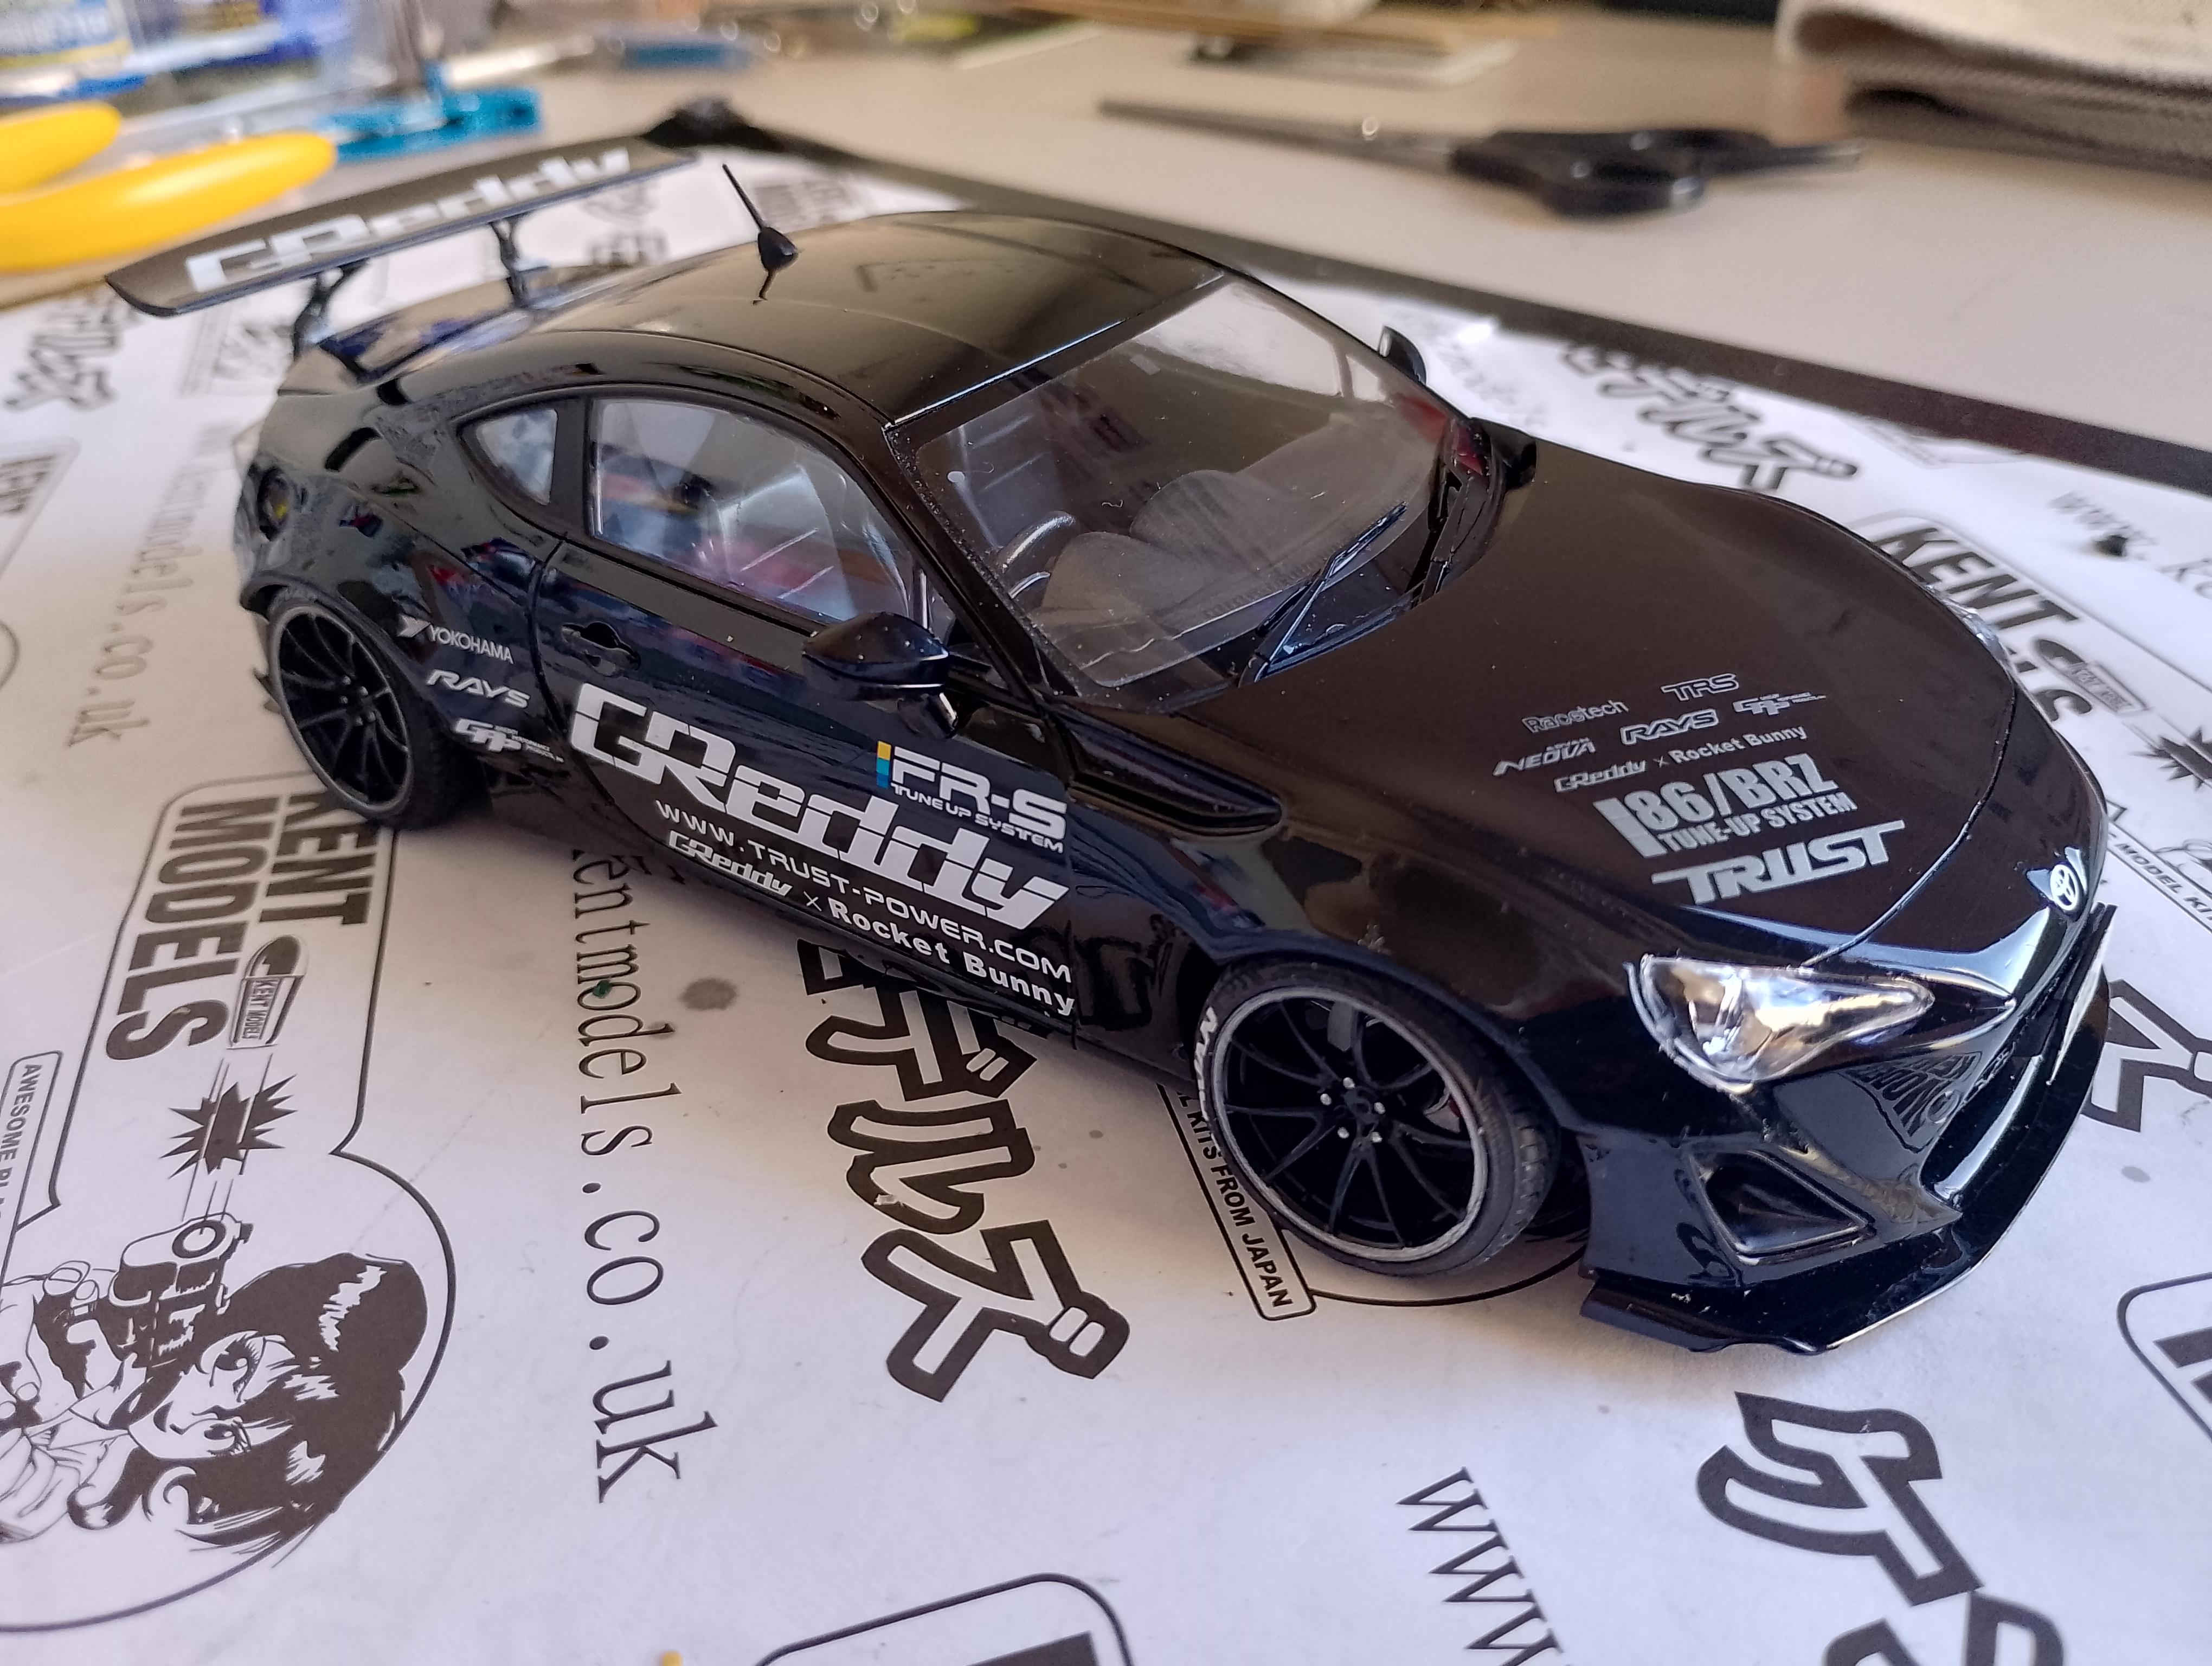
 Will be interesting to see your take on these simple toys, Pierre. But you are right, they can easily pass as 1/24 or 25 bodies....
- 38,323 replies
-
- 1
-

-
- johan
- glue bombs
- (and 1 more)
-
Very nicely done. cheers, Graham
-
I think this is going back in the box for a time. I've got someone thats going to teach me the basics of freecad so i think i want to try redoing the dash door panels to fit better once i start learning. I figure having something i'm aiming for with it will help me learn rather than just doing random stuff. I find having a goal helps me to learn better
-
Nothing wrong with that!
-
Yessir! I use it, almost exclusively, for straps.
-
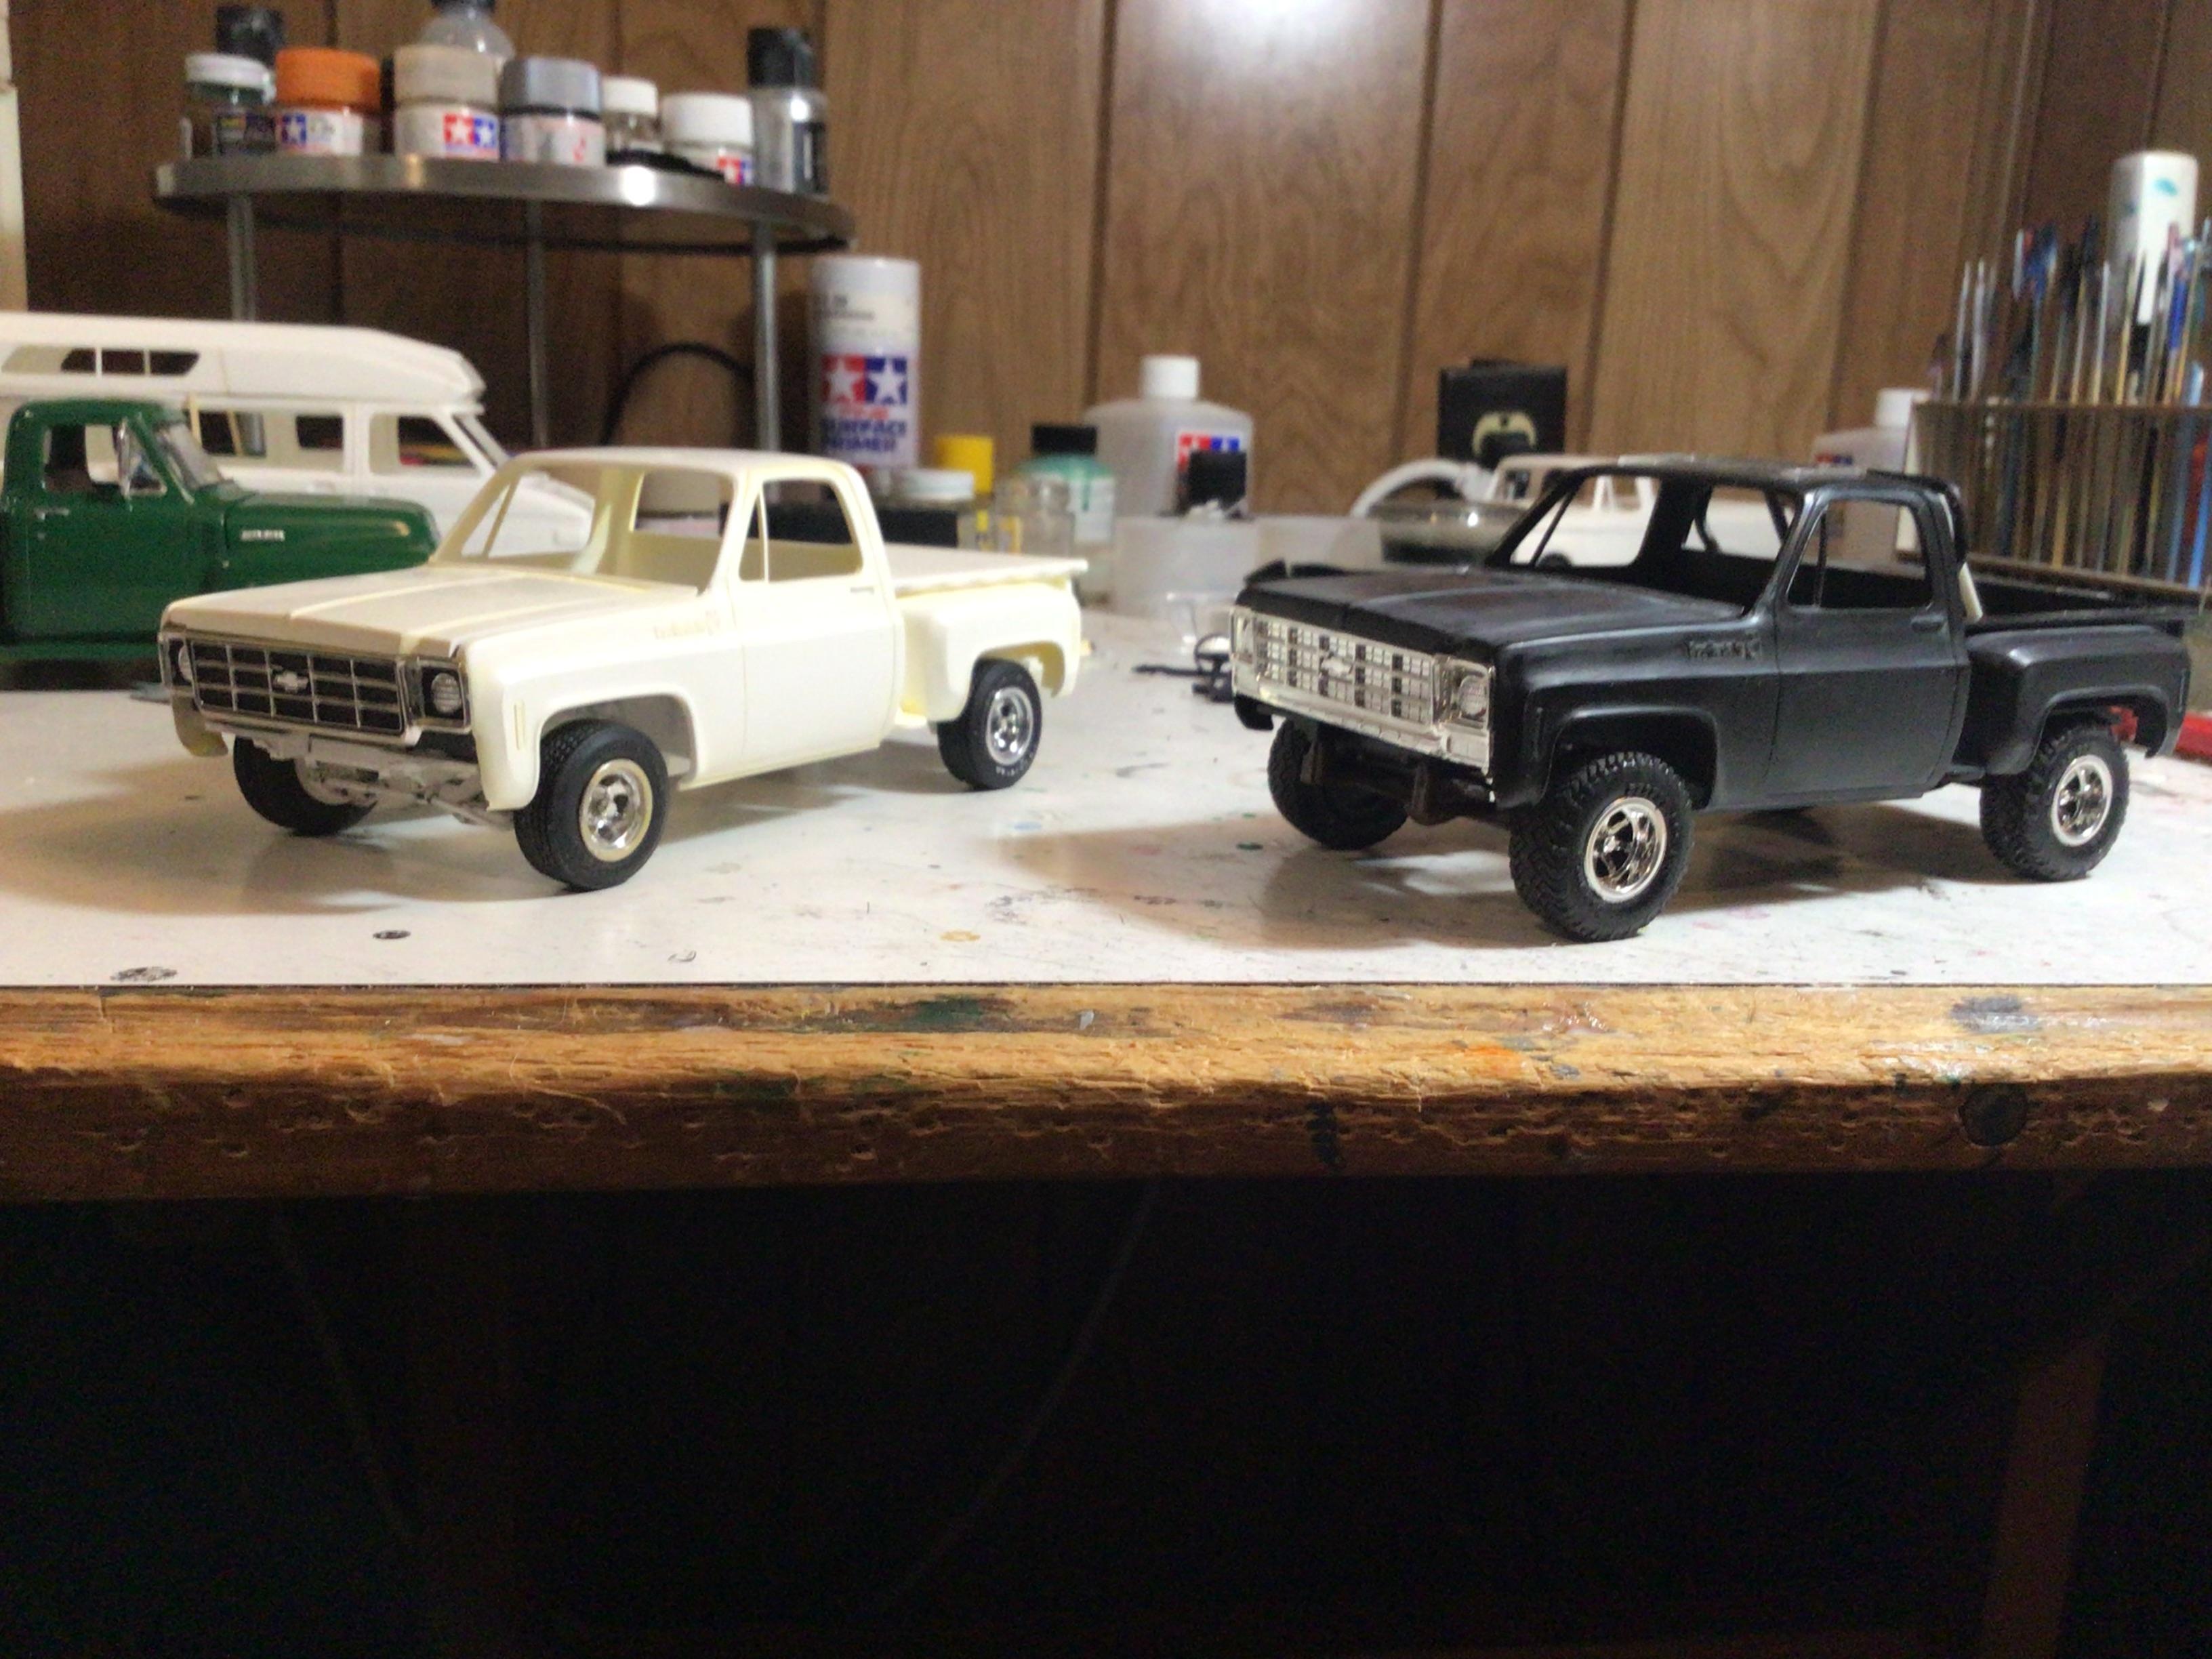
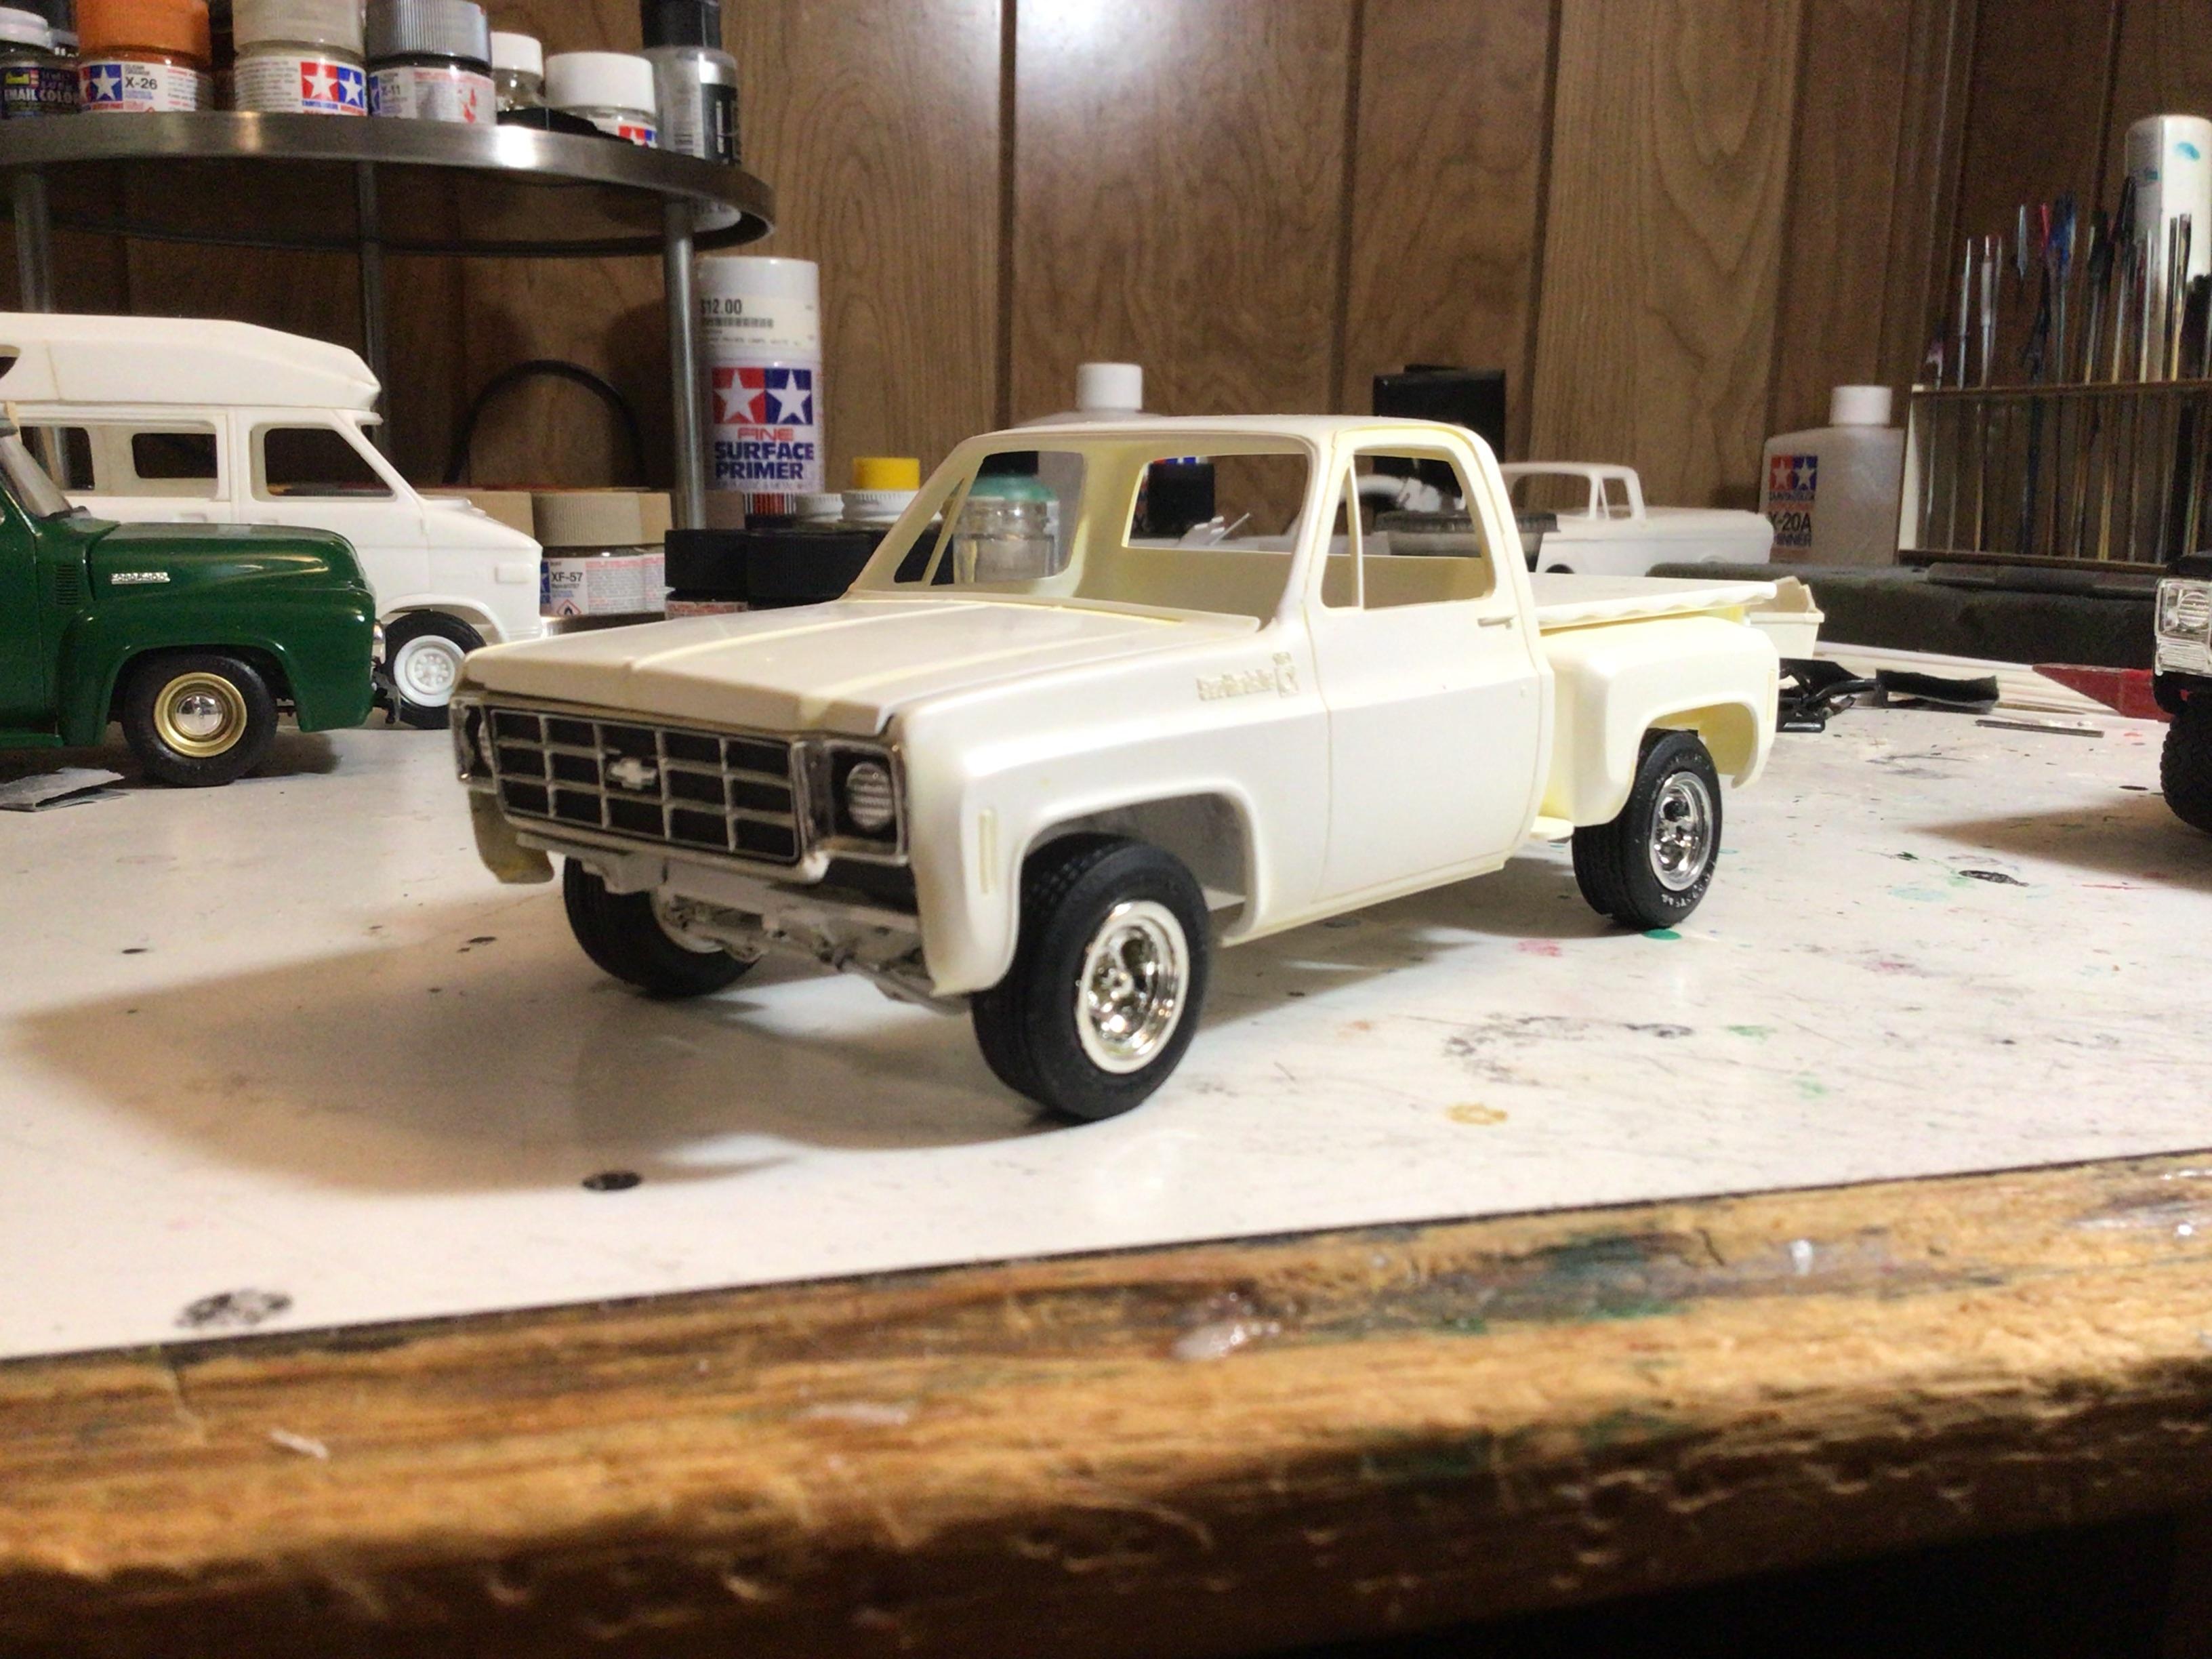
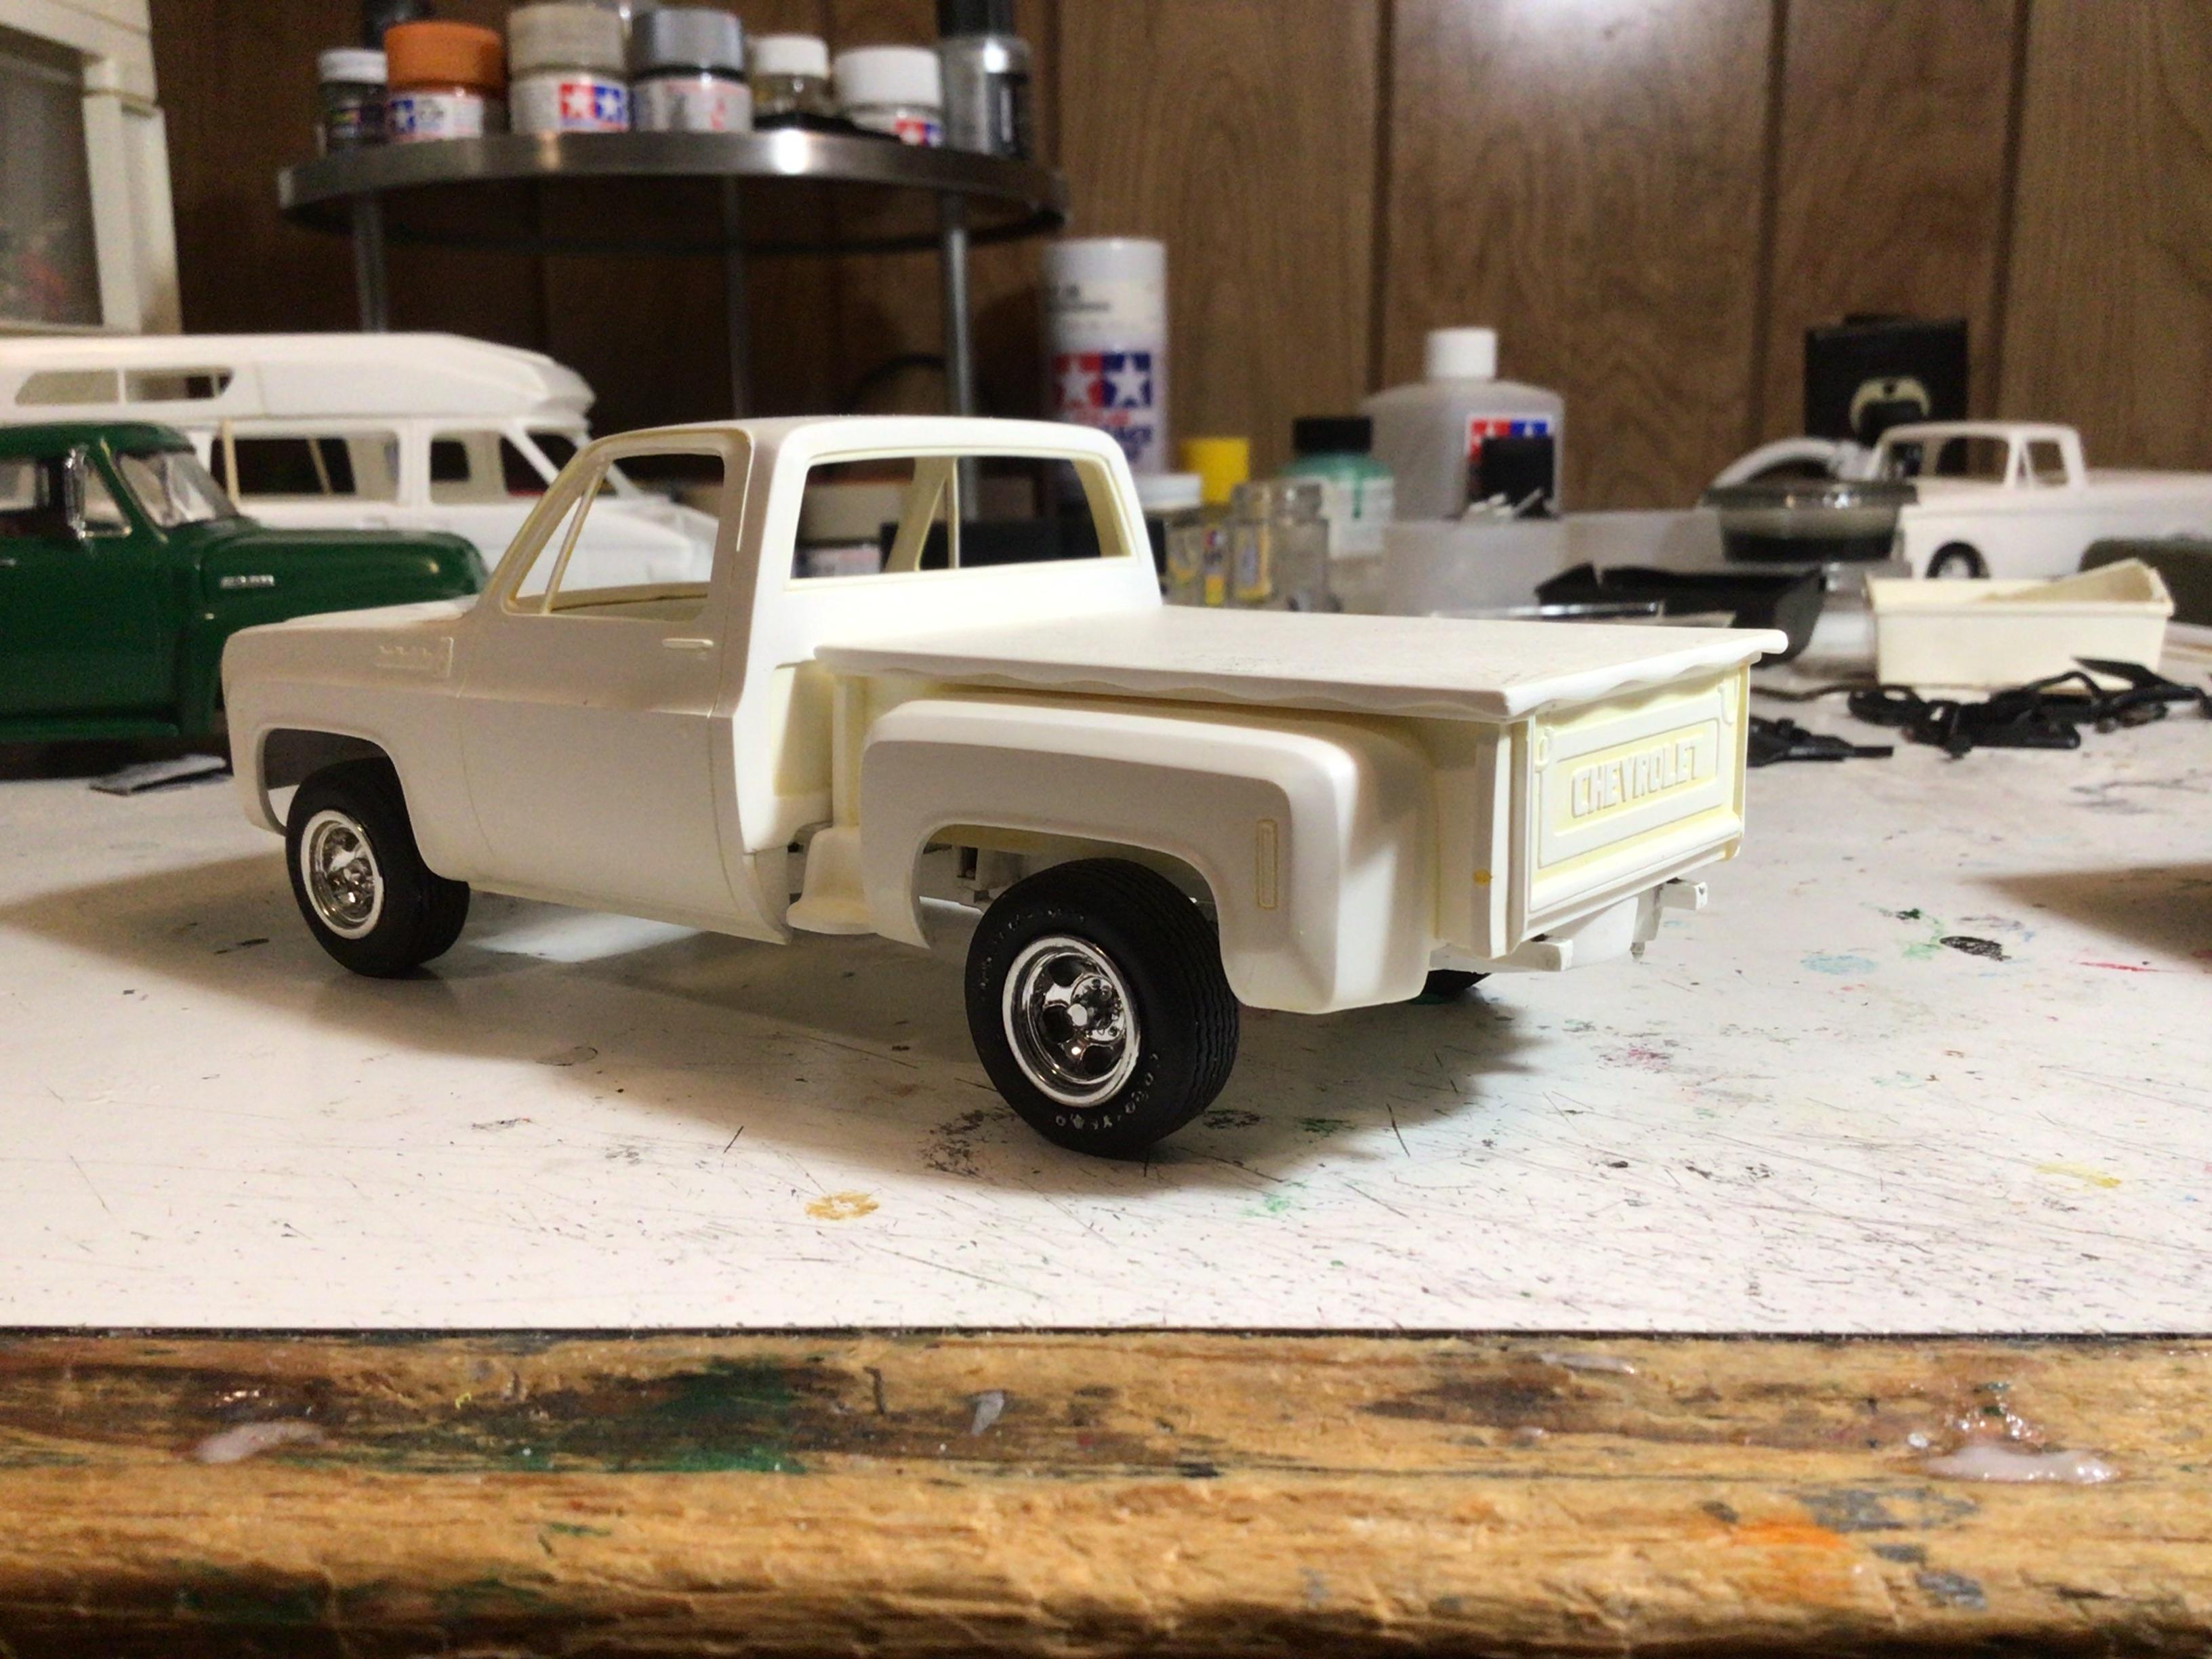
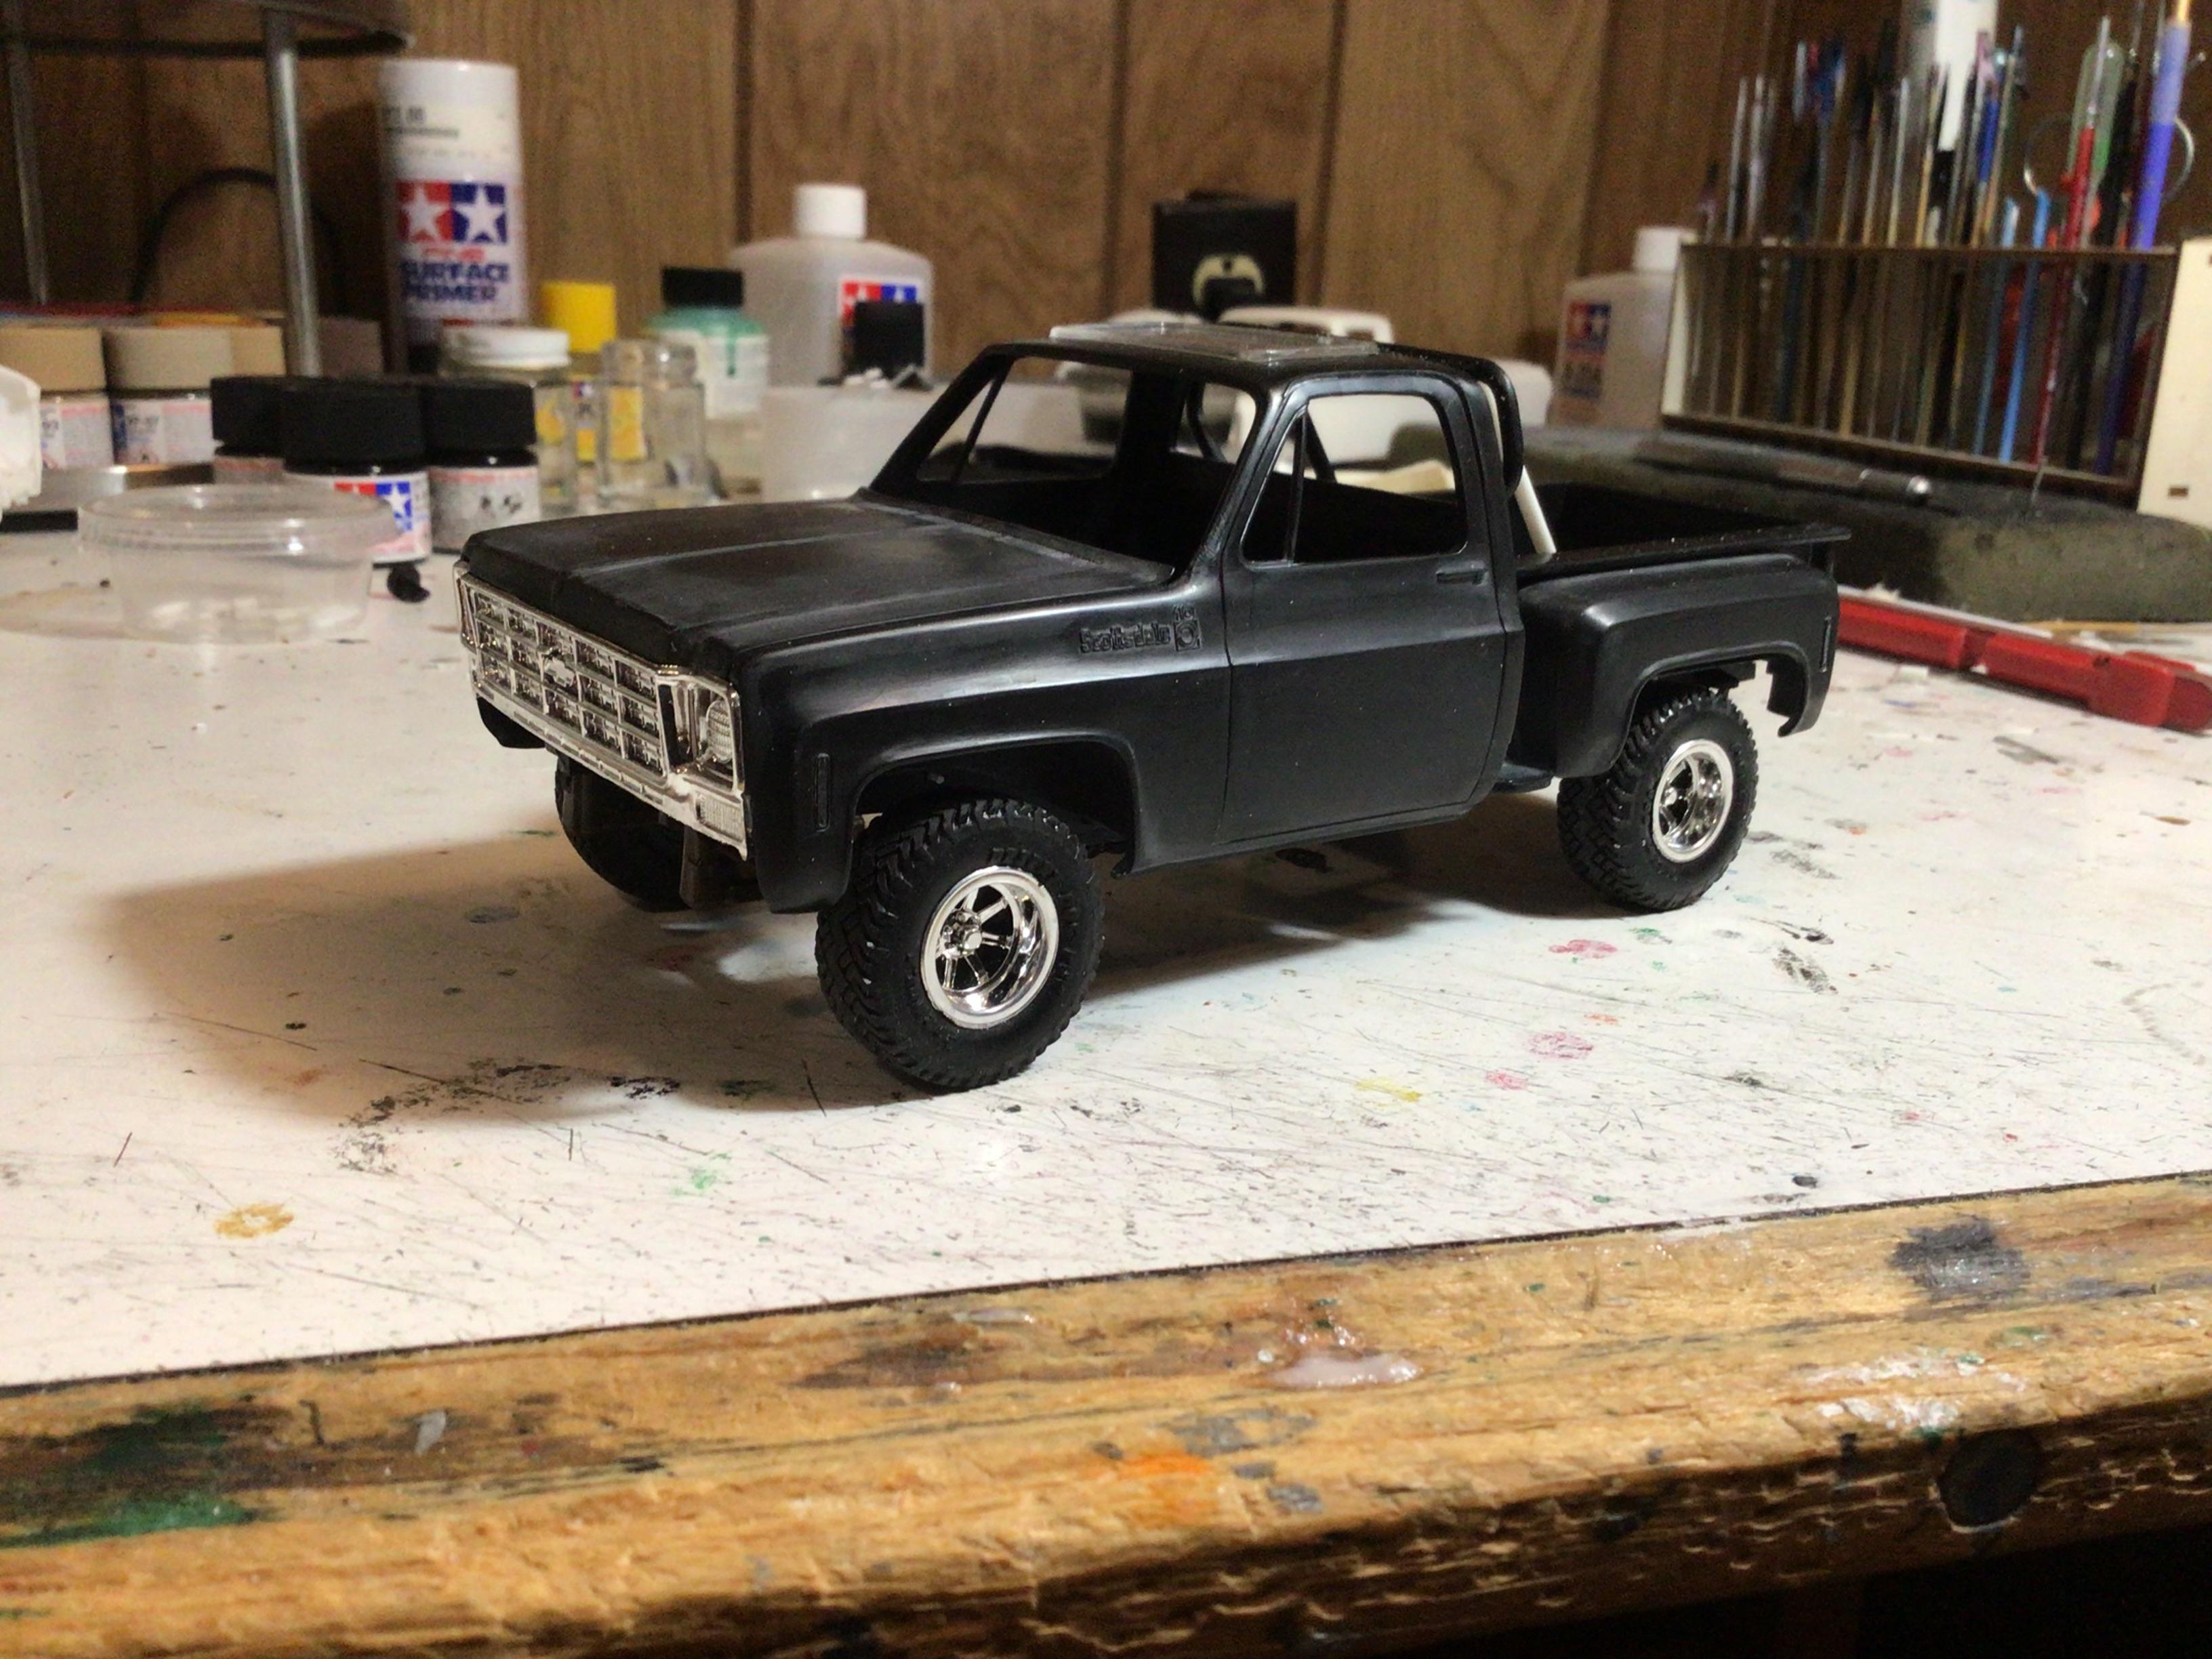
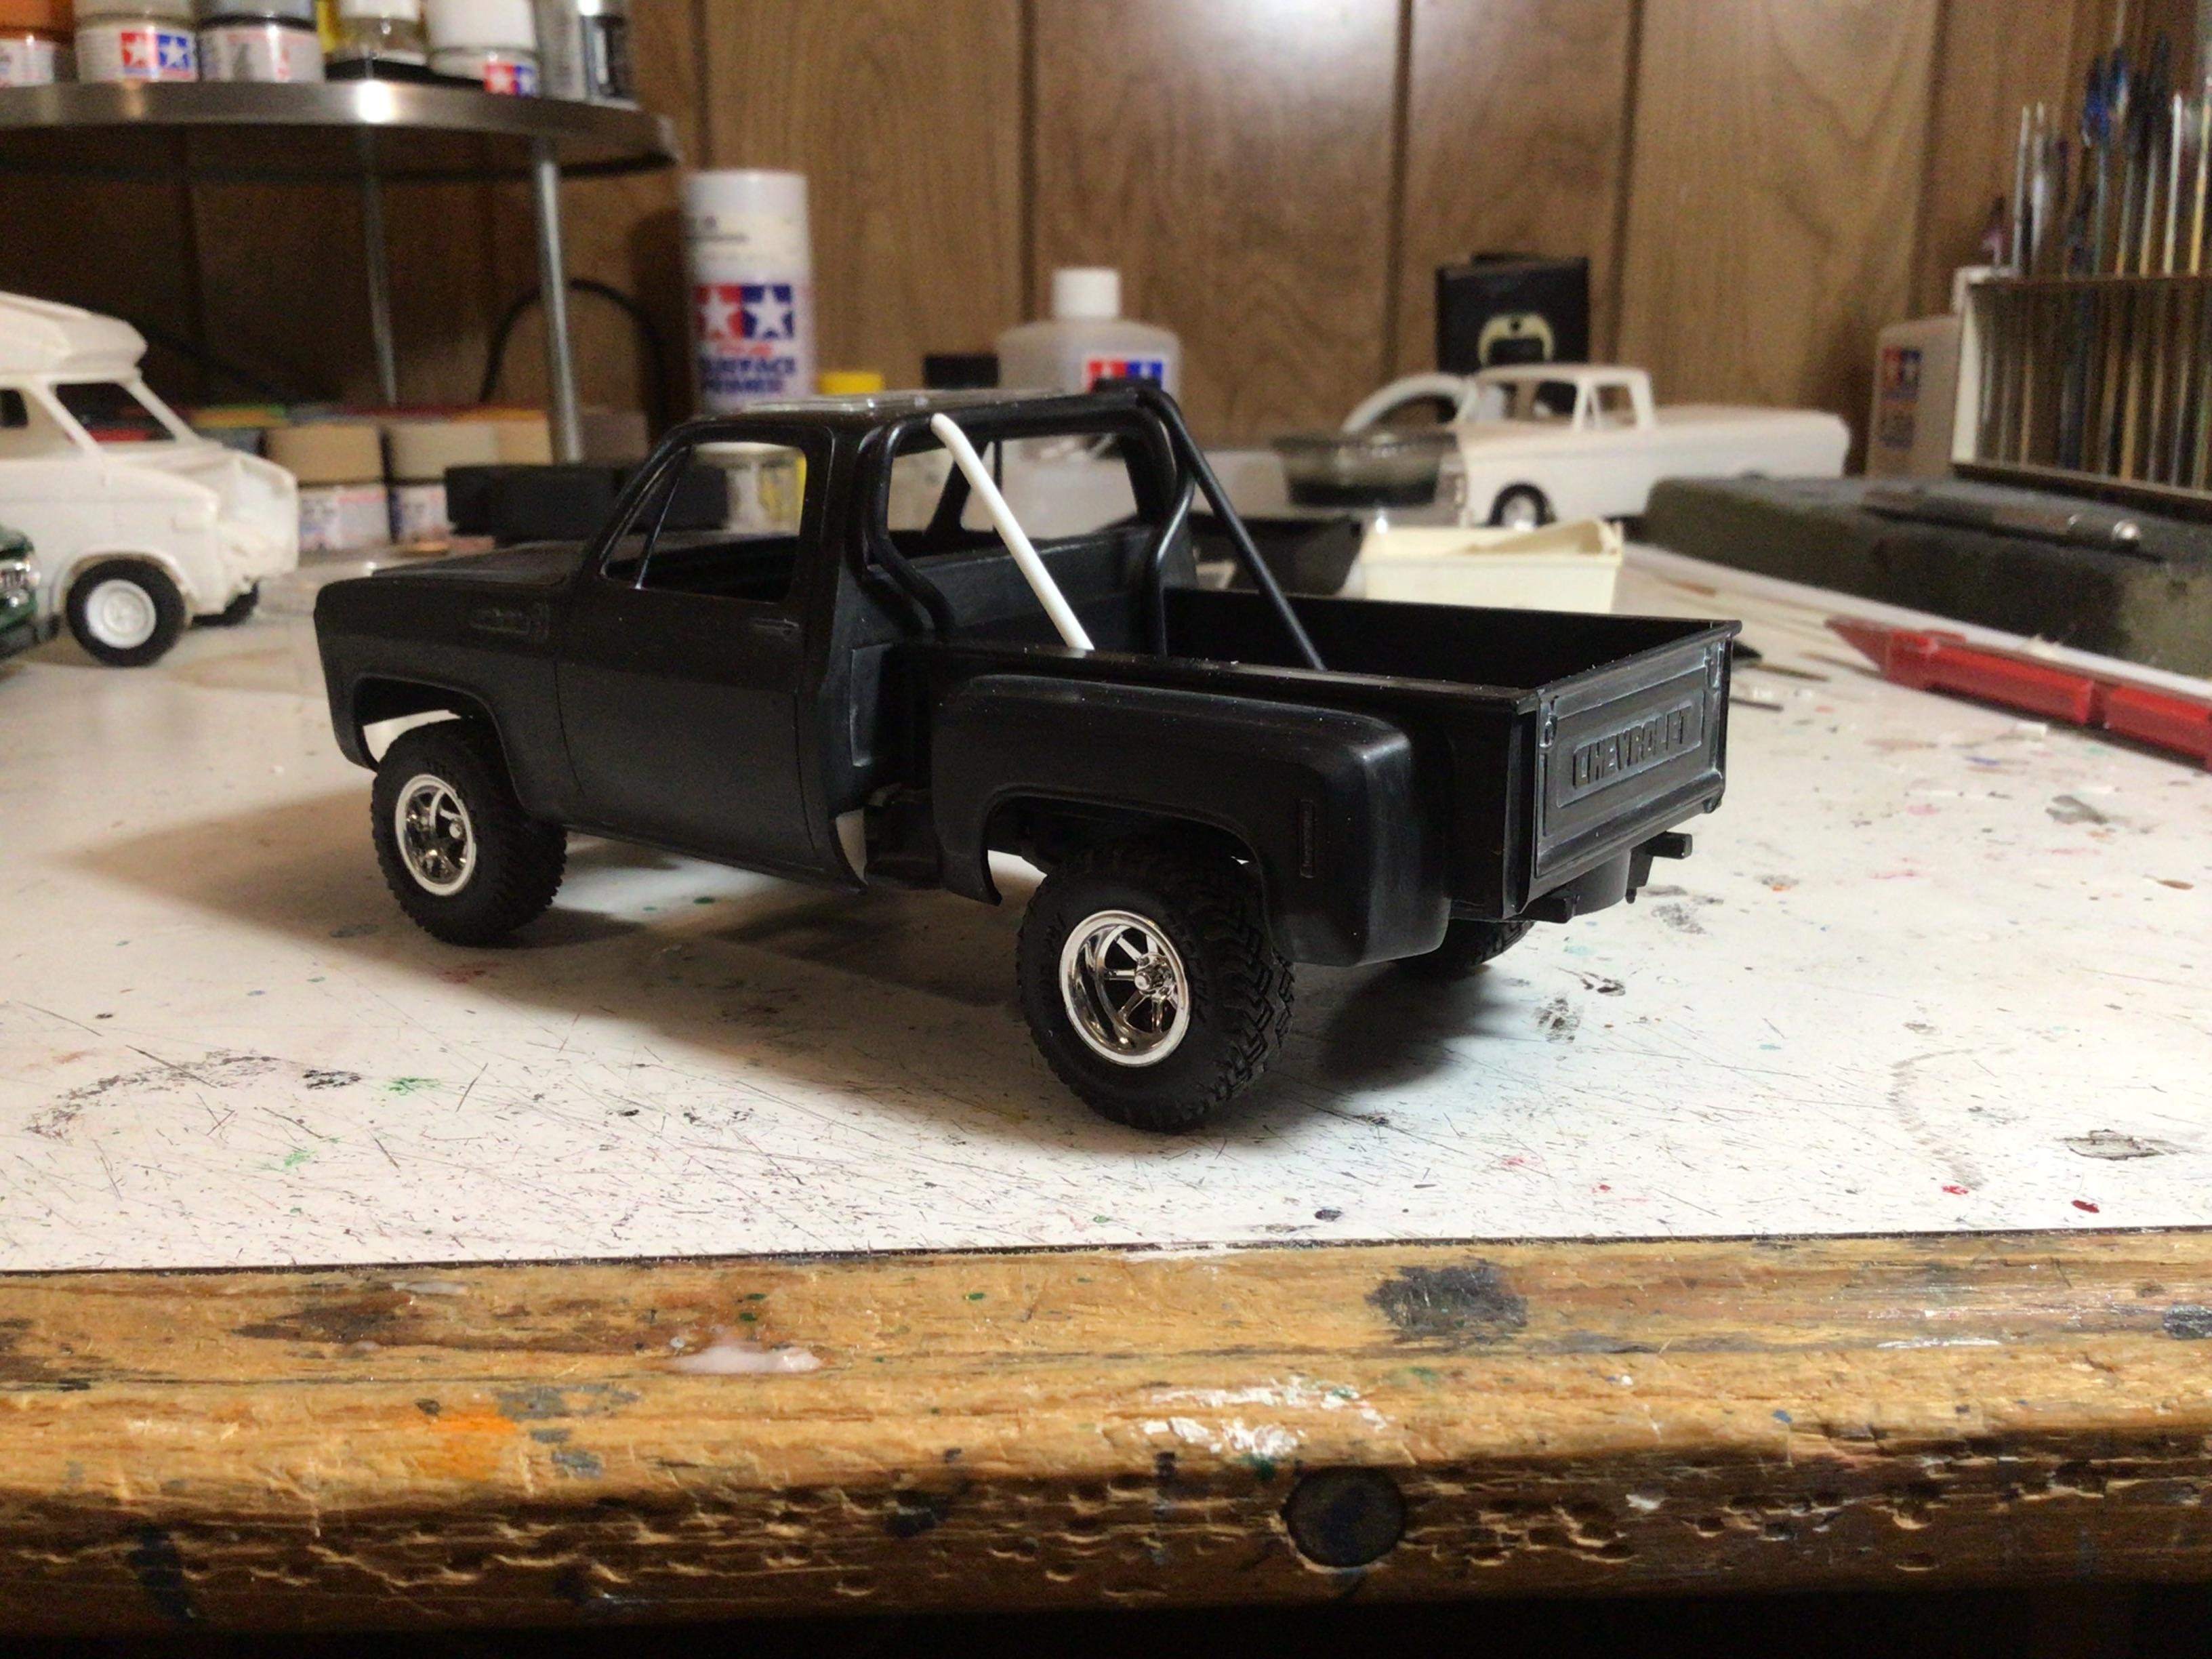
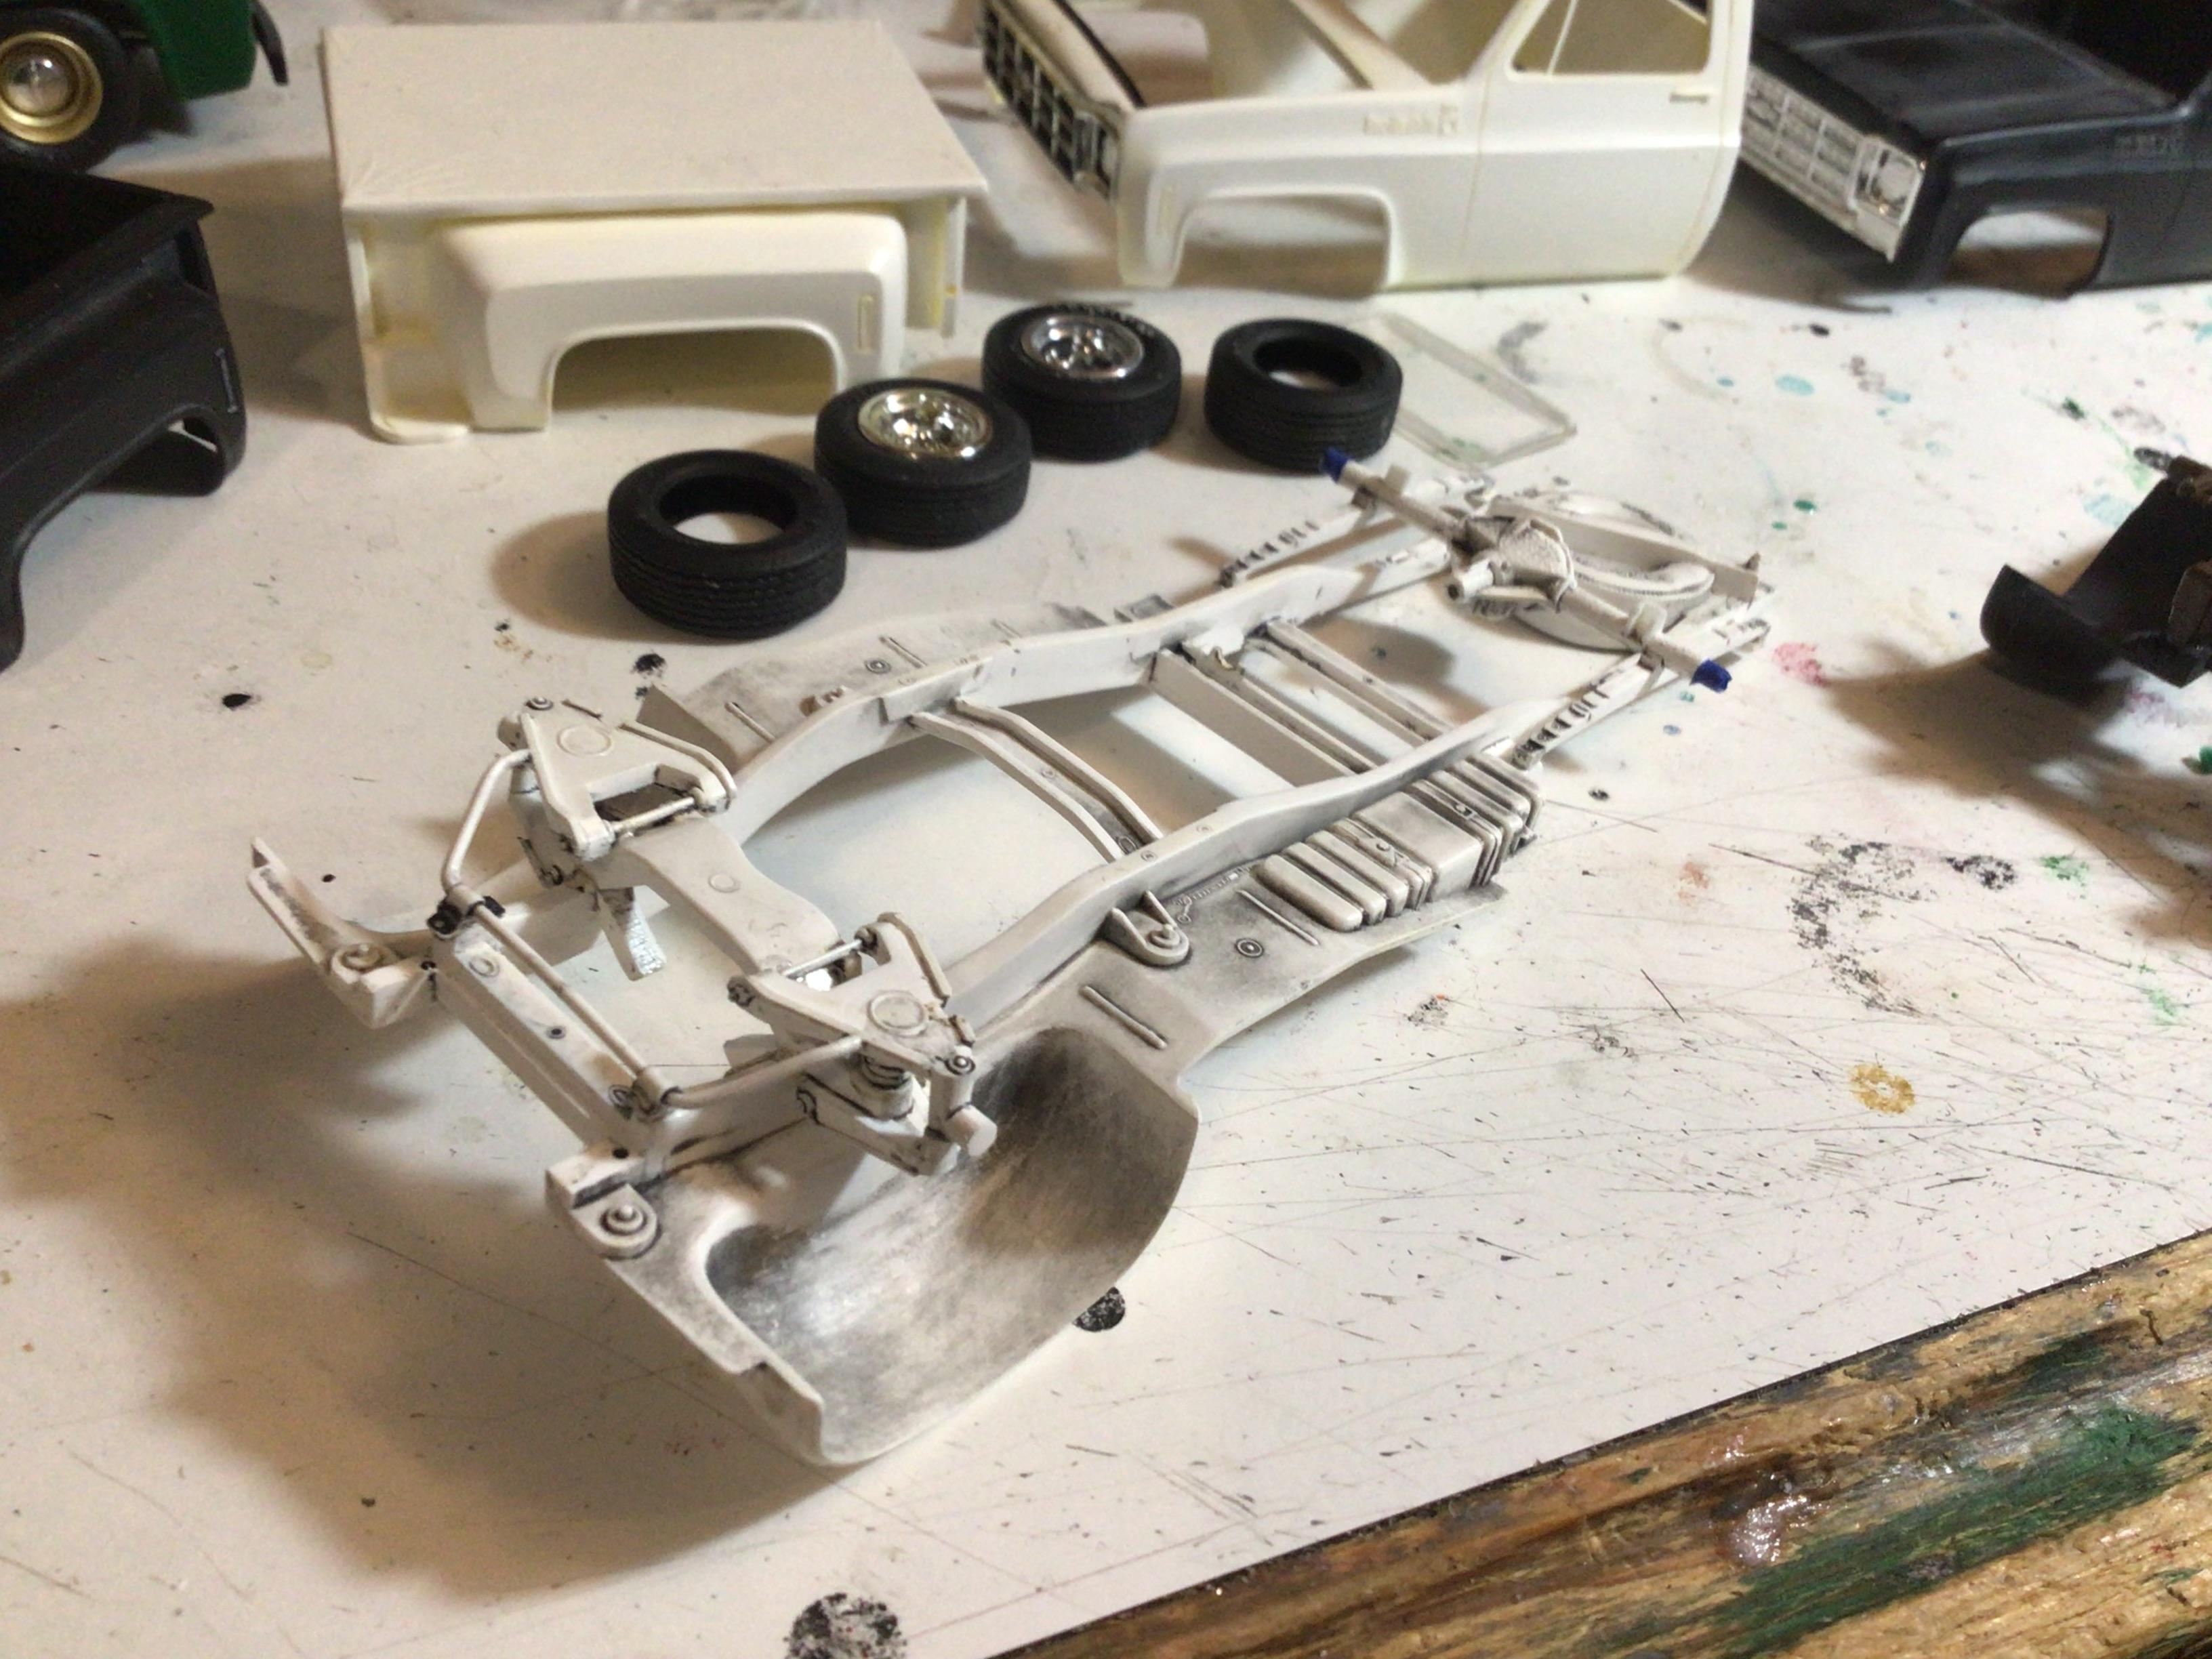
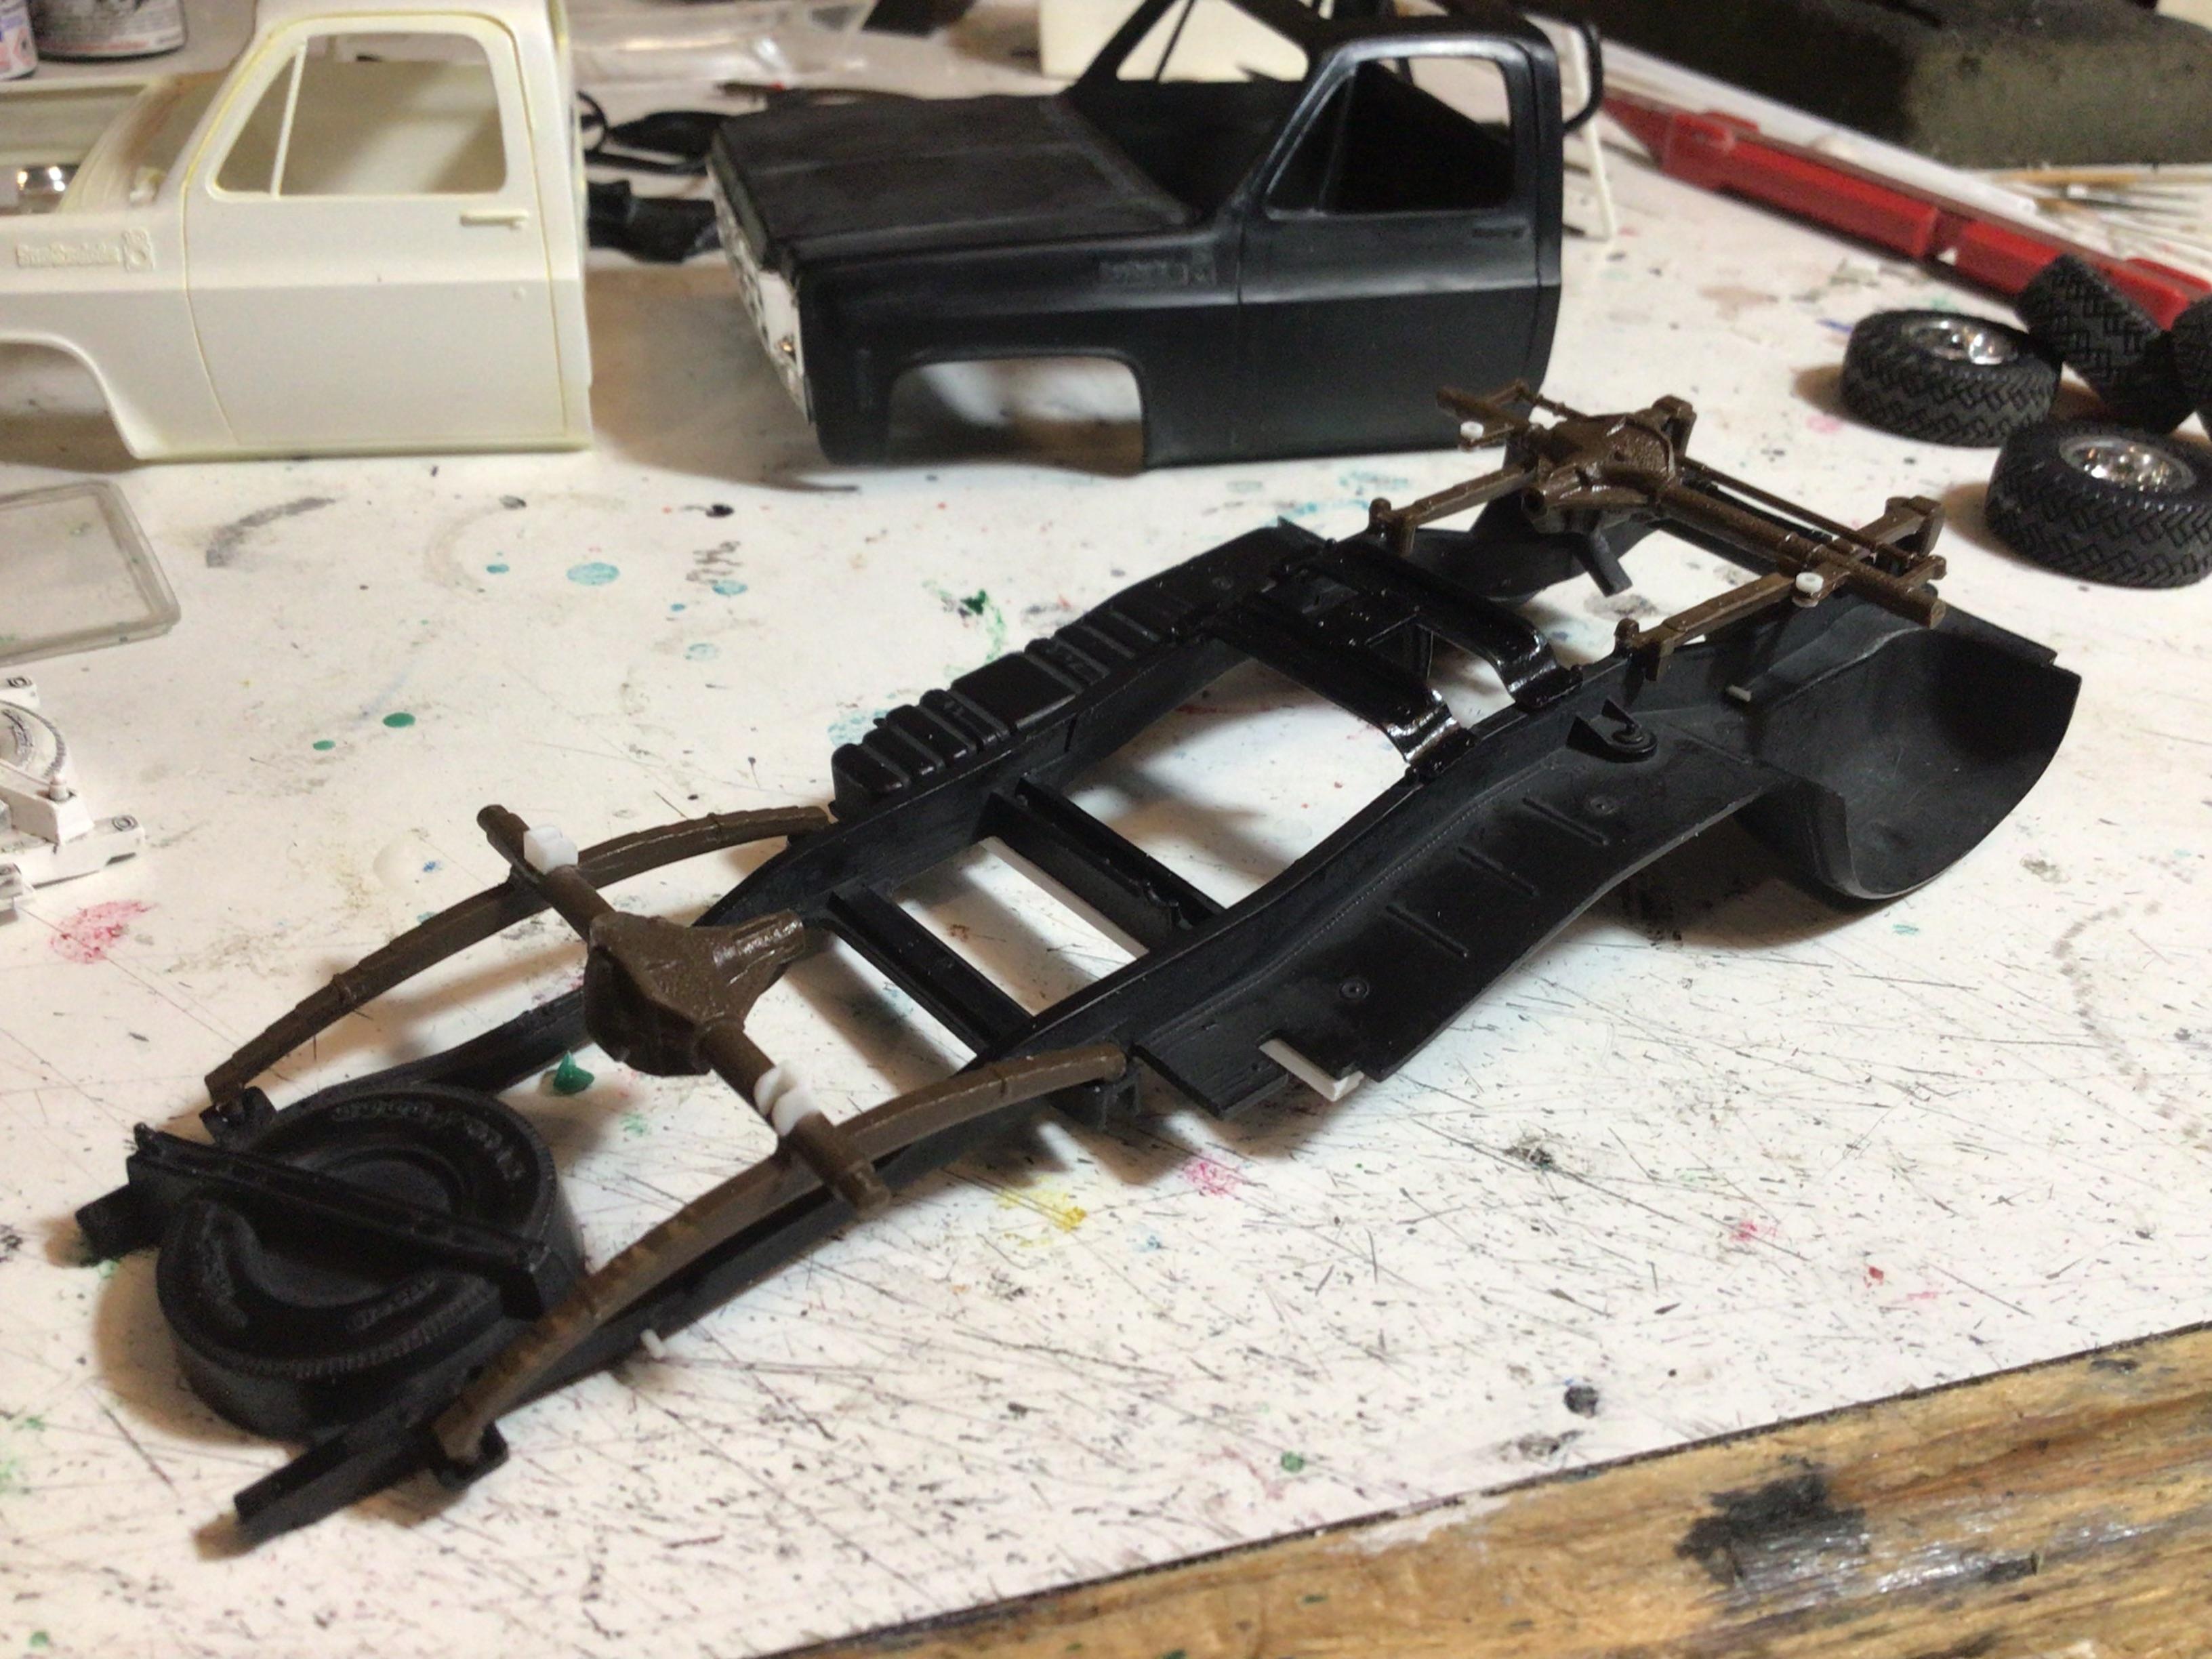
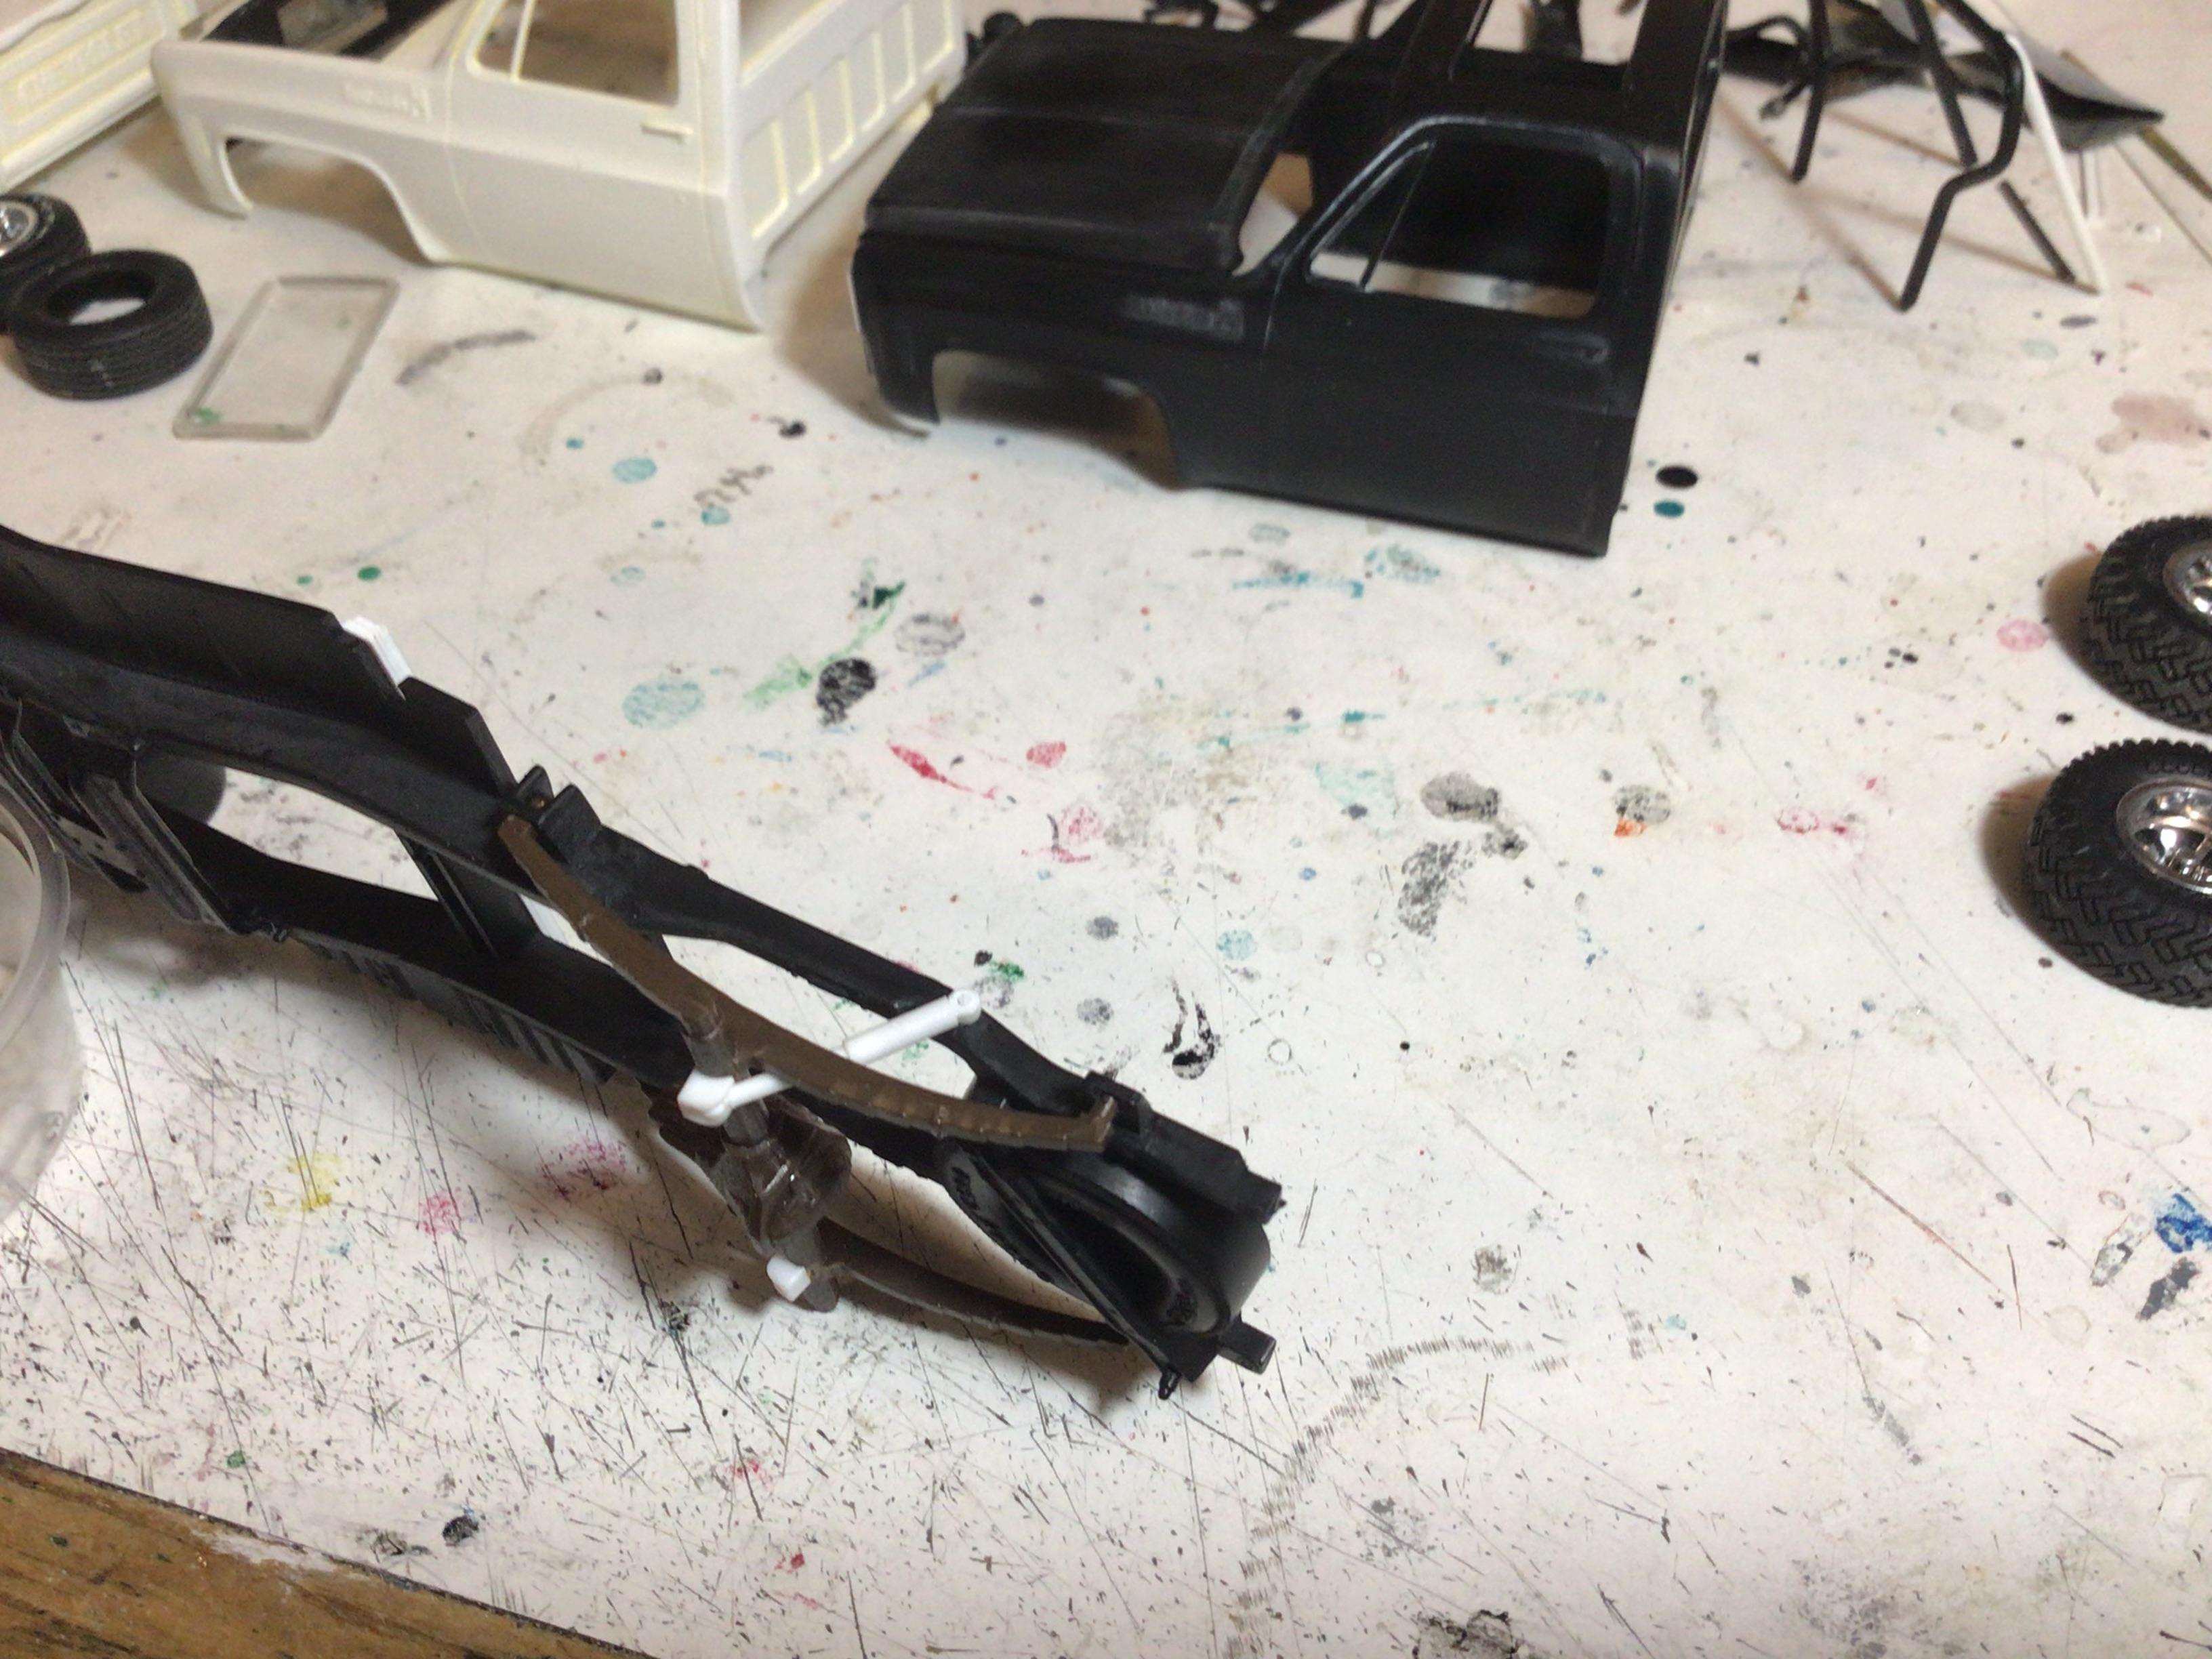
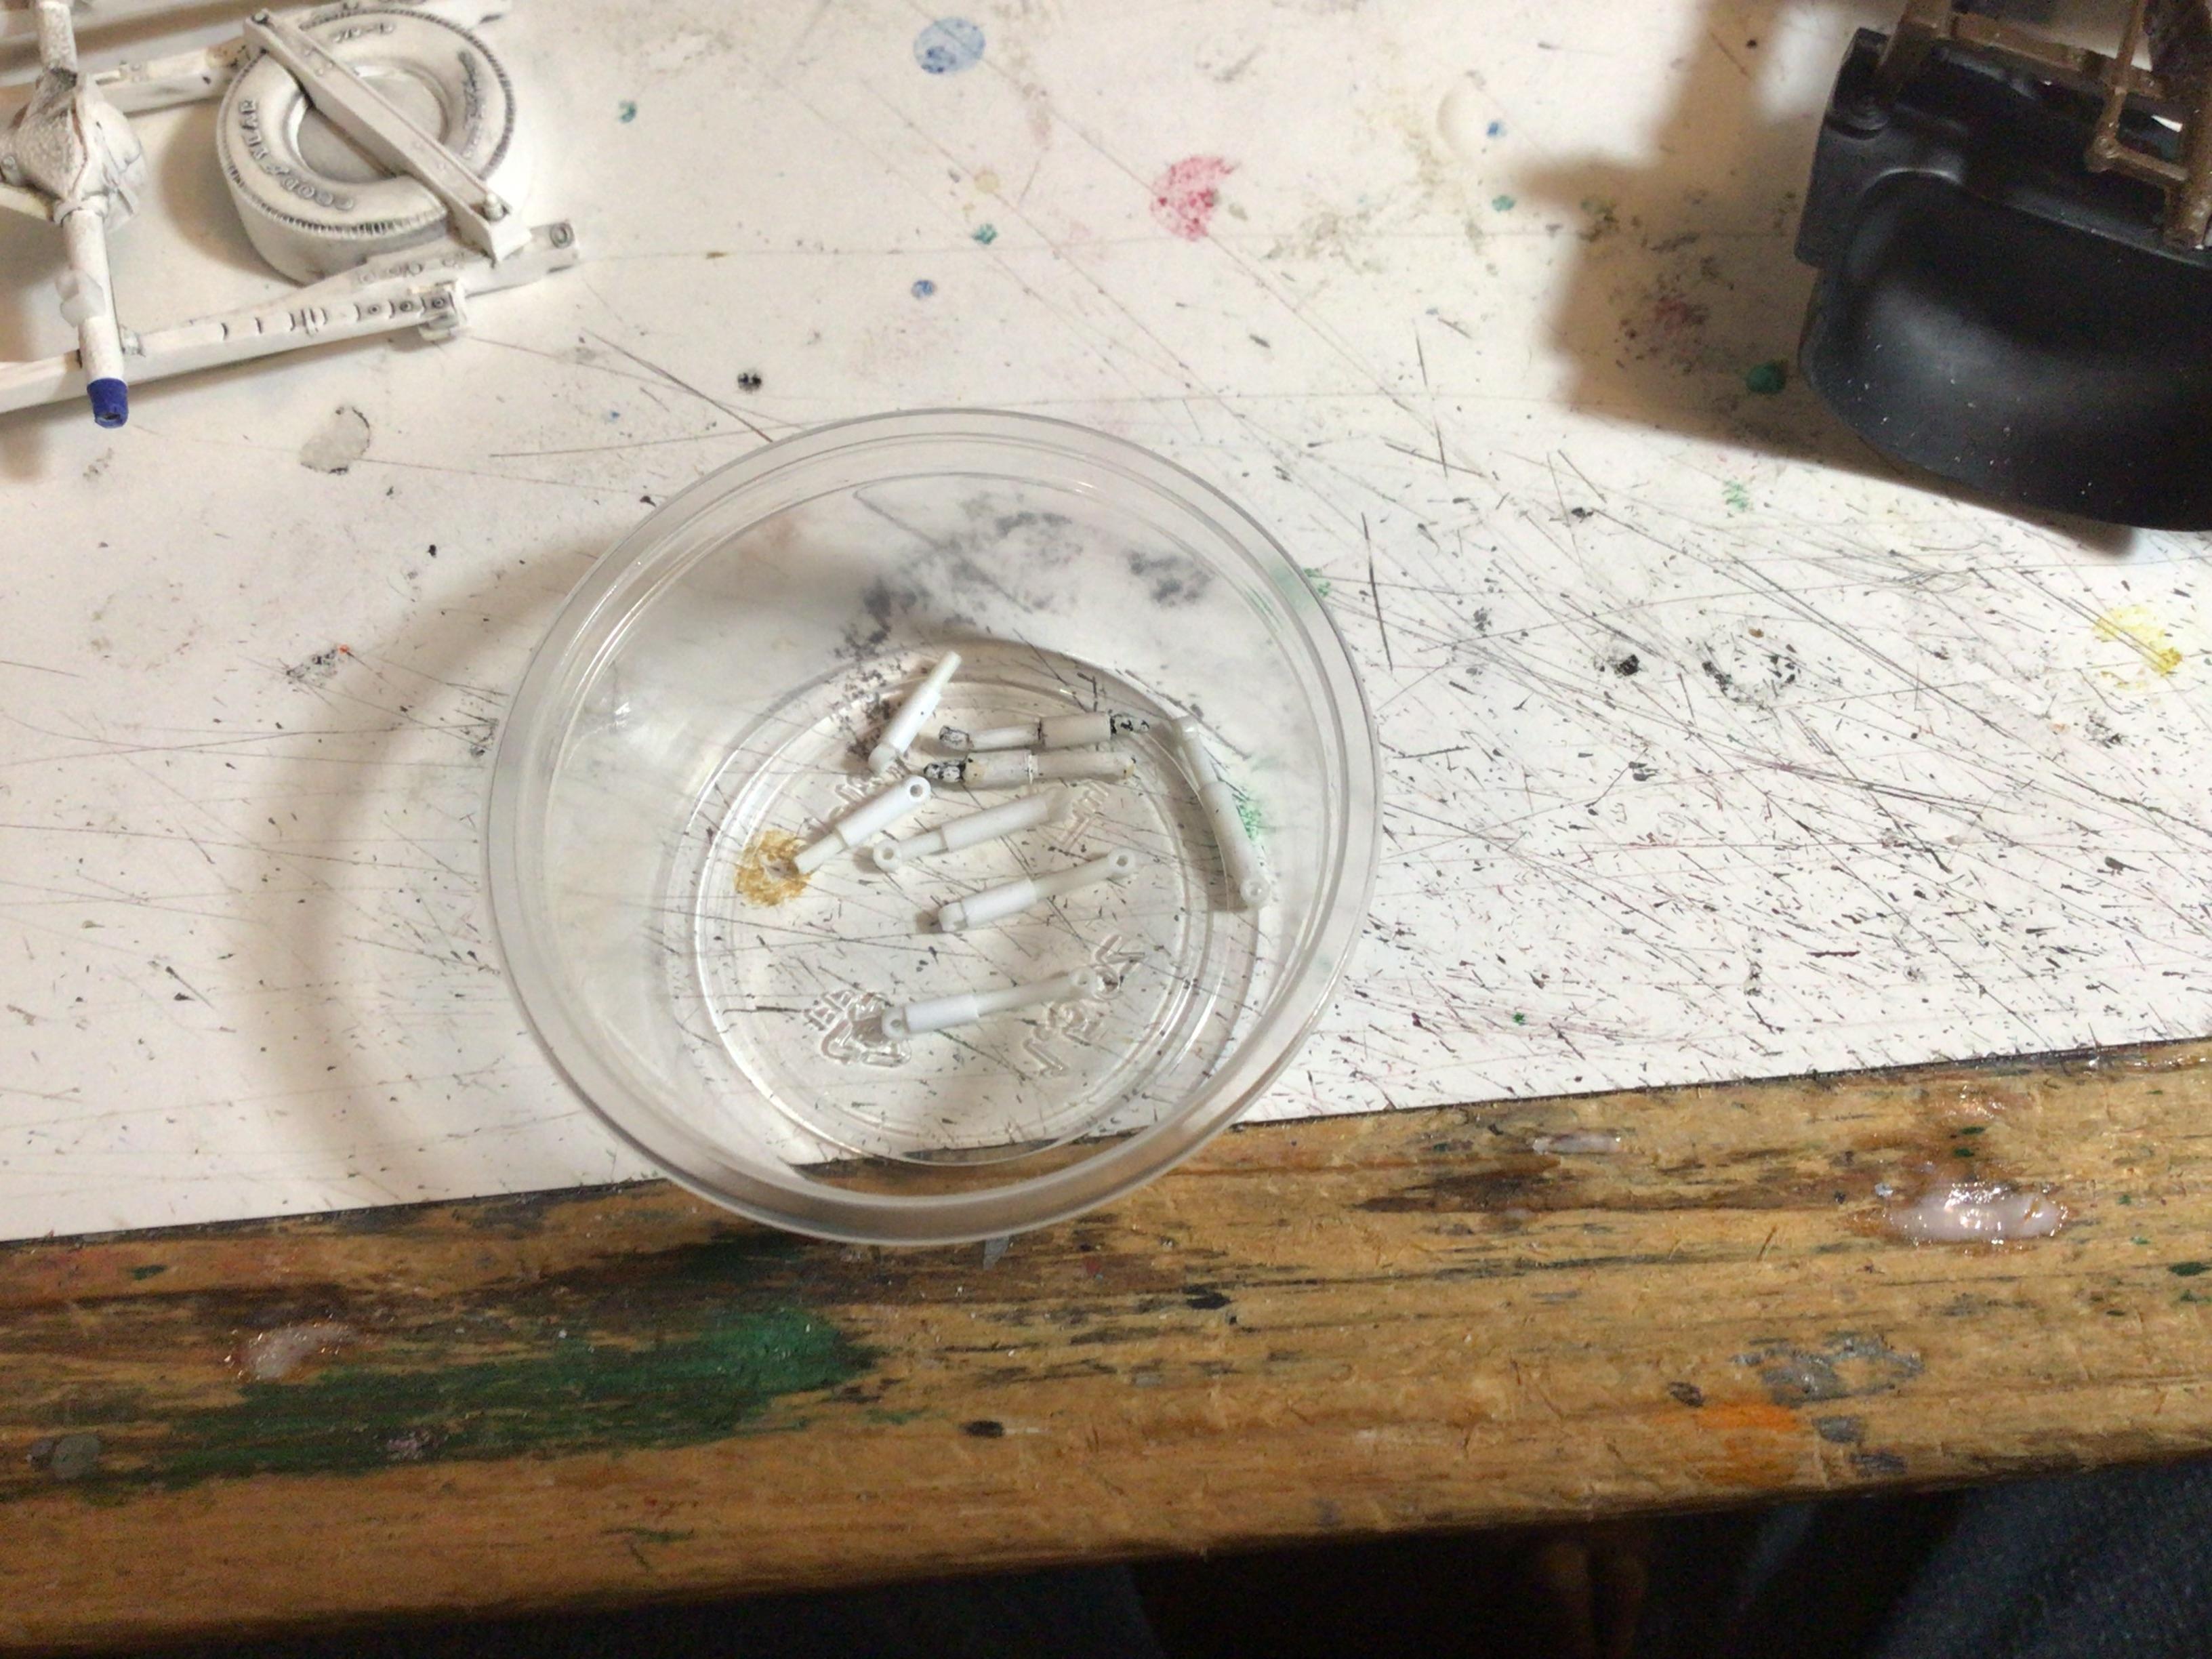
 A box of old MPC Chevy square body truck parts I scored at a swap meet back in the ‘90’s for the princely sum of $1.00 turned out to be a treasure trove of enough rare, intact, pre tooling change major components to build what I have mocked up here. Inside I found a ‘78 annual full 2wd chassis with both f&r suspensions, wheel inners and retaining caps, cab and bed with the original bed cover and the grille and bumpers. The box also contained enough major components to build the ‘79 4wd version on the box. Everything needed only an overnight dip in the purple pool to bring them to the condition pictured here. I had to raid an old unbuilt Fall Guy kit for the f&r 4wd springs and axles along with the engine for the 2wd. I’m planning on bashing a current sod buster kit with the Fall Guy GMC cab and bed in the future so it won’t go to waste. So far the only missing parts I’ve had to fabricate are the shocks with new improved lower mounts. I’ve also fabricated rear lower cab corner fillers and one bed bar down tube. The sunroof opening on the 2wd cab had been cut through on two sides so I filled in and sanded them. I’m definitely going to finish these two in the weeks ahead so I’ll post updates as they are completed.
-
- 1
-

-

Ford Bronco full 3d print
stitchdup replied to stitchdup's topic in Model Trucks: Pickups, Vans, SUVs, Light Commercial
the shocks were a pain but the rest is all one colour so it wasn't all bad. i did the shocks with molotowe and clear tamiya green and it surprisingly worked well but i did put the tamiya on heavy with a tiny brush and only had one chance at it. i dont think it would touch up. take cars when you fit the brakes, with the weighted tyres its easy to get the angles different on each side which might be why theres no actual chassis pic in my post, lol -
I added the hood to the rest of the car and it is tight! I may leave as it is instead of trying to loosen it up.
-
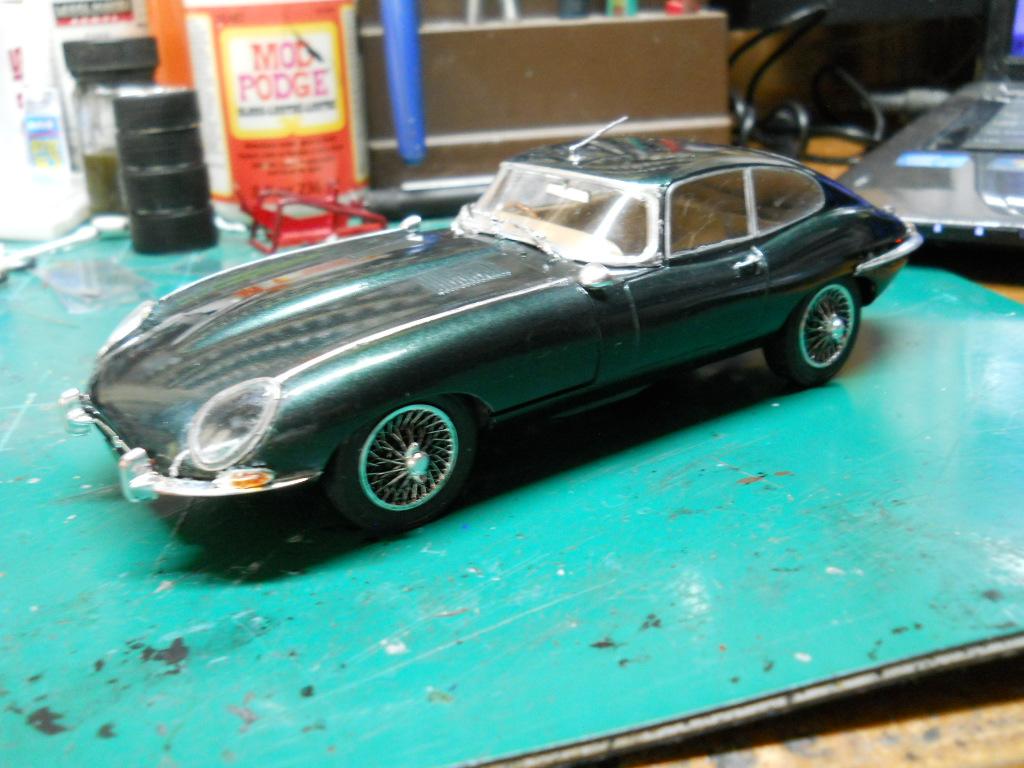
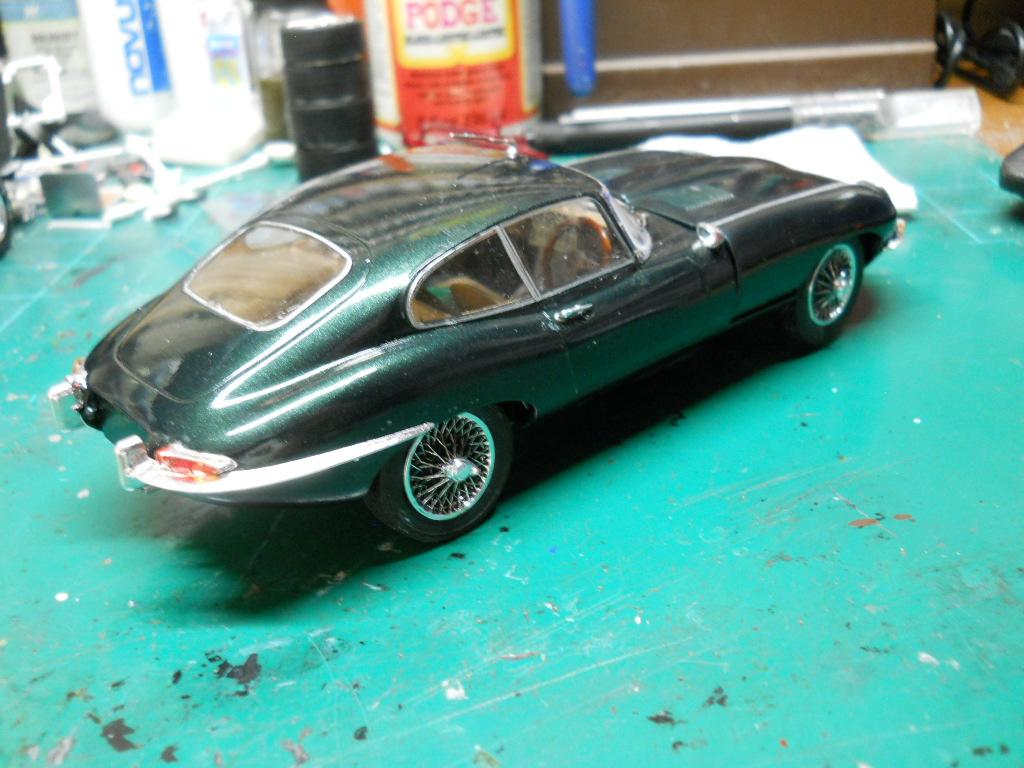
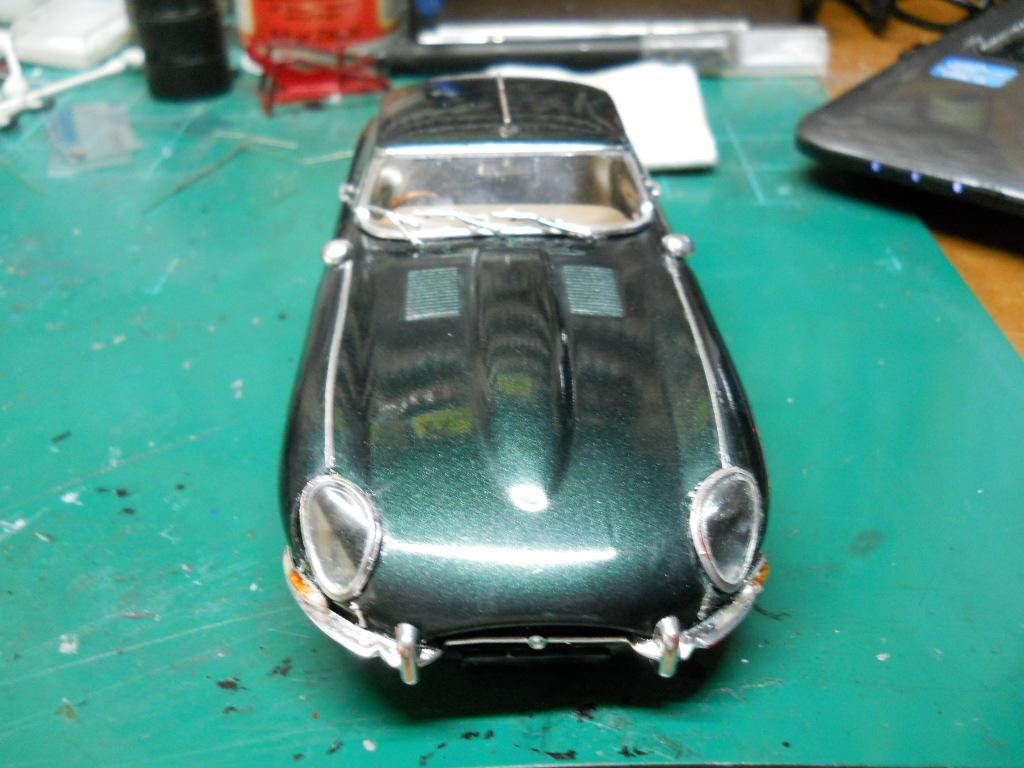
 Rustoleum Black Knight Metallic rattle can and Gundam markers, with Apple Barrel brick red and copper paint pen for the seat.
 -
1937 GMC COE Handyman's Truck
Andria H replied to Andria H's topic in Model Trucks: Pickups, Vans, SUVs, Light Commercial
thanks all! the figure is a miniature replica of my old friend Wes that was (I believe) a G-scale cast resin figure that was already painted like James Dean. I painted Wes' features and jacket patches on. He is gone now and his jacket, albeit unwearable and ragged, still hangs in my closet in his memory. -
How to do tuck n roll?
stitchdup replied to FoMoCo66's topic in Model Building Questions and Answers
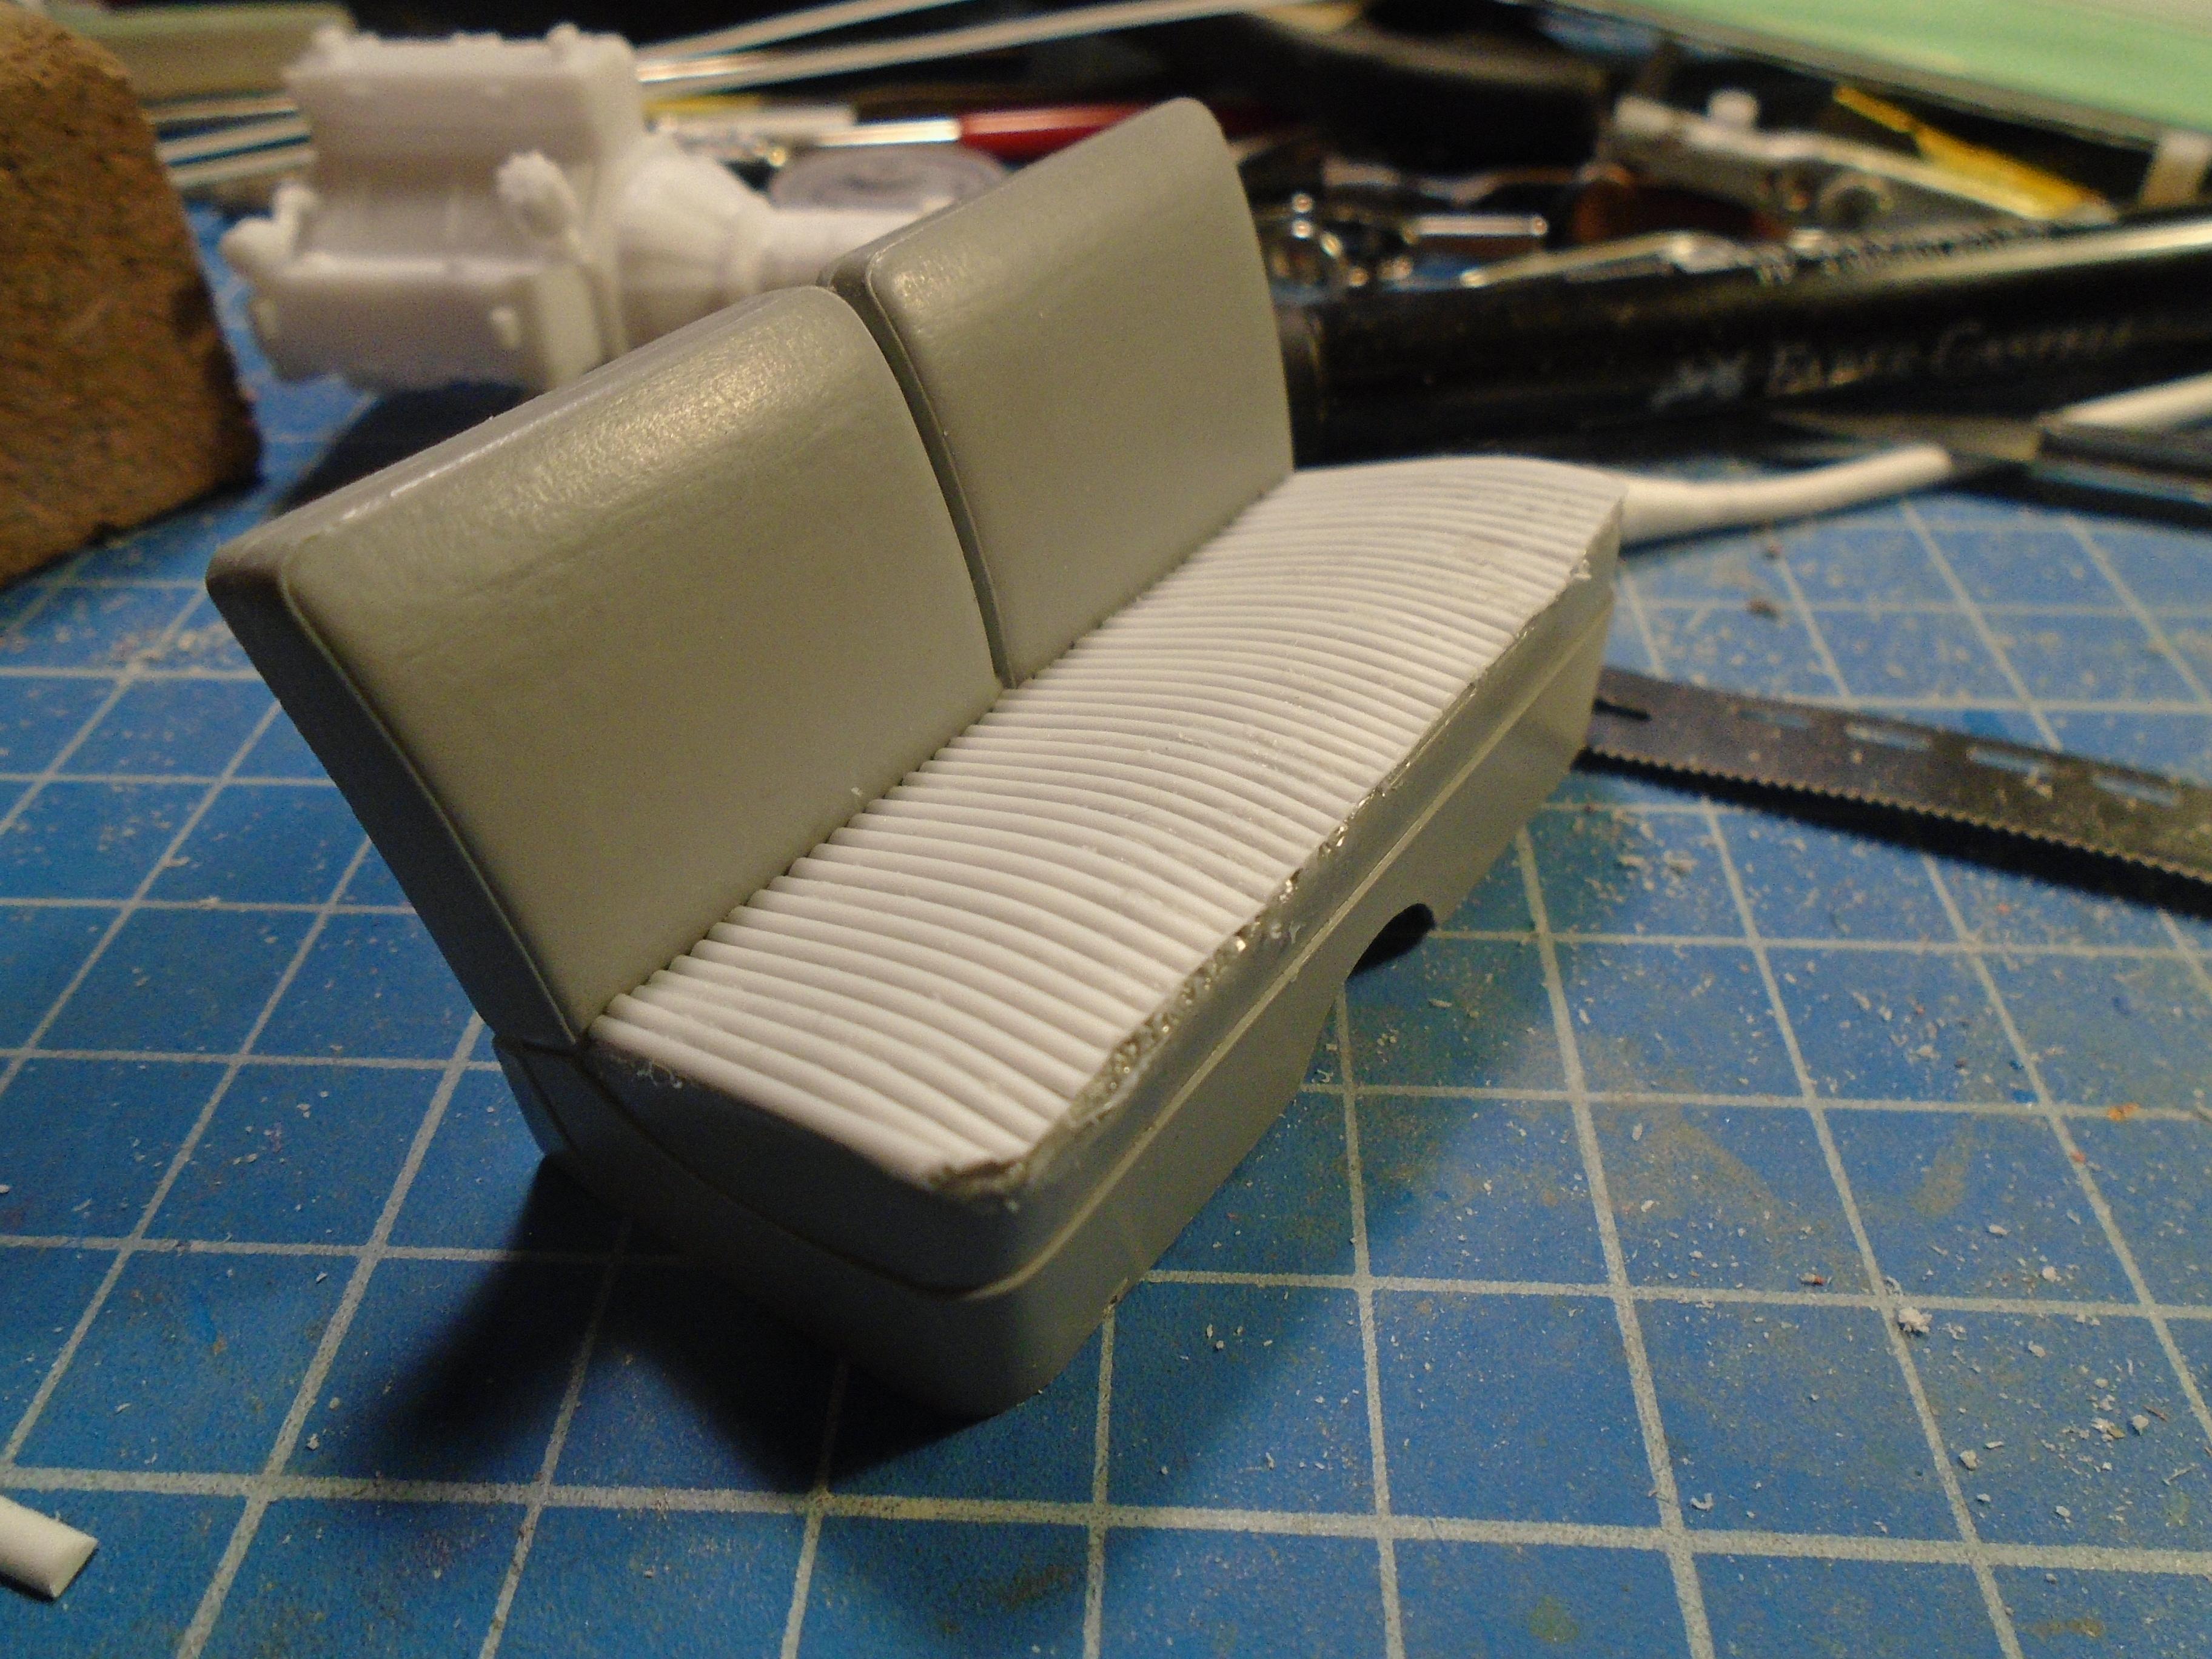
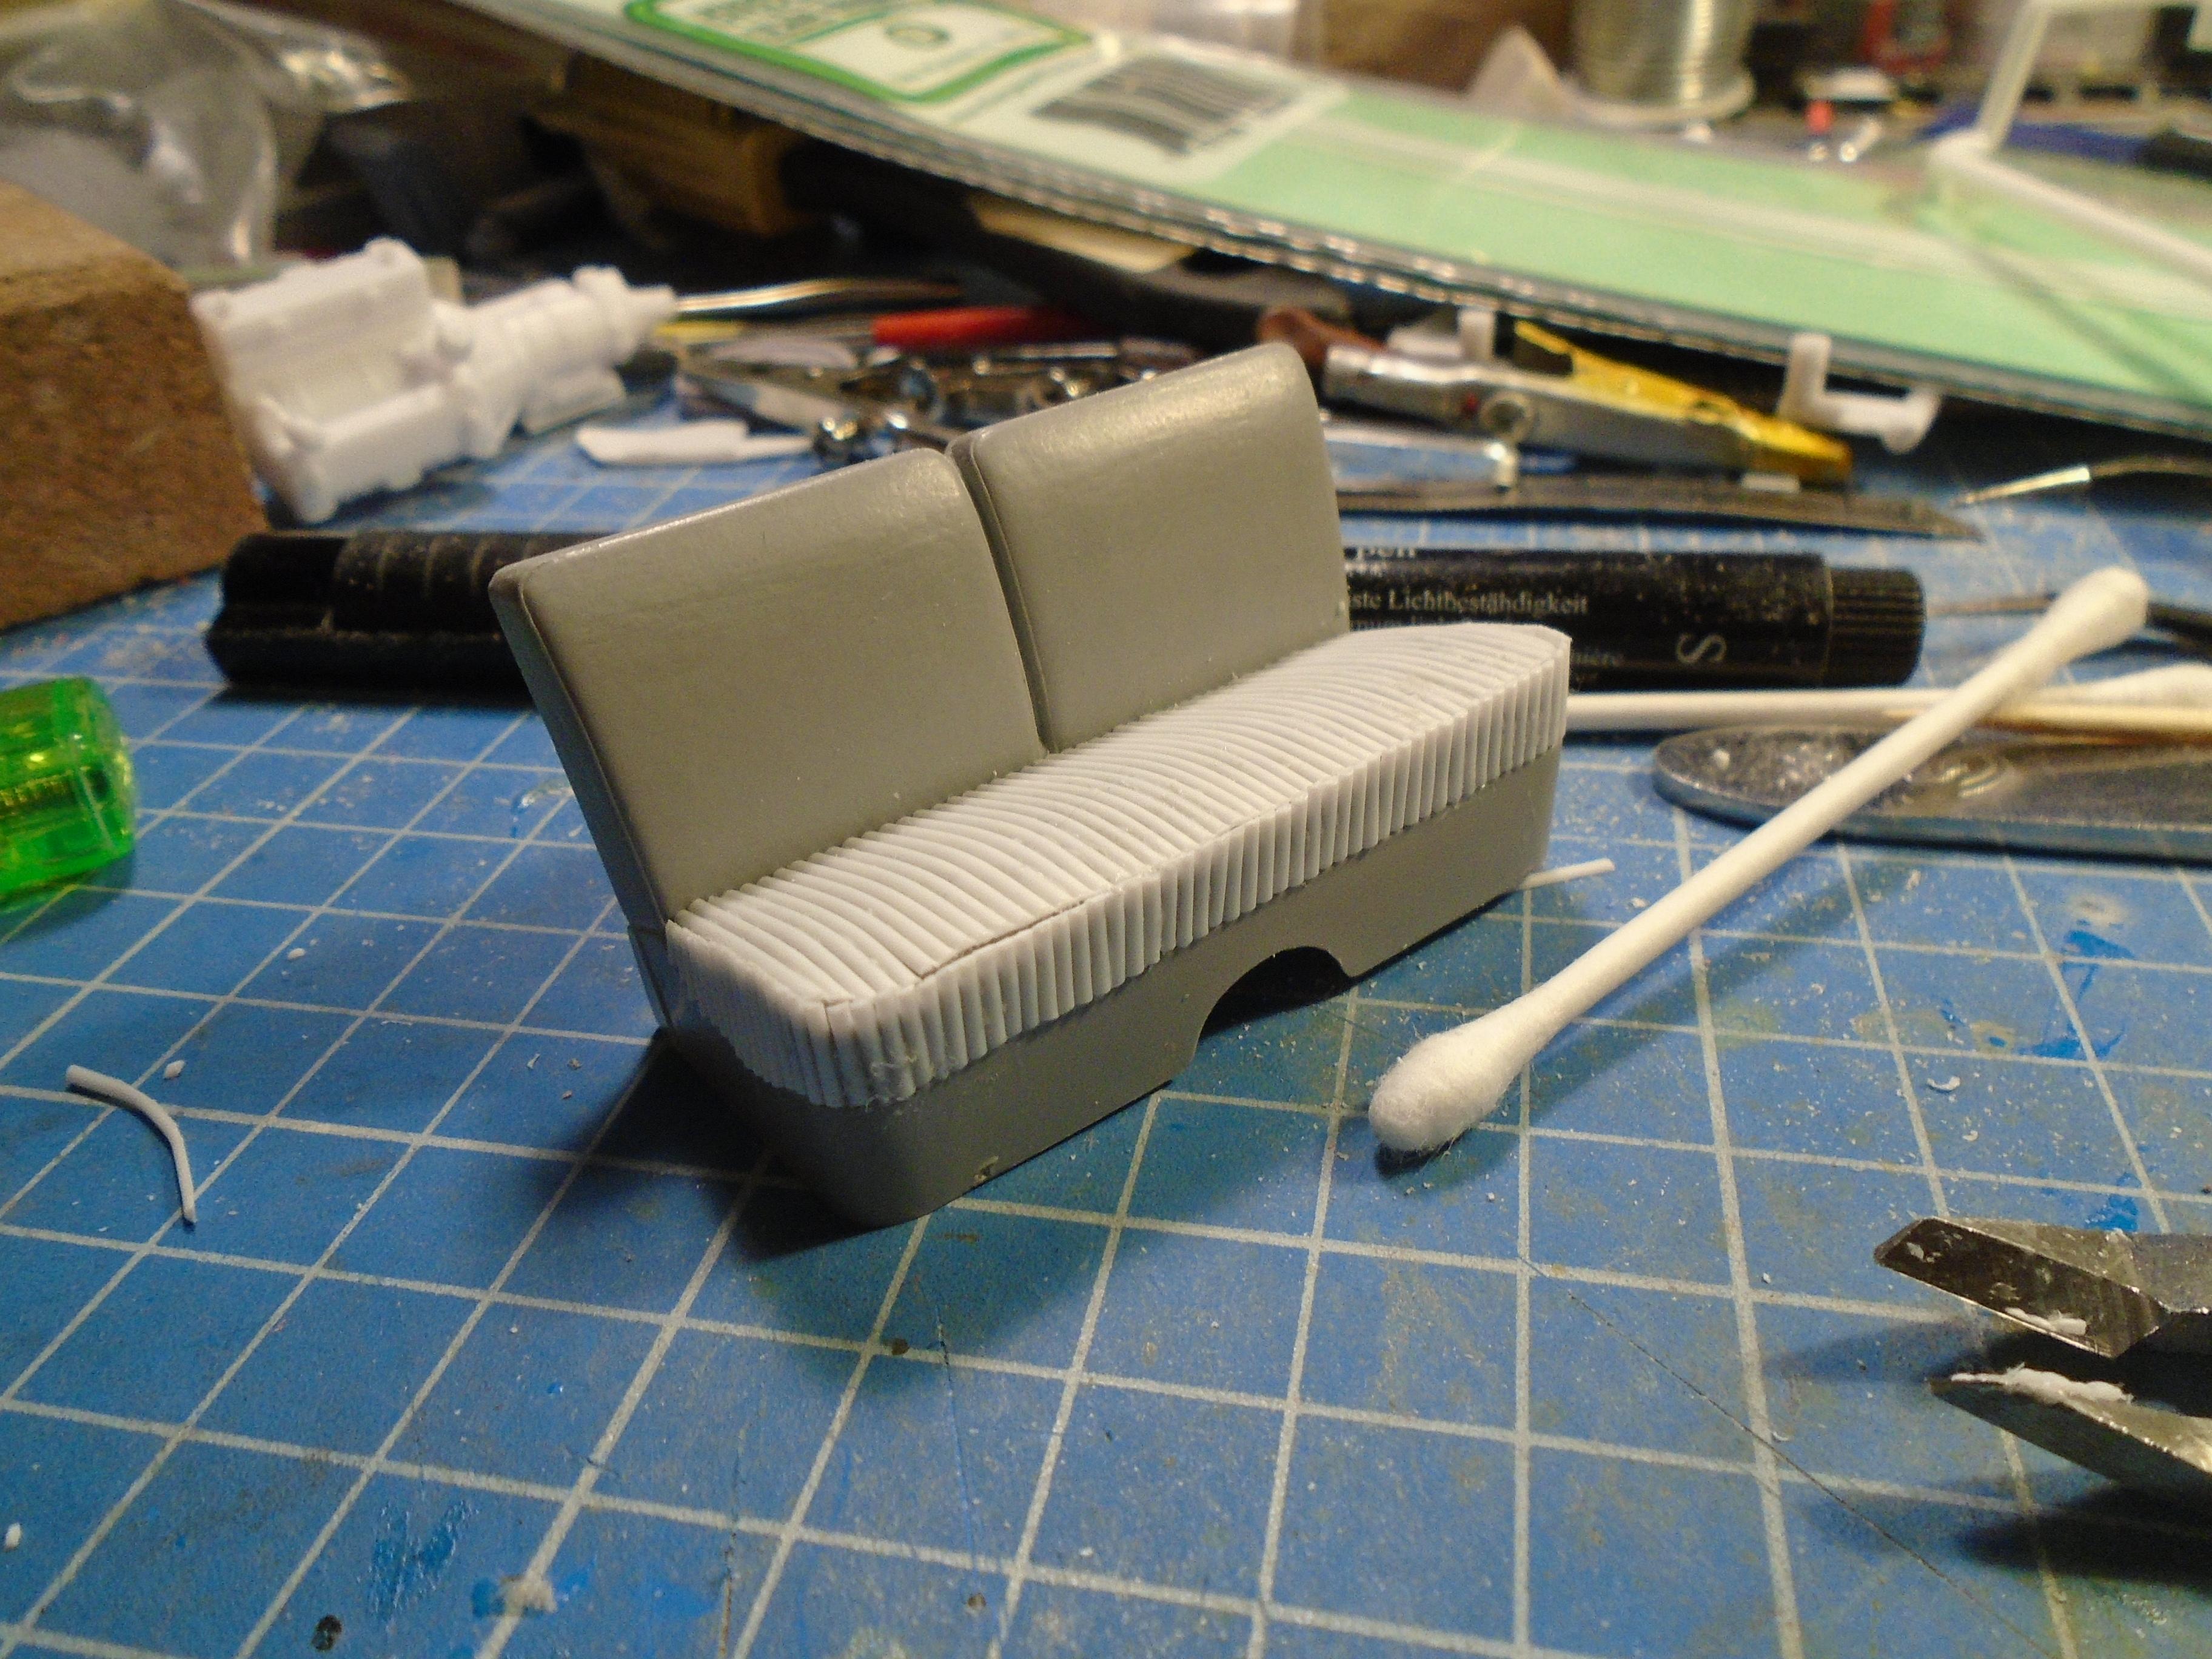
I just use what looks right. usually its 1.5- 2.5mm size i use but i have used other sizes. I prefer evergreen over plastruct for doing tuck n roll but thats probably just because i find it easier to work with. this is a bench seat for a custom ford pick up based on a amt 50 ford bench. its taken 3 full packs to do the bench and i'm at a pack and a half on the door panels but they are only half done and might take another pack. I put a angle on the rear edge of the strips as otherwise the join between top and bottom cushions looks off. I started with the base on these seats but thats only because the back is split and it makes it easier to line up the back. I also start in the centre so it builds up evenly, and i leave them a touch longer to help with sticking the edges down and trim after its all set. on this seat i'm adding t'n'r around the edges too but you could use tiny rod for piping (which i'm doing too but havent dont yet) I also give it a good 240 sand after as the real thing is rarely half round, and my first primer is filler primer but thats just for the inevitable gaps between the strips and only needs a light dusting.
-

Convoy, take 7
Jürgen M. replied to Jürgen M.'s topic in WIP: Model Trucks: Big Rigs and Heavy Equipment
Just slight withdrawal symptoms! 😉 - Today
-

Revell (Monogram) 1/24th scale, 1985 Pontiac Fiero
peteski replied to Luc Janssens's topic in Car Kit News & Reviews
I'm almost certain that the original run had that tree plated. Even looking at that tree parts, it holds parts which would customarily be plated. Yes, there weren't many plated (or polisher aluminum or stainless steel parts on 1:1 Fiero, and the wheels were aluminum mags, but having those parts plated makes painting them easier. The wheel faces were very shiny bare turned aluminum with a clear coat, while all the recessed areas were black. On a plated model wheel you just spray the entire wheel black (like Testors flat black), and right after the paint is dry you wipe the rim's surface with a paper towel or a piece of rag moistened with paint thinner. That will remove the paint from the plated surface, leaving rest of the wheel black (just like the 1:1 rims). Nice and easy. If you find the plating too shiny, you can spray it with a flat clear. If they are ribbed, the same can be done for rocker arm covers. If those items are unpainted plastic, they have to be dealt with other, not as easy ways. -
1/8th scale T Bucket pinstripes in white ?
stitchdup replied to Jon Haigwood's topic in Model Building Questions and Answers
look for nail striping tape on amazon. its 1mm tape for doing pinstripes on nails and a pack of 32 rolls is less than 5 bucks. most are metallic but a bit of searching will find non metallics but they might cost extra. they can be used over or under paint and are almost as thin as bmf -
Waw! very nice built, color choice and paint-job are stunning👍
-
Thought I'd bring this thread out again; been a while.
-
 Anyone now a source for 1/8th scale T Bucket pinstripes in white ?
 -
He could use your 1/43 sheet for reference, but I doubt the quality would be good doubling the size.
-
Might be a dumb answer, but since you are doing a custom interior, I would just eyeball it and use the width that looks right for the effect you are trying to achieve. I "corrected" the rear seat in a Revell '68 Mustang and I used 1/2 round that matched the front seats. You don't have to do that, and custom interiors usually are pleated further apart than stock interiors.
-
So far only overseas retailers have them and they don't ship to the US currently. I bought one, came to USD42 but USD50 for shipping from Hong Kong... 😅 I did a video, too. https://youtu.be/wrIeOlEkQAU
-
Finished article. I possibly won't be building anymore just now as I will be moving house
-
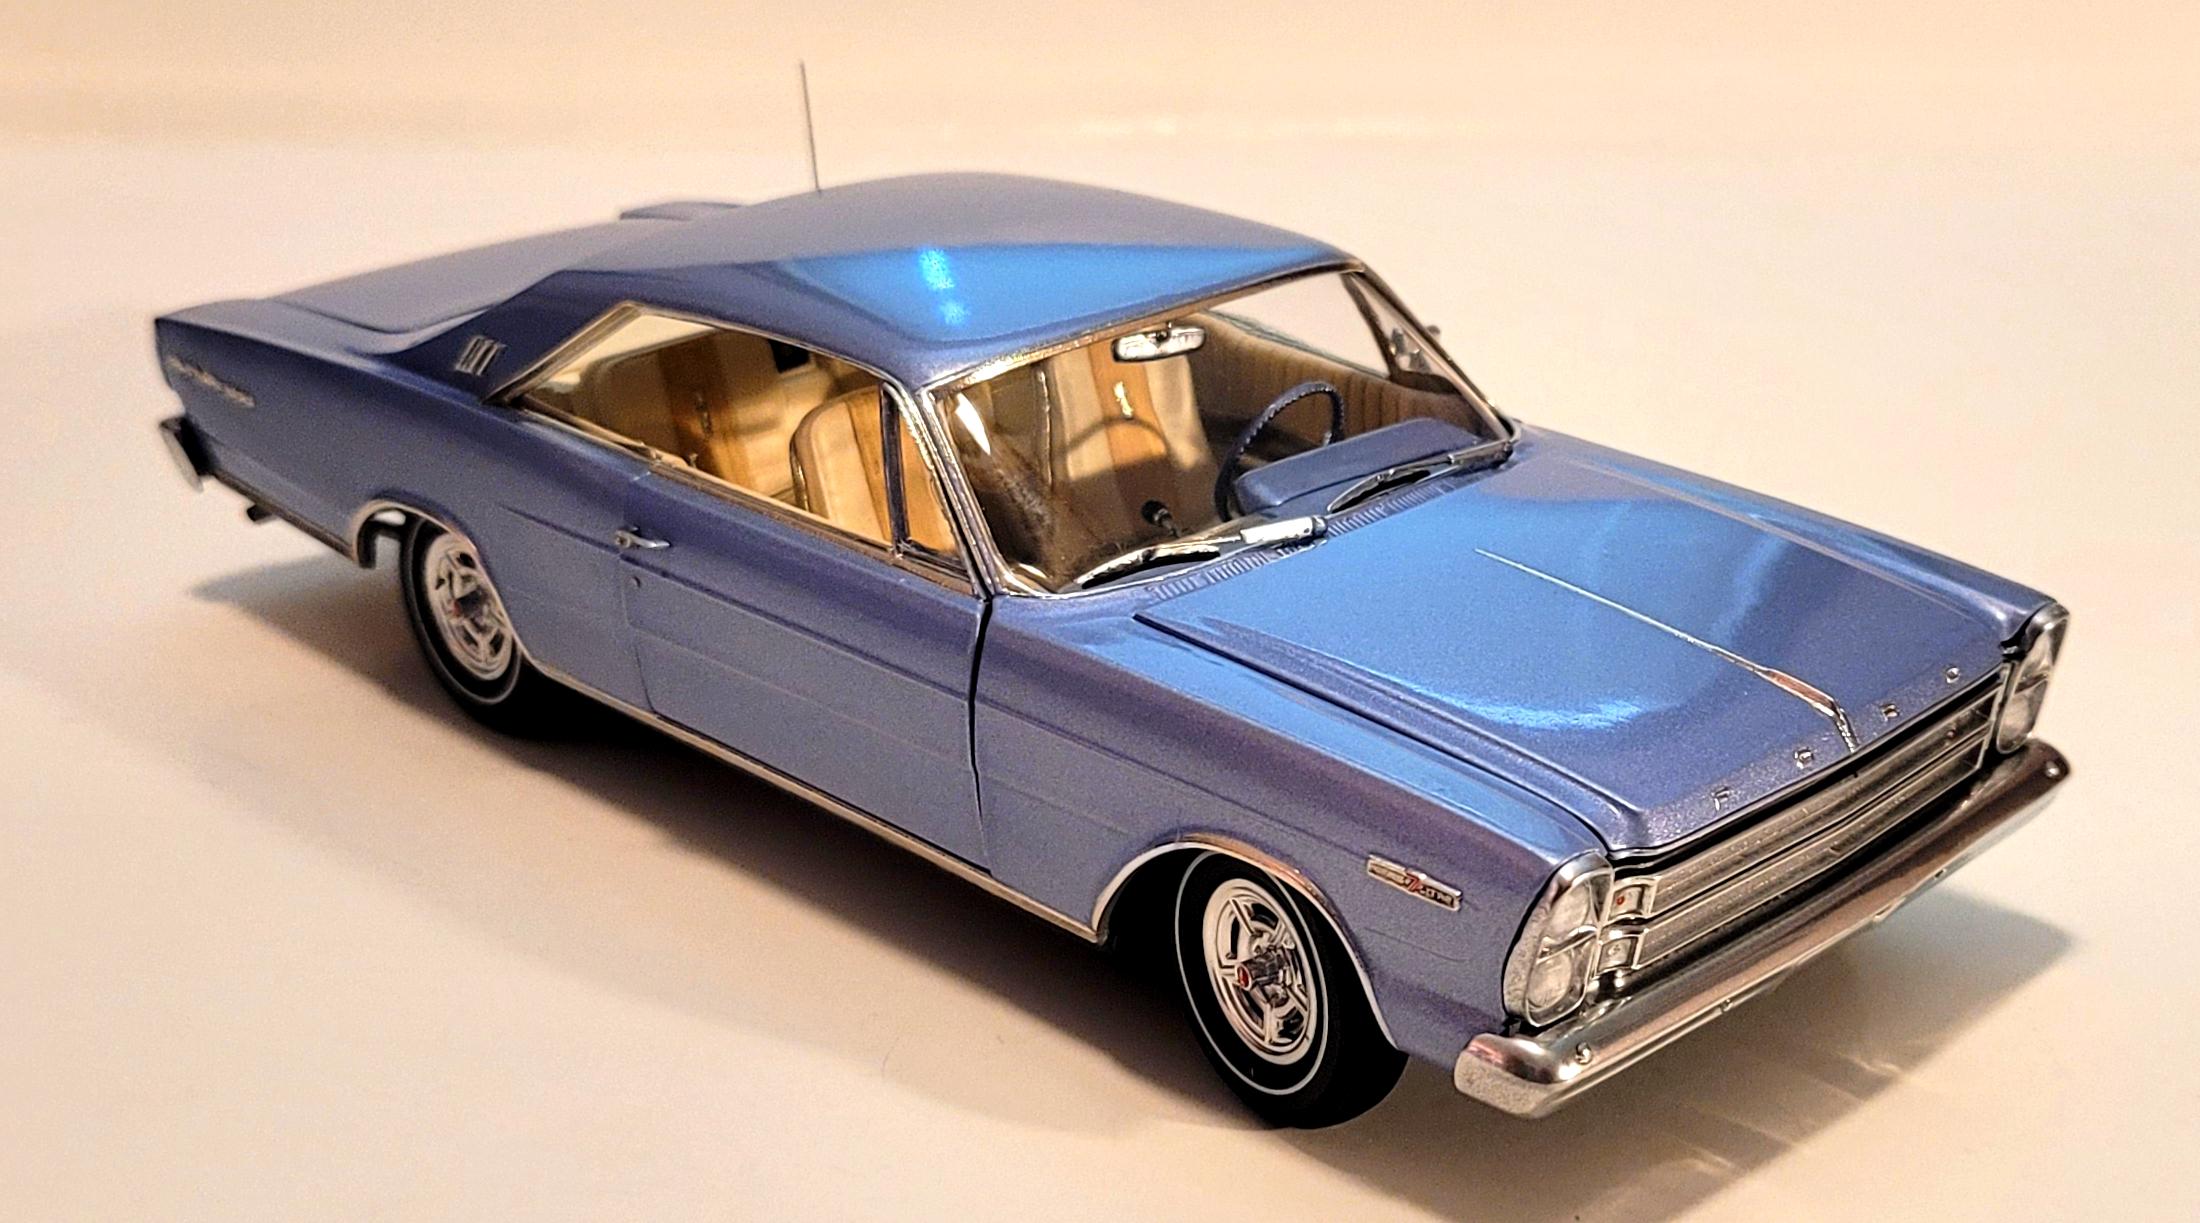
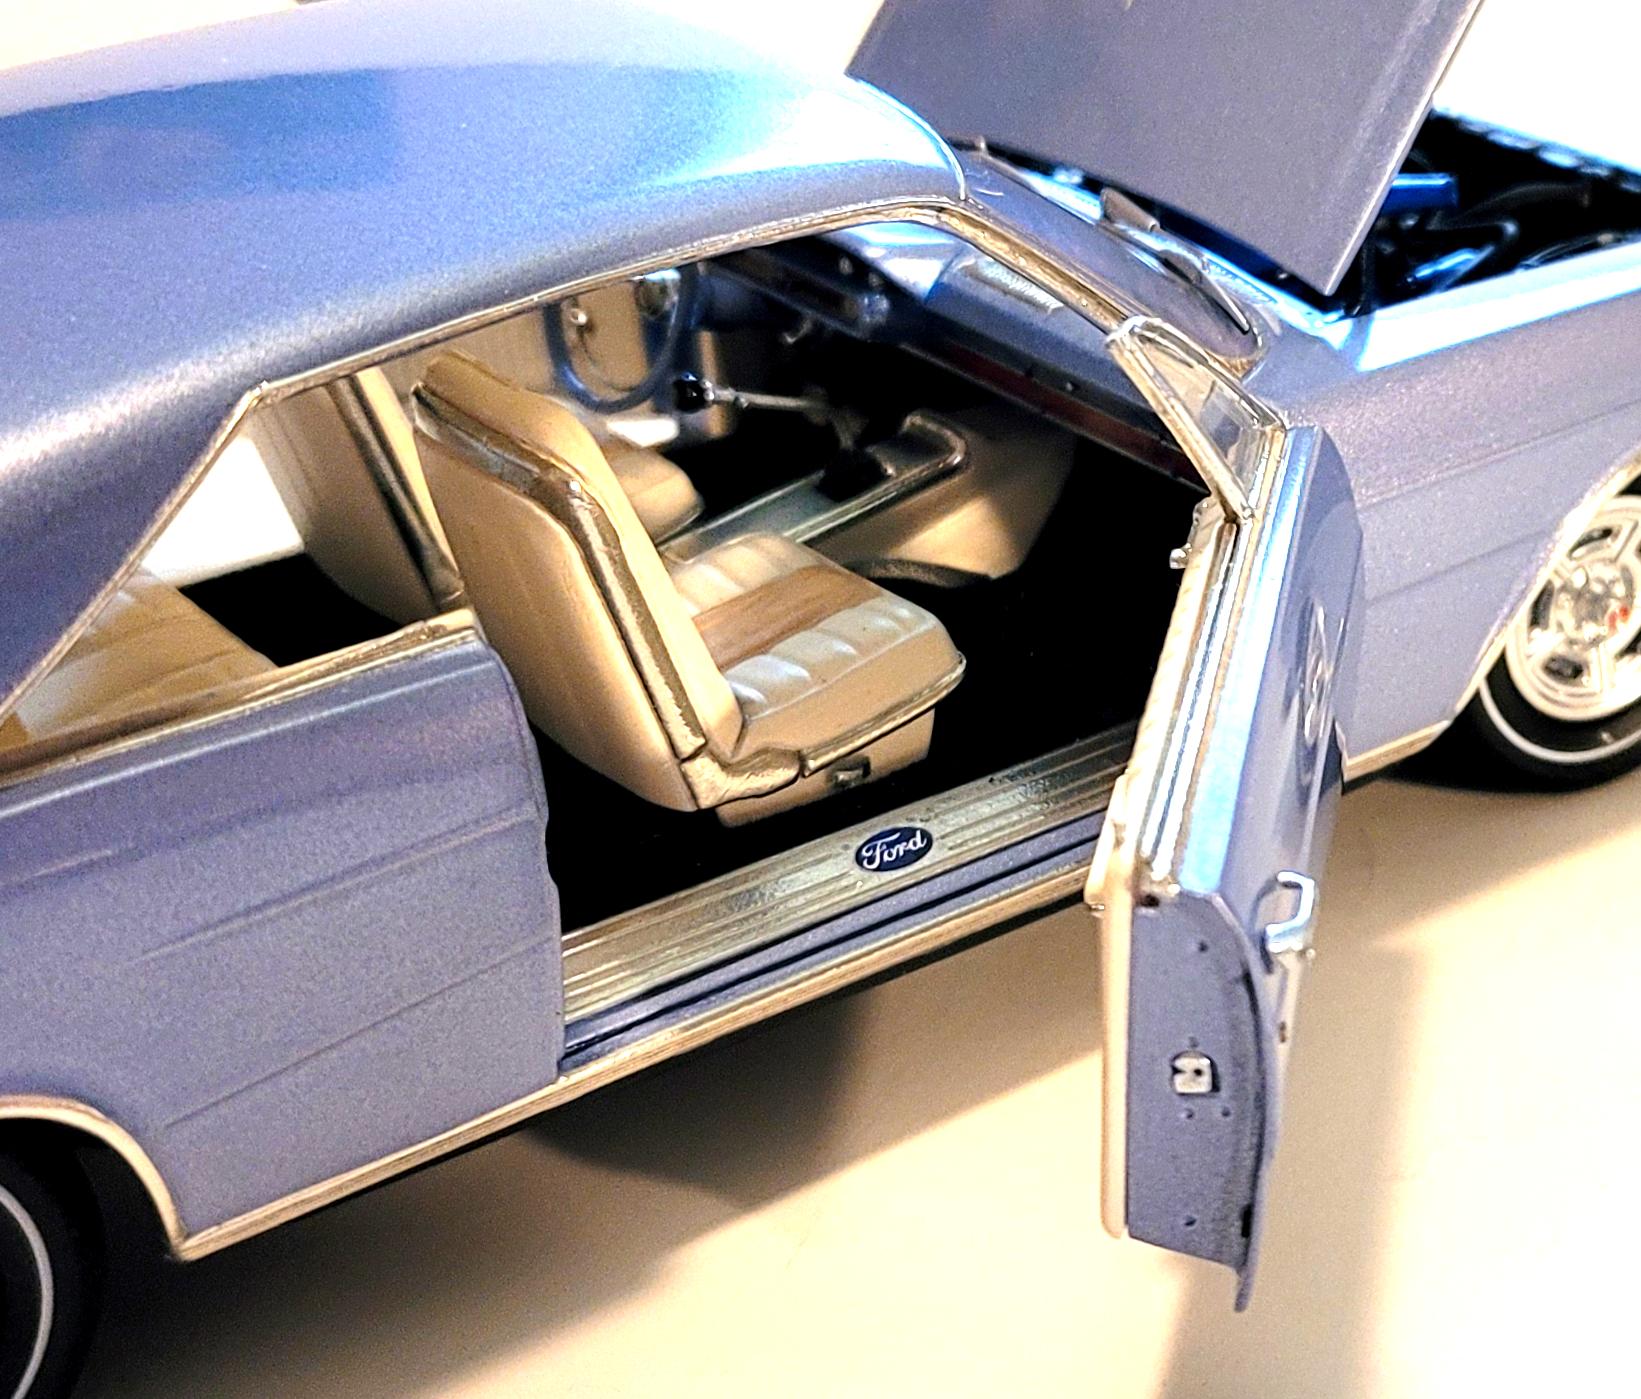
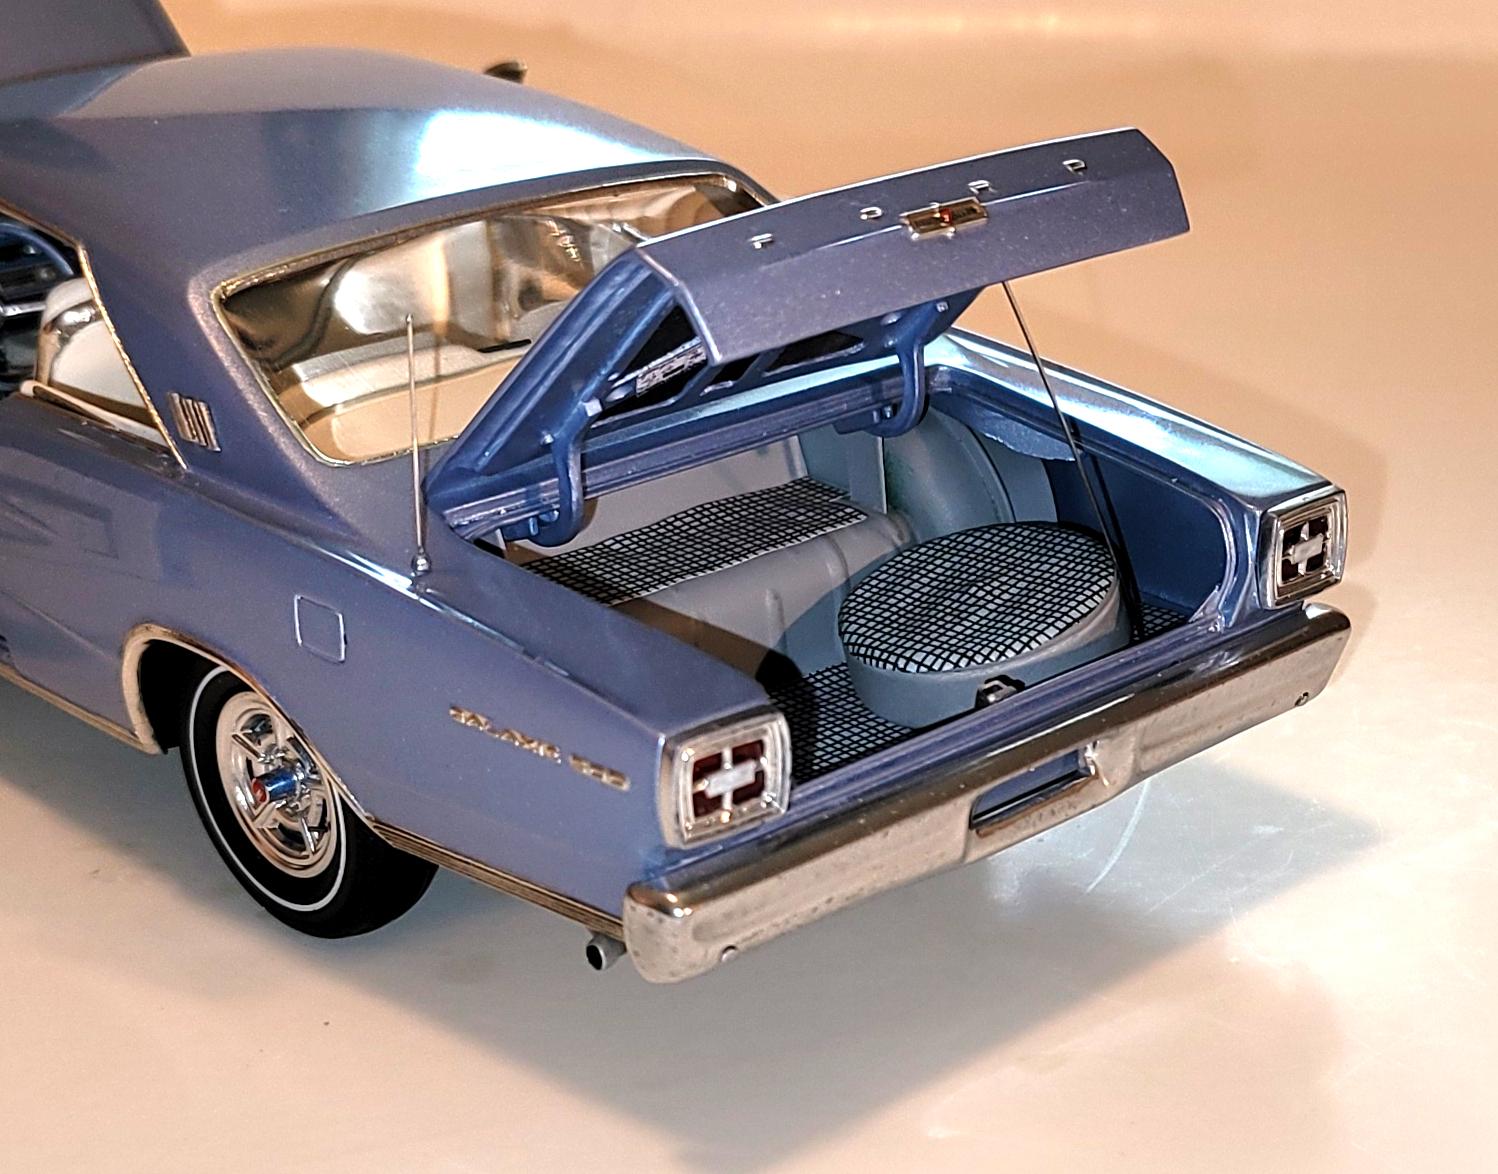
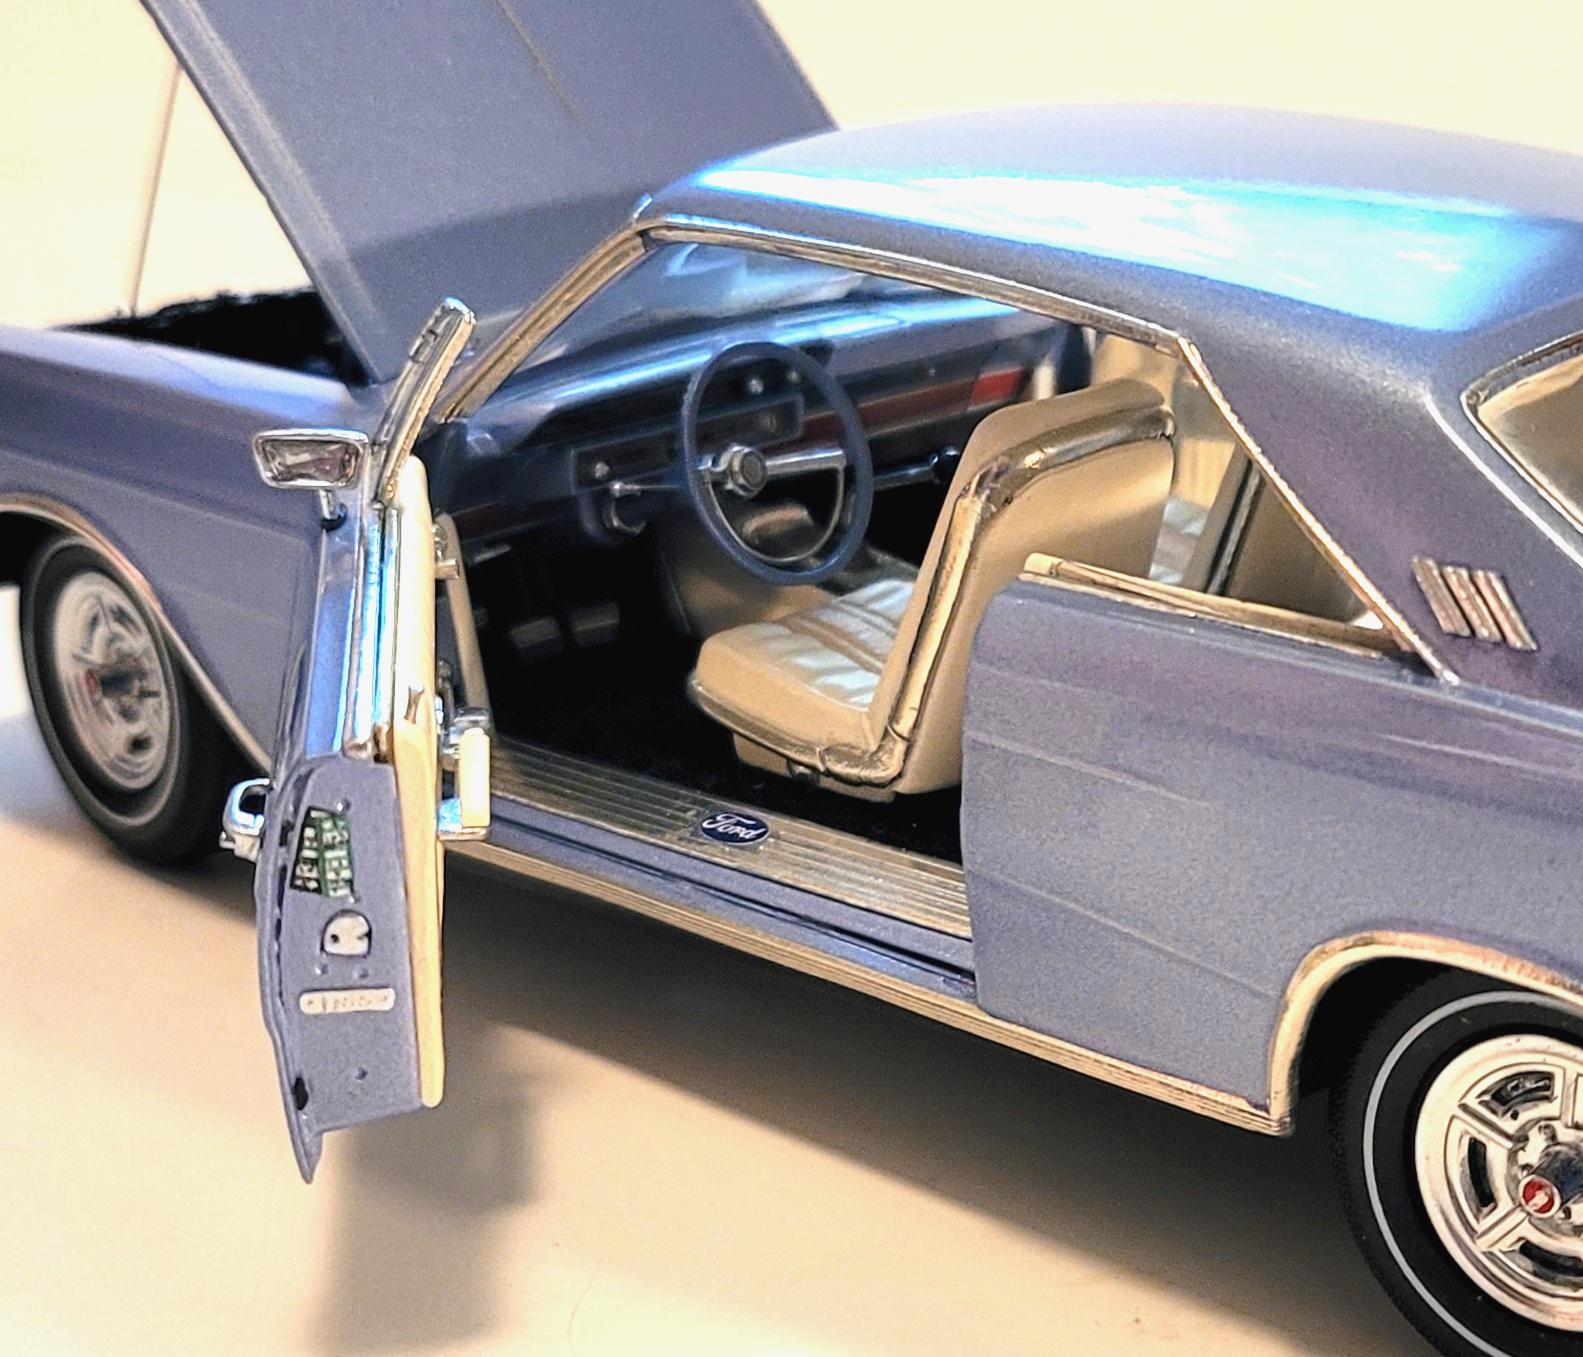
Holy detail! That is outstanding. Very nice Galaxie and the colour is great.
-
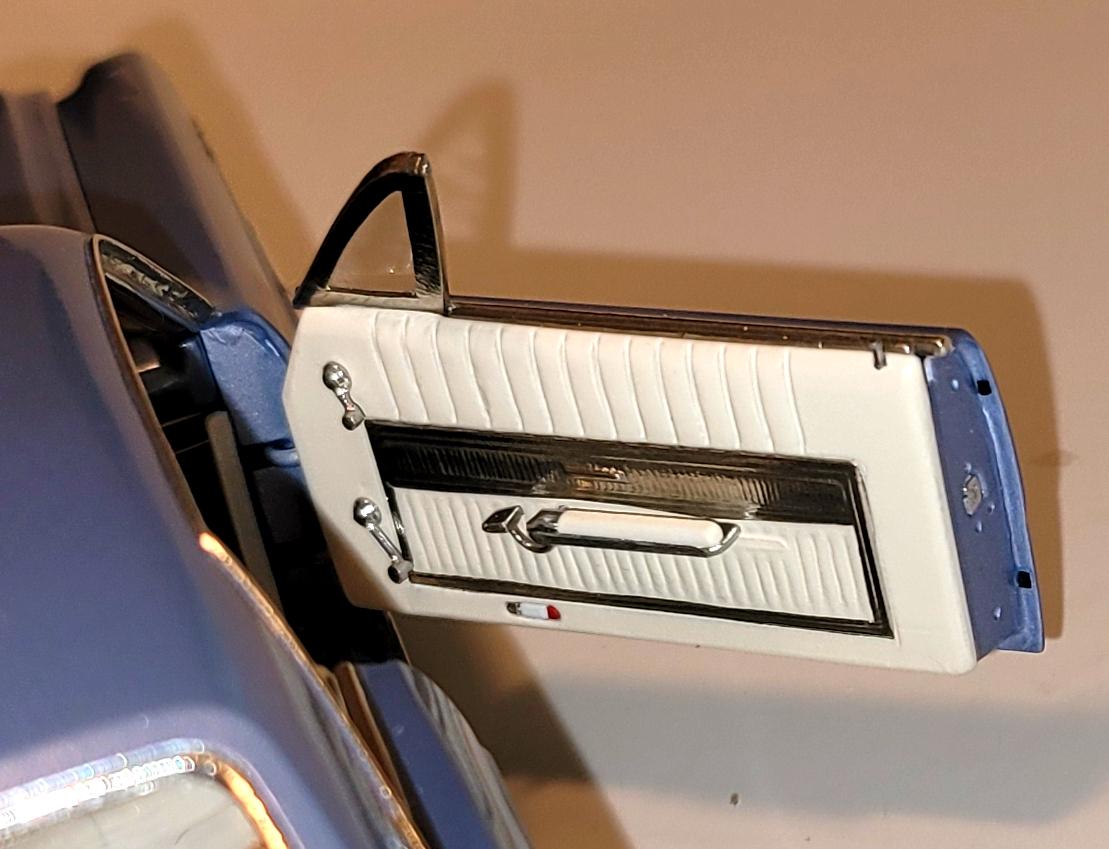
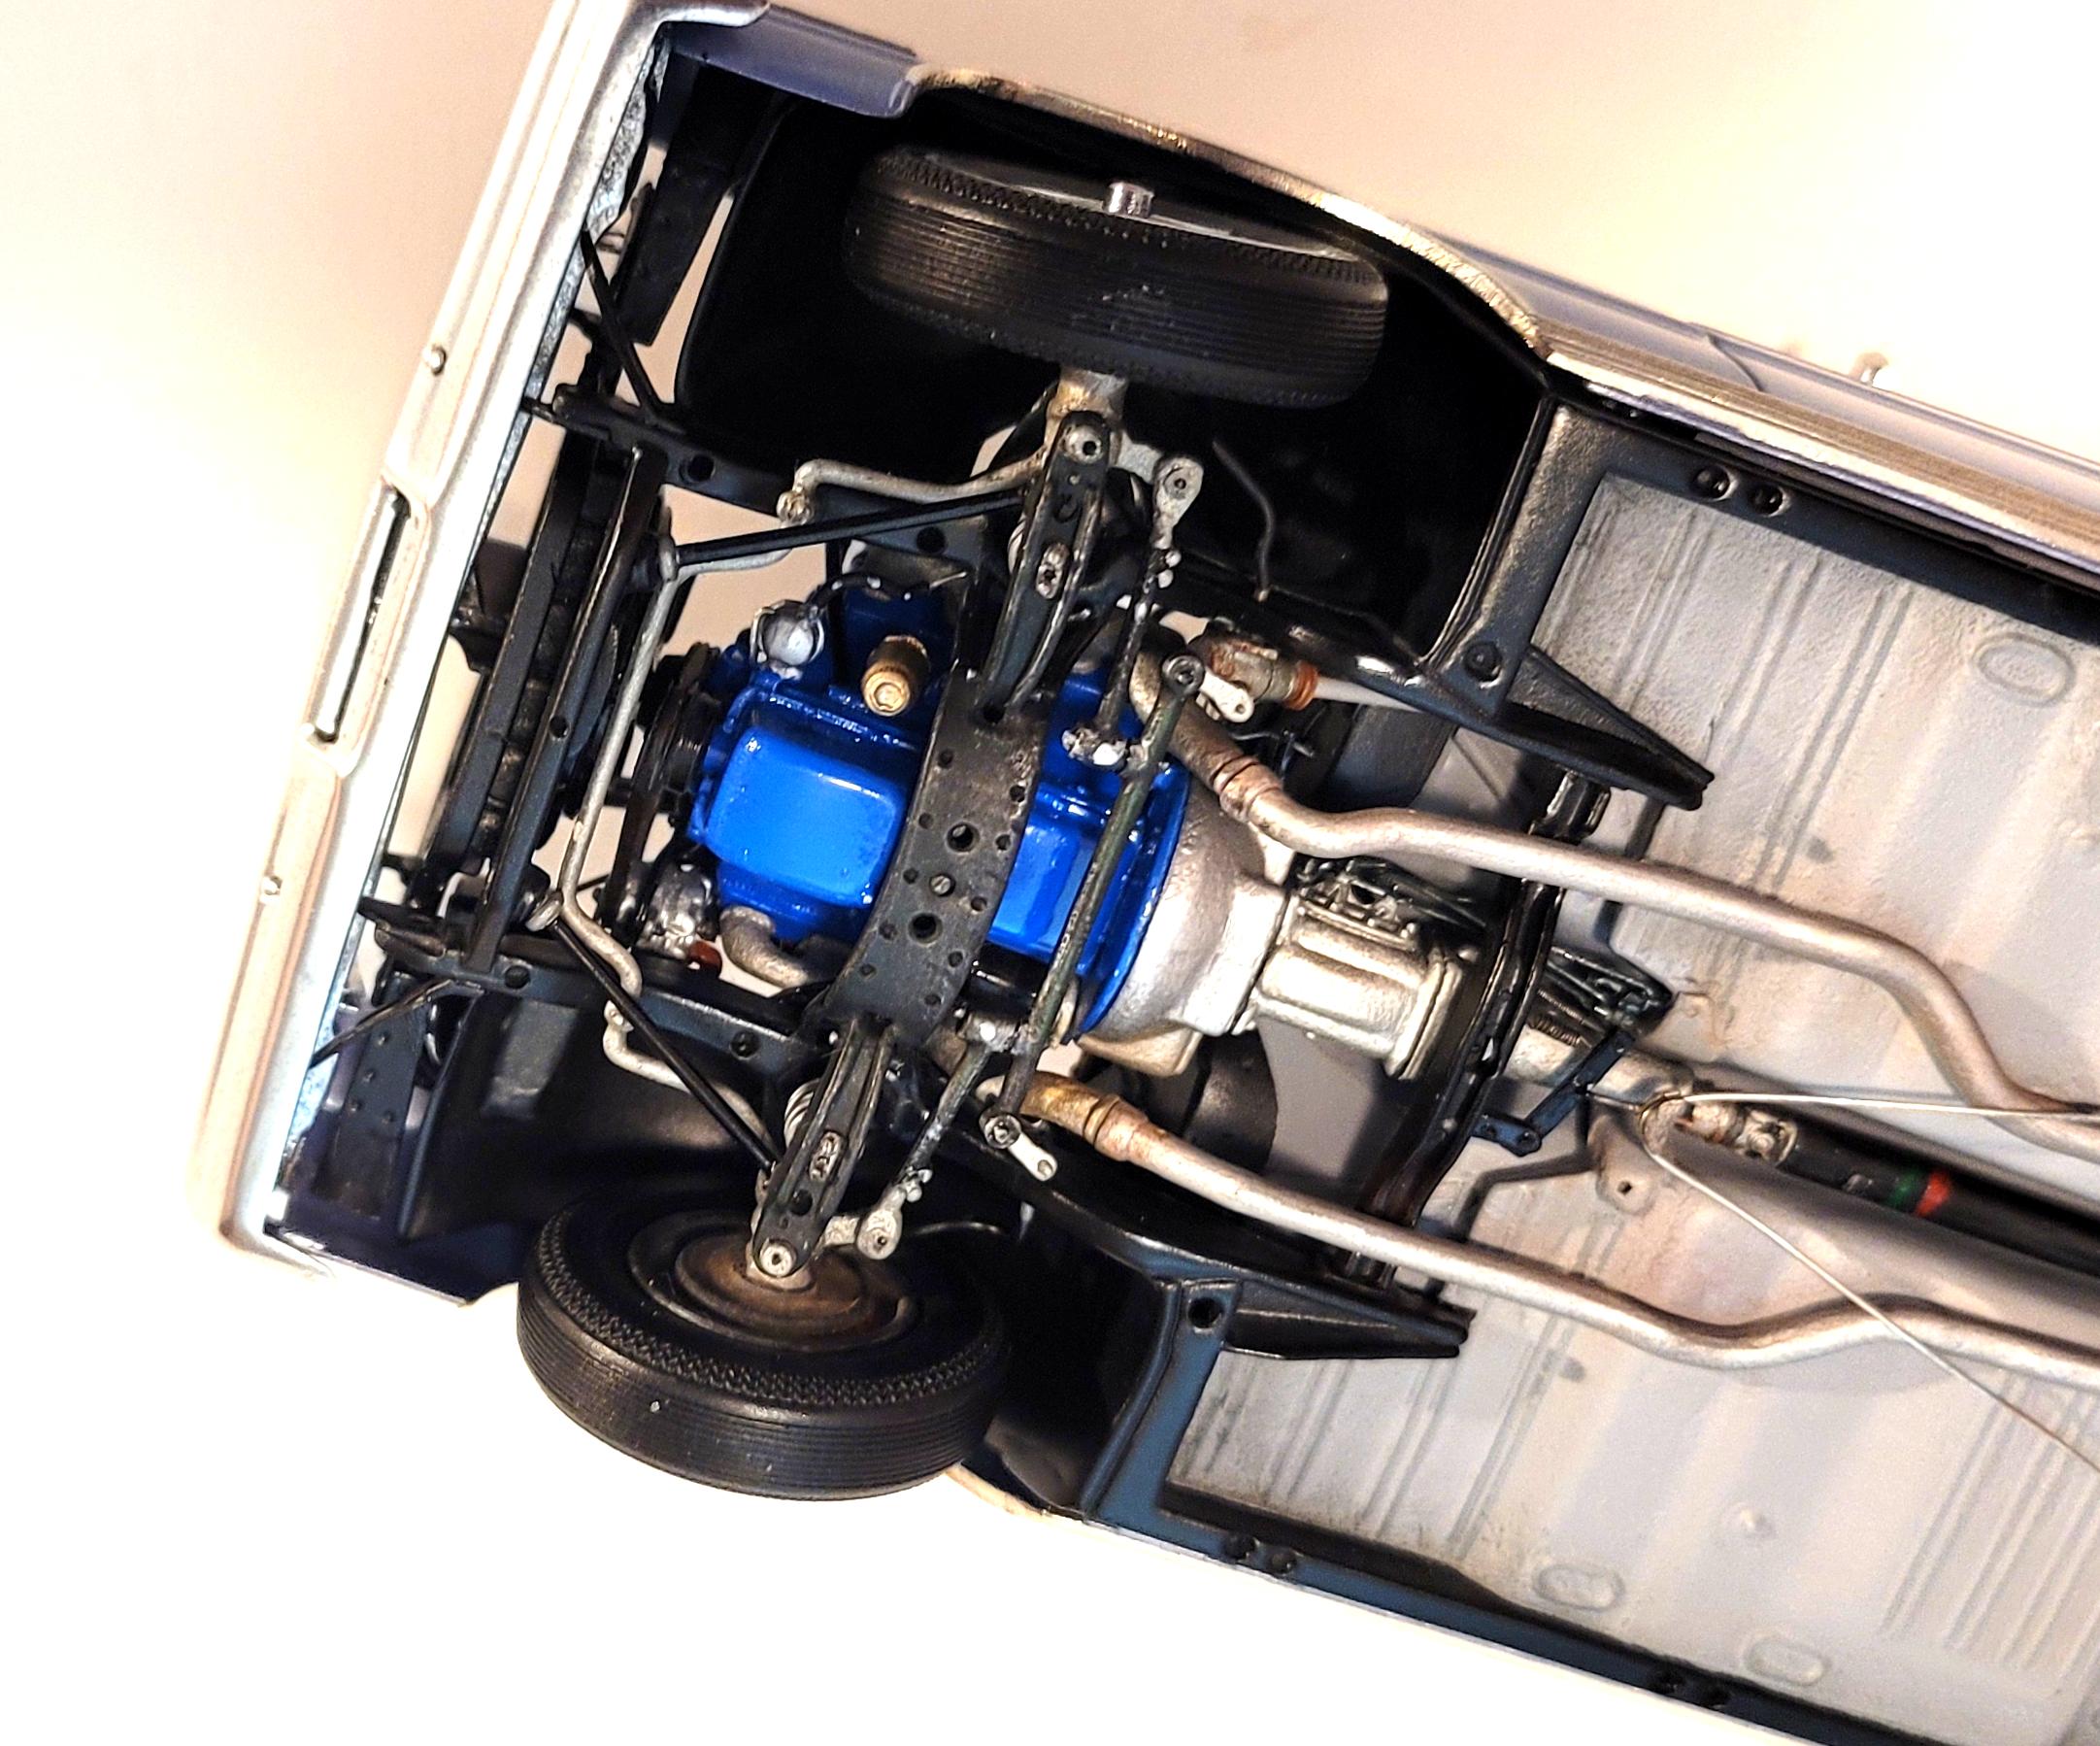
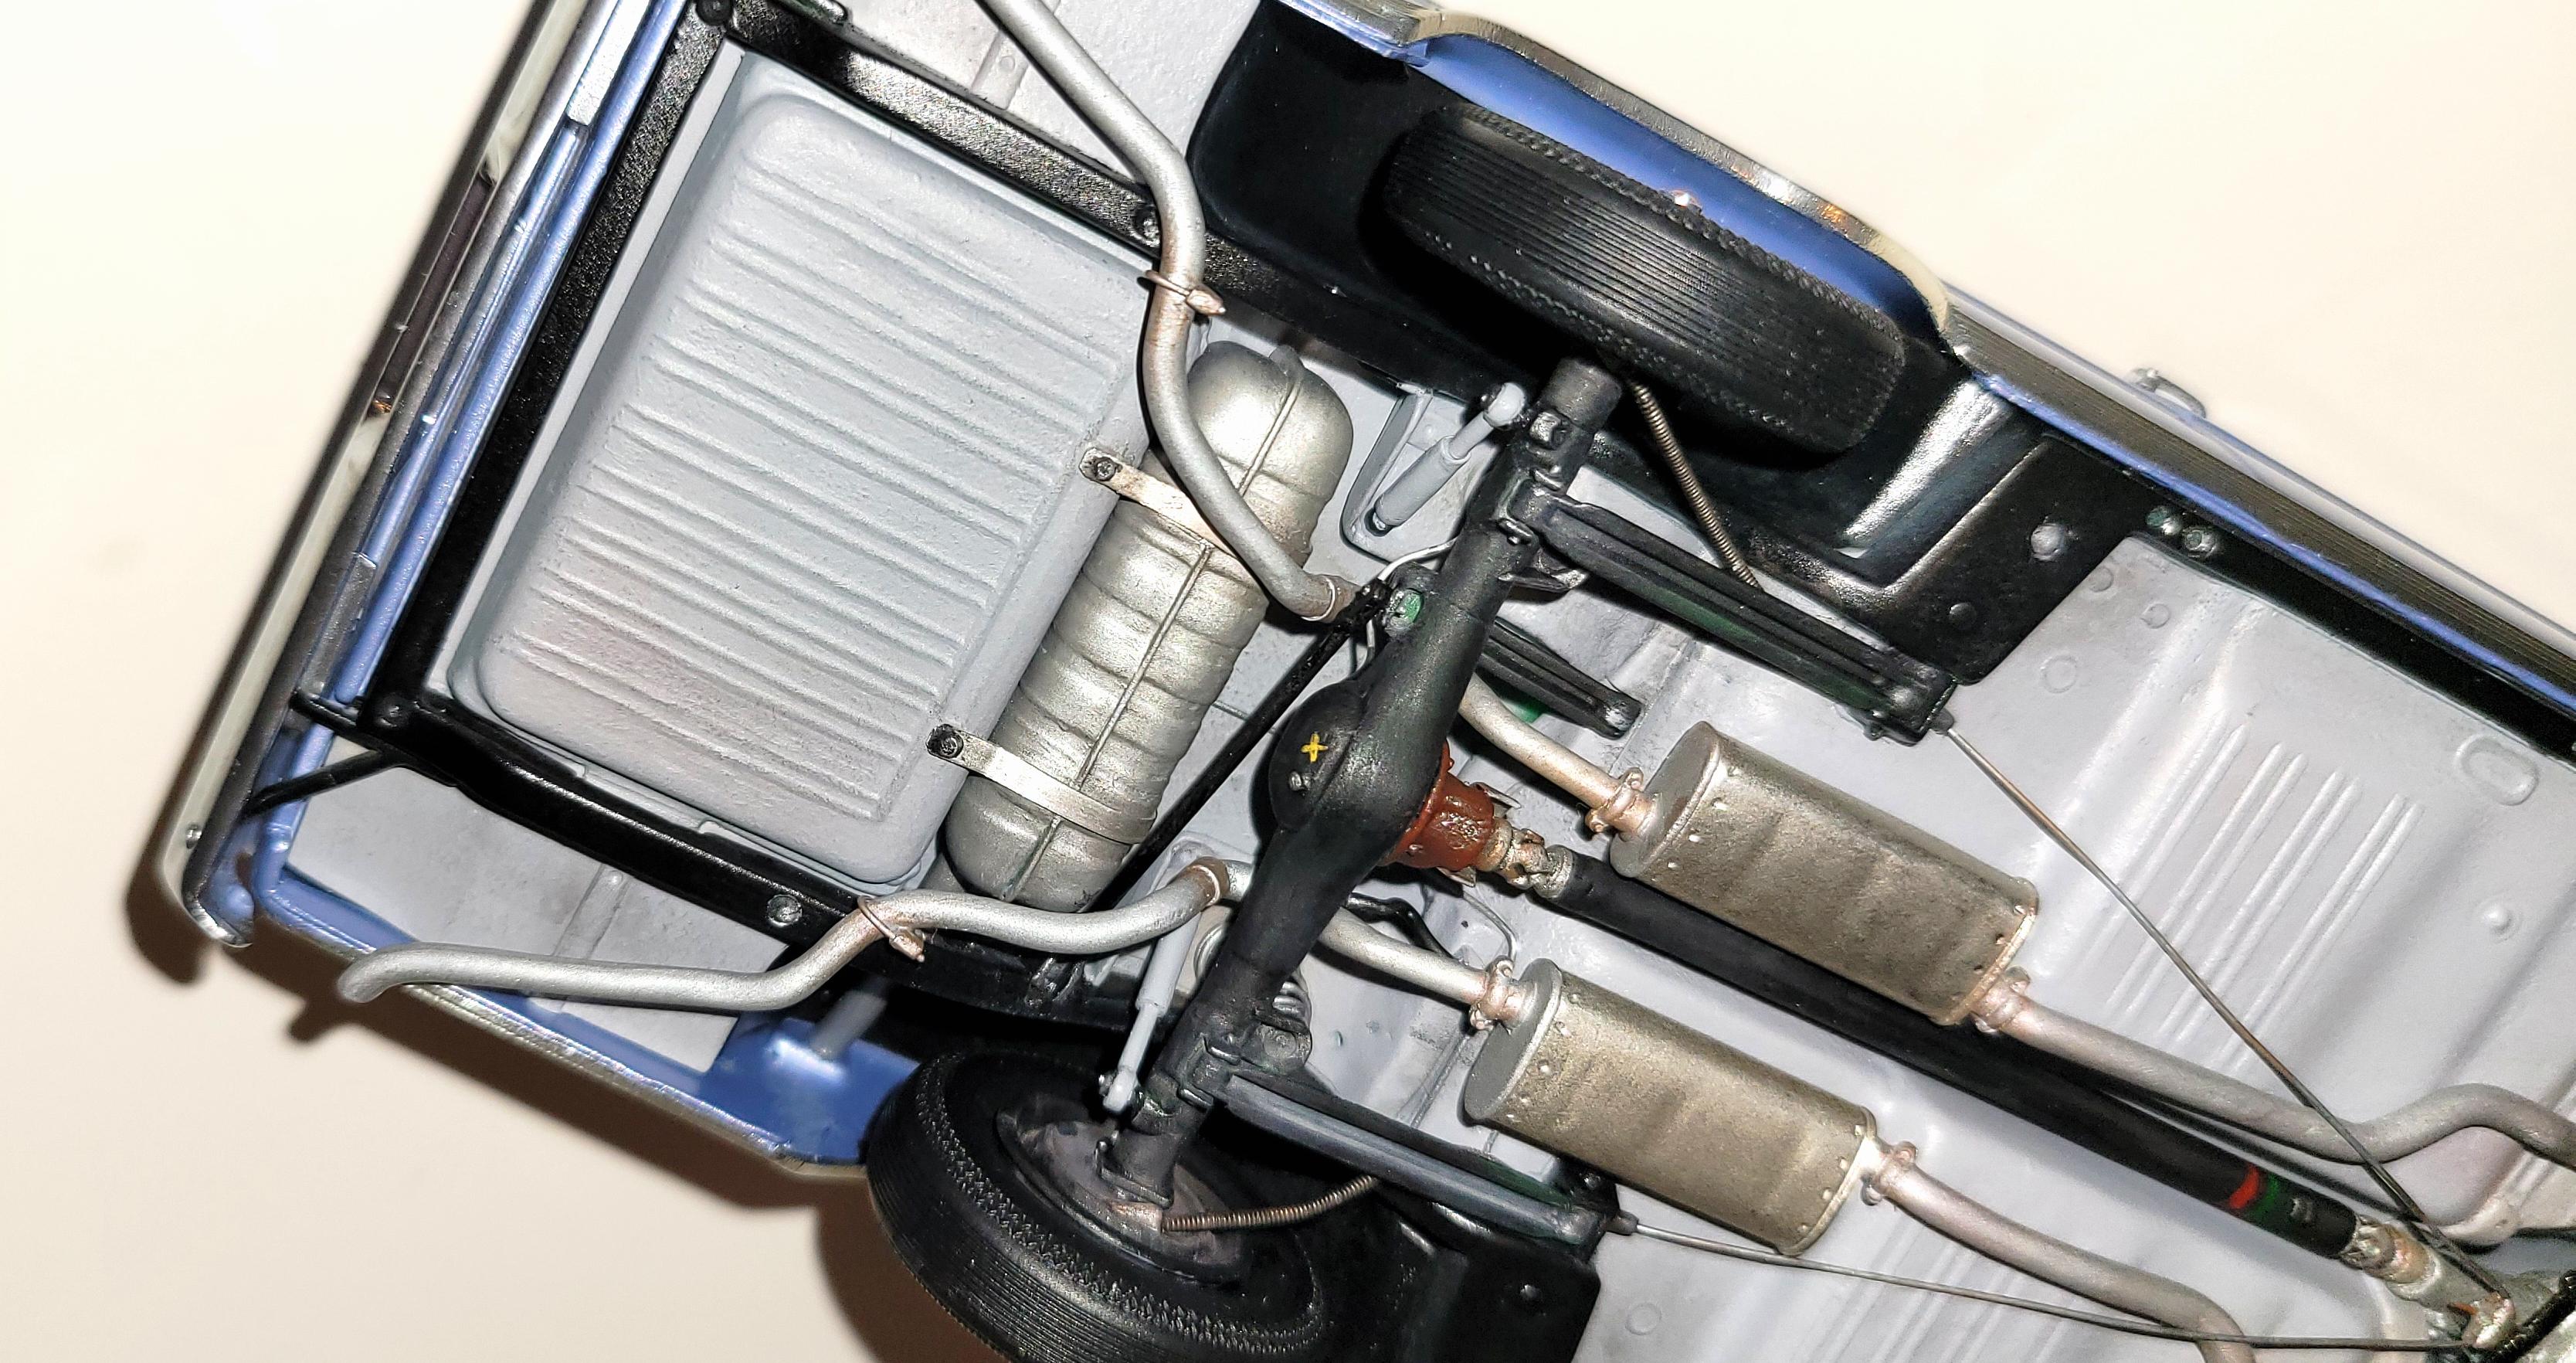
This was Ford's large performance model for 1966, complete with a torquey 428 and top loader 4 speed. Add some 7 Litre badges, a sporty roof line, bucket seats, and 7 Litre wheel covers and you get a very handsome package. Contemporary competition was Chevy's SS 427 Impala and a variety of Chrysler product 440 cars. This is the Round 2 reissue. The molded in rear exhaust area was replaced with part of the AMT '65 Galaxie rear pan. Doors and trunk opened, console reworked, wood grain on dash is cut out from my Corvette catalog.The old tooling produced a windshield that needed body mods to look right. Some of the other usual old tooling issues were present and accounted for such as shallow engraving and simplified suspension parts. The added windshield wipers are built up from thin aluminum flashing, wire, and plastic. Paint is Tamiya rattle can light blue metallic with 'palomino' interior using acrylics. Carpet is black velour. The kit grill / bumpers were reworked to eliminate the usual lumps and bumps so I used Rustoleum Chrome as a reasonable recovering. The kit tires were actually pretty decent so I used 'em. I've still got to place some of the checkered '428' air cleaner decals to give the engine some color. This one faught me !
-
I can not ad much more than other on here have. Read past bad feedback. If it looks unsure to you dont bid. Figure out a price you would pay and ad the shipping cost into the figure for whatever it is. I have purchased way to many kits, parts and supply's on ebay. Only a few problems and they were resolved but one. Being you live on a border town if you had a friend across the bridge things might be easier for you to purchase in the US.
.jpg.b9265433dc8c3b550370b1d0e4e4d2fc.thumb.jpg.915f5b46e3c9402eeaa6972073121c87.jpg)


.jpg.26cbe20796a3223a52c8a9dbd22c1097.jpg)
.jpg.ac238ae93fa1a785e354268c628012d0.jpg)