Rusty92
-
Posts
1,017 -
Joined
-
Last visited
Content Type
Profiles
Forums
Events
Gallery
Everything posted by Rusty92
-
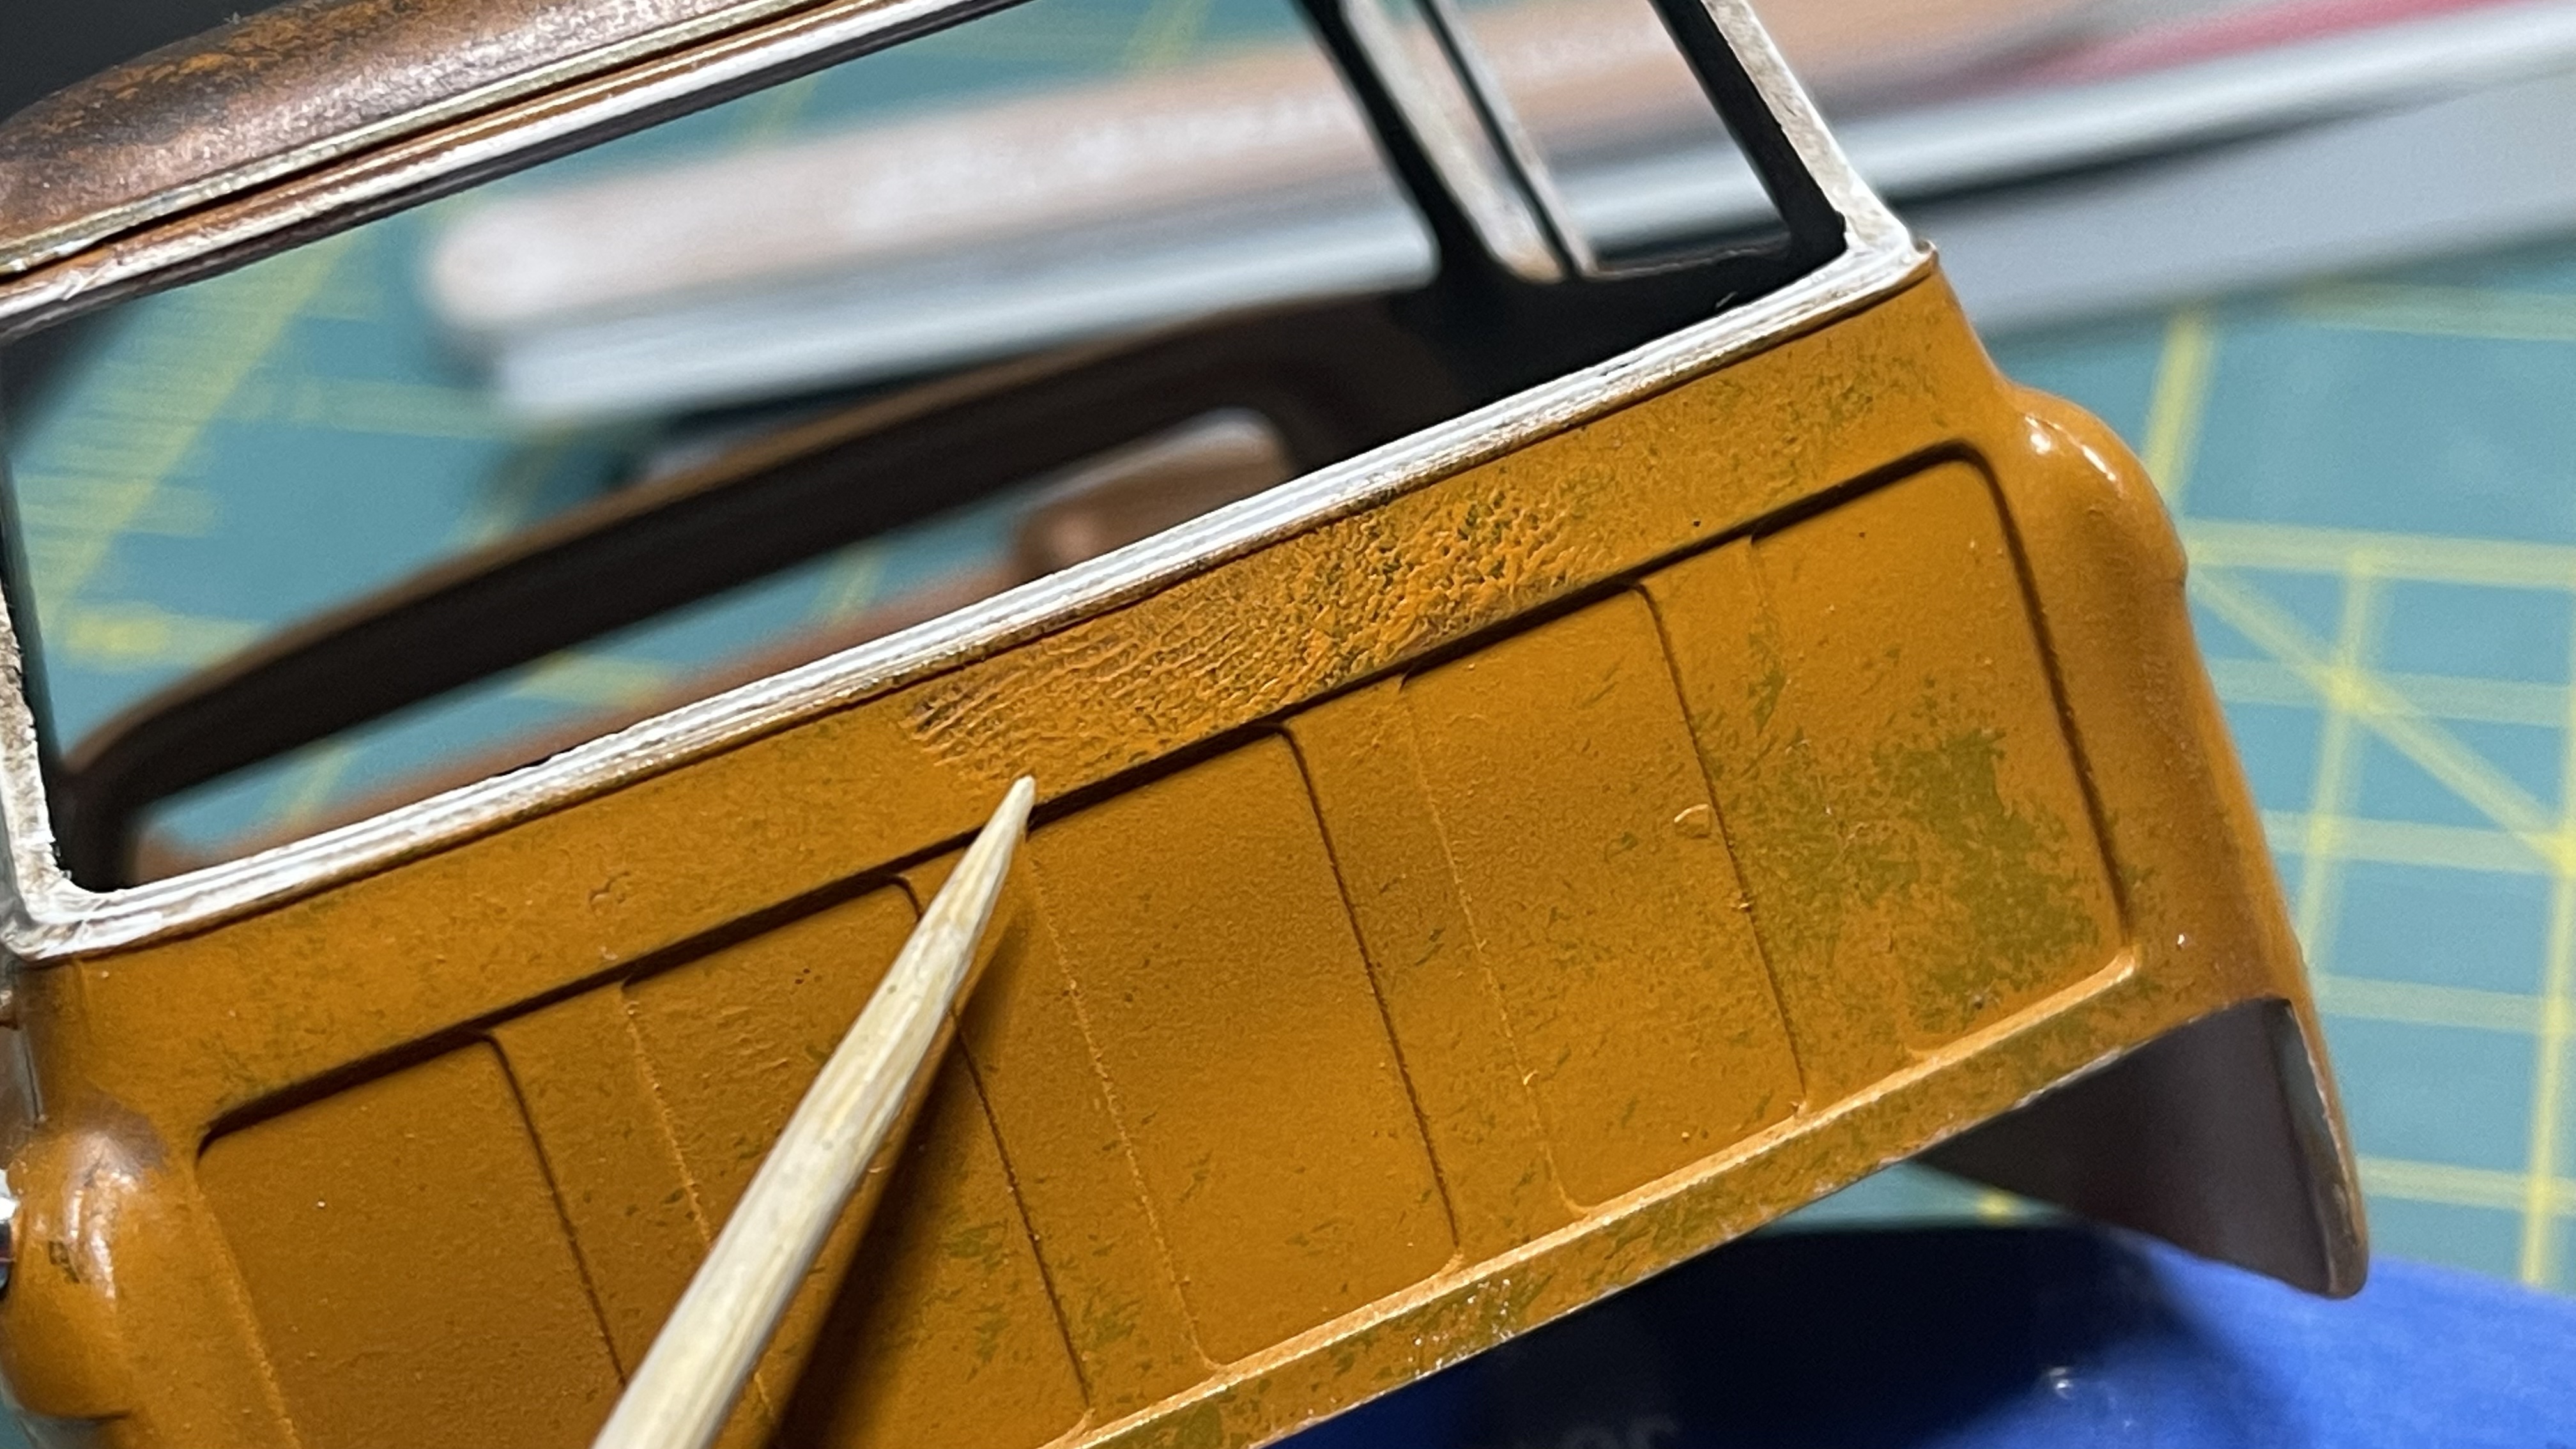
Can’t forget the oil! It’s a good song. A little bit of progress tonight. I used the hairspray method to chip my inner fenders. I did not go overboard with the rust effects. I’ll let it dry a bit more and dry brush some more dirt and grime on to it.

-
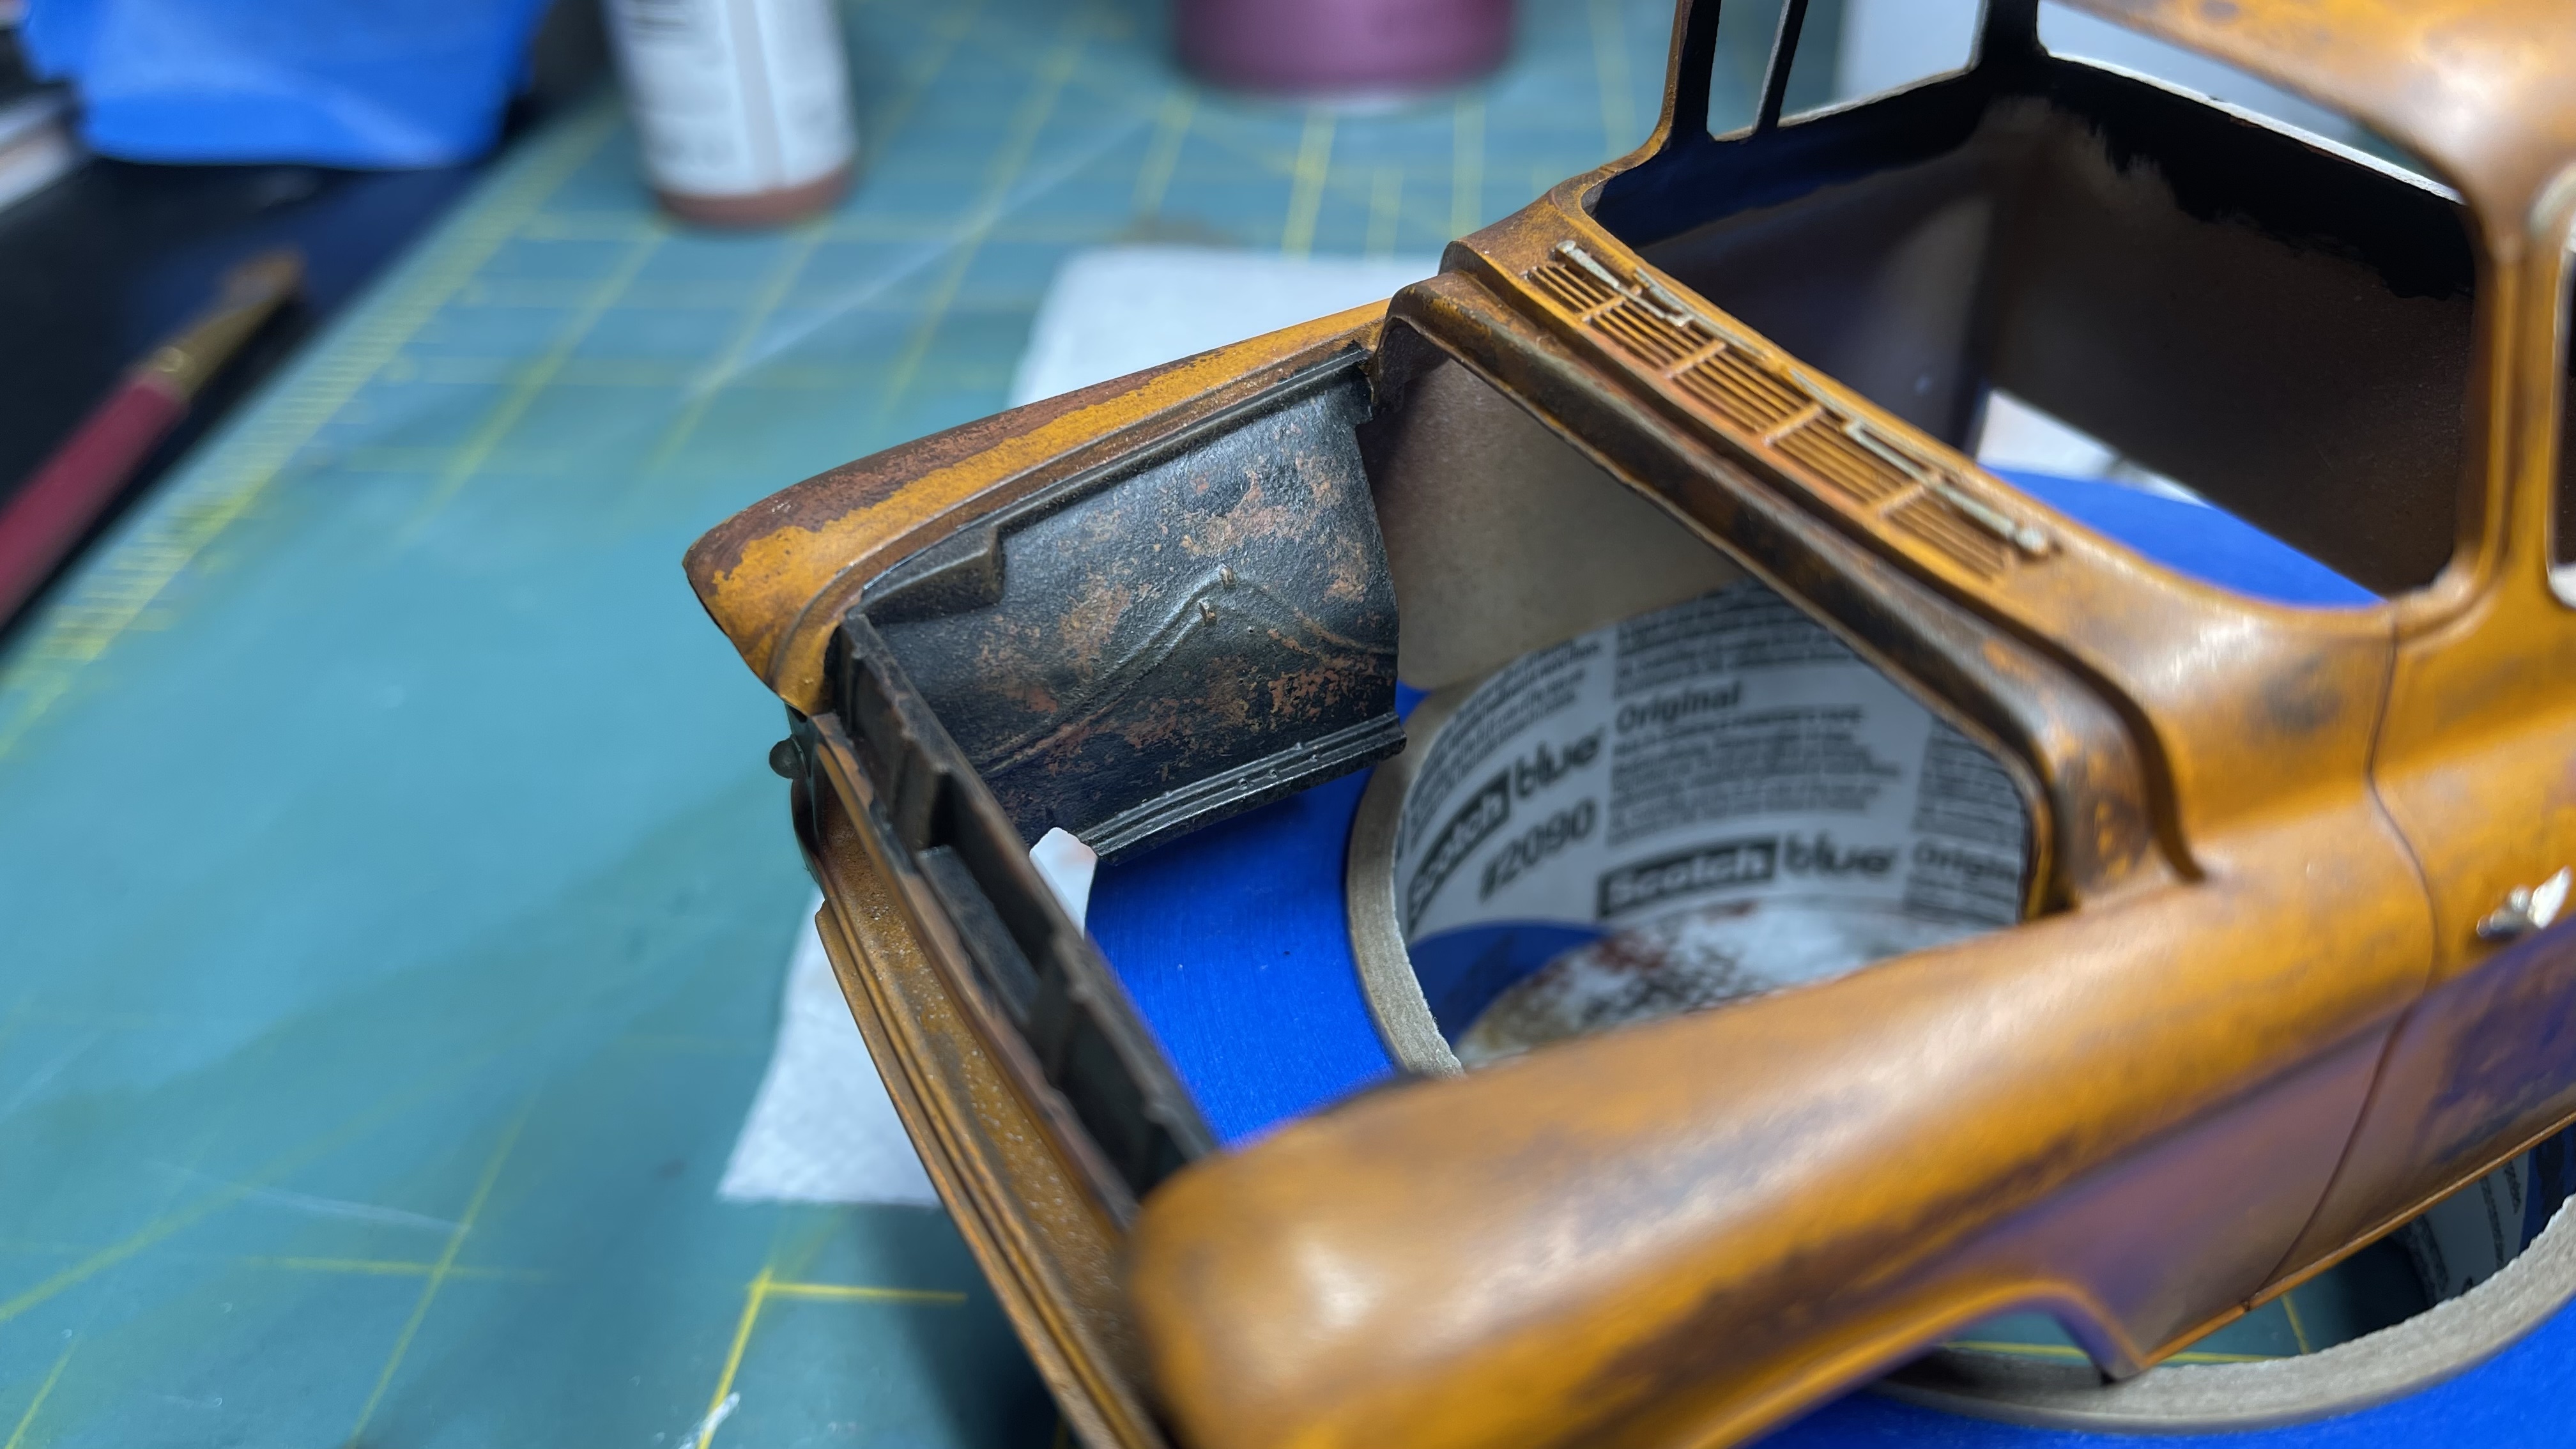
Thanks everyone for the encouragement! I got a little bit done tonight. There are two obvious flaws in my paintwork on the cab. Thanks to my fat fingers! I was able to tackle the one on the cowl tonight, and I think it turned out pretty good. Good enough for me anyways. After all, the hood will be closed most of the time. See below: Hopefully tomorrow I’ll have some time to work on the back of the cab. I also got the inner fenders and core support painted. Not worried about the uneven lines as they will be blended with washes, grime, and other weathering materials. Thanks for stopping by and checking it out!
-
Not much change since one year ago. Finally got my new desk set up and I’m ready to finish this one. I have to order some paint but this will be one of the first to get done. Her it sits now. I do have 6 lug wheels, just not painted yet.
-
Today I finally got my hobby room set up at my new place. I haven’t really built a model in over a year and haven’t completed one in probably closer to two. I hope to get back into the hobby soon! I need to re-decorate the room I think haha!
-
This is a great tip. Thanks for sharing.
-
Ahh the ‘56. My favorite of the tri-fives!! Fantastic work!
-
I built this kit as well. It was a challenge for me, I wish I would have taken more time. You’ve inspired me to pick it up and give it another go! I am enjoying your work as always!
-
This was some excellent information. Thank you for sharing.
- 92 replies
-
- 1
-

-
- mpc
- super stocker
- (and 1 more)
-
1/24 Heller Renault Estafette
Rusty92 replied to The Creative Explorer's topic in Car Kit News & Reviews
That looks pretty cool! -
Clearly Scale at Model Builder's Warehouse
Rusty92 replied to Randy D's topic in Car Aftermarket / Resin / 3D Printed
Wow! I am pleased to hear the news!!! -
This is cool
-
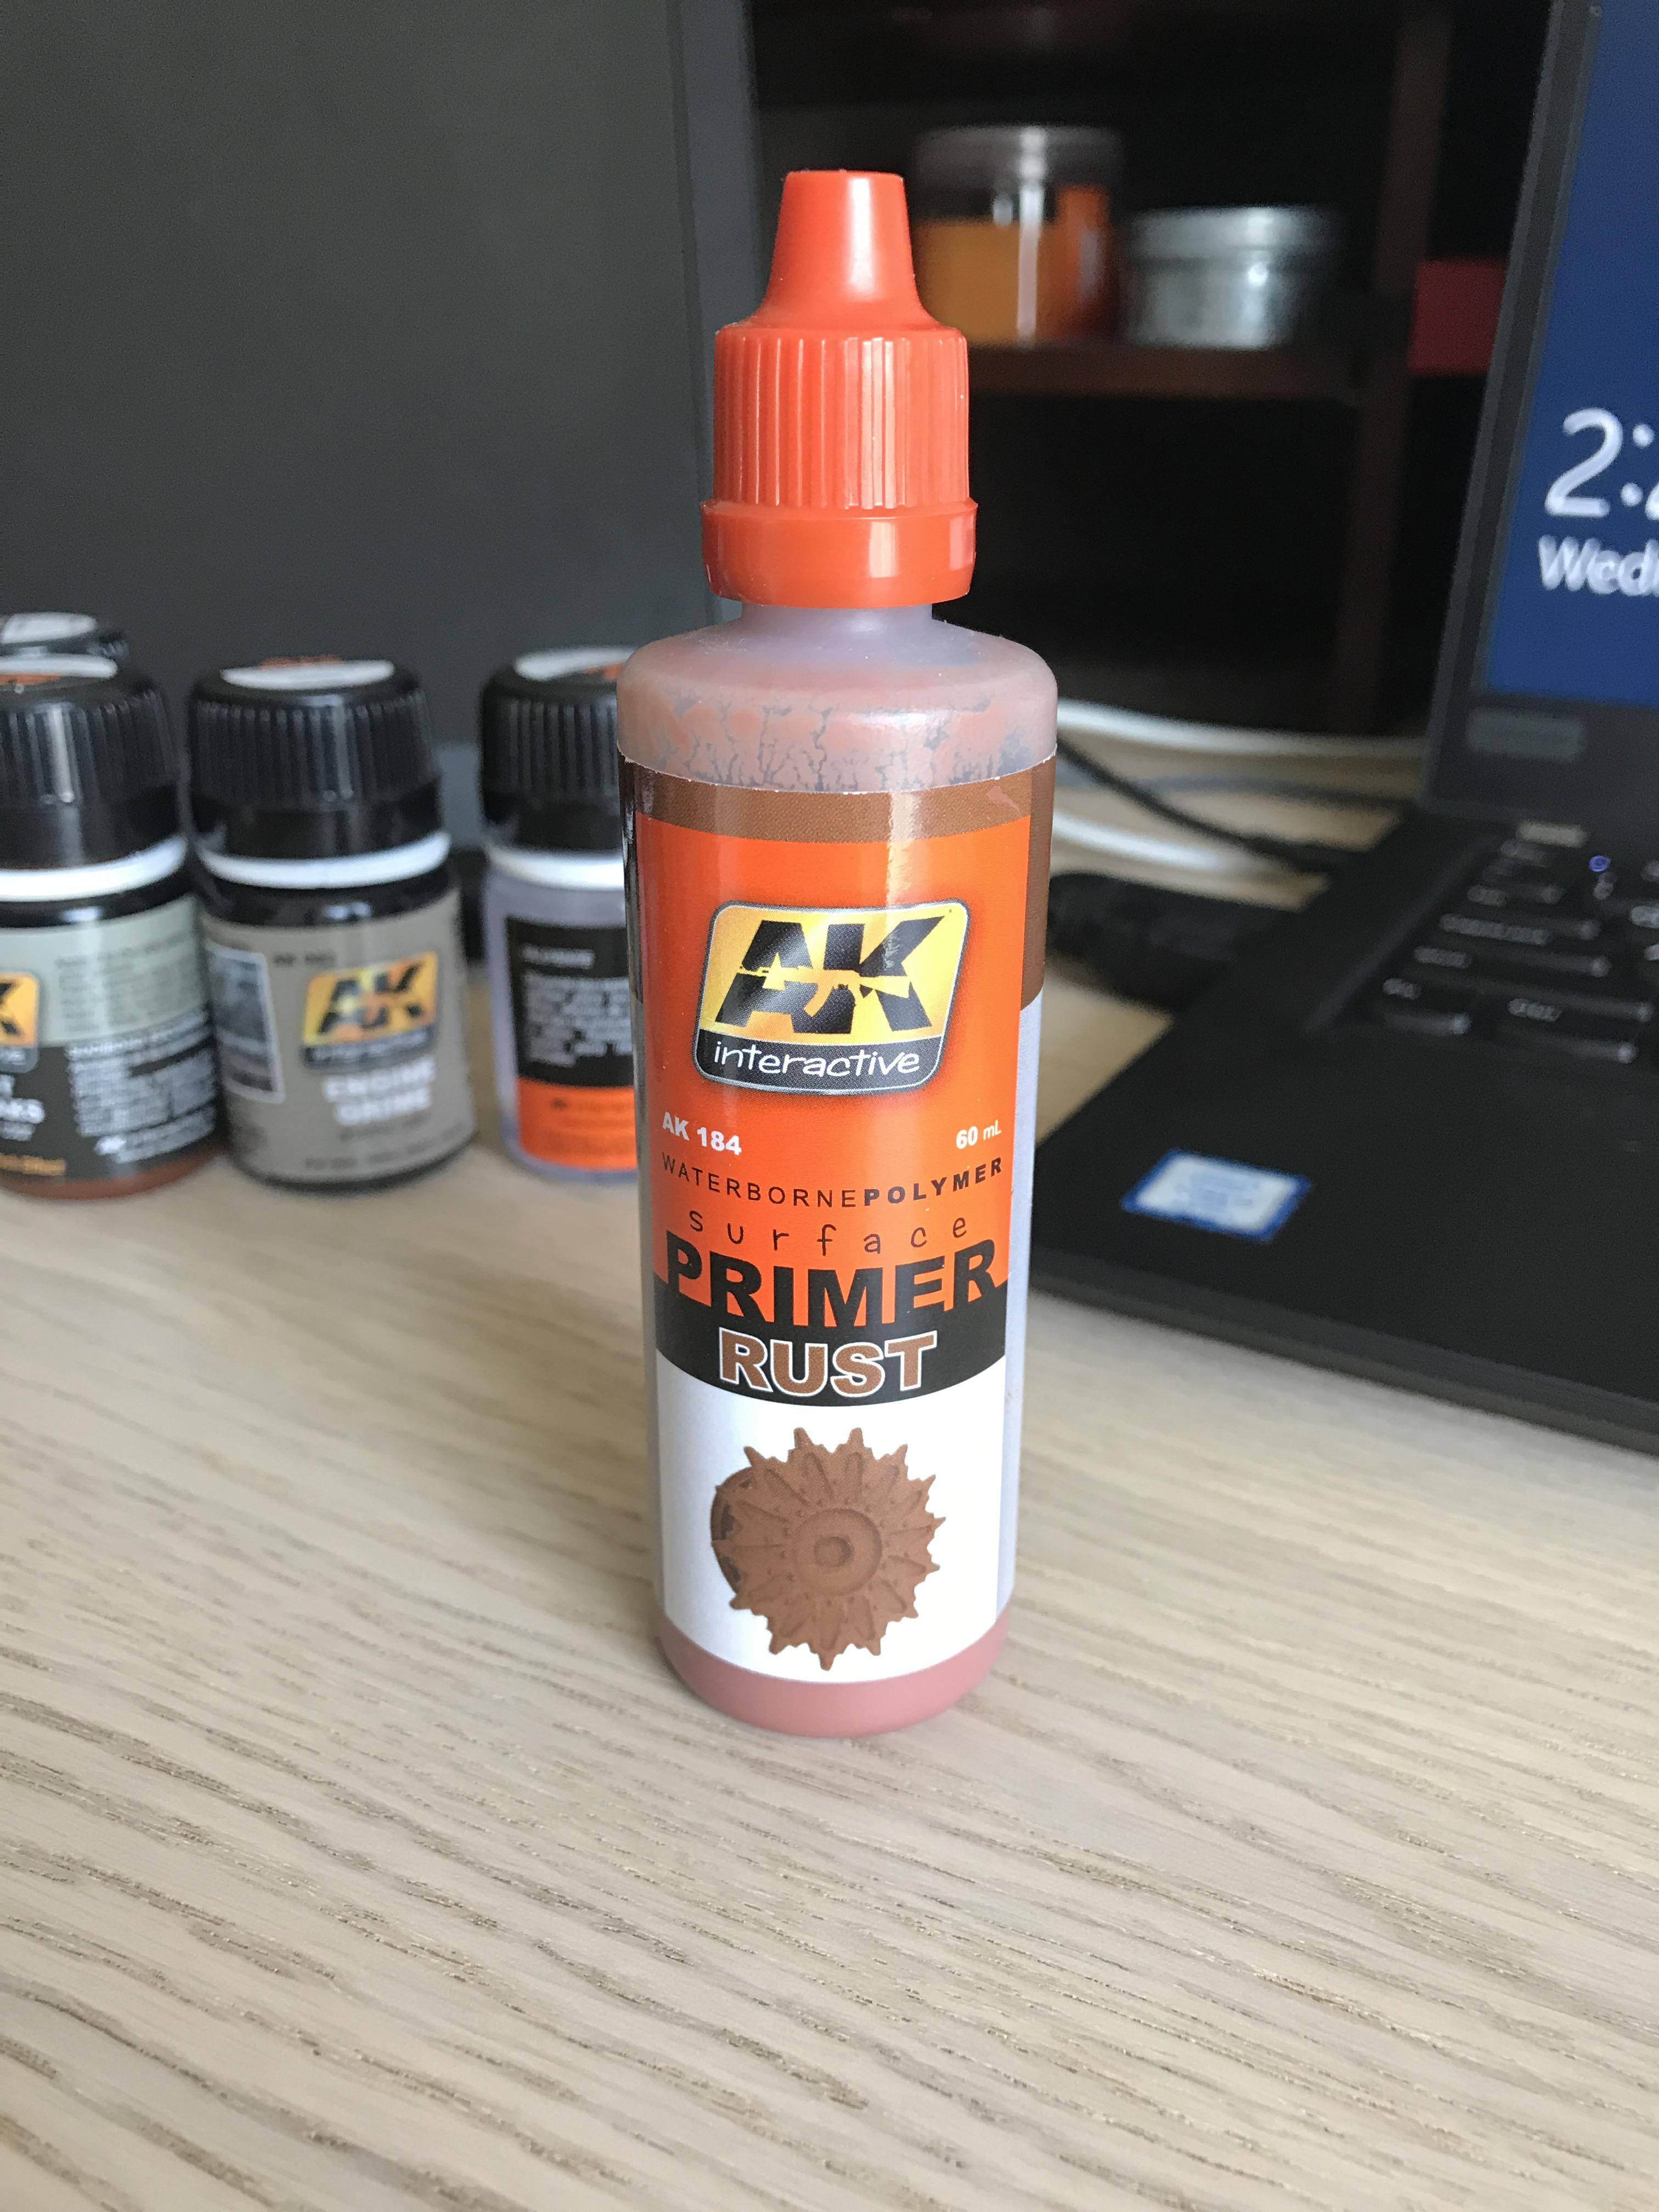
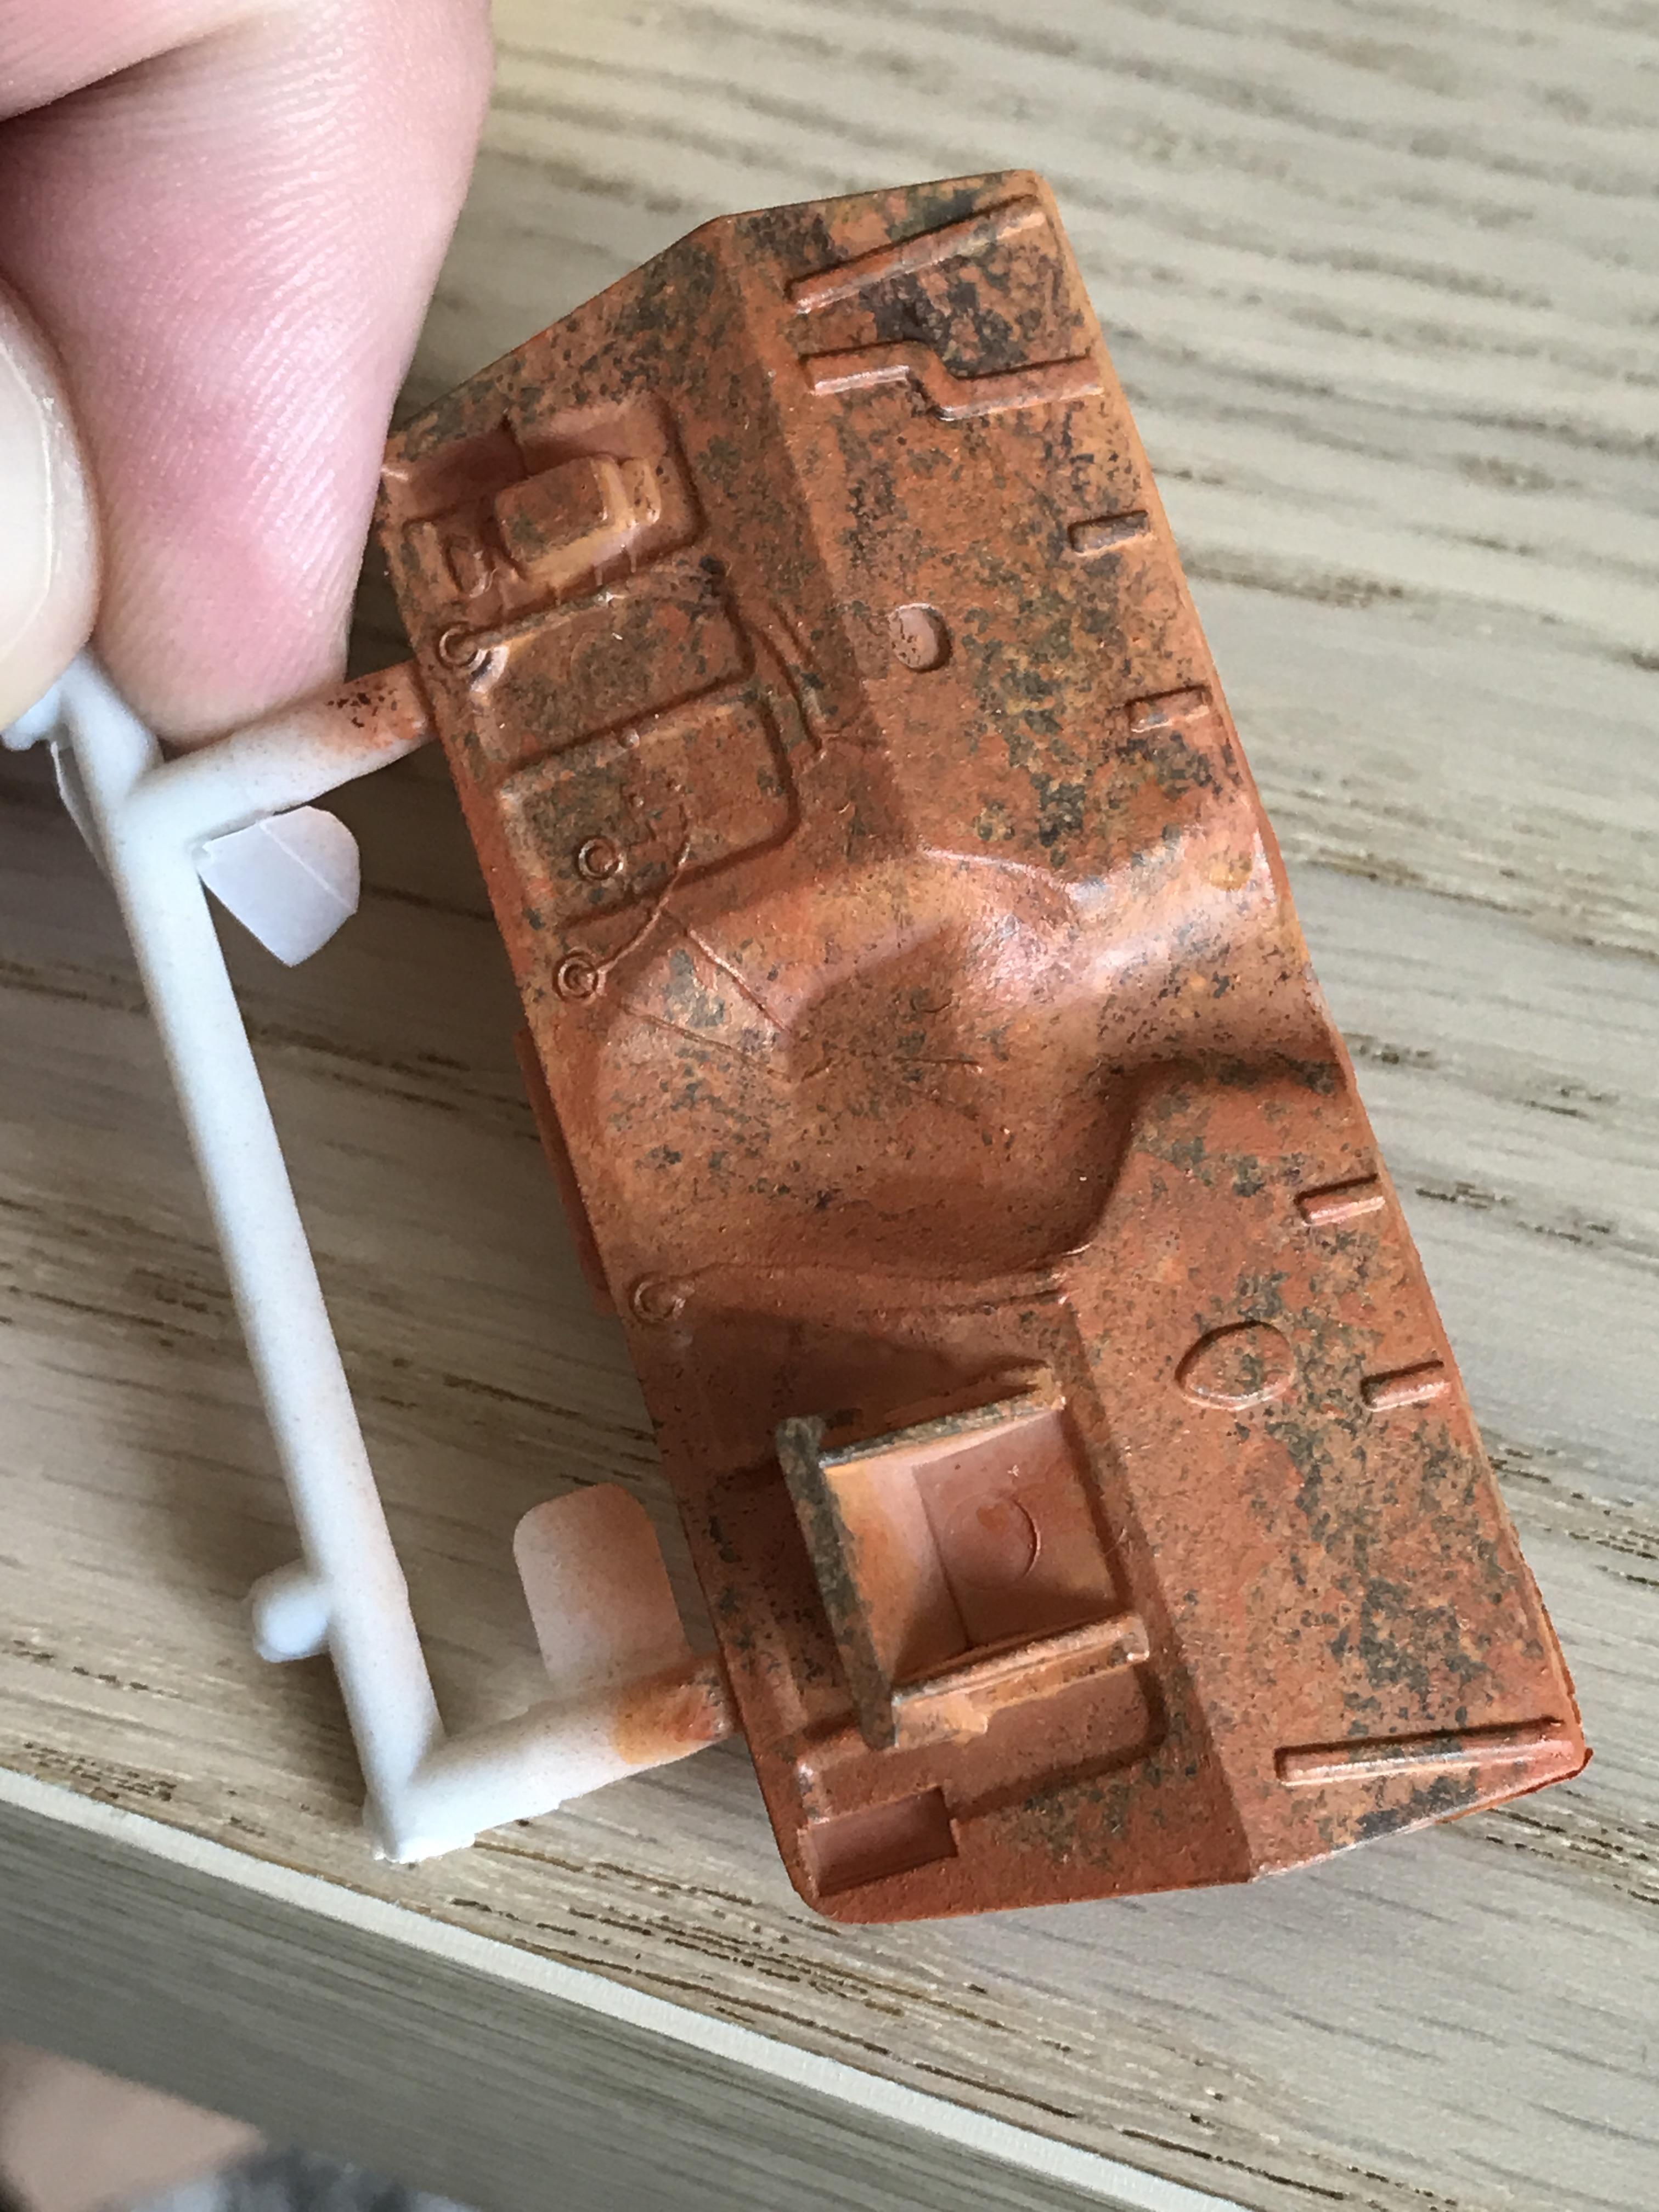
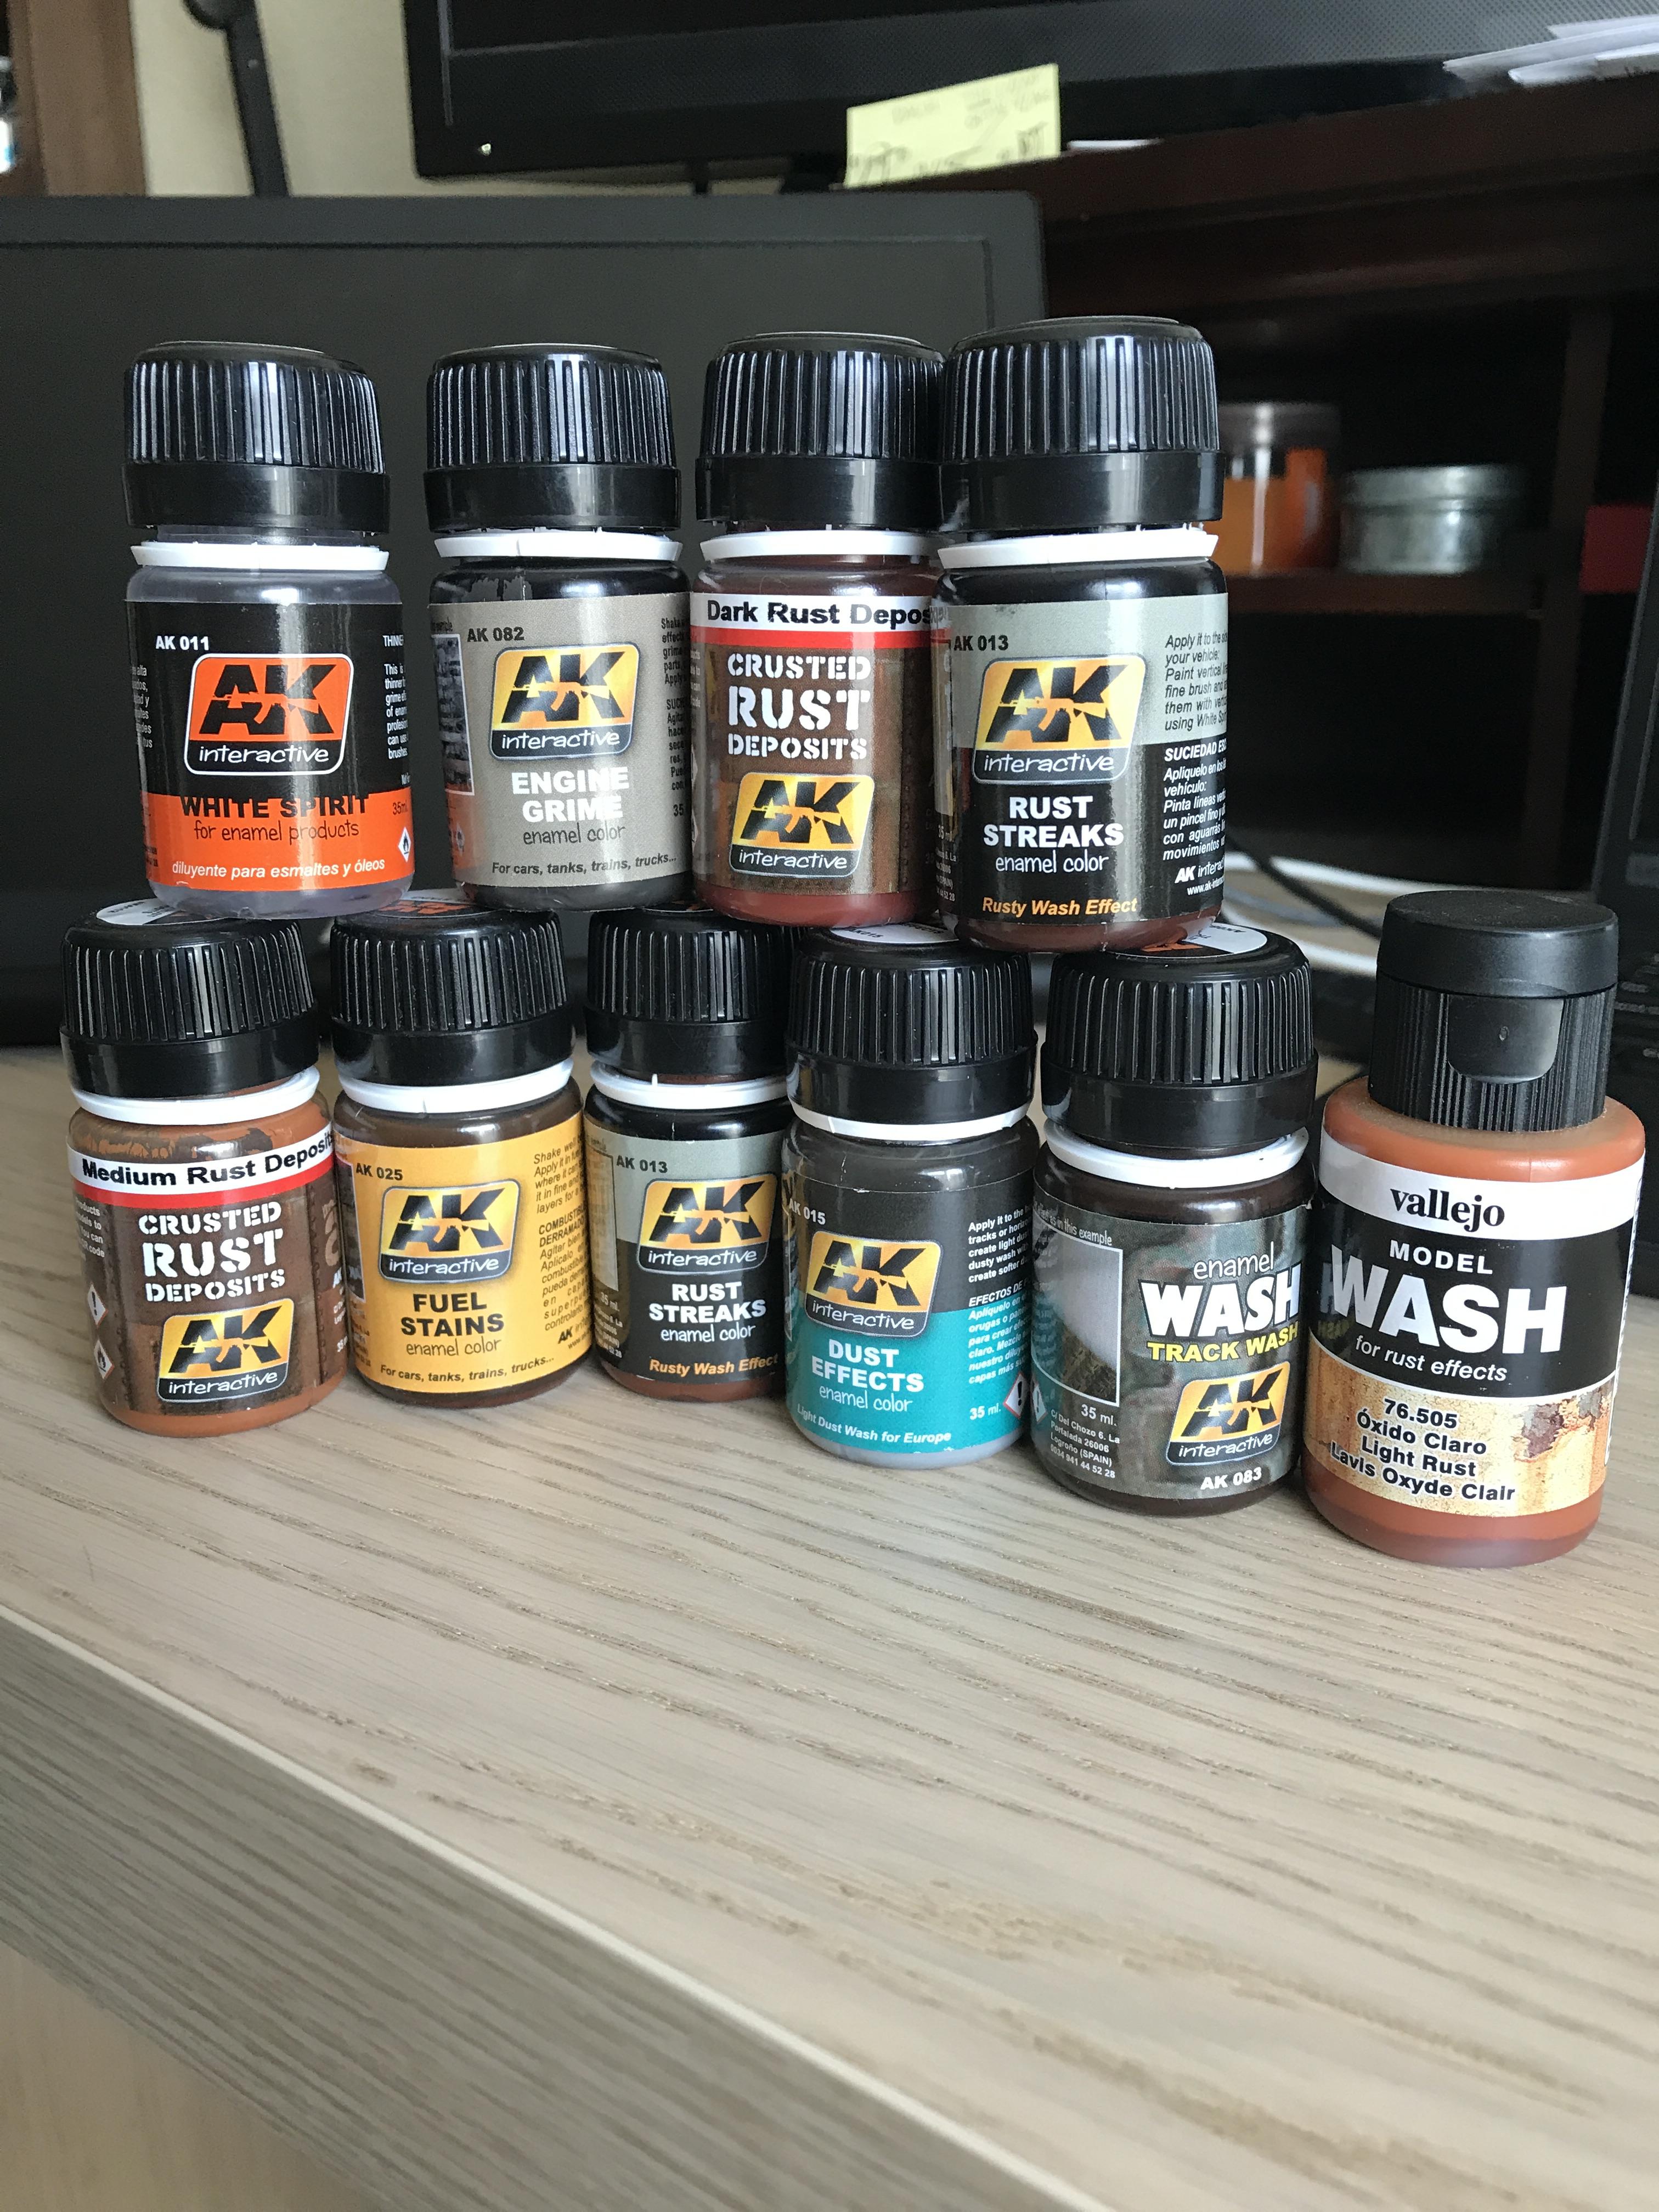
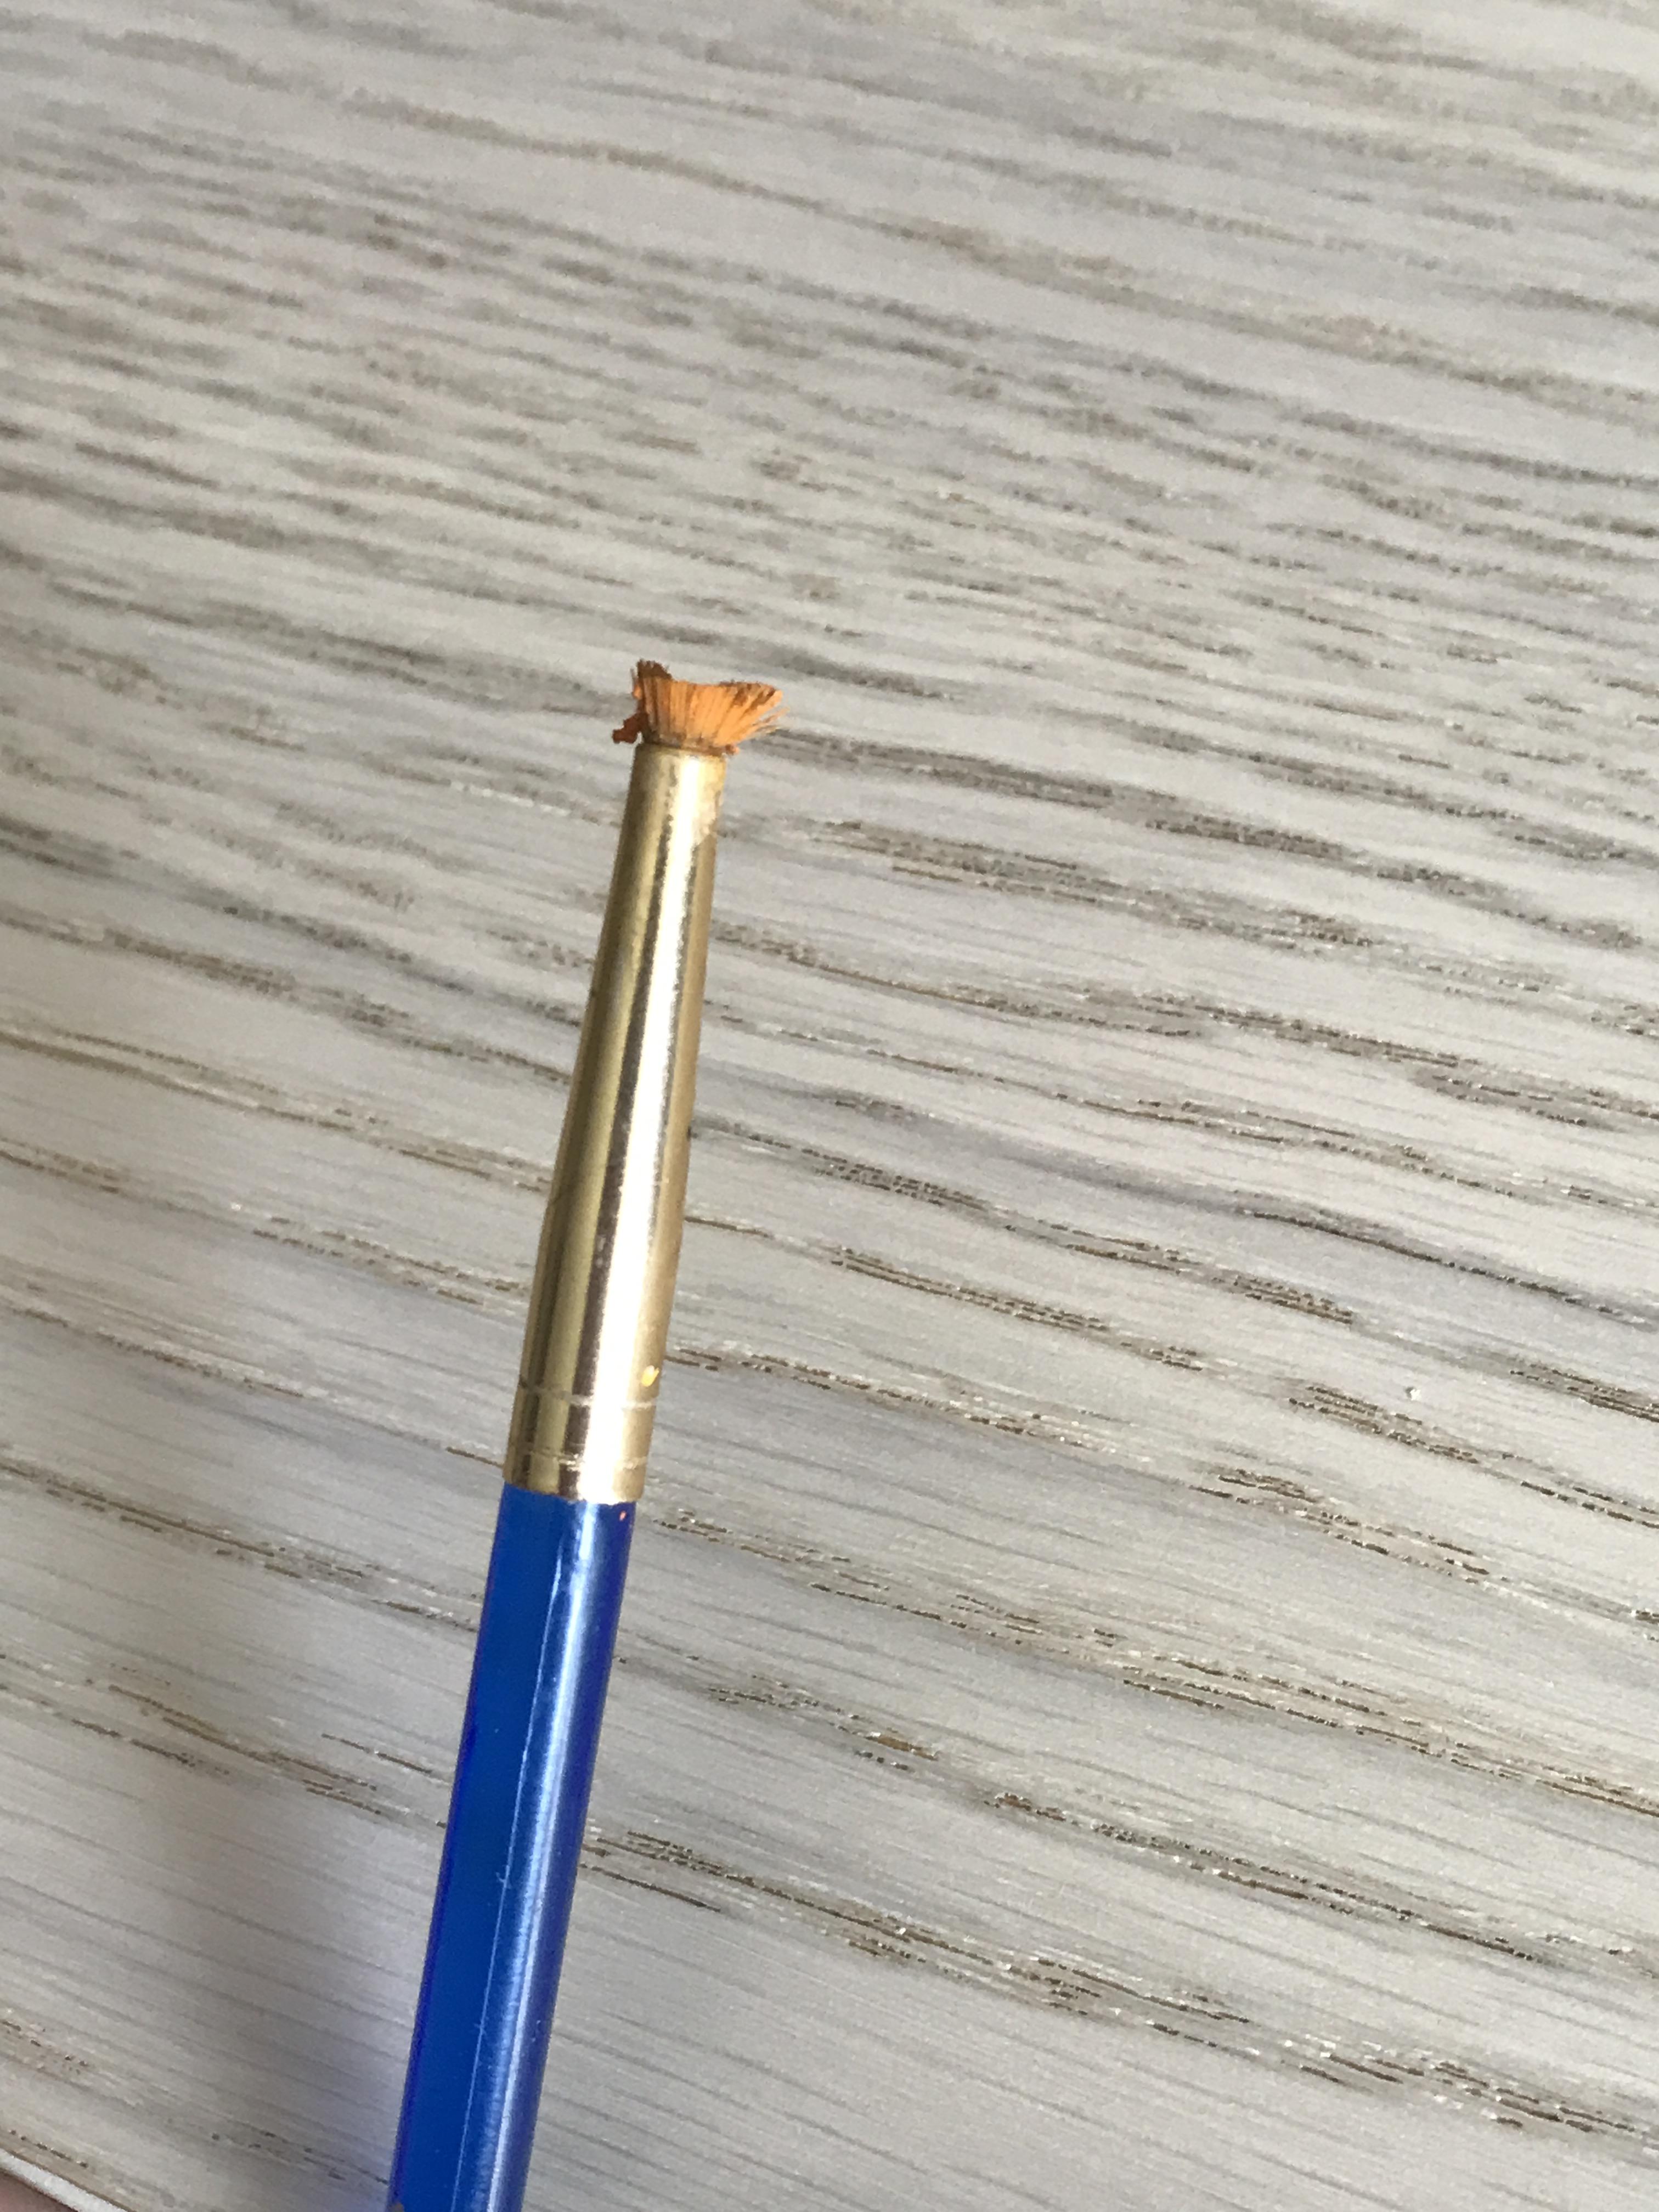
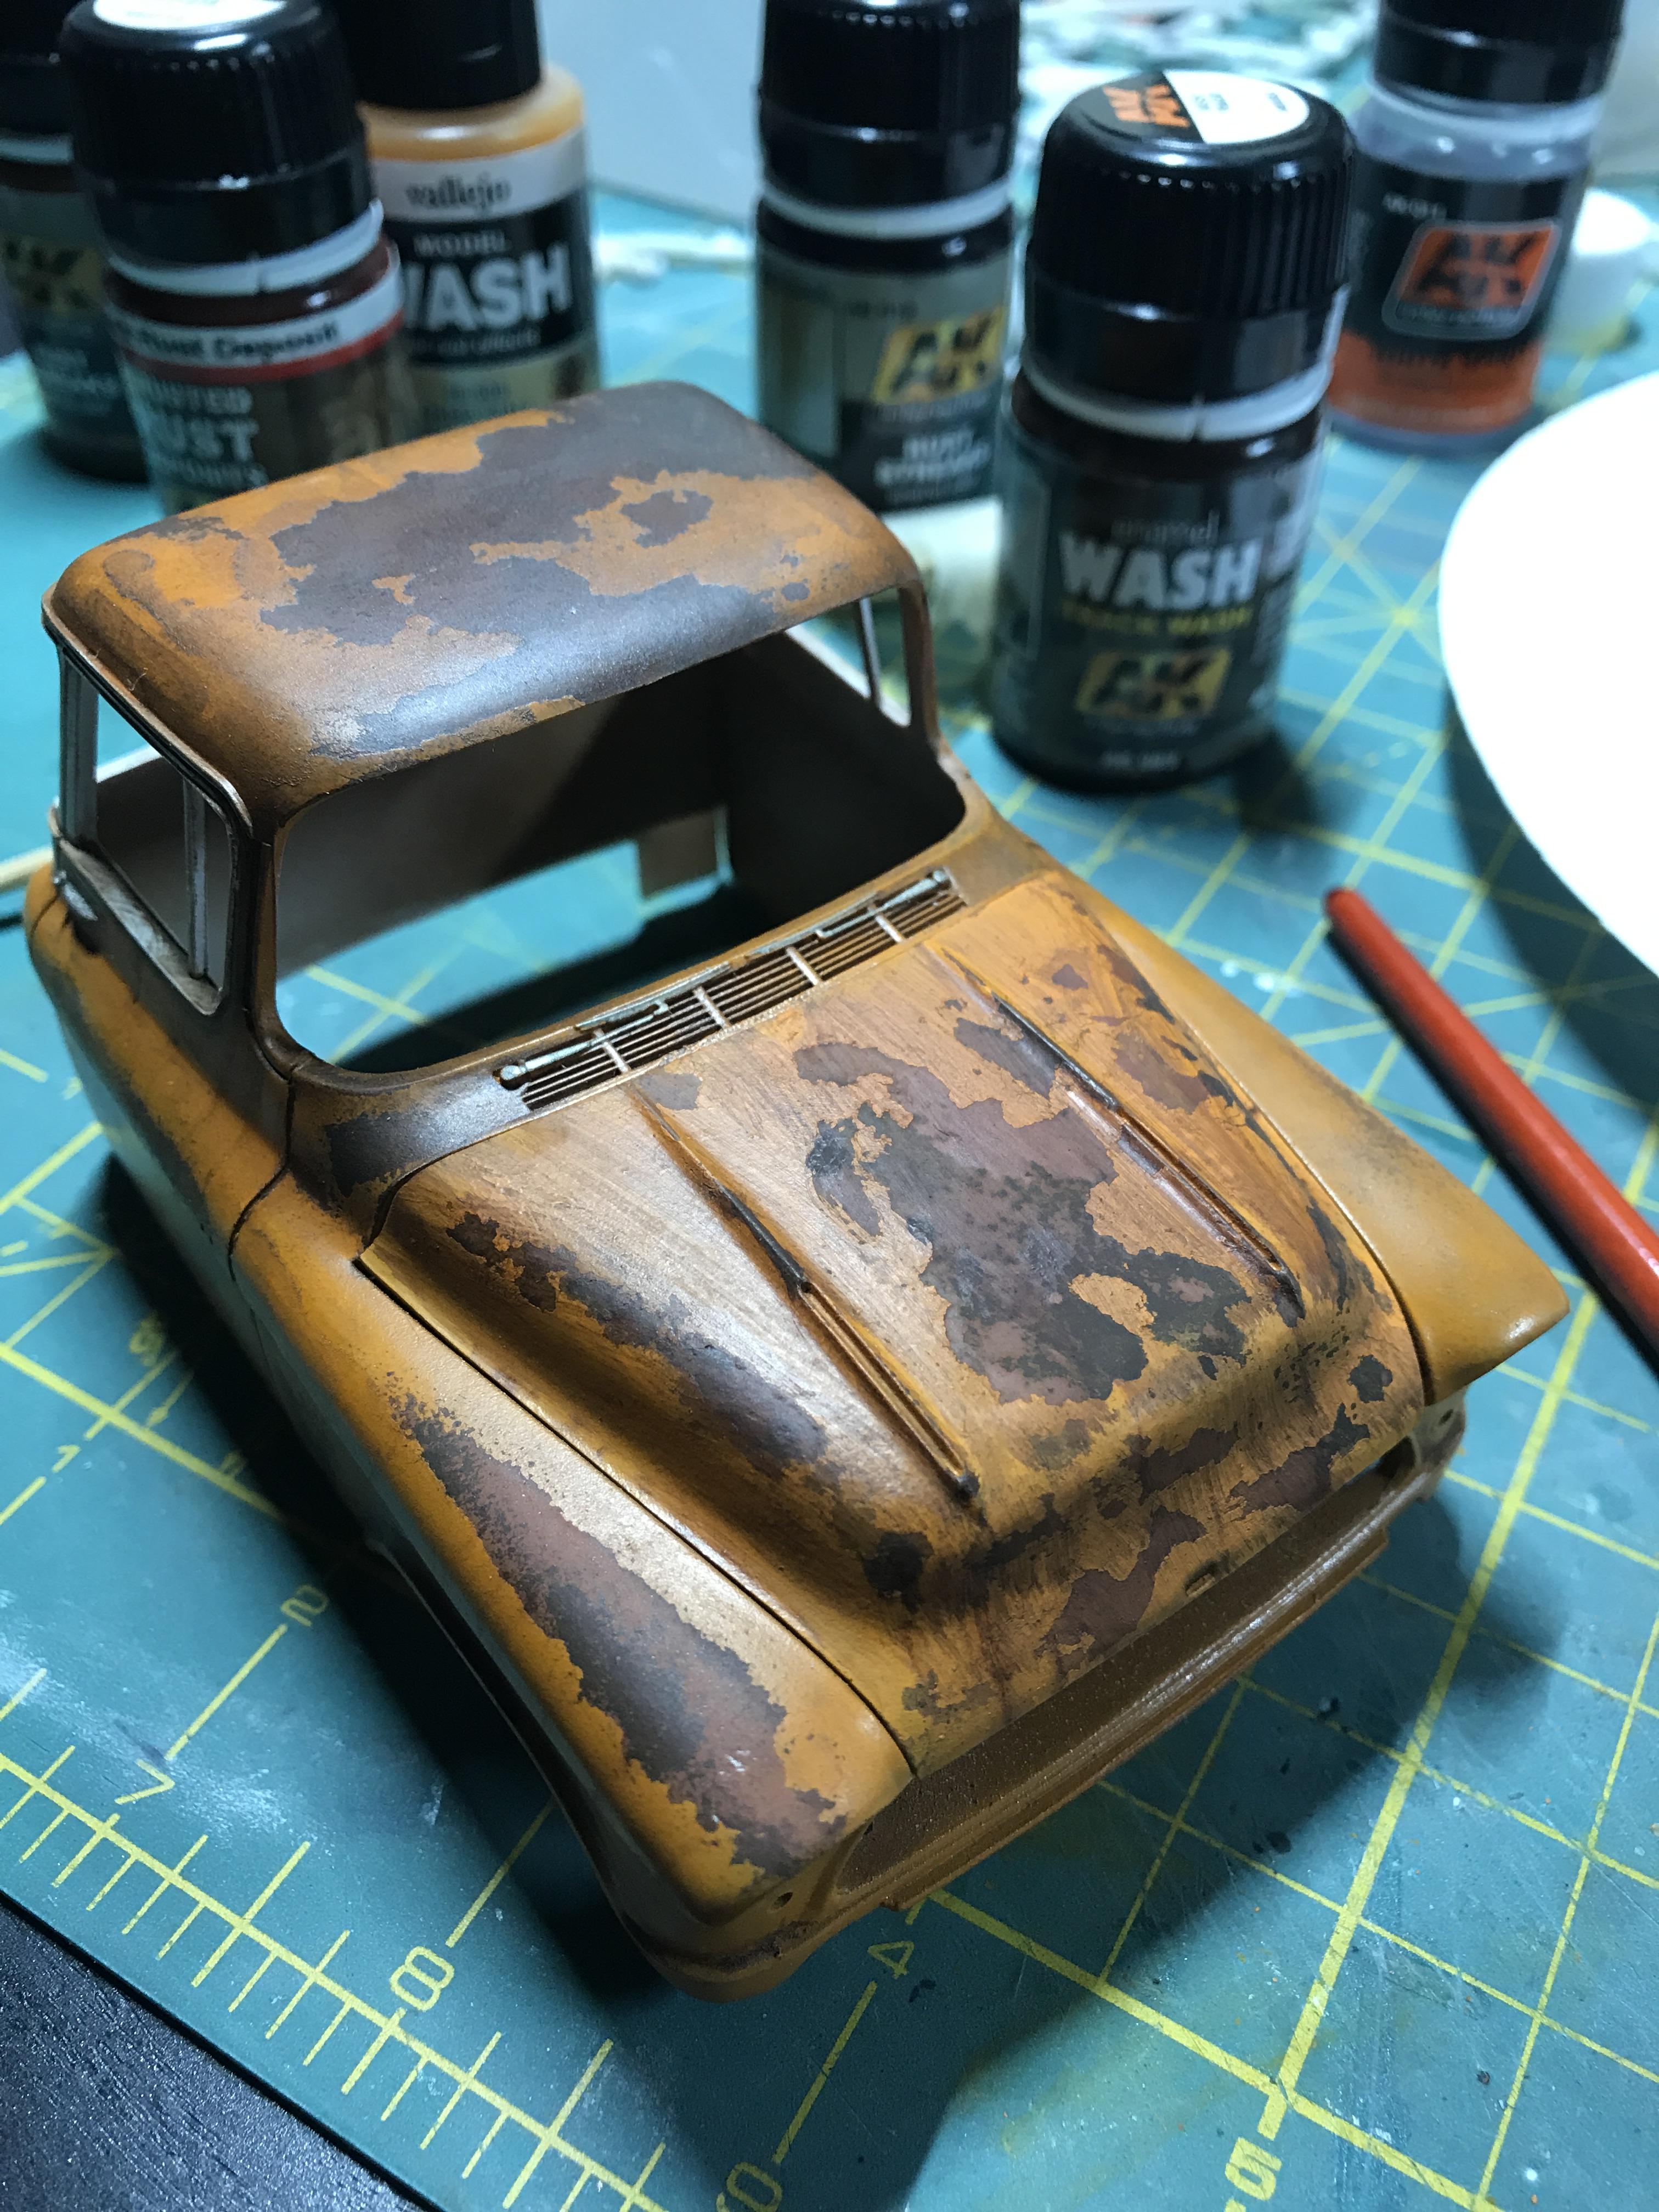
@HJK, thank you for the kind words. I will try to list out my steps as best as possible, if you have any questions on steps that may be unclear, please feel free to ask. 1) all body parts are primered in AK Interactive surface primer - rust. It is a very runny primer so I usually do several light layers. No more than 3 so I don’t lose detail. 2) I take a sponge (I prefer the yellow ones you can get at craft stores) and cut off a chunk, and distress the edges to create a random edge. After doing that I apply a variety of AK or Mig paints via the sponge. I use these 3 most often it seems, but they make a ton as I’m sure you know. As they say, a dab will do you. Make sure your sponge is not too saturated, change up how you hold it and where the it makes contact with the model. You’ll want to take a picture of this to use in step 5. 3) Once that layer of paint has dried for a few days, give the model 2 light coats of hair spray and allow that to fully dry. Don’t worry if it goes on a little heavy, you can wipe it off and it will also evaporate a little bit. Cheap hairspray will work just as well as the high dollar stuff! 4) The hairspray should be dry after about an hour or so. Then you can paint the model/part your color of choice as you normally would. Or keep it lighter in some spots if you please to give it a faded look. 5) let the paint dry for a few hours (maybe more depending on your paint) and begin chipping away at the layer of paint you just applied. Reference the photo in step 2 to focus on chipping the paint off where the rust was created underneath. To chip paint, I recommend doing a YouTube search, or clicking Here. I use water when the paint is coming off easily, and thinner when it is putting up a fight. It really depends on the paint and cure time. You can accomplish chipping with a stiff brush, or a soft brush and cutting off the hairs almost down to the nub. Here is a brush that I use to do my work. It can be quite aggressive at times so be careful. You can go through the hairspray and primer if you’re too rough. Below is the brush I use: 6) After this I apply a variety of washes to the model. Rust streaks are accomplished by making vertical lines down the model with the rust enamel wash, and later blending them with white spirits. I watched This video to learn how to do this effect better. It is really handy. And if you goof it up, just wipe it up with some spirits and try again. You can put on the rust lines thick like in the video and “neck” them down to a smaller streak. For washes, I will liberally coat the model with track wash and let it sit to dry just a bit. Then I blend the wash better with enamel spirits, eliminating any brush marks along the way.
-
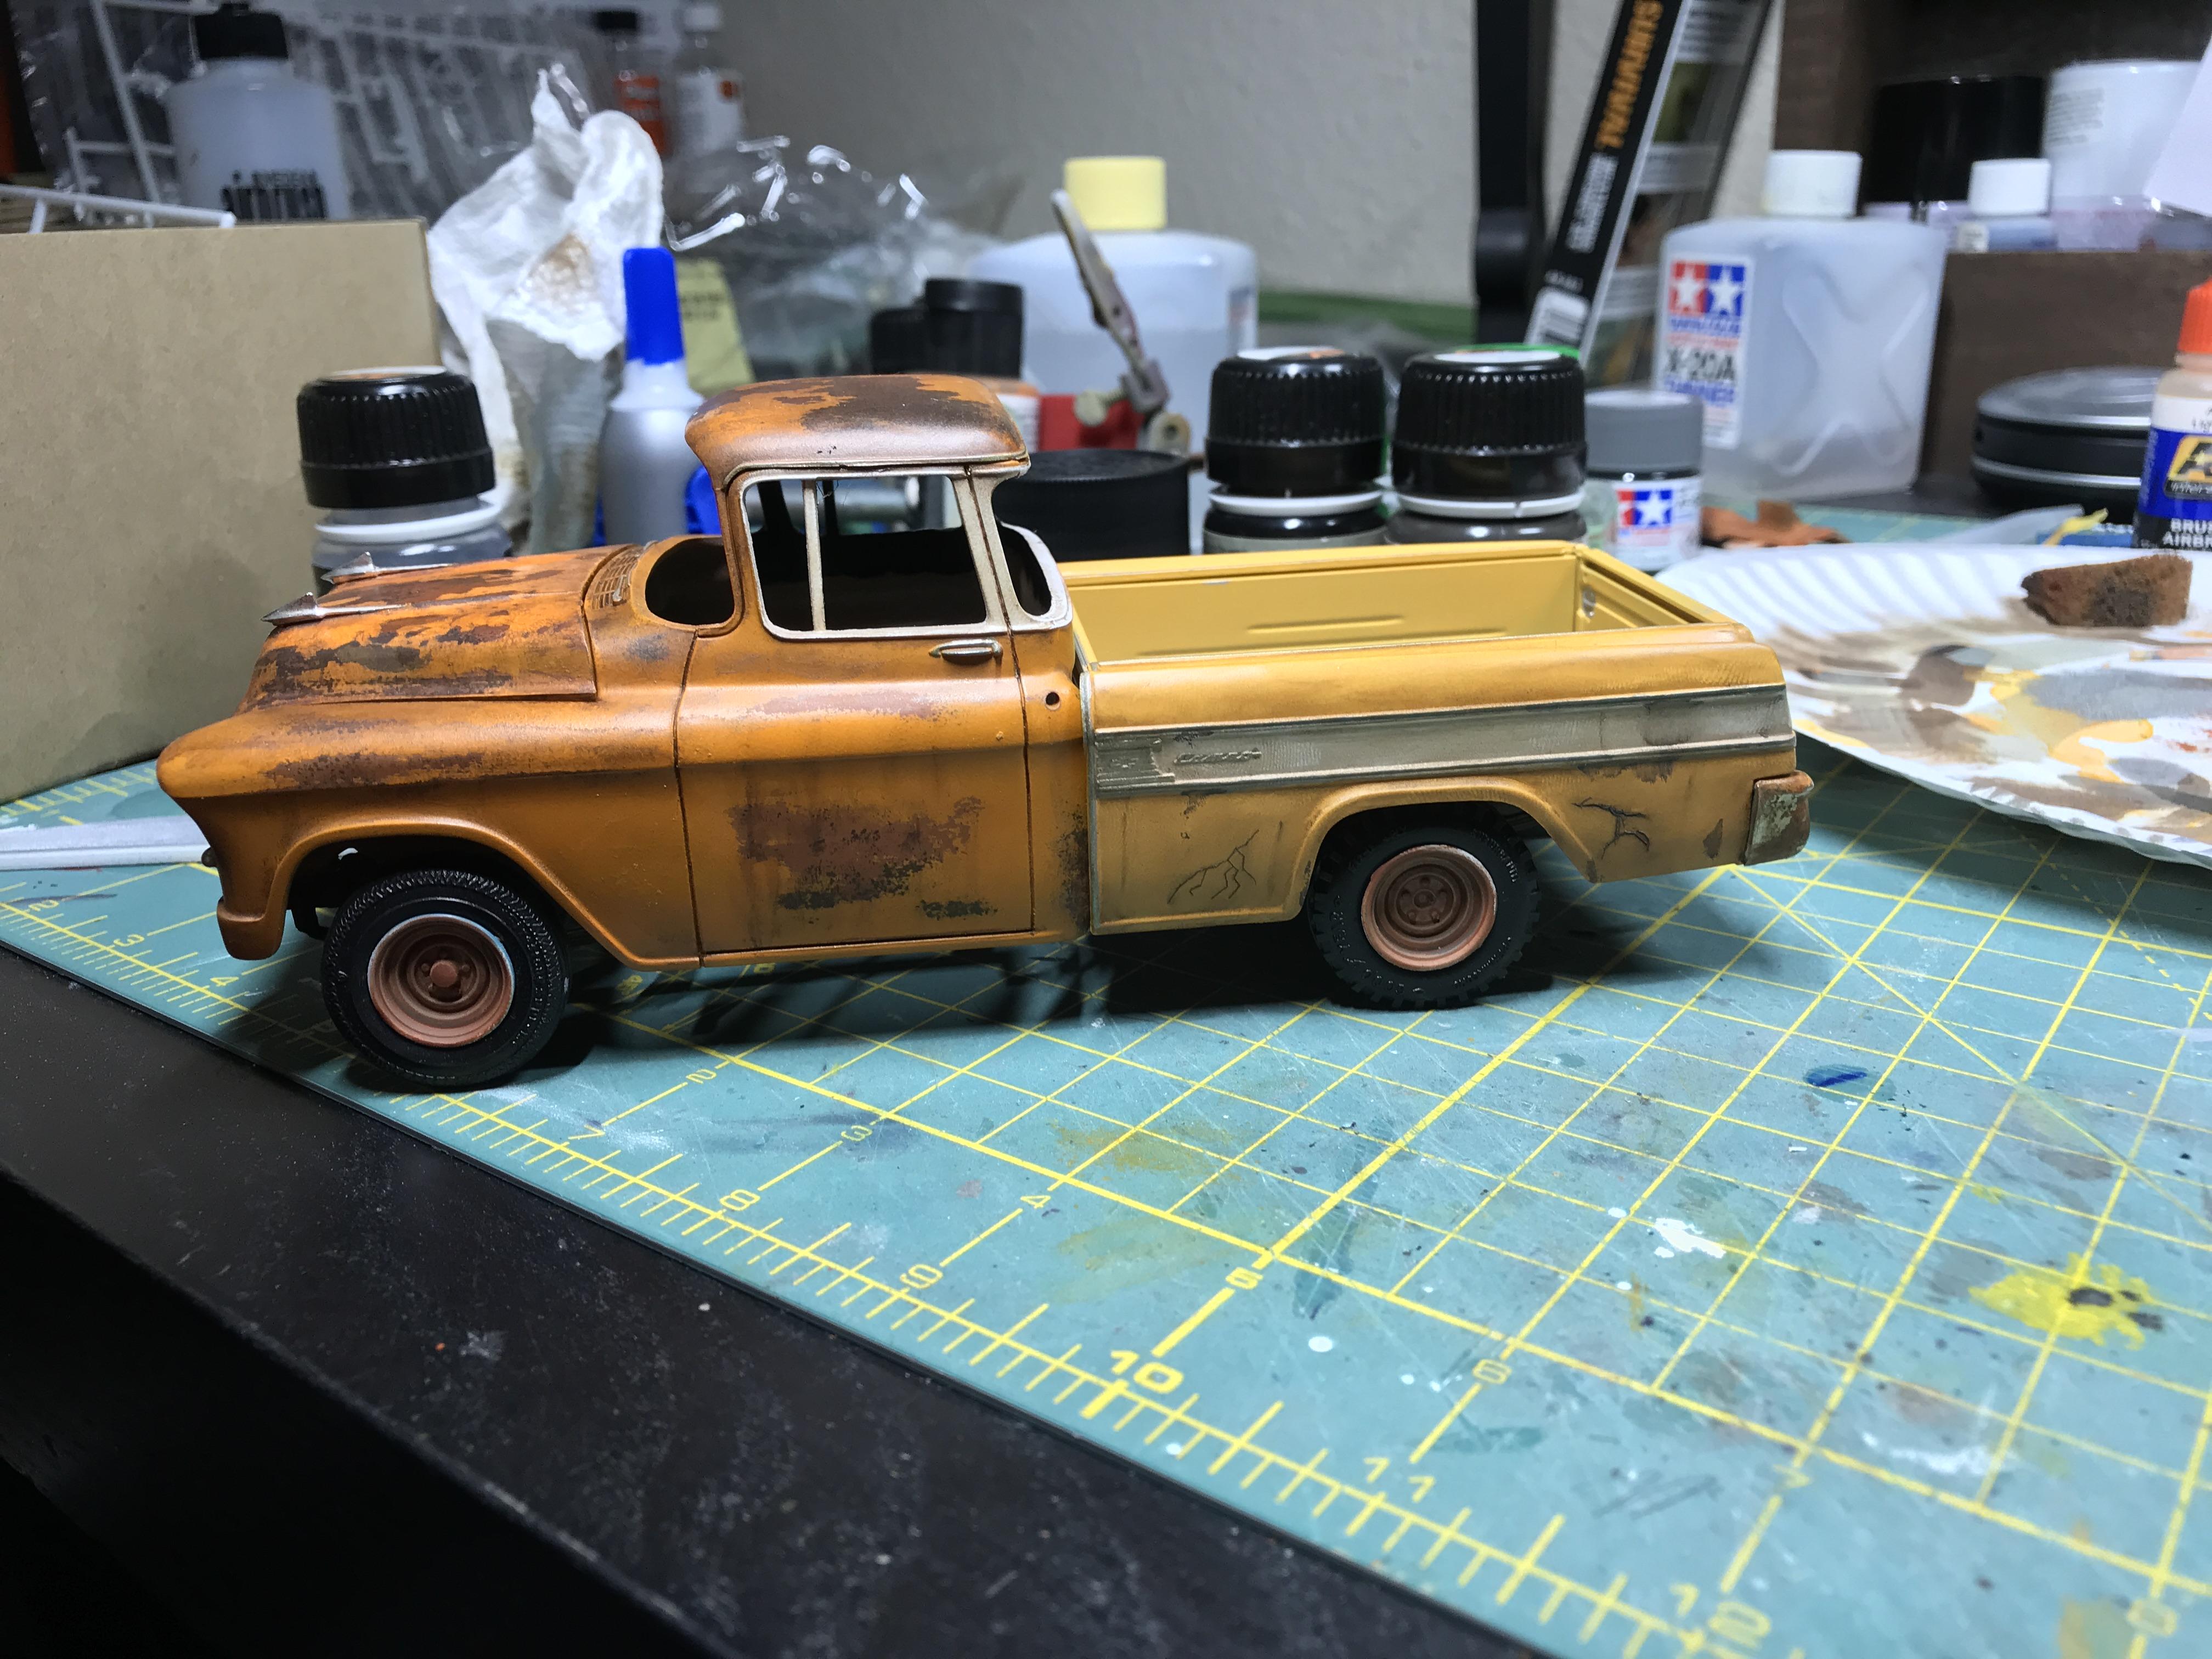
Mock up. Still need to weather the bed a bit more. The 6 lug wheels are not out of paint yet so not pictured here.
-
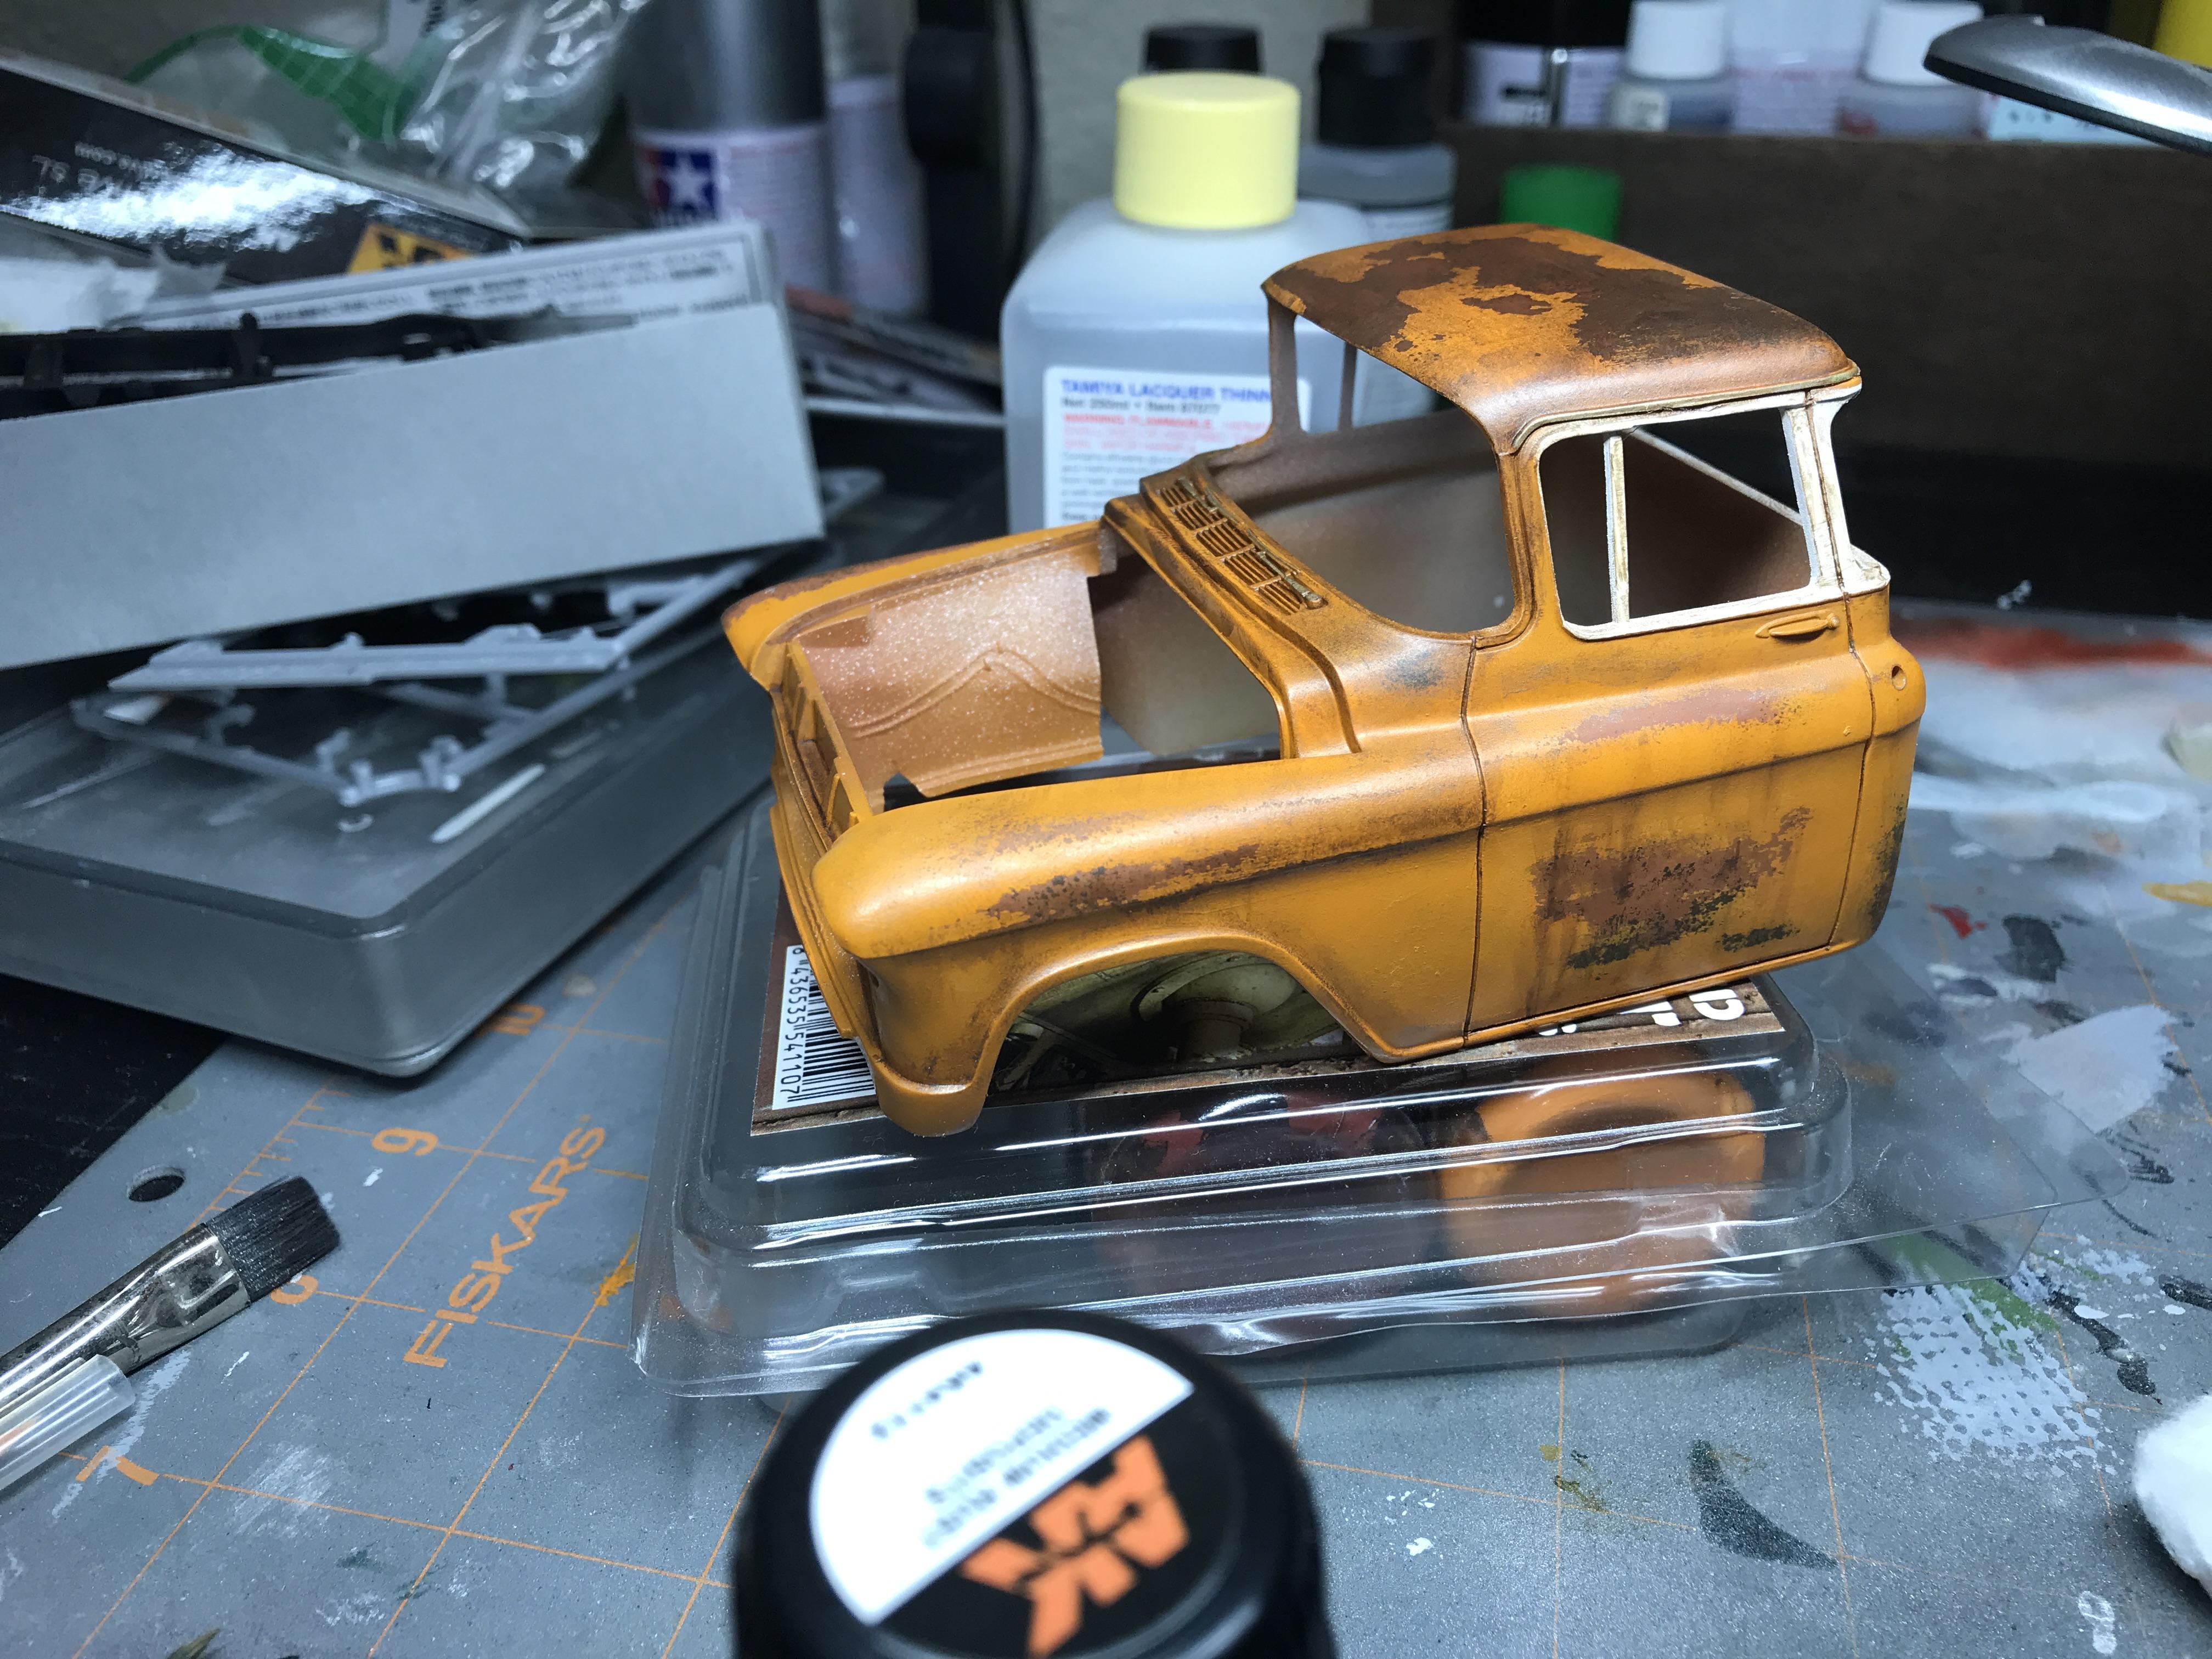
Got the hood done.
-
Thanks for the heads up. I ended up getting a set from the Black Widow ‘57 Chevy. I originally did not know until I saw a for sale listing for a bed and it mentioned “no cracks.” The wheels got to turning and I figured they were fiberglass. Pretty cool!
-
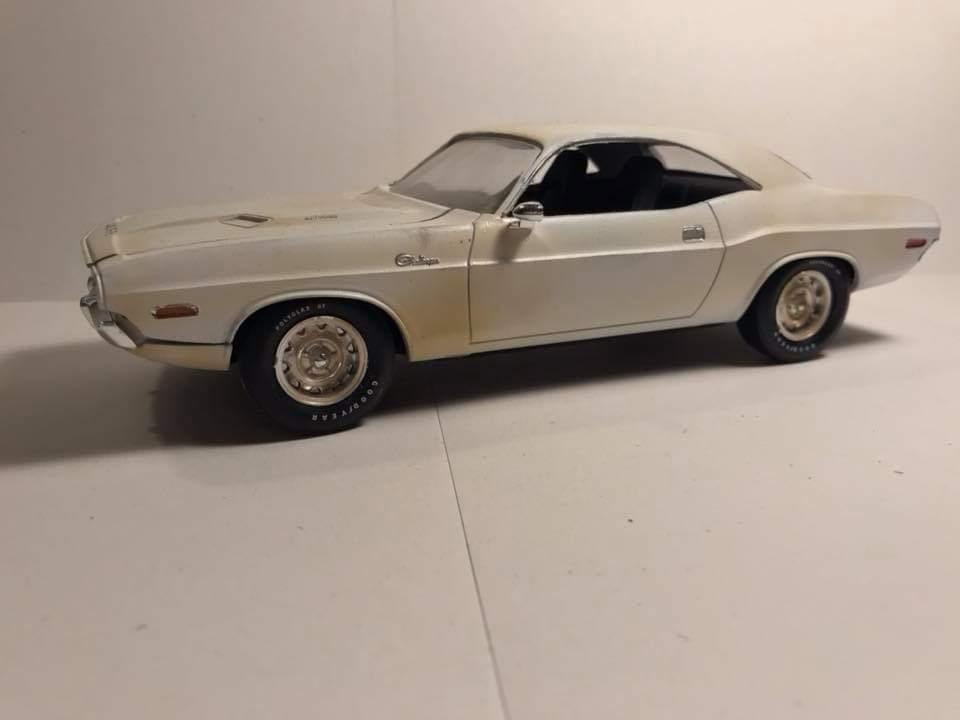
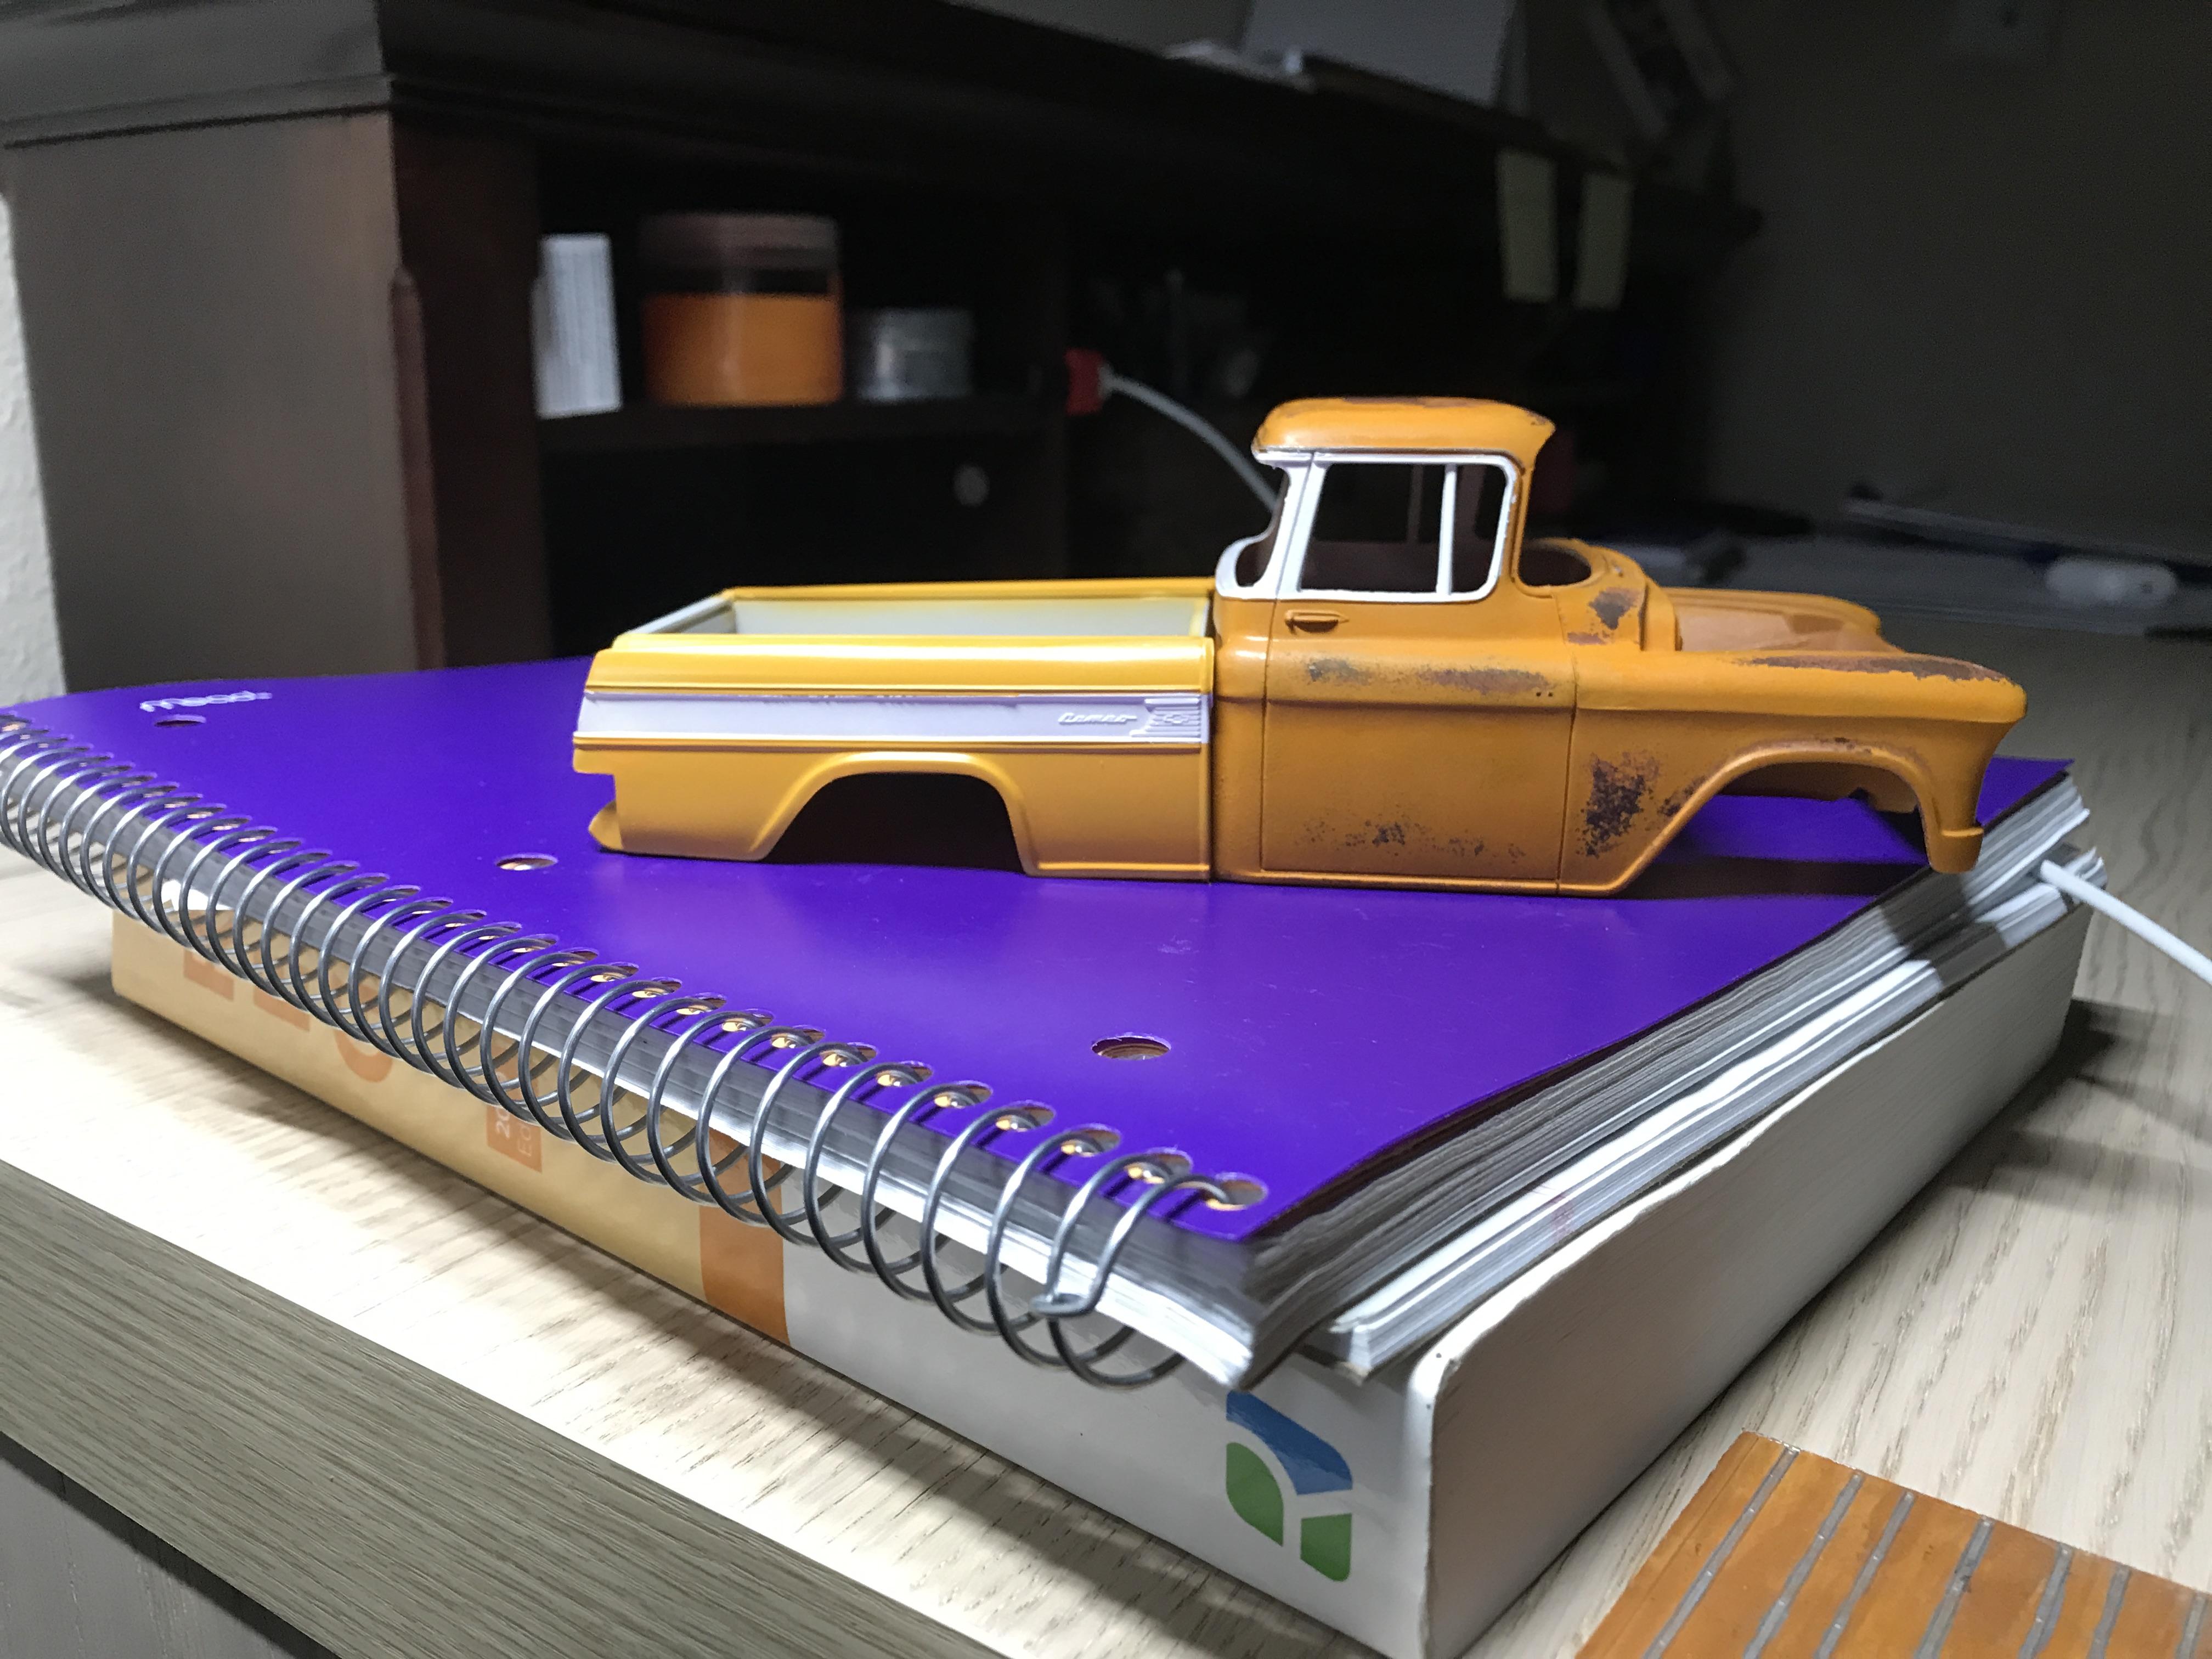
Working on some weathering today. I also got the white airbrushed on last night. The bed is lighter than the cab because the bed is fiberglass, and this truck would be sitting outside so the sun would really get to it. I have not weathered the passenger side yet.
-
Some members find it more interesting to try and make every post or thread funny, thus derailing the entire thing.
-
New Revell kits are sealed with the circle shaped piece of tape. Hobby Lobby kits have had those for a while now.
-
Revell to Repop the Will do wrecker !
Rusty92 replied to Mr mopar's topic in Truck Kit News & Reviews
There’s no reason to berate another forum member the way you do. Just let it go. Doug shared his post with a photo of the wrecker and they said it was coming out. And honestly, I would have believed it as well. I still do believe that it is coming. Perhaps your distributor information is wrong? Give it a break. You’ve disrupted a perfectly good thread with your rude behavior. FWIW 61.99 euros to USD is about 66.75. Not 62. Gosh I hate that misinformation that people spread here -
Revell to Repop the Will do wrecker !
Rusty92 replied to Mr mopar's topic in Truck Kit News & Reviews
Why are you so upset about this? It will be okay. It’s just plastic. -
1st Gen Ford Raptor
Rusty92 replied to lghtngyello03's topic in WIP: Model Trucks: Pickups, Vans, SUVs, Light Commercial
Looking very nice!! I like the detail you’ve done to the interior. -
Nicely done so far.
-
AMT 81 Toyota Truck 4X4
Rusty92 replied to Adecoste's topic in WIP: Model Trucks: Pickups, Vans, SUVs, Light Commercial
I have one of these as well. Very nice work so far! -
GMC Mason Dump
Rusty92 replied to Warren D's topic in WIP: Model Trucks: Pickups, Vans, SUVs, Light Commercial
Looking very nice! -
Great Mountain Climber!
Rusty92 replied to Rusty92's topic in WIP: Model Trucks: Pickups, Vans, SUVs, Light Commercial
Thank you! I’m liking it a lot myself.