Search the Community
Showing results for tags 'revell'.
-
Painted Tamiya TS-11 Maroon Interior will be either black and white or maroon and white. Still got some fixing to do to the body. Thanks for looking, all comments welcomed.
-
This is one I started back in 2002. Originally I had painted it with auto touch up paint. Did not like how it turned out so got another body and finally painted it with Tamiya TS-54 light metallic blue today. Thanks for looking, comments welcomed!
-
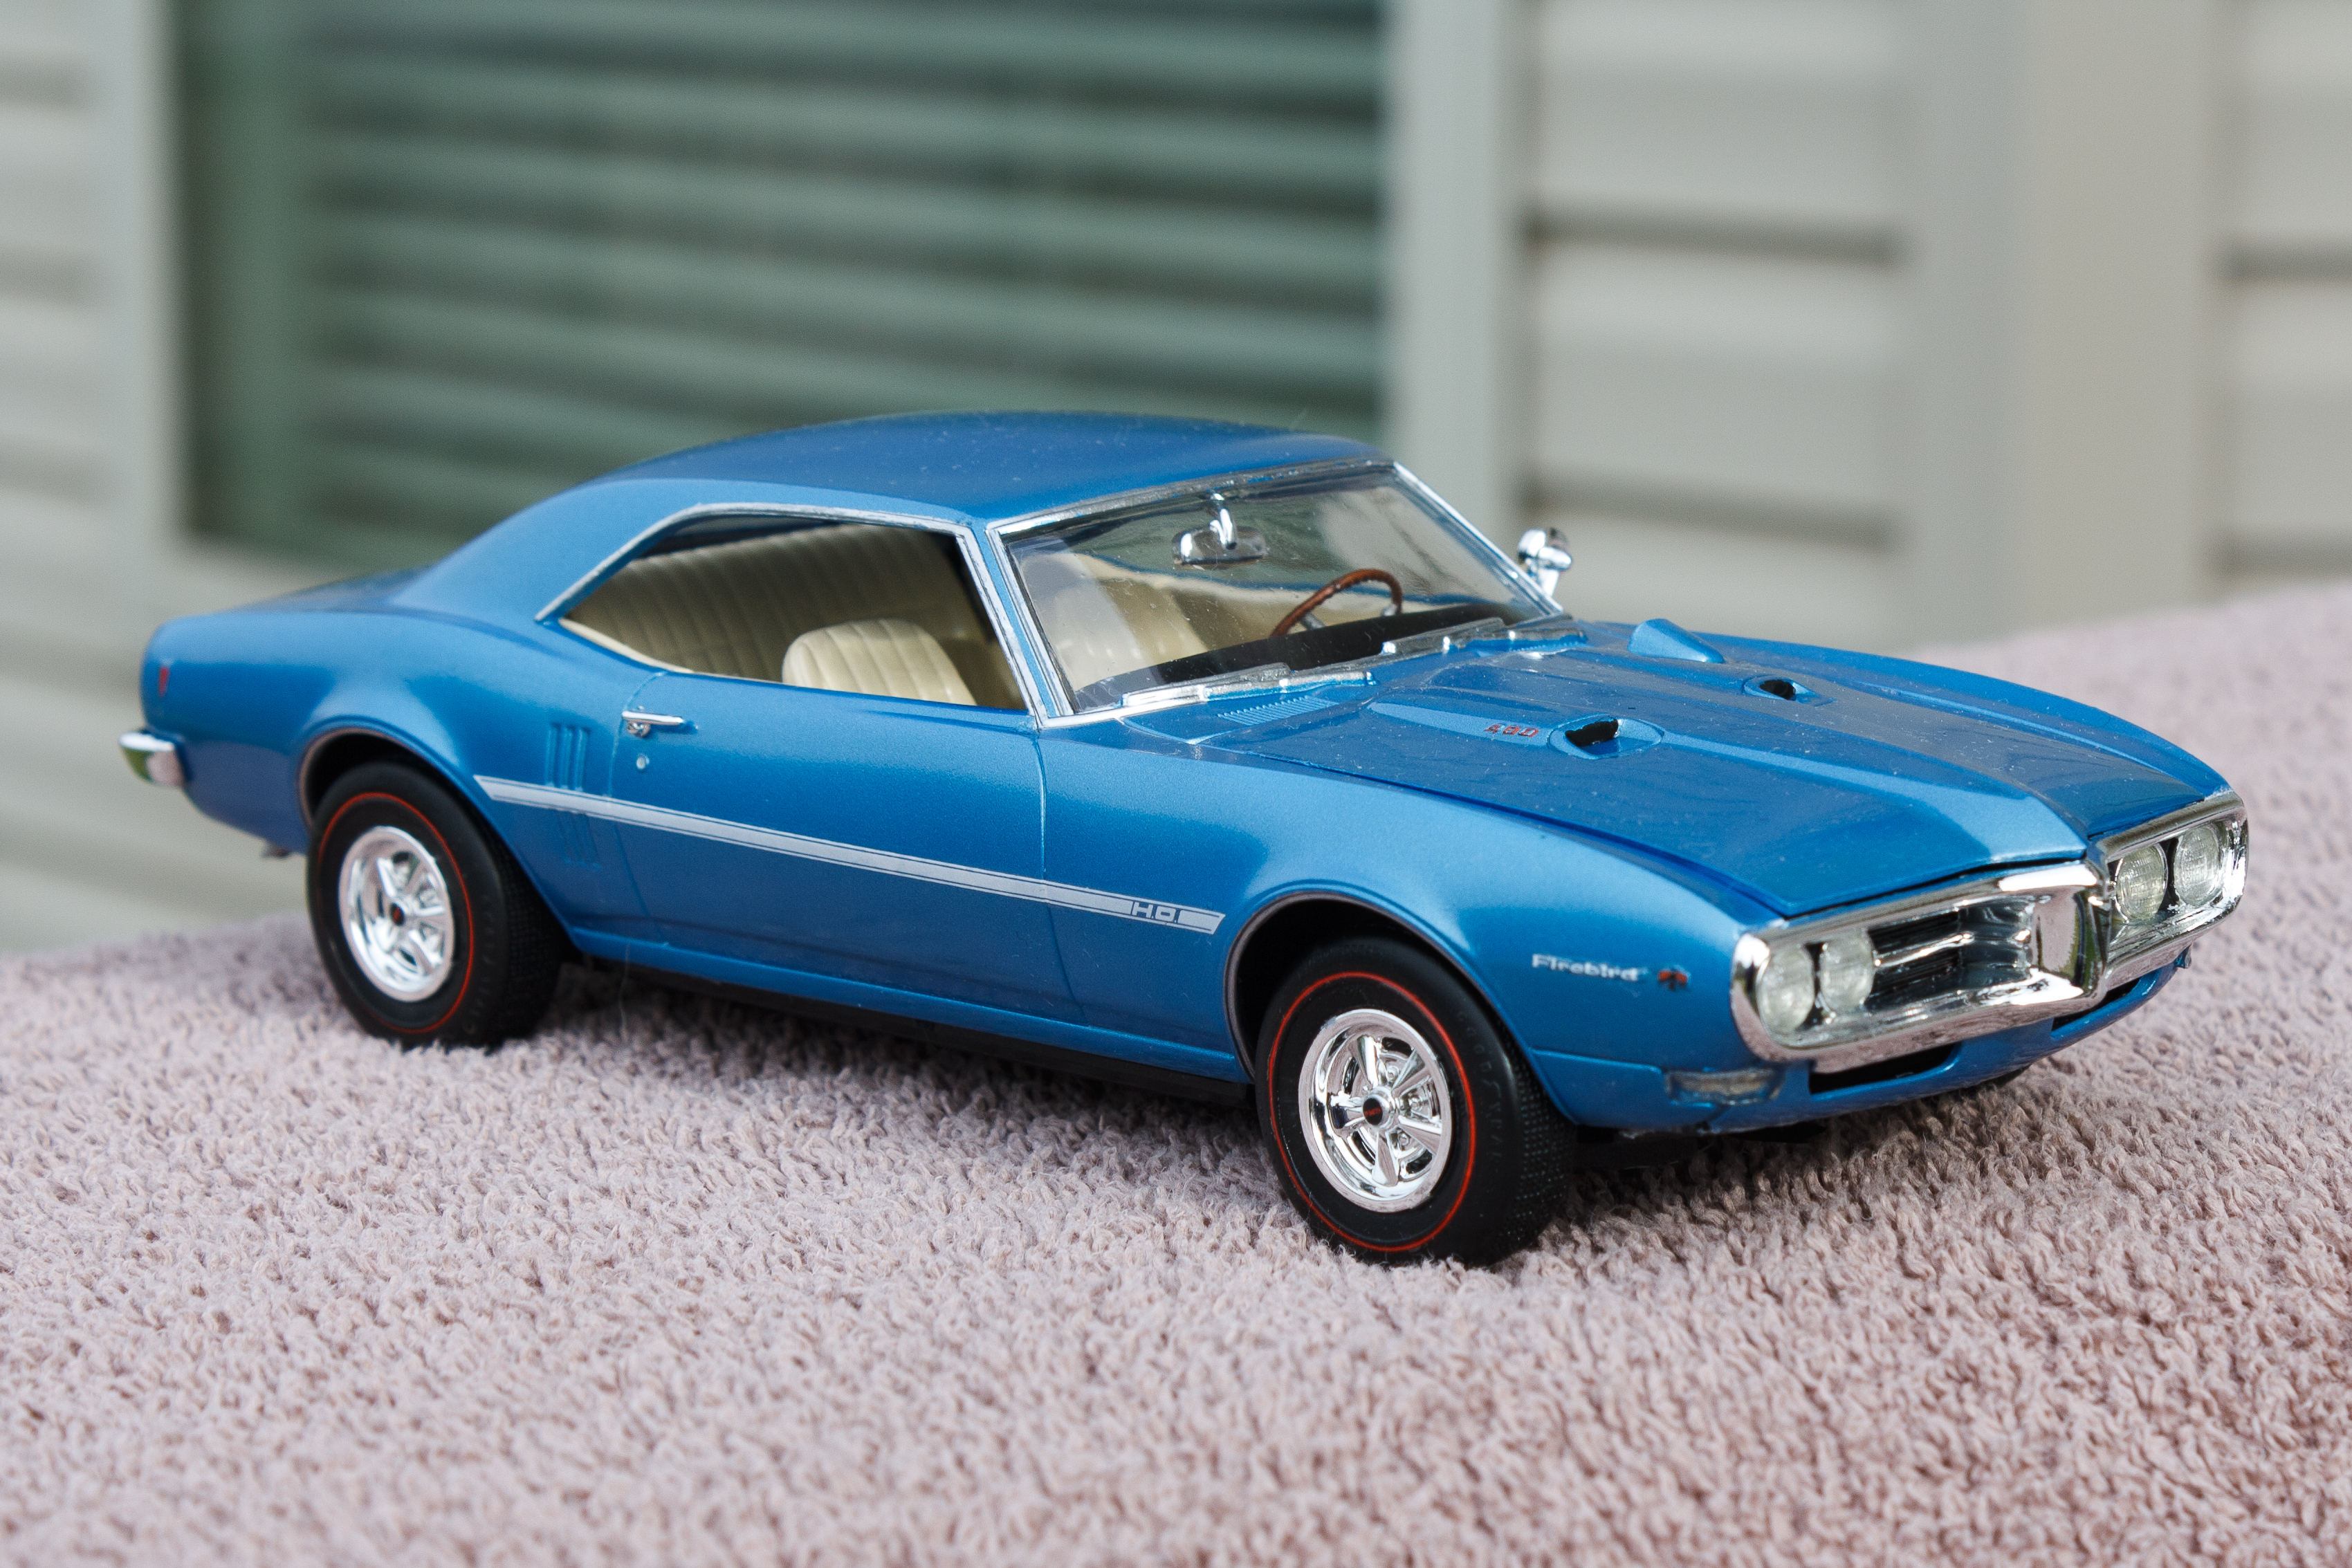
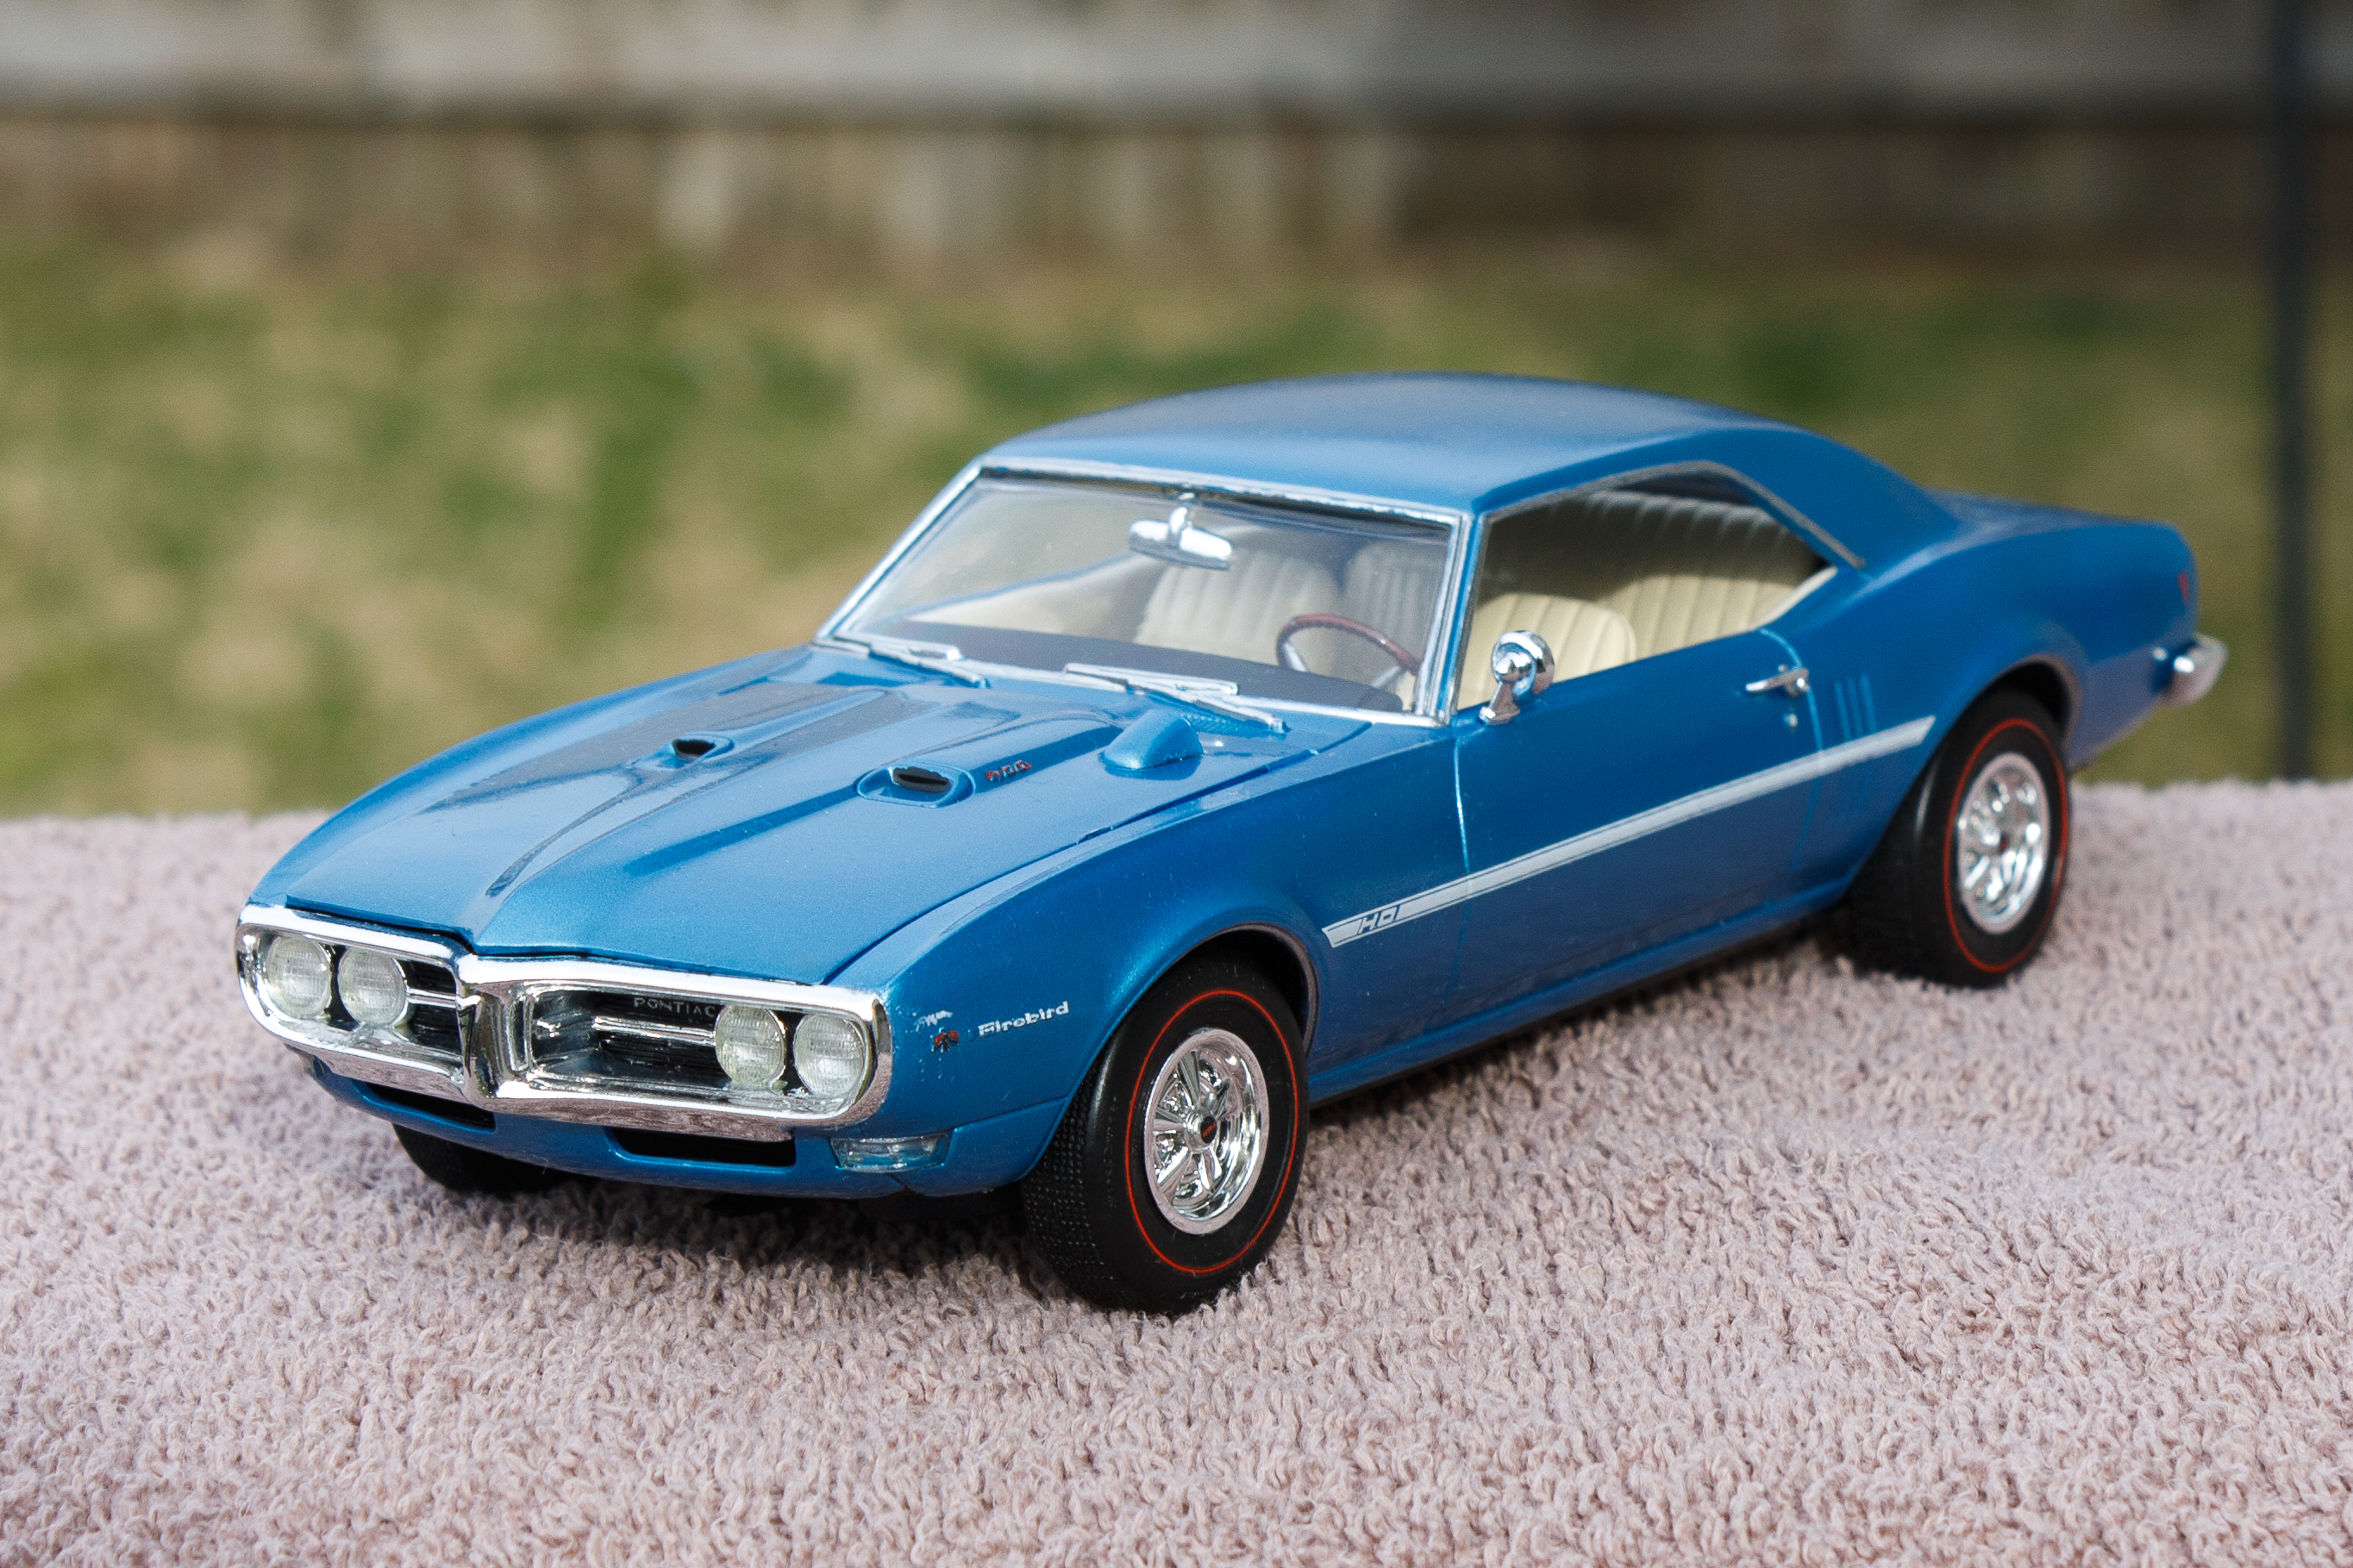
Here is my finished Firebird 400 model (Revell kit). Body is Model Master metallic blue, and interior is Model Master light ivory. Enjoy! The workbench thread is below.

-
I wanted to work on something bright, so I got out this 70 Charger for a quick build (I hope). Painted Odds & Ends sun yellow with wet look clear coat. Thanks for looking, all comments welcomed.
-
Interior is complete! There is almost too much detail on this kit. Someone could spend hours on the interior alone. I have all the outside chrome put on, now I am just working with the windows and I am hoping it will be done tomorrow. Thanks for looking! Comments welcomed.
-
I had started working on this one before I was sidetracked by the 60 Impala. Finally got the door panels and flooring done and now I can concentrate on getting to completed. Thanks for looking, all comments welcomed.
-
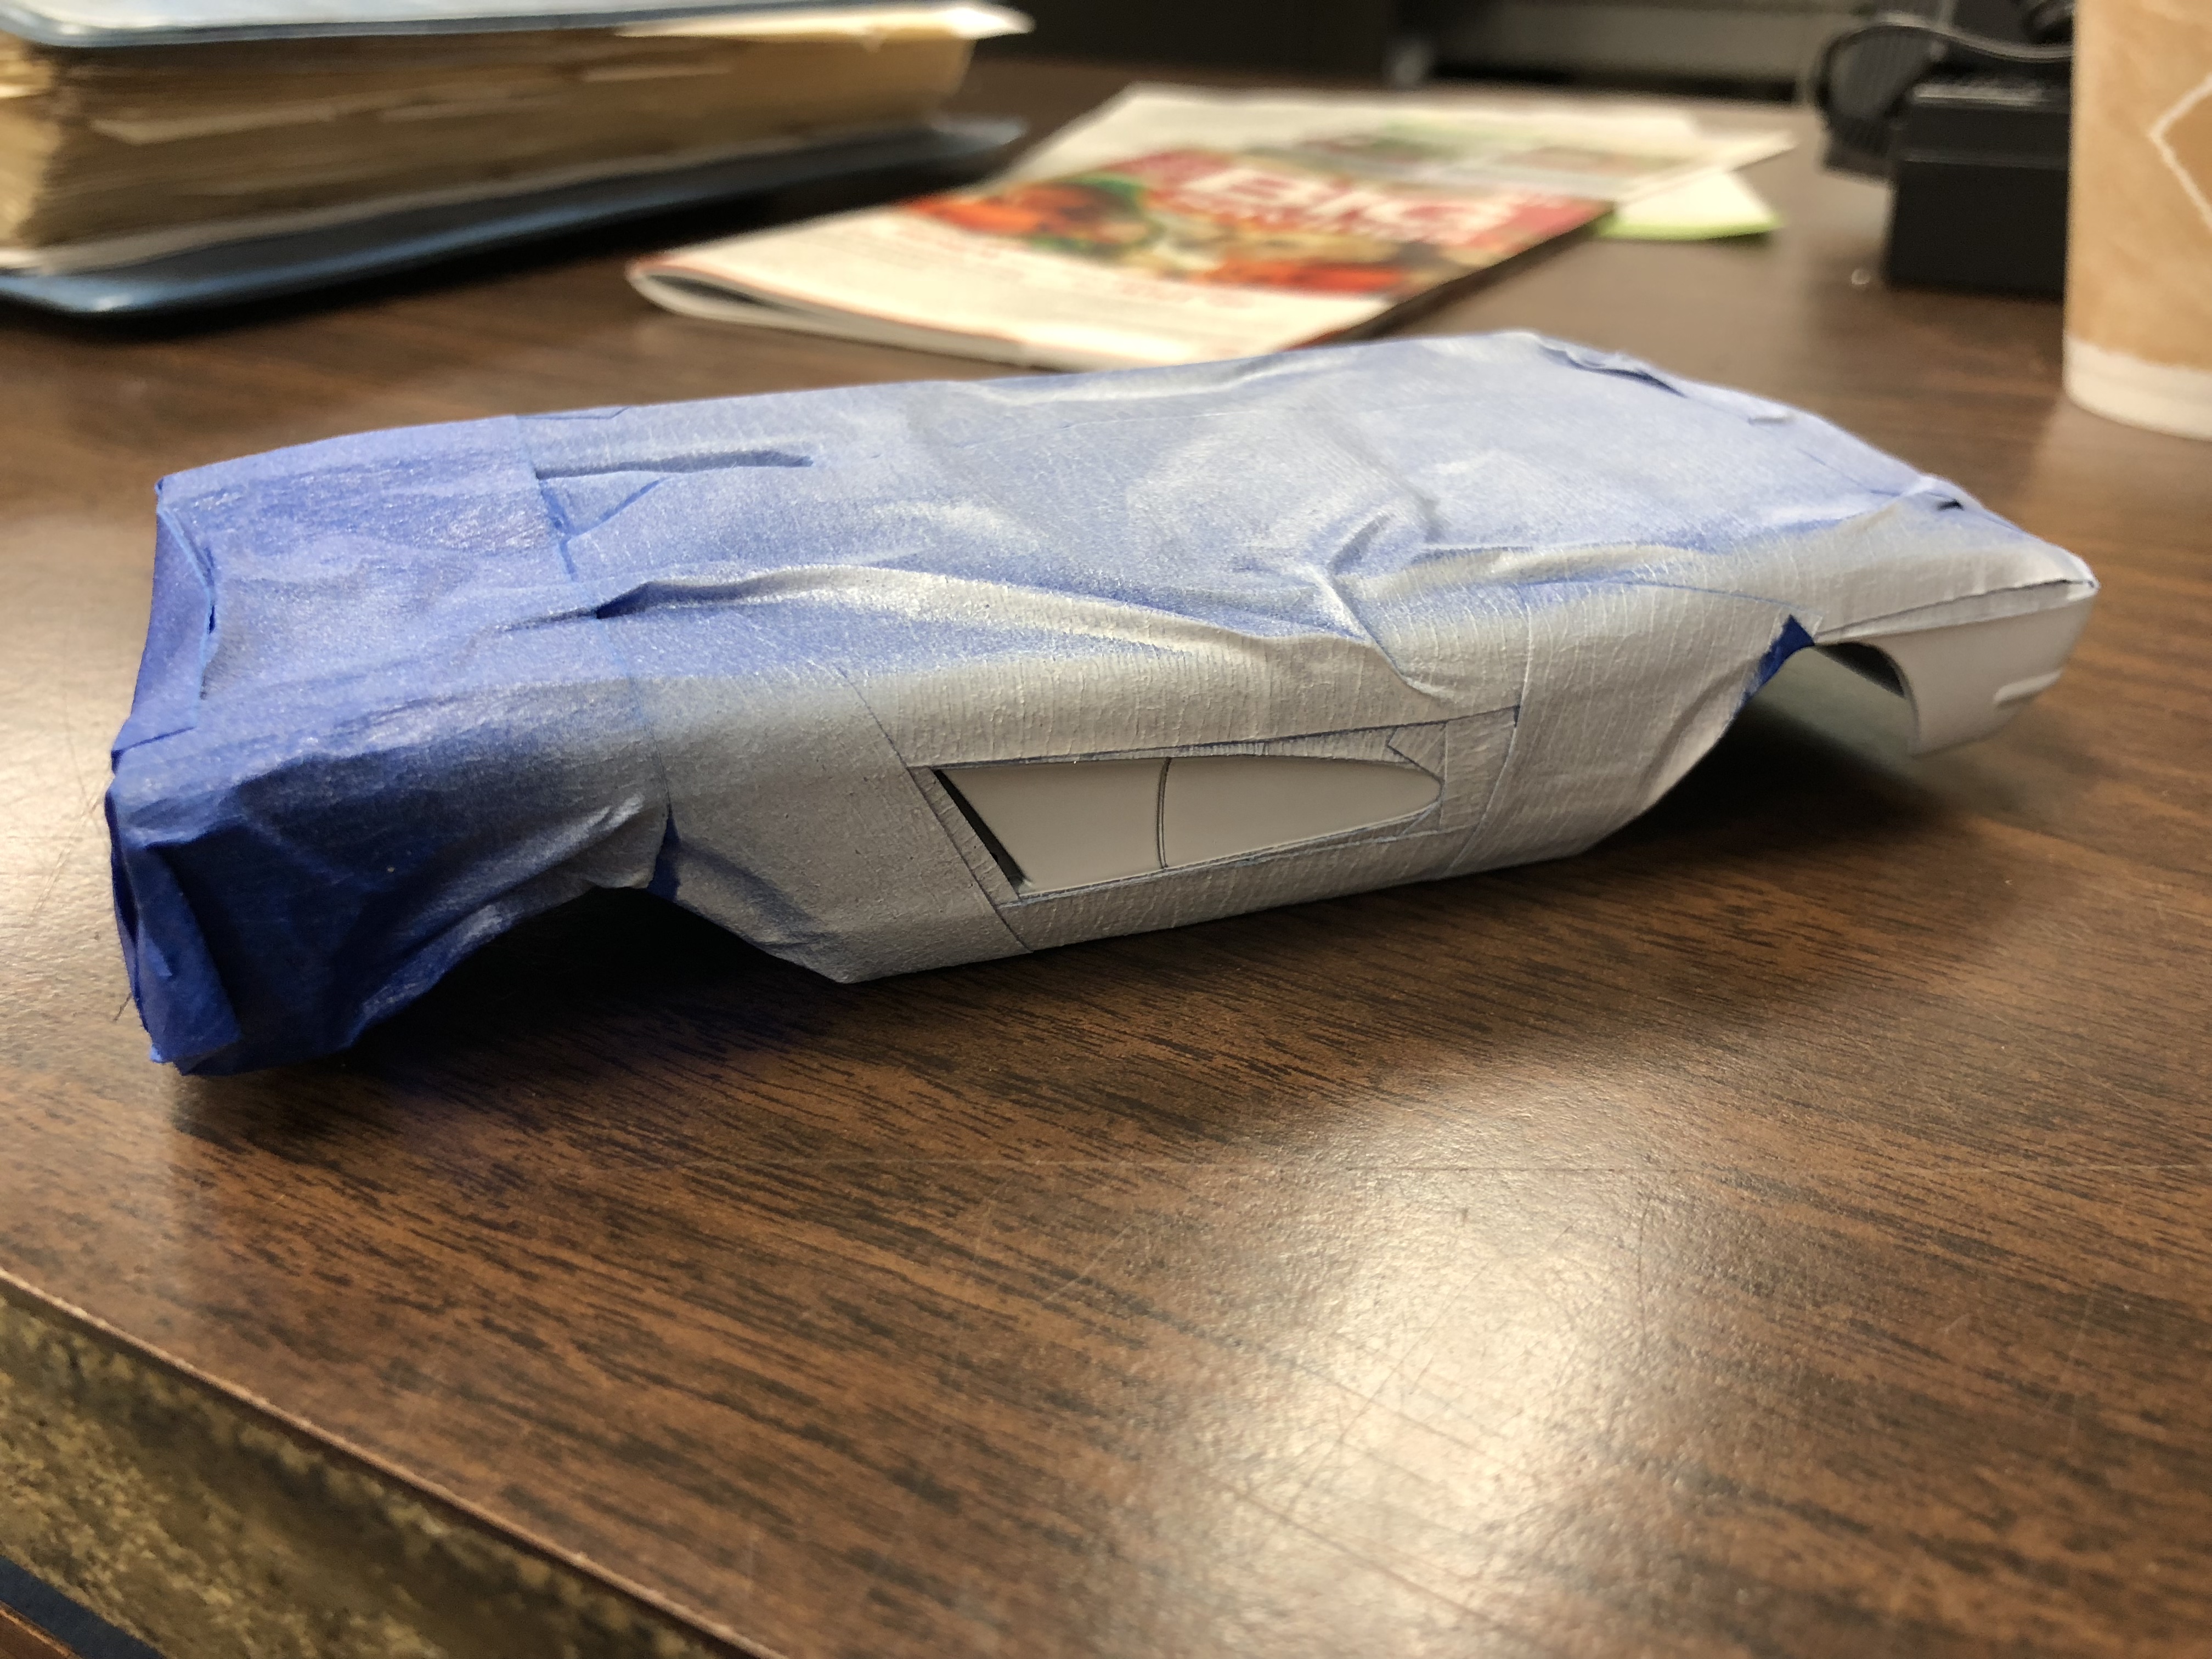
I started this one way back in 2009, I painted it with a large can of red paint but decided I didn't like that color. I dragged it out today and did a quick color change using Tamiya TS-11 maroon. Before and after shots. I discovered I have another 60 in the box that I want to paint turquoise, so instead of repainting the wheels again, I borrowed them from this project car. Thinking about what to do with the project car, I shot it TS-11 maroon and put some tires and wheels on it from the Revell 59 Corvette kit. Plans call for a grey interior and bucket seats and center console from the parts car AMT 67 SS 427 kit. Thanks for looking, all comments welcomed.
-
 Hello everyone, i finally got this Fleetside project done, and its about time to post it here. I used a lot of aftermarket photoetching parts from High light model studio and had much fun with detailing and painting progress. I did learn alot about weathering techniques and all painting is done with brush. Im already looking forward to my next project. But less talk now and more photos Workbench topic:
 -
I decided to get some better pictures of this (with my iPhone!) to share. This build has held up pretty well considering I built it in 1995! Painted Testors' sky blue with a clear coat. All enamels I believe. I had not heard of Tamiya paint, and just did discover BMF, what a time capsule! Thanks for looking, all comments welcomed.
-
Finished after 8 years, painted Testors Emerald Green with clear coat.
-
Started in 2011, not touched since 2013, I think it might be time to finish this, what do you all think? This is how it was on Wednesday. Thanks for looking, all comments welcomed.
-
Lessons learned on my first time, keep it simple. Single color interior, have EVERYTHING in the box or within reach. I spent about an hour total looking for stuff I decided I needed to add. Do a simple tire/wheel change if your going to do that. I spent probably 40 minutes getting those Aoshima wheels, tires, and brakes adapted to the Impala. Perhaps the Impala was not the best kit to select, lots of little parts and loads of opportunity to do detailing ate up time. However, my total build time for this model was, 20 hours, so If I could have worked right on through, I might have gotten it done. I had loads of fun though, and that is what counts.
-
After 17 years, this one finally got dragged over the finish line today. Painted Auto touch up Ultra Marine blue with Kens fuzzy fur carpet and white plastic seats. Thanks for looking.
-
After 12 years, I finally got this one off the bench! Using the intake and exhaust from the 69 Nova kit, and the Air cleaner assembly from (I think) the MPC 69 Camaro kit, I present to you a stock Z/28 RS!
-
So here is one that I started back in 2002. I want to get it finished because I have decided to do the same kit for the 13th Annual 24 hour build. I figured if I'm going to get one done in 24 hours, then I should get this one done first! Here is where I'm at right now. I did the wheel well trim, seat trim, dash trim, tail light trim, and hood chrome all with a Molotow 2mm chrome pen. I love it! How did I ever get by without it? (By using BMF that's how! PIA it is!) Body is painted with Auto touch up "ultra marine blue with a clear coat (I think) or else I polished it out. It has been too long for me to remember, but I think I just clear coated it. Ken's fuzzy fur carpet. I still need to do more on the dash, like instrument decals and some finer painting of the chrome. Door trim is BMF while seat trim is Molotow pen. I have a decal for the back as well, I just could not resist doing the pen on it though. Outside of tail light bezels are the pen while the inside is Testors Chrome paint. Valve covers and intake are from the AMT 62 BelAir while the block is from the kit. Thanks for looking! All comments welcomed.
-
This has been hanging around the workbench since November of 2017. Good to have it completed and under glass.
-
Got the frame and engine done on this bad boy. I am using the chambered exhaust from a Revell 69 Camaaro kit along with the headers. I needed to shorting the carb a bit to get the air cleaner to fit below the hood and I need to fix one of the pipes coming out of the mufflers. The chambered exhaust did not fit very well and needed some modifications to get it to fit. Thanks for looking.
-
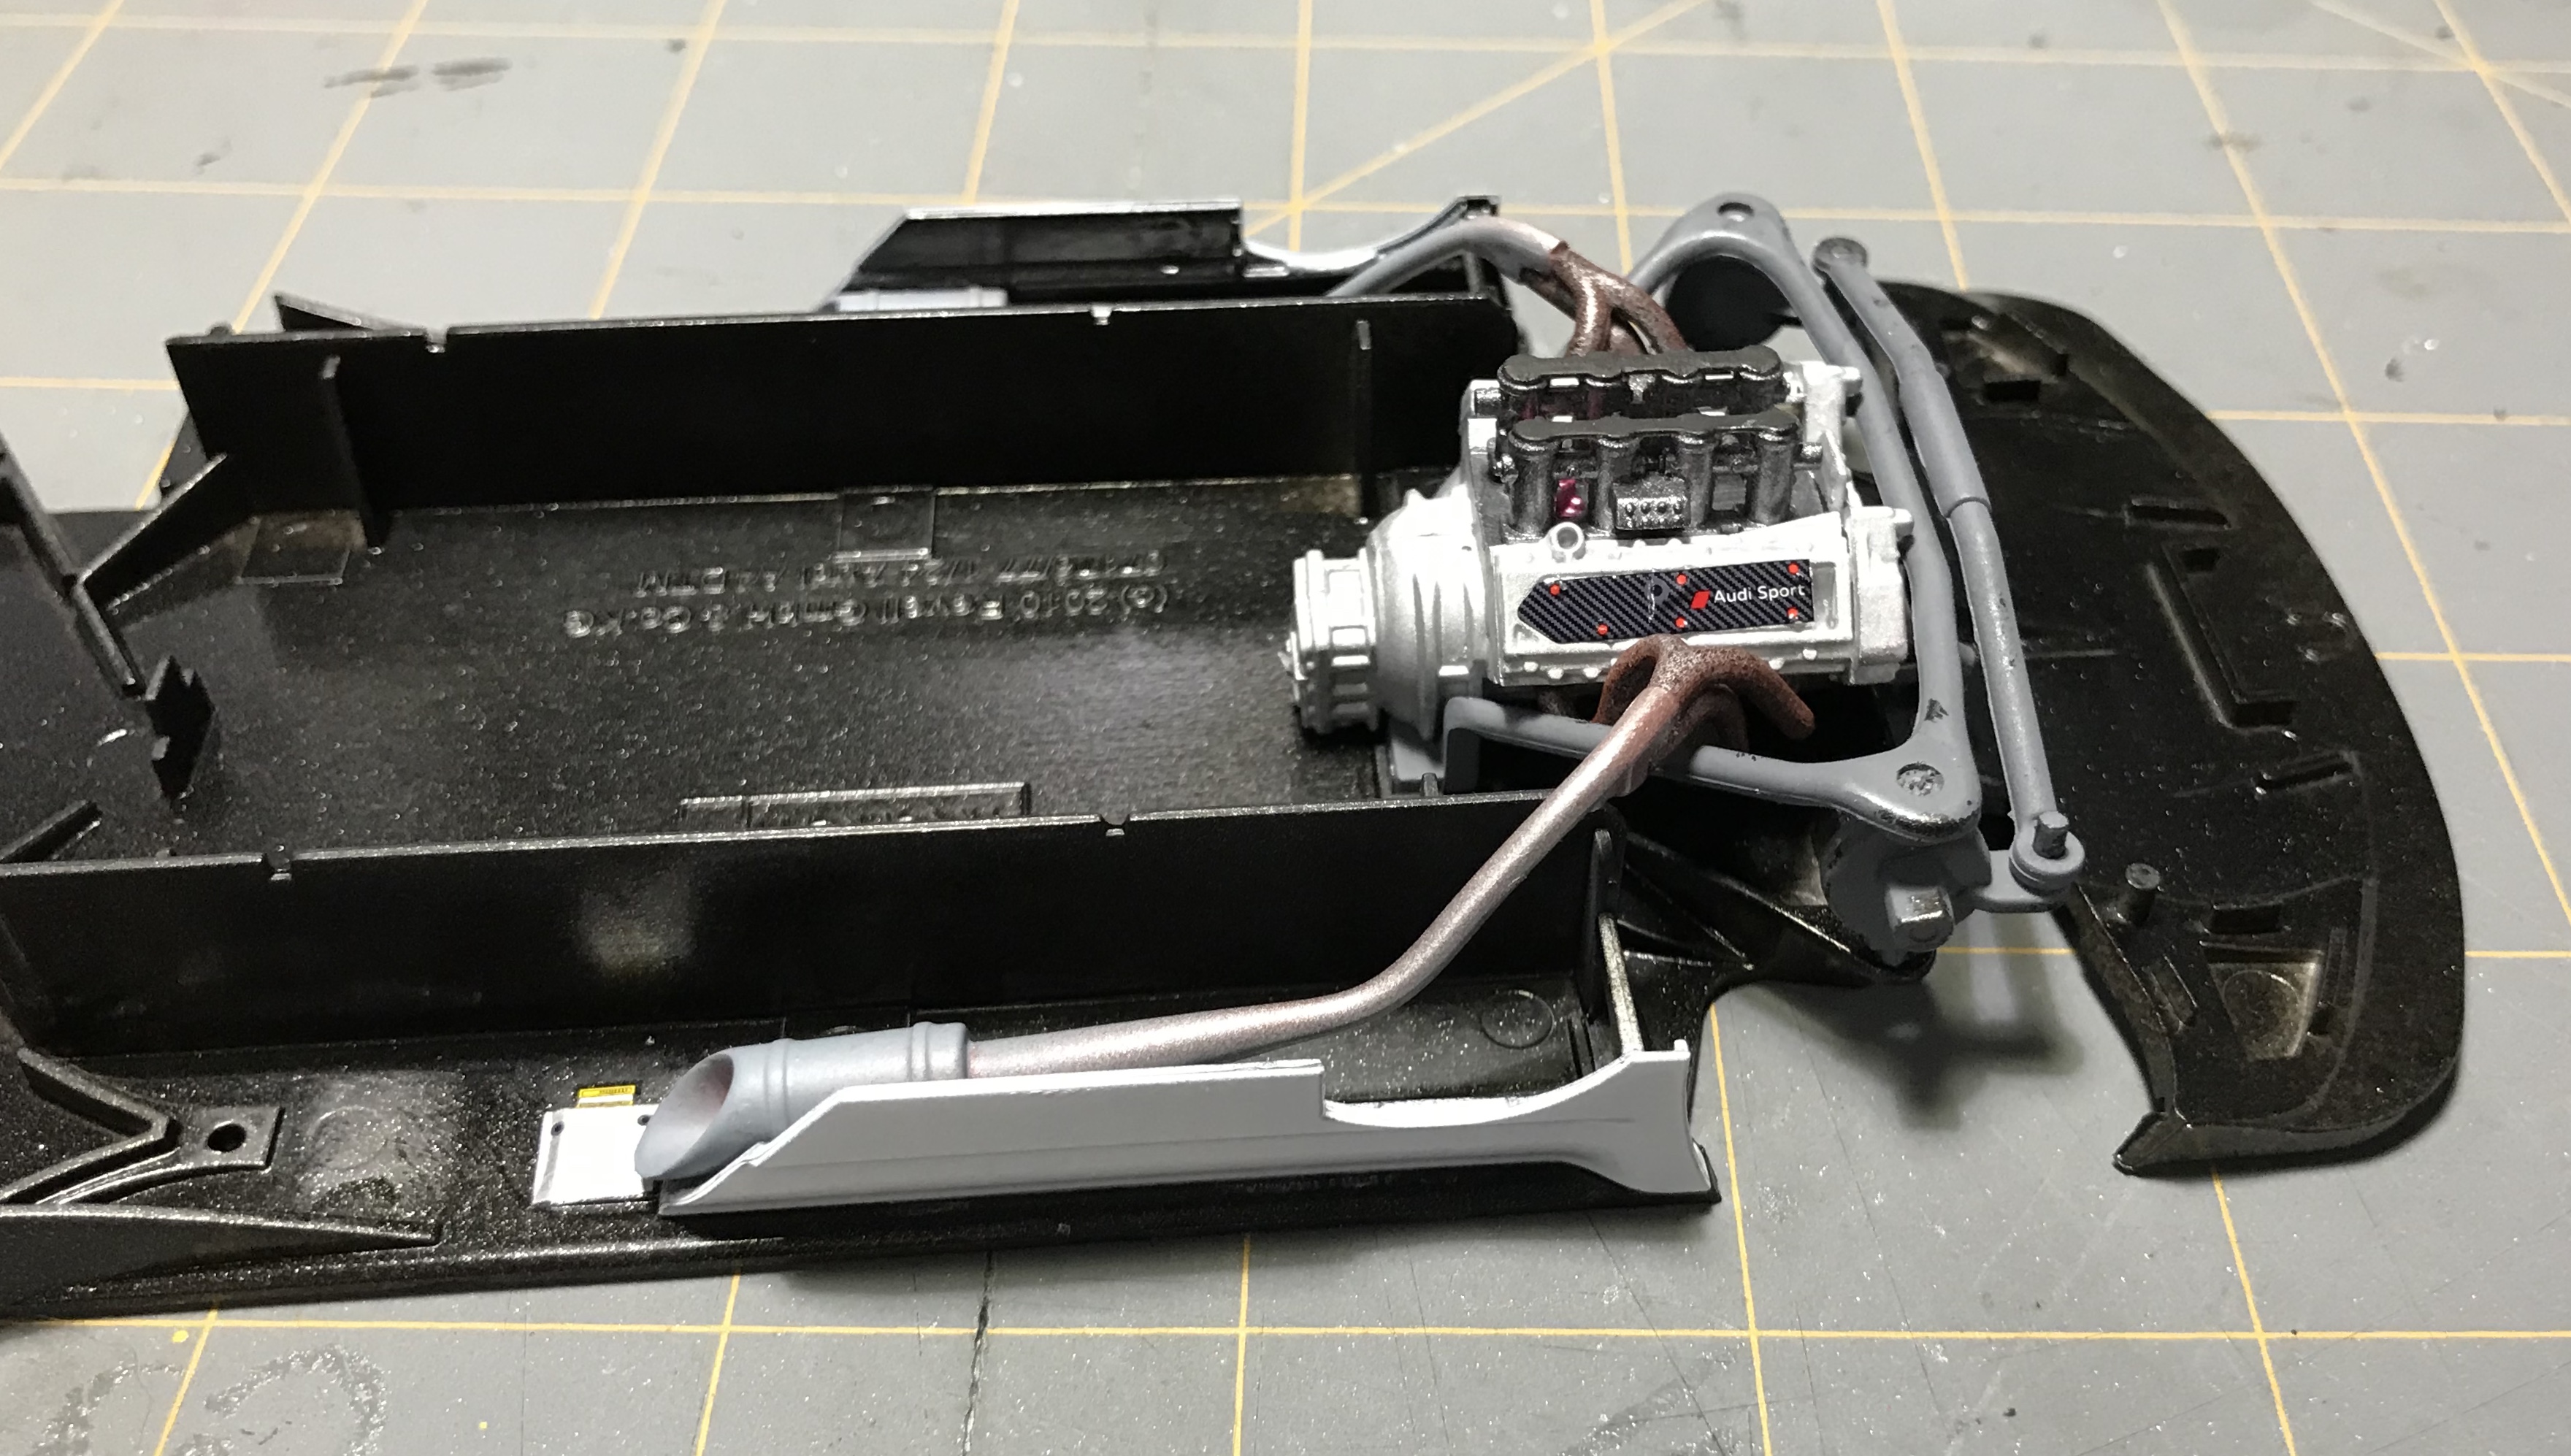
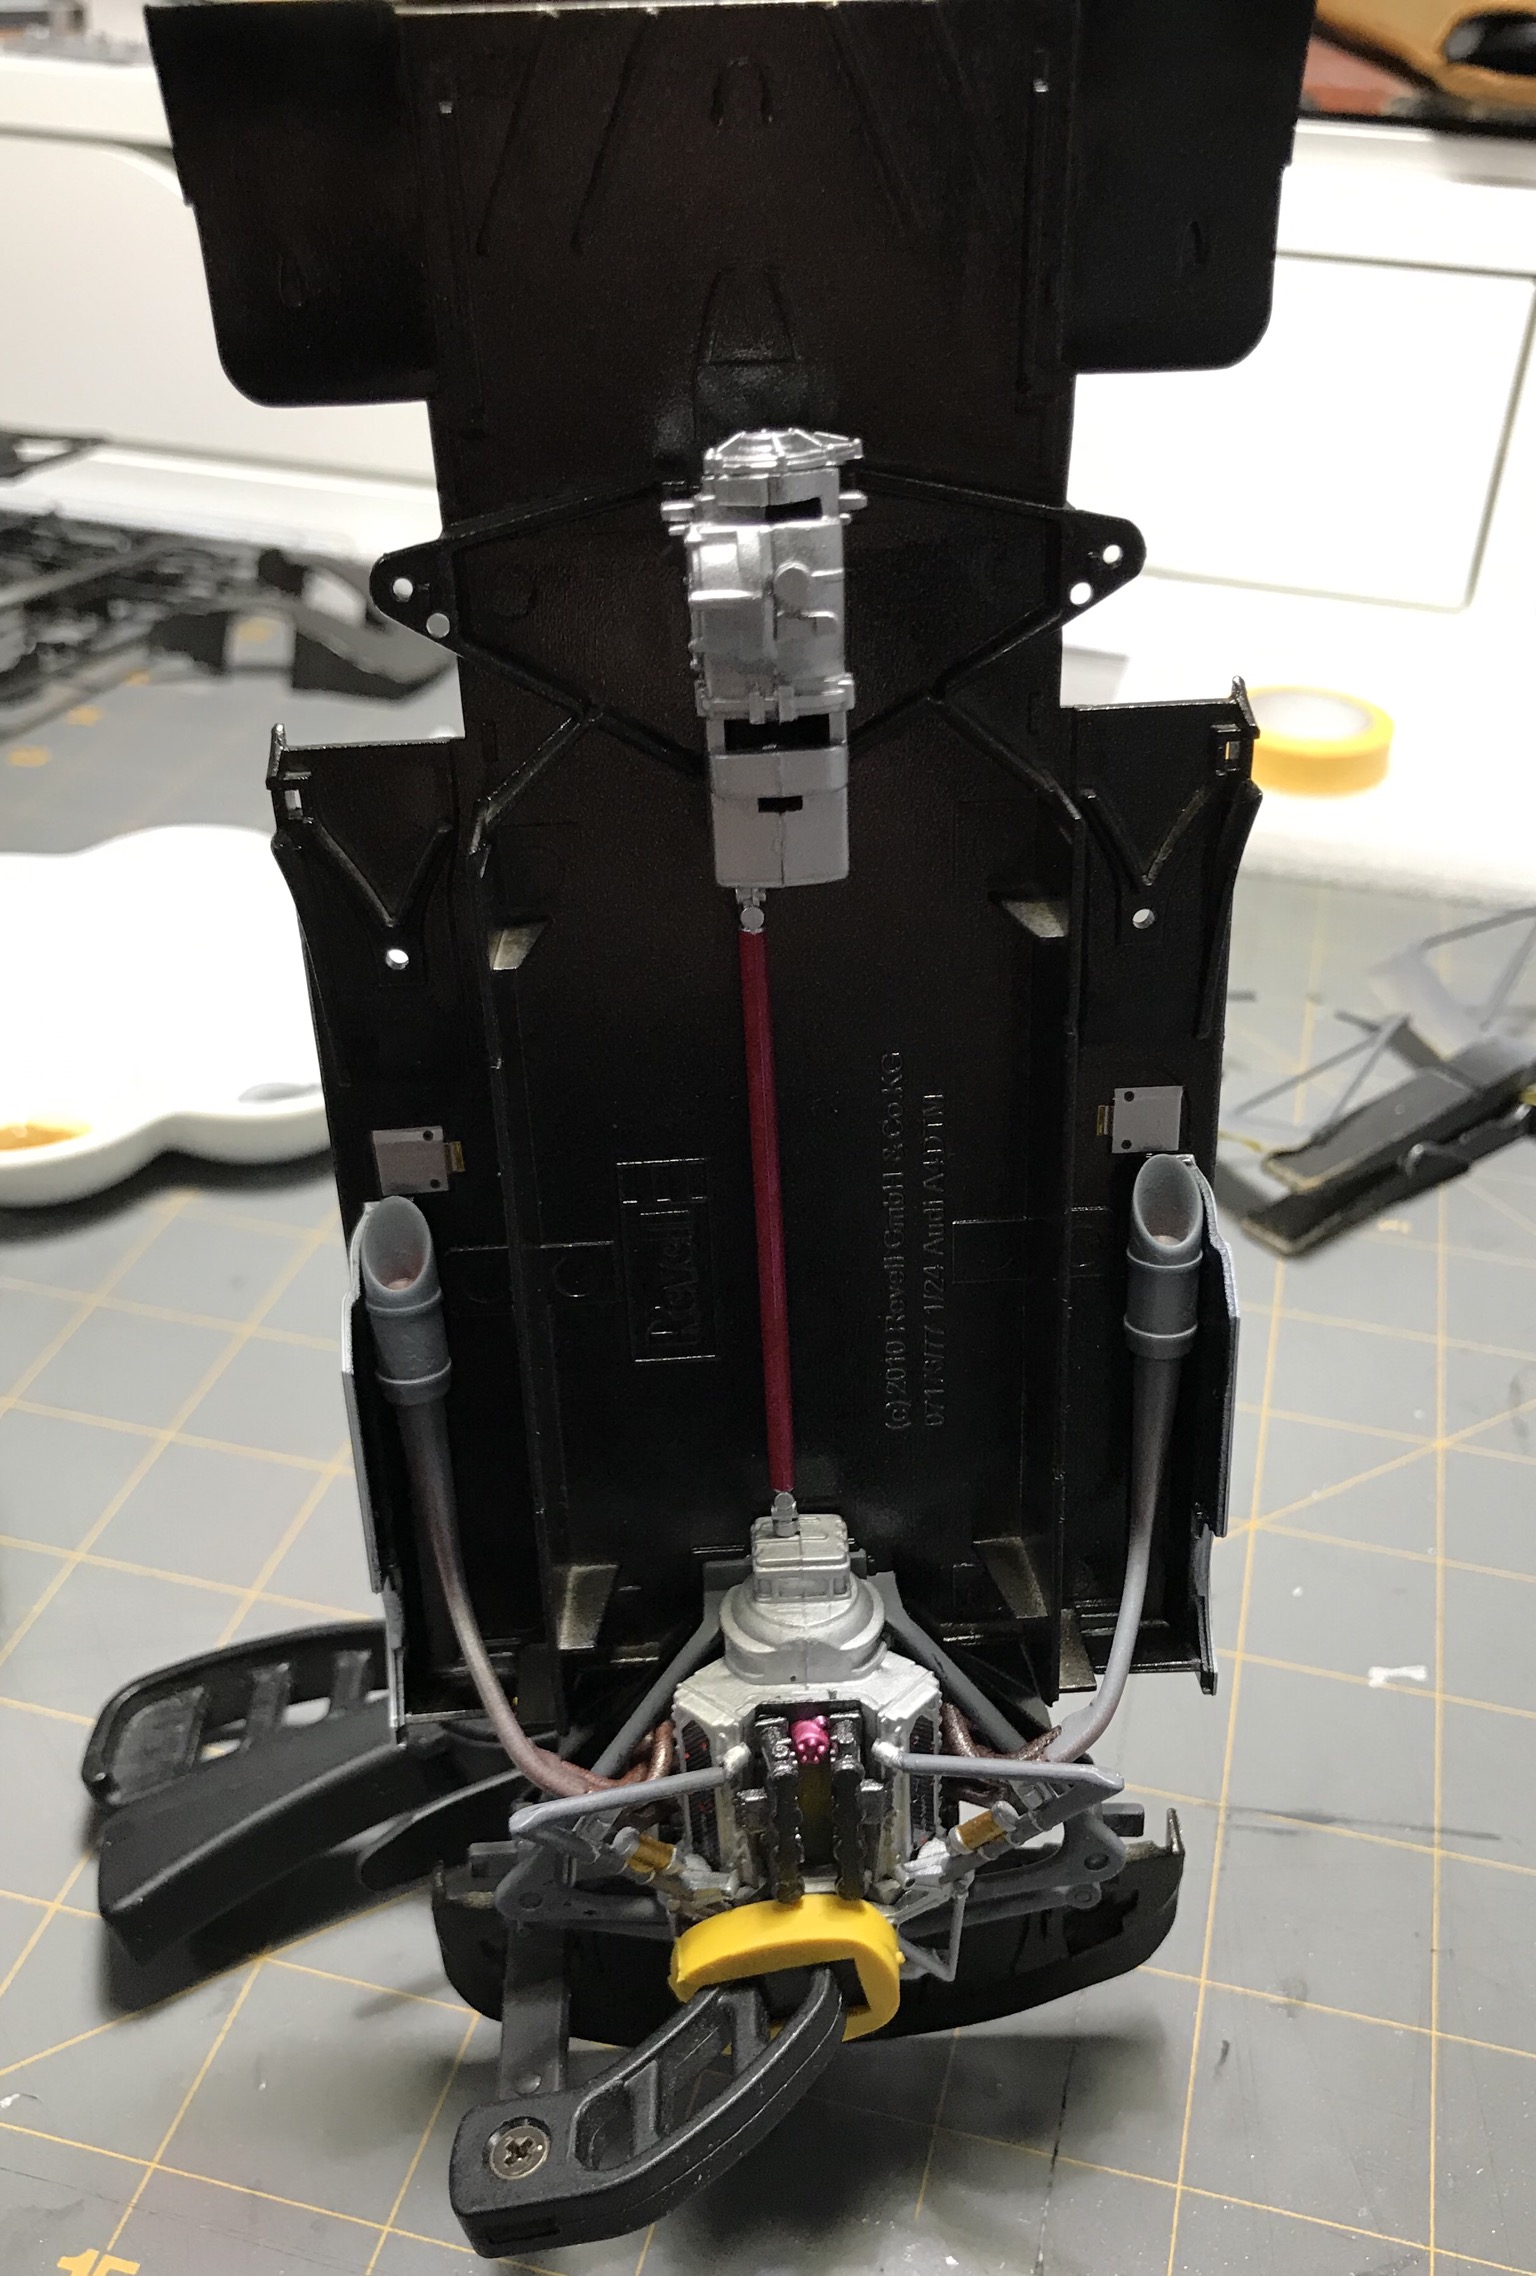
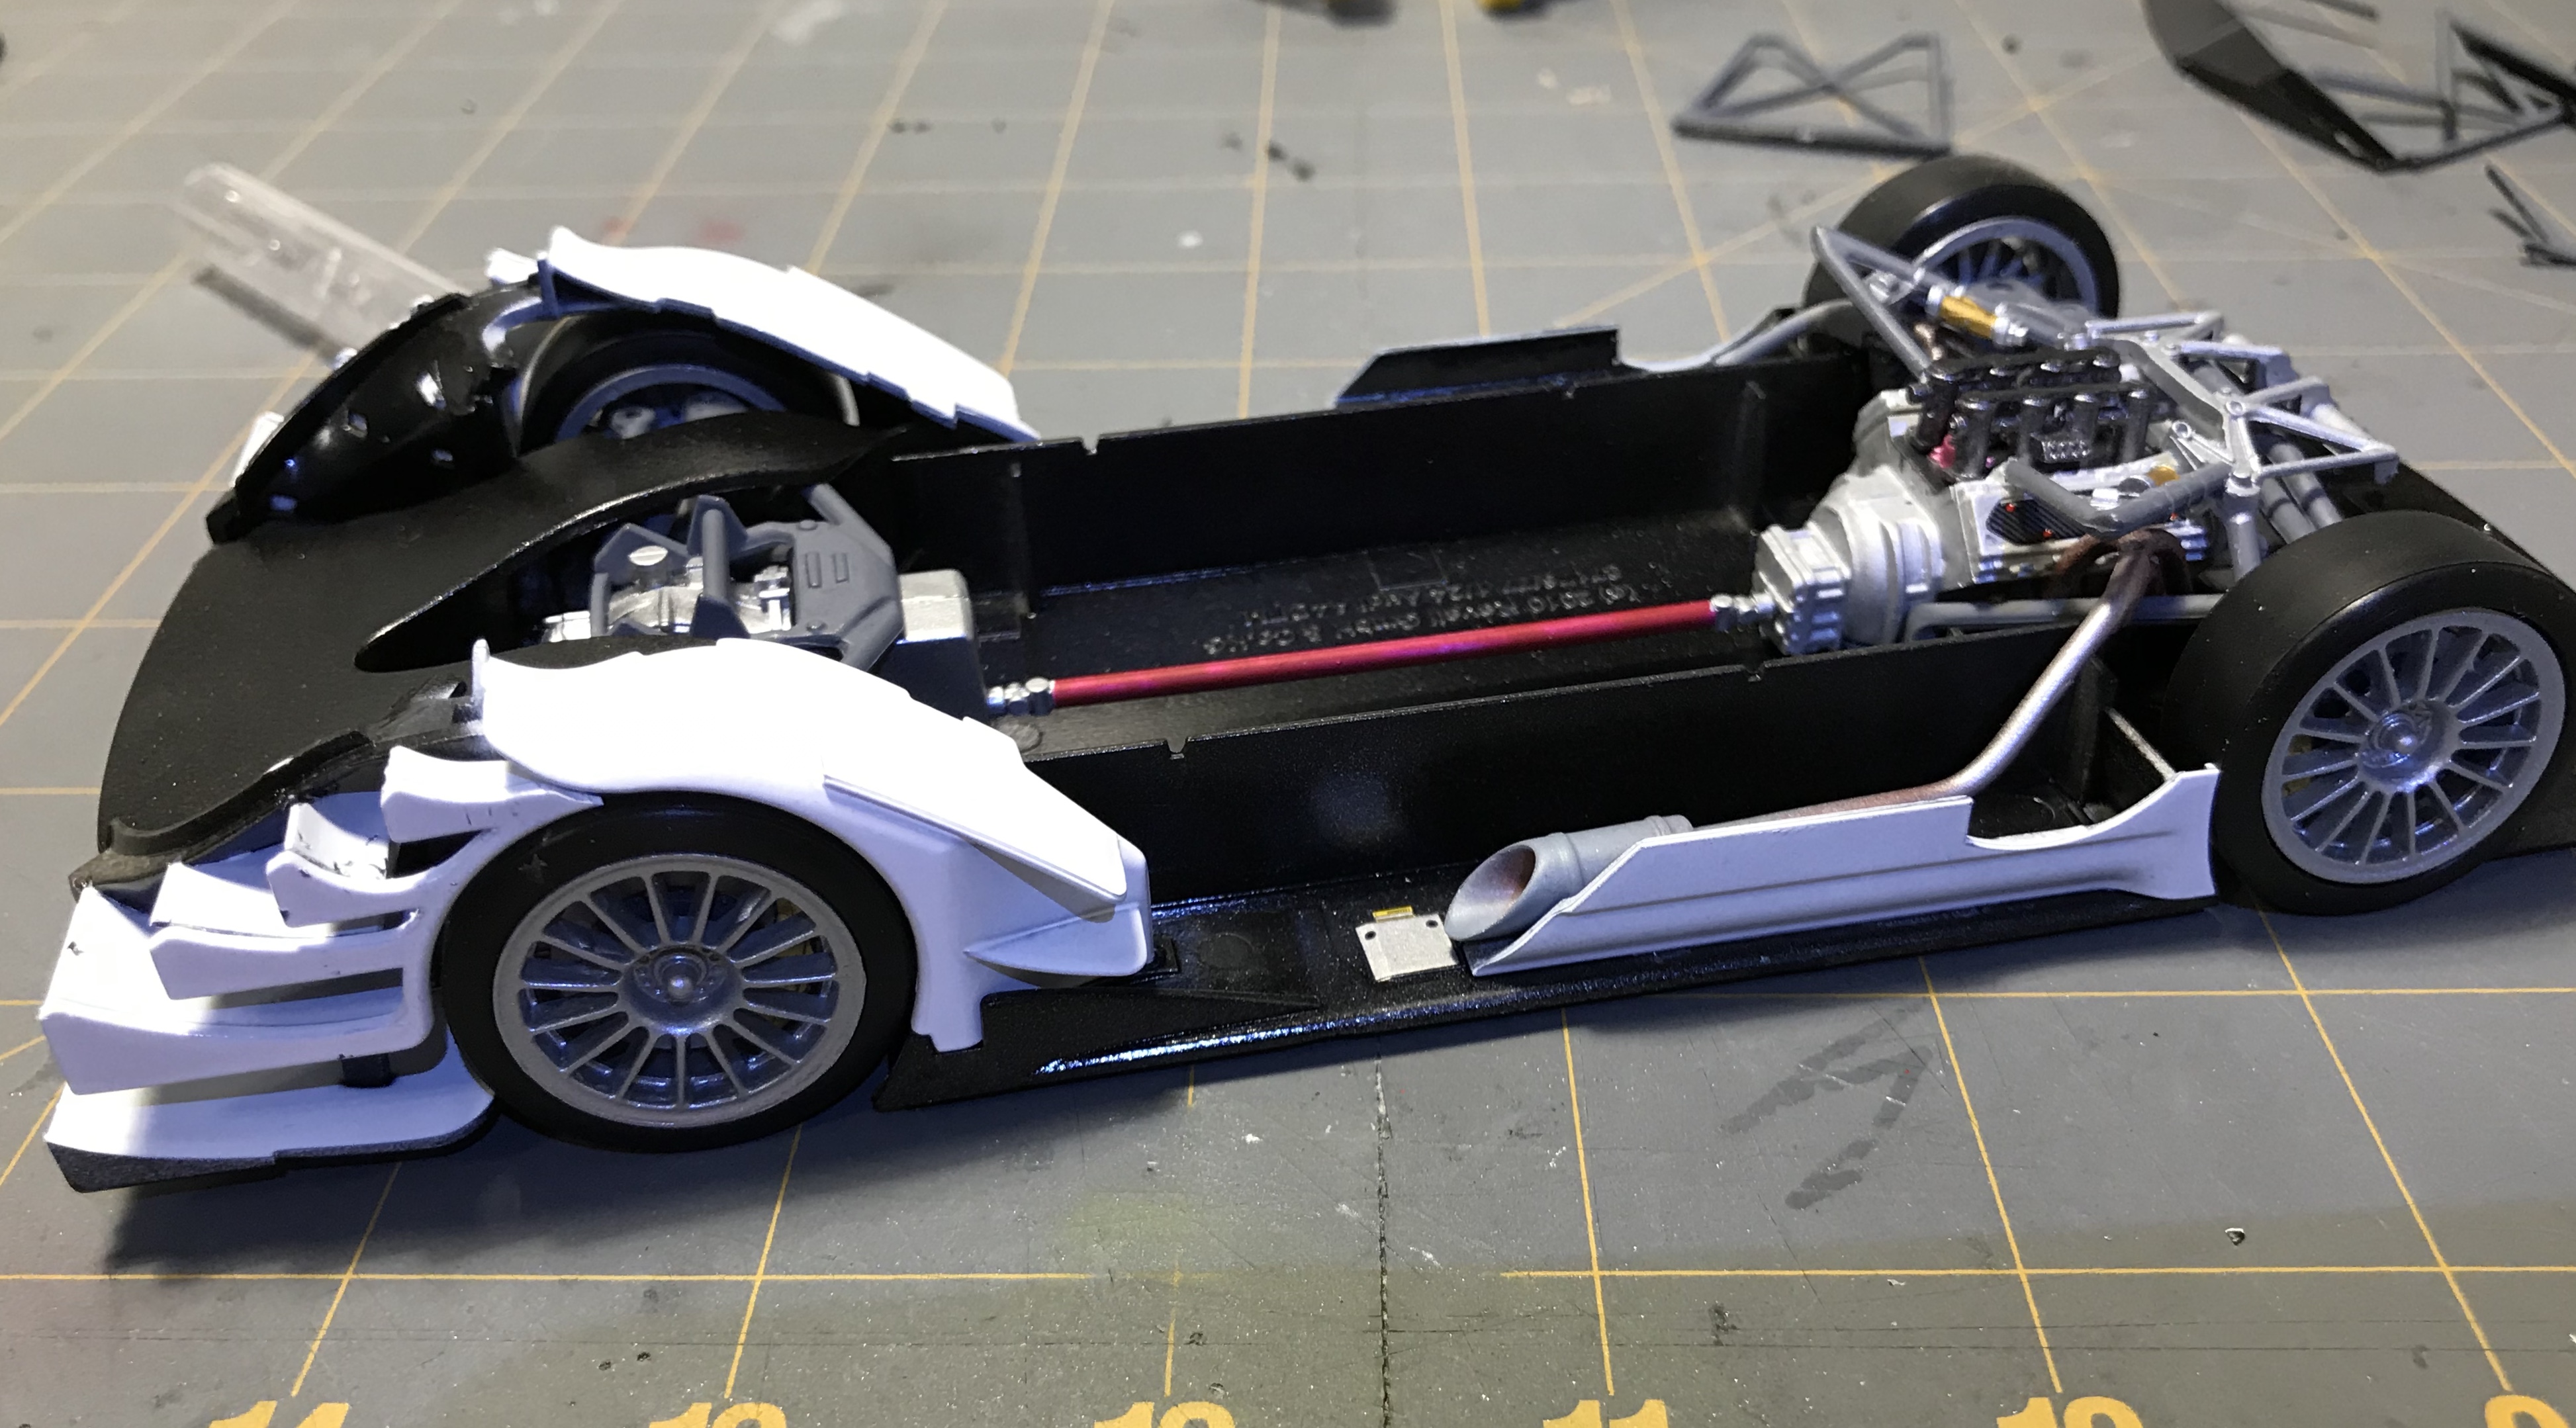
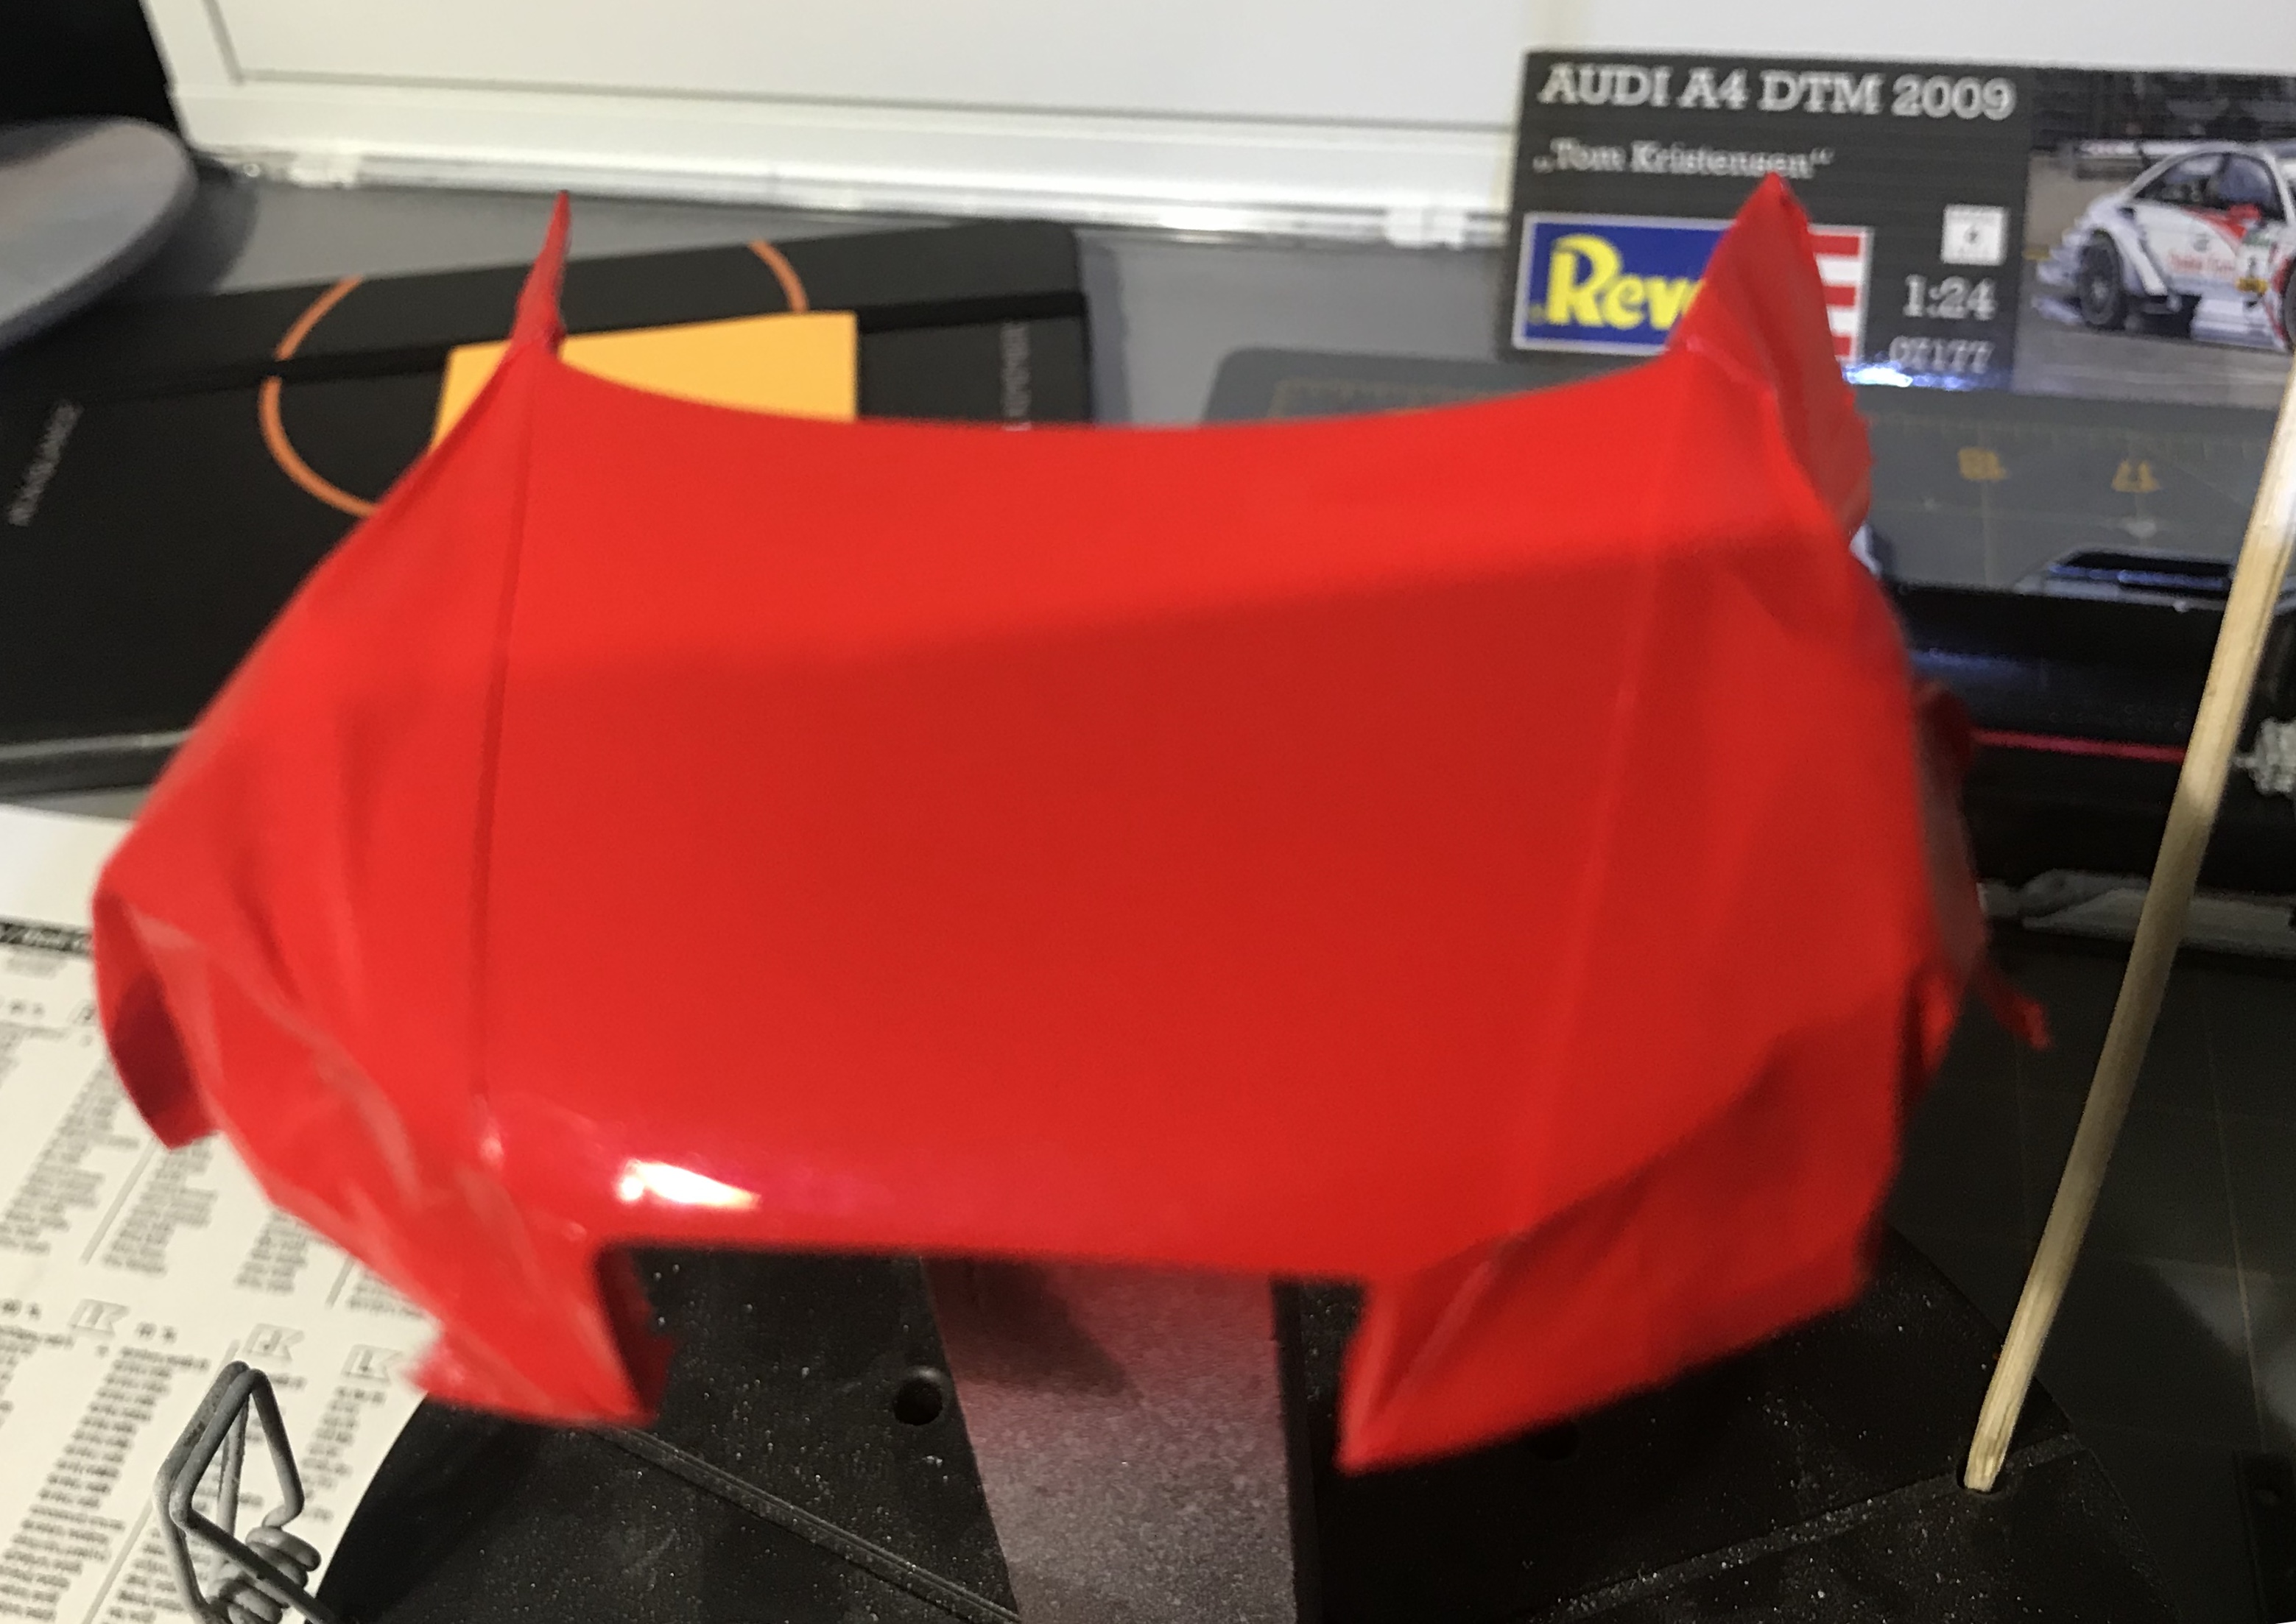
I started this in November of 2017 so I figured I’d better finish it before I start any new kits. So far it has been going together just fine and the only incident was yesterday when I dropped the hood on the carpet after the final coat of red. Into the alcohol bath it went and I repainted it this morning. I love all the crazy aero stuff on these cars.
-
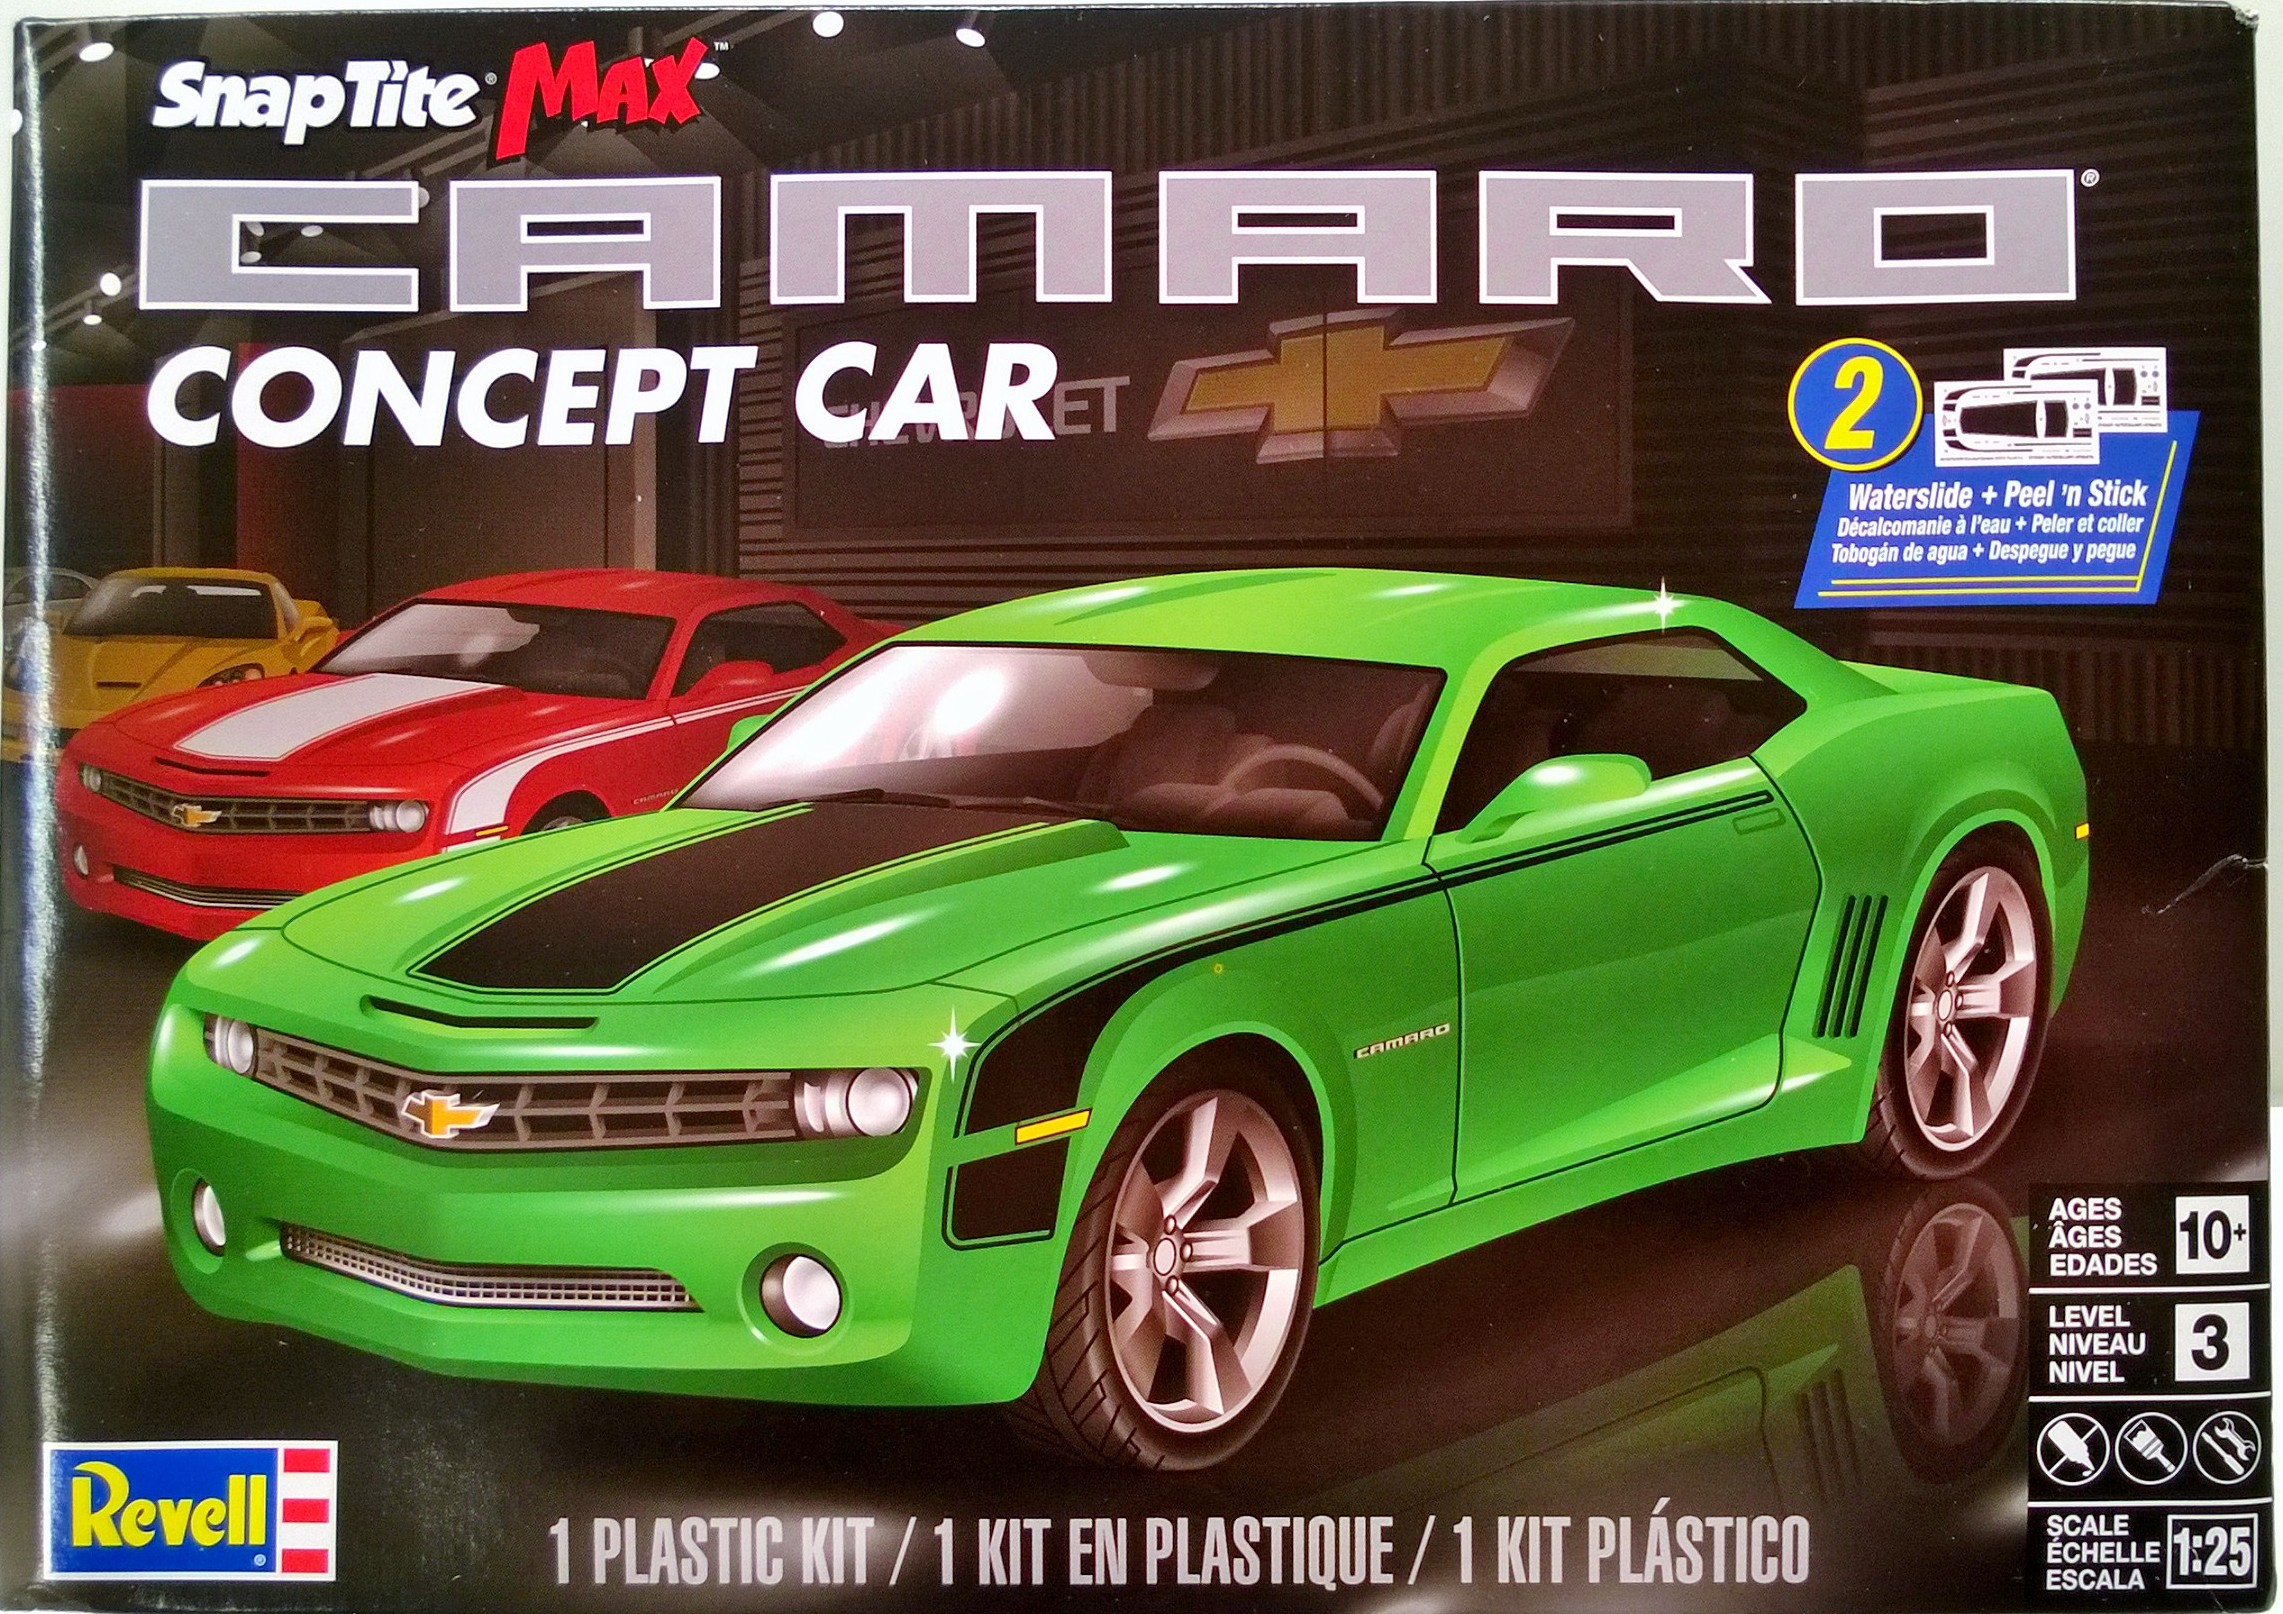
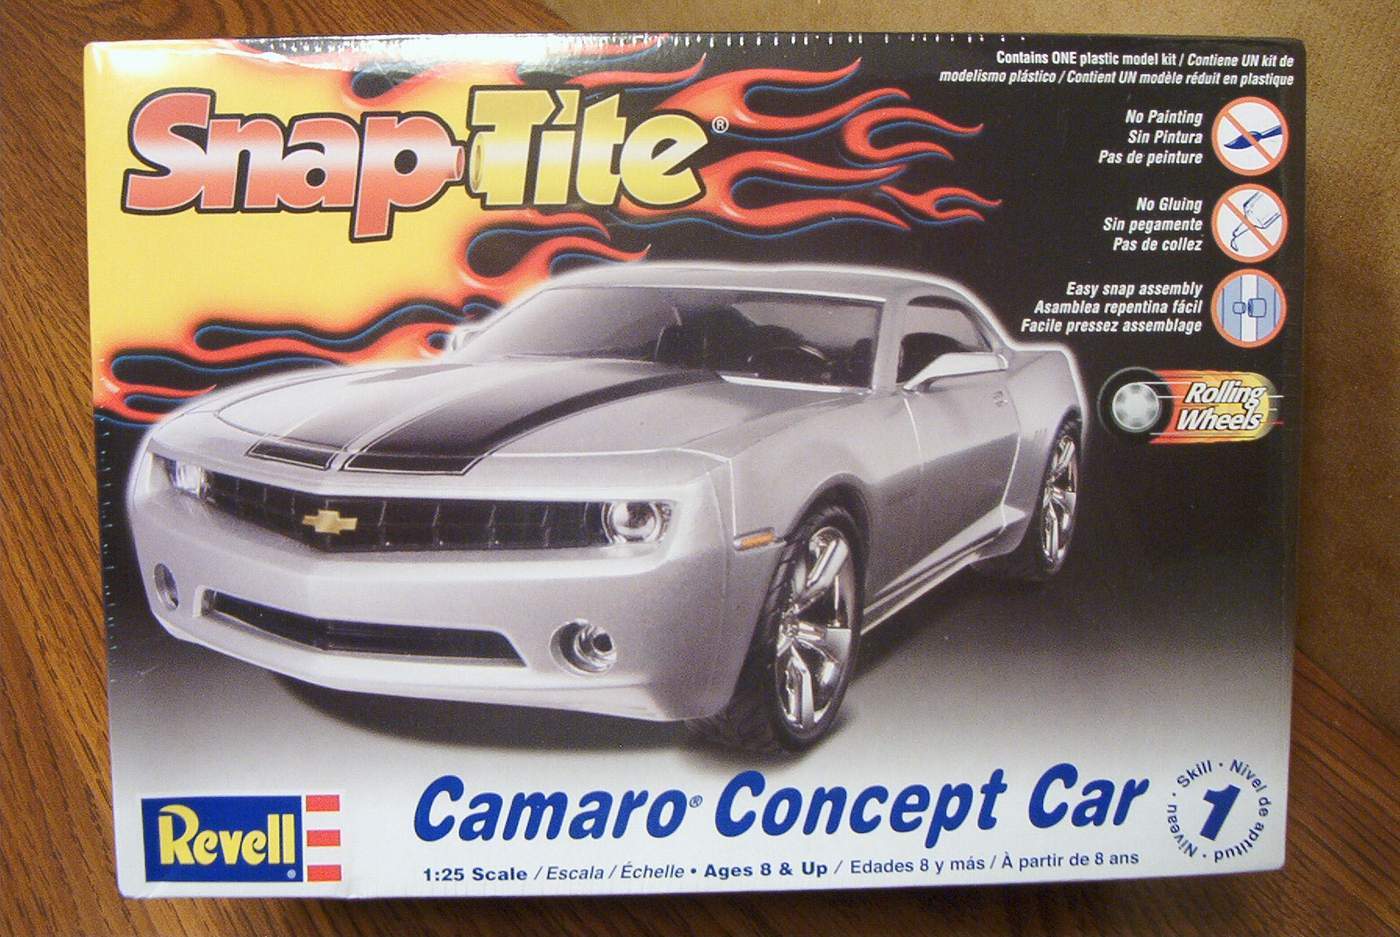
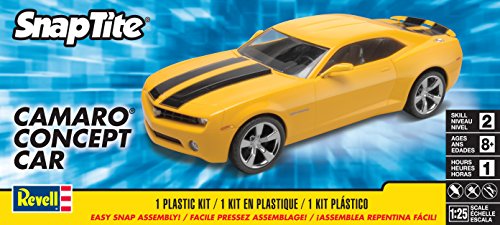
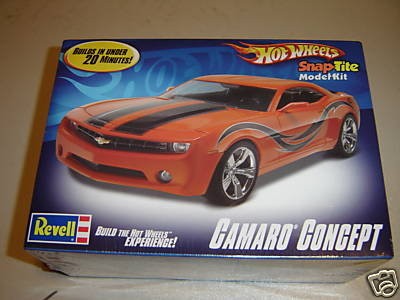
Here's a look at what's inside the 1/25 Revell Camaro Concept SnapTite Max, kit 85-1527, this time molded in lime green, and with both water slide decals and stickers included: http://modelkitreviews.proboards.com/thread/957/revell-1527-camaro-concept-snaptite This is pretty much the same Revell Camaro Concept kit first released back in 2006, with some minor changes as noted above. Previous kit versions were molded with silver, orange, and yellow bodies, and I believe the silver version was also offered in Revell's Build & Play program, too:
-
Well I built this from the foose issue of the 1/12 kit. This is my first big scale kit I have completed. Mostly box stock. Paint is a duplicolor gm color and the stripes are airbrushed on. I added the springs, vacuum lines, brake/fuel lines and other small details in the bay. Overall the kit was pretty decent to put together. There was a few fitment issues and the chrome plating is not very good. But the finished product came out very well. This will probably be my last finished build for 2018 ? Thanks for looking.
-
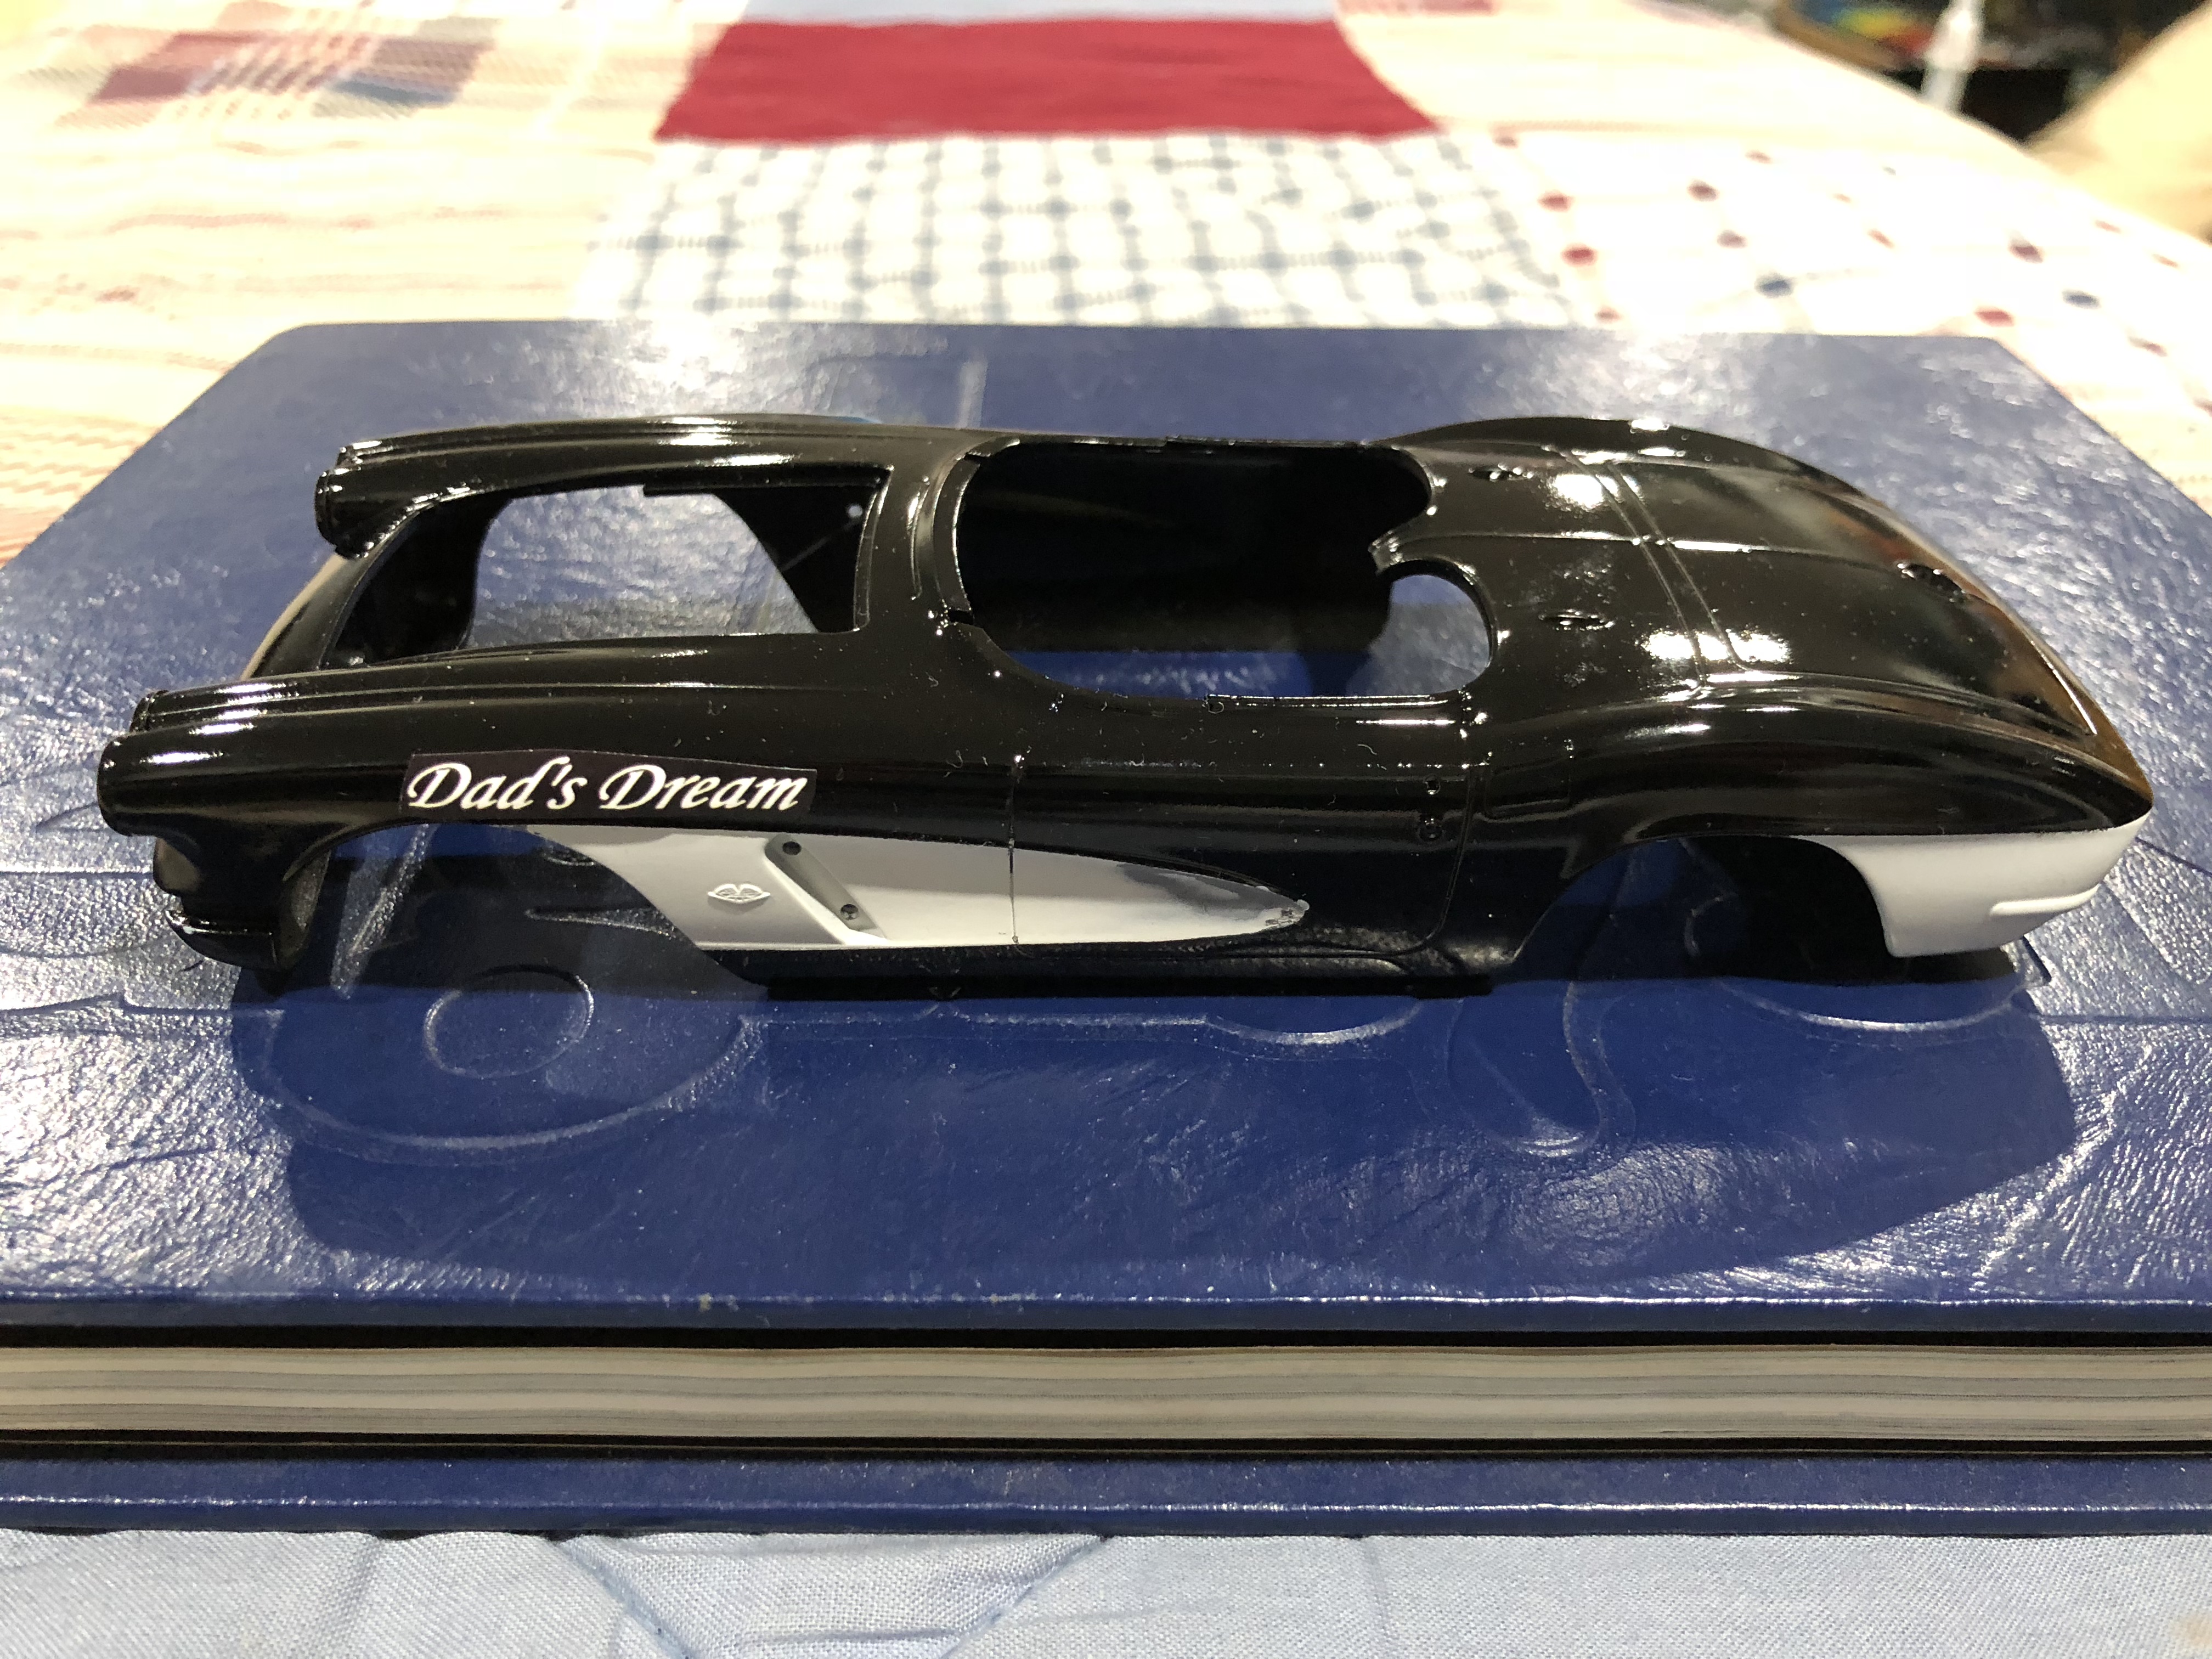
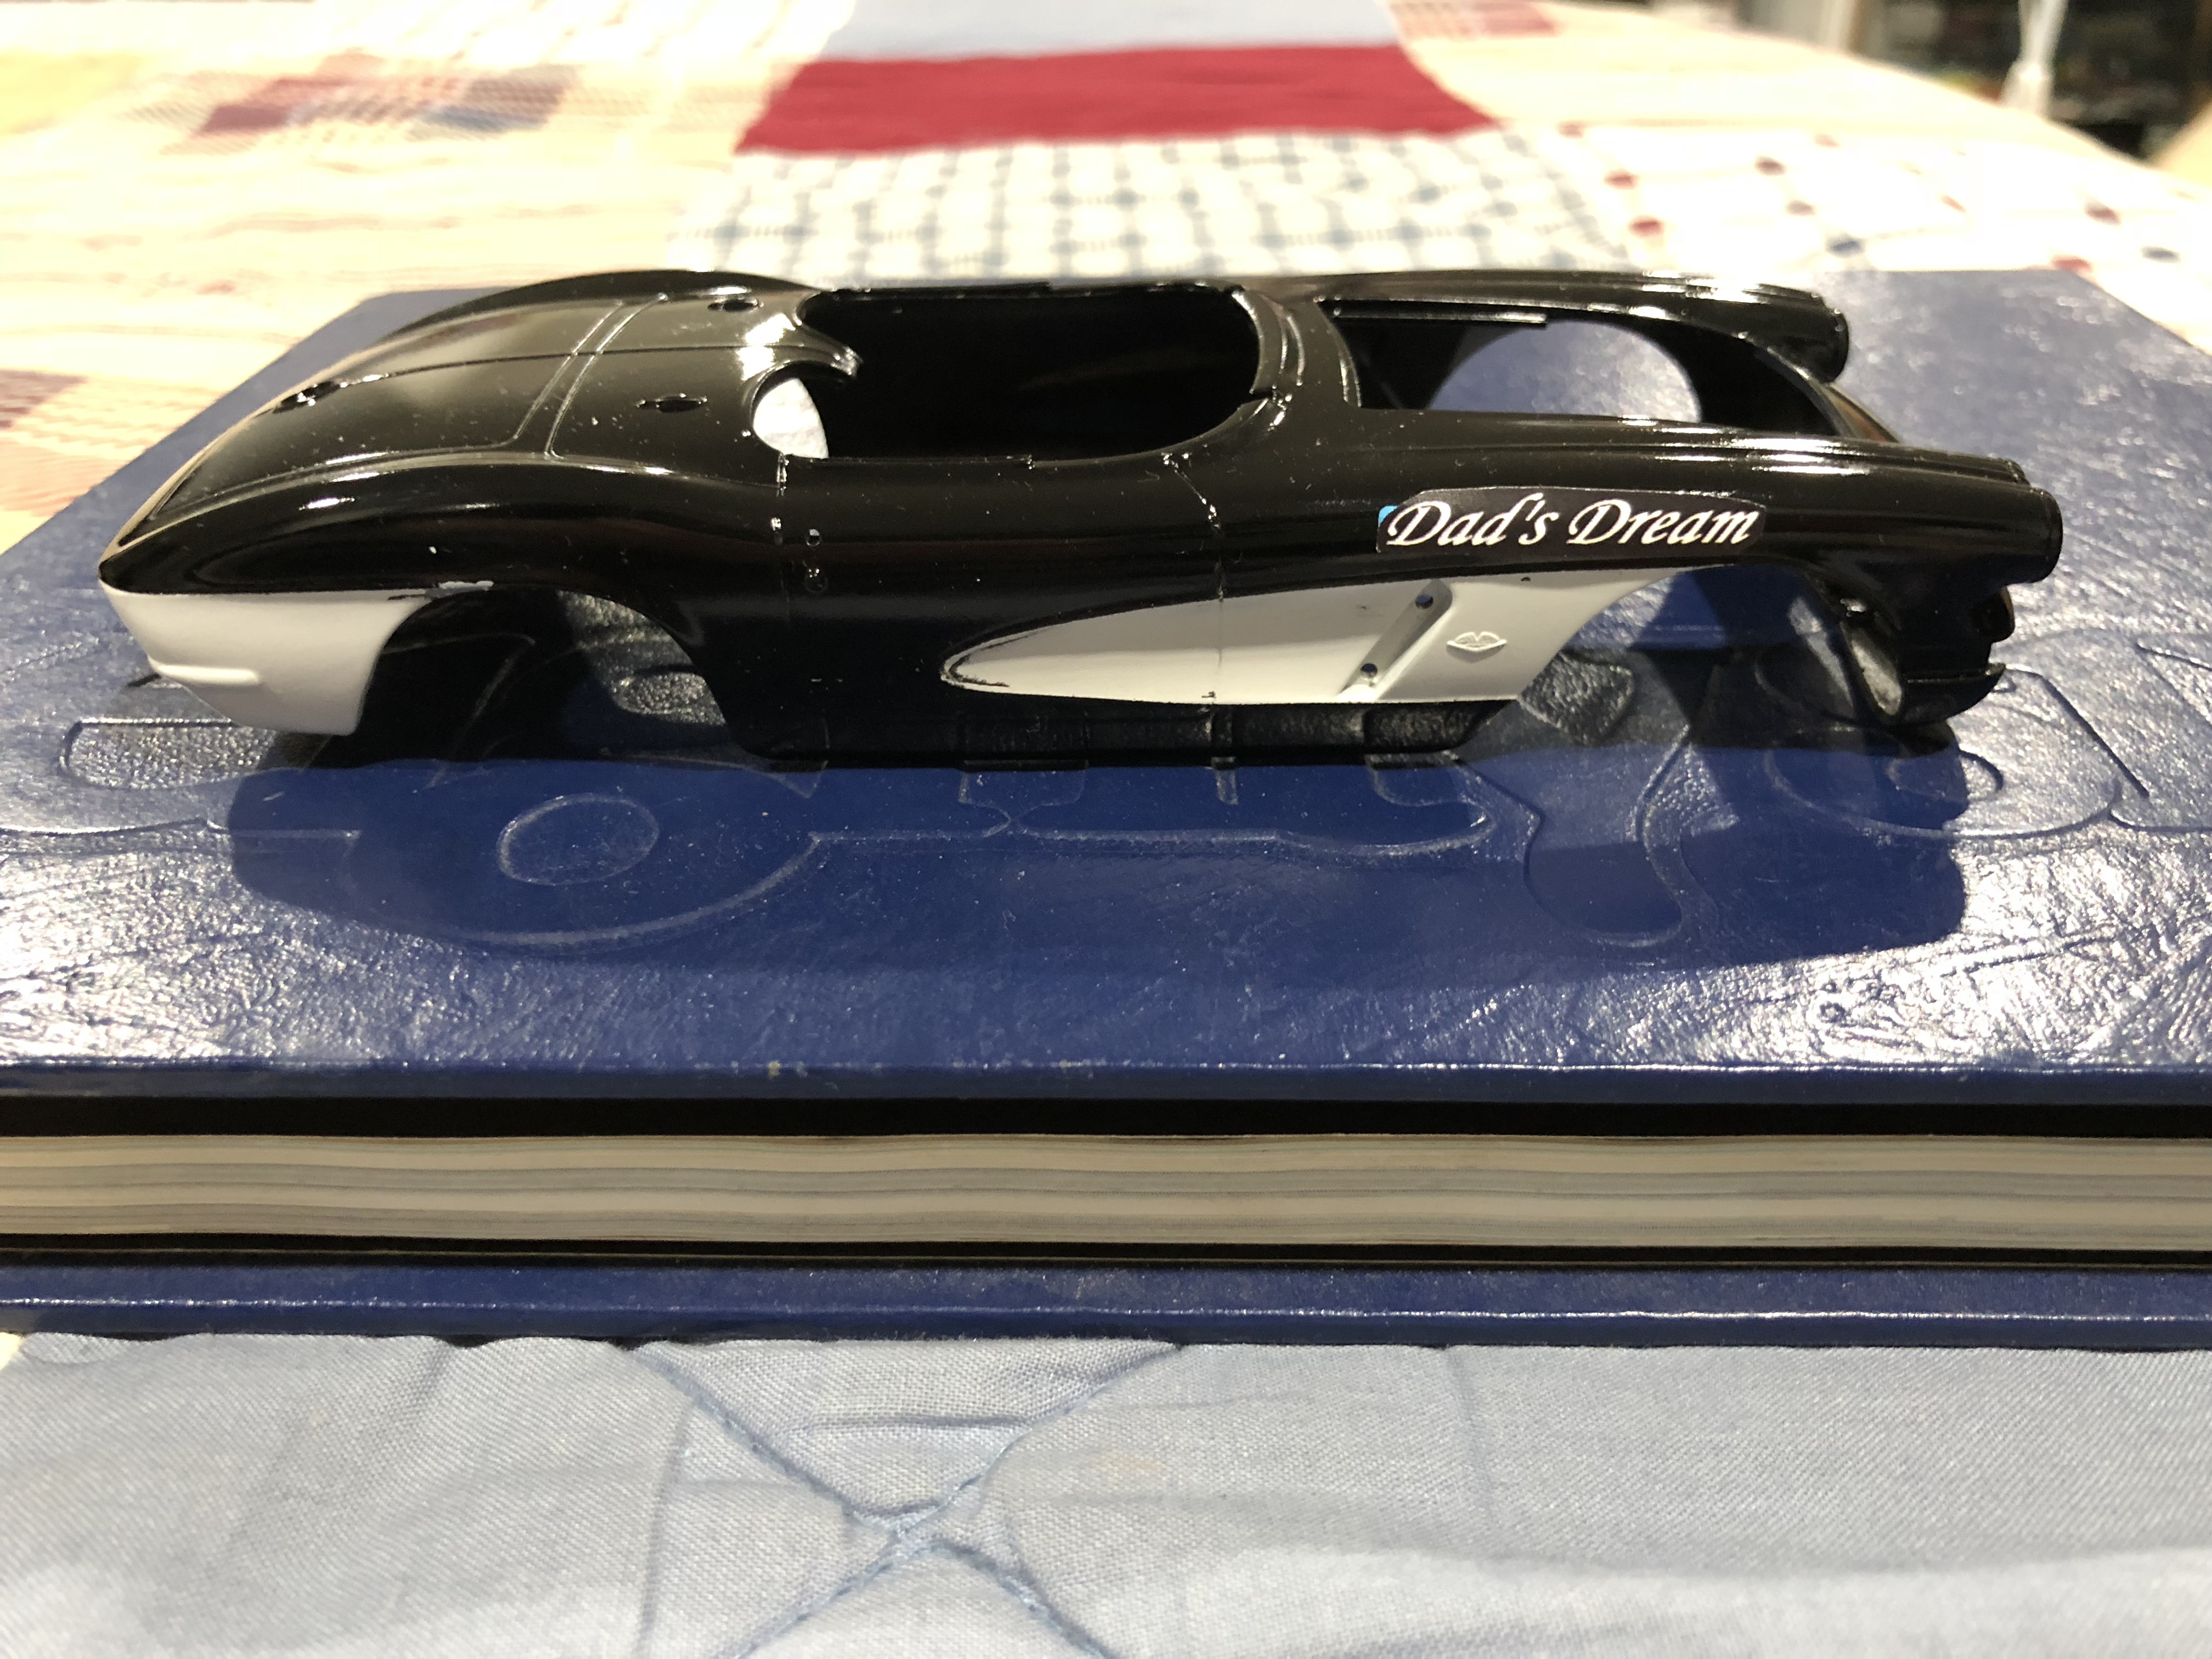
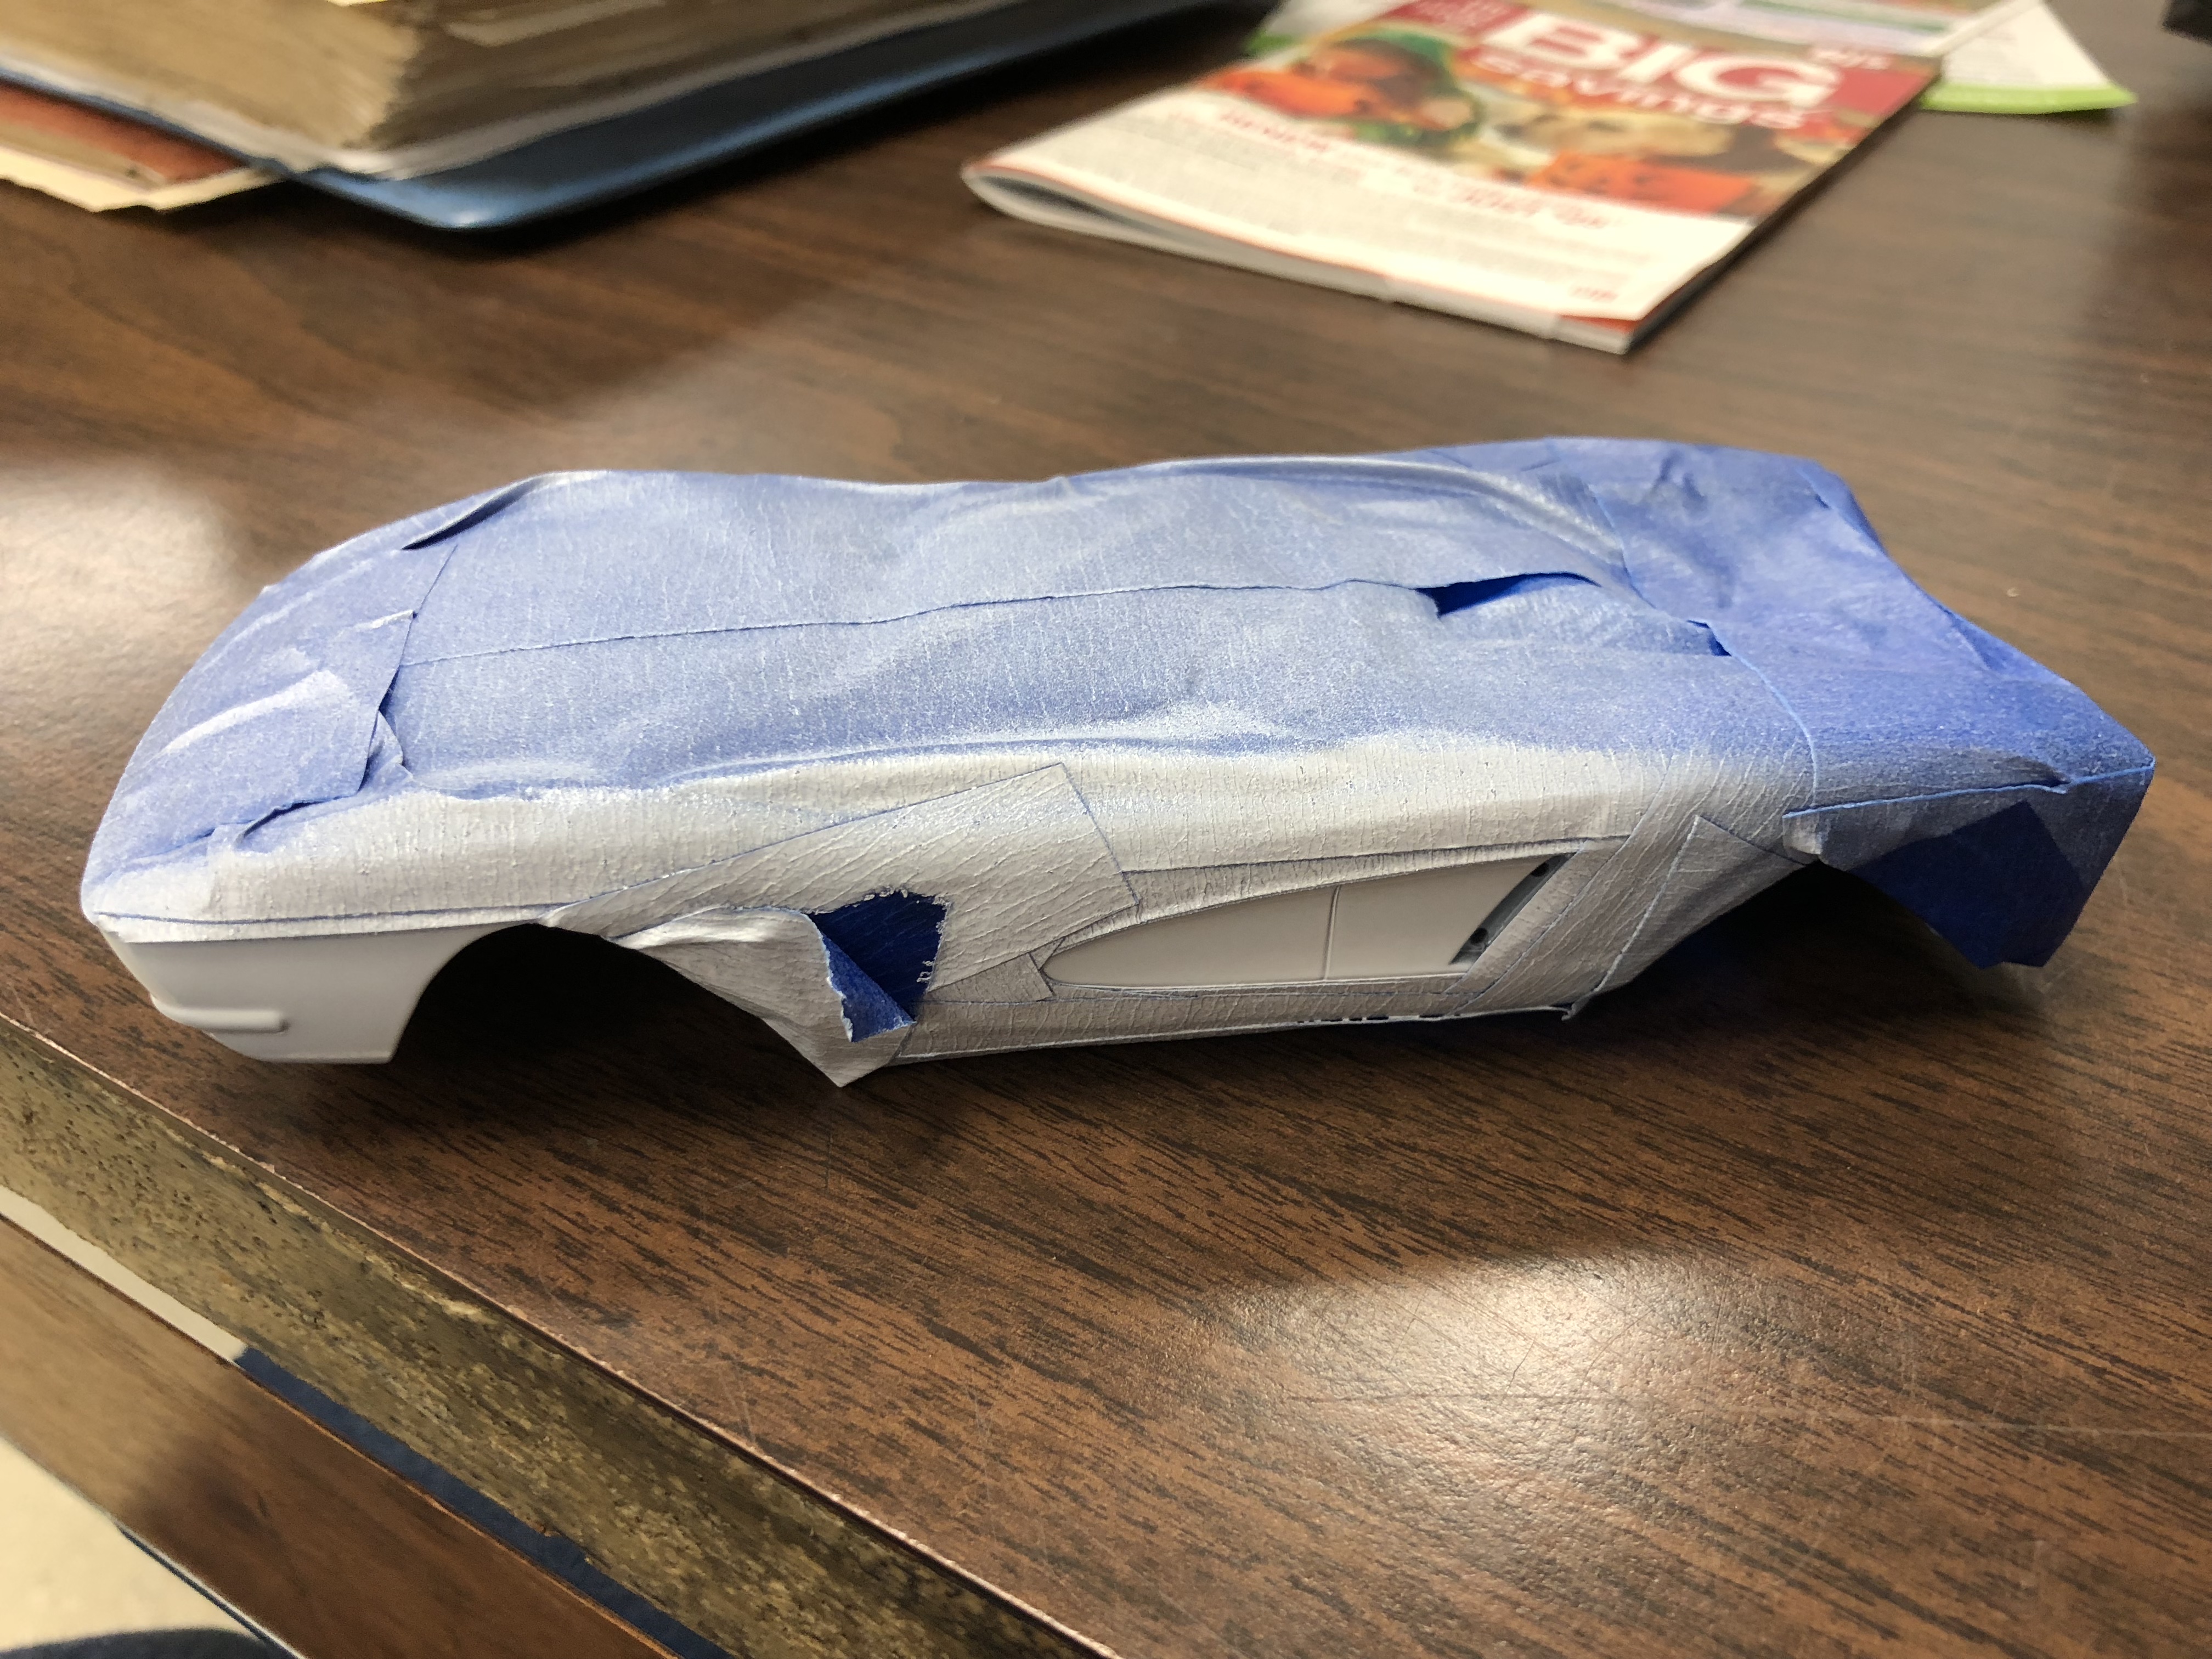
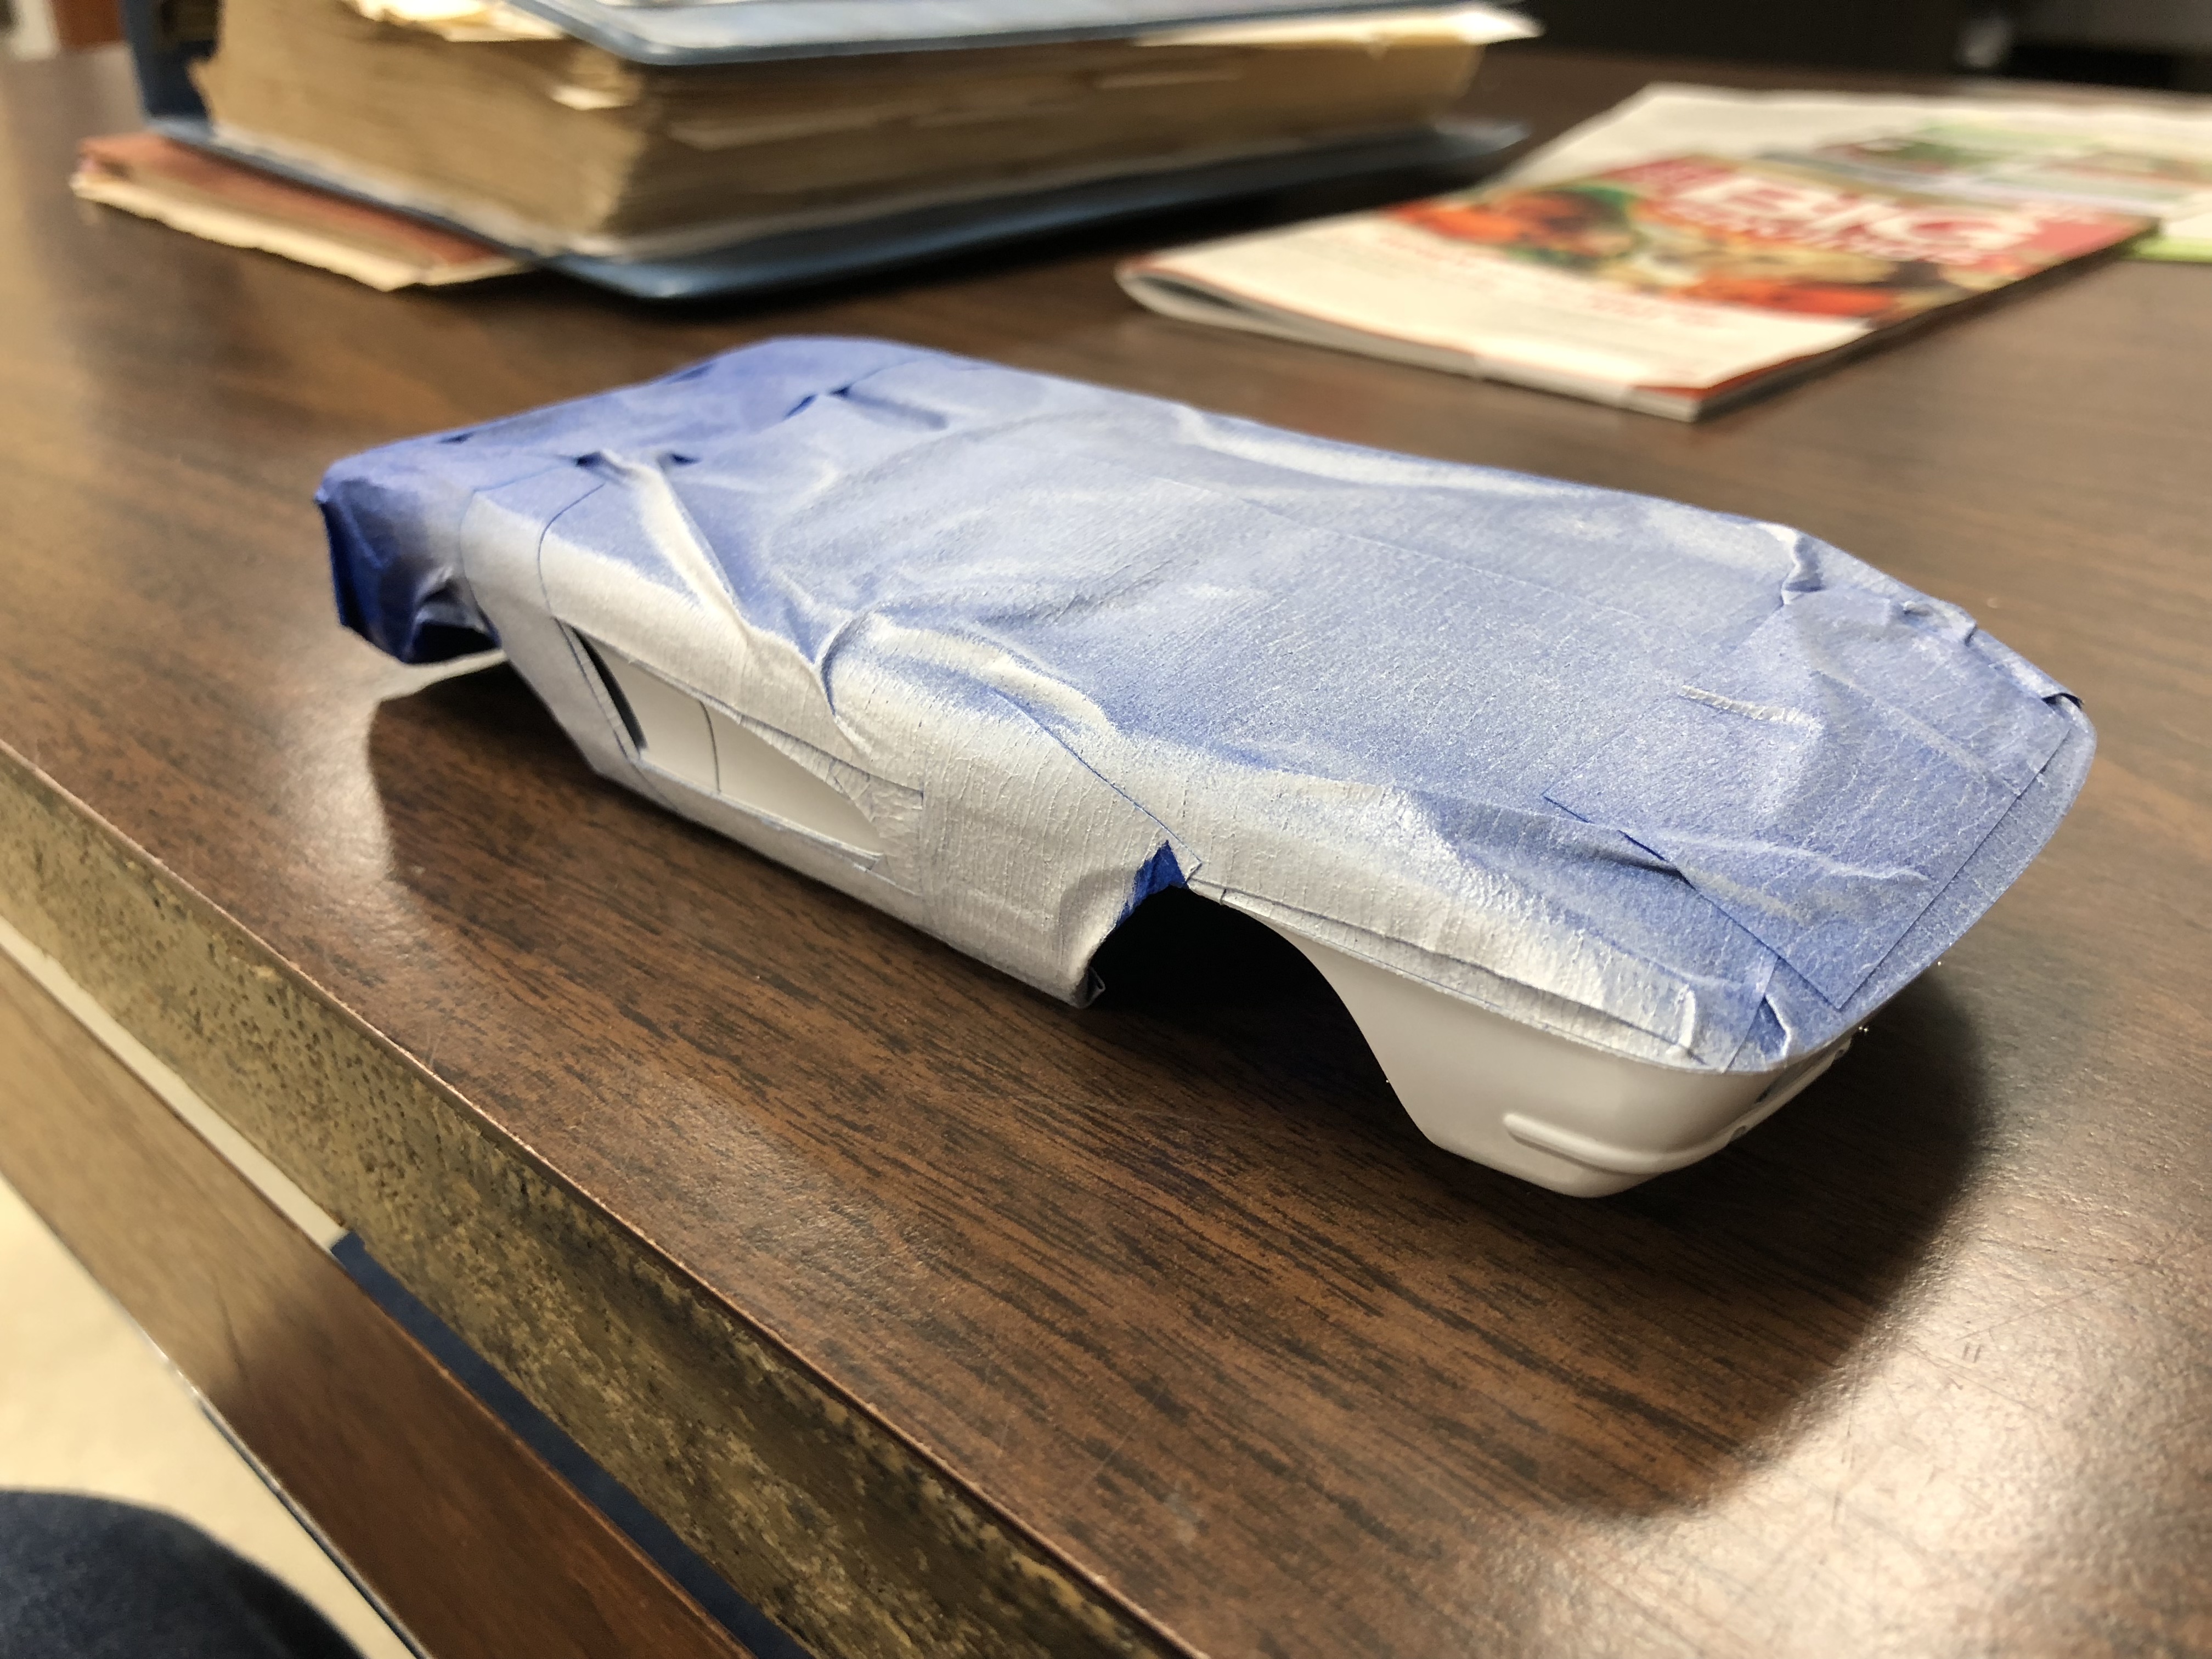
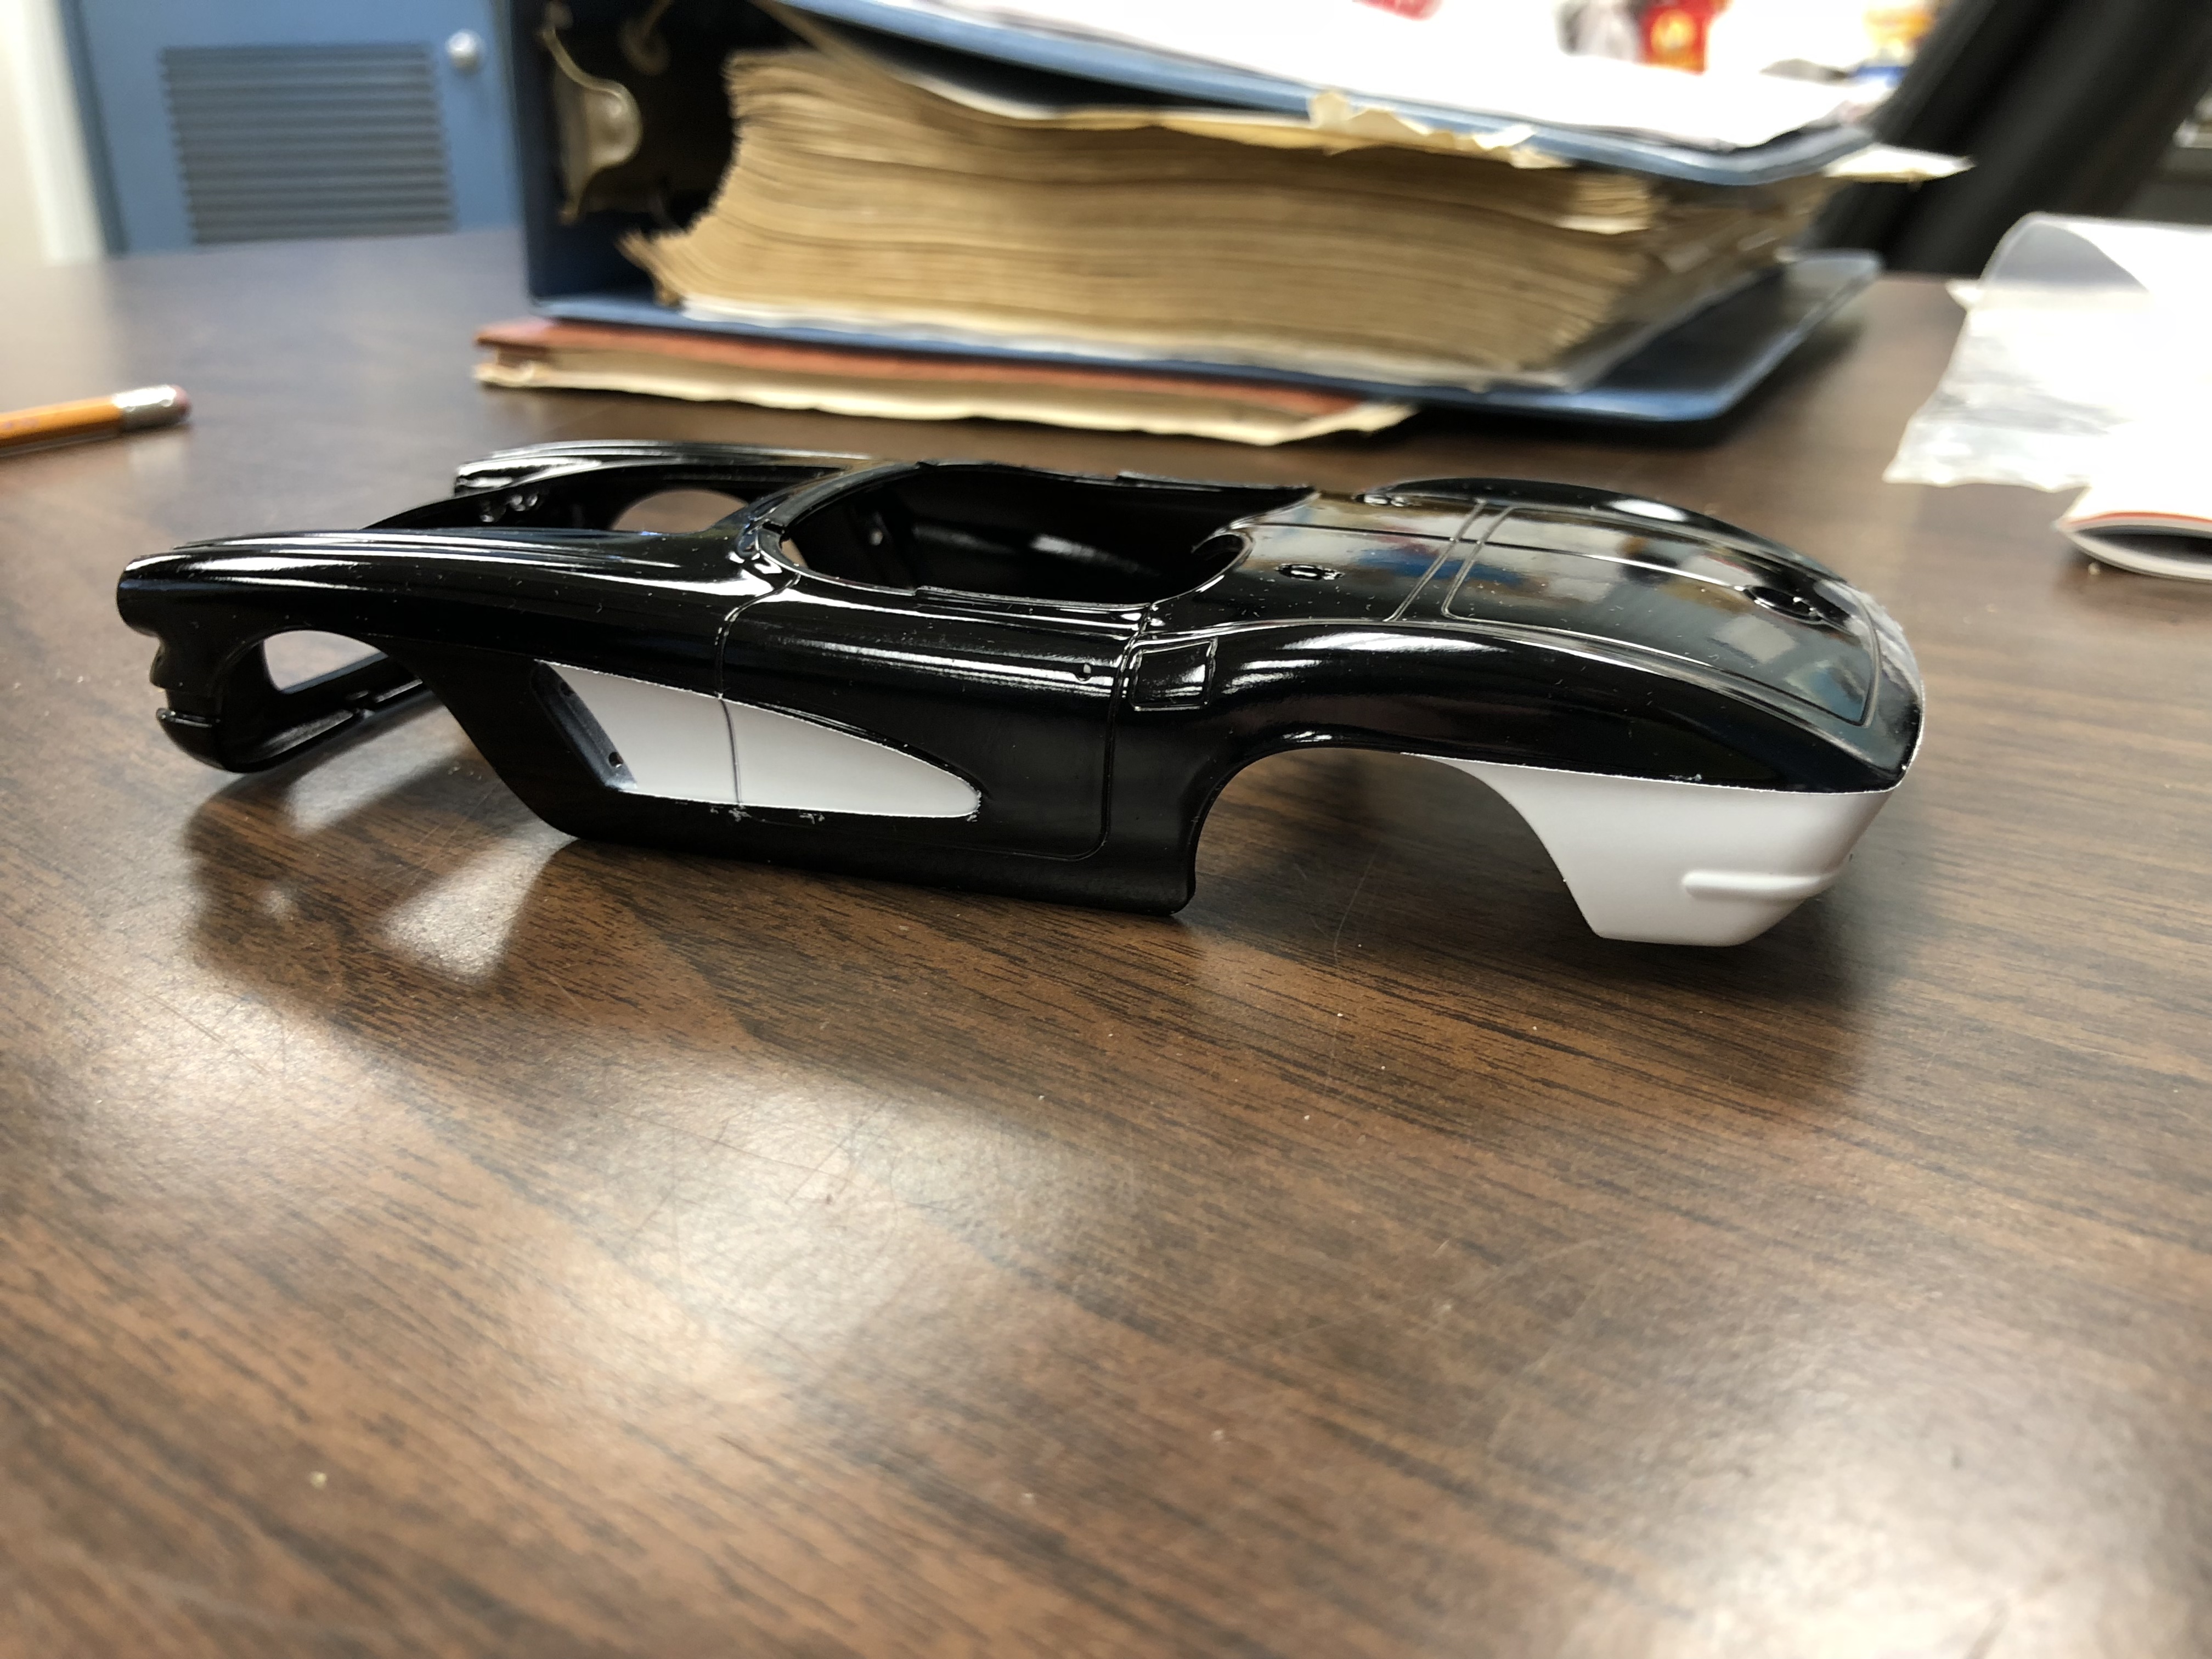
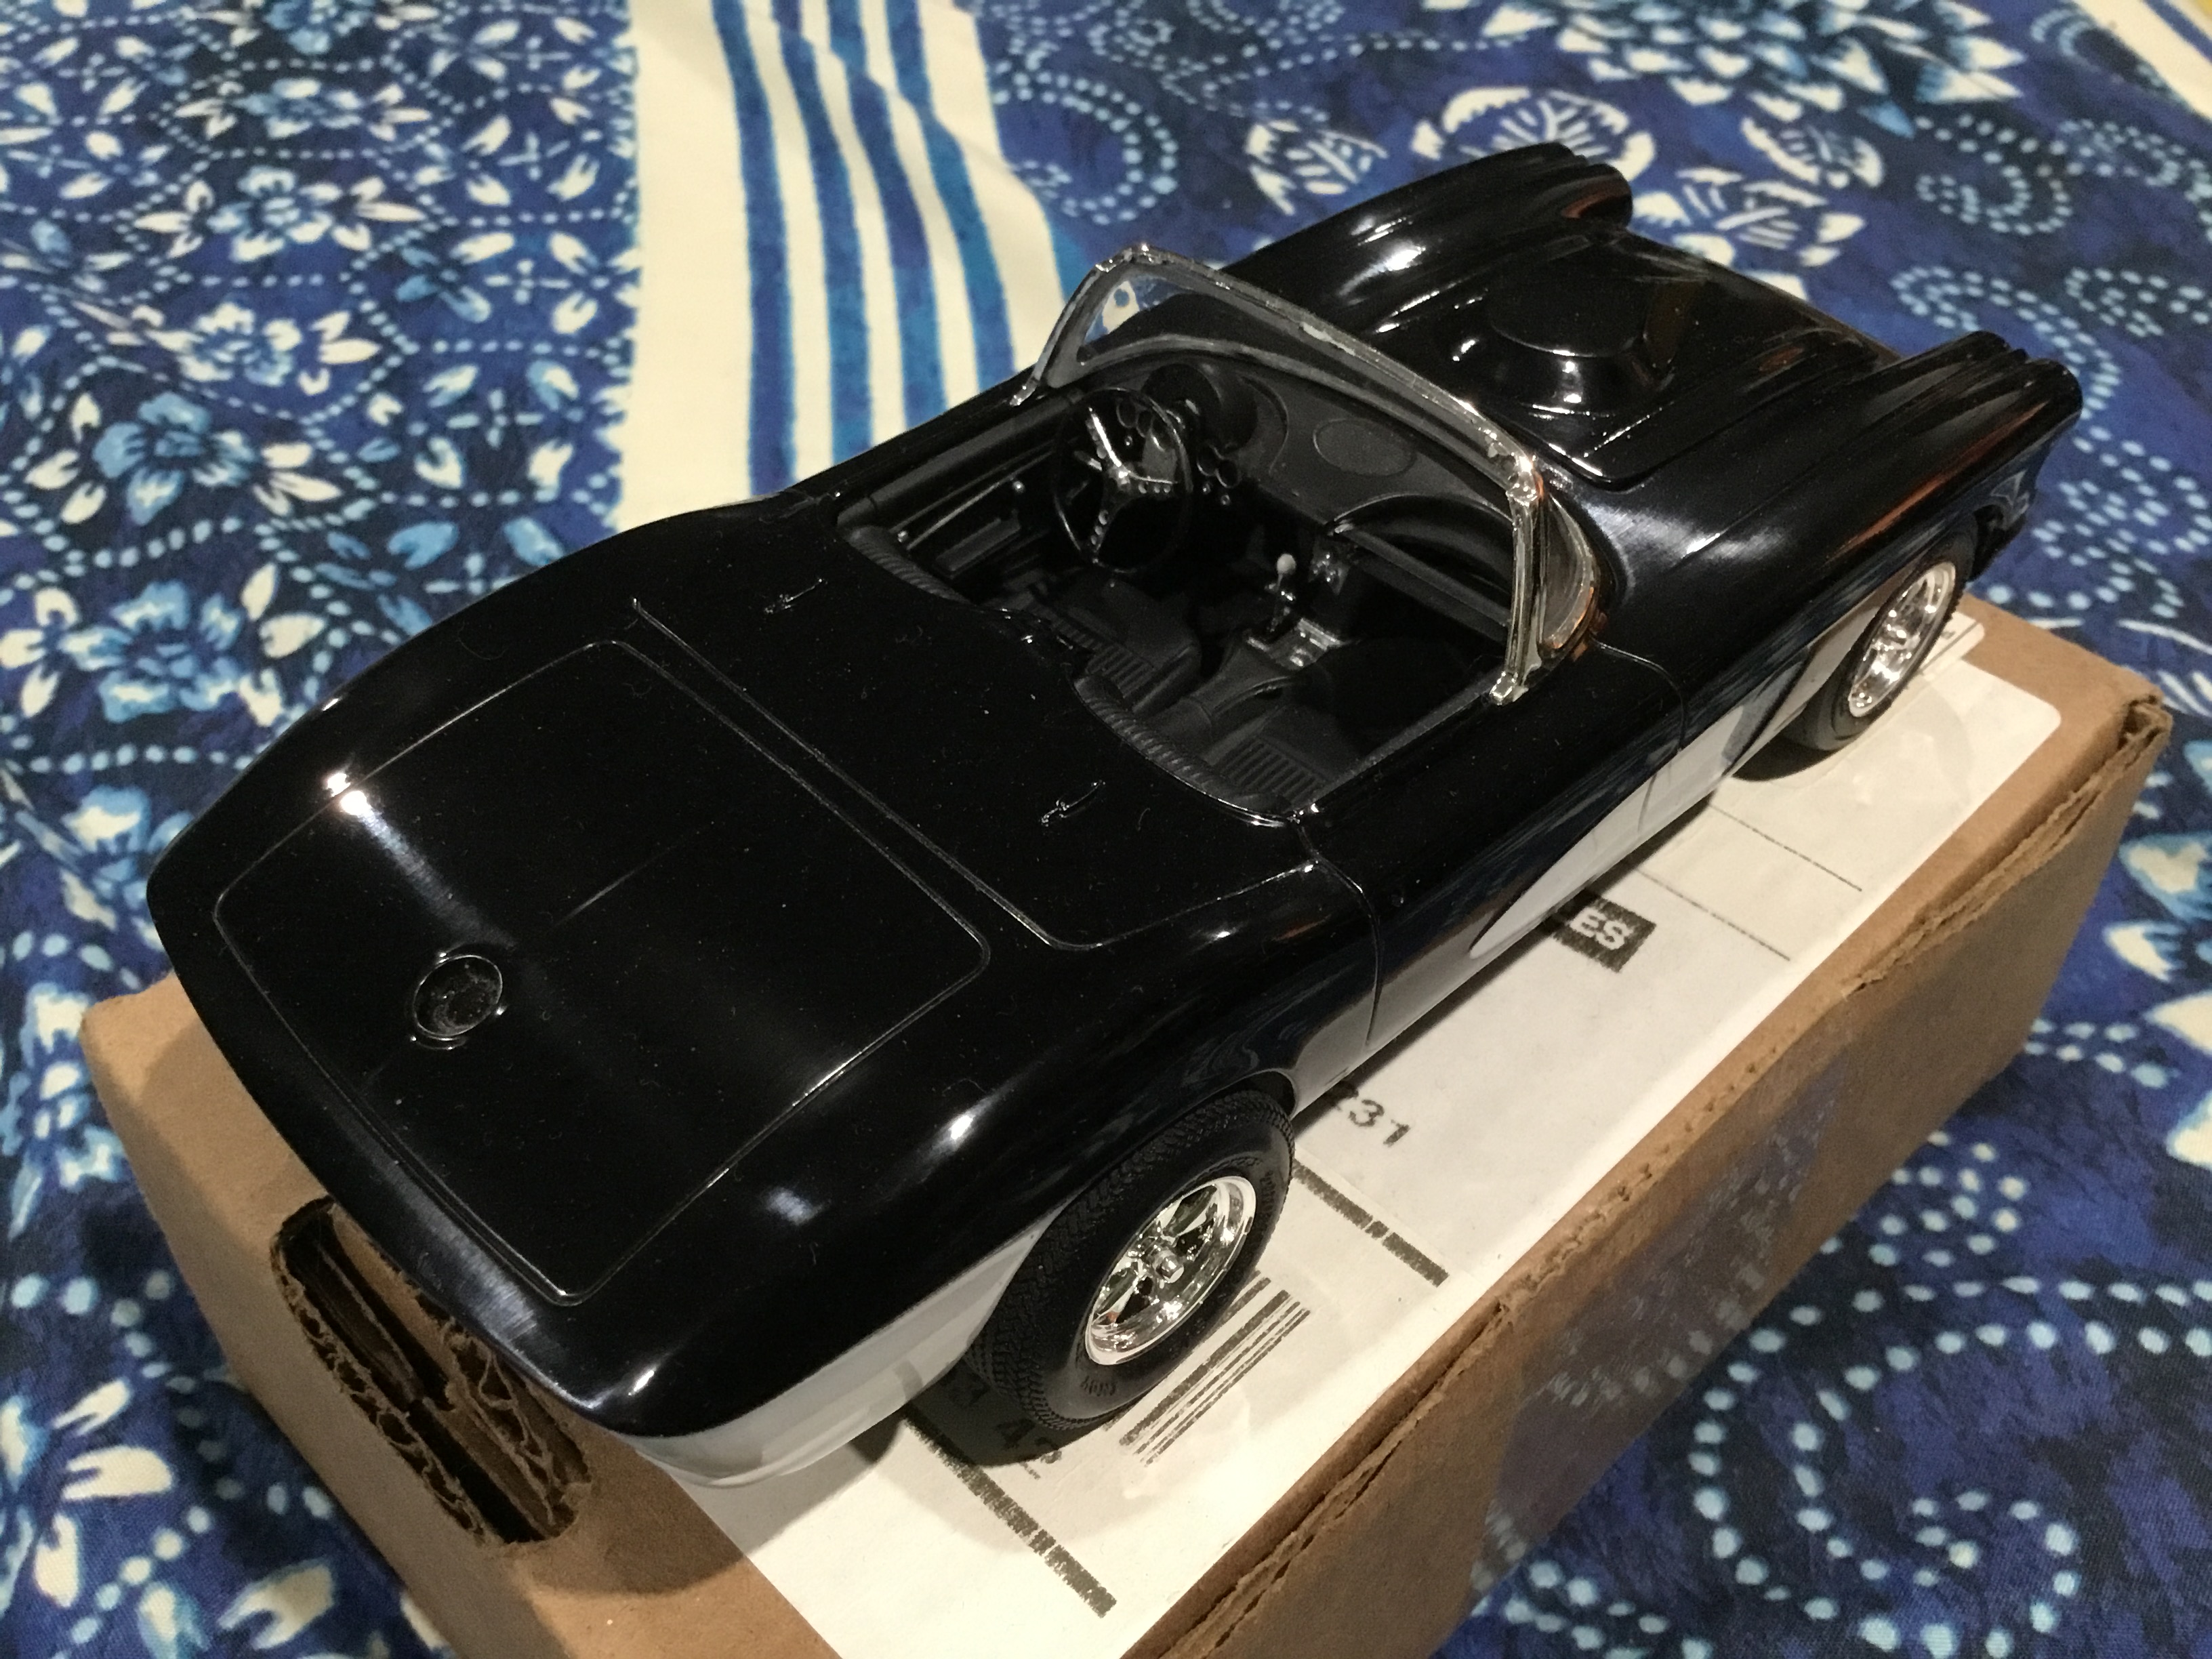
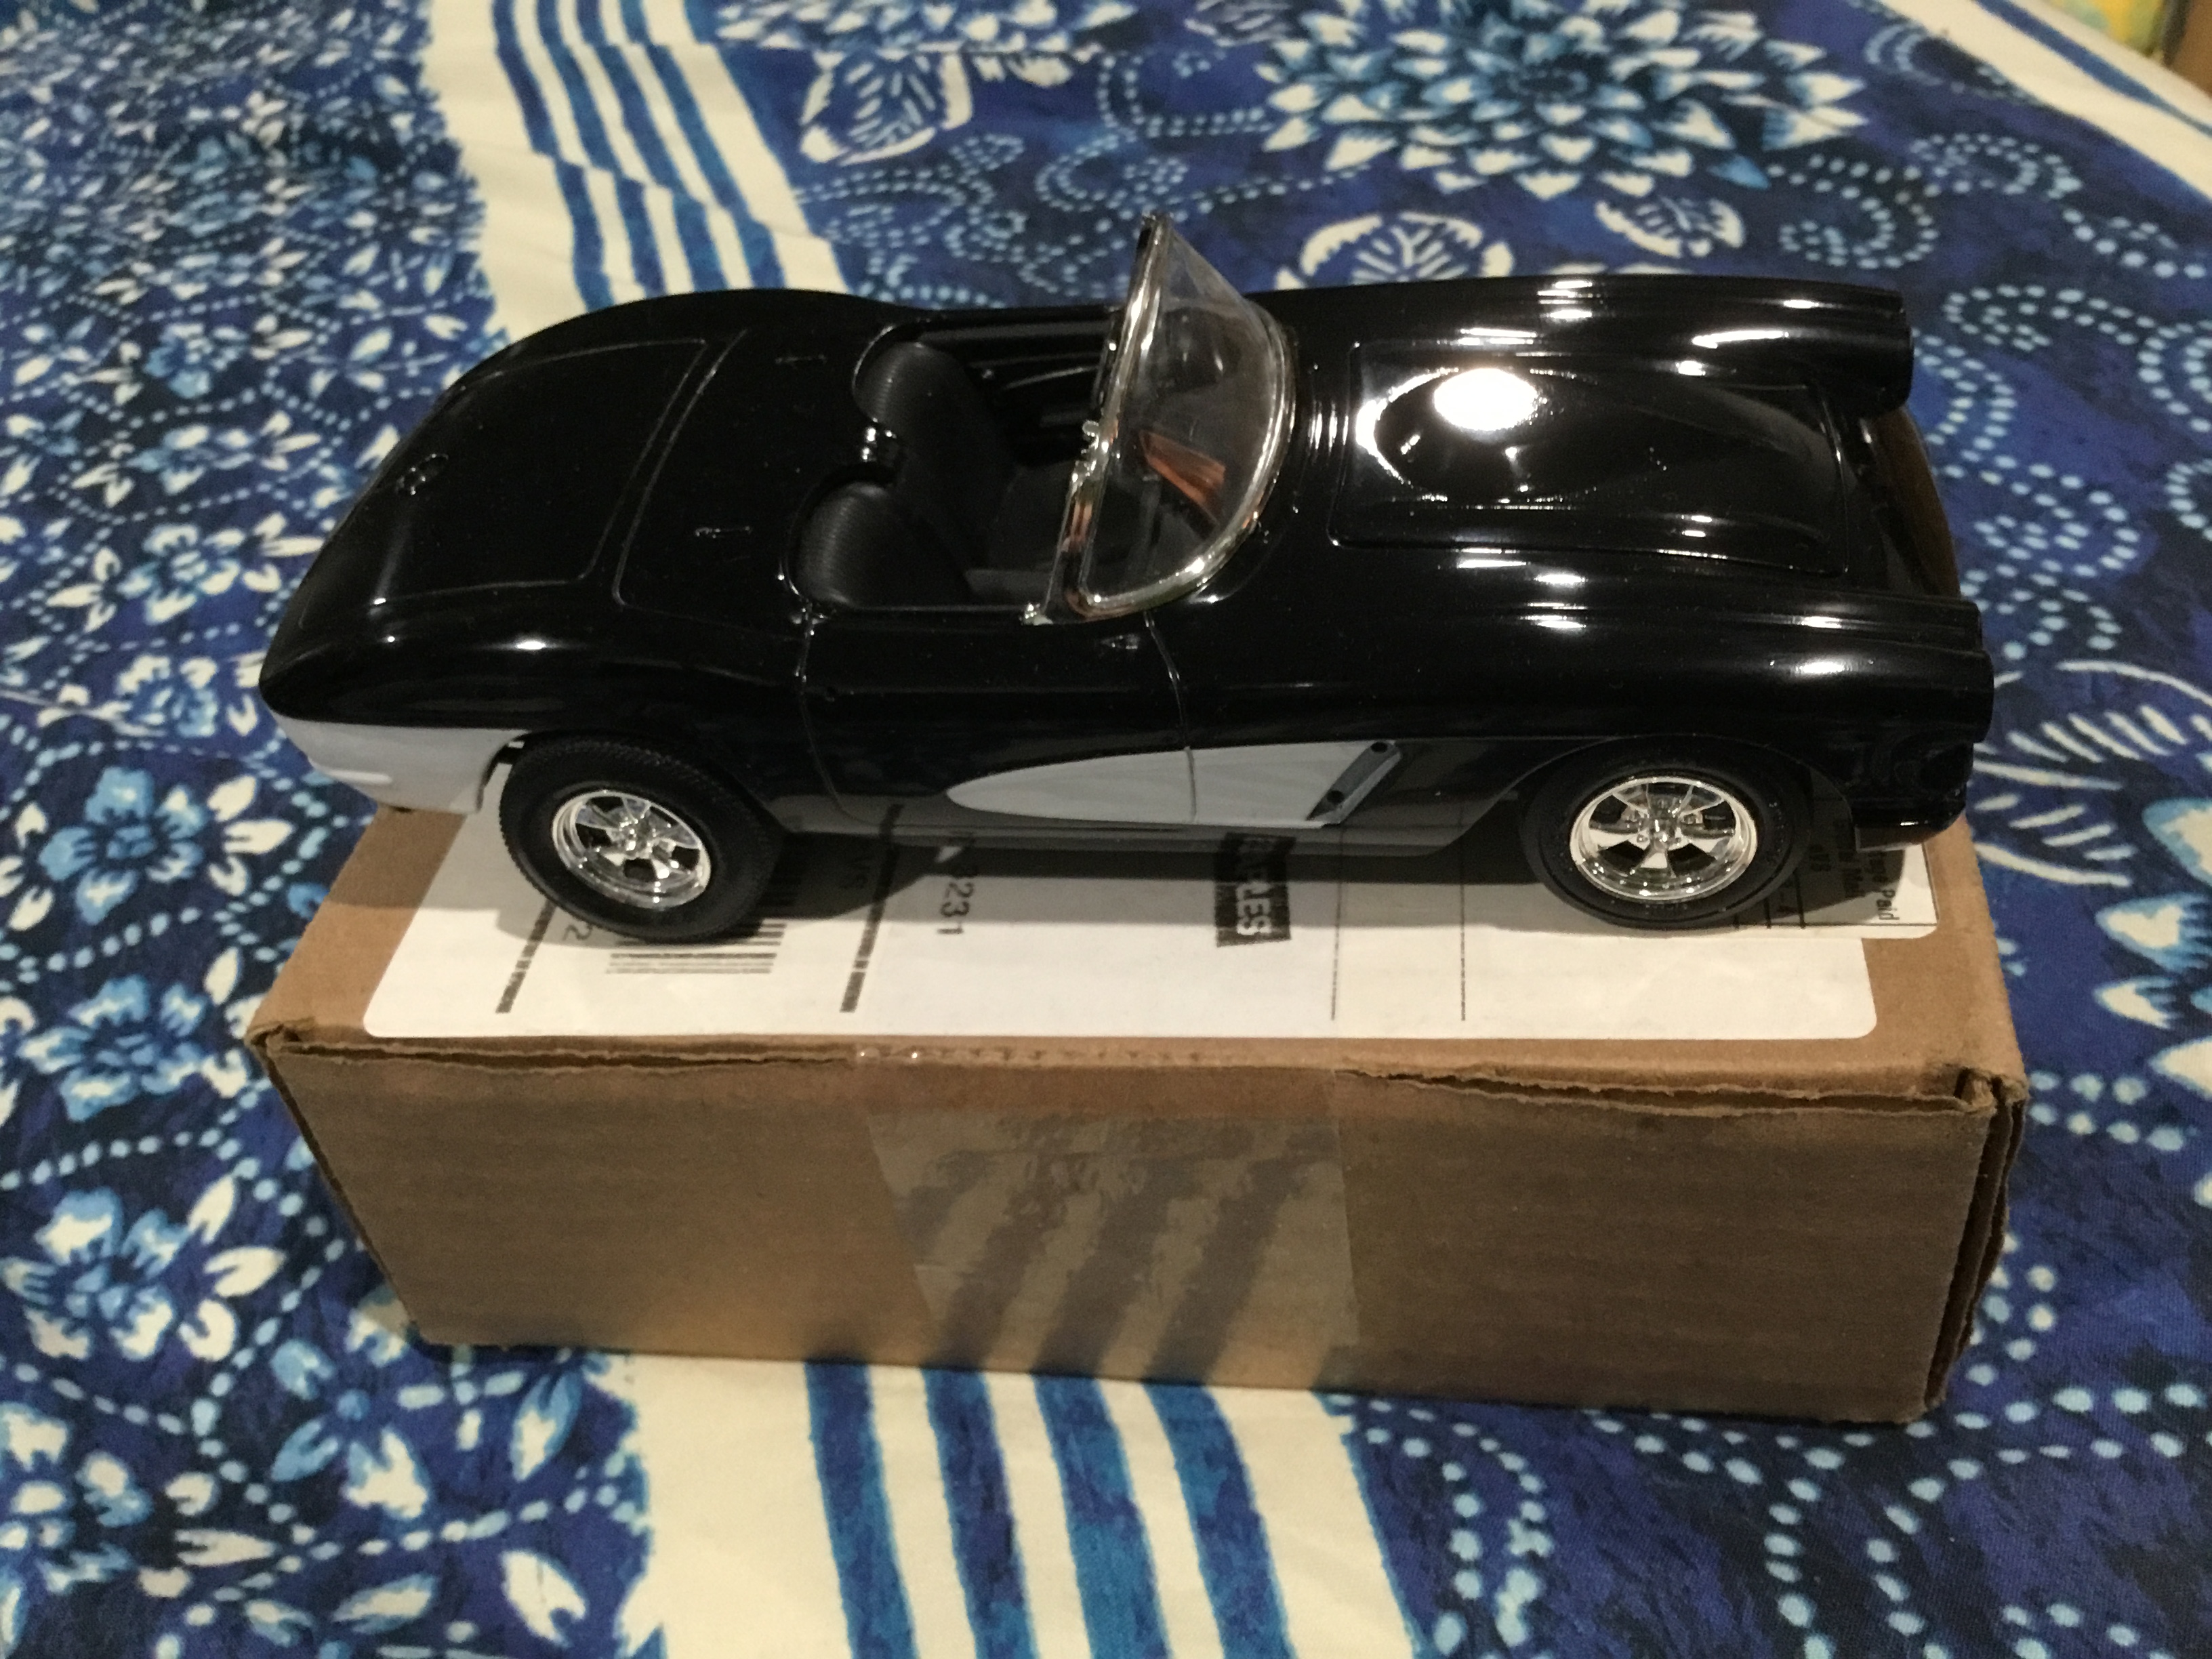
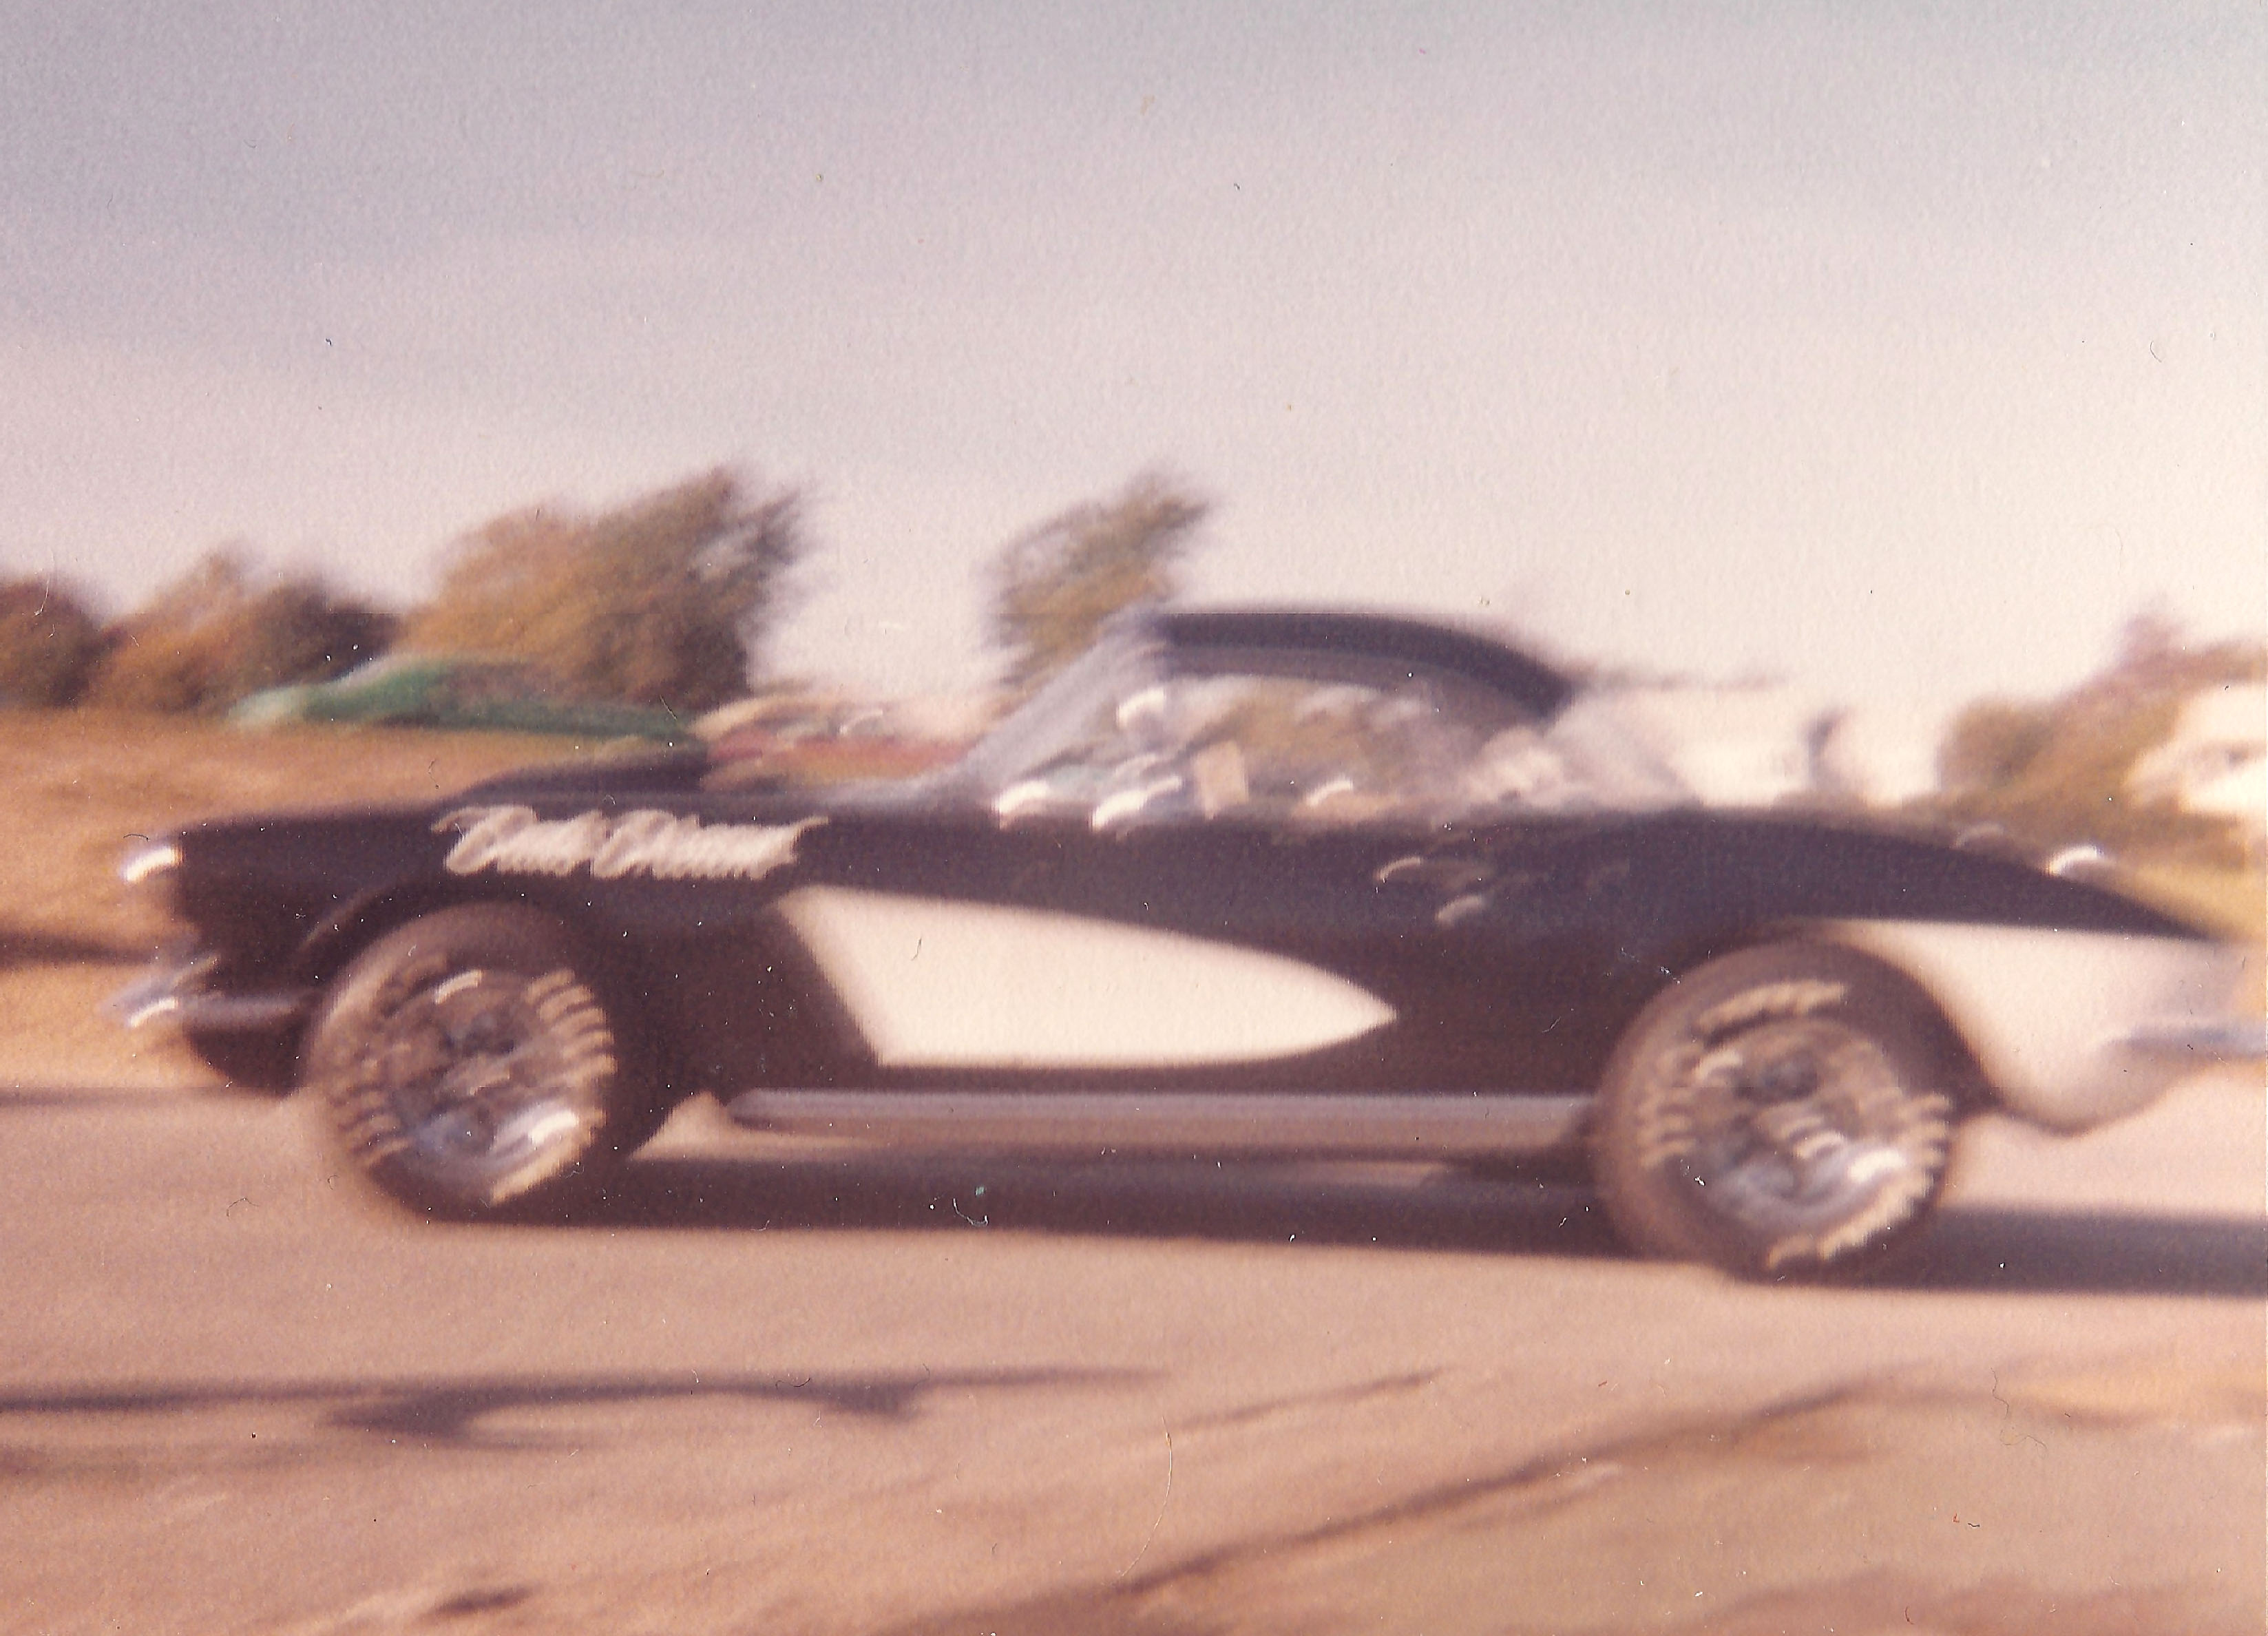
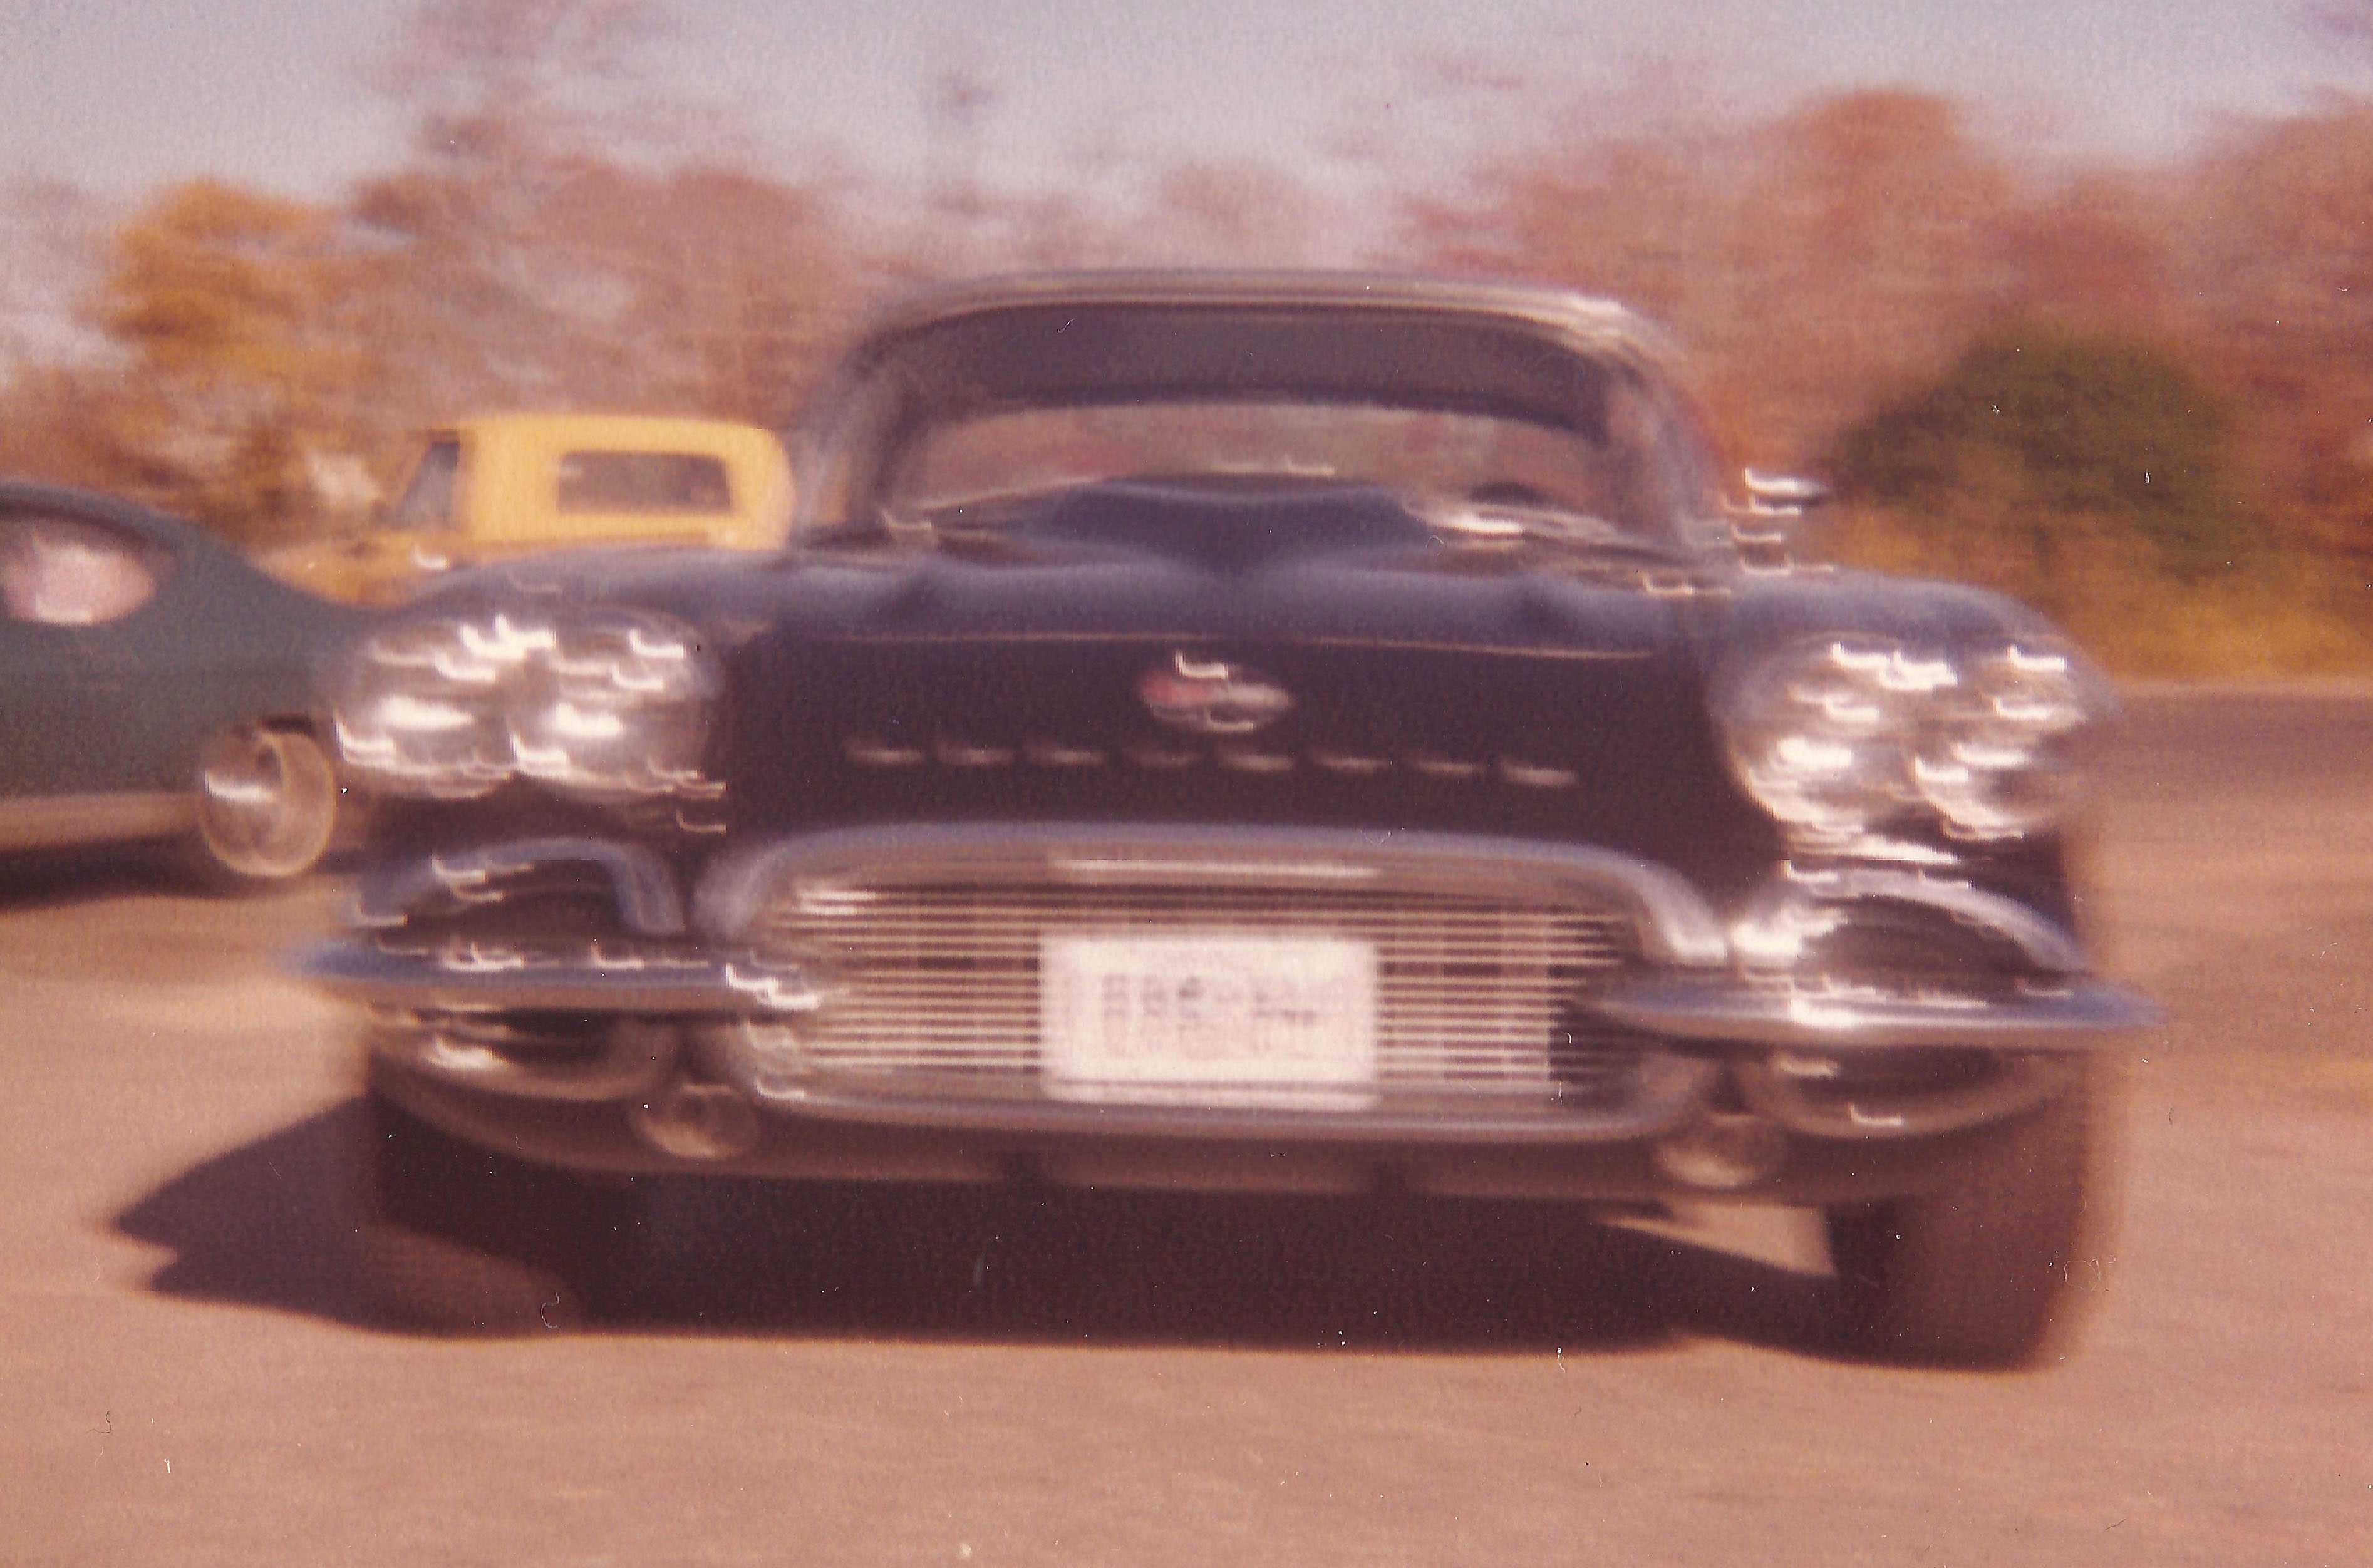
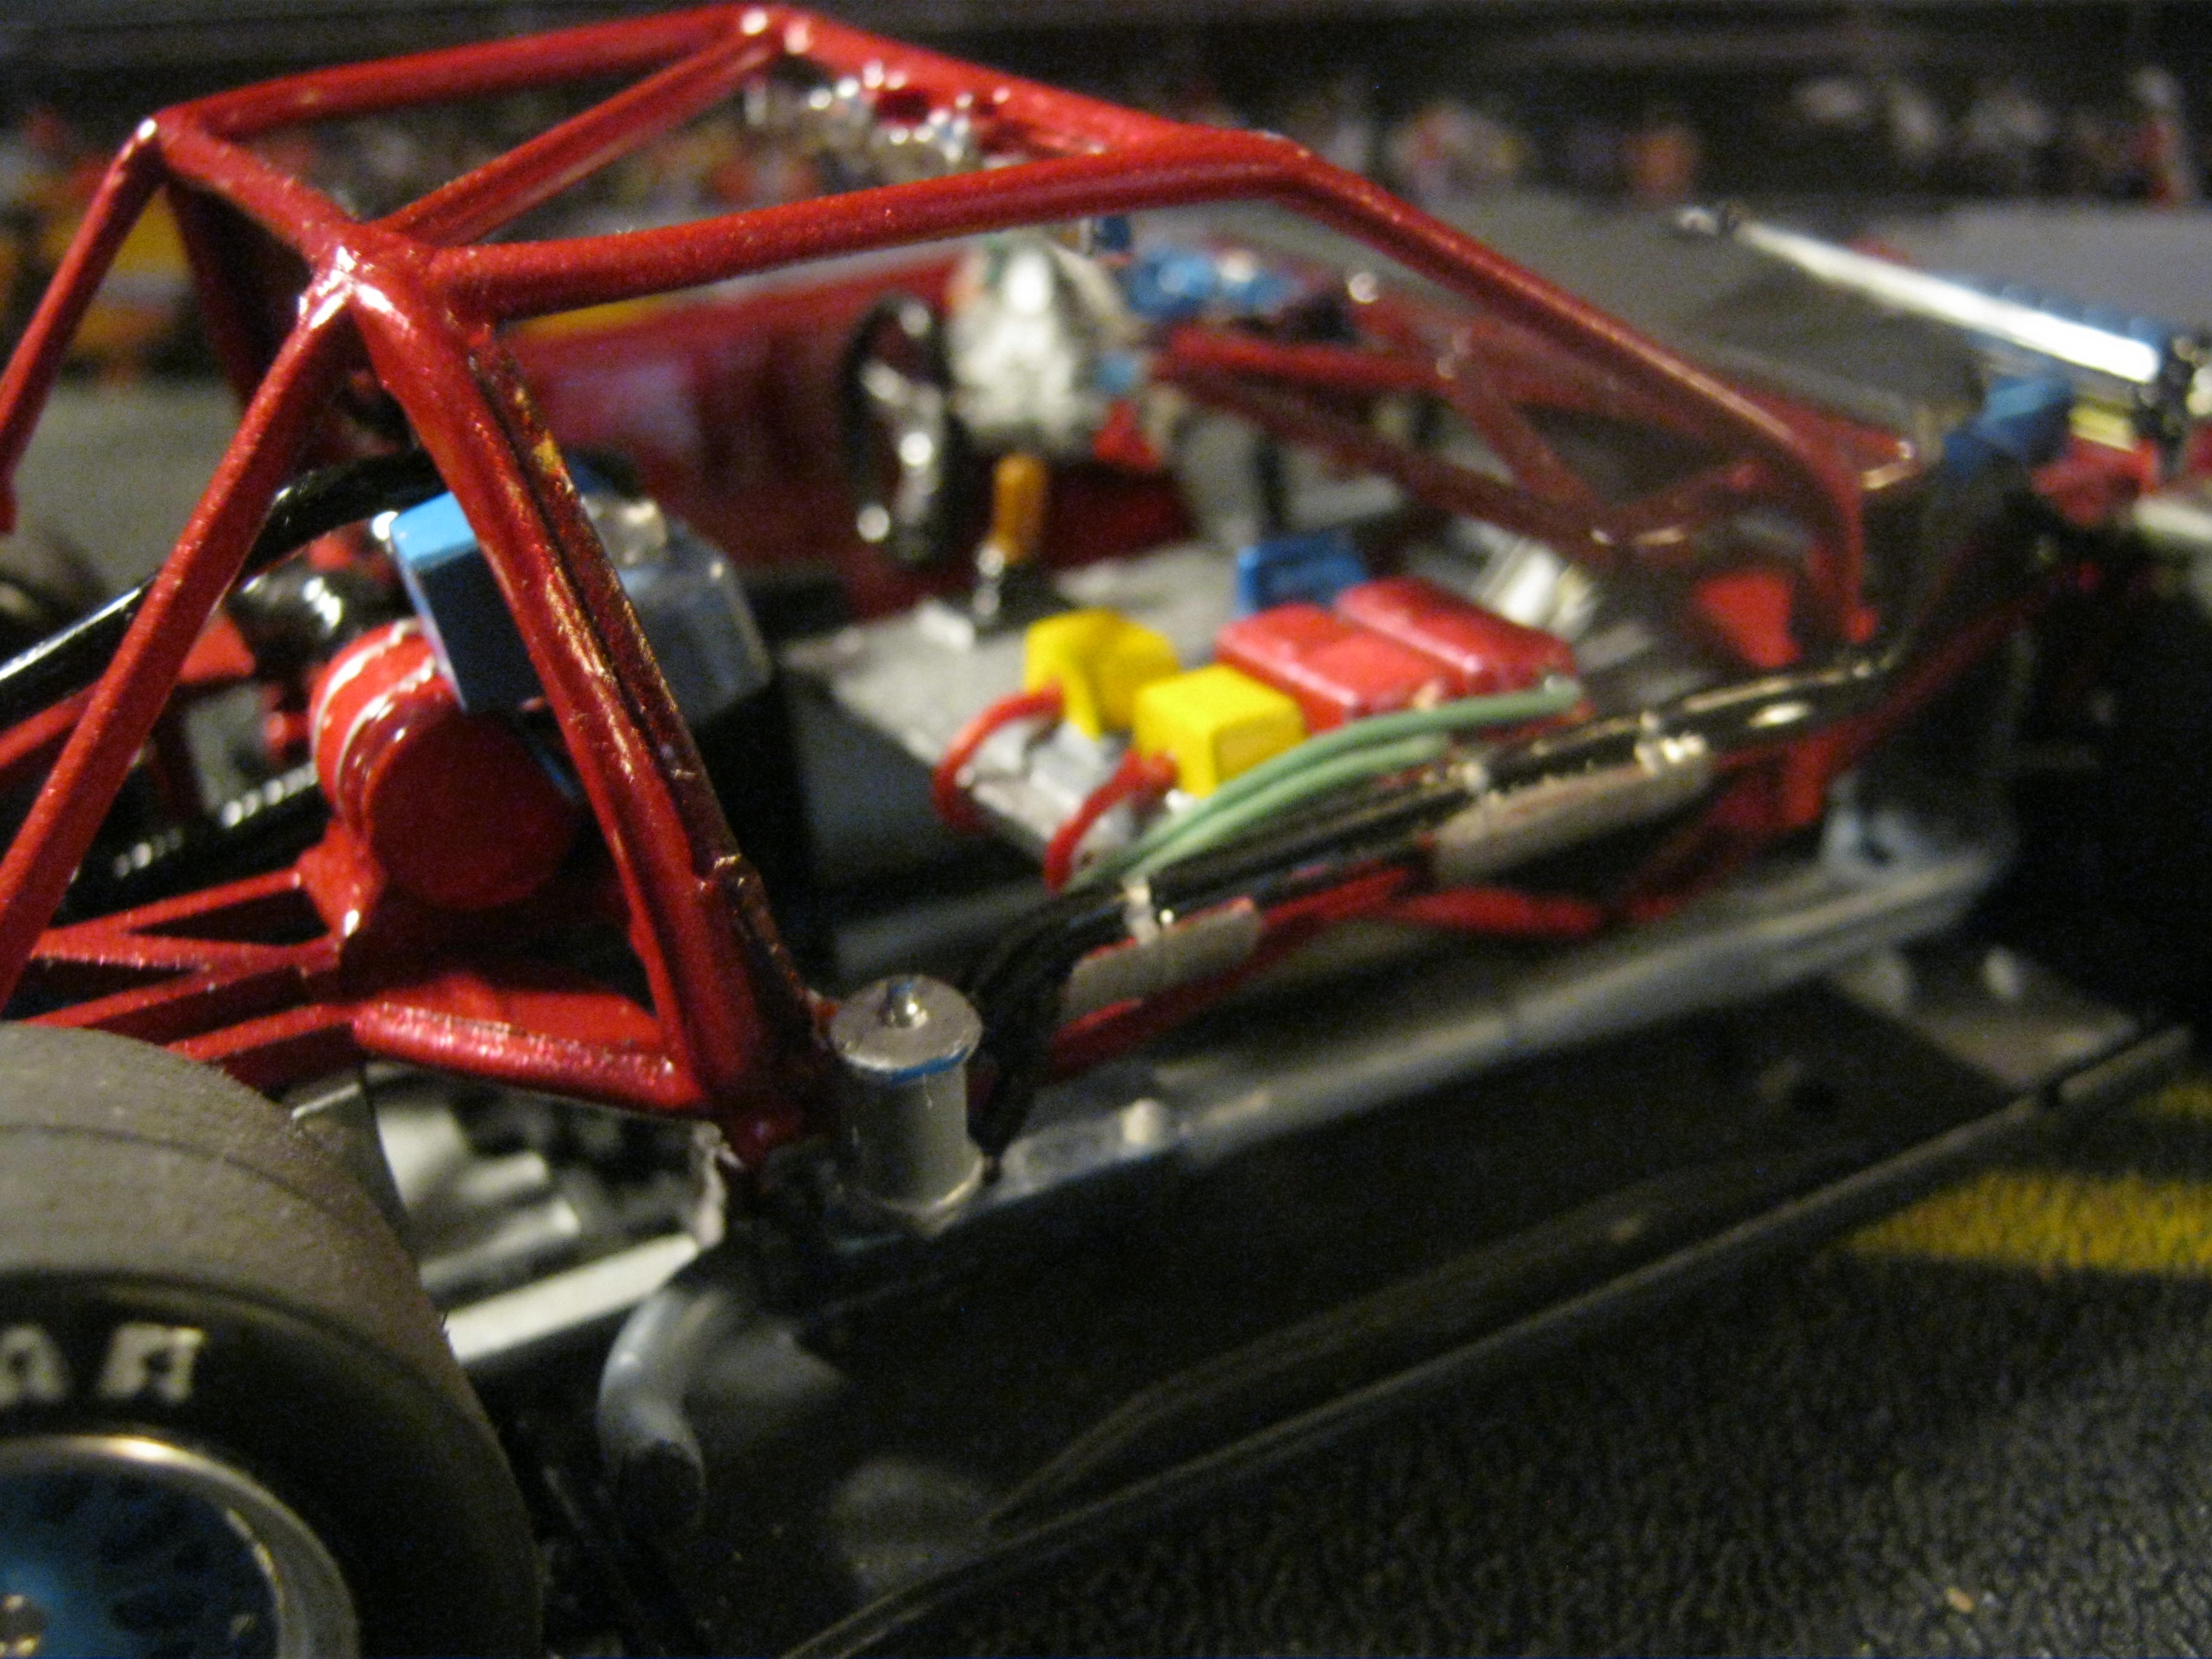
Waaaaaay back in 1980 I was 12 years old. My bedroom window overlooked the West Islip High School. Every graduation day, my dad and I would stand on the deck to the pool so we could look over the fence and chant, “We want smoke! We want smoke!” I remember a lot of muscle cars that were driven to School in the 70s. From Road Runners, Chevelles, Corvettes, to 442s, you name it. They never failed to fill our neighborhood with smoke and the smell of burning rubber! I did my part in 1986 with my 1970 Monte Carlo. It was a 350 2 barrel with a 2 speed powerglide. I couldn’t do a standing burnout, but donuts worked to break the tires loose! I have a short video taken by my mother! We were and still are a car family! Here is a short video of my efforts: Back to the subject of this post! One day in 1980 while looking over the cars in the parking lot, I spied a Corvette. It looked pretty cool, so I grabbed my 110 camera, hopped the 6 foot chain link fence and ran over to the car for a couple pictures. Back in those days you didn’t know what your pictures looked like until you sent the film out for developing and got them back. I guess all the running put me a little out of breath and the pictures came back with bit of camera shake. But I saved those pictures all these years. I’ve always wanted to do a model of that car, and the Revell 62 Corvette was just what I needed to finally get it done! There’s some lettering on the front fenders that is very hard to read today in these pictures. But for some reason “Dad’s Dream” sticks in my mind from all those years ago. Recently a friend of mine was able to clean the pictures up a little bit for me, and it does look like that’s what it says on the fenders. So I painted the body white and then masked off what I wanted to leave white. I painted the rest of the car black but experienced some trouble with paint flaking off while I was removing the masking tape. I set that body aside and decided to paint the spare body that I had, black and then mask off for the white. This yielded much better results. Plus as it turns out I incorrectly painted too much of the cove white the first time around. In the pictures I can see the car had a teardrop hood. I was unable to find a teardrop hood for that body style Corvette so I had to create my own. I used plastic and clay to get a rough shape and then made a mold and cast the hood in resin. The resin copy was smoothed out, primed and painted with the rest of the car. Here is where I’m at now. The interior is in place and the chassis with the wheels in place. There are some pictures below. I figure for the engine I’ll do a dressed up 350 with basic chrome goodies and headers. This is artistic license of course, as I did not get any pictures of the actual motor. I printed the Dad Dream lettering on the laser printer using white decal film with a black border. But it’s not working too well. I recently acquired my father‘s old laptop that still has windows XP on it. I have to try and find drivers for my Alps printer so I can print the lettering in white on clear film. Here are some pictures, any comments or suggestions are welcome!
-
Hi all fellow builders,,wishing you a happy thanksgiving coming up. I always enjoy the oddball,,not so popular kits to build. This is one I got for 10$ at April #DAMM show in SE Mich. Its the 1996 pop of Jack Baldwins SCCA trans-am Camaro. First off,,its not the color scheme of the original car,,but I like it in light blue just the same. It went together fairly well,,the decals were scary,,trying to get them to hug the radius scallops/lines on doors ect. I used the decal micro-soft stuff,,and after a while they went on decent. Added some minor wiring/plumbing,, not a contest car,,but a good addition to my shelf. Hope this finds you doing well! Build on!
-
Getting back to this one final. Did some work on the interior, Tamiya Dark German grey, flat aluminum, ultra bright BMF, and kit supplied decals. I think it come out really well, just some touch up on the aluminum on the front seat. I have some Ken's Fuzzy fur for the carpet area.
-
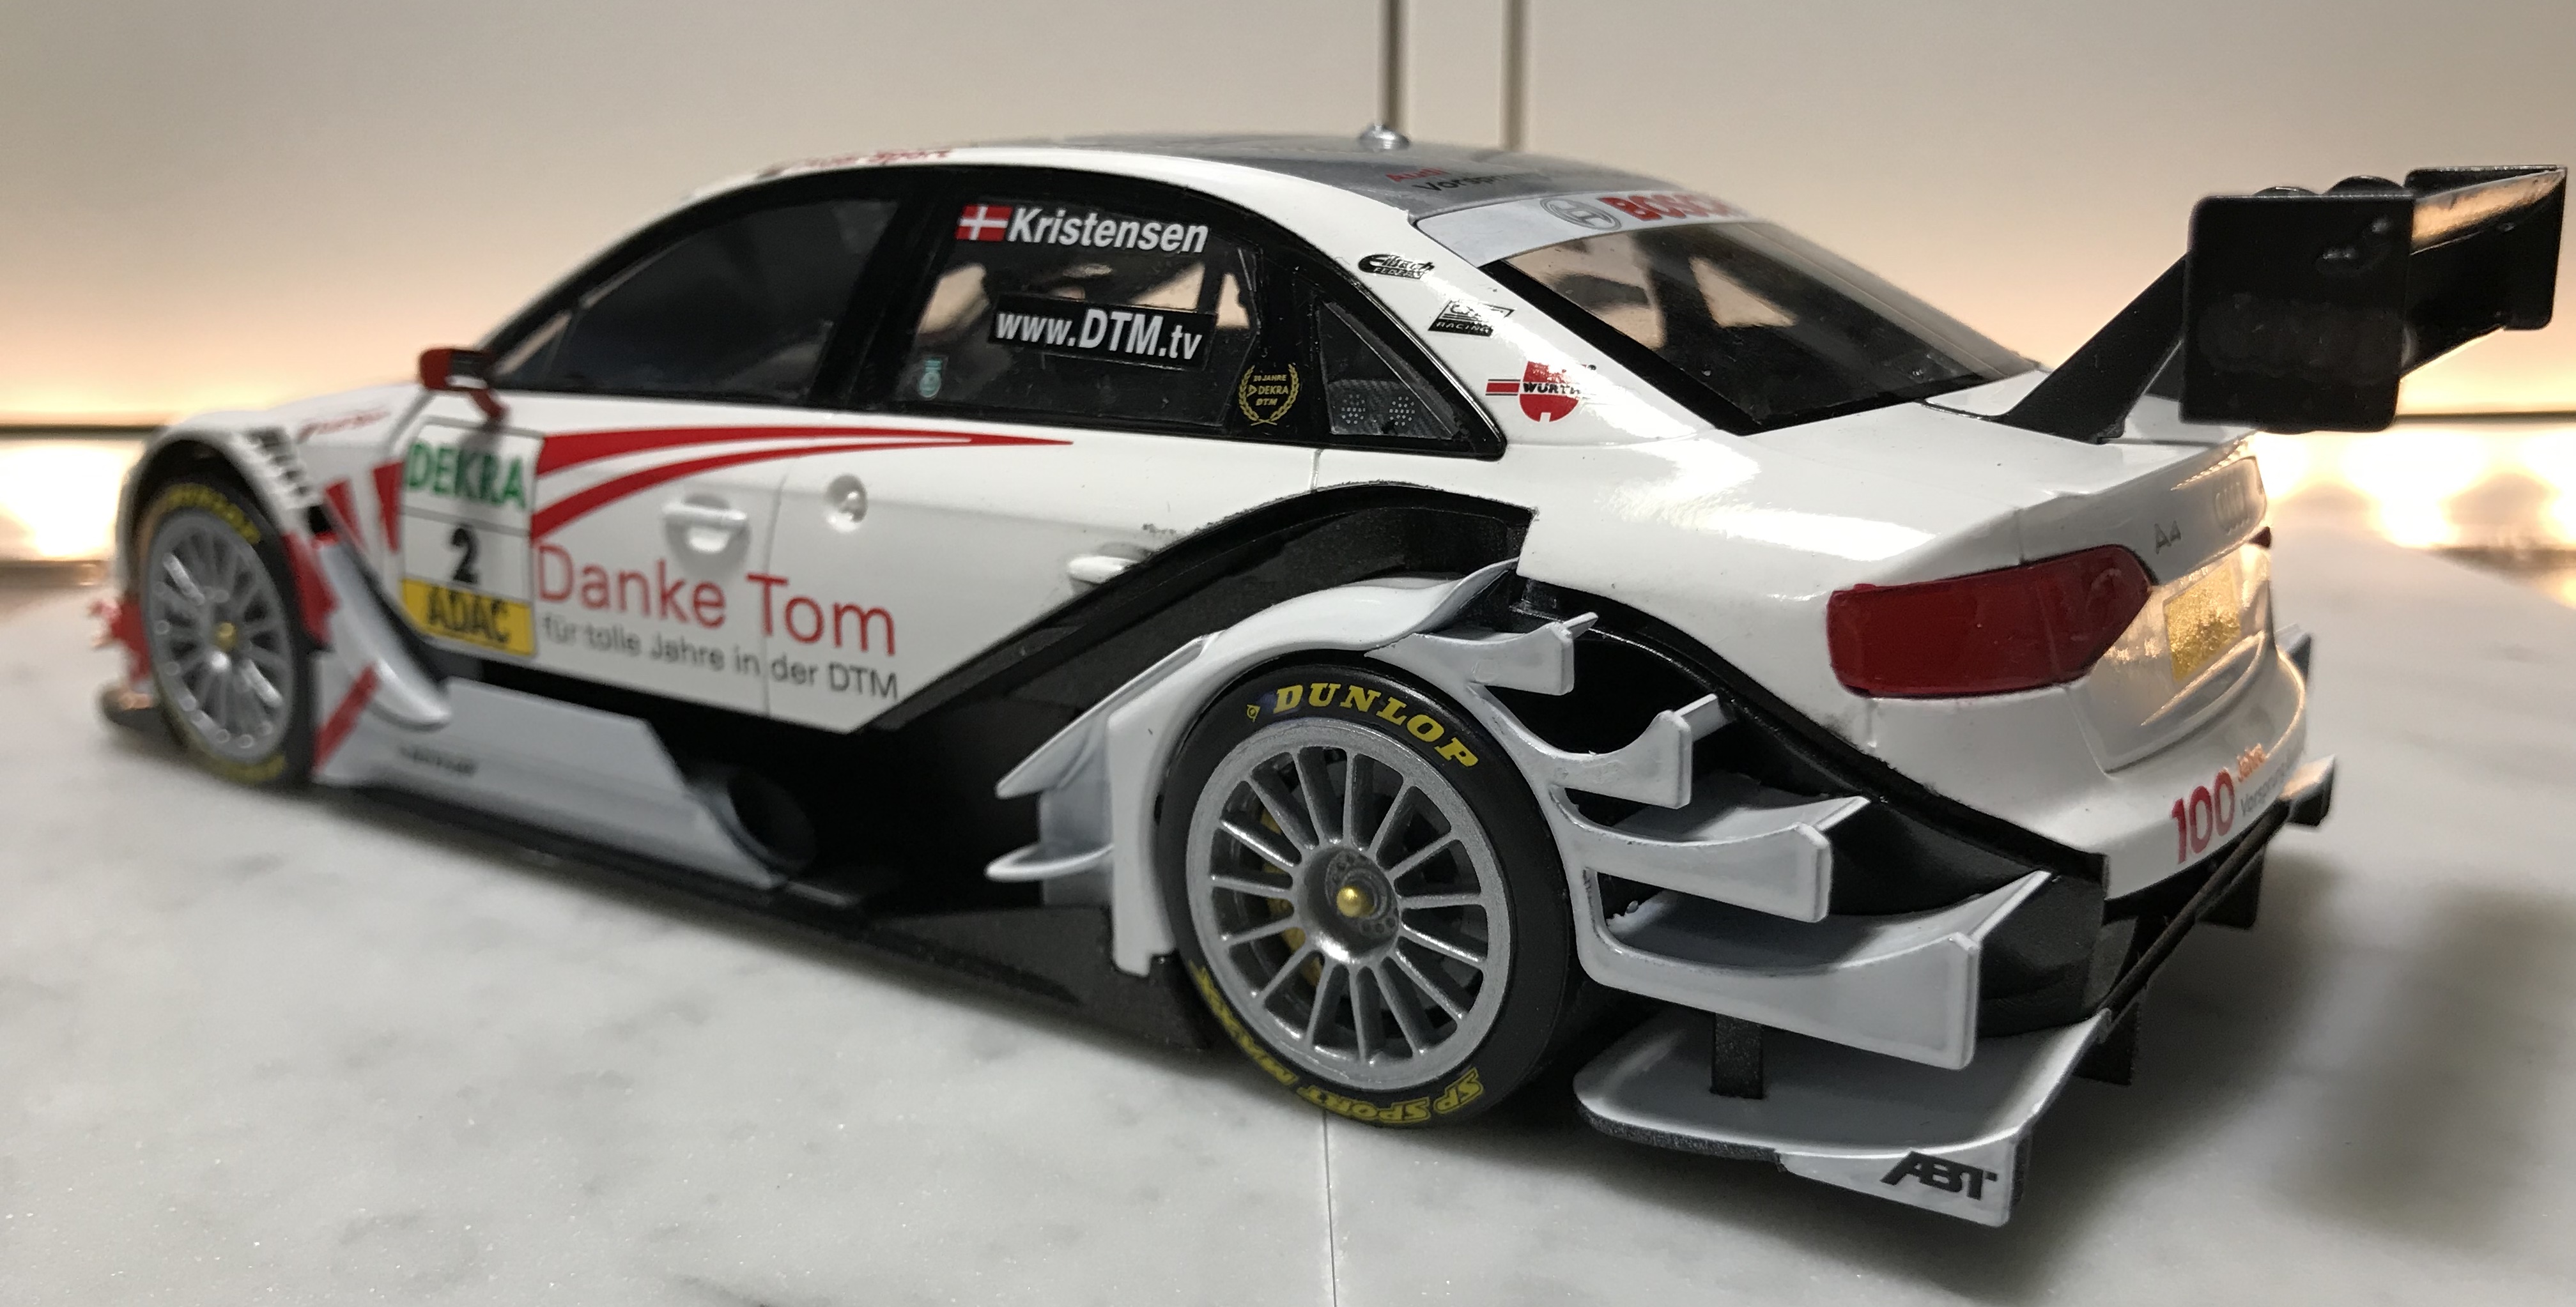
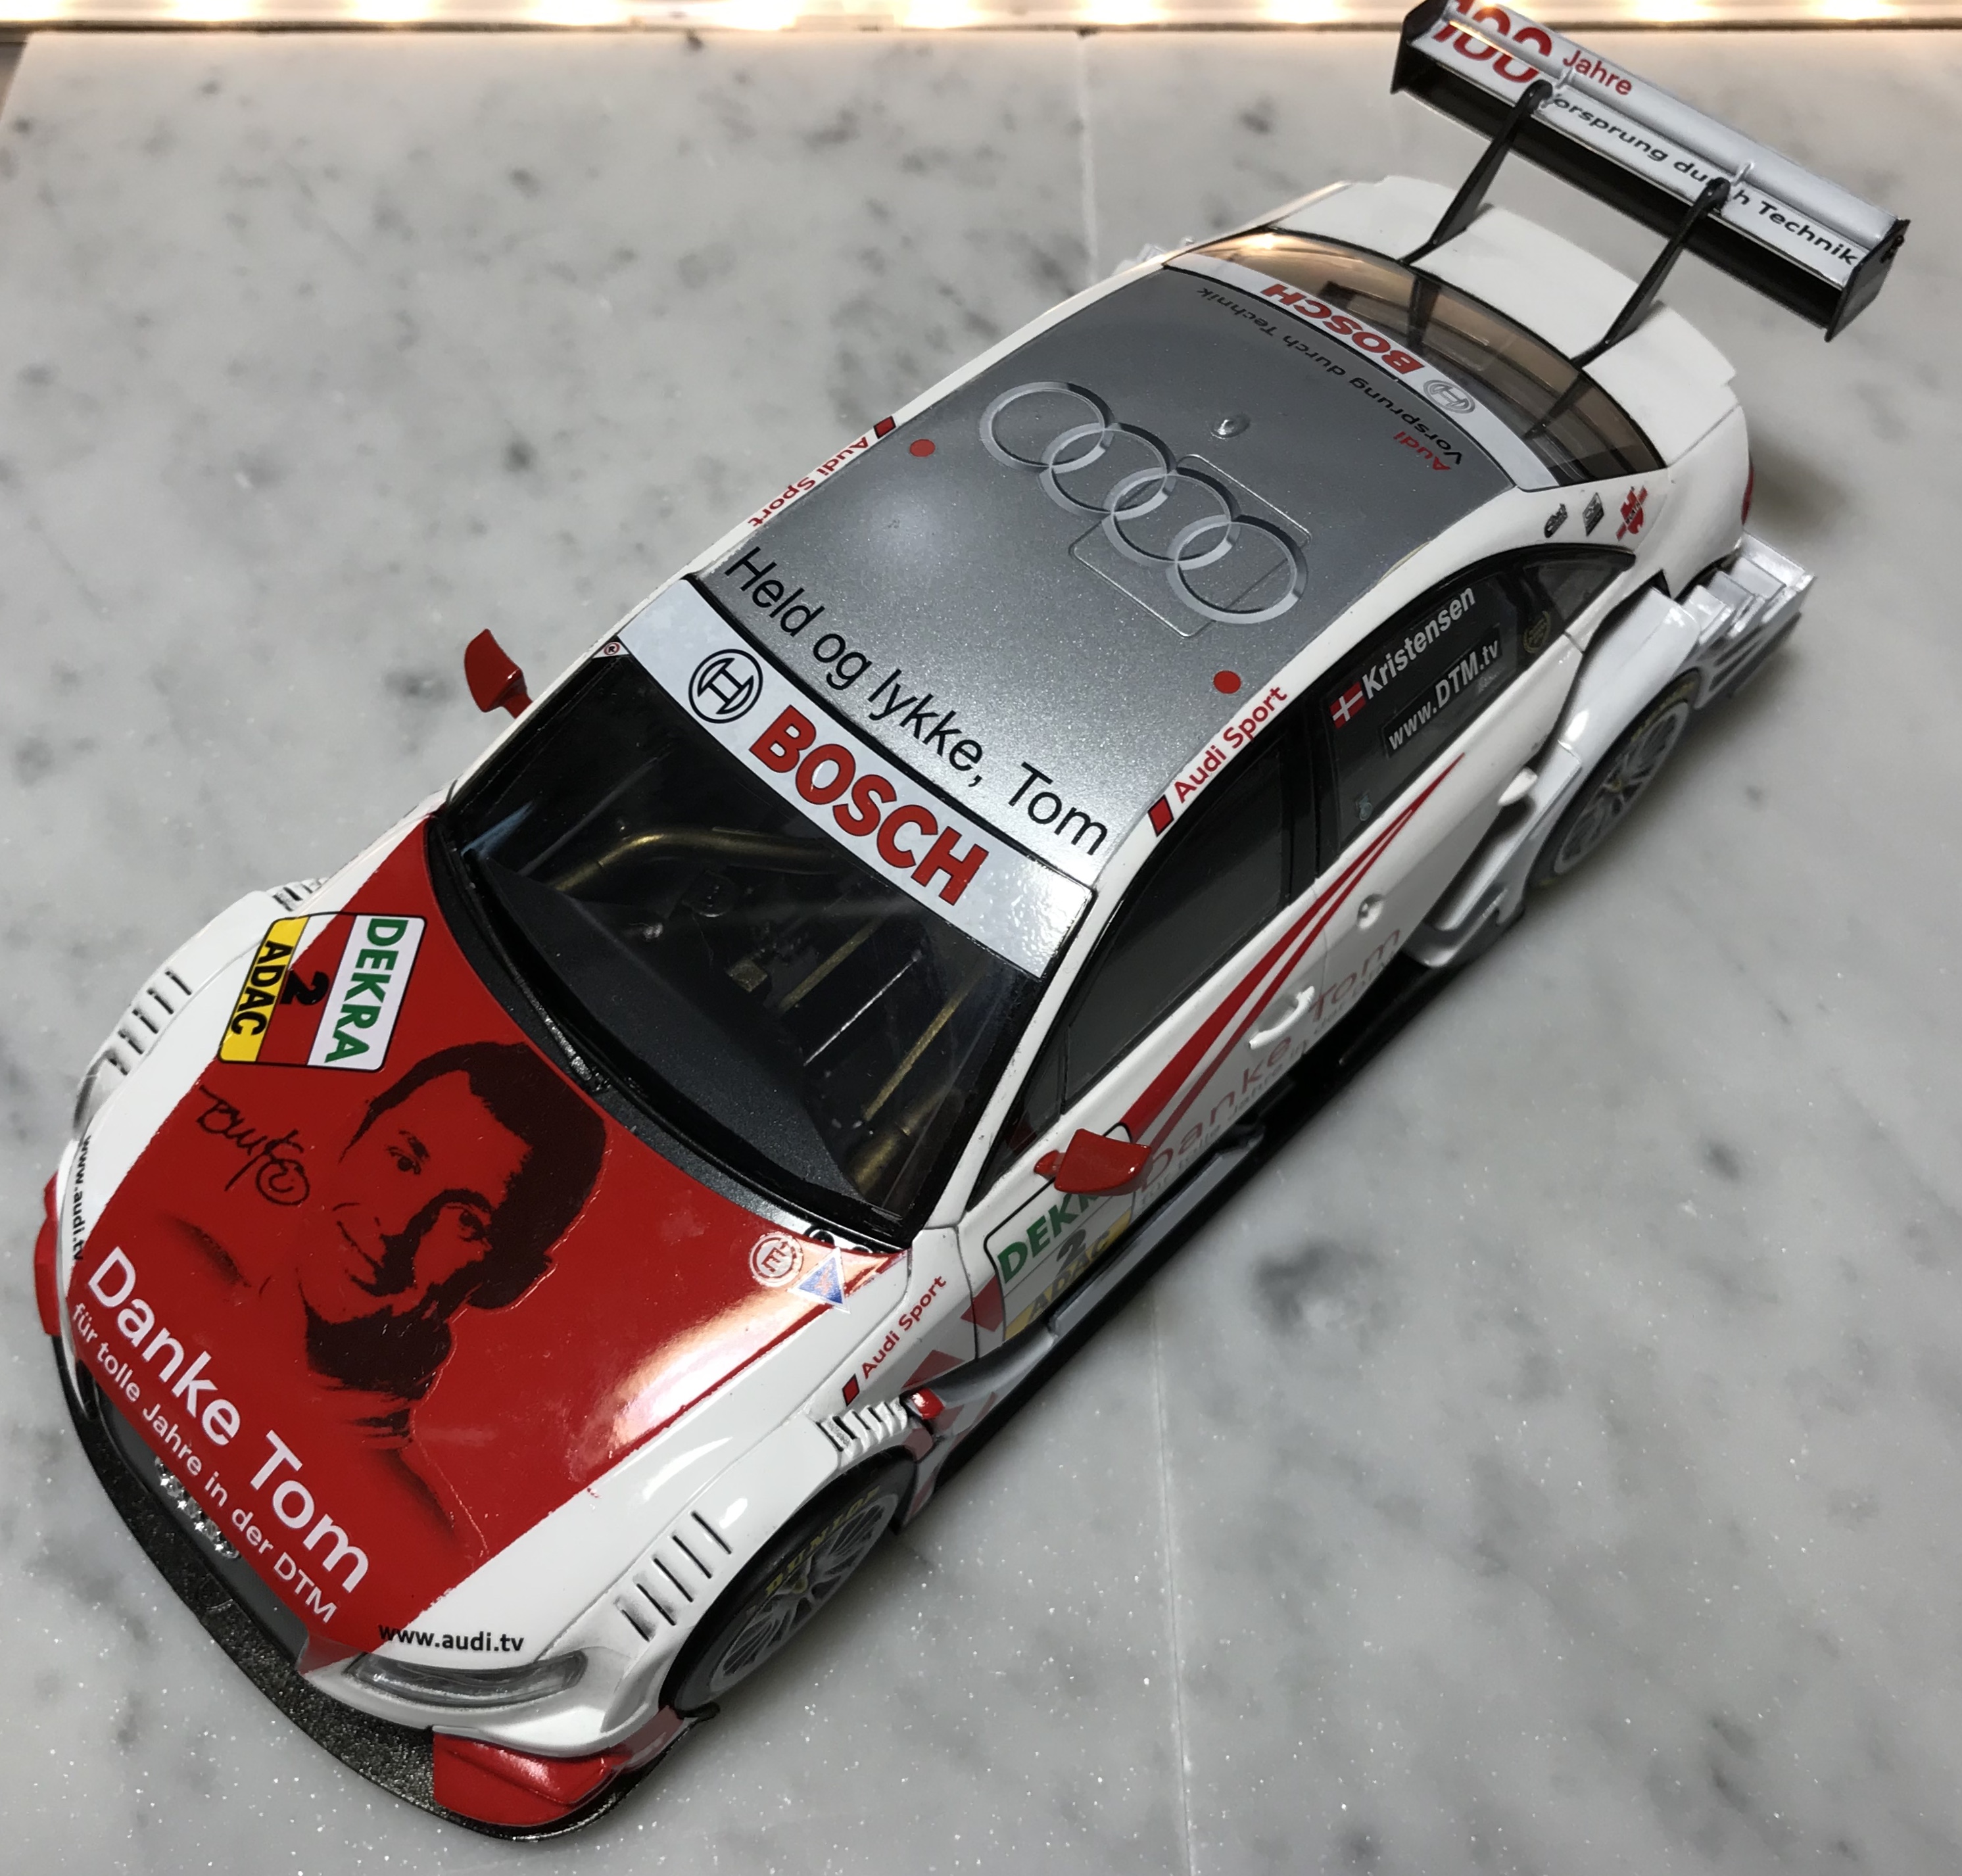
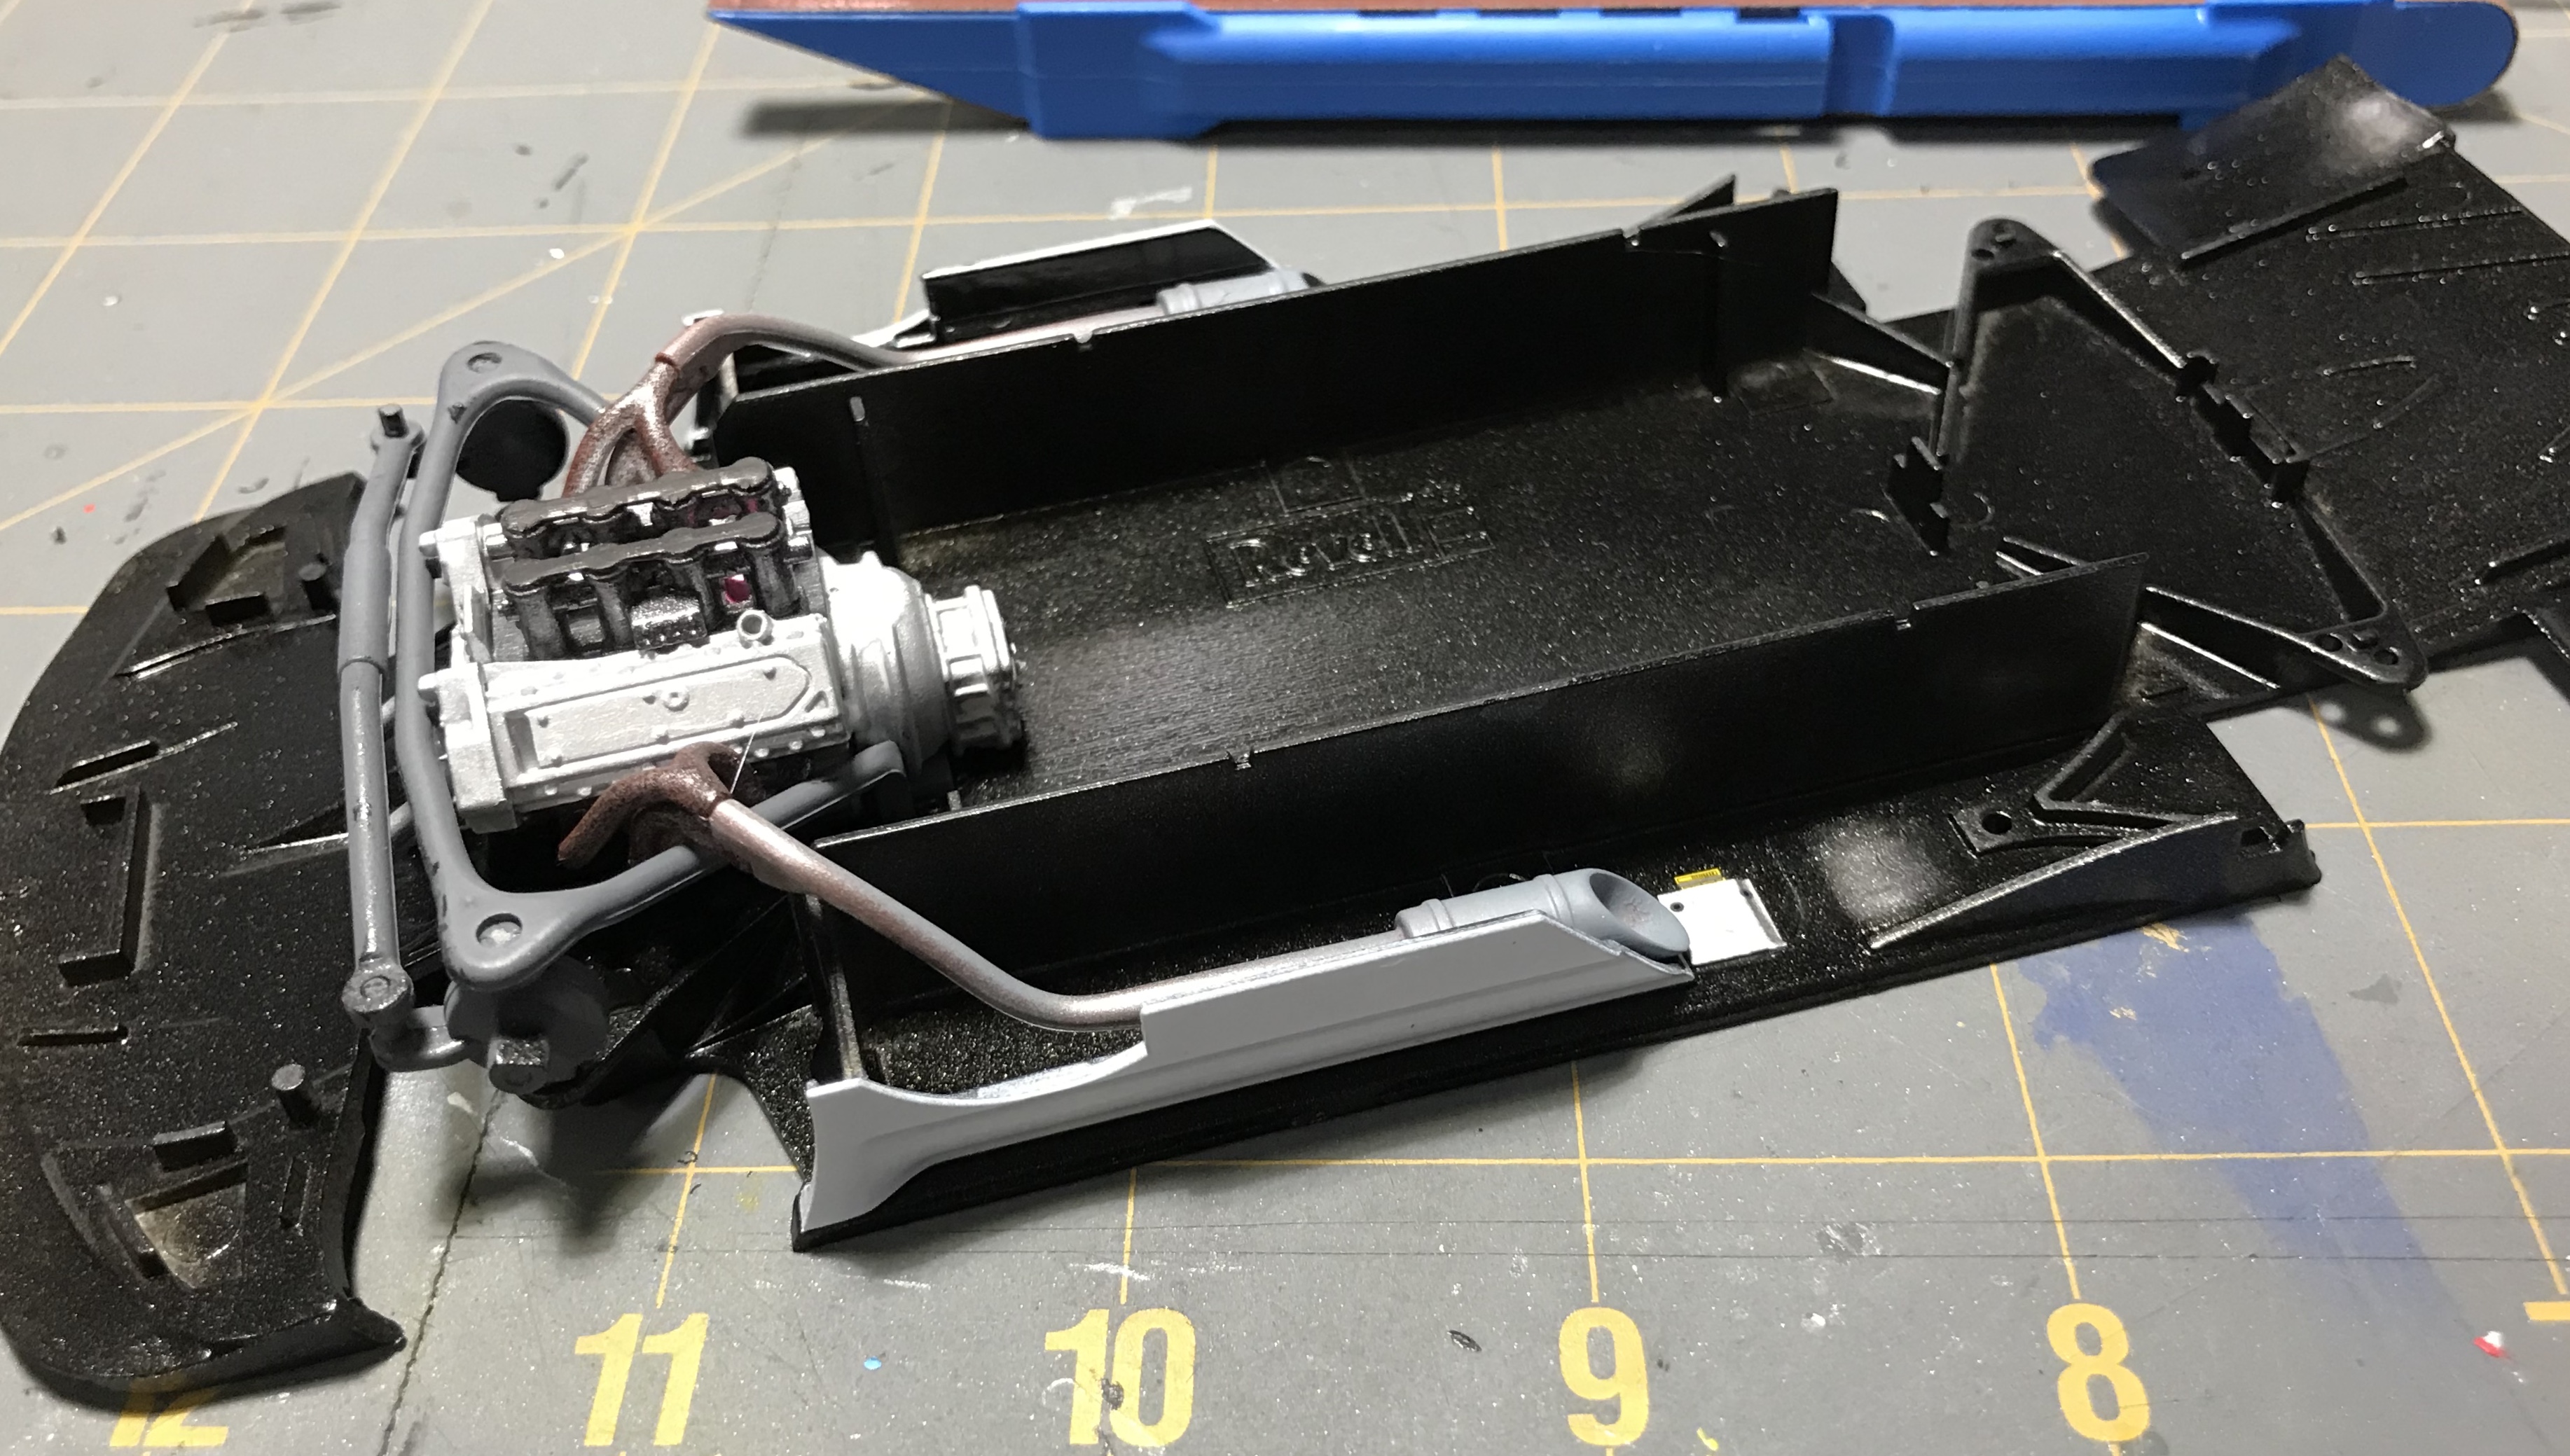
My new project! Im going to use alot of time for detailing and painting and every progress. Hopefully its my masterpiece when its finished and done. So shortly, Its going to be something special Engine has started for progress.. Not much happened so far but maybe on next week i have more time to make some serious progress.. Engine is from kit, and those Edelbrock valvecovers are from some AMT model kit, i believe its `55 Chevy Stepside.. Im using Highlight Model Studio detailing parts for this build, and here are especially photoetch set designed for 64-66 Chevy pick ups.. First i started modifying tail lights, i am filling original places with glue and plastic sprue number plates, then i will sand them smooth and use filler later for really smooth finish.. PE light will be glued there, just when im about doing final detailing.. Body work first..
-
This is my first build on here, so sorry if it is badly worded or done, but to start it off I’m a 14 year old, and have been building since the age of 5 1/2, starting that age with my dad, building on my own since age of 7-8 years old, but enough of that. It’s a Revell 1/24 1966 Shelby GT350, and I’m not sure how I want to build it, I had a dream a couple of days ago about a vintage racing school, where you learned vintage racing, and in that dream there was a 1966 Shelby GT350, so I might build it as that, but I’m not sure yet, also, when I try to upload progress pictures, from my phone which is what I use to take model progress, it says error, no matter what I use, is it an error with the pictures or? I need input.


.thumb.jpg.e0420fe52e683c60d19e843462316523.jpg)