Search the Community
Showing results for tags 'tamiya'.
-
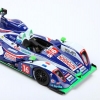
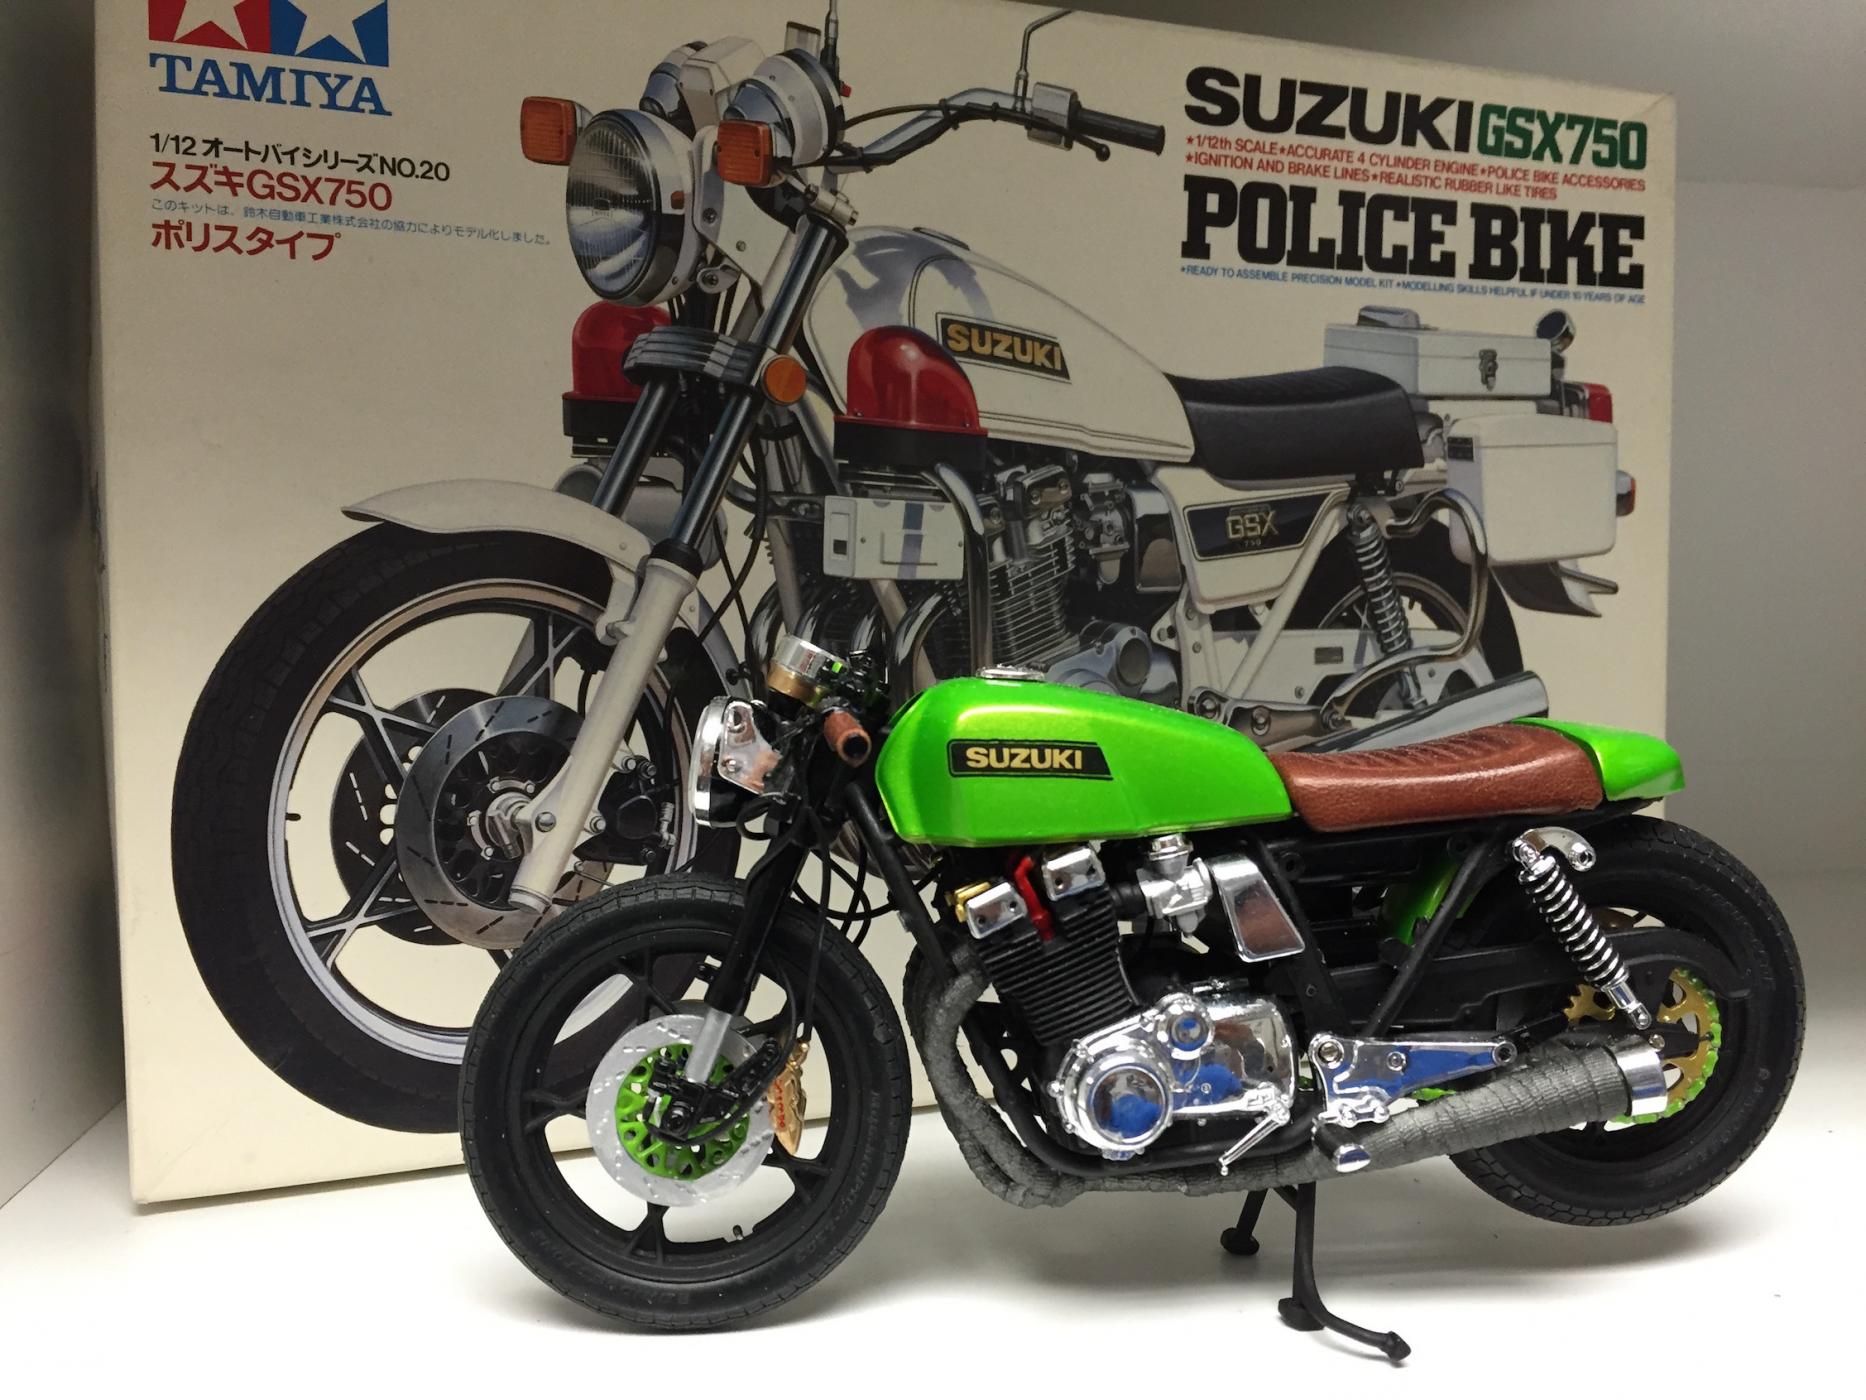
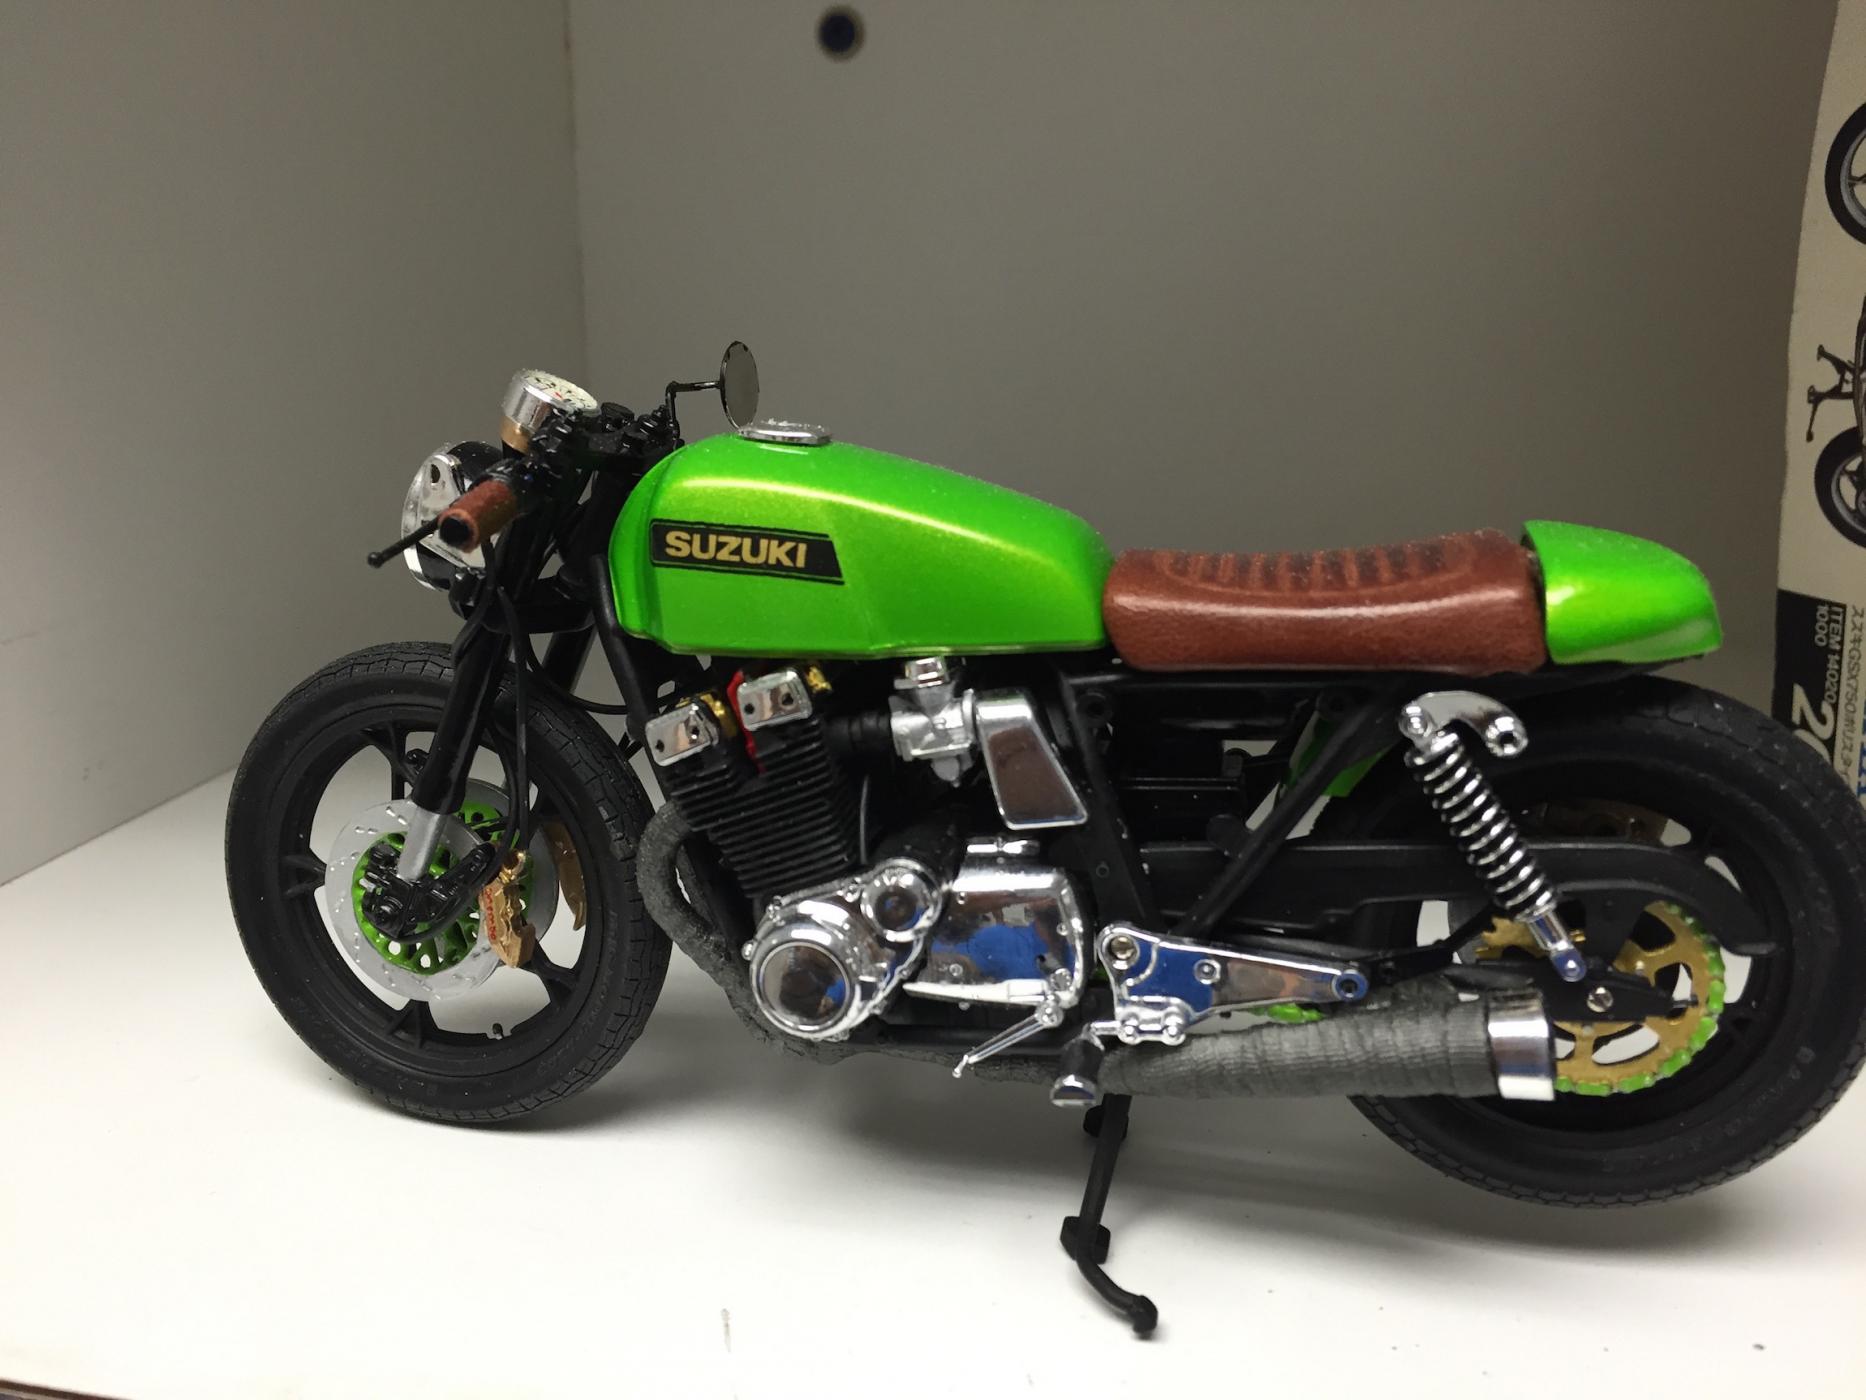
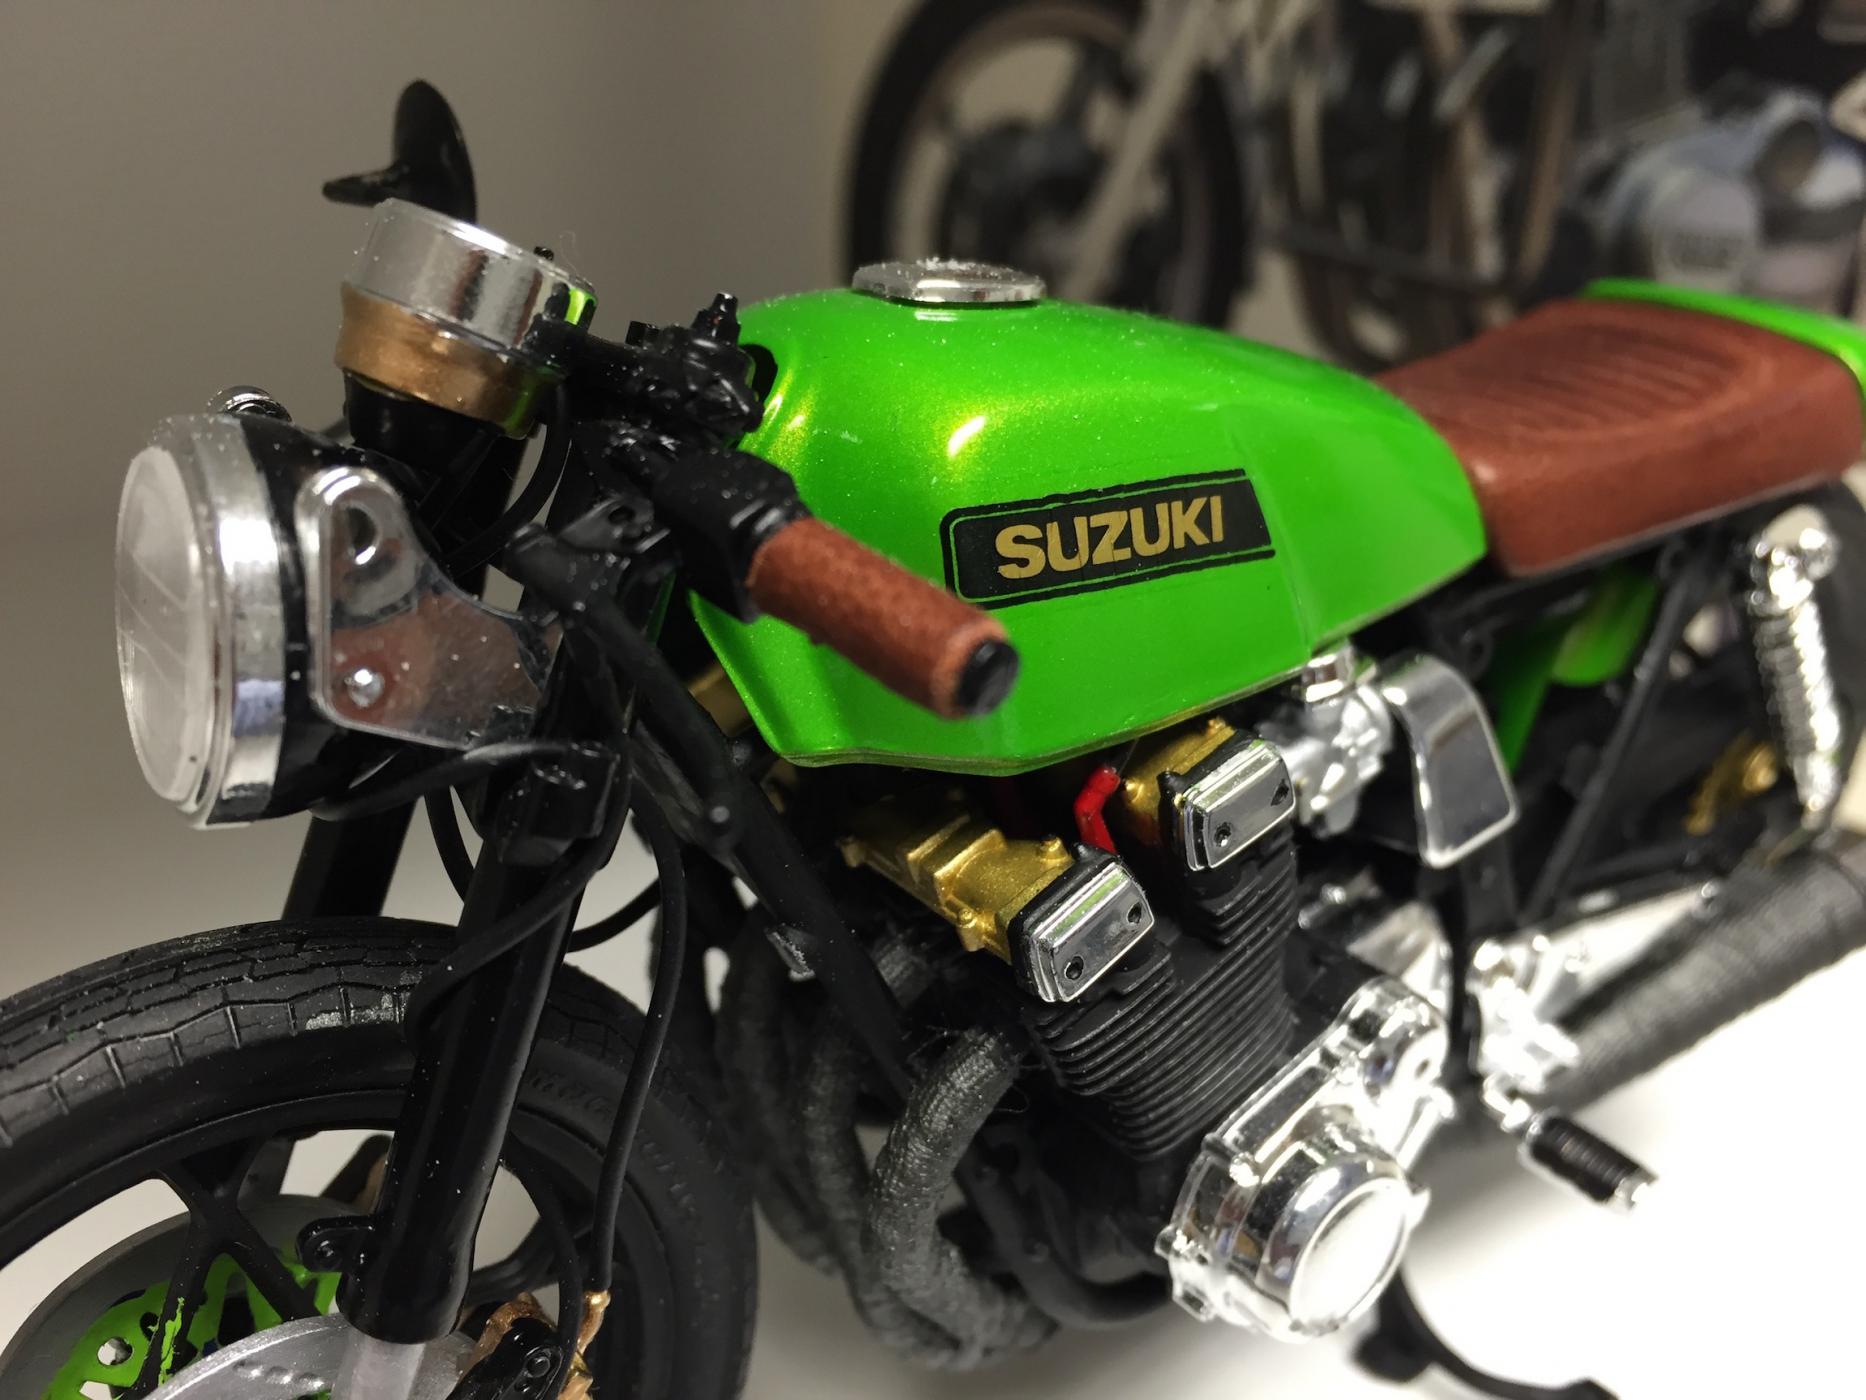
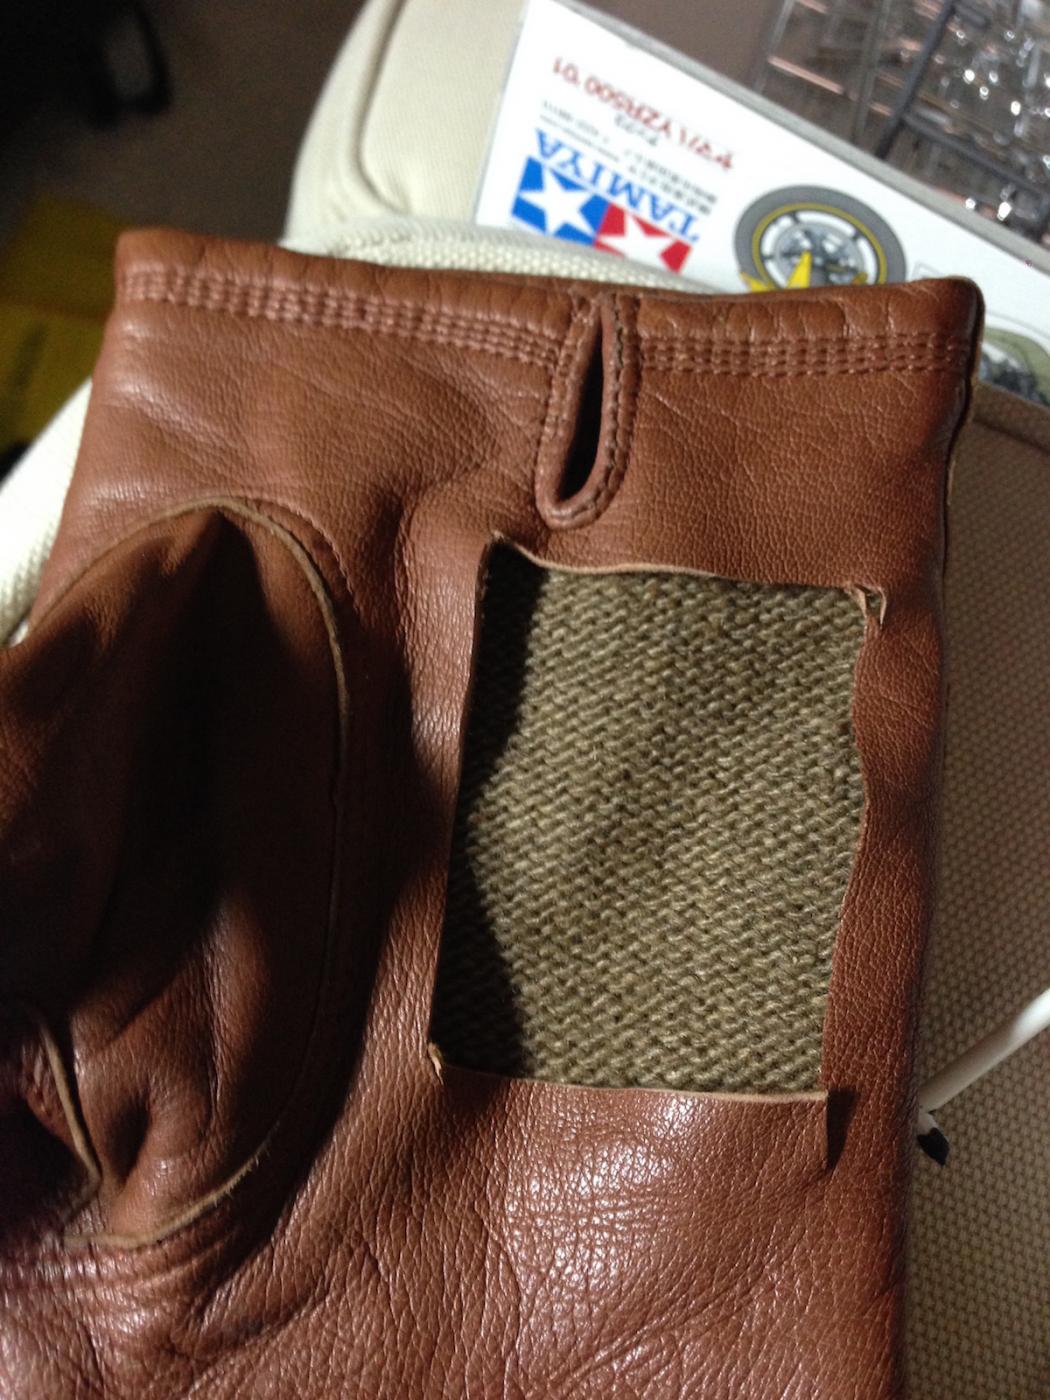
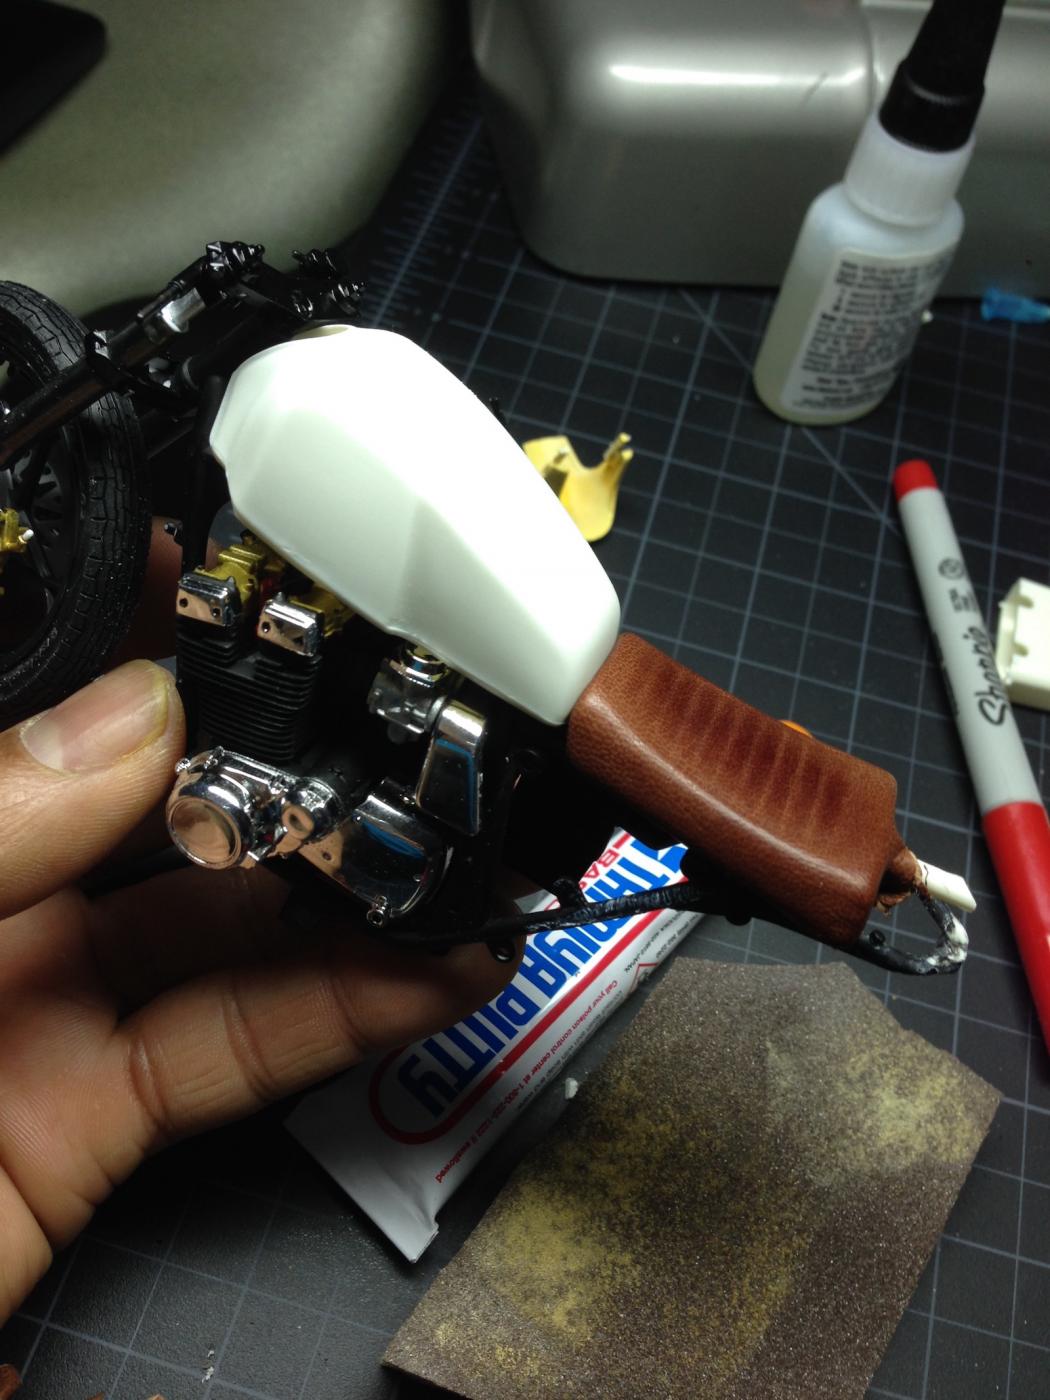
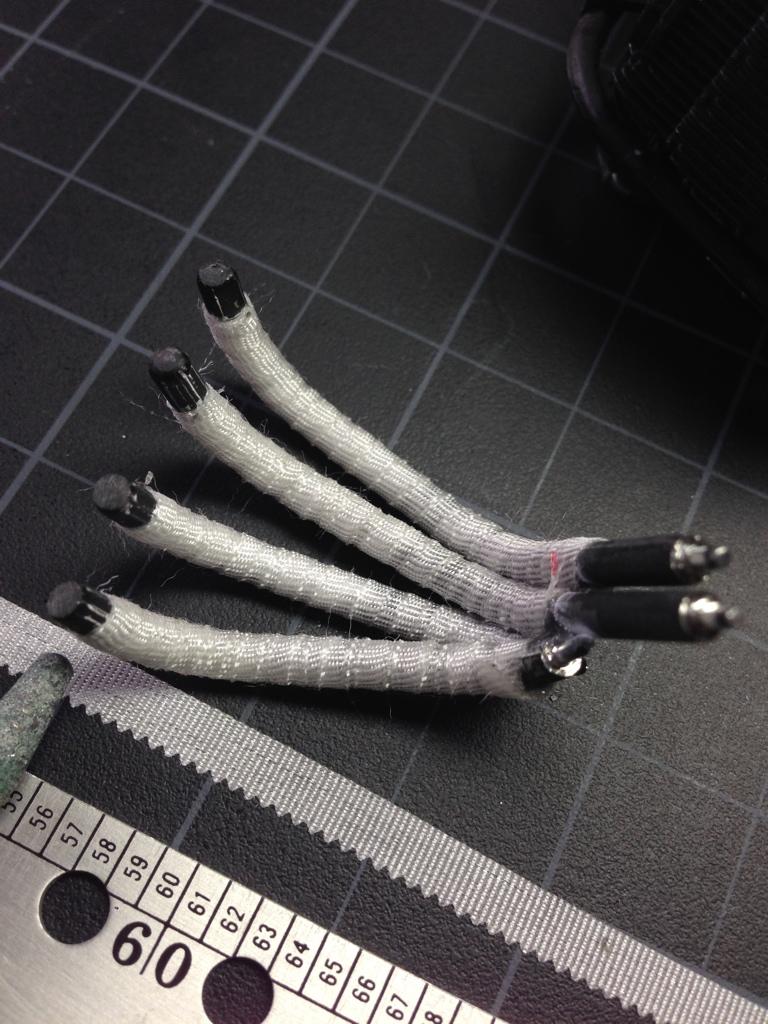
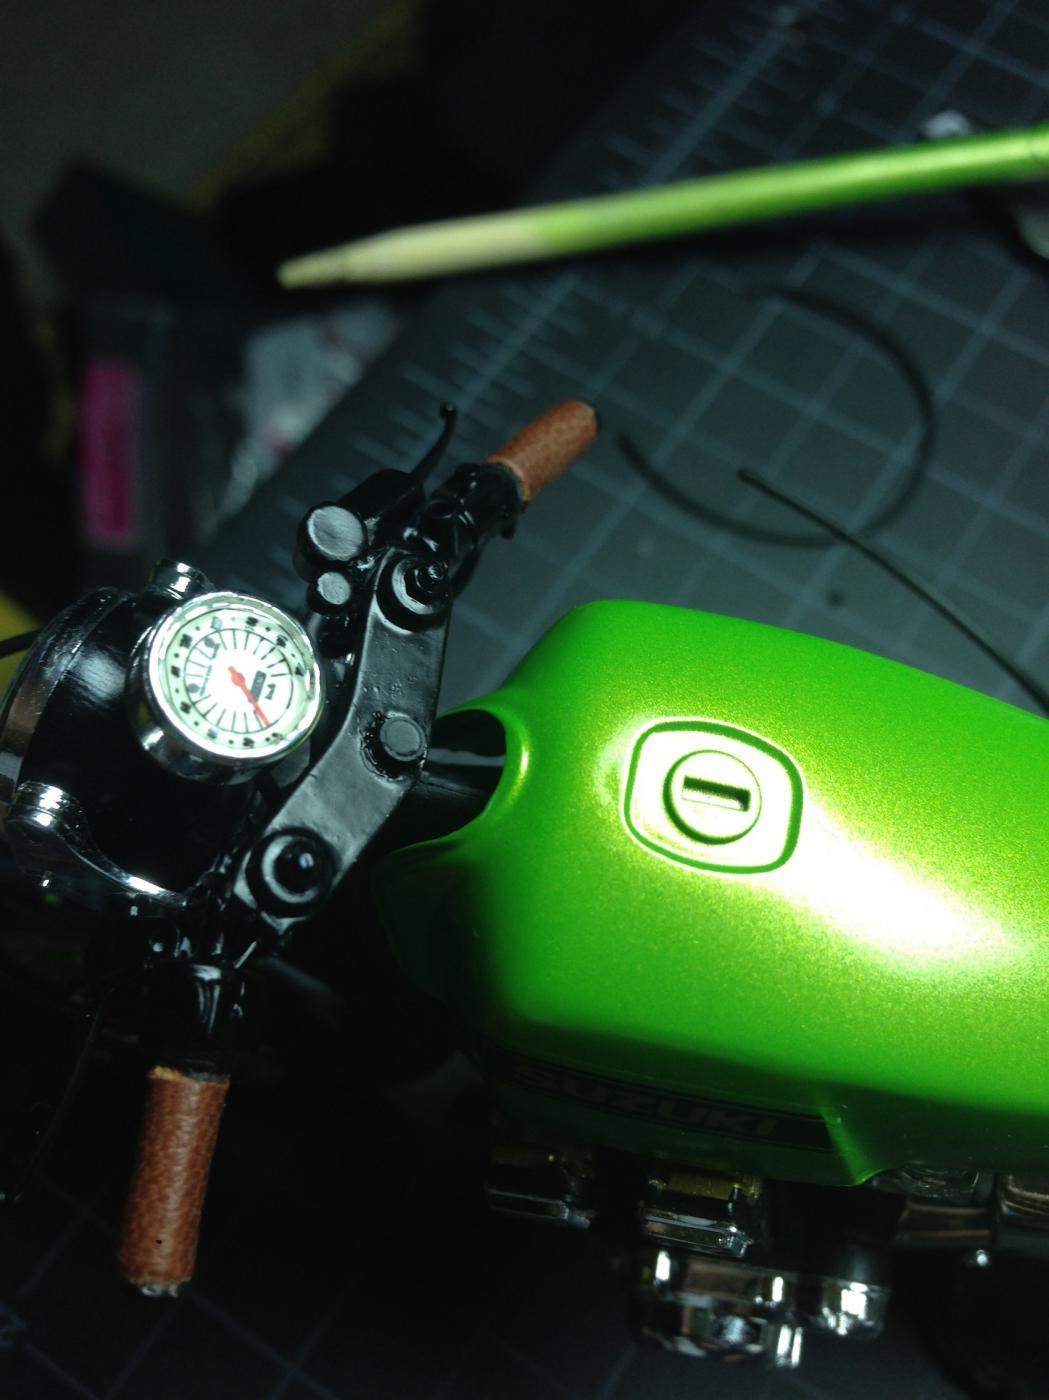
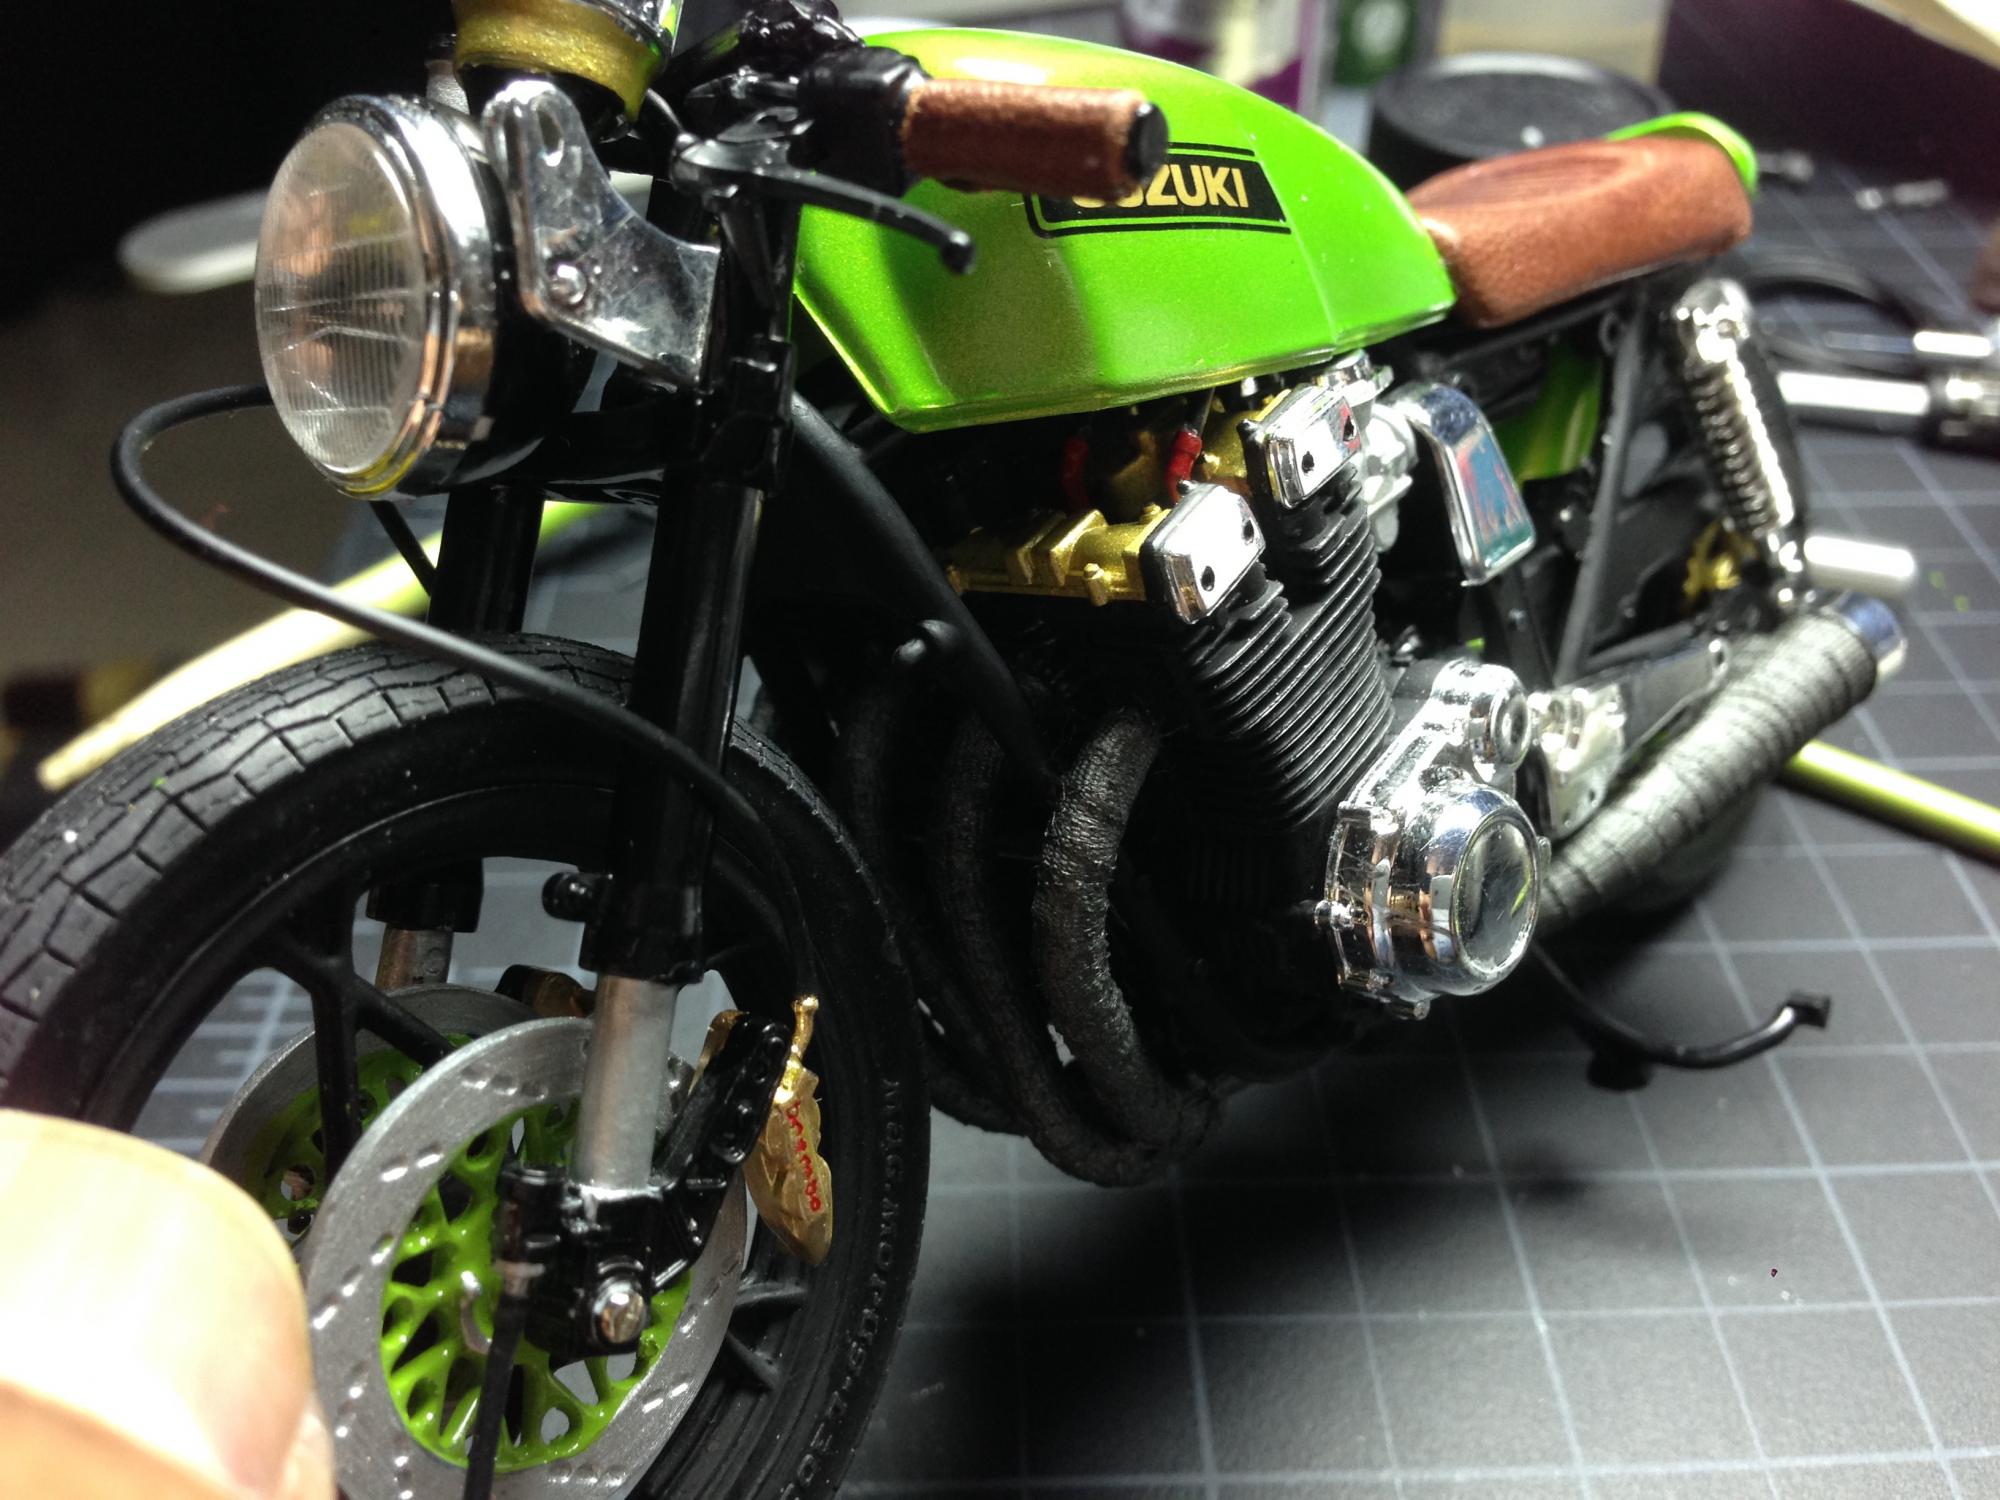
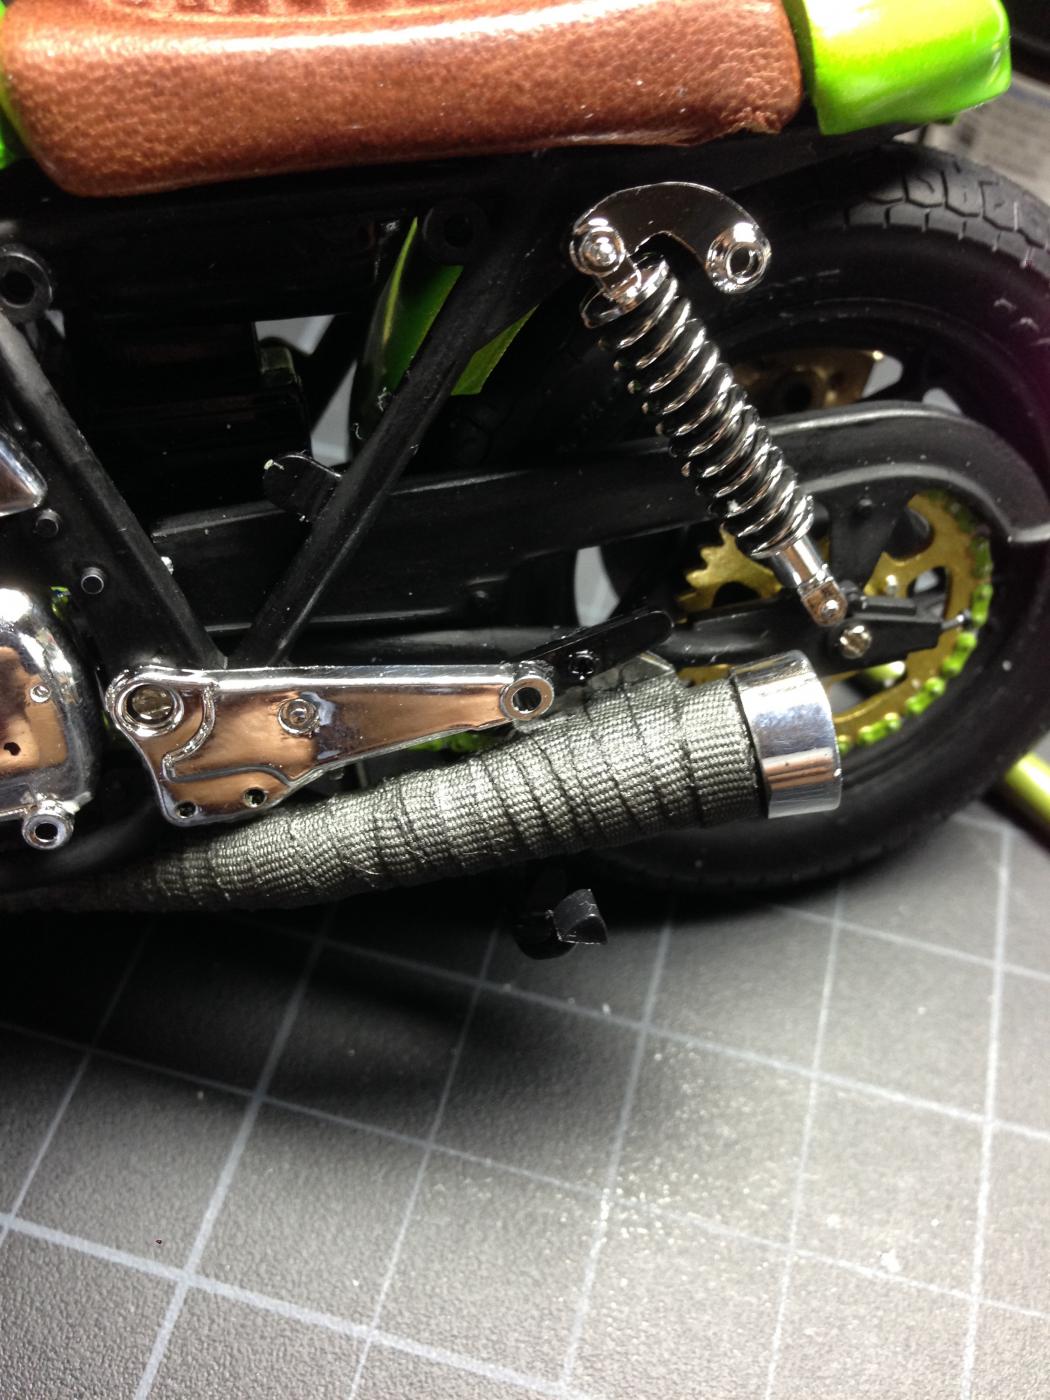
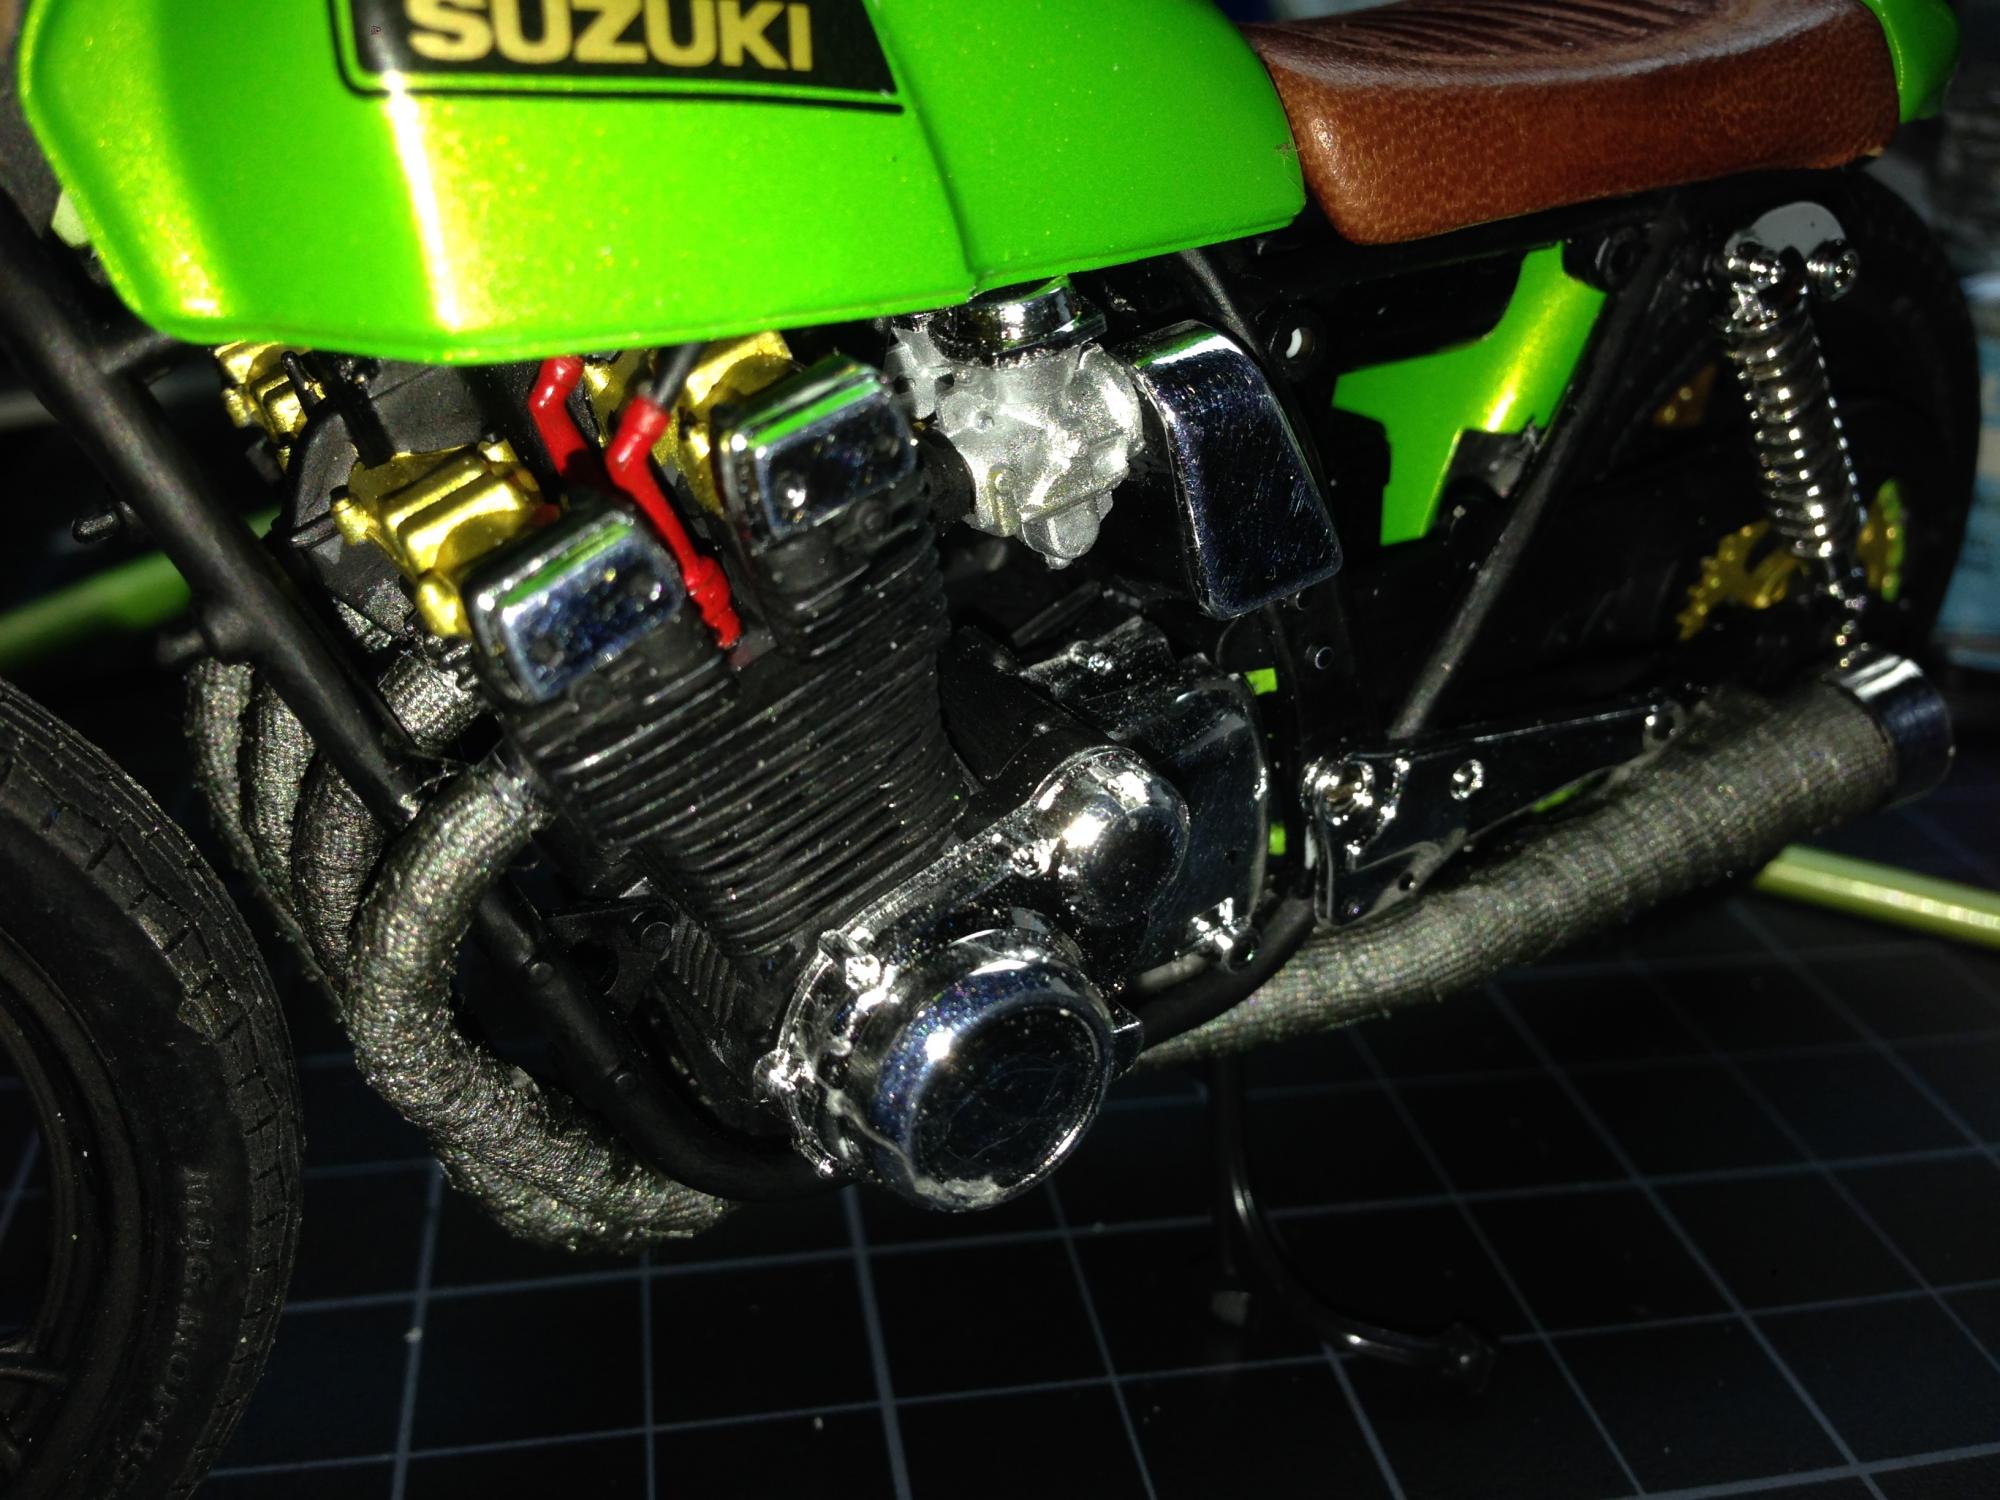
I decided to make my own Cafe racer, and as you gents (and some ladies) know, they don't sell Cafe Racer model kits...just like the real ones, you just don't go buy one....someone builds it for you from an old motorcycle. Therefore I took an old Tamiya 1/12 Suzuki GSX750 Police Bike kit and made my own. I made the rear cow from a piece of plastic and putty and metal and the seat and grips I made out of real leather donated via the glove in the picture. I custom made the pipes by cutting the 4 into 2 pipe into pieces, melting them in shape to wrap around the frame and wrapped them in strips of surgical tape, then painted the tape. I used the forks of a GP Race bike and cut the speedo down from 4 dials to one. First one I ever done, therefore the gap in the rear cowing is off, but hey...its my first! I put the picture of what the model would've looked like on the box behind mine.. Enjoy

-
Good afternoon gents, Here's my first model in a year or so, the Tamiya Ferrari F60. It's my first F1 model and I learned a lot about the construction of these guys. Several parts fought me and I had extreme issues on the front suspension. The paint went well, I'm very happy at the paint I messed several things up during the build. The rear wing was an absolute nightmare. It fell apart several times as I attempted to build it. Then in the process of attempting to attach it to the car it again fell apart. It truly was the most frustrating experience. However, I learned a lot about the use of the carbon fiber decals and have prepared a jig using balsa wood for my in progress Ferrari F310B build. It was a fun first F1 build although I don't believe I did the kit justice. Thanks for looking!
-
I got into modeling recently. This is my first semi-professional build I hope you like it
-
This is going to be a very long and drawn out build, as I don't have the time to build that I wish I had! Anyway, go easy on me. A little background on me; I've been a VW/Porsche/Audi nut since elementry school, and spent almost 15 years working for Porsche, so you'll see a number of Porsche kits coming from me. I finally got around to starting a kit that I've had sitting around for years. This is Tamiya's Porsche 996 Carrera kit. Curbside, no engine detail. I decided to build this in Speed Yellow with the black interior, a somewhat uncommon colour combo around here. I've started by spraying the interior pieces in black. This is an automotive semi-gloss black, can confirm brand later. Then I masked, laid down the white glue, and flocked it. Turned out pretty good I think. I've since touched up the spot on the passenger door. Not too exciting yet, more pics to come as I get working on this.
-
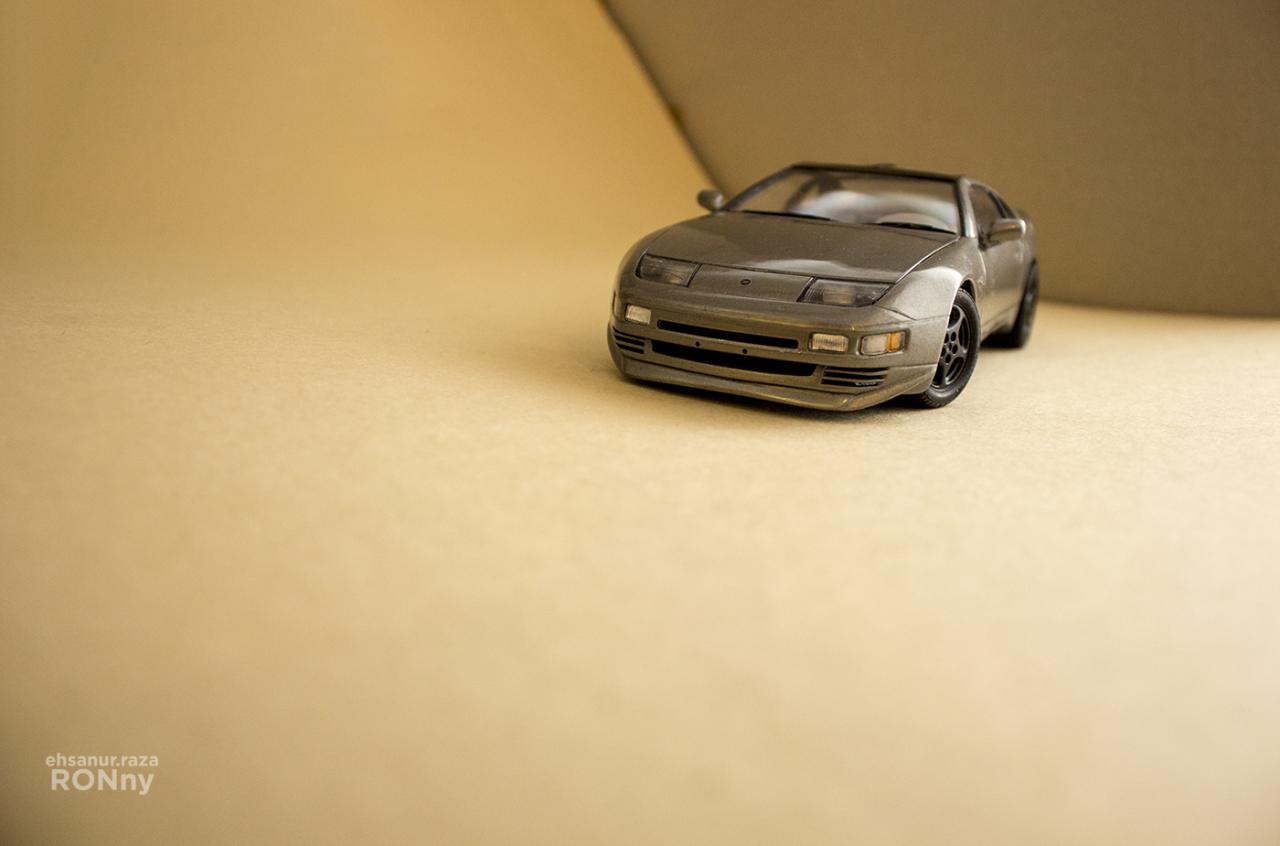
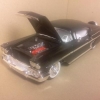
The one build where almost everything went flawlessly....almost. Then the black basecoat bled through after I applied the clear. Too soon perhaps. The Nissan is lightly tweaked. Slight lowering of the front, added a hand made chin spoiler and smoothed the rear spoiler for a more fluid look. Currently has the left hand drive setup but thinkgin of going for the right hand drive. The engine has a few molded in parts. Needed to clear up some of that. An actual 300ZX engine isn't pretty to look at. The piping looks wrong here, in fact it's kinda incomplete on these Tamiya models, but oh well. I wish I could have added different wheels but where I'm from, kinda difficult to get parts. THe best I could do is give it a satin black finish. Overall, this is a wonderful kit by Tamiya with everything providing excellent fit.
-
OK... the Lambo is still under way, but this one is now done! Lovely little kit of a lovely little car. The only thing I'd do differently if I did another one would be to thin out the body at the wheel arches, to give the dropped suspension a bit more room to move... bestest, M.
-
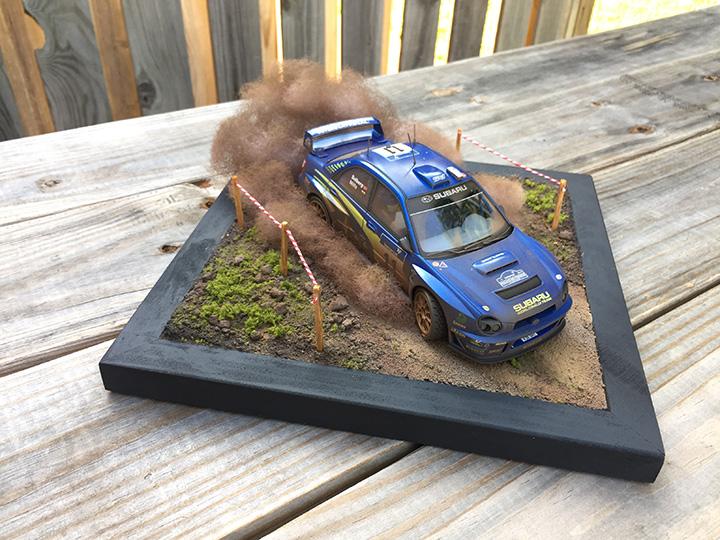
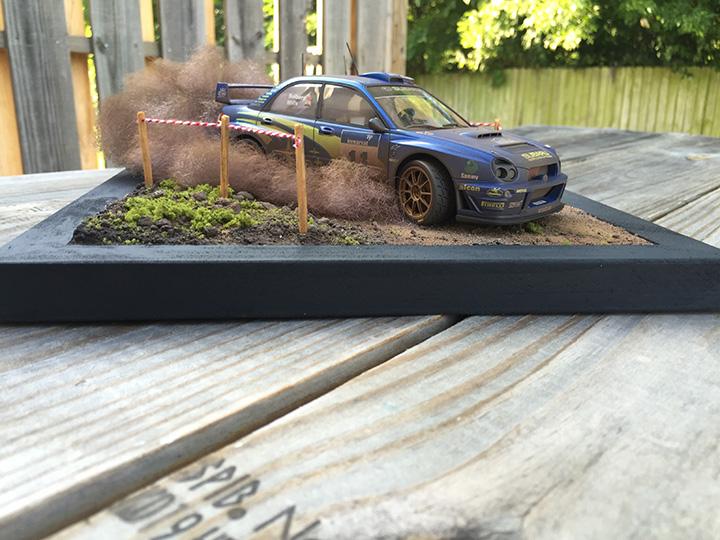
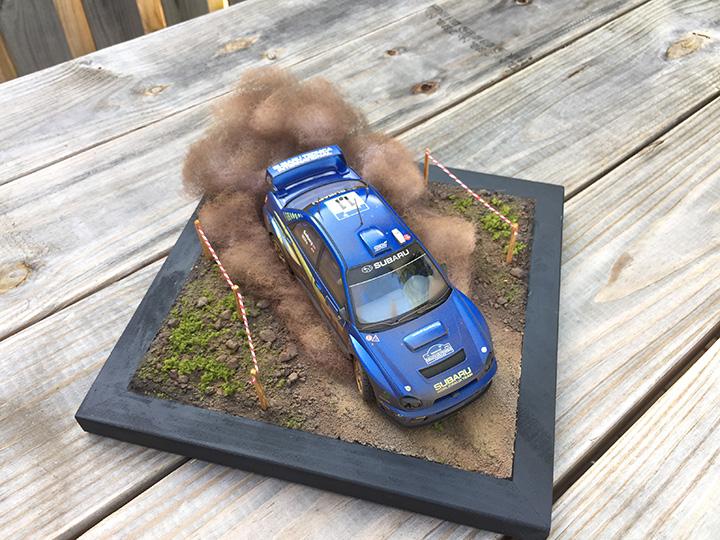
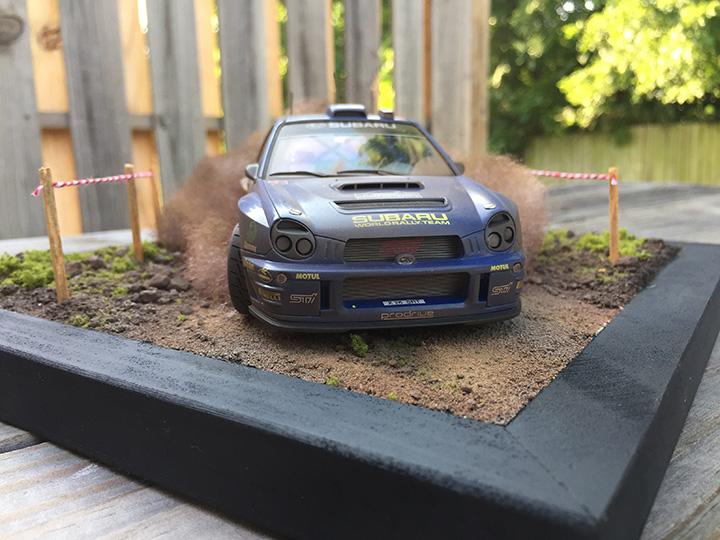
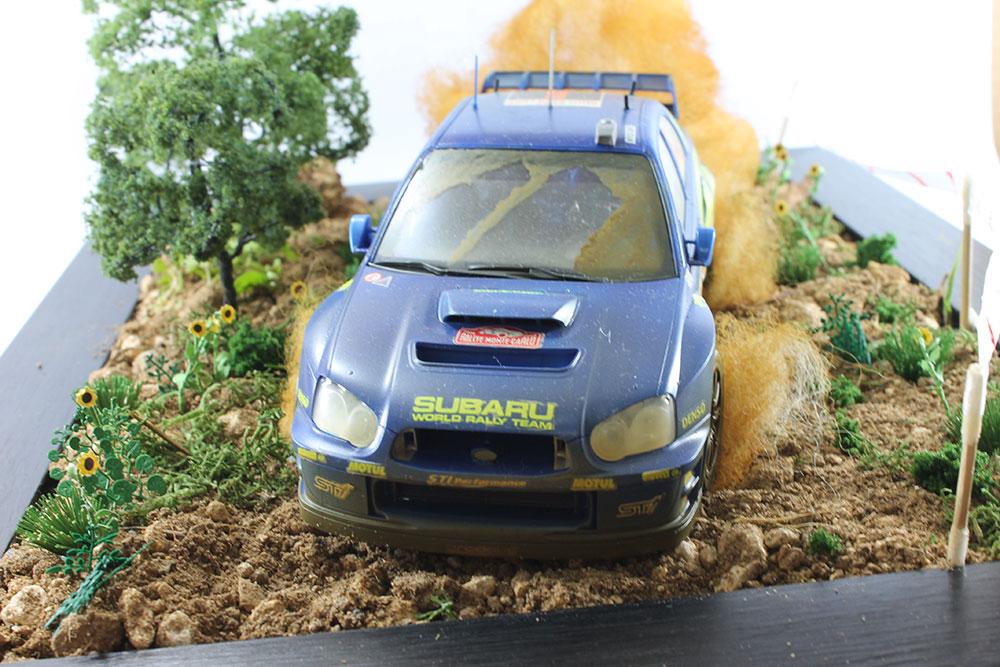
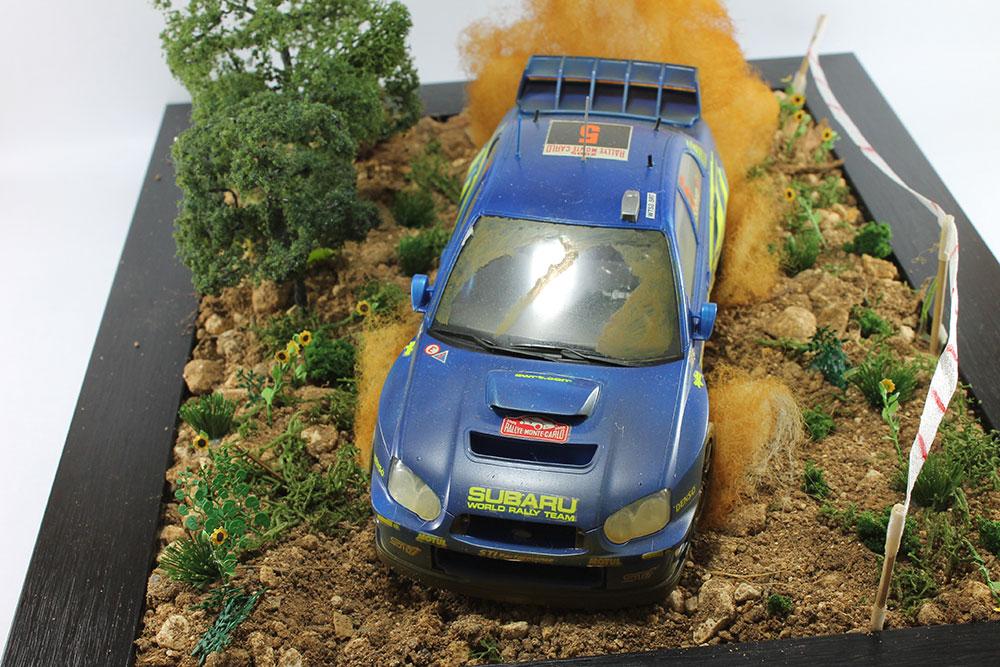
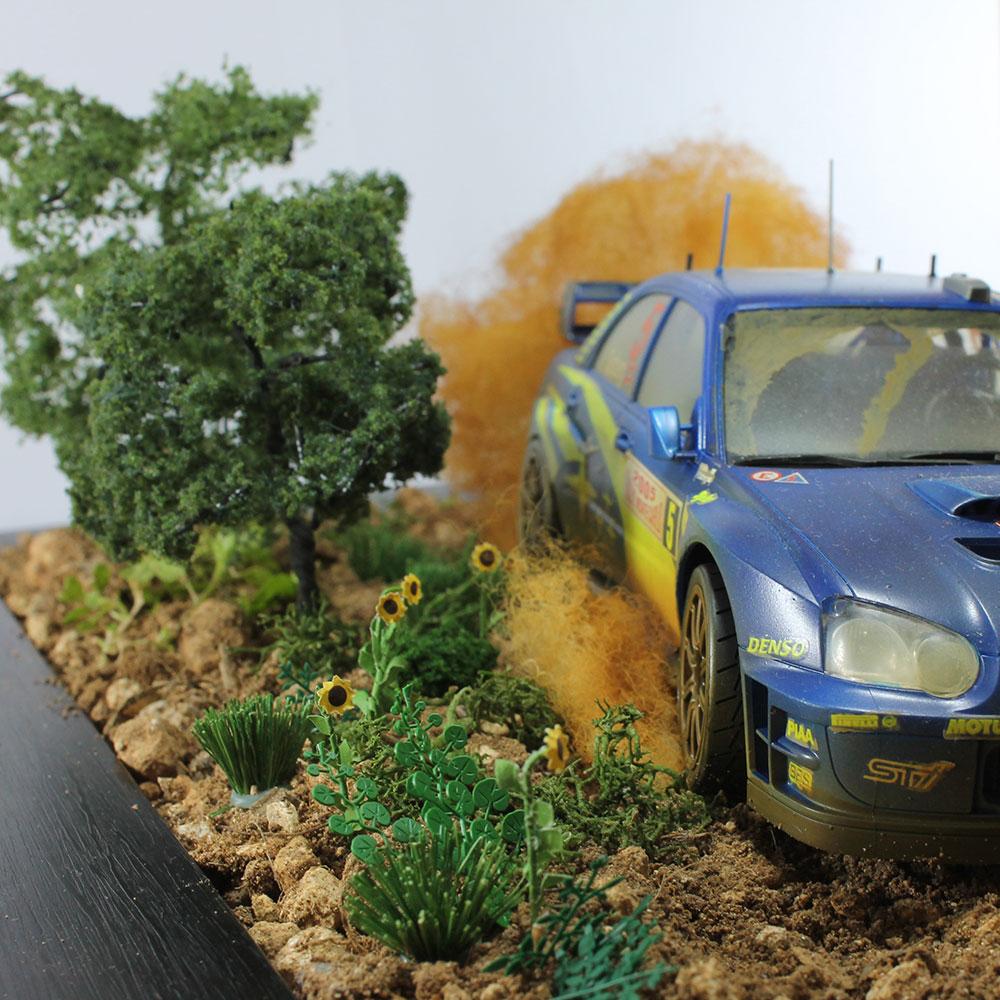
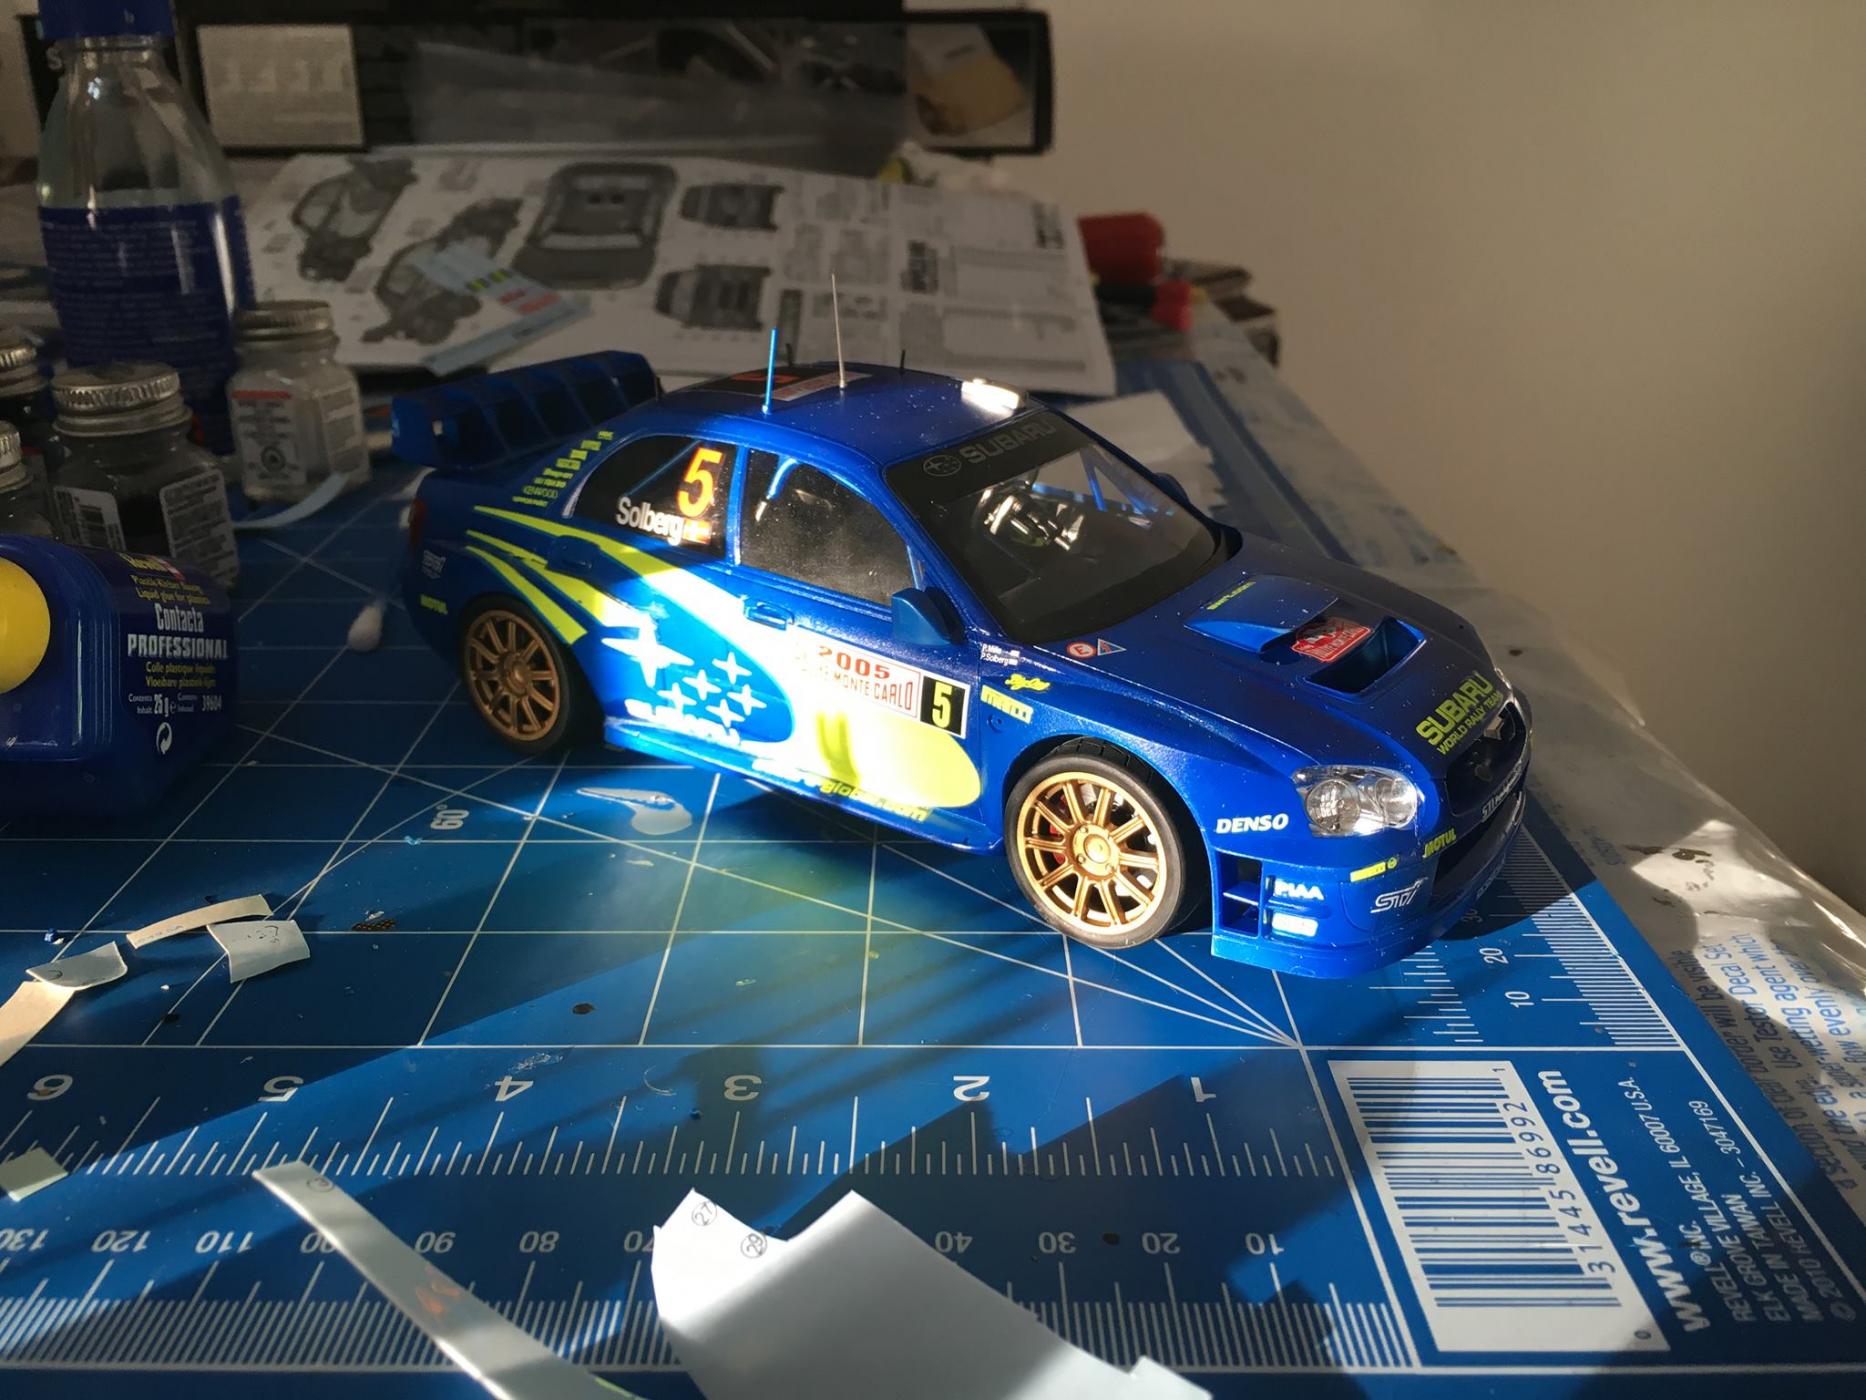
Here is on of my latest builds, Its the Tamiya Subaru WRC 2002. I built it and the diorama base for it. The kit came with two figures for the inside, but they are hard to see with the weathering I applied to the kit. Thanks for looking!
-
-
Doing a build review for Tamiya's Toyoda AA kit Here is the video Starting with the body and interior/chassis piece Frame Front and rear suspension ready for paint. Test fitting the frame to the chassis The body, there are two sets of mold/seem lines, that run from the front to rear of the body Added some the pieces to the frame in preparation for paint Frame painted, bottom half of the engine installed, I did use different shades on black. Chassis painted And another mock up with the frame on the chassis
-
Hi all! I have a question about new Tamiya's paint, its TS-94 Metallic Grey. What is the difference between TS-38 Gun Metal and TS-94, IRL? I saw preview pictures of this paint, but it's all preview, not the real hue or tone, you know. May be TS-94 darker? I would like to see some real photos of this paint on the bodies or other details or just tell me about it. Thanks.
-
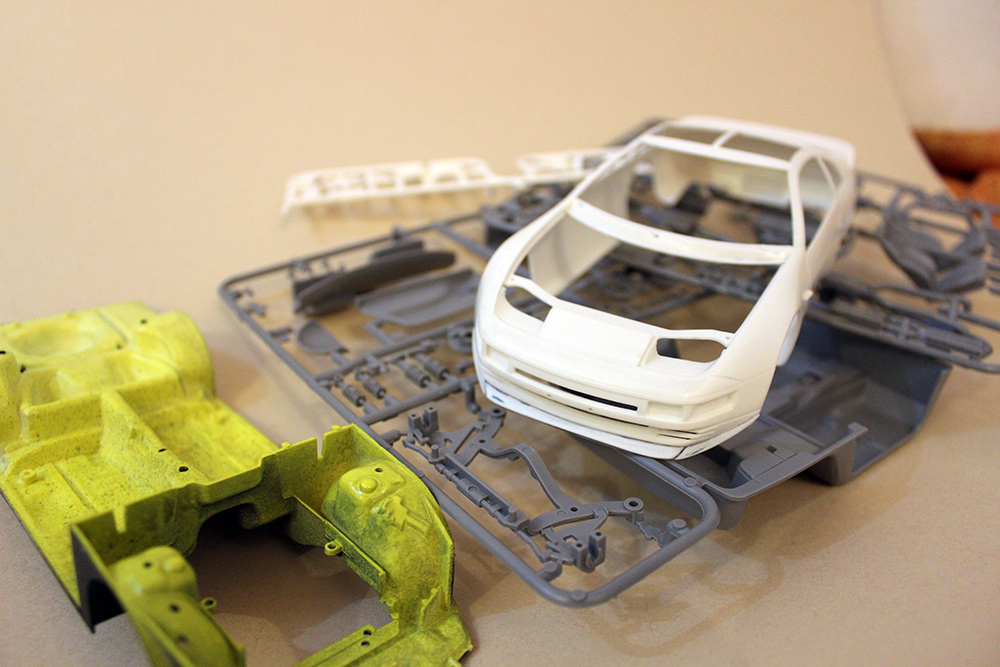
Bought this kit this weekend for next to nothing this weekend, and even though it's 26 years old, the quality is amazing! So far, I've only opened it up and looked at what's in it, and I quickly decided to change the wheels and modify the suspension similar to what i did with my Mini. Problem is, I don't have any rims that will look good on it, so what to do? Scratchbuild the rims of course! I started with a strip of 0.5 mm styrene... ...Which was wrapped around the super glue cap because that was the one thing that had the right diameter. Over the big strip, I added a 0.25 mm strip to strengthen the shape. It may look a bit messy, but since the outer side won't be visual I didn't pay much attention to it to be honest. And here it is inside the tire. There's a bit to clean up, but overall it looks pretty good. Next up is to make one more ring of this width, and then move on to the front rings, and after that, I'll make the face, out of either 1.0 or 1.5 mm styrene. Thanks for stopping by, I'll update later tonight when I get back from school //Bumblebi
-
Along with my 64 Chevy Pickup I started this Tamiya Kit to give to a good friend. Its mostly stock but I had a old Castrol Supra kit so I stole the brakes and probably the seat and other random bits. I tried to fit the wheels but they are too wide and did not want to ruin anything by cutting and hacking it up. Thats beyond my skill level at the moment Some of these pics are not great because I was too lazy to use real camera, so just sent from phone. I love my Spray booth, it may be the only way I continue to work with the move coming in a few weeks. Lets hope it does the job assuming I can properly vent it out a window. 3 Coats of Tamiya pure white on top of 1 grey and 2 white coats of primer Engine is stock nothing fancy. Going to go back and do a few small touch ups. My hand is not as steady as I would like it to be. Assuming my buddy is happy with these wheels, this may be the final stance and fitment. *edit* after posting this I just realized I installed the brakes backwards... uhhggg Thanks for looking, more to come later
-
I'd like to show you some models I've built in the near past. I'll start with one of my favorite model - because I'm a Honda enthusiast. I bases on the following model kit of Tamiya: 1996 Honda Accord JACCS 1/24 Tamiya #24180*1800 I ordered the decals at http://www.scalemodellink.com because I found them on ebay.com. I like the fresh green and the golgen stripes. I finished the built after one year building time in 2014 because different issues made me to park the kit in the waiting loop. It started with the whit paint. It was horrible. A lot of spots on the body where the plastic did it's thing (ruff surface) and amazingly some silicone spots. The first time in years.... I stripped of the whole paint and restarted successfully. Then the decal set wasn't as good to handle as I supposed. After a lot of decals were on the body I decided to paint the green color by my self. The first layer of clear coat should save the decals. But I was wrong. I don't know, why some of them got off after the tape and masking film was removed. Another thing: the decals were cracked after another layer of clear coat. Good that I ordered two sheets so I was able to scan them and make some on my own. Some decals where I'm sure they'll be work because I thought the second sheet wouldn't be better to handle. So the most decals on the white paint are self made and the result after another layer of clear coat was pretty good. The last step were the golden stripes. They are made of BMF. Sealed under another (who wouldn't believe it ) layer of clear cote. Done. I completed the interior with seat belts and some flocking for the drivers seat. That was all.
-
Thought I'd show you guys what I've been up to lately (other than the P40-. This won't be a full work-in-progress thread, just a few pics thrown out here & there as I get sub-assemblies completed. This was a kit I had almost completed about 25 years ago. Had everything finished and then screwed up the clear coat on the one of the side panels. So guess what. Into the box it went, and there it has sat for all those years. I found it about a month ago and decided to take as much of it apart as I could and redo what I didn't like (most of it). This looked pretty good to me so I'm leaving it. Just polished it out and called it good. I just finished the transmission/rear suspension sub-assembly this weekend. Check it out. That's it for now. More to come.
-
... you know how sometimes a project just seems like the right one to do right now? Well, I've been noodling with the Murcielago SV, but I suddenly got the urge to build an XJ220. Don't ask me why... The usual start with Zero Paints for the body. This is meant to be "Silverstone Green", one of the exclusive colours for the XJ220. It's NOT meant to be any kind of British Racing Green, and I found some excellent pictures of a car on sale that categorically is Silverstone Green. This is specially mixed by Steve at Hiroboy -- a "Pacific Green" originally found on a Mustang. The colour codes for the original paint are not in the 15 pages of database entries for Jaguar colours on Lechler mixing tool, so I had to get something close. One source pointed to Boyd "Chezoom Teal" which is available in a Testors can, but is not in the DB either, so this is the closest I could get after rather a lot of online research. I wanted to keep the wing painted with the body to make sure it was exactly the same colour -- I learned that lesson the hard way! As always, the clear coat transforms the colour. I'm quite happy with this, since it matches my reference pictures pretty well. It's hard to photograph! The headlight covers raise and lower, and fit rather well -- these are taped on for effect and came slightly loose before I took the pix. On to the rather neat engine now... bestest, M.
-

1966 Volkswagen 1300 Beetle | Low 'N' Ru5t Bug - Tamiya 1:24
Renaz posted a topic in WIP: Model Cars
Hello Guys! First of all: please excuse for my bad English! Finally can I post a assembly that ran in secret over a few months! So, I stopped with other projects that were in line and only dedicated myself exclusively to this Beetle. Follows a small descriptive of the event so that everyone understands the rules and project development: All modellers will mount the same kit and a single assembly line: of the box (OOB). The kit was the Beetle from Tamiya and small exceptions were released – wheels and suspension could be changed, only wiring the motor and detail the belts inside the car. Nothing else would be allowed. But the most interesting rule was not to be allowed to publish photos during the assembling. So ... Let's go to my project for this Event: 1966 Volkswagen Beetle 1300 Tamiya with Codename: Low 'N' Ru5t Bug! My great desire would be to make a very low car. Here in Brazil calls: "Socadaço"! You should take some very drastic measures in order to stay consistent with the vehicle 1: 1. One is the negative camber on the rear wheels, so I removed material of the rubber tires (which was wide) so akin to what happens in reality, the car adopt a really aggressive look and to sticking to the ground. As if the tire was "deformed" by car's weight. Other changes are required: inverted axle shafts for the curvature was thrown "up", cleaned injection marks and other imperfections in the plastic parts. A few more "views" from the suspension ... And here, a general view... After this work was big and exhausting, I came to something more light ... I tried to leave the front seats with a more accurate face as in real Beetles. I do not like license plates on my car, so I tried to close all the holes... That's all guys... Big hug! -
Hello Guys! Done: Tamiya Low 'N' Ru5t Bug. WIP: http://www.modelcarsmag.com/forums/index.php?showtopic=98645 Let's go! Some Close-ups...
-
 Hello everyone! Well, this is my third military model I started some time ago. Several modifications - turret, spare track holder, bulbs, muffler brackets, fender springs... Don't be too harsh. Greetengs from Poland!
 -
 Project # 7 (and #8)... The usual box stock Fresh out of a frustrated Audi A4 DTM build, decided to fall back into something more in accordance with my skill level but this time around it will be a double build (See if I can finally deliver the model I've been promising to a good friend of mine). Originally wanted to build a NSX Raybrig, but endend up selecting a Tamiya Tom's Supra model that I already built back in February (That one was my second build ever), decided to build it again mainly because it was made using custom colors and decals that didn't come out at all as expected, also because I'm aware of all the mistakes already made and will have the ability to correct them and lastly... because I truly like this particular car!!!. 1995 Castrol Tom's Toyota Supra GT, some photos for reference: I have been working on these for about a week now so I will post a few more photos during the course of the day. Thank you for reading.
 -
Yes, there actually was a short lived North American Touring car series back in the '90's. It used cars very similar to Japanese and European Touring Cars that ran as an undercard to the Indy cars on road racing courses. My build is a fictional "what if" factory Honda effort for the series. You can see more pics and read all about it on my site at the link. http://www.svensworldofwheels.com/accordpage.html
-
I know many have opinions on how a sleeper should be,but here is mine. Dull original beetle on the outside. Stuffed with some italian 390hp 500nm lump of aluminium. Some dull non-metallic grey or green would be lovely,and try make the exhaust not show to much.
-
 Two very different cars, but both a tribute to the best of Italian sports car know-how... The GTA in primer. I'm trying out the technique suggested by "Cruz" in which you wash the shut lines with black while the car is in primer, before painting. He suggests rescribing the lines first, but I thought that the GTA had crisp and deep enough lines out of the box to test the technique without needing to scribe them. The Murcielago in primer. I wanted to get as many parts of the body together as possible to avoid having to match the colours, and glue clear-coated pieces together. In practice, this means the extreme nose, skirts and lower edges of the extreme rear can be attached. Doors and one intake (which has a segment of body colour inside) have to remain separate... The Murcielago will be Giallo Orion -- a pearl yellow colour -- with lots of black/grey carbon trim. This is, once again, the ever reliable Zero Paints system of ground coat, base coat and clear coat. Whereas the Giulia Sprint GTA is in a colour scheme inspired by some of the racers I've seen at Donington over the years. More Zero Paints, this time Alfa Rosso Corse and Lamborghini Powder Blue (a Miura colour which eventually lost out to the lime green when I built mine, but I may still do another in this colour, because it looks so cool...) And now with the clear coat on. You can see how much it changes the apparent colour of the base coat, especially on the Lambo. I think the change is even more intense with the pearl finish because it reduces the scattering of light by the pearl layer, and lets you "see through" to the base coat more directly. I also tried using clear over a decal for the first time, (the Alfa "snake" on the bonnet) which has worked very well. There are the odd spot imperfections here and there, but once again the Zero 2K clear has done its job and settled into a smooth, glossy finish all over. These will now go away into plastic boxes for a week or so to fully cure before polishing out those spots. It's good to be back at the bench! bestest, M.
 -
Fantastic kit of an extraordinary car... bestest, M.
-
I haven't posted here in a while as i have many builds on the bench and other things happening. Anyway i have finished this one off, basicly stock except i painted the rims black and used a custom mixed colour for the exterior. Let me know what you think.
-
Tamiya Nissan R89C 1/24


.thumb.jpg.d0926de2d8346363976c7c0a63bd15d7.jpg)