ModelcarJR
-
Posts
1,648 -
Joined
-
Last visited
Content Type
Profiles
Forums
Events
Gallery
Everything posted by ModelcarJR
-
Thanks, All! I appreciate your comments and suggestions. It was tight but I went with the steelies. I guess I am too old school! This one is done! Final photos are in Under Glass! Thanks for looking and thanks for commenting! ?

-
So I did an extensive search of my tires and wheels parts boxes ( I have two scrapbooking cases full of tires and wheels) and came up with some wheel backs and some ideas on wheels for this build. I didn't find much that I liked. I still have the tires from the kit so I thought I would use them. However, the tires are Goodyear GT Radials that should have the outline white lettering which I am loathe to do. Then I remembered that I had purchased steelies and dog dish hubcaps from Fireball Modelworks. They would be perfect! So I painted the wheels and wheelbacks. I had previously painted the hubcaps with Alclad but it didn't come out chrome. So I re-painted them with a bright aluminum. While they were drying, I used a set of Fireball Goodyear Polyglas GT decals on the backside of the Goodyear GT Radial tires. Once everything was dry I assembled the wheels and hubcaps and applied the decals for the hubcaps which came with them. I like these much better for this build. My wife says they are ugly so I know i am on the right track! Let me know what you think. Thanks for looking! ?
-
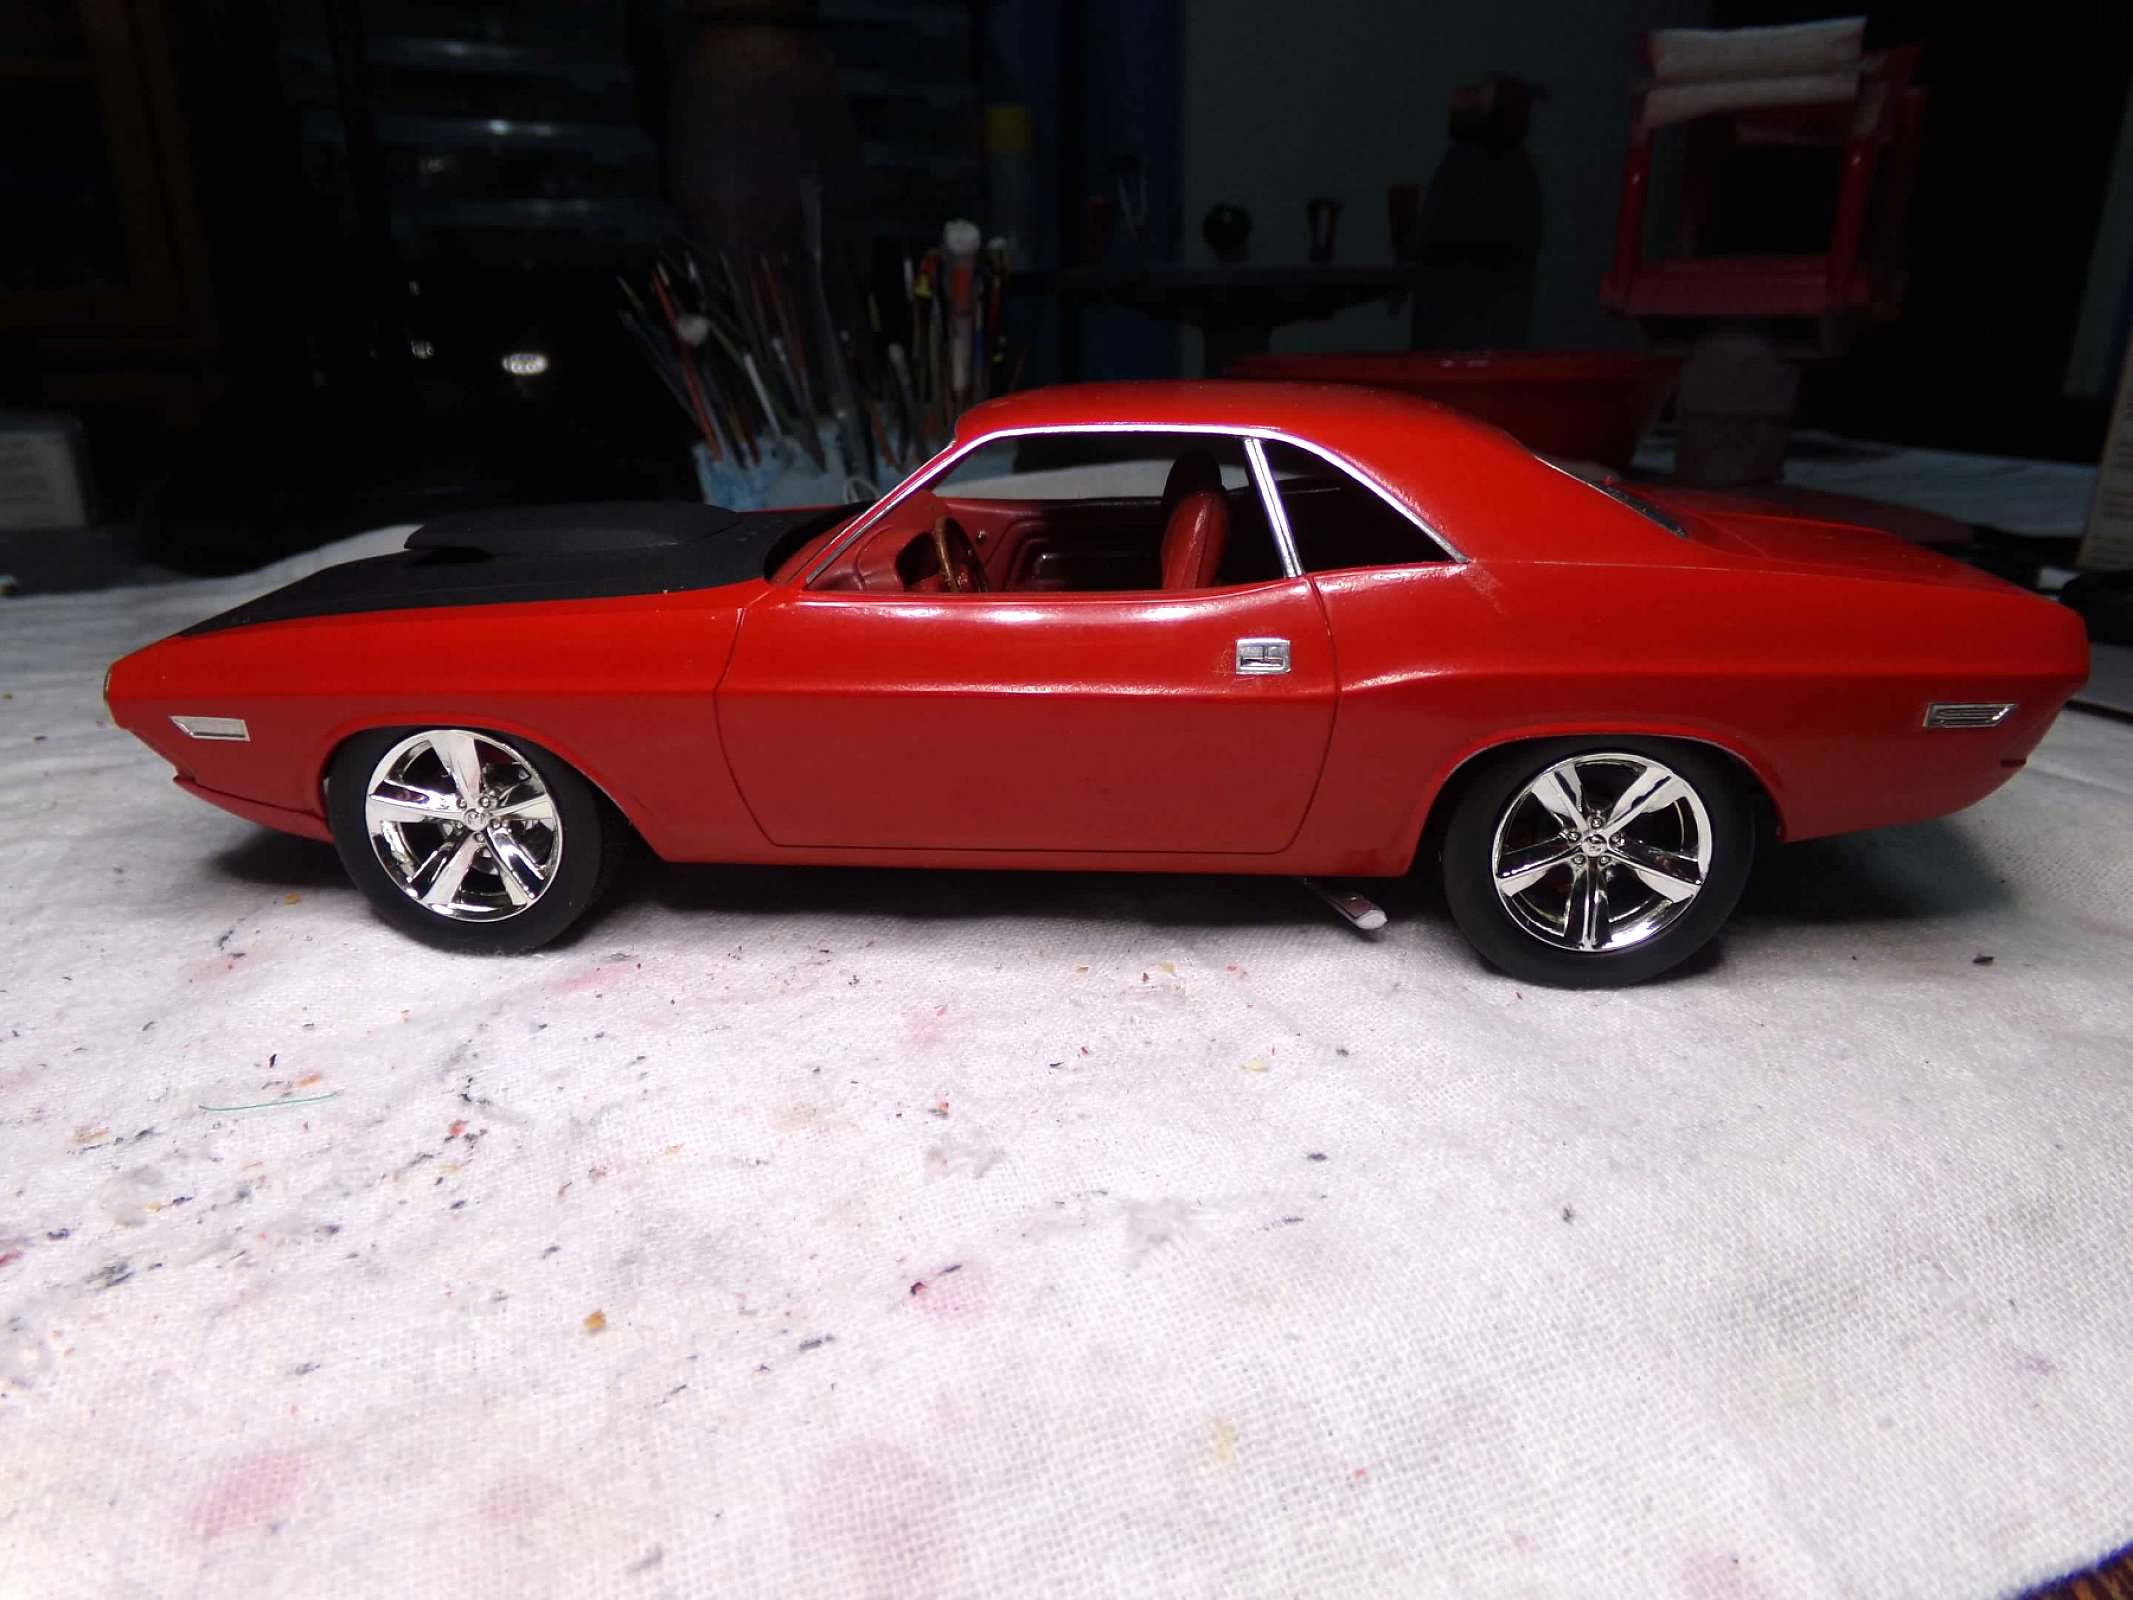
Thanks, Carl and David! I appreciate your comments! This is a mock-up of the wheels, tires, and rotors. The wheels and tires came from the 2009 Challenger, I think. Nothing is glued on yet and I need to adjust them inward a little bit. They look a little big for this body to me. I could use a set of keystones on some regular tires or maybe just painted wheels with some dog dish hubcaps. What do y'all think?
-
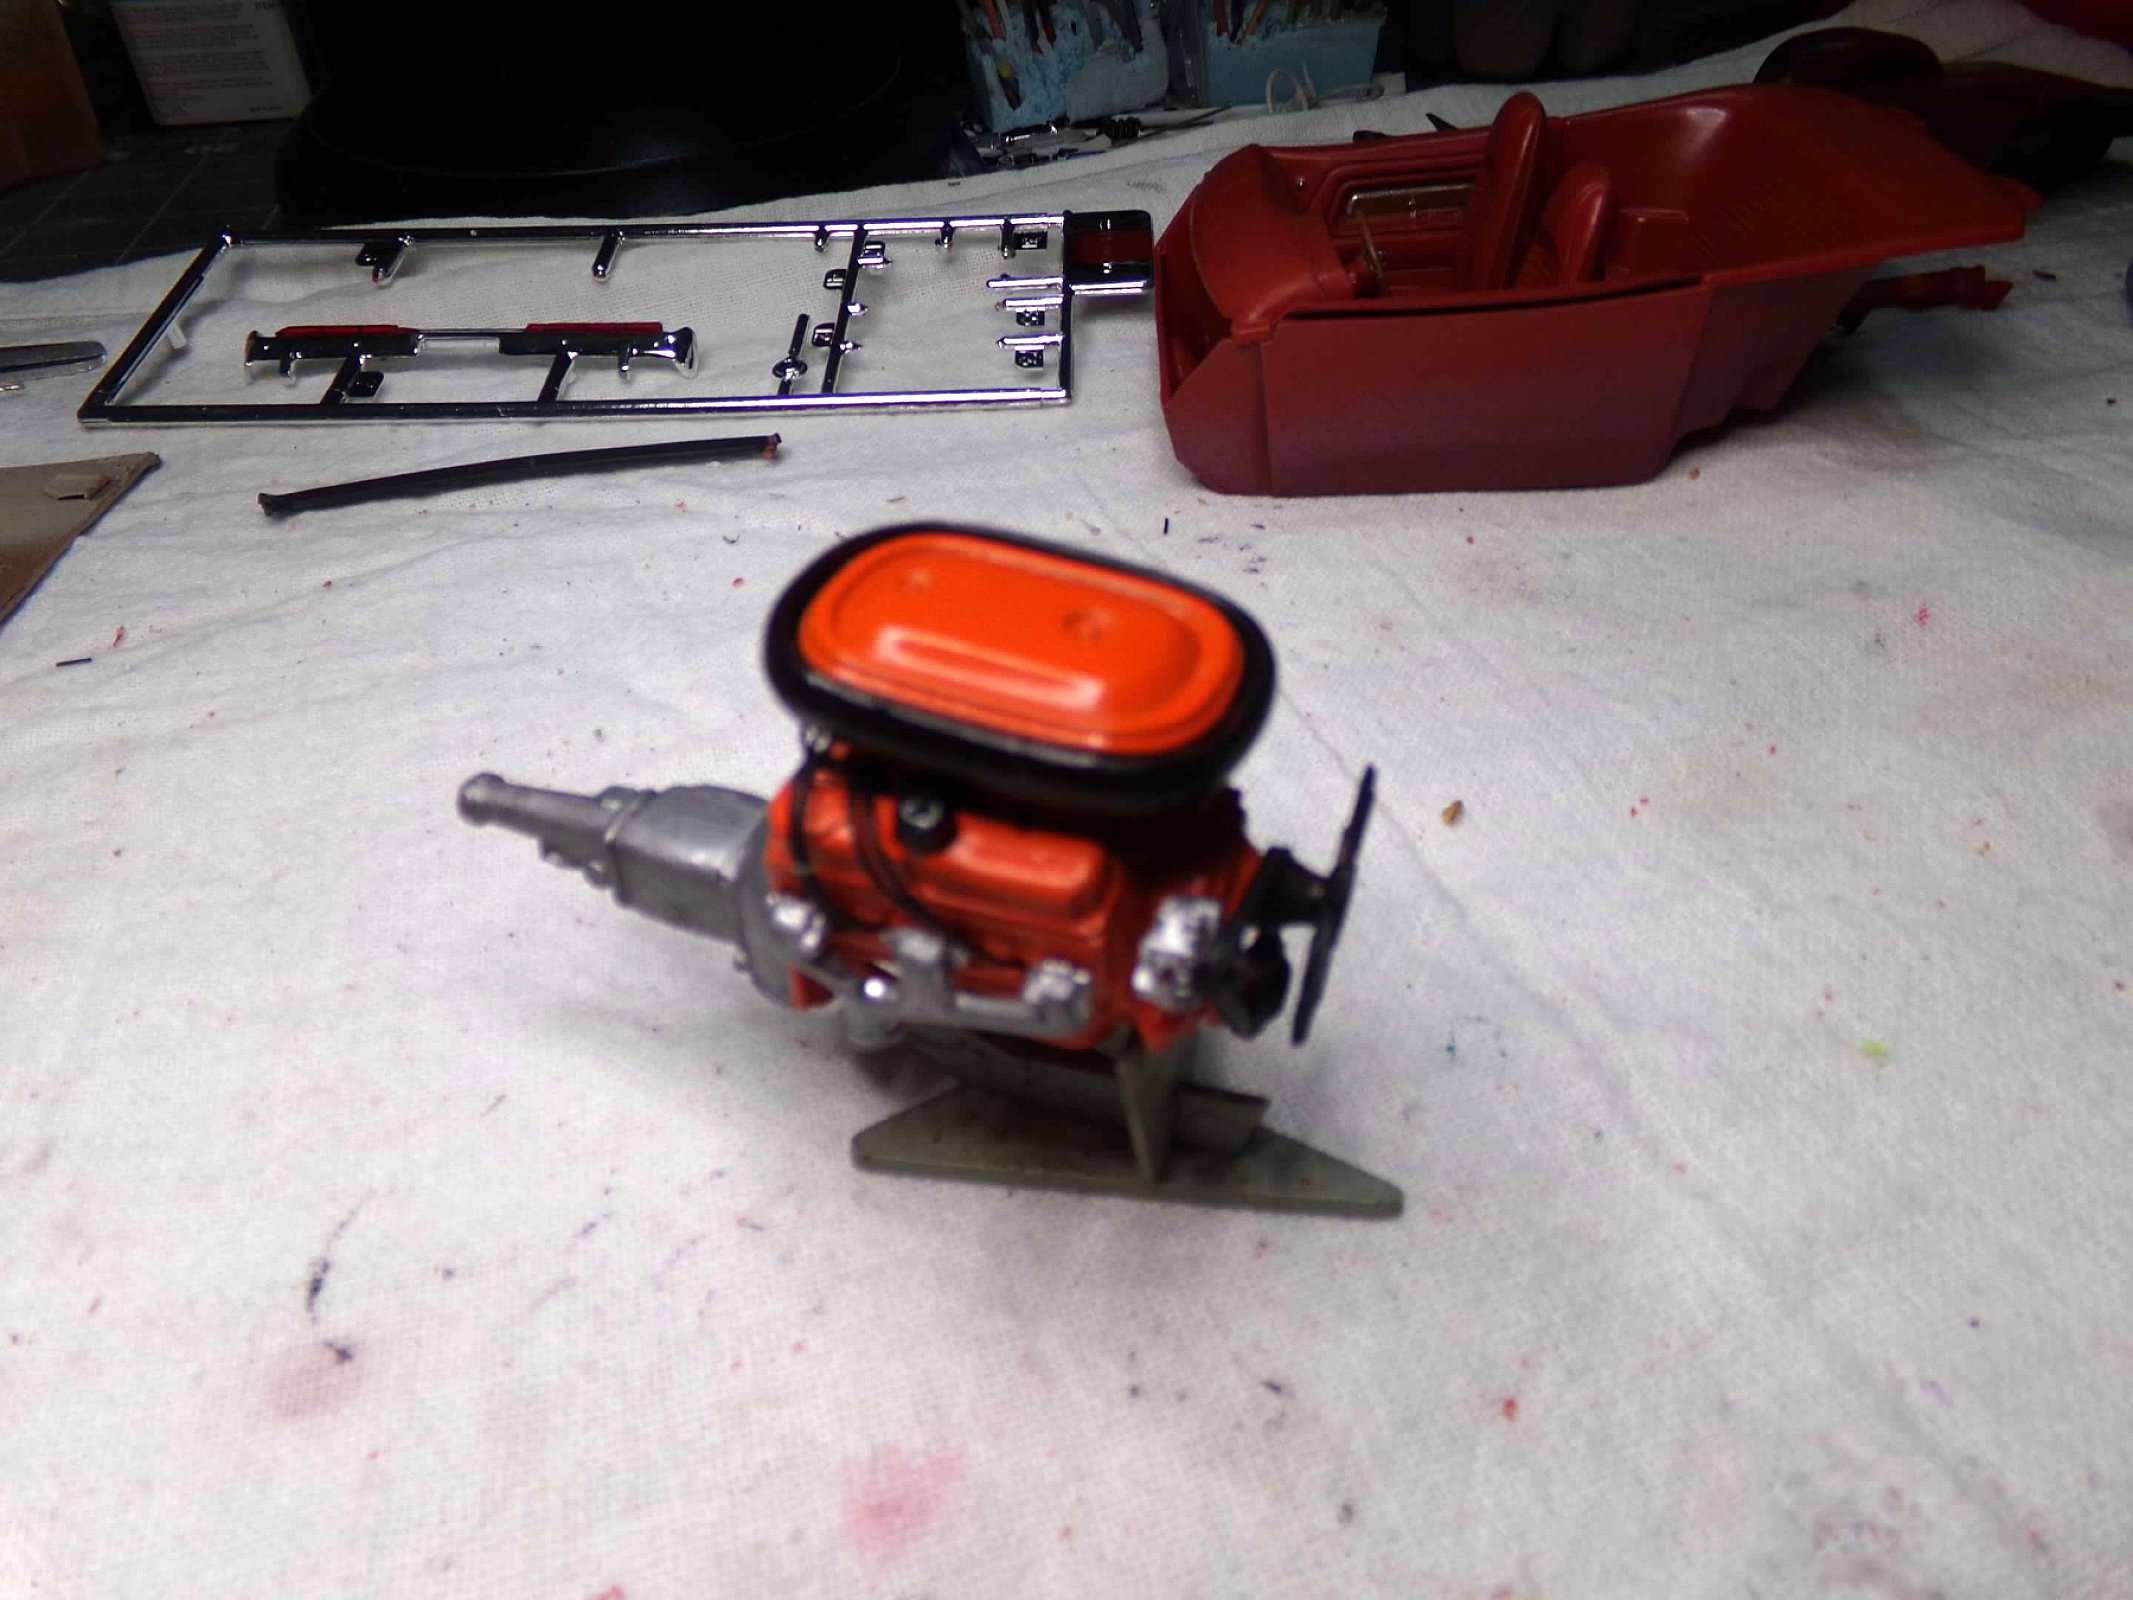
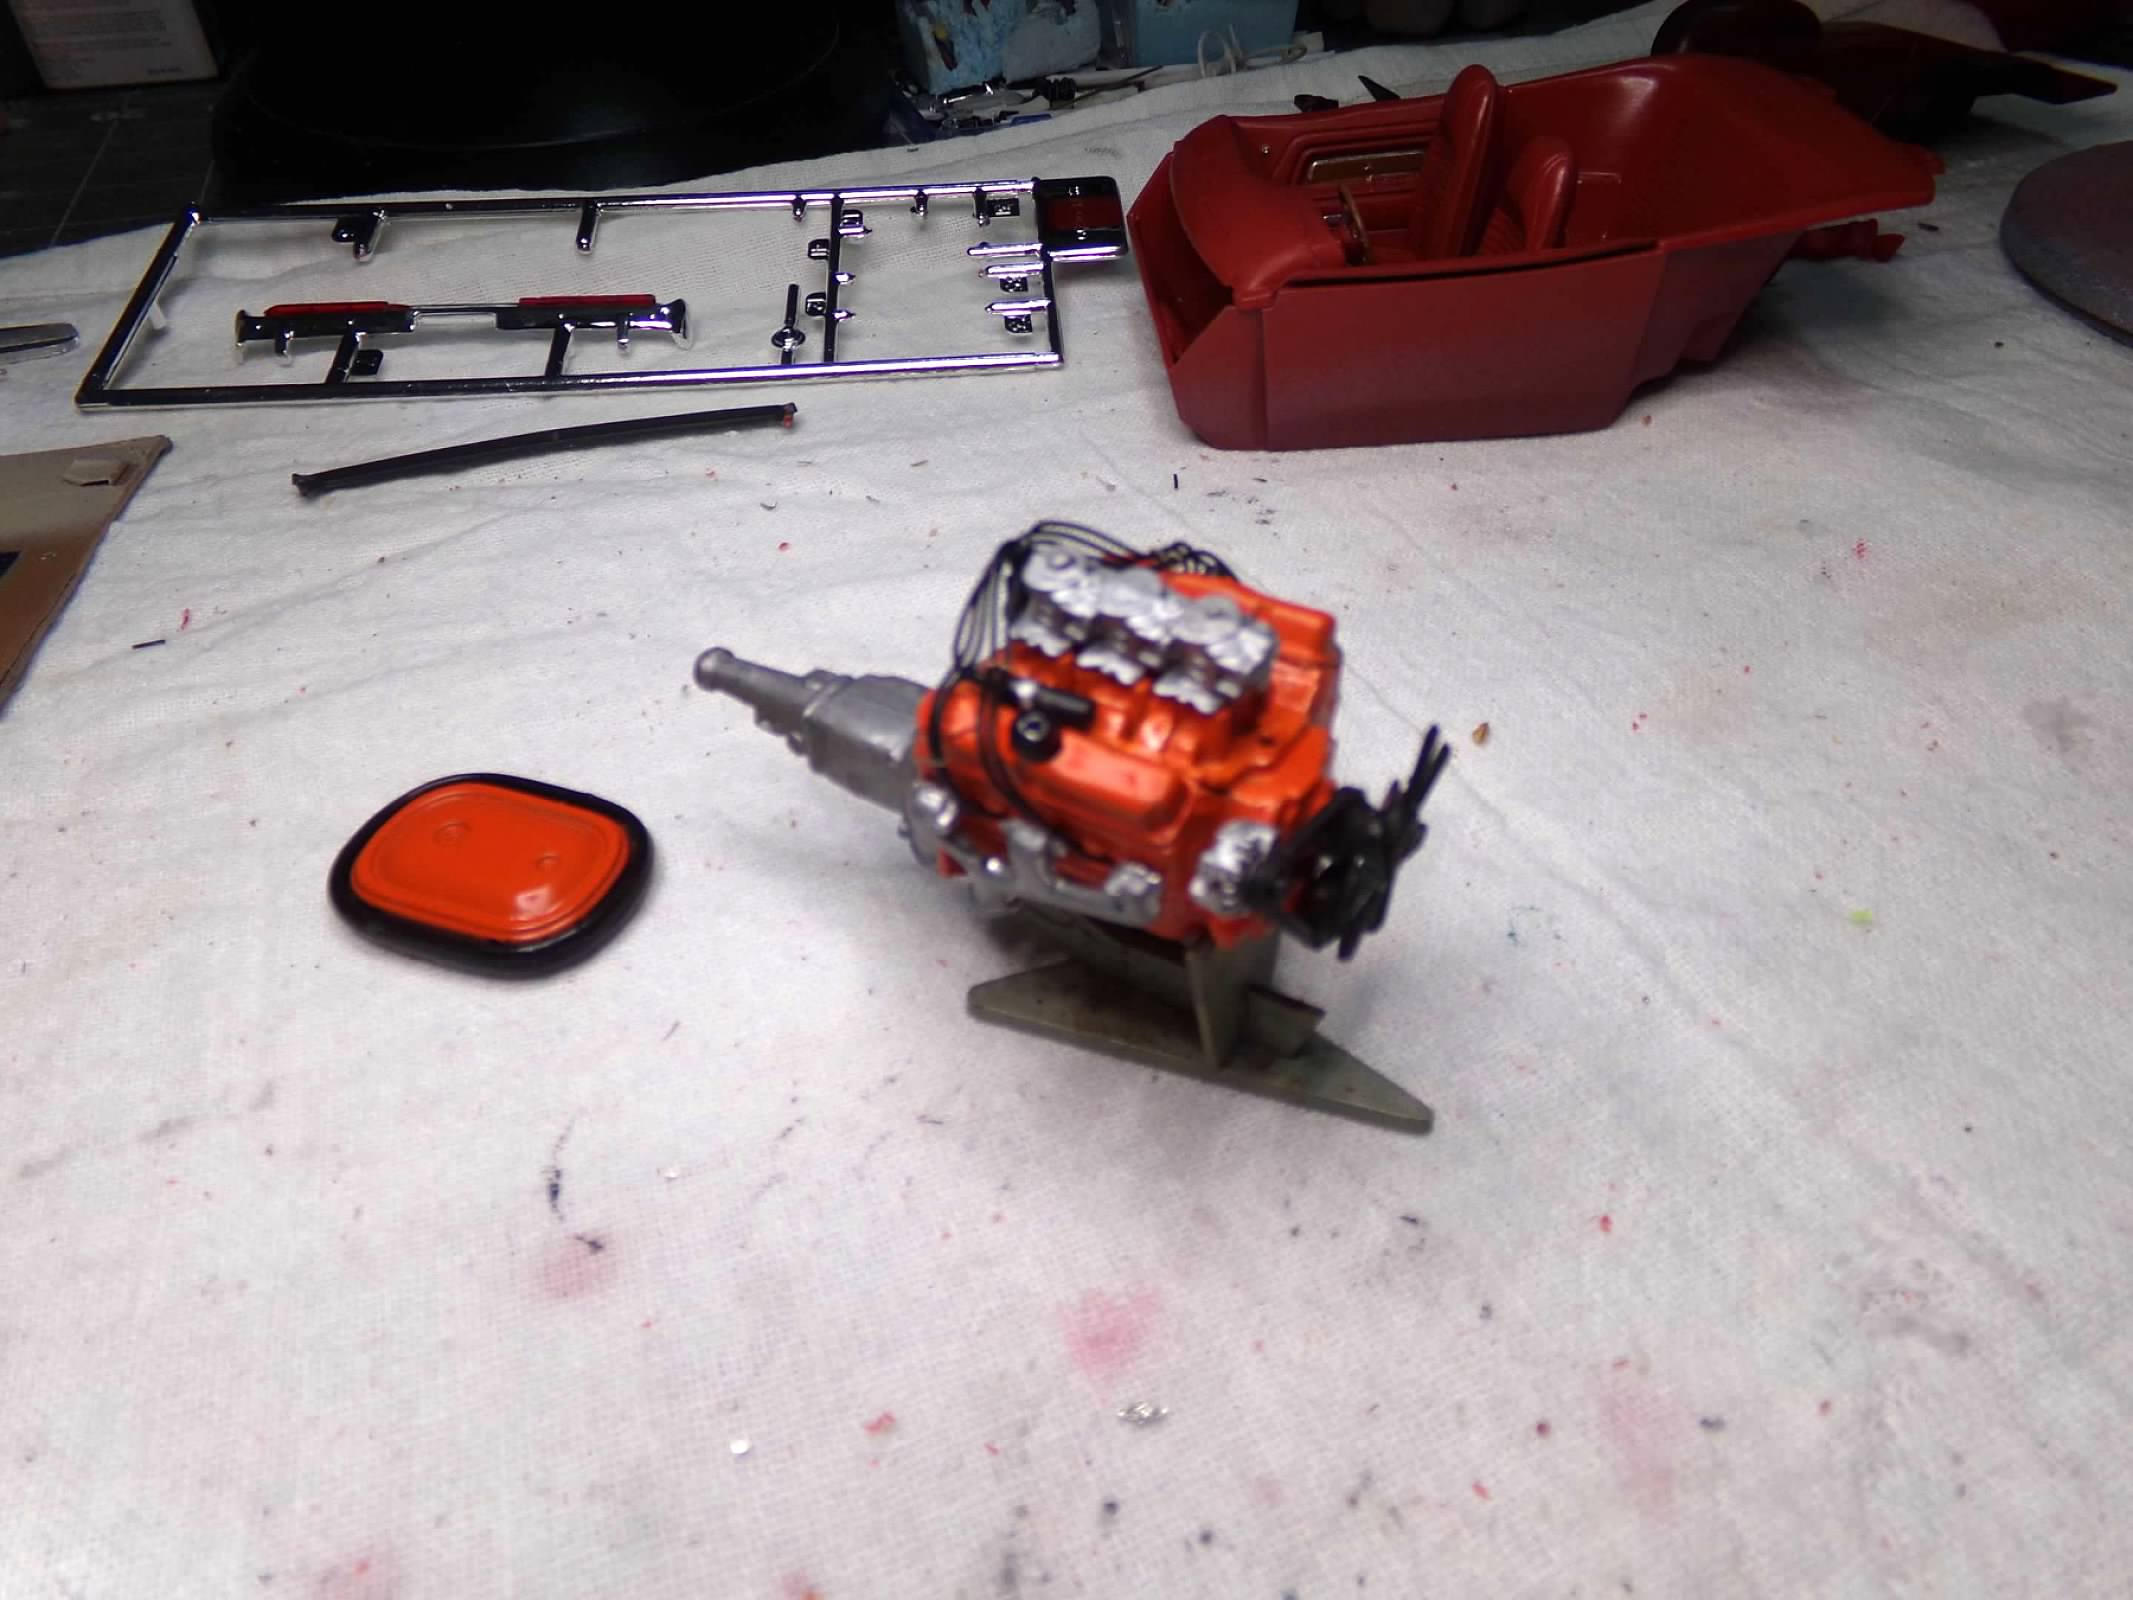
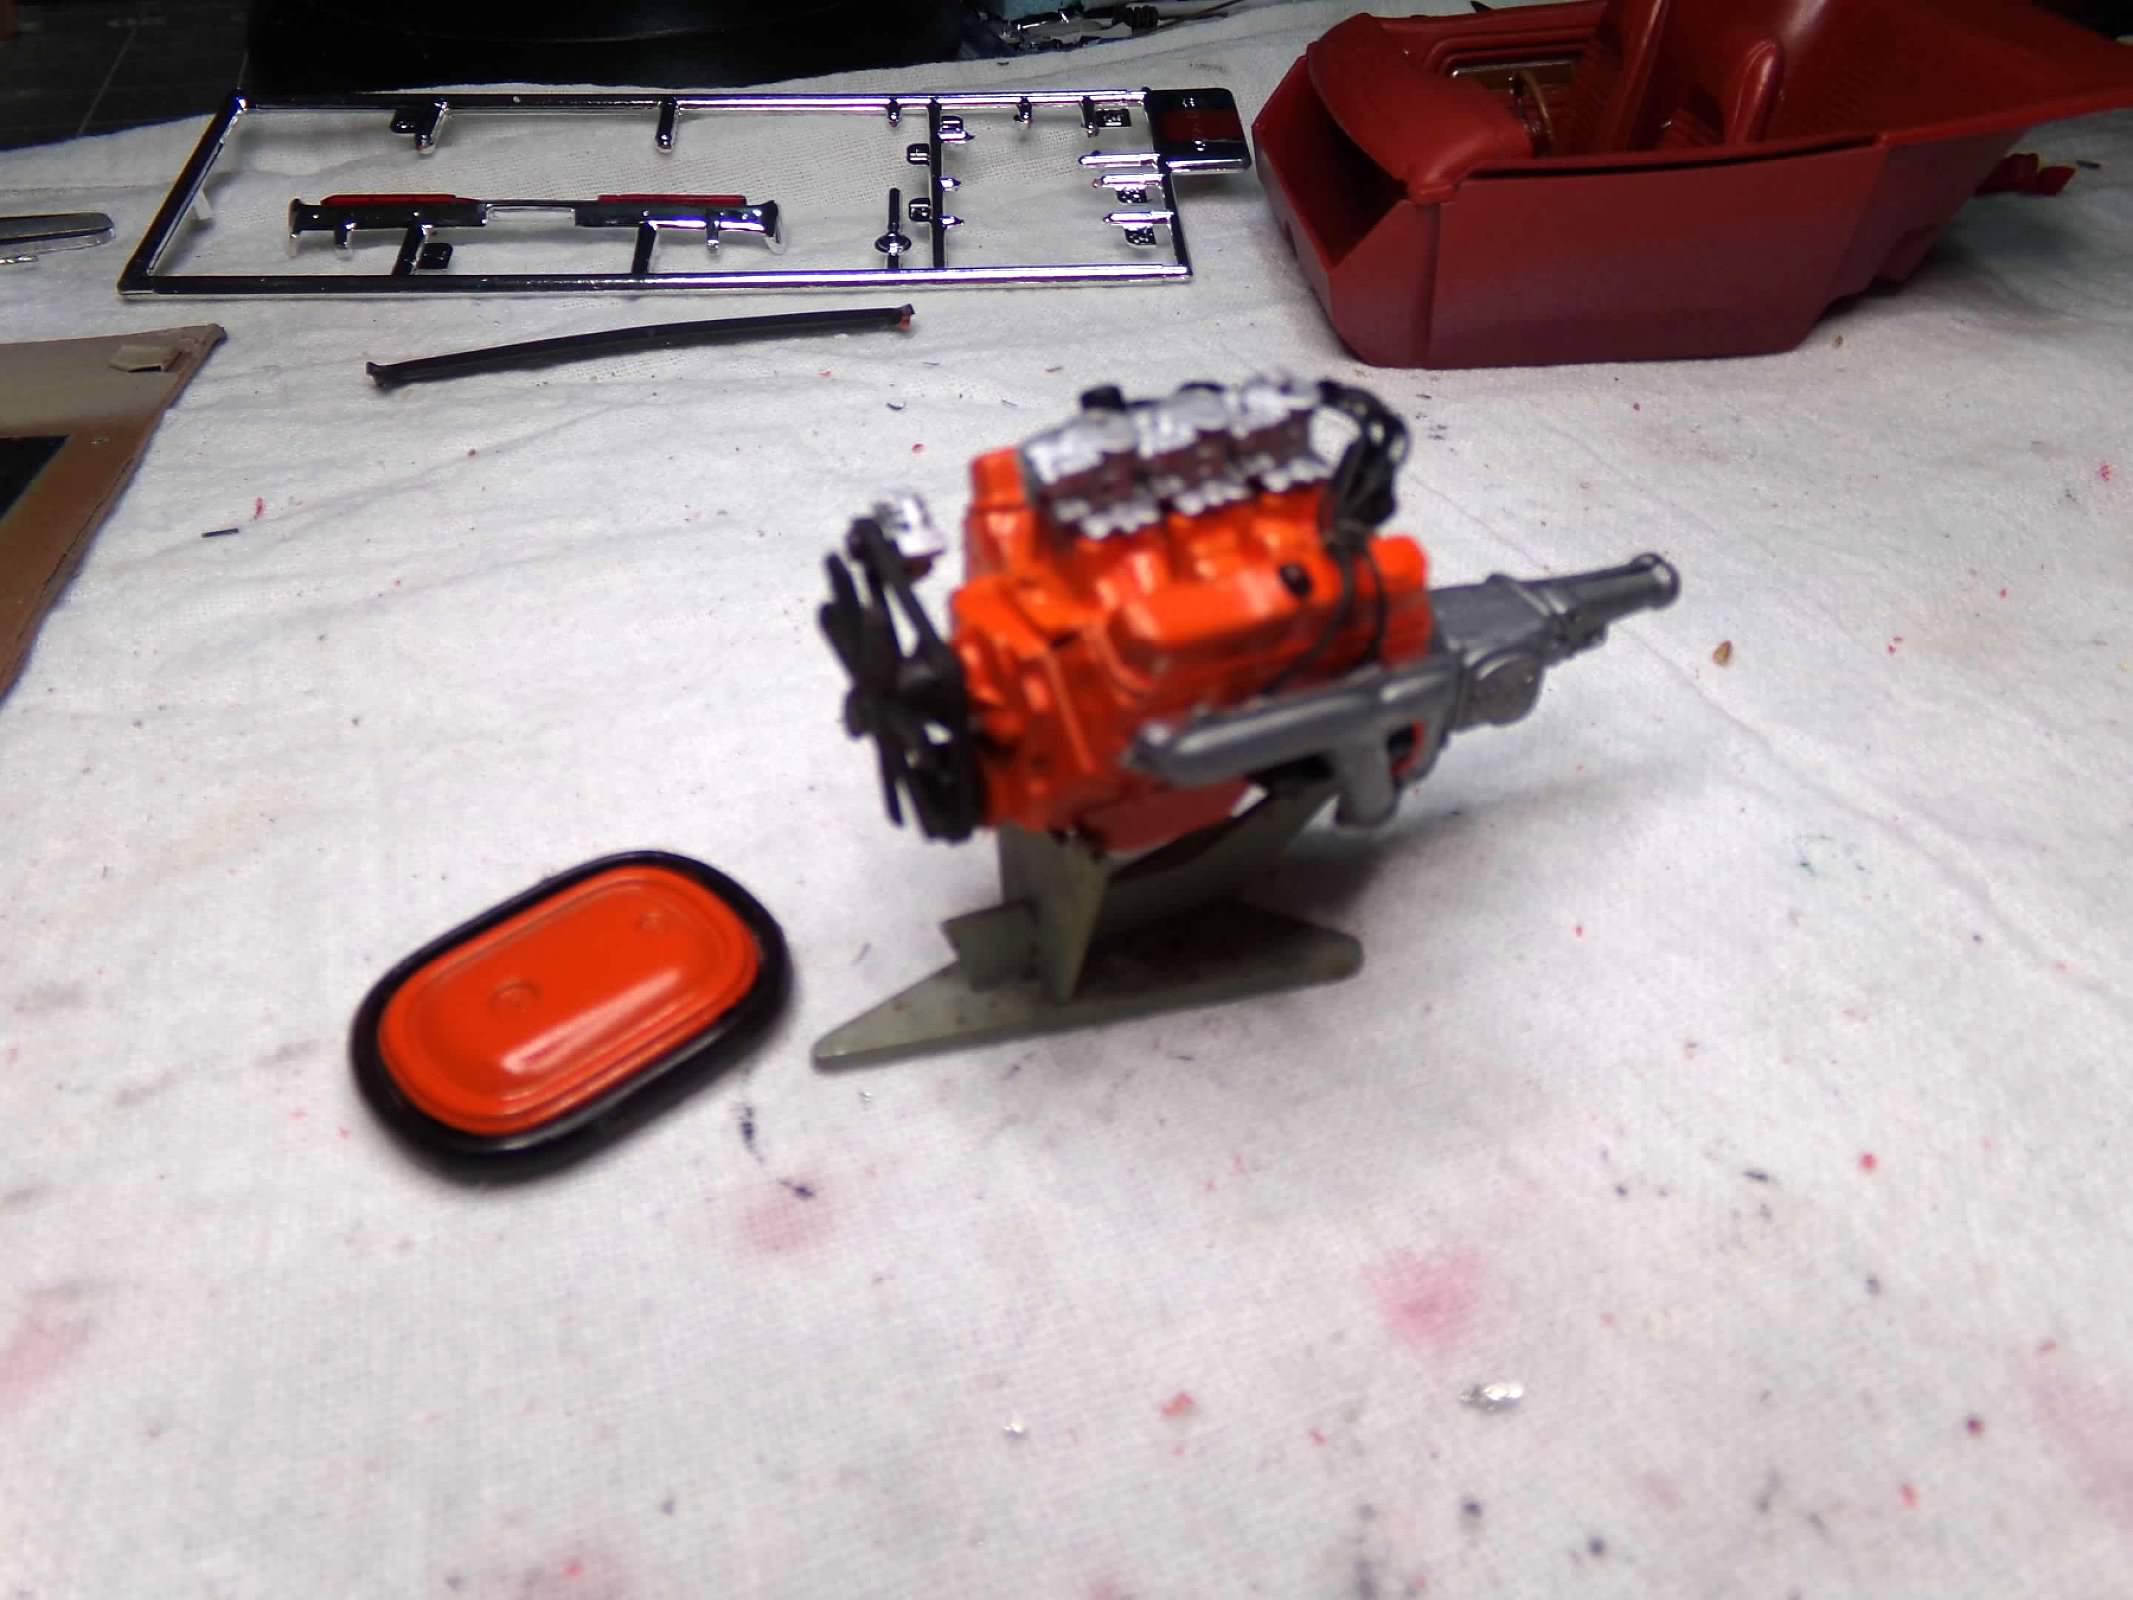
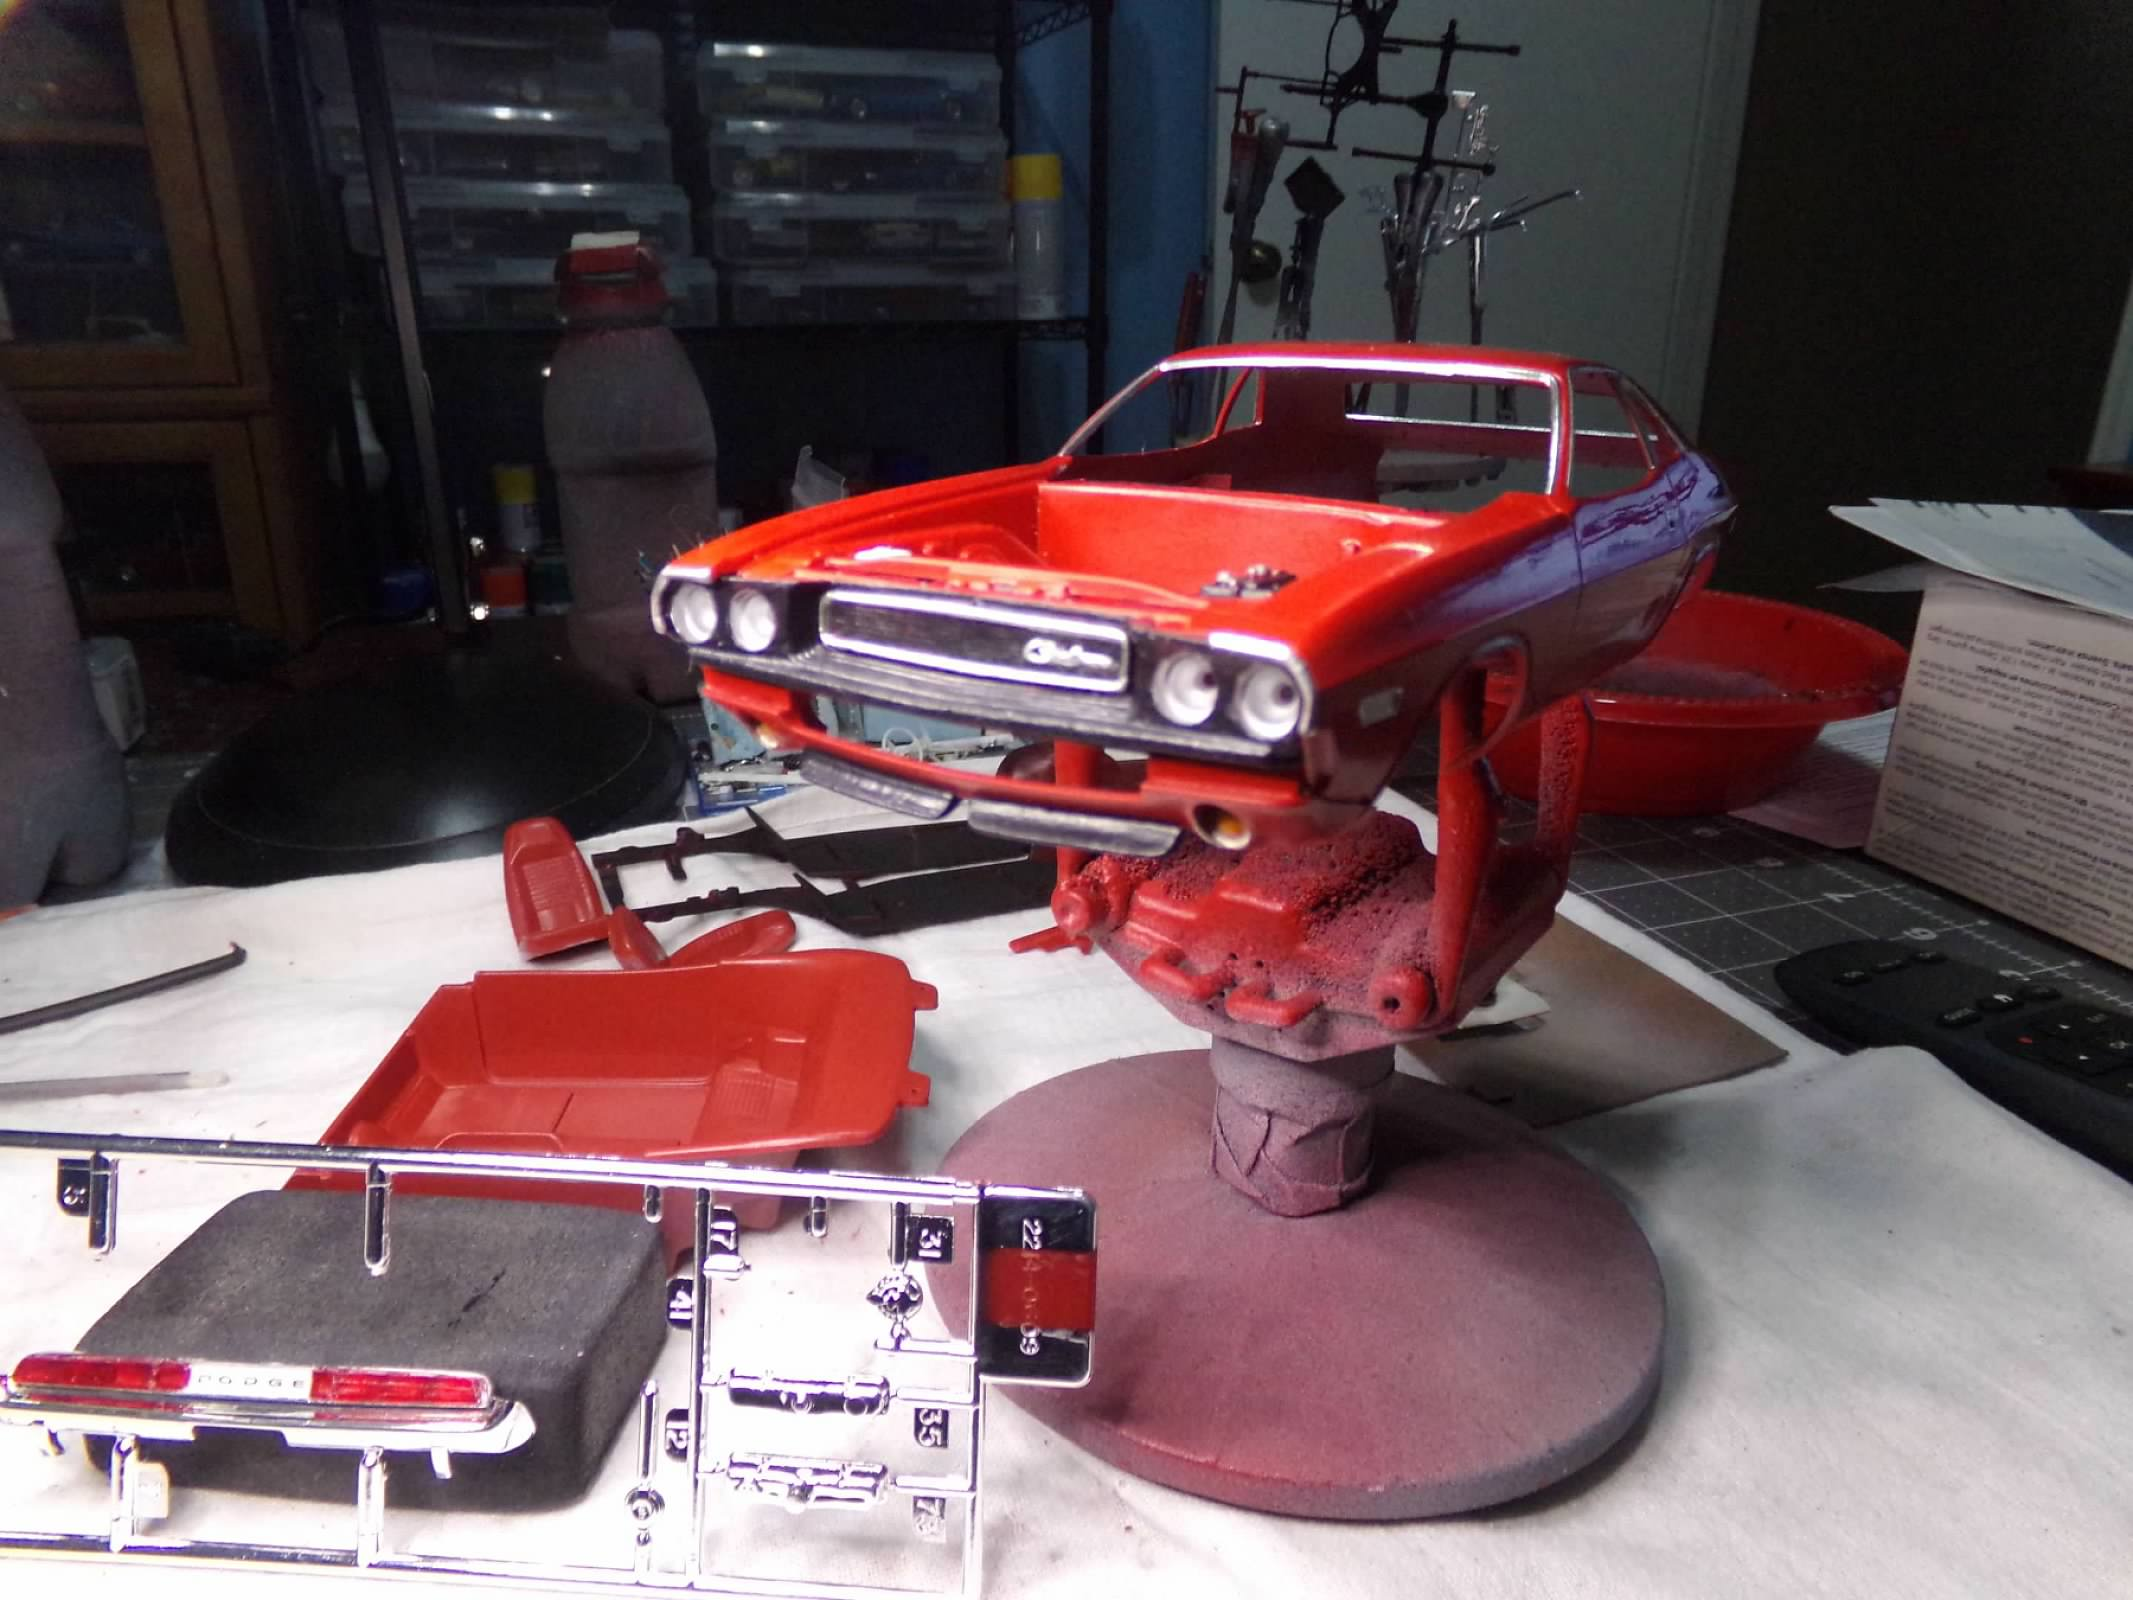
Engine is done. Added plug wires and scratched a coil. I'll add heater hoses once installed in the body. Thanks for looking! ?
-
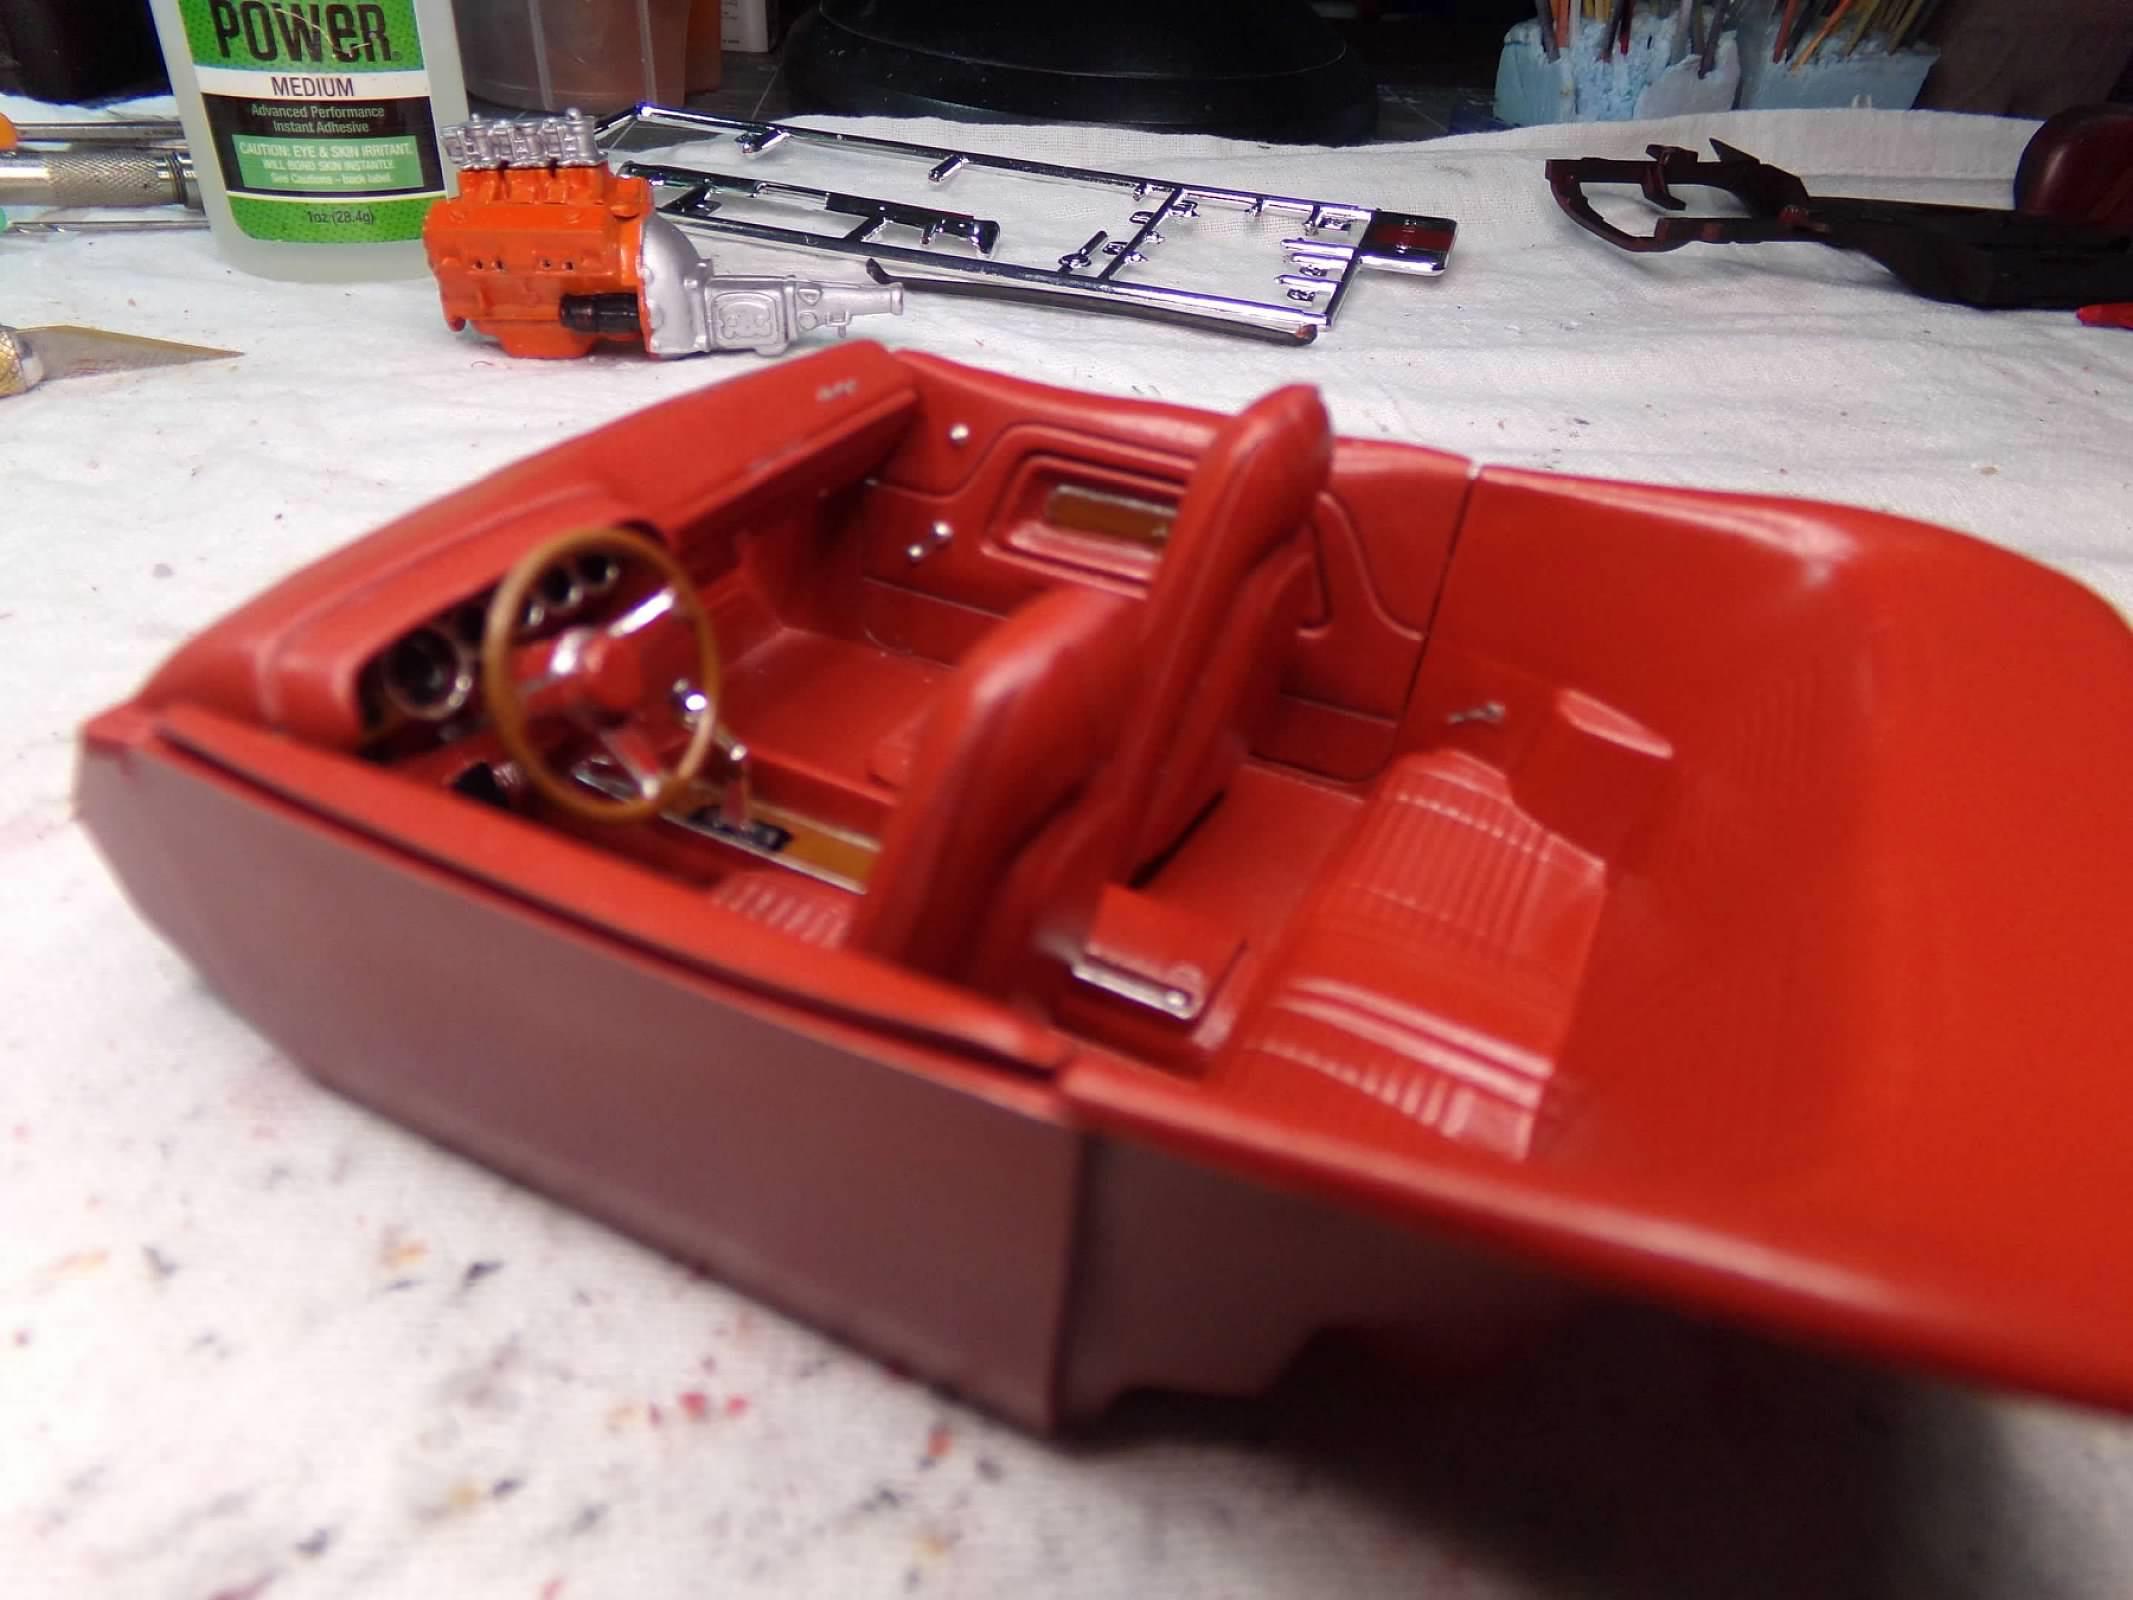
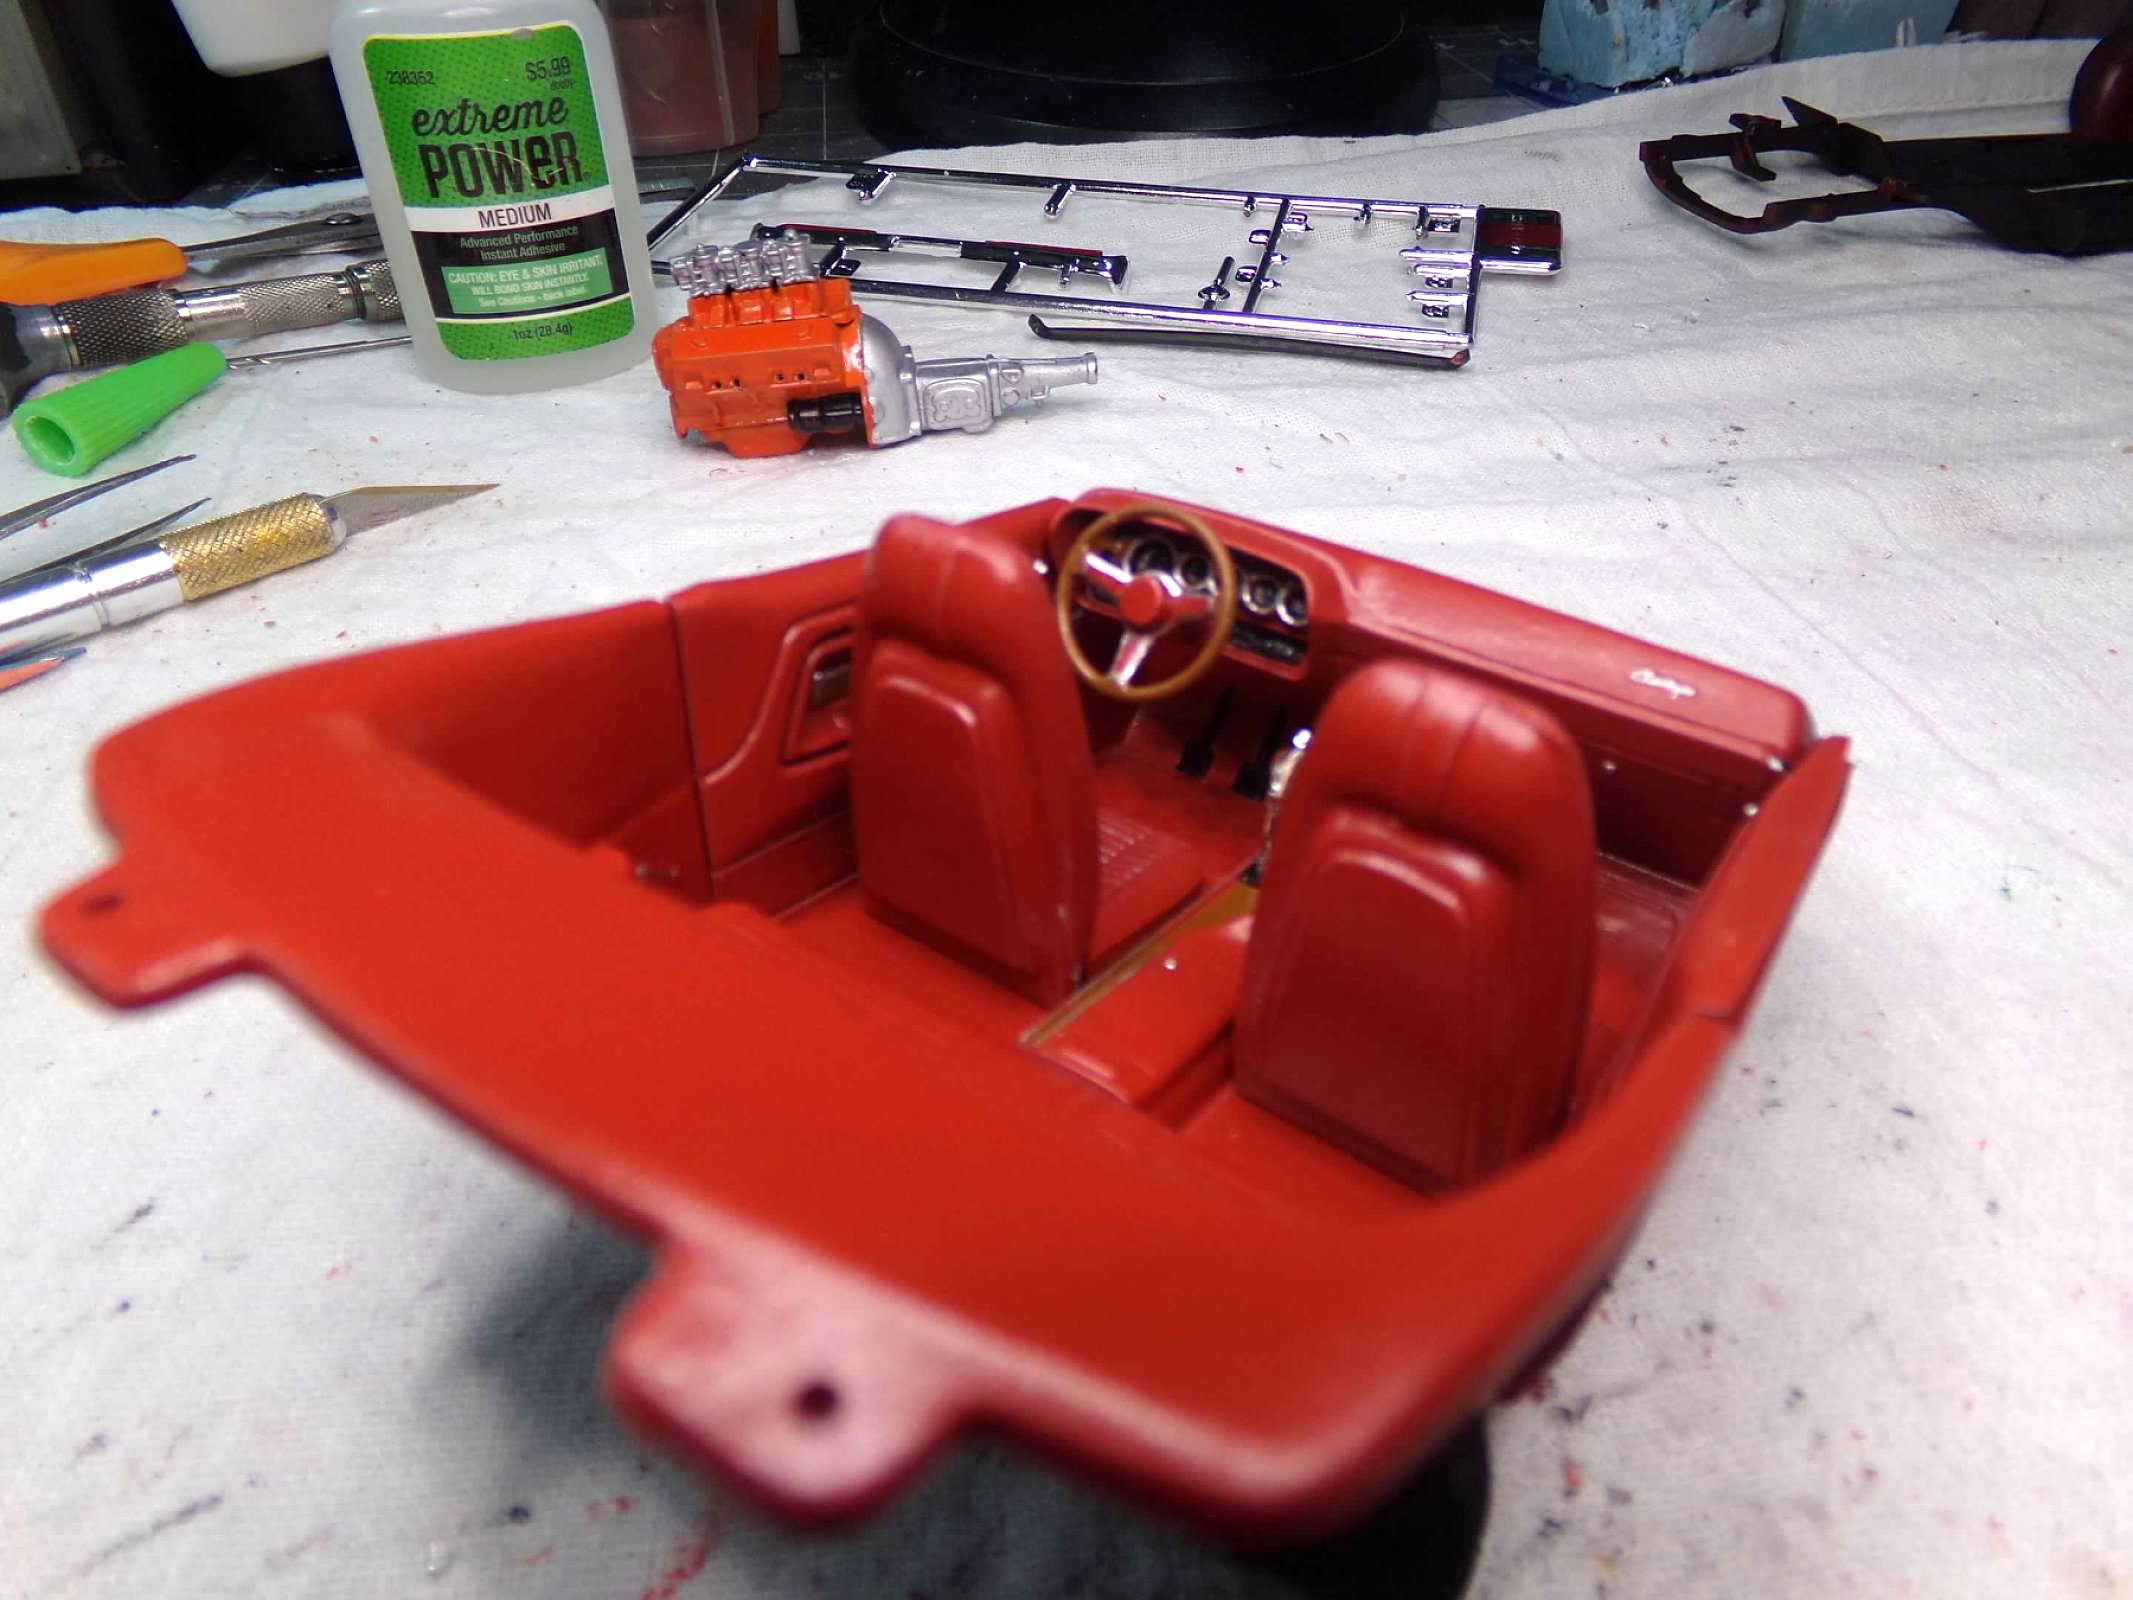
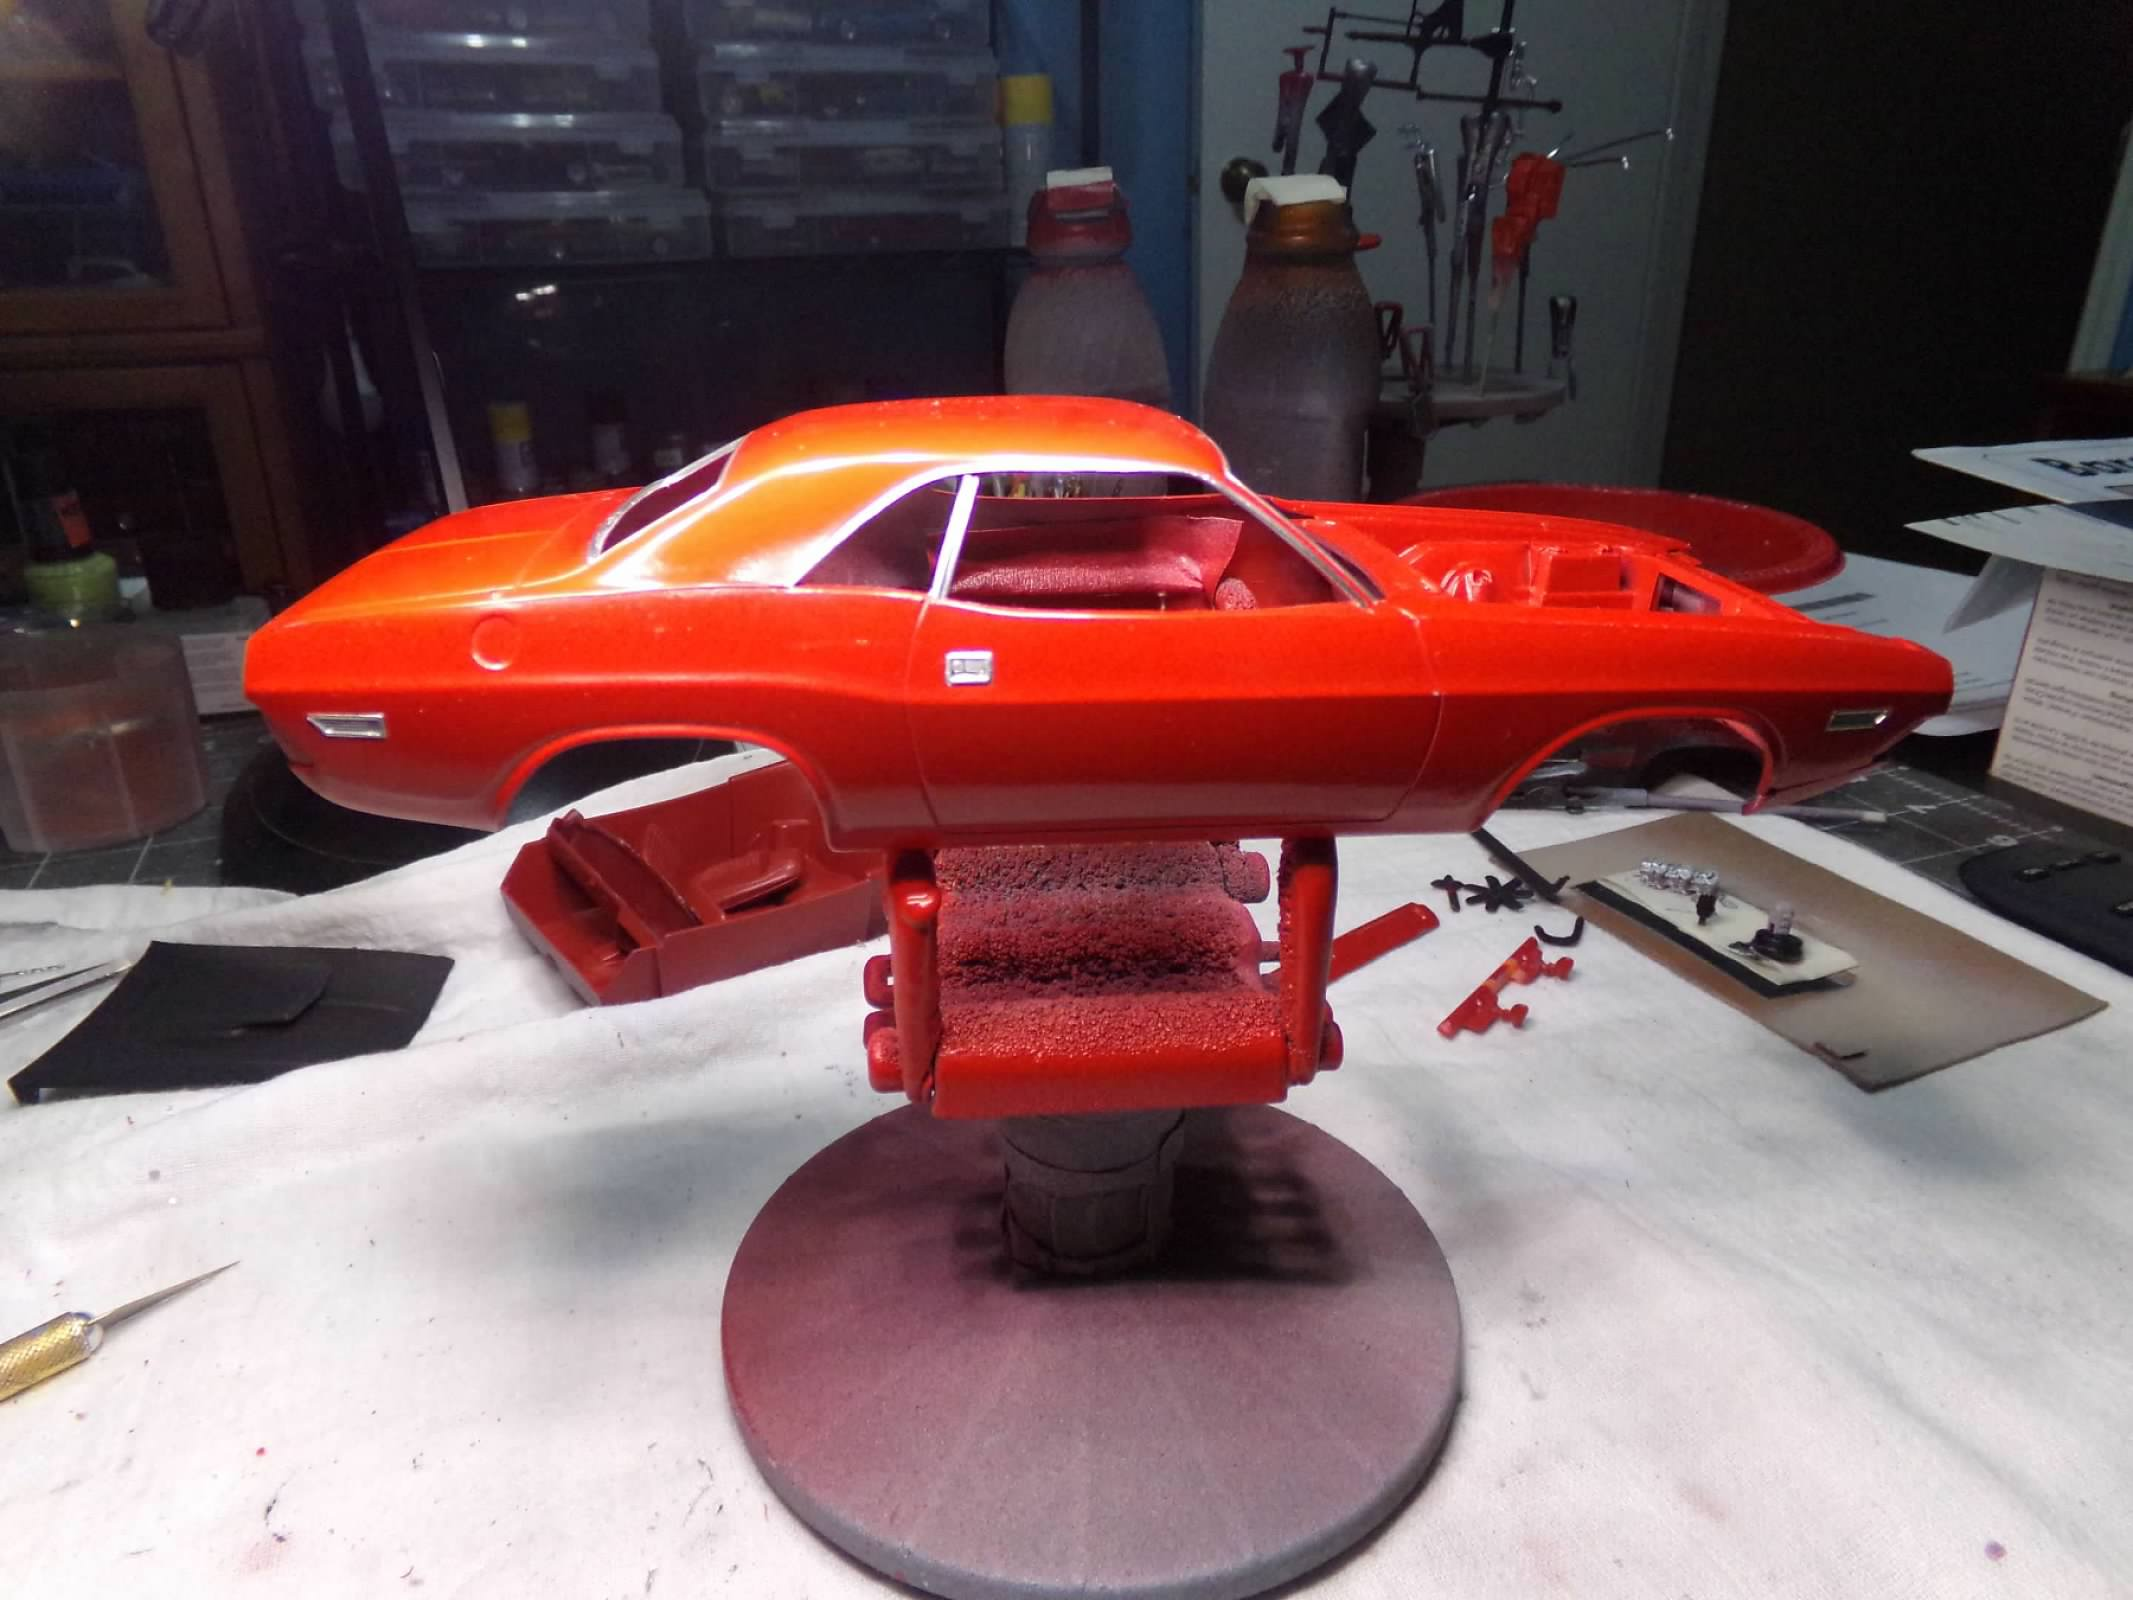
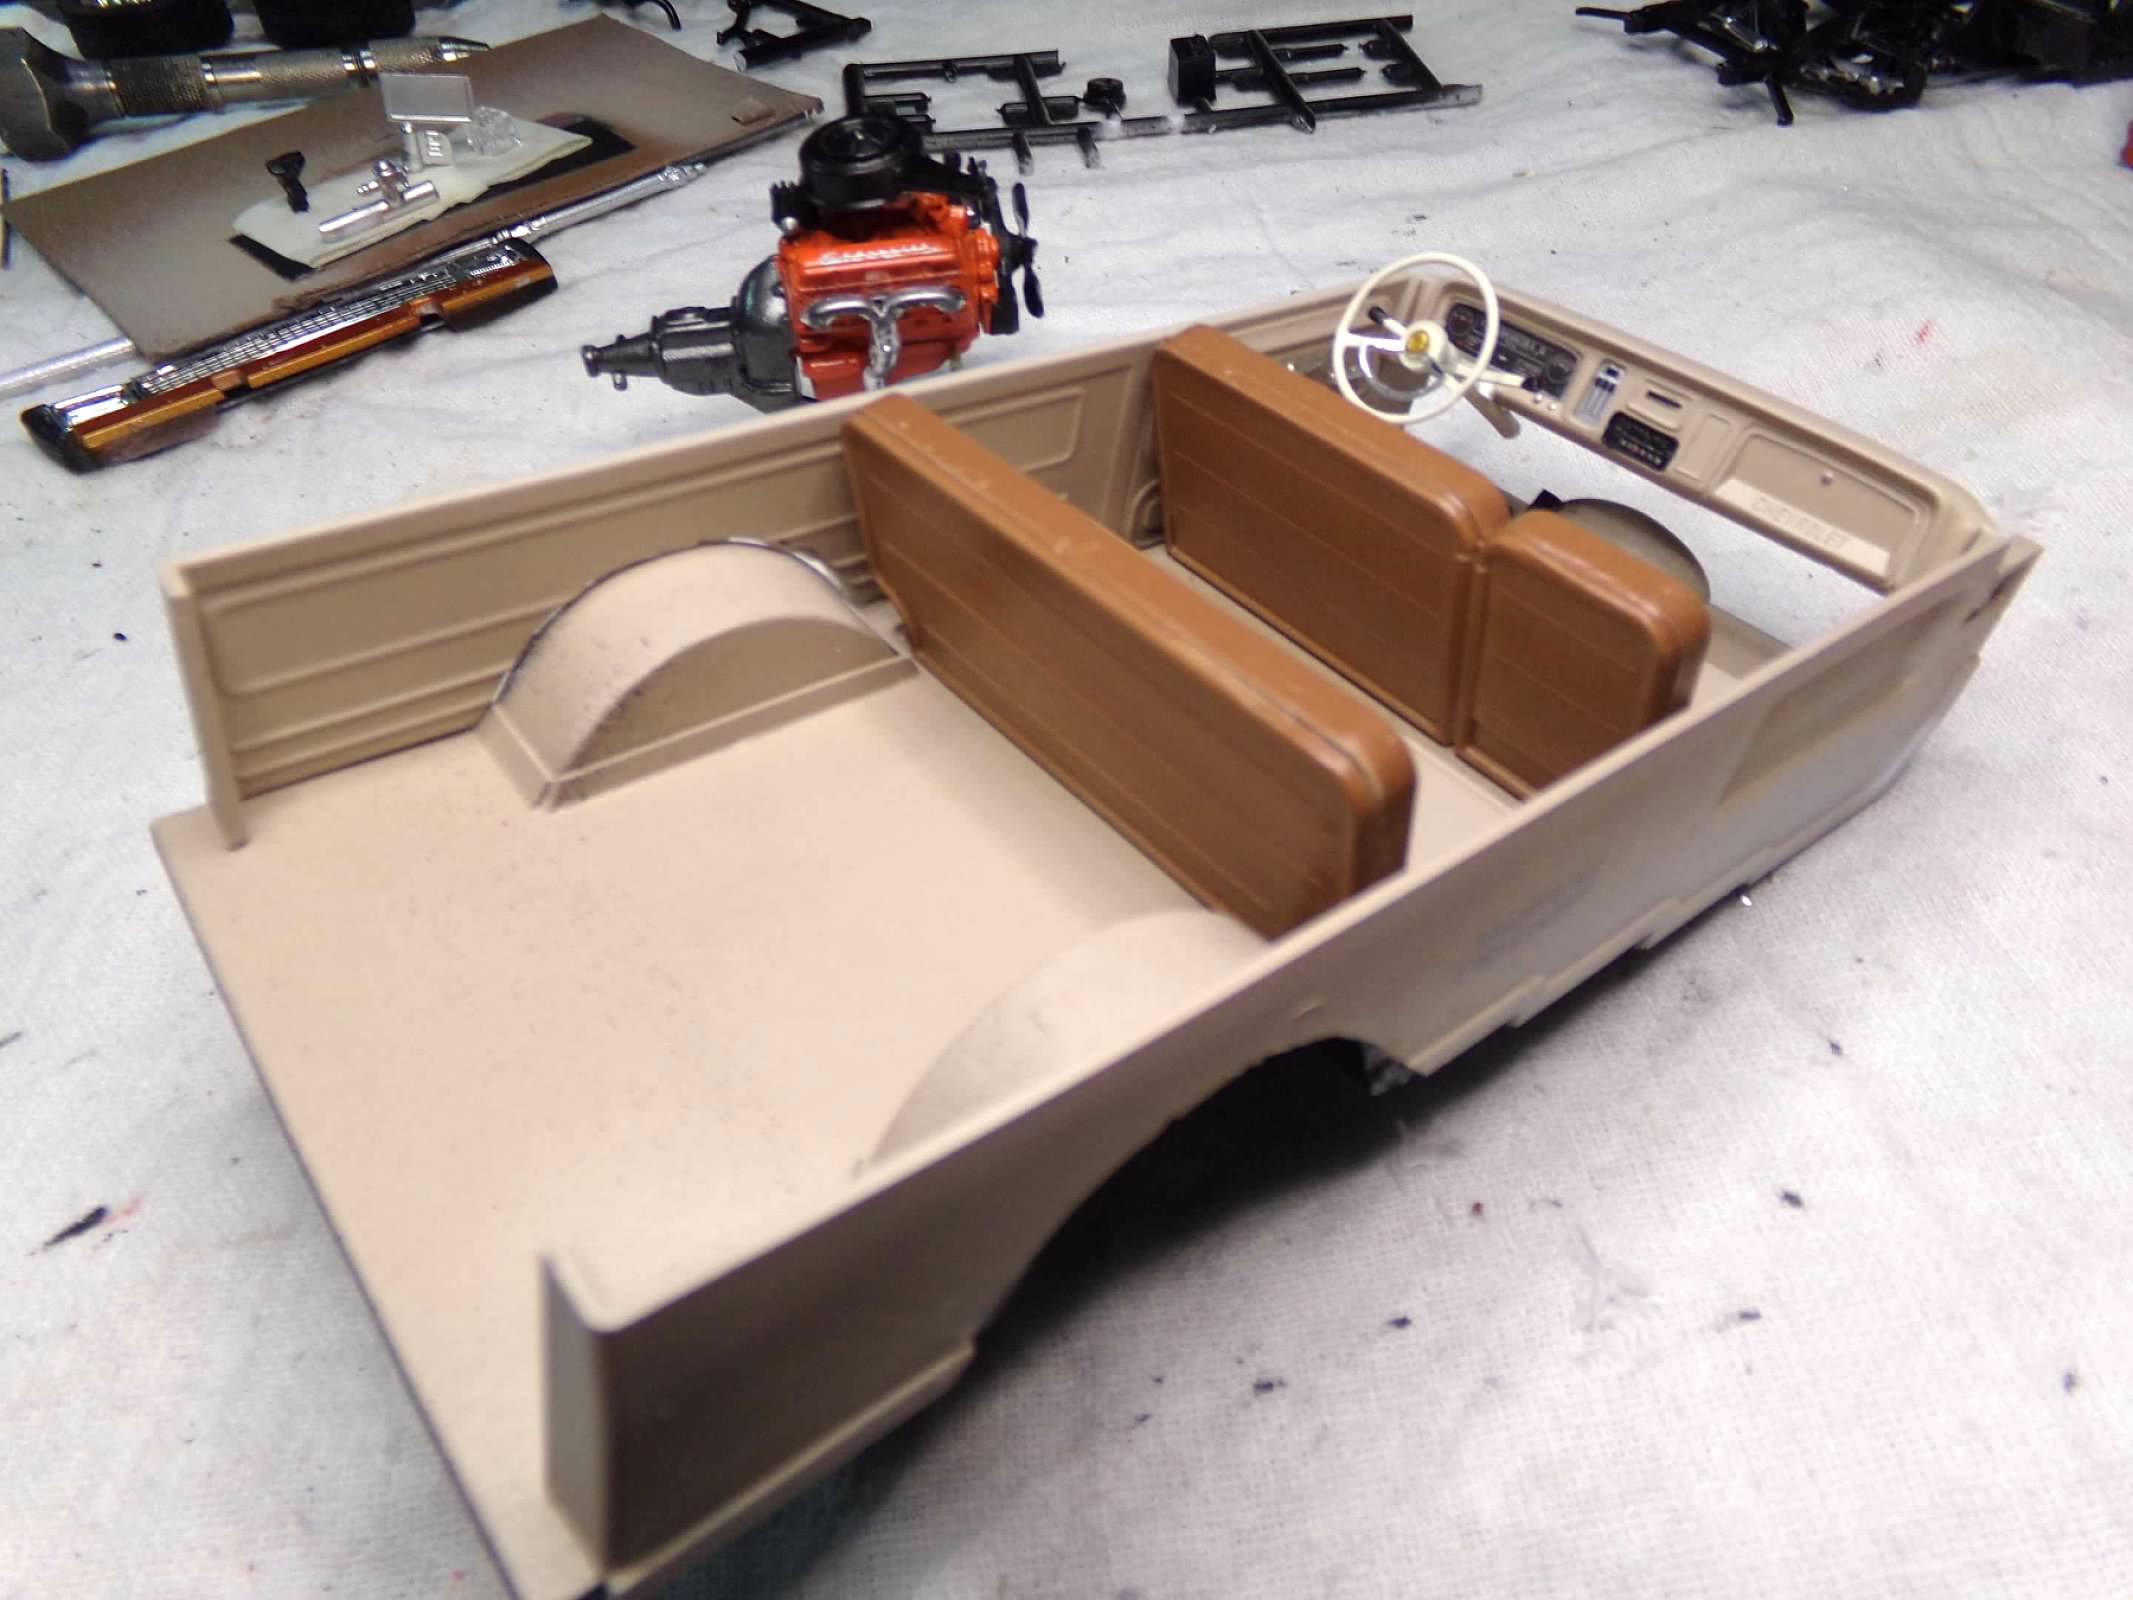
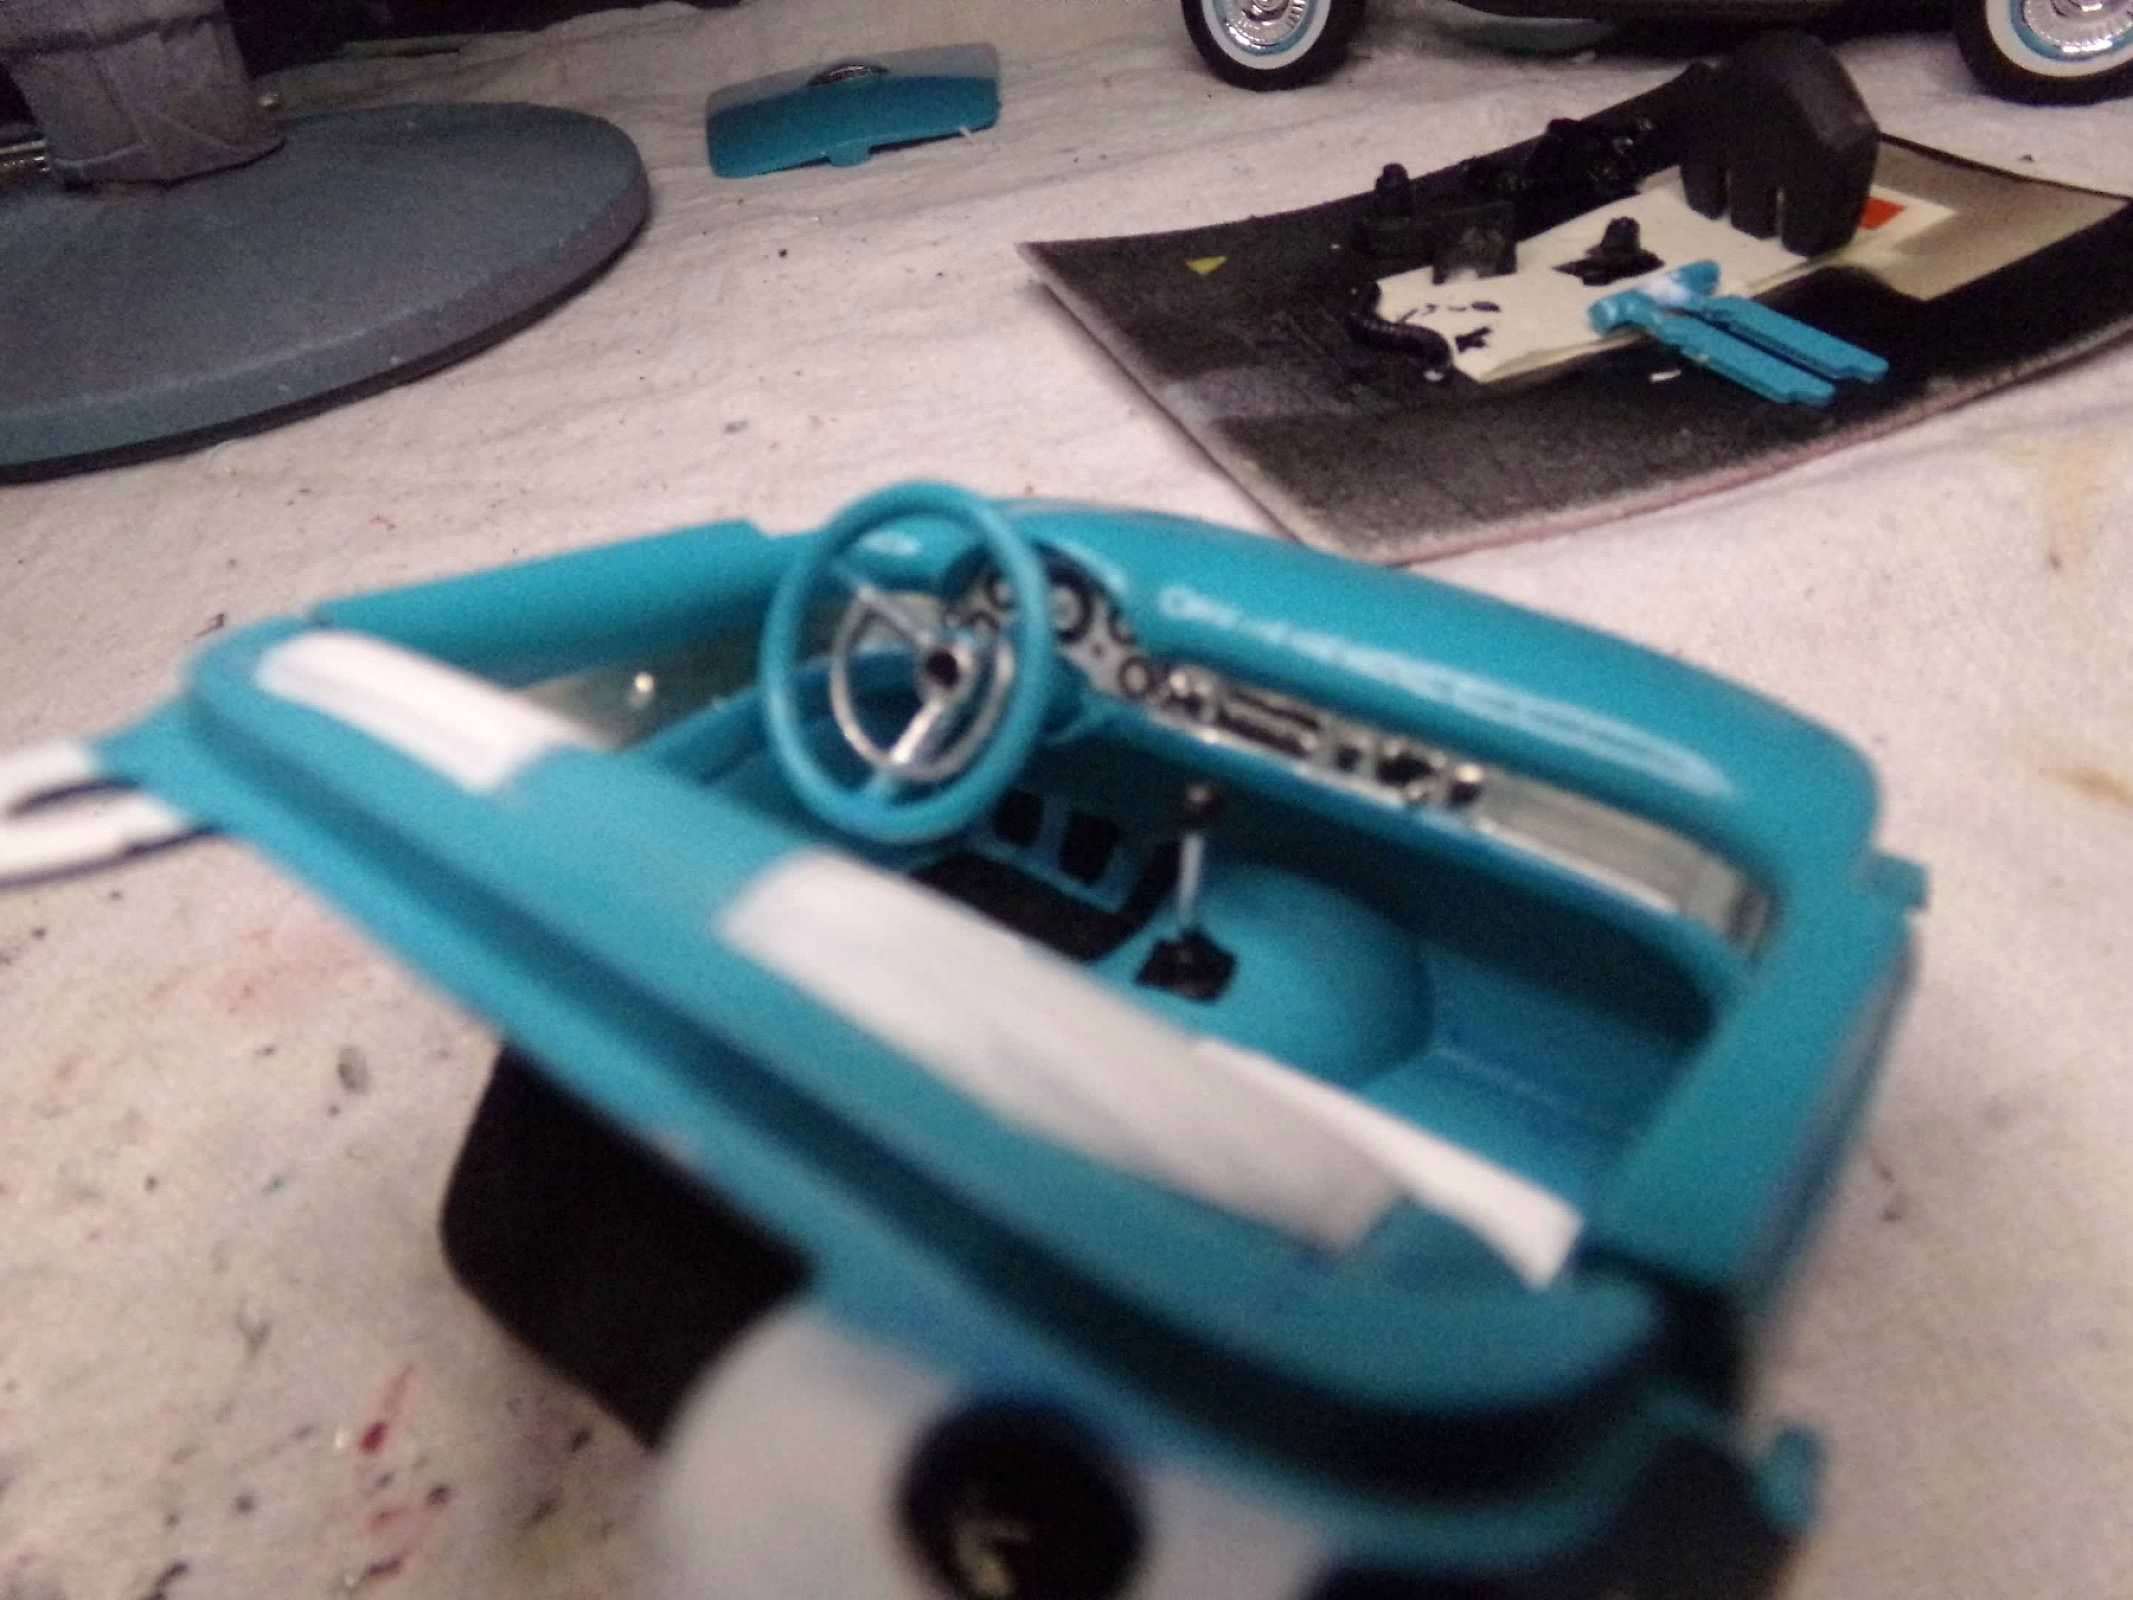
Finished the interior. The bucket is well engraved with separate door panels. No dash decals so I just painted the gauges black, added wood accents to the dash, steering wheel, console, shifter and door panels. I used the chrome pen on the dash, steering wheel, doors and console along with some foil on the door panel hardware. I added a horn button in the middle of the steering wheel and a turn signal indicator lever. The chrome pen might be a bit too prominent but I'd rather have it than not. Engine is next. Thanks for looking! ?
-
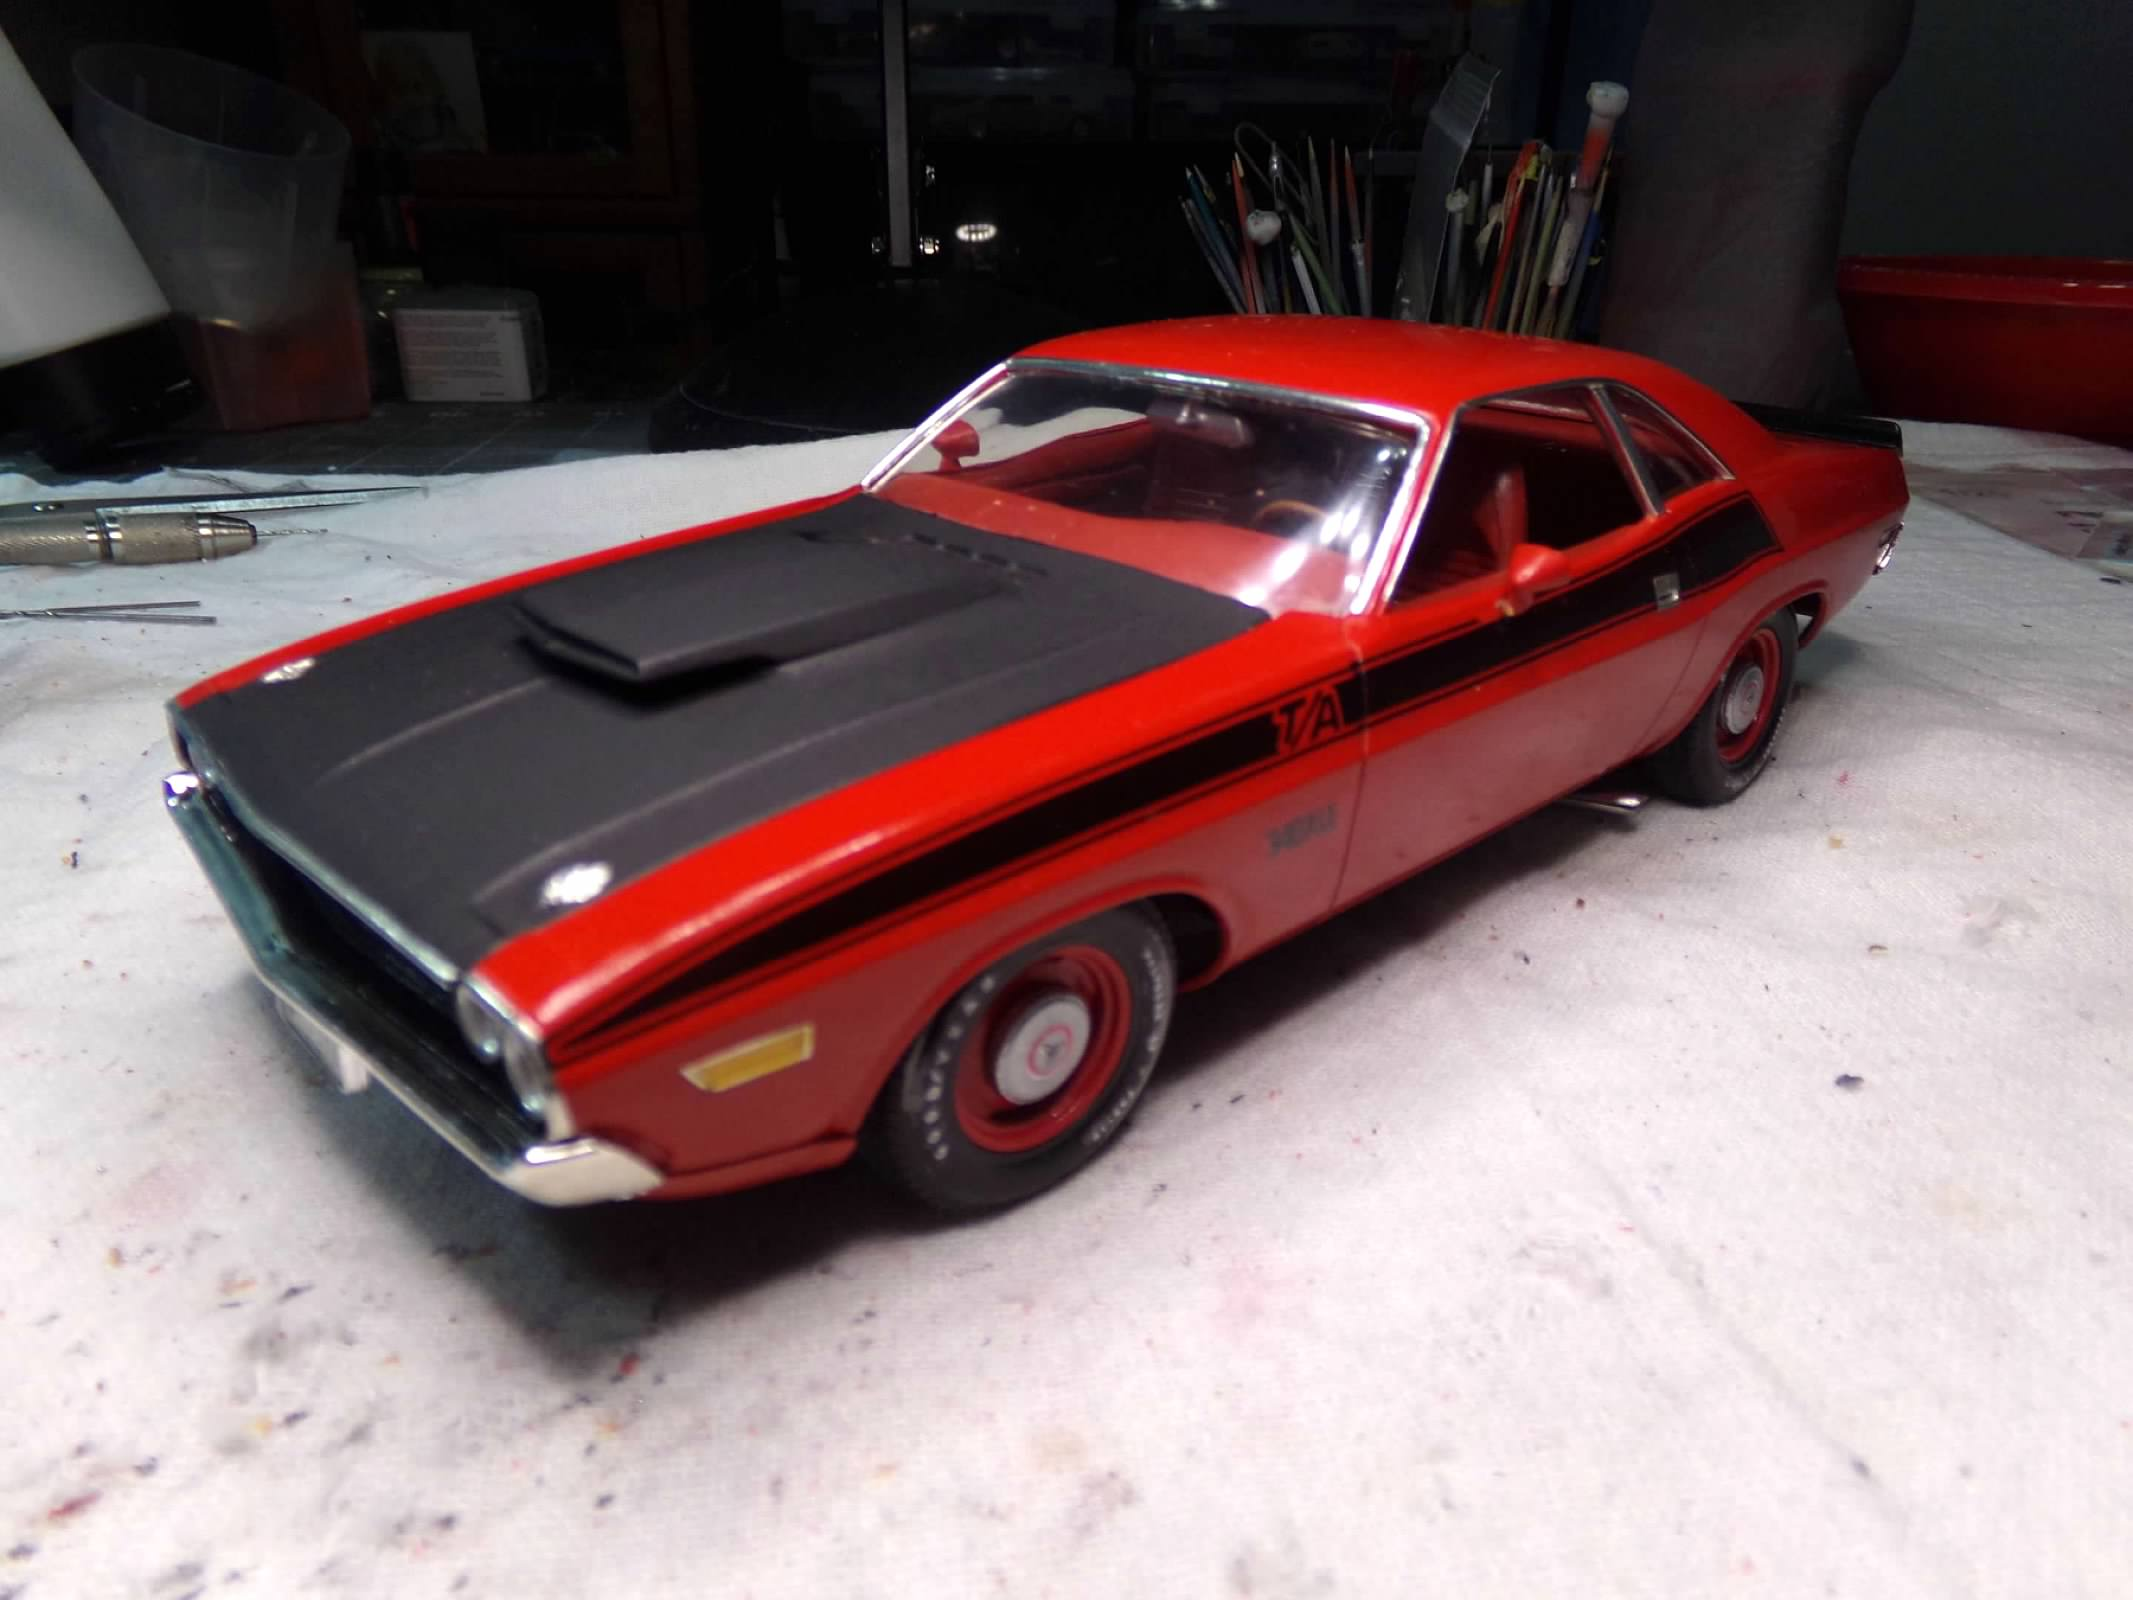
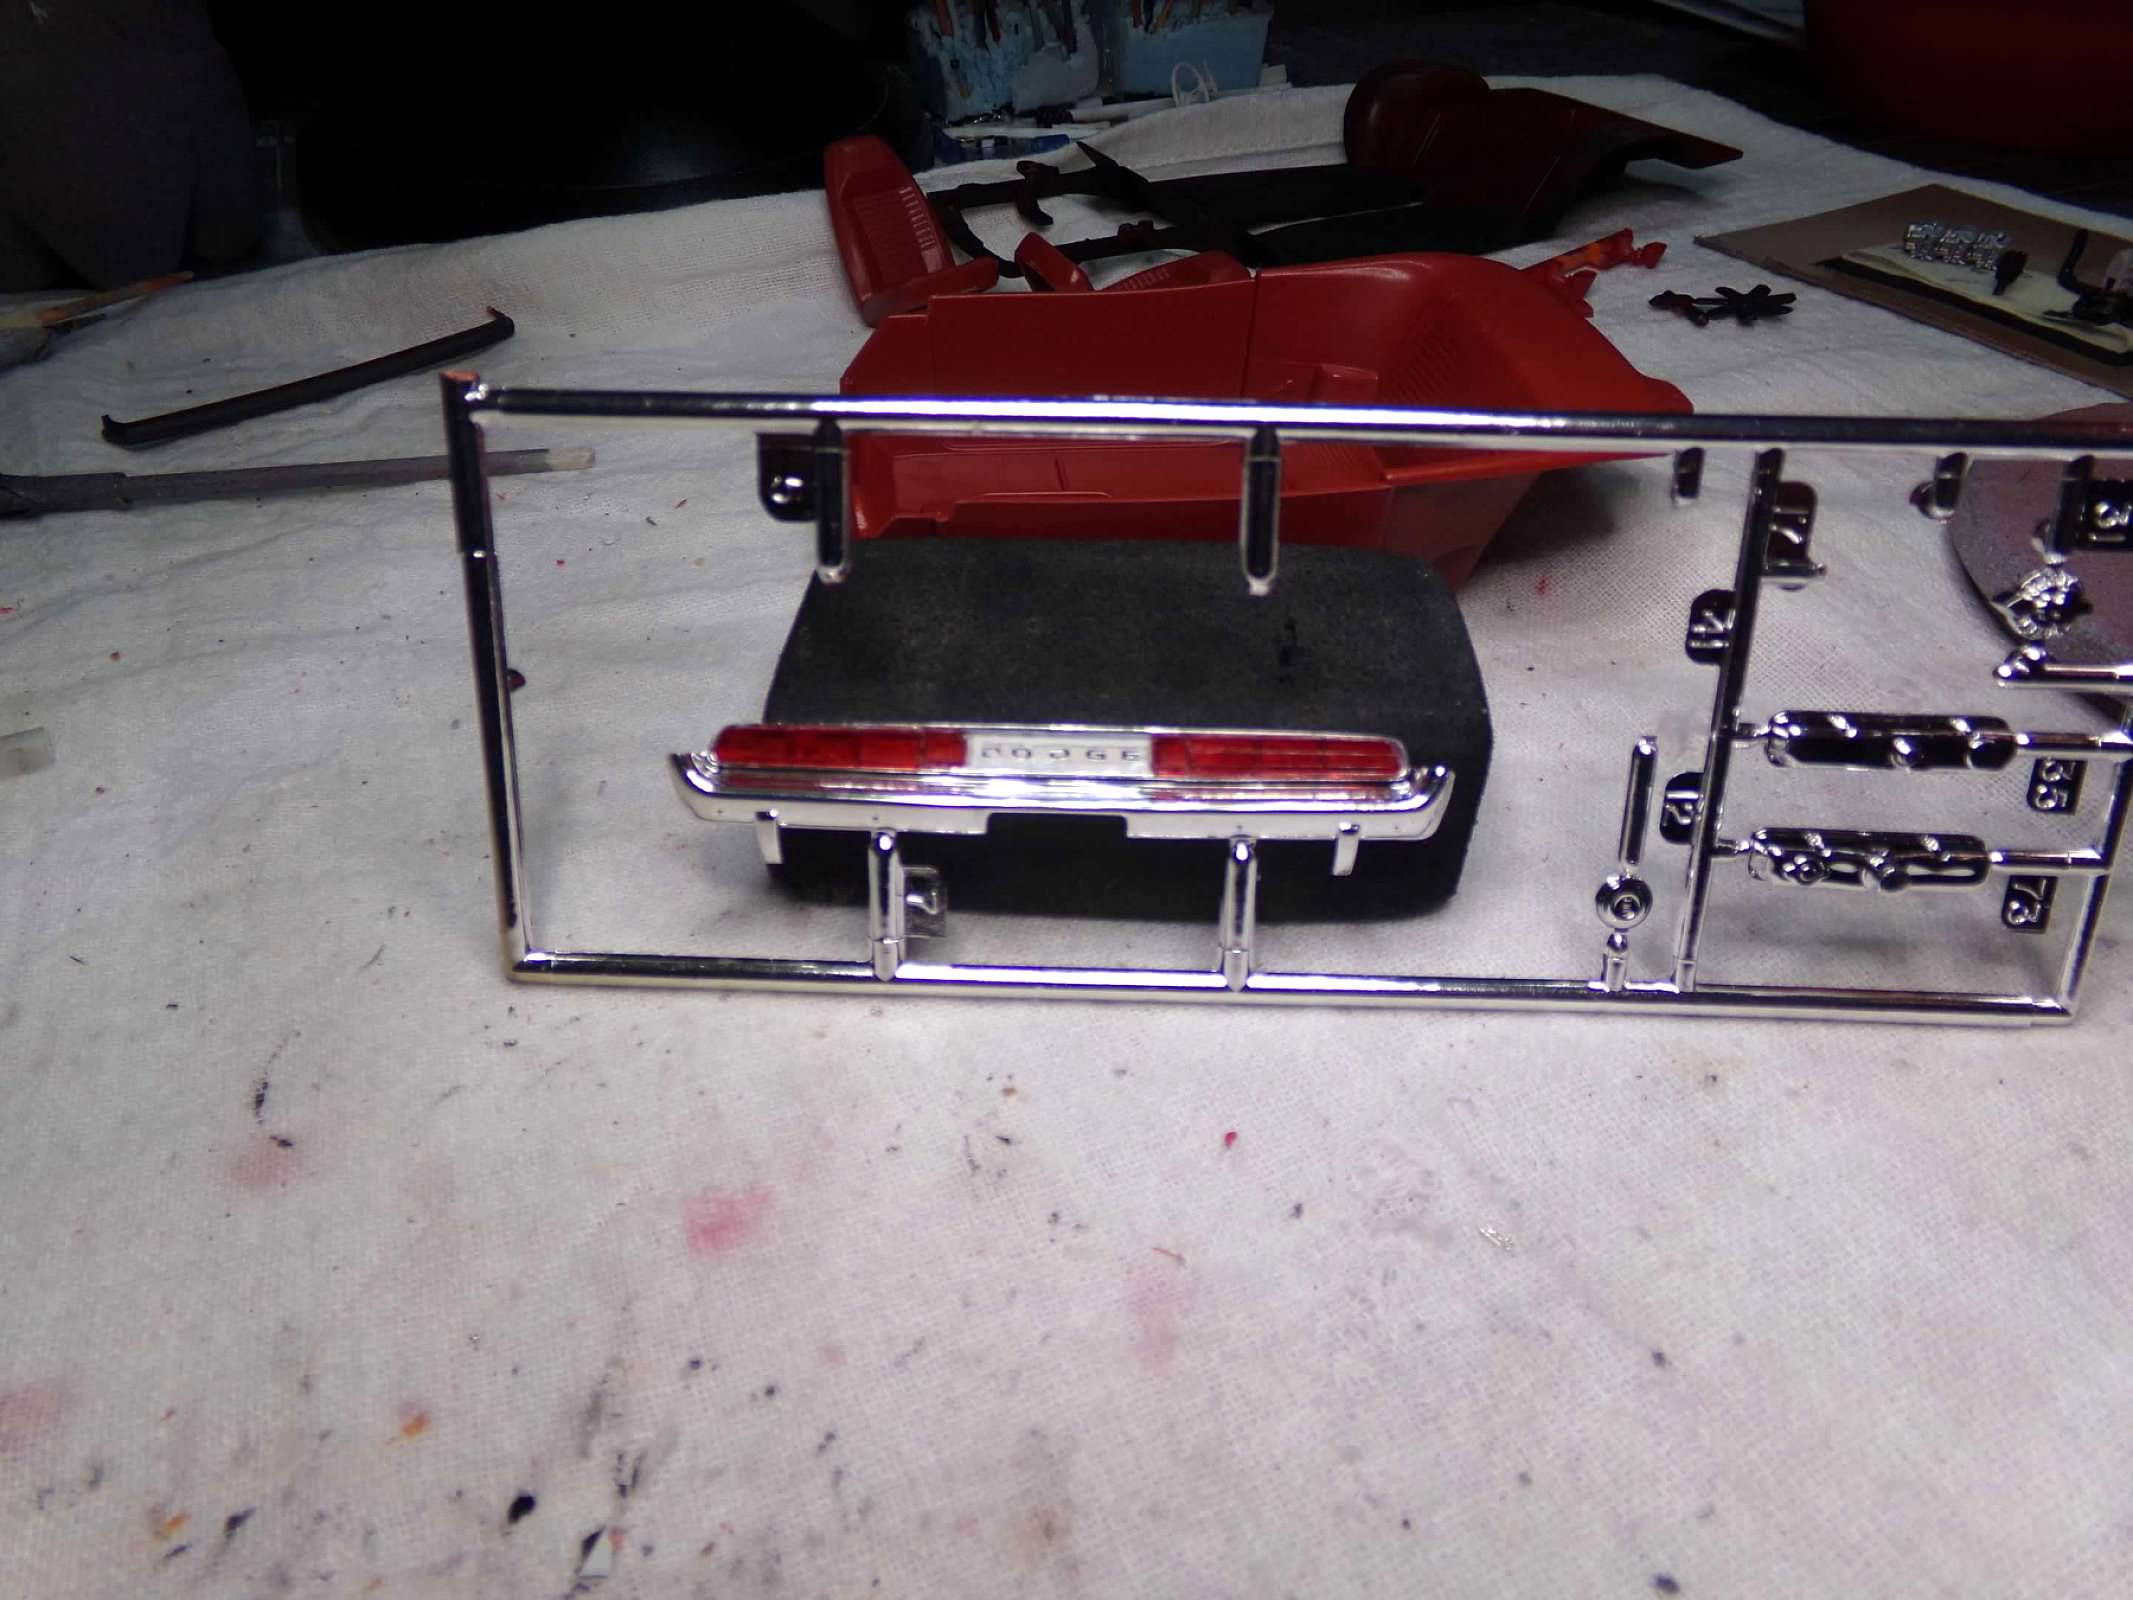
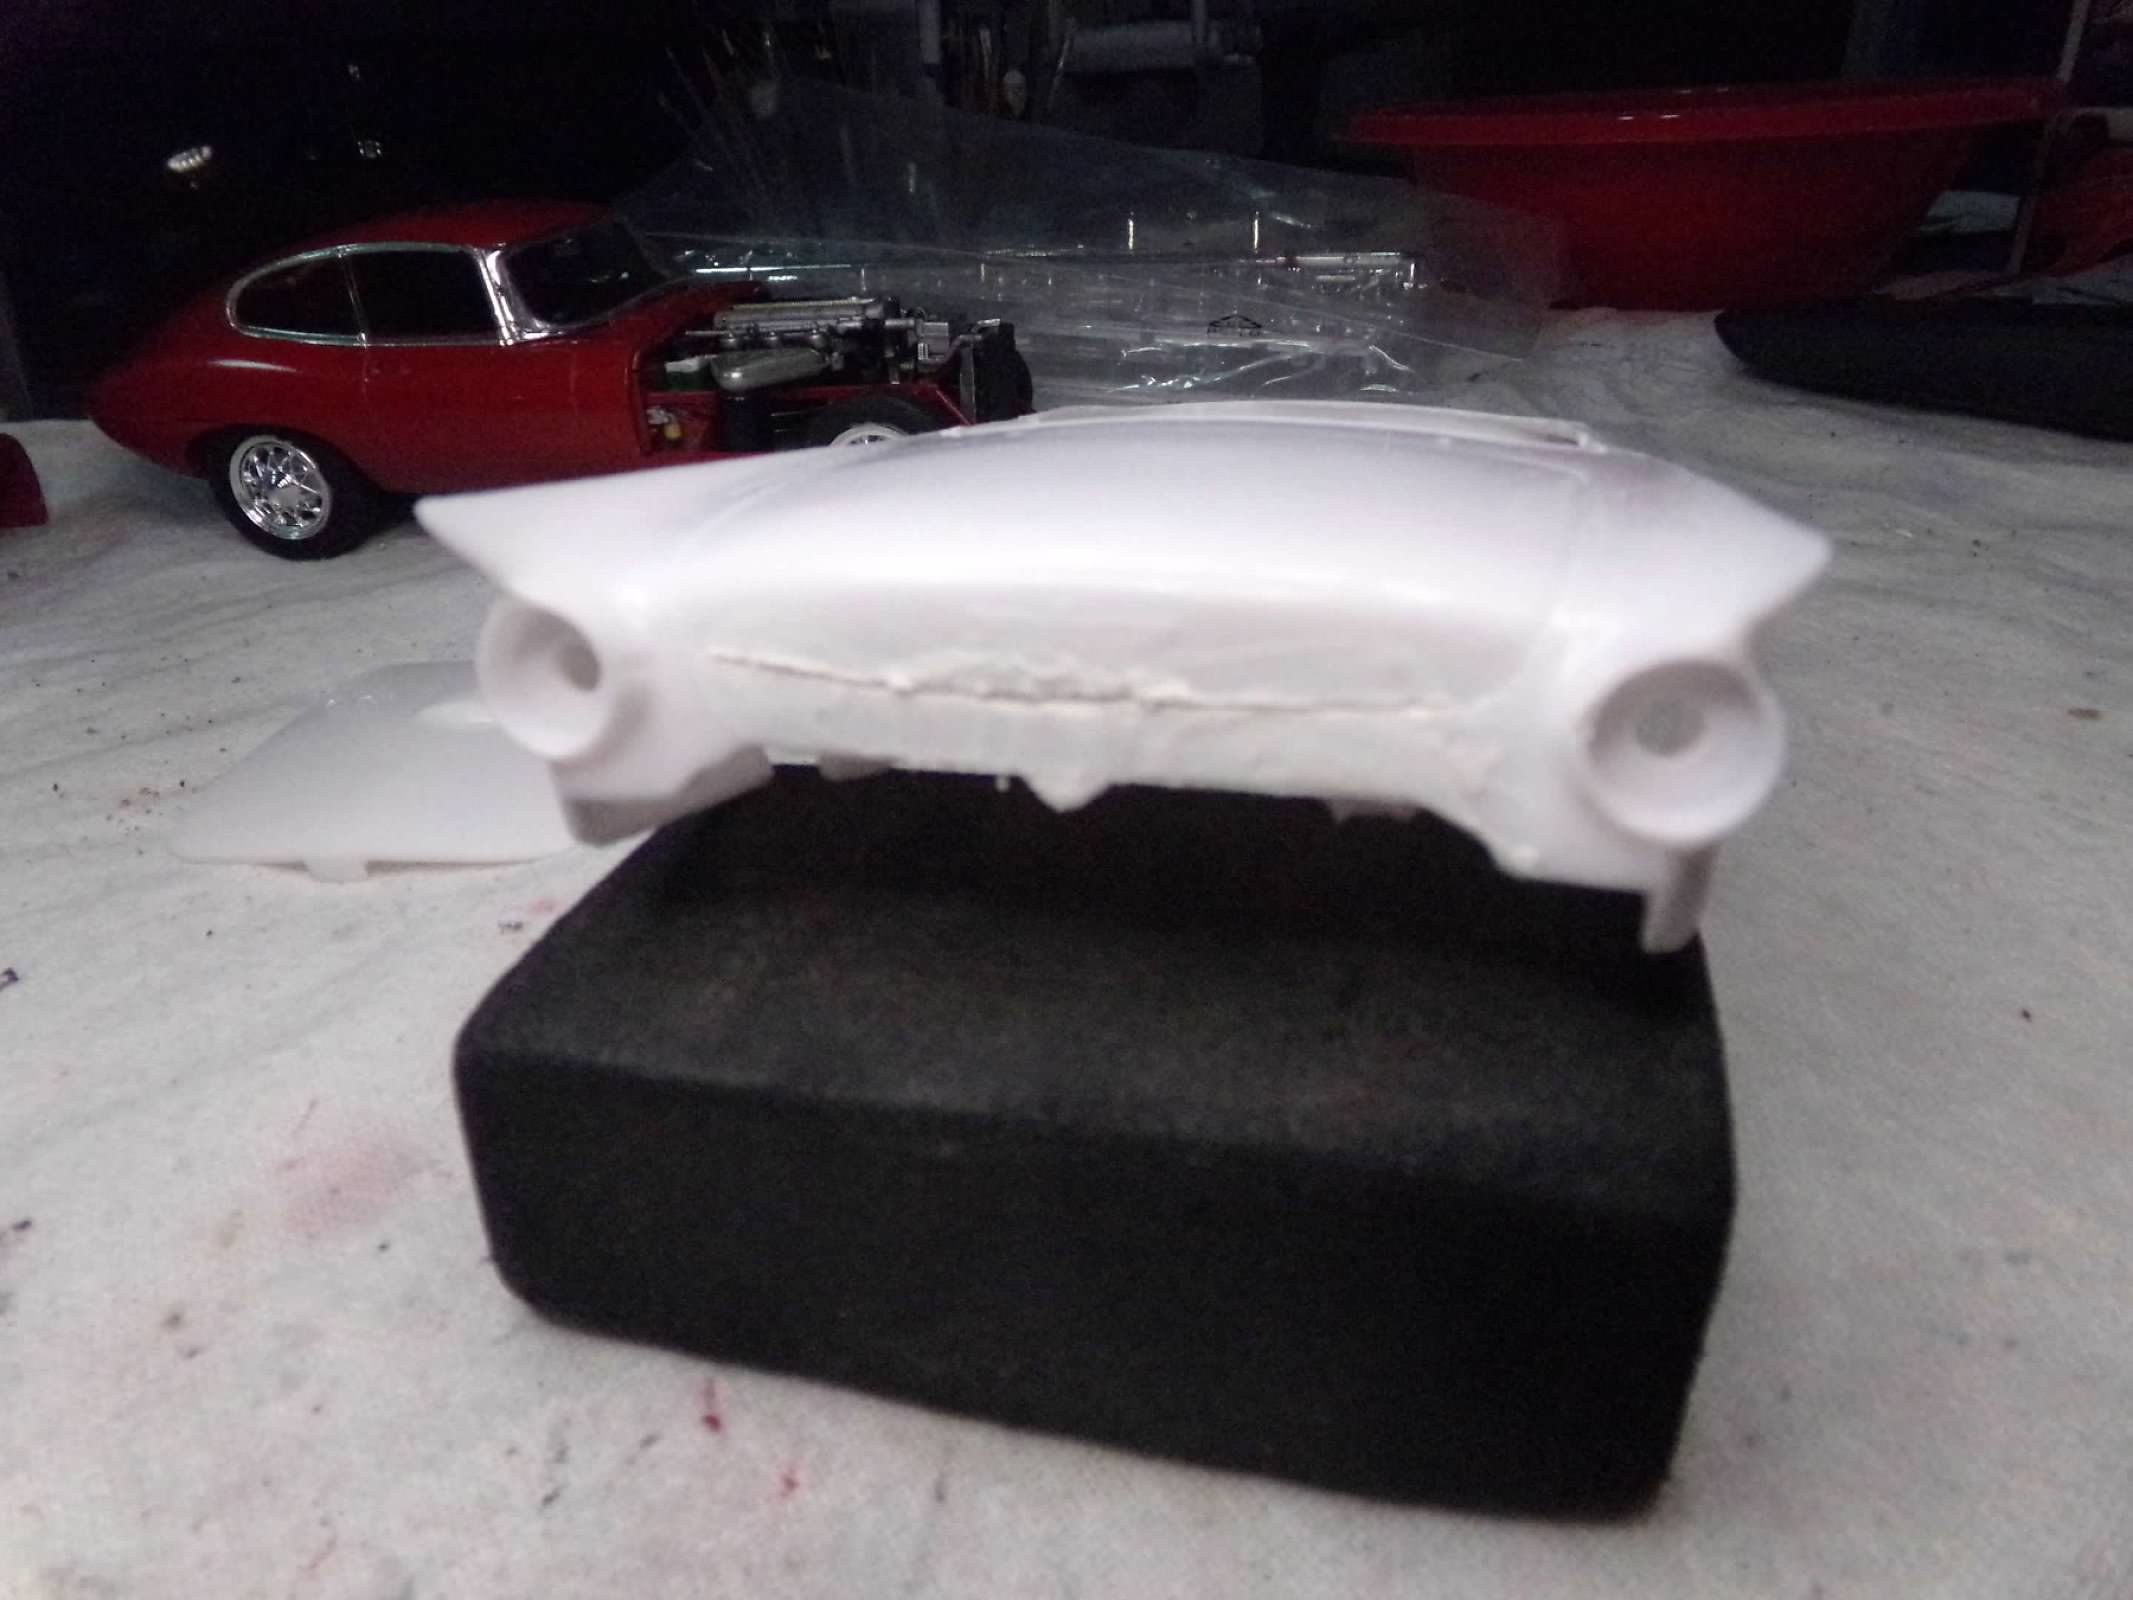
Thanks, Carl! I don't think its warped, must be how it is sitting in the stand. I worked on the front end all morning. Doesn't look like a lot done but its tedious with a brush. This afternoon I got busy on the missing taillight. I cut two pieces of plastic strip and glued them in the middle of the taillight surround for the decal in the center. Then I thought about the extra 69 Camaro taillights that I had in the parts box. They fit fine but were about 1/8" short. So I cut two 1/8" blocks out of a third taillight and glued them in. Now it looks like it was made for it like a kit piece. That's it for today! Thanks for looking! ?
-
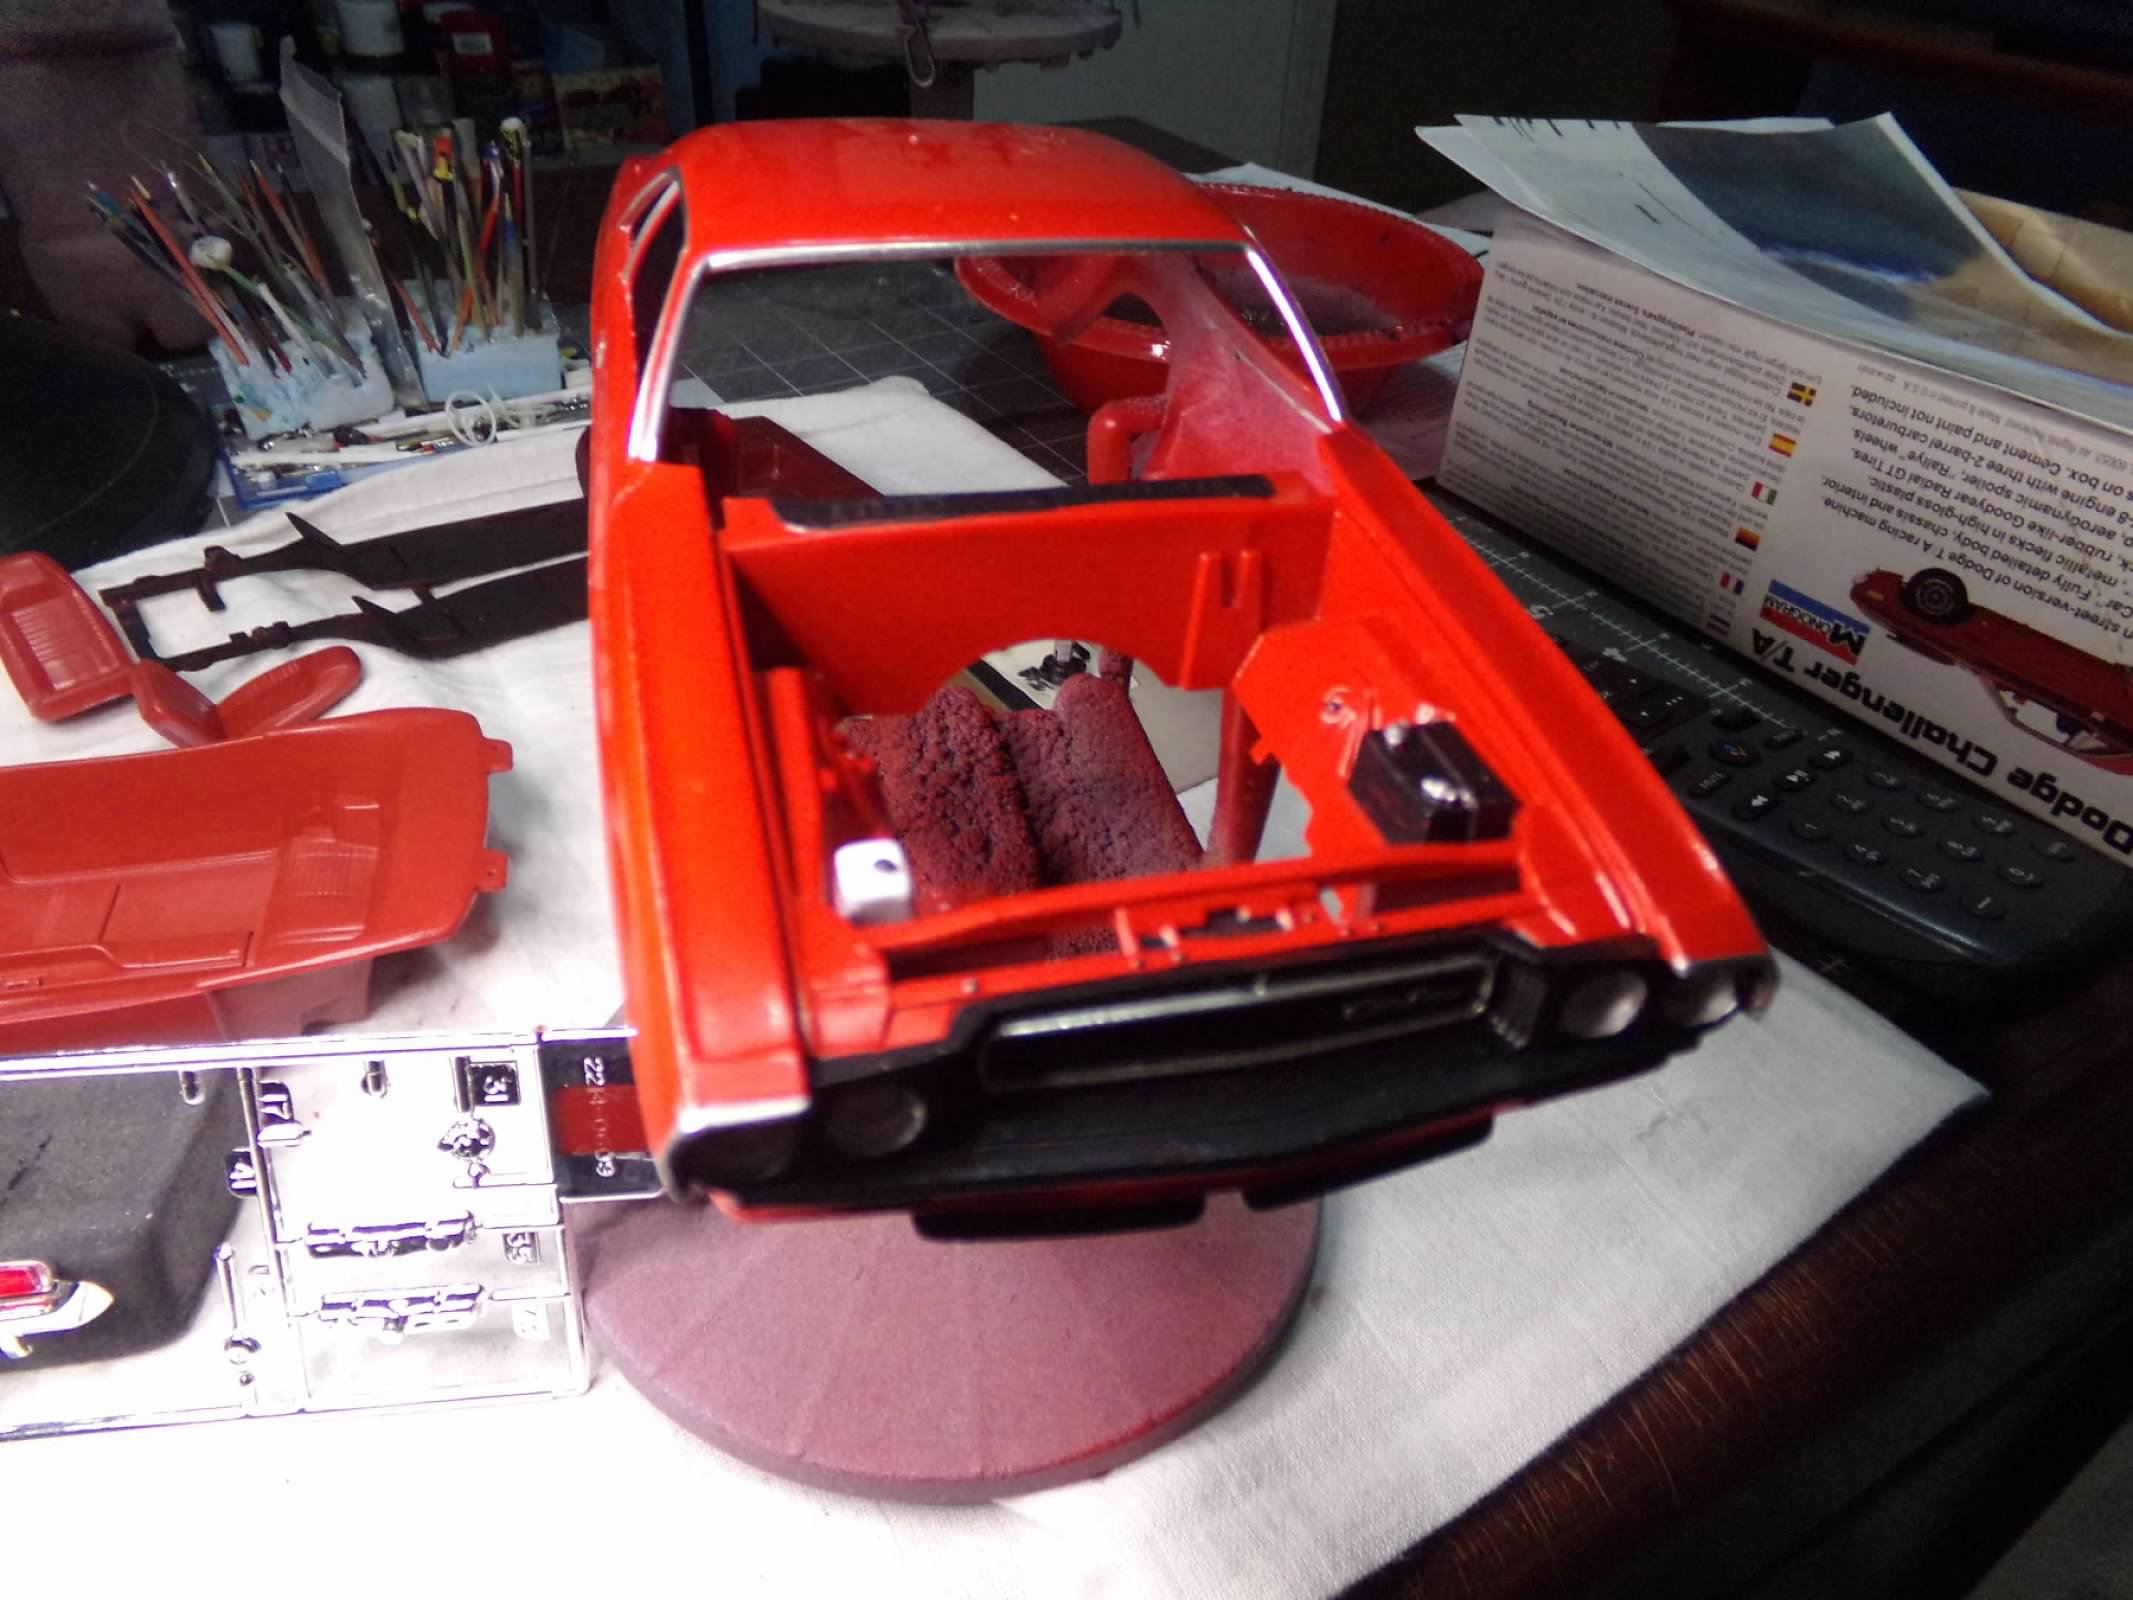
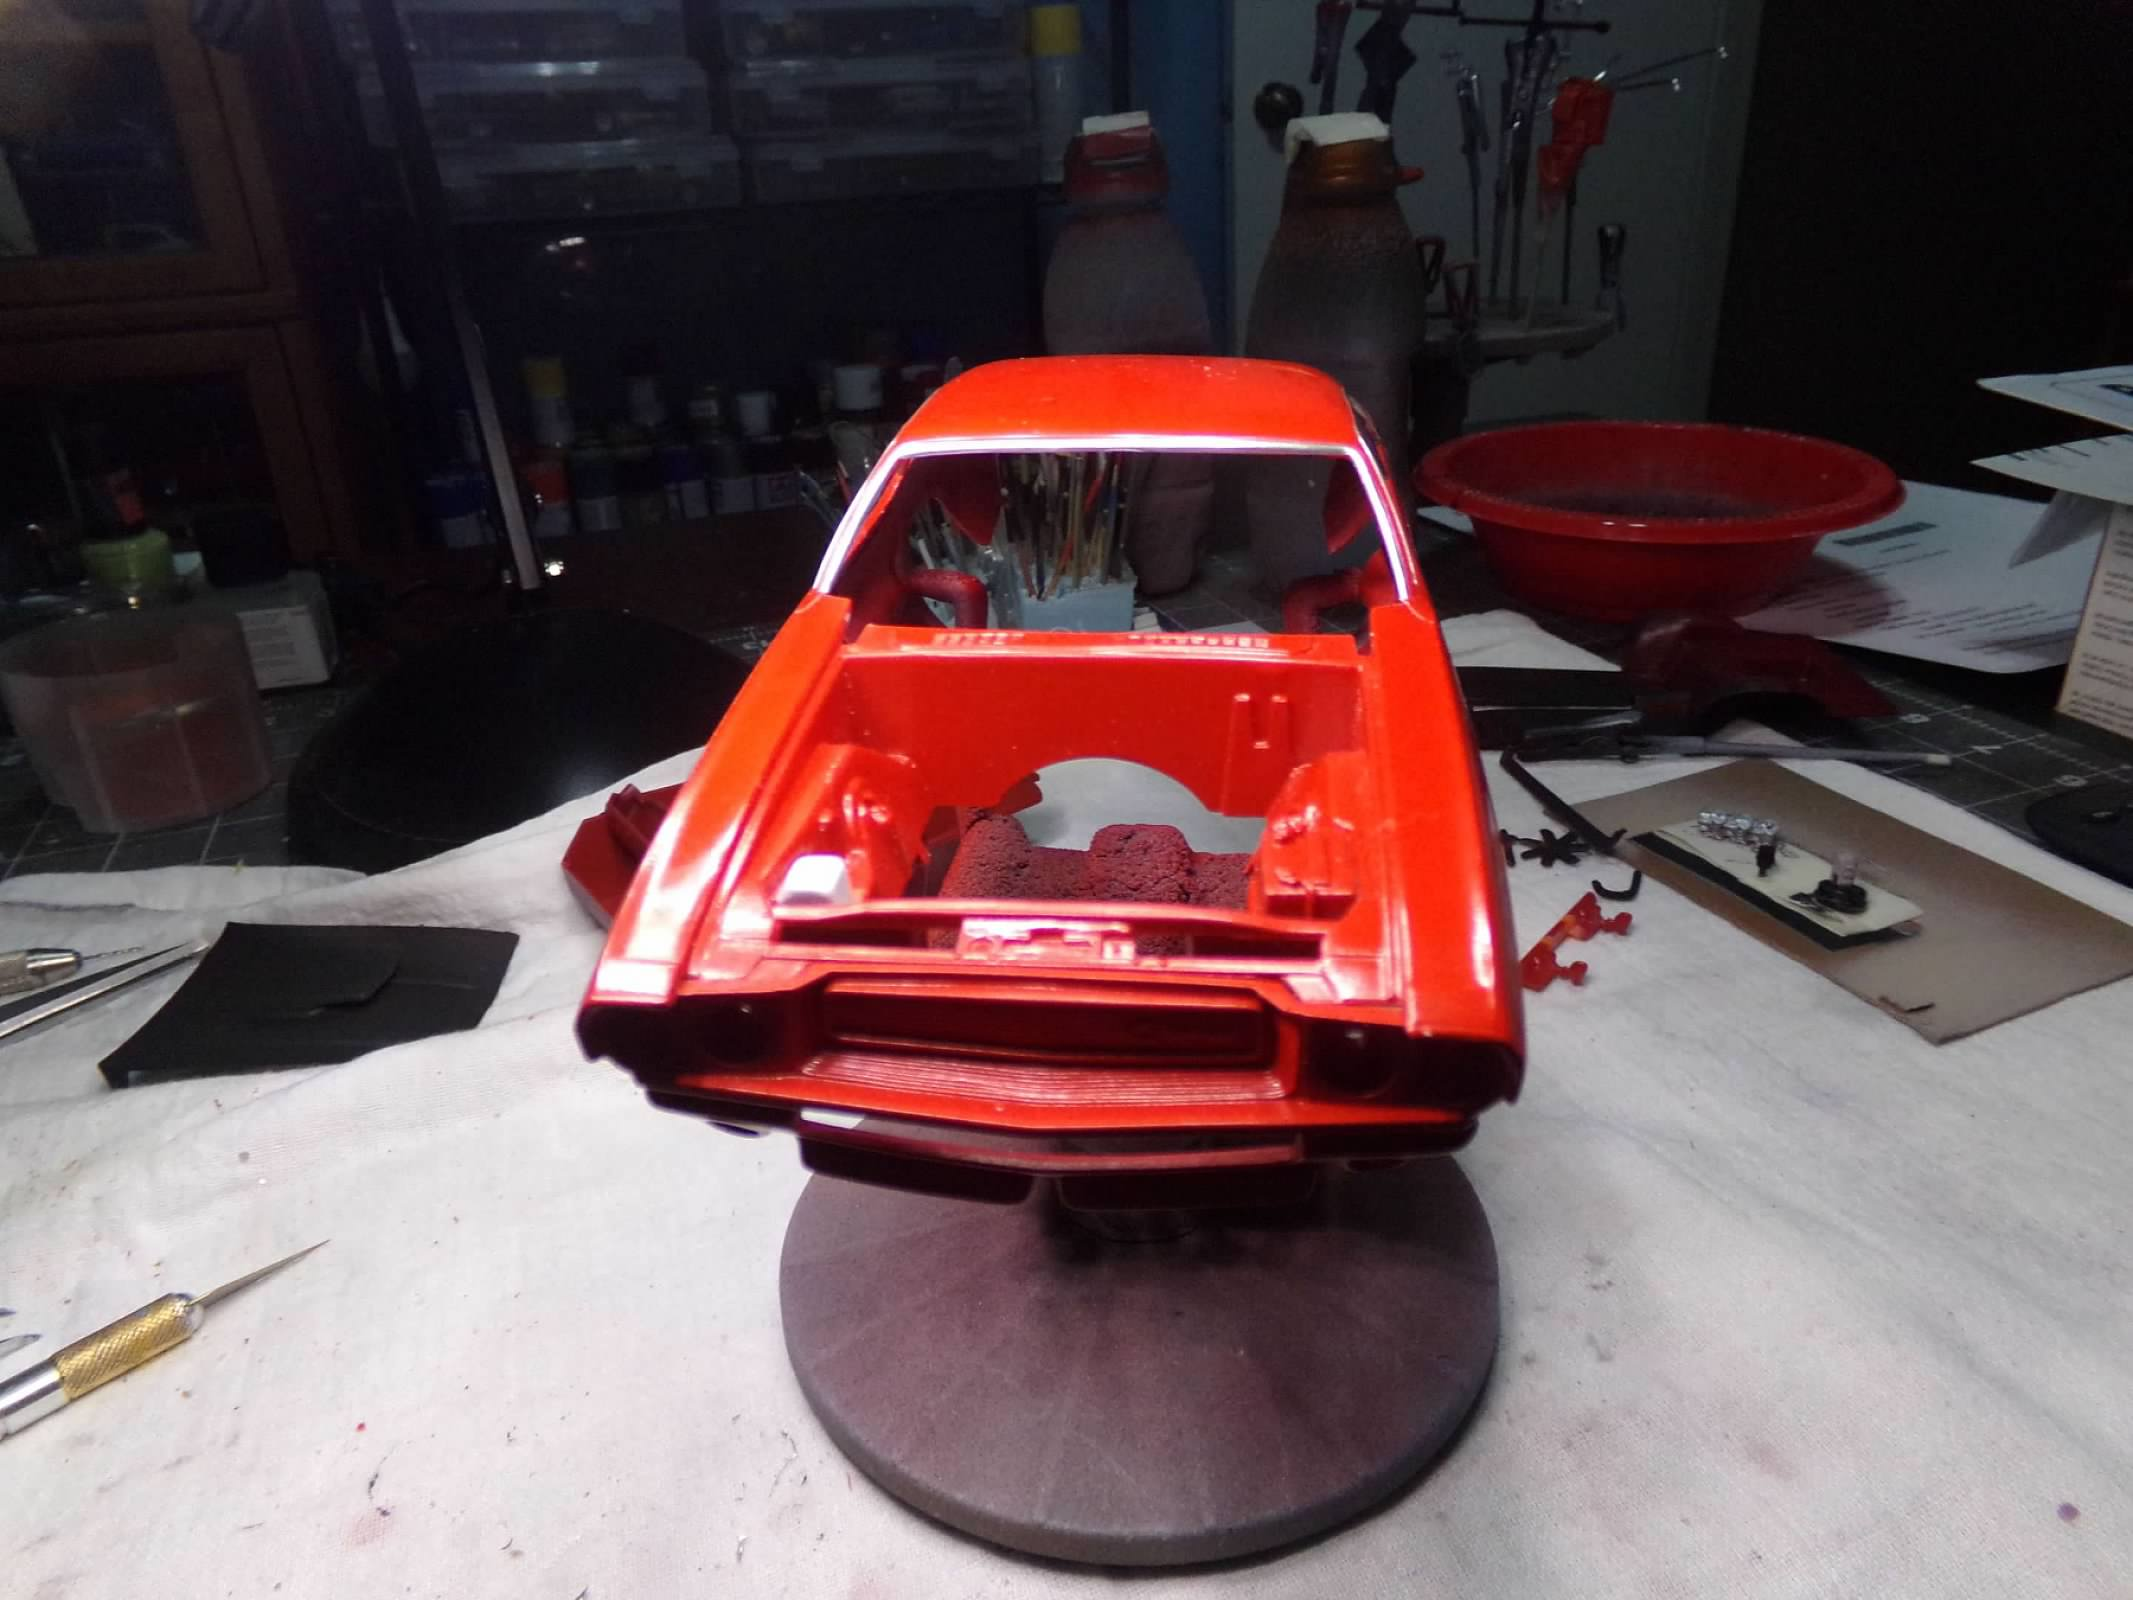
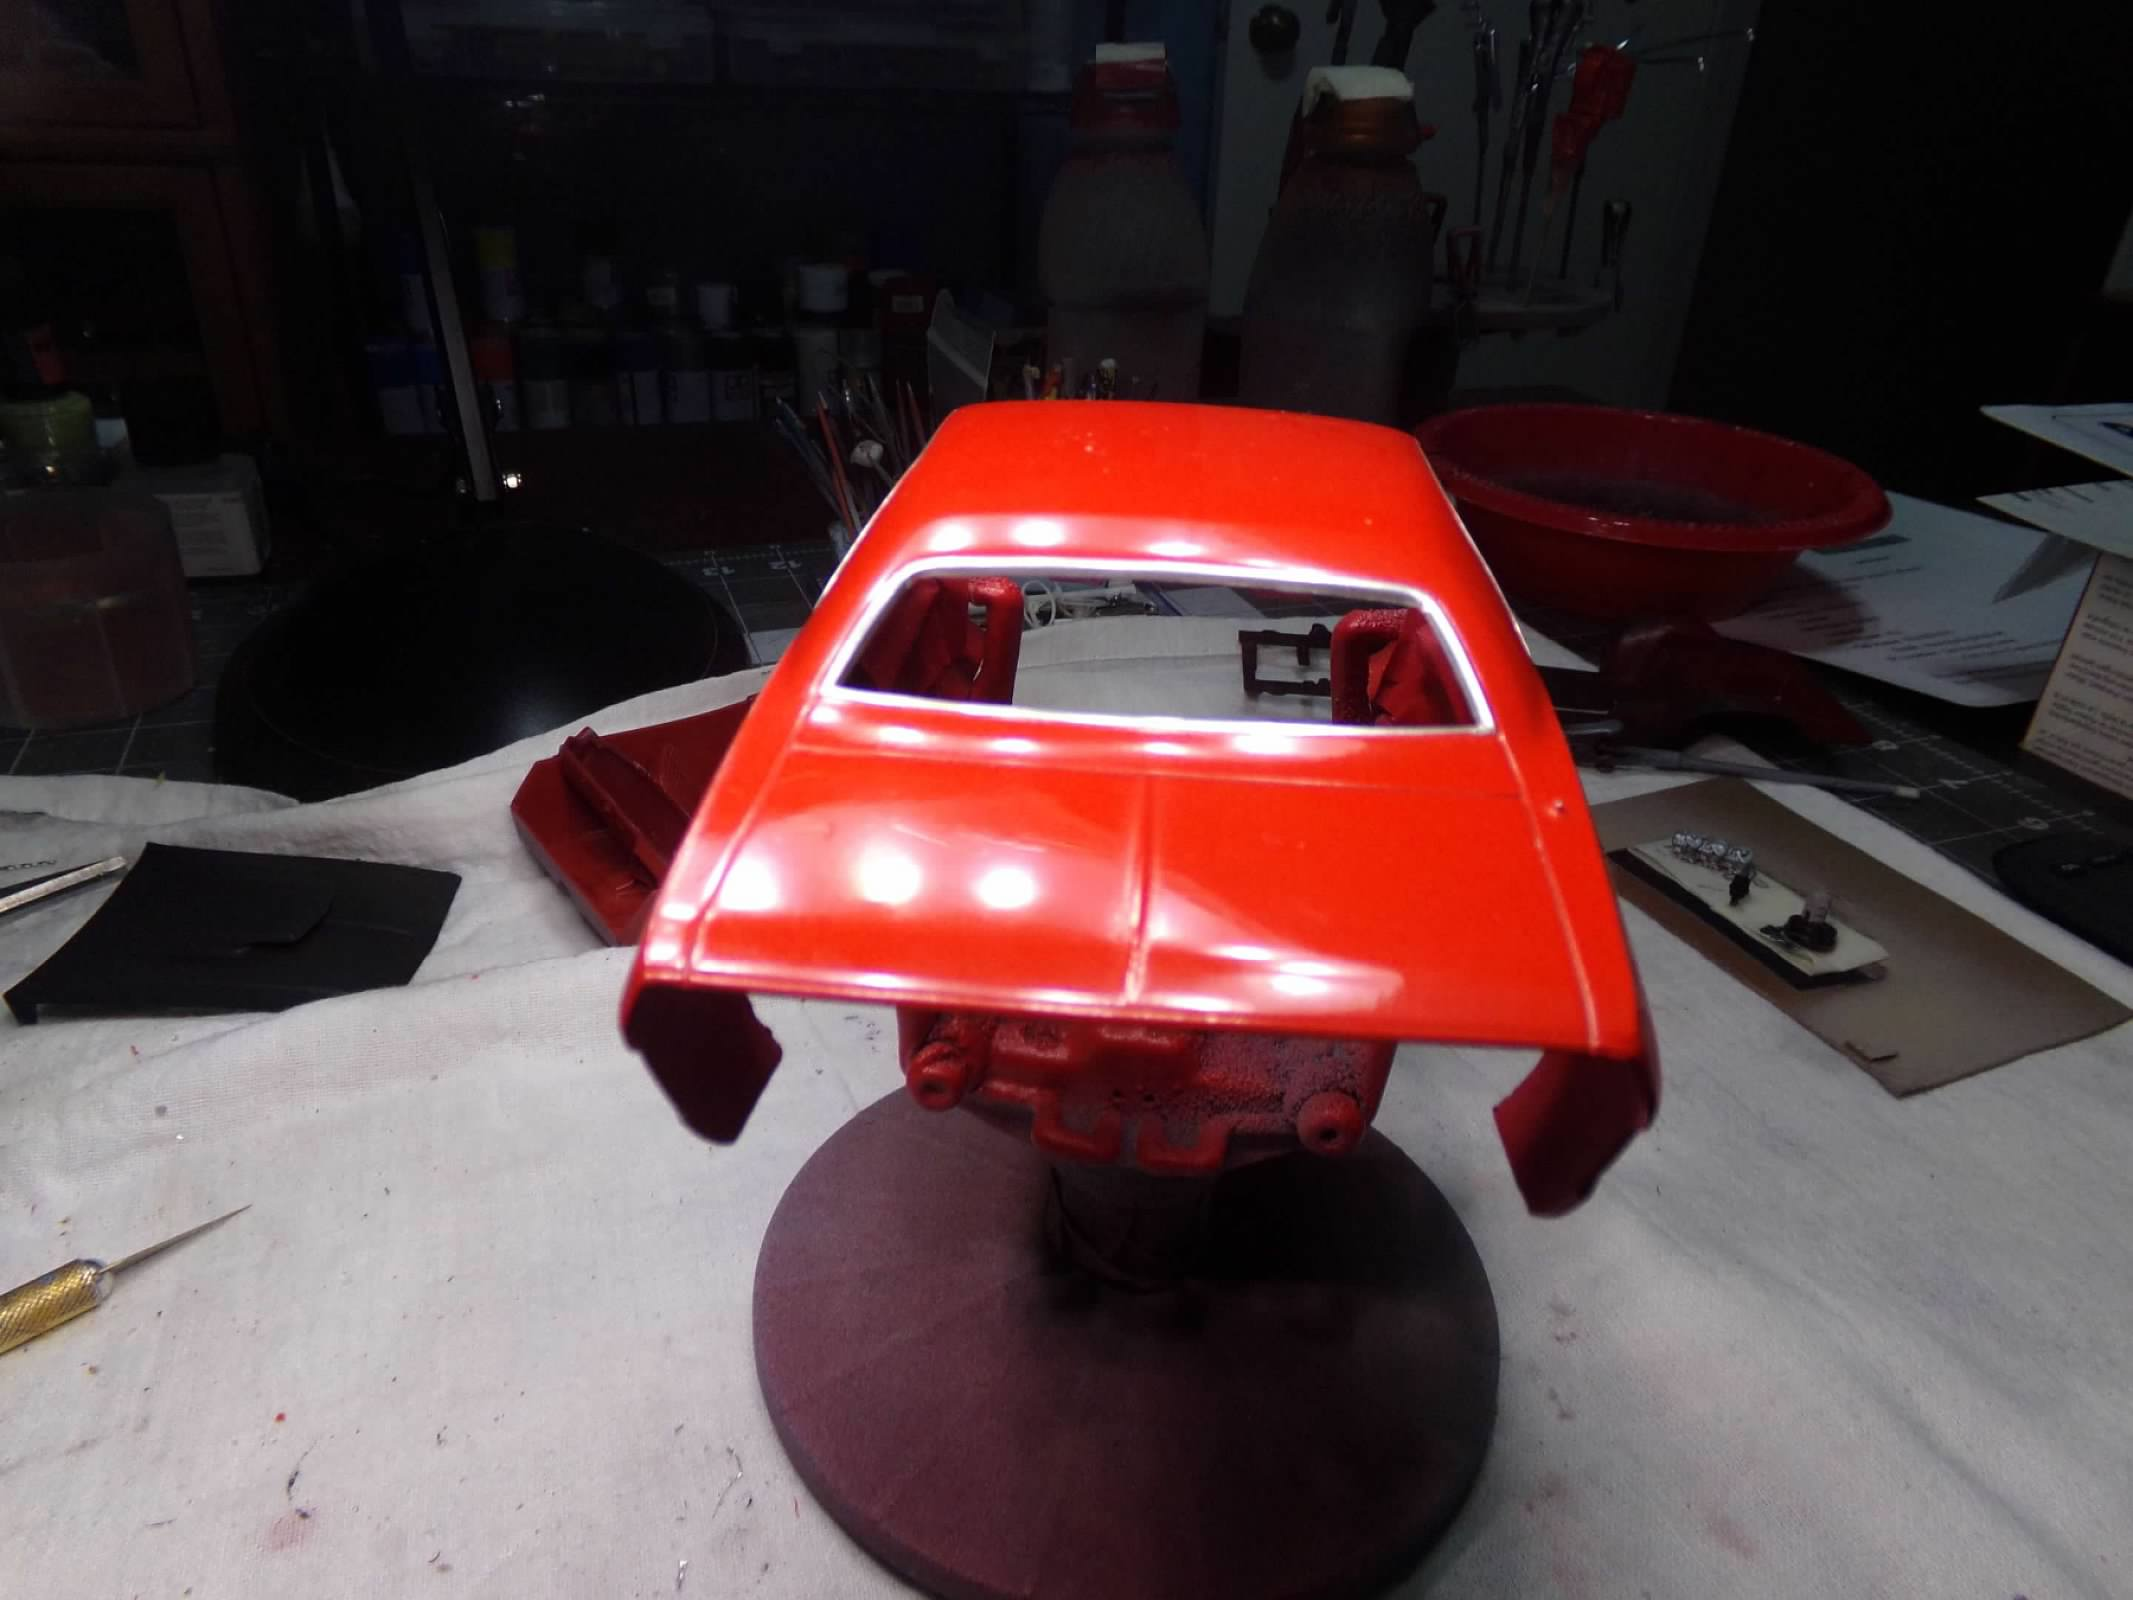
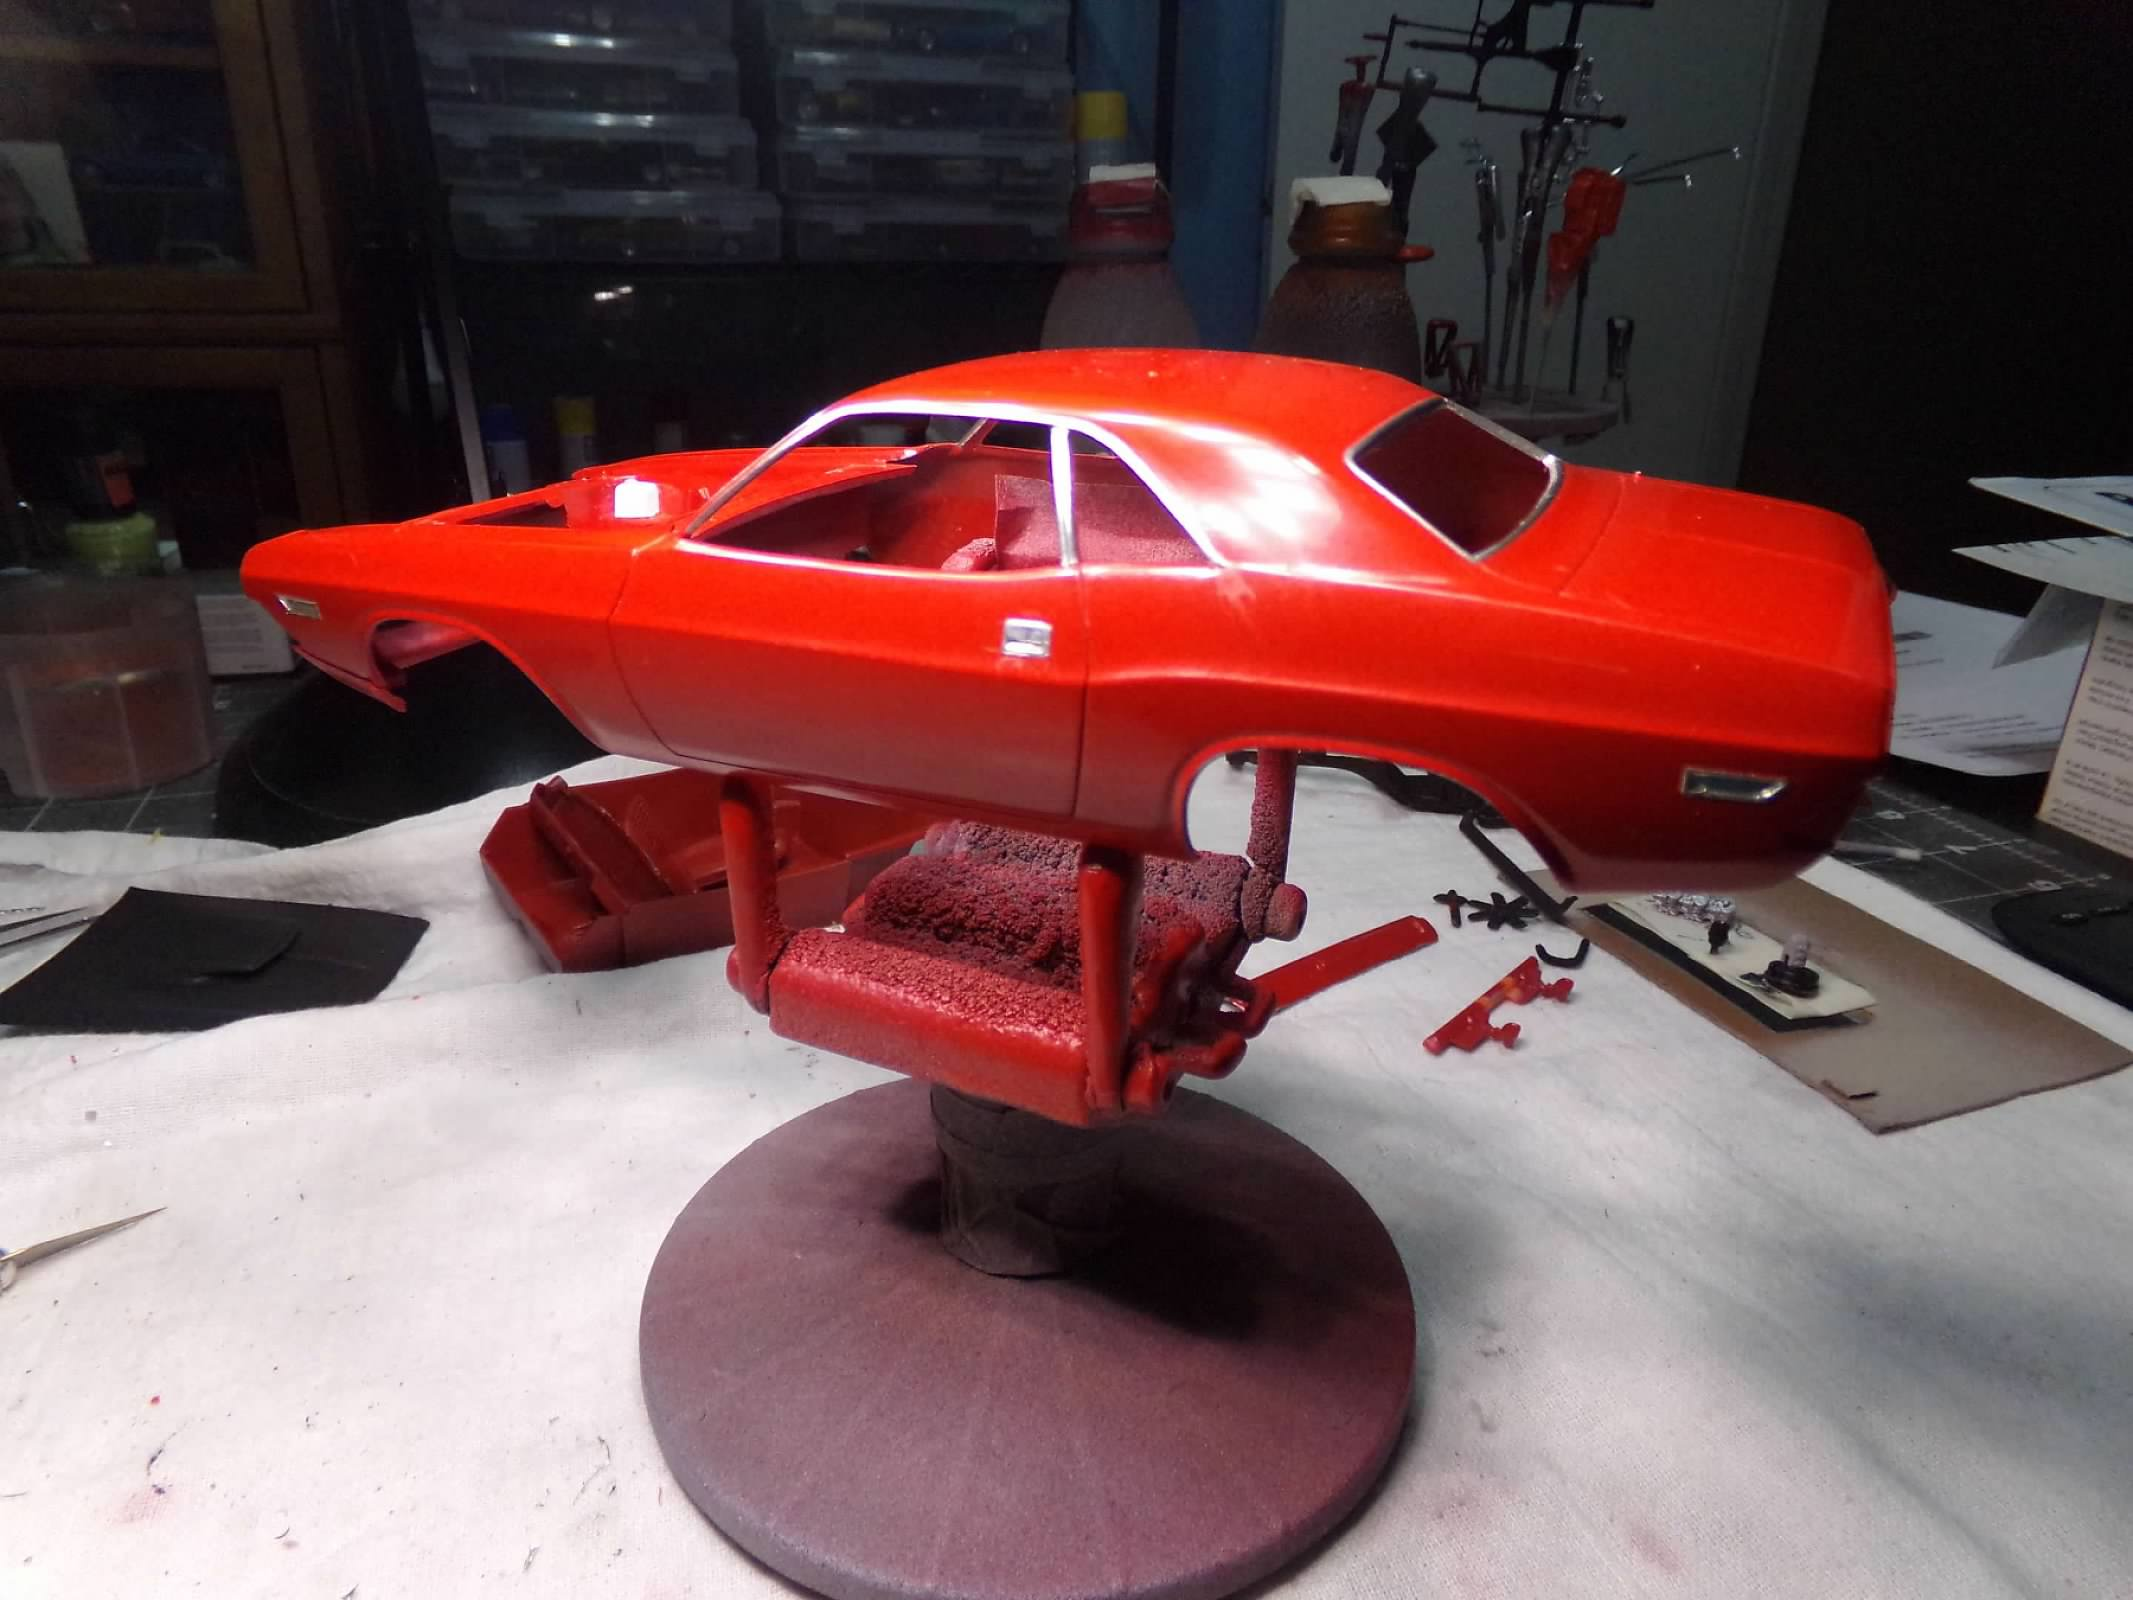
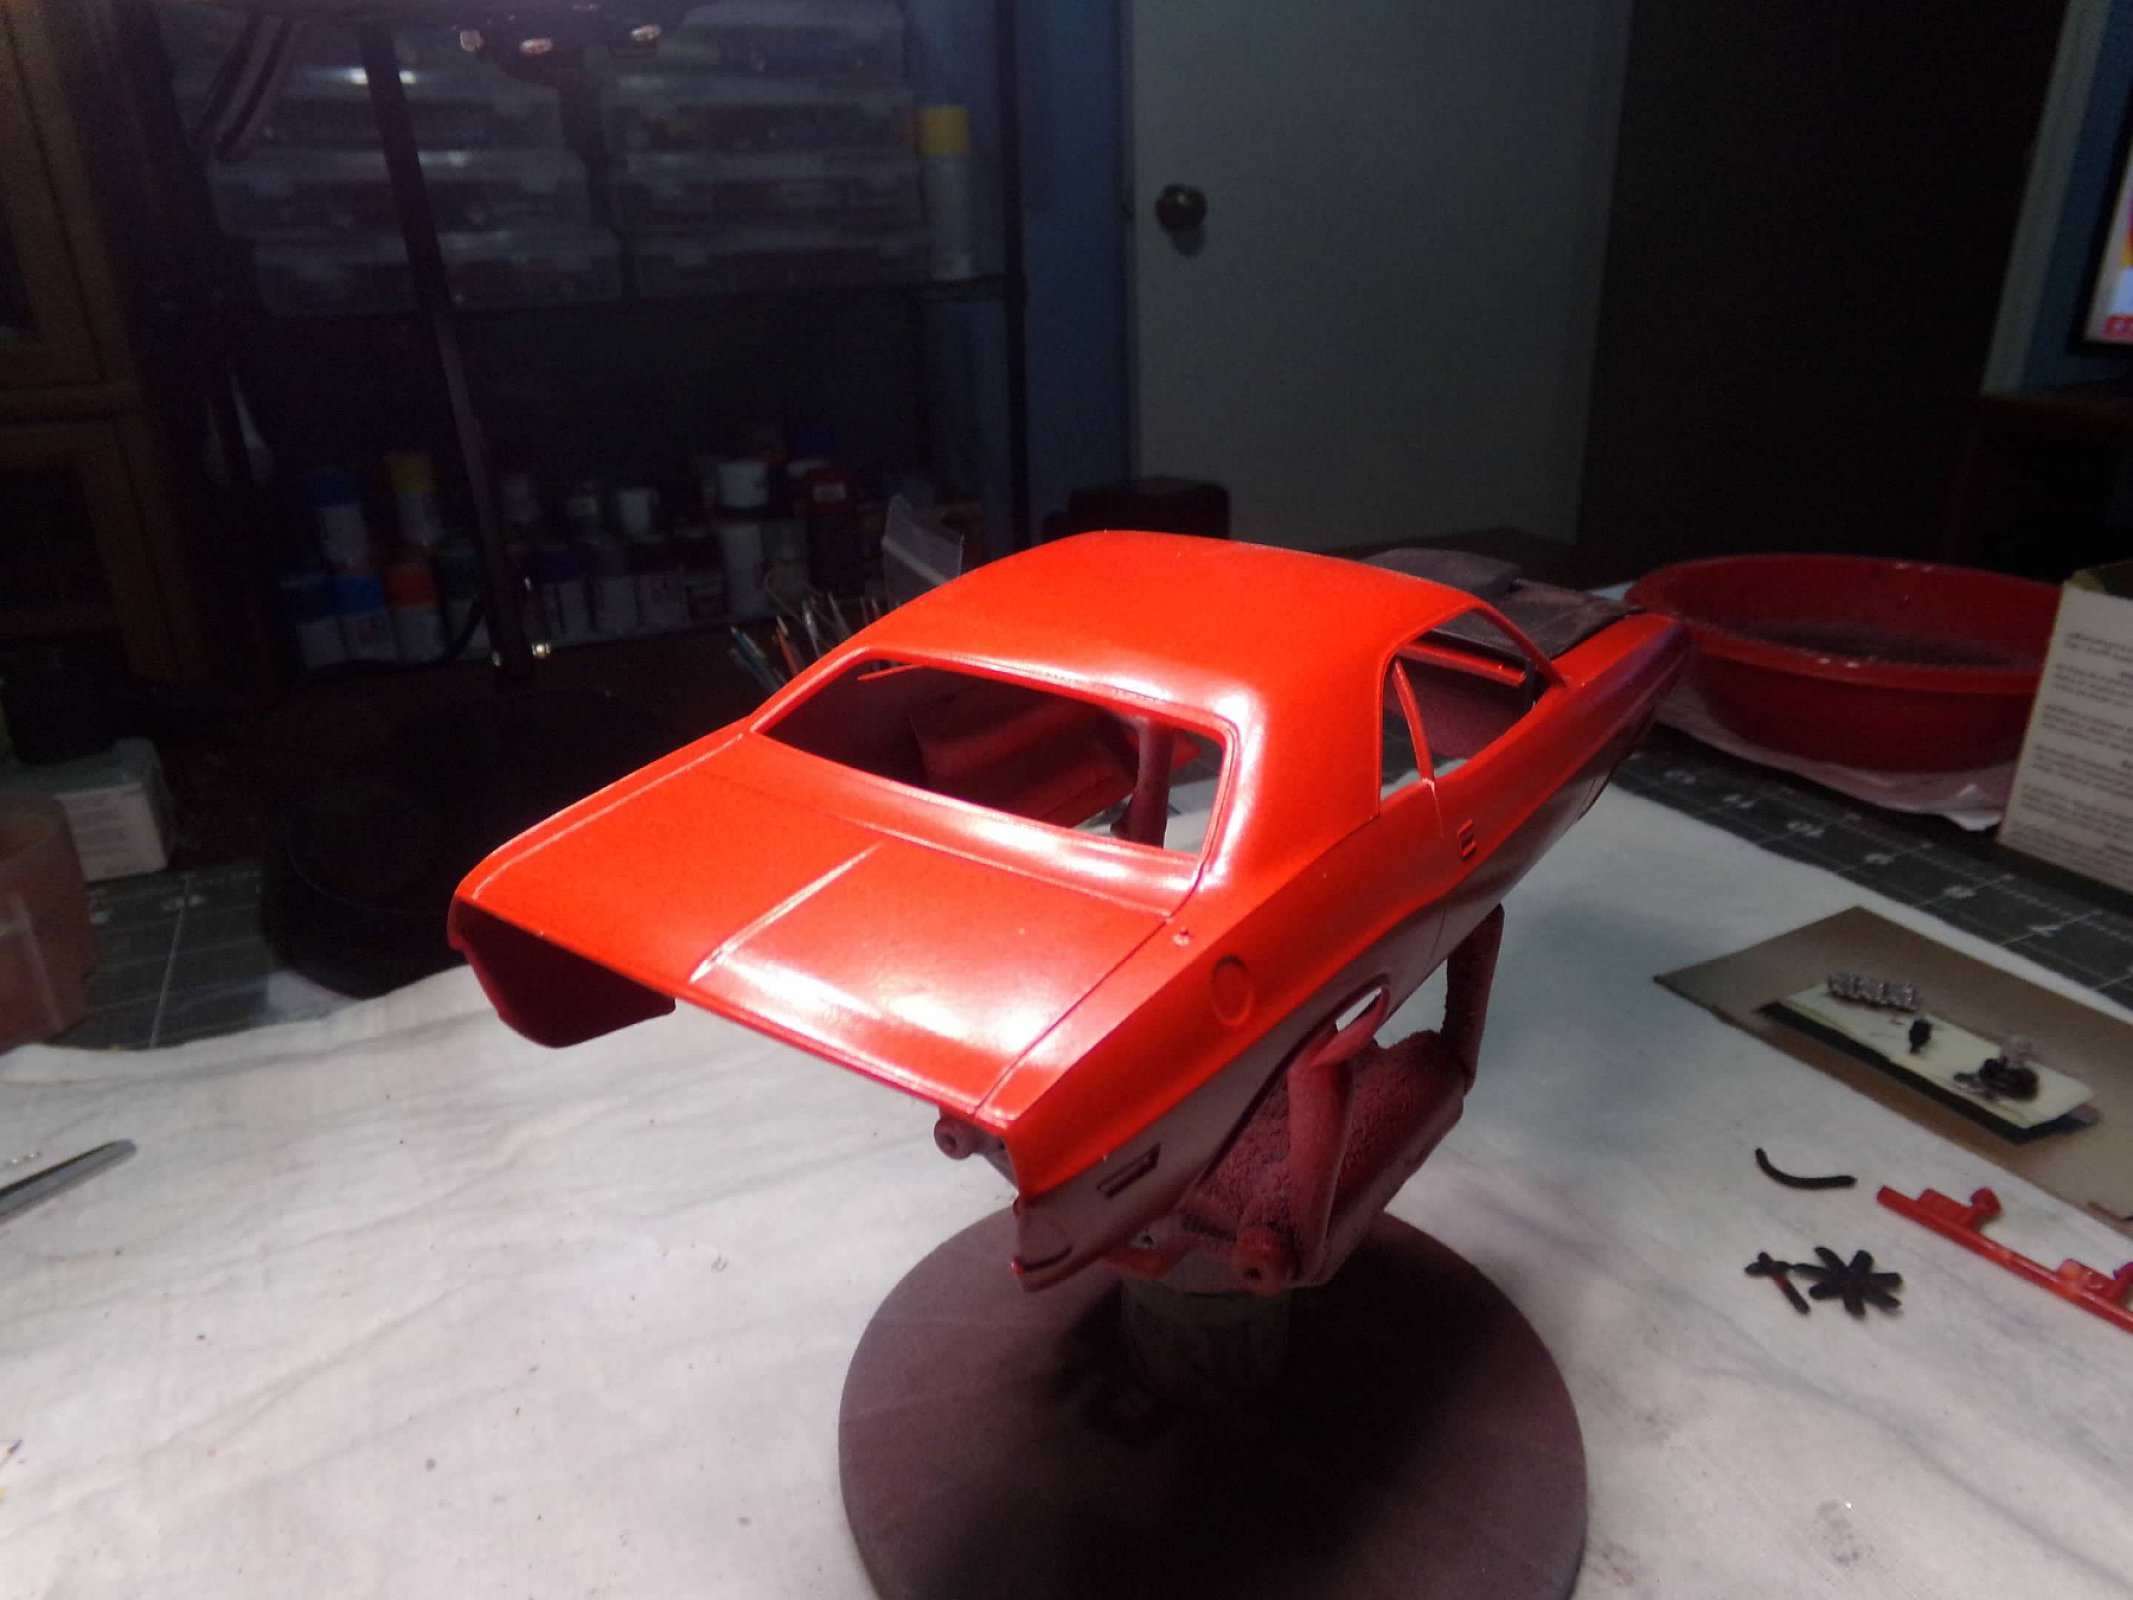
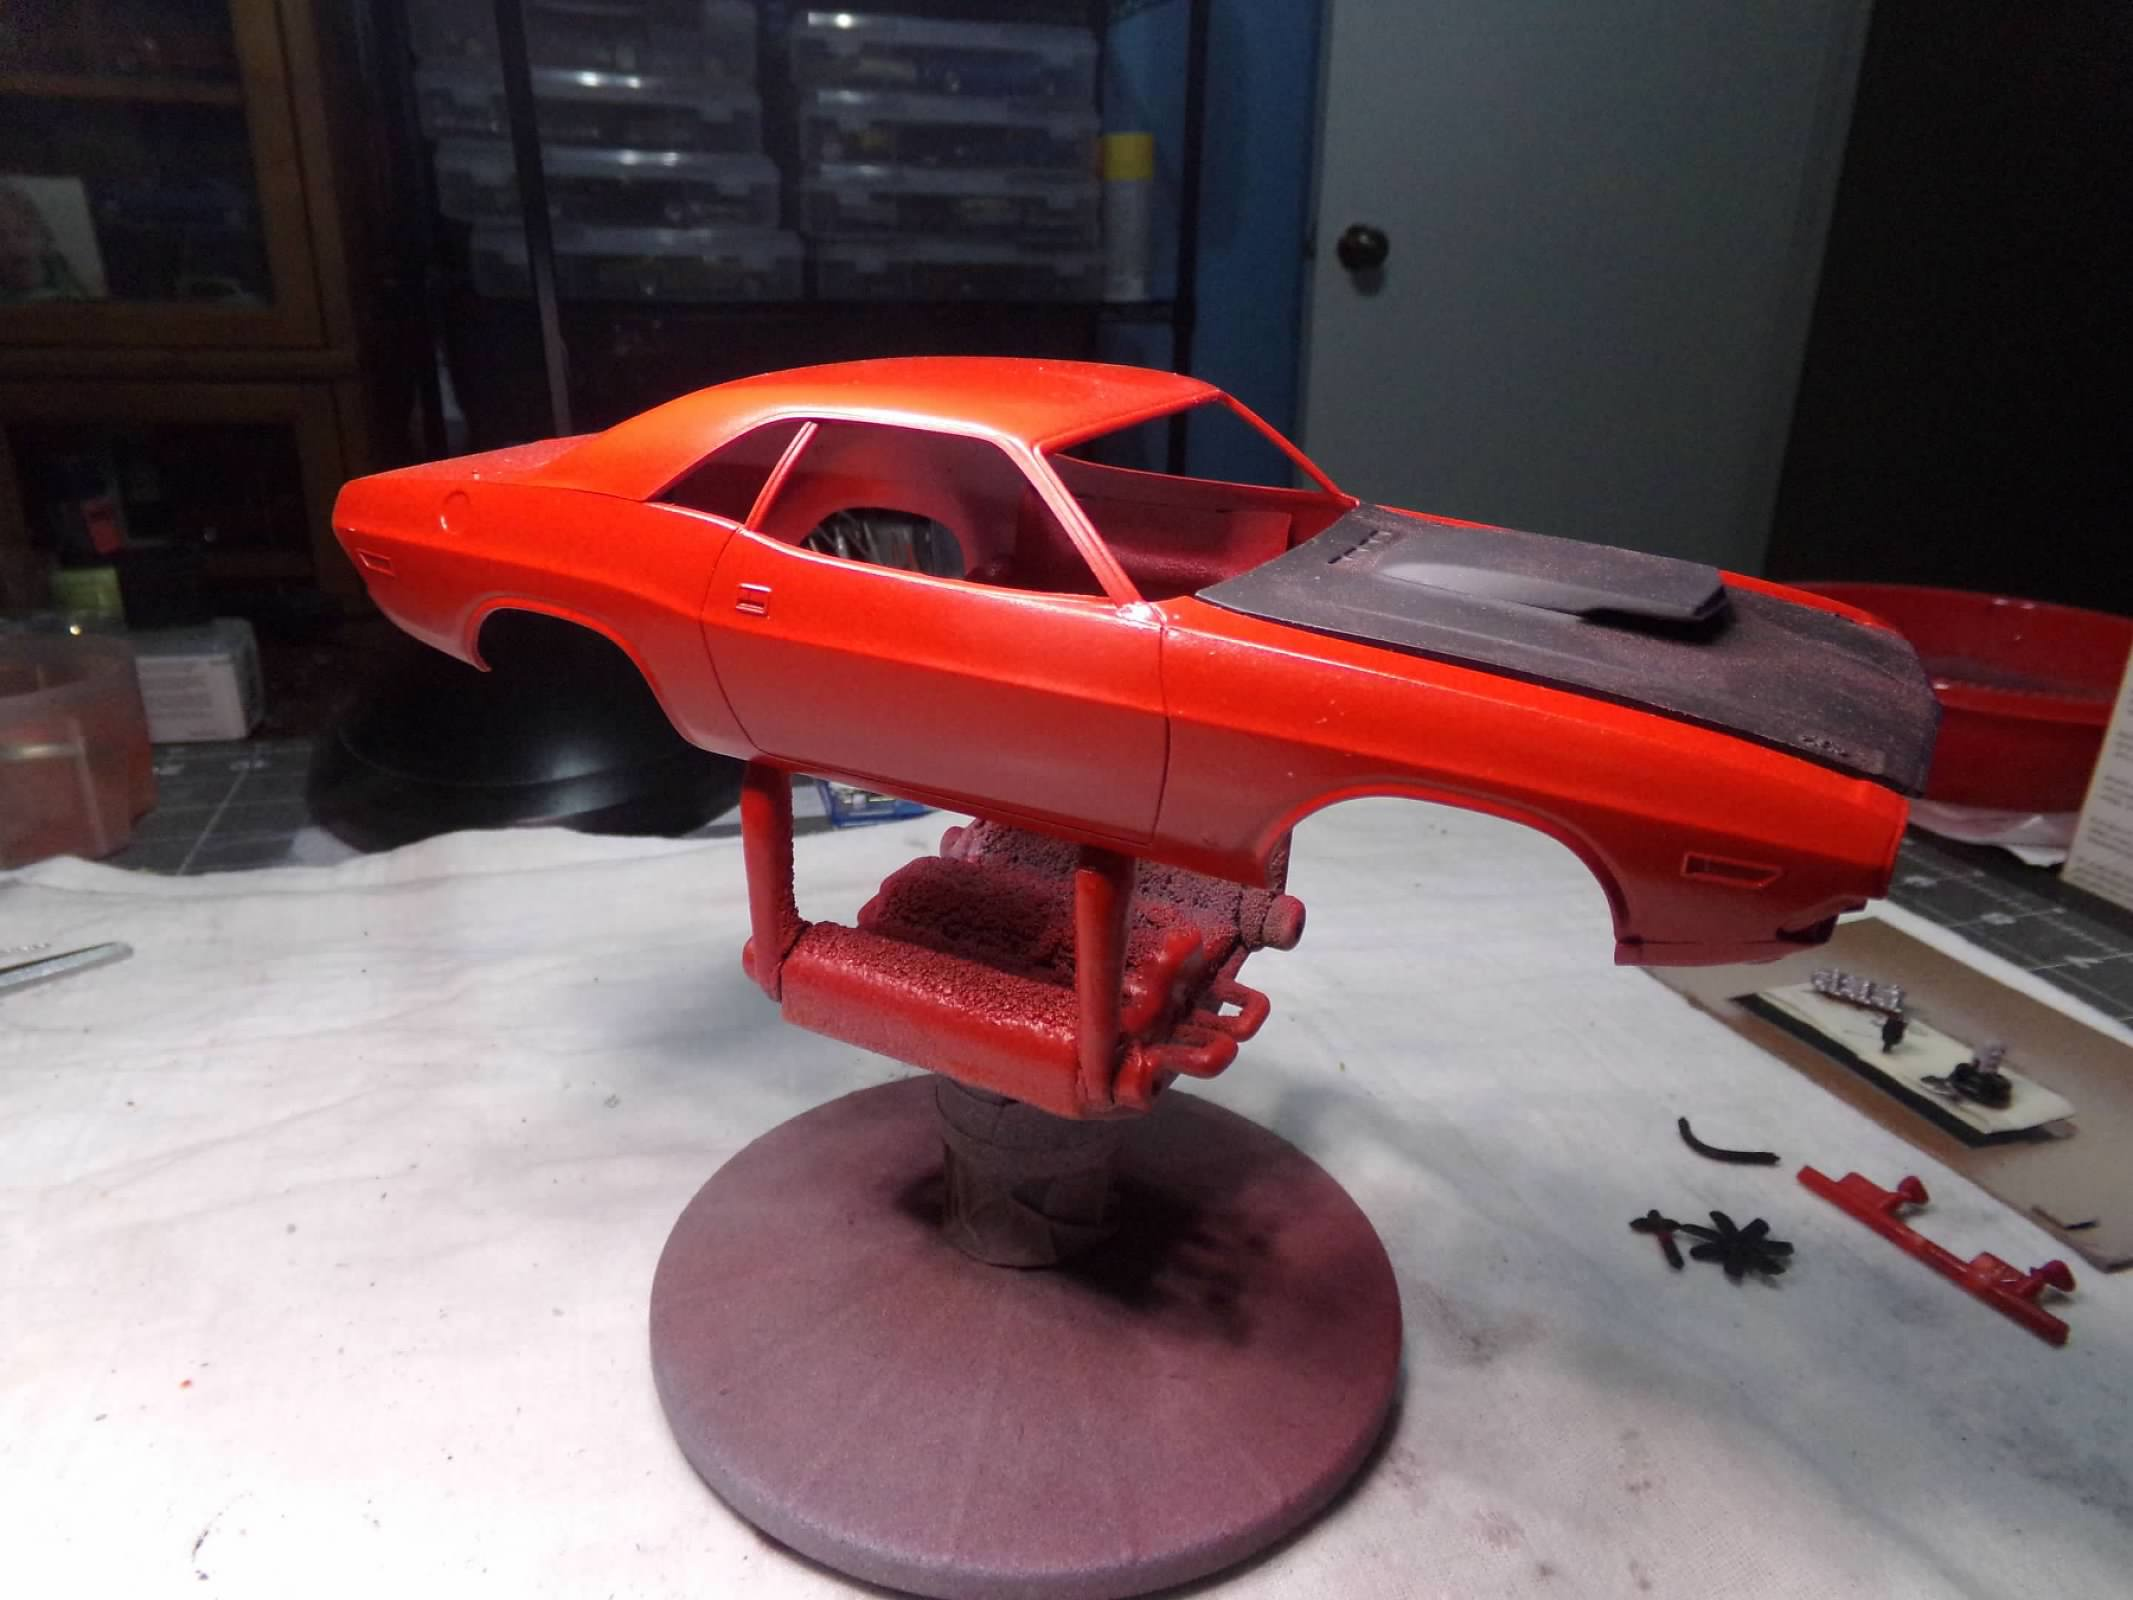
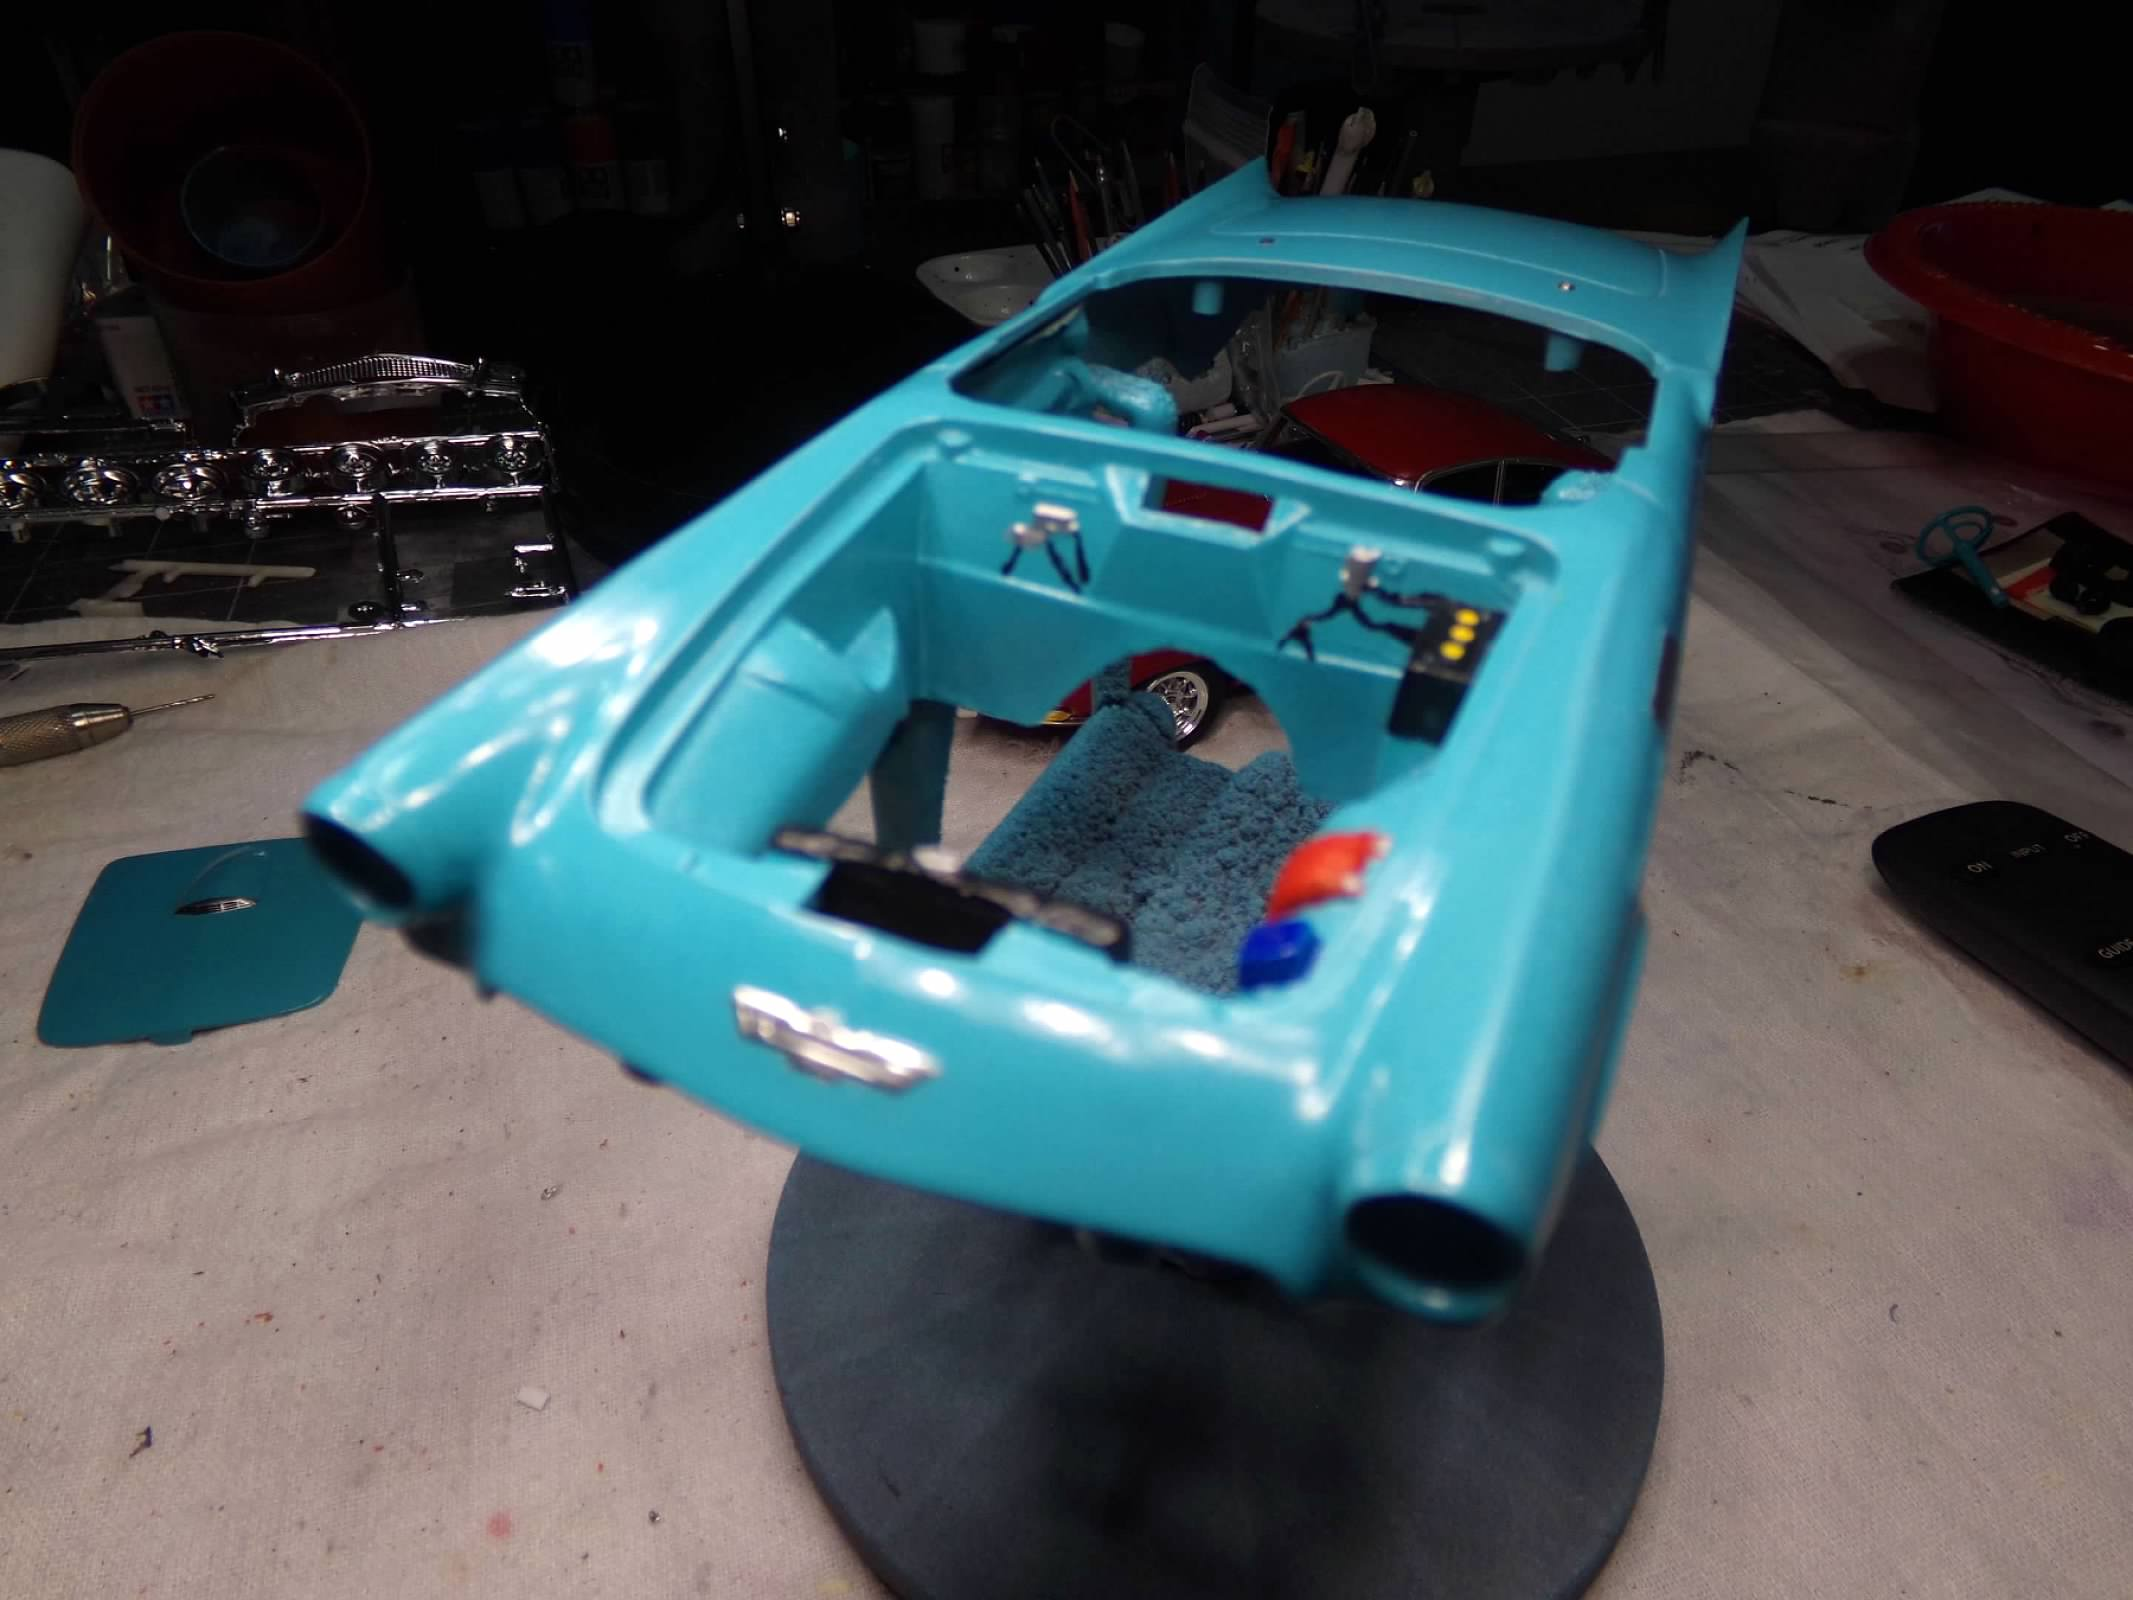
Thanks, David and Jeremy! I appreciate your comments! Rubbed out the body and got it foiled today. I had painted the wiper bottle before I painted the body and taped it off while painting the body. I'll paint the black battery, the grill and headlight surrounds, and the chin spoiler with a brush next. After that, the engine and interior are next. Thanks for looking! ?
-
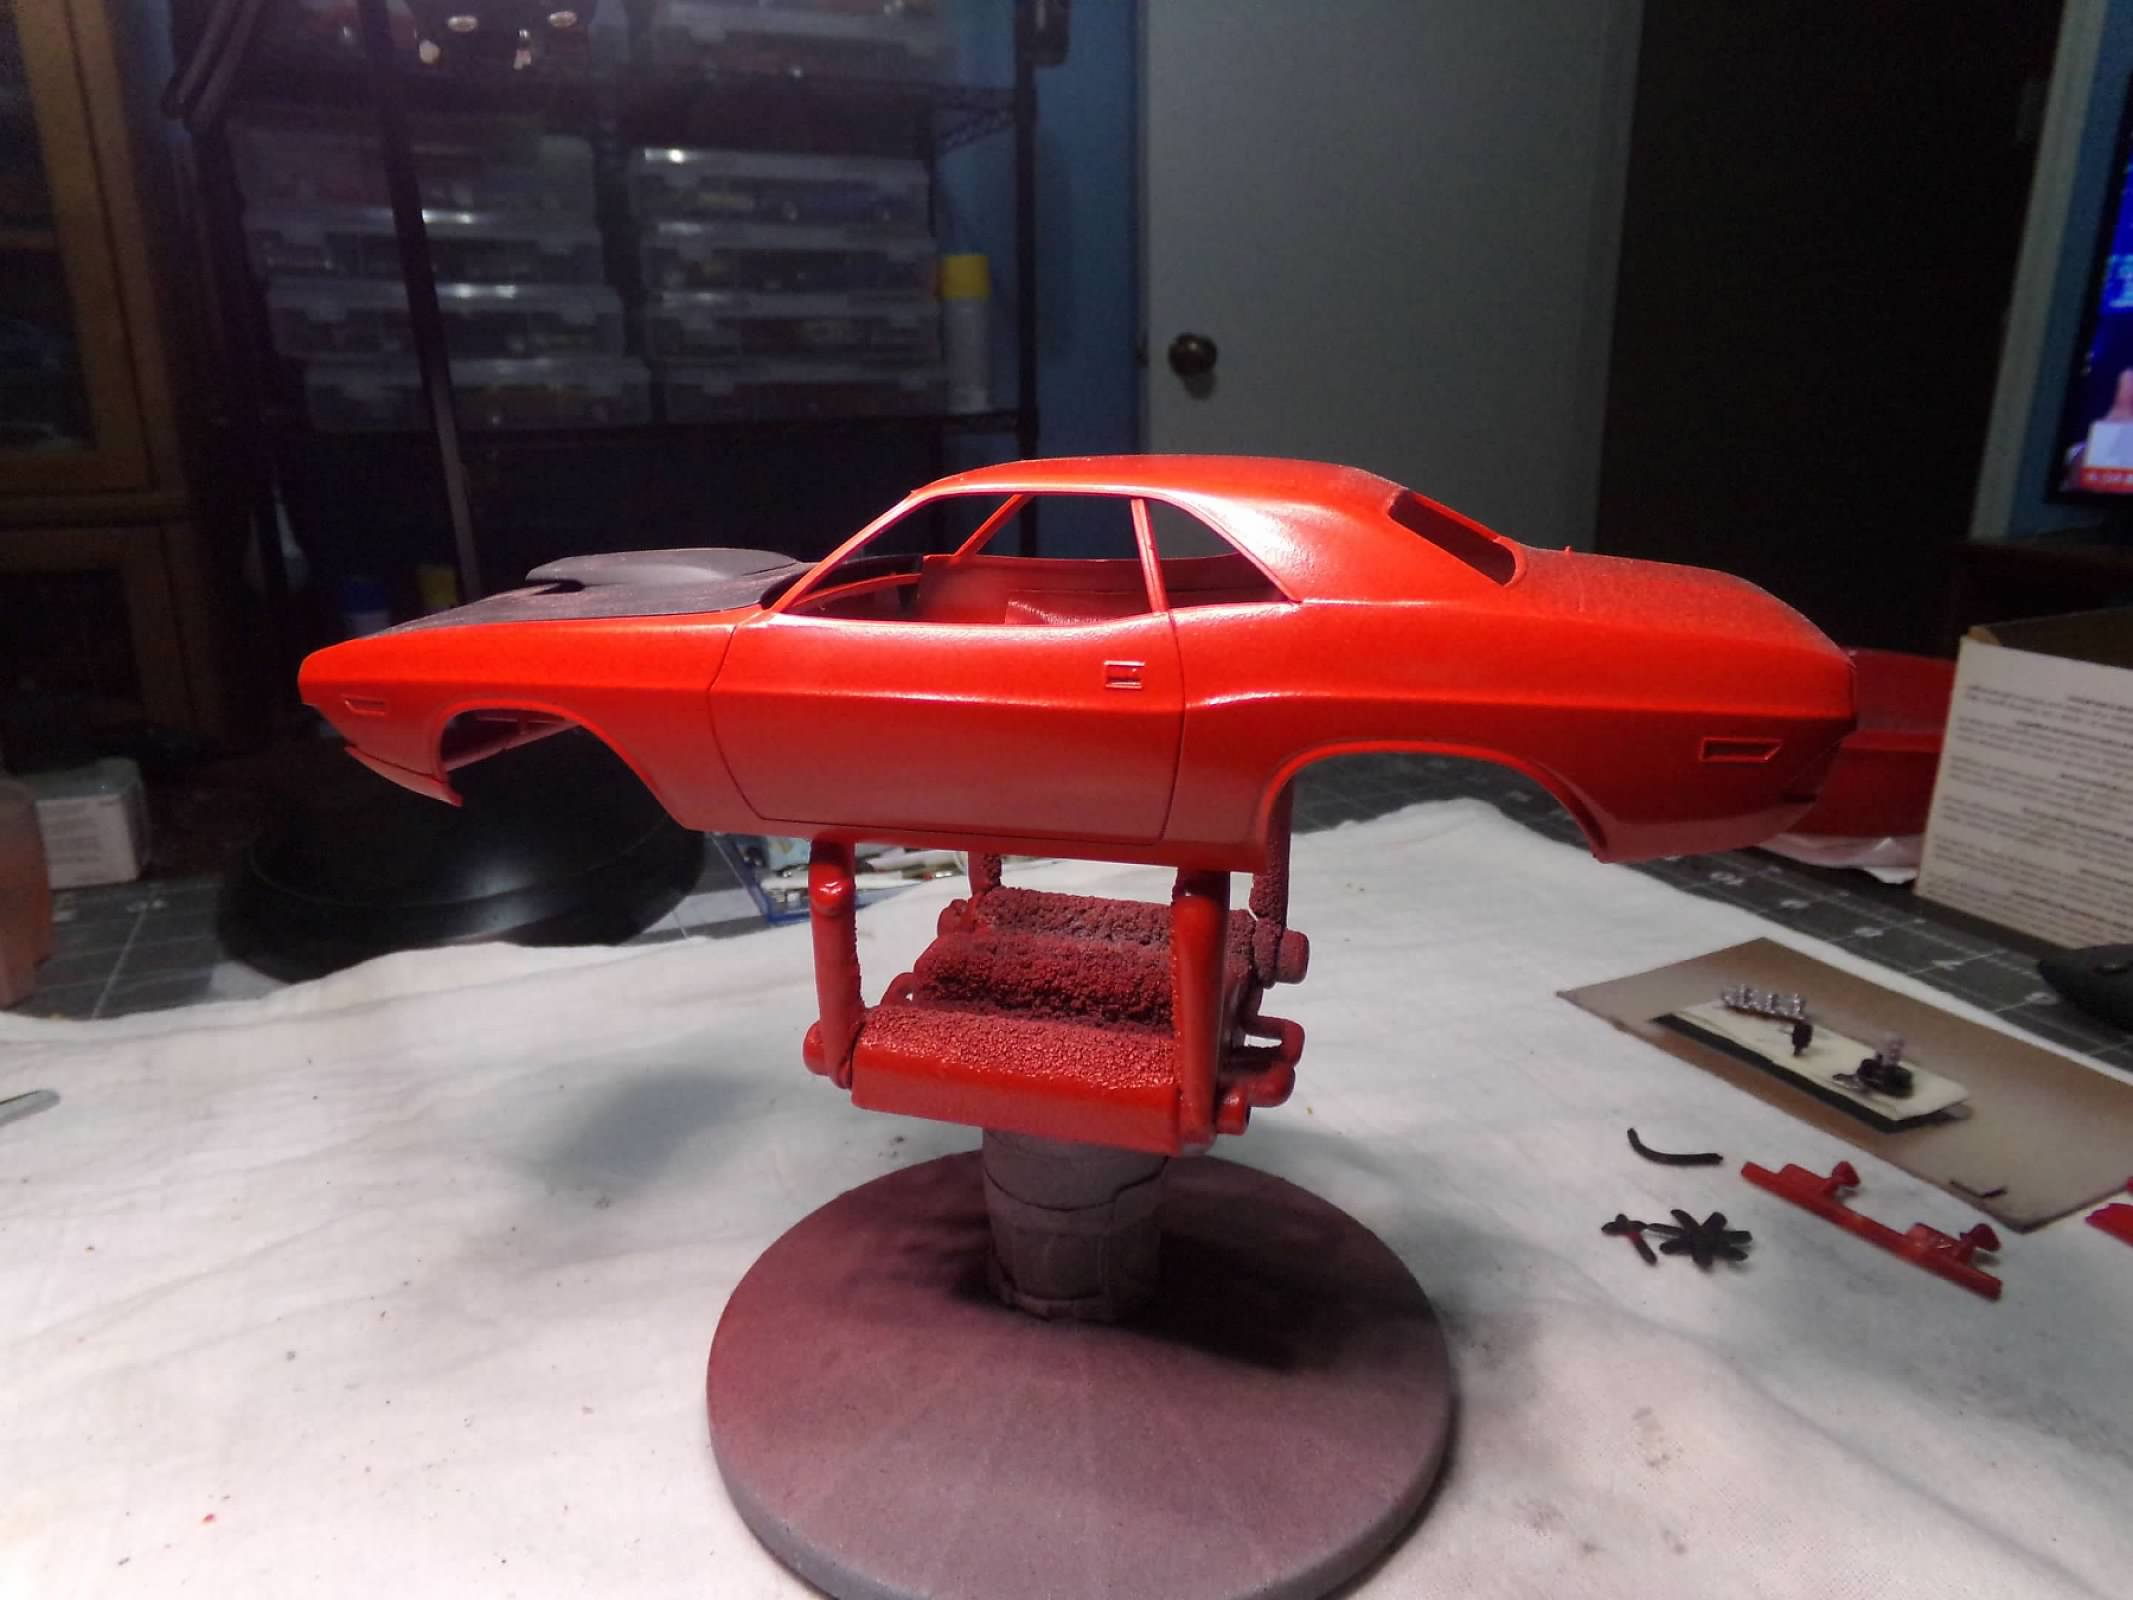
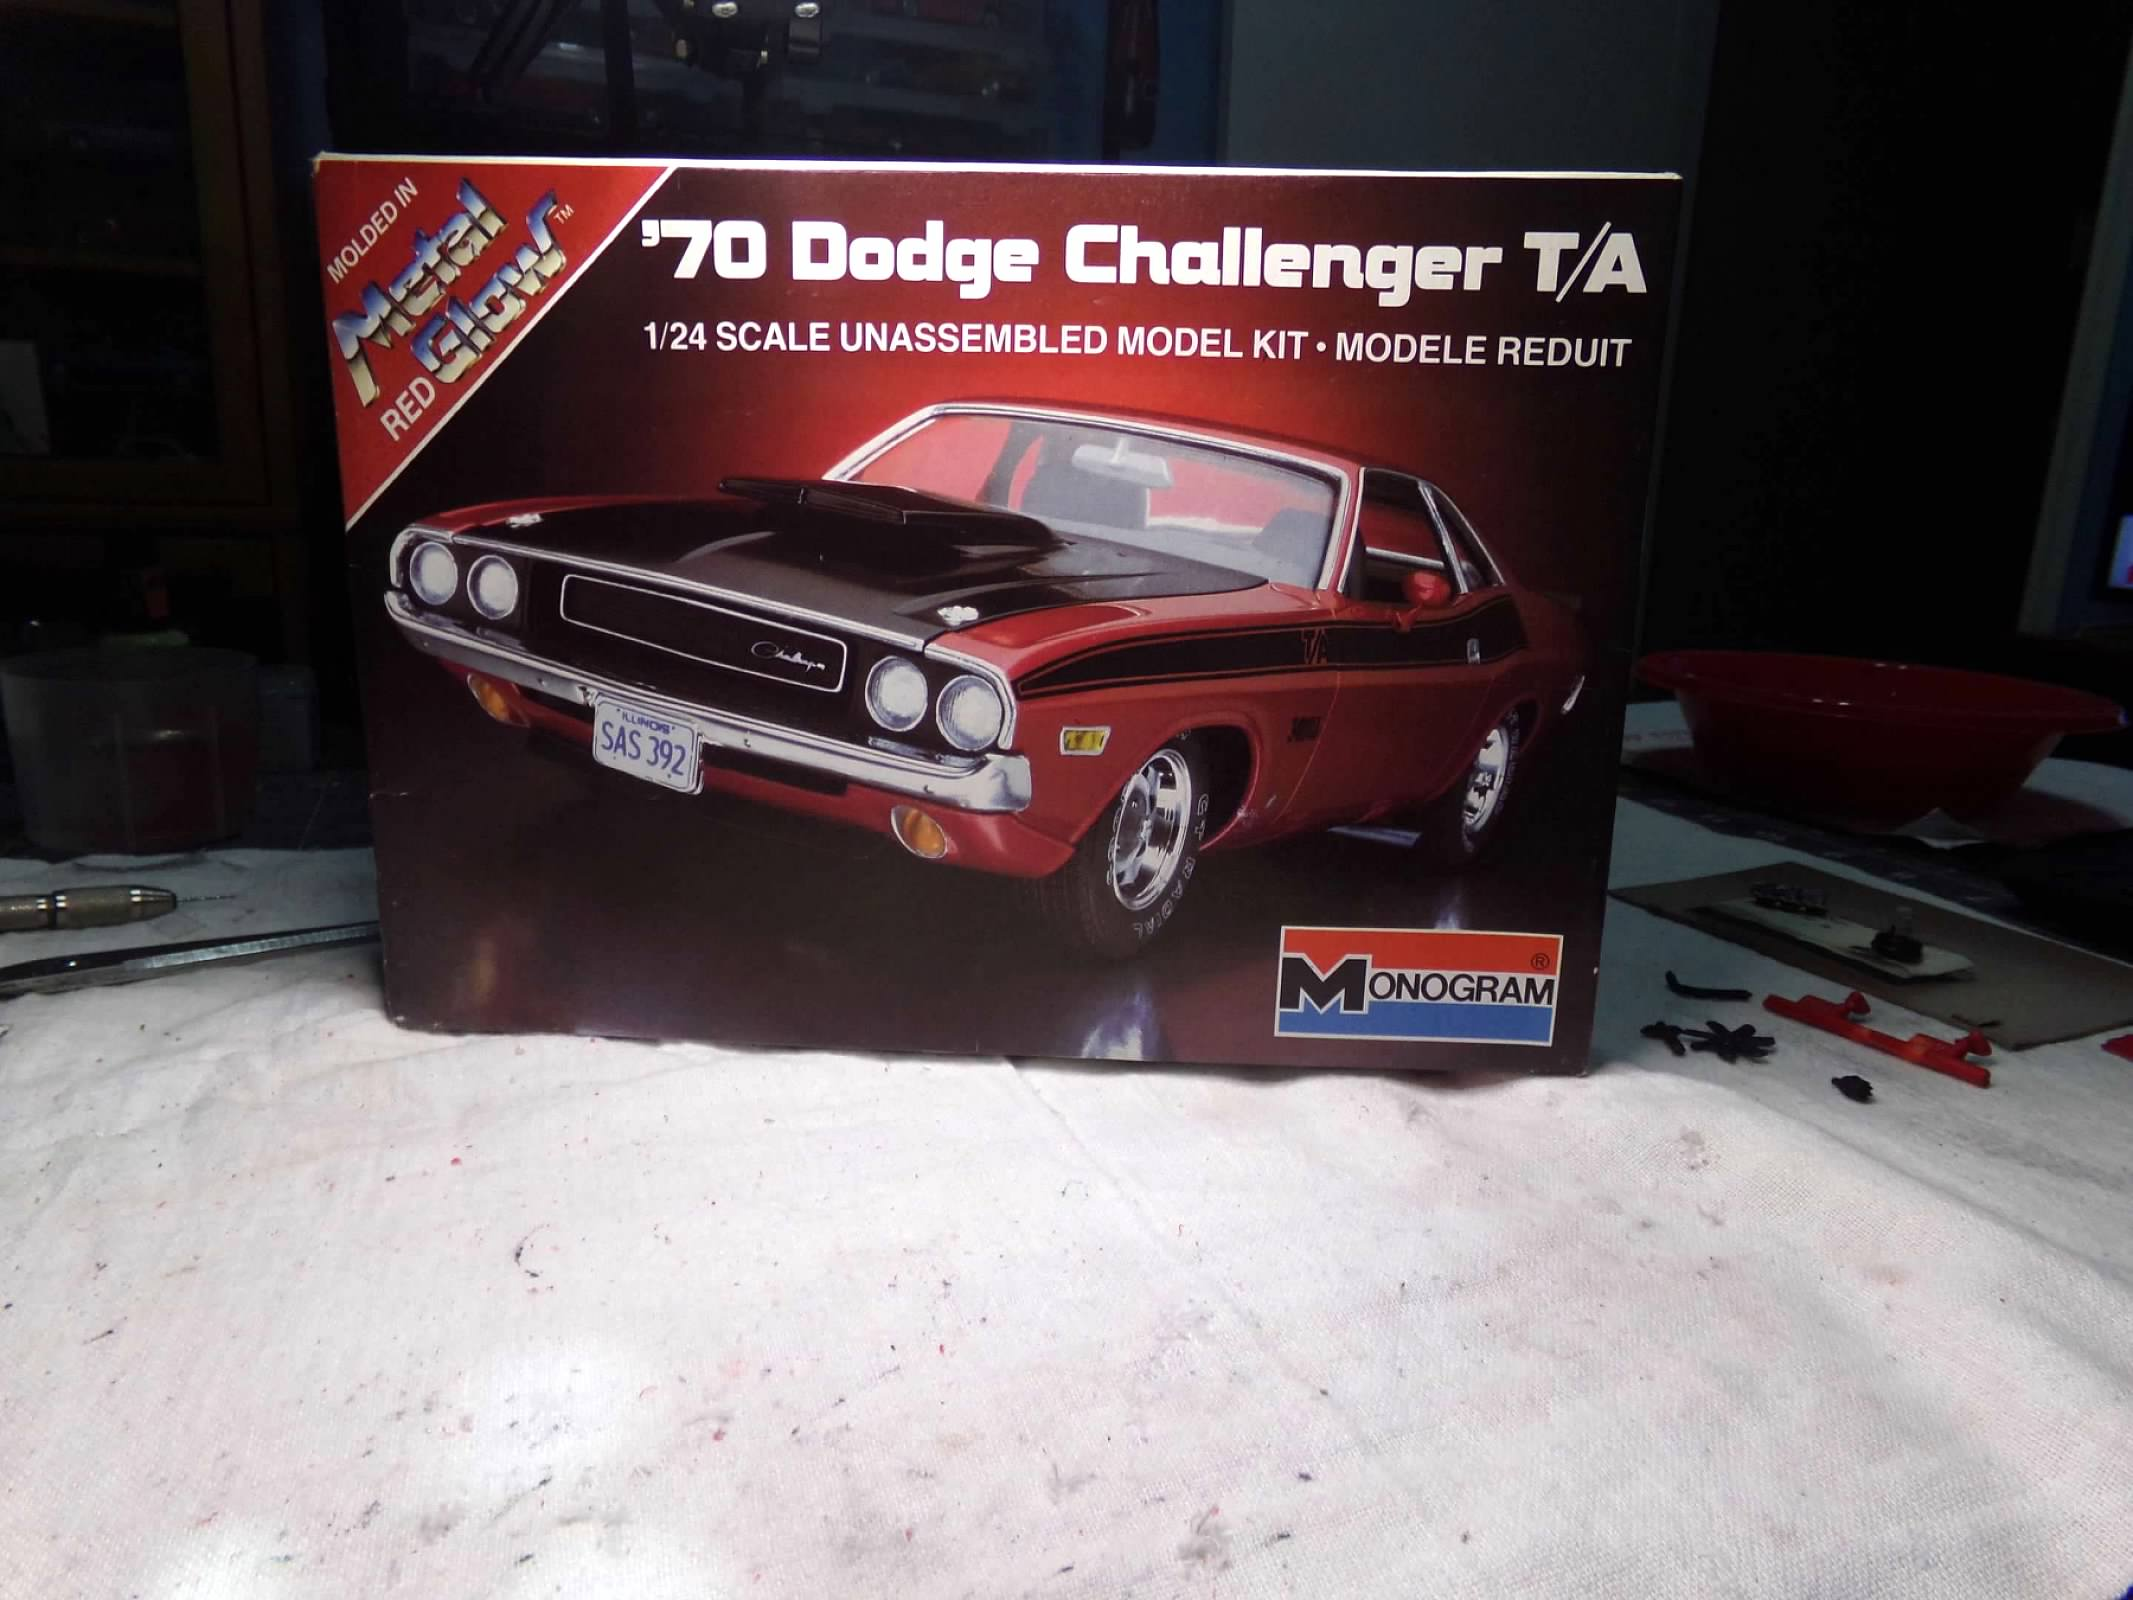
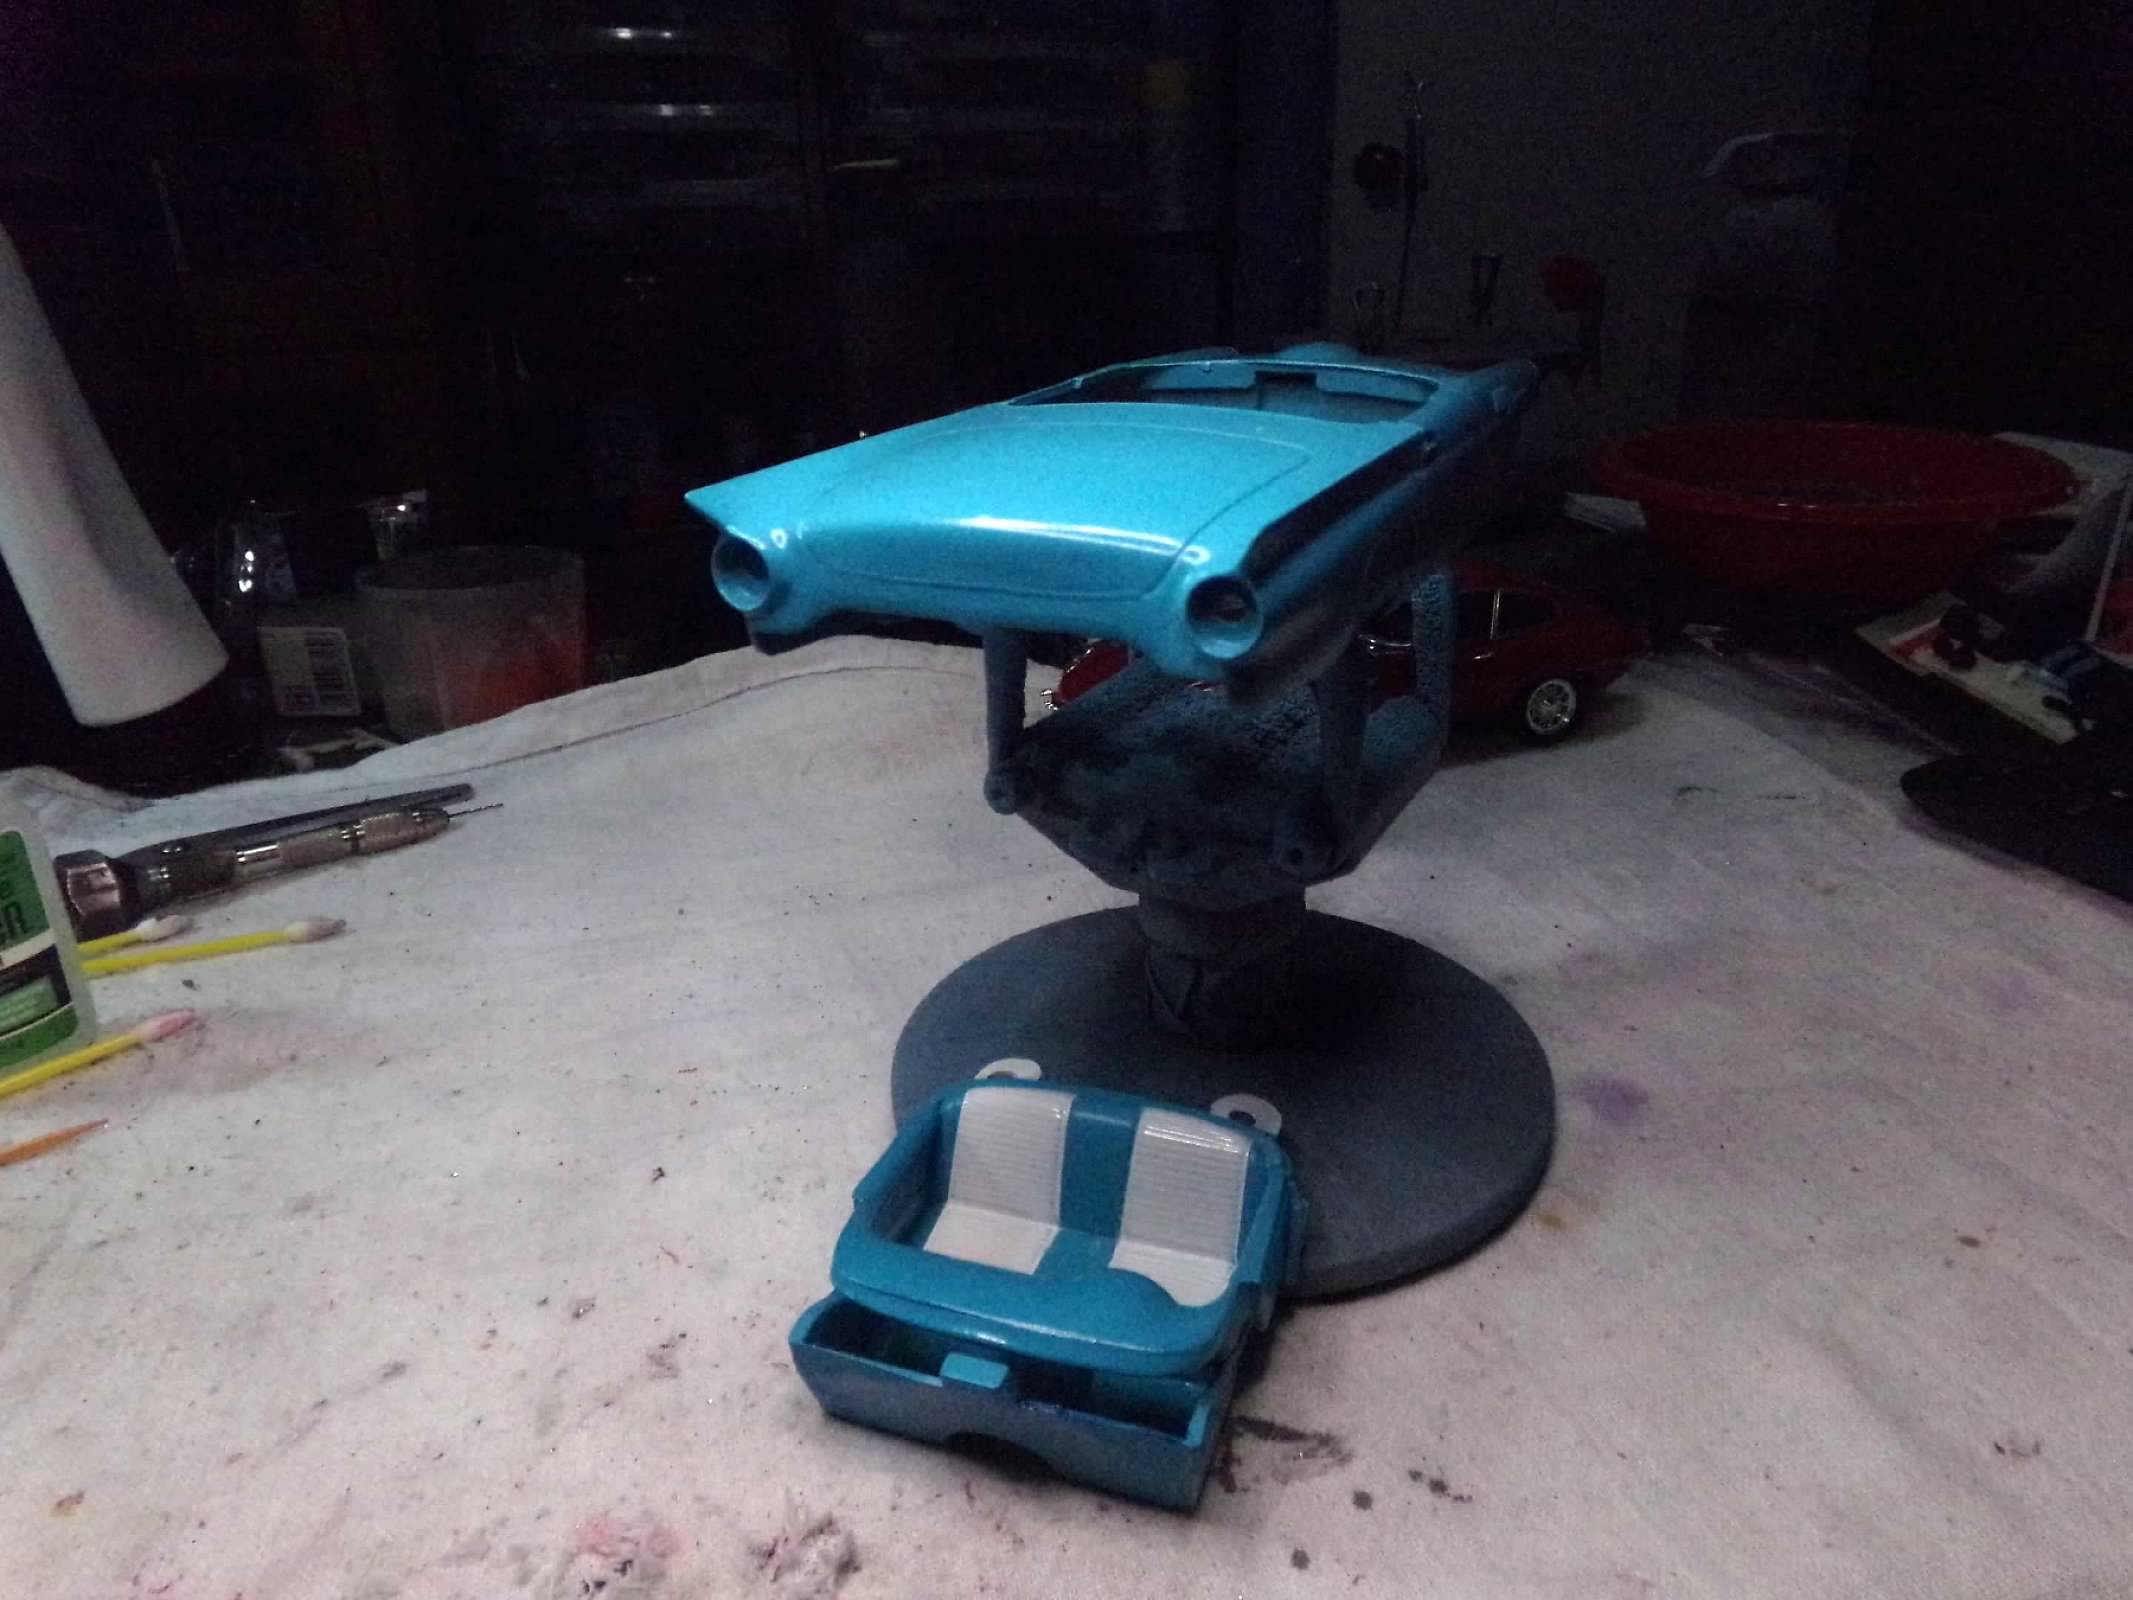
This is an old Monogram kit with "Metal Glow" that has long since Glone. It has been rolling along in the closet for many years. I've stolen the wheels, the exterior mirrors, and the long taillight lens. I know I can find some wheels in the parts box and have some suitable mirrors so I'll have to come up with something for the taillight. I may just paint it in. So I wanted to get something painted today as it will rain tomorrow and a cold front will be here for the weekend. I painted the body with Dupli-Color Flash Red and the hood flat black. I also painted all the other parts. I painted the interior with an old can of Color Place (WalMart's brand from years ago) Fire Red since its a little bit darker. I flatted it out with some Dulcote and it looks pretty good and still drying outside. its amazing that it sold for about $1.19 a 10 oz. can about 15 years ago. Its not great paint but its good enough for an interior. But I wouldn't paint a body with it. So everything is painted and ready to go. I'll rub out the body tomorrow and get busy with the foil. Another one will be out of the closet! Trouble is I keep replacing these old kits with new kits! Thanks for looking! ?
-
Bob, your 41 is looking great! Nice engine and chassis, and beautiful paint! What a looker this one will be! ??
-
1966 Chevy Suburban
ModelcarJR replied to ModelcarJR's topic in Model Trucks: Pickups, Vans, SUVs, Light Commercial
Thanks, everyone! I appreciate your comments! ? -
Carsini Wineries stake truck
ModelcarJR replied to Michael F's topic in Model Trucks: Pickups, Vans, SUVs, Light Commercial
Nice looking stake bed truck! Very realistic looking! Nice work! ?? -
1941 Chevy Truck
ModelcarJR replied to Zippi's topic in Model Trucks: Pickups, Vans, SUVs, Light Commercial
Looks good, Bob! The paint looks great and great execution all around! ?? -
1966 Chevy Suburban
ModelcarJR posted a topic in Model Trucks: Pickups, Vans, SUVs, Light Commercial
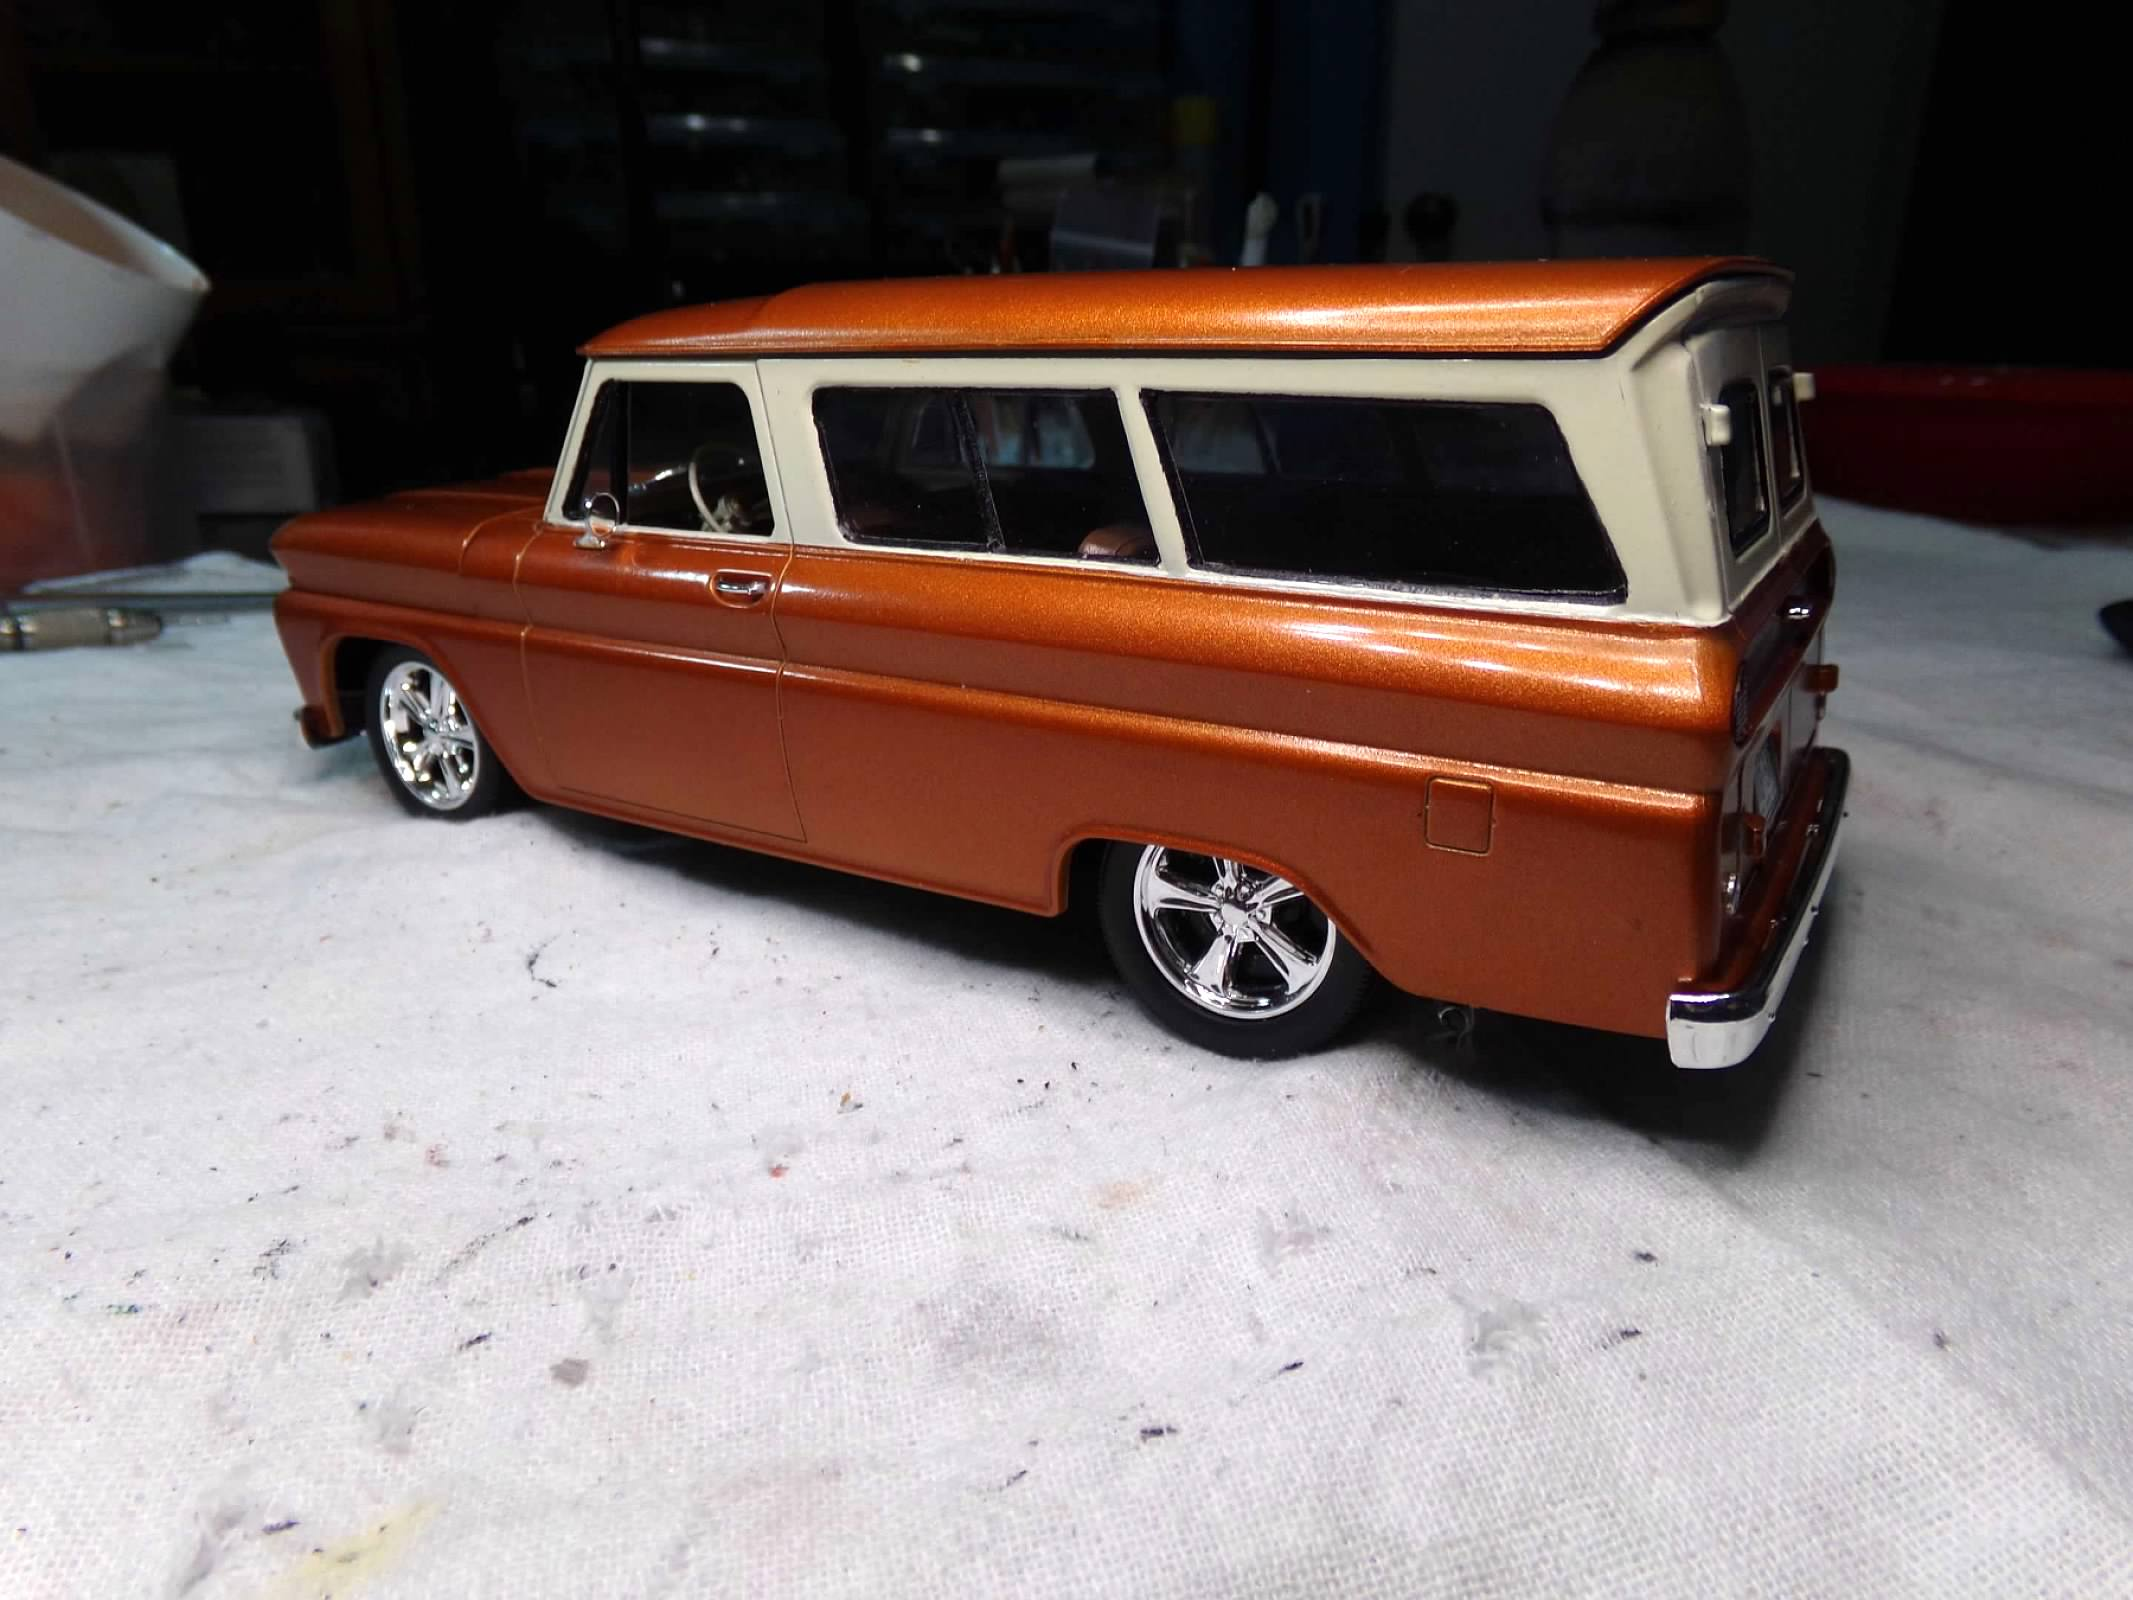
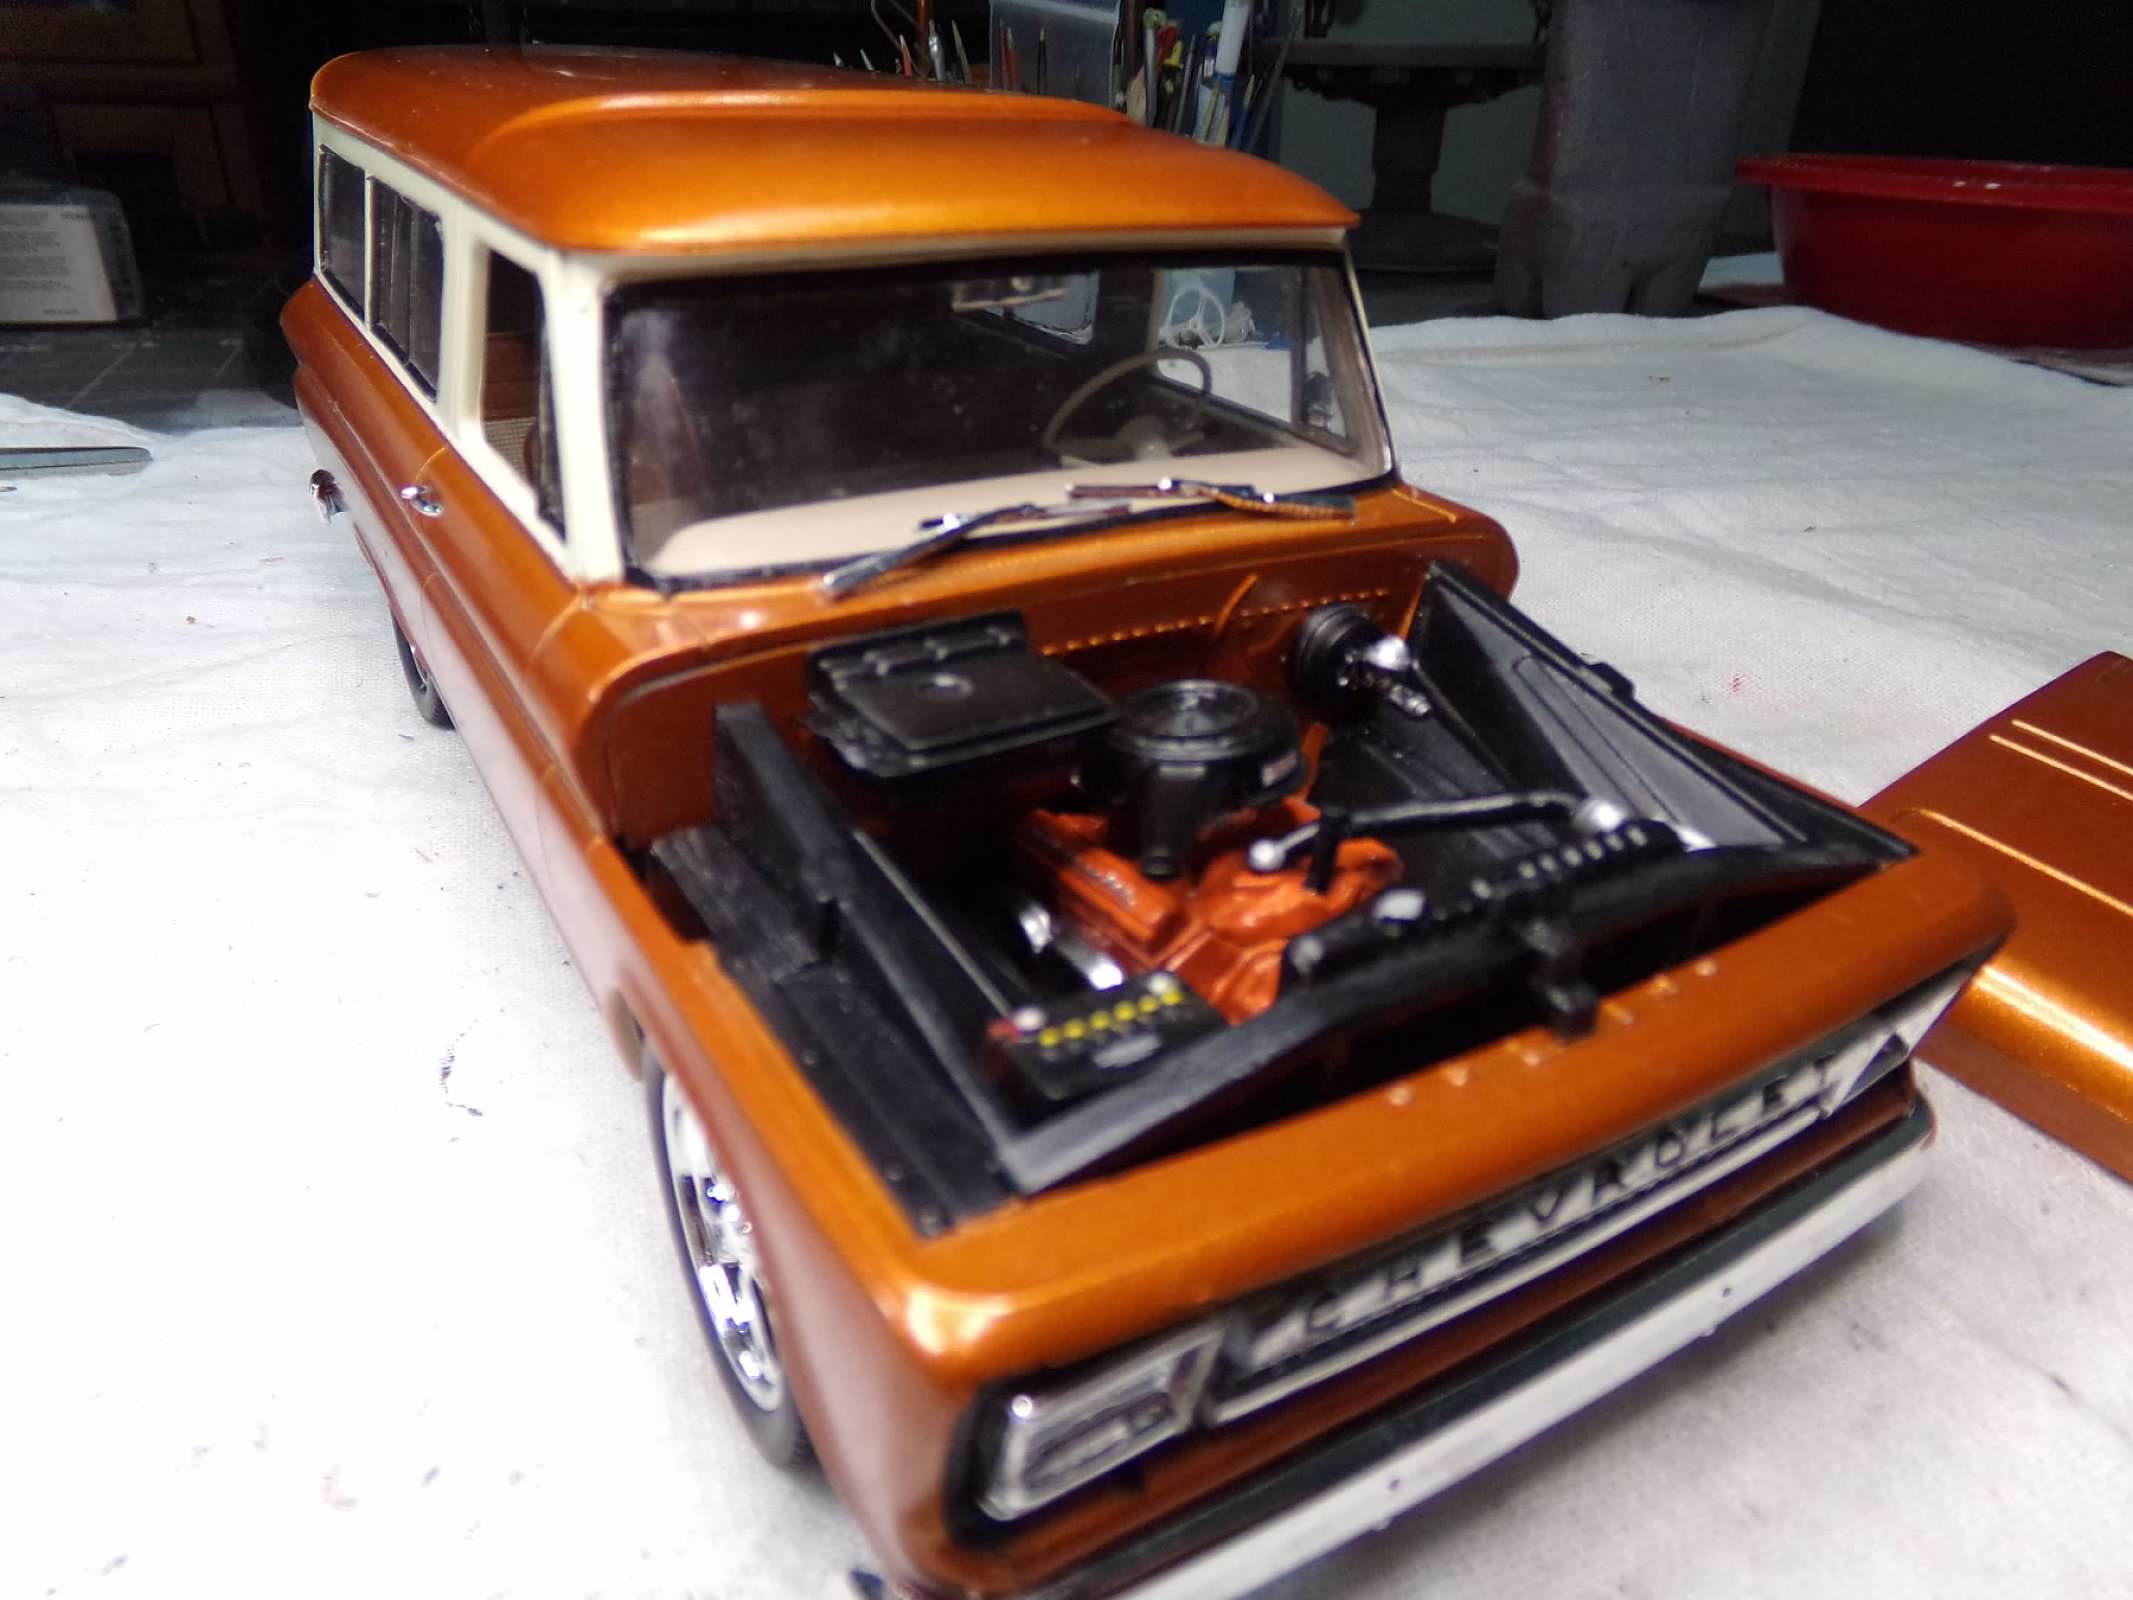
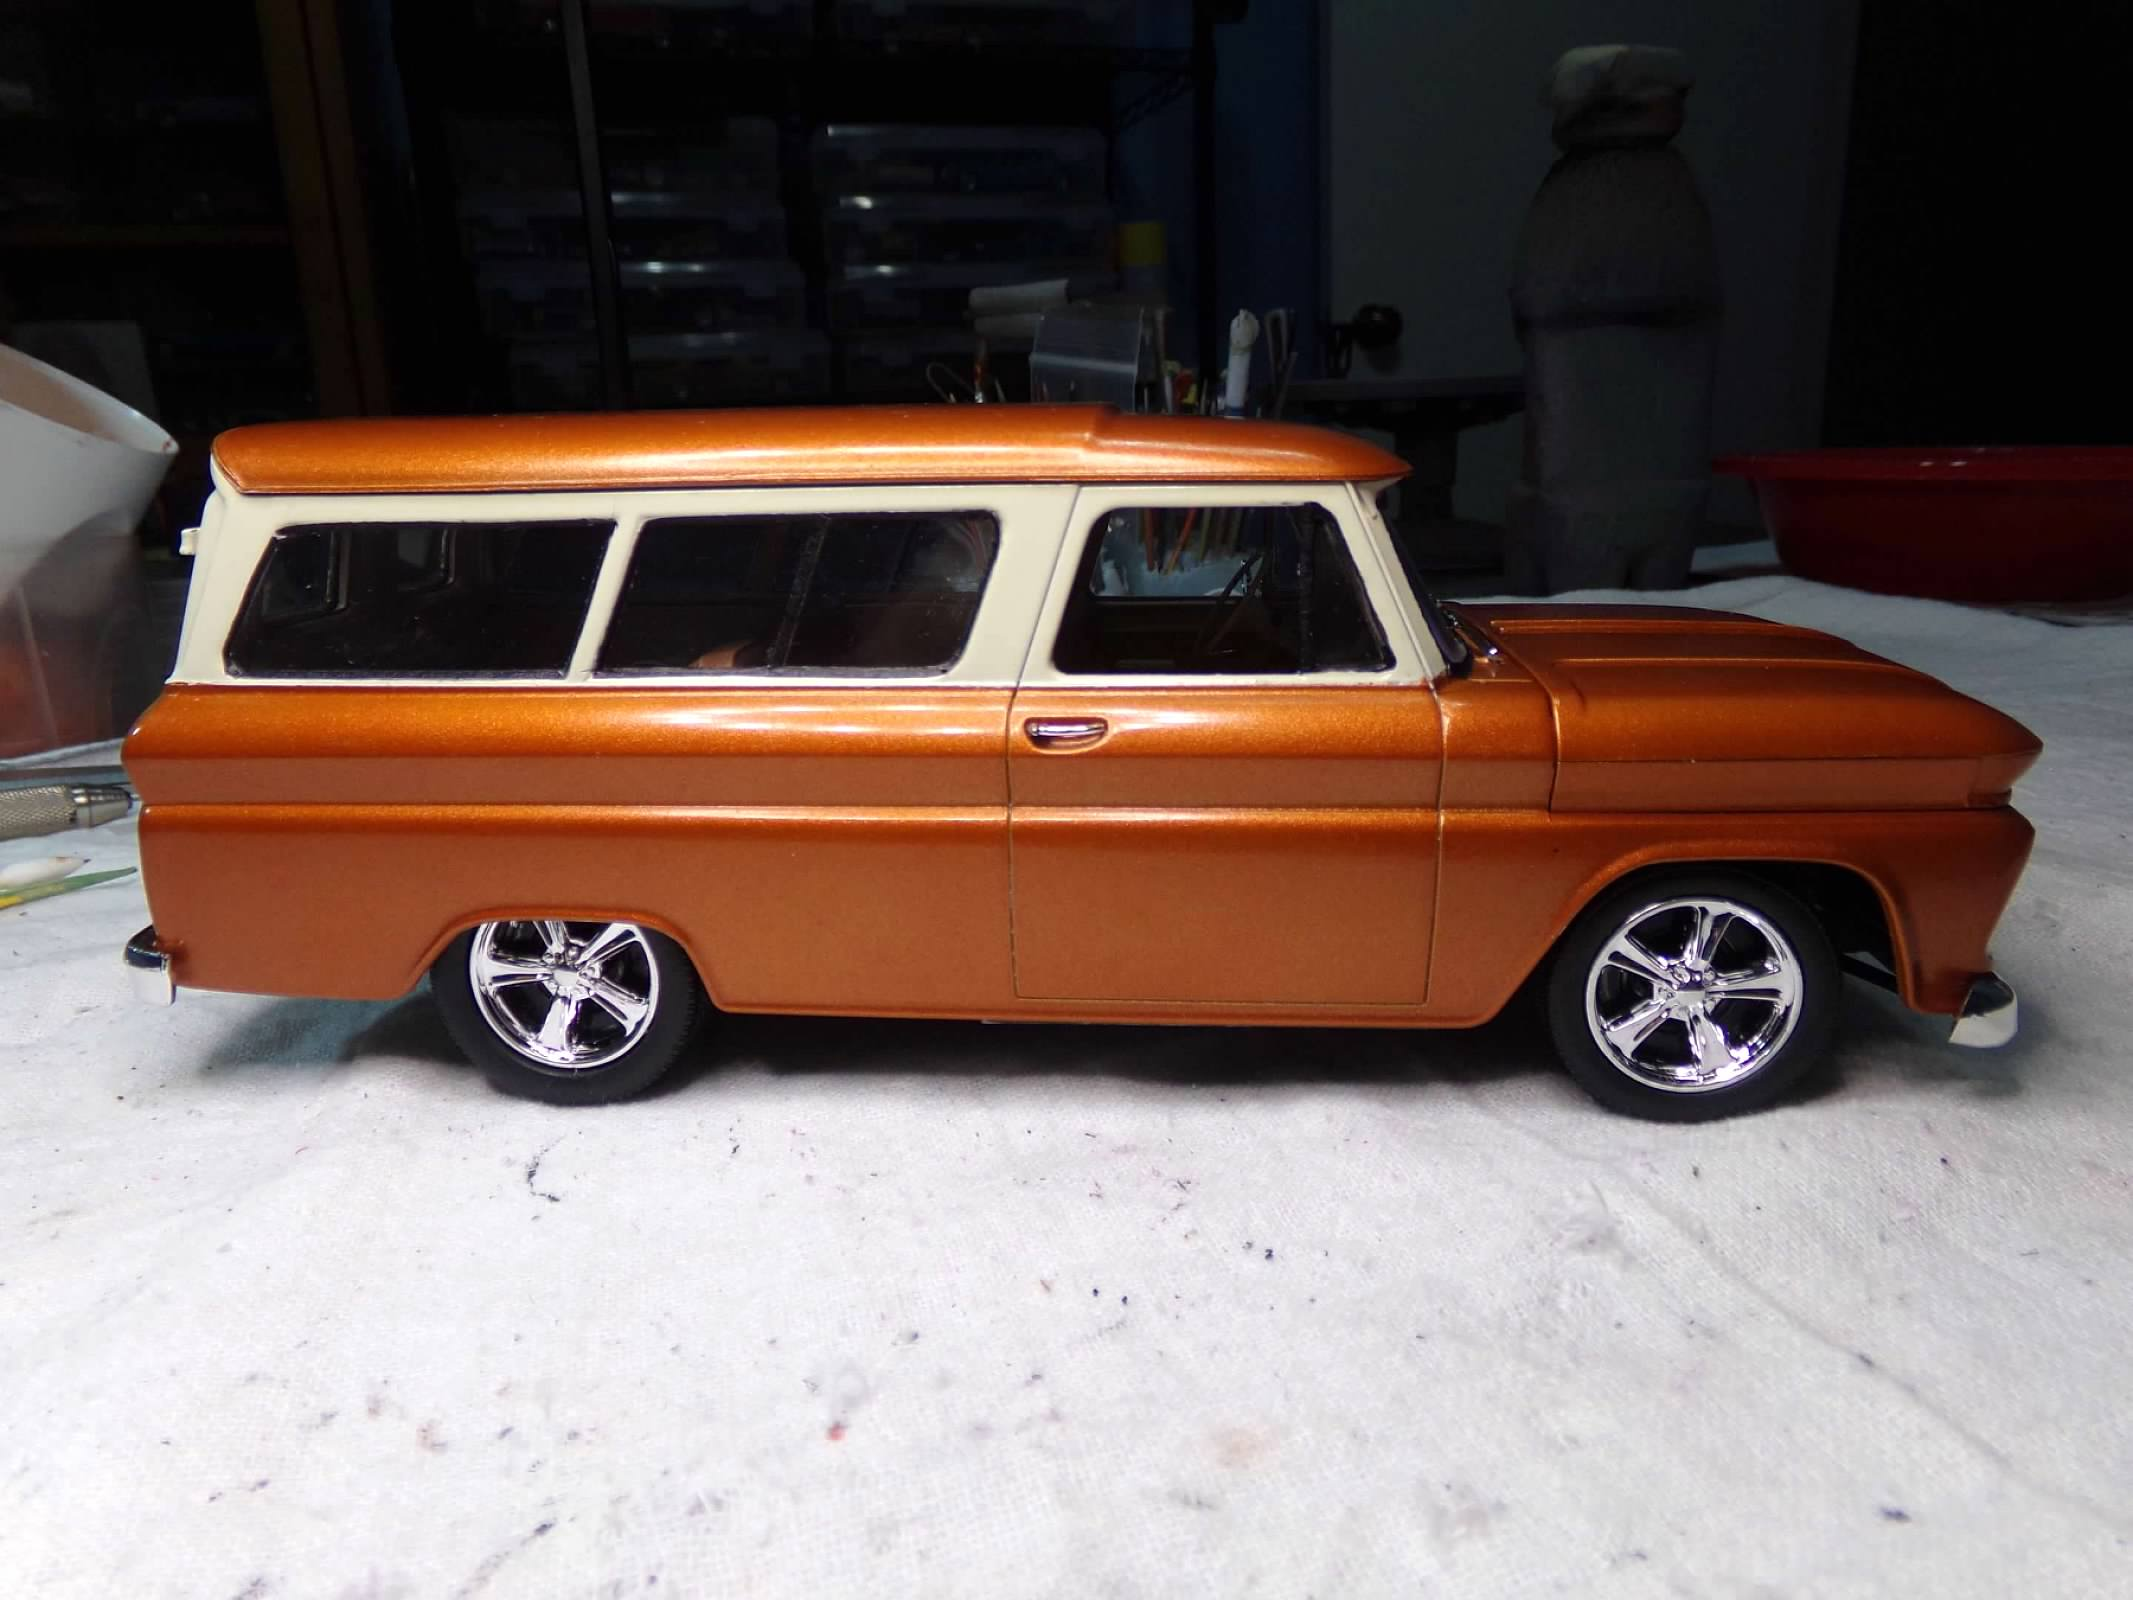
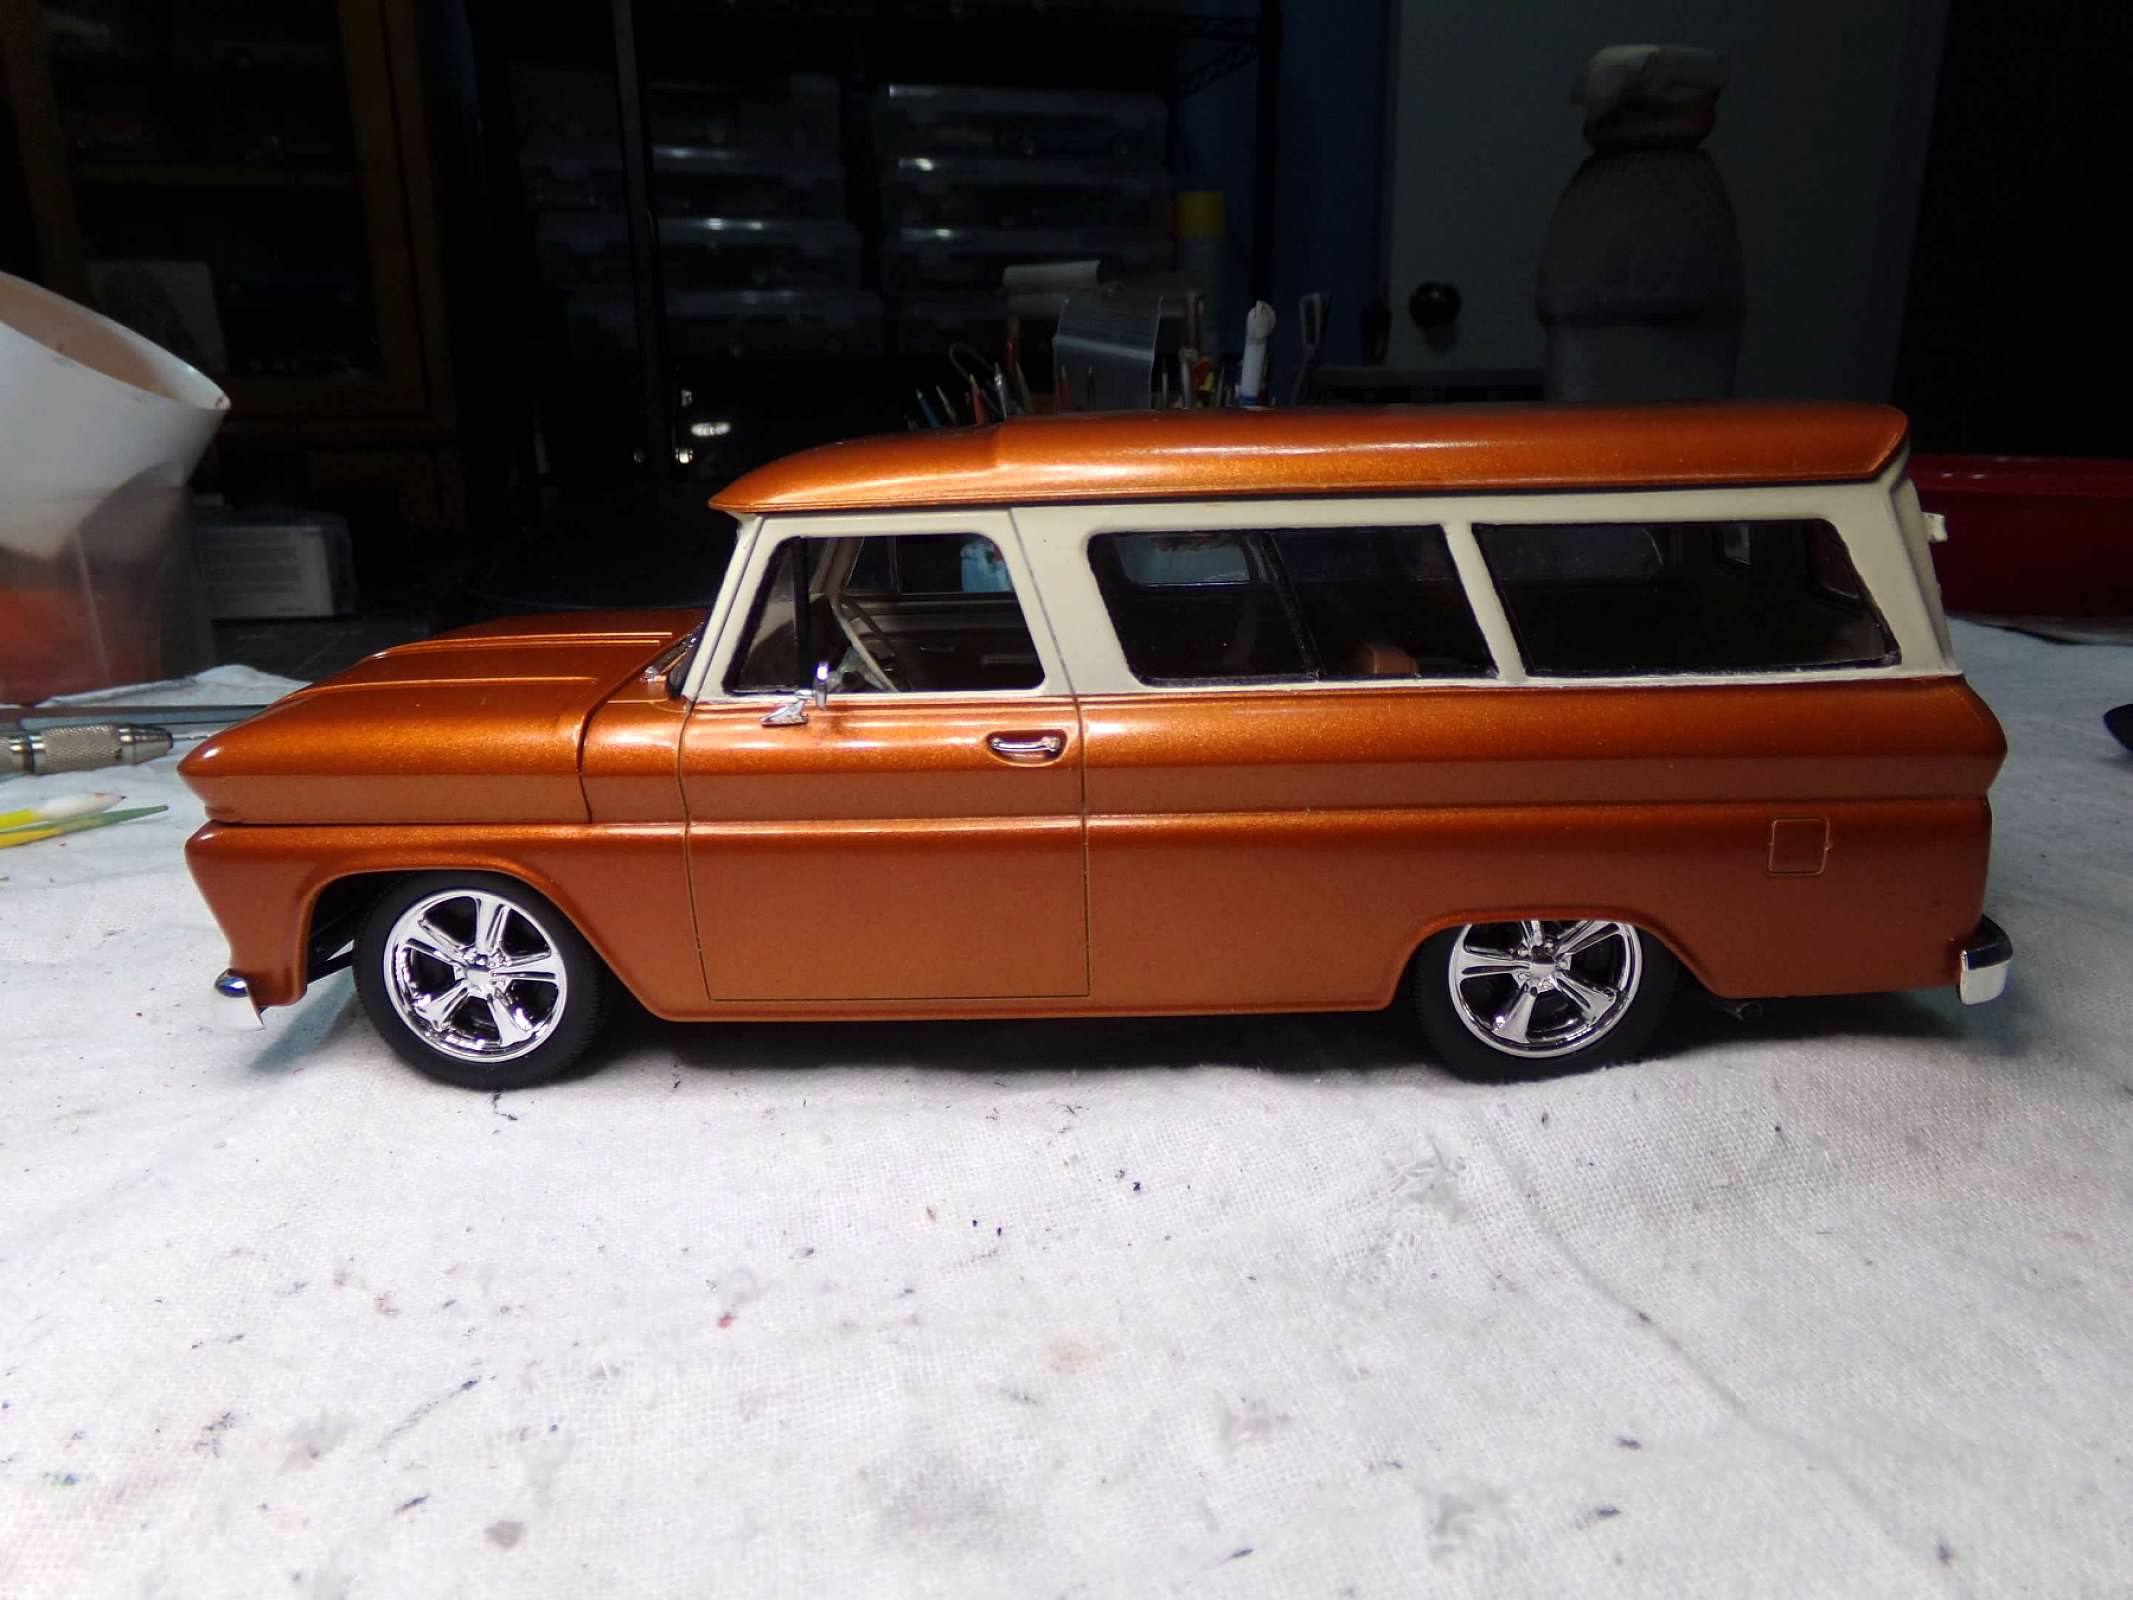
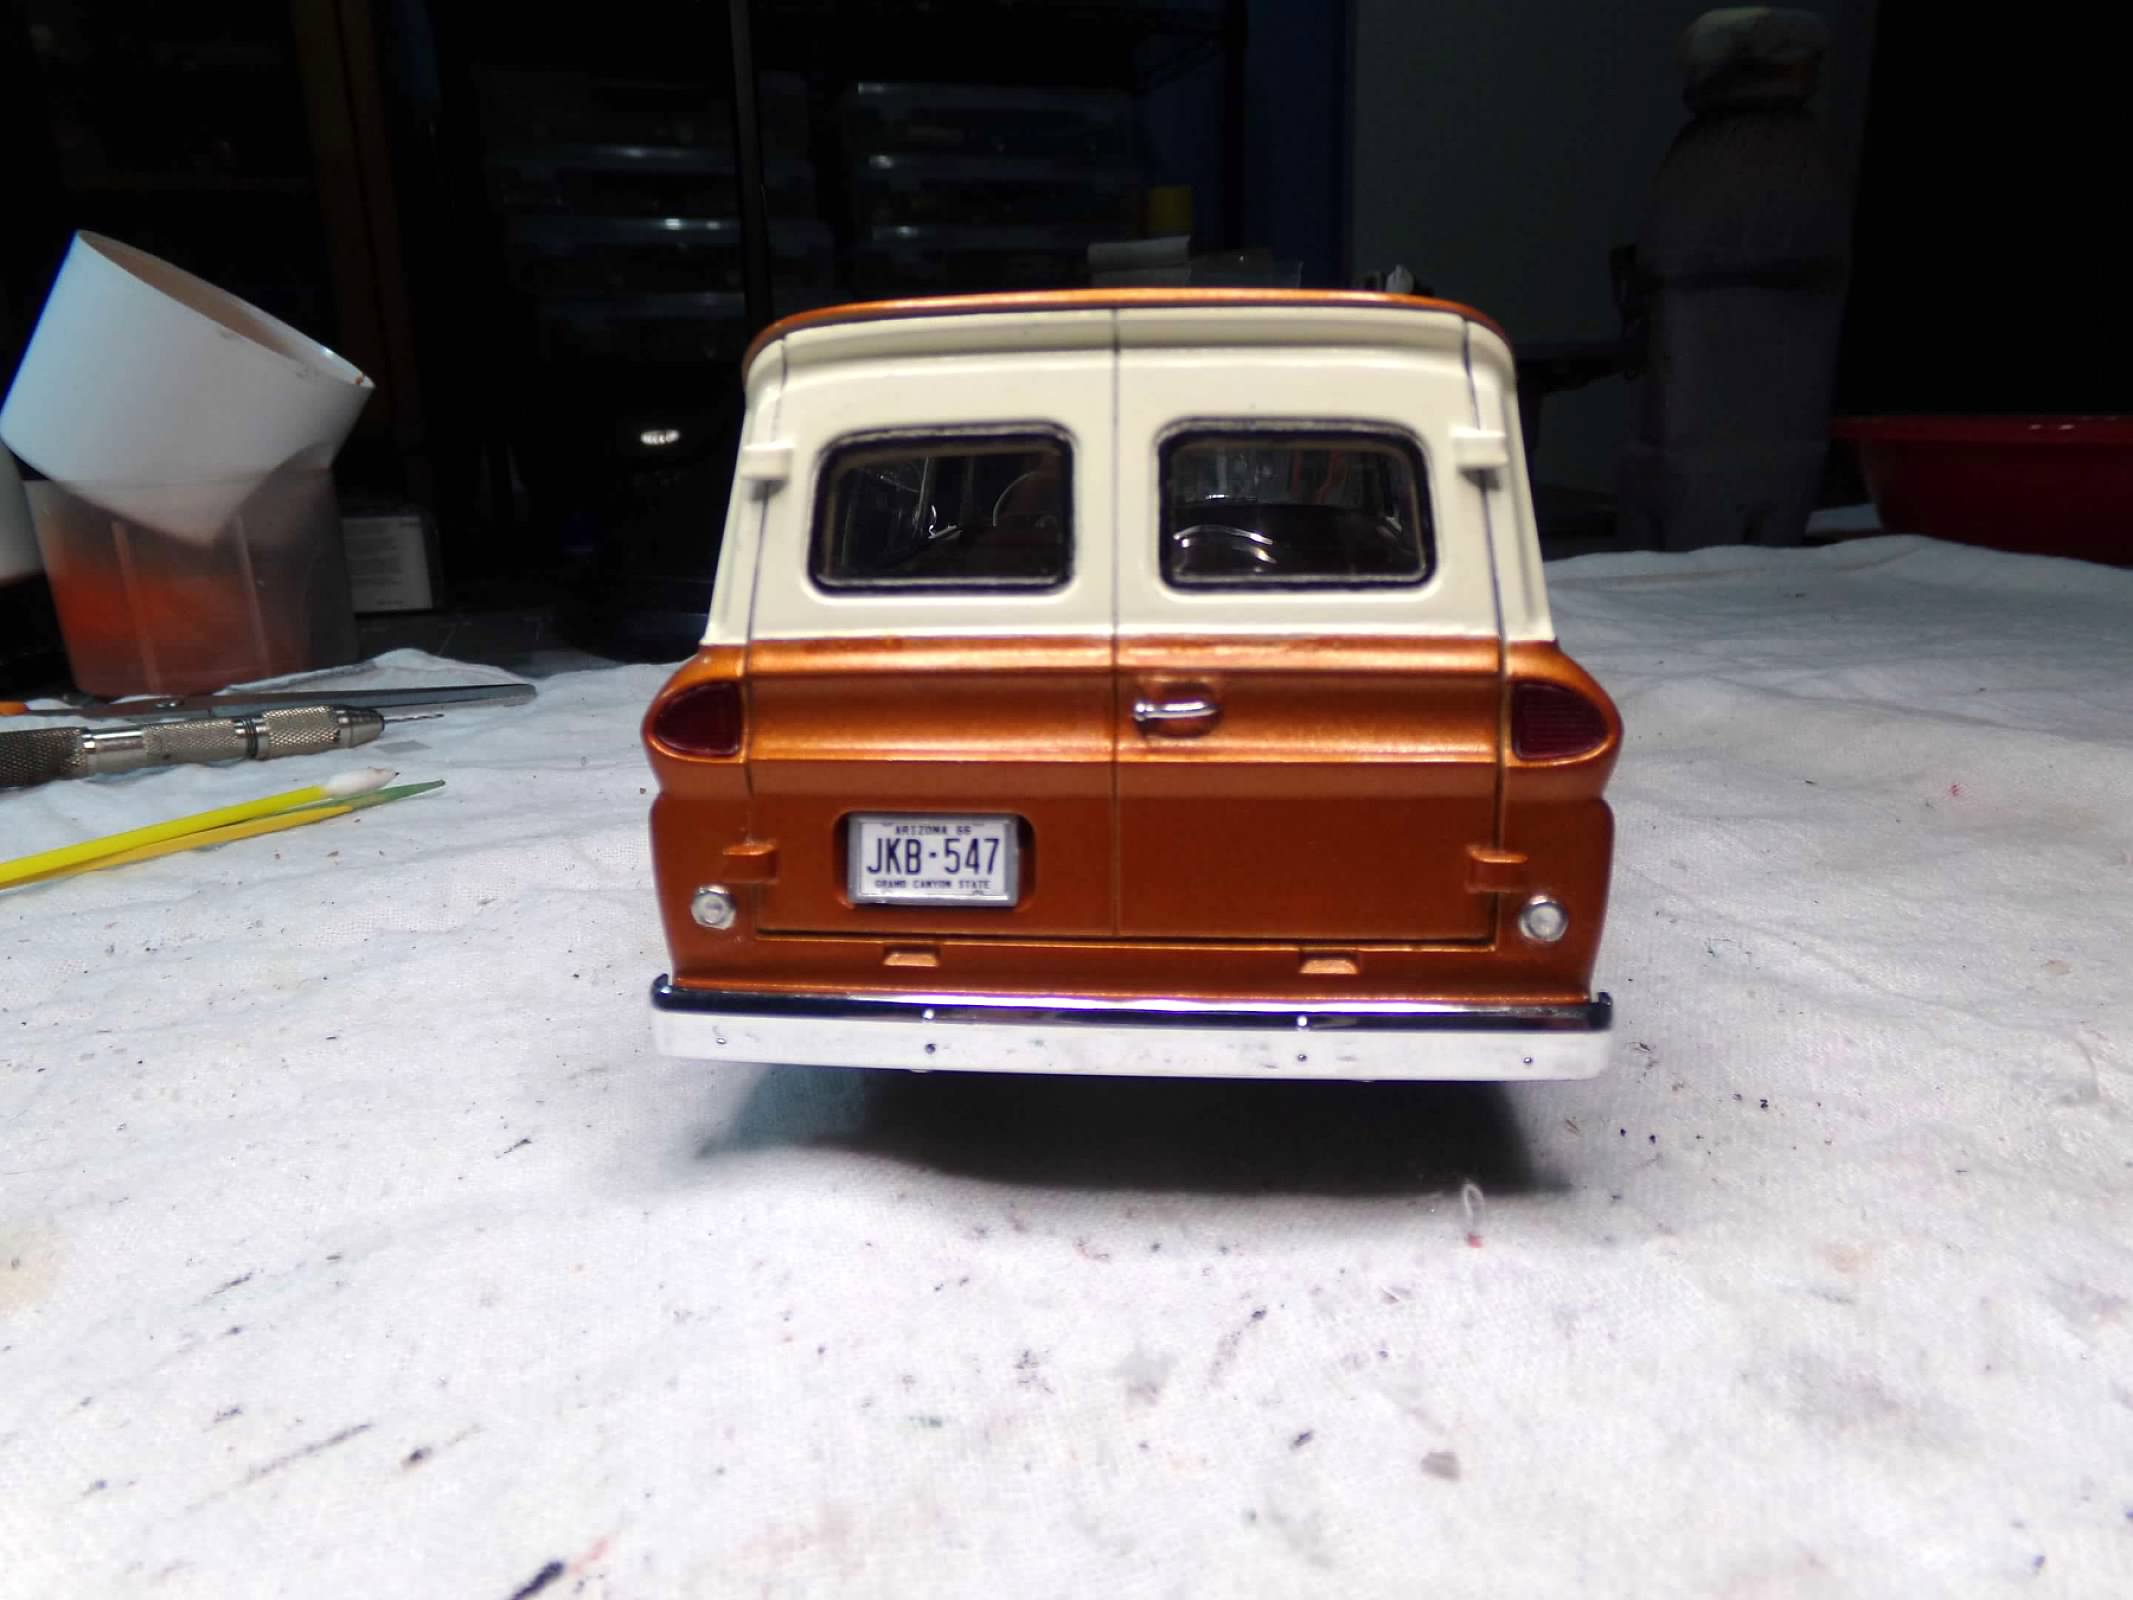
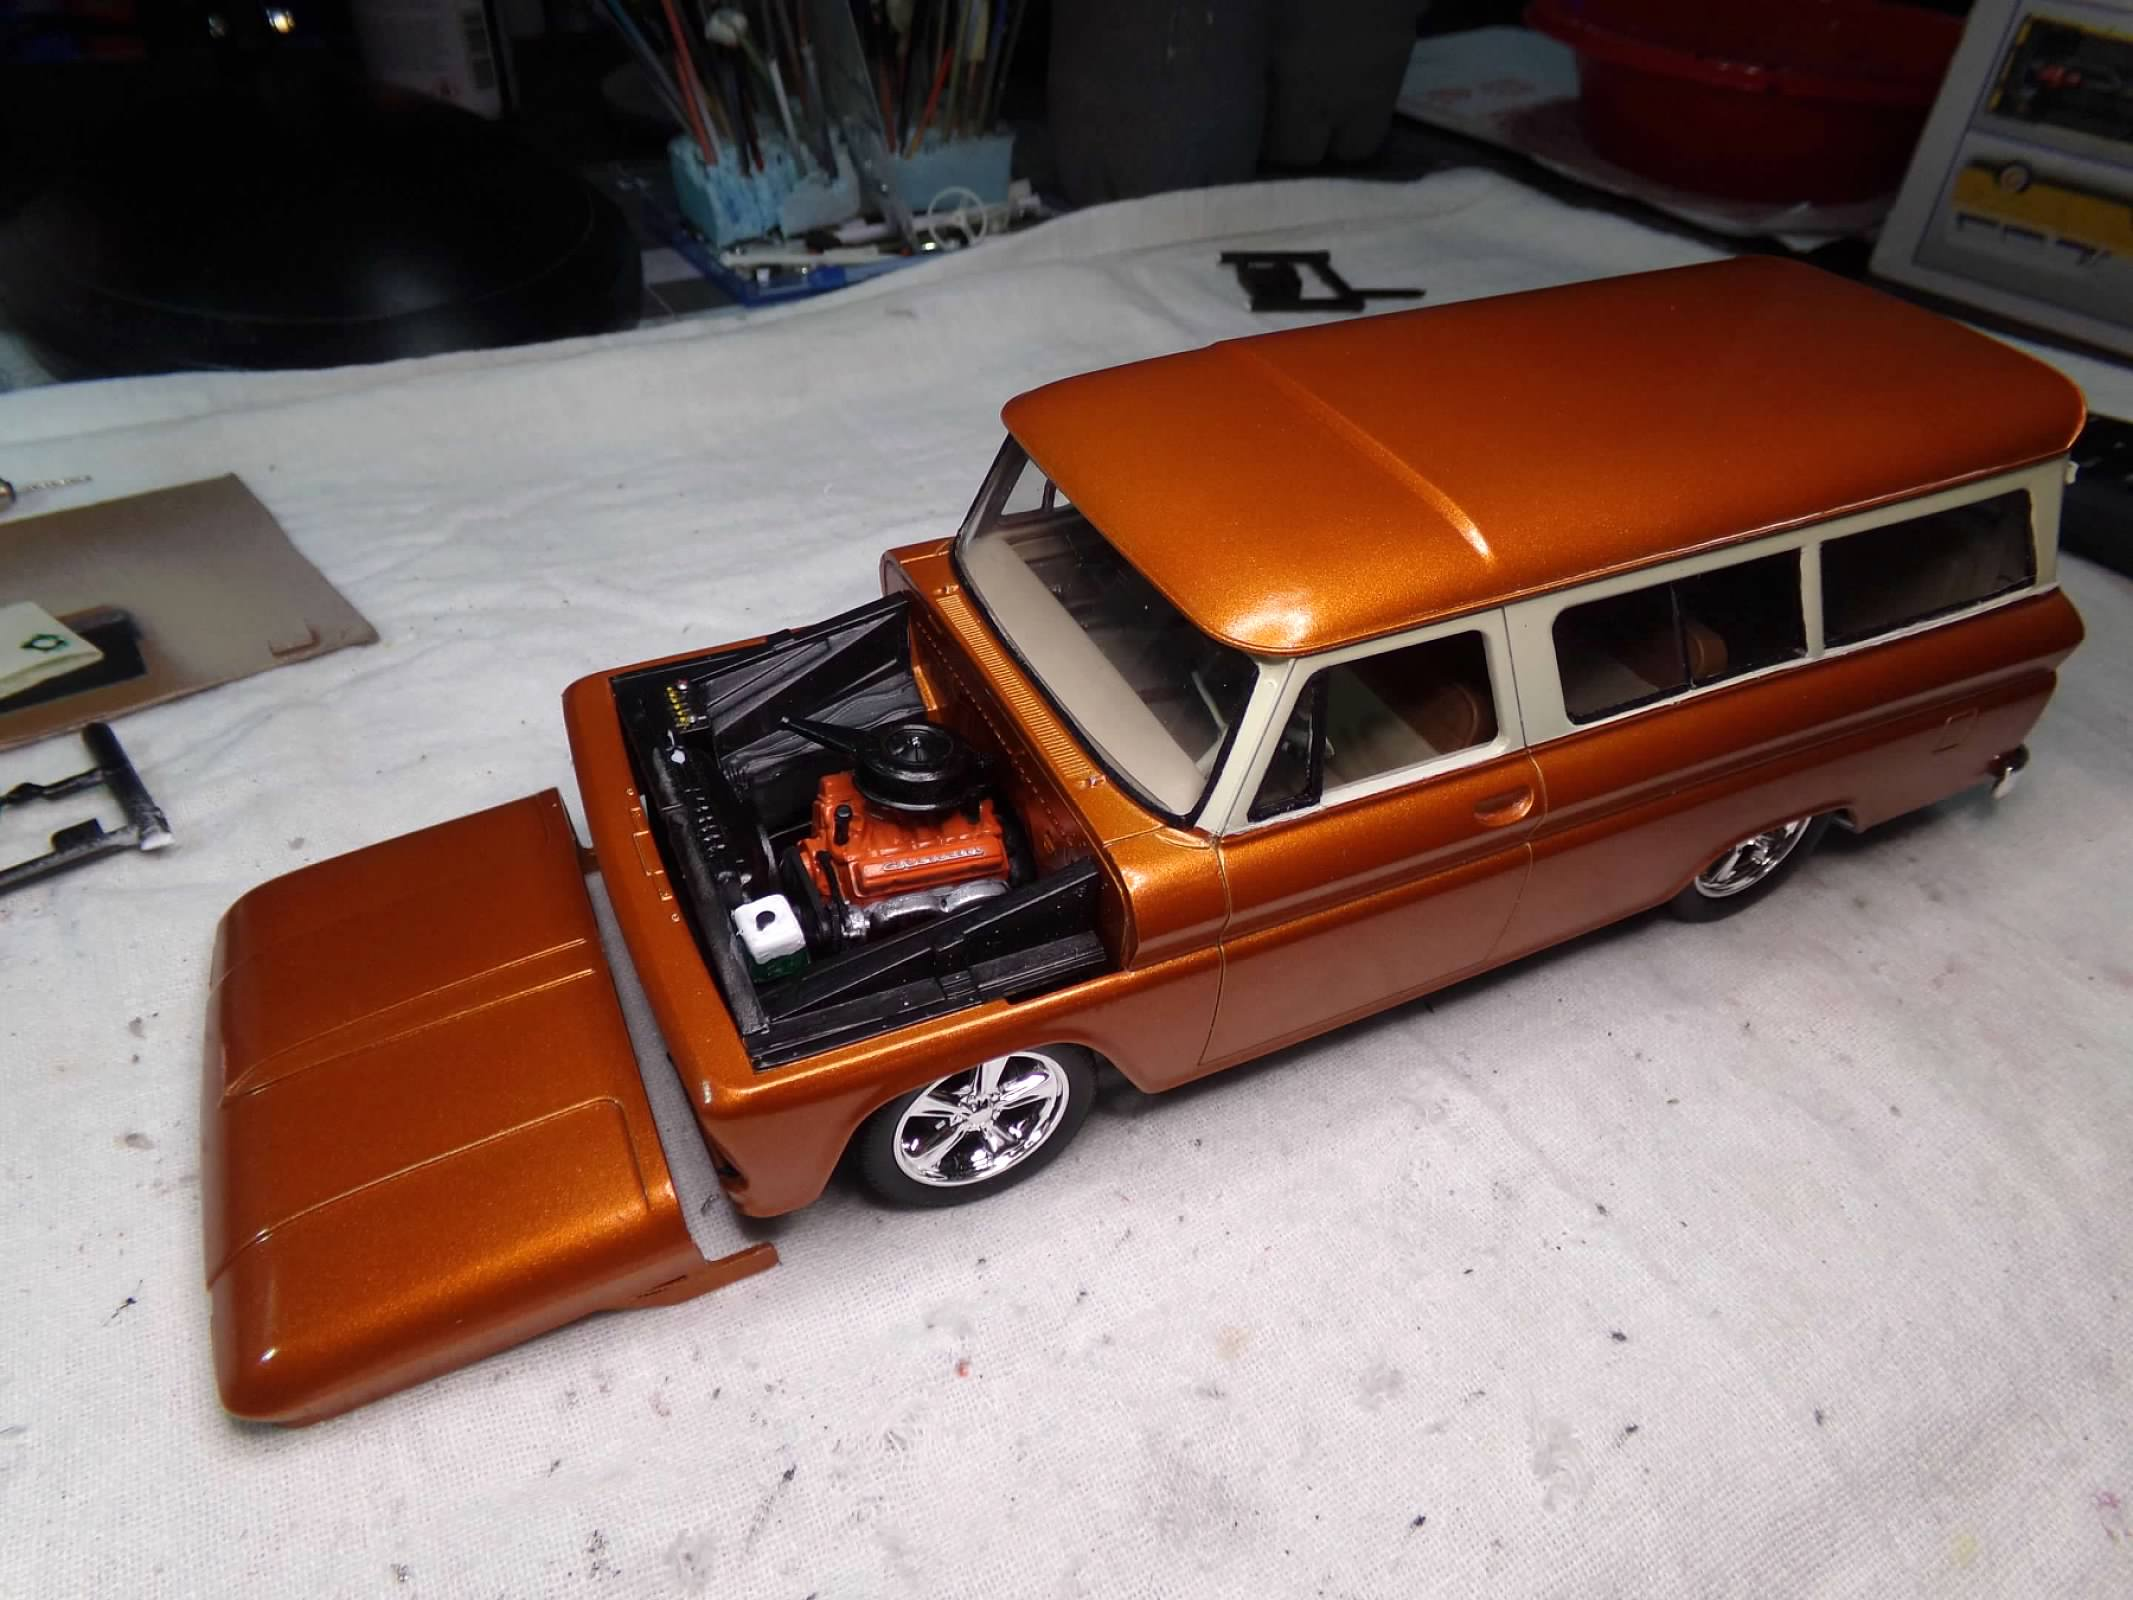
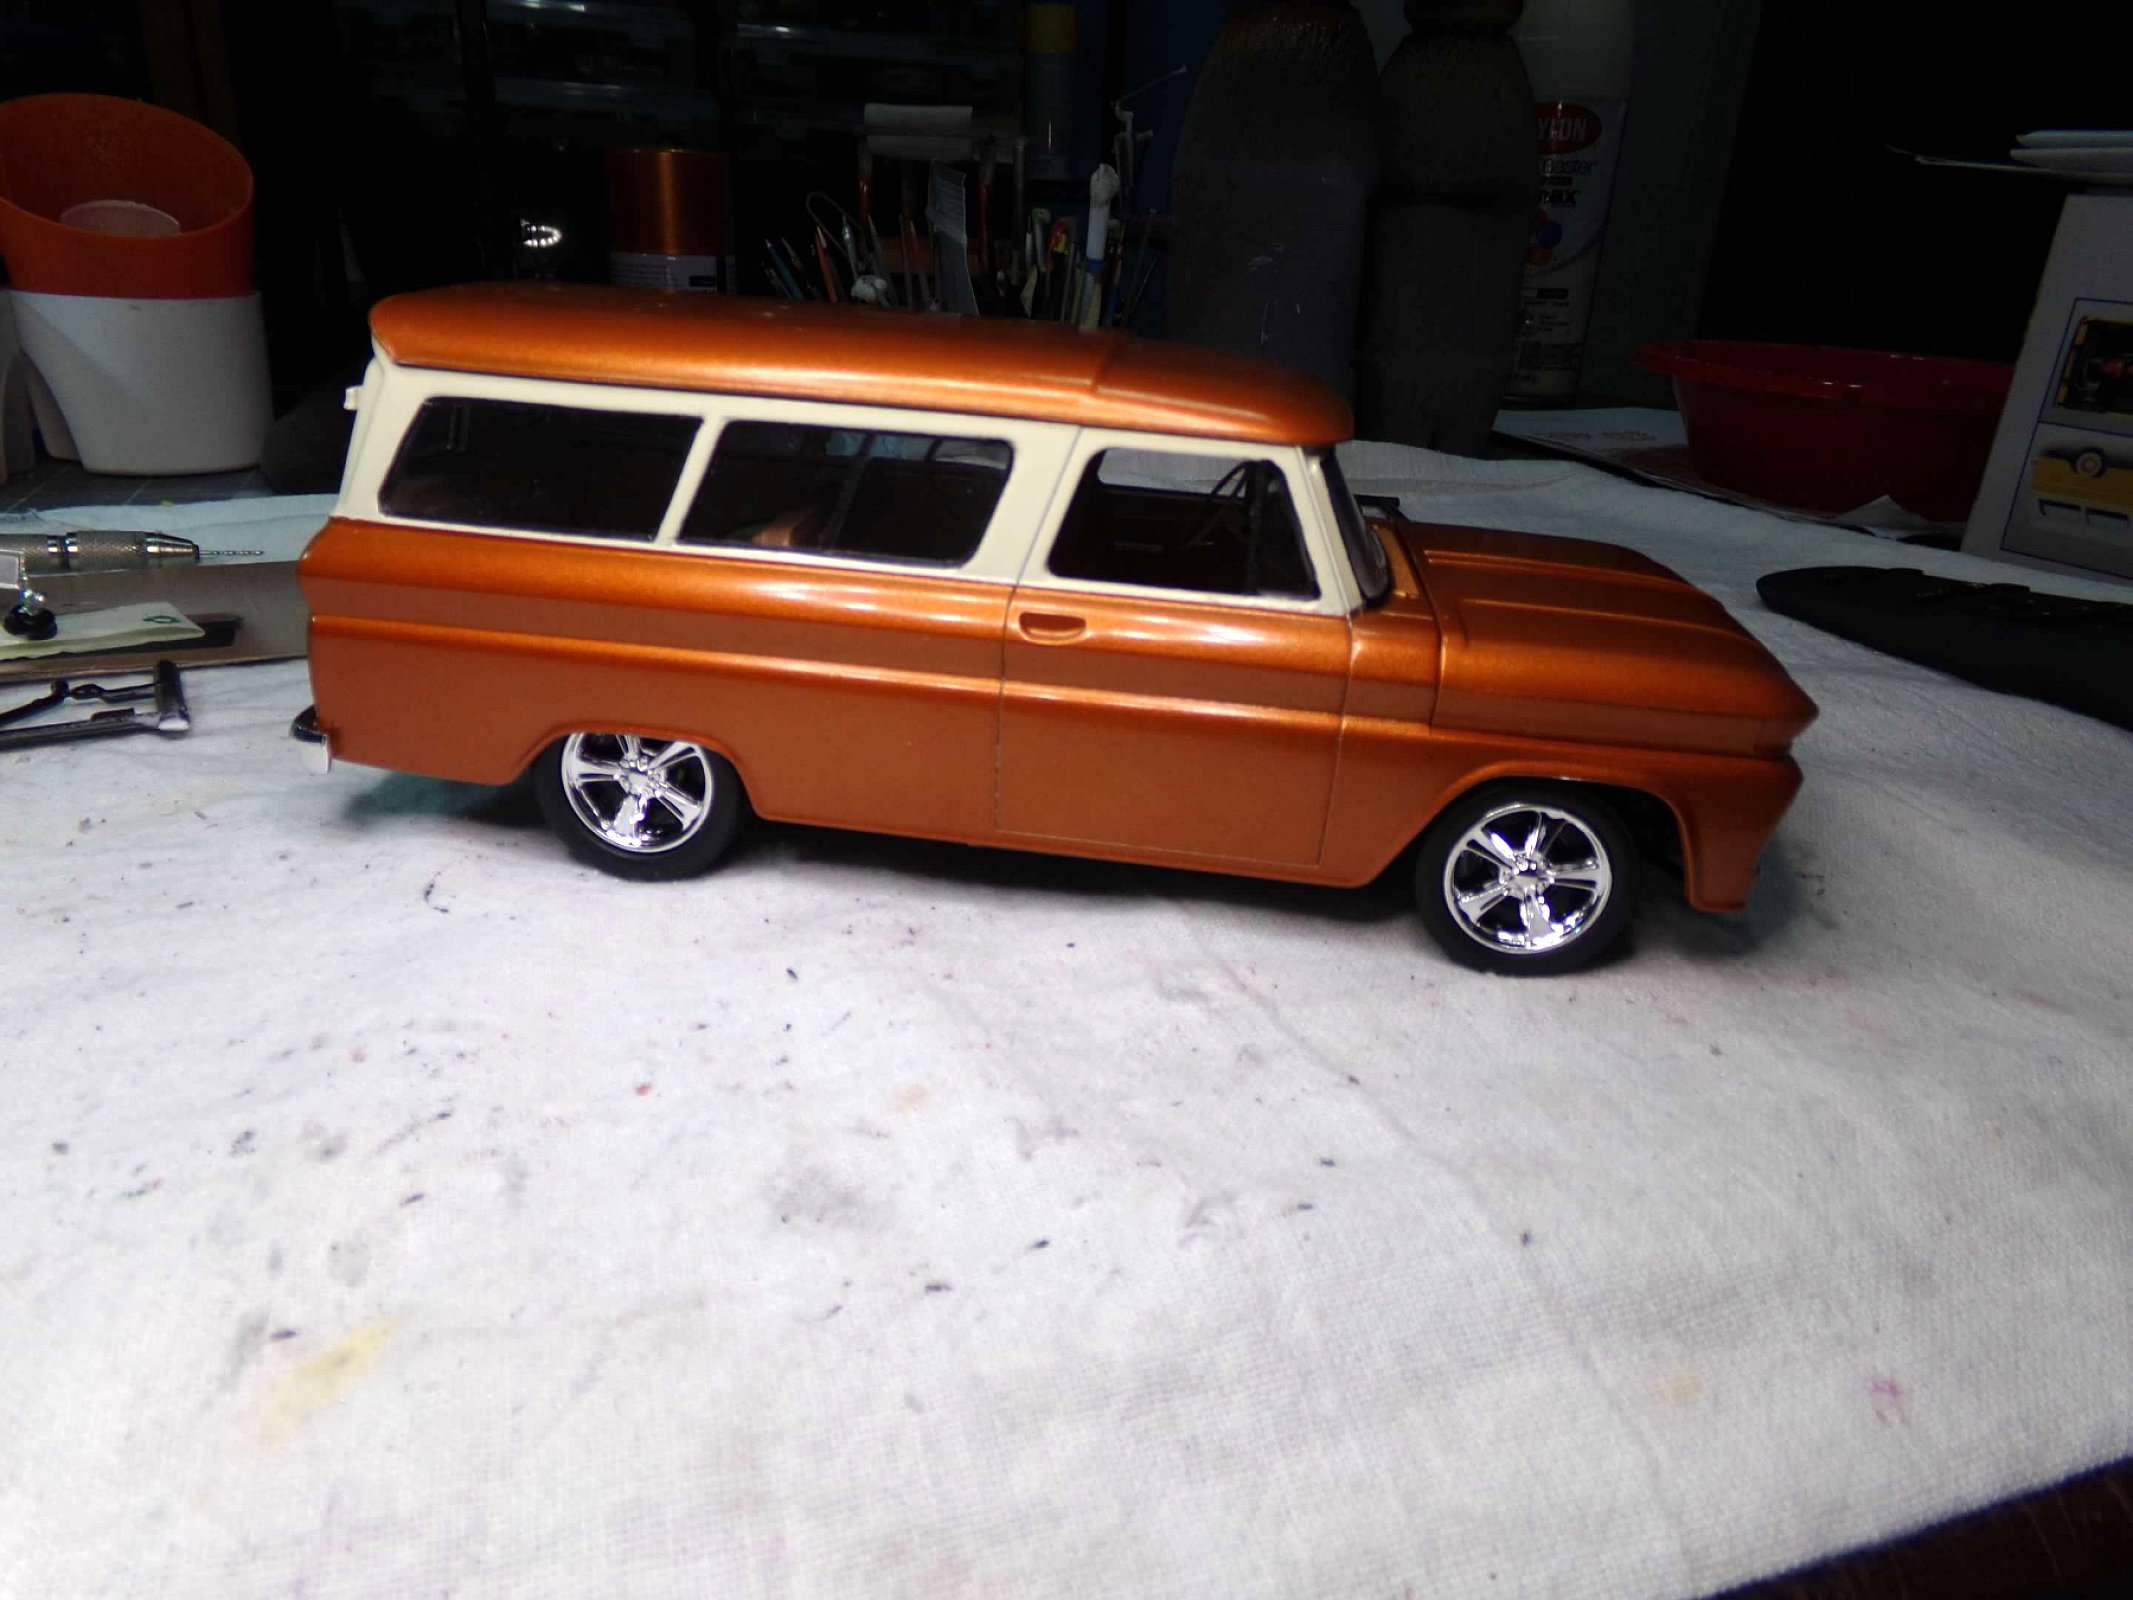
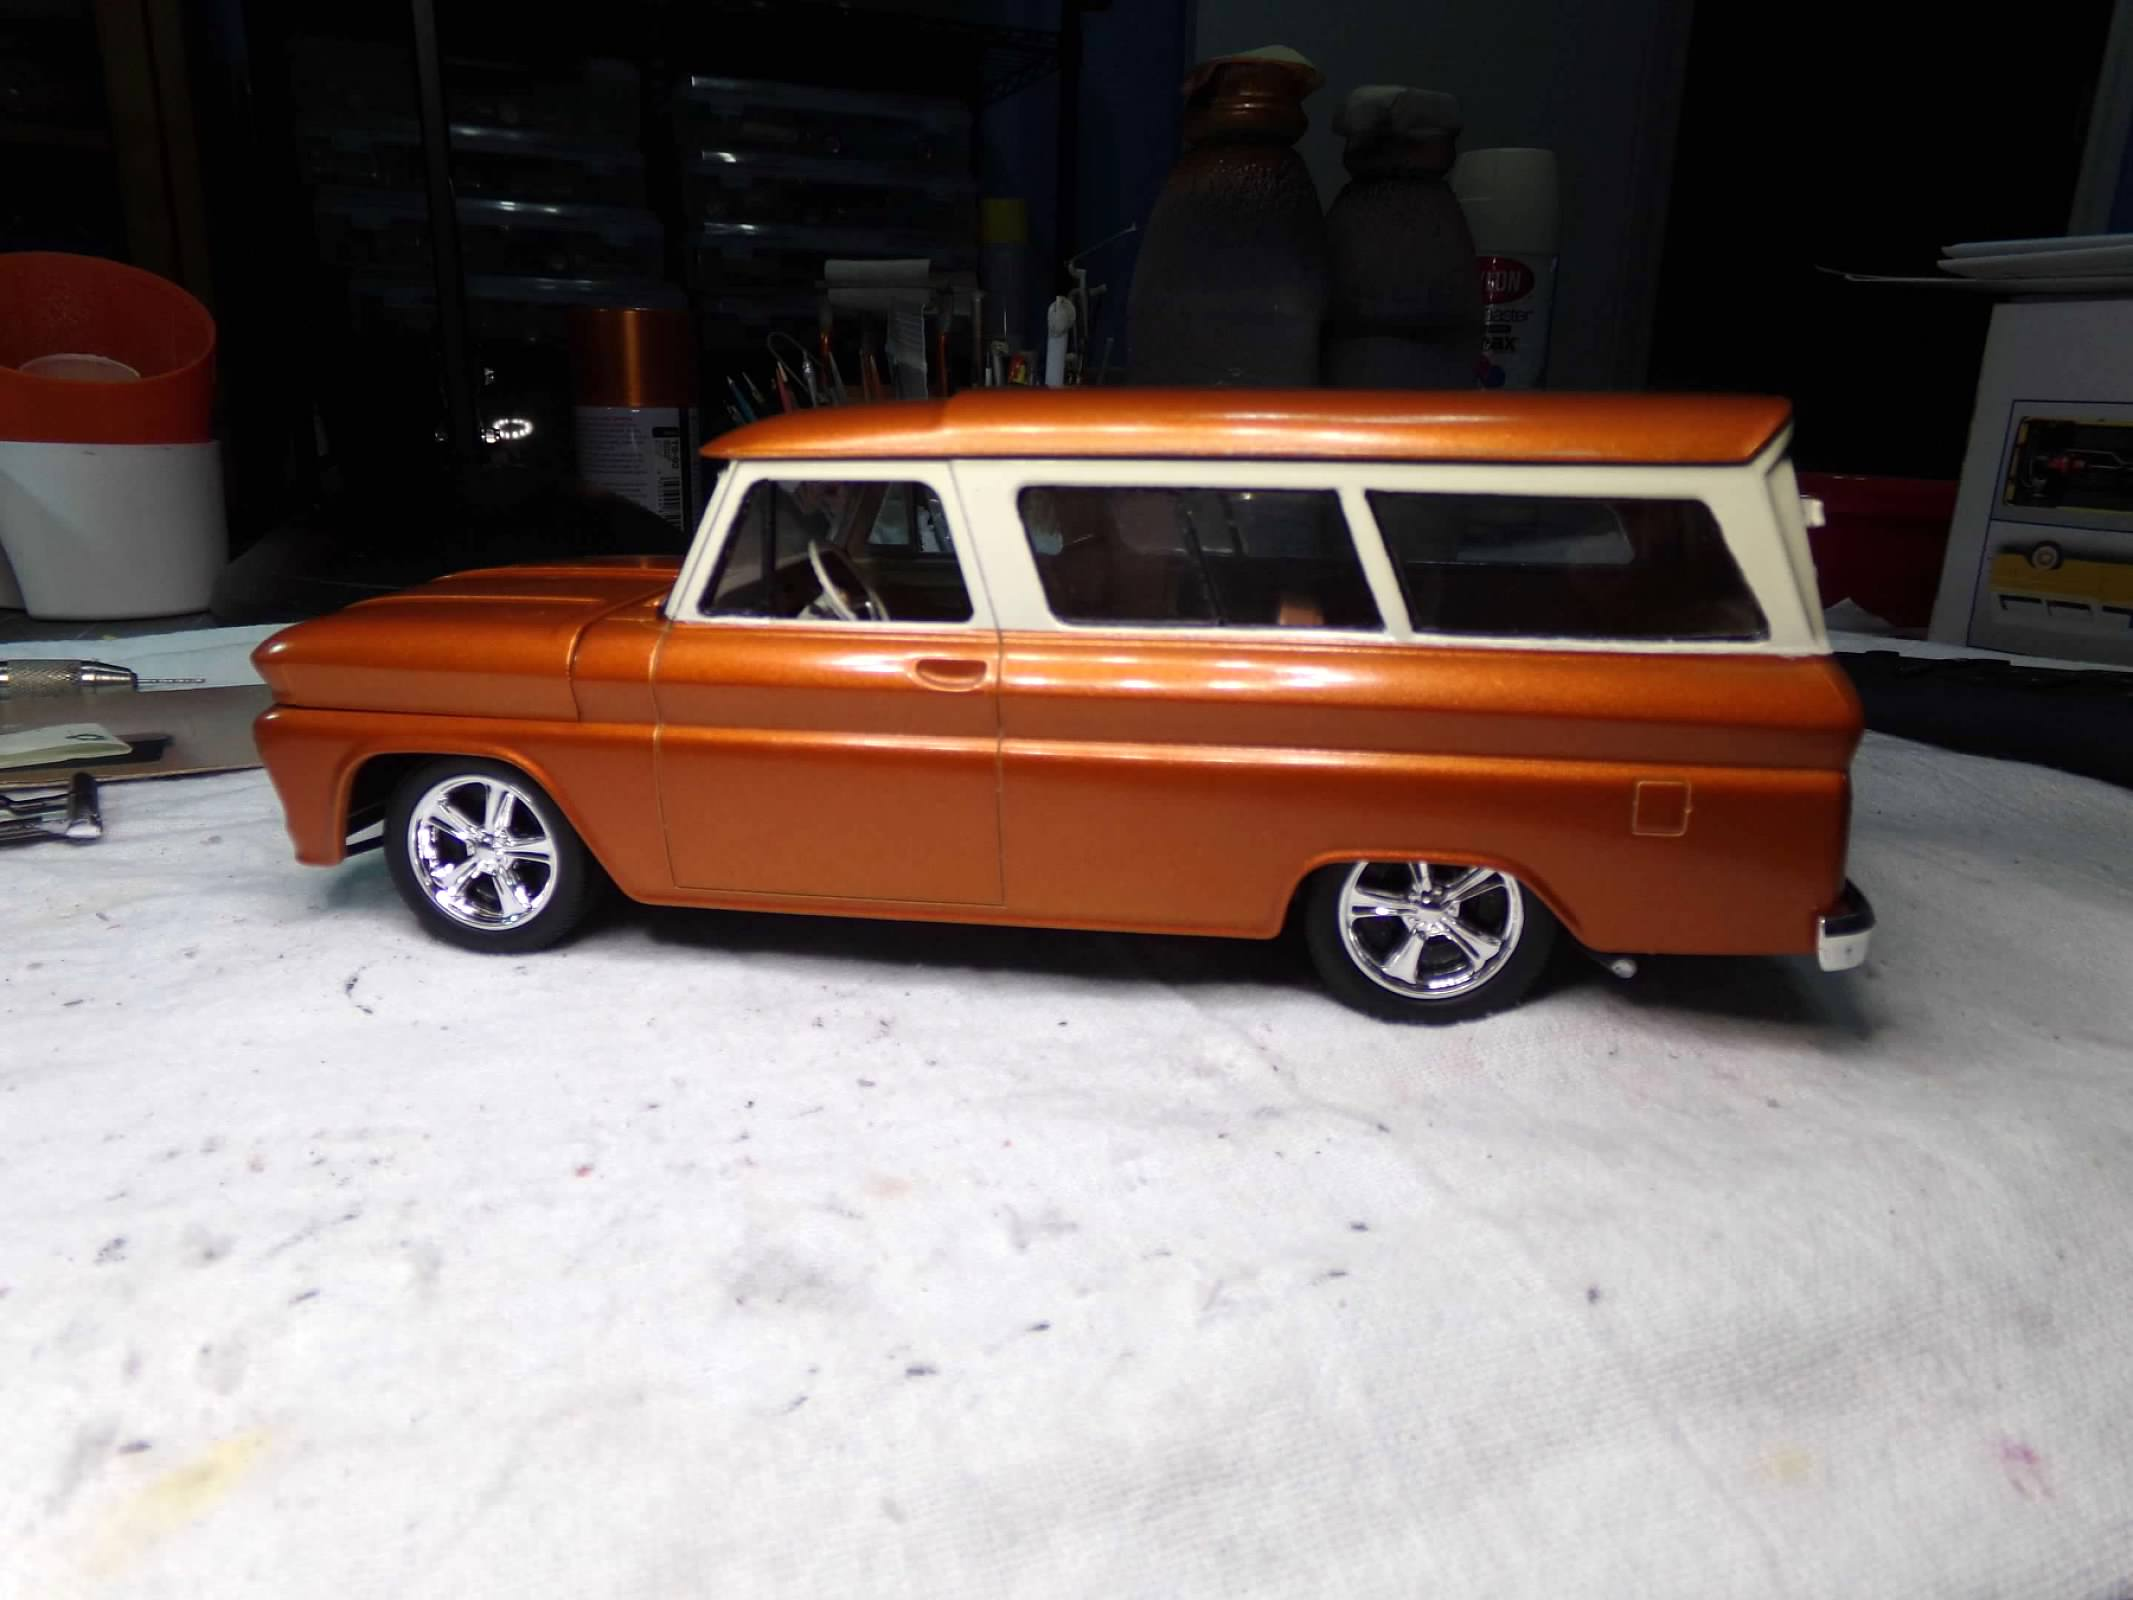
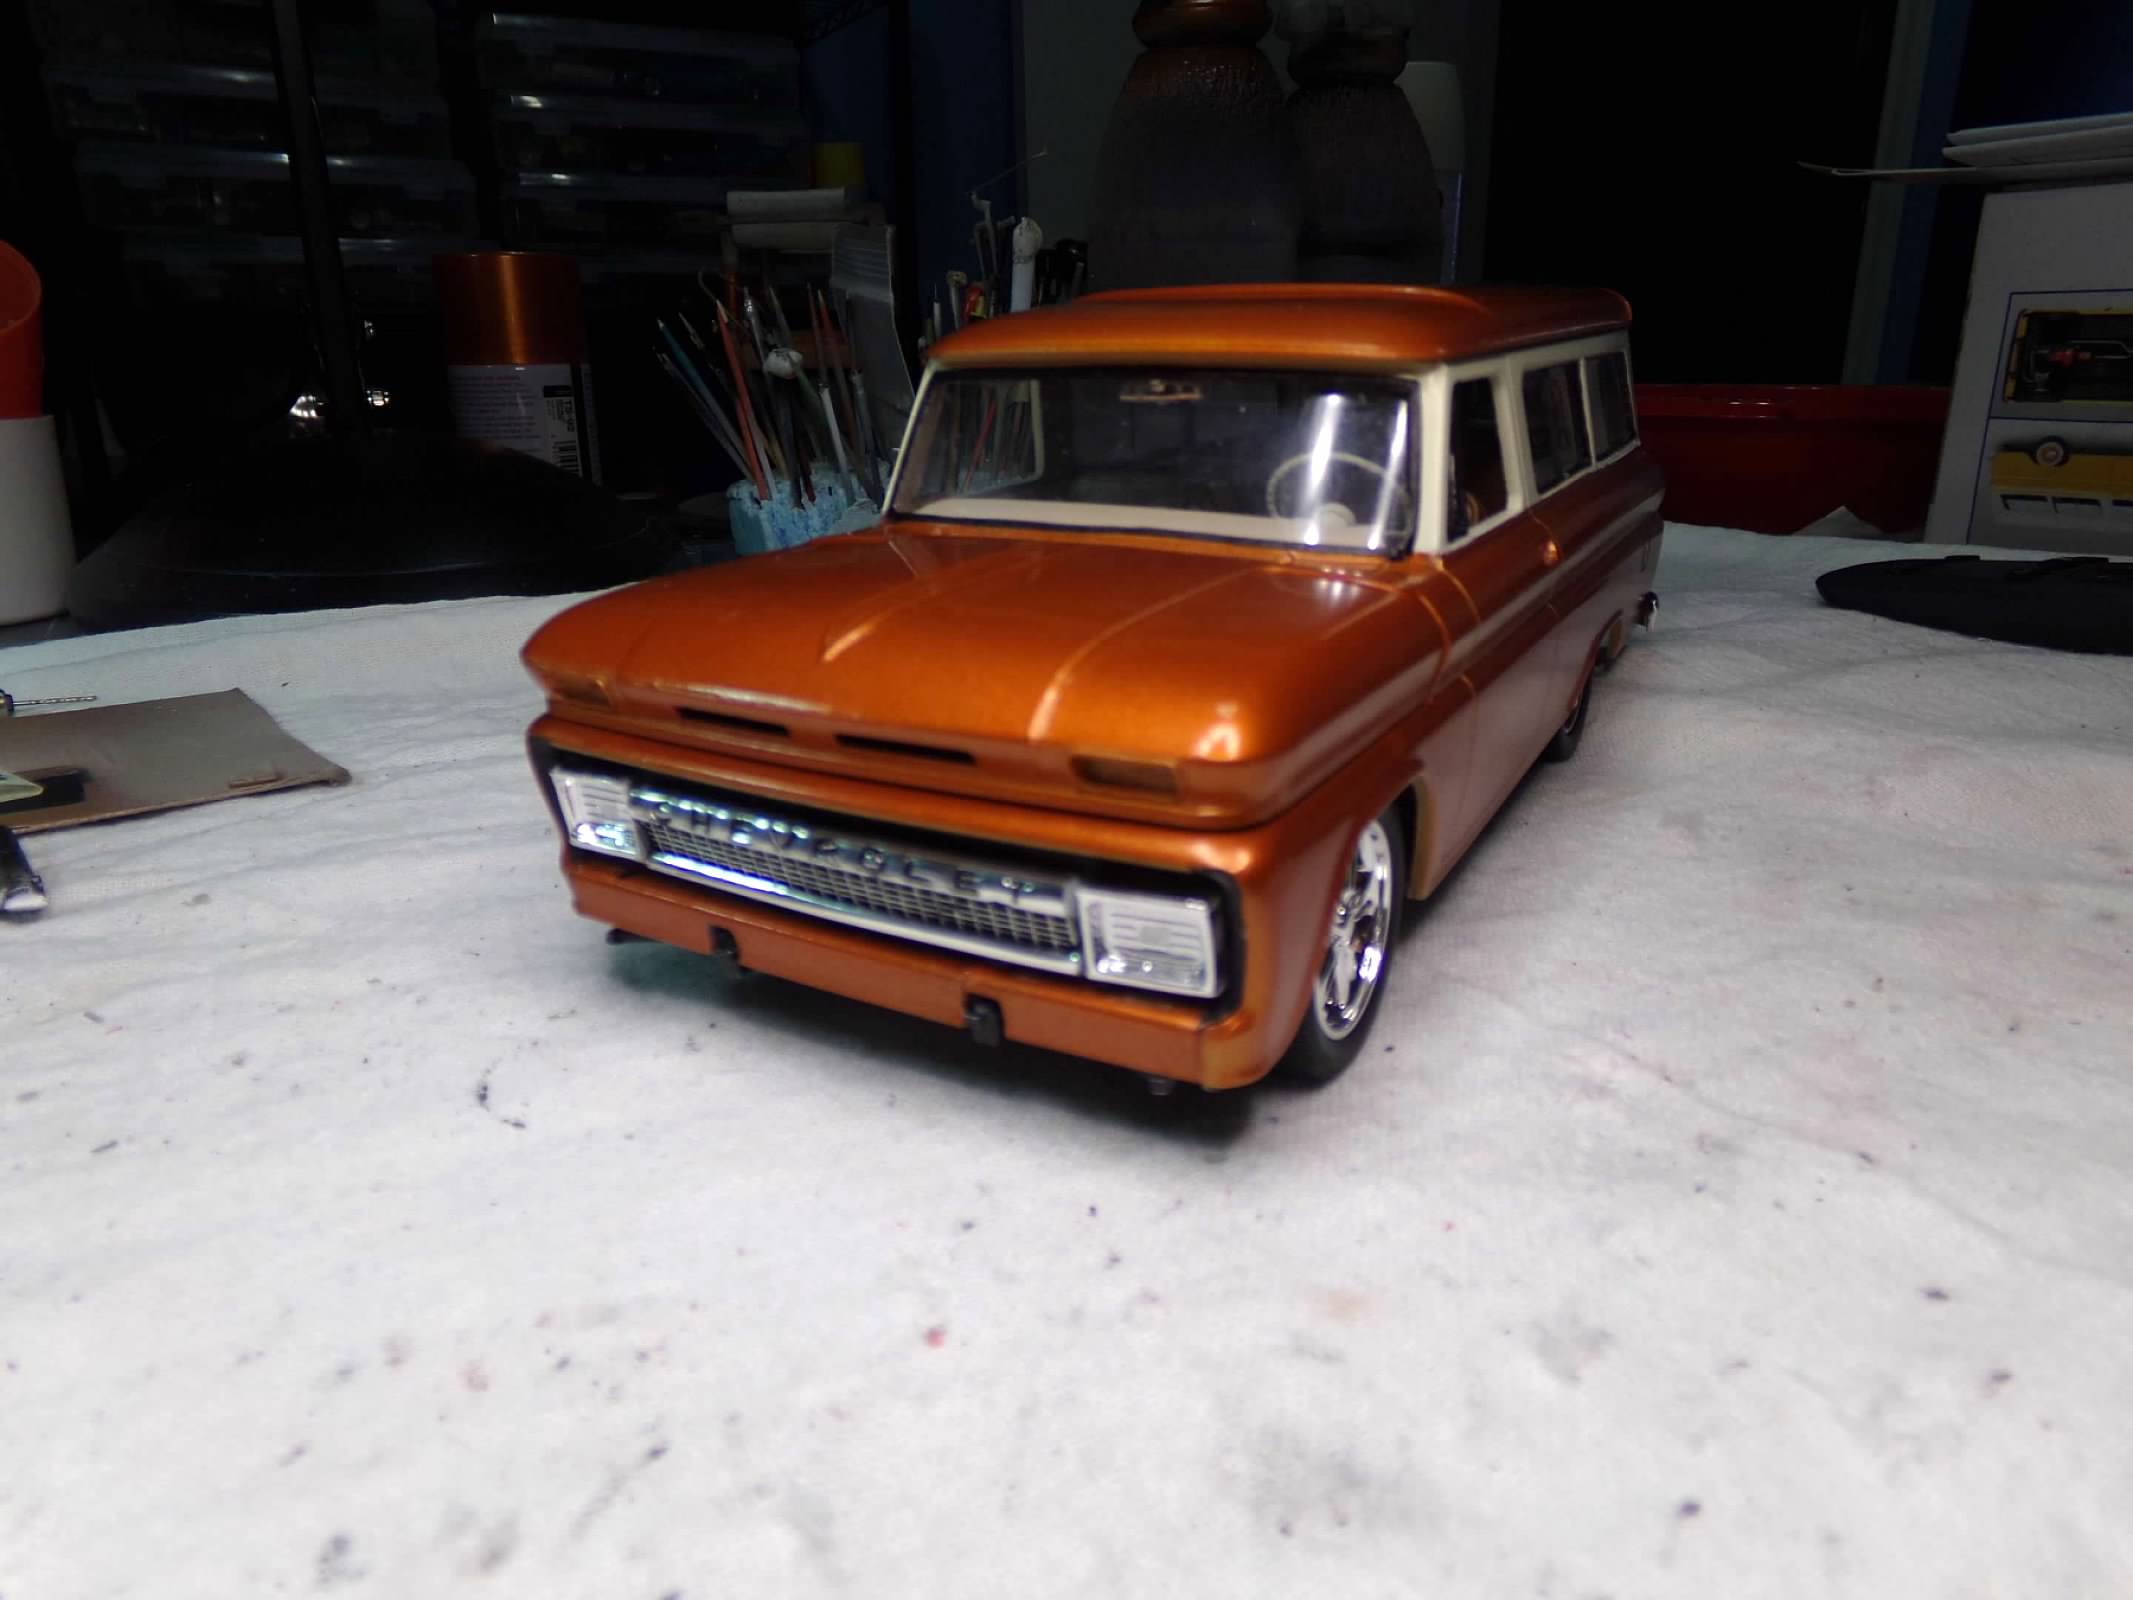
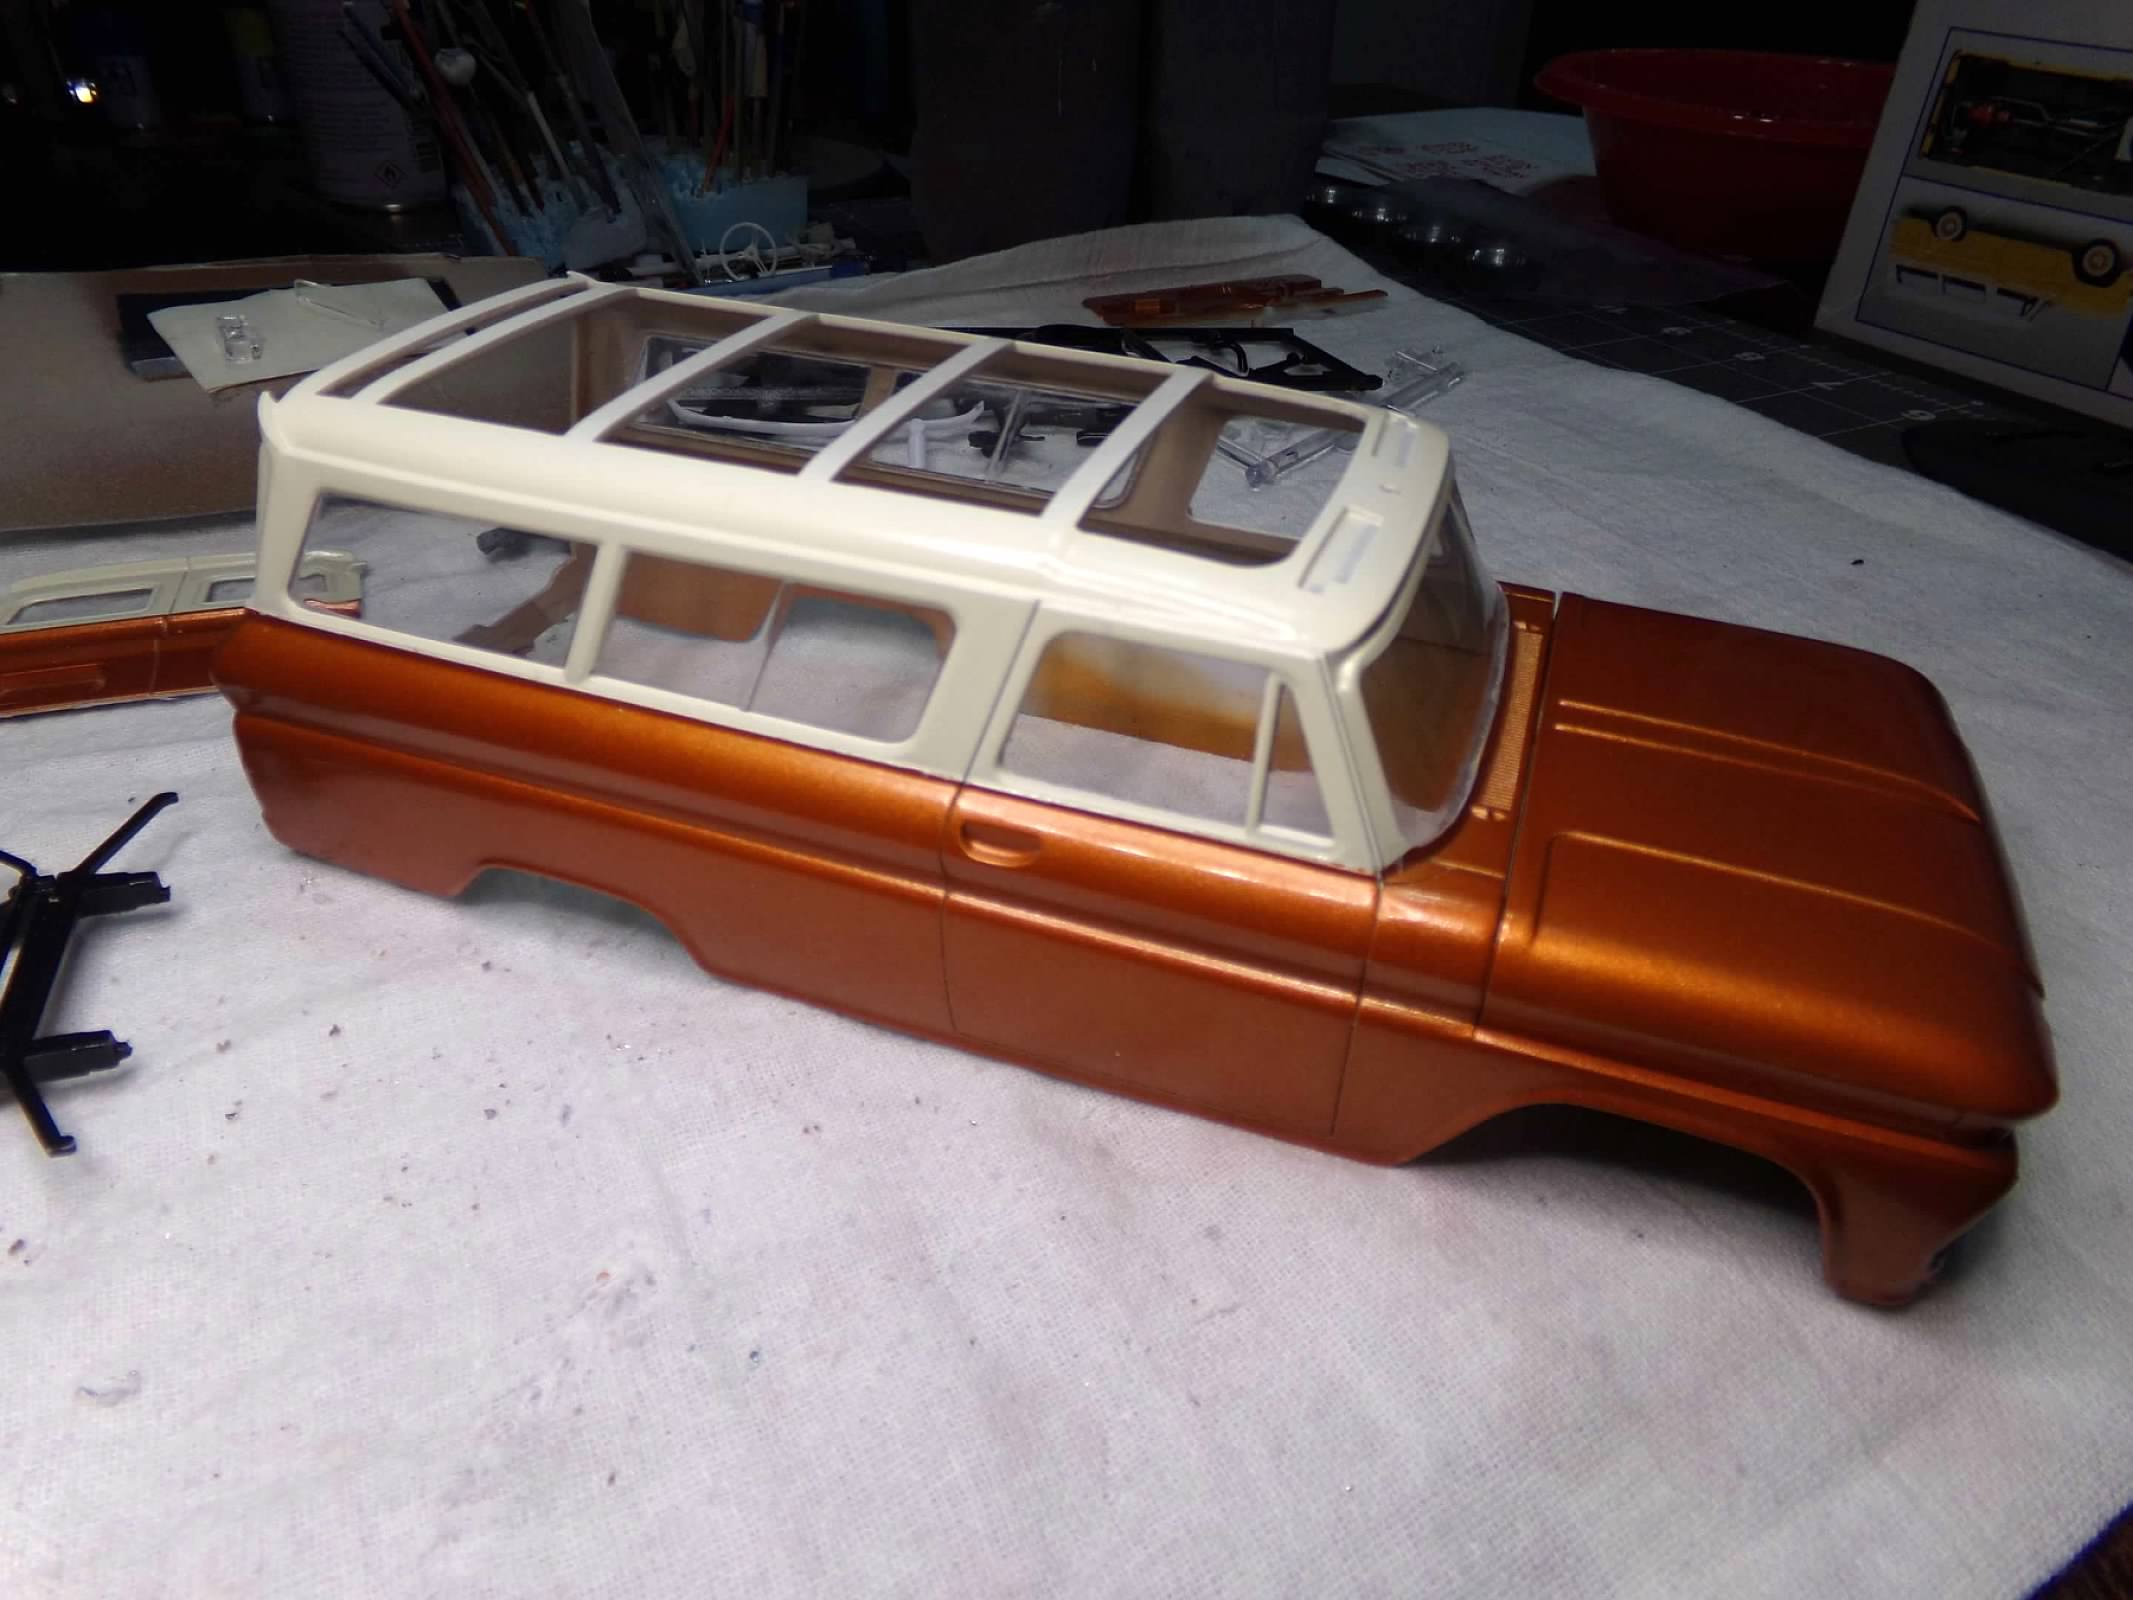
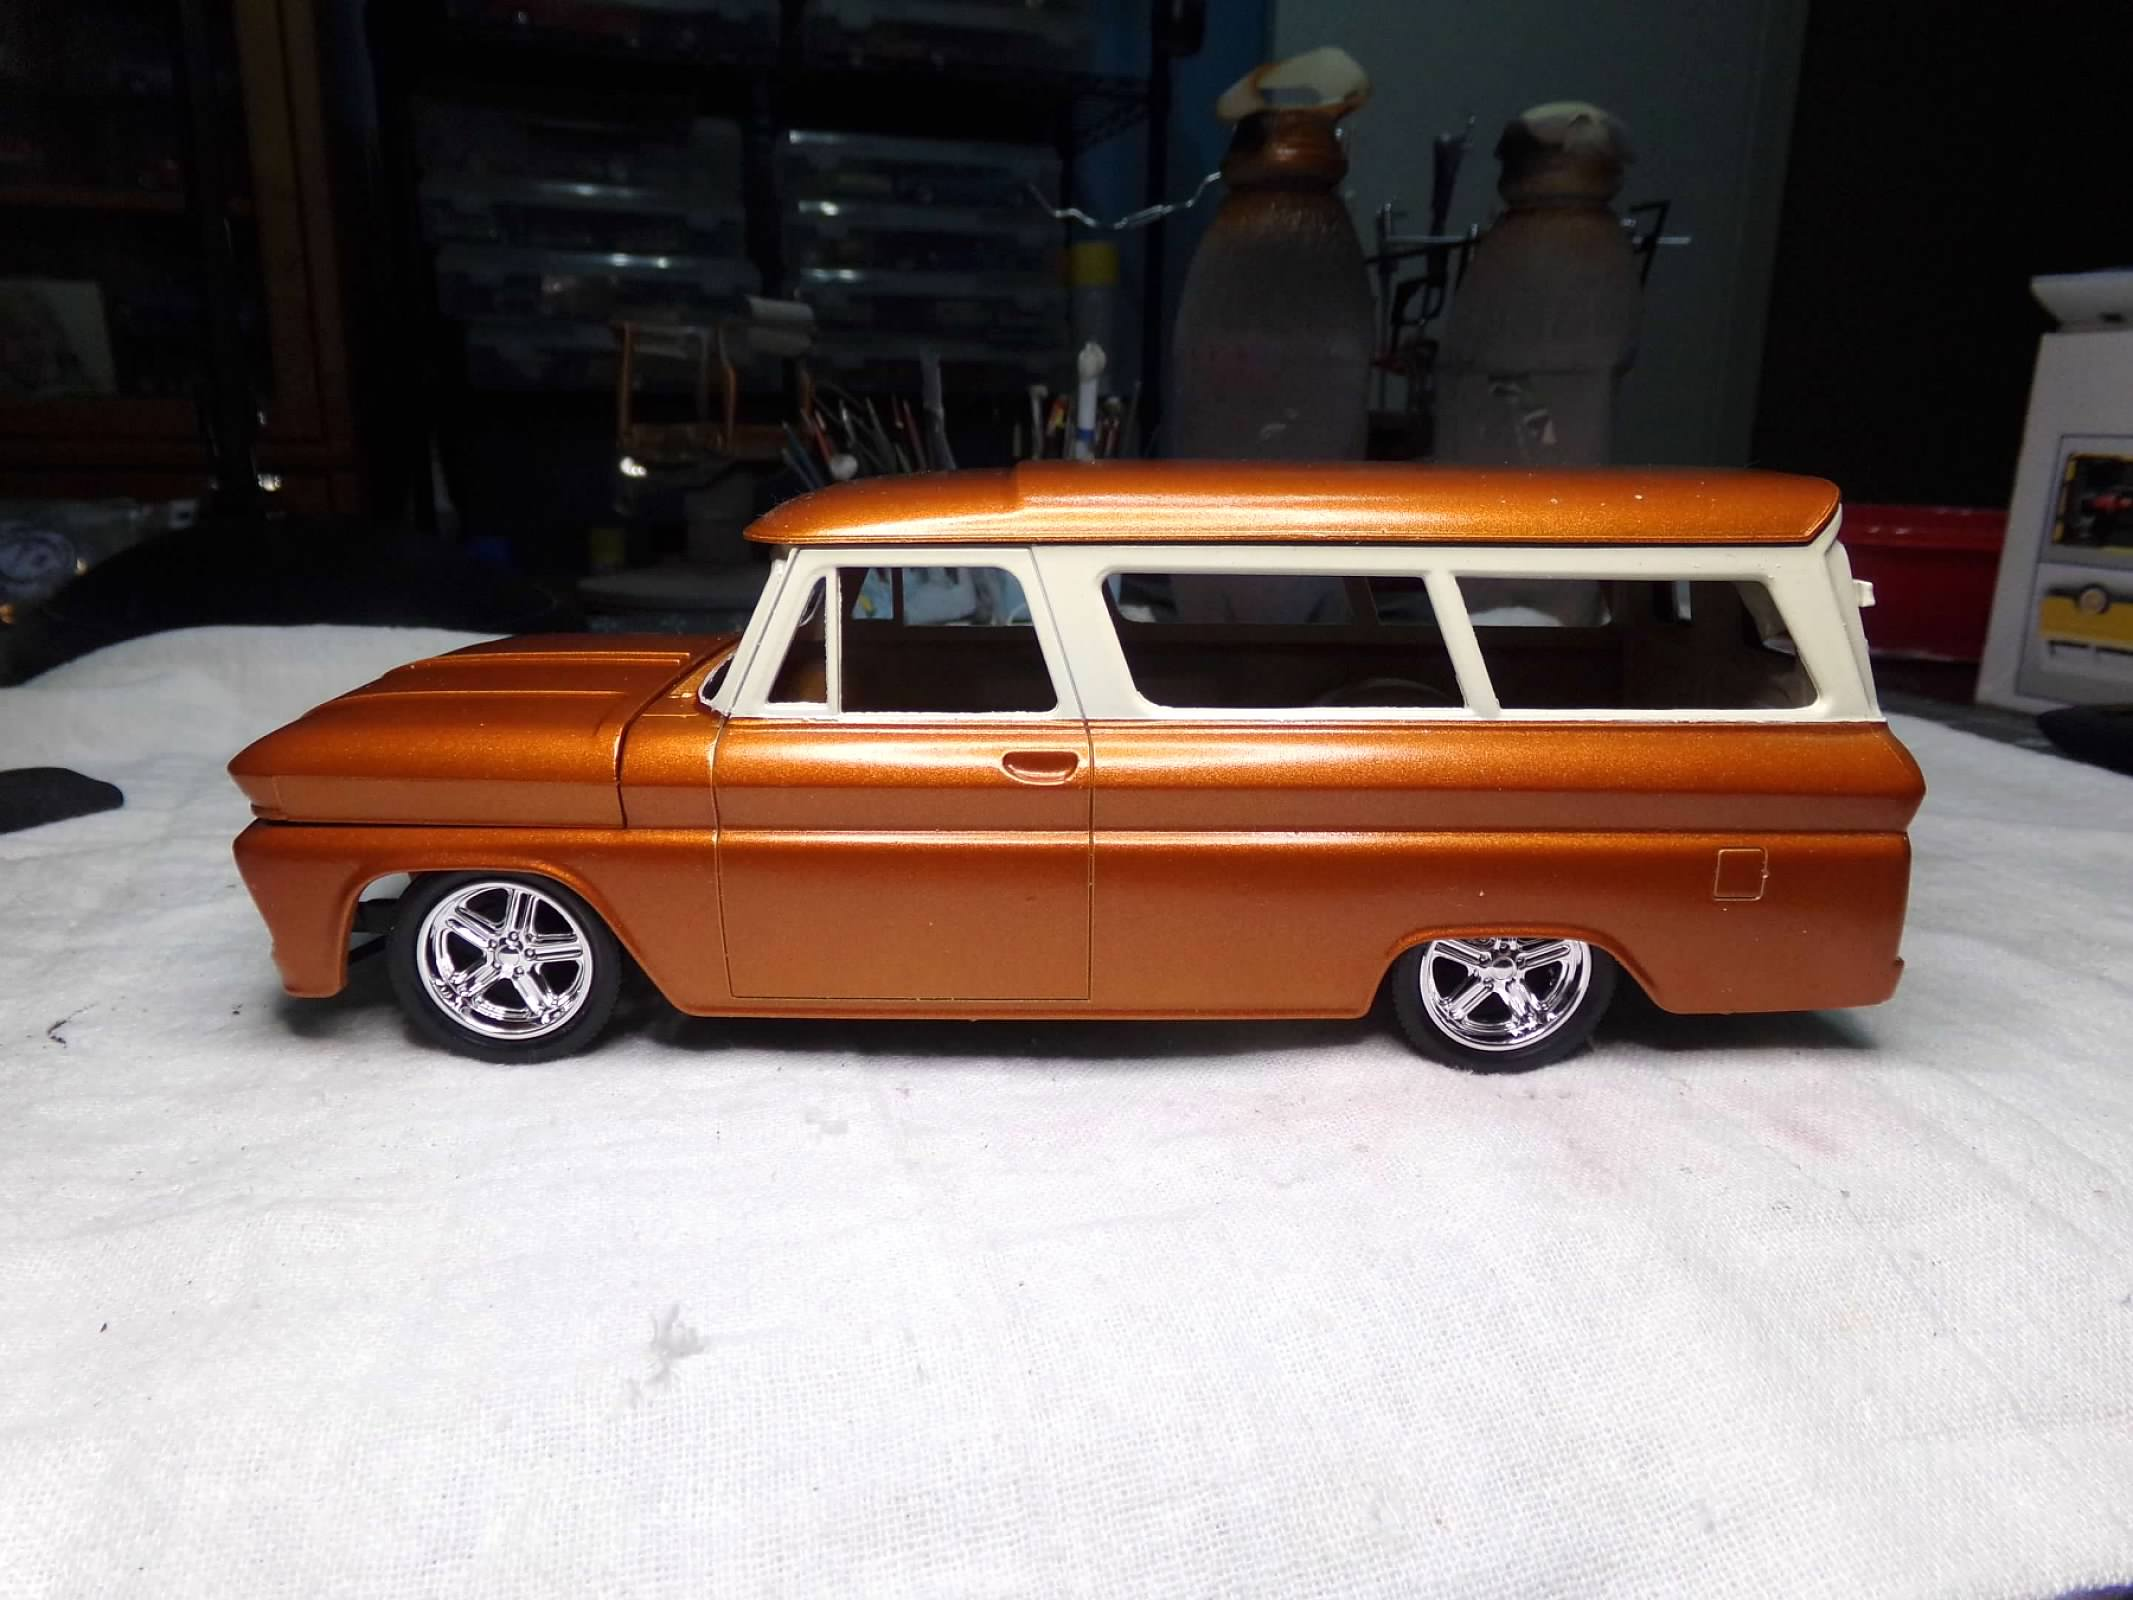
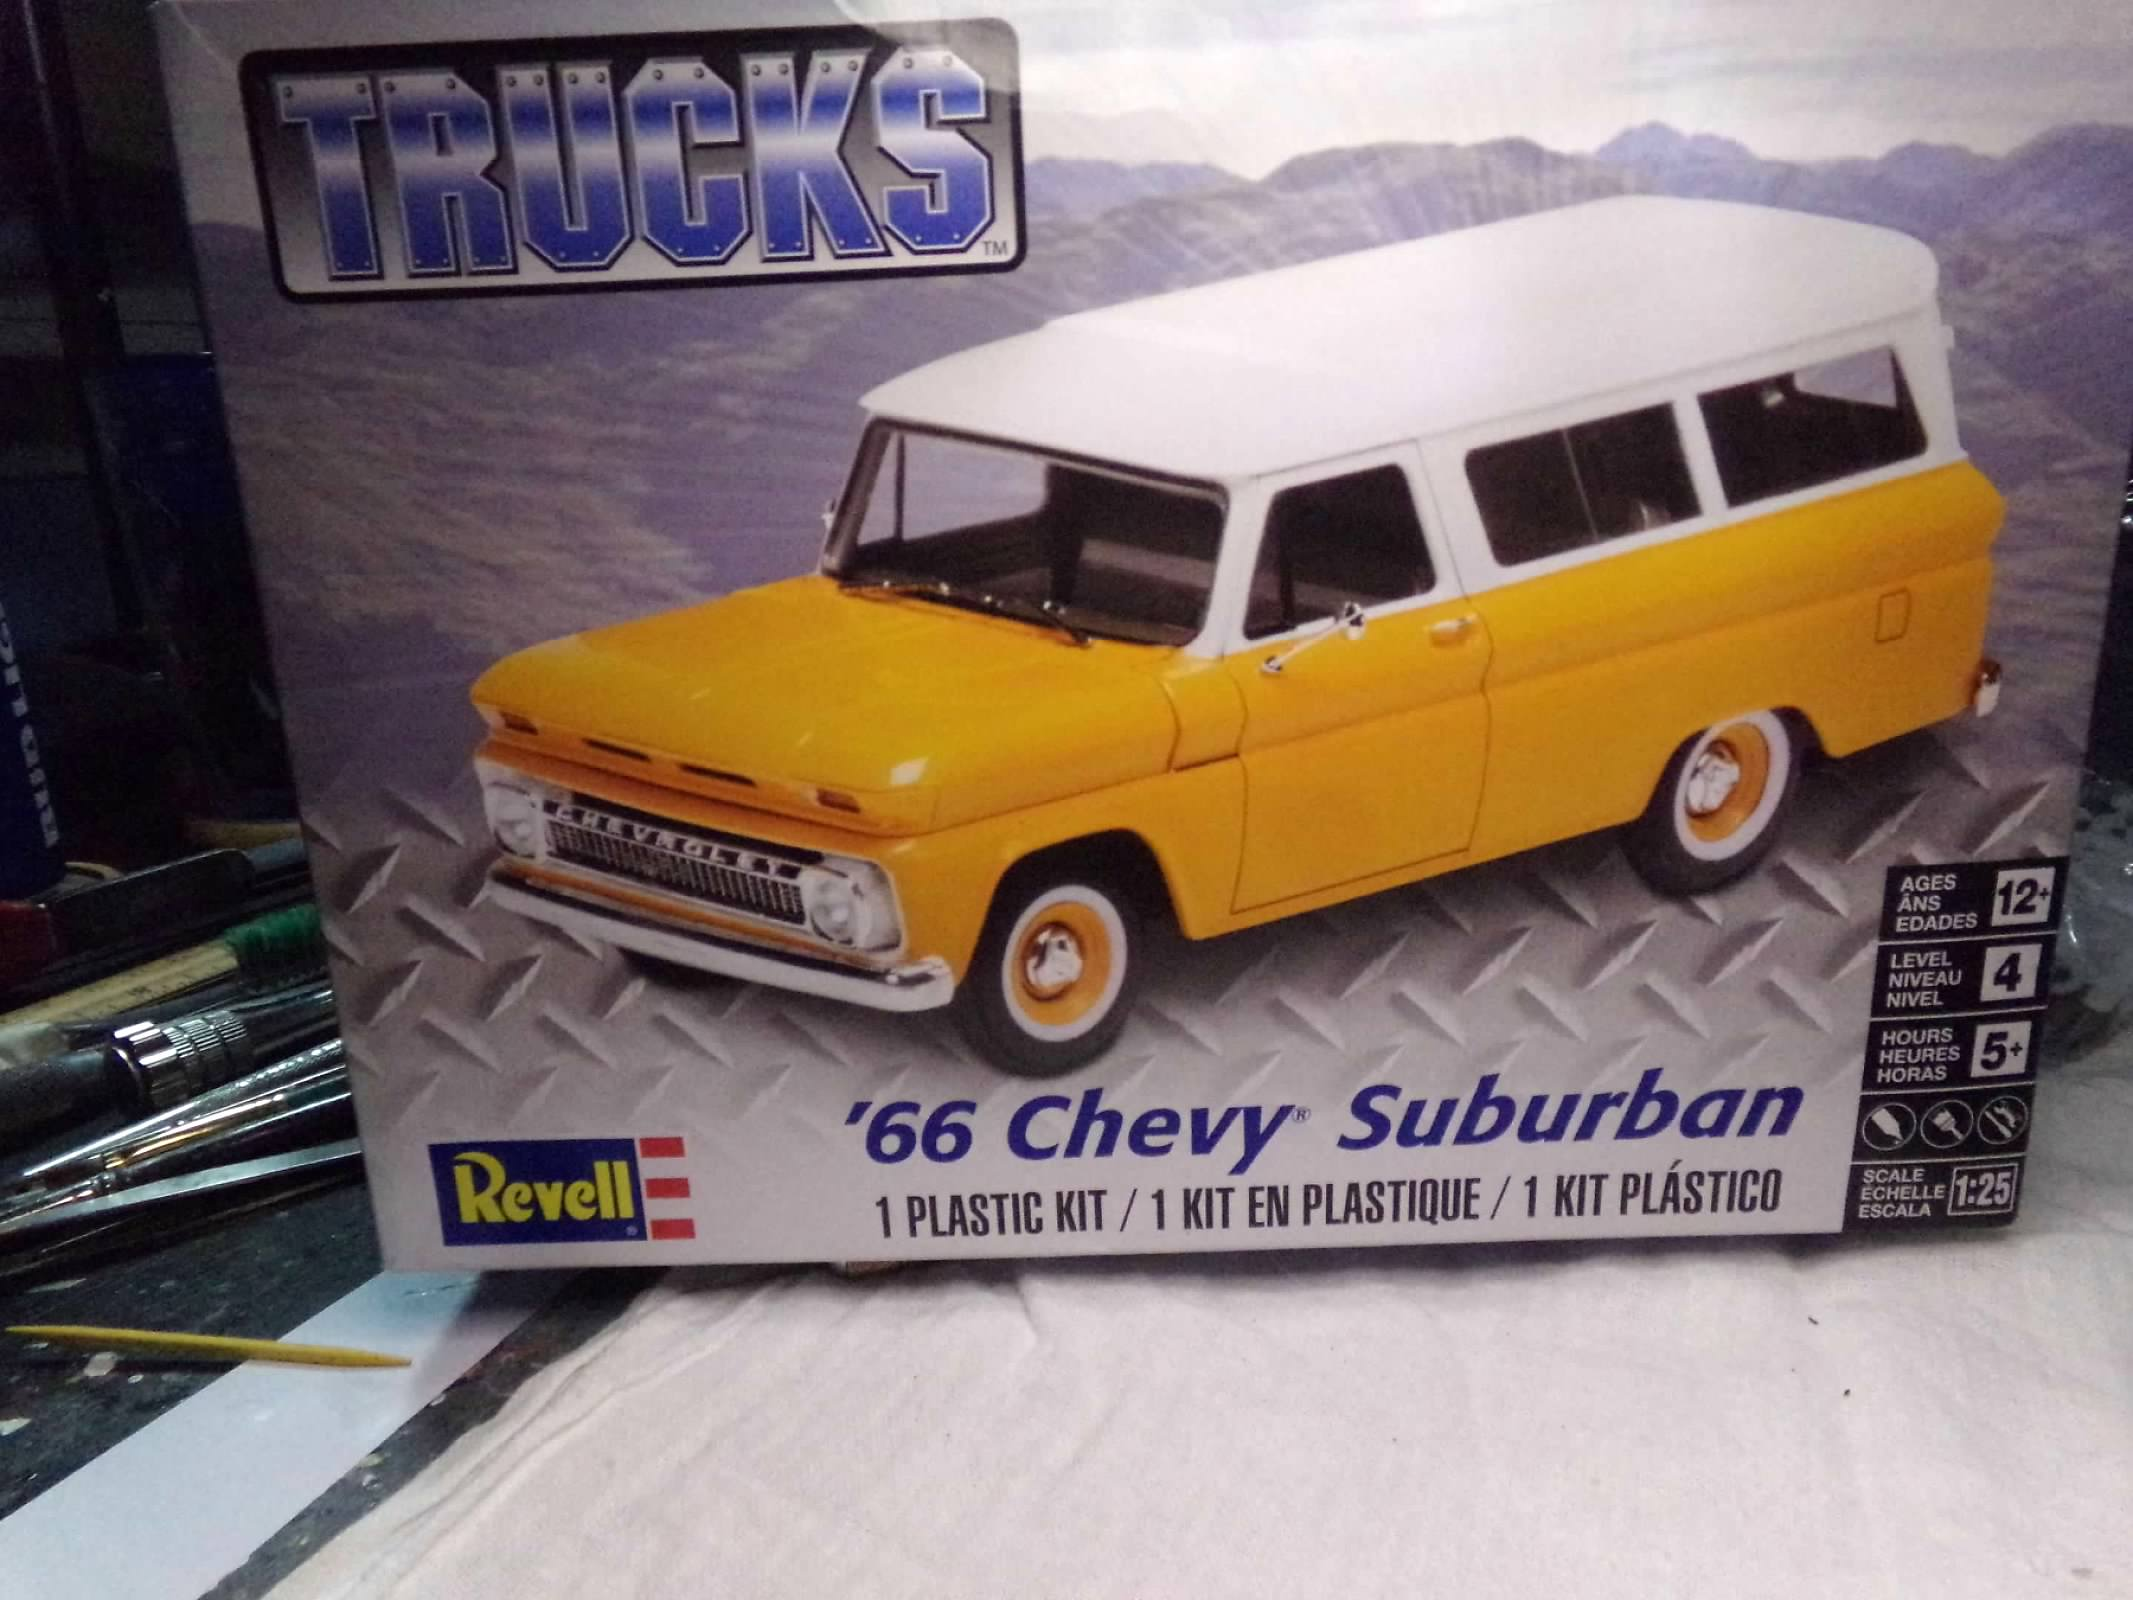
This one is done. Painted Tamiya Metallic Orange and Krylon Ivory. Interior is Krylon Sand Dollar (tan) and Brown. I lowered the body about 3 scale inches. Wheels and tires are big and little touring style from the parts box. I left off the side badges, the long truck mirrors, and the spare tire rack. I added a Chevy car mirror from the parts box (only 1 left). Everything went together well, no problems. So now I have a low-rider touring bus! Thanks for looking! ?
-
1966 Chevy Suburban
ModelcarJR replied to ModelcarJR's topic in WIP: Model Trucks: Pickups, Vans, SUVs, Light Commercial
Thanks, Bob! I appreciate your comment! This one is done. I left off the side badges, the long truck mirrors, and the spare tire rack. I added a Chevy car mirror from the parts box (only 1 left). Everything went together well, no problems. So now I have a low-rider touring bus! Thanks for looking! ?
-
1966 Chevy Suburban
ModelcarJR replied to ModelcarJR's topic in WIP: Model Trucks: Pickups, Vans, SUVs, Light Commercial
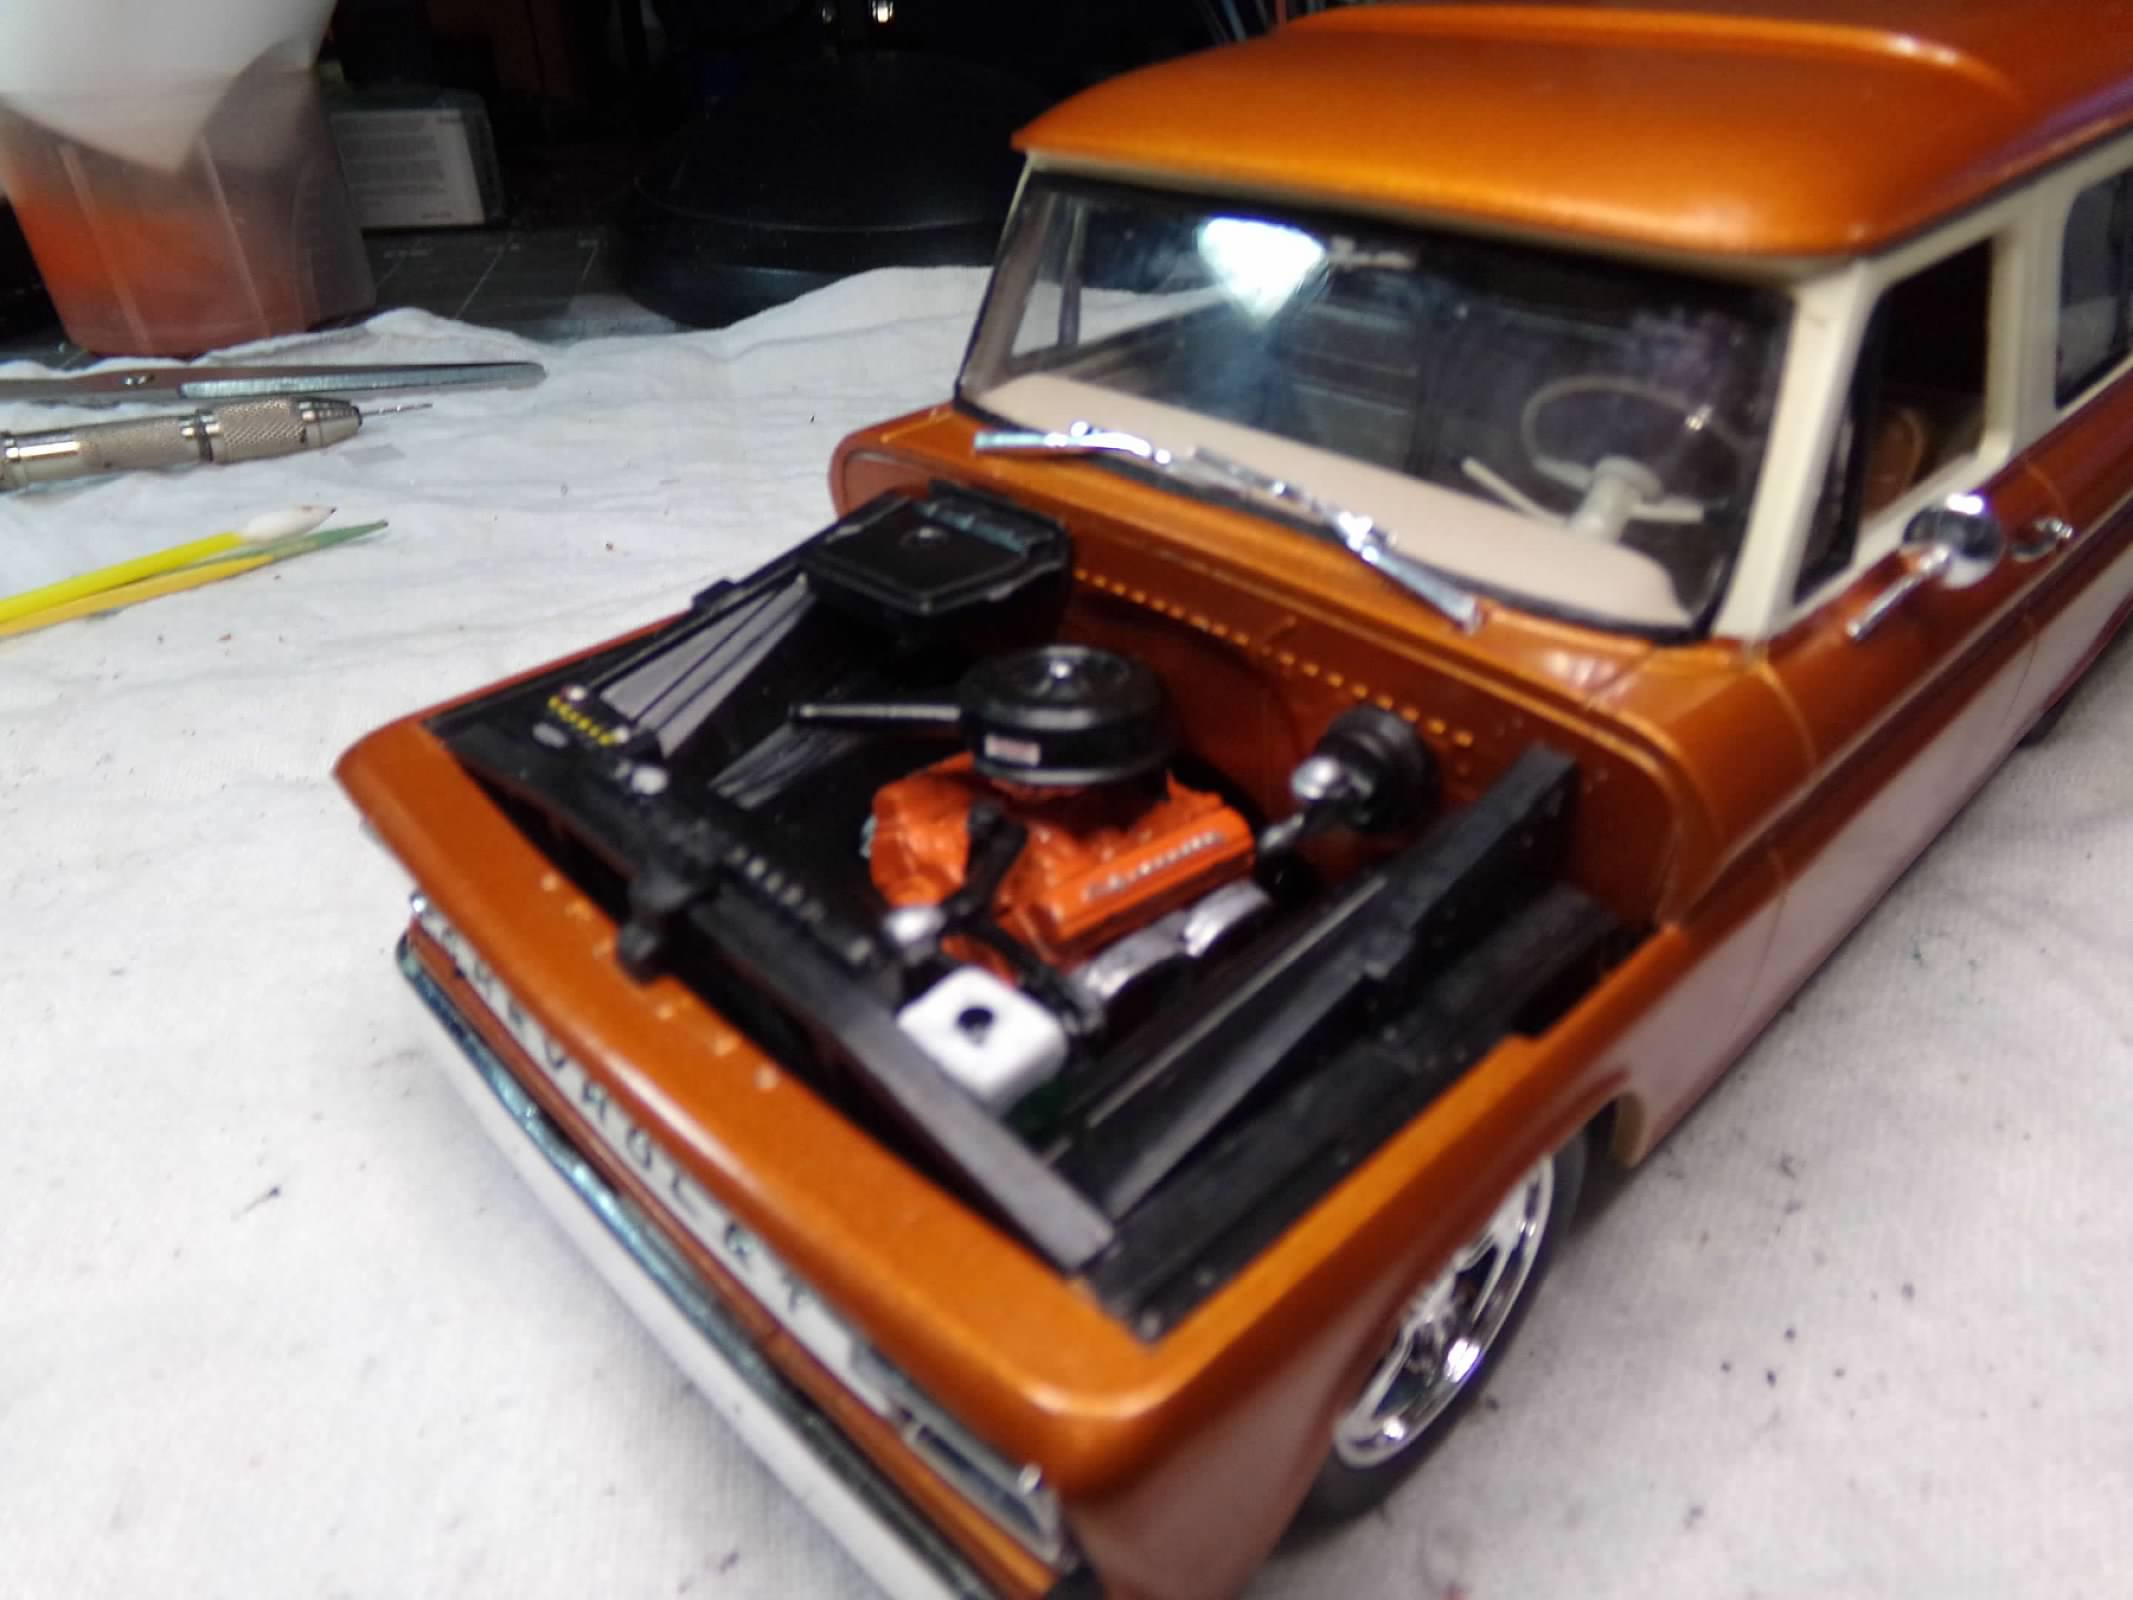
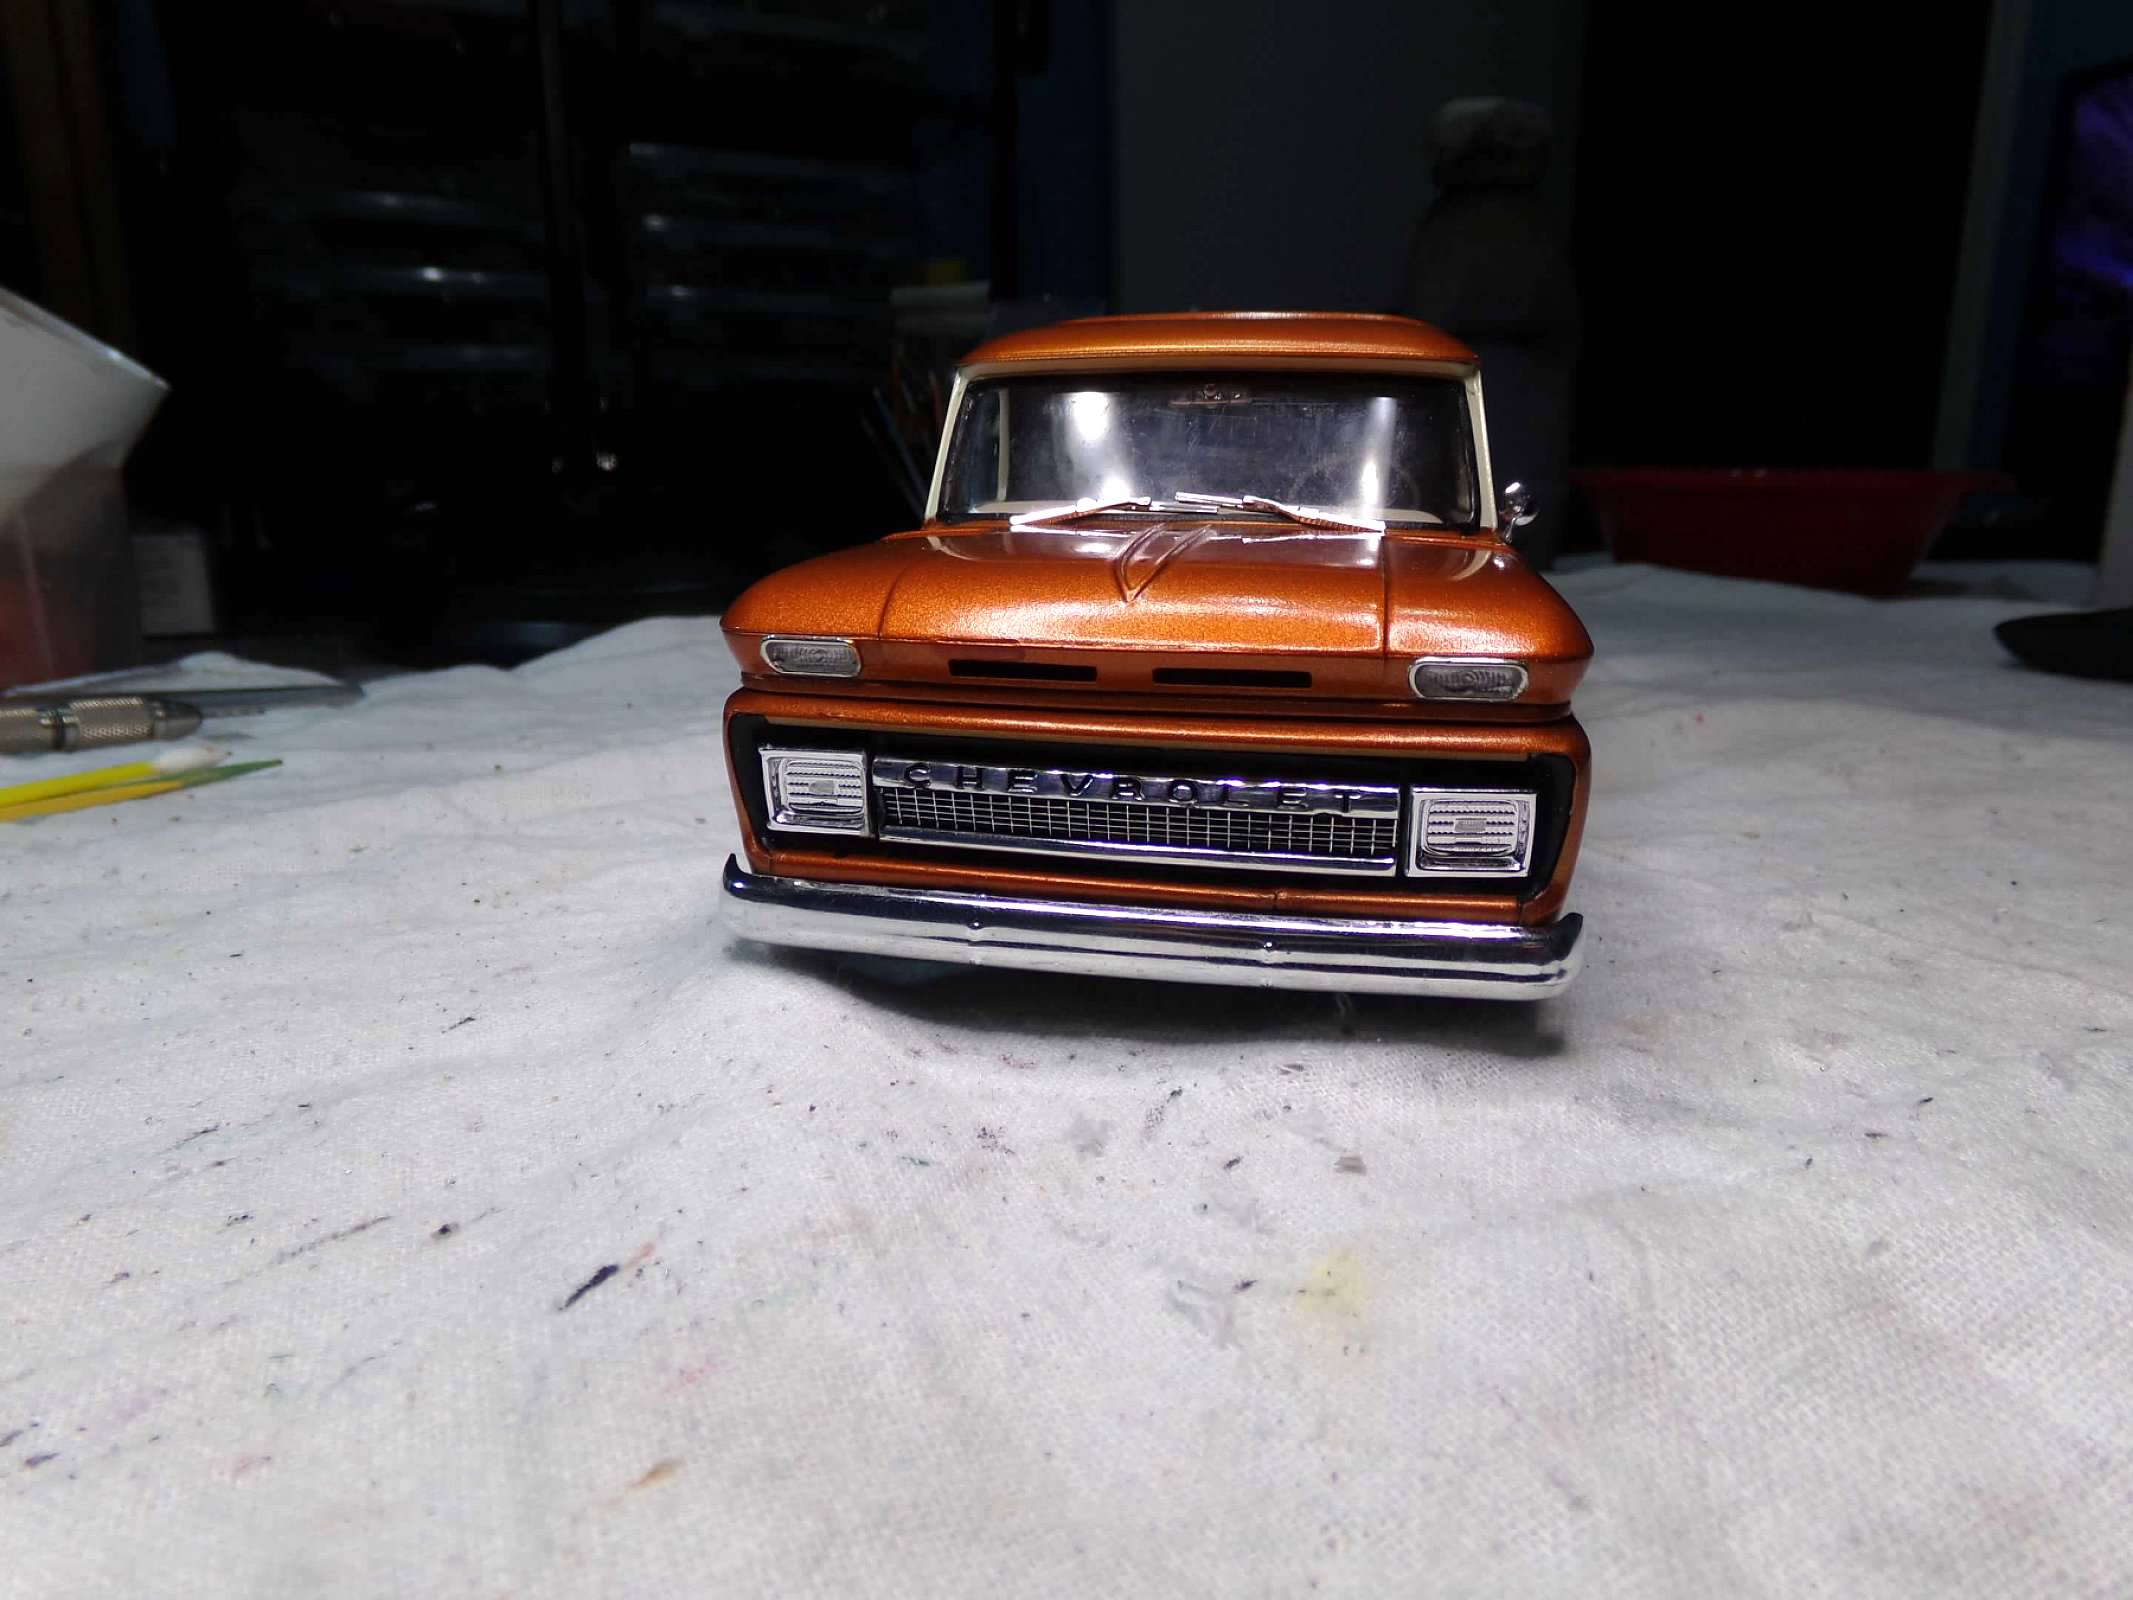
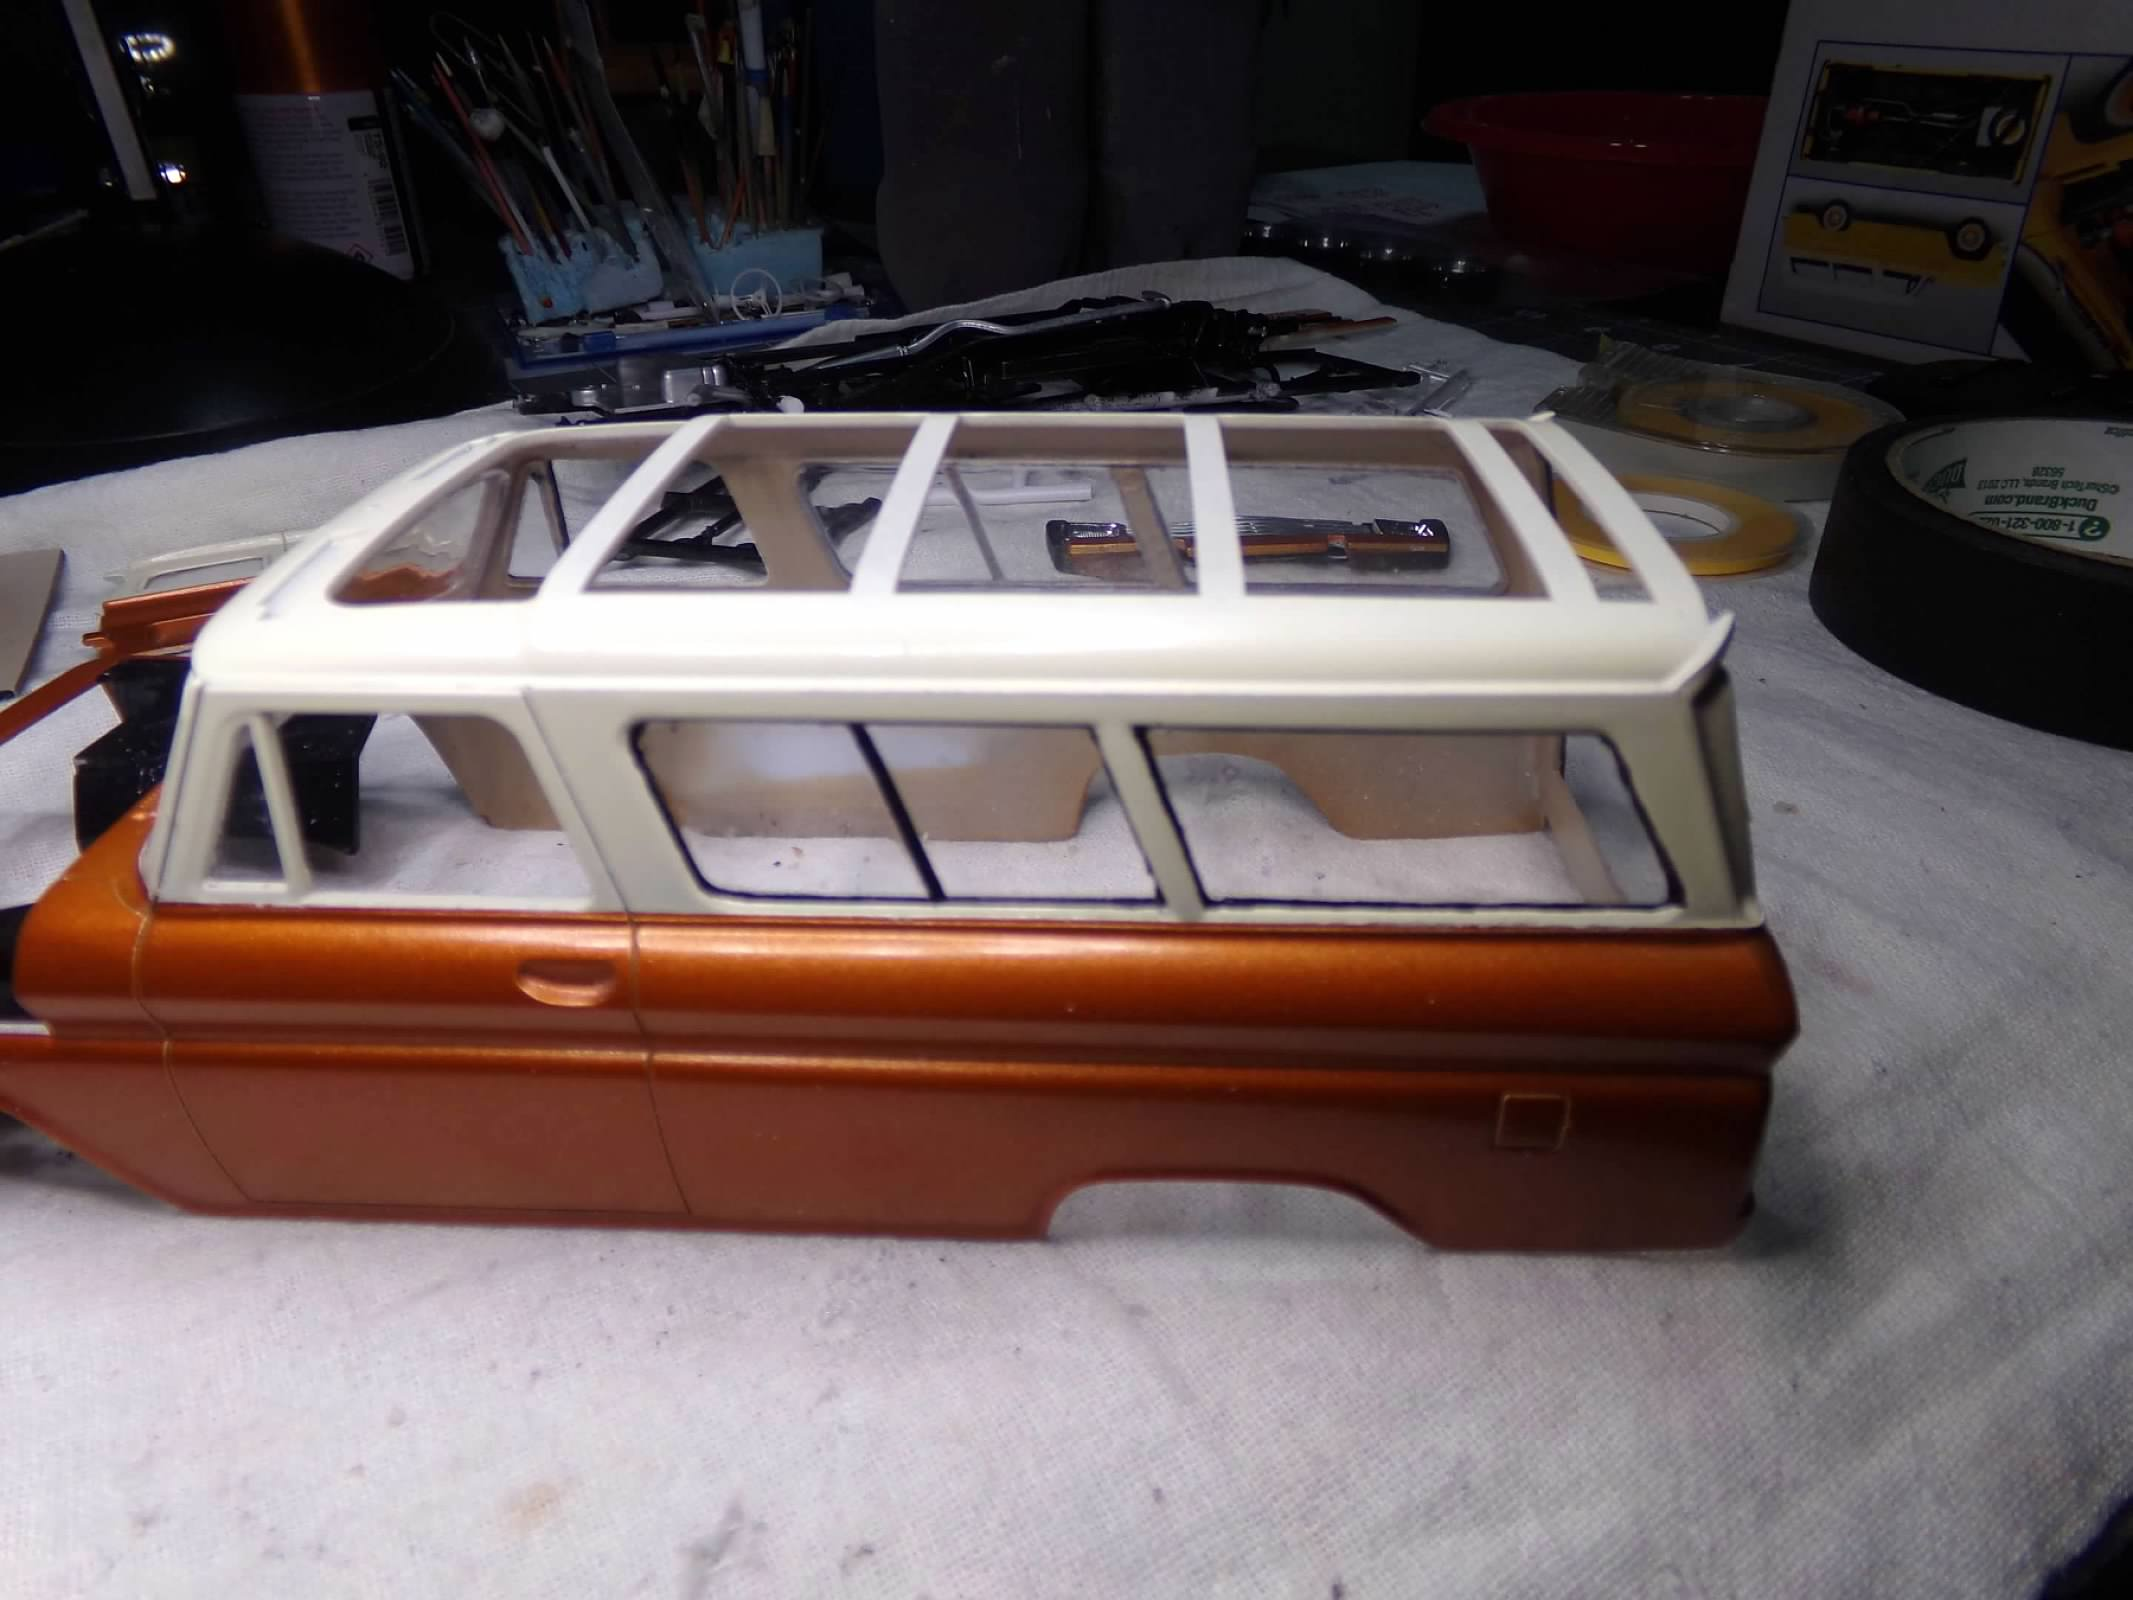
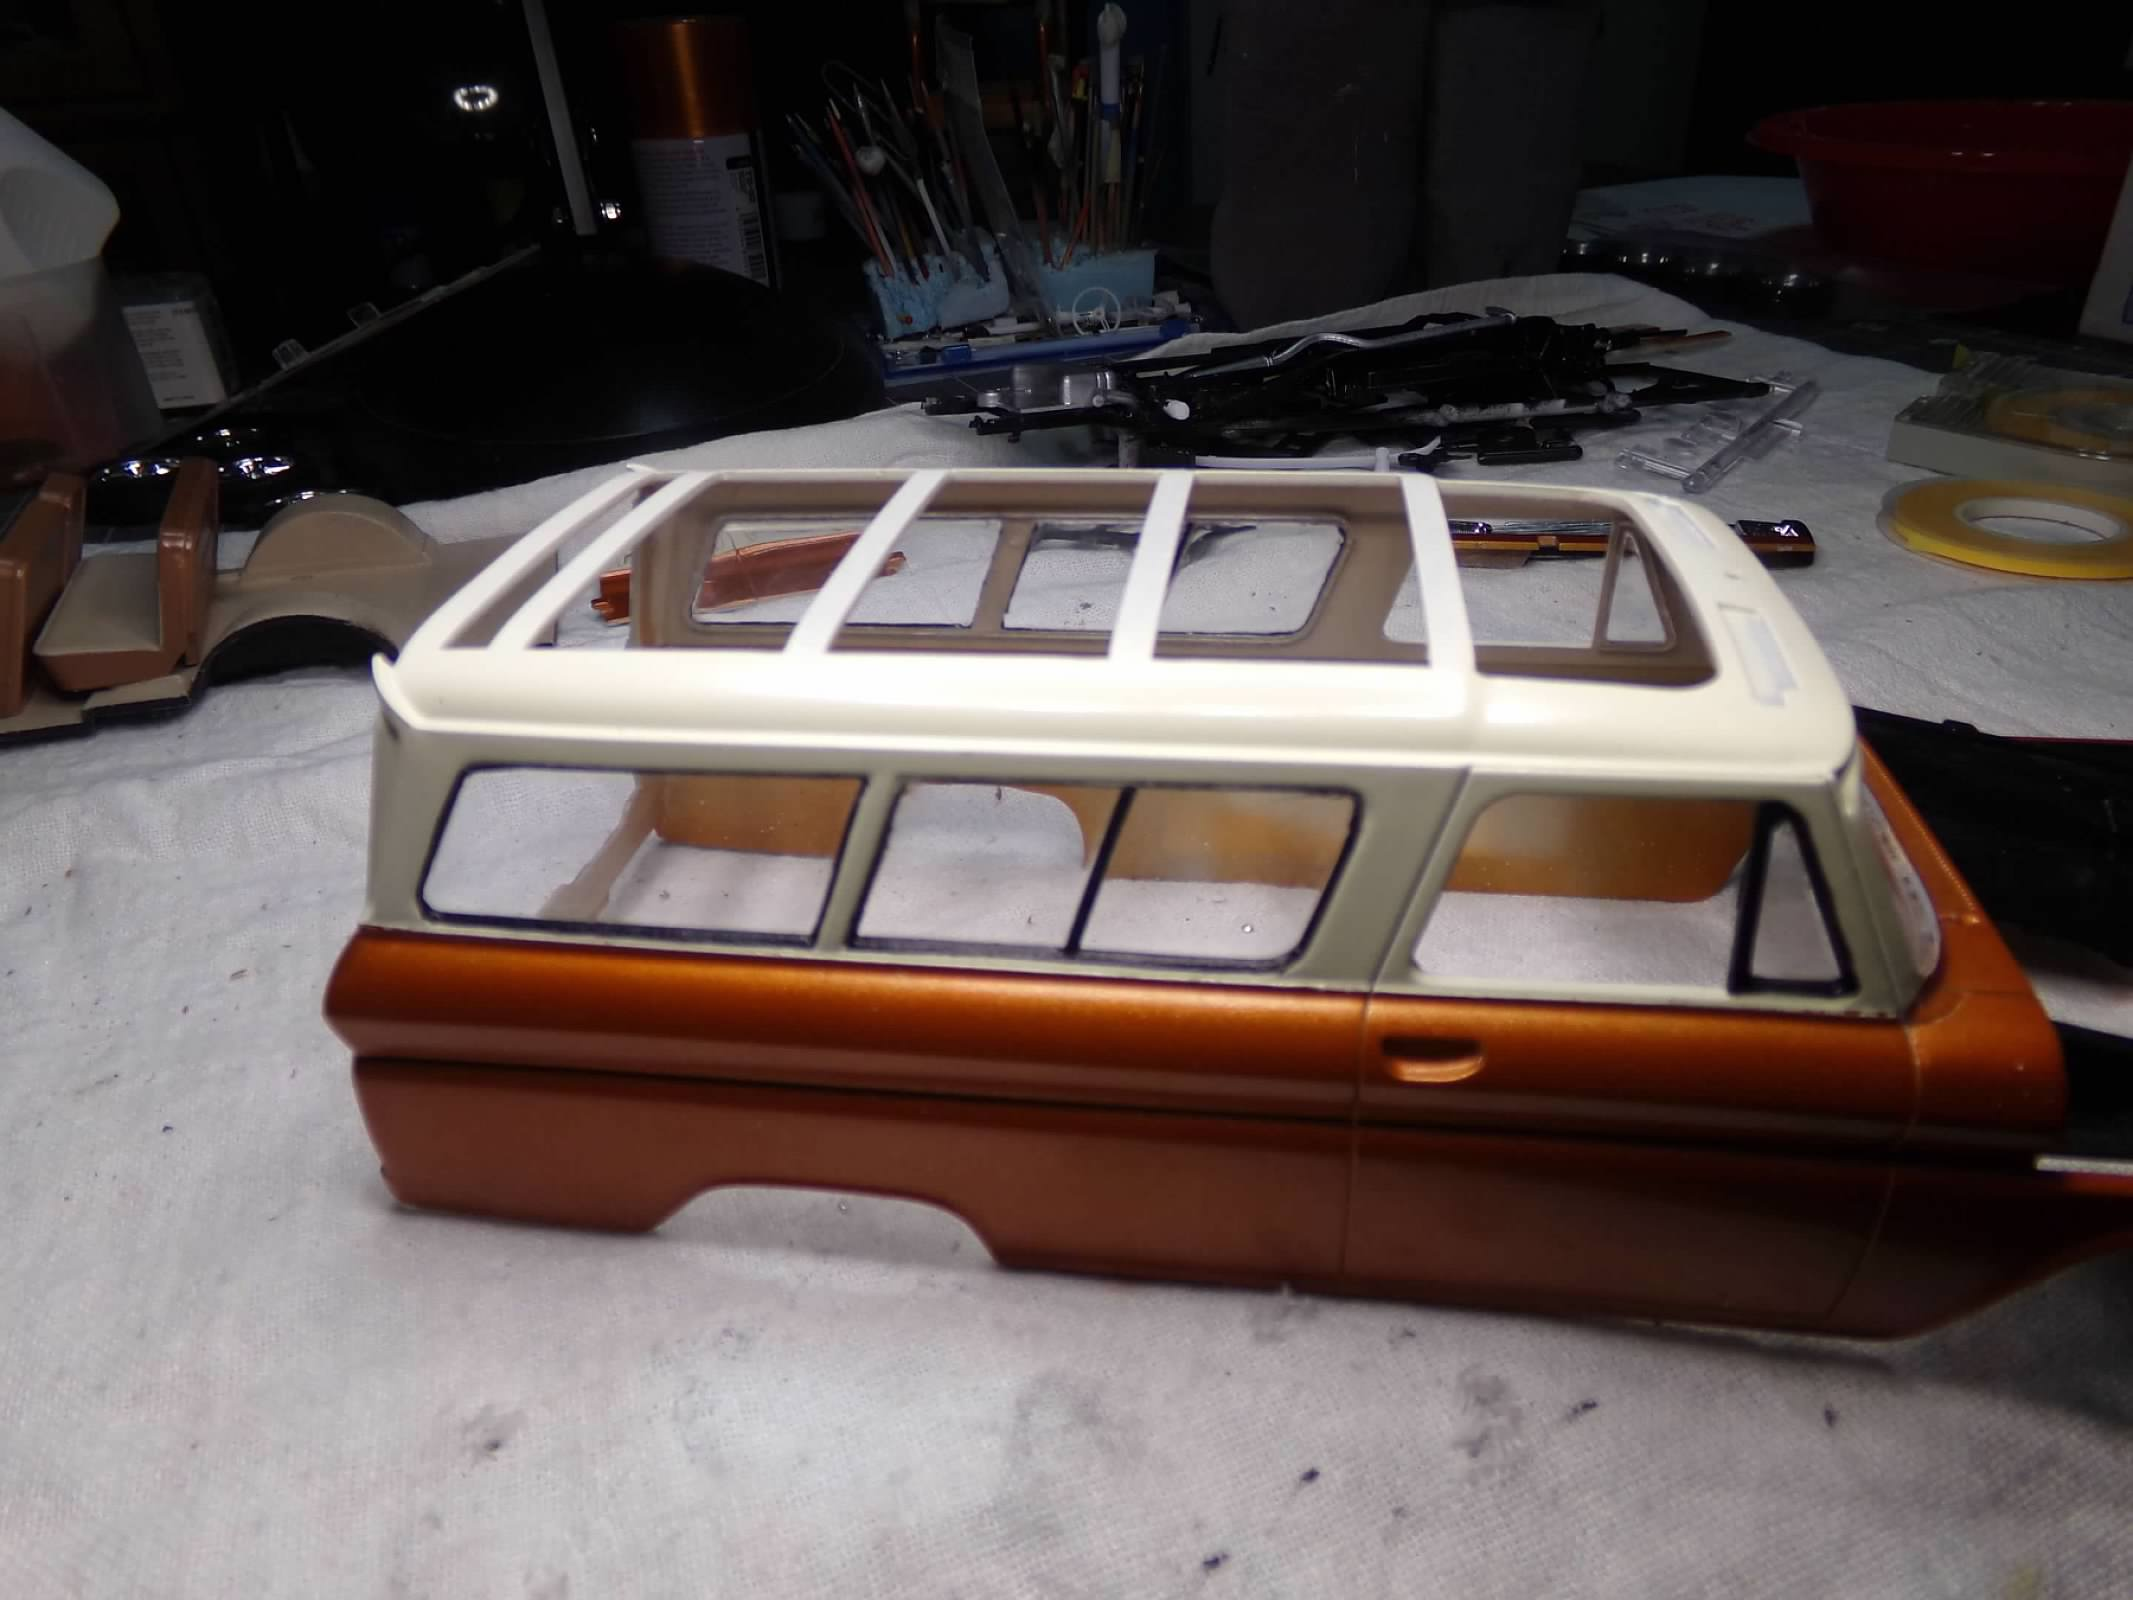
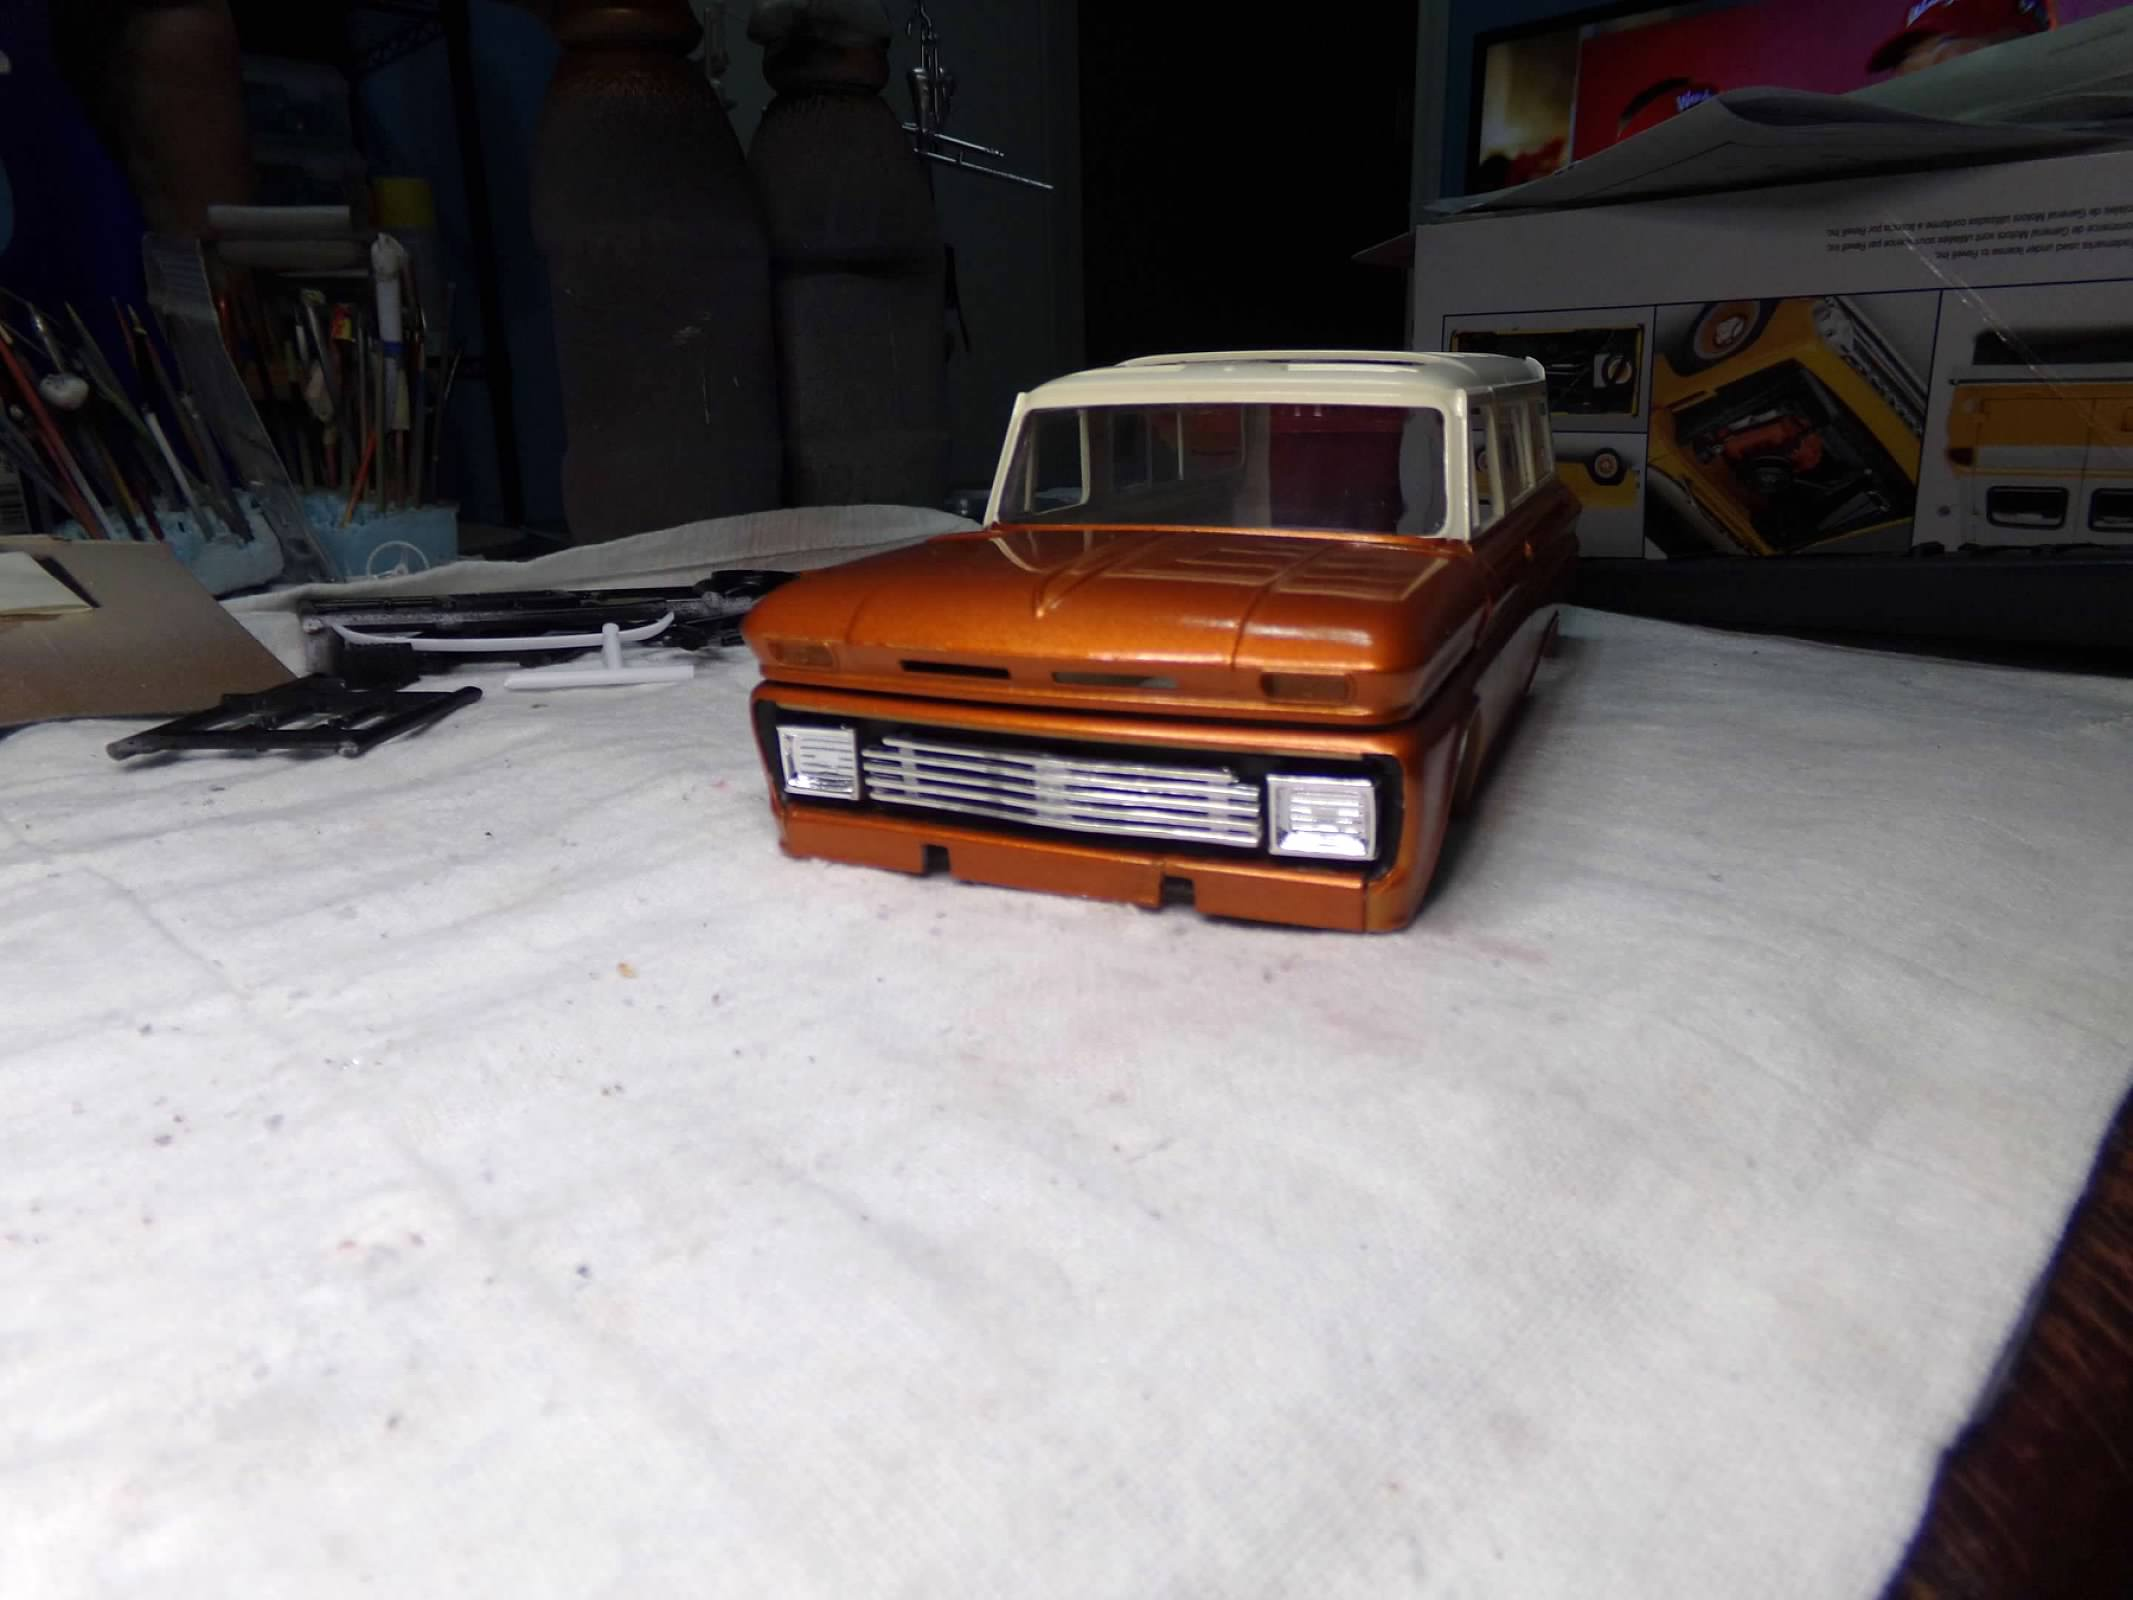
Thanks, Bob and David! I appreciate your comments! I changed my mind again on the grill and went back to the original kit piece and thinned it down and then left the square headlights. I like this better as it fills up the grill area better, its recessed, and has the Chevrolet brand included. I went with the big and littles for tires and wheels and left the 283 engine kit engine. I would have liked to substitute a big Chevy engine but I don't have one without kit bashing another kit. No wiring just box stock. So the only customizations are the tires and wheels, ride height and grill/headlights. I did add the black window trim and first used paint on the left side and then had the idea to use black masking tape that I cut for the right side. I like that better so I went back and added some tape on the left side. I used tape on the windshield but I had to use paint on the rear as it didn't look good with tape. I put the interior together and kept it pretty basic. So in the end I guess I have a custom looking family bus! Just a few more pieces and this one will be done! Thanks for looking! ? Tape Painted
-
1966 Chevy Suburban
ModelcarJR replied to ModelcarJR's topic in WIP: Model Trucks: Pickups, Vans, SUVs, Light Commercial
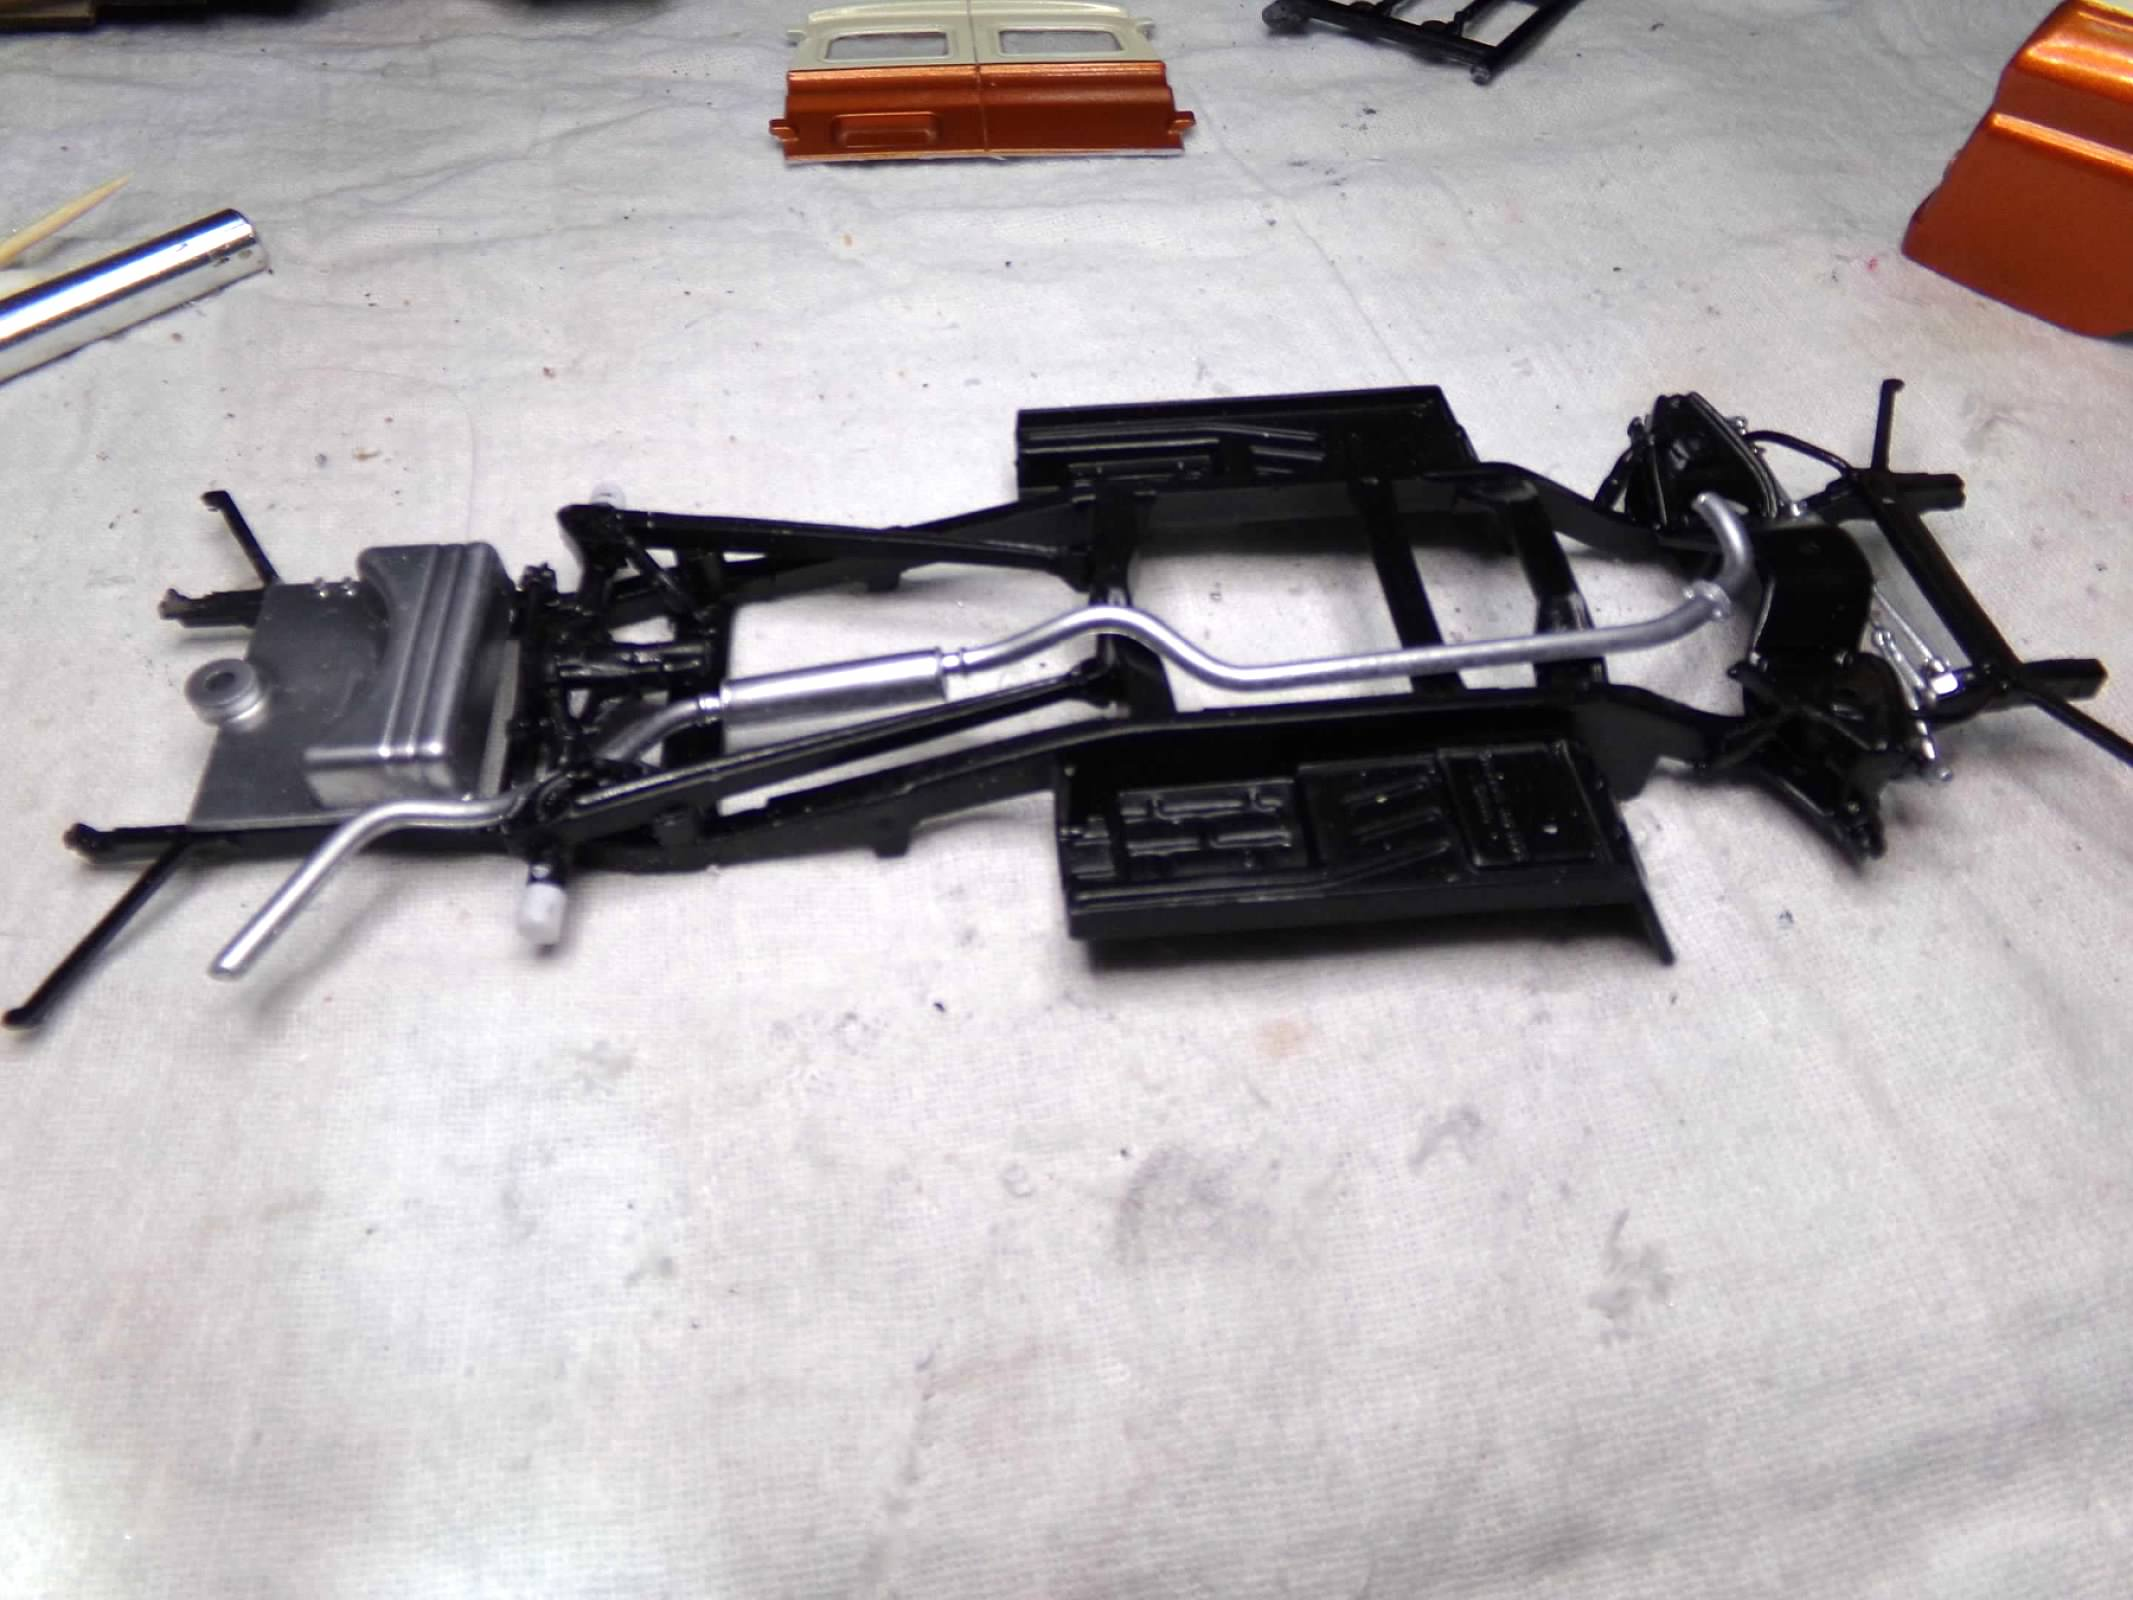
Thanks, Ulf, Bob, David, and Carl! I appreciate your comments! I may have found some other wheels but I haven't tried them yet. The big and littles came from a 1/24th scale Monogram Mustang so they might be a little too big. Don't know yet. I took a day off on Thursday and got back to this one yesterday. Nothing to exciting, finished the chassis and had to cut the exhaust pipe and shortened the shocks. I also installed the windows. Today, I took a look at the headlight/grill area. I wanted to recess the whole thing so that it wasn't sticking out and looking a bit bug-eyed. So I started hacking up the kit piece and ruined it. Next, I had another set up started, when I dropped a headlight piece on the floor. I looked for it at least an hour and even had my wife look for it but it is not to be found. So finally, I cut off the square leadlight buckets from a 1980 Plymouth Volare (an old kit that I may or may not ever build). So I found an old tube grill in my parts box and added that for a grill. Now its recessed and even though the headlight buckets do not have lenses, its the best I can do at this time. Maybe better luck tomorrow! Thanks for looking! ?
-
Looks good, Brian! You almost have this one whipped! A nice looking custom truck!??
-
1966 Chevy Suburban
ModelcarJR replied to ModelcarJR's topic in WIP: Model Trucks: Pickups, Vans, SUVs, Light Commercial
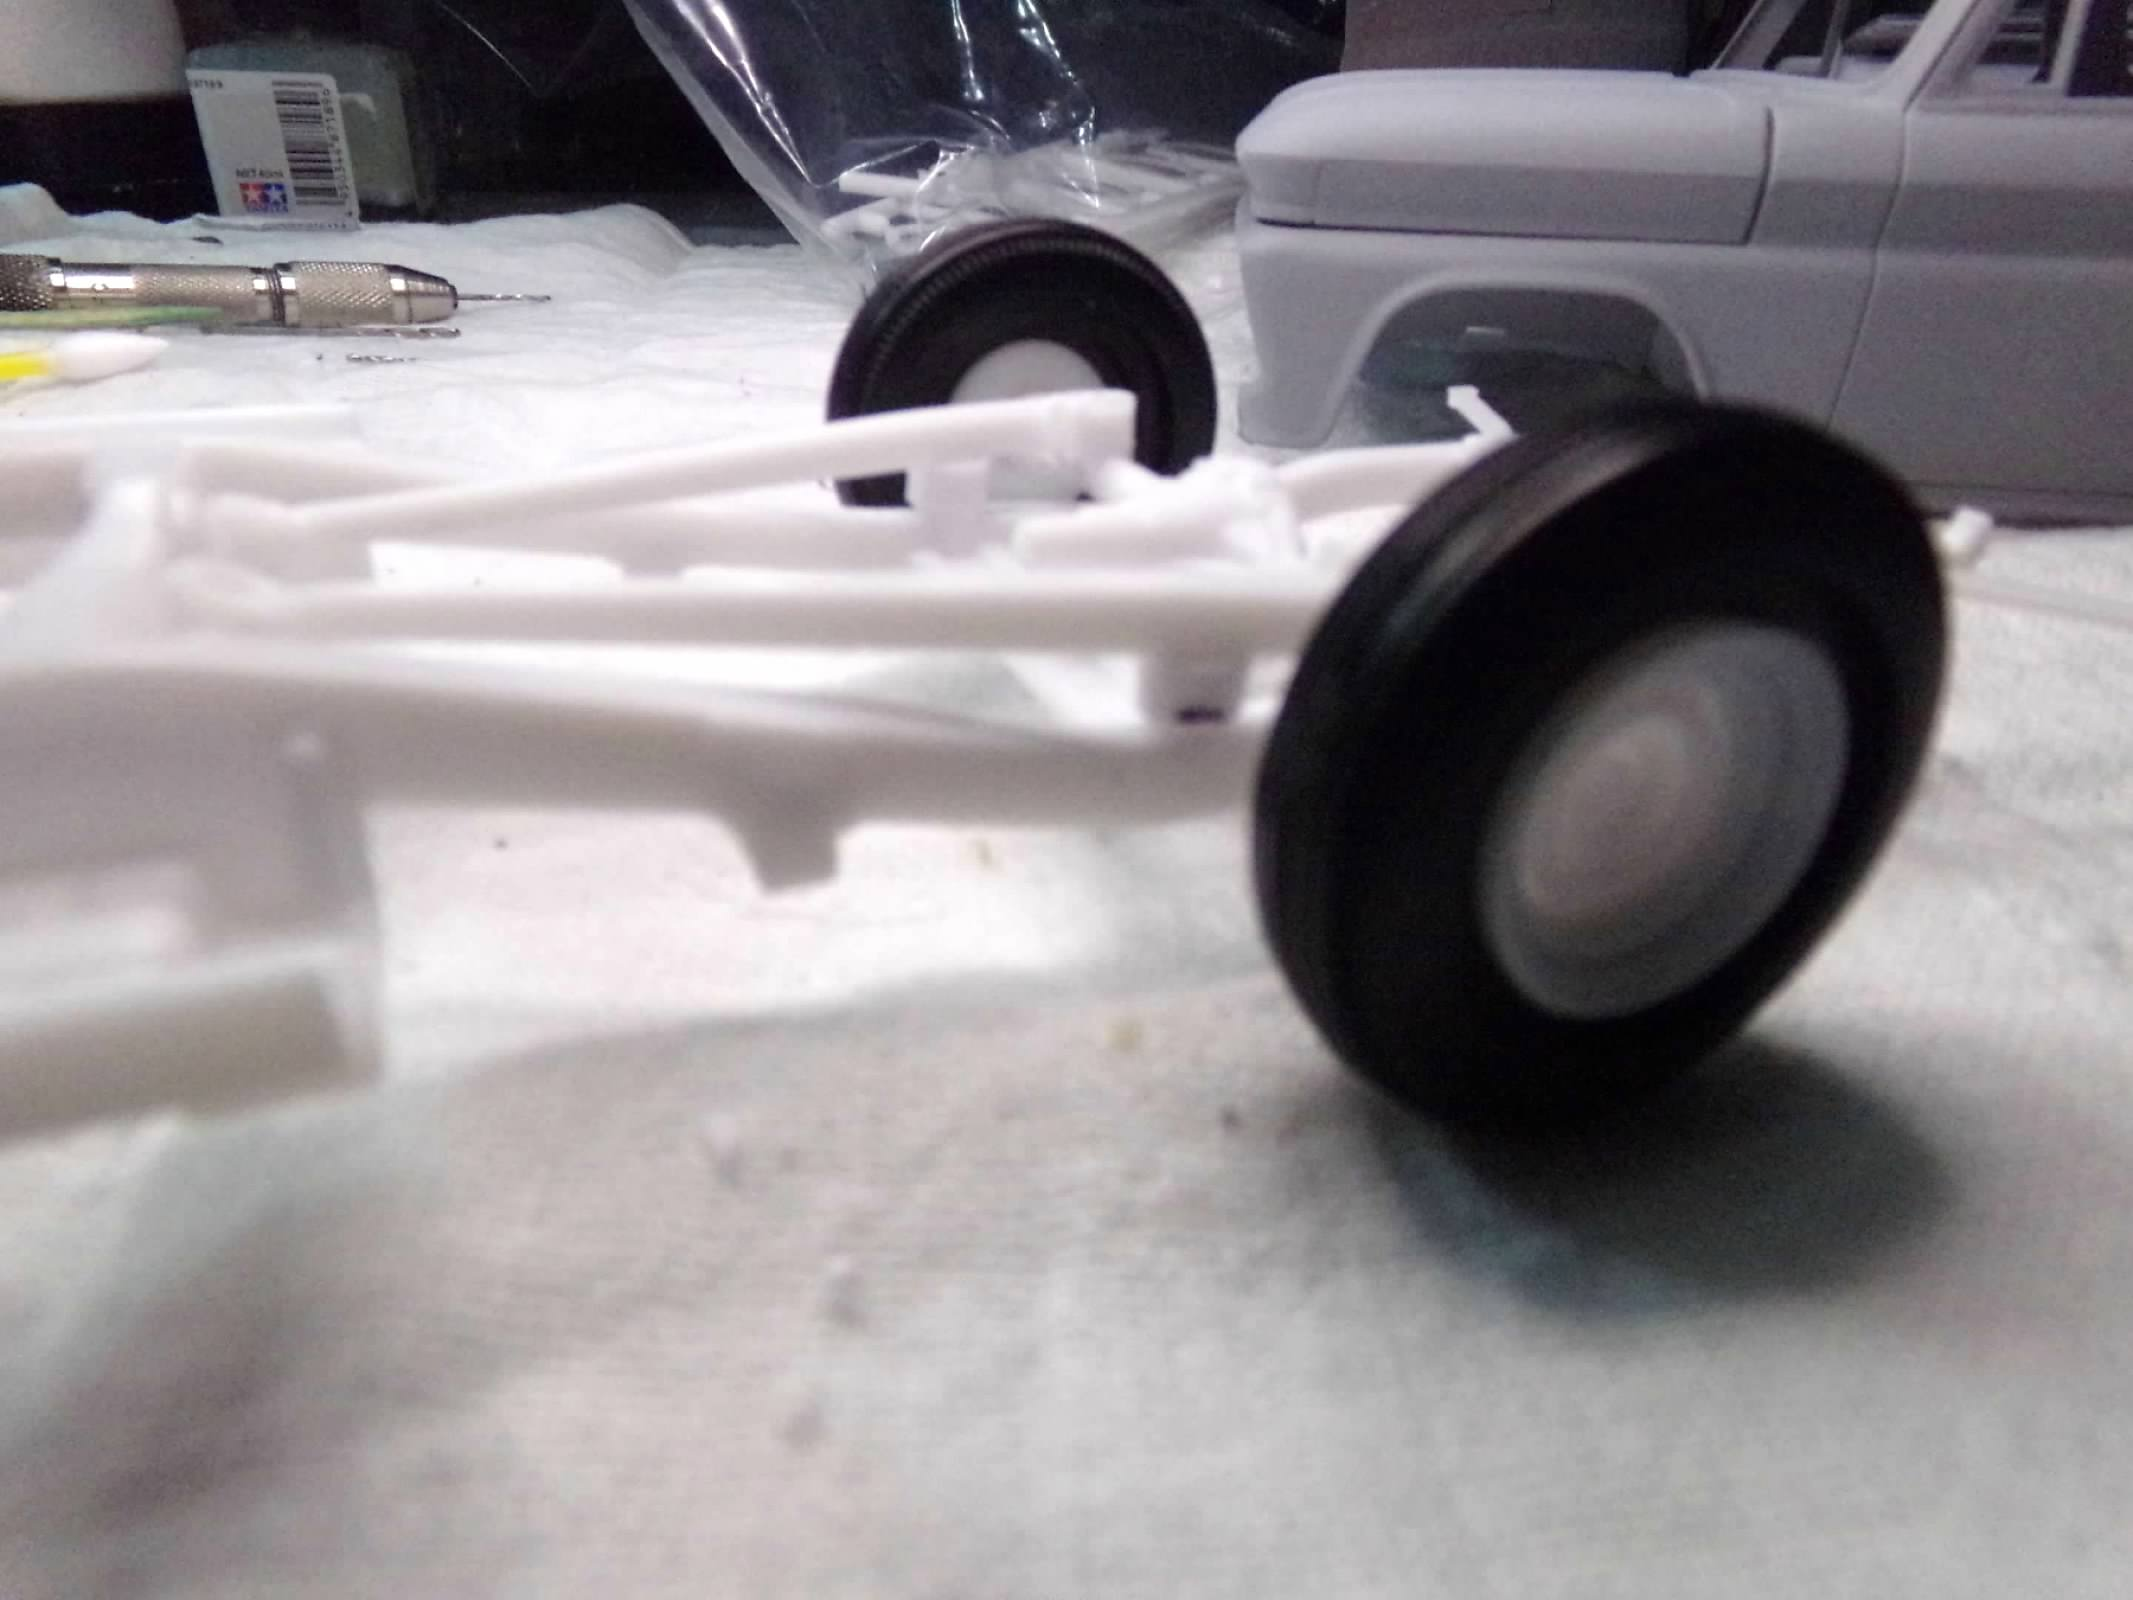
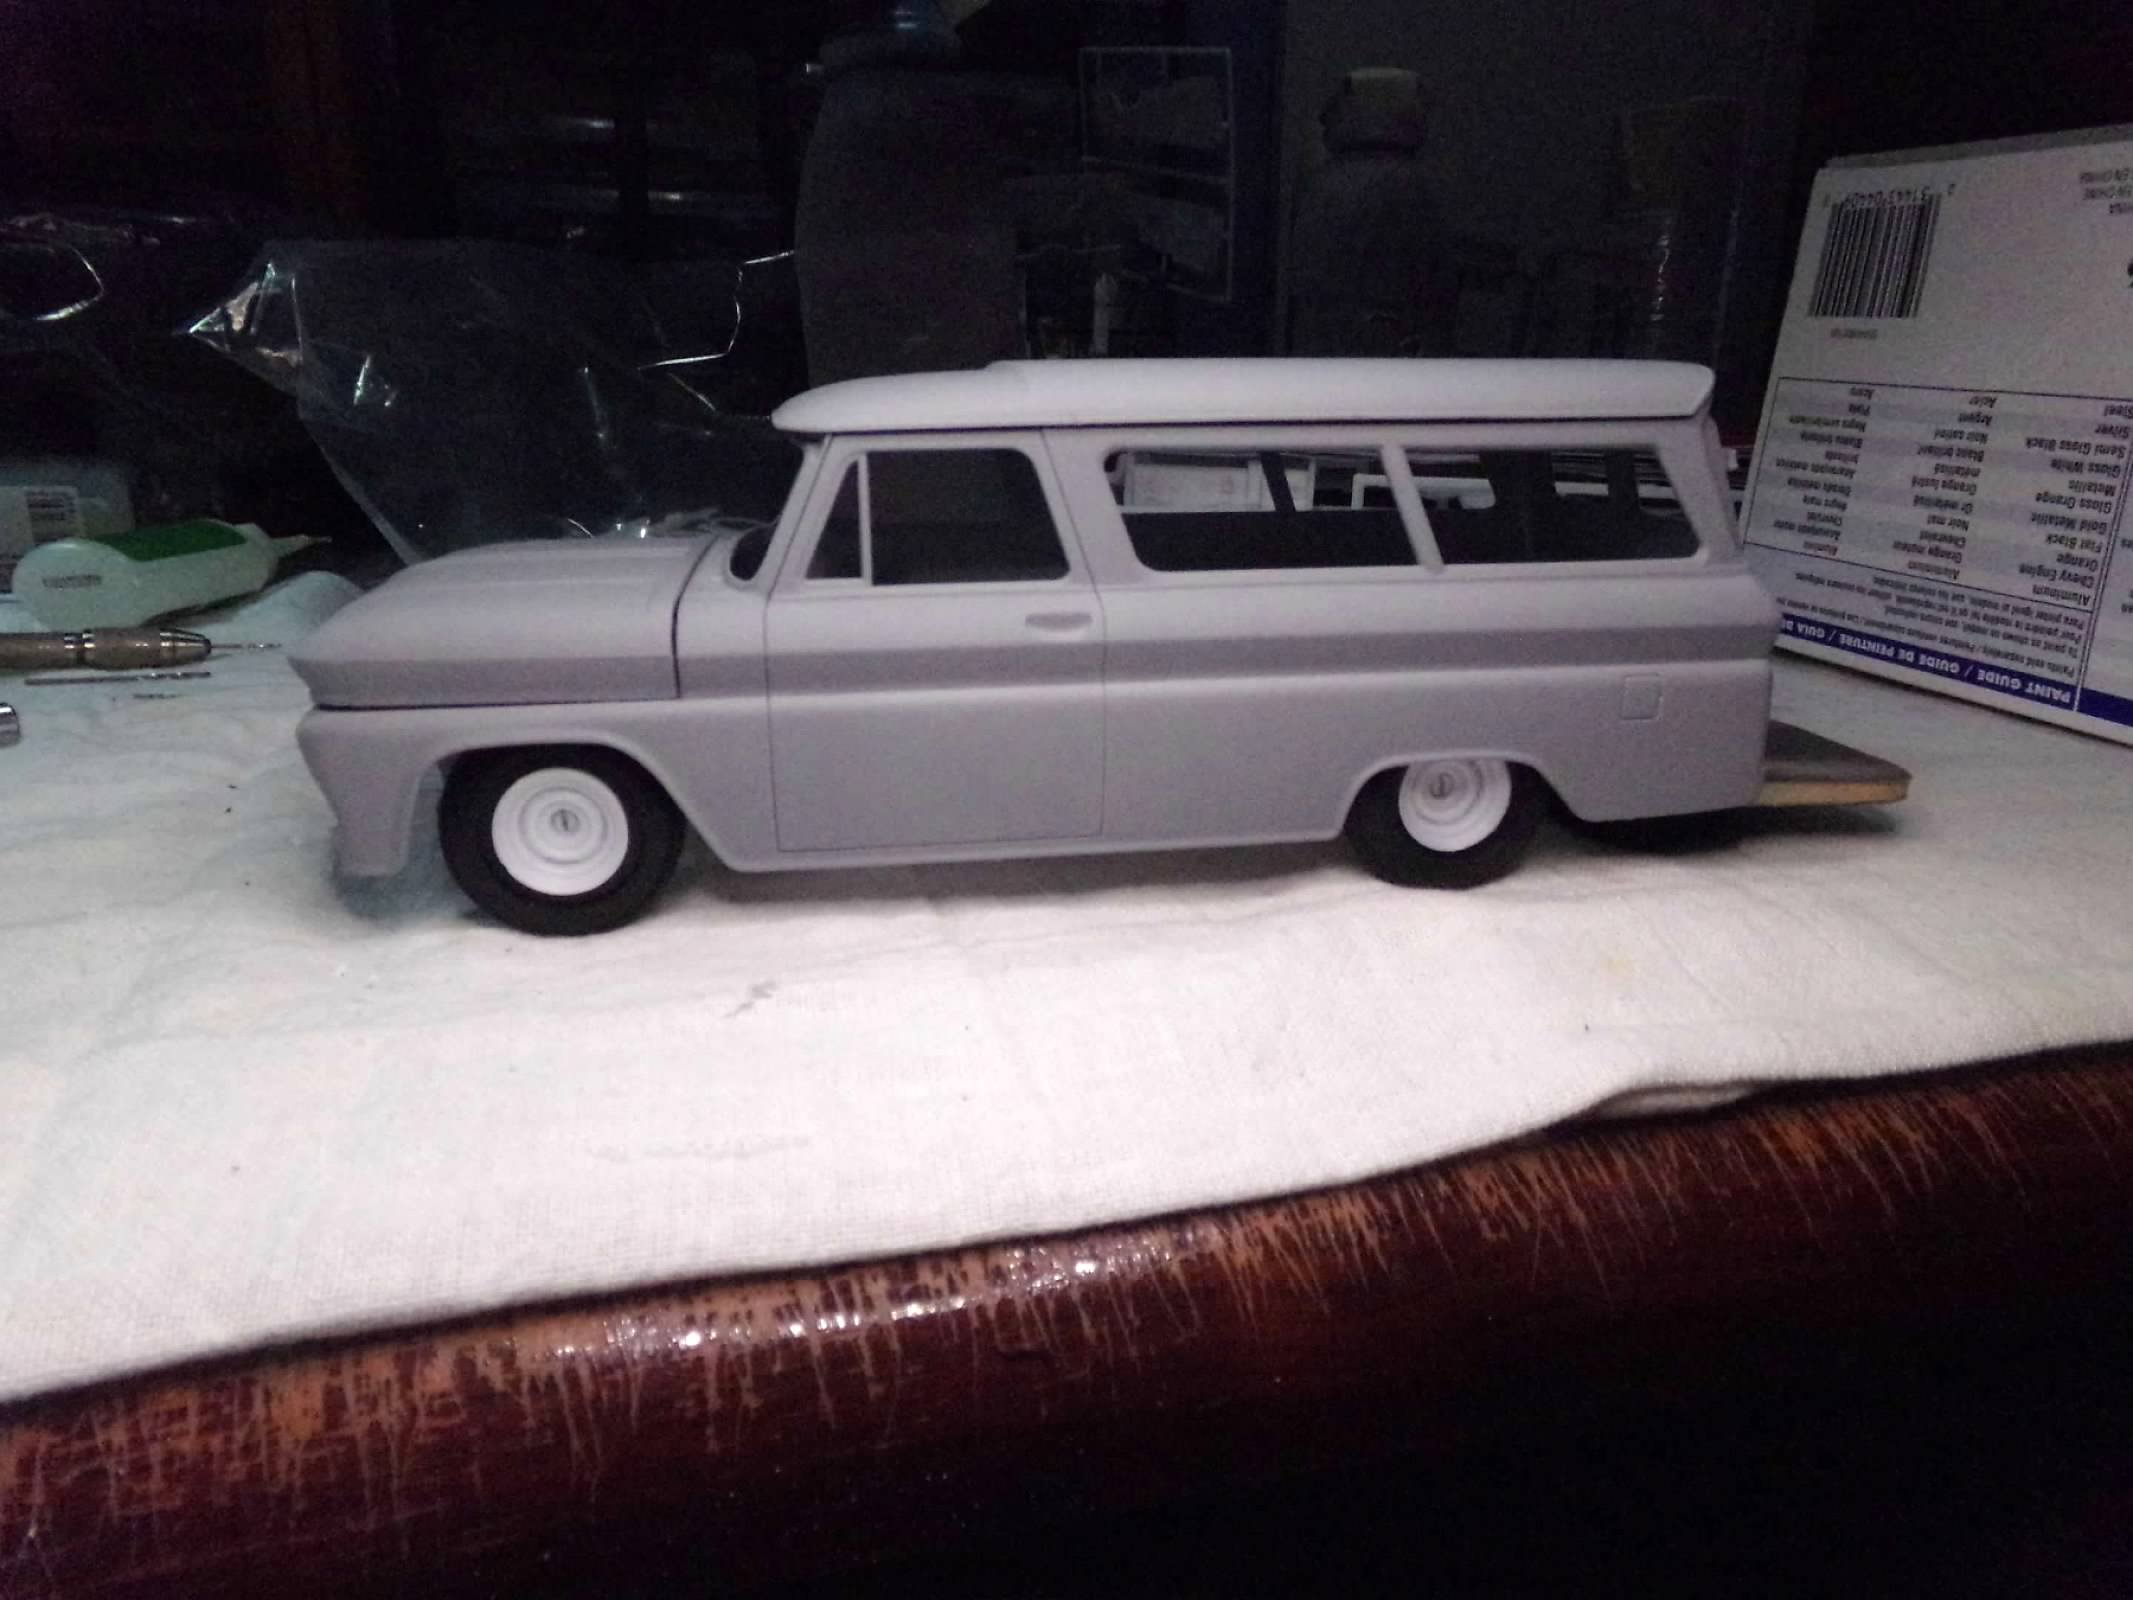
Thanks, Topher, Bob and Charles. I appreciate your comments! Painted the Ivory today and all the other parts. I've been toying with the wheels for this bus for a few hours. I have a lot of these big wheels but generally don't use them. I also have to pick ones that will fit the axles so I don't have to do too much more work to adapt the wheels to the axles. I had it narrowed down to two different sets. One set that were all the same size and not too large and another larger set of big and littles. I think I am going with the big and littles as the rear wheel fills the wheel well better. Let me know what you think! Thanks for looking! ? Smaller wheels Big and Littles
-
1966 Chevy Suburban
ModelcarJR replied to ModelcarJR's topic in WIP: Model Trucks: Pickups, Vans, SUVs, Light Commercial
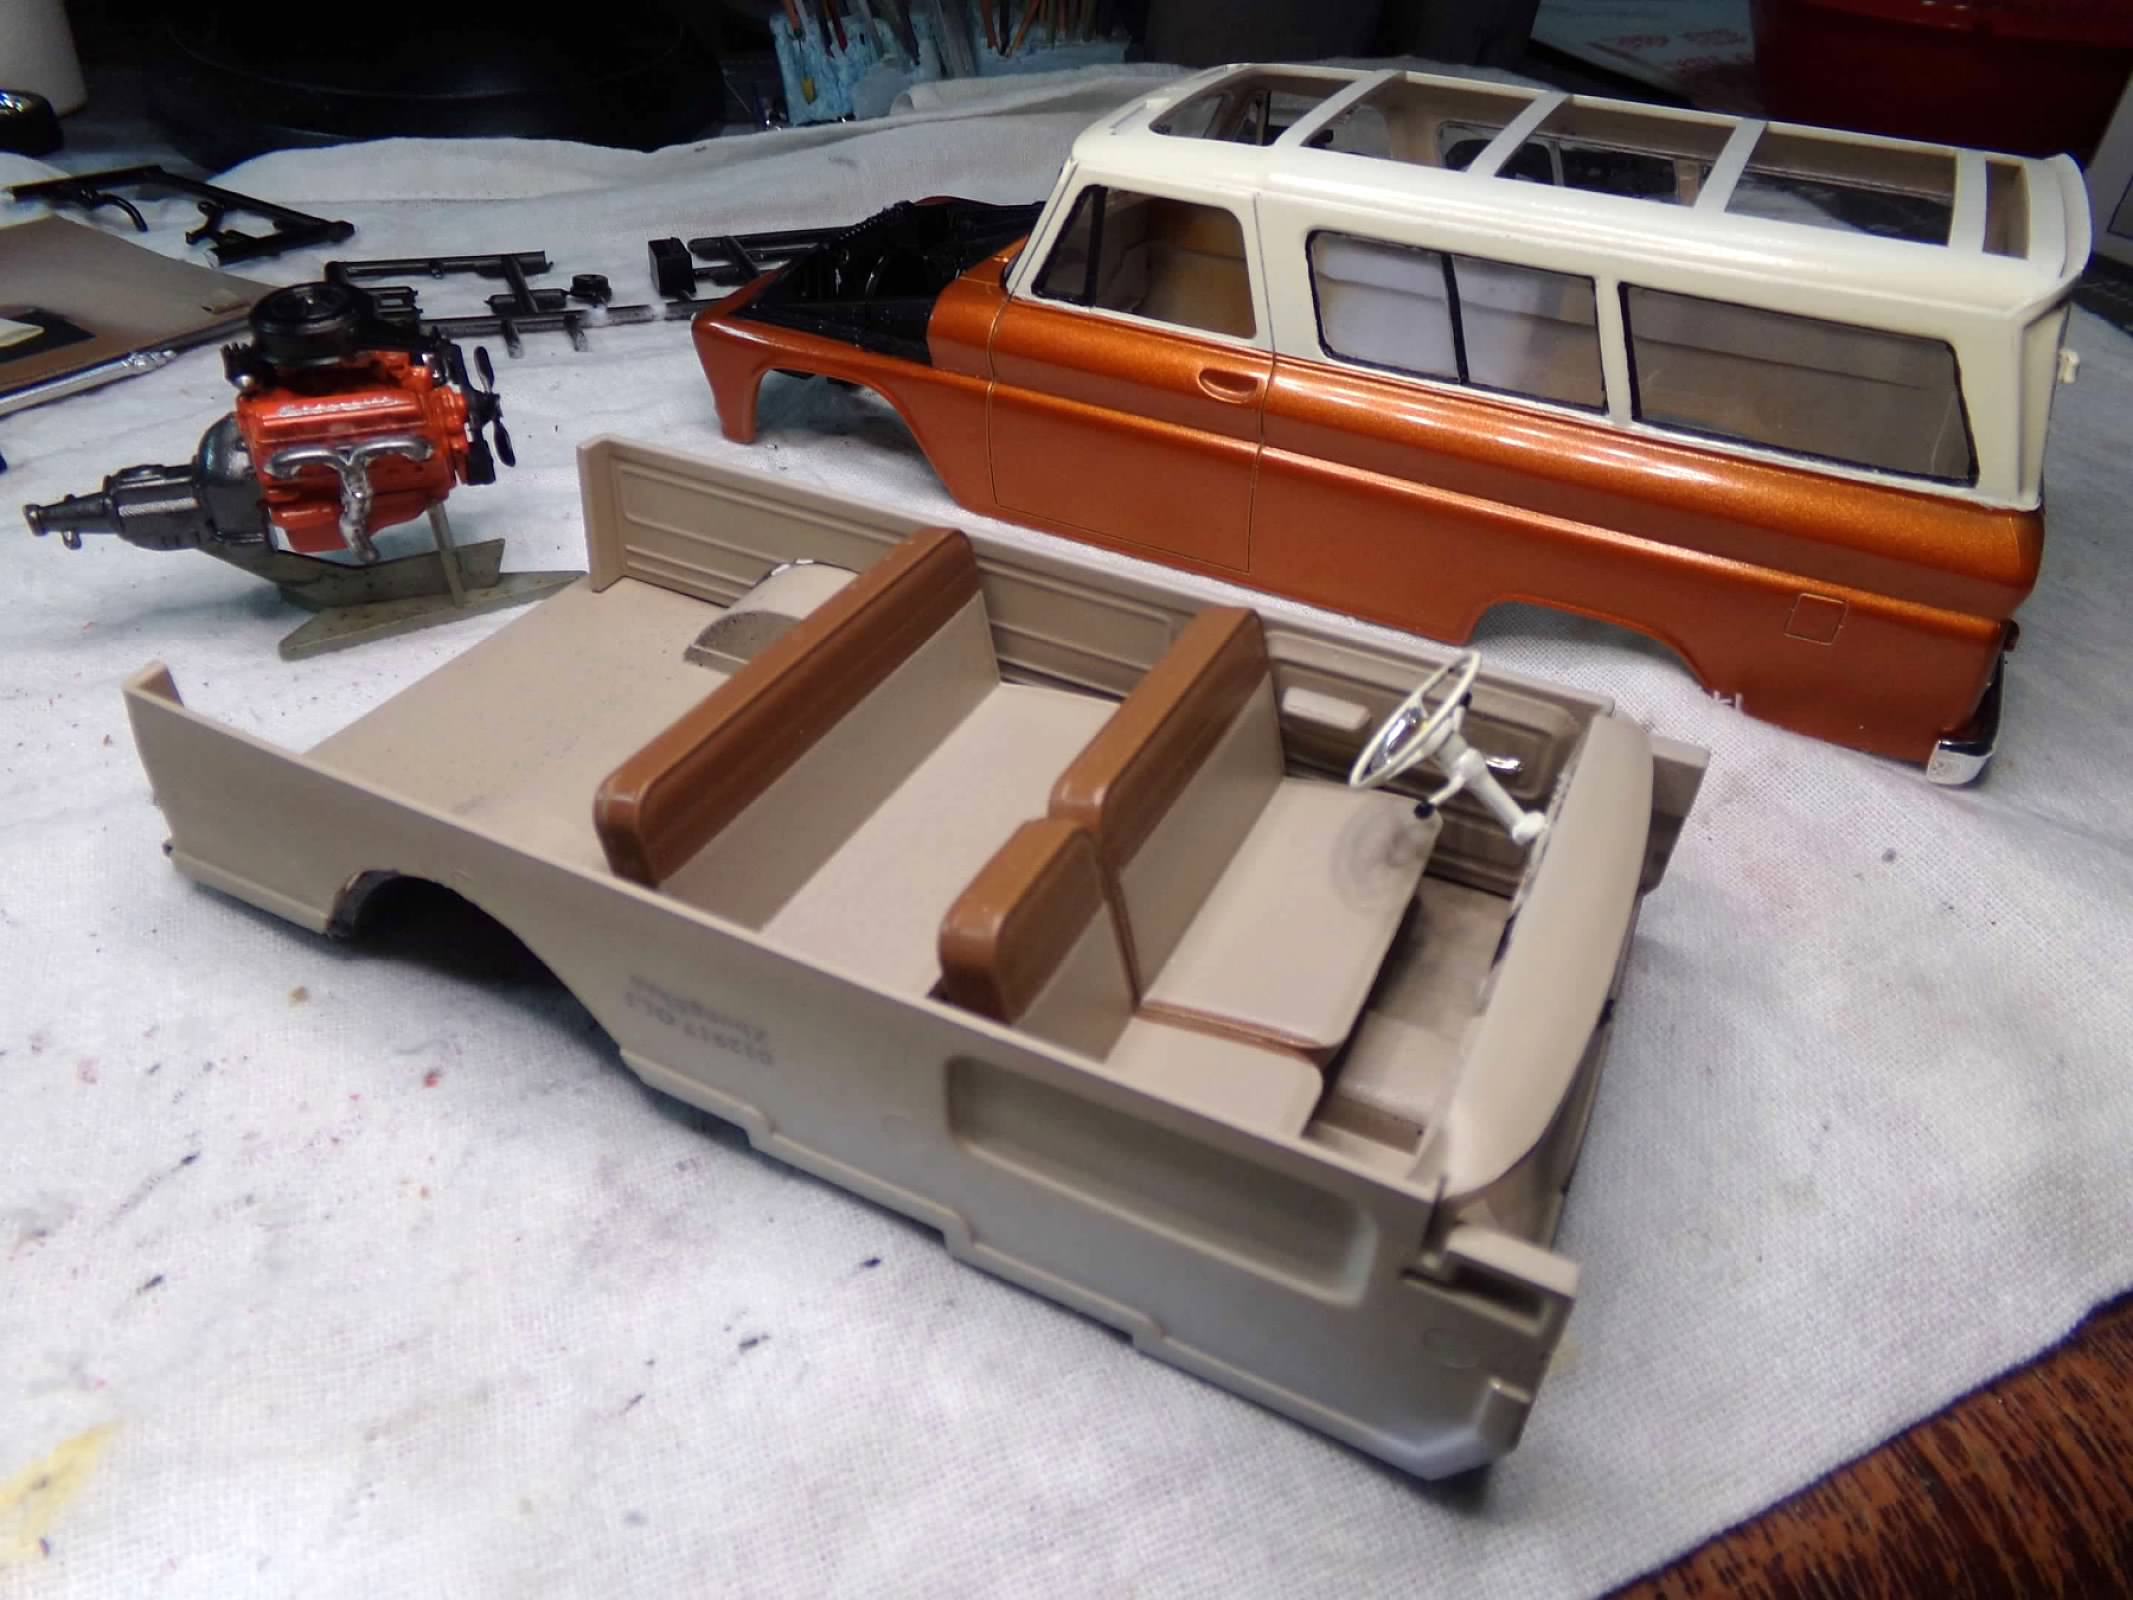
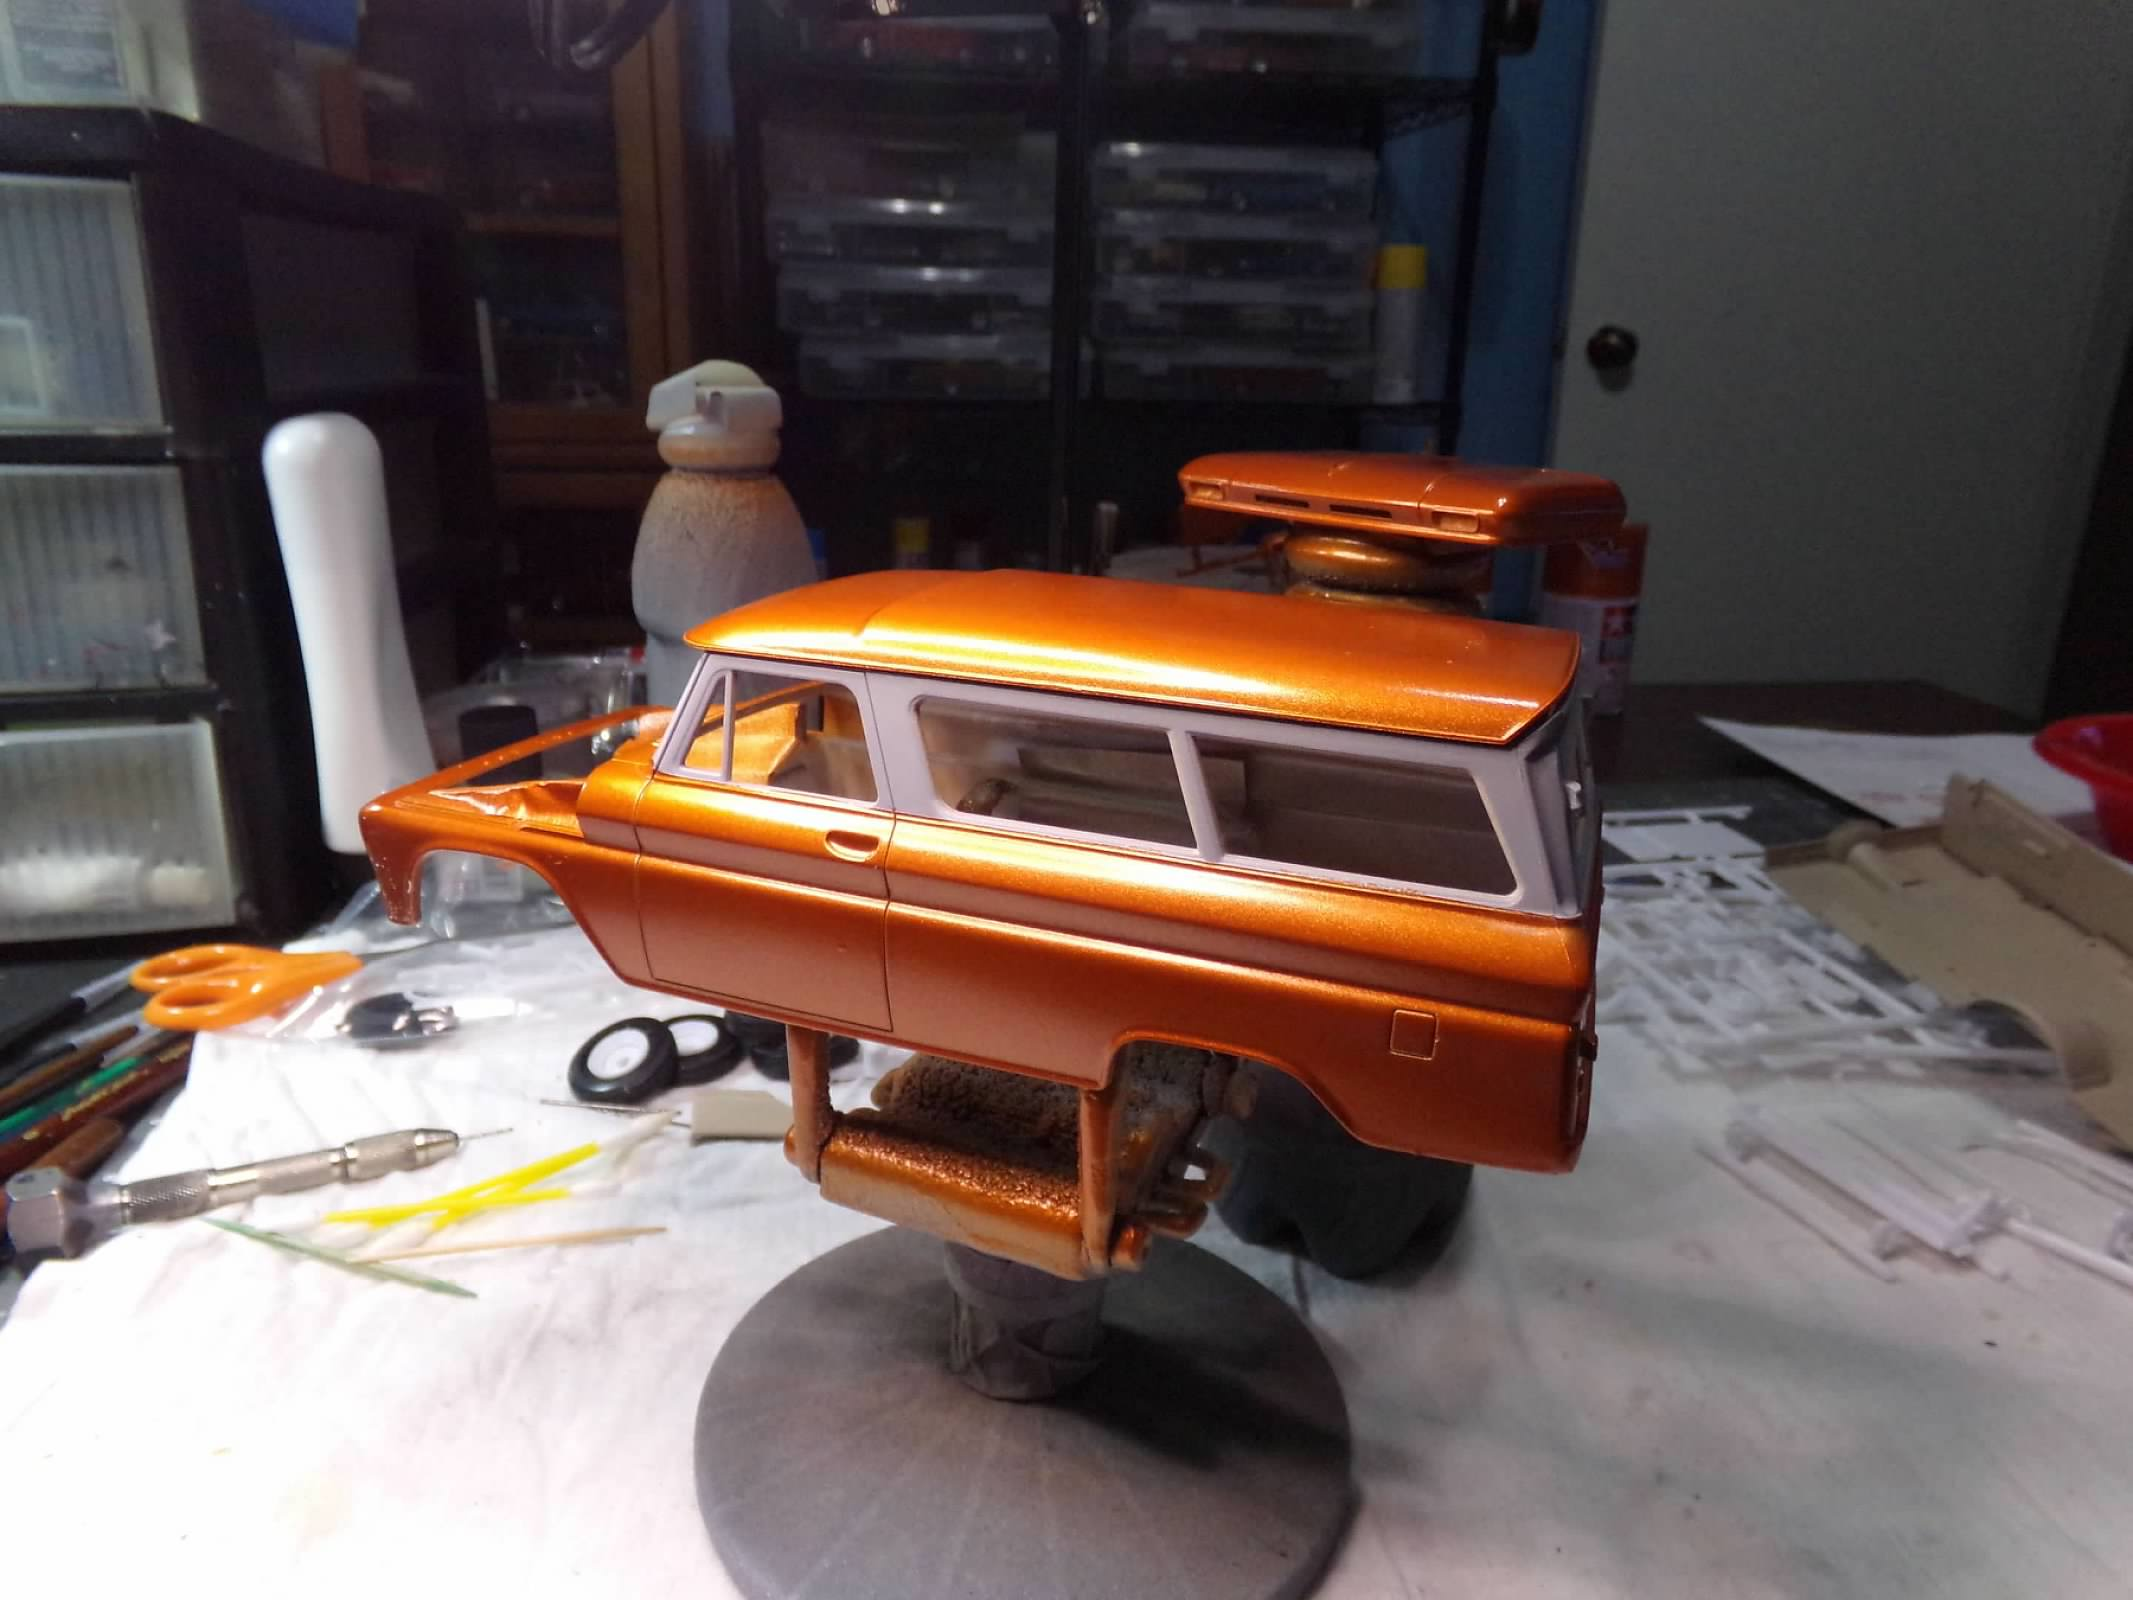
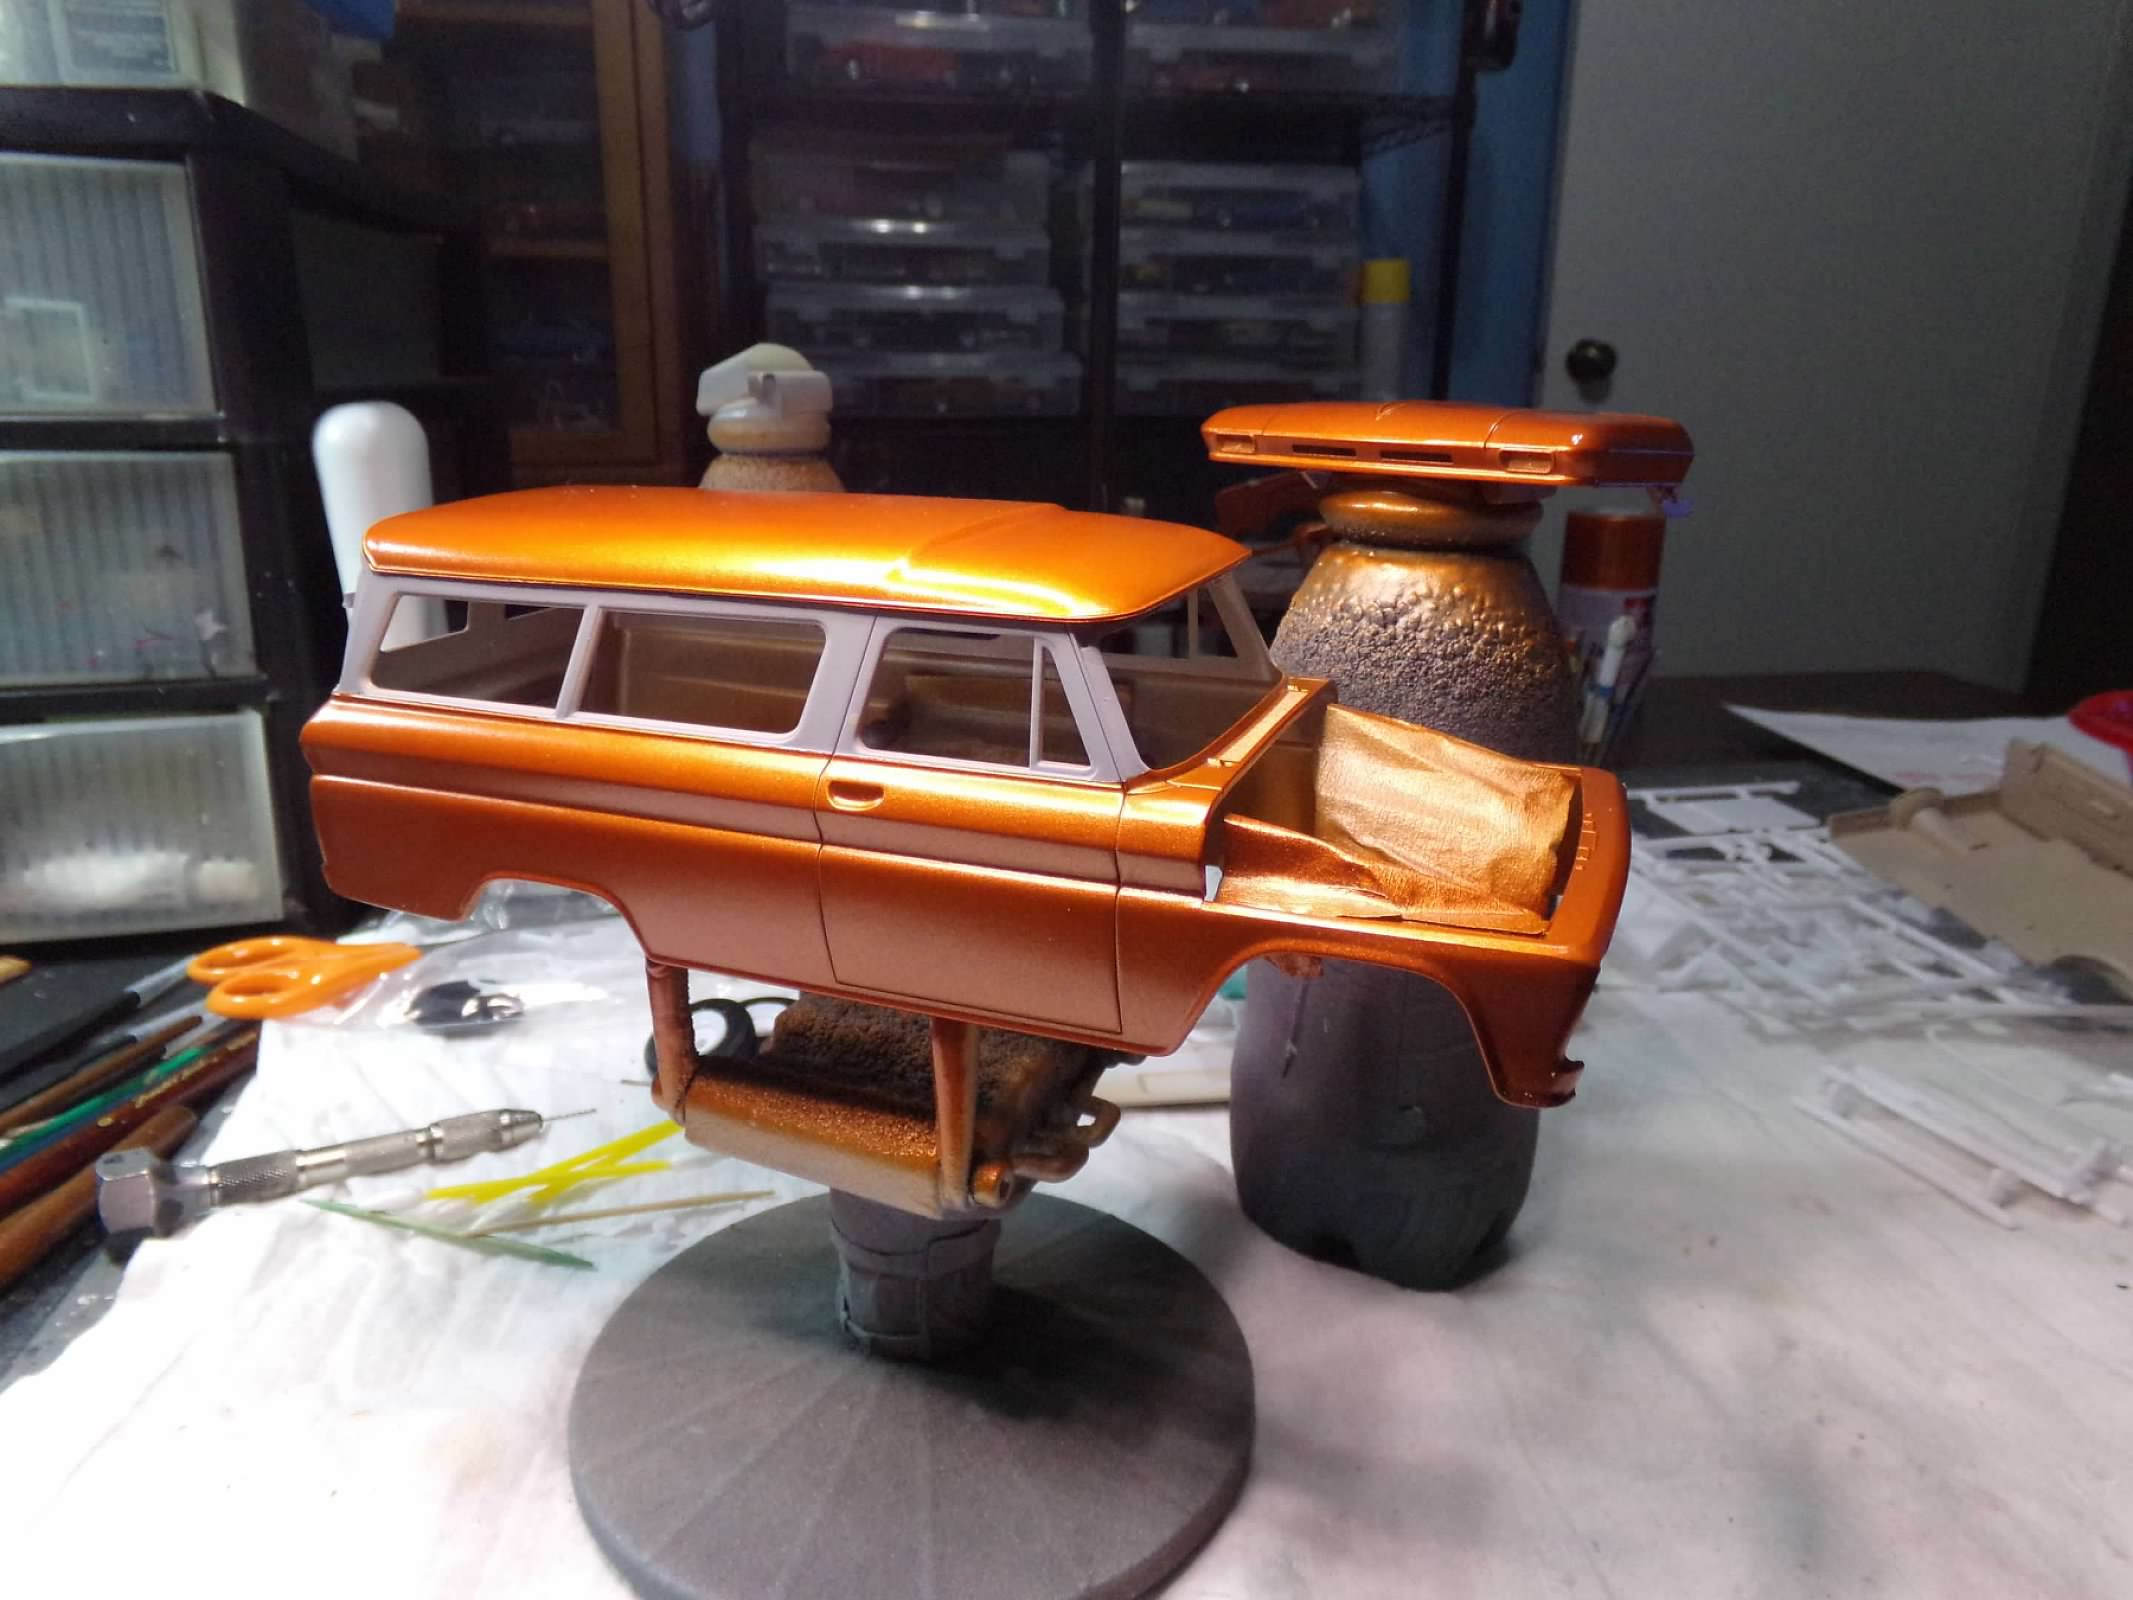
Thanks, Greg! I appreciate your comment! I had a good day today, starting this morning over coffee. I found an adequate 32 Ford fender unit in the parts box that has now lost its rear fender wells. I cut the interior platform, glued in the wheel wells, trimmed them with plastic strip. I also traced the new wheel wells onto the interior panels and then cut them to fit. Finally, after about 3 hours and multiple cups of coffee I had a platform to paint with new wheel wells and I didn't need any putty. The right side is a little taller than the left as I did a better cut on the second one but youyt won't be able to tell once everything is together. I then painted the interior pieces with Krylon Matte Sand Pebble better described as Tan or Beige. Next, I painted the interior body and let it dry. Then, just before lunch I taped off the body and painted the exterior with Tamiya Aluminum for a base coat. After it had dried I then painted the color coat, Metallic Orange or as I like to call it Sierra Gold. Sierra Gold was a 1957 Chevy color and it sounds so much more nostalgic. Tomorrow, I add the color for the window area, Ivory, and then add another coat of clear. I think the combination will look good for 1966. Photos are below. Thanks for looking! ?
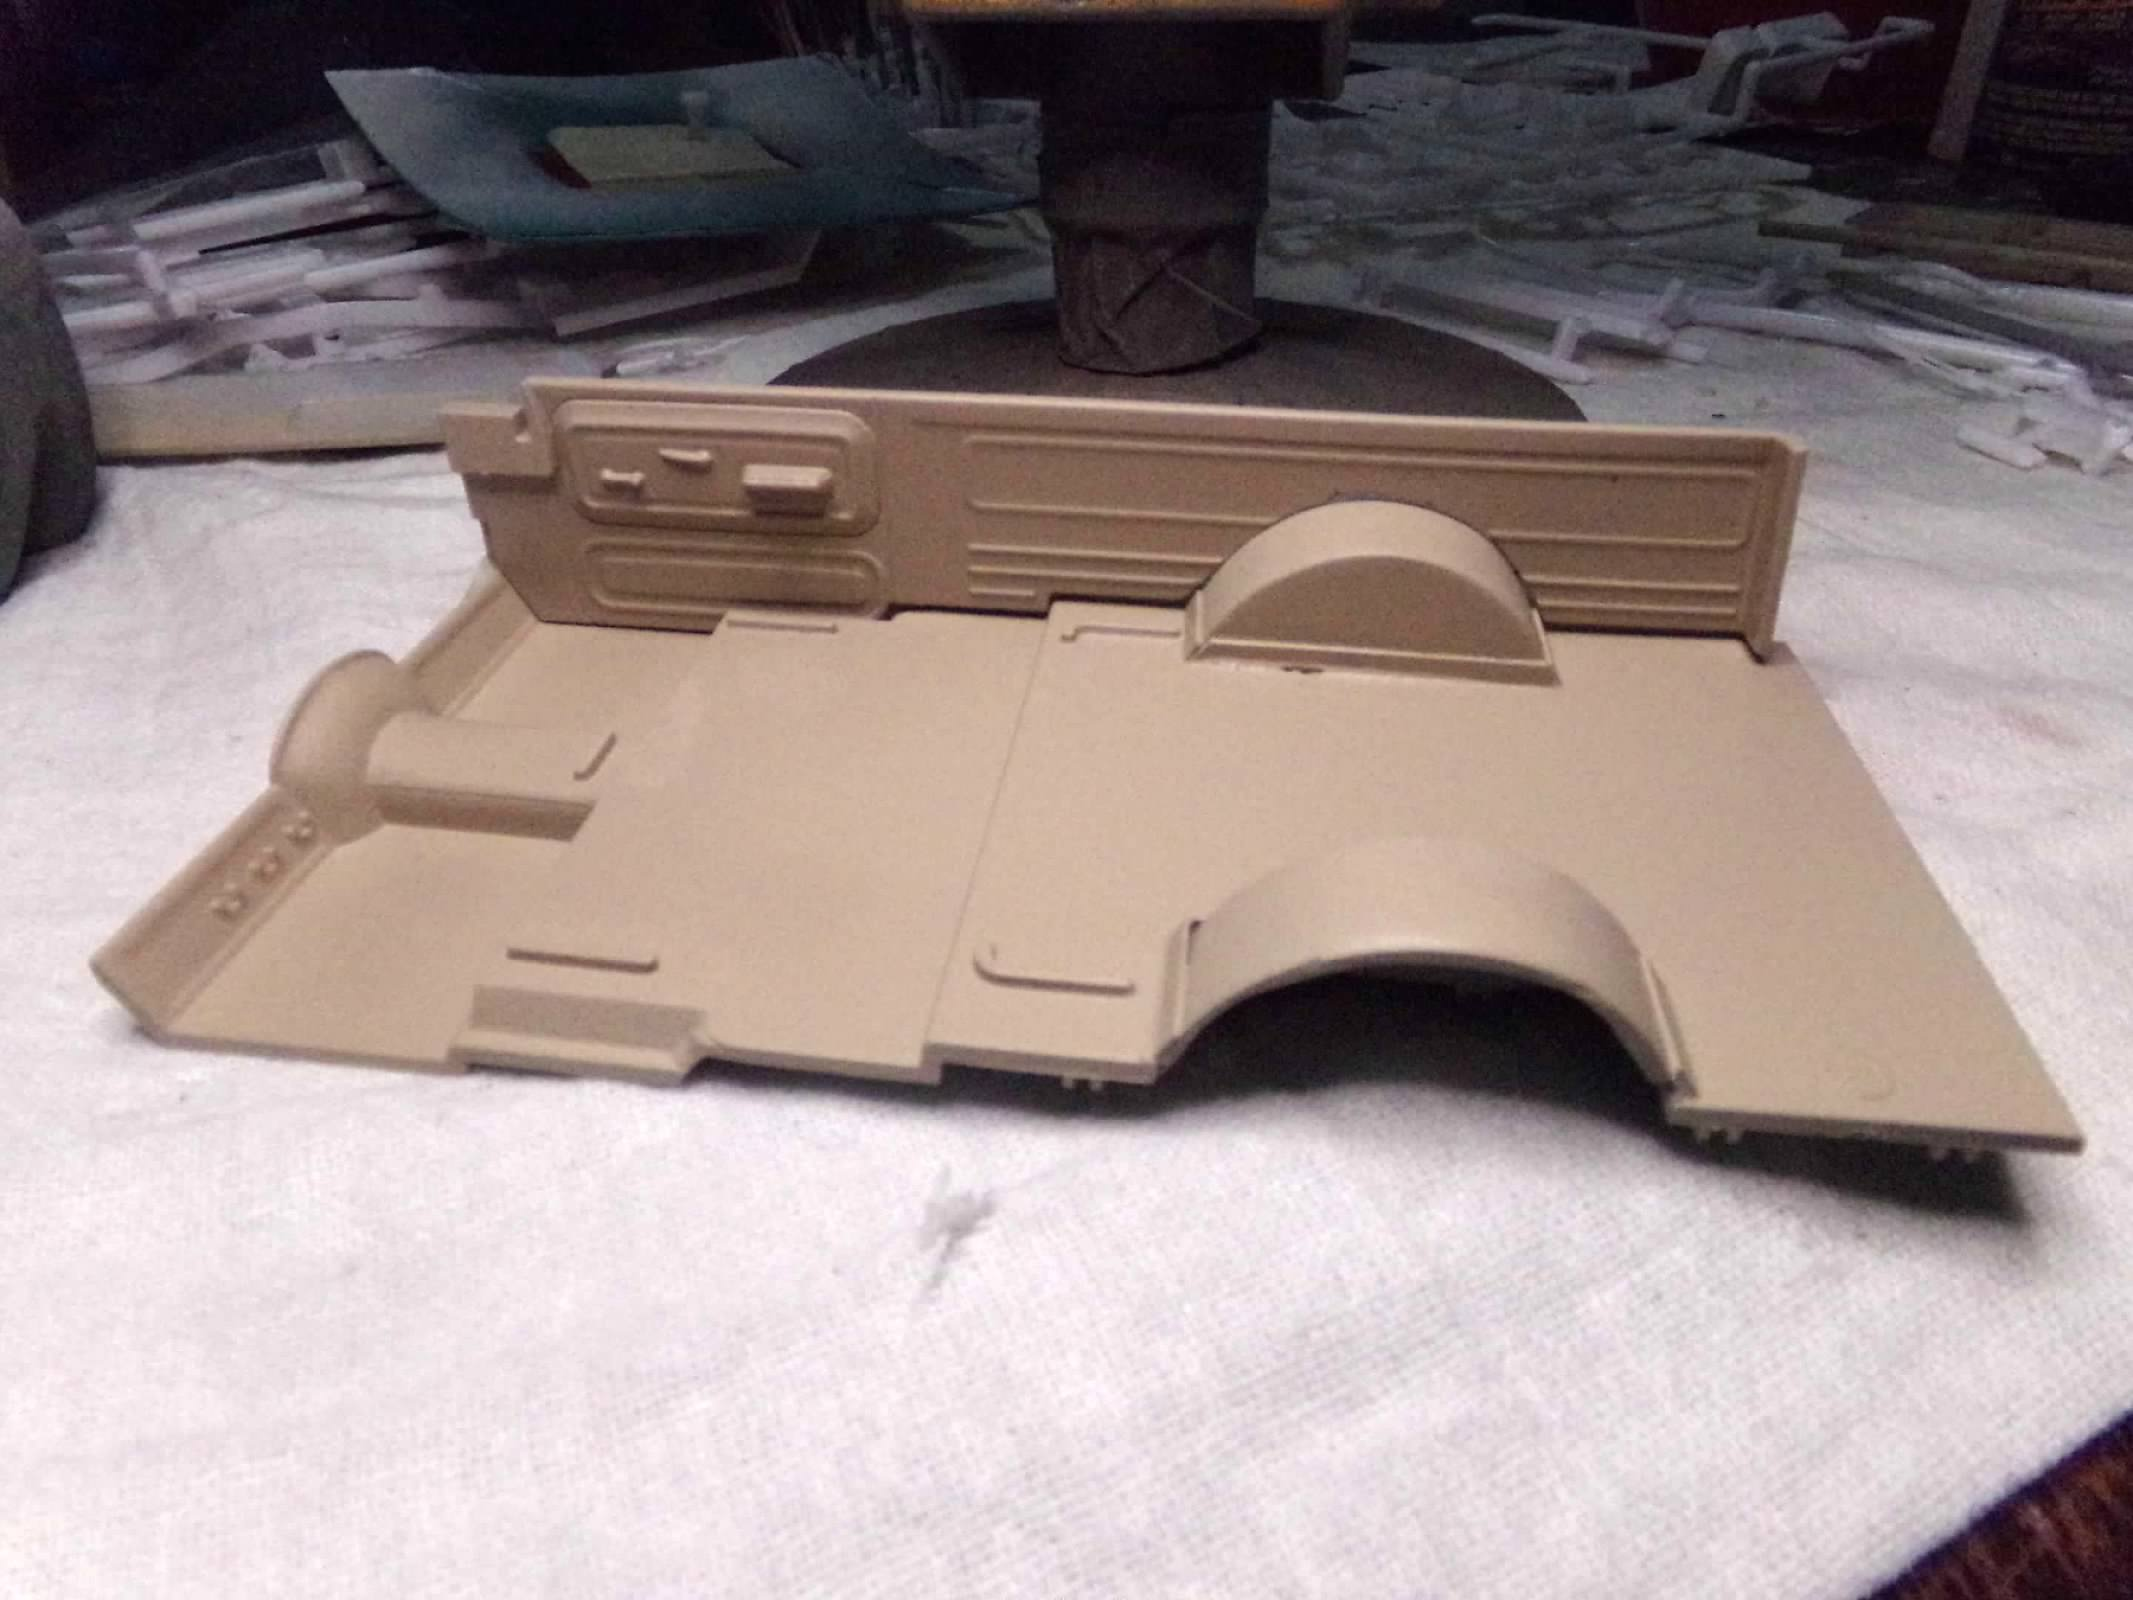
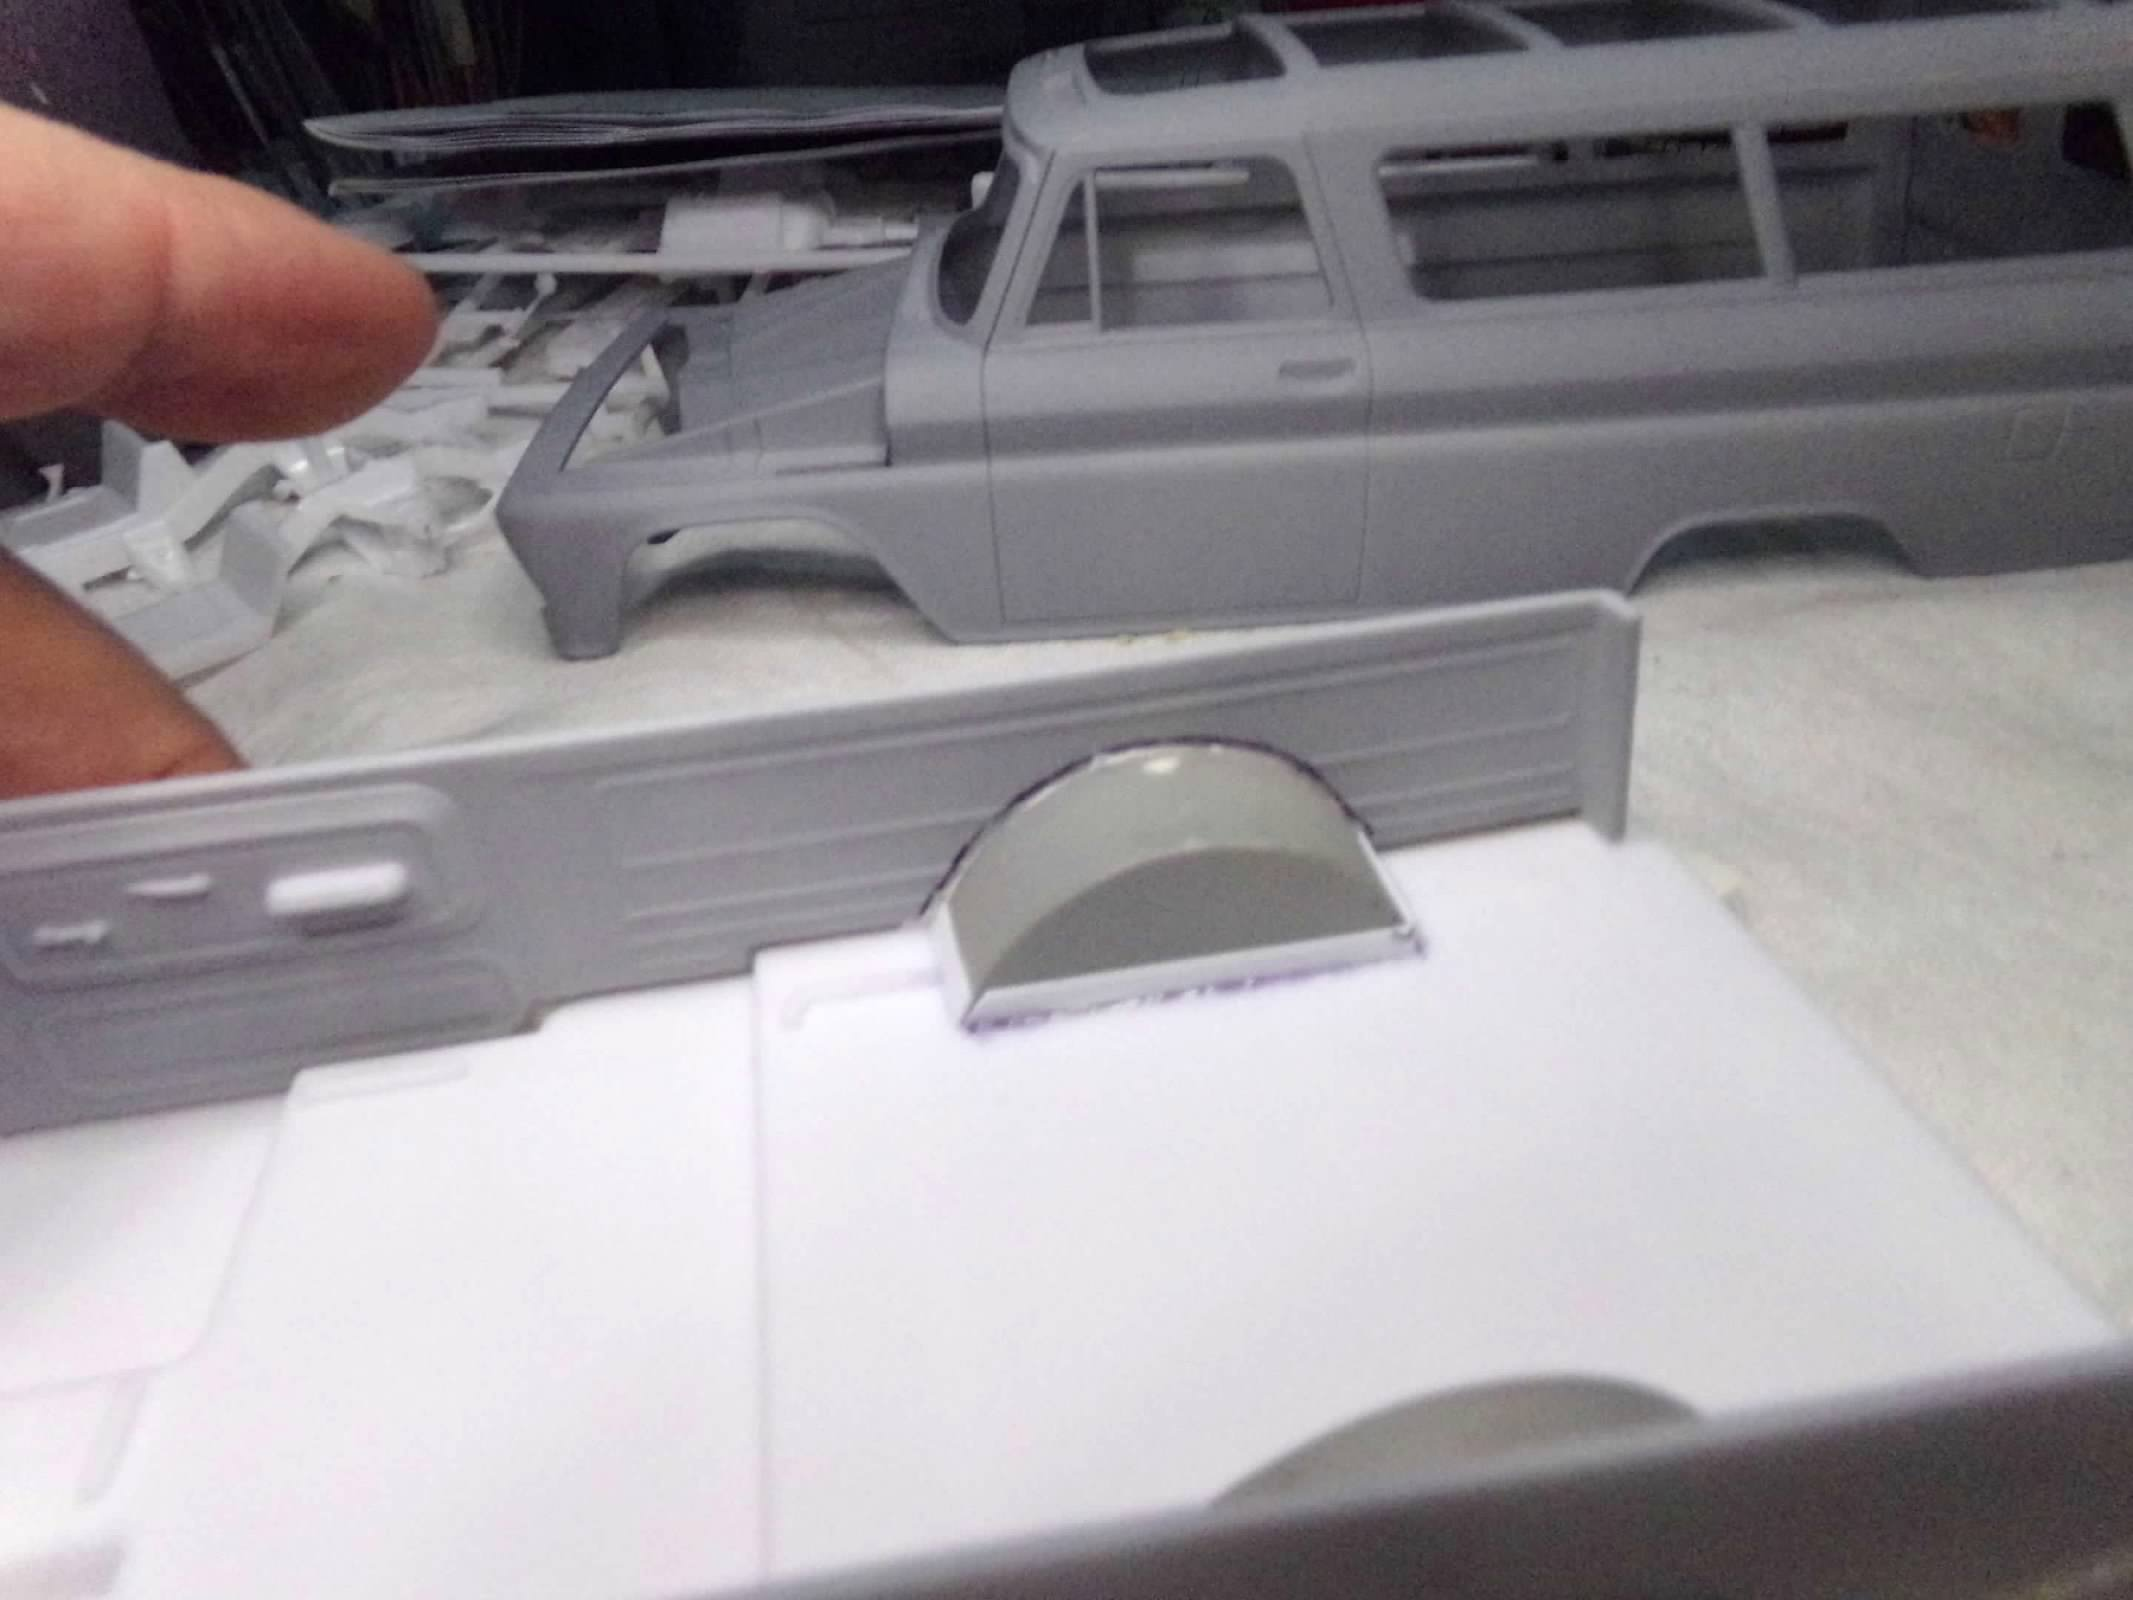
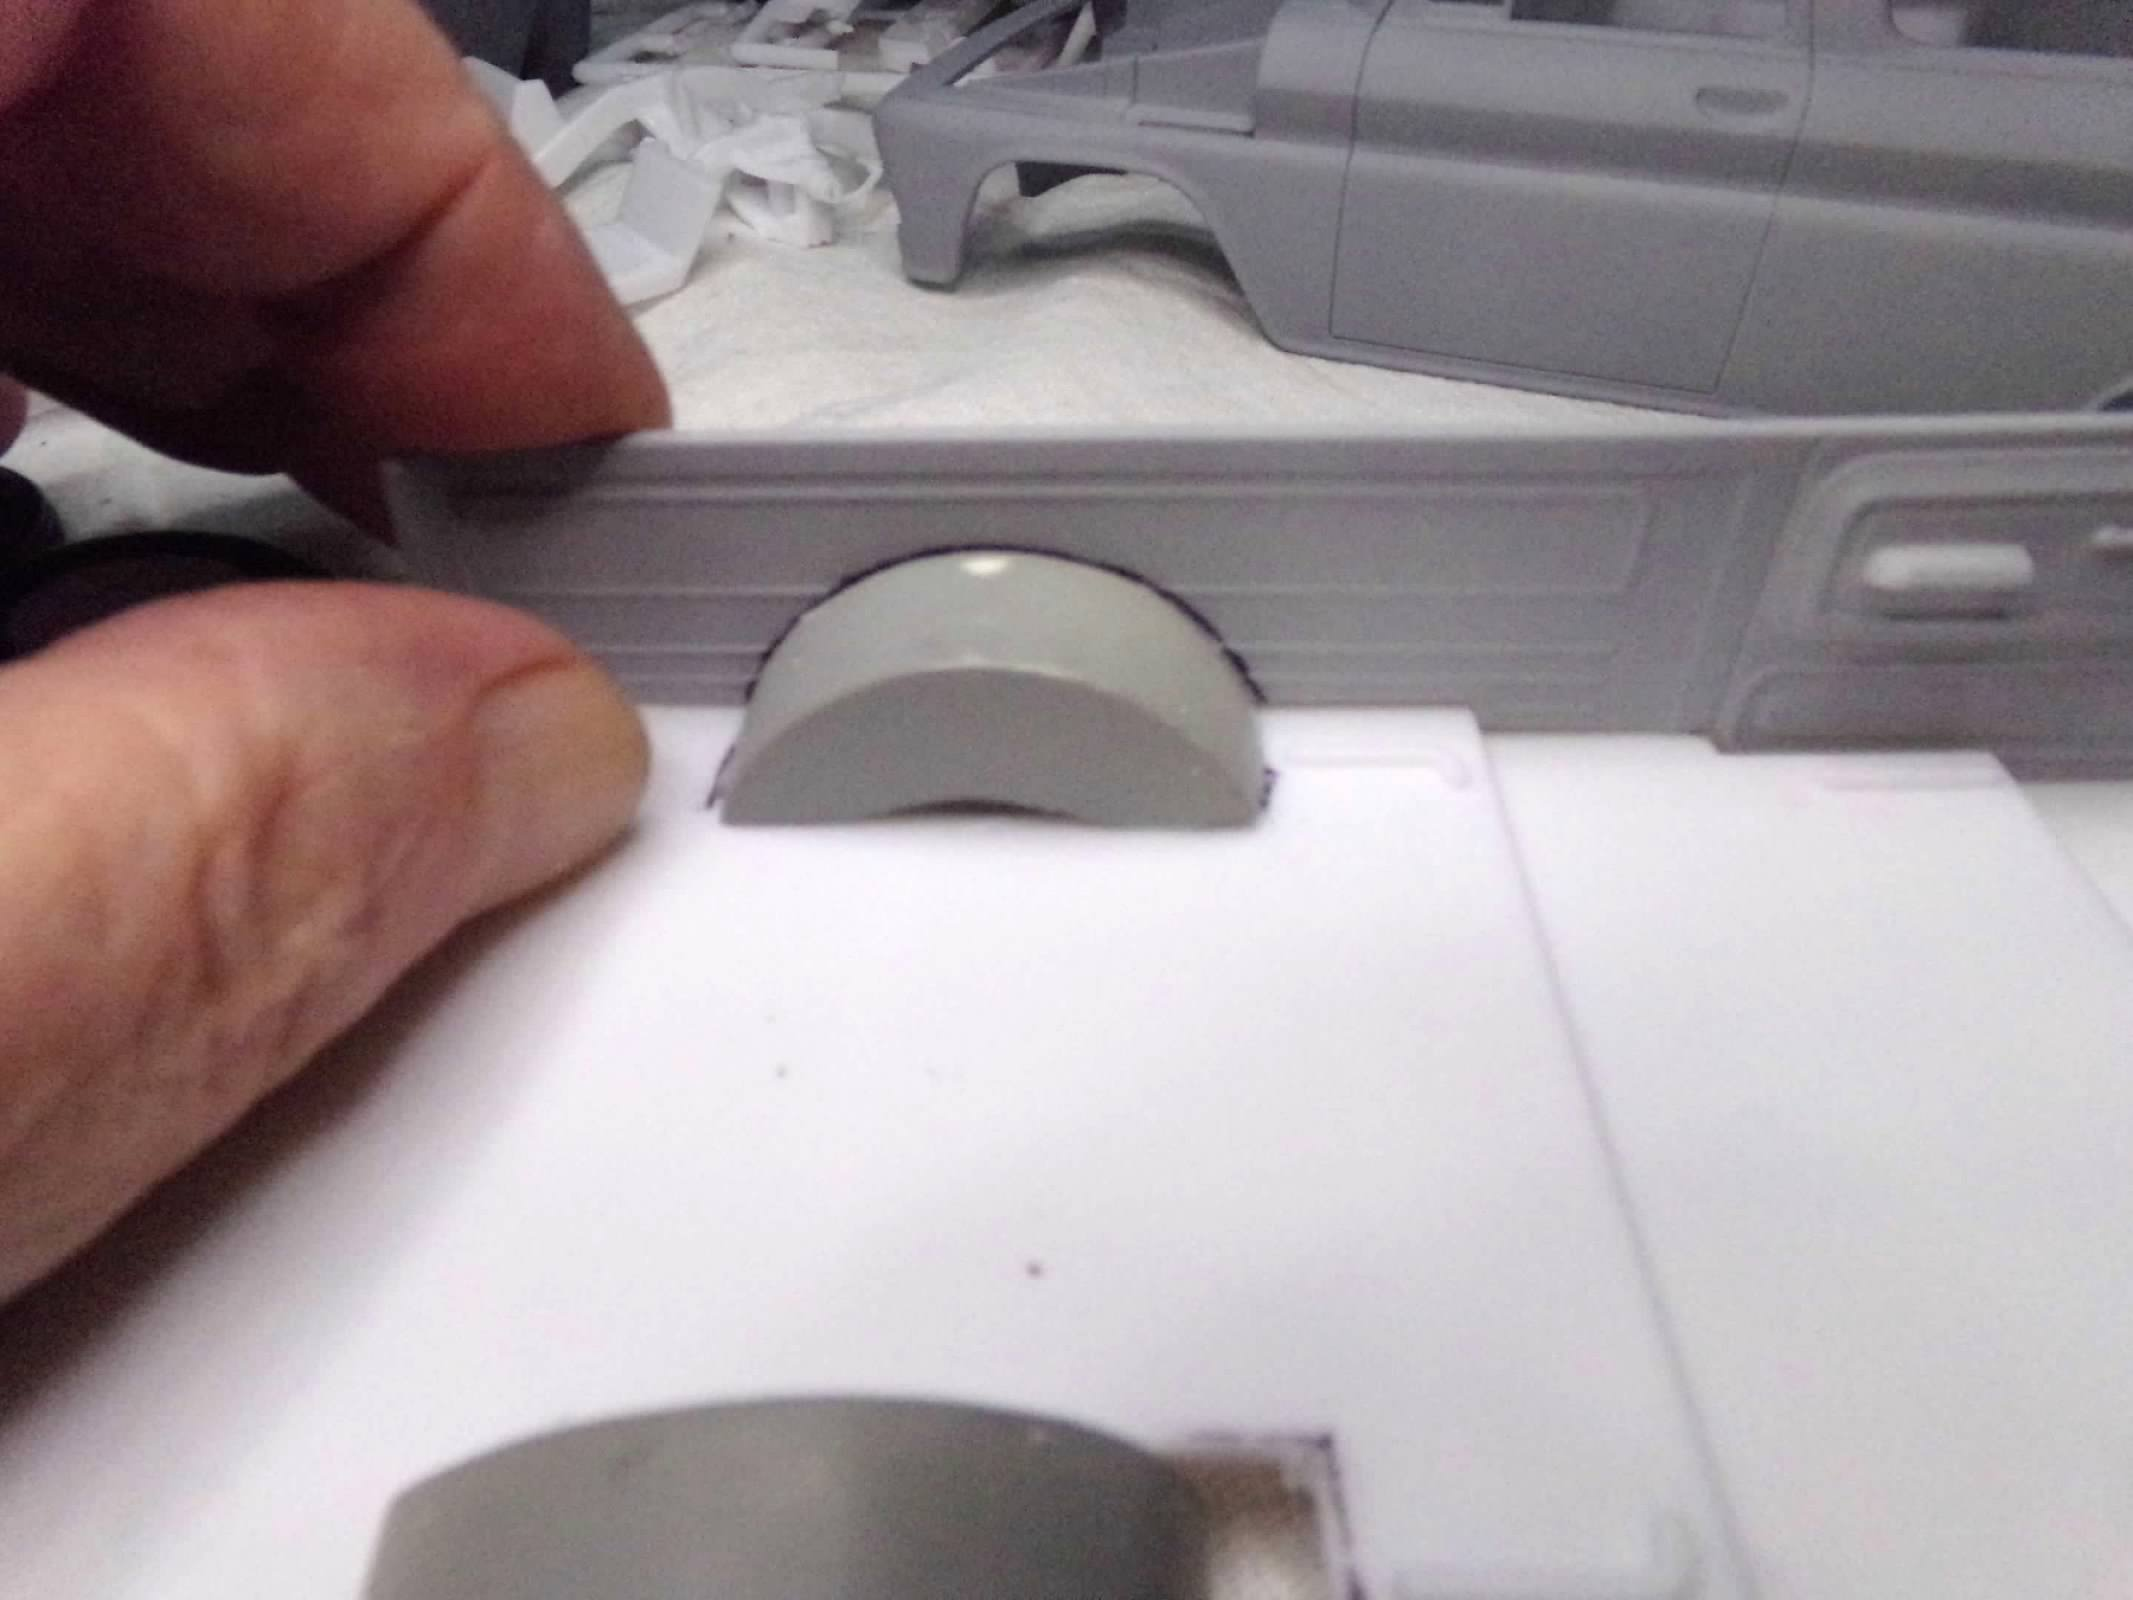
-
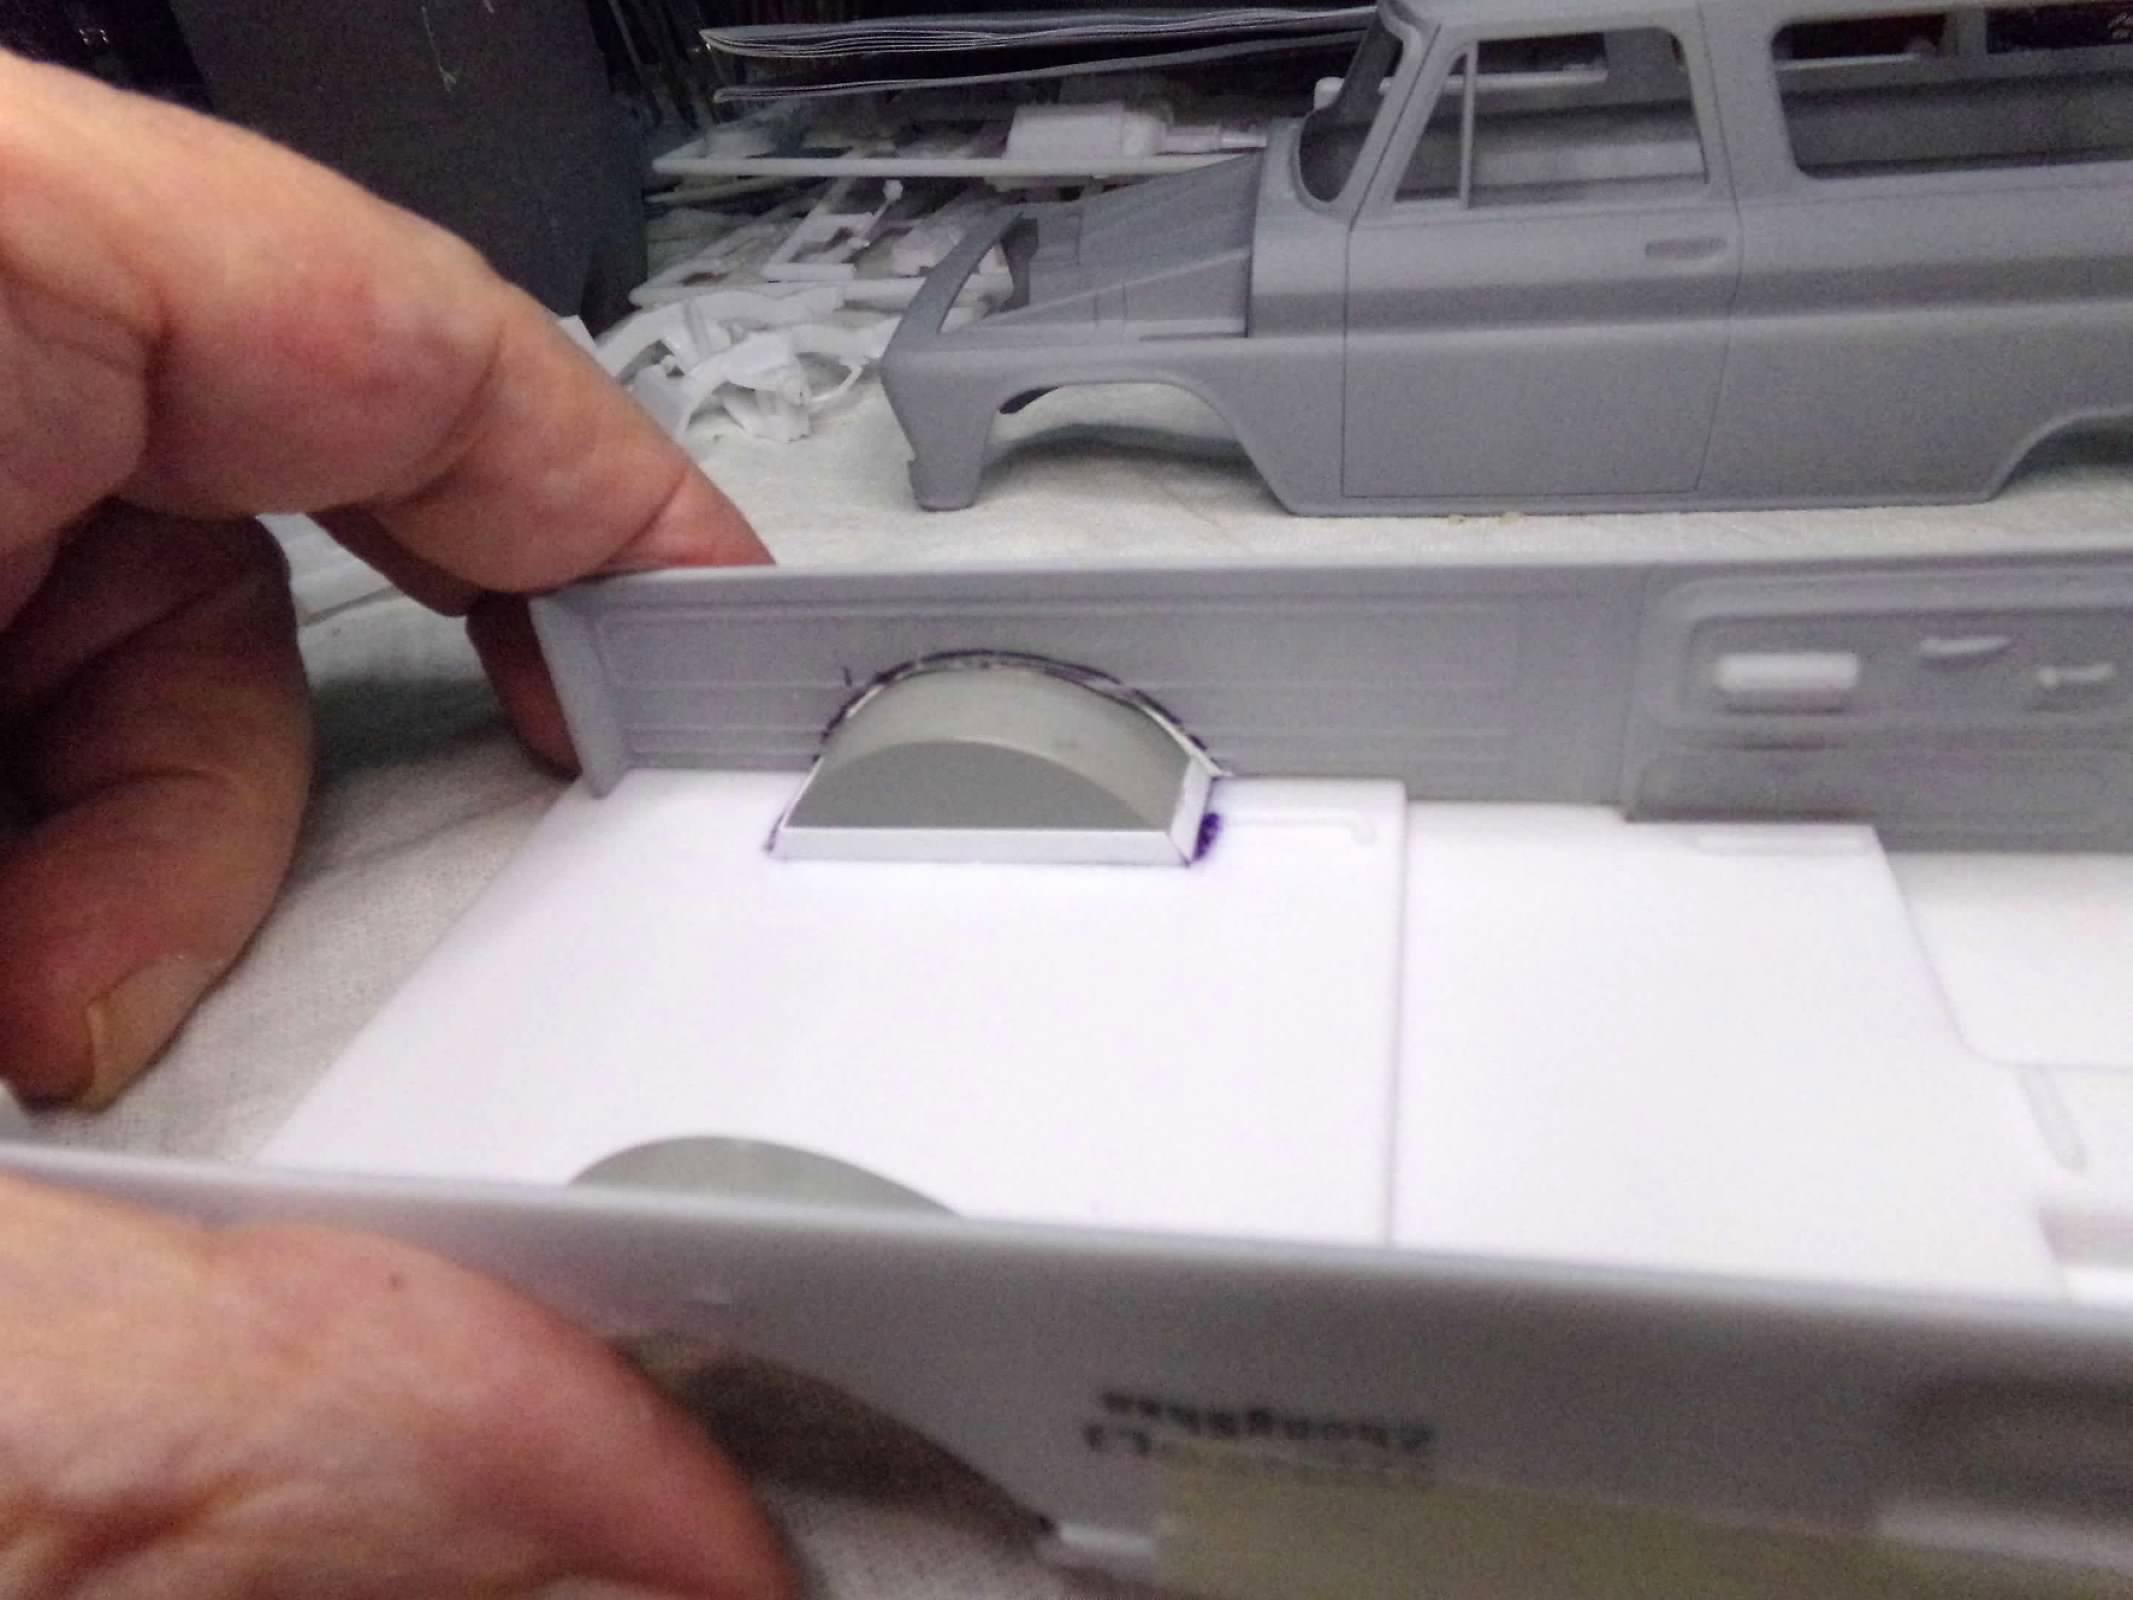
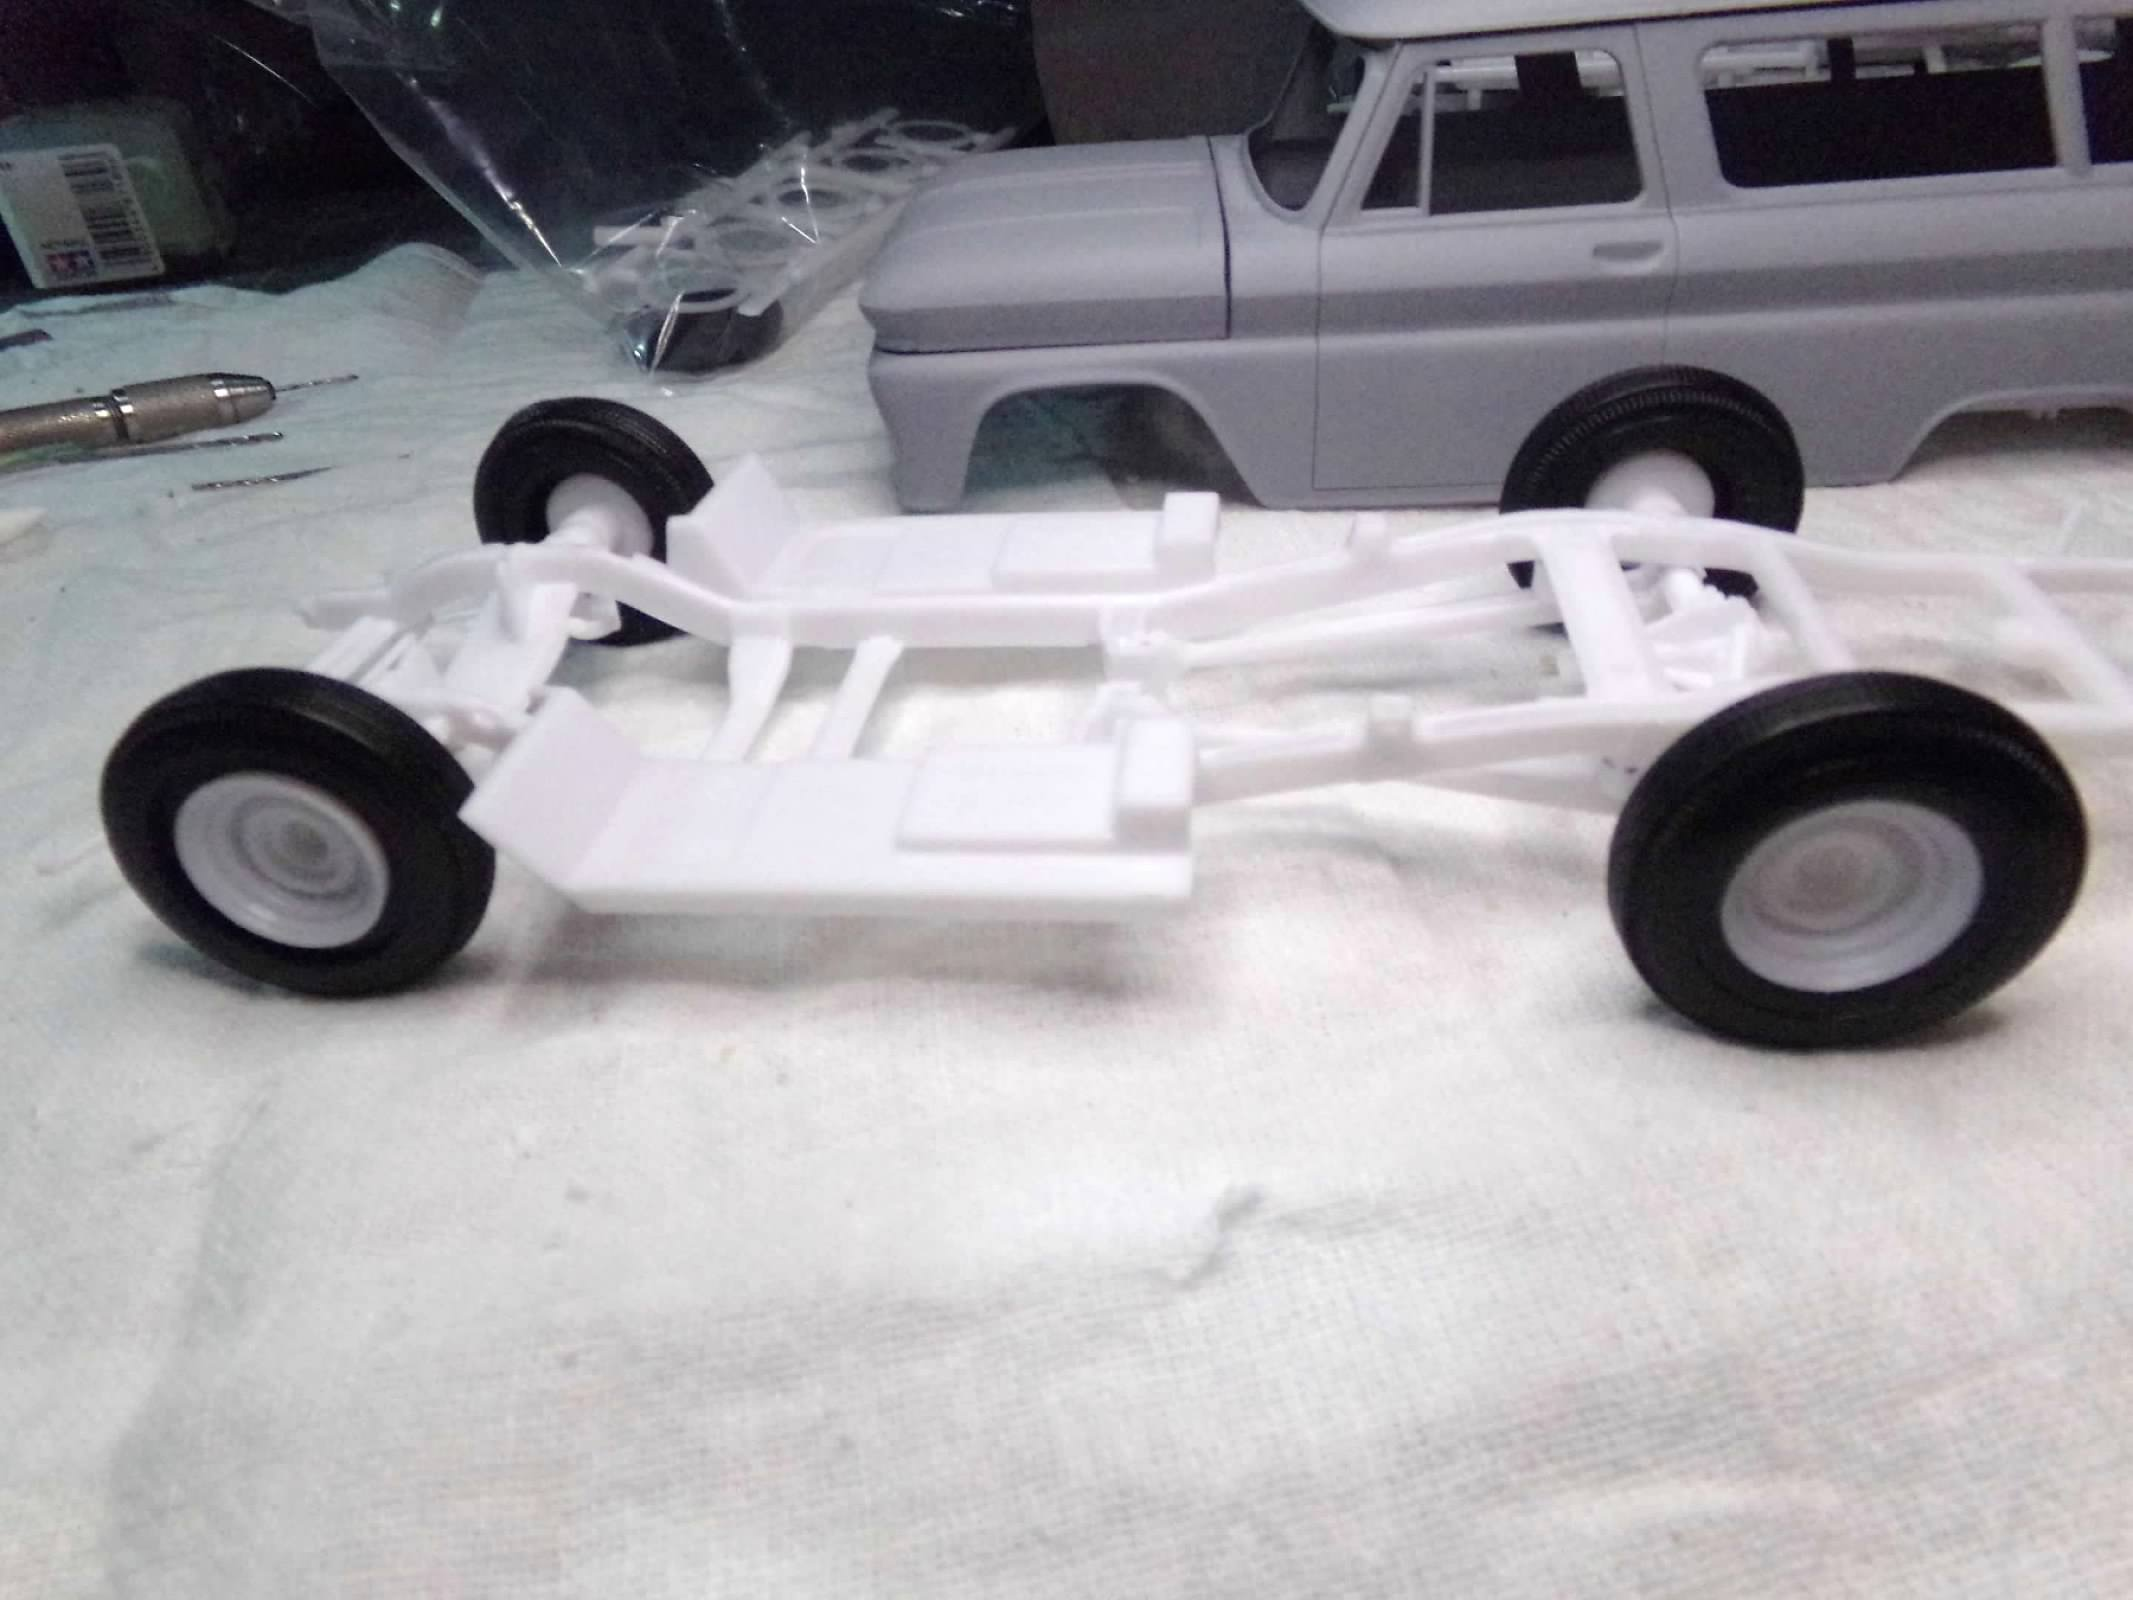
I started this one this afternoon and started looking at photos on the internet of these Suburbans. I noticed a few that were dropped and looked pretty good. So whilethe primer was drying I began looking at the chassis and devising a way to drop this bus...I mean truck or maybe SUV. So I mounted the axle high on the kingpin by cutting it off and pinning it about 1/8" higher. Then I cut the rear supporting posts for the rear suspension by the same 1/8". That would be about a 3"drop in scale. I want to put some big wheels on this truck so I will have to cut up the interior floor and find some wider and taller wheel wells to graft on. Thanks for looking! ?
-
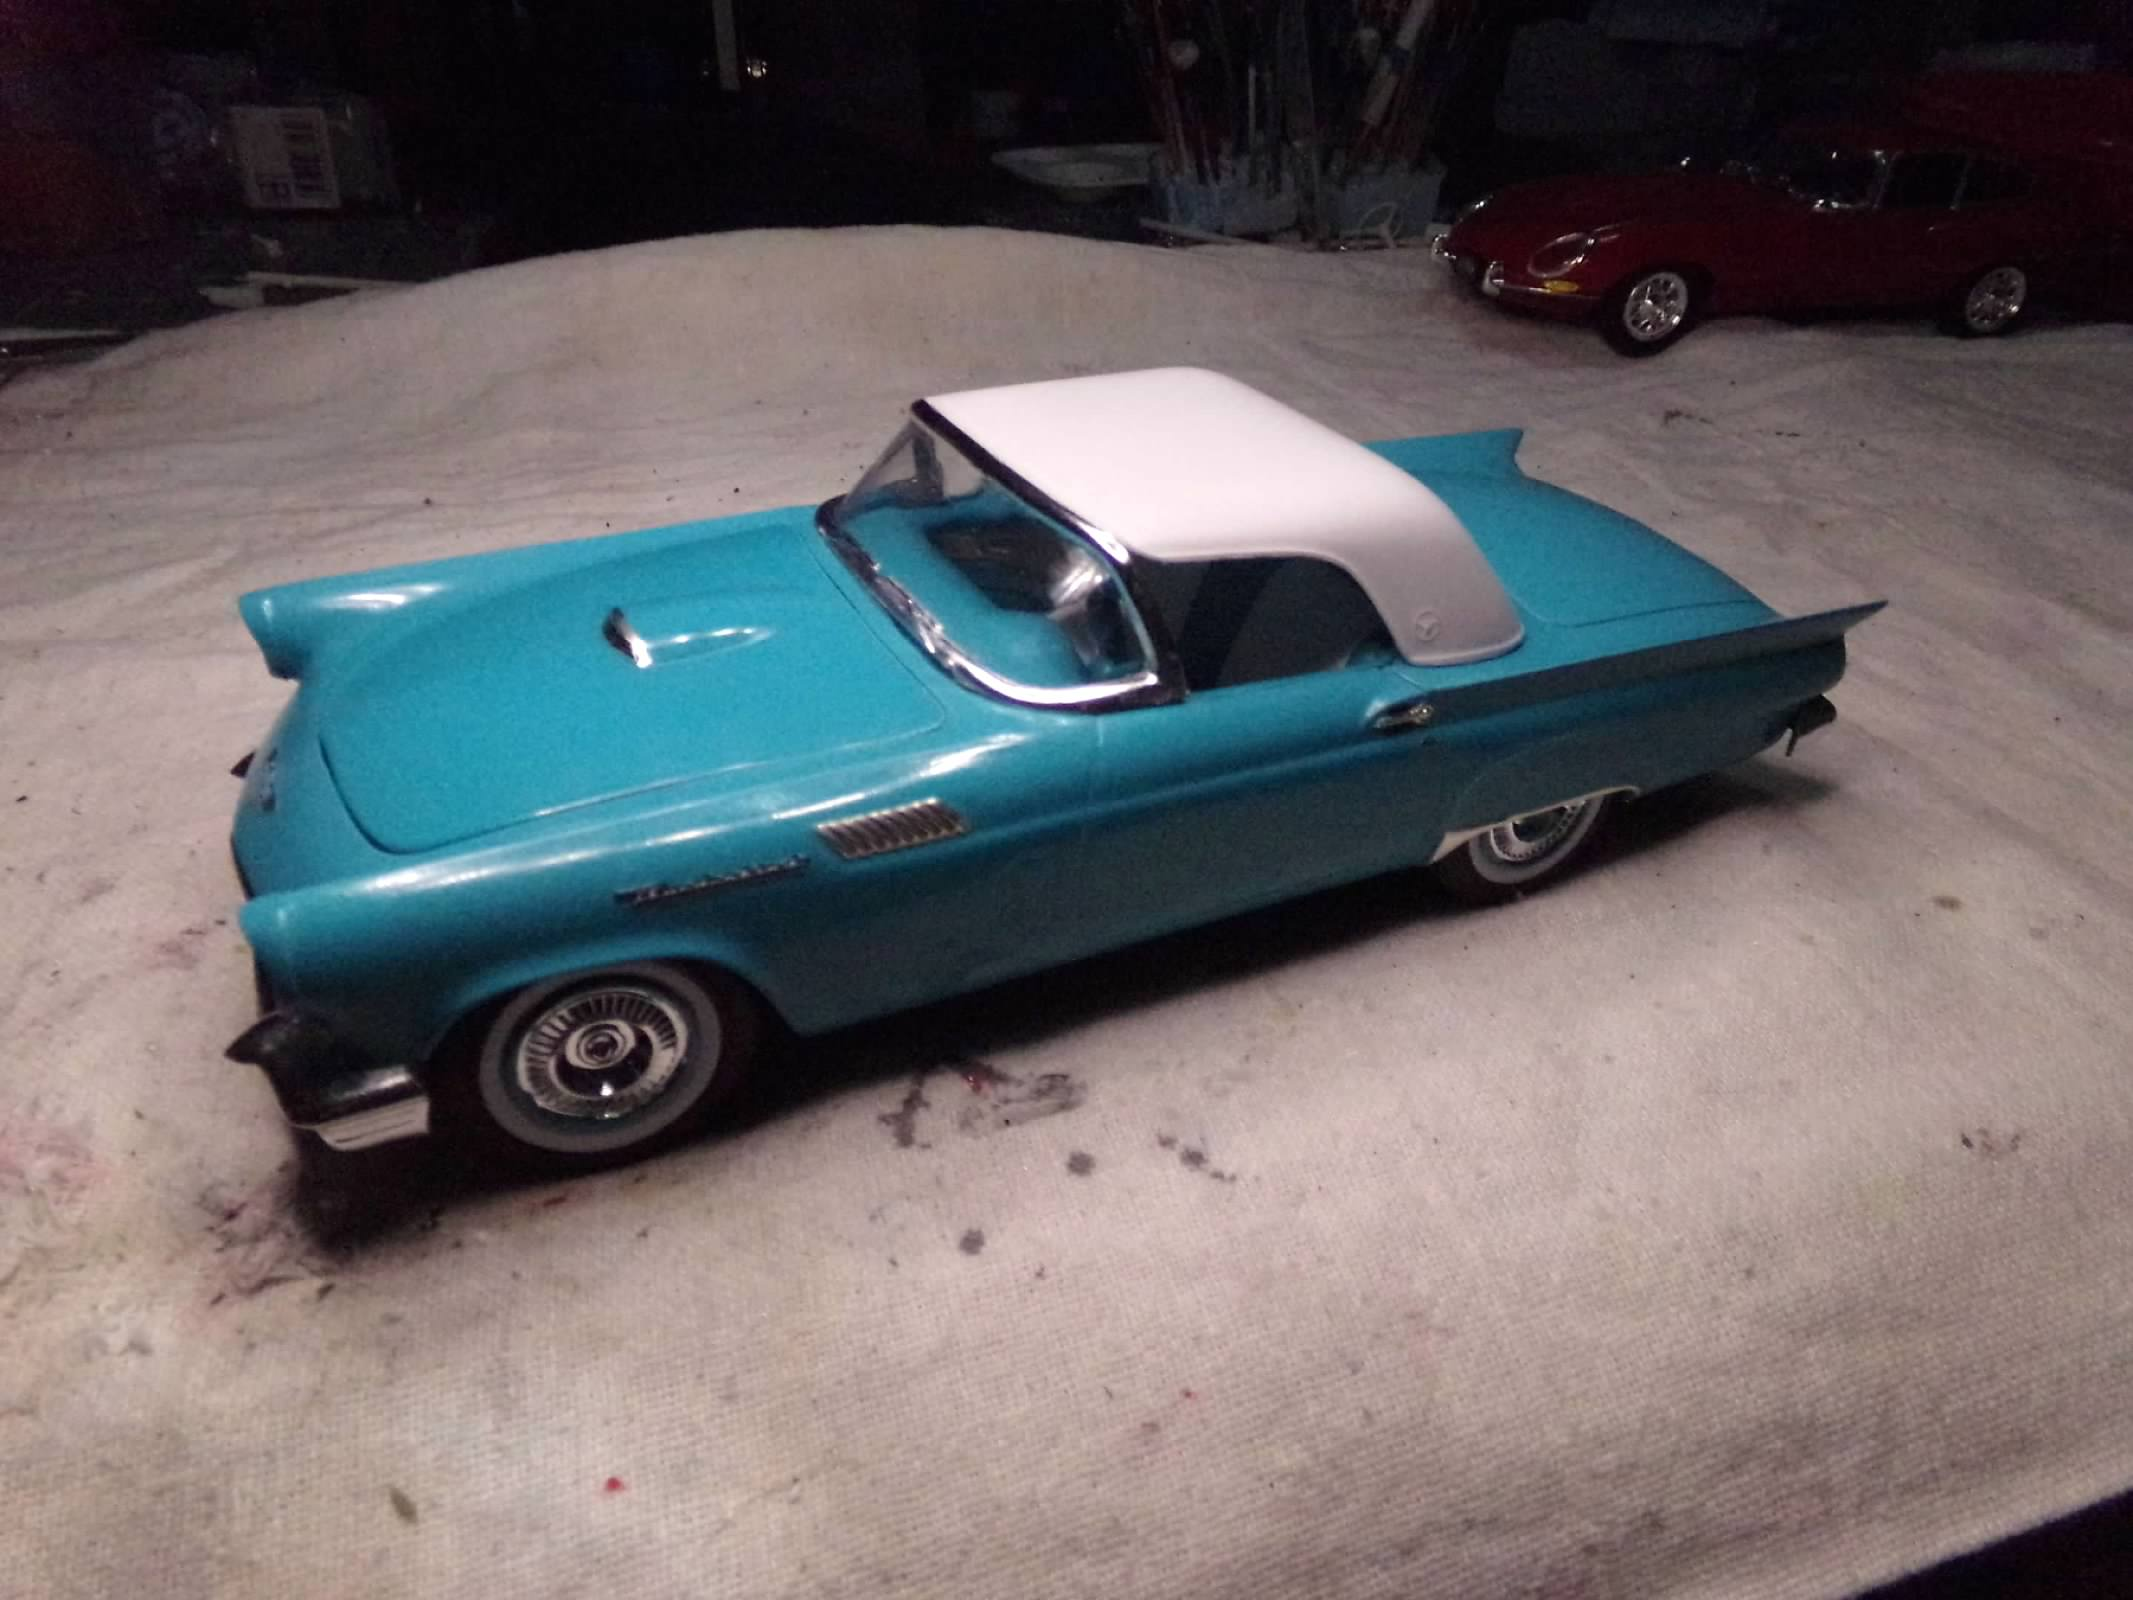
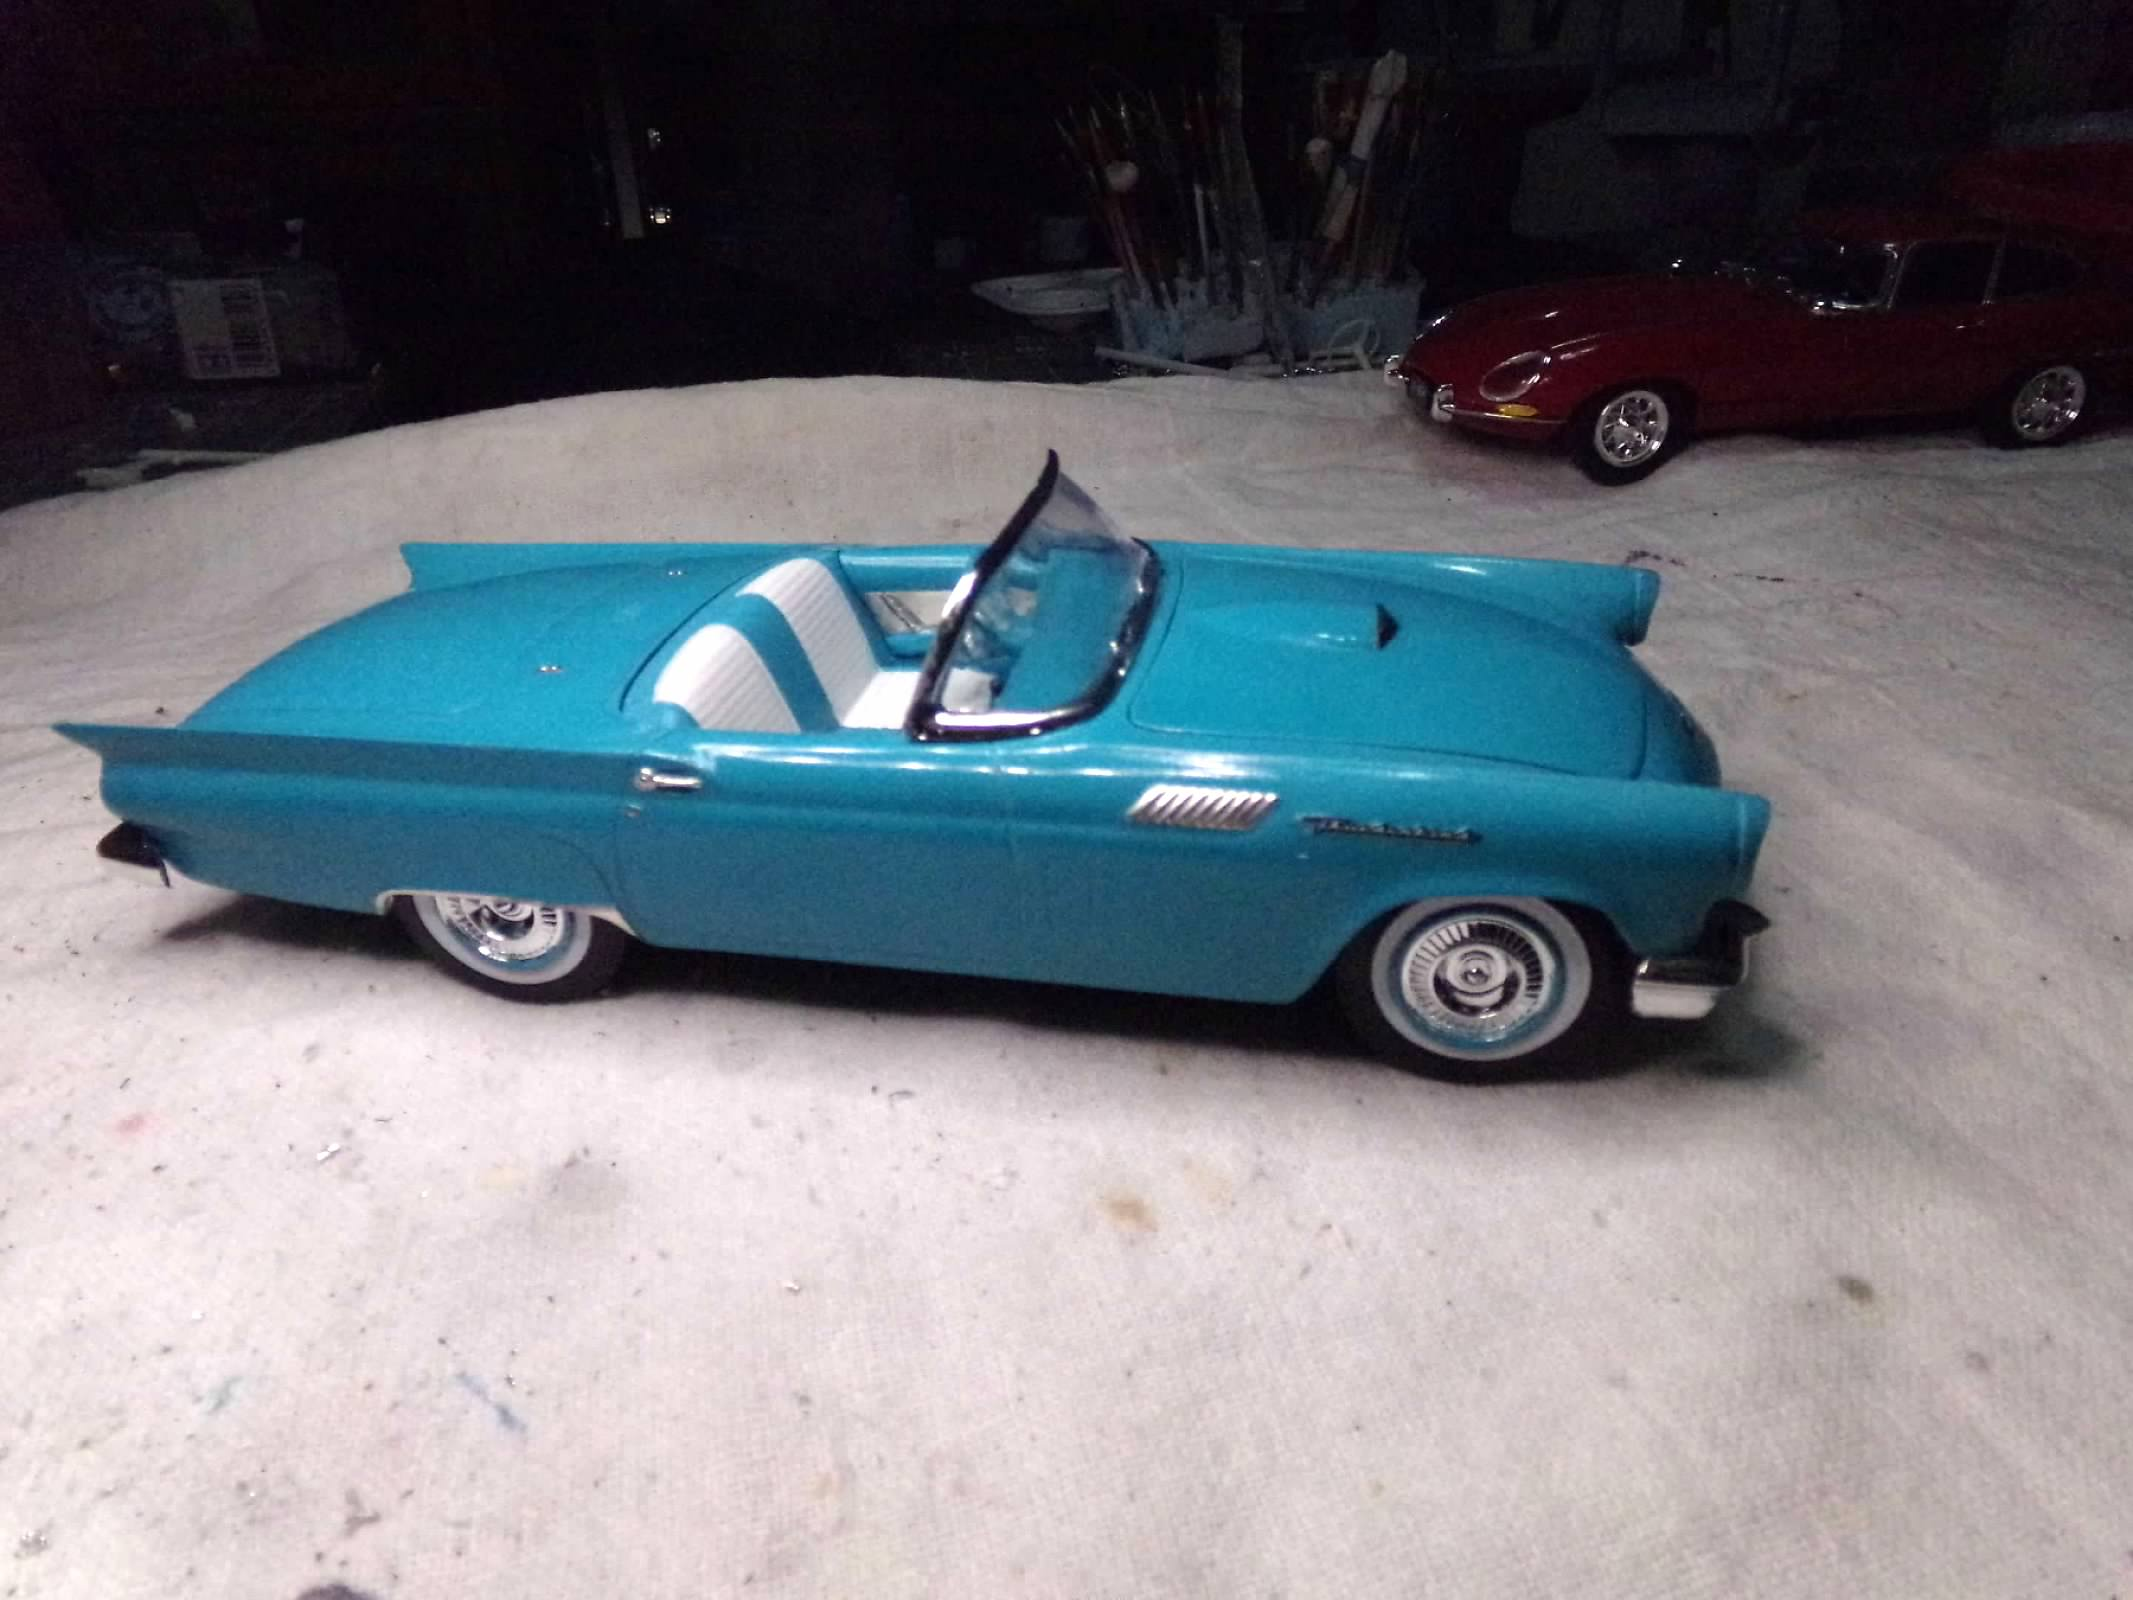
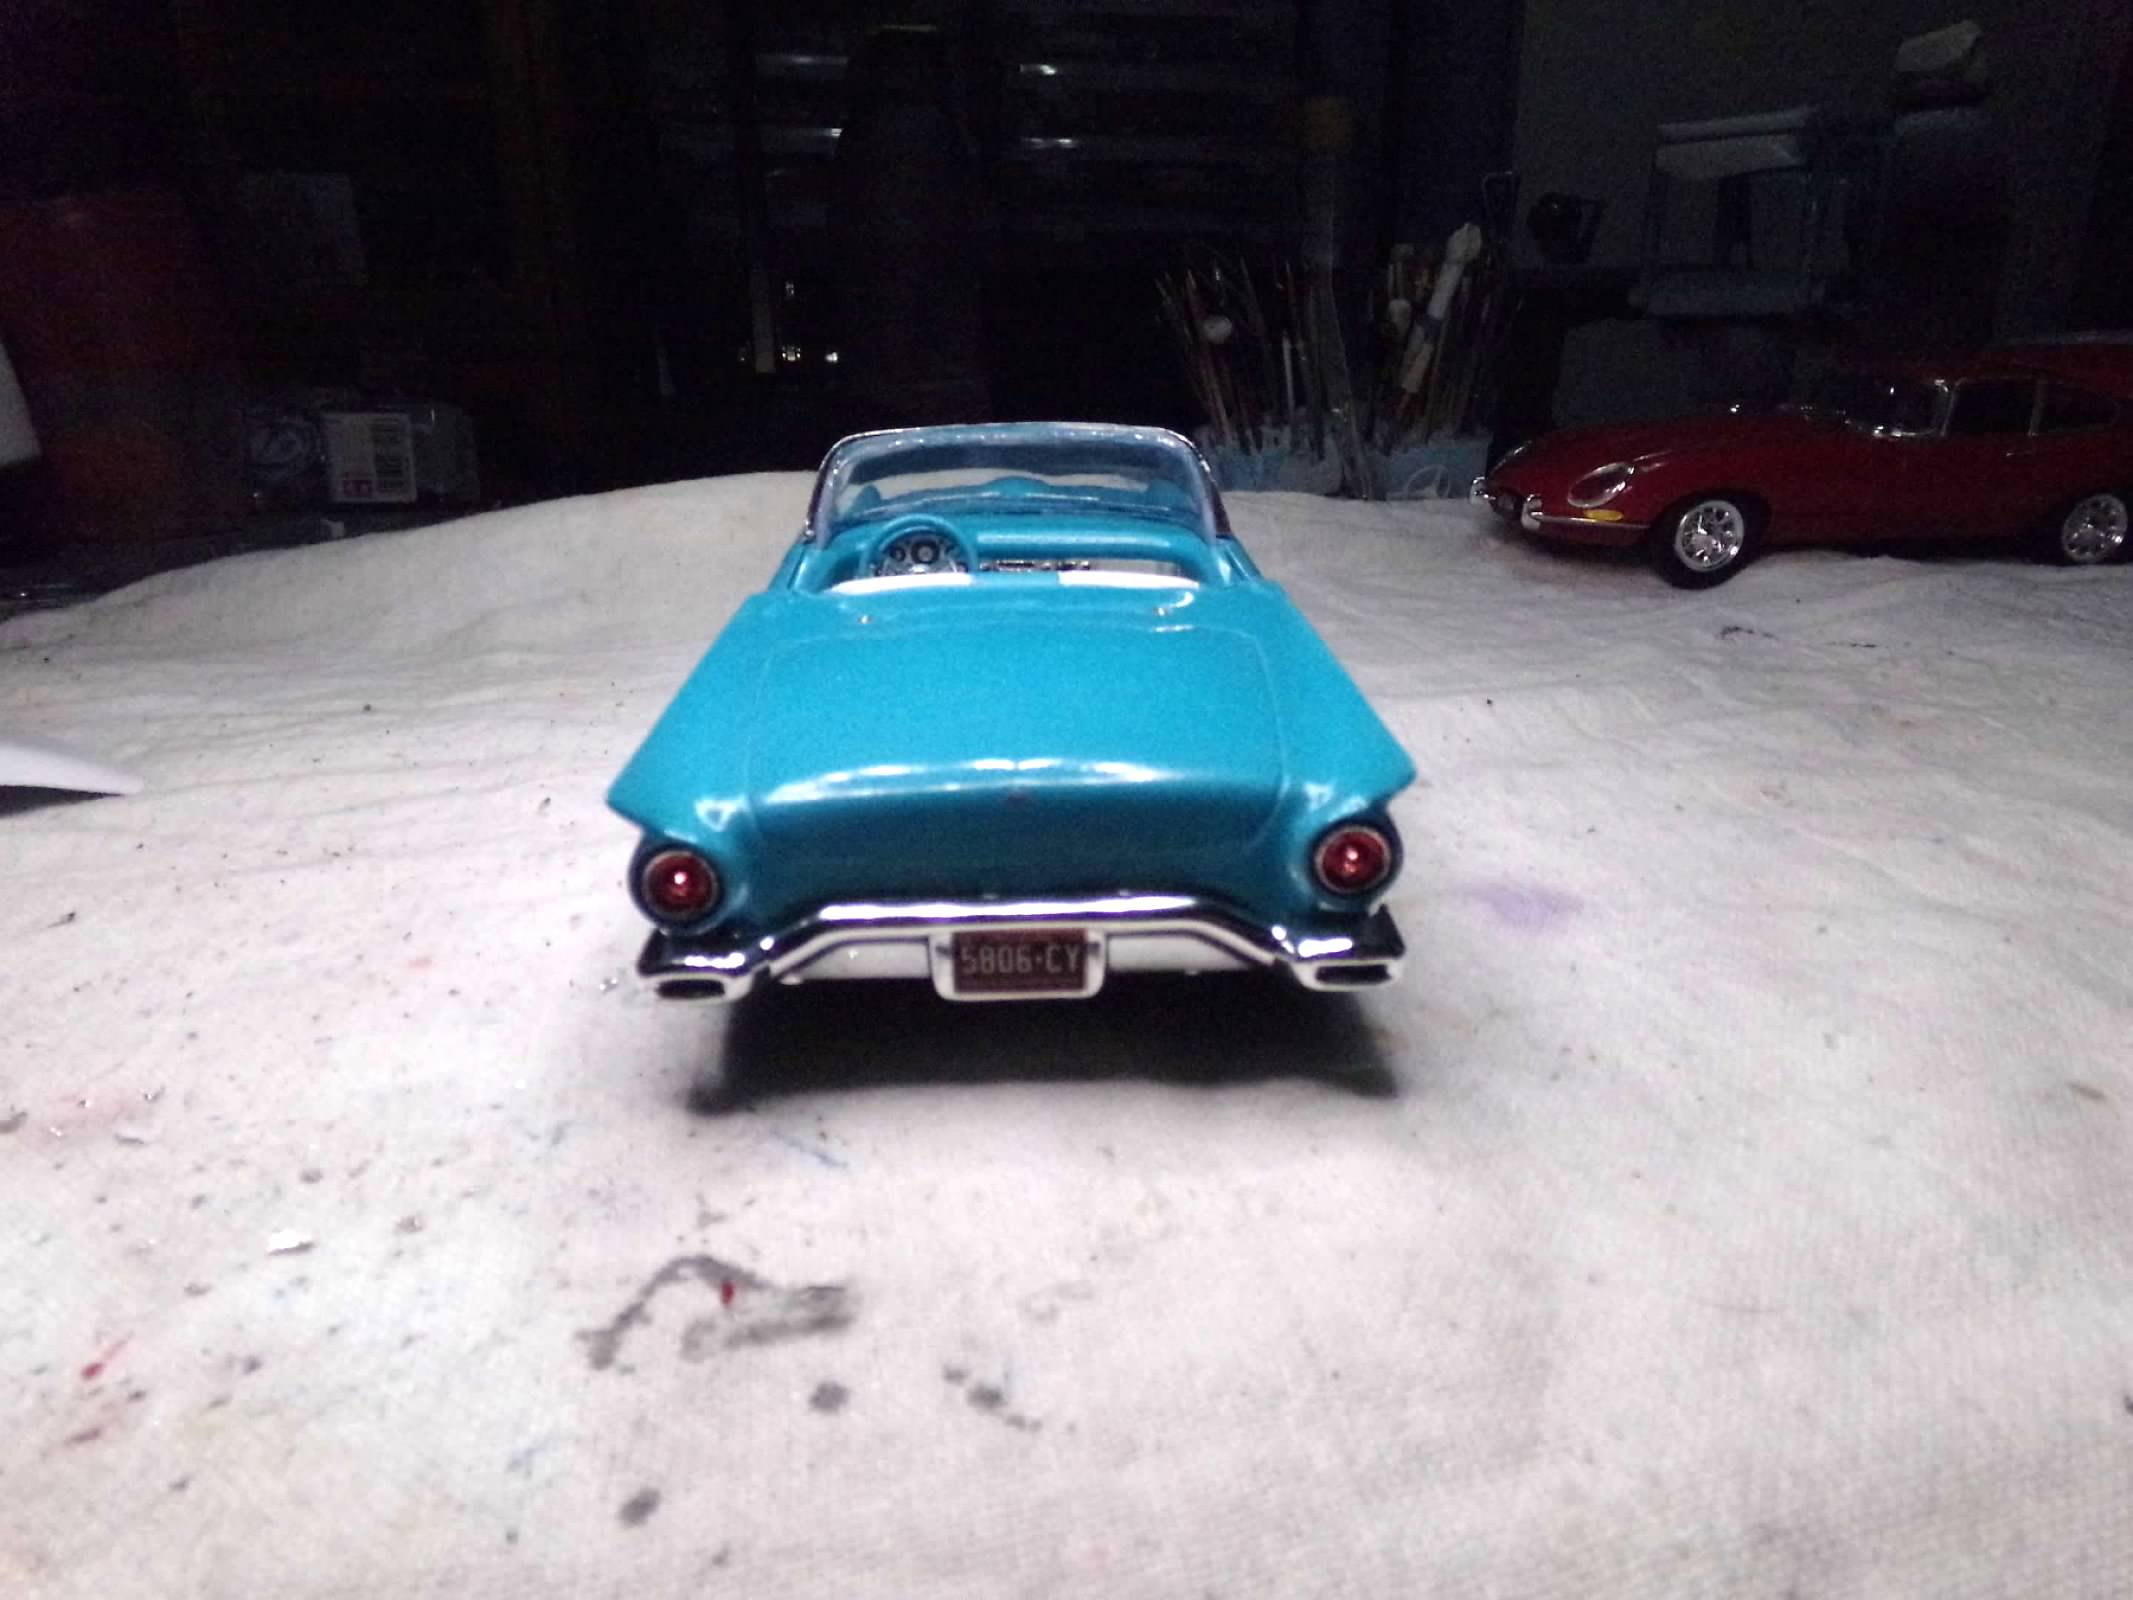
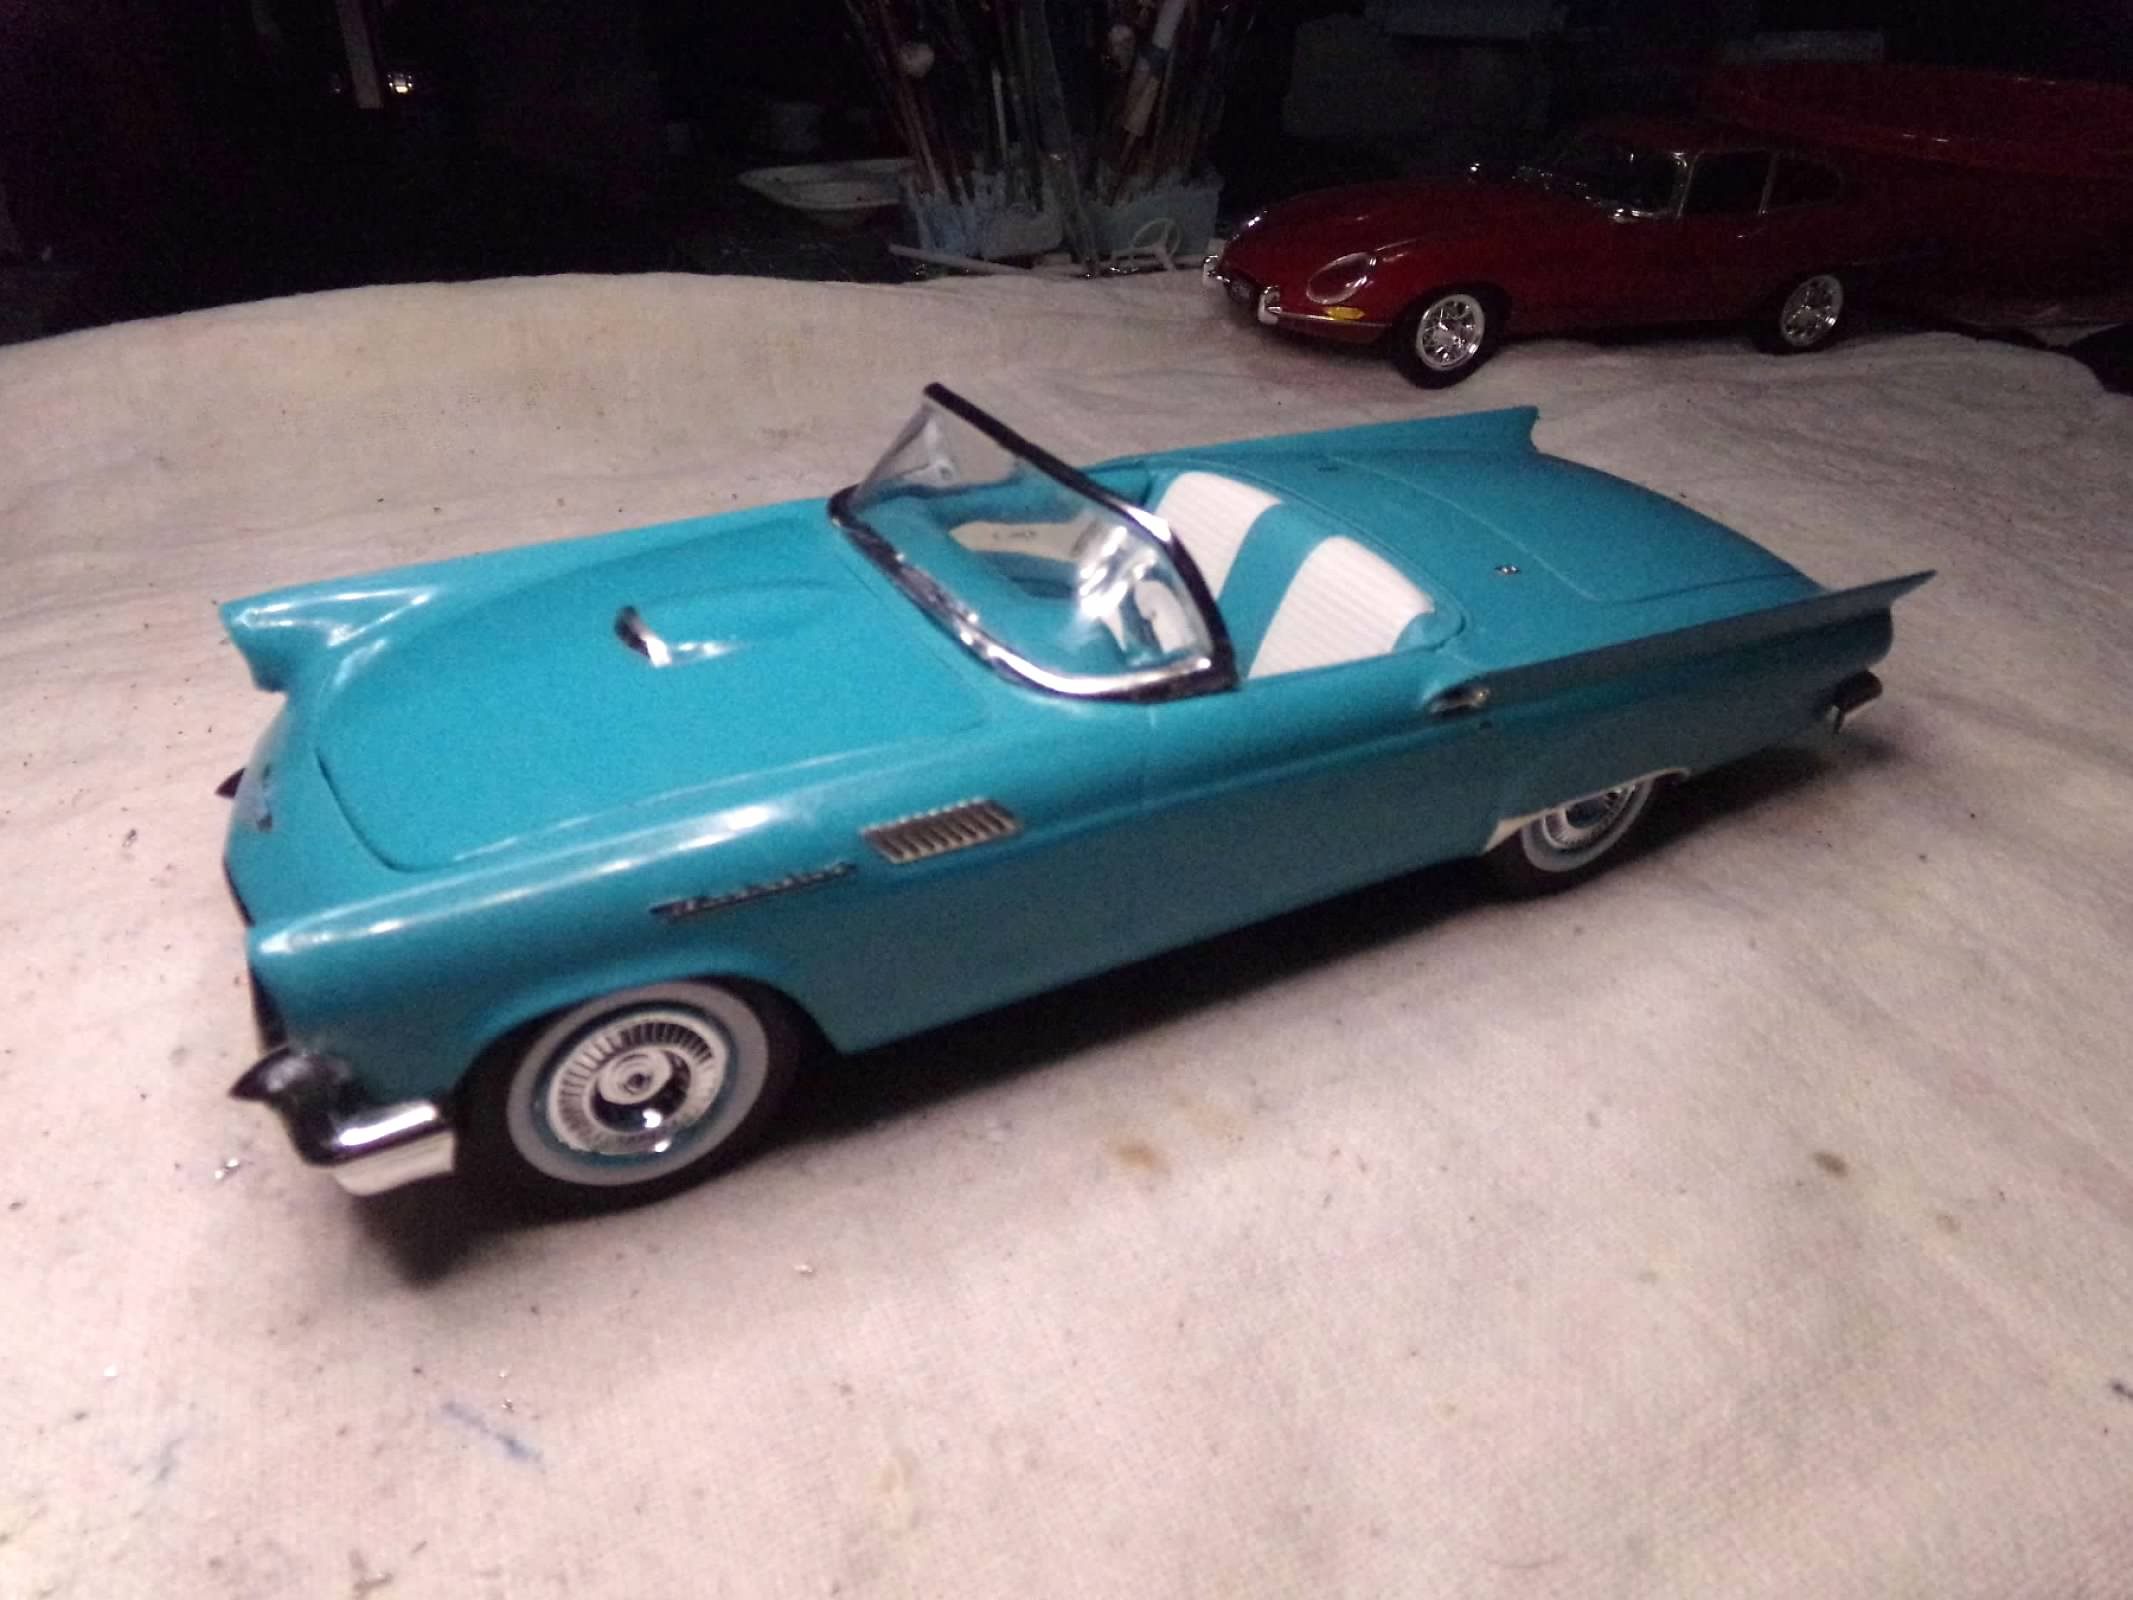
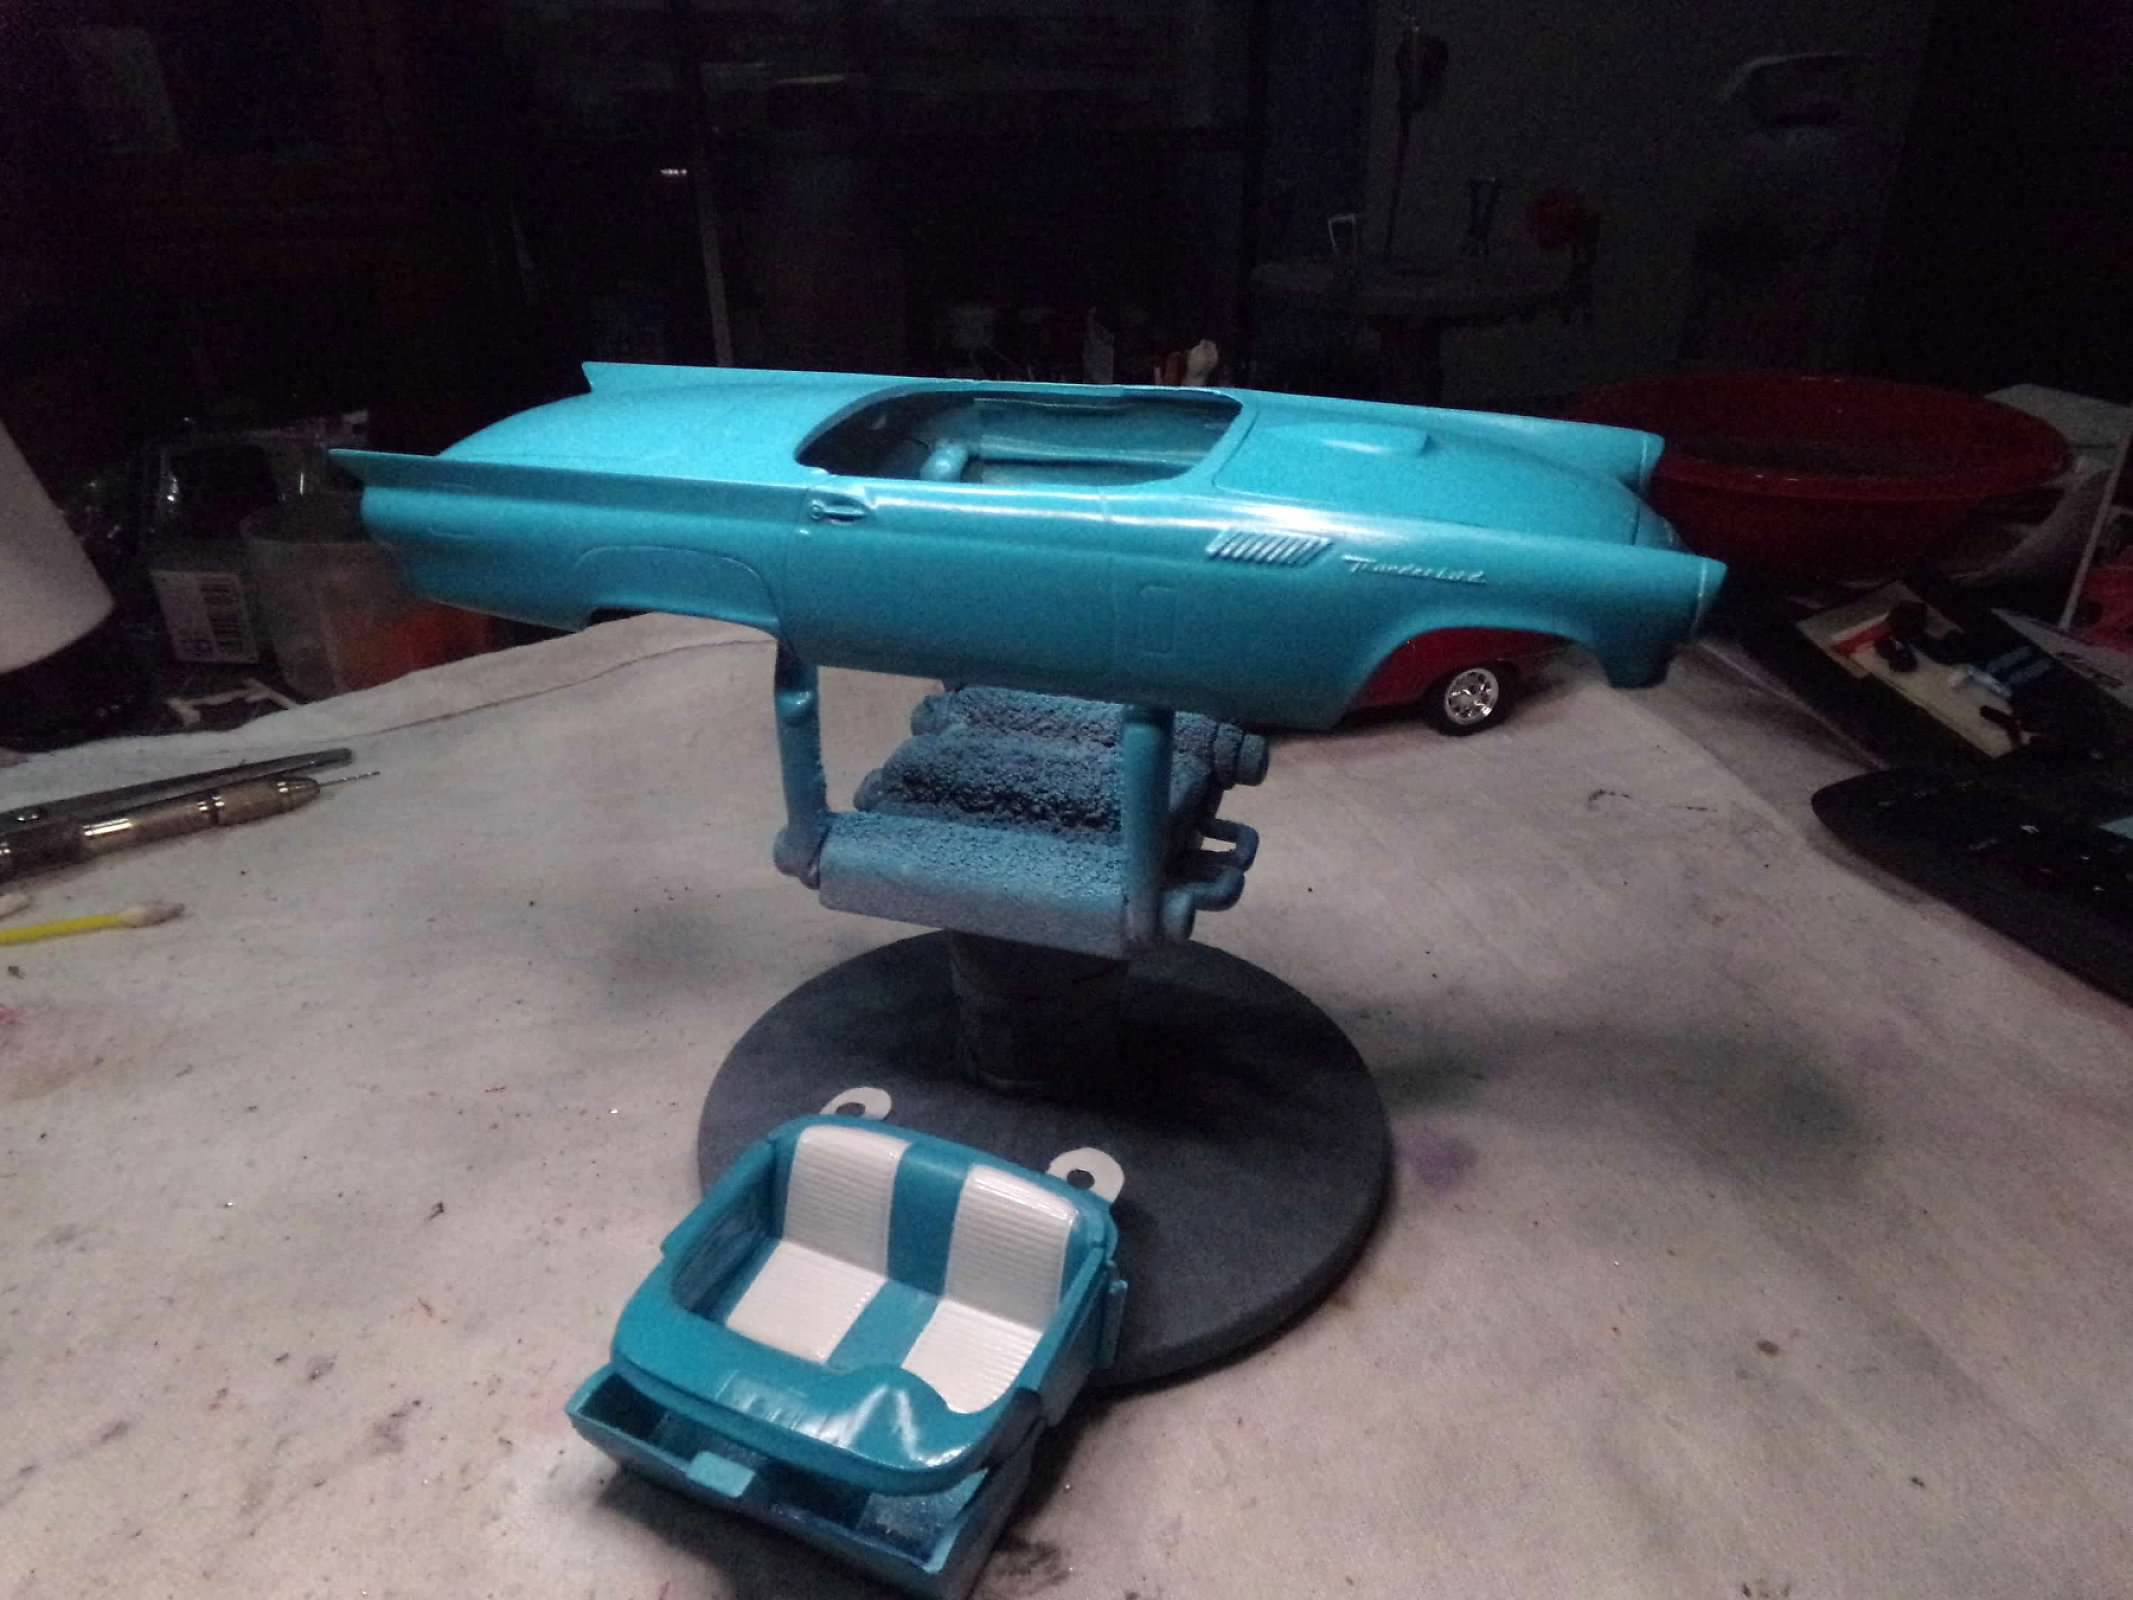
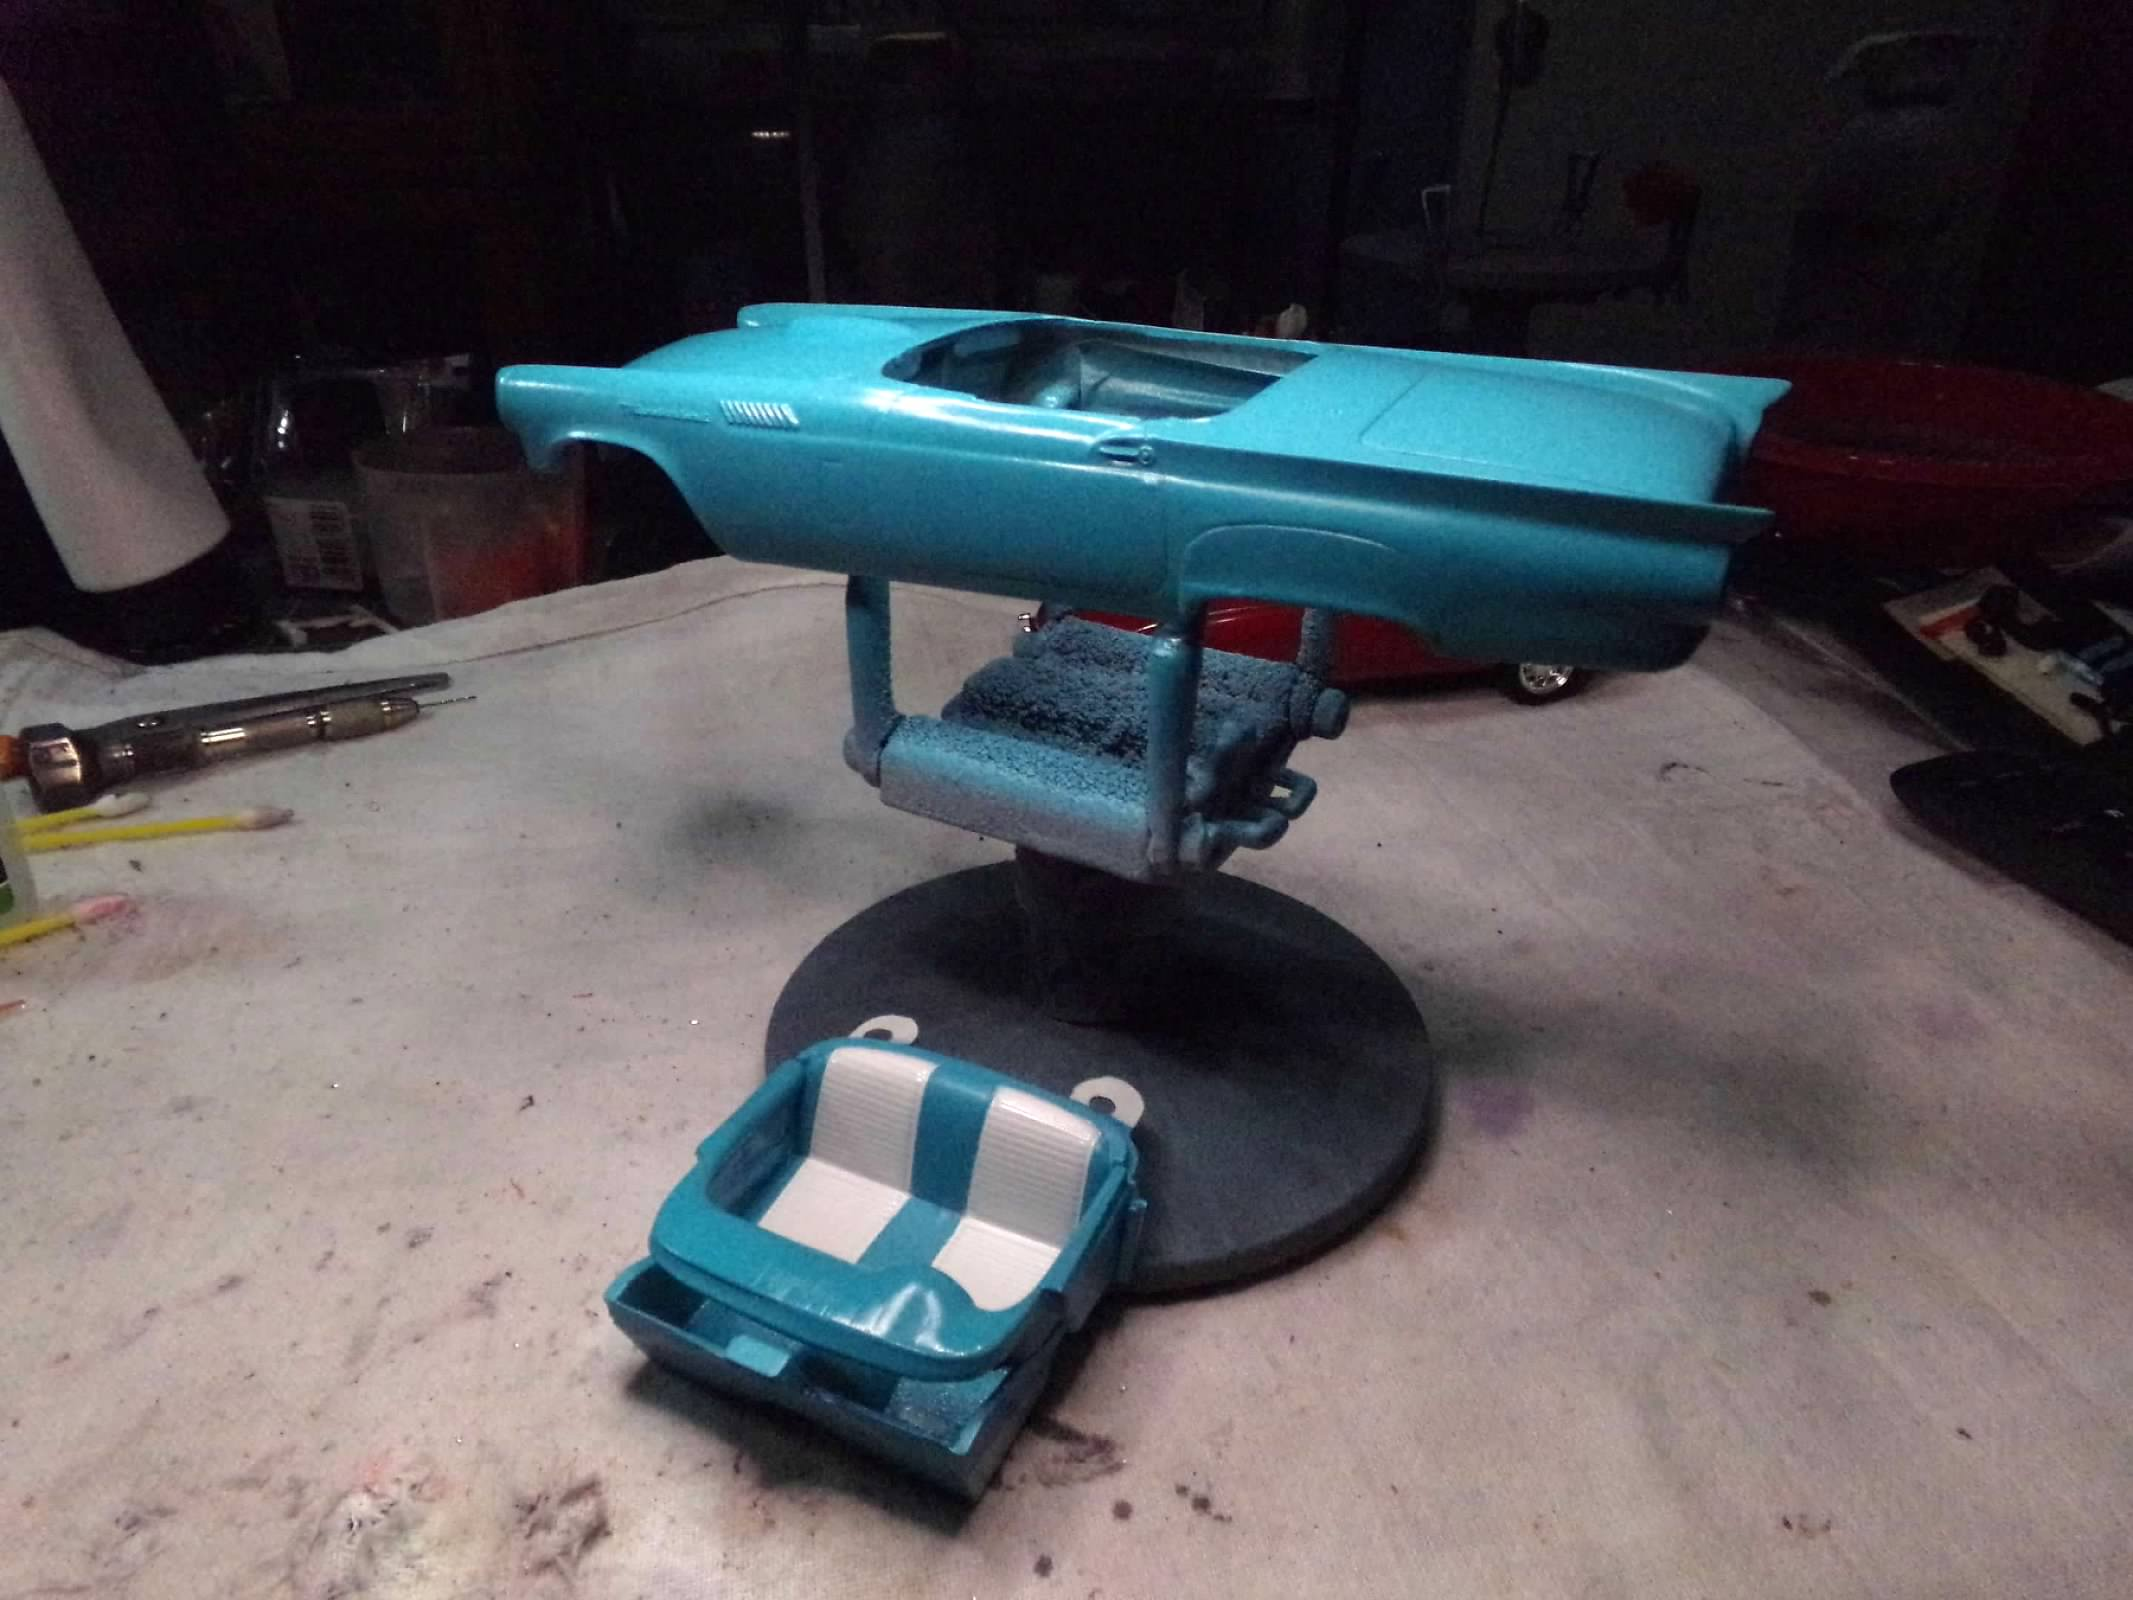
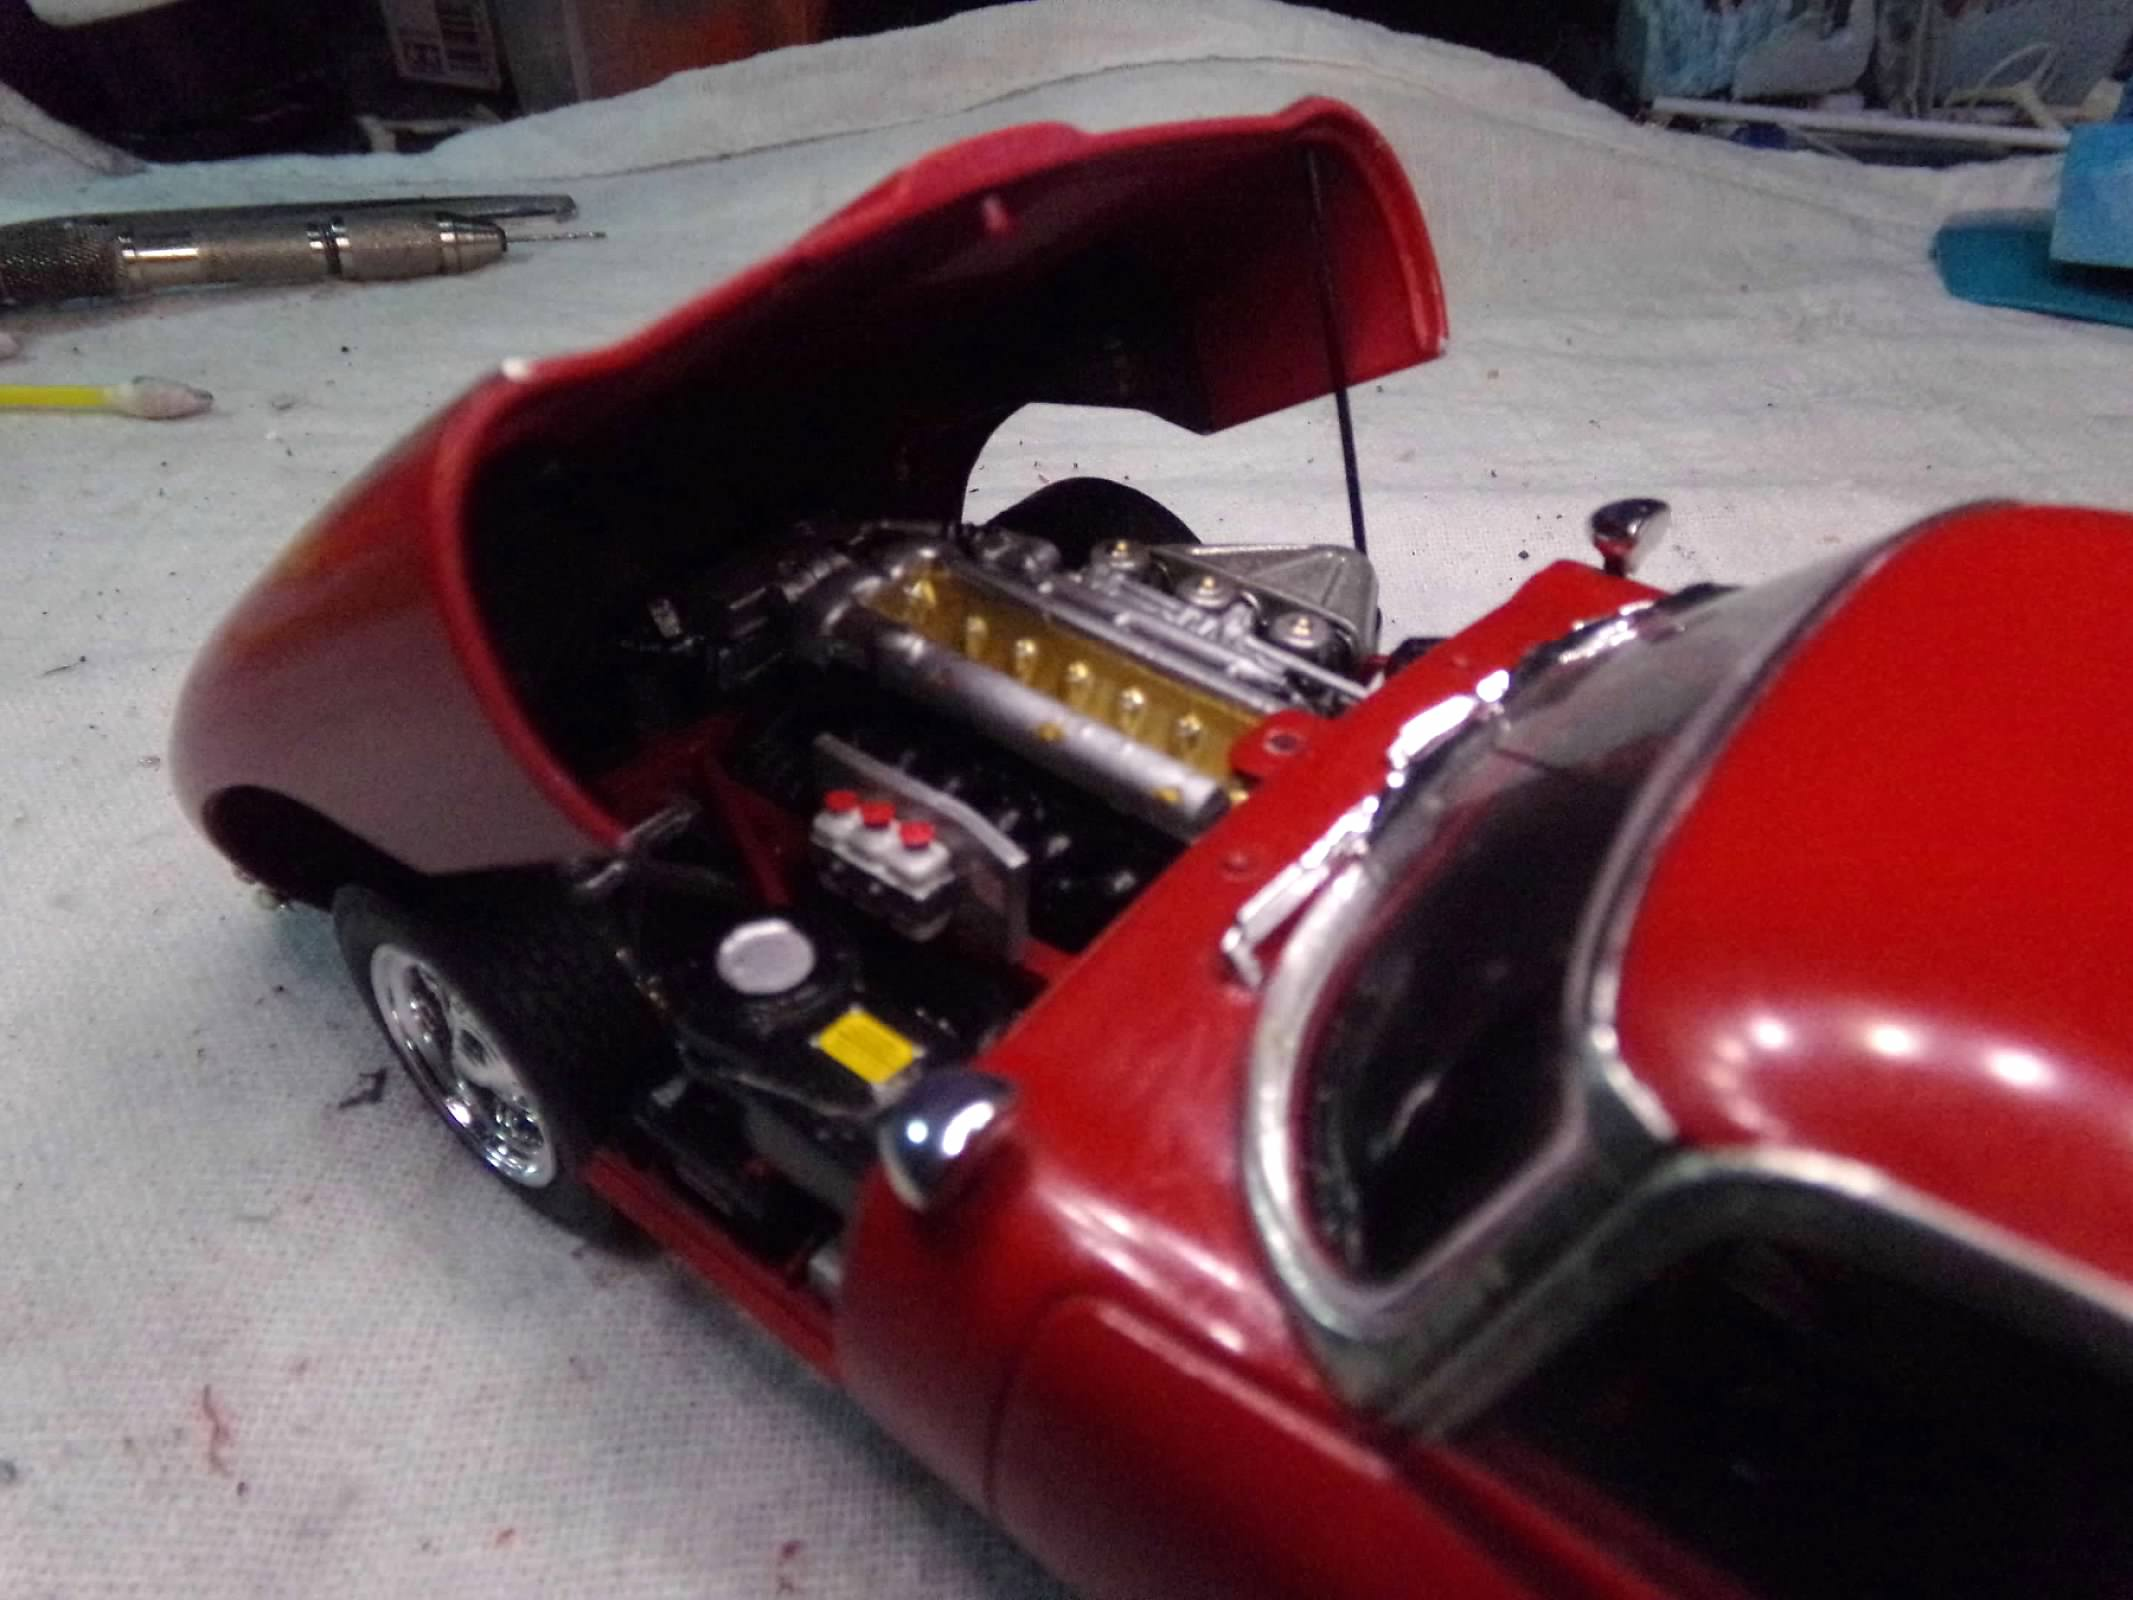
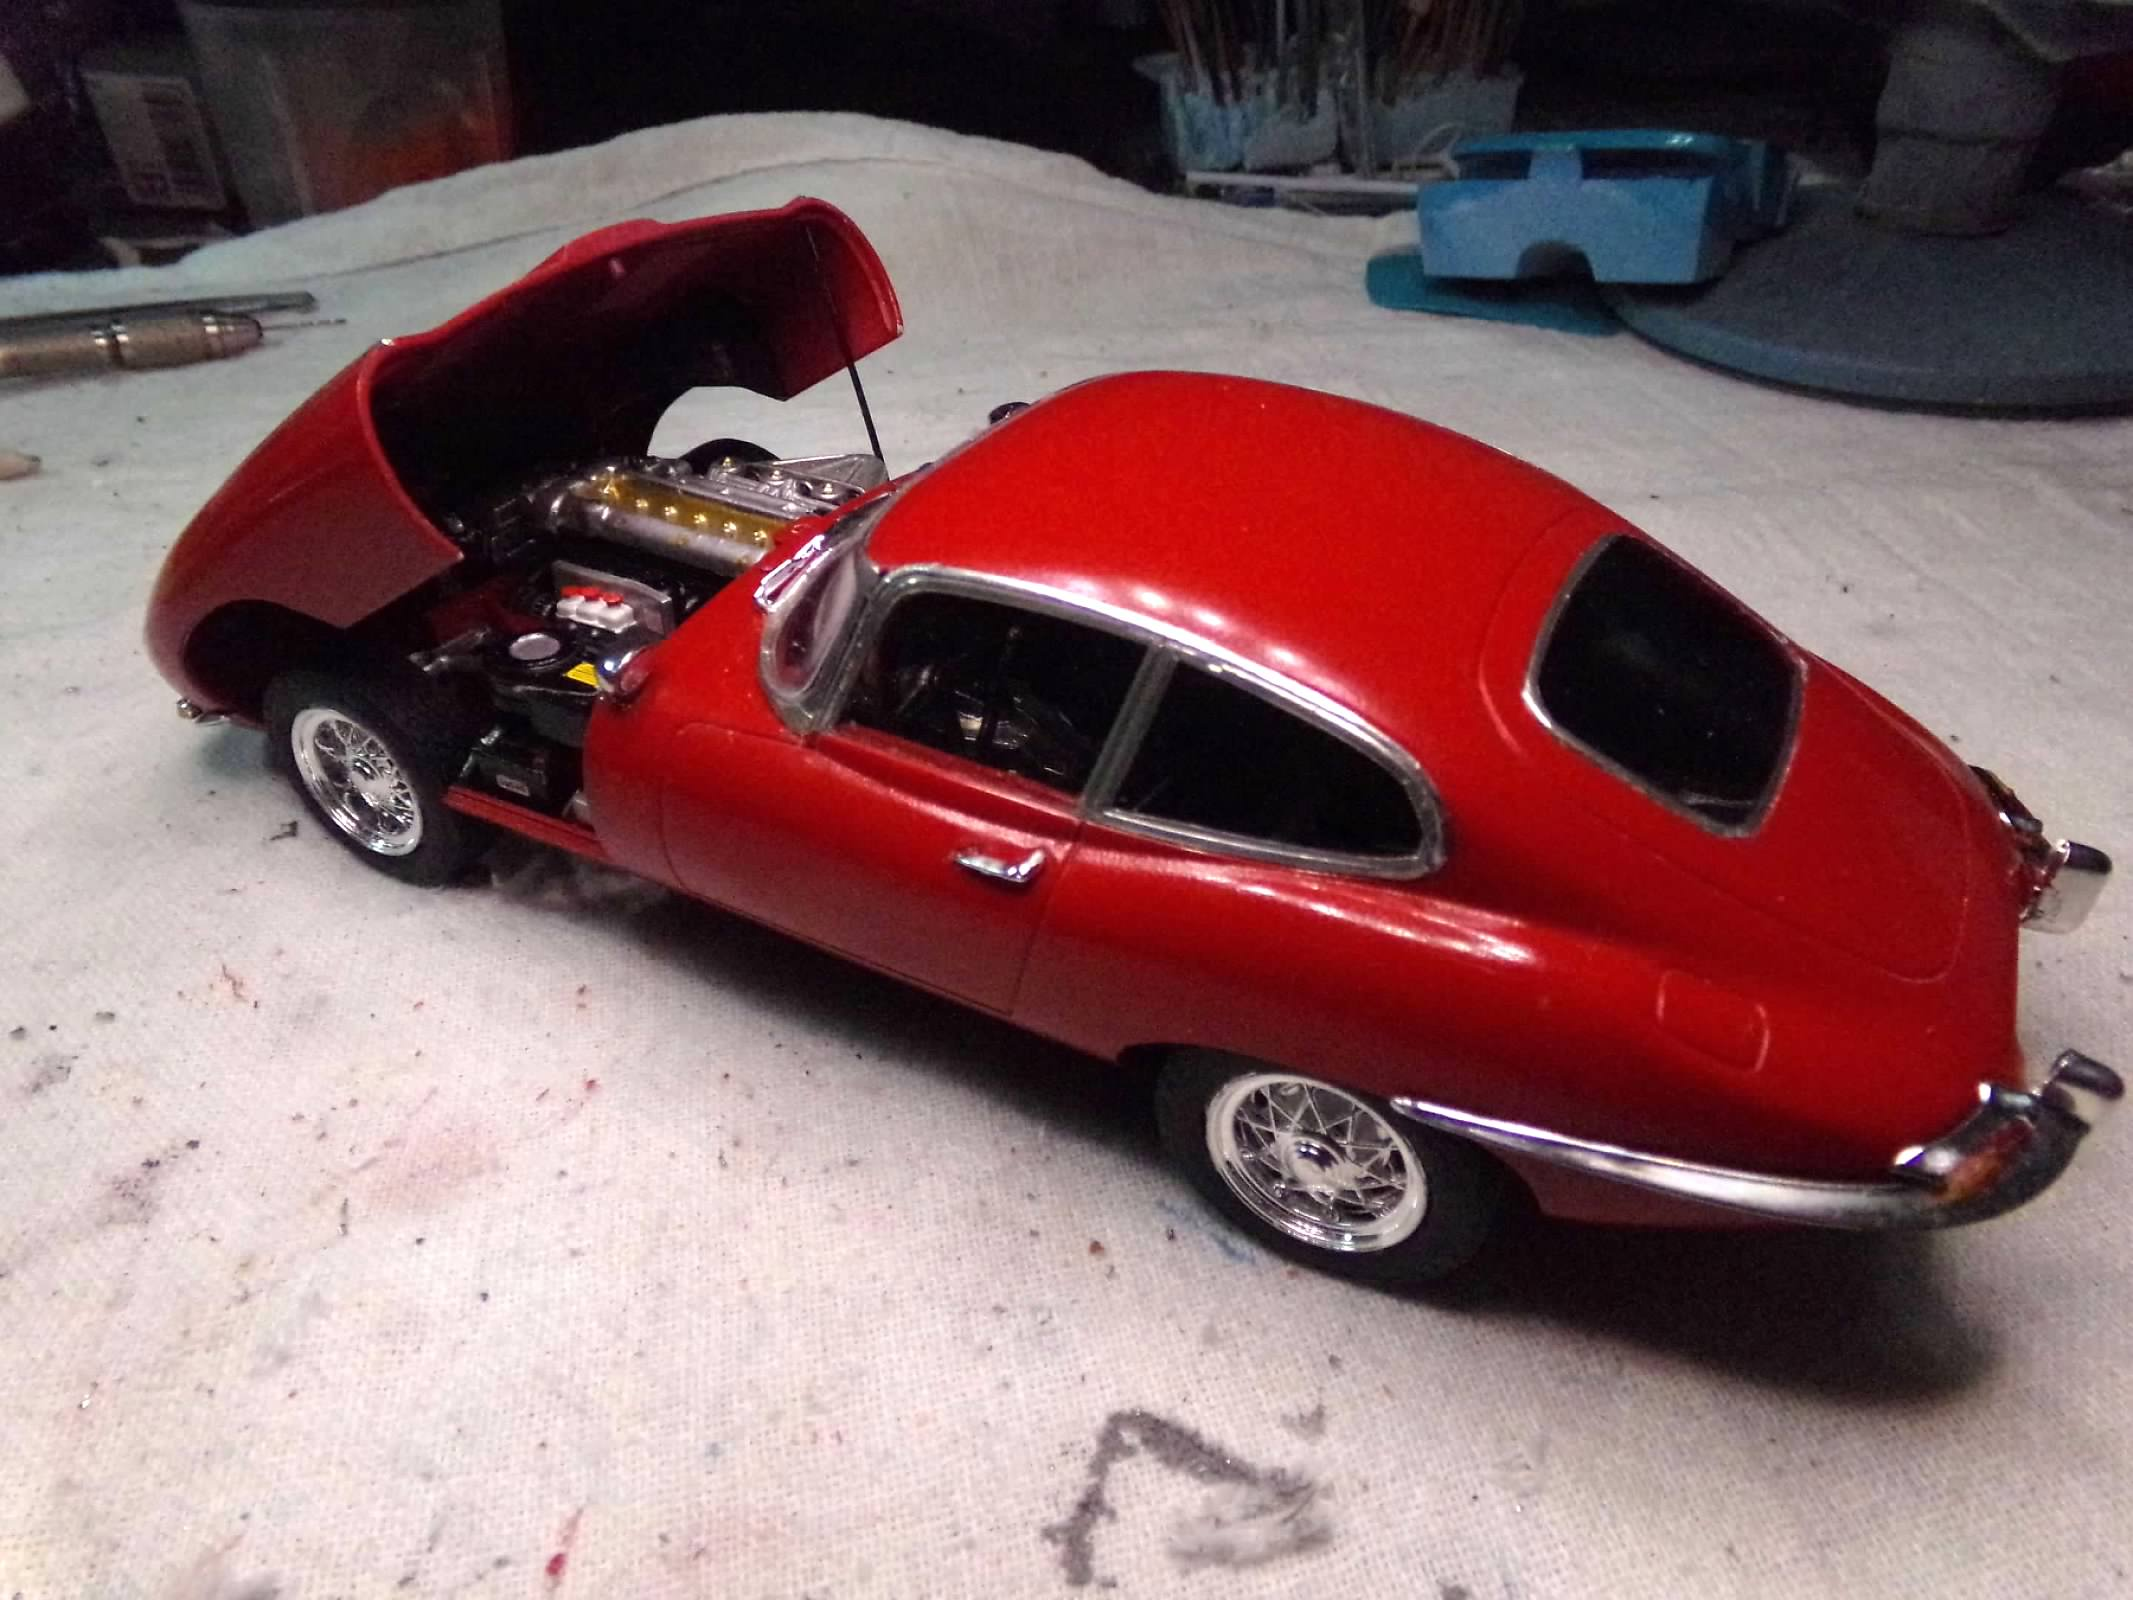
This is a four day quick box stock build. Body work and paint on Thursday/Friday and rubbing out the body, foiling, and building on Saturday/Sunday. Everything is from the box except for the hood scoop decal which came from the Jaguar XK-E that I had recently finished (a complete coincidence). the paint is Tamiya Coral Blue inside and out with white seat inserts and hardtop. No mirrors, no turn signal indicator lever, no wiring. Now its on to the next project! Thanks for looking! ?
-
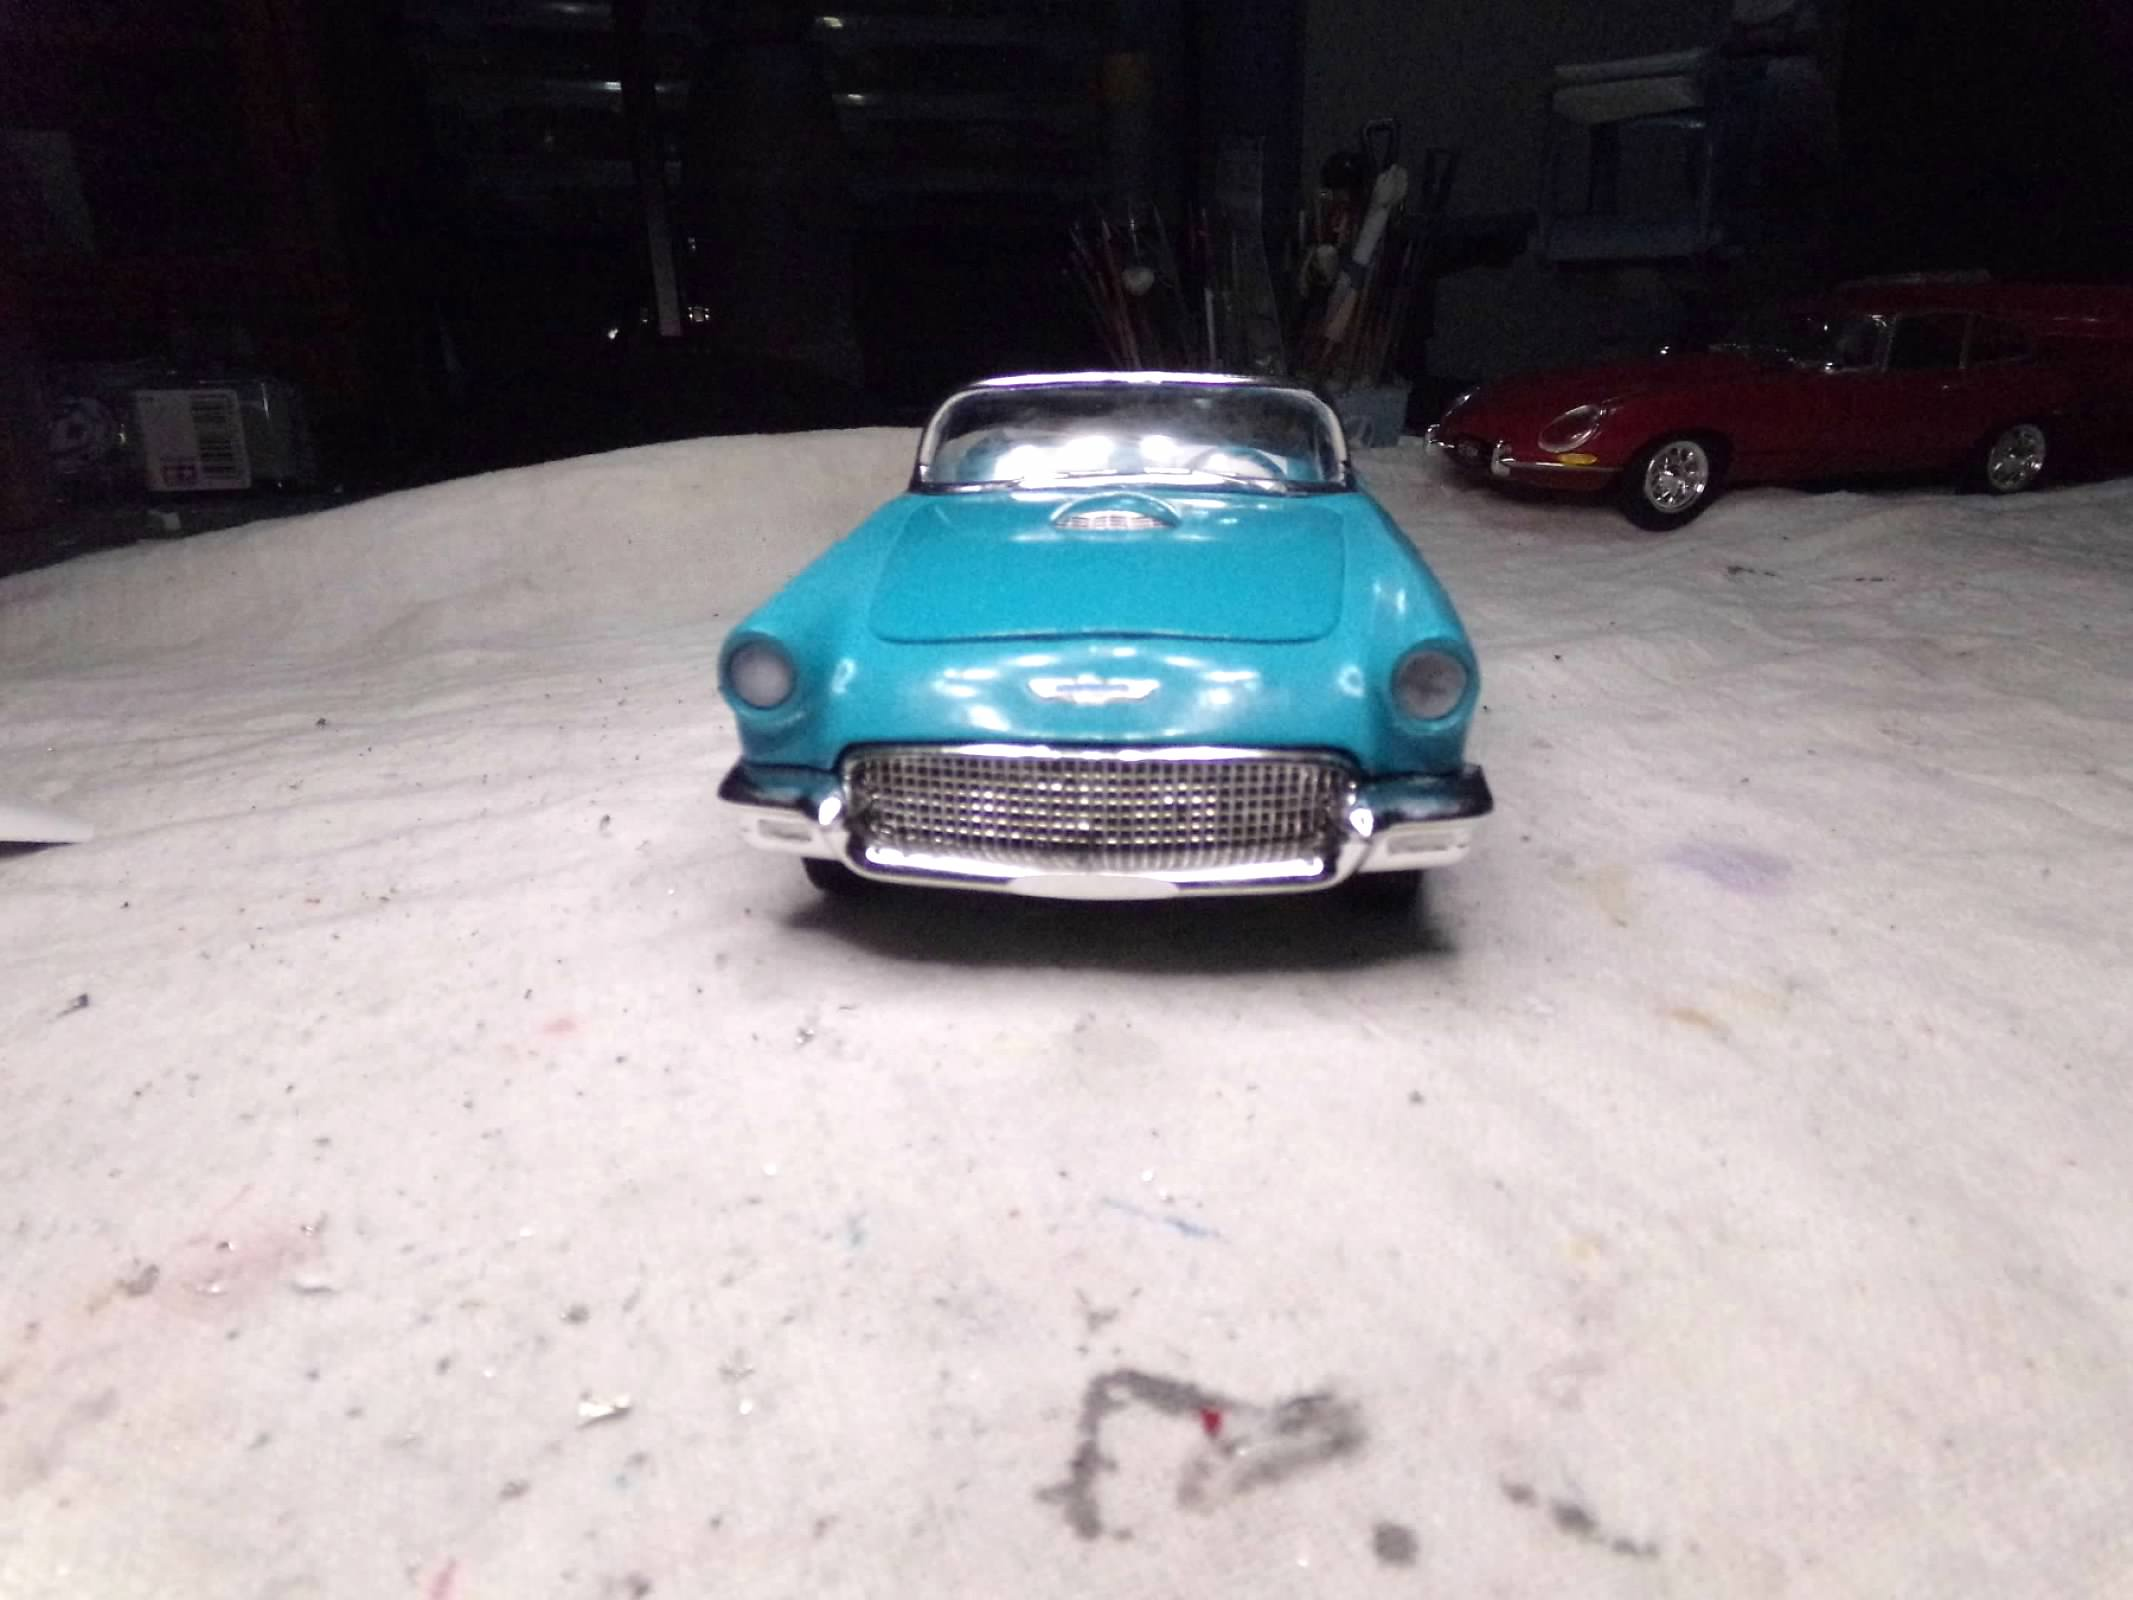
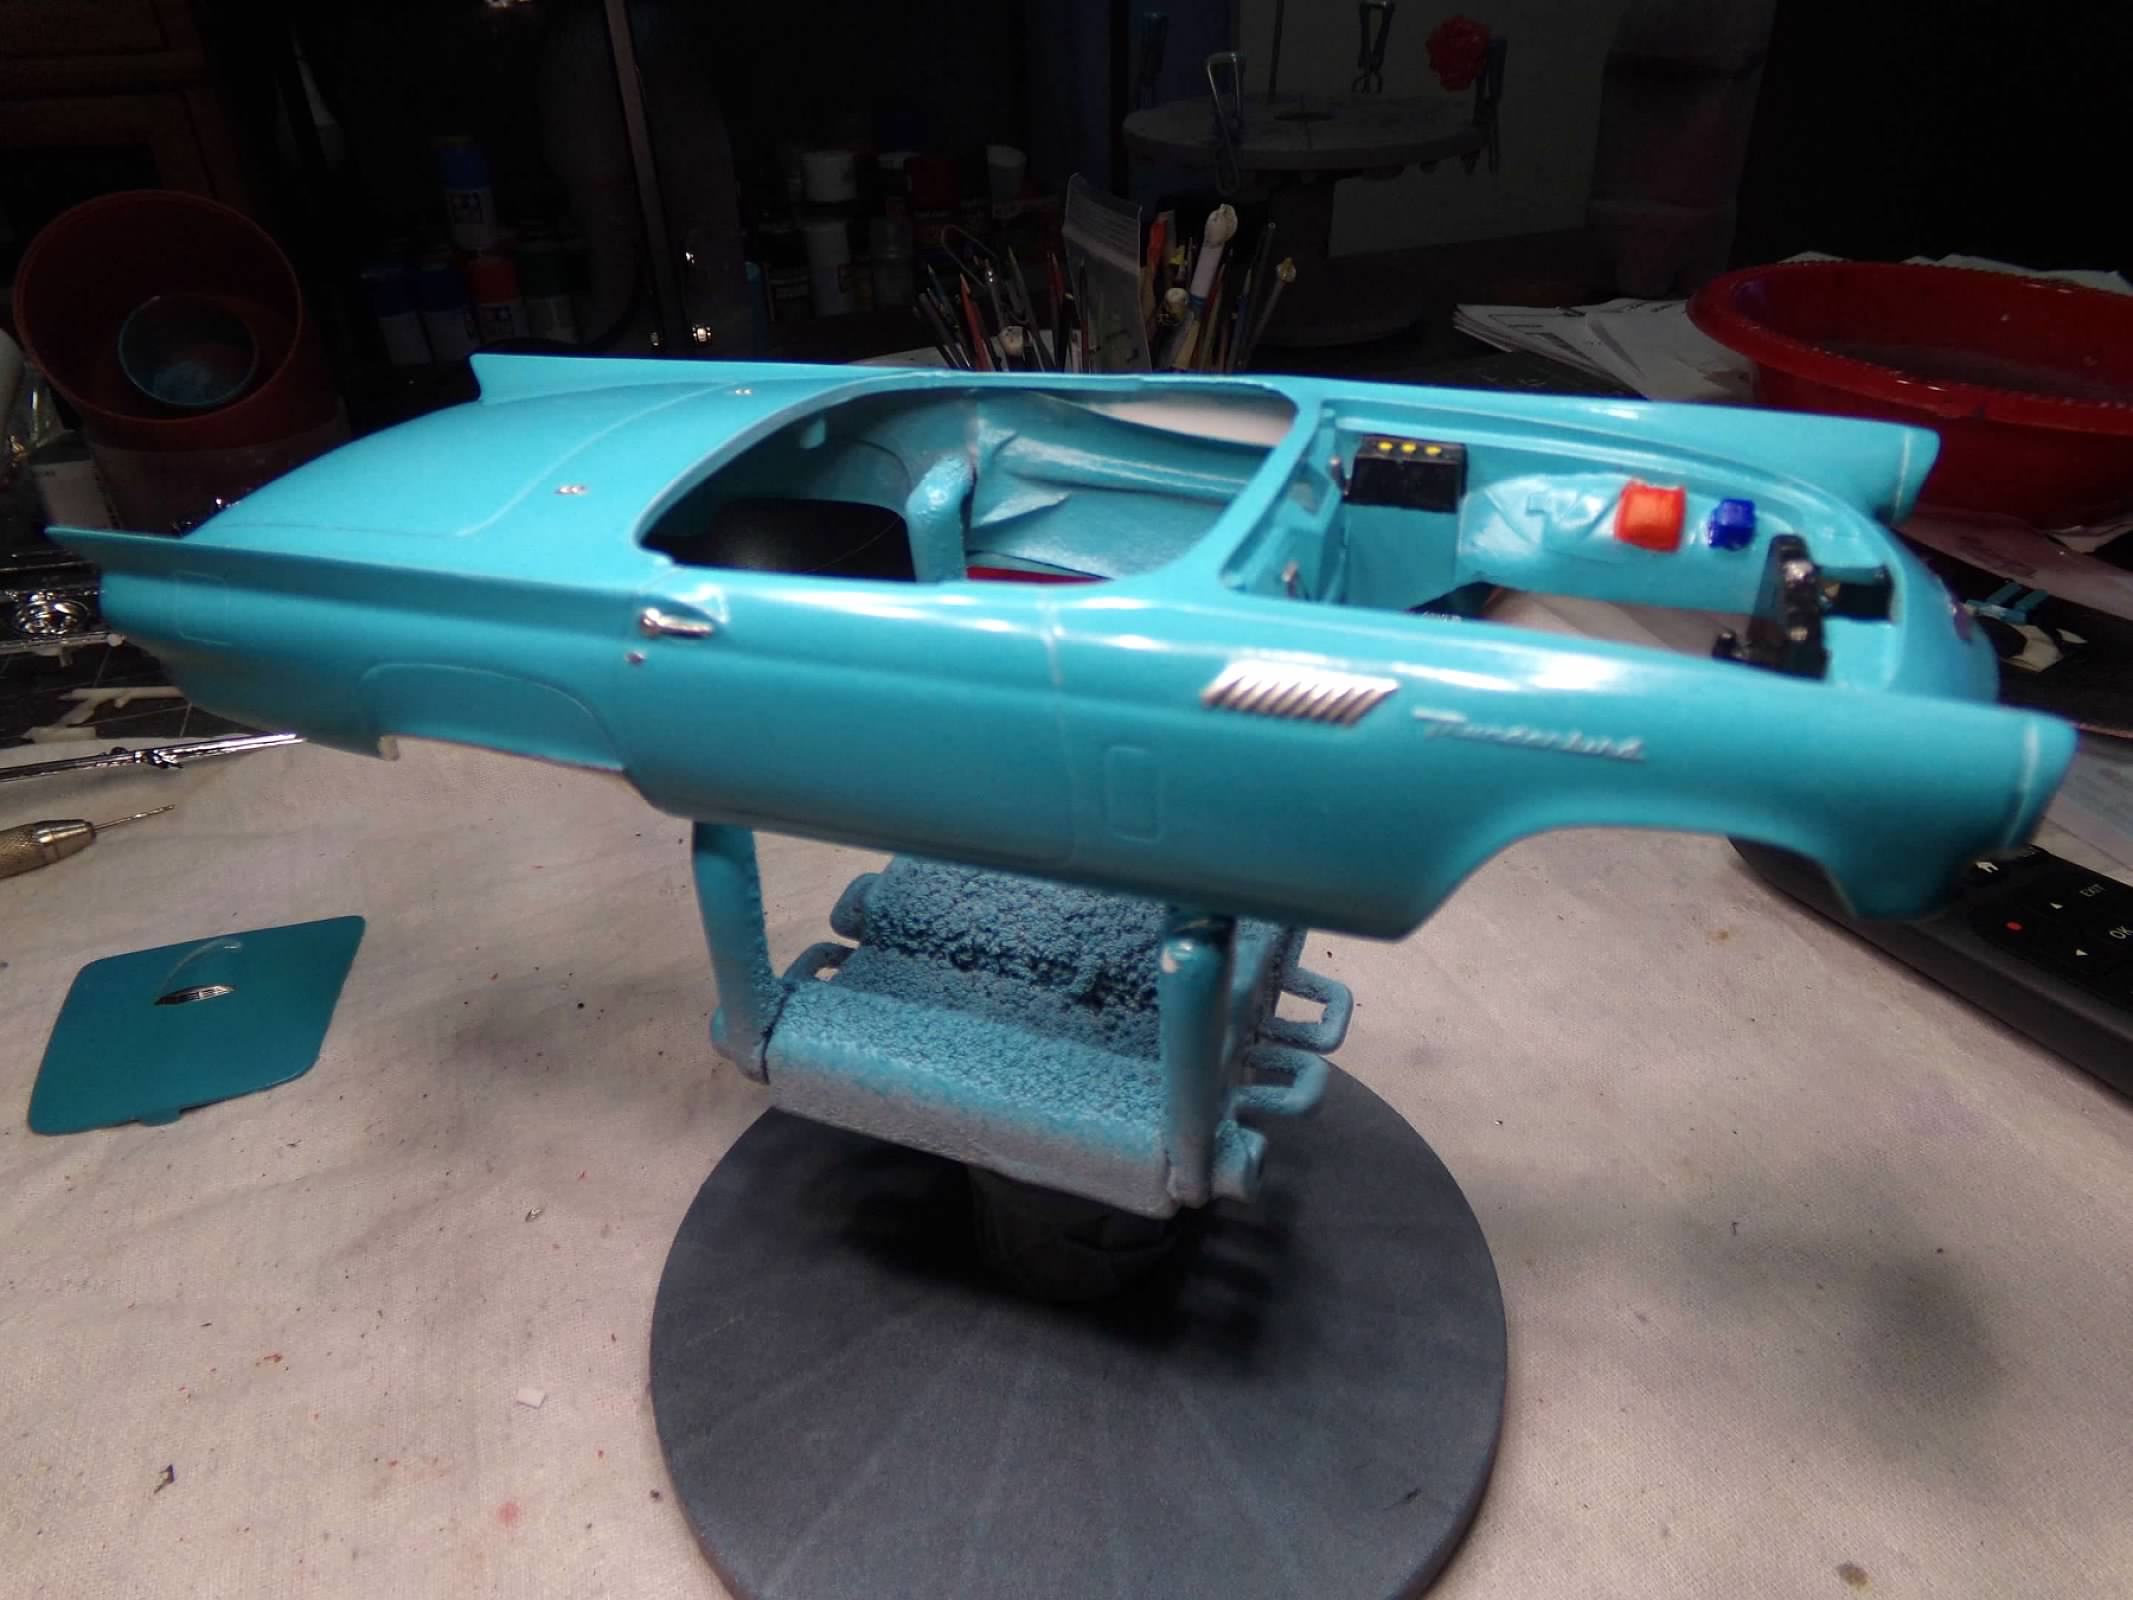
Thanks, Lenny, Mike, Donald, Bob and David! I appreciate your comments! They improved the decal sheet a bit by adding a dash gauge cluster decal. I also found on the border (almost missed it) Thunderbird letter decals. Not much that cam be done with the windshield other than putting the glass in the slit that is made for it, then glue the frame on with some white glue and hope it stays. That what I did. This one is done completely box stock, including no mirrors, no turn signal indicator lever, no wiring, and I left off the visors so I could mount the hardtop. its mounted with some handy tack so I can remove it. More complete photos in the "Under Glass" section. Thanks for looking! ?
-
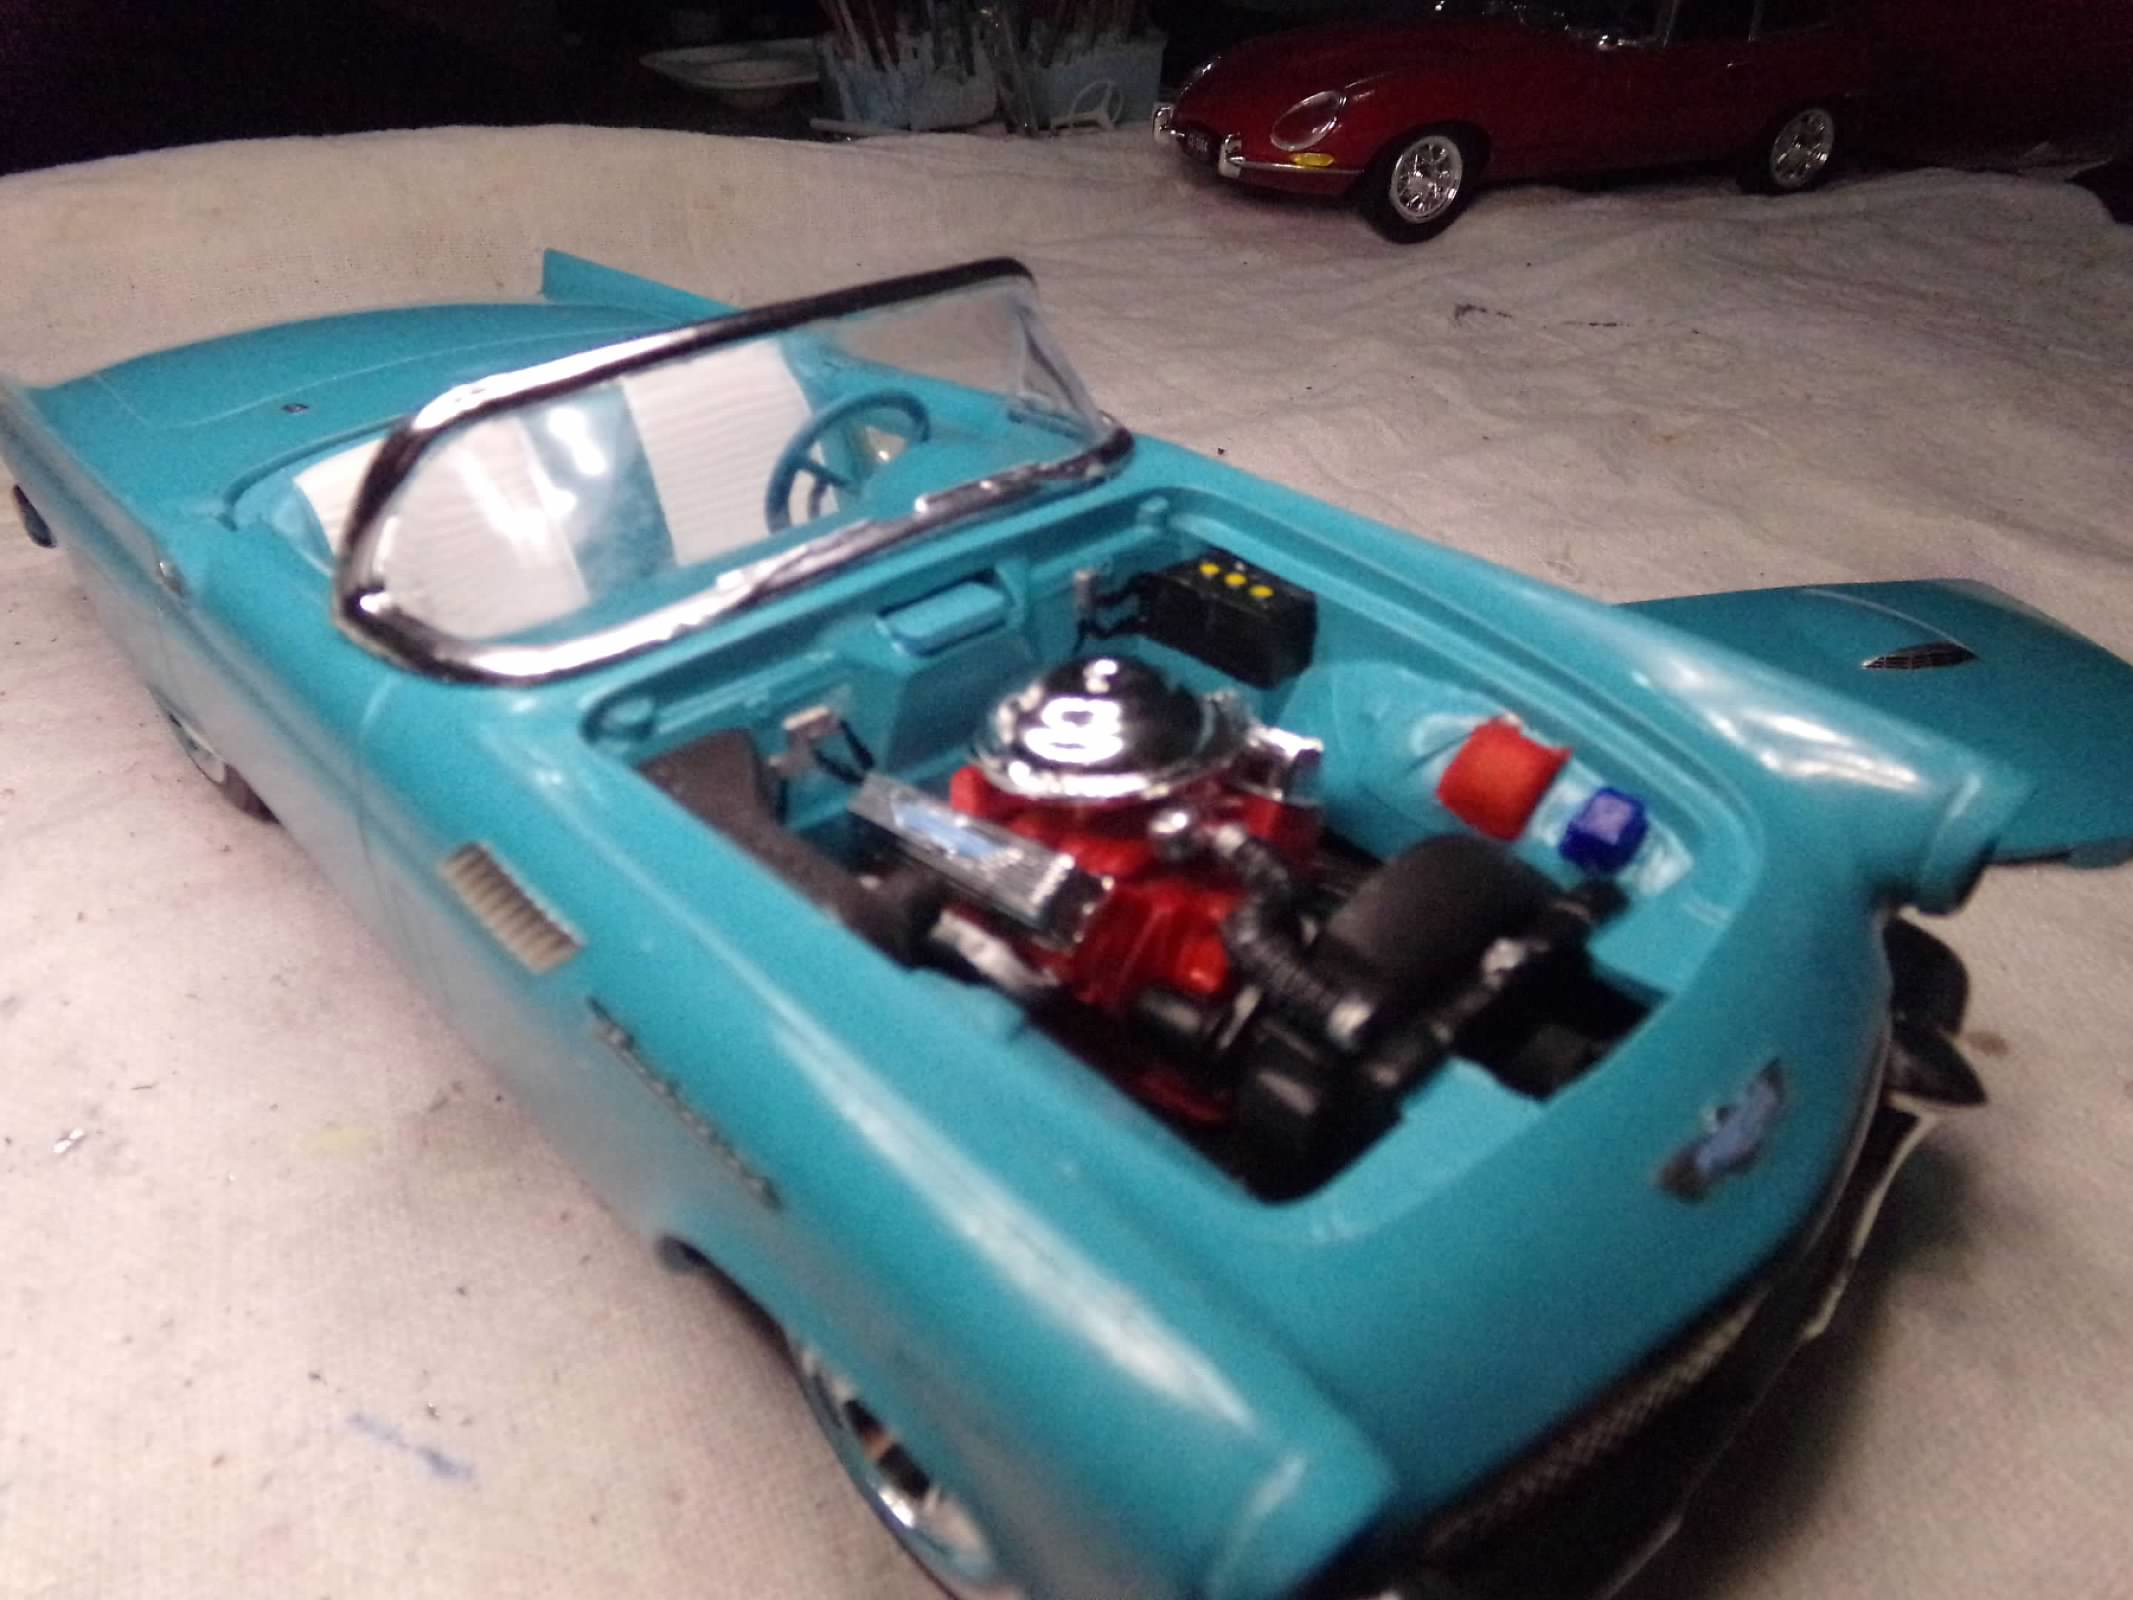
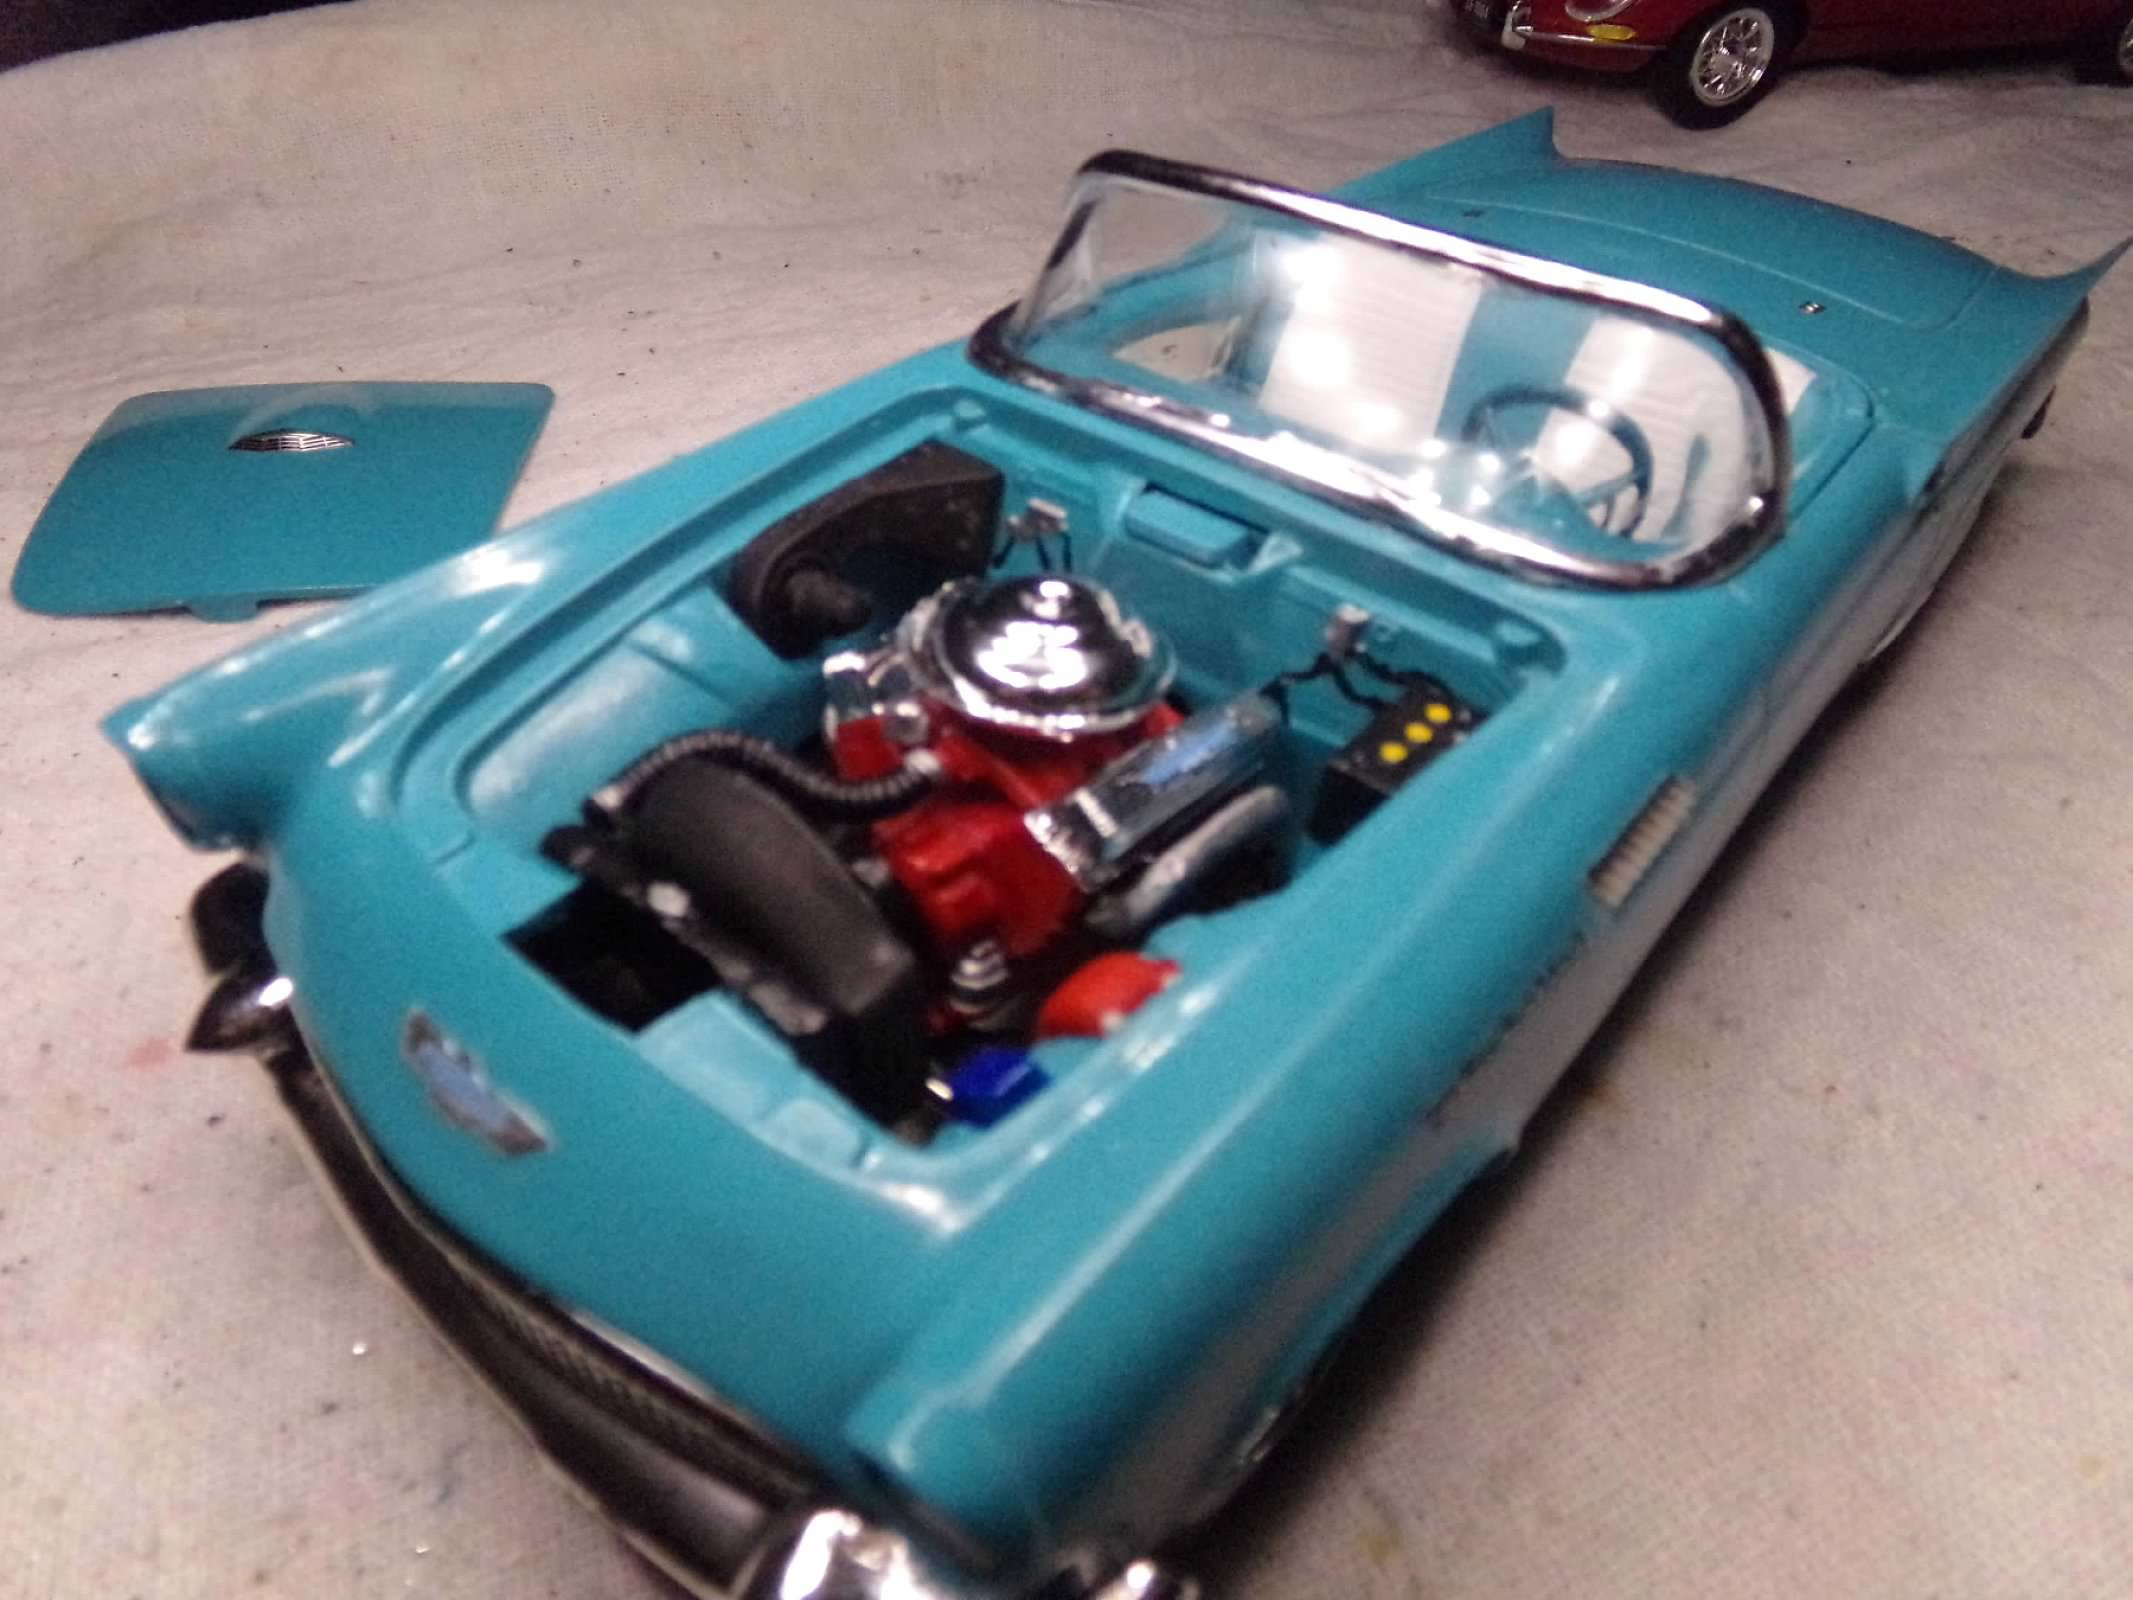
Thanks, Eric and Greg! I appreciate your comments! Rubbed out the body, foiled it and painted the components in the engine bay. I touched it up with a brush after rubbing it out and I am dead out of paint so no more hiccups. I didn't take a photo of the hood but I think you can see it on the desk. I used the decal from the Jaguar that would have just been scratch off by the hood closure on the Jaguar so I used it for the scoop on this one! It looks good and it was totally a coincidence. I have a Keith Marks Thunderbird decal from the 56 T-bird I built some time ago so I hope I can get it on later. I'll work on the engine and interior tomorrow and I should be done by tomorrow night. A nice weekend build! Thanks for looking! ?
-
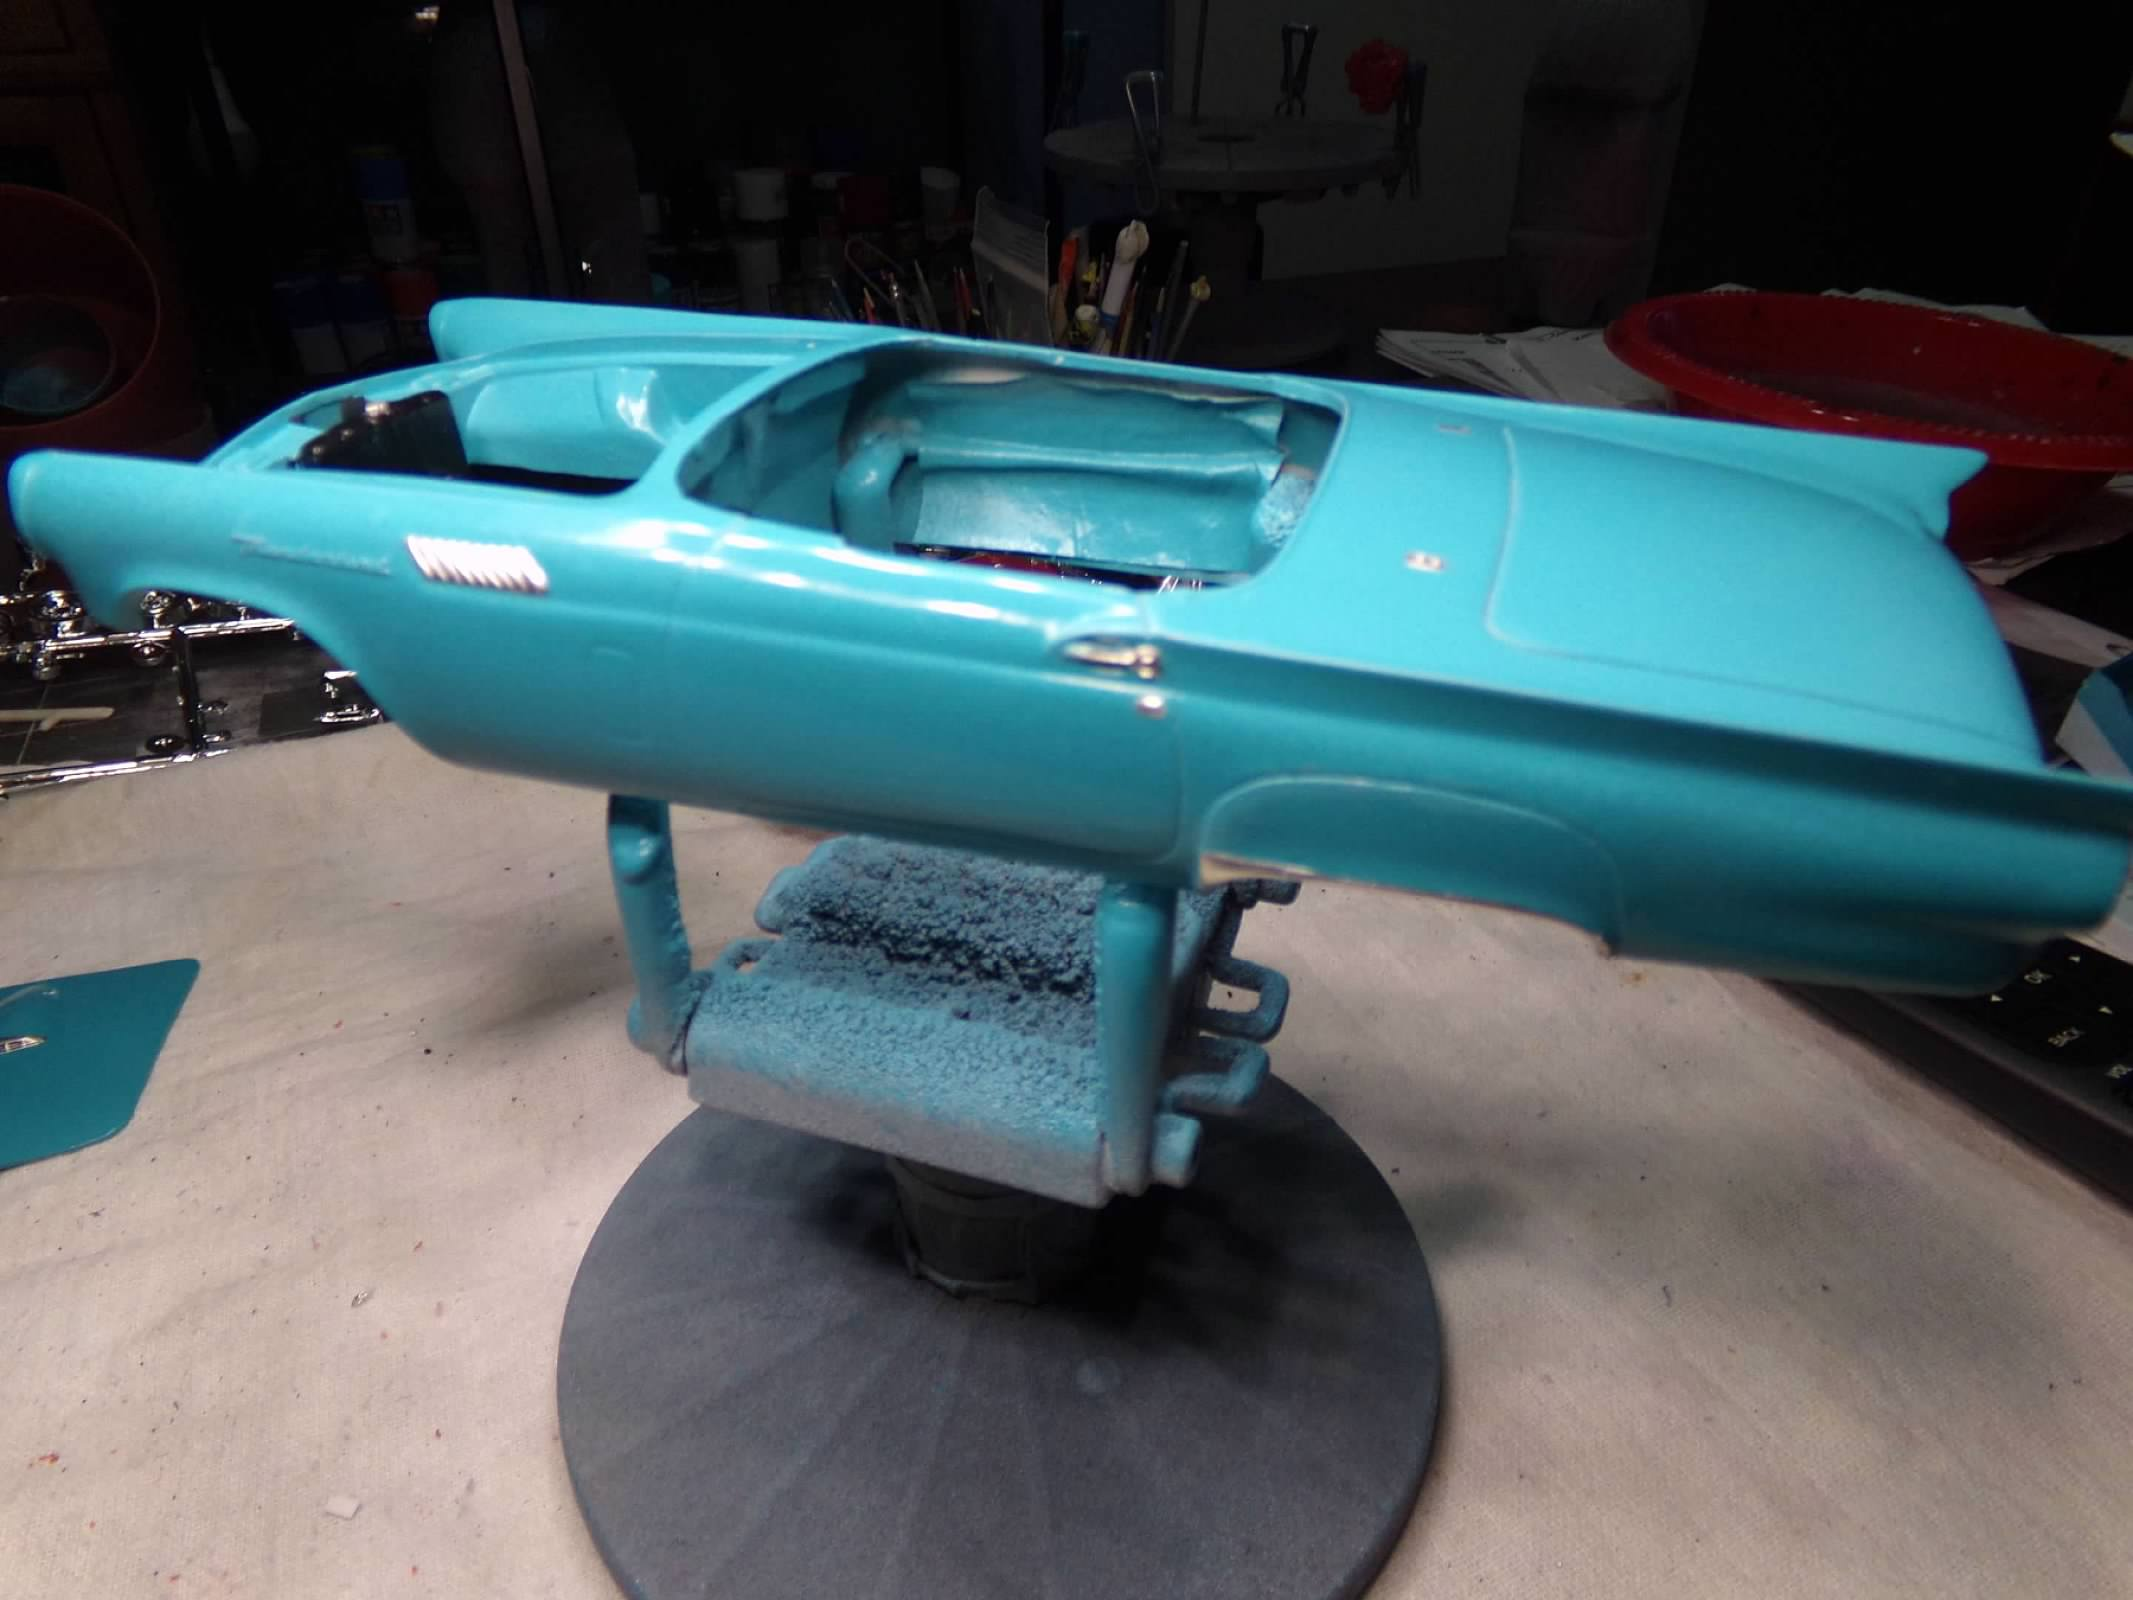
I saw this on the shelf and remembered that I built this one when I was a 12 year old kid. I've always liked the 57 thunderbird and thought it was comparable to the Chevys and Corvettes of the same era. So I bought it and opened it when I got home. Although I may have been impressed with the all chrome engine when I was a kid, I was not as enthused about it now. There are few parts in this roller and the rear of the car was a mess. It was like the mold maker was told to stop and get it into production immediately! So I set about to fix the trunk and rear valance area but screwed up the trunk line. I couldn't live with the deep trunk line I had carved into it so I filled it with .020" rod and sanded it out. It actually looks pretty good now and the rest of the paint looks OK too. I painted it Tamiya Coral Blue to finish up a can I had used earlier on a 57 Chevy and was going to paint the interior Tamiya Light Blue but it clashed with the Coral Blue. I didn't think I had enough Coral Blue for the interior but I had just enough and a little left for the wheel rims on the hubcaps. So this should keep me busy over the weekend while its raining. Thanks for looking! ?
-
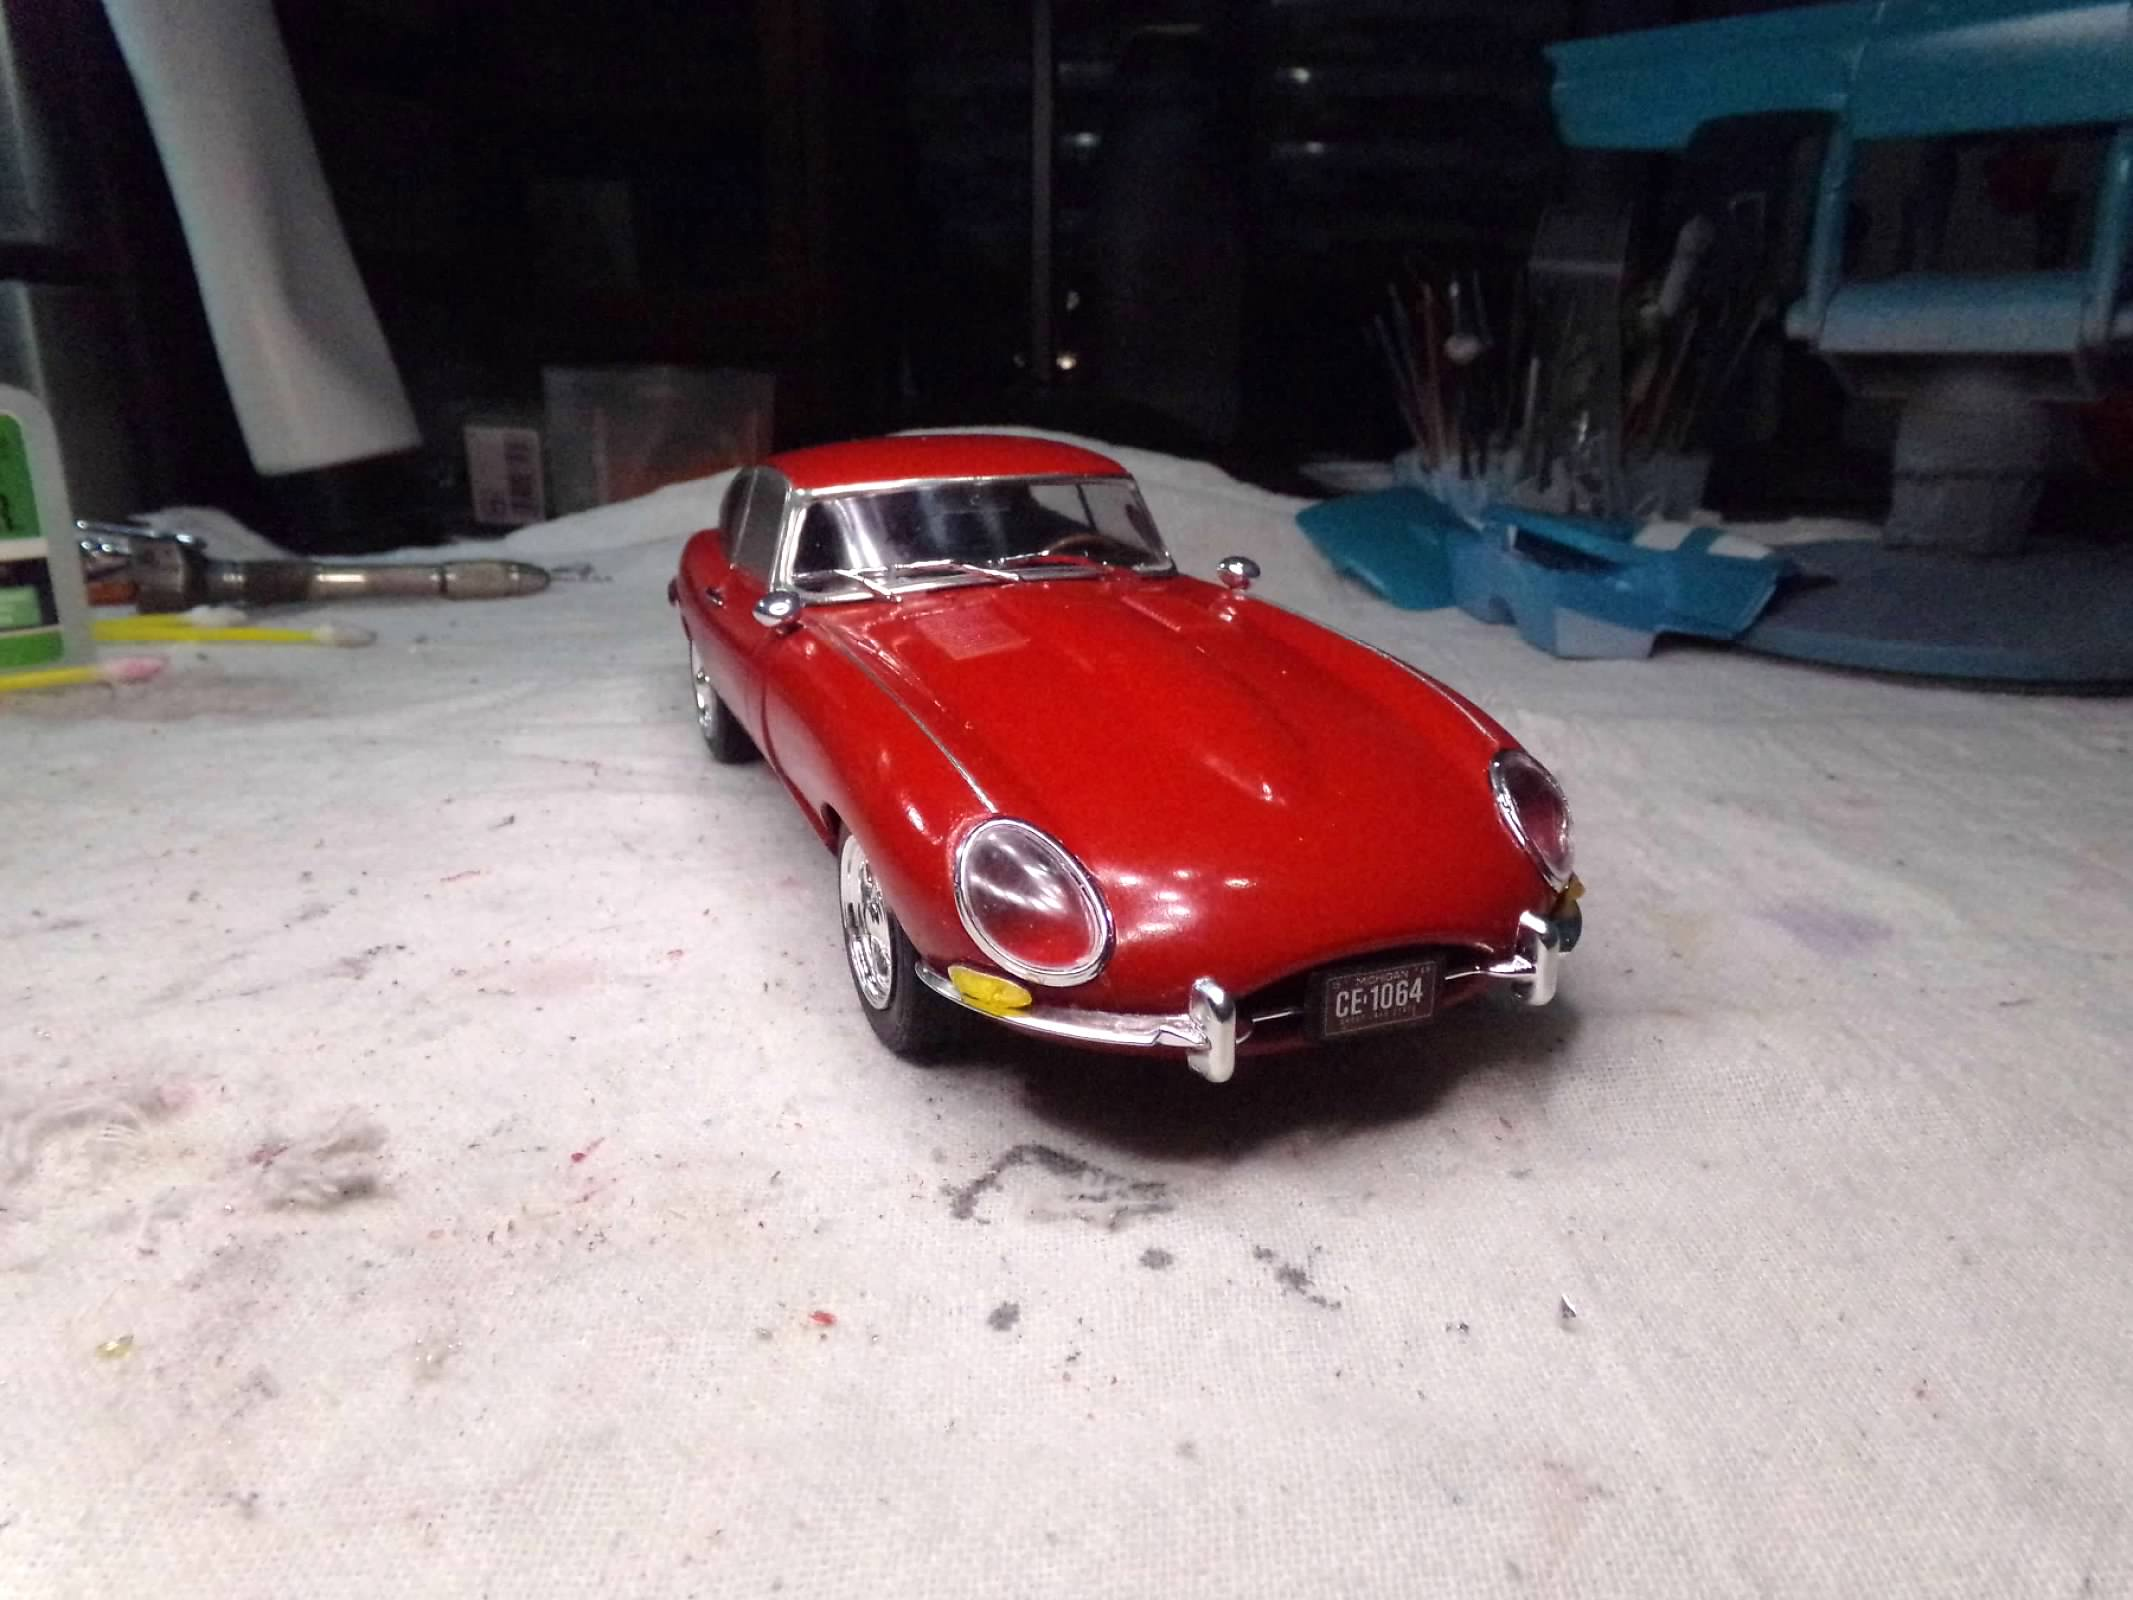
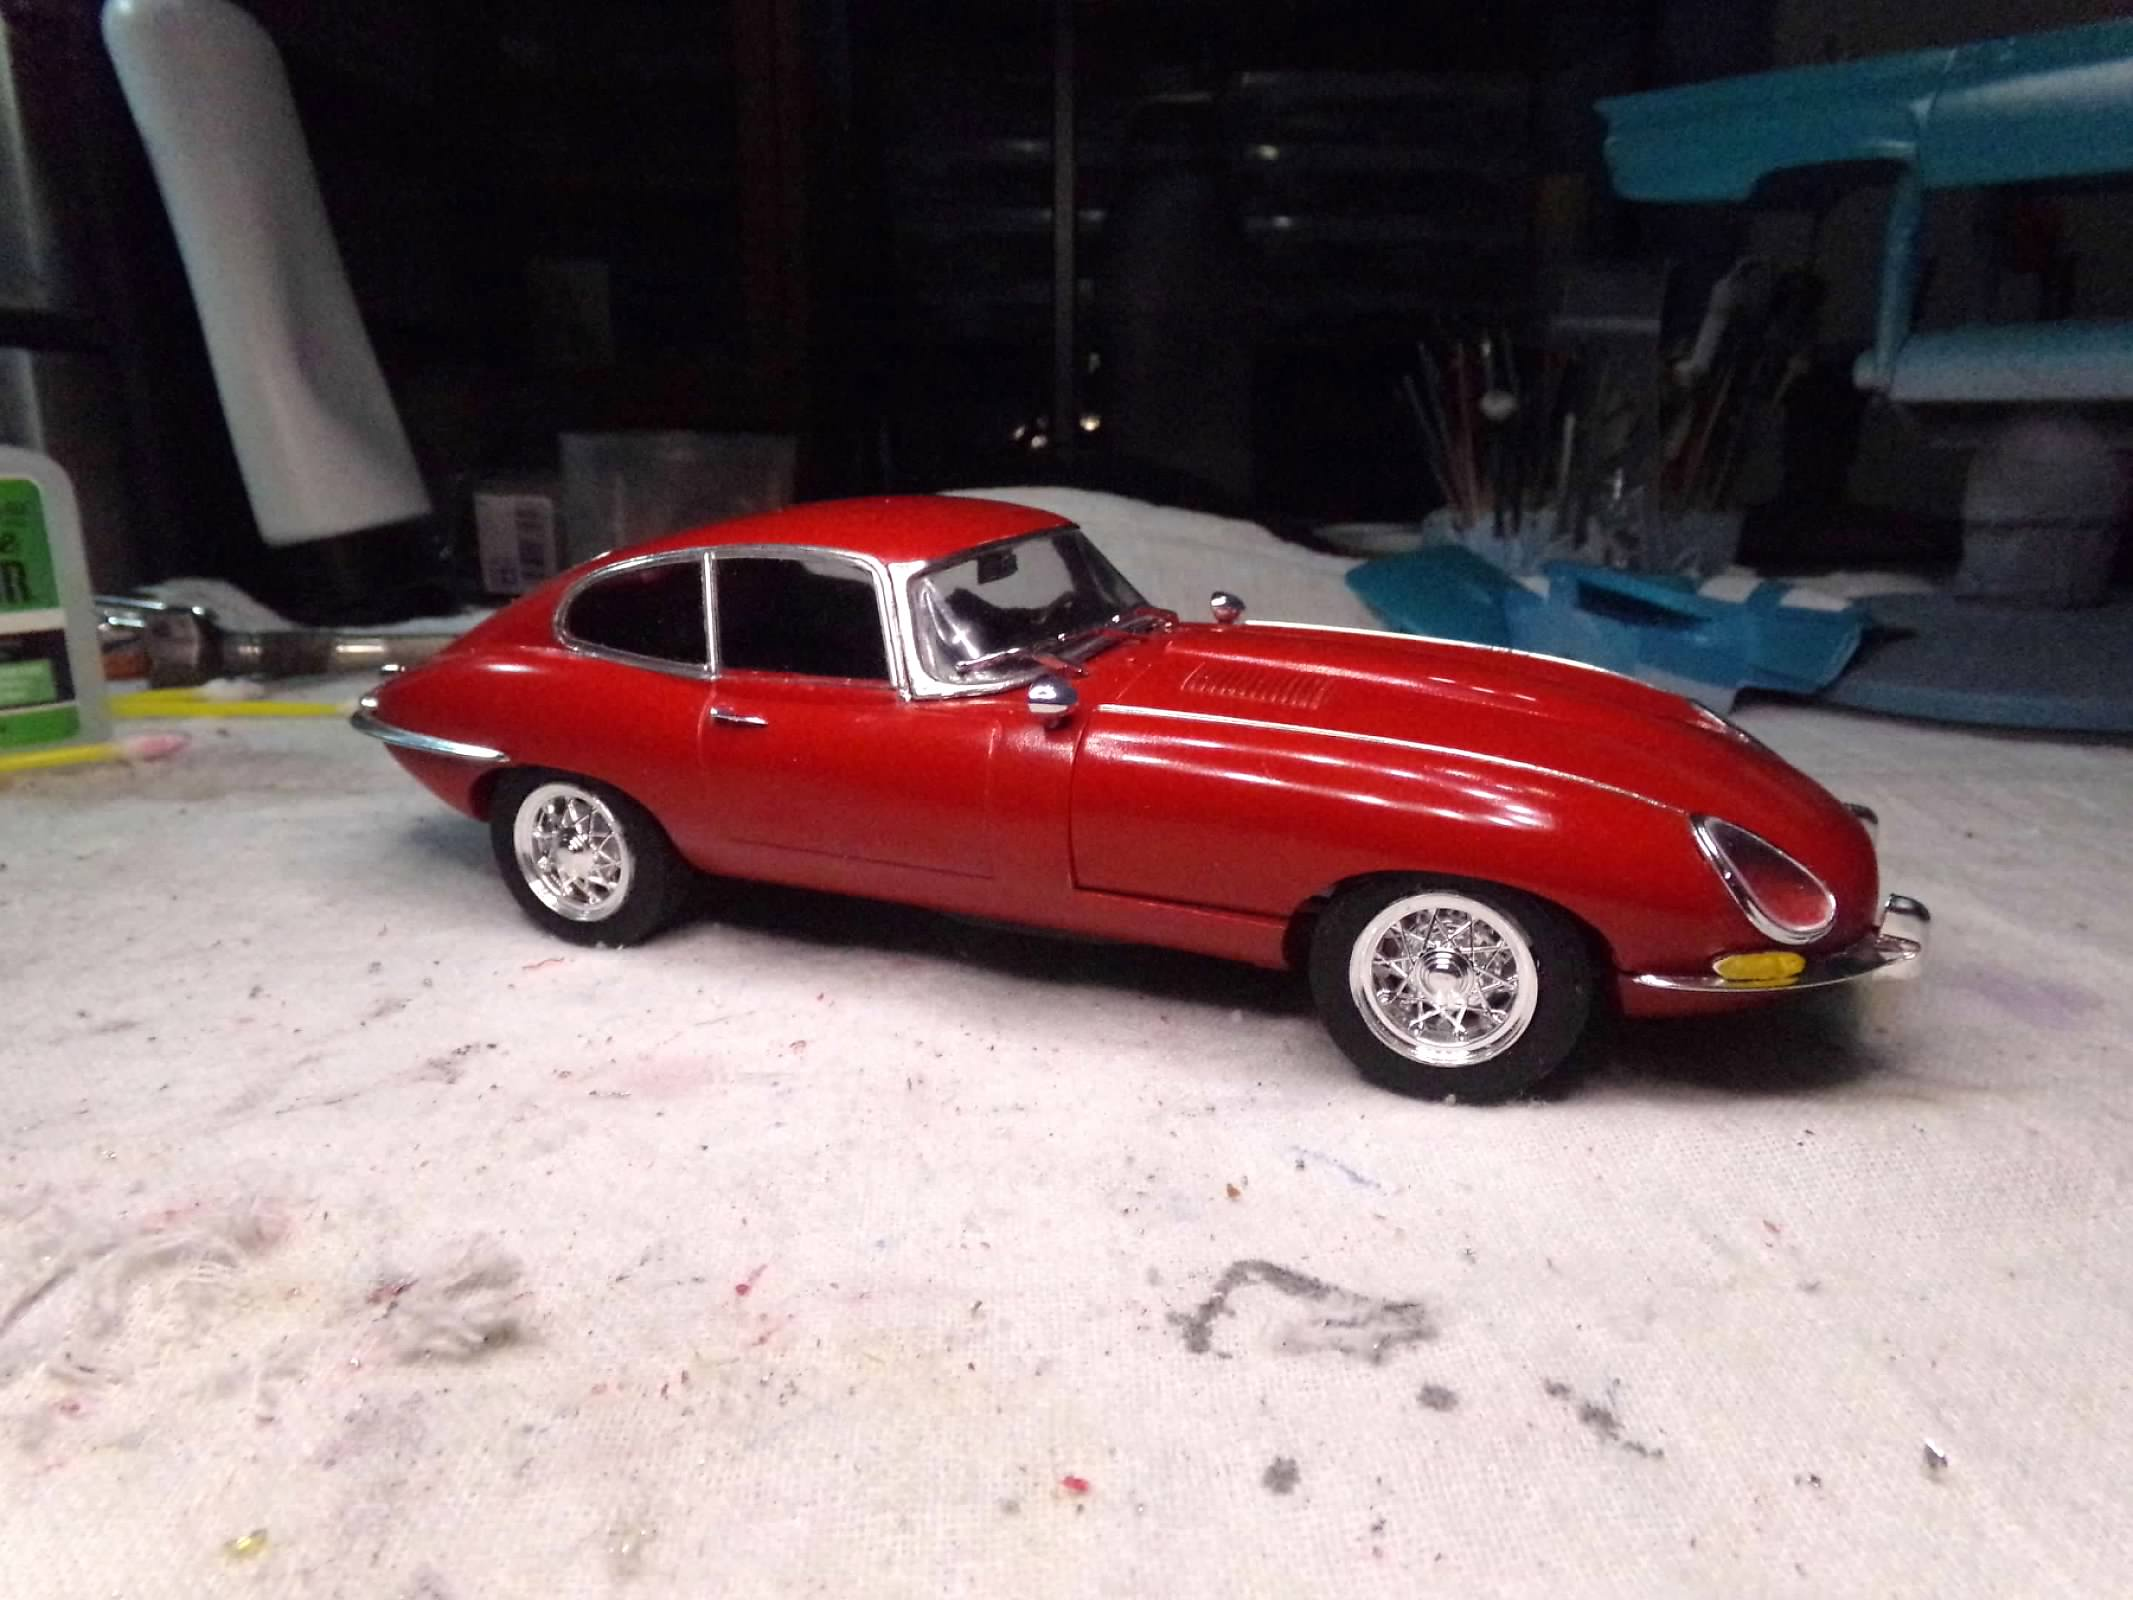
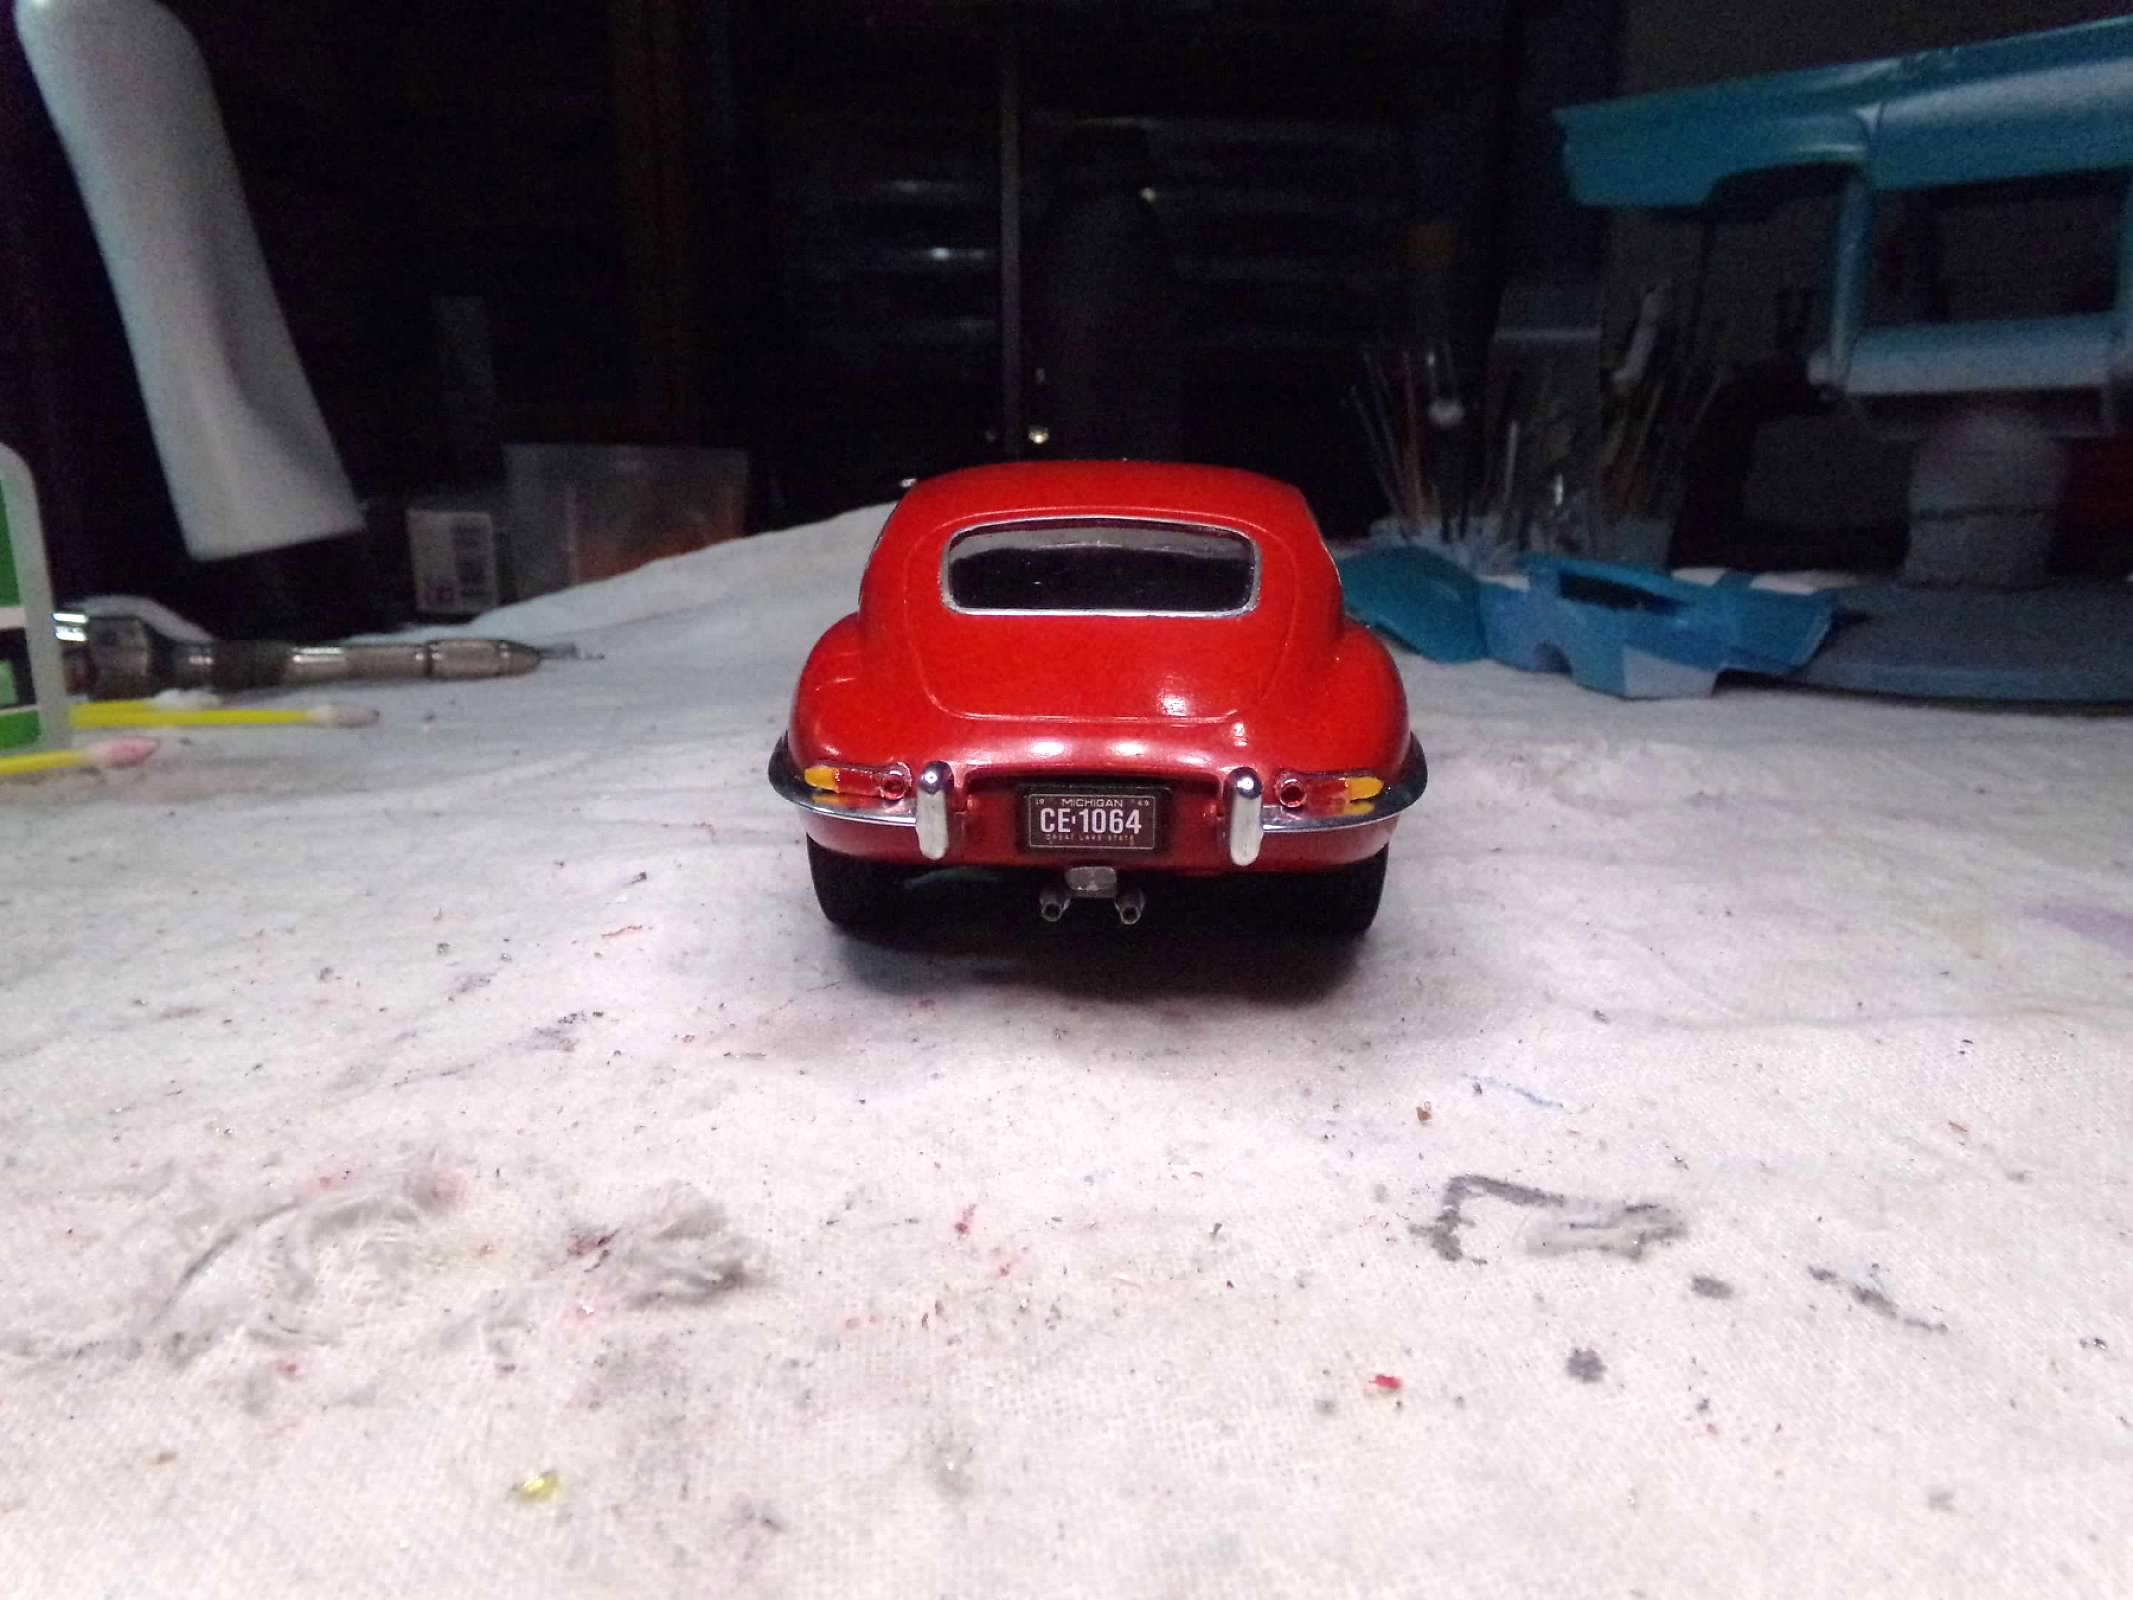
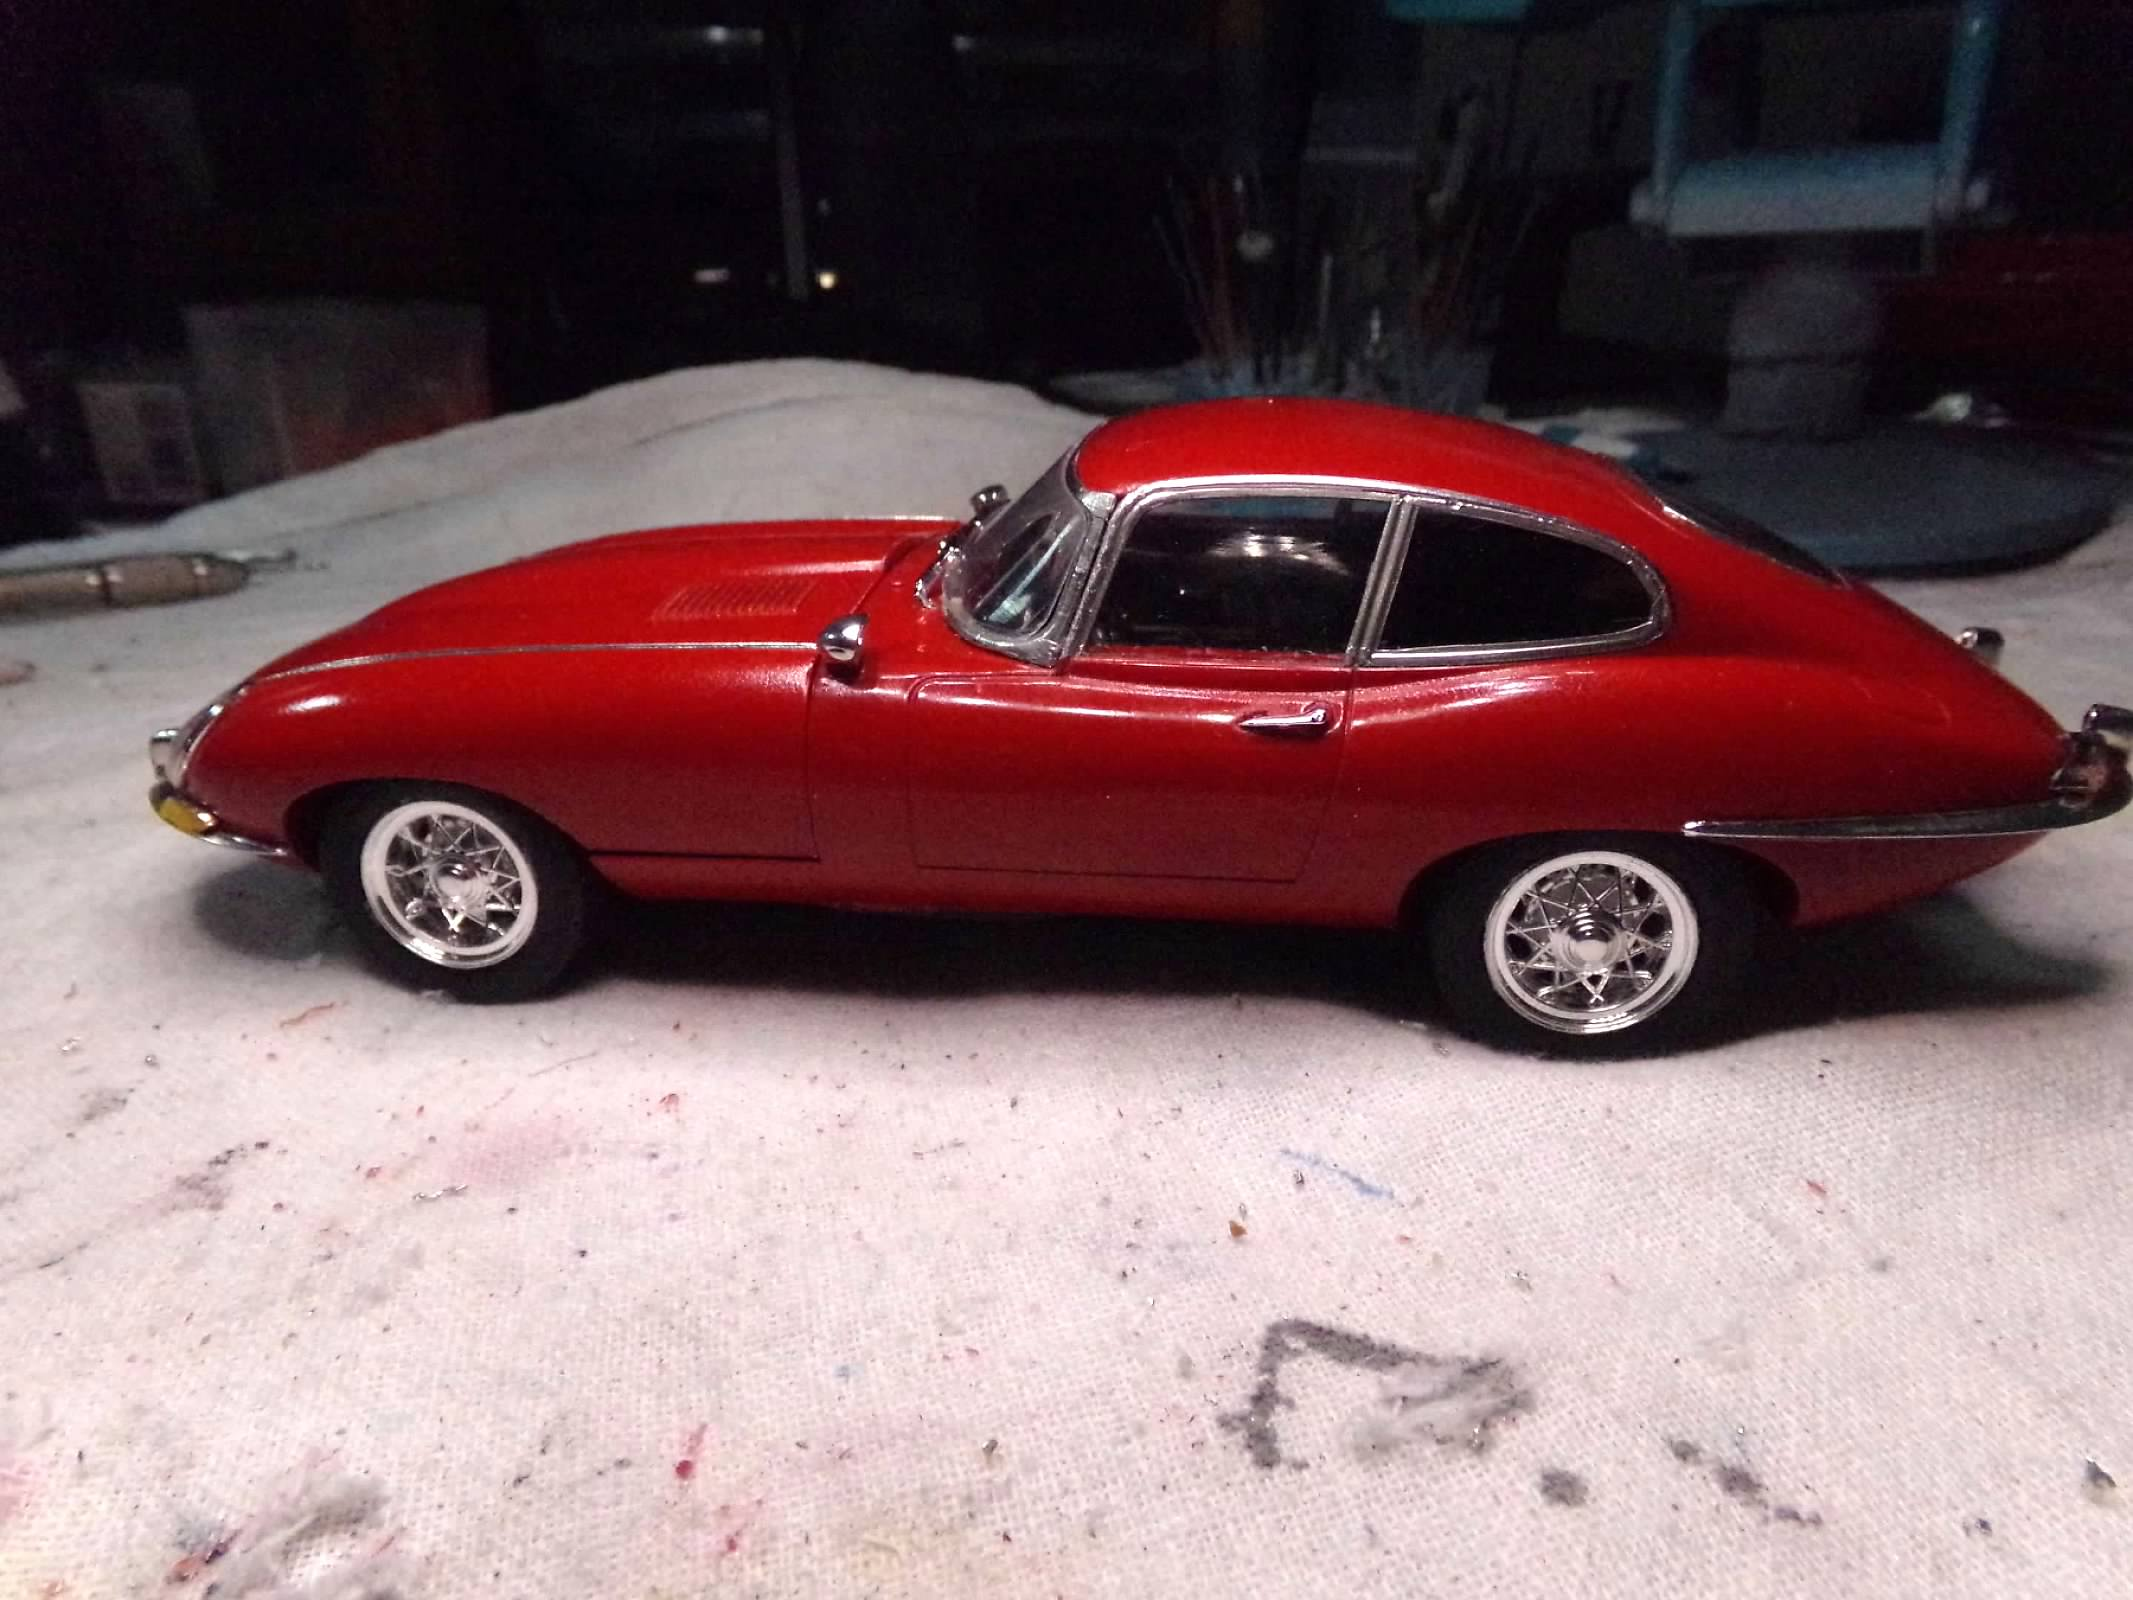
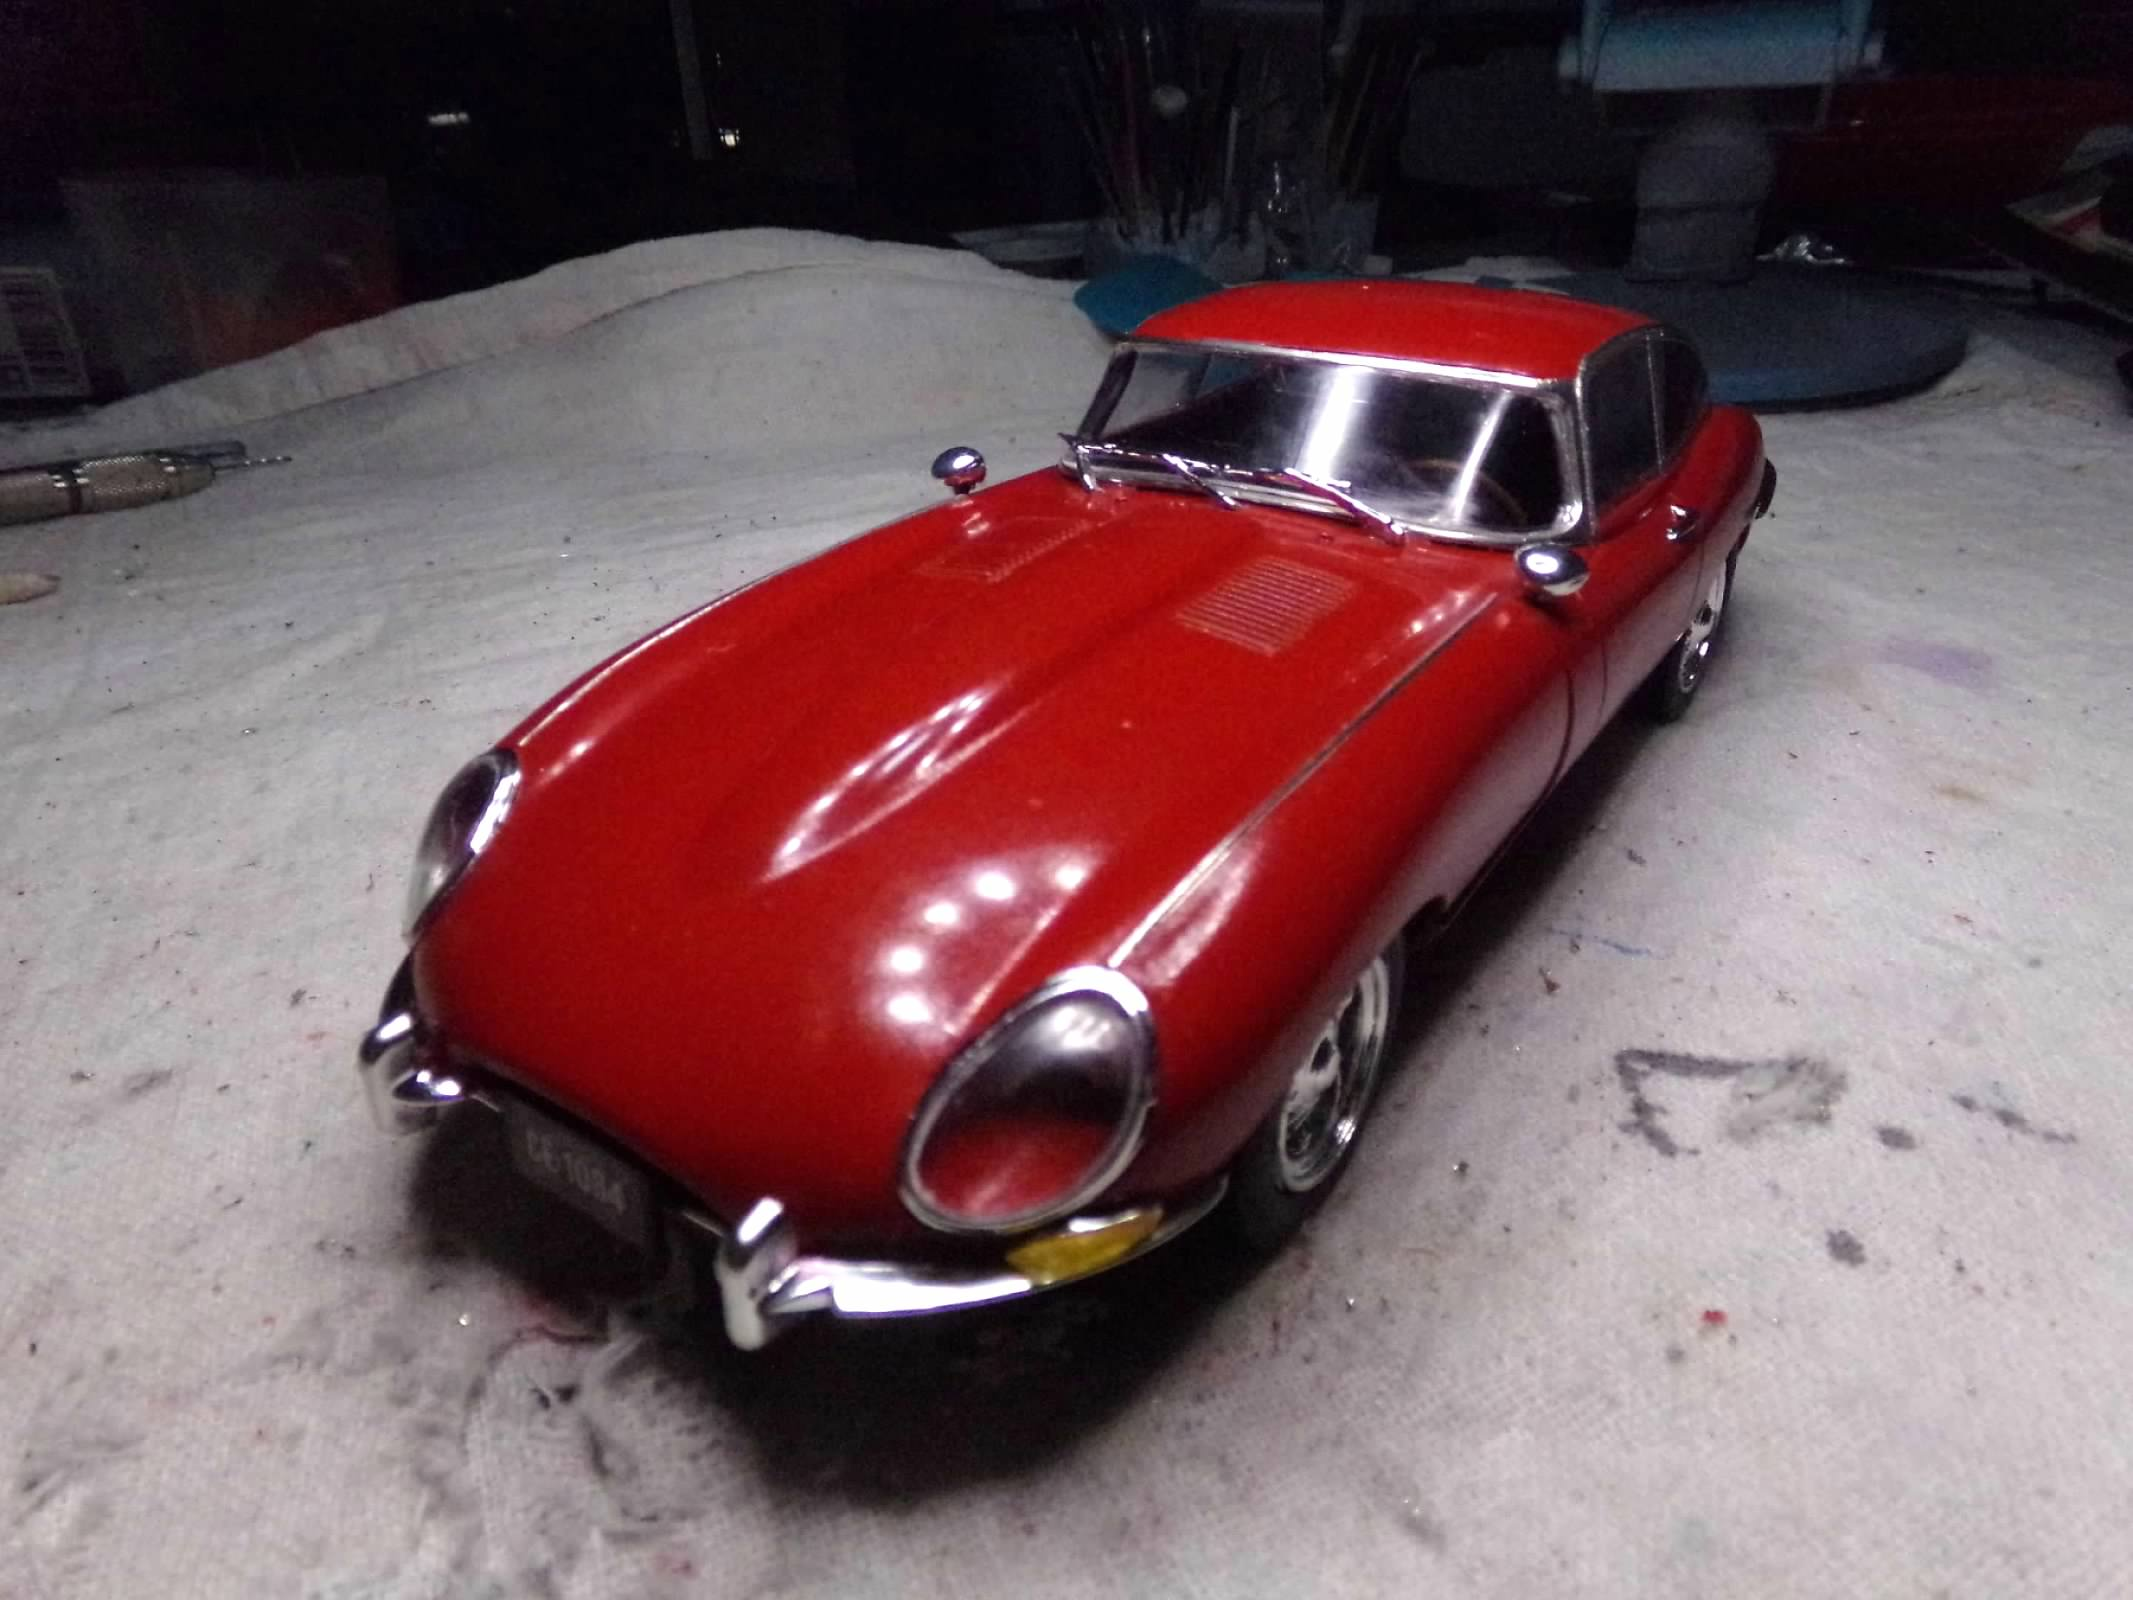
This is a revised tool from Revell. I have painted it Tamiya Italian Red with a black interior. Built box stock except for the wire wheels that I had in the spare parts box from the Revell 32 Ford Sedan. Although they are big and littles the diameters are not that different but the wider rear wheels had to be cut and sanded down a bit. The wheel backs fit the axle hubs nicely and the wheels cling to the spongy kit tires pretty well with some white glue. Some of the small parts like the wipers and mirrors are a bit fiddly and need some adjustment. One mirror needed some mirror foil. The hood also needs a prop to stay up. Thanks for looking! ?