1959scudetto
-
Posts
3,300 -
Joined
-
Last visited
Content Type
Profiles
Forums
Events
Gallery
Everything posted by 1959scudetto
-
Thanks, Carl - I like the shape of this car !
-
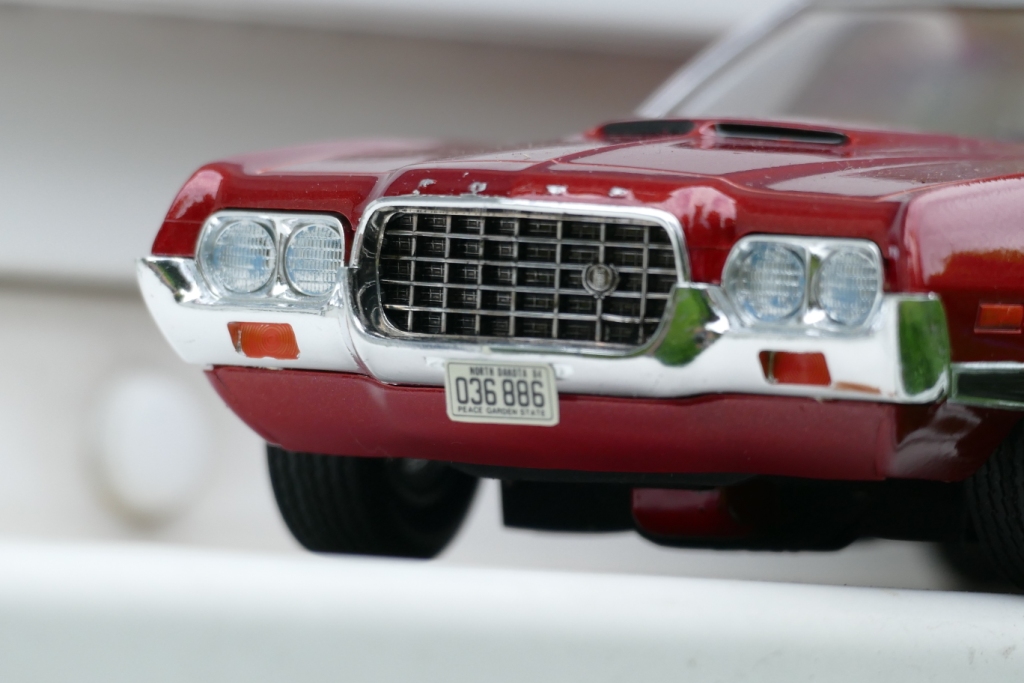
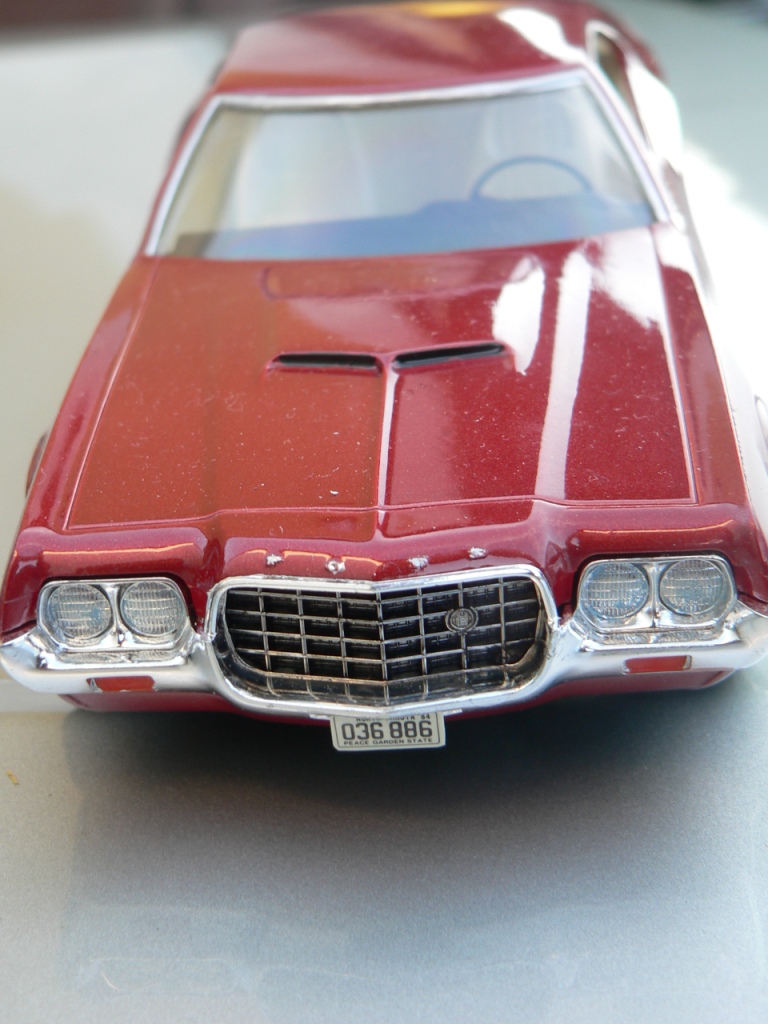
Thank you Rusty - Humbrol paints are ideal for brushing and lay down very well - you are right: the paint looks like a mixture of red and orange (the orange indicators in the 1st picture are more yellowish than the body, and if you look at the rear light in pic 2, you will see that it is not red, but maybe in-between)
-
Thank you, Anders ! Thanks, Jim! Thank you Gareth - those Humbrol paints are ideal for brushing and lay downvery well - I've been using them for 50 years now - but unfortunately they seem to be no more available here. Thanks, Dennis - I like the '70's look with some chrome accents.
-
Thanks, Ray! Thanks, Dave 1 Thank you, Glen! I like that body style. Thanks, Mike! Thanks, Larry !
-
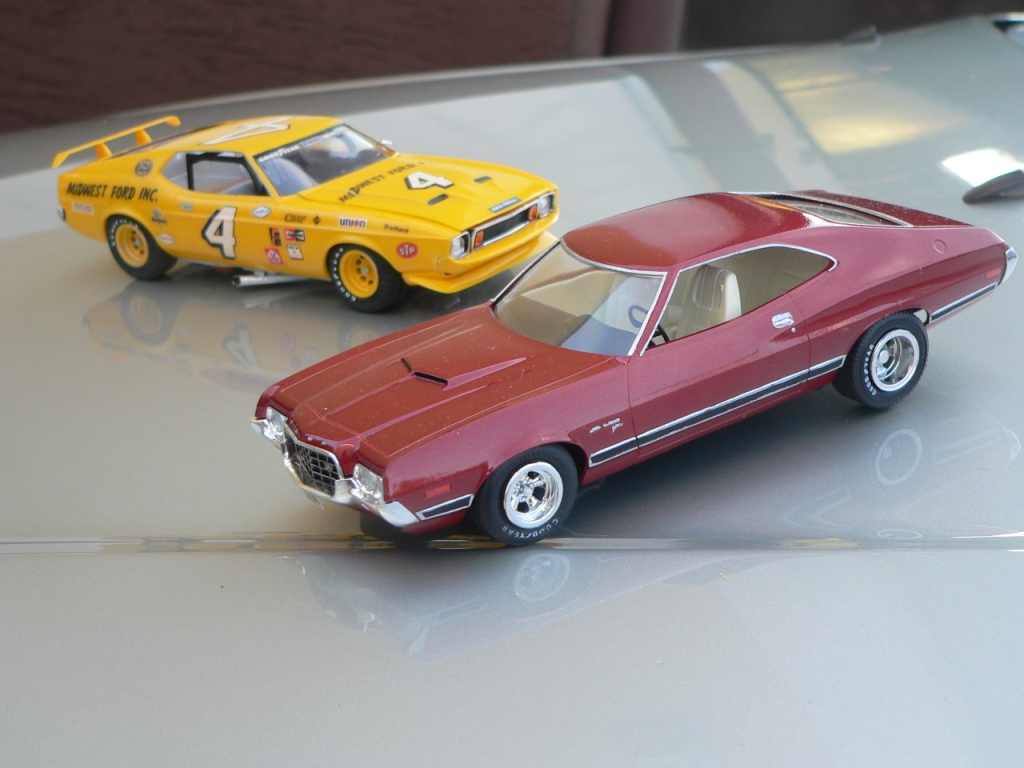
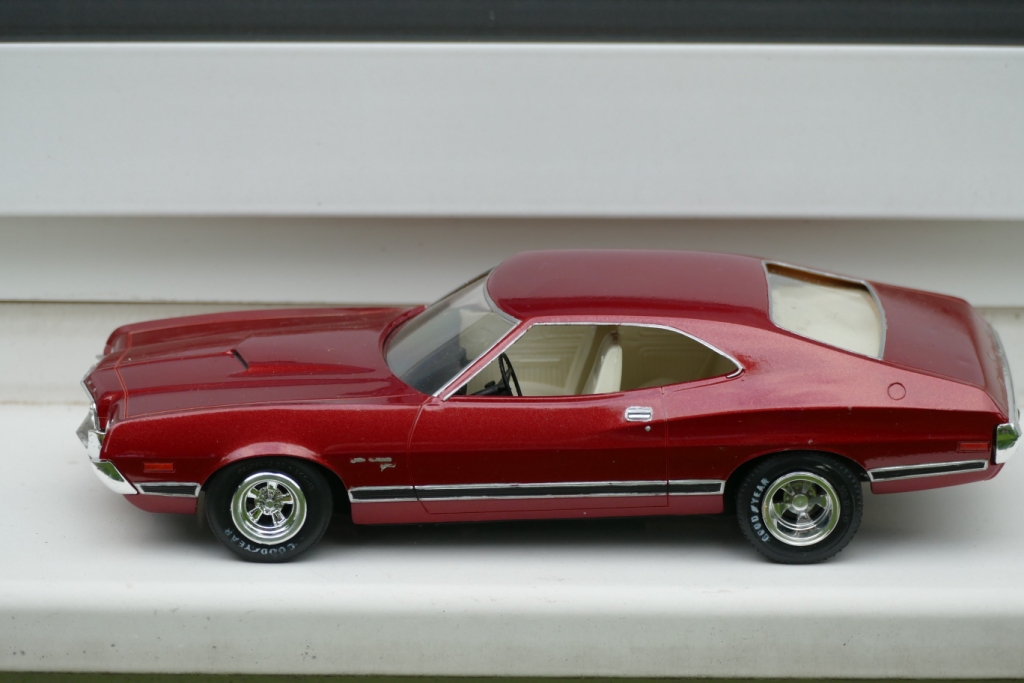
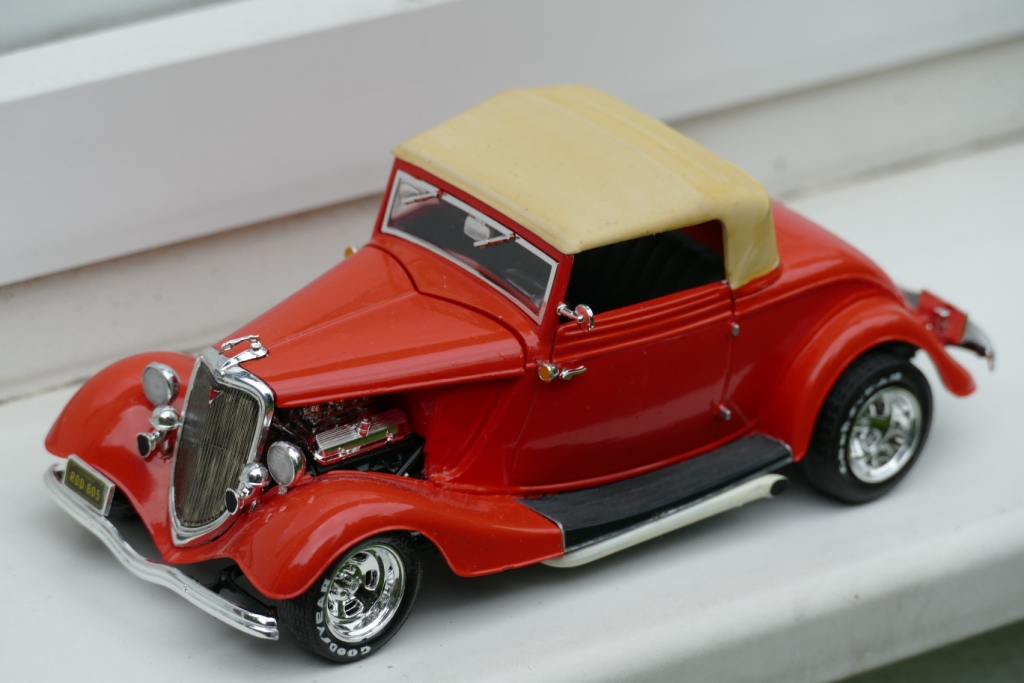
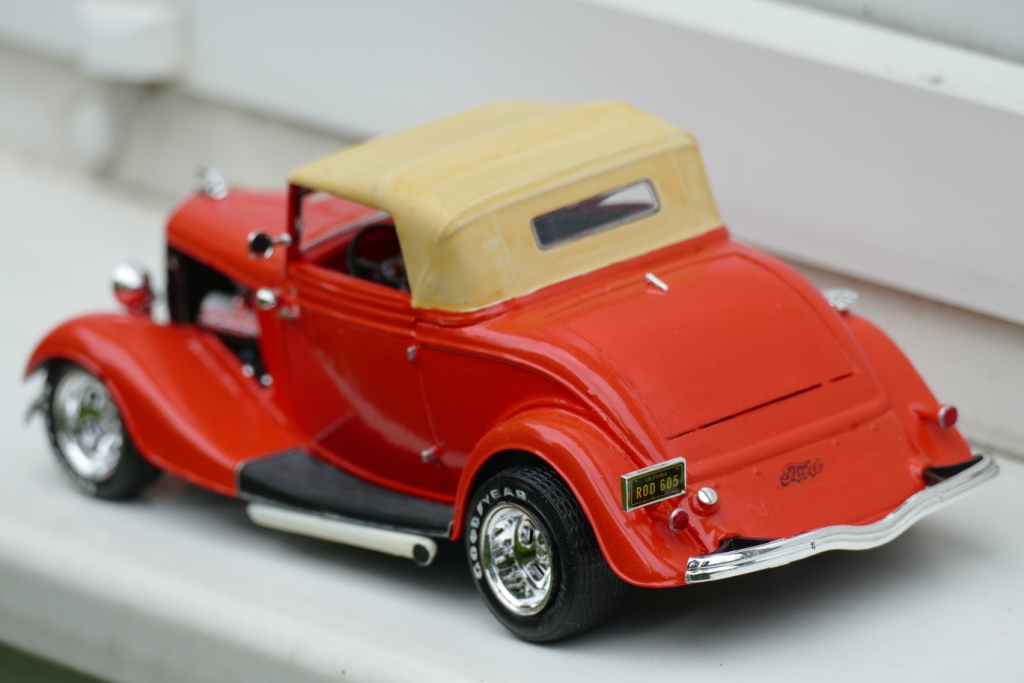
My last remaining muscle car: JoHan's old snap-kit out of the box, automotive laquer spray-painted, wheels from the (amt) parts box.

-
Thank you very much, Anders - this was a labor of love for me - together with the 250 GT Lusso and the Miura this is my favorite Italian sportscar.
-
Thank you Gareth, the engine with its different color shades was built exactly according to the informations from the owner. By the way, the 2nd engine would not have fit into the model - the exhaust headers stick out too far - the built-in engine has them much tighter to the cylinder block.
-
Thanks Larry!
-

1964 Ford GT40 #12 Le Mans
1959scudetto replied to Gramps46's topic in Other Racing: Road Racing, Salt Flat Racers
Very nice early GT40, Gary - the conversion work really paid off ! (the GT40 is my all-time favorite racecar since I had the Matchbox diecast as a kid) -
Thank you Anders, that is too kind of you.
-
Thank you Gareth - I have sold off all my muscle cars including this one.
-
Thank you, Michal!
-
Peterbilt 352
1959scudetto replied to Bronzekeg's topic in Model Trucks: Big Rigs and Heavy Equipment
Awesome looking late 70's truck, Ken ! -
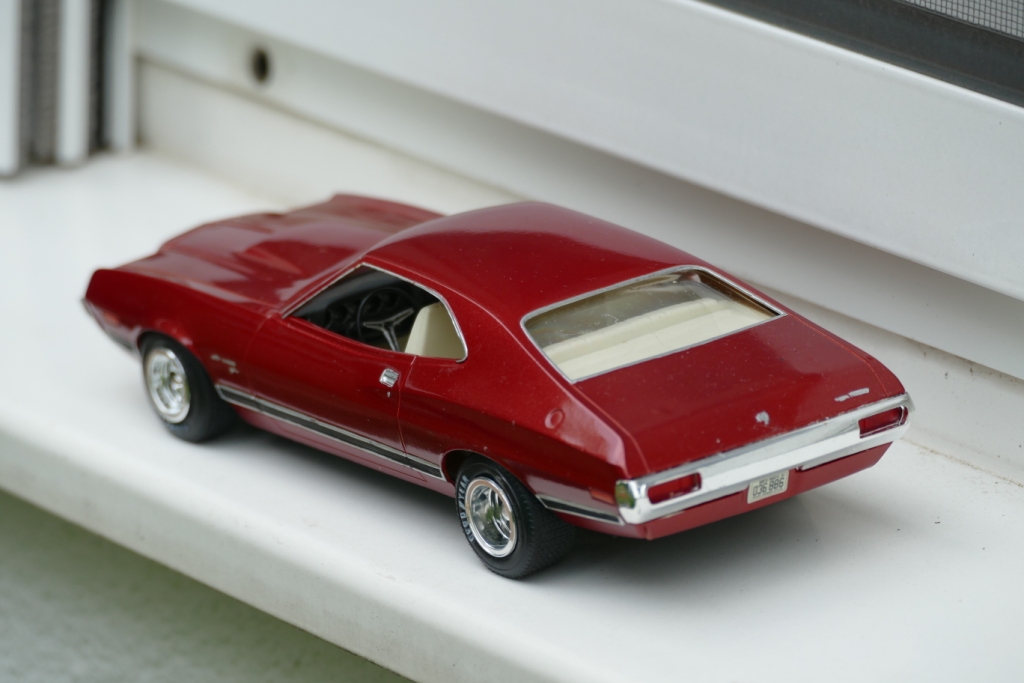
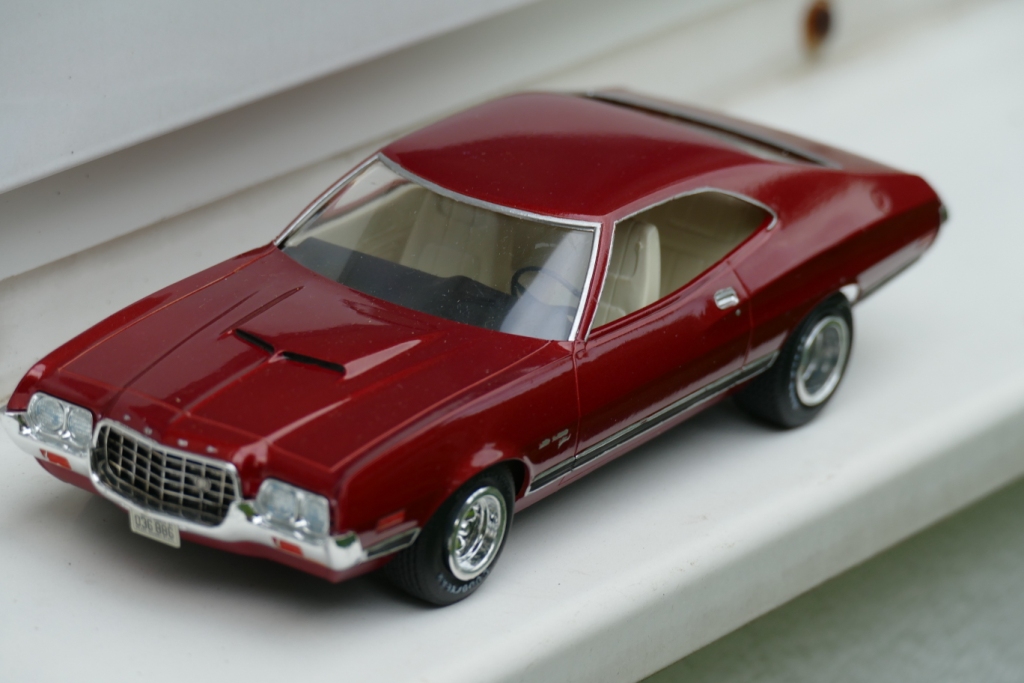
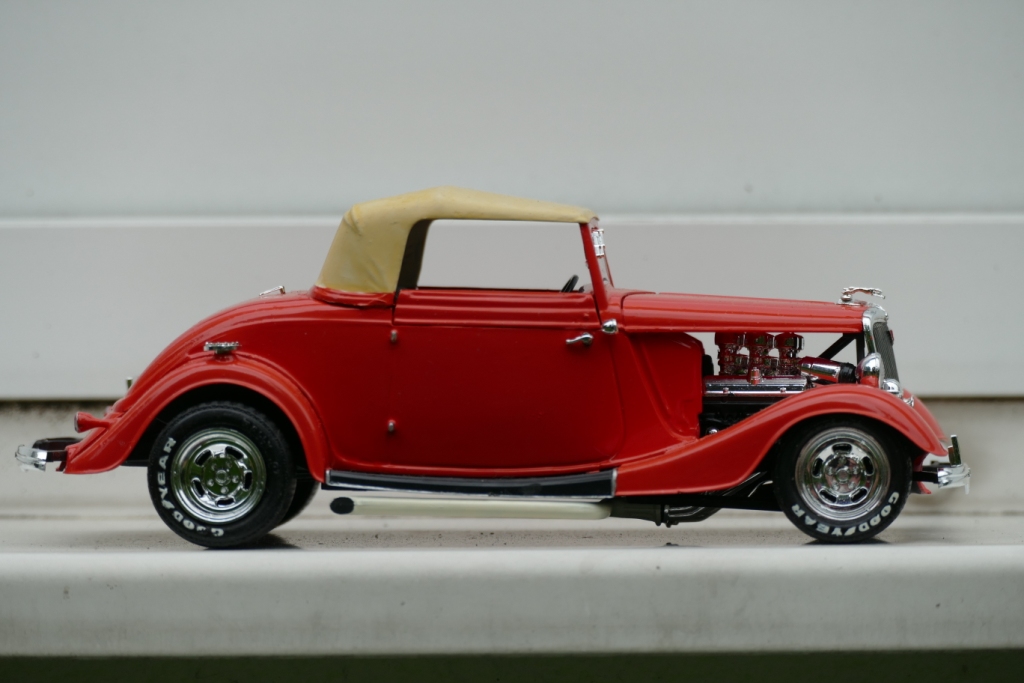
Now for something completely different: Though i'm not into street rods, I wanted to have at least one typical example. In 1983, when one of the hobby shops in Vienna closed, I caught this: 1/24 Monogram 1934 Ford Roadster from the 1974 "Early Iron Series": once again brush-painted with Humbrol orange, it has a typical '70s look (at least to me) - the soft-top has been covered with clear matte which has started yellowing over the years - will get a repaint.
-
Jaguar XKE/ Corvette Sting Ray - Deadman's Curve
1959scudetto replied to RandyB.'s topic in Model Cars
Very nice pair, Randy - now Jan andDean's song is running through my head.... -
Yesterday I saw that the 1961 and 1962 Ford Station wagons went for about € 58 or 55 (which is in the $ 70 range) without postage - might be reasonable for such an old kit, but was still too expensive for me (in the US the price probably would have risen much more, I guess)
-
Thank you, Marco - it is my favorite color for this car. Thank you Bruce - in my opinion, sports (and race) cars of the '60s look best.
-
Thank you, Justin ! You are right about these kits - due to the sheer number of tiny, delicate parts, they are a bit complicated to build, but if you work carefully and take your time, you should not face huge problems.
-
Thank you Monty - if I had wetsanded the primer and the final color (and eventually polished it, too) it certainly would look a lot more smooth (and would have no orange peel)
-
Thank you. Larry - the kit is not easy to build but absolutely worth it - it was my first Fujimi Enthusiast Model but certainly not my last one (3 Dinos, 1 Countach, 1 Stratos, 4 Porsche 356 and 5 Porsche 911 are still in my stash) Thank you Rich - the owner had a yellow Dino, and that is also my favorite color for this car. Thanks, Eric!
-
Well done, Mark - especially the bent chrome trim hanging down from the driver's door and the mounting holes in the left front fender.
-
Very nice TC's, David - the only difference is the color of the horn (?) below the right headlight.
-
Thanks, David ! Thank you, Bob ! Thanks, Bill ! Thanks, David !
-
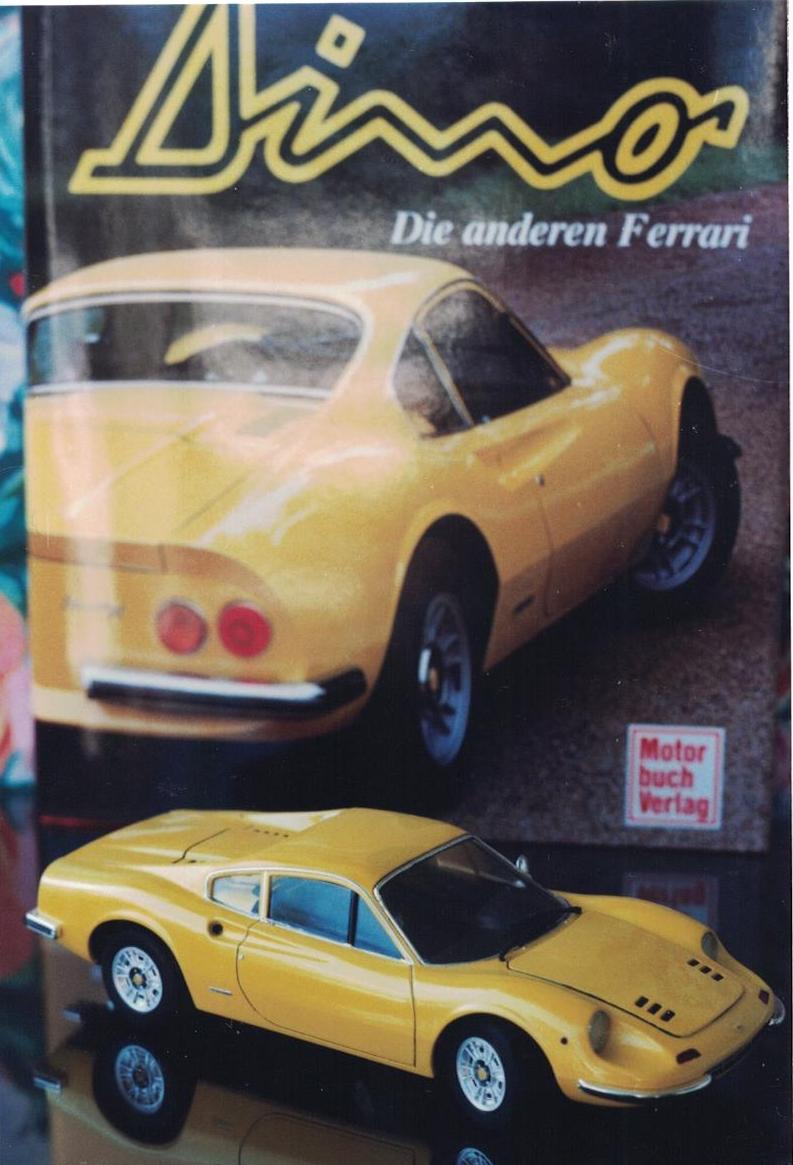
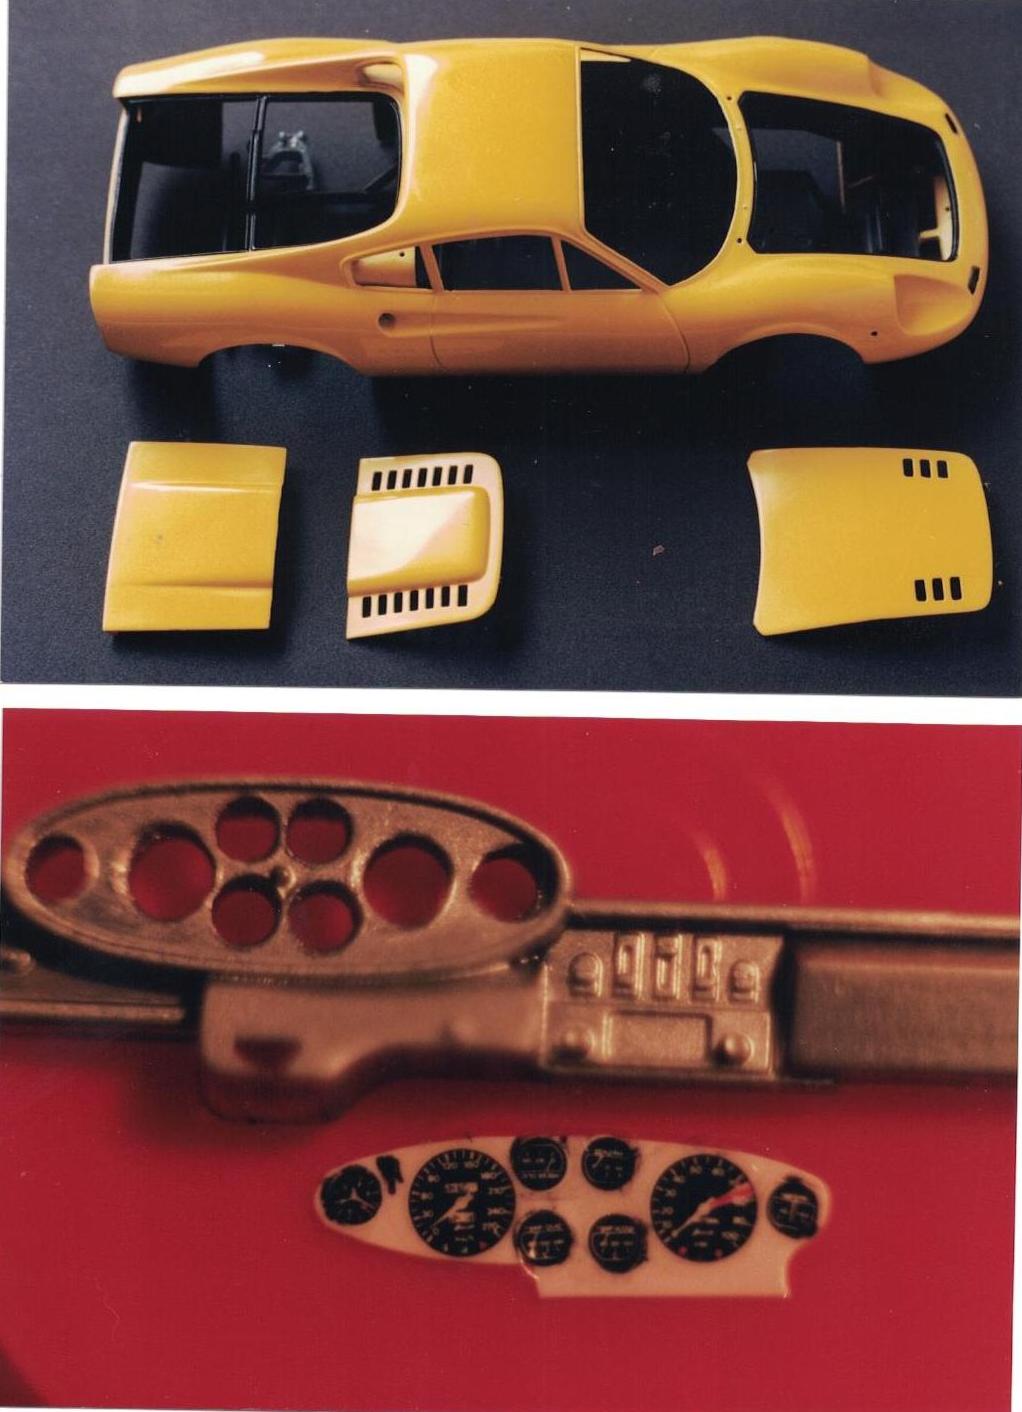
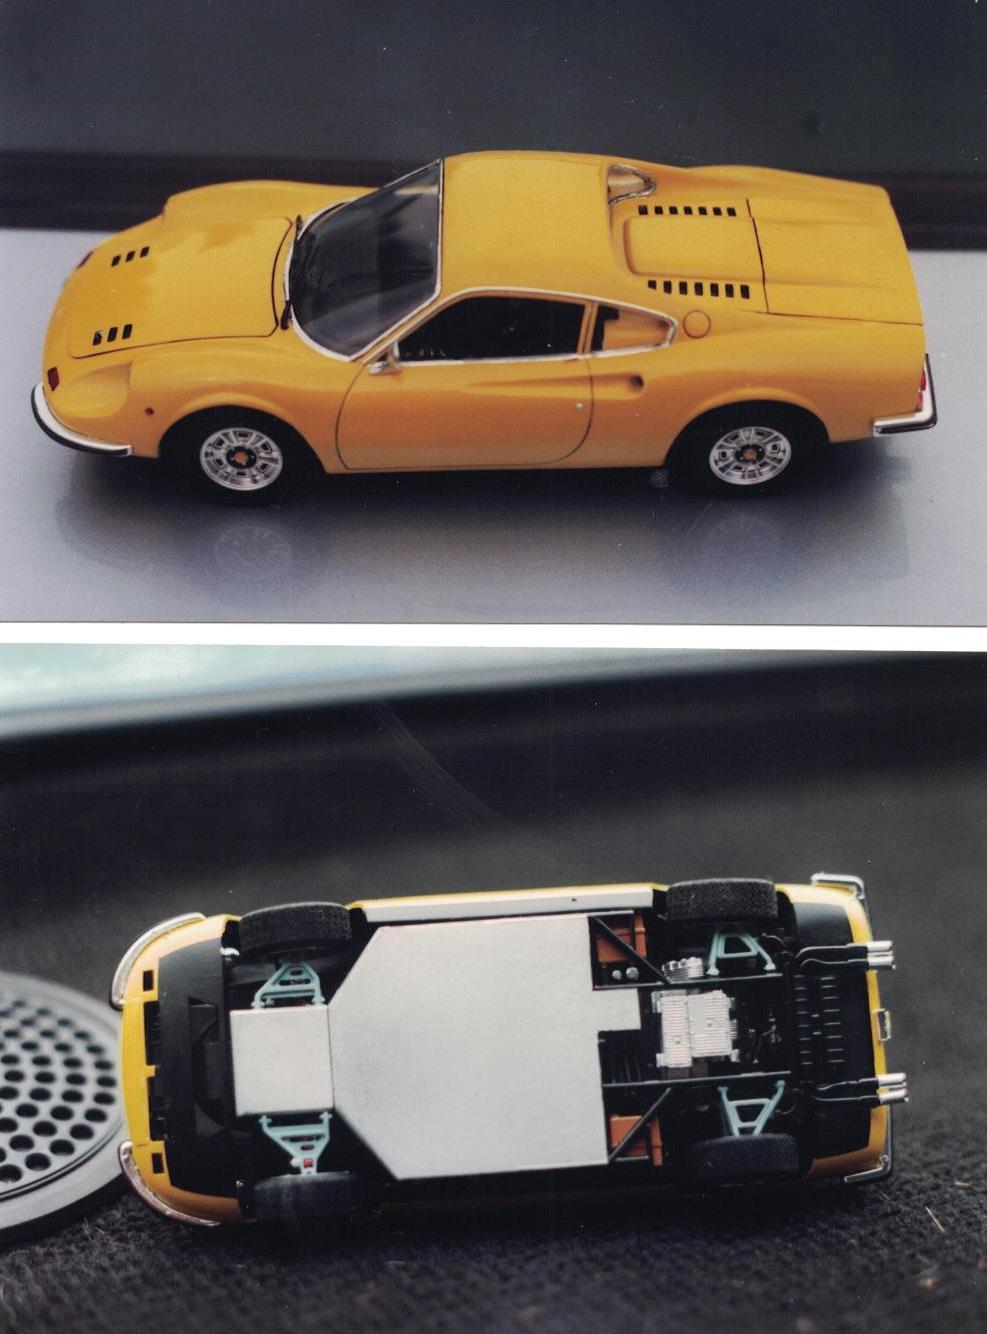
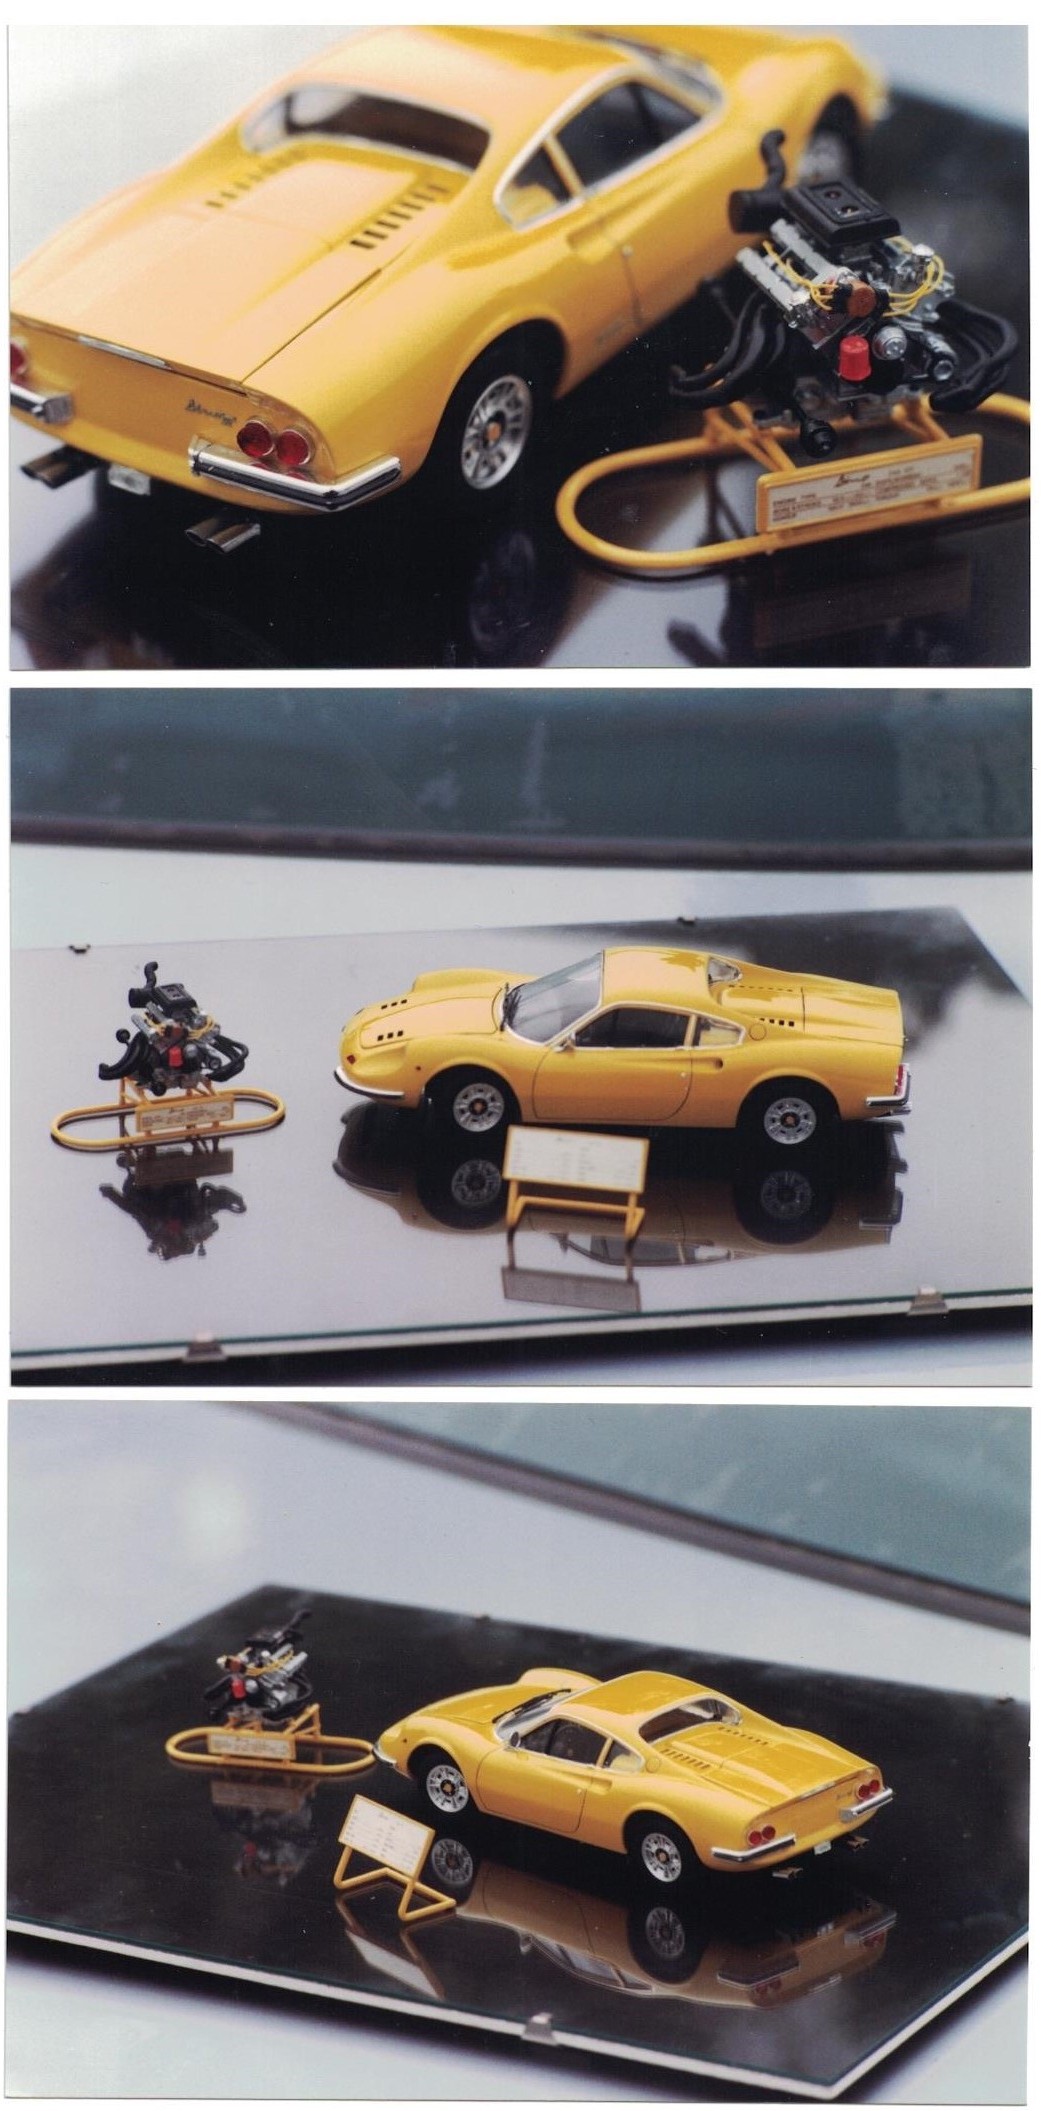
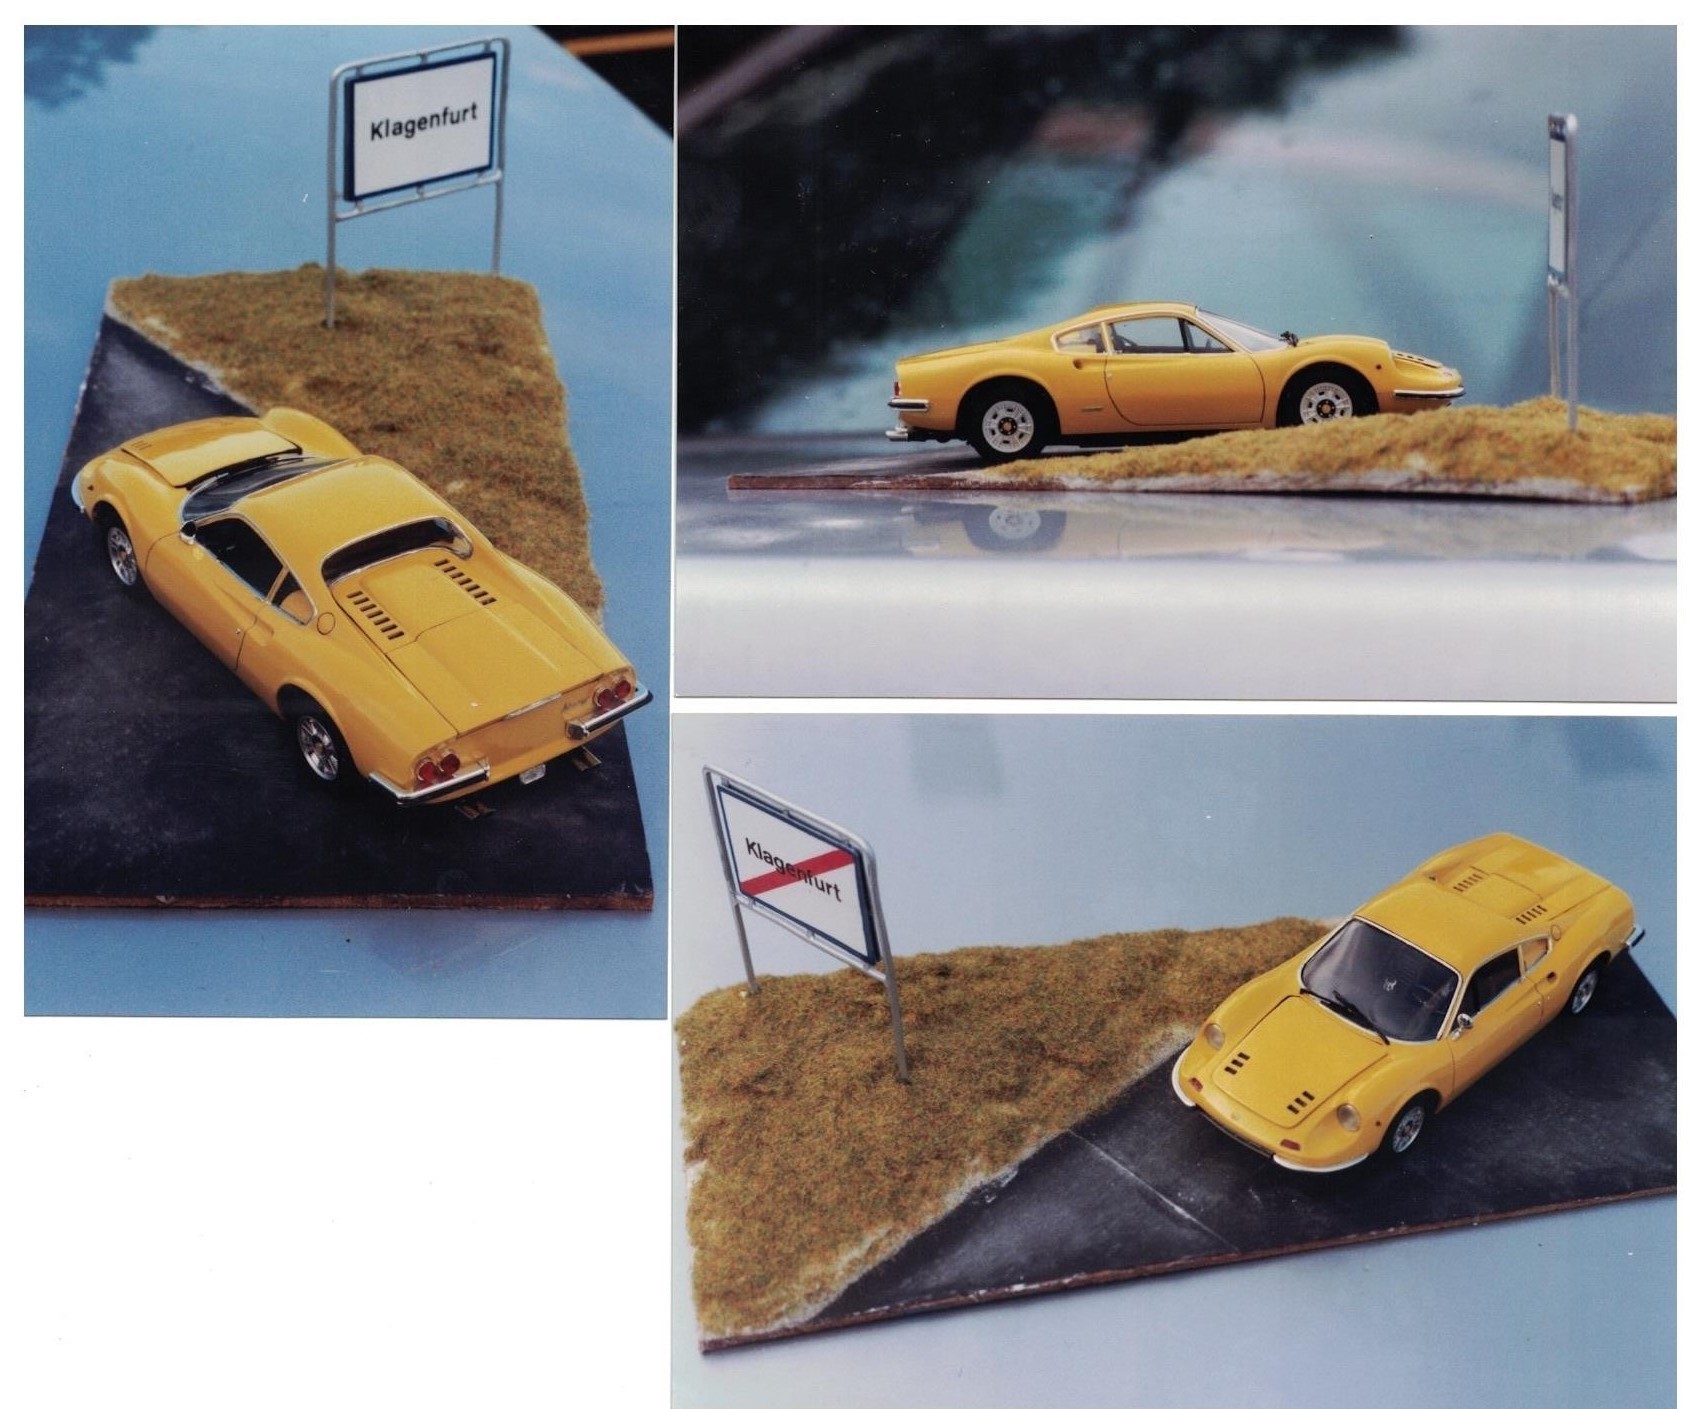
This has to be my best (most detailed) model yet - at least the one I put my most effort into: I wanted to make it as good as I can (it was a commission work for the owner of the real car; I put the Fujimi EM together and built an additional engine - from a second kit – complete with engine stand). As this is one of my favorite cars ever, I went the full route: ordered photo-etched scripts from RMCM, yellow wire for the spark plugs, a Micromesh polishing set, fresh Bare-metal-foil and organized a can of original Ferrari “Giallo Fly” yellow. The owner had imported a metallic blue U.S. Dino (with A/C) and had it completely restored to European specs with a repaint in that Ferrari yellow. He gave me every color information – from the color of the oil filter, the distributor and the spark plug cables, the light grey of the suspensions parts to the underside body panels and up to where the black underbody protection had been applied; I modified the steering wheel to look like from the US version. To achieve a little more depth, I drilled holes into the instrument panel, glued plastic sheet with the dials from behind and sealed the dials with 5 min. epoxy to simulate glasses (a rather useless thing because you can’t see it through the windows anyway). My other reference was the excellent book “Dino – the other Ferraris” by Jean-Pierre Gabriel. I wish that I could have posted pictures like Marco Tullio did, but after taking some pictures, I handed over the model to its owner back in 1994, so I had to scan my color prints – but I still have the 3 different Fujimi EM Dinos and one from their RS series in my stash, together with a cheaply build-up that will replace the missing engine… On to the pics ( I had a little issue with the plastic hinges of the front lid – it would not sit flush and raise permanently for about 0,5 mm - like a spring = too elastic) : these 2 were made during the building process: I gave the body the full treatment: wetsanding the primer, wetsanding and finally polishing several paint coats (rattle can). On the underside you can clearly see the black parts of the body panels: 2 views of the 2nd engine/transmission mounted on the engine stand (included in the kit): This is the final result of the 2 kits: At last, I put the car onto a small diorama with the sign of the town where the owner lives. This is a highly detailed kit with about 230 parts, IIRC, and I highly recommend this to all fans of classic sportscars. Remember, that the 1:1 Dinos - as they left the factory - did NOT show any Ferrari script, badge or prancing horses. This has always been applied later by their owners.
-
ERTL International 4300 Eagle
1959scudetto replied to 1959scudetto's topic in Model Trucks: Big Rigs and Heavy Equipment
Merci, Philippe, glad you like it !