Peter Lombardo
-
Posts
2,393 -
Joined
-
Last visited
Content Type
Profiles
Forums
Events
Gallery
Everything posted by Peter Lombardo
-
Thanks, I am glad you acknowledge all of the info I supplied. I always think about the build I am working on well ahead of time therefore I want others to know what I was thinking about with what I do to the car.
-
Thanks, I really appreciate your well wishes. I know it will be fine, thanks, again.
-
Yeah, with my currently failing eye sight, I think I just couldn't see it well enough to ensure it was snug and fit into the cavity properly. I am having a much needed eye surgery next Monday to get my "good" eye back to near perfect condition. [hopefully] I can barely type since the keys are all fuzzy to me. After the operation I will see if I can correct the mishap. Or I can say the driver just banged into the wall at the garage and it isn't fixed yet.
-
My three most recent builds represent three very different styles of subjects. P.S. I do not expect any of you guys to read all of this, as it is long but it is here if you are interested 1. AMT 1966 Chevy Nova Drag Car. Opened and hinged the doors. Side and rear windows replaced with acetate sheet sprayed with Tamiya clear red. Homemade 3D printed racing seat installed with a photo etched racing harness. Scratch built roll cage. Scratch built front and rear spoilers installed. Hood budge scratch built with hot air exit vents installed. 409 V8 added with homemade 3D printed Twin Turbo’s installed and plumbed. Body painted Tamiya Silver Leaf and roof painted with Tamiya Gunmetal both topped with Tamiya Clear Red, and then topped with Tamiya Clear. Decals from the parts box with an eclectic mix from a number of sources then all covered with a coat of Future to “seal the deal”. 2. AMT 1957 Ford Fairlane Coupe. I started this car about 10 or 12 years ago and just completed a few weeks ago so I do not recall of the modifications and sources of the parts used. The Interior, I think came from a Thunderbird, certainly not from the kit with the addition or turquoise dice hanging from the rearview mirror. I added the rear fender skirts and a rear spare tire piece I think came from a ’53 Ford kit. The roof was sourced from either a ’62 Chevy or Pontiac. I installed it lower than what stock height would have been {mild chop} and then added a moon roof. Wheels and tires came from a ’62 Thunderbird kit and the rear end was lowered. Poseable front suspension came from a long ago discarded die-cast car. The front grill back material was ground off so that it is “see-thru”. The center hood ornament was removed and filled. Car was painted Rust-oleum solid bright white. I masked off the borders and then sprayed on Rust-oleum Gloss Seaside topped with Rust-oleum Gloss Clear. I toyed with the idea of adding lake pipes and spot lights, but rejected the idea opting to keep the car less cluttered. 3. Revell 1962 289 Cobra Roadster. When Revell announced a 289 Cobra roadster I was quite excited as it was my missing link car. I have completed 2 of the 3 Mustang GT350R race car kits I have, one white and one blue, and one more, most likely to be done in white. I have built 14 Ford GT40’s [including the starting lineup from Le Mans 1966] with 3 more to go [just received the Meng 1/24 kit, with engine and it looks beautiful]. 9, 427 Cobra’s, both Revell and Fujimi kits in various paint schemes. I have built a Gunze Sangyo Daytona kit with a detailed engine installed with opening hood, doors, and rear hatch. All of these kits are 1/24th scale. So when Revell announced the new 289 Cobra KIT, I expected it to be a sweet little 1/24th scale car to fit right in with the other 1/24th scale Shelby offerings. I ordered two 289 Cobra’s site-un-seen. I built the AMT 1/25th 289 Cobra, as a kid, back in 1963. I have one kit somewhere on the shelf, but have no interest in building it since I pilfered the engine from it for another build, besides, it is an old casting and to me rather crude. So expectation for the new 289 Cobra kit were high, but as soon as I saw the box and realized it was 1/25th scale. I was rather upset. How could Revell produce this race car in 1/25th scale when all of the other Shelby kits they produce were in 1/24th scale? Granted it may seem like a small matter to you, but there is no conceivable reason, in my mind, to build a race car kit in the wrong scale. When the executives, assuming there ARE executives at Revell, sat down to discuss the idea of making this kit the number one issue should have been the scale chosen for the kit, and how they got this wrong is beyond me. When I put the completed 289 car next to the 427 car, the size disparage is very obvious. I sent a nasty e mail to Revell about this and got a rather nondescript tepid response, but that did not surprise me at all. Anyway, I built the first of the 289 kits as a generic racer because I wanted to formulize myself with the kit and learn where the pitfall are. The second build will be a specific race car from the era. This kit is labeled as a 5 in difficulty. I have built more difficult kits, but this is not that easy because many of the parts are tiny, there are no real “positive” position tabs to reference, the instructions do little to help locate the position placement, and to build it to the proper ride height, at least to my eye, a lot of changes must be made. In a moment of complete ignorance, I opted to use the kit supplied hood and trunk hinges as I should have known better. The trunk fit is not that bad but it allows the hood when open to slide side to side which is okay, but annoying. The hood hinge is a complete joke. Without major surgery, the hinges interfere with the radiator and worse, once in place and the kit completely built, the hood will not open with damaging the leading edge and paint. I find it unacceptable and I am annoyed with myself for not anticipating the issue, therefor, in the photos the hood remains closed. The engine is not that big of a deal anyway. It comes with the 4 Weber down draft carbs which are, to my eye, a very simplistic casting. Very disappointing. Oddly, my kit, and I have yet to open the second box which is still sealed to inspect it, included two sprues of the same, one chrome and one un-chromed, and to Revell’s credit I applaud this move [assuming this is intentional] as I really did not touch the chromed sprue opting to use the un chromed one for this build. Because of this, you get a second set of wheels, valve covers, and carbs. The wheels are fine, but as said before, and especially with the chrome plating on them, the carbs really lose the little detail they have. The wheels and tires are very nice. The tires have a raised “GOODYEAR” embossed on them. On the box art they show a white Goodyear on them. So I used a photo-edged stencil template and flat white paint airbrushed on them on this build. I opened the doors and hinged them. I have built a huge unknown amount of kits and added open doors to most without much problem, but for some yet unknown reason, these hinges and door fit, gave me fits. The kit, which seems to be the new normal with Revell uses both front and rear metal axle rods. I refuse to use a front metal rod because I do not want to see it running through the engine compartment on a build. Also, in my opinion, if you use the axles and the wheel hub as supplied, the wheels sit way to far outside of the vehicle fenders. To me, the ride height was too high also, so the combination of sitting to high and the wheels too far out required major surgery to the suspension. Approach this situation carefully when, and if you build the kit. I painted the kit in a Ford Guardsmen Blue automotive lacquer. Once dry, I masked off around the stripe area and sprayed on Gloss White lacquer stripes. The roundels were cut from vinyl on a computer and stuck on. The decals are a combination of kit supplied for the sponsors and leftover numbers from the Daytona Coupe kit. I have fought the urge to cover all of the car with gloss top coat since it is a race car and a medium shine should be sufficient. The roll bar is a cut down piece from a Fujimi 427 Cobra roadster kit. Side pipes were painted flat white and toned down with Tamiya panel line wash. The racing windshield was cut from a piece of vacuum formed blister pack edge that had the right shape painted black on the bottom. That’s it. I am happy to finally have a respectable 289 Cobra kit, without spending an arm and a leg on a Model Factory Hero kit, which is the correct 1/24th scale.
-
Nice and clean, just like the Cobra before ir.
-
Very nice. I have built so many Cobra kits in just about all colors, but not in dark blue, and it looks great on it. Very well done.
-
Superb. Just beautiful and period perfect. Love it.
-
Pretty cool, I like the blending of the different vehicle parts. The green is intense too. All and all, very nice.
-
My two most recent completions. A 1991 Pontiac Firebird Formula that I picked up for $5.00 and a 2001 Corvette Z06 that has been on the shelf for a long time. The Firebird got wheel well flares and a front air dam and the hood bulge was raised. Doors were opened and hinged as was the rear hatch. Wheels are Aoshima 20-inch RTM. Interior is Tamiya Dull Red, exterior is Krylon Color Maxx Gloss Classic Gray topped with clear mixed with pearl micro flakes. The flams are a hybrid of airbrushed and brush painted Tamiya white, yellow, orange with some red highlights and some dark charcoal smoke. All topped with clear The Corvette is very similar with the same kind of body mods and opening doors and trunk. Interior is black and white Tamiya paints. The exterior is Krylon Color Maxx Satin Jade topped with clear mixed with Micro Blue and Green Micro Perl flakes. The flames are also a hybrid airbrush and brush with Tamiya White, custom mixed light blue, and light pinkish purple with highlights of Violet India ink and then charcoal smoke, topped with clear. Wheels are from a Corvette and the side pipe is aluminum tubing bent to fit. The rear wing and supports are scratch built
-
Gotta' love it. just beautiful. The orange pearl complements the design perfectly.
-

Airfix Chevrolet Cavalier converted to Opel Ascona.
Peter Lombardo replied to Jurva's topic in Model Cars
Impressive. Well done sir. -
Not really, Roger. I thought that too at first, but looking at the model from the same angle, the headlight edge is still visible. It is a minor point, but once again, Chip took a little artistic license here. It is not a criticism just reality. It seems a little strange to me that the price I paid and the comment about Chip drive the responses. I guess if I show any other builds here, I will omit the thought process since that seems to be lost here.
-
Foose Dodge Coronet I think most of us, if not all of us here, respect Chip Foose’s talent for design. Obviously Revell sees Chip’s name as a huge draw that will help them sell product. He puts his name and a rendering on the box, and here-to-fore old castings get a new life. Such is the case with the 1967 Dodge Coronet. Foose adds a set of wheels and a custom stripe on his rendering and Revell expects his name to carry enough weight to move them off the shelf as a unique version of the same old kit. Note the clearance price sticker. My son stumbled across this kit and picked it up for me because he thought the price was right, and yeah, at $5.00 the price is just about perfect. Notice the box top rendering. Foose usually takes a bit of “artistic license” with his rendering, and this kit is no exception to that rule. If you look carefully, you see that the image as depicted, just looks sharper, and more aggressive. The roof looks a bit chopped, the front windshield looks a bit more raked back. The upper hump on the rear fender looks a bit more heightened and curved. The stance is lower which makes it look sleeker and if you look closely, the quarter window wings by the A pillar and the rear windows at the rear are so vague they almost are not even there. If you look carefully at the rendering you’ll see that accidentally, I am certain, Chip omitted the second headlight on the driver’s side of the front grill. With those subtle modifications in mind, I built the kit with a few additional minor changes. I made a minor chop to the top of a couple of scale inches and laid back the windshield as Chips rendering does. I omitted the A pillar vents and lowered the car down as low as realistic. I added a rear deck spoiler that I fabricated and added a bit of curved height to the tops of the rear fenders as the image suggests, then I opened and hinged the doors. I thought about the turquoise color scheme but rather opted to go with Tamiya light blue metallic topped with blue translucent pearl then clear coated. That’s it, nothing too major, and with a discount from 29.99 to $5.00, I had nothing to lose.
-
Looks pretty darn good to me. It is a shame the striping paint blead a bit. but short of that, it looks real nice. I have built a number of the Fujimi kits as well as a number of the Revell kits. My only hang-up with the Fujimi kit is the wheel height. I lowered the ride height on my builds and it looks better to me. Well done.
-
Very well done, not your usual cup of tea, certainly different. I love the creativity and taking up the challenge of doing something different. Box stock is simple, but throwing away the instruction sheet and breaking new ground is infinitely more gratifying. Nice job.
-
Great execution on a unique design. Very cool.
-
I have a number of favorite builds. Here in no particular order.This car has a remote control sunroof that opens and closesThe rear section of this one opens and closed by remote control
-
Isuzu Impulse Turbo (early Fujimi kit)
Peter Lombardo replied to Peter Lombardo's topic in Model Cars
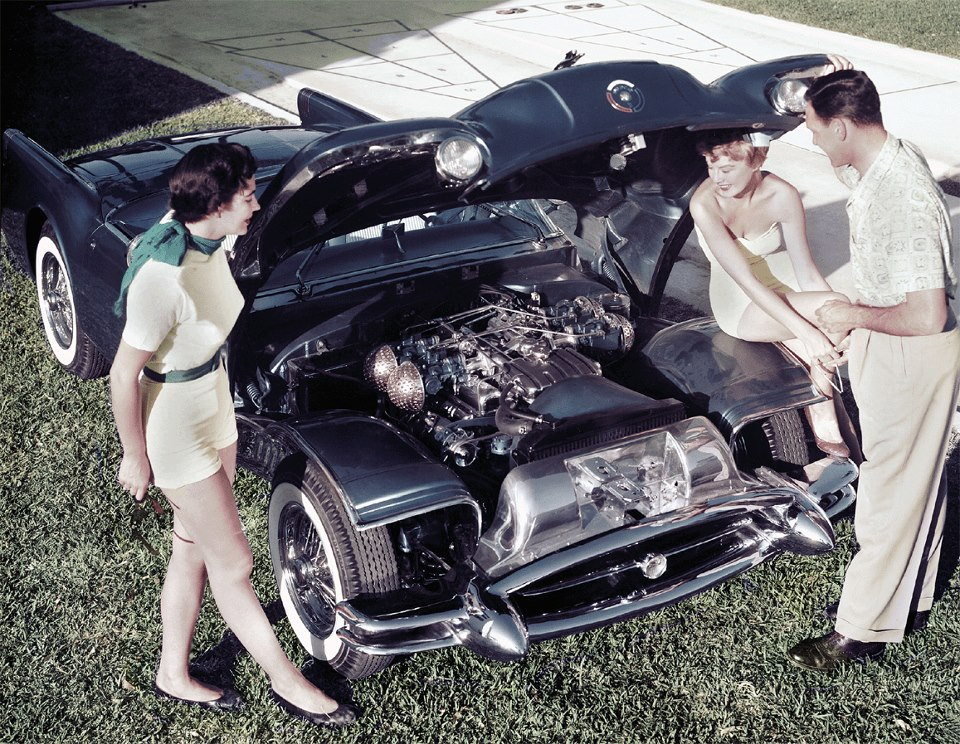
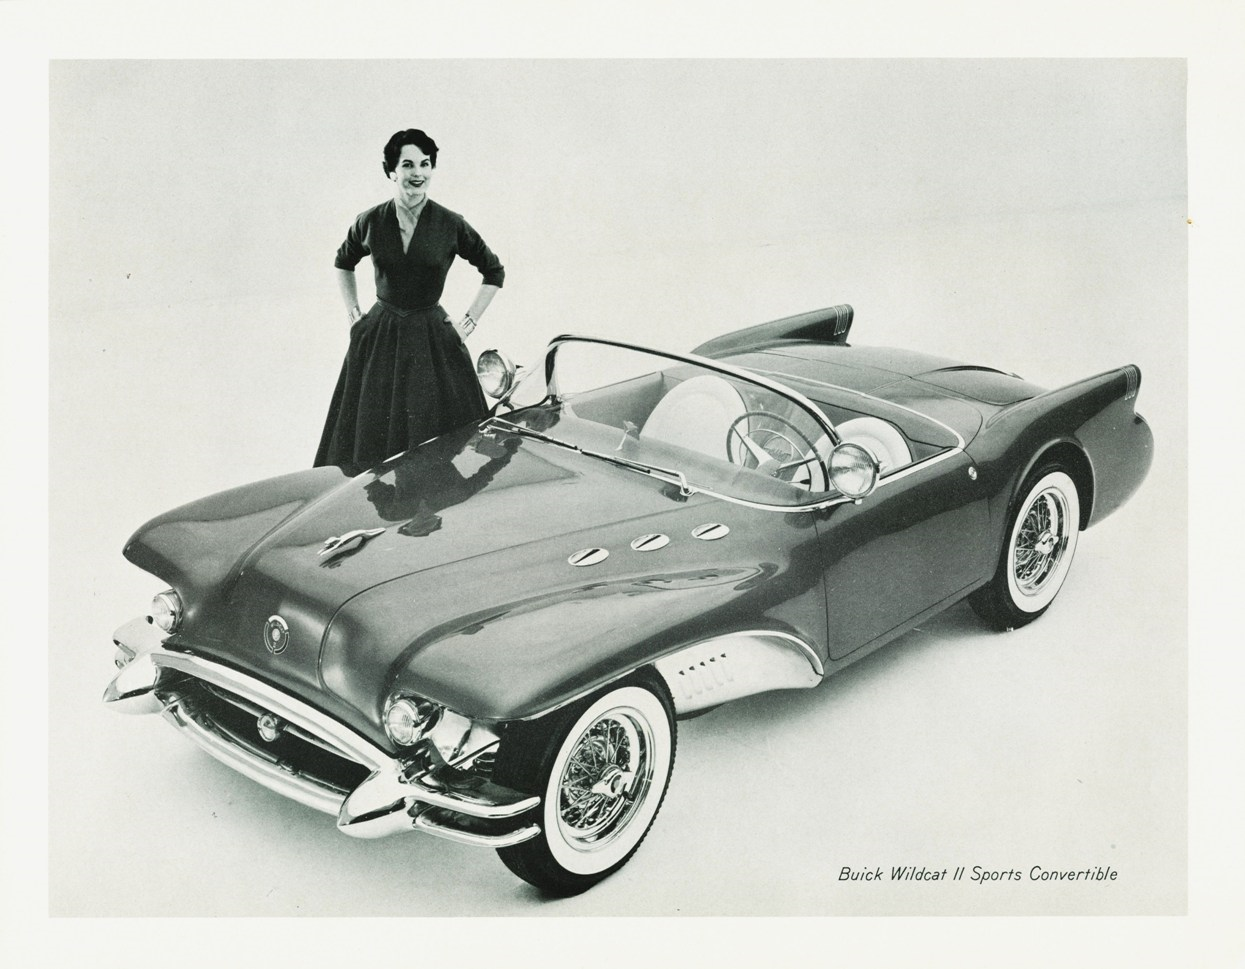
Chevrolet was getting great reviews in the early 50s when they showcased the new Corvette. Looking to build on the great press, and kind of, spread the excitement around other GM brands, the Corvette chassis was "loaned out" to the other design studios under the corporate umbrella. Buick basically took the rear three quarters of the Corvette with minor taillight changes and dropped on the front end styling from their road cars, and presto, they had a sport roadster to showcase. In the early version of the car, it has a very unique feature in that the headlights were mounted next to the windshield. On the replica versions build well after the original version, the headlights were moved to a more conventional location in front of the front wheels and next to the parking lights. Also, the hood ornament from the original car was dropped. My plan is to build the original version. Looking at the picture with the lady in yellow with the green scarf, it seems clear to me where the inspiration for the two "Dagmar" bumperettes on the front of the car came from. -
Beautiful paint! Super clean and crisp. I did one in metallic red, personally, the Miura is my favorite Lambo since it has the cleanest and most flowing lines. Todays Lambo's are amazing, but I find the angular lines rather "off putting" compared to the smooth lines of the Miura.
-
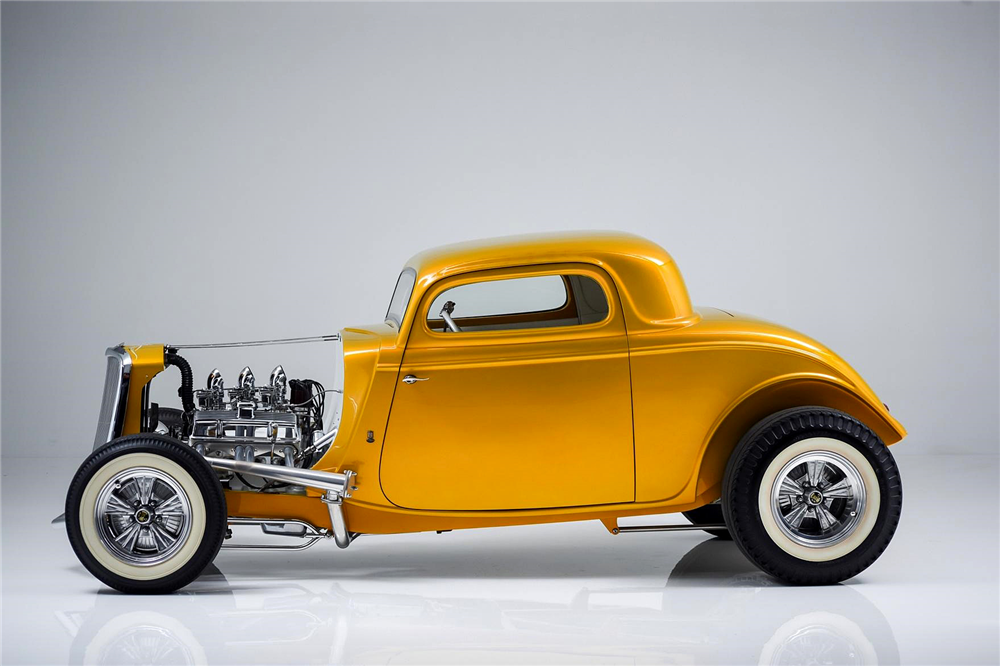
Completed Testors (early Fujimi kit) Impulse. See WIP post if you are interested in the plan and early build with body modifications. Painted Rust-oleum Matte Citron. Top layered with Jacquard Pearl Ex Pigment Interference gold mixed with Tamiya gloss clear, then topped with Tamiya pearl clear with a final topping of Tamiya gloss clear. Carbon fiber hood decal material is a sheet of Scale Motorsport cut to fit. Window were sprayed with Tamiya smoke on the inside surface and black marker used for the window borders. Hood scoop is to bring in fresh air to the turbo intercooler. Interior is Tamiya Matt Black with brown inserts which were then topped with Scale Motorsport Leopard Hide decals. As the rear hatch is opened the truck cover lifts up with it. (Hard to see with it all being black). Decal markings came from various left-over Japanese race car decal sets. the net 2 builds I have begun will be: 34 Ford Coupeand 1954 Buick Wildcat roadster

-
Very well done. I did a very similar version with the hardtop from the Corvette Hardtop grafted on into a race car also. Looks great, like the idea of the vinyl paint mask rings. Different.
-
Very nicely done, I am really looking forward to seeing the C9R kit. Whenever Revell of Germany gets around to it. Nice color. The C8, is the mid engine Corvette that the car magazines have been teasing us with for the past 40 years. Finally here, and Chevy, most definingly got it right.
-
Very nice. I enjoy seeing different color Ferrari's. Red is nice, but it is getting a bite boring. I have a 250 GTO which I will be doing in moss pale green since there is a real one that color and it is so different looking. But, I do like the metallic moss green you did.
-
Looks great, I just love the split bumper second generation Camaros, and this looks like a wonderful representation of the car.
-
Progress on the body mods