Jump to content
Model Cars Magazine Forum

Kennyboy

Members
  • Posts

    2,208
  • Joined

  • Last visited

Everything posted by Kennyboy

  1. Excellent as usual Bill on your detail.......your wheel fitment issue is all too common, you showing how to address it is quite commendable. Great job! * If you wanted to add a little more detail to the rotors you could do what I do when the kit rotors are just lacking, take a small washer (the right size needed) and spin it on a drill while "cutting" the surface with a file...this machine the surface. Then, just cut off the caliper from another disc setup (Tamiya, Fujimi, etc) and glue on to the rotor.
  2. Looking great Mark! Now people will really be amazed when you tell them how big it is.......great work.
  3. Just completed a trade with Rotorbolt73 (Matt McCain), smooth trade, kit was packed well and arrived as packaged. Would trade with him again! Thanks Matt!
  4. One of my all time favorite "sleepers".......my friend had one that was not stock, at all. He took it to the drag strip and received much laughter from the crowd when he was up against a 70's El Camino. The El Camino did it's large burnout to the crowds cheers, my friend motored quietly around the burnout pit which received more laughter.....the laughter became silent when he brought up the rpm's and the once quiet wagon sounded like a lear jet. He blew thru the gates at an 11:26 at a 118 mph. The crowd went wild. The el camino lost BTW. Great build of an iconic car to me.
  5. If you have a even clearcoat on it, just respray the color over it... no need to strip it. Dont despair.......Smooth surface is smooth surface whether it is clearcoat or bare plastic.
  6. VERY nice Len! I really like the masking that was done on the center stripes. Great idea.
  7. The one thing not shown is the body.....I am guessing there is an issue there. Too bad too, (if that is the issue) the rest is looking great!
  8. Was great to see this spectacular model 1st hand yesterday Gerry! Just awesome.
  9. Thanks Wayne! Once the clear is fully cured, I will be masking off for all the black trim. So a couple of days.
  10. Thanks guys! Finally got the body painted....used OPI nail polish cut at 60% Lacquer thinner. (color is called "Romance on the moon".....) It matches the color I was shooting for, so I went with it! As you can see, small movements can change the look of the paint color.
  11. Would be a very easy chop if you were to seam it at the door front. With the new re-pop of the Gremlin that part is now easier....the AMX on the other hand.....!
  12. Thank you Mike......fingers crossed Thank you Curtis, used Testors flat aluminum for the aluminum parts, Testors Metallic silver for the exhaust pieces, and Polly Scale Greasy black for the monoleafs.
  13. Digging this up from the grave for an update..... Worked on the chassis for quite awhile to replicate the 1:1, being it was all one piece it was a REAL challenge to paint all the details (think promo-style.) 1st the 1:1 Now my attempt (excuse the cel phone pics)
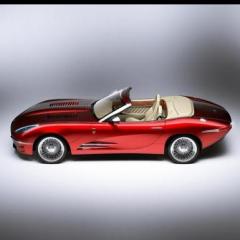
  14. Same on my end...Ken Krawiec (BIGTRUCK) is an awesome guy to trade with.....you can trust him 100%!
  15. eightyone81.com sells the F20c on their site. http://www.eightyone81.com/ek002-honda-f20c/
  16. Great trade with JC Reckner [afx]......would trade with him anytime! Fast shipping and quality packaging. -Ken-
  17. The other plastic sheeting that is usually free and most people just throw them away is the SMOOTH license plate blanks from when you buy a new car. The smooth ones are indeed sheet styrene that I use for a lot of my scratchbuilding and also gluing to the backside of a joint to strengthen.
  18. Would be pretty easy to build that barchetta using the front end of a cobra and the back half of this resin casted Cunningham, a little nip and tuck and voila!
  19. It's my pleasure Greg. Take your time and enjoy your mother's company.....the casting can wait. Best wishes my friend
  20. Thank you Bill! I will be sending it to Greg with the hood closed (due to the massive amount of seams under all the body work) I figure that it should be a relatively easy task to cut open the area for the hood when the body is in resin....or it will make a nice little curbside as well. Either way, the AMT 289 Cobra kit will make this car a rolling reality. Forgot to state, the reason for not cutting open the hood is this is the first of several masters I am working on......the next is the 1954 Kaiser Darrin.
  21. Where I am at today on this build is REAL close to completion.
  22. Hey guys, been working on this body for some time now. The reason for not posting was because in the past, I would start something up and never finish it (for some reason), I figured if I kept vigilant on the build without any interuptions I would be more apt to finishing the build. Turns out I was pretty spot-on with that assumption. Below is the the hopeful end result or a reasonable facsimile..... Ok, so this idea was posed to me by my friend Greg Wann......thru PM's we decided it was worth a try to produce this body. After much research and measurement, I came to the conclusion that the AMT Shelby 289 Cobra was the closest to the design. I obtained one of these at a local meet and dug in.....now close is just a relative term, it turned out that the wheelbase was different, the side body beltline-to-sidesill height was shorter, the body rear shape was wrong, front clip shape, on and on and on.....1 month in on this and the body rear quarters were swapped out for '37 Chevy rear fenders (with Bugatti front fender spare tire indents for the lower curvature on the front of the '37 Chevy rear fenders.....hard to explain much better than that.) The '37 fenders brought in that much needed outer contour to the trunk section but the '37 fenders were lacking in the lower rear pan curvature.....they just ended abrupt. Ok, so I dug thru the pile of donors and realized the contour I needed was in the rear of the Shelby Series 1 (thank you yet again Mr. Shelby!) Attached those and ended up with what you see below......rough but closer. I failed to state earlier in this story, that Greg had sent me a 1/32 scale Aurora Cunningham Phantom to work from. While being quite helpful, the Aurora Cunningham was not quite spot on when it came to the proportions of the body. Therefore I used it for rough dimensions to convert up the scale but body shape and contour came solely from the pictures obtained on the internet. Ok, so after dealing with the body shape in the rear it was time to deal with the front wheelwell placement. On the Cobra the wheelwells are so far forward they almost fall off the front of the car! Moving the wheelwells was a large undertaking, I ended up going back to the Series 1 again for the front wheelwells from it, after which I cut and sectioned the front fenders on the build and installed the new wheel arches. In the pictures below you can see the difference in size between the 1/32 Aurora Cunningham and my build (I have decided since these pictures were taken though to remove the hood scoop....it was too Shelby.)
×
×
  • Create New...