Kennyboy
-
Posts
2,209 -
Joined
-
Last visited
Content Type
Profiles
Forums
Events
Gallery
Everything posted by Kennyboy
-
Bo Zolland Lyonheart convertible custom build. updated 1-10
Kennyboy replied to Kennyboy's topic in WIP: Model Cars

-
Bo Zolland Lyonheart convertible custom build. updated 1-10
Kennyboy replied to Kennyboy's topic in WIP: Model Cars
Thank you sir. Got more photos to put up as this is quite far along at the moment. -
Bo Zolland Lyonheart convertible custom build. updated 1-10
Kennyboy replied to Kennyboy's topic in WIP: Model Cars
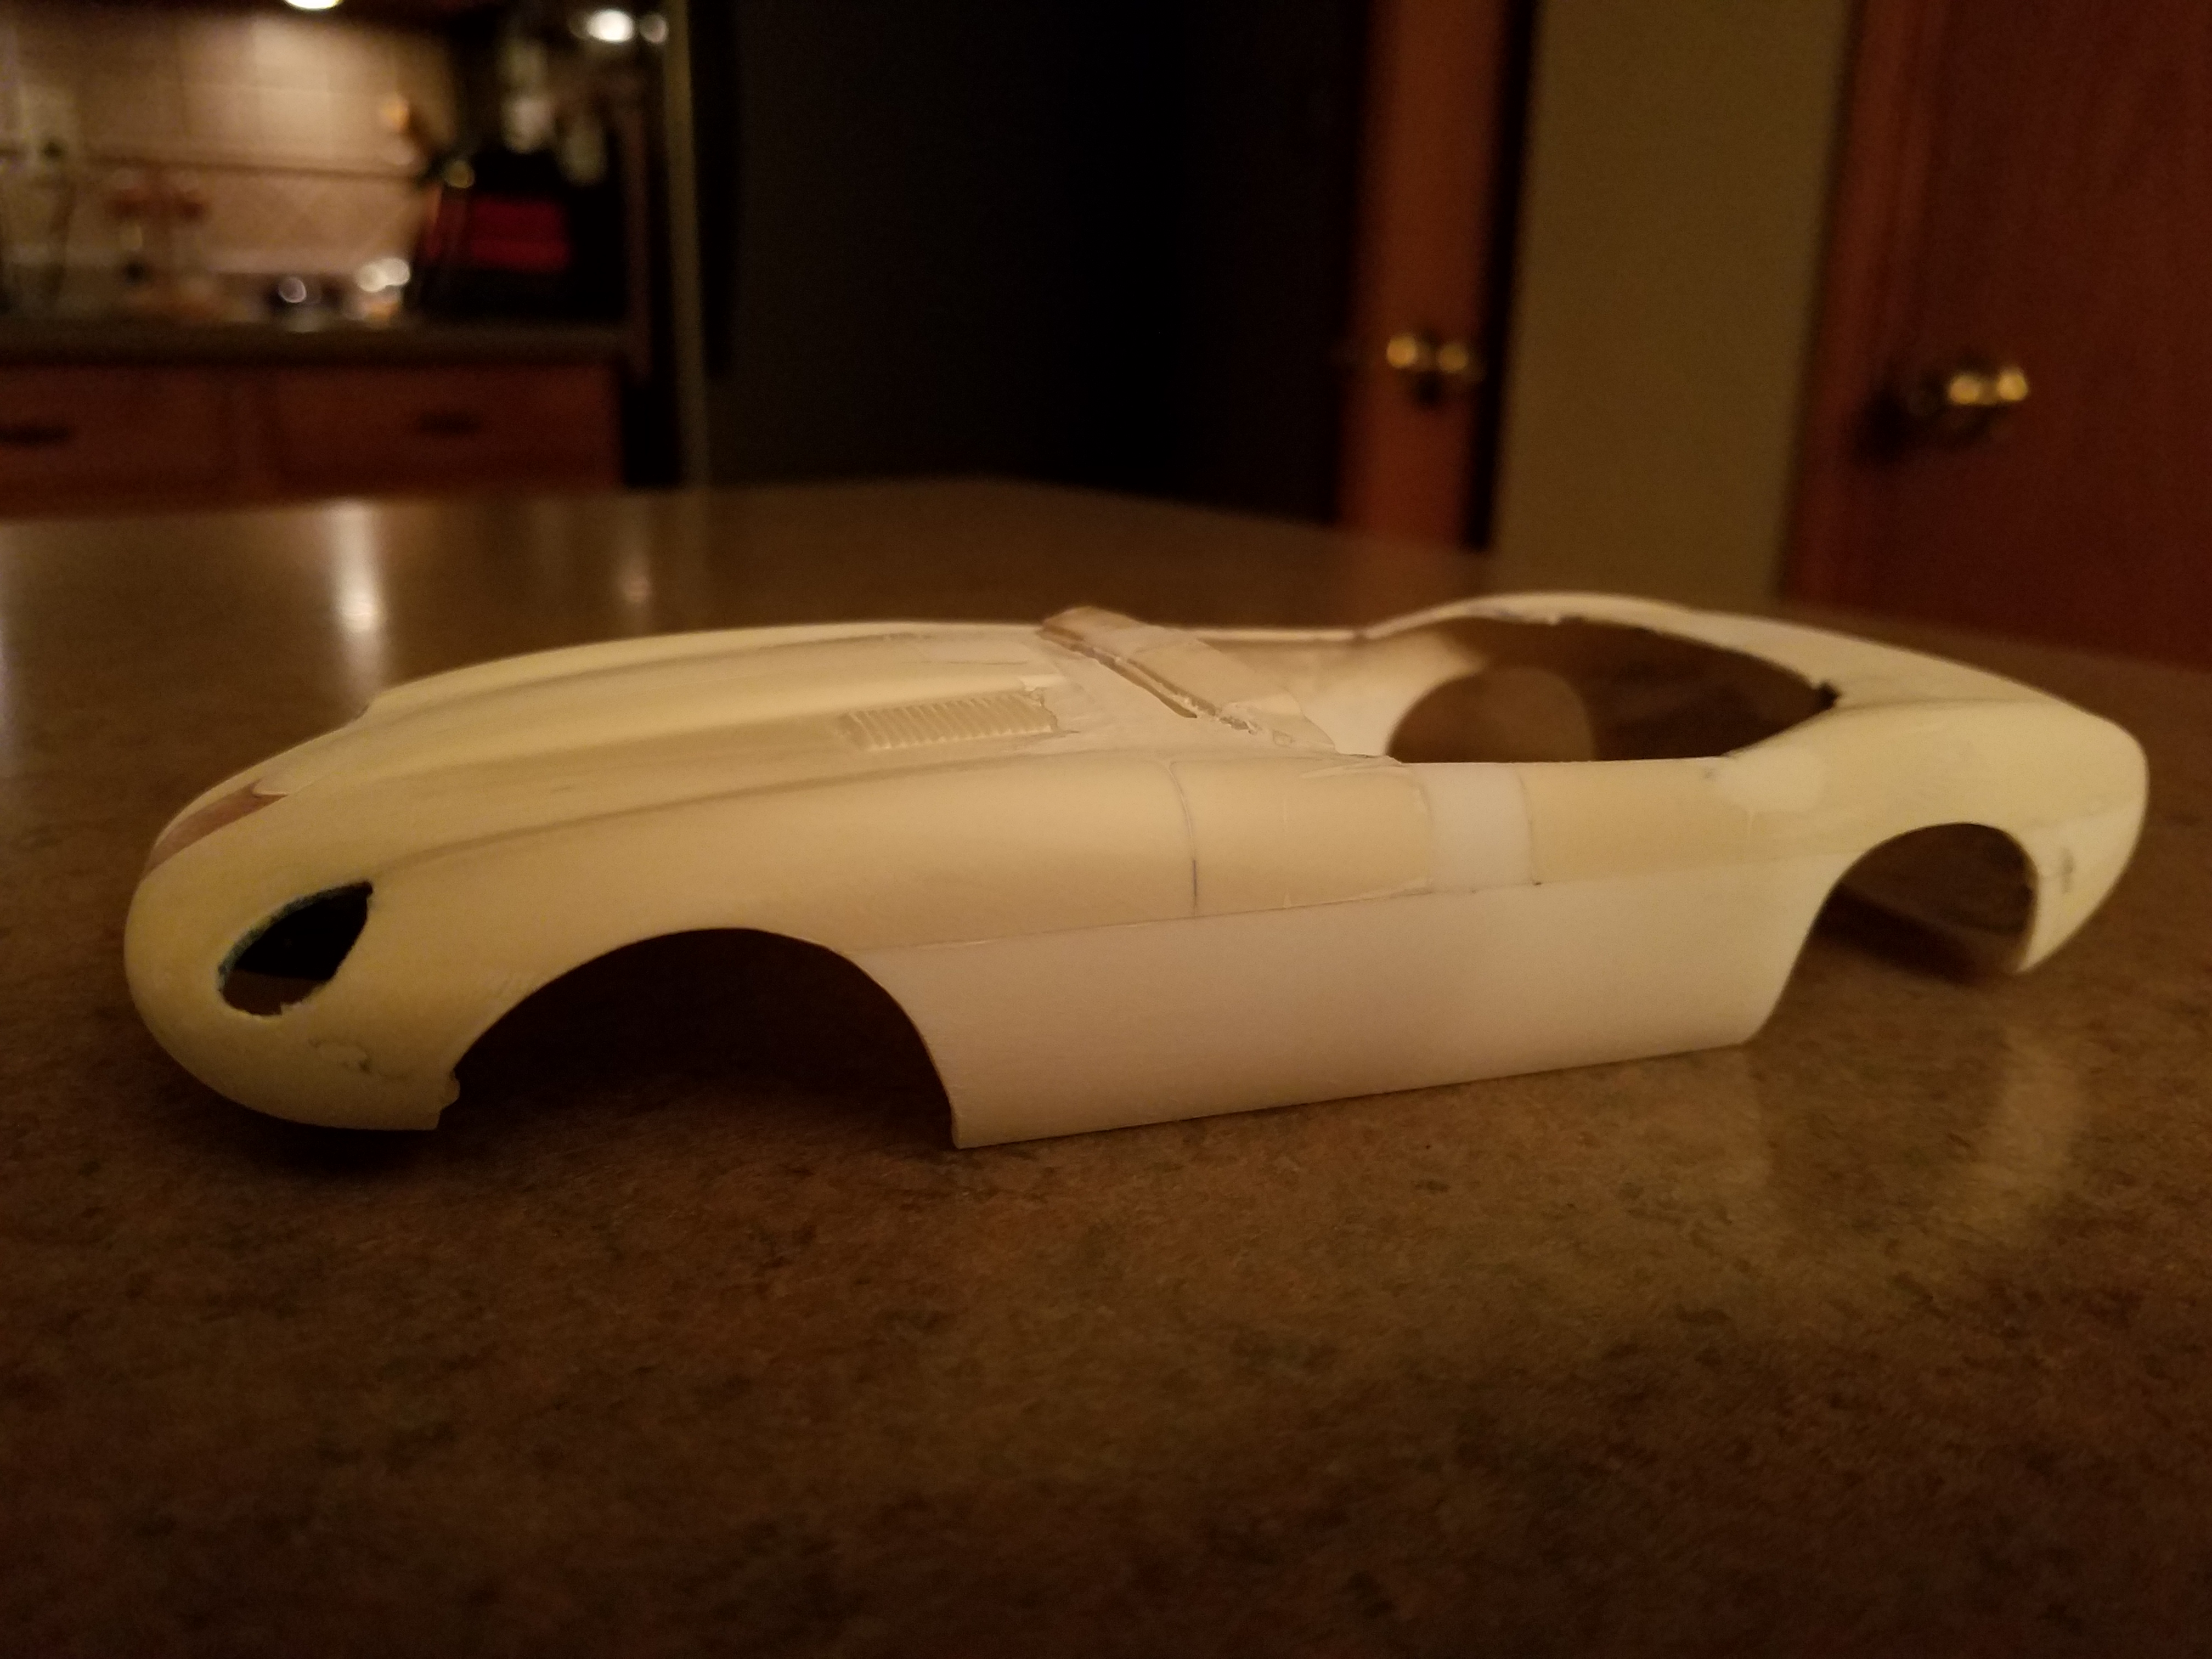
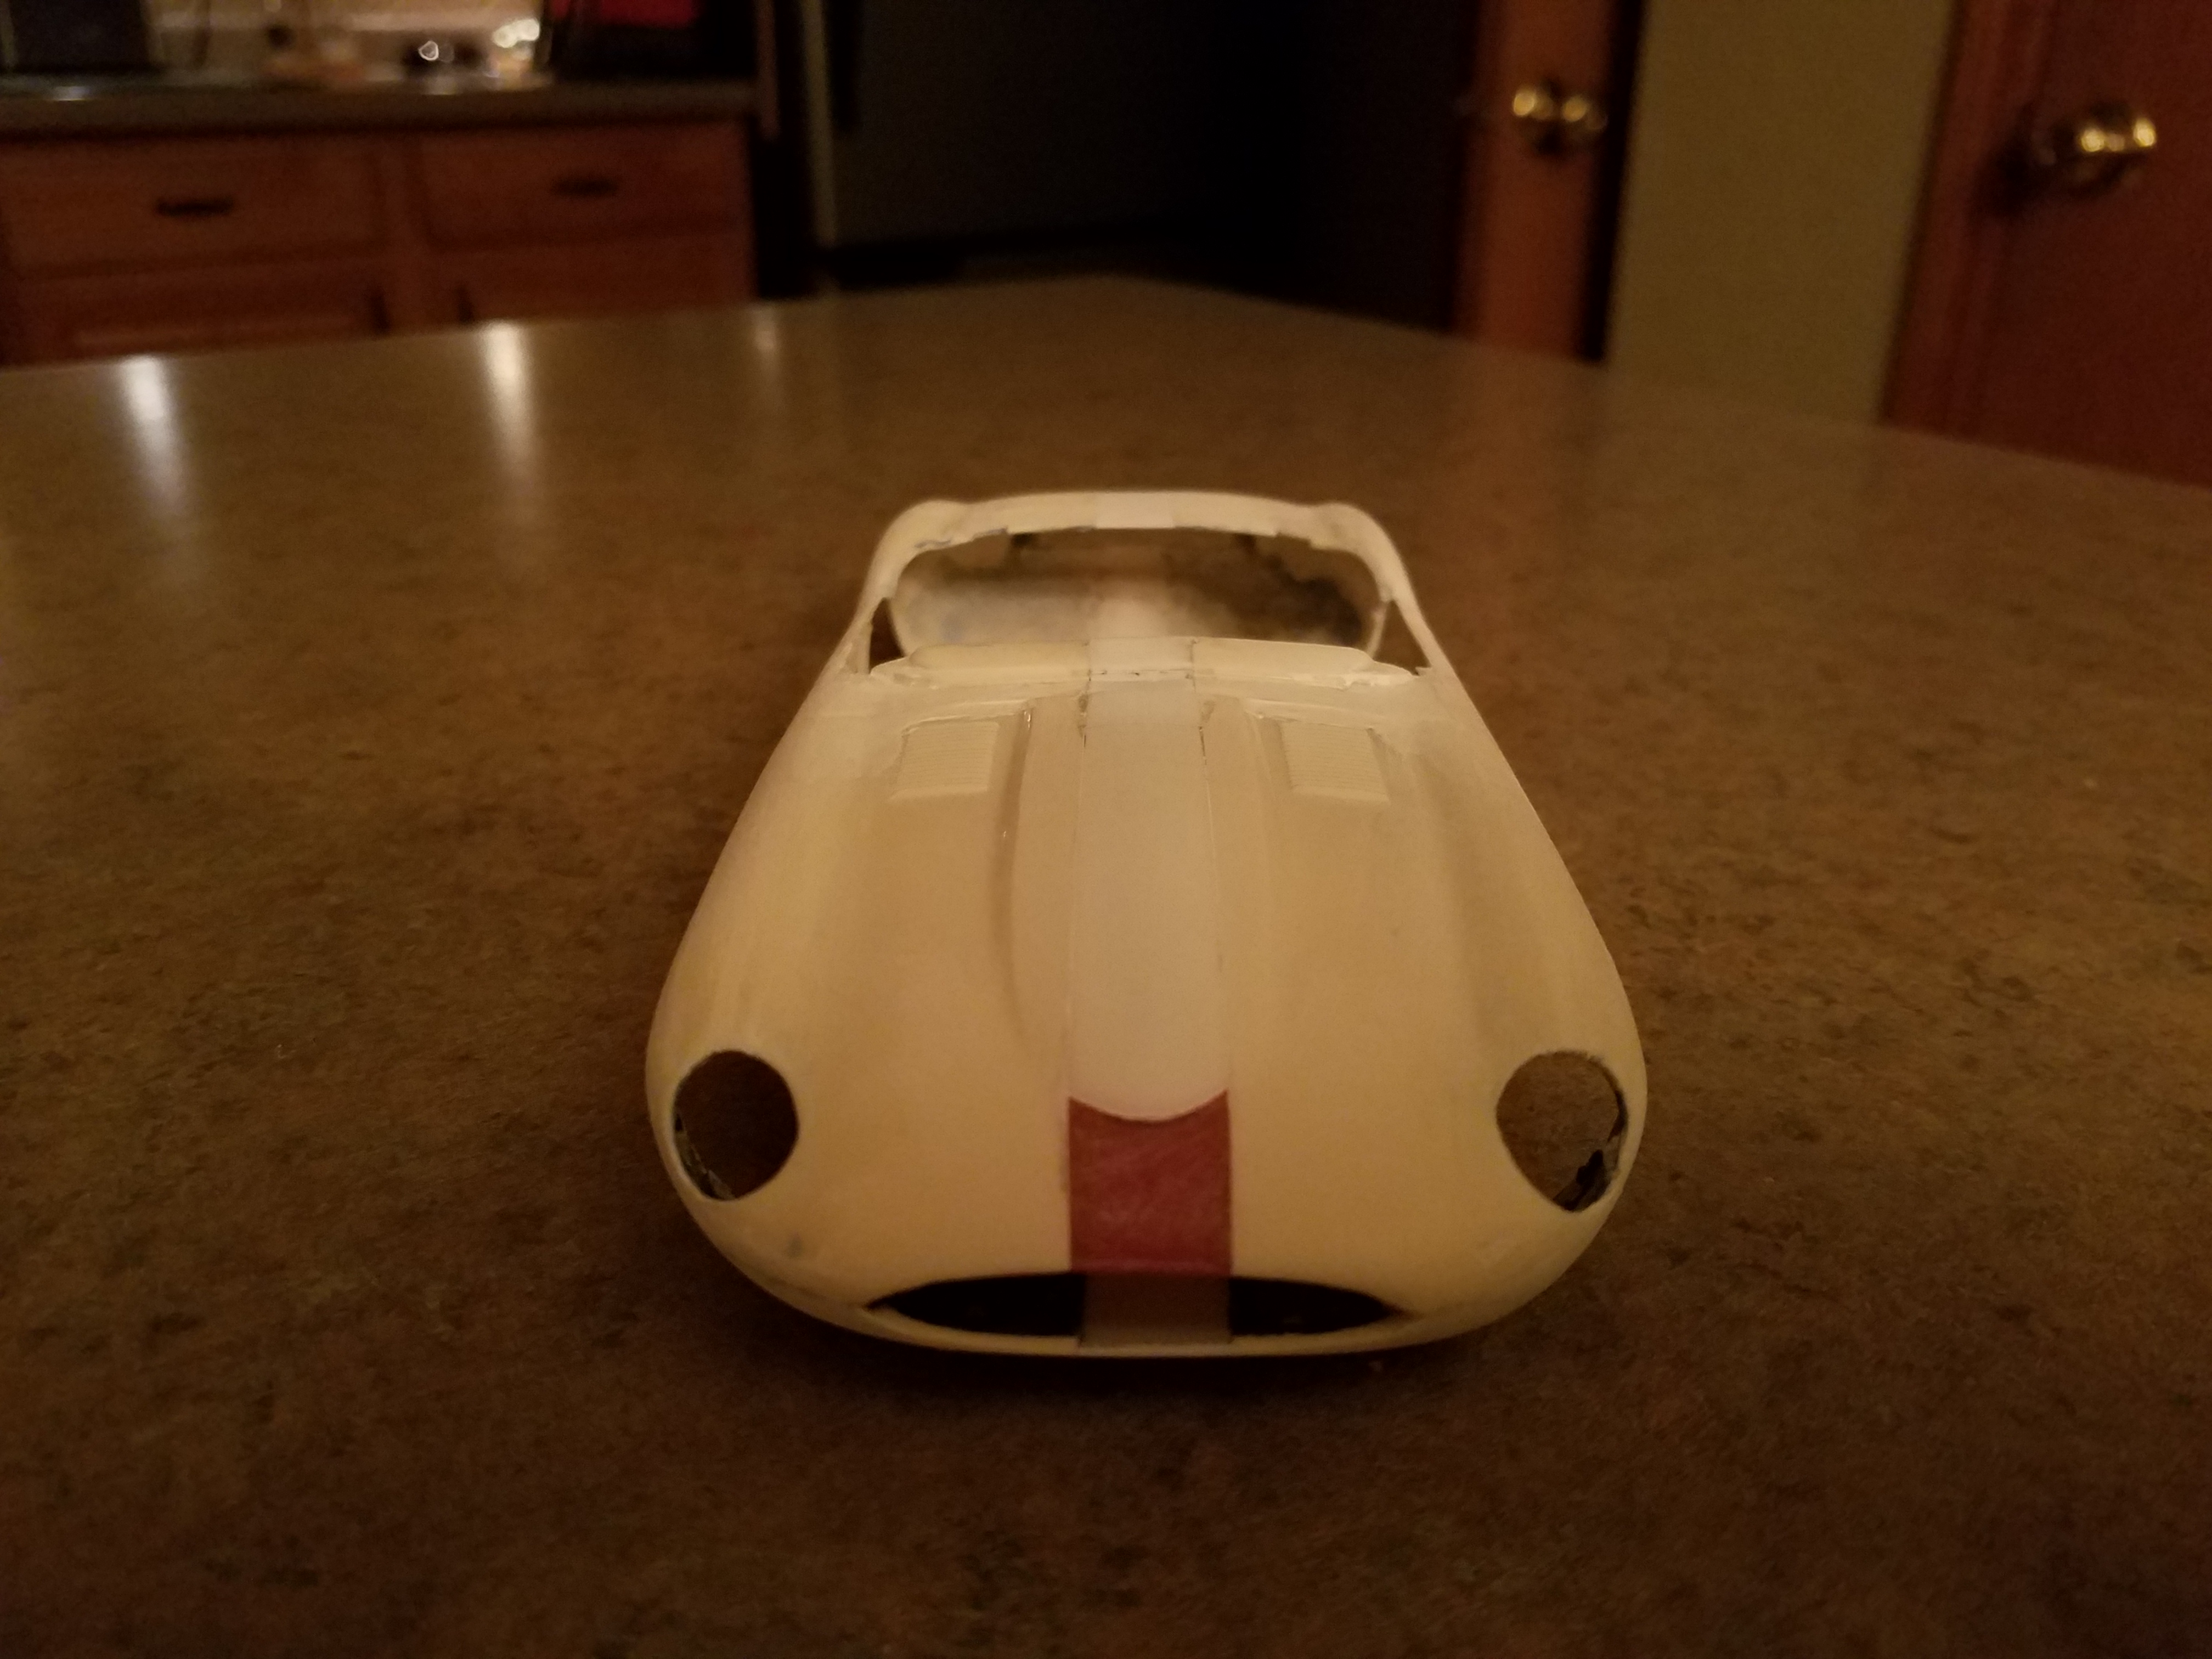
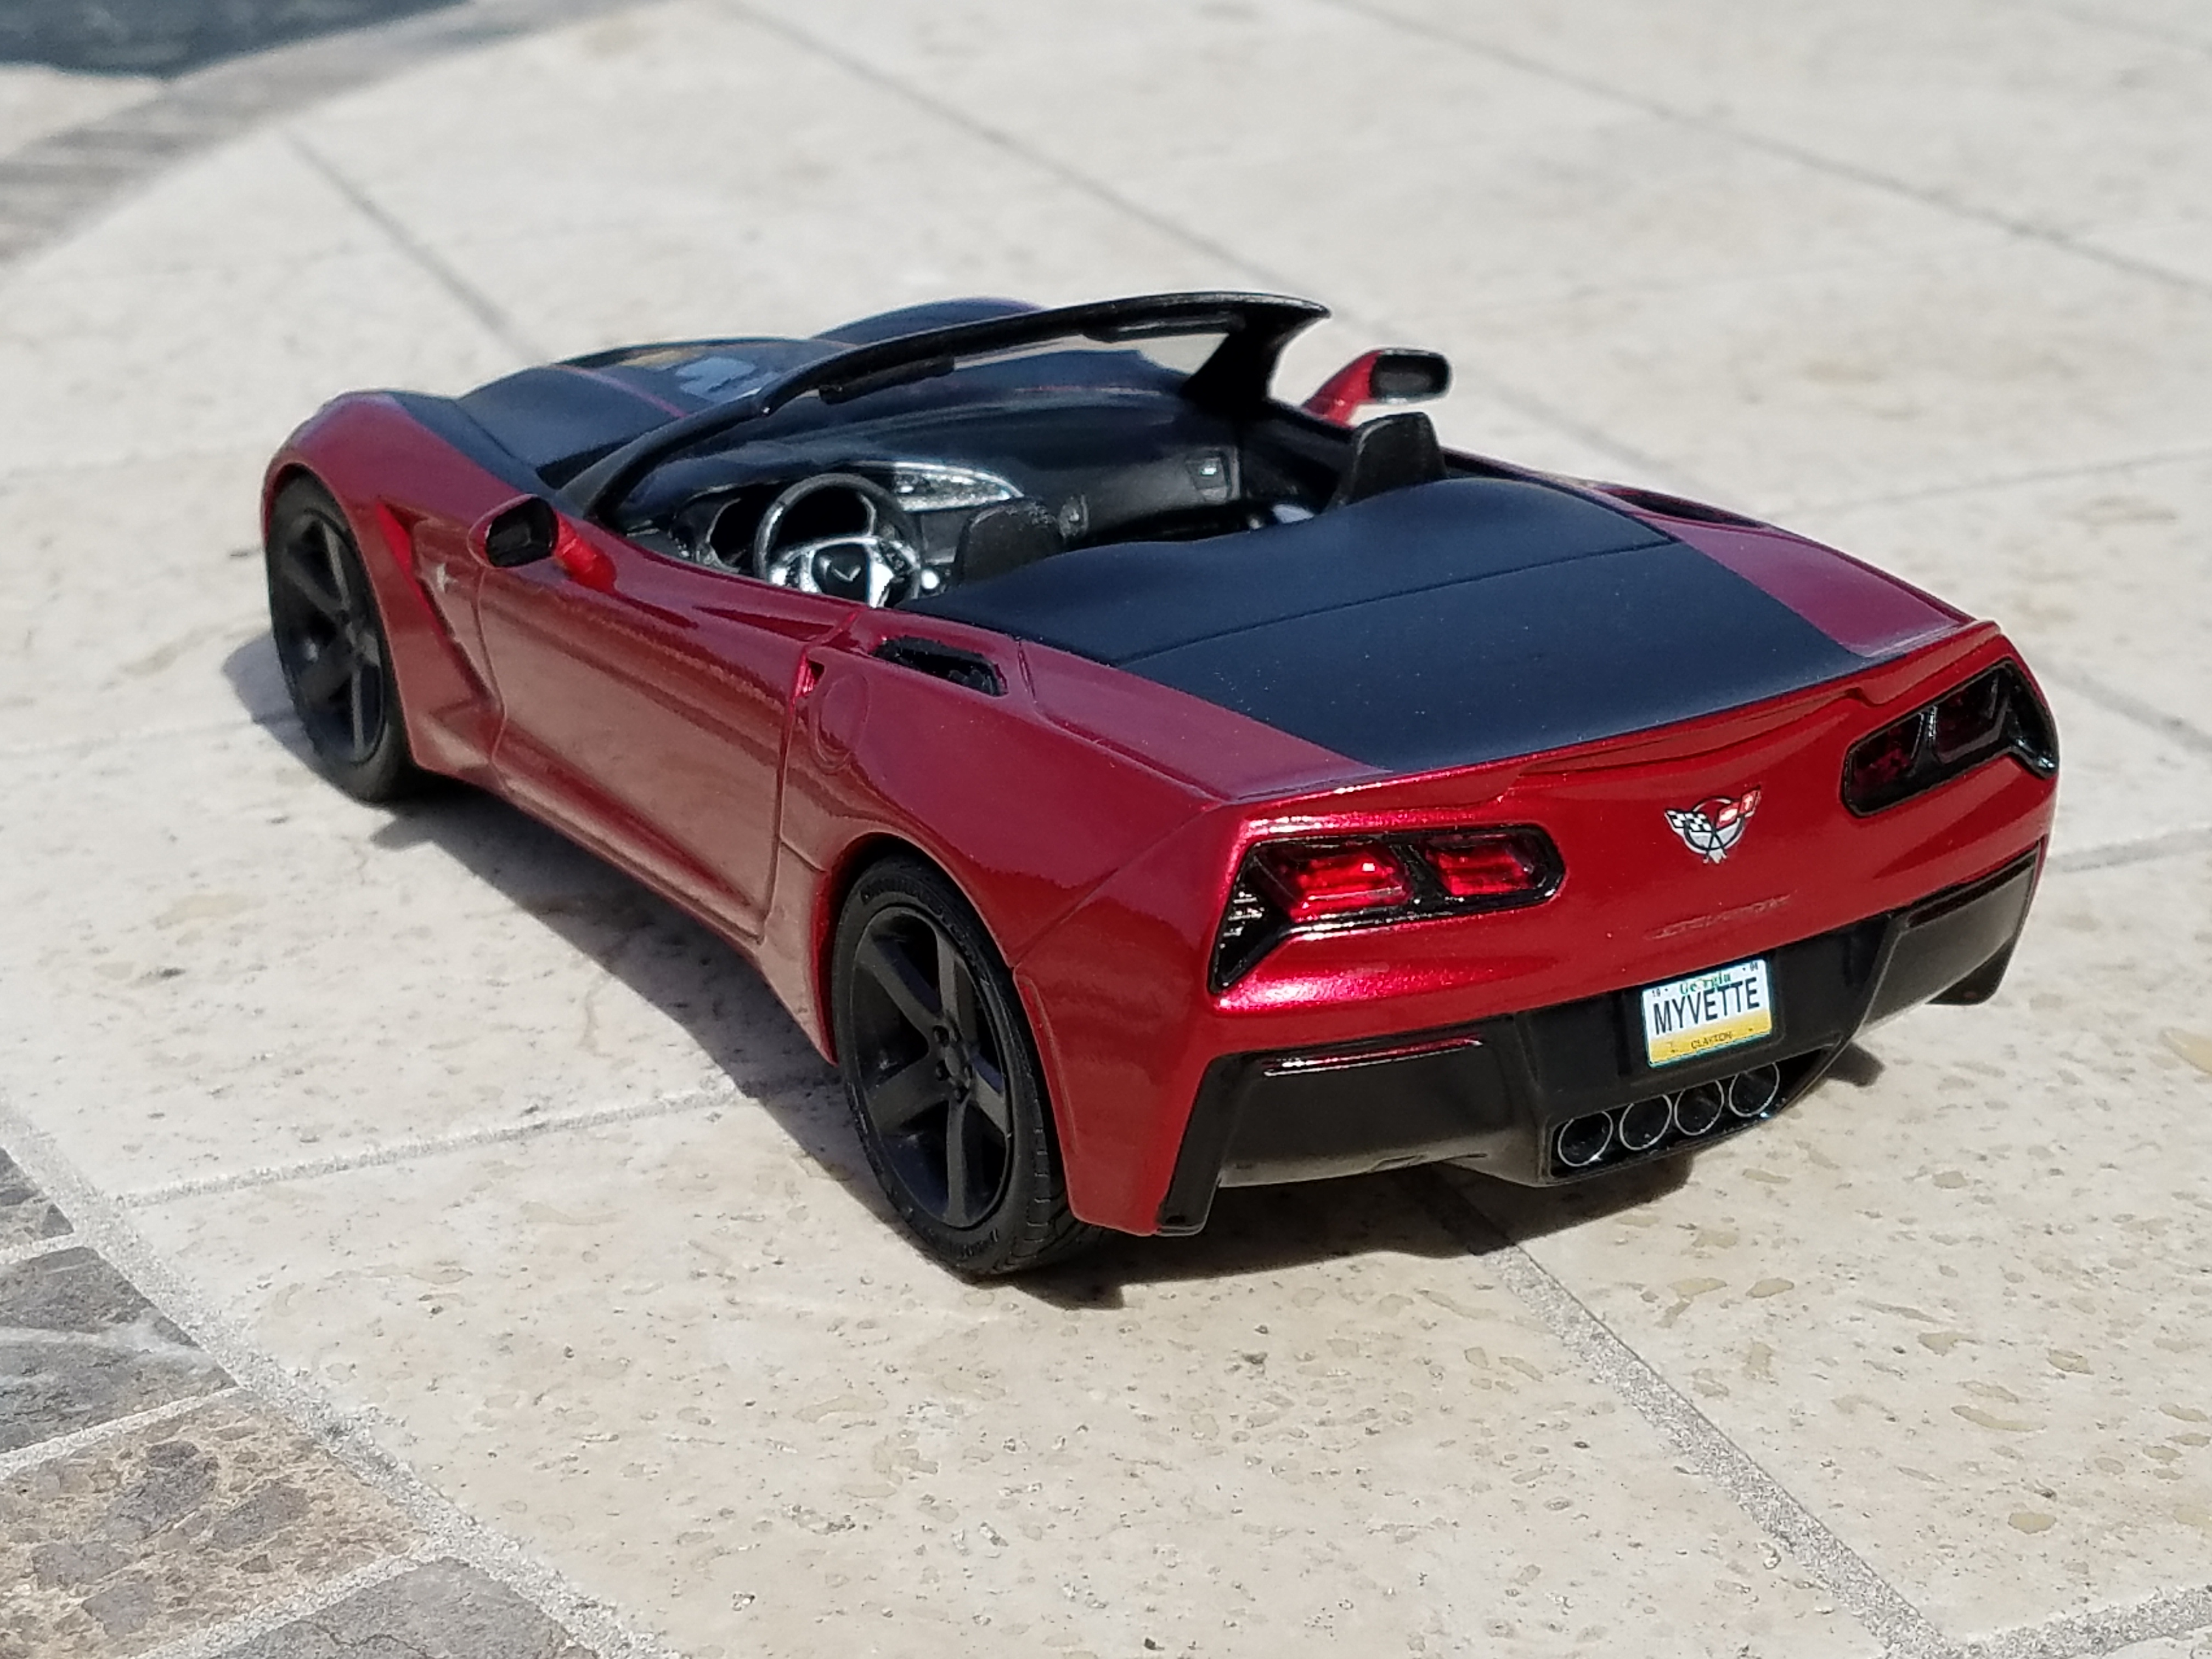
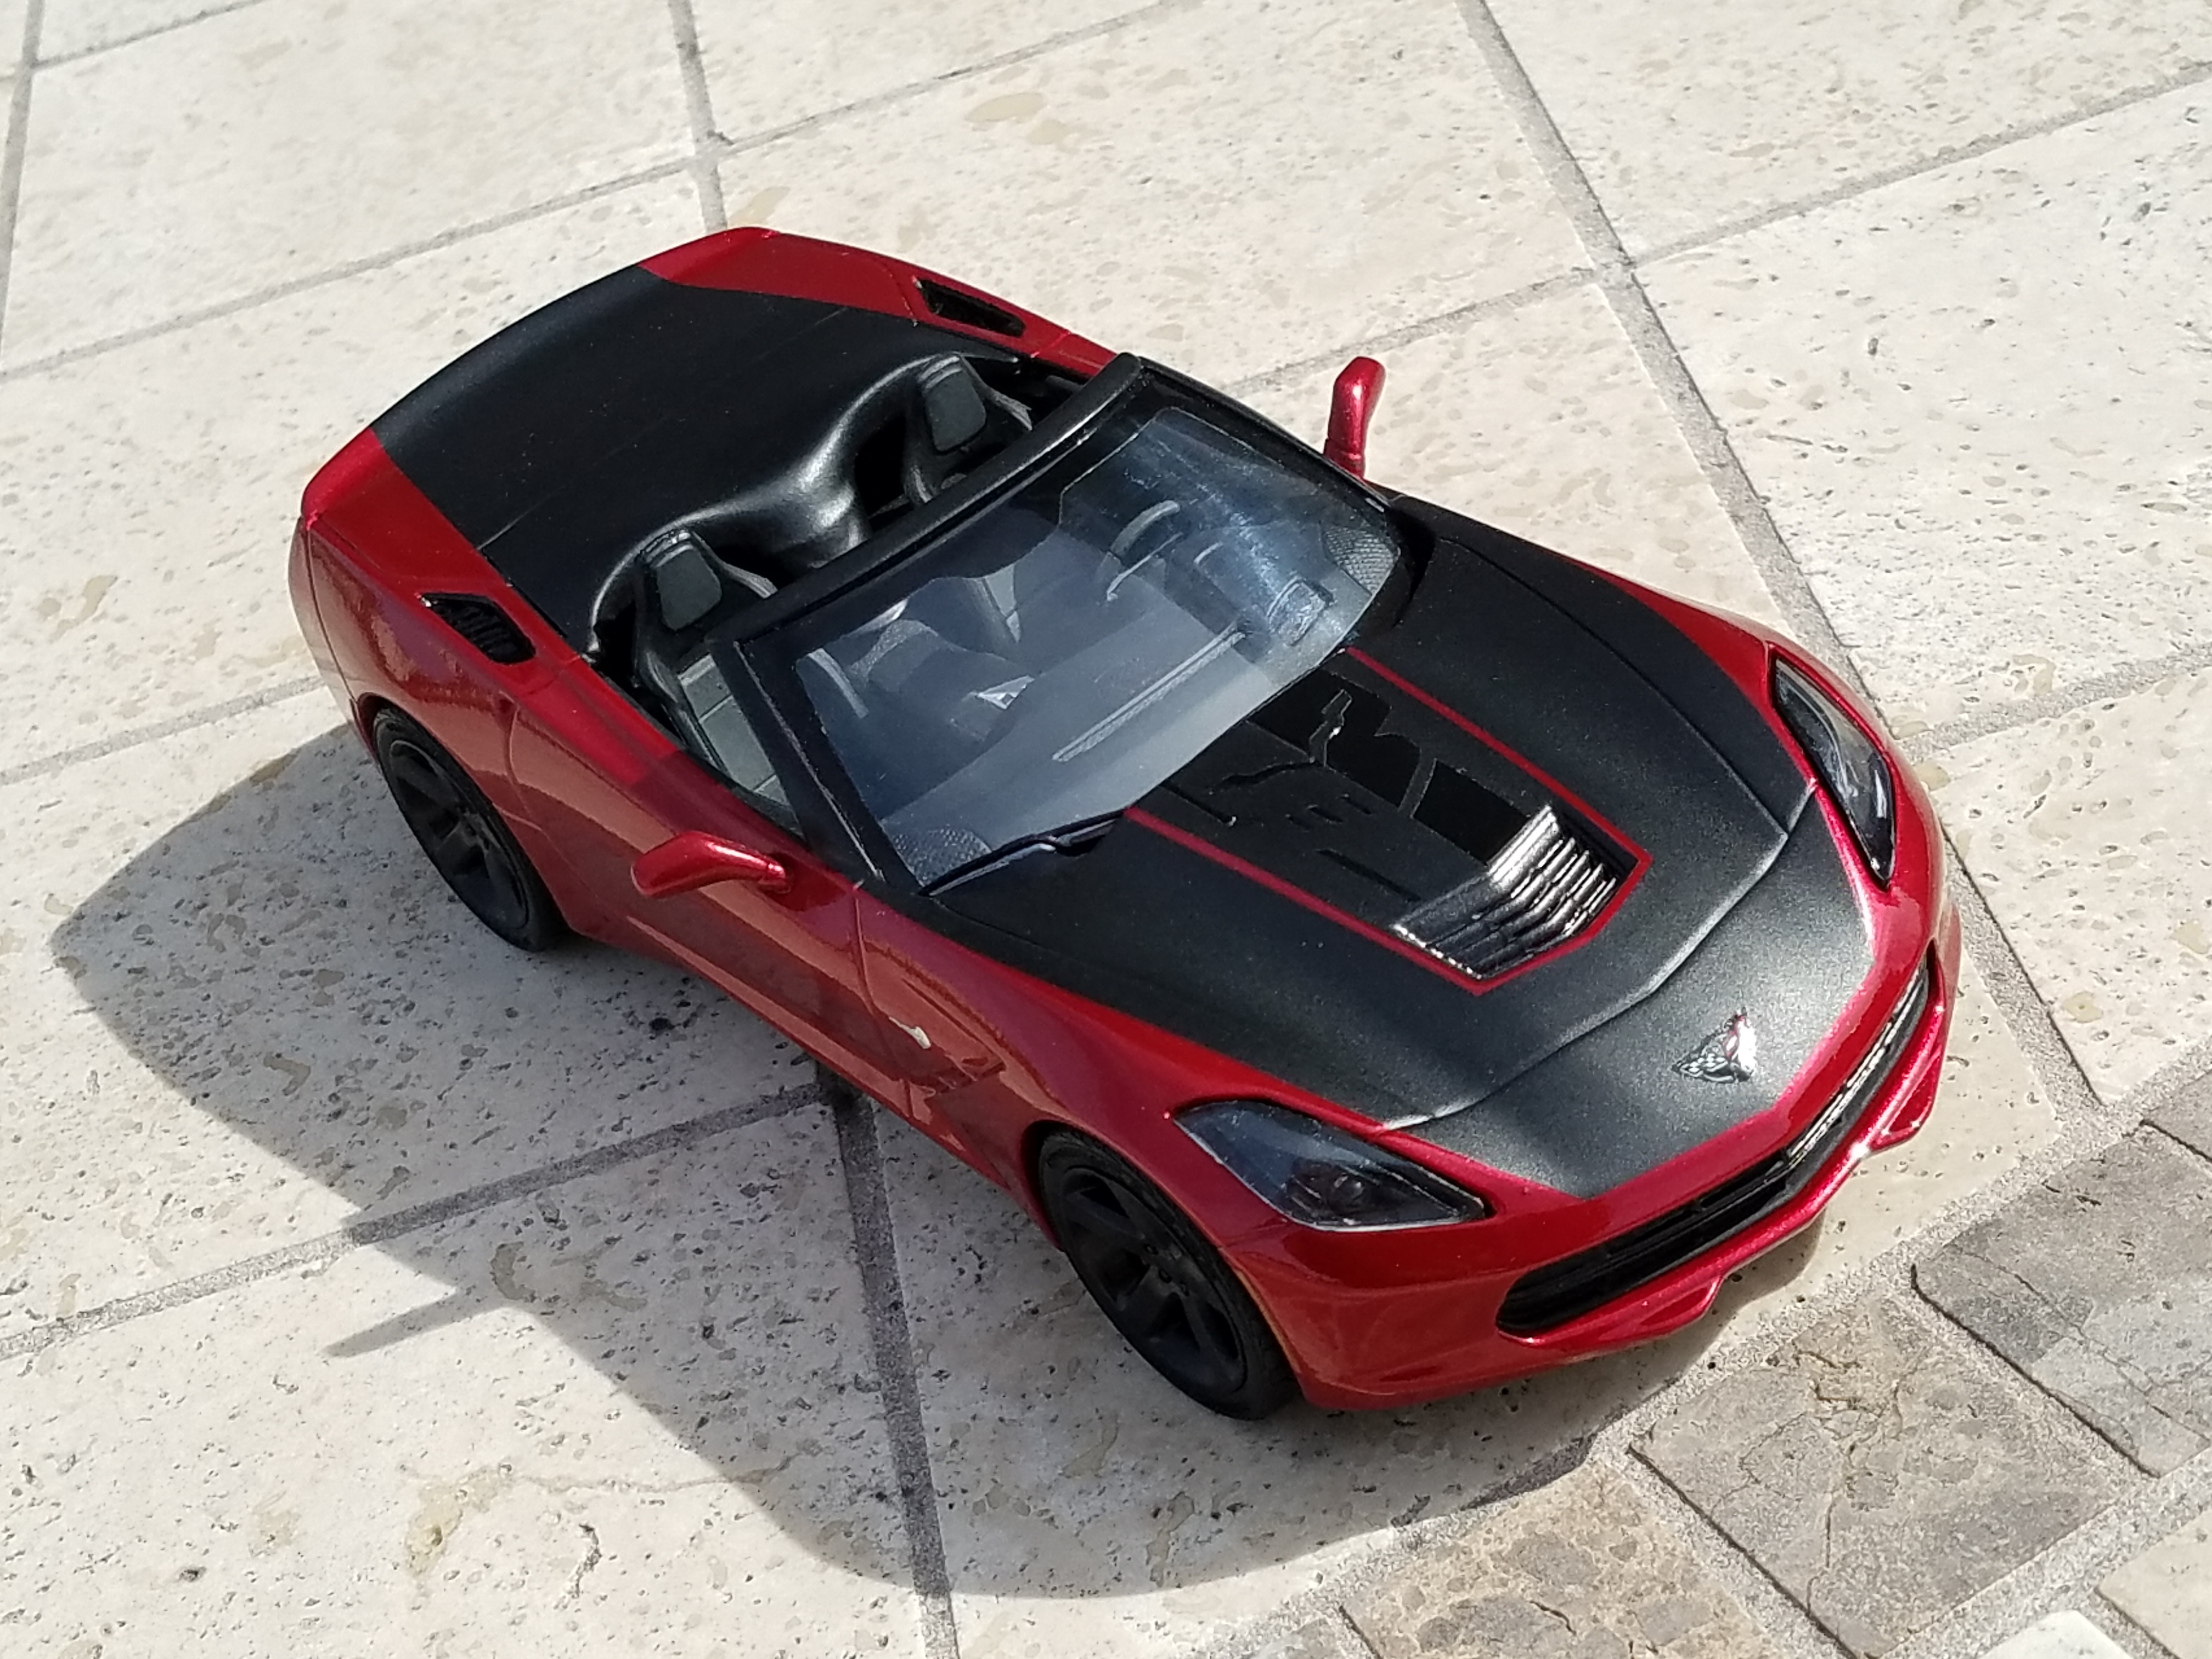
The new headlight housing was sourced from parts I had in a parts box from a Tamiya r35 gtr. They looked like some sort of intakes maybe....looked at the instruction sheet and they weren't labeled. Oh well, extra parts. Moving on the fit of them was darn good and was able to find some projector housings and lenses in the parts box as well. Added a piece of beadwire for the led tube and the white piece was made using a bristle from a scrub brush. The lens was made using a water bottle for the convex clear plastic.
-
Bo Zolland Lyonheart convertible custom build. updated 1-10
Kennyboy replied to Kennyboy's topic in WIP: Model Cars
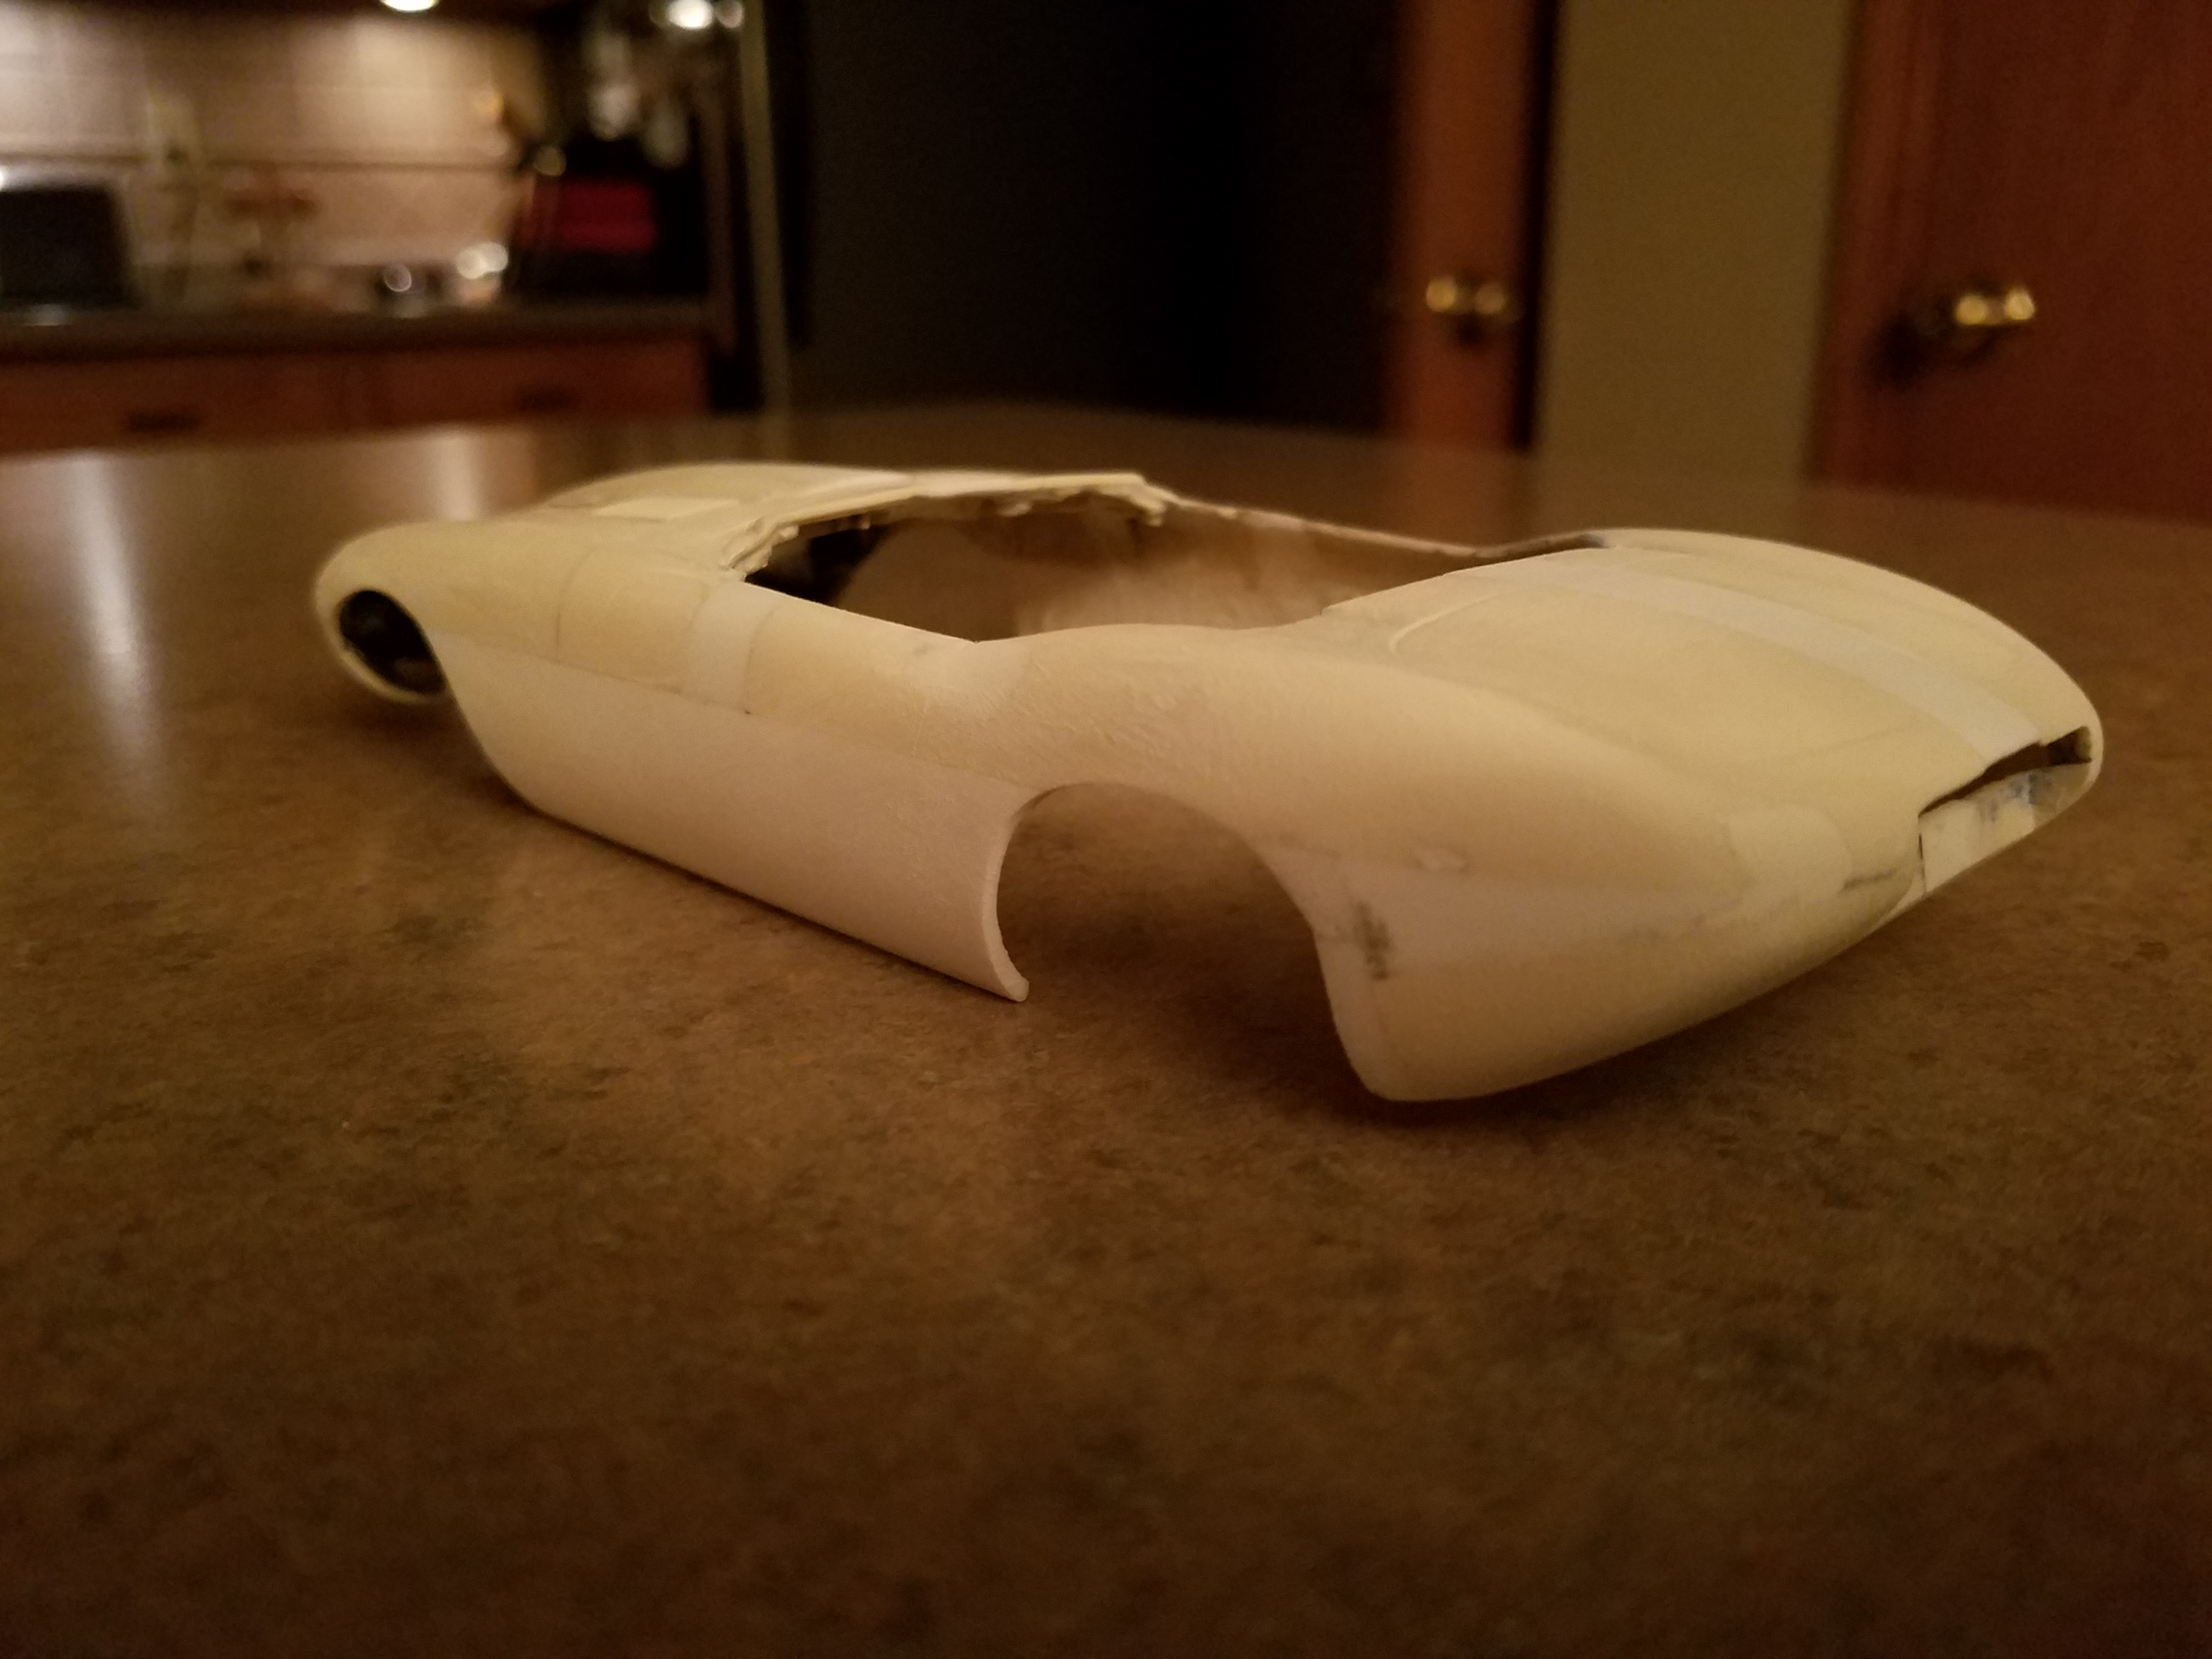
Unfortunately, I am usually not that forthright at taking photos of ongoing progress....so there will be a bit of "skipahead". The vents in the hood of the original car were way too small to match those needed on the Lionheart so I cut them out and enlarged them as needed. Also, the headlights shape was wrong and needed to be filled. To fill the hole of the old headlight I used the bomb halves from an old p51 mustang, they had the correct convex shape and when sanded and fitted, they made the hole disappear. Laid out and cut the new shape of the headlight and set out to build the new housing and lens. -
Bo Zolland Lyonheart convertible custom build. updated 1-10
Kennyboy replied to Kennyboy's topic in WIP: Model Cars
Smoothed out and leveled the body to prepare it for the next steps. Adding a proper windshield frame, and the dreaded side coves. The windshield frame came from the Shelby Series 1 kit and was a perfect fit and looks almost identical to the reference. The coves were not at all as easy. Ended up using the side pieces from the Pontiac Banshee to create the interesting curvy shape I needed for the coves. Laid out the stencil for the cove cutouts, penciled, and cut the side out for the new piece from the Banshee. Side note, realized that the interior, and several other items from the Series 1 were an exact (almost) fit for this build.
-
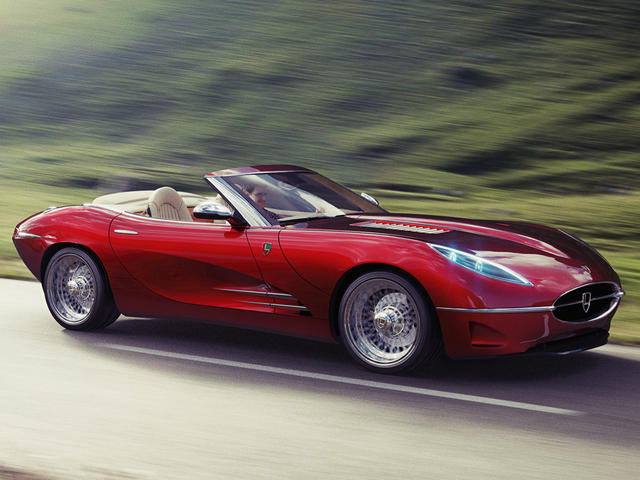
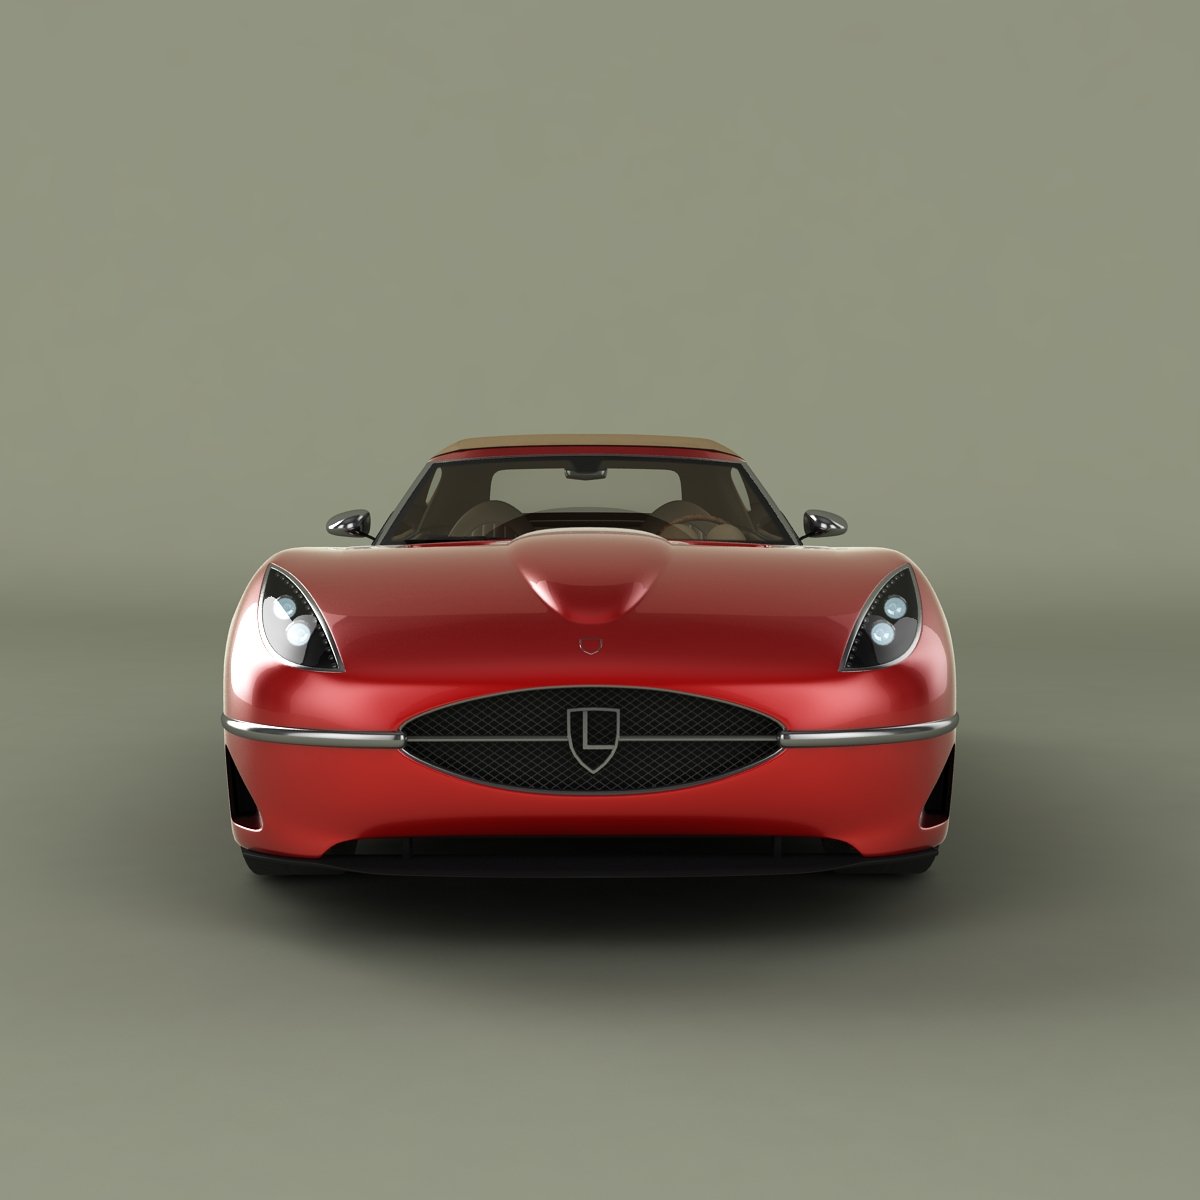
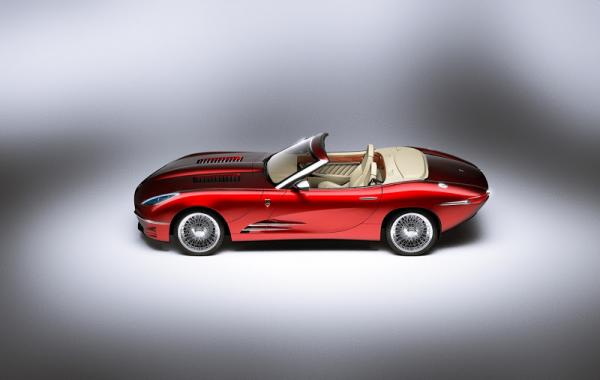
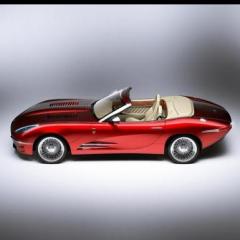
This is my build of Bo Zolland's digital rendering of a new age Jaguar E-type, he referred to it as the Lyonheart. I started with a builtup of an original Monogram Jaguar E-type that I purchased at a local meeting for $2. I stripped it apart which was quite easy and put it in the pond for a few days to strip off the paint from the 70's. Next task was to take all the body parts and glue them together to create a one piece body that would be the starting point for the long road of cutting, gluing, filling, sanding, etc. I made a 1/24 scale printout of the sideview of the digital rendering of the Lyonheart and realized the E-type was 10 mm too short on the total length....sigh here we go. Cut the body at the front of the doors and added 10 mm of plastic from a Nascar body (which had the exact contour I needed) carefully sanded the mating surfaces, squared up, and glued the body back together. Next step was to add the necessary height to the side profile. Added in the center pieces from the beltline to the rocker from another Nascar kit (nice smooth sides). Next, on the rear quarter I had to pie cut and add in plastic to match up with the center. After all that dried I sanded smooth and got ready for the next step....had to widen the body 8 mm. Cut the body down the middle and added 8 mm of plastic on the hood, trunk, and front and rear valance. Amazingly (!), it sits dead level on the table and is now a scale 1/24 which is correct for my plans.
-
Hey Dann, that is a REAL nice Trans am! Here is the link to his page...https://rayskits.com/decals/
-
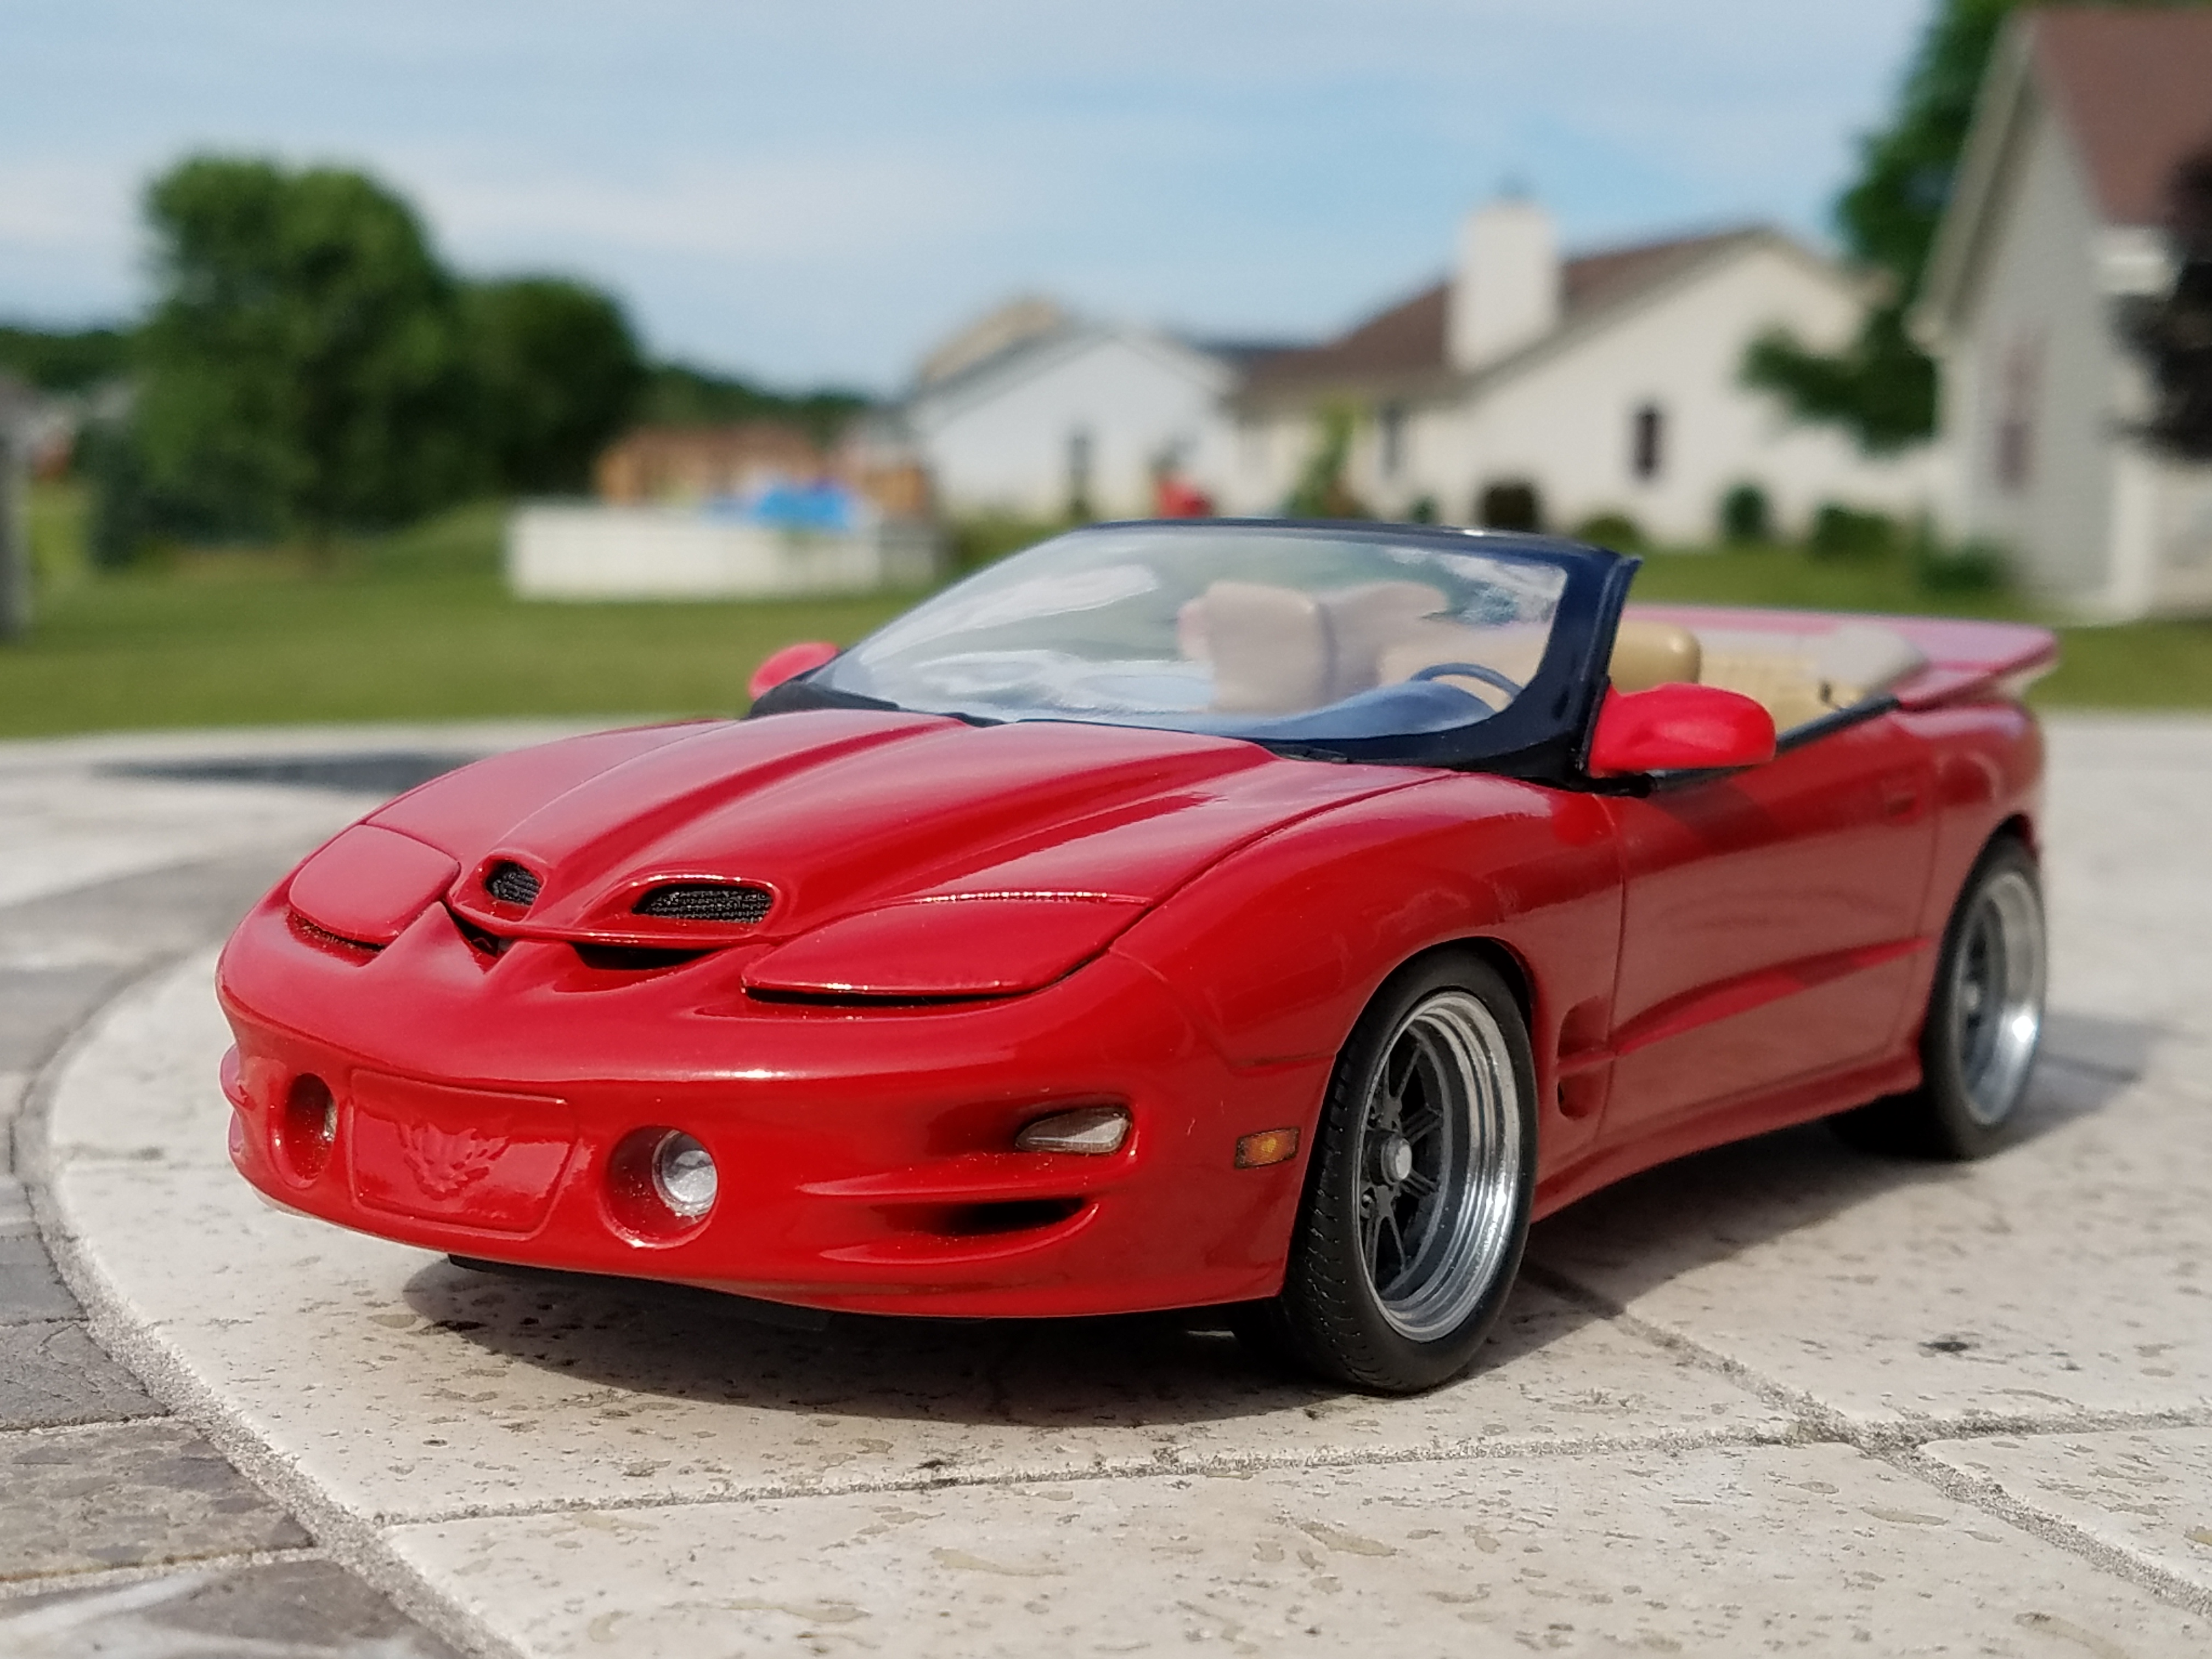
Thanks! On my Trans Am build I used a set of wheels I got from a resin caster on ebay years ago. I tried to get another set or two but he stopped making them because the spokes were breaking the mold when pulling them out.
-
Thank you to all that replied, I really appreciate your kind words and support! You guys are great.
-
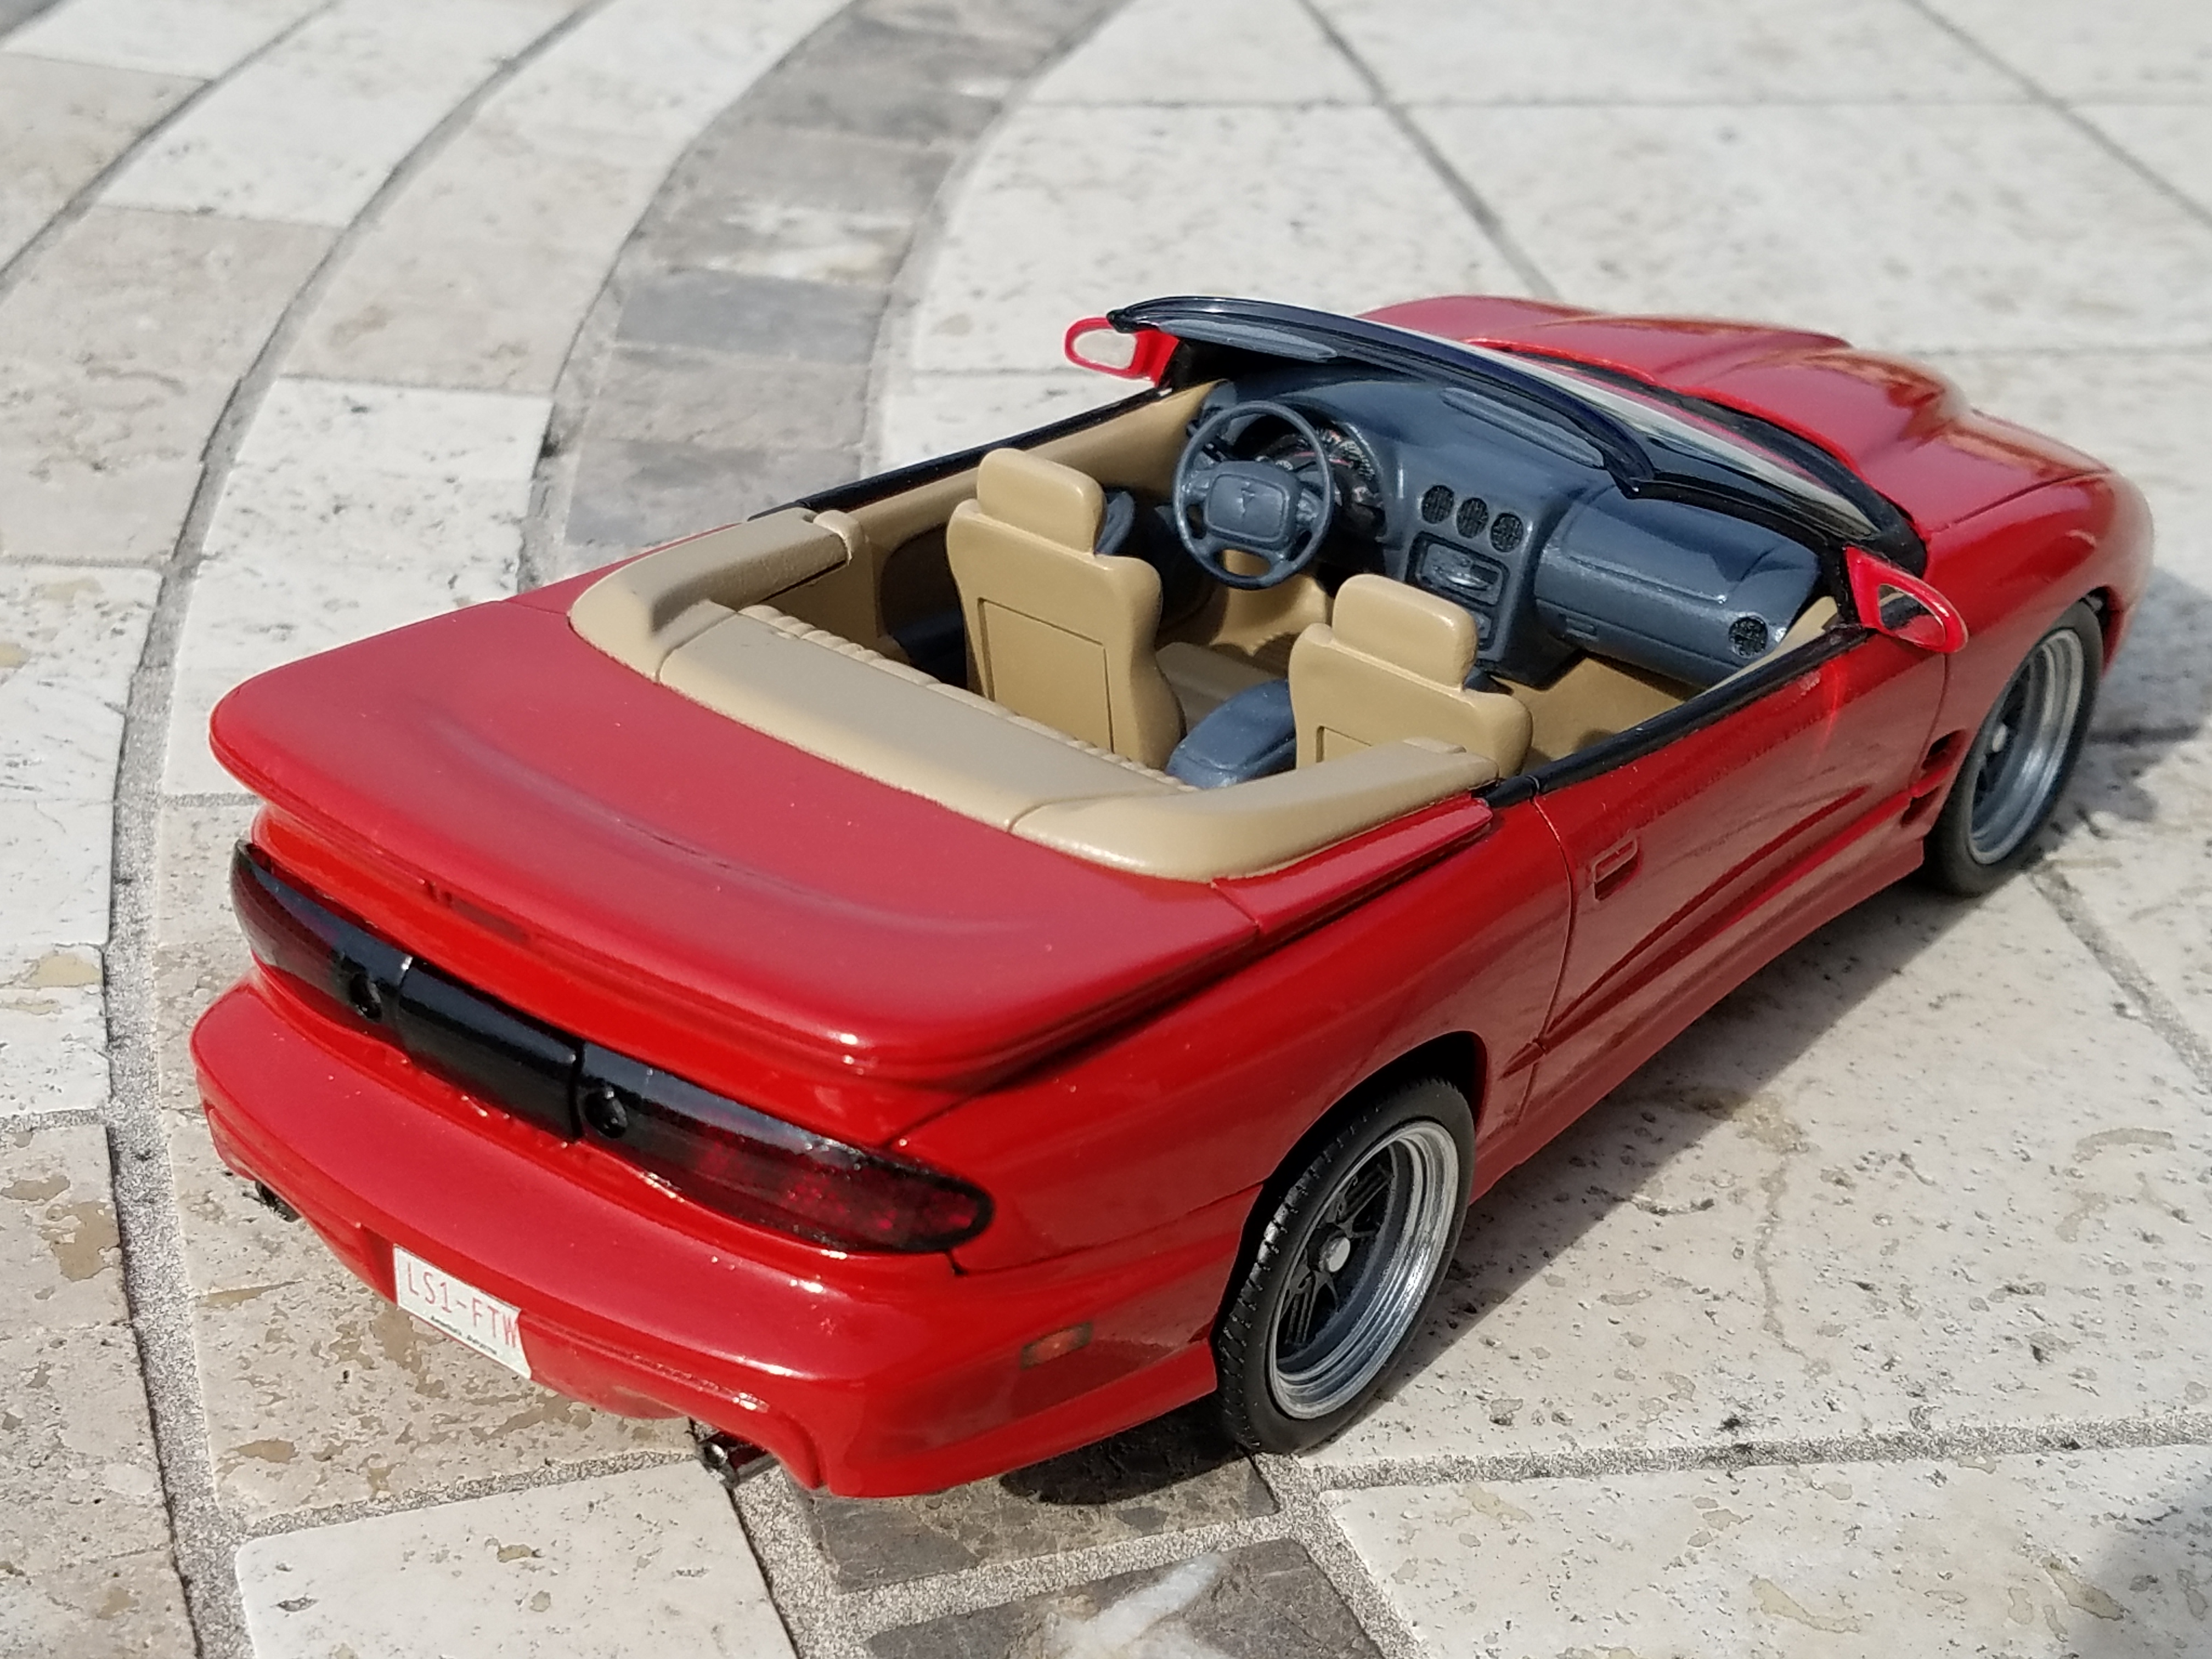
Interesting story, this build was on hold for a while because I needed the honeycomb look to the taillights....could not figure that one out. A member on here had finished a yellow ws6 model that had honeycomb taillights. I had to know where they came from, turns out the guy who printed the honeycomb overlay decals replied to that build thread. I contacted him and bought 1 of the last sets he had....from the Netherlands. ? Good eye spotting that!
-
Thanks Rich. I wish they did, would be another cool piece of detail
-
Oh yeah, lol....here is the 1:1. ?
-
-
Exactly Ismael, C5 waterfall. Thank you
-
More pics are available of both if interested...thanks guys
-
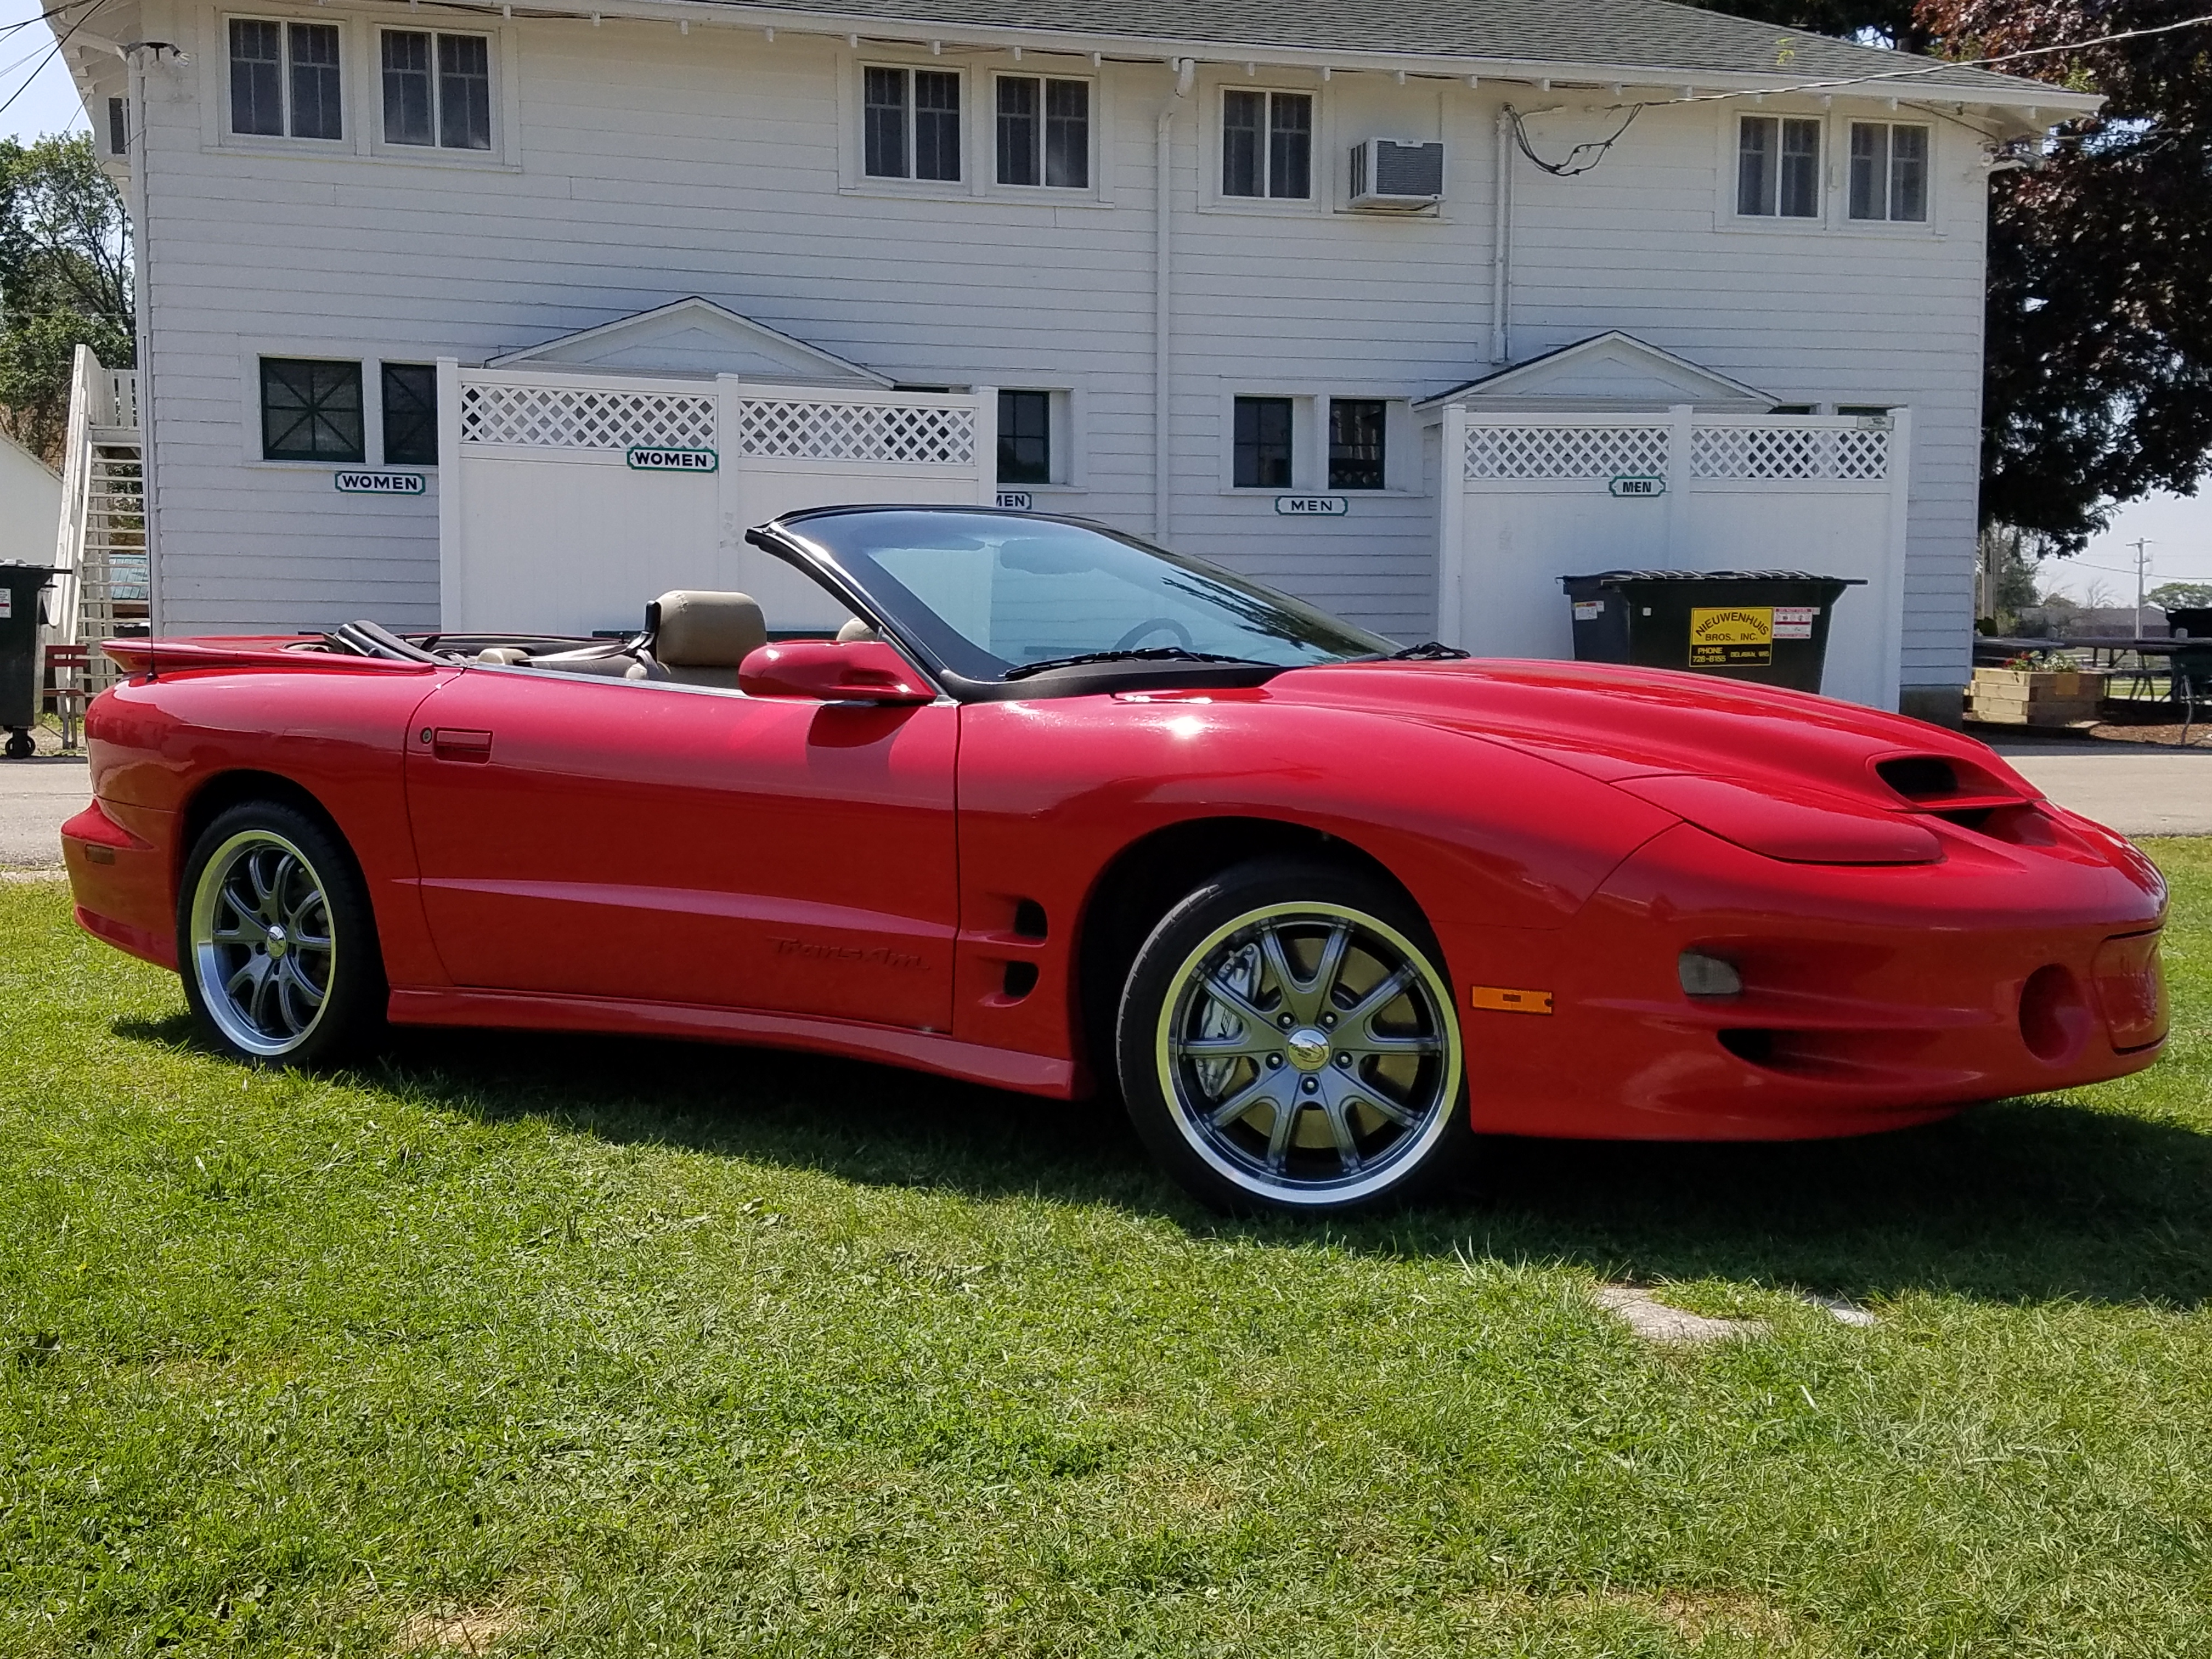
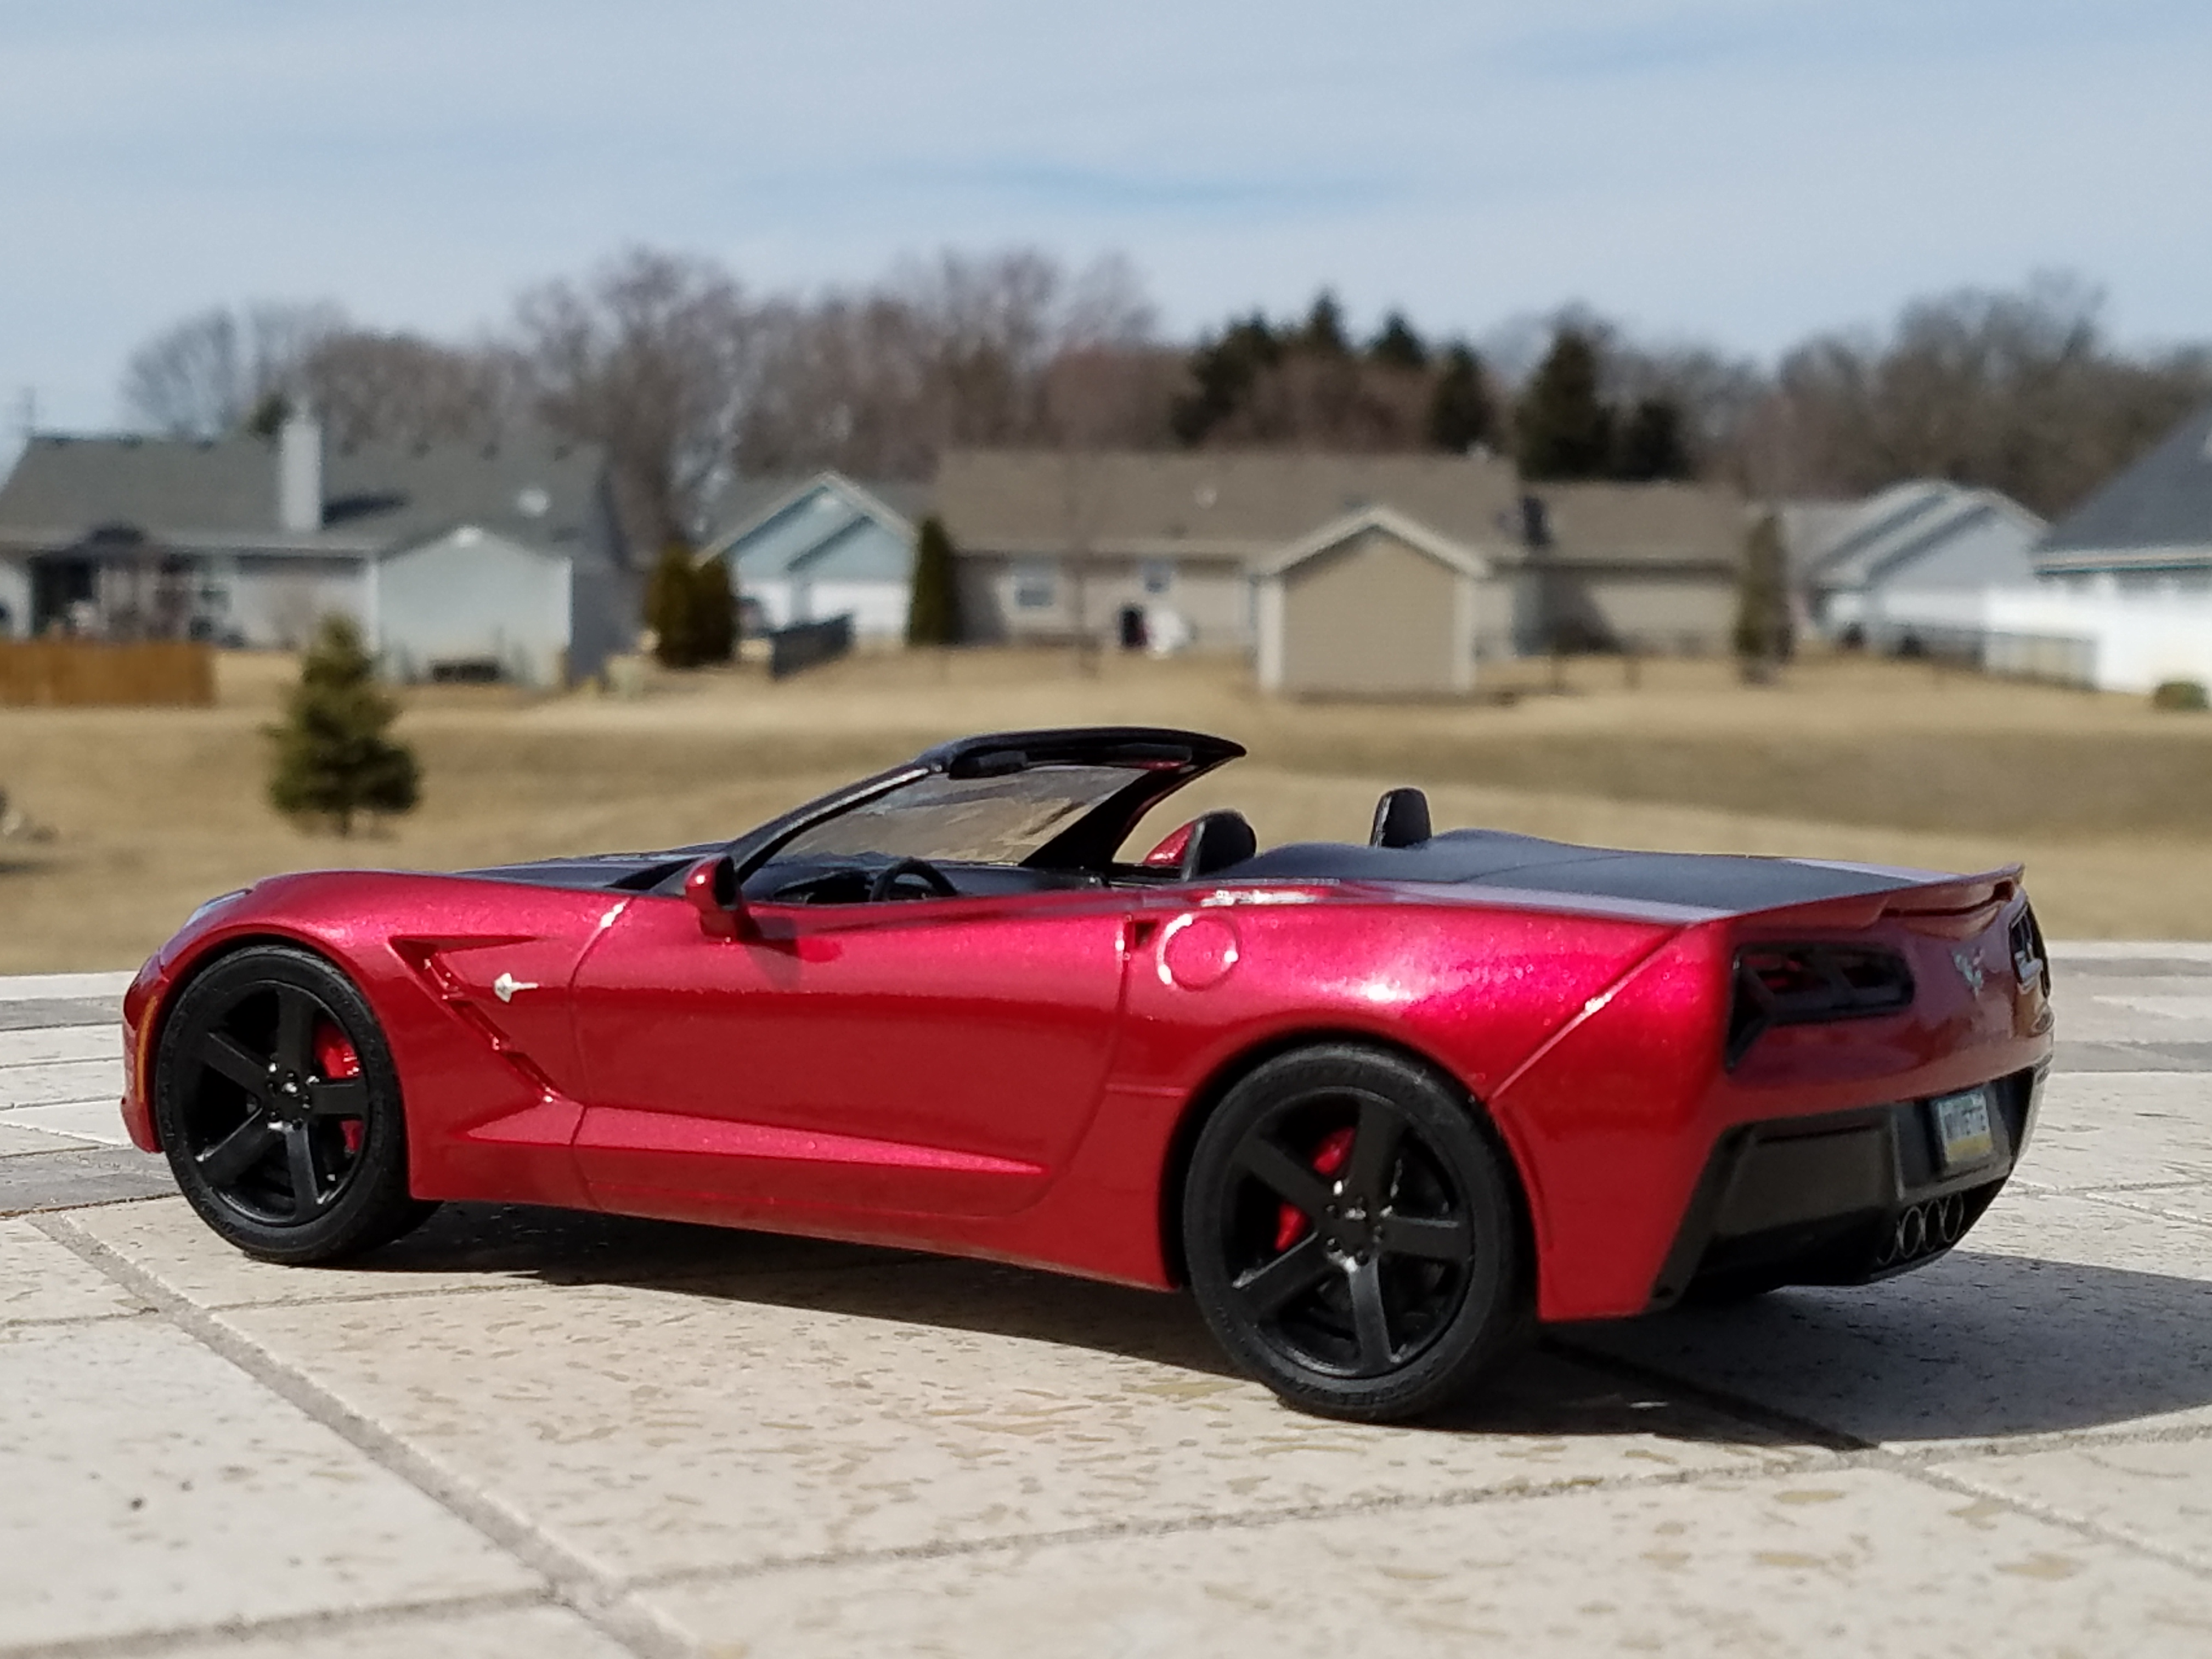
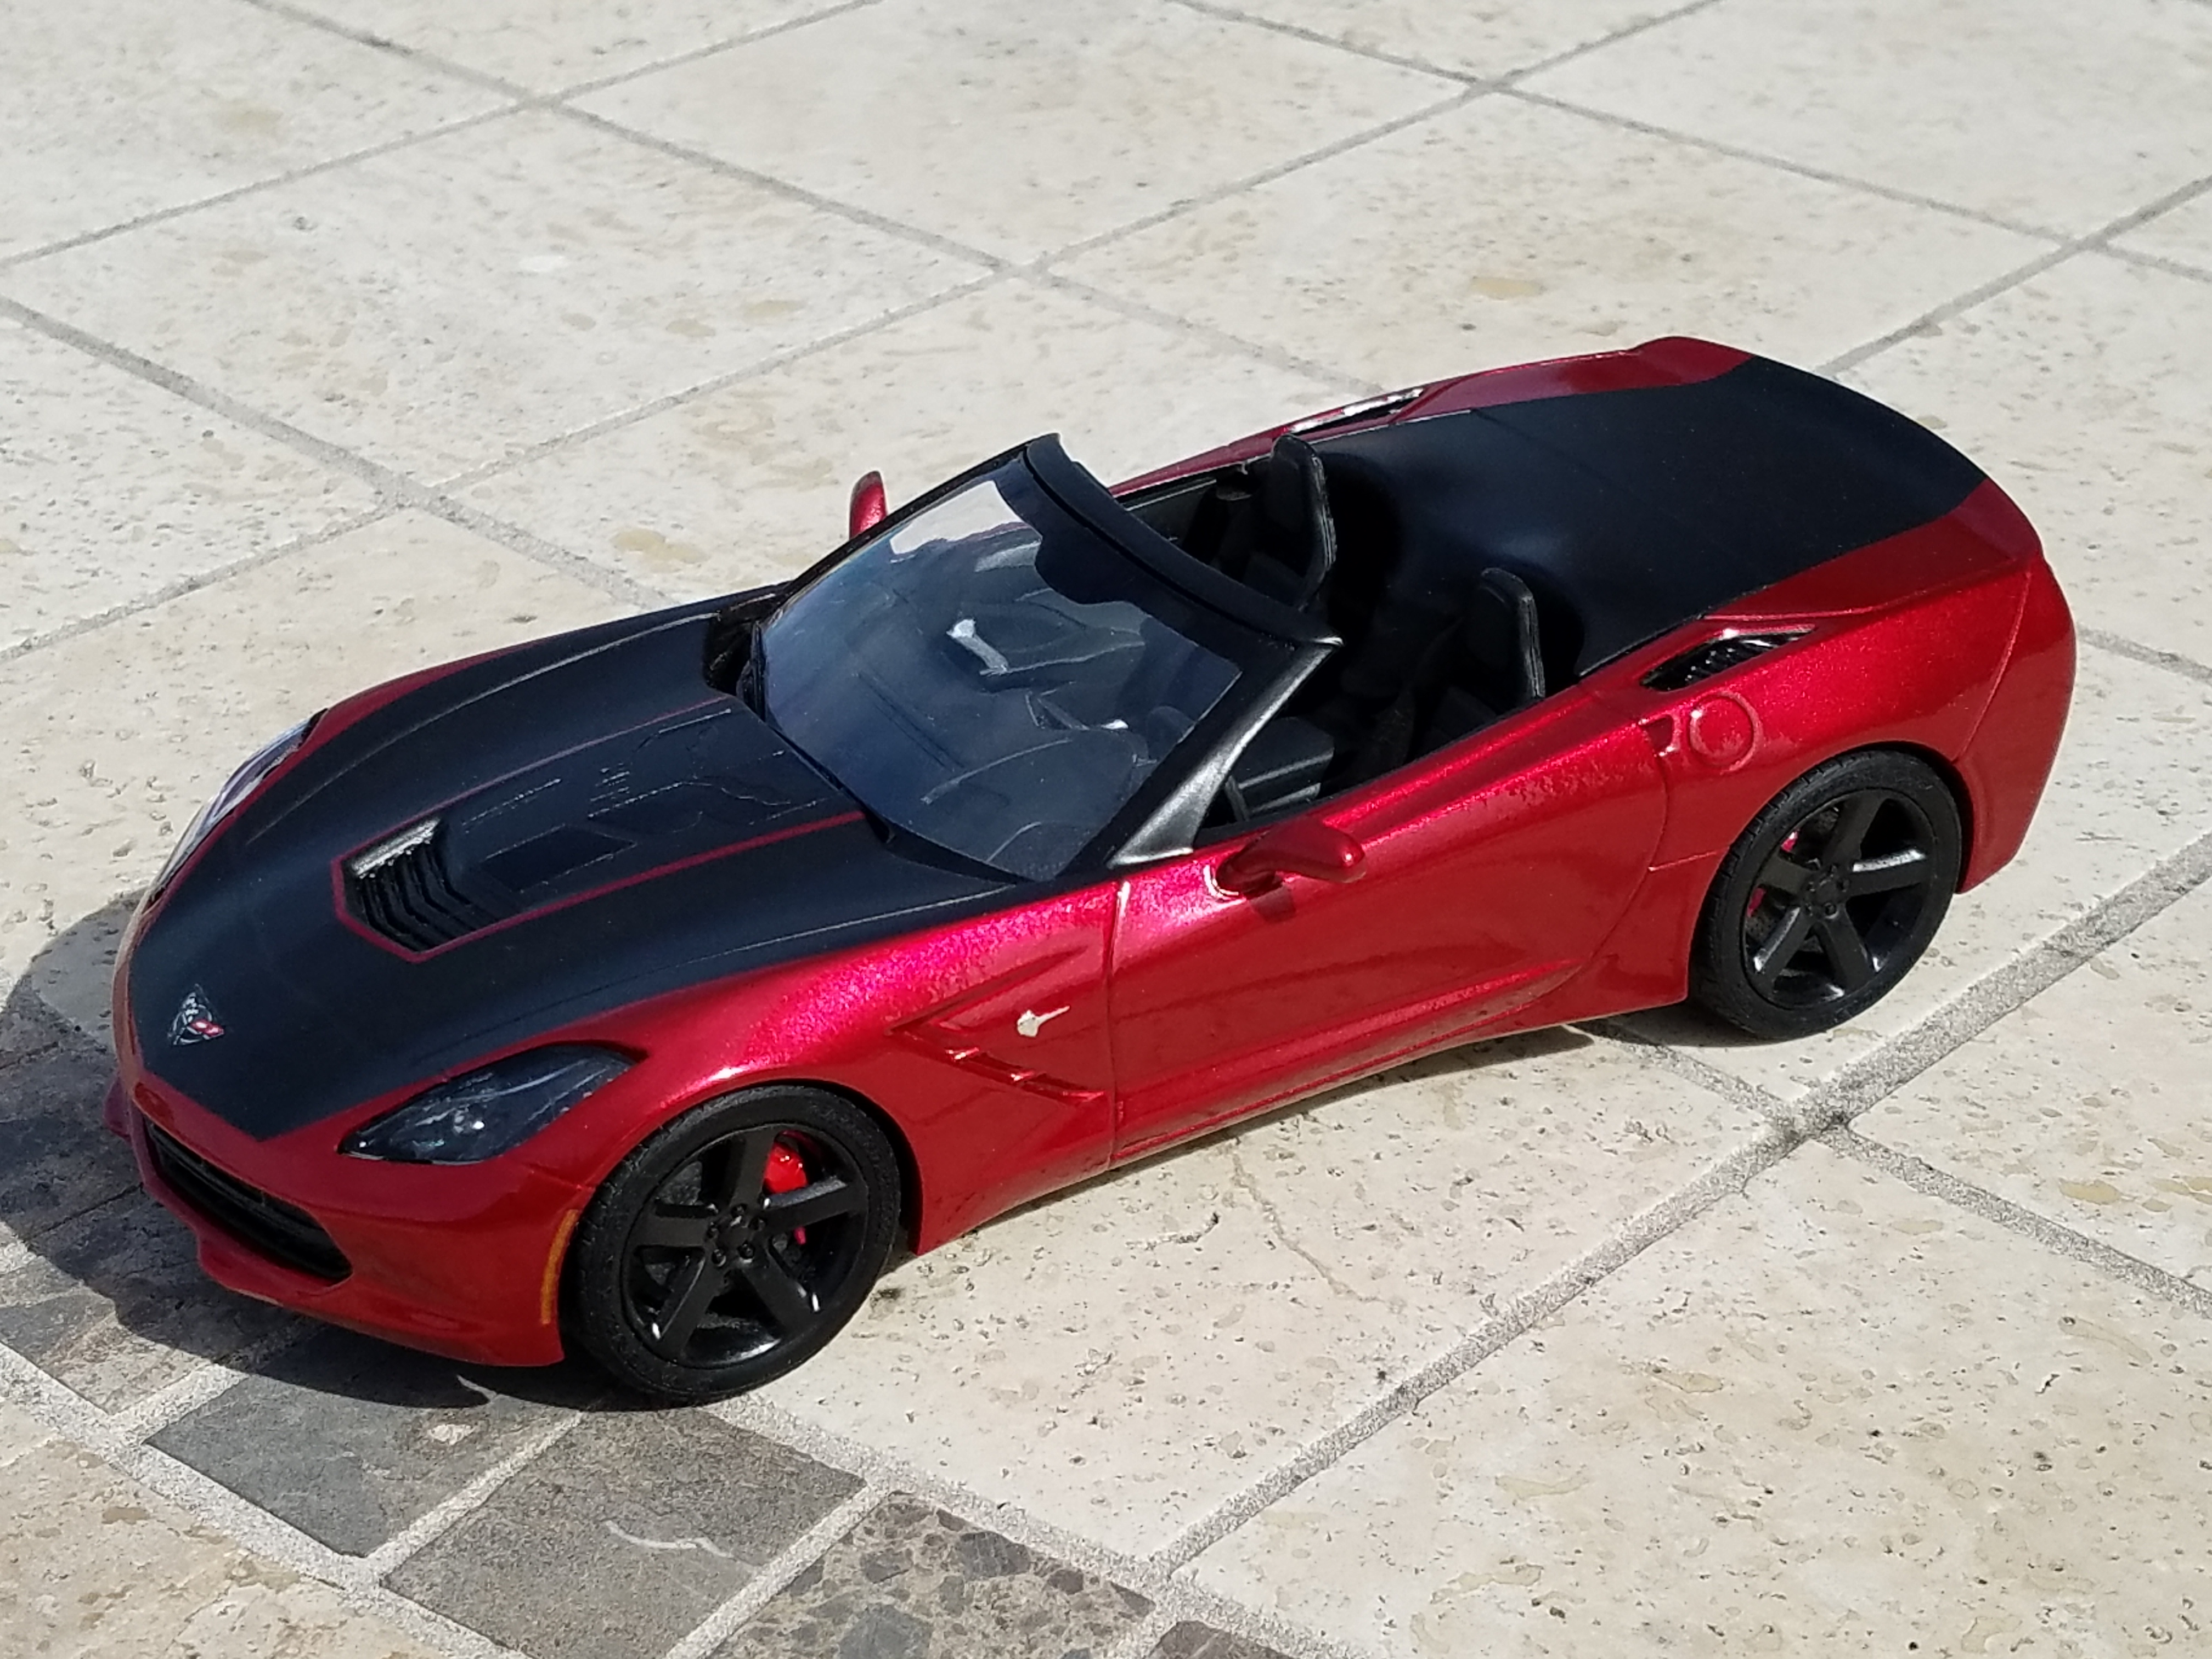
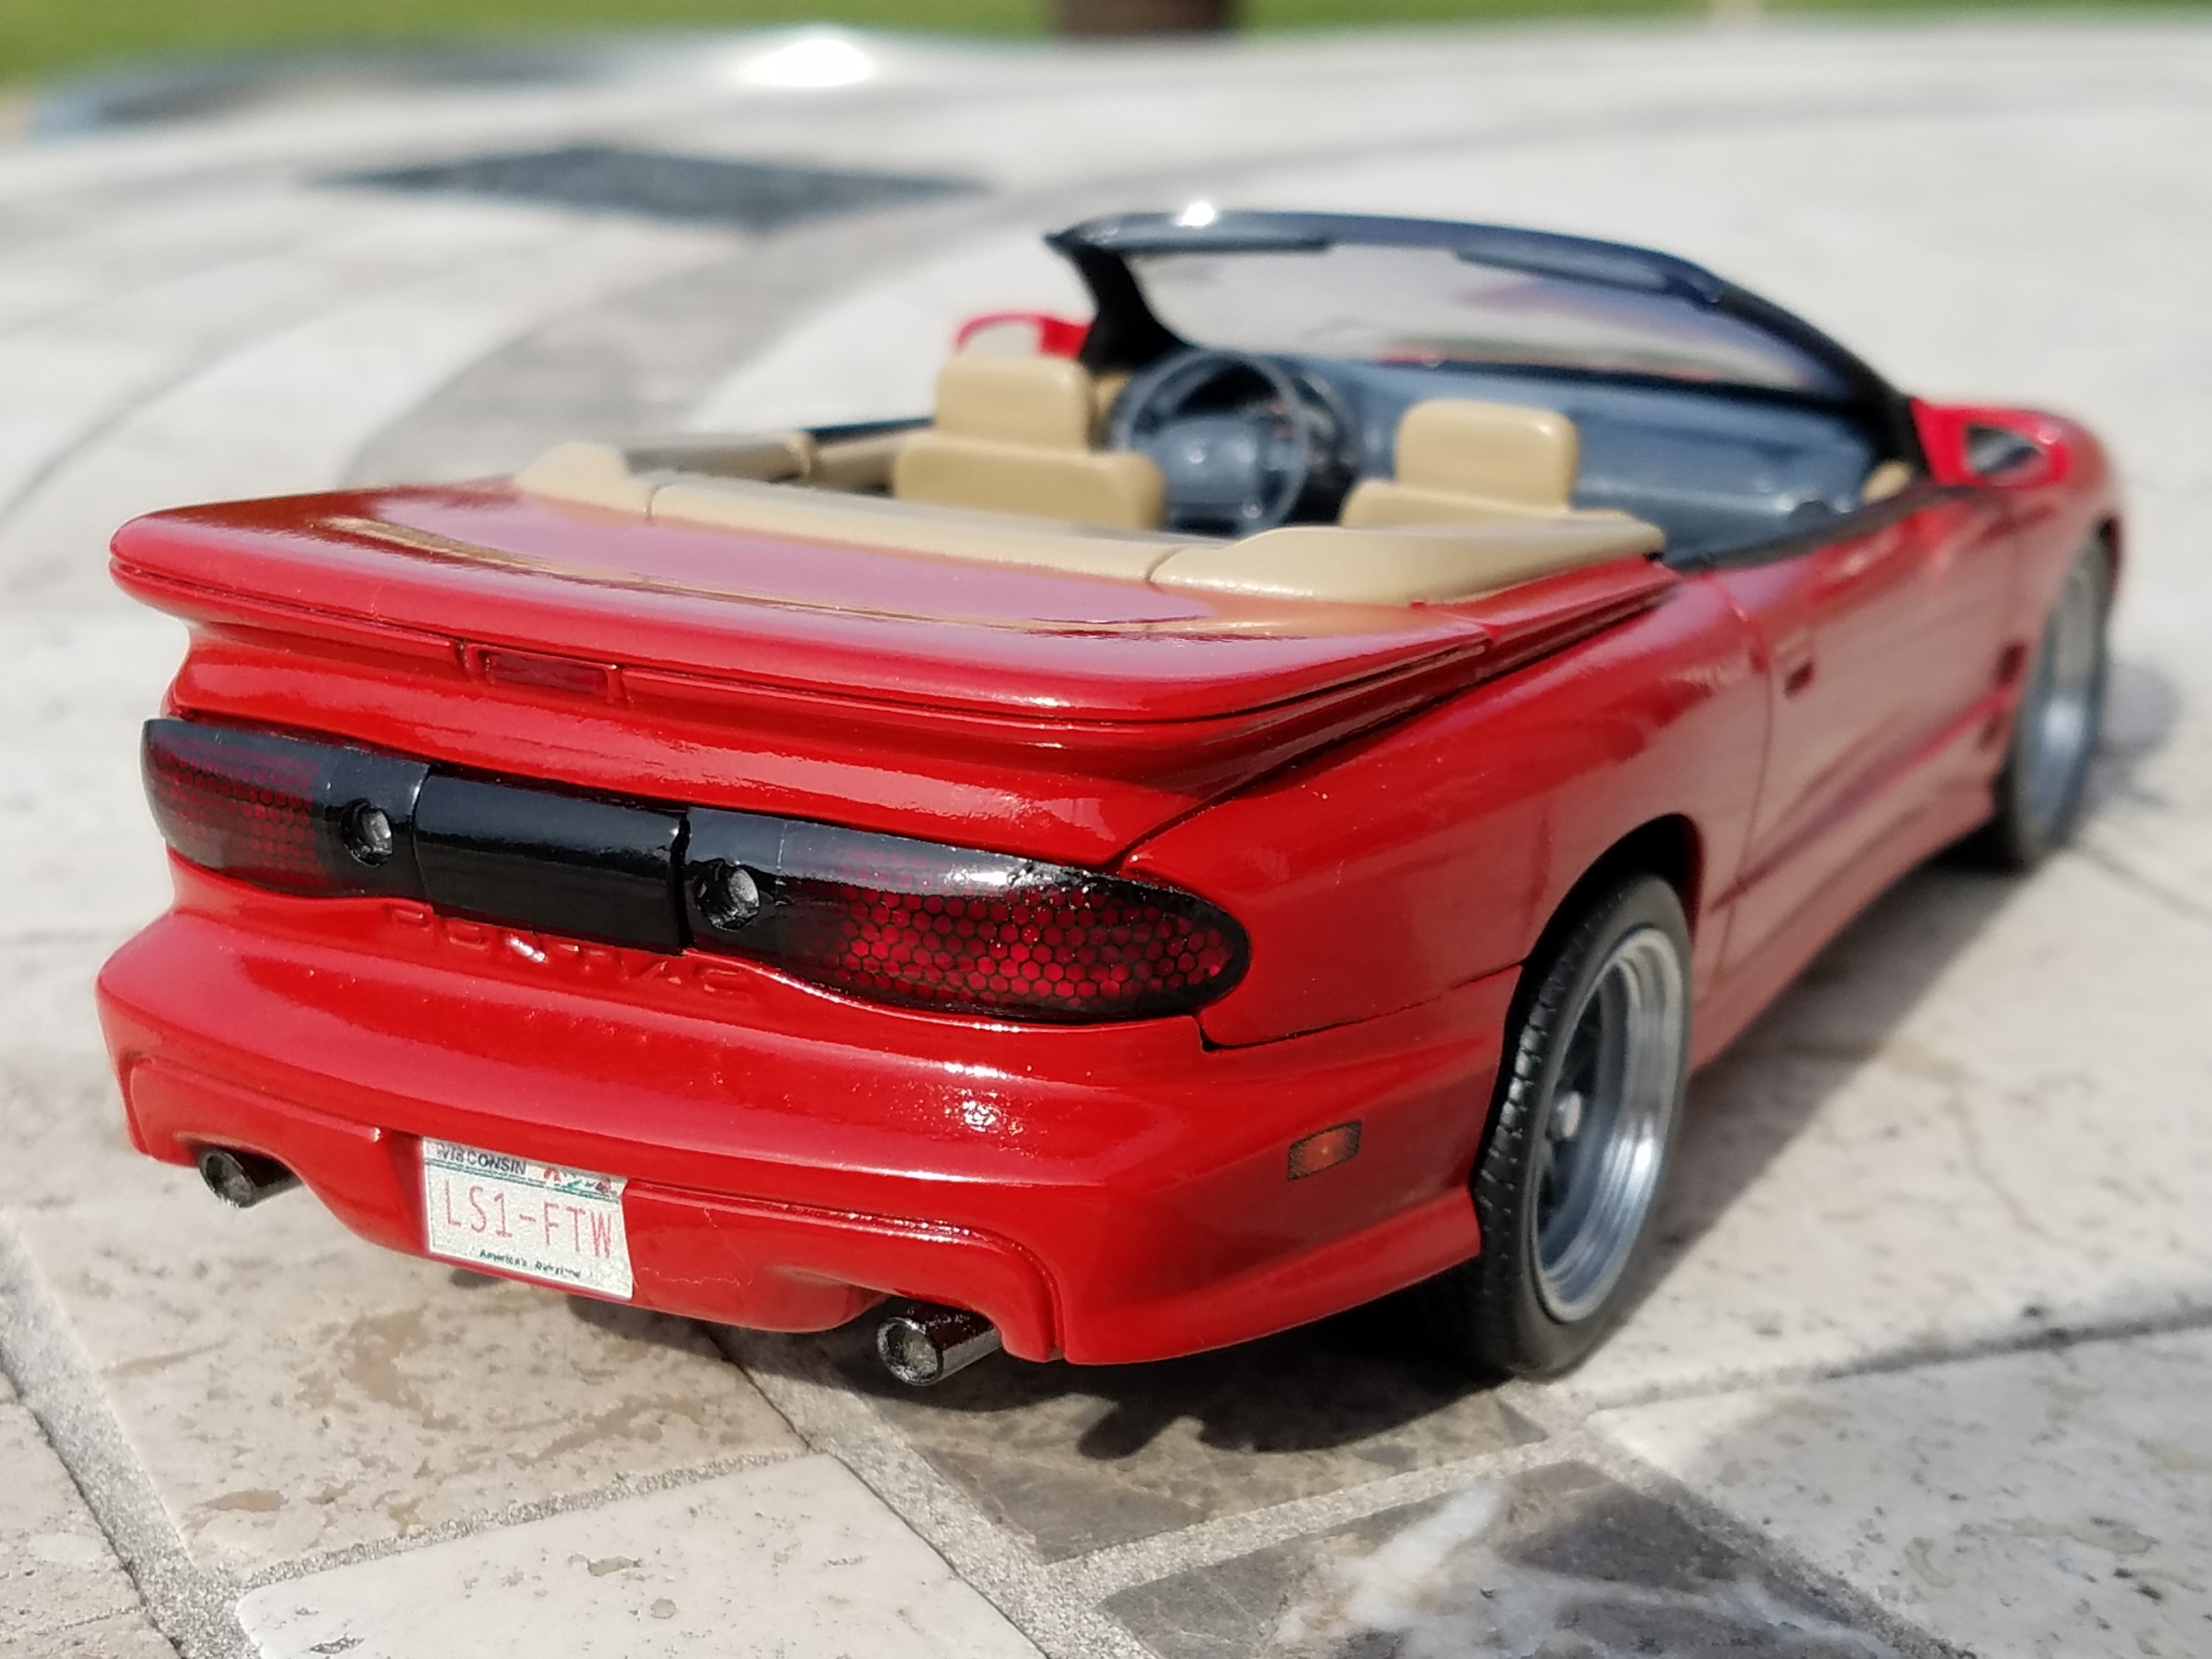
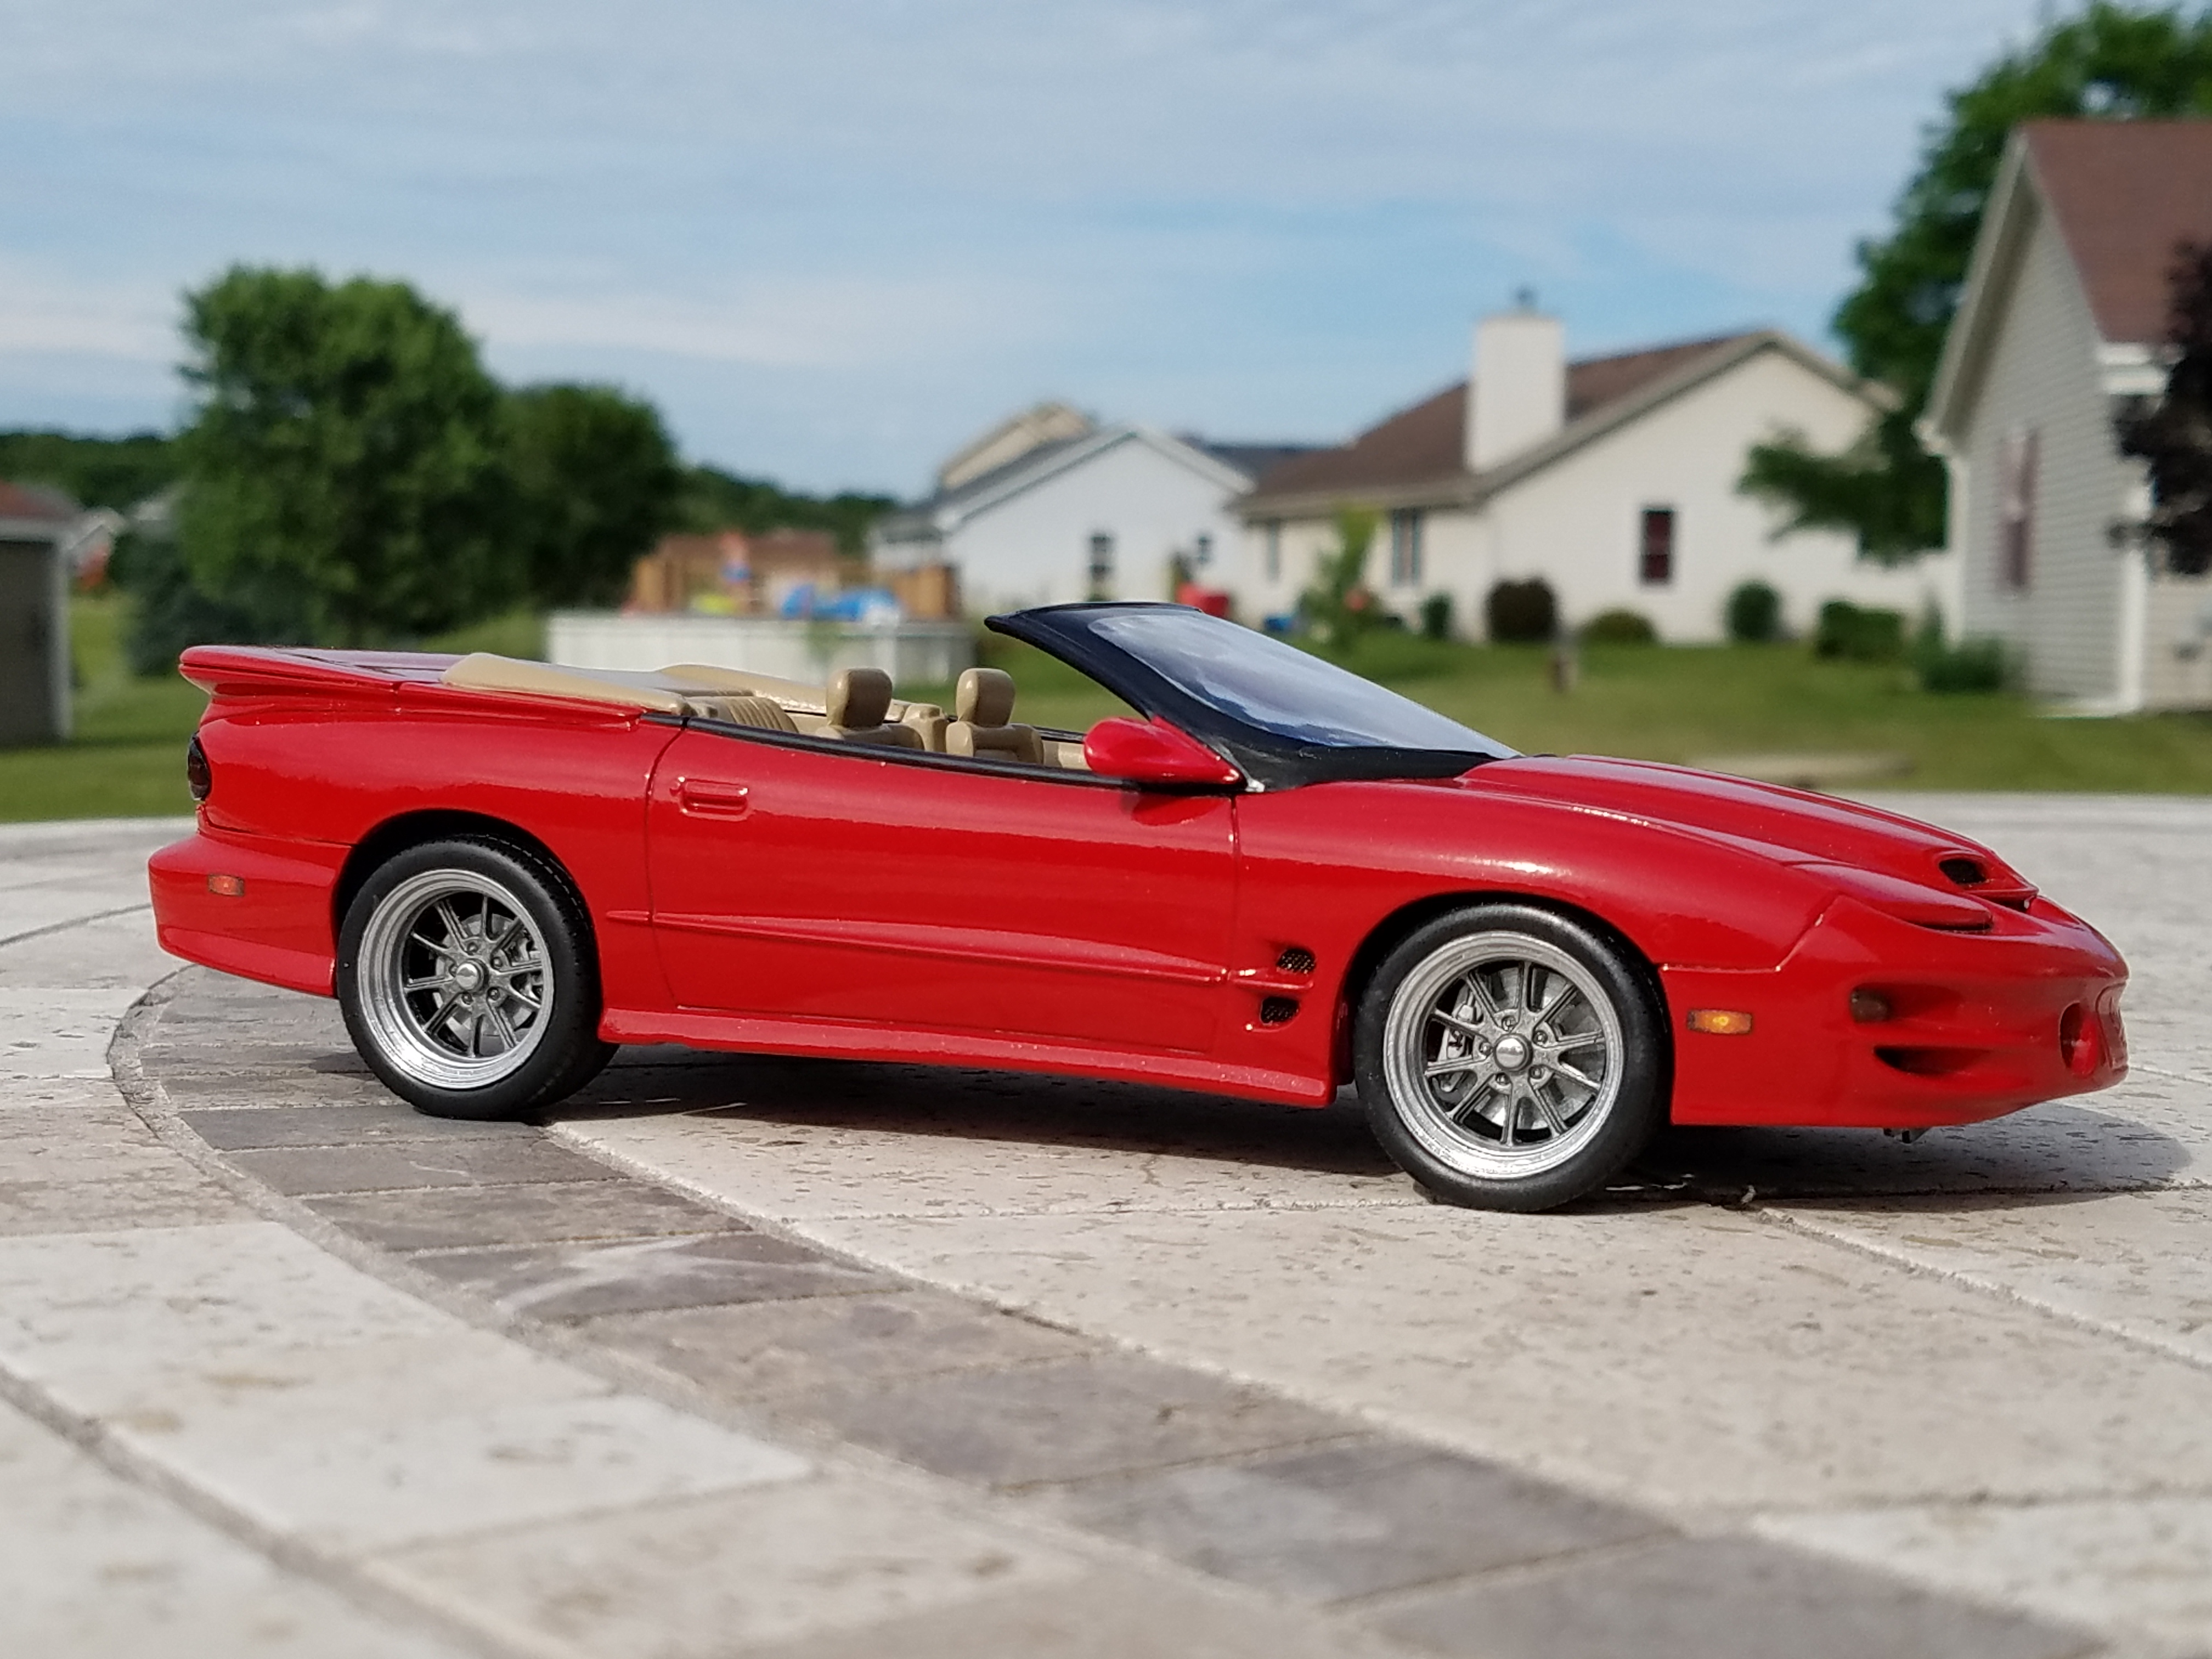
Well, unfortunately I only completed 2 whole builds.....I have many other wip going on at the moment but alas....here are my two completions. First, the 2 year build of my 1:1 1999 Trans Am convertible. SO much work went into this being that a convertible 4th gen has never been produced in model form. Second, my completion build of a quickbuilder c7 Corvette Convertible. Color is OPI nail polish cut with lacquer thinner and airbrushed, wheels are from srt8 Challenger, brakes are my machined washers with glued on calipers. Cut, masked, and painted Jake skull on hood. Merry Christmas everyone, and a Happy New year!
-
Nicely done Ray. The designer of this body is Bill Stalter. Bill is a member of the local club AMG (Auto Modelers Group) and is a friend of Jimmy Flintstone who is also an AMG member like myself. Saw this body early on and knew it was going to be a winner....its different and I like different.
-
I have a roll of this stuff called Fancy Foil. You can buy it at Michael's, looks similar to the stuff from MFH and it is probably a lifetime supply for $9.00.
-
Big thank you to suprafastcelica for the much needed parts. Great guy to work with.....excellent packing and great communication/tracking info. Would work with him again for sure.
-
If you could only choose ONE photo of any of your builds, wich would it be?
Kennyboy replied to JAFFA's topic in Model Cars
Here's my ONE picture. Build of my 1:1
-
Koenig Competition Ferrari Testarossa (1/24 scale by Fujimi)
Kennyboy replied to Tommy124's topic in Model Cars
I stand corrected then, thank you for the clarification Tommy. -
Koenig Competition Ferrari Testarossa (1/24 scale by Fujimi)
Kennyboy replied to Tommy124's topic in Model Cars
The Koenig 911 looks strange mostly because of the headlights. I am working on swapping in fenders from a slantnose to solve that issue. Btw, the taillights on it are from a 944. Great build on the OP. -
Diablo GTR
Kennyboy replied to Mixalz's topic in 1:1 Reference Photos: Auto Shows, Personal vehicles (Cars and Trucks)
What appears to be painted grey is most likely "dry carbon". A lot of high end auto accessories are made from it because of how hard/light it is. Dry carbon tends to look satin in appearance. That being said, there is a chance that the dry carbon pieces were painted satin black rather than grey. I have seen several race cars with this type of wing and they tend to be made from all carbon so you would be safe going that route. Cheers -
For your seats "luster" Dan. Try some of the natural oils that are on your nose or forehead....sounds weird but works. Build is looking real nice.
-
I have this kit Jonathan. I will definitely be watching!