
Jeremy Jon
-
Posts
1,127 -
Joined
-
Last visited
Content Type
Profiles
Forums
Events
Gallery
Everything posted by Jeremy Jon
-
Thanks James, Wayne, Steve, Daniel, Larry, 'horsepower', Ronald & Clemens!
-
Very nice, looking forward to seeing more!
-
Great build, love the correct details, nicely done!!
-
Custom 1966 Volvo P1800s "Bringing this back to the bench!"
Jeremy Jon replied to Kennyboy's topic in WIP: Model Cars
Looking good Ken, you've been busy!! -
Looks good, nice stance and wheels, looking forward to seeing completed!!
-
Nice work Josh, the paint work in particular is very well done!!
-
Ferrari 340 Competizione FINAL PICS UP.....Getting casted!
Jeremy Jon replied to Kennyboy's topic in WIP: Model Cars
Great build Ken, your workmanship is fantastic!! Looking forward to seeing this build!! PS Sent you a PM -
Looks great Carl, I always liked that generation of Camaro, but I had my '82 Mustang back then, so I had to pretend not to! LOL
-
Thank you Ben, Michael, Ray, Joseph, Carl, James, Jose, Mike, Ken & Ryan! It's been a little while I'm afraid but healing & have about 1/2 usage/strength, enough to resume some work Stitches are long gone & skin's healed since this photo taken, trouble was they had to open and do more surgery twice, so healing process has been dragging out
-
Nose bumper cover, with plastic grill and radiator upper cover from kit Nose bumper cover, with plastic grill removed, and hood latch opening removed from radiator upper cover Difference in shape of plastic radiator upper cover, and grill shape, photo-etch grill shaped correctly to more "V" shape forward New styrene edge constructed & added to trimmed upper radiator cover, matching shape of grill Fill of gap between new styrene edge and existing piece, photo-etch grill bonded to upper radiator cover, and added styrene strips added to bottom inside edge for realism Holes drilled in upper radiator cove for new hood bumper mounts on body cross-bar, for realism Completed upper radiator cover with photo-edge grill, painted for final install after body painted
-
Nose bumper cover, with plastic grill mesh portions cut out, ready for new photo-etch grill mesh parts Lower air dam lip extensions scribed to match realism of car Extensions added to create realism of air dam lips standing proud from fender well inner edge Side exterior lower sill plates scribed for realism, with front edges cut in scribe line for stand proud from fender well inner edge Scribing of panel lines around headlights, and all nose bumper cover lines, for detail and further painting differentiation of colour Nose bumper cover primed, and ready for further detailing Nose bumper cover lower driving lamp openings detailing, using thin wire to build lip surrounding openings, for realism of actual car Once wire added around opening, then glued and sanded finely to make flat front edge, for realism of actual car
-
For realism, perimeter of door skin sanded to thin edge, and front fender inside edge also Test fitment of door into body opening, door will be hinged, but for display fixed in open position (so small variations in opening is acceptable) Door primed and ready for fine filler and sanding preparation for final paint stage Door frame structure hinges added, and interior door panel receives photo-etch speaker grills, and made flush Interior door pull + lock handles scribed open for realism, all panel lines scribed for detail Mirror control portion of interior door panel separated for detail added Interior door panel primed, and rubber seal fashioned for door frame structure I was not happy with the photo-etch door speaker grills as provided, they lacked depth of definition for realism, so disks removed from plastic, perimeter of photo-etch disk trimmed for center portion only, and new plastic disks made for correct depth of assembly Upper speaker grills scribed out of plastic interior door panel, so result as flush fitment Lower speaker grills constructed final, with blocks (6) added surrounding central grill standing proud, for proper realism
-
Been off due to hand injury & surgeries (tendon & bone, yes ouch!) as result ....just easing back into model work again, and primary is to finish this (commissioned) build of a 2007 Shelby Mustang GT500 It is white with blue stripes (decals), dark grey interior, and will be modified with opening drivers door, hinged engine hood, extensive detailing of interior, engine & engine bay I picked up both the Revell (of North America) kit (#85-2097) and the Revell of Germany kit (#07243), primarily to see what differences - if any - existed, but also as backup of duplicate parts and decals should need be The only difference between them, turns out to be only the decal sheets! Detailing parts & photo-etched sets gathered for build Some issues with the KA photo-etch parts, poorly designed for usage, explanations with photos Revell of Germany decal set Basic body, with drivers door cut out Interior drivers door panel cut out, and window perimeter seal separated from door skin Exterior door handles being cut out, for more realistic handles to be installed post-painting Templates made to create realistic door frame structure Door frame structure constructed to match outline shape and position of interior door panel Fitment check of alignment between door frame structure and interior door panel Thin styrene edge added to perimeter to close up gap left by saw blade thickness More detailing added to door frame structure, shaped and lock striker
-
Coyote - Hardcastle & McCormick - kit re-build
Jeremy Jon replied to Jeremy Jon's topic in WIP: Model Cars
A cool graphic one FB member sent me, showing summary of the different Coyote (season 1 car) used as hero cars! Thanks Daniel -
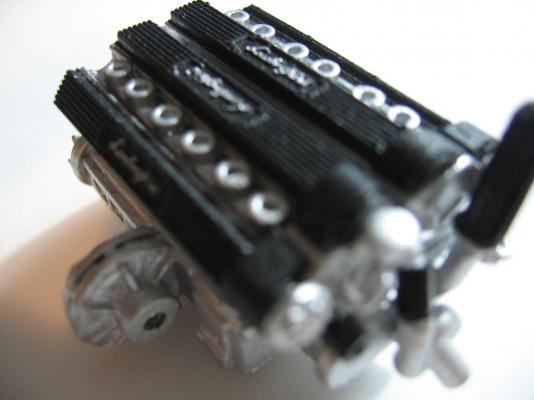
Thanks Pat! Been off due to hand injury, but starting to resume some further work on my projects now This first casting of Vector wheels, I gave shot of gloss black paint to see detailing on inspection ....mastered off of 3D printed sets, they came out not to bad, and I'm quite pleased!
-
+1 excellent gent Joseph is!!
-
sanded grout would work also, what about simple wall filler or plaster-of-paris (crafts product) and add sand for texture, then complete with white airbrushing as needed either of these, would allow you to form the tire track impressions, like are at the real salt flats of course these would be more difficult to manage, and risk of cracks while drying if just a subtle ground impressions, then the airbrushed sandpaper - heavier grit - sounds good, and you could make tire track impressions on it by removing some grit in the tracks, and while paint it wet
-
Good suggestion Dave, I did stop by briefly the linen store, but couldn't find anything quite exactly right, and then promptly as the old women glaring at me oddly was un-nerving! the crushed velvet stuff was just too tall or strong, and the other linens I saw in my short visit have very distinctly their woven patterns ....I will have to go back and look around some more though Neat photo there Tom, great idea, not sure why I hadn't thought of what doll houses use, I think Michael's crafts should have that!? I think plain paper would be too flat in the diorama, but being able to print patterns is a cool idea I hadn't thought of either, and I have an 11x17" Epson printer too that would be ideal for that, as the Dio base is about that size area ....maybe I can run the construction paper through the Epson?? as the carpet does have a faint pattern, but I was just going to make it plain dark blue, thinking the pattern duplication to difficult to do Hmmmmm?!? Agreed Jim, some great ideas!!
-
Neat idea Dale, this Dio is an indoor carpet actually, but a good idea for rubberized type floors, one could cut different coloured squares - like black & white - to create that tiled appearance too True Joe, though more typically used for asphalt but might do the trick, but sprayed with flat drk blue from a mist to form more texture might work, then I will have to protect it with some clear product, maybe artists spray, so keep it from becoming dusty as can be prone to ...I'm going to grab a few items, and test them out each
-
That's what I'm thinking might work best too Joe I could also roughen it up slightly with mild sandpaper - only if necessary About half the area will be visible in the Dio, so I want it to look presentable & realistic, not just immediately recognized as a just as a of ol' chunk paper
-
Clean build, very nice Jurgen, lovely!
-
I'm working on a garage diorama, which has carpet laid in part of it, a level-loop or utility type carpet (dark blue) Flocking I think would look too strong ( fuzzy), and any powder potentially be difficult to make look evenly distributed I'm considering trying out a construction paper, possibly spray with an artists sealer or dull coat to cover it? I thought maybe a fabric, but when looking didn't find anything quite right Looked at felt also, but it's too strong (fuzzy) also Any other first hand used suggestions? Thanks
-
Also try masking the detail area to protect it, just as we do when power polishing 1:1 vehicle, use a low-tack tape like the Tamiya, and double it's thickness even, I usually cut it and make double thickness for protecting prone areas
-
Looking good Matt! piping on leather looks great! What's that on the top of the dash pod? smudge?
-
Mini Mopar "Pocket Rockets" Omni/ Daytonas
Jeremy Jon replied to MsDano85gt's topic in WIP: Model Cars
I have one of those, way bigger than 1/24-5 scale, closer to 1/20, and very basic details, is in factory turbo spec, no does the Shelby version in resin or metal ...thus building one myself!