gotnitro?
-
Posts
4,498 -
Joined
-
Last visited
Content Type
Profiles
Forums
Events
Gallery
Everything posted by gotnitro?
-
 Thanks I have everything ready to go, once I find a few spare minutes.
 -
Fantastic work so far , looking forward to your progress
-
R model Mack garbage truck Finished
gotnitro? replied to gotnitro?'s topic in WIP: Model Trucks: Big Rigs and Heavy Equipment
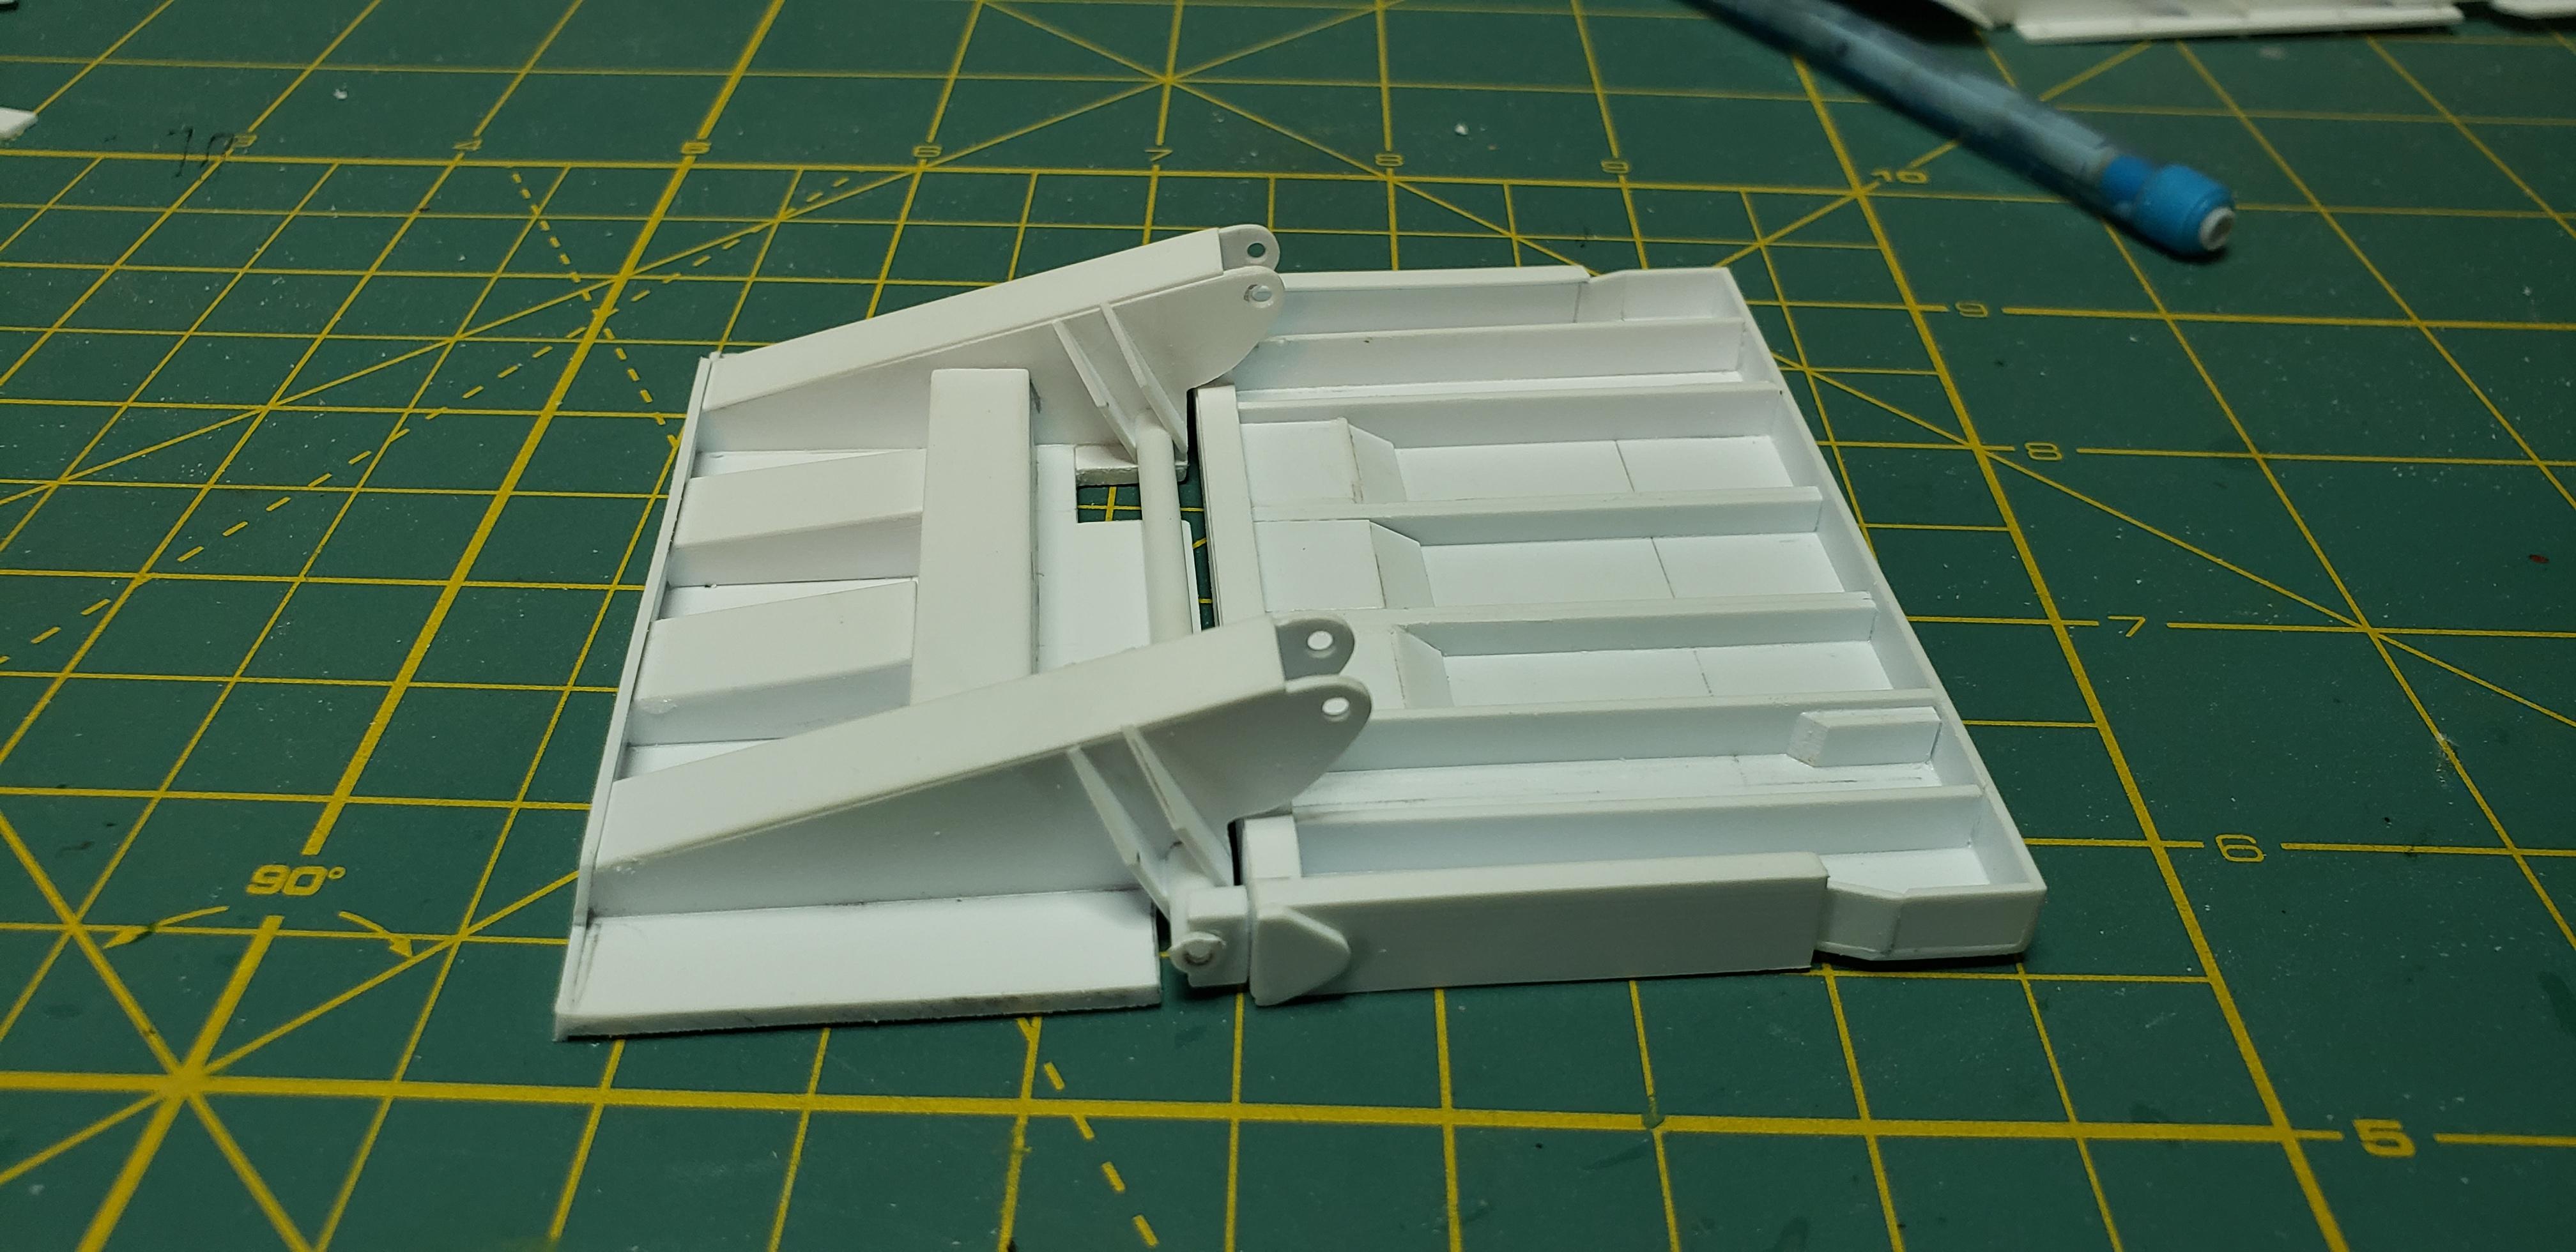
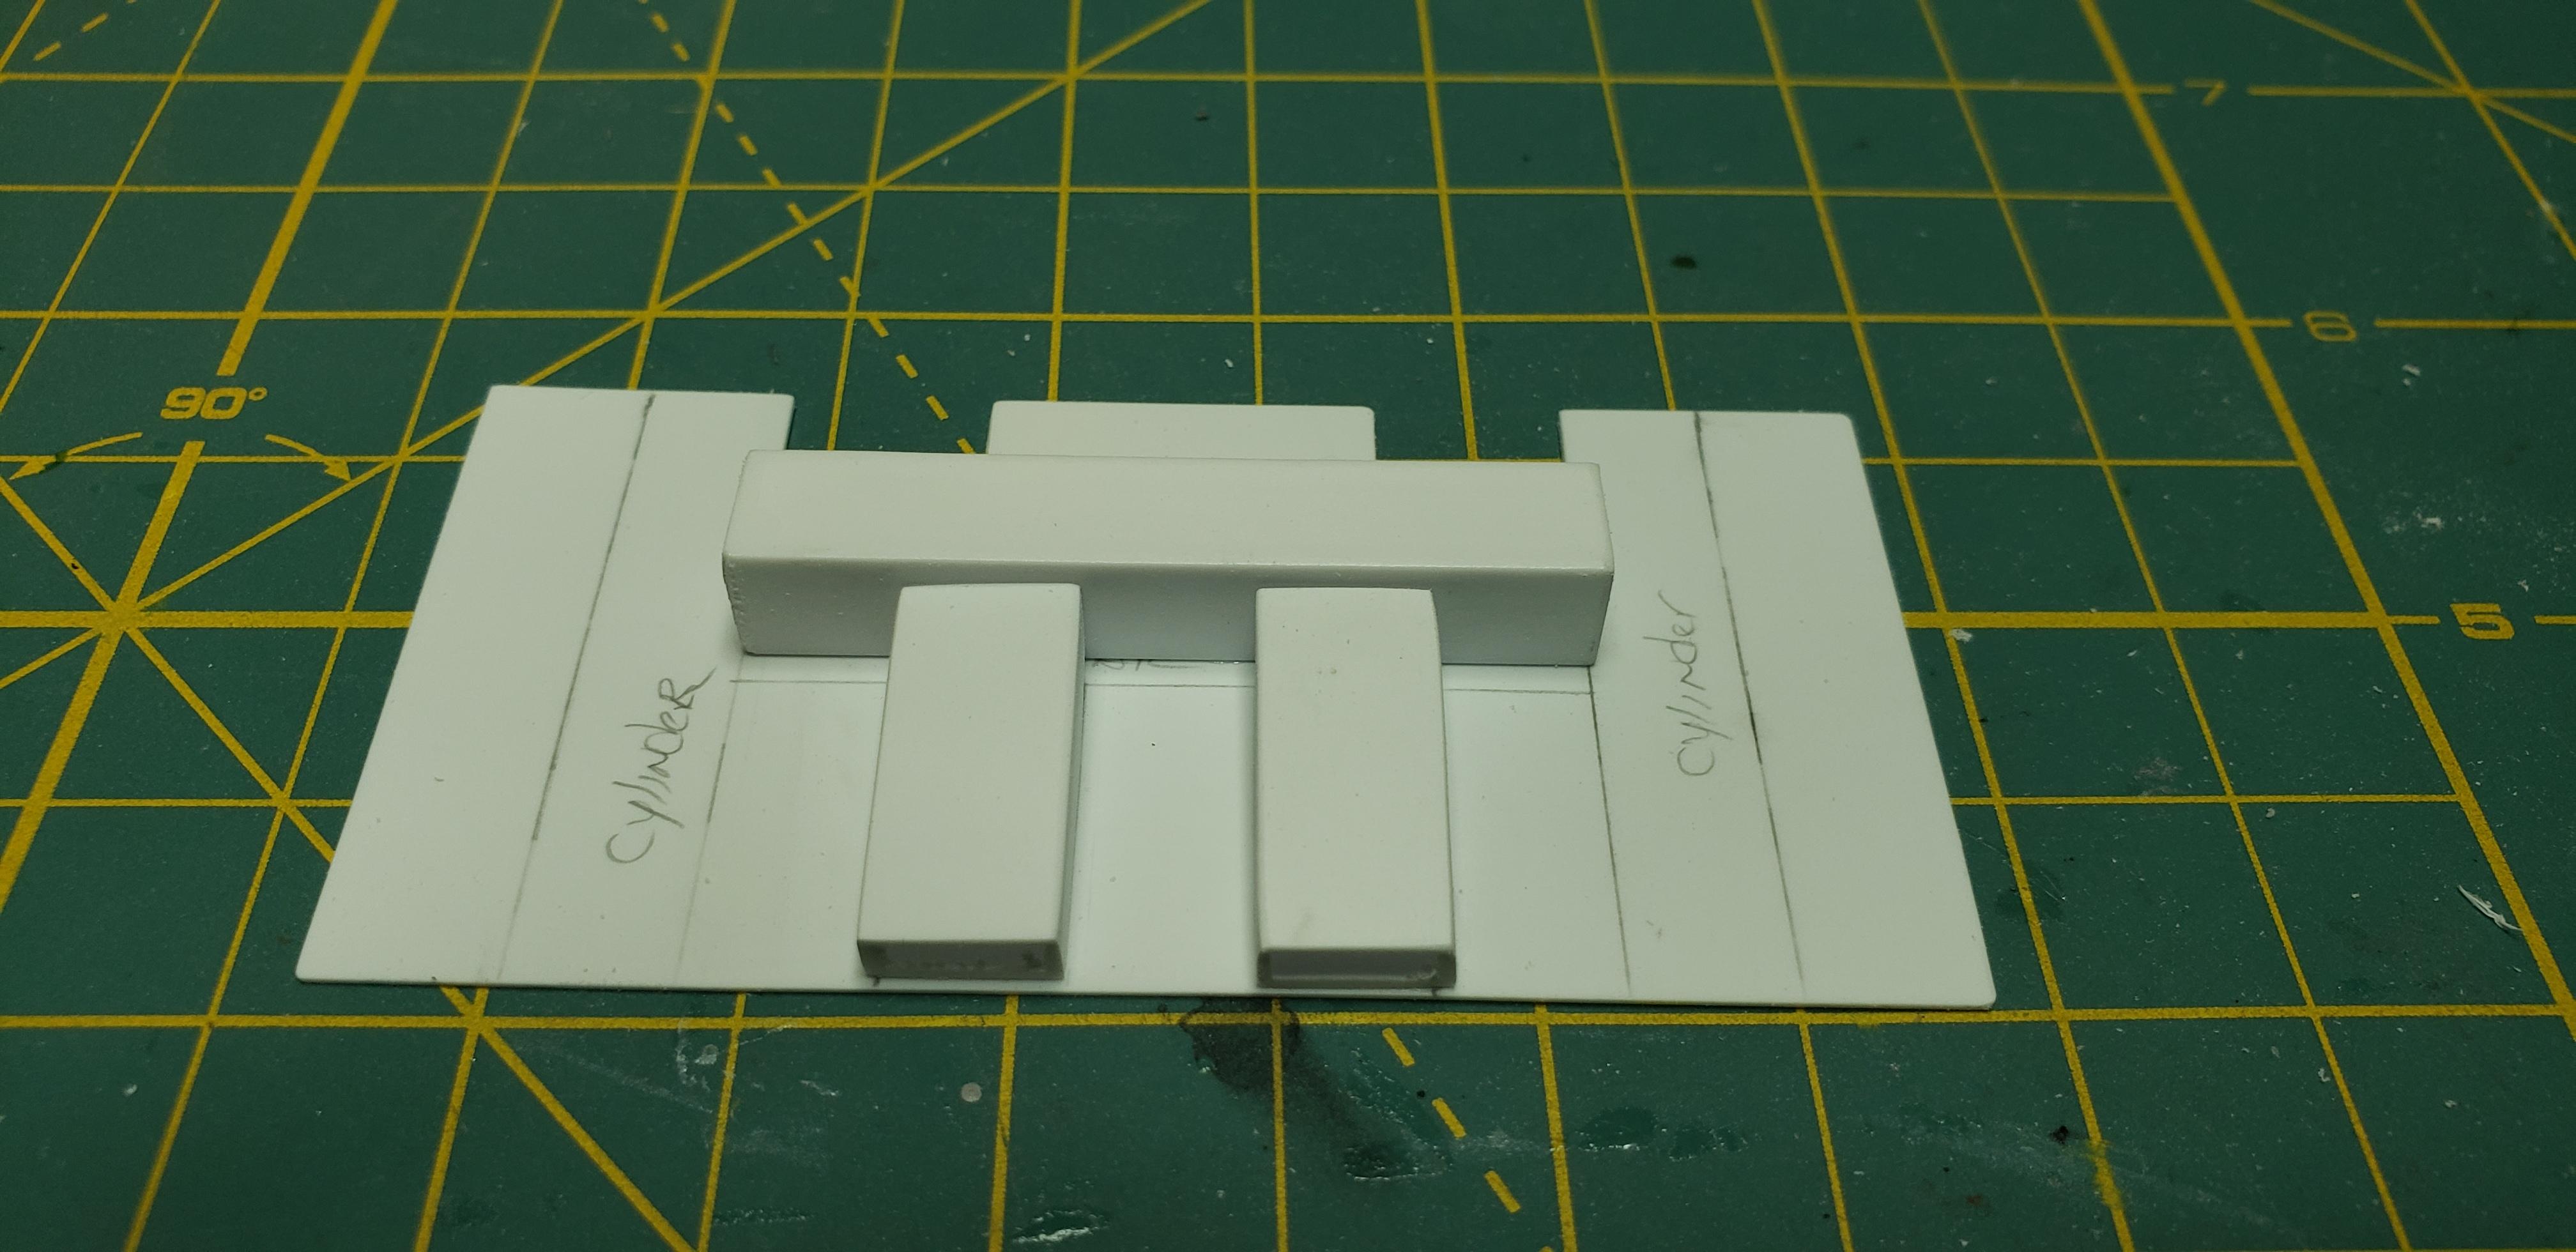
Worked on the blade carrier today, luckily found a few photos of these assemblies on the dark web. This plate houses the cylinders that push/ pull the entire packer assembly and also the cylinders that curl / fold the blade to drag the trash into the container box. Heres an image i found for ref. Using my blade for size comparison, I drew a pattern on paper suggested by Mopar-D . After it fit , I transferred to plastic . I used 30 thou for the pan, then 40 for framework. The rest of the bracing was similar sizes judged by the photo. Sistered up with the blade straight on view showing where the enormous rams will attach I'd really like to make my cylinders functional, only to have movement to display all the components..pretty sure this was posted awhile ago how this is done. Thanks for following along
-
Mack R-Model Hammill Construction
gotnitro? replied to DRIPTROIT 71's topic in Model Trucks: Big Rigs and Heavy Equipment
Awesome build and the weathering looks exceptional! Cool back story to tie everything together too Curious whats the black spot on the drivers side headlight bezel -
Mack R/Leach Garbage Truck
gotnitro? replied to kuhnj's topic in WIP: Model Trucks: Big Rigs and Heavy Equipment
Looks fantastic sitting on its tires. Your using the same type wheel im going with, just placed order w moluminum for them -
The sides look perfect ! Looking forward to your 20 yrd packer
-
Mack R/Leach Garbage Truck
gotnitro? replied to kuhnj's topic in WIP: Model Trucks: Big Rigs and Heavy Equipment
Its a Mack attack !!!! -
Mack R-Model
gotnitro? replied to DRIPTROIT 71's topic in WIP: Model Trucks: Big Rigs and Heavy Equipment
Your mack looks fantastic w the etch and budd wheels ! -
R model Mack garbage truck Finished
gotnitro? replied to gotnitro?'s topic in WIP: Model Trucks: Big Rigs and Heavy Equipment
@Mopar - D- yep thats the plate that pulls the trash into the container for compaction. Thanks for tip about paper patterns, I'll use that idea for the next section Thanks..lots of pics and video screen grabs help Thanks , yours won't be far behind -
Mack R/Leach Garbage Truck
gotnitro? replied to kuhnj's topic in WIP: Model Trucks: Big Rigs and Heavy Equipment
Good looking trash hauler inspiration ! Your ribs on that body look a little narrower than mine, something along 3/16" possibly would be close . Happy to help ya along the way -
Canadian Kenworth LW 900
gotnitro? replied to lwwoodss's topic in WIP: Model Trucks: Big Rigs and Heavy Equipment
KWs make an excellent oil field truck w those huge flat fenders Nive work so far everything lines up well -
R model Mack garbage truck Finished
gotnitro? replied to gotnitro?'s topic in WIP: Model Trucks: Big Rigs and Heavy Equipment
Thanks ! Good thing about tamiya glue , conceals easy but the fingerprints stick around lol Thanks Dan math was never a popular subject in school making this way more challenging. Crossed off another milestone, getting the tailgate hinges working. A few tabs from scrap bits and a roughed in hinge profile from the scaled drawing , and it actually works ! I need to clean up the attachment, and the cover panel running over the roof still. Turned out a little crooked , but what garbage truck isn't a little twisted !! Started work on the meat of the packer after dinner last night. Photos showed several options, I chose one w the wide teeth for more bite visually. Watching videos of the cycle helped catch details i still need to add. Most of the layout was done w a popsicle stick and channel for spacing lol
-
Thanks Kerry ! I gotta get back to working on this before I forget where I stashed the detail parts lol
-
Looking good ! I'll pm ya some info I have for the Leach I'm using . Theres a few dimensions I've used for the major parts , the rest are web pics
-
R model Mack garbage truck Finished
gotnitro? replied to gotnitro?'s topic in WIP: Model Trucks: Big Rigs and Heavy Equipment
Tossed some more plastic together this weekend, started building the push out plate. After a couple try agains..I had a suitable pusher. I really fought getting the angles right on the sled the plate attaches too, and still functional to slide out making painting easier . Id really like to add the angled horn onto the pusher before closing things up. Inside view showing the pusher at home waiting for its turn emptying out the container While the glue cured i also worked on the tailgate ribs, these really helped tighten up the curved area
-
Canadian Kenworth LW 900
gotnitro? replied to lwwoodss's topic in WIP: Model Trucks: Big Rigs and Heavy Equipment
Following along for sure ! -
Your Cuda looks plum- tastic!!
-
Scratchbuilt flatbed
gotnitro? replied to Rockford's topic in WIP: Model Trucks: Big Rigs and Heavy Equipment
Fabulous work on the trailer ! You've done a remarkable job building and detailing the model. If ya ever think about staining the deck, I've used the paint residue in the bottom of thinner bottles several times, just mix up and brush on. Test a few popsicle sticks first for getting the look -
Kaiser-Jeep M54A2C
gotnitro? replied to Terry Jessee's topic in WIP: Model Trucks: Big Rigs and Heavy Equipment
Looking good! I can still smell the grease and oil these trucks used to leak ..spent many an hour underneath them ..good times -
Brockway 457 Garbage Truck
gotnitro? replied to Warren D's topic in WIP: Model Trucks: Big Rigs and Heavy Equipment
Your garbage truck is really coming together! Nice choice on wheel combo -
Mack R-Model
gotnitro? replied to DRIPTROIT 71's topic in WIP: Model Trucks: Big Rigs and Heavy Equipment
Good looking Mack ! Can't wait for the rest of the story of how the shed was knocked down Switching the kit grill to the etch one is a huge improvement -
Trailways bus
gotnitro? replied to yellowsportwagon's topic in WIP: Model Trucks: Big Rigs and Heavy Equipment
Outstanding work converting that bus from a toy to the spectacular model displayed. -
R model Mack garbage truck Finished
gotnitro? replied to gotnitro?'s topic in WIP: Model Trucks: Big Rigs and Heavy Equipment
Lol those hairy rats are pretty viscous but our new tabby kitten stepped up. He's a couple months old and absolutely a riot -
R model Mack garbage truck Finished
gotnitro? replied to gotnitro?'s topic in WIP: Model Trucks: Big Rigs and Heavy Equipment
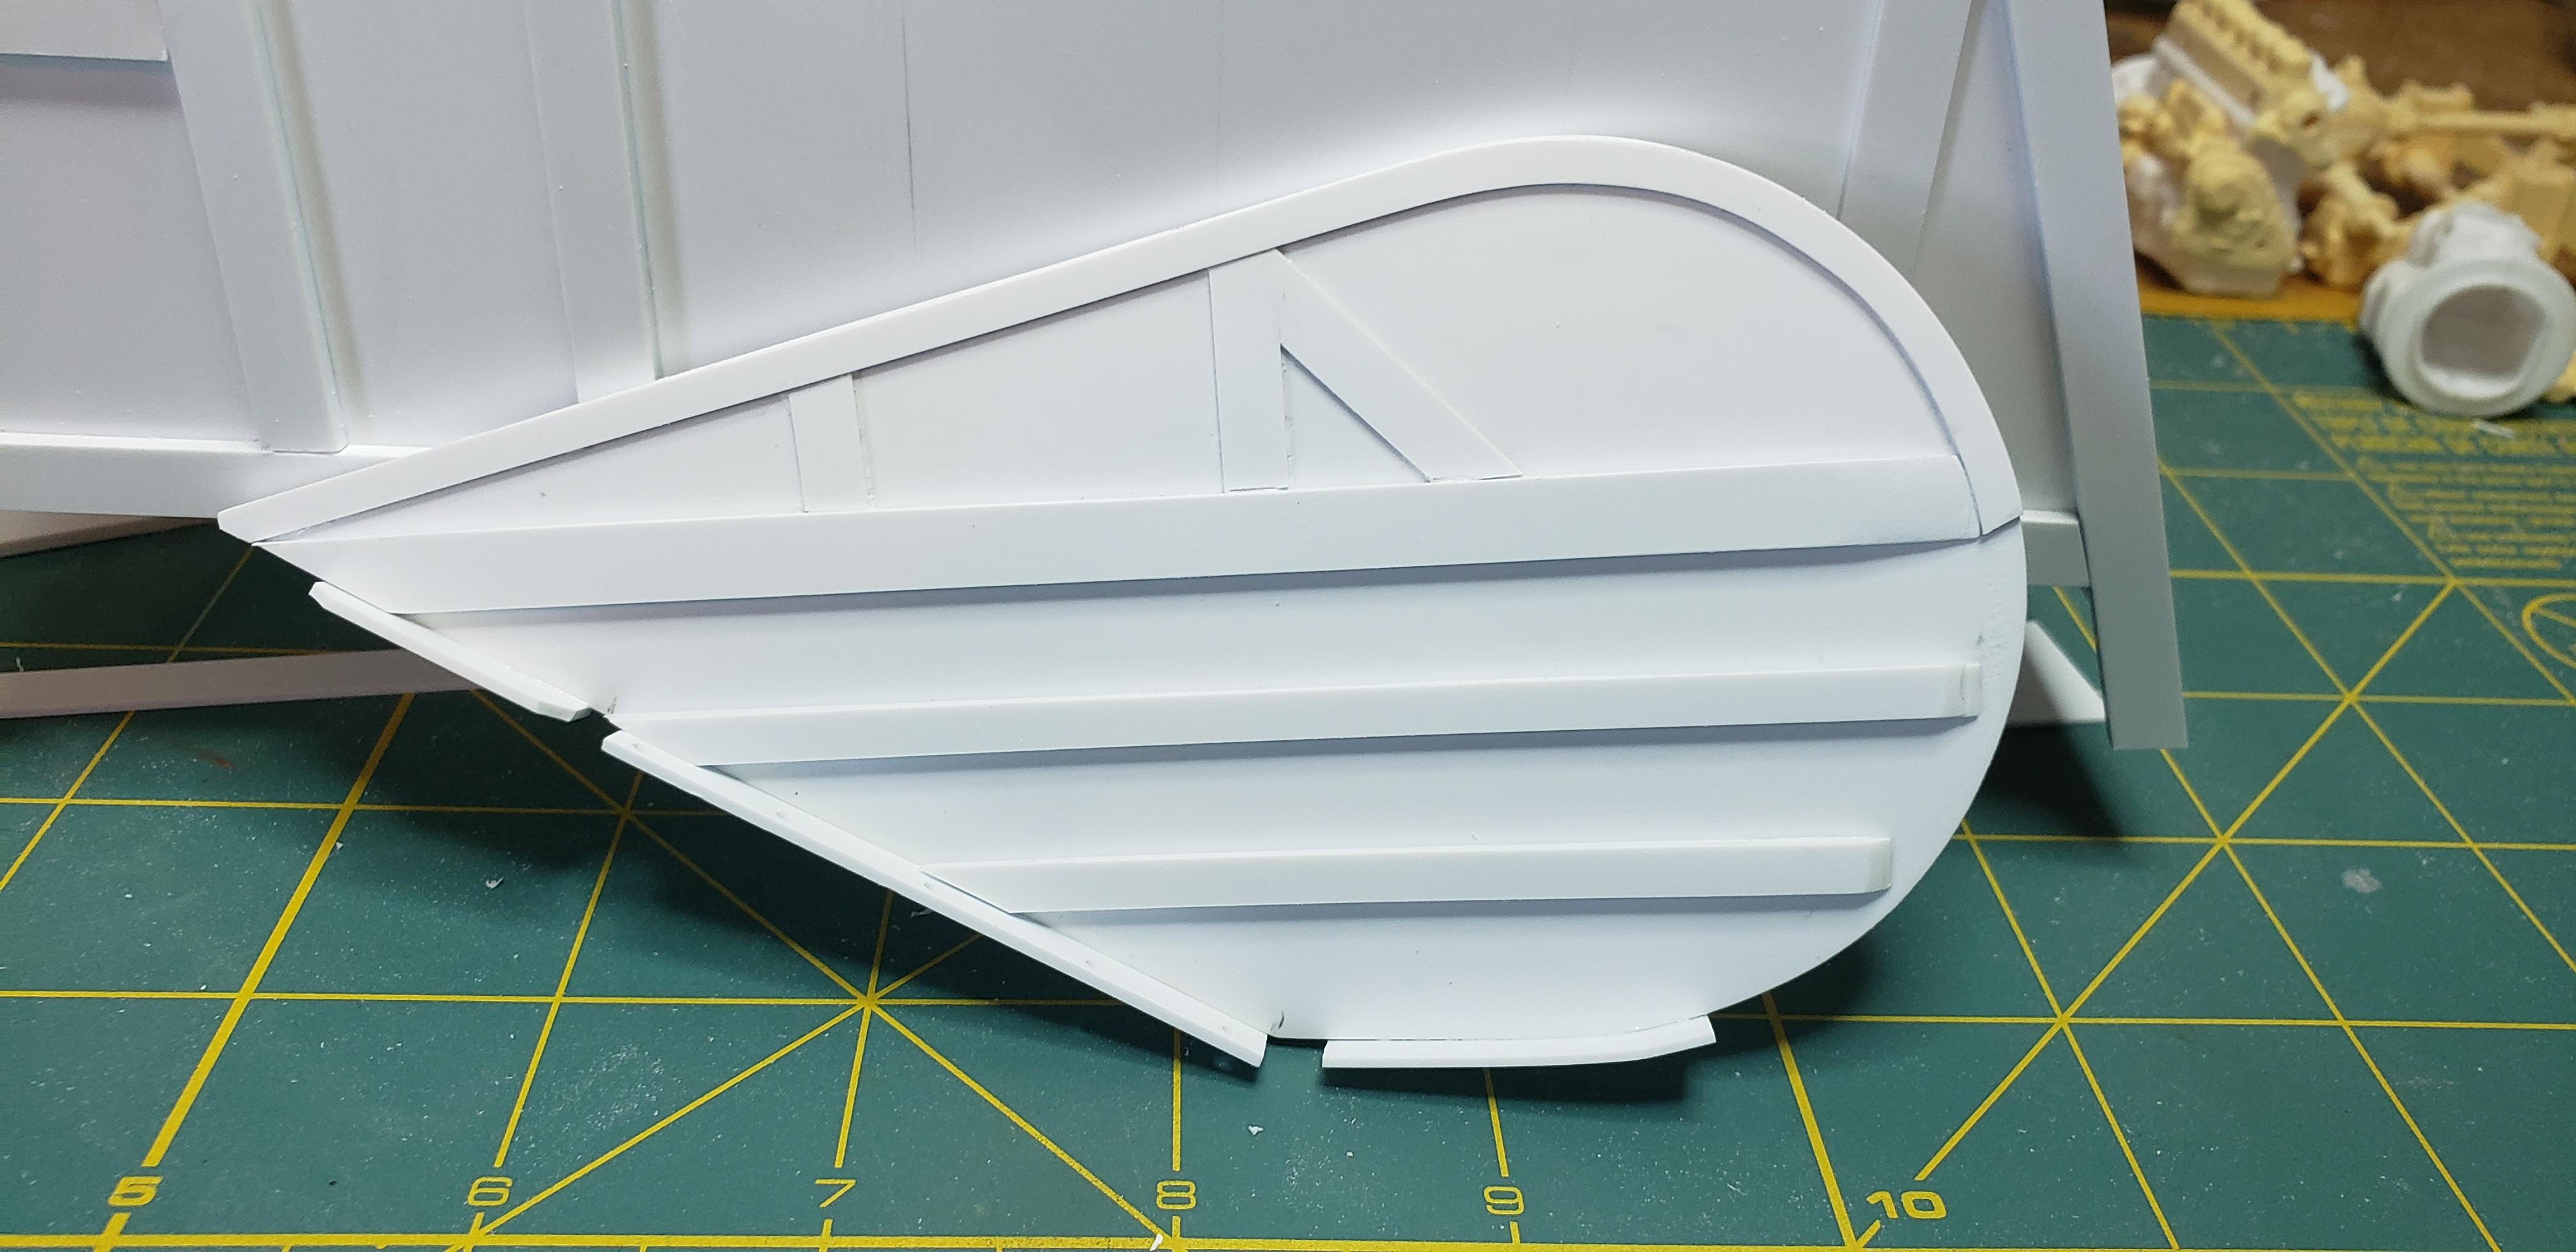
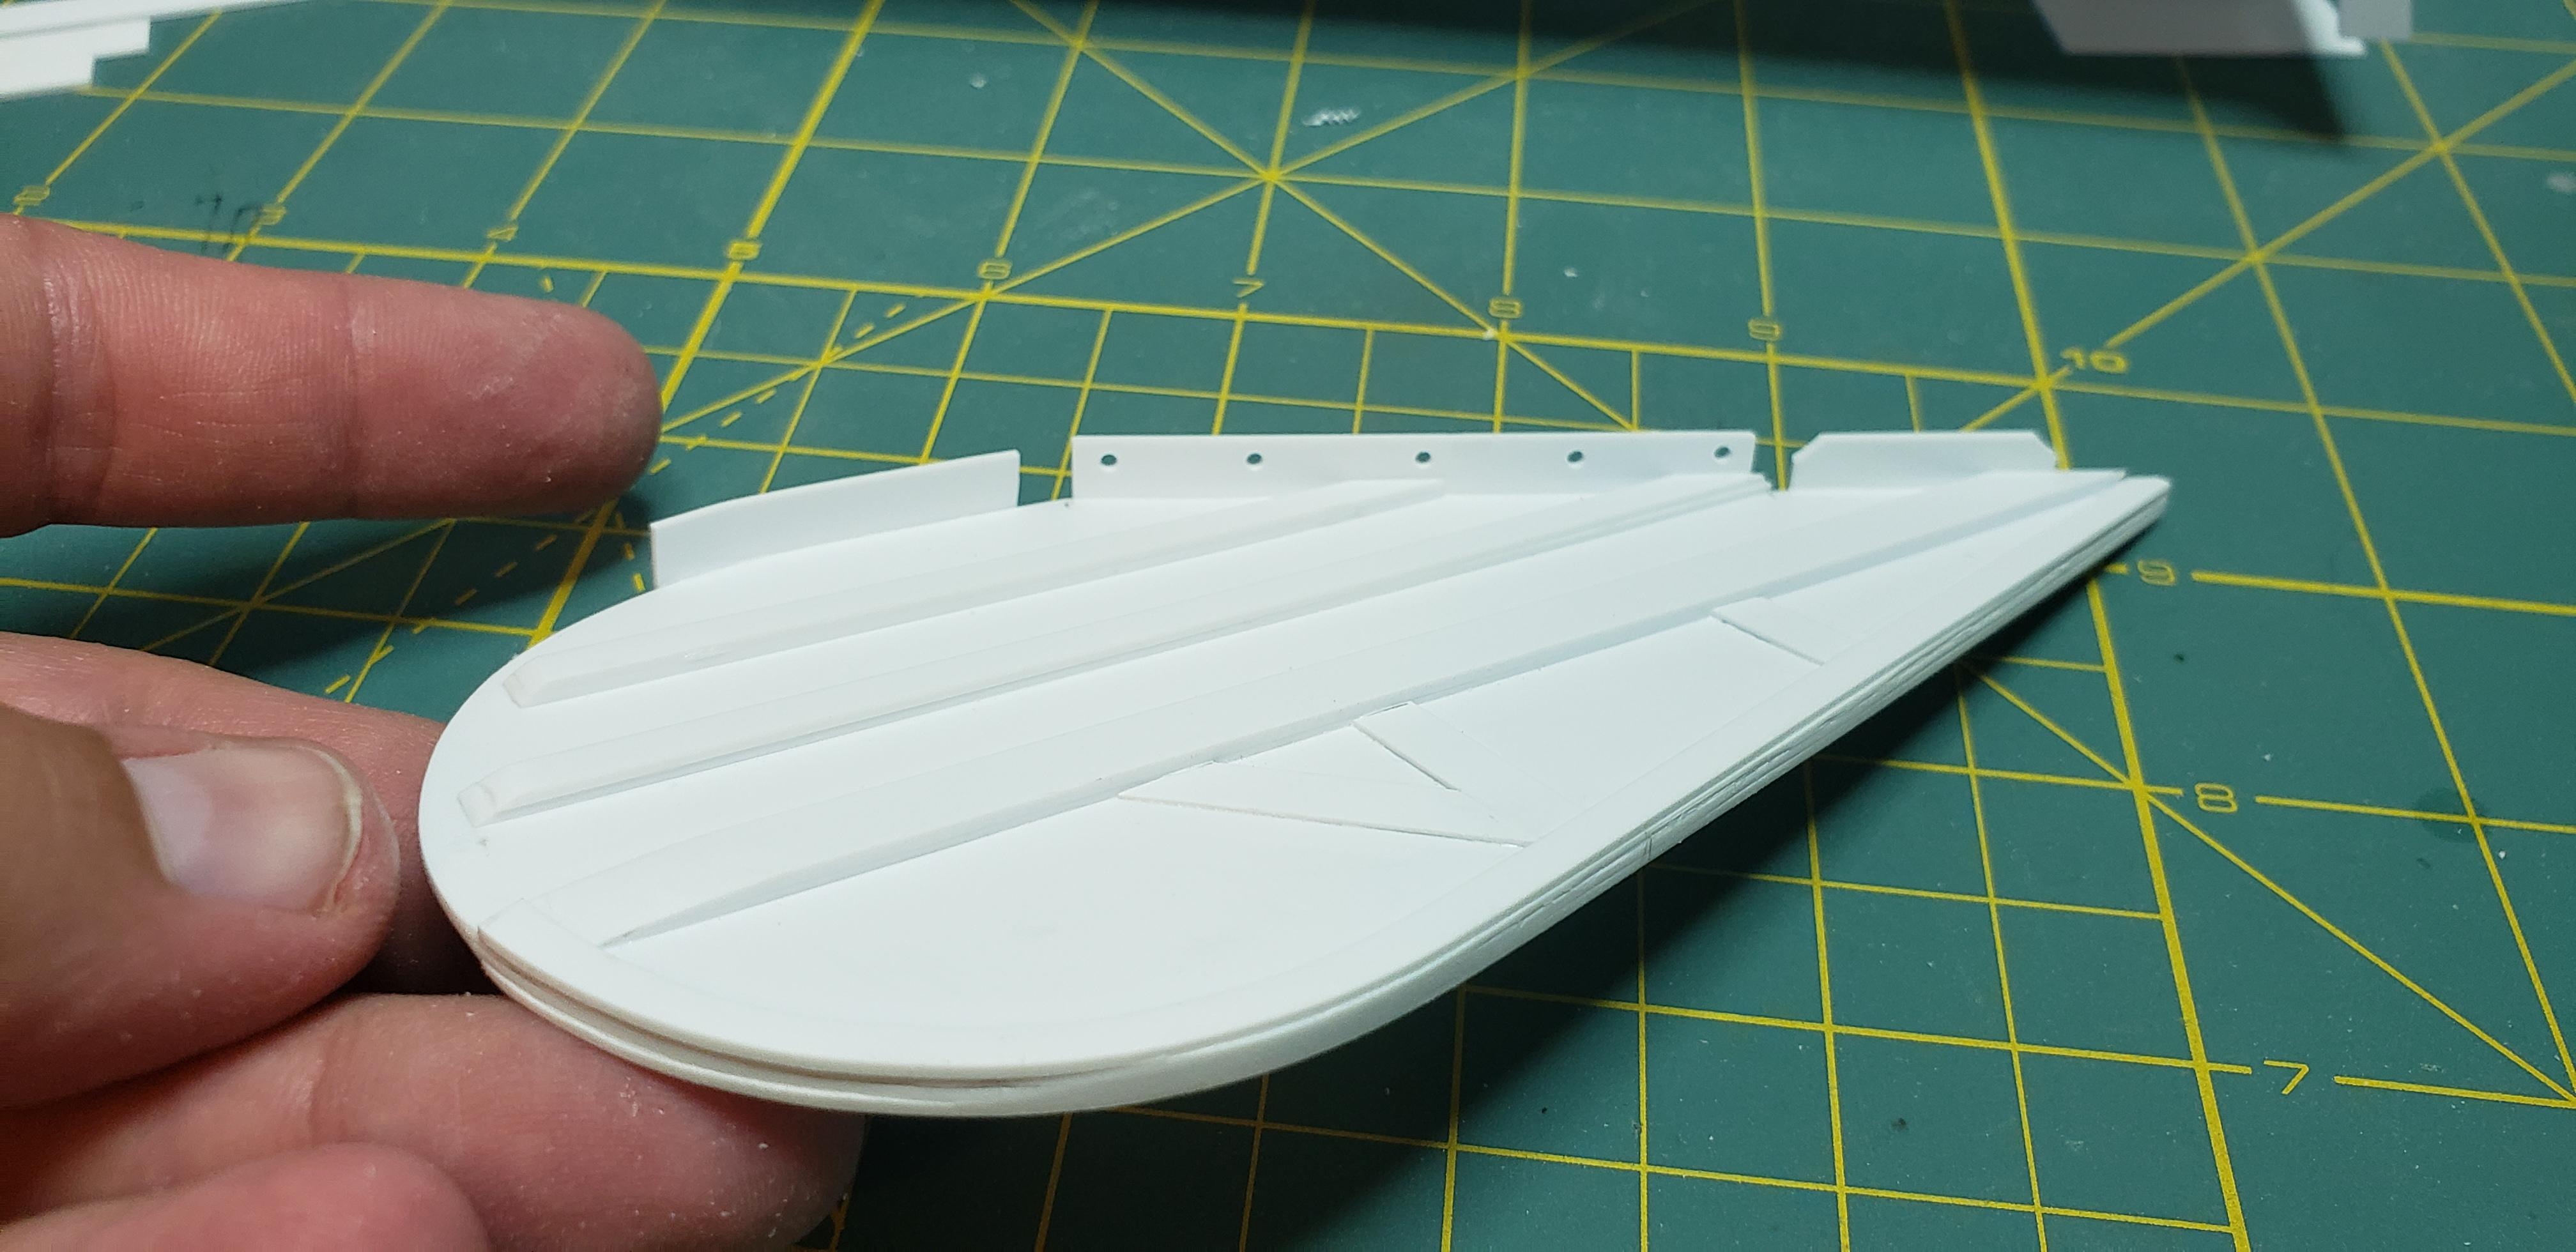
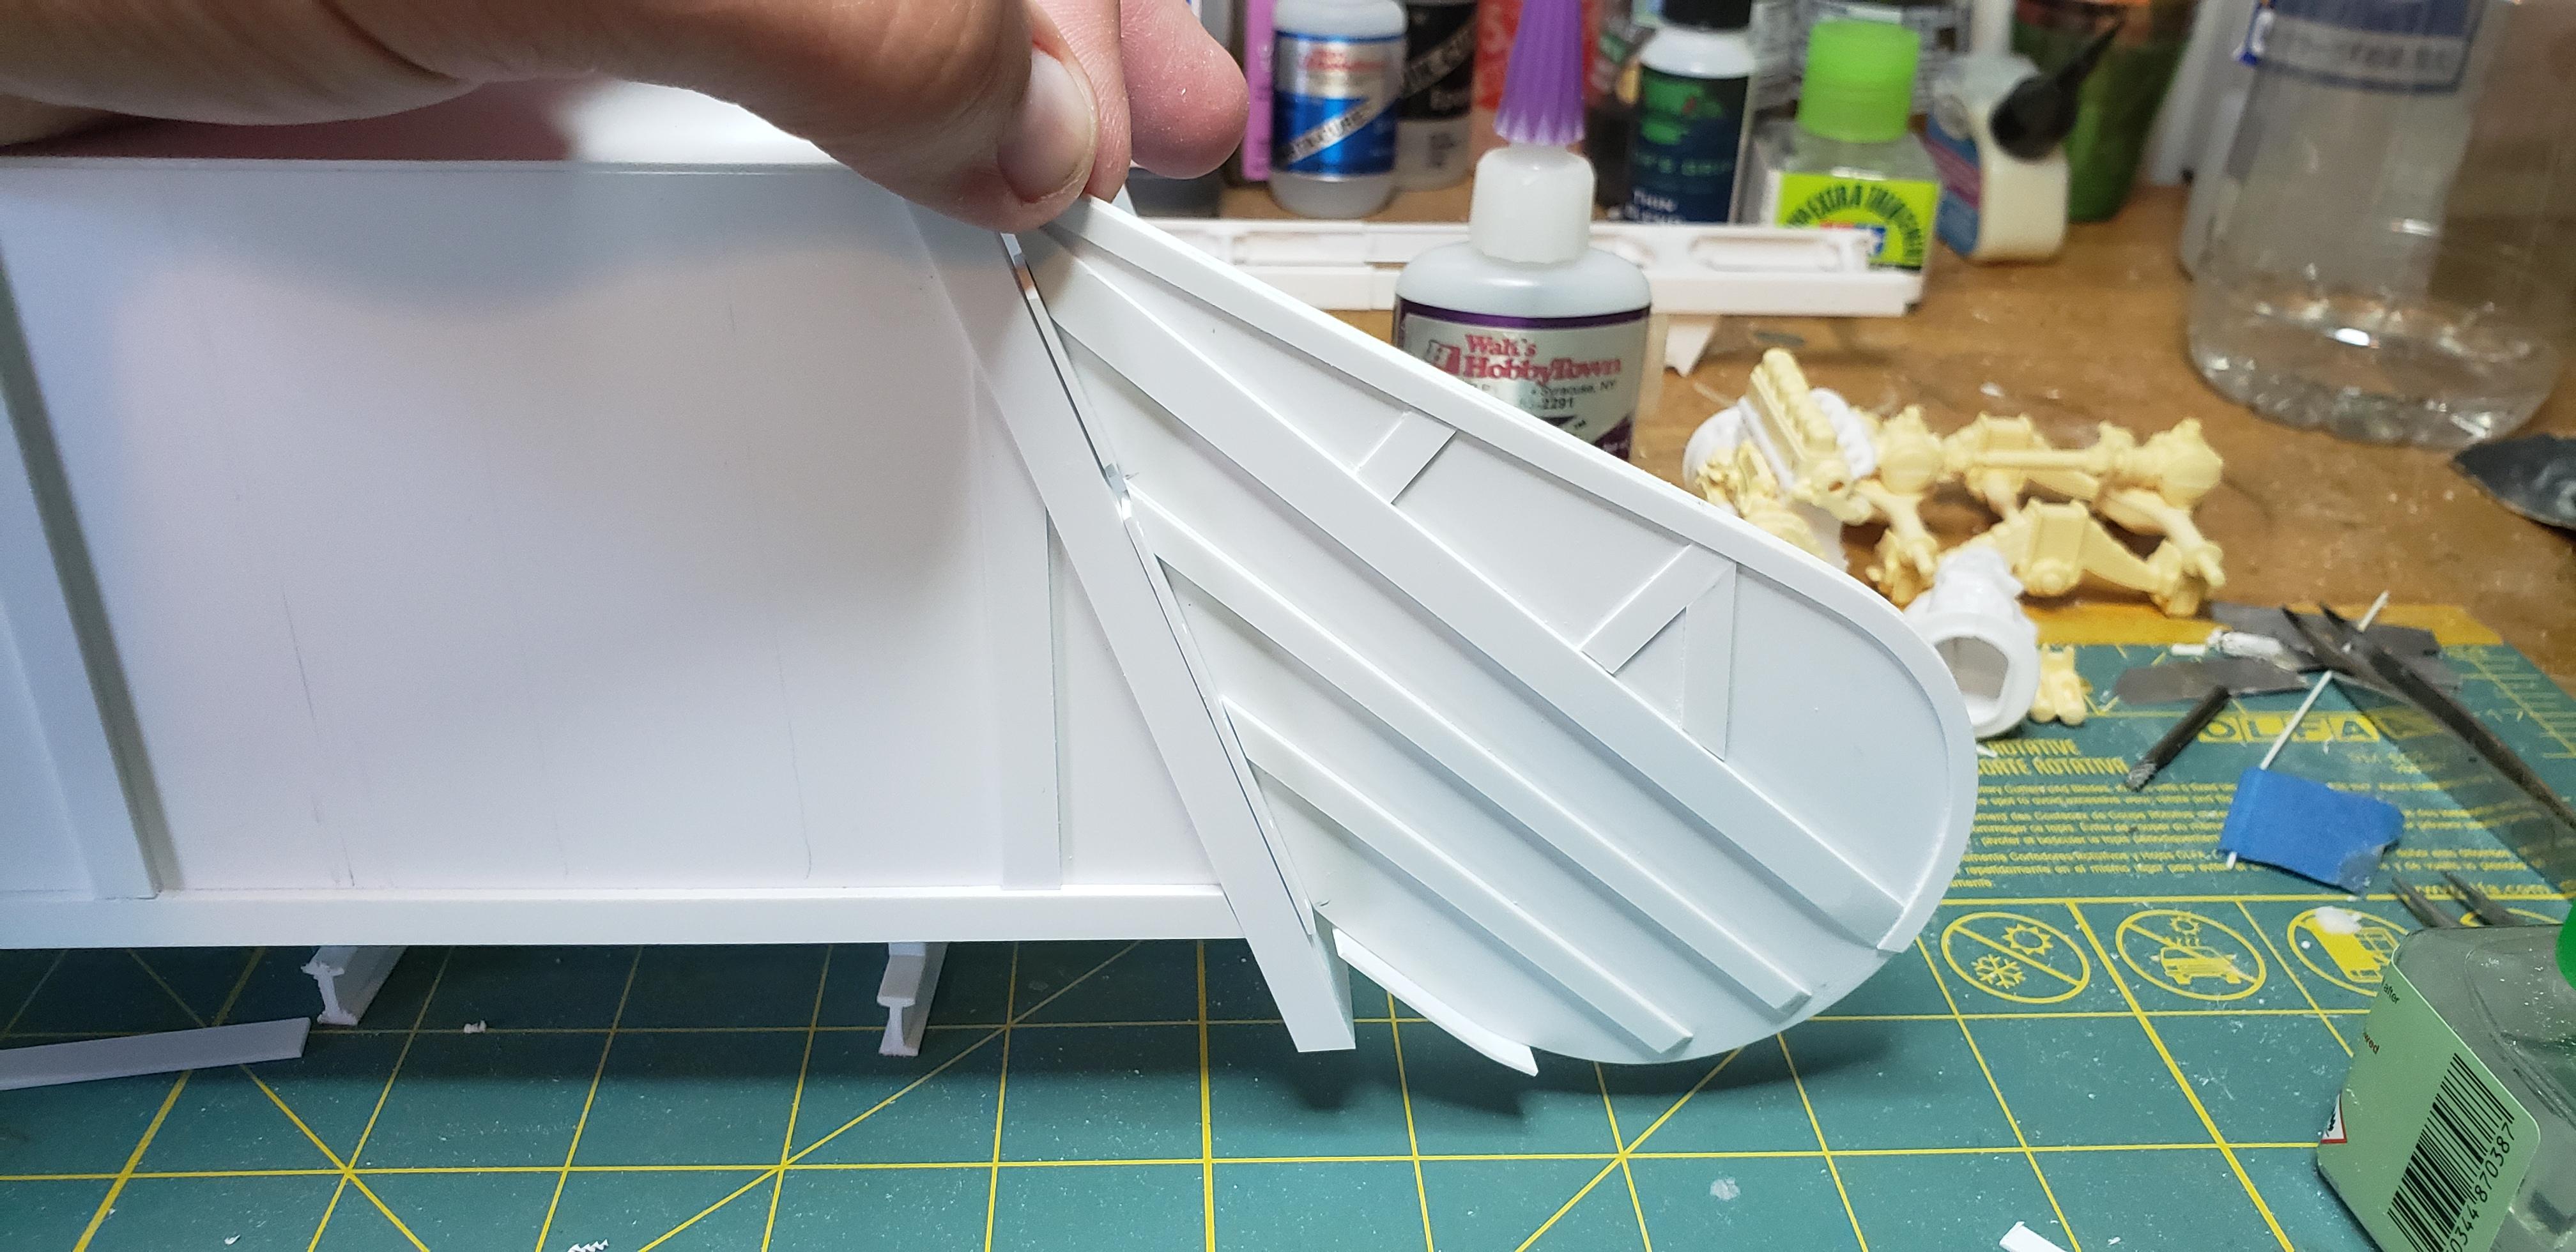
Started detailing the tailgate sides this morning. Trying to mirror both sides, when their tear shaped proved challenging..but ya can only see one at a time lol. The side plates keep the hopper from going into the packer box, and include a " tire shield " . Safely 1st ! The step for the rider on the back will be deck plates from moluminum, I haven't found anything else as convincing and easy to use. mock up of its final spot We're off for a drive and picnic before the summer heat makes us hide inside w ac running. I'll finish the box bracing tonite after a lfs trip..and hopefully get the tailgate belly wrapped Thanks for following
-
R model Mack garbage truck Finished
gotnitro? replied to gotnitro?'s topic in WIP: Model Trucks: Big Rigs and Heavy Equipment
Whew the squirrels almost derailed this project when I was sorting thru boxes. I found this forgotten trade box, and immediately thought this would make a killer garbage truck... thats the long hauler chassis tucked under the packer But the kitten chased them away and I got back to working on the Bulldog build again whew crisis averted .