gotnitro?
-
Posts
4,498 -
Joined
-
Last visited
Content Type
Profiles
Forums
Events
Gallery
Everything posted by gotnitro?
-

R model Mack w scratchbuilt Leach packer
gotnitro? replied to gotnitro?'s topic in Model Trucks: Big Rigs and Heavy Equipment
Thanks everyone for their feedback -
R model Mack w scratchbuilt Leach packer
gotnitro? replied to gotnitro?'s topic in Model Trucks: Big Rigs and Heavy Equipment
Thanks Charles I kept thinking it needed more of a sloppy trash , but never found a combo that worked..settled on the slushie cups -
Beautiful work
-
R model Mack w scratchbuilt Leach packer
gotnitro? replied to gotnitro?'s topic in Model Trucks: Big Rigs and Heavy Equipment
Thanks @Doug 1061 -
R model Mack garbage truck Finished
gotnitro? replied to gotnitro?'s topic in WIP: Model Trucks: Big Rigs and Heavy Equipment
The build is finished w photos under glass Thank you to everyone who followed along and commented -
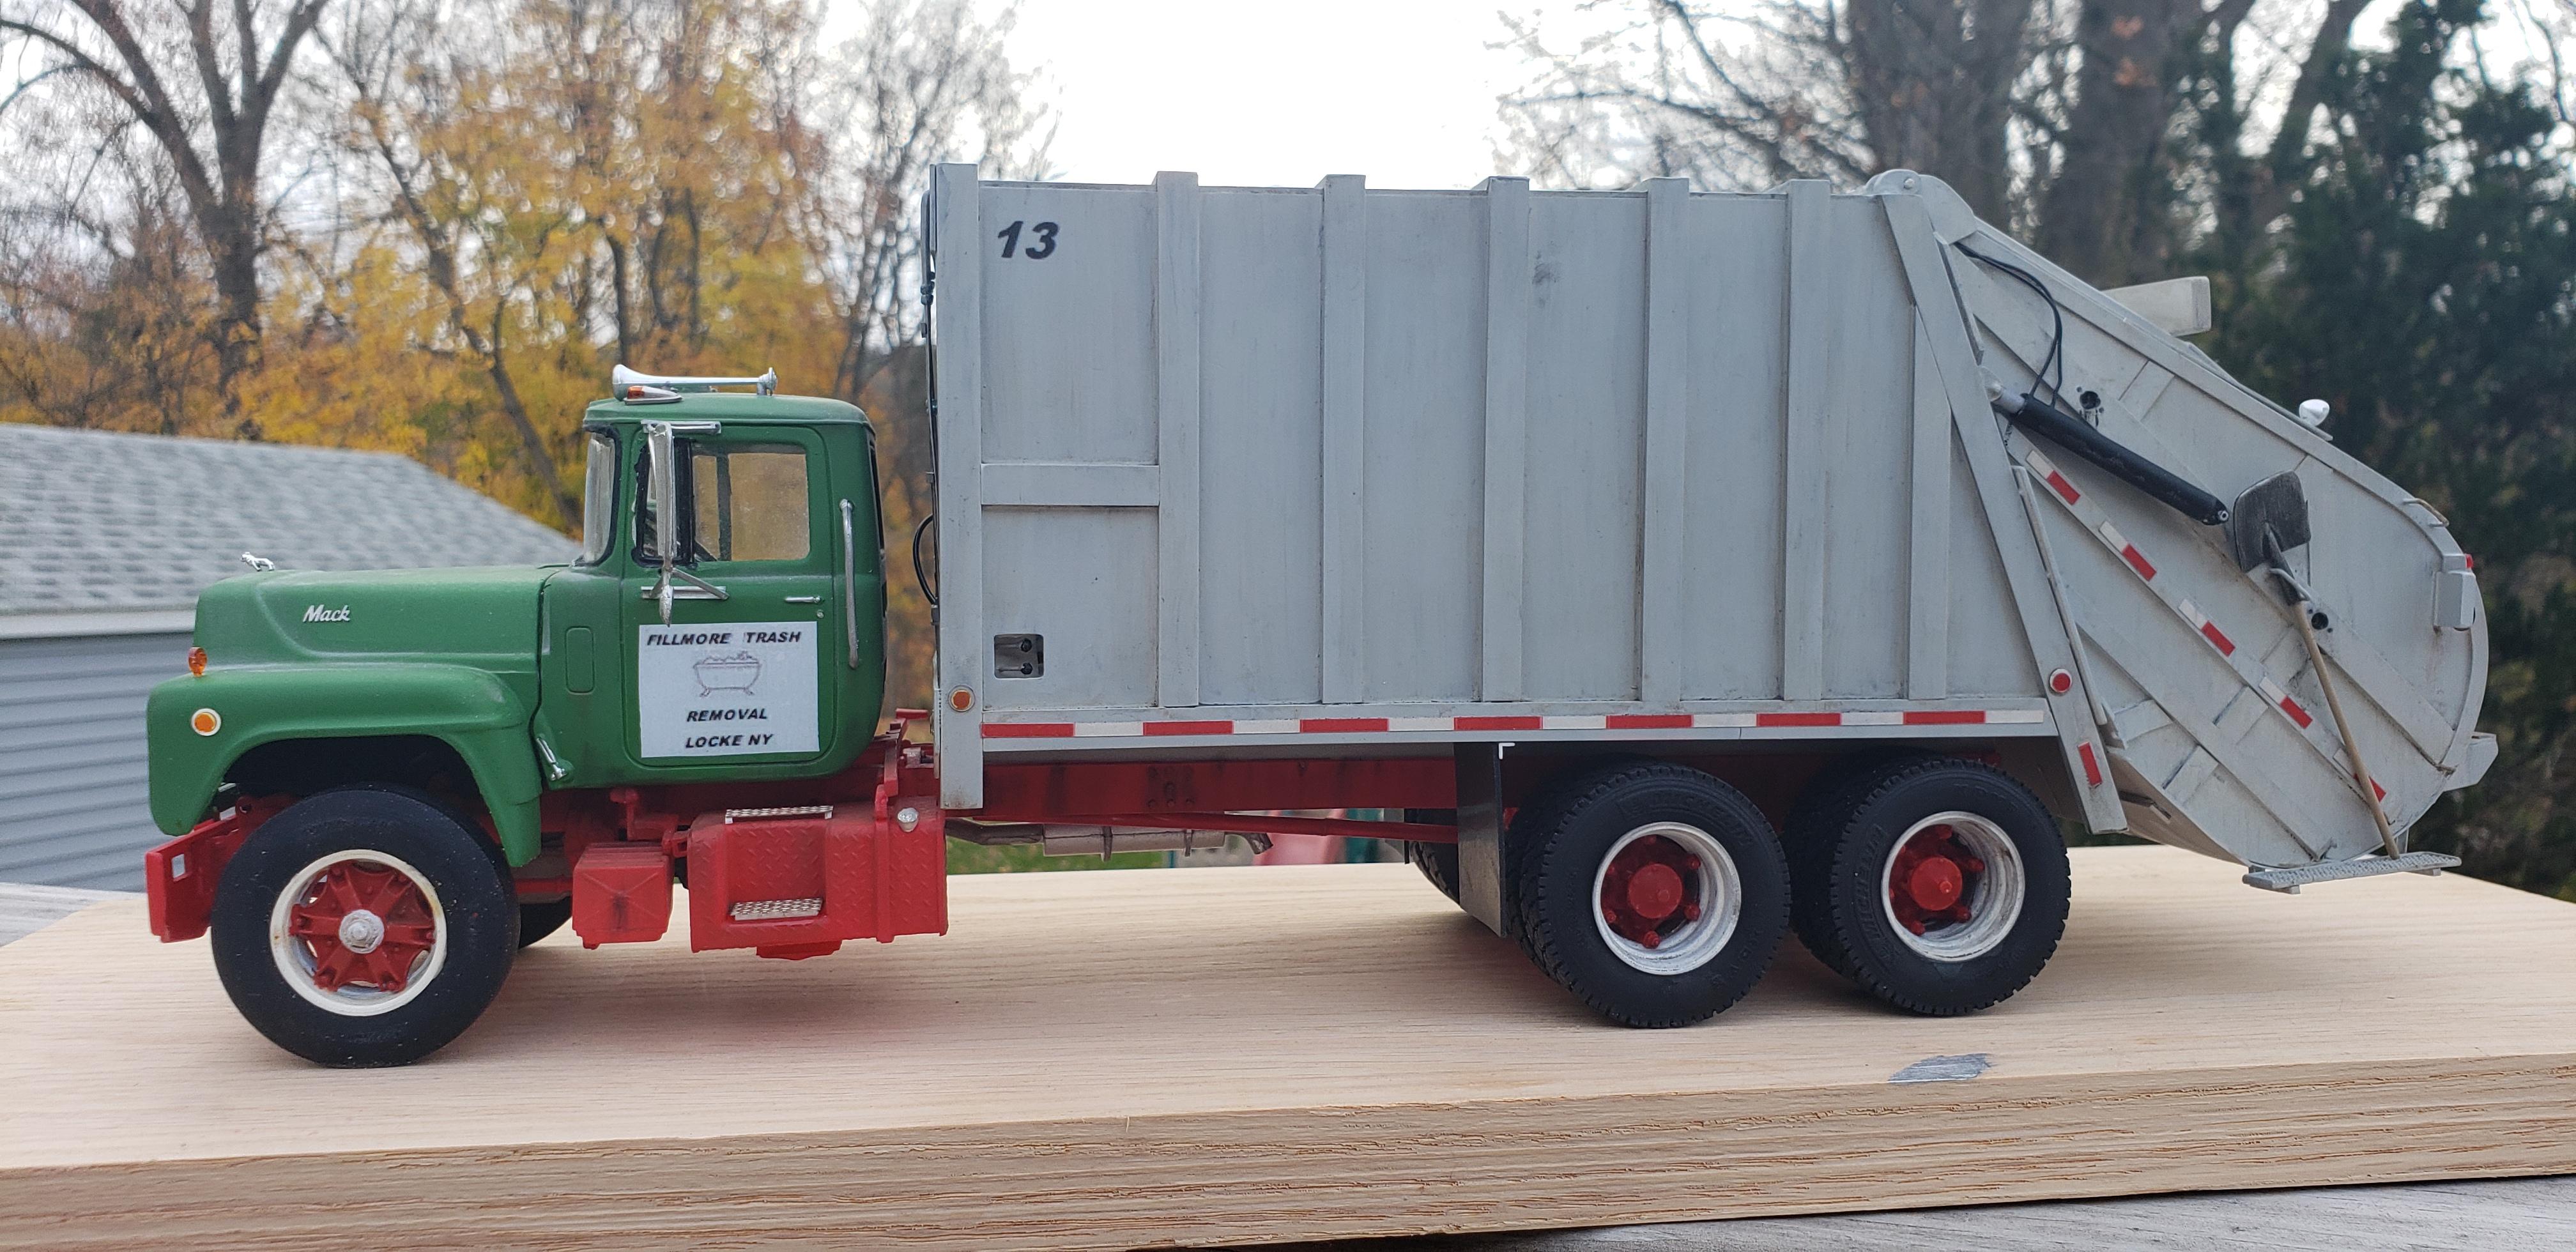
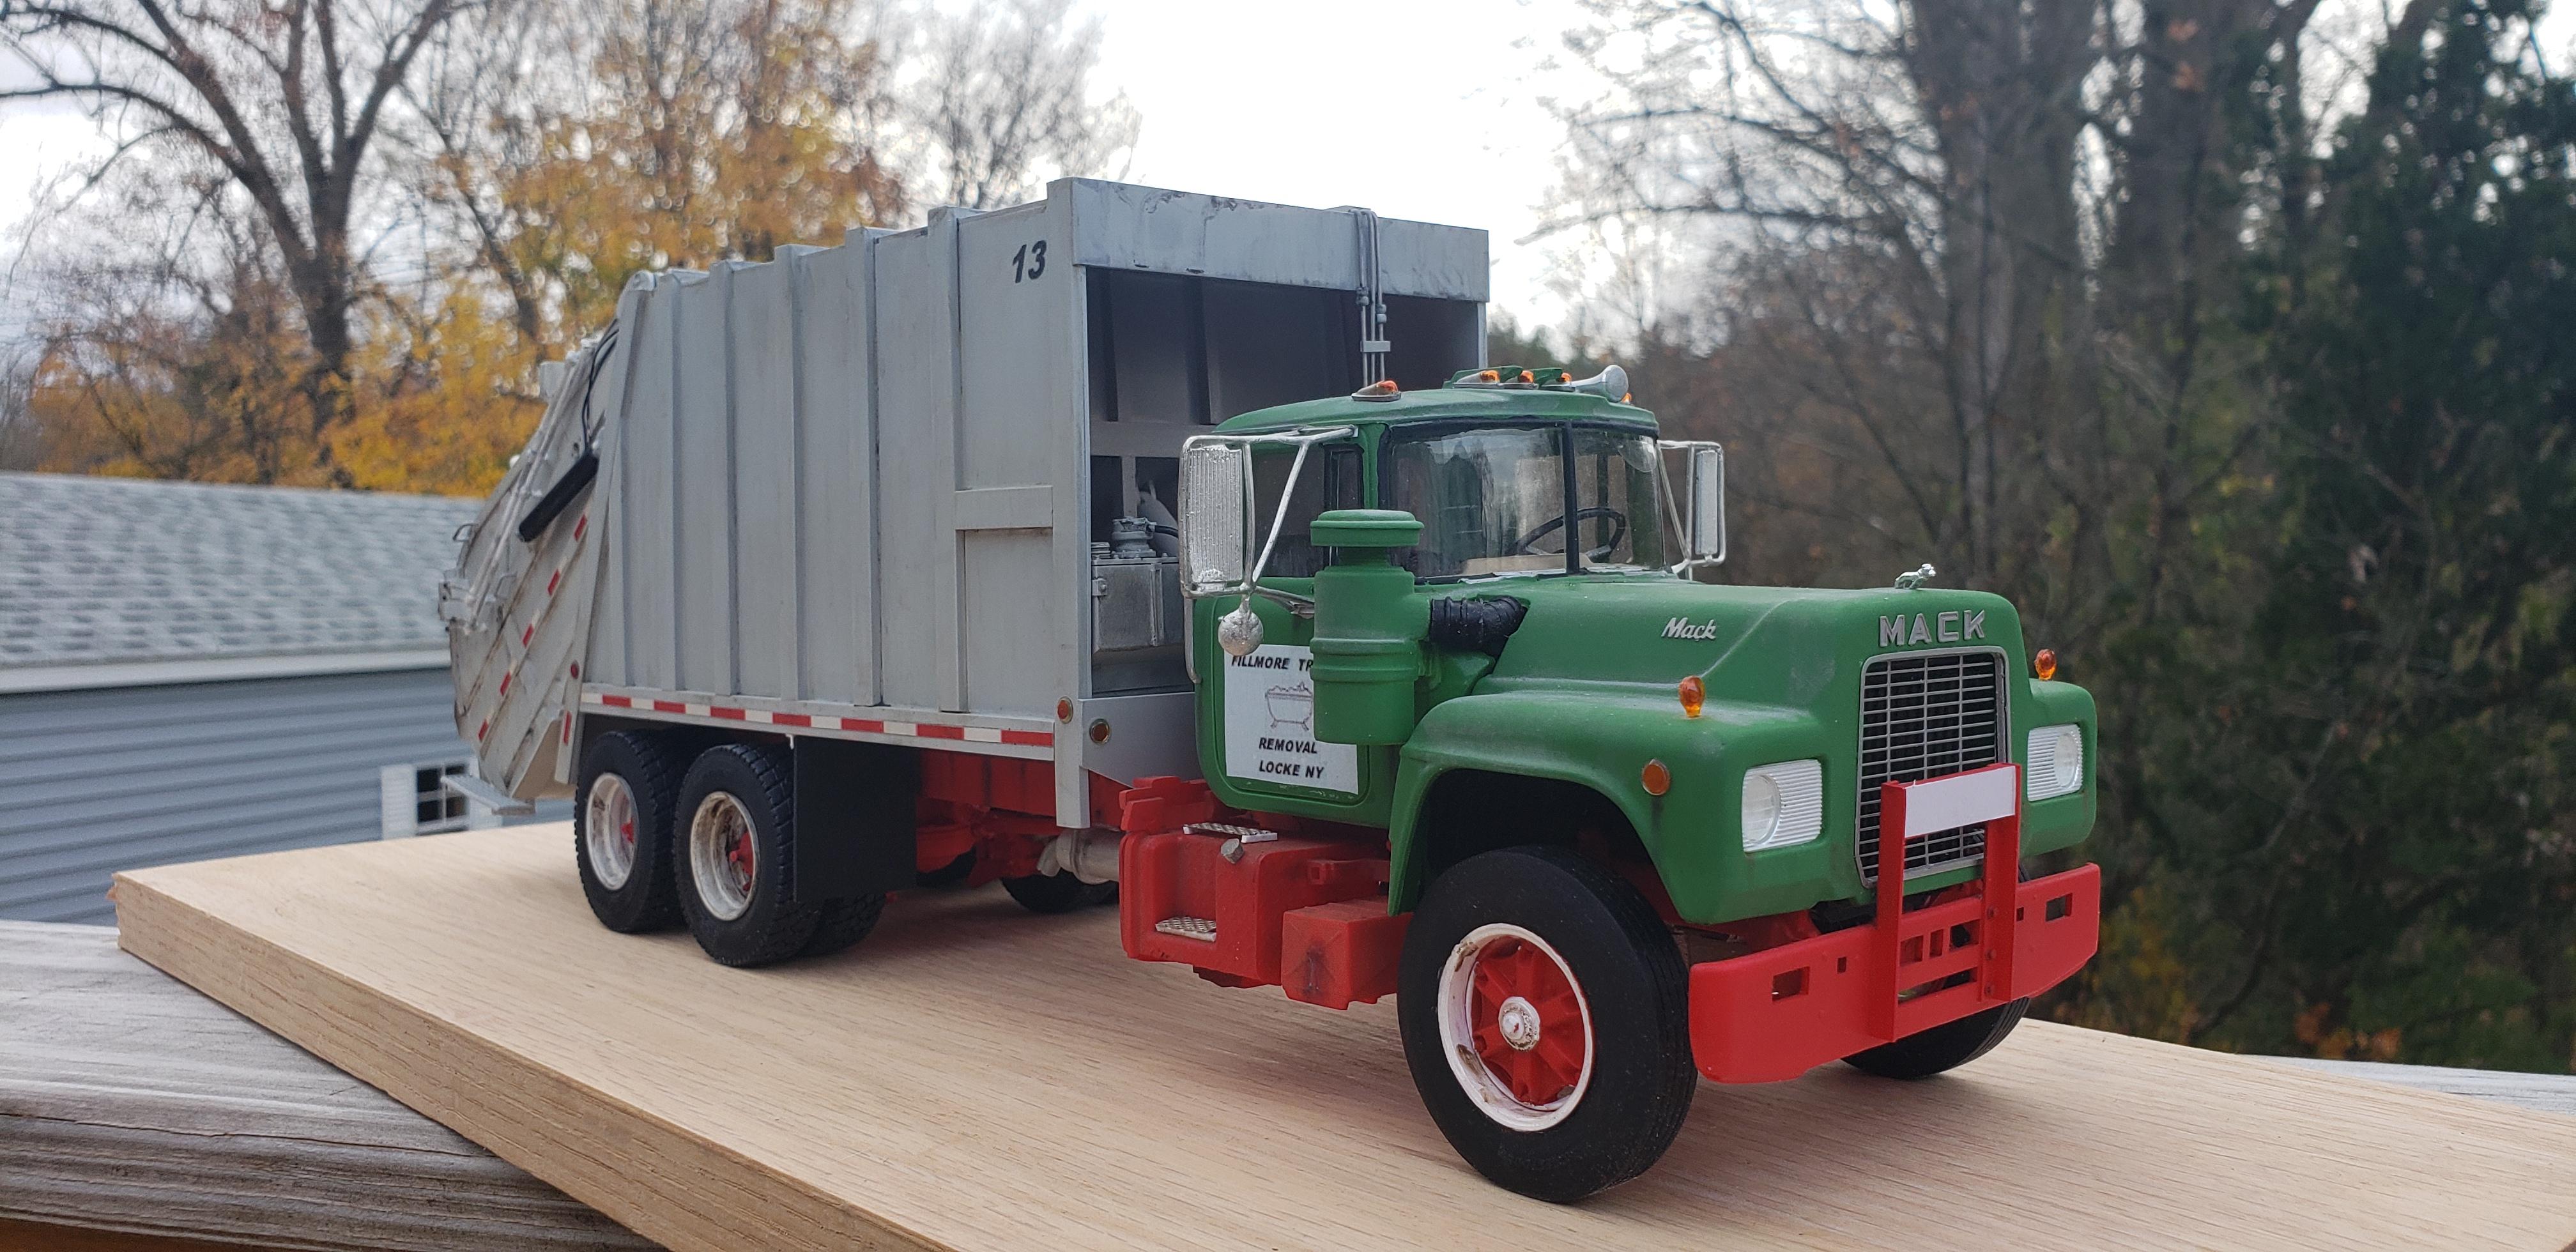
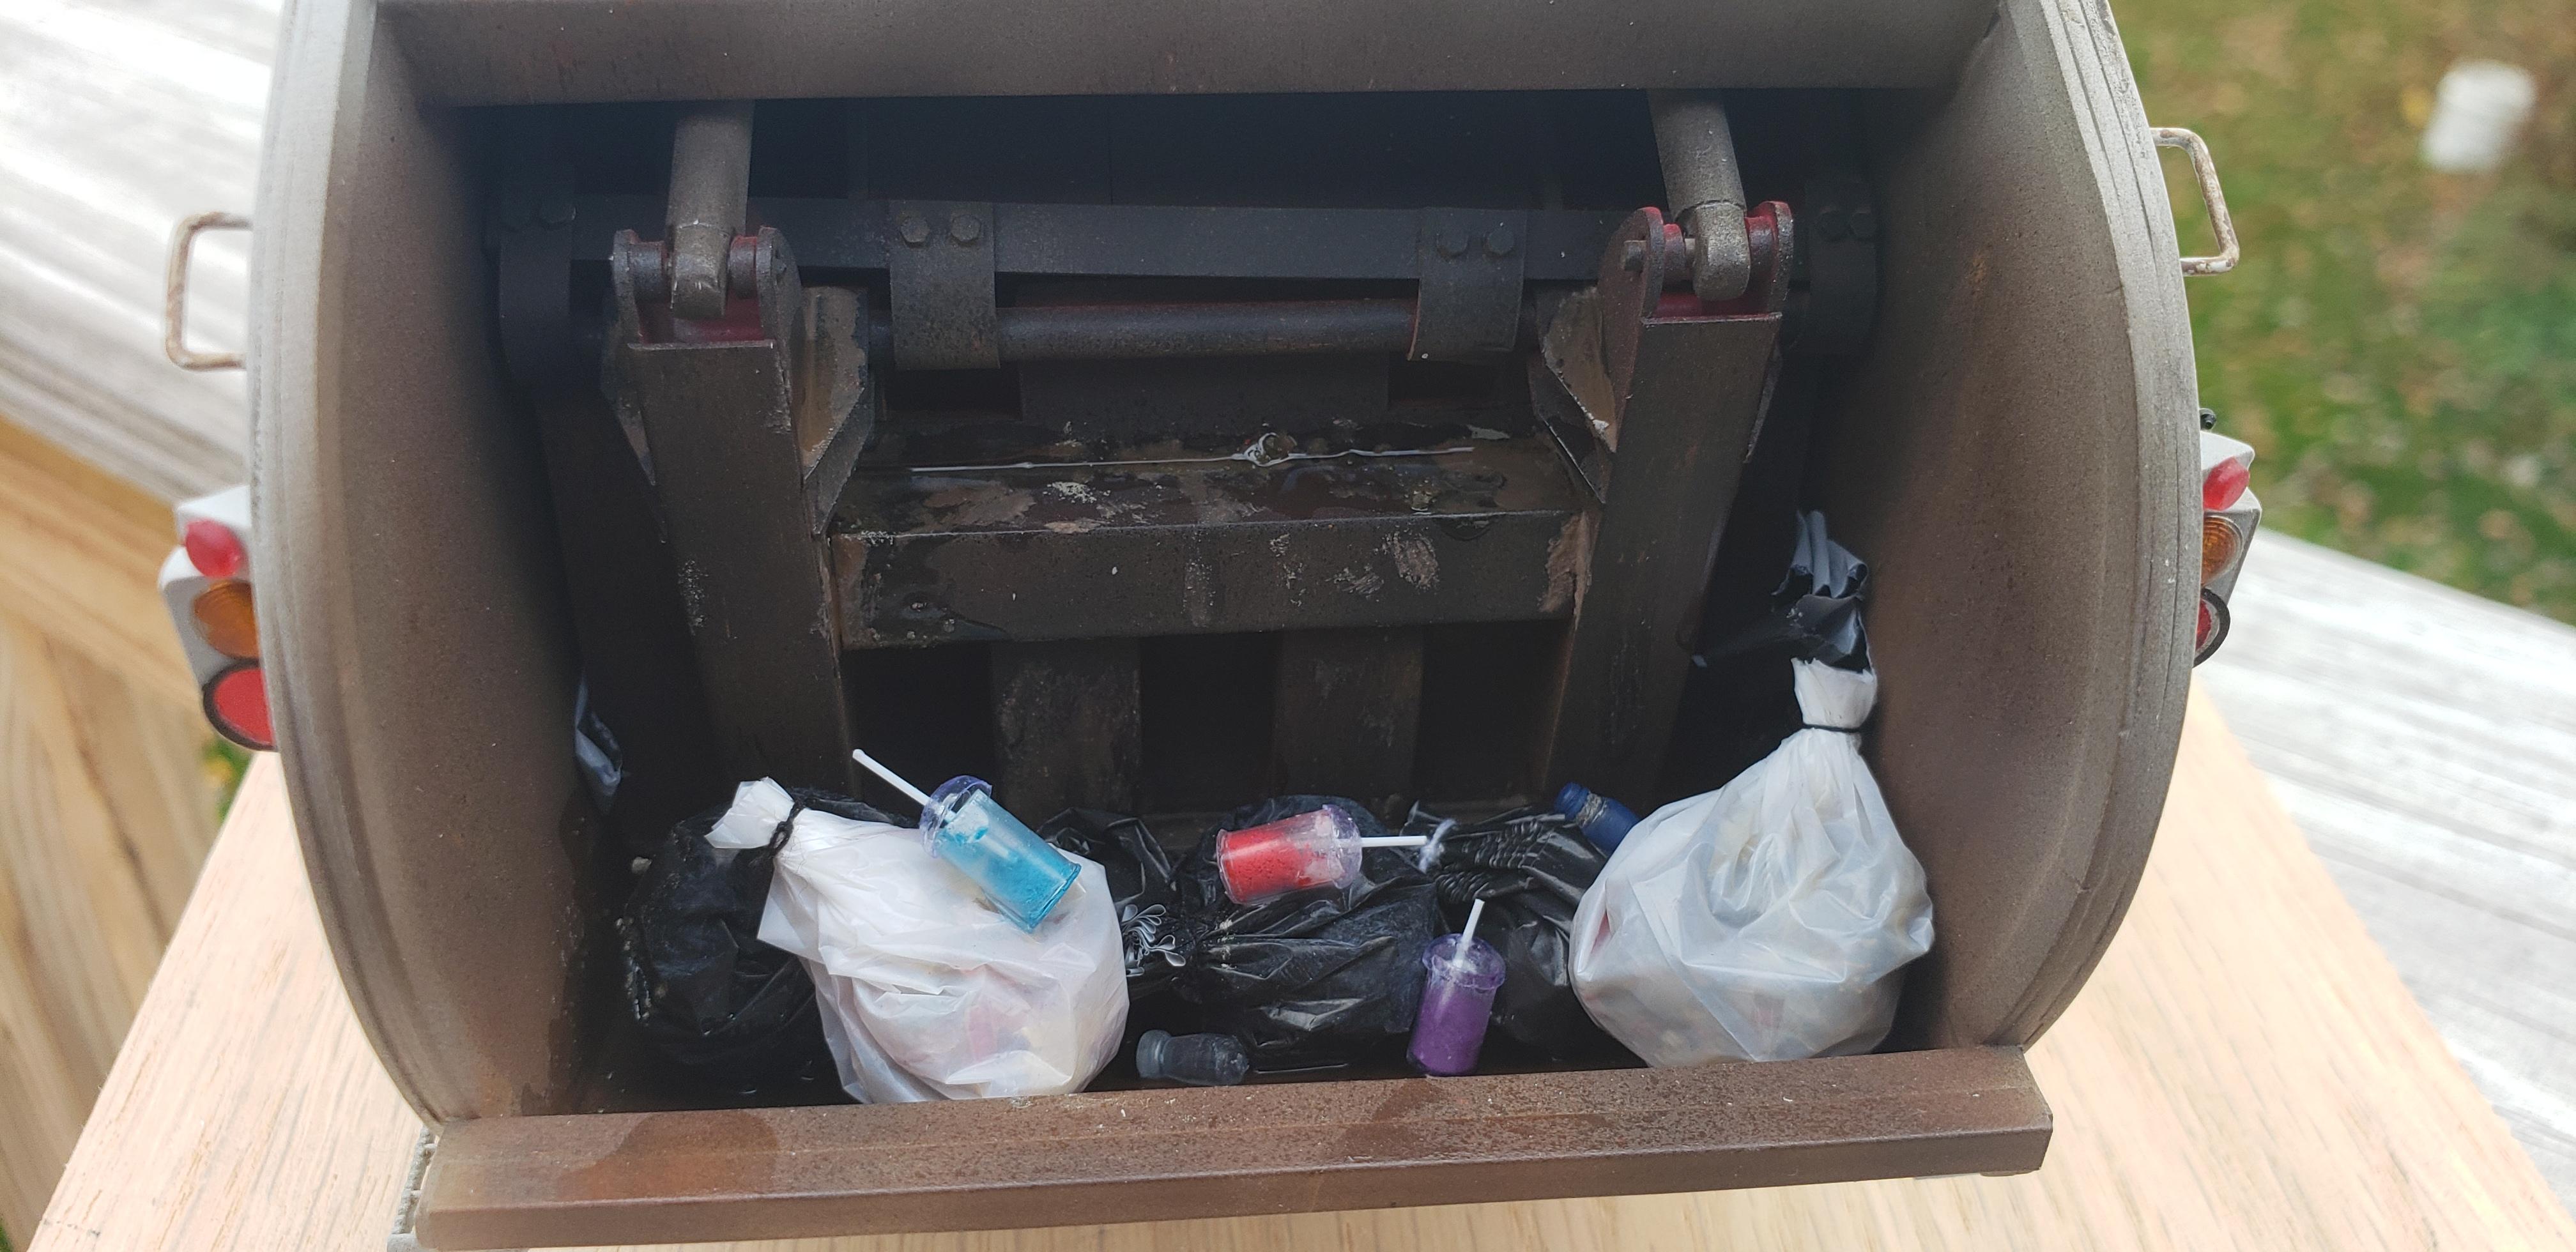
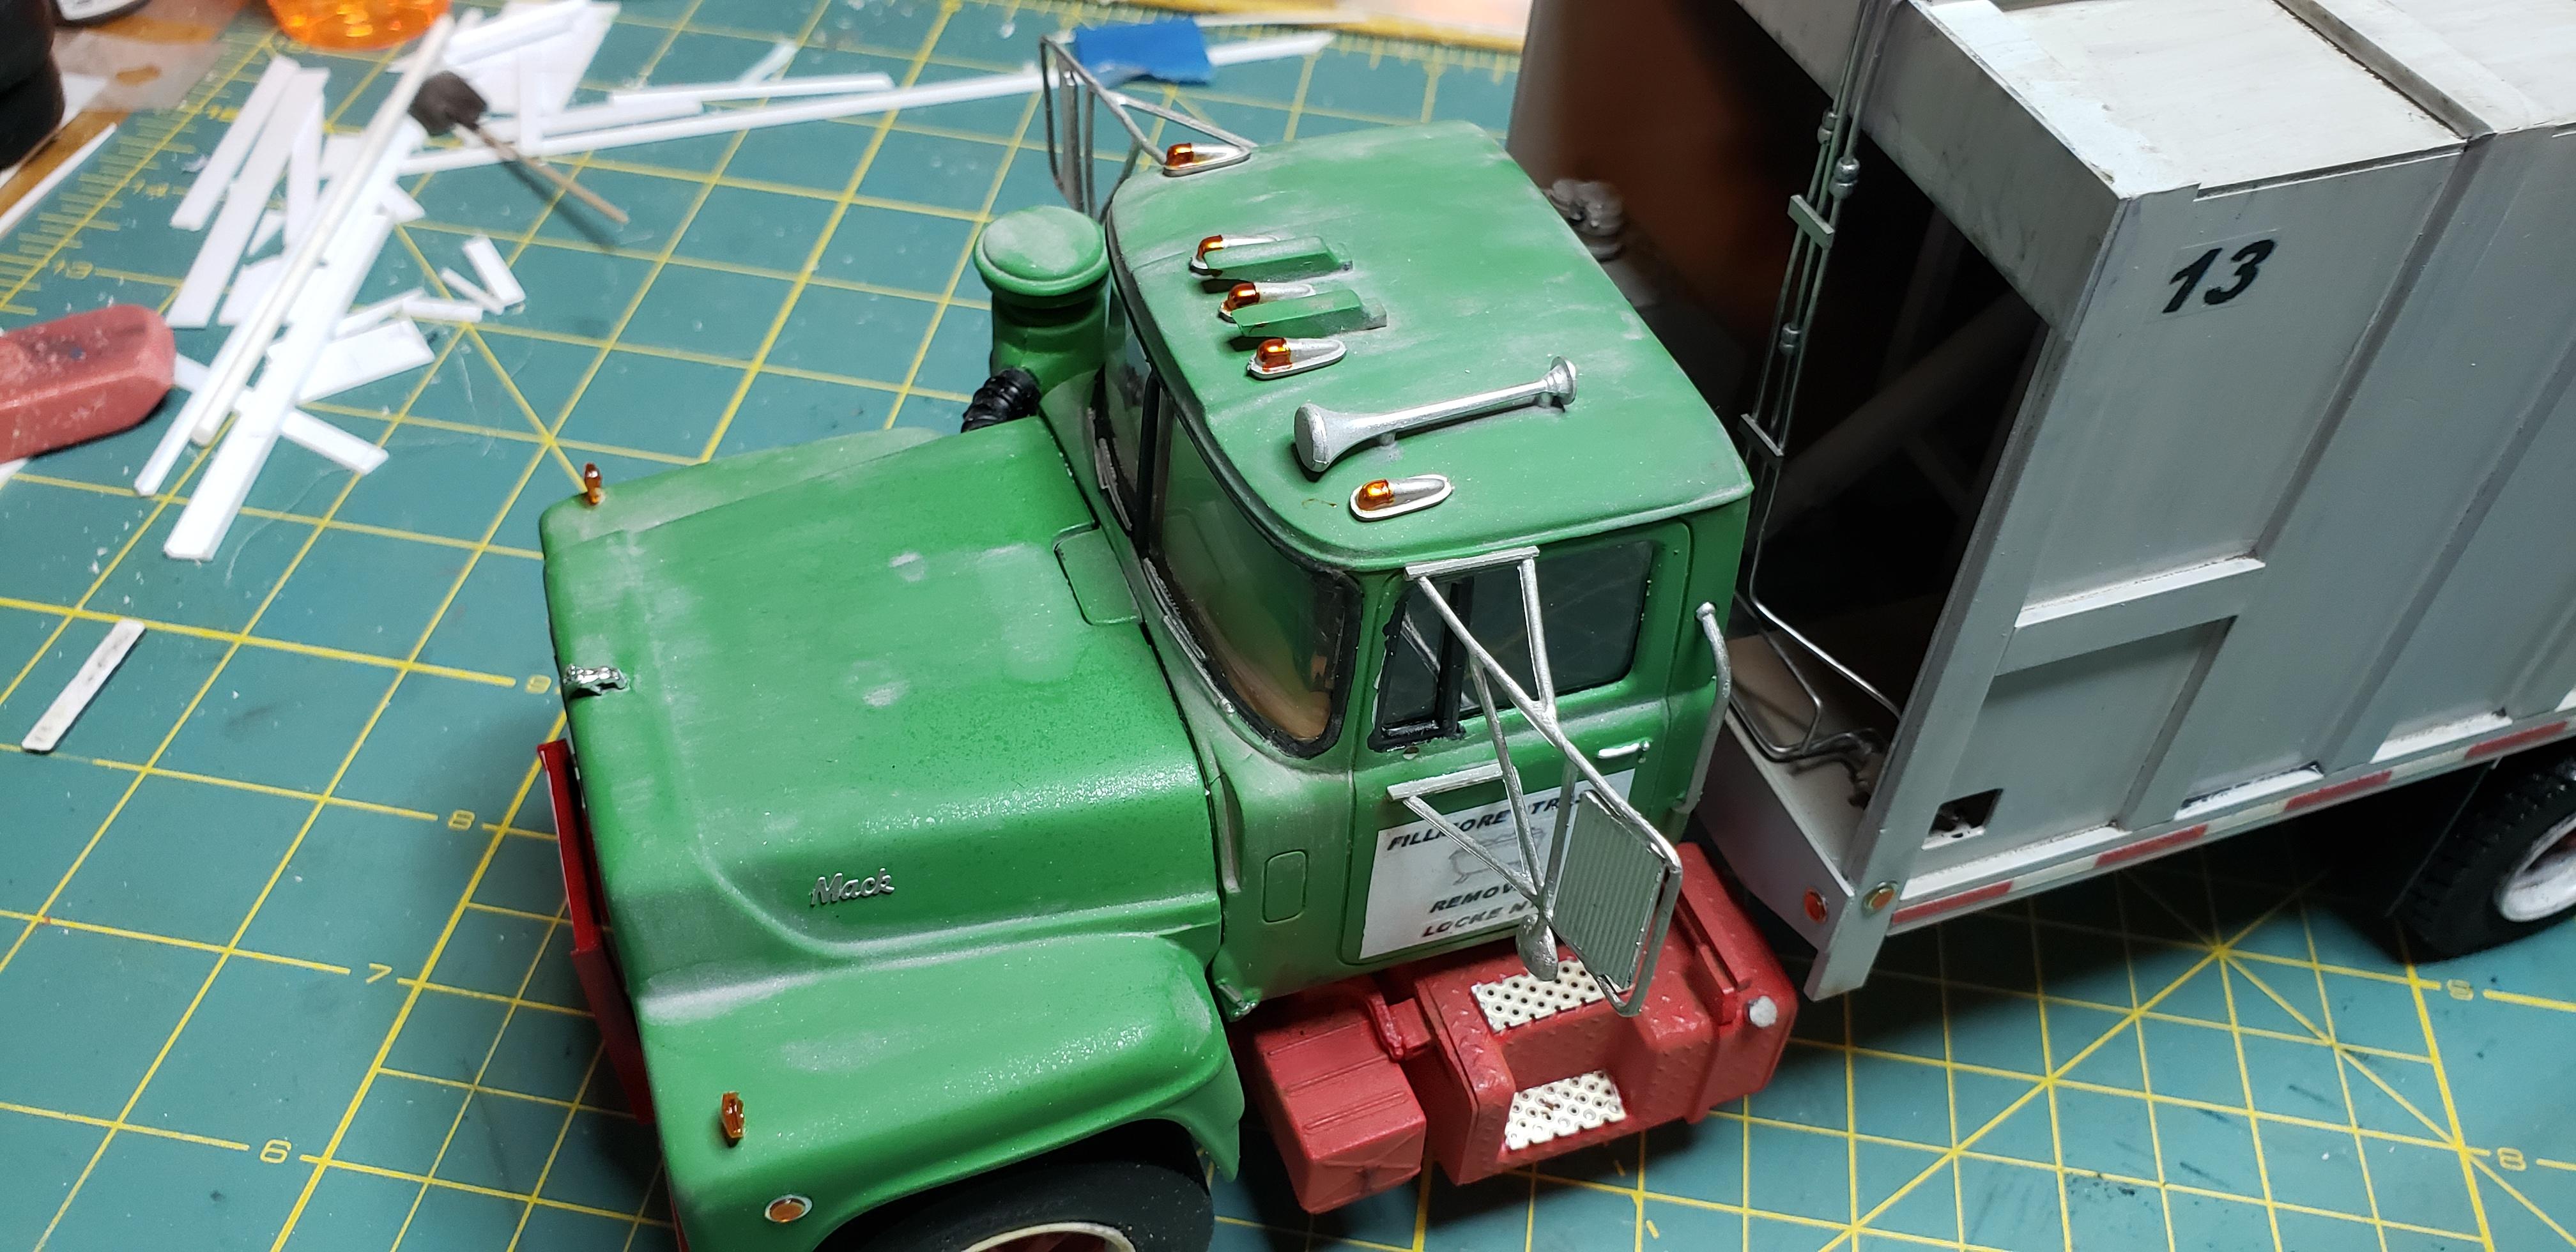
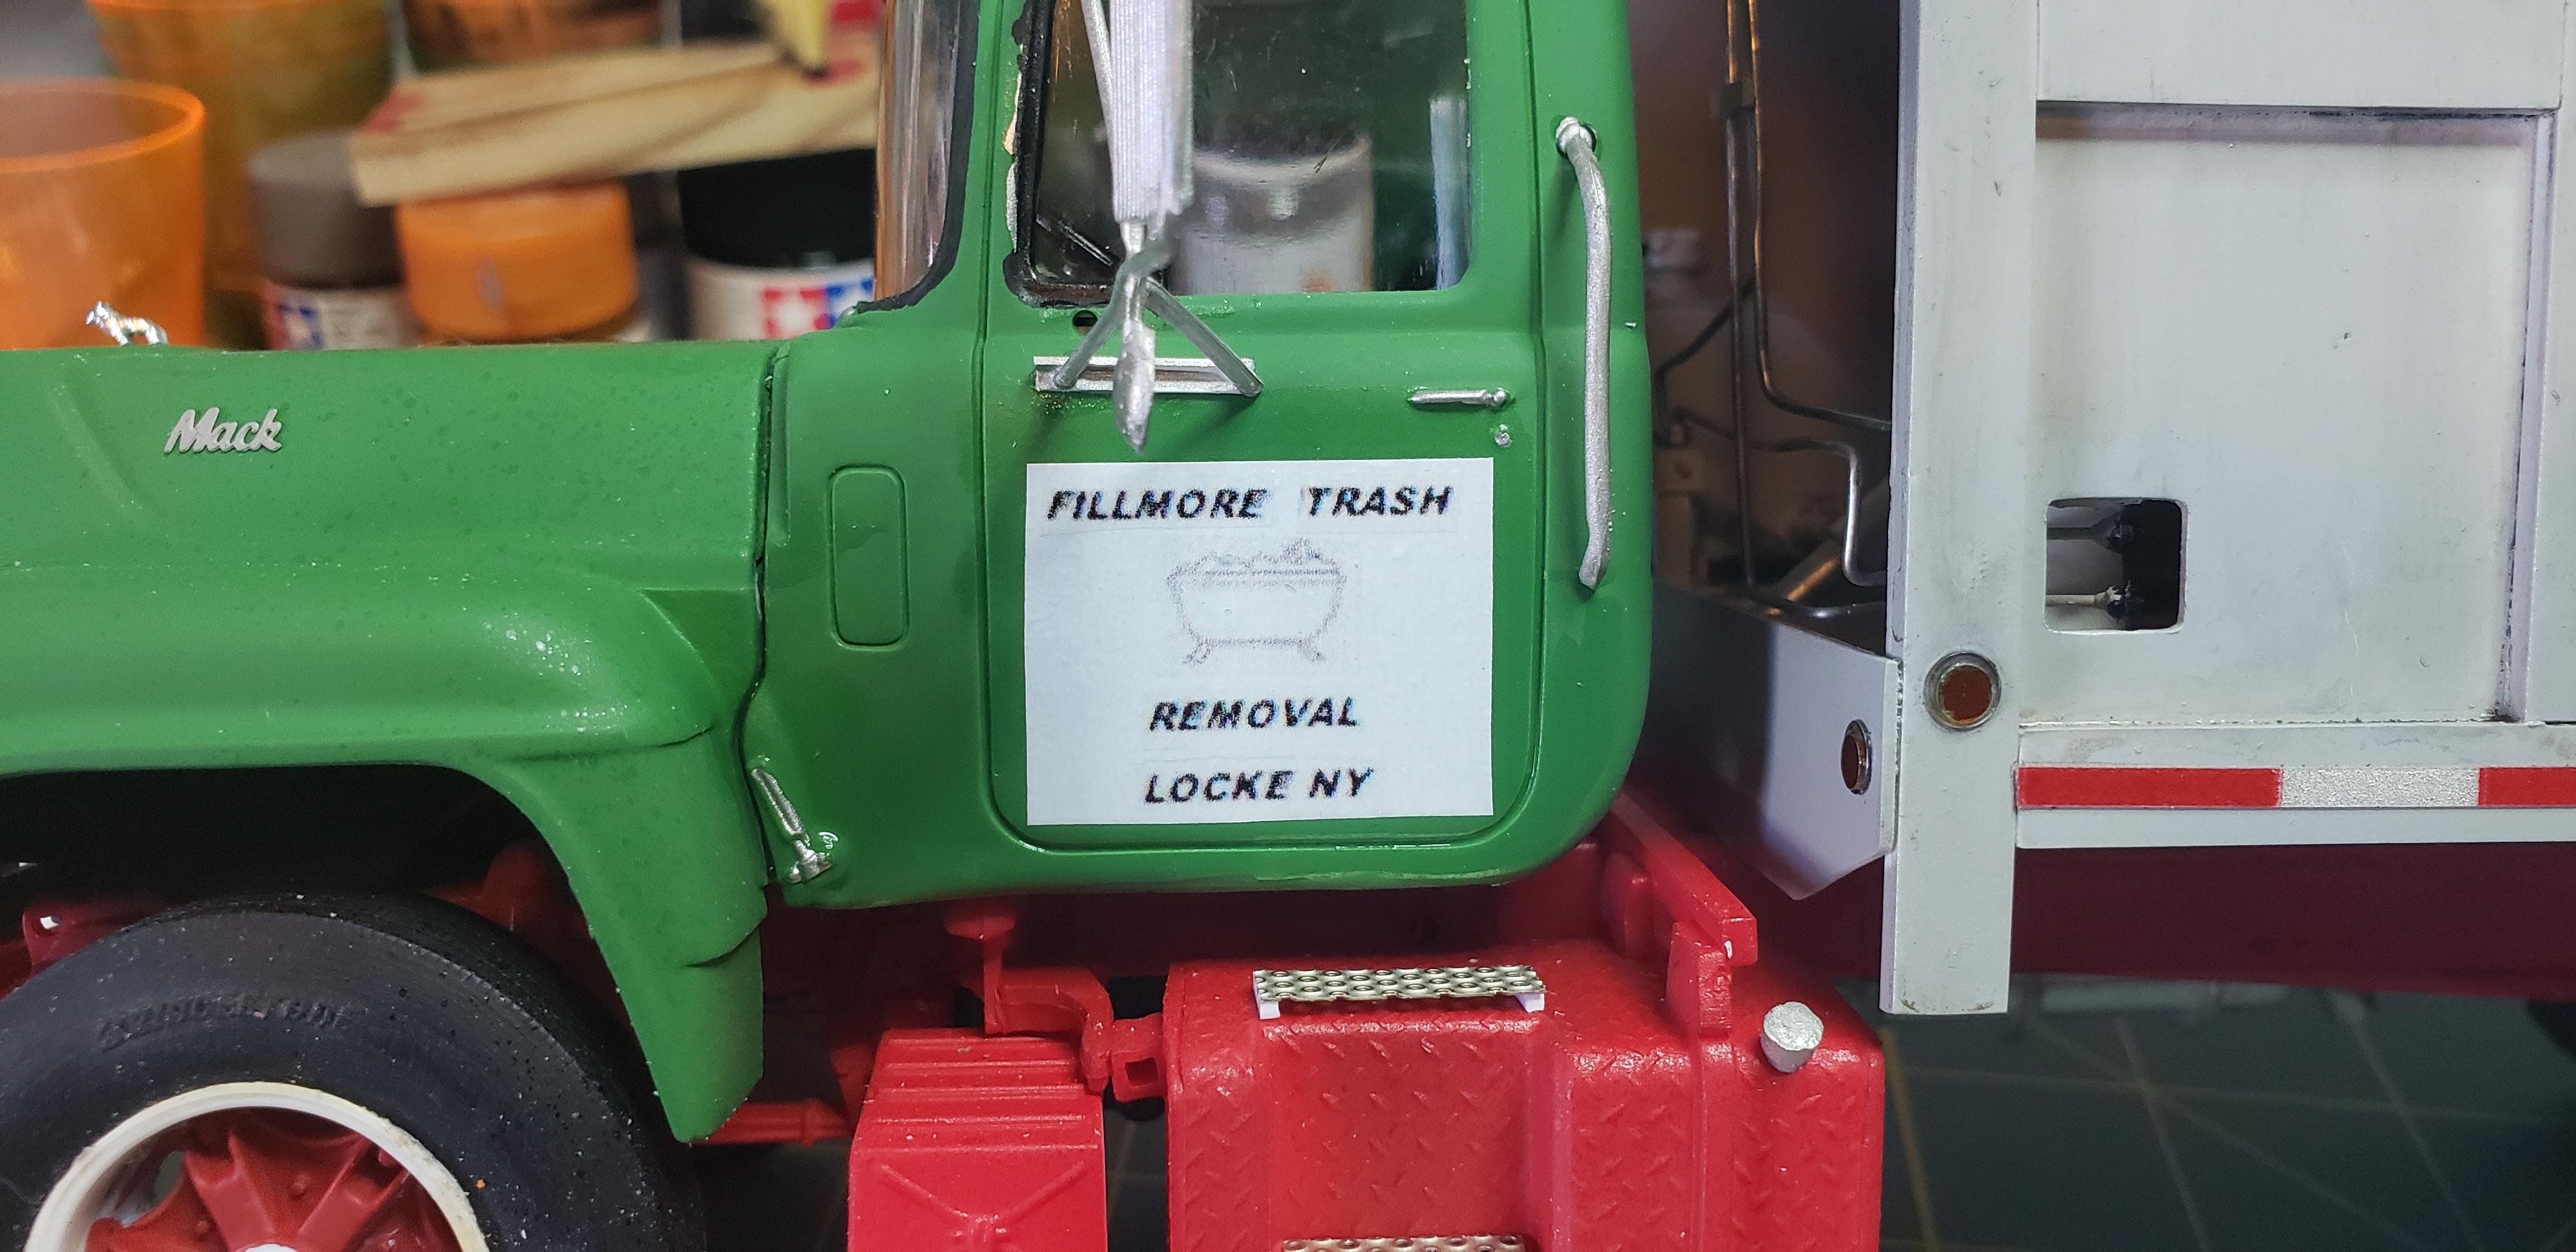
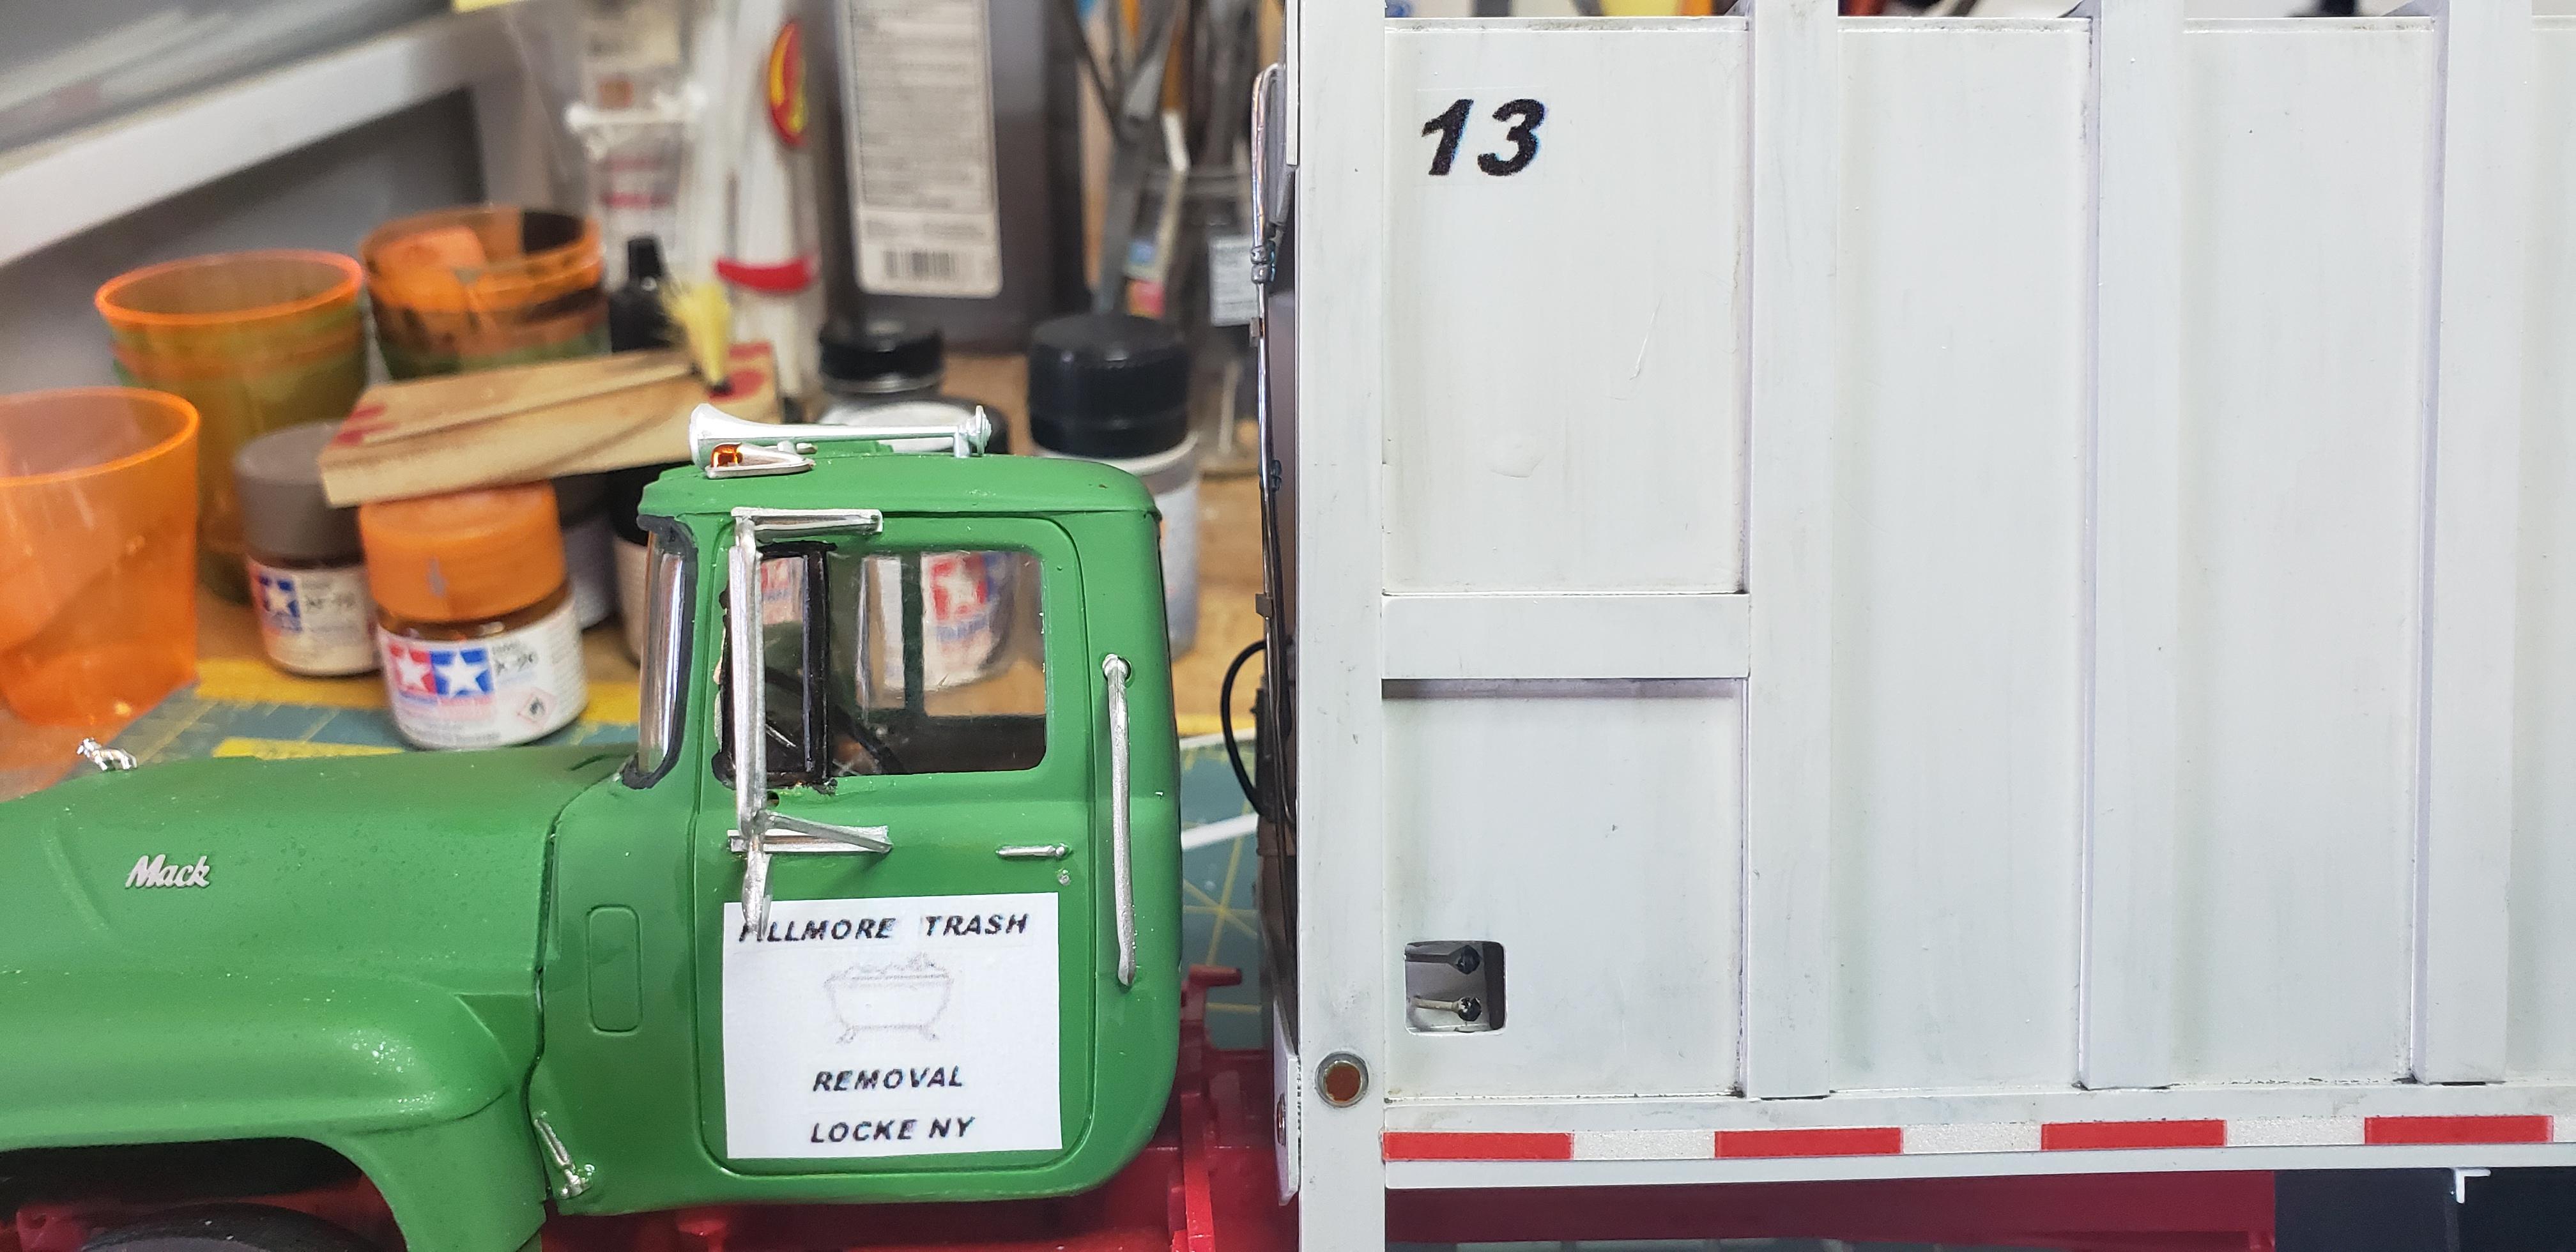
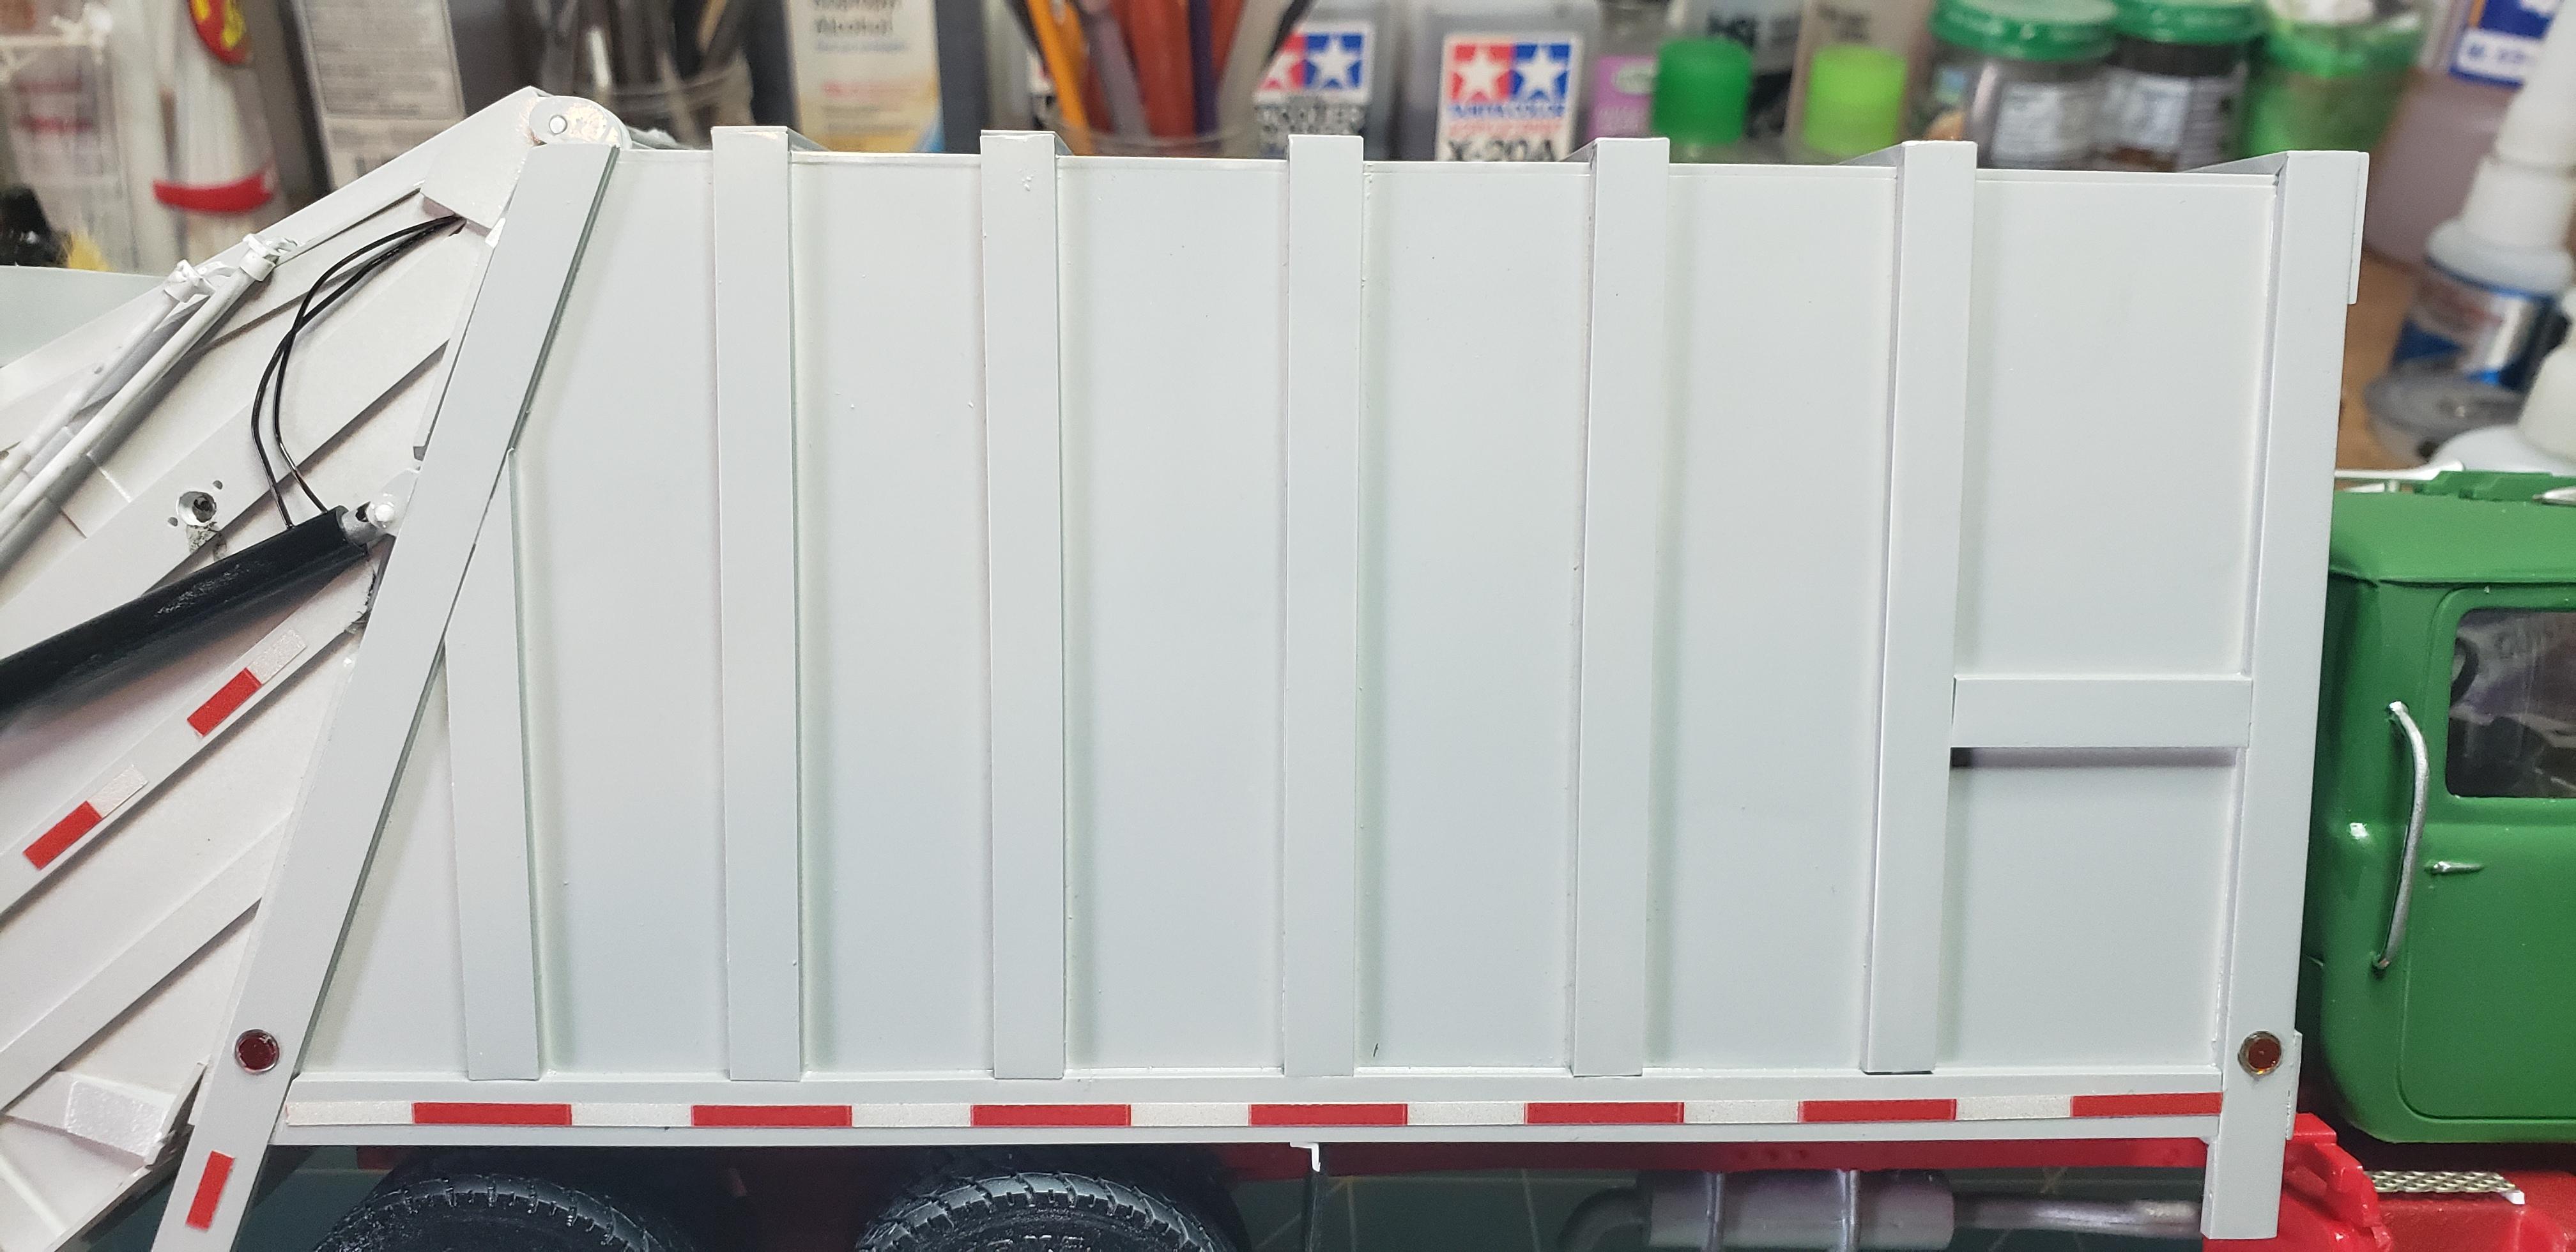
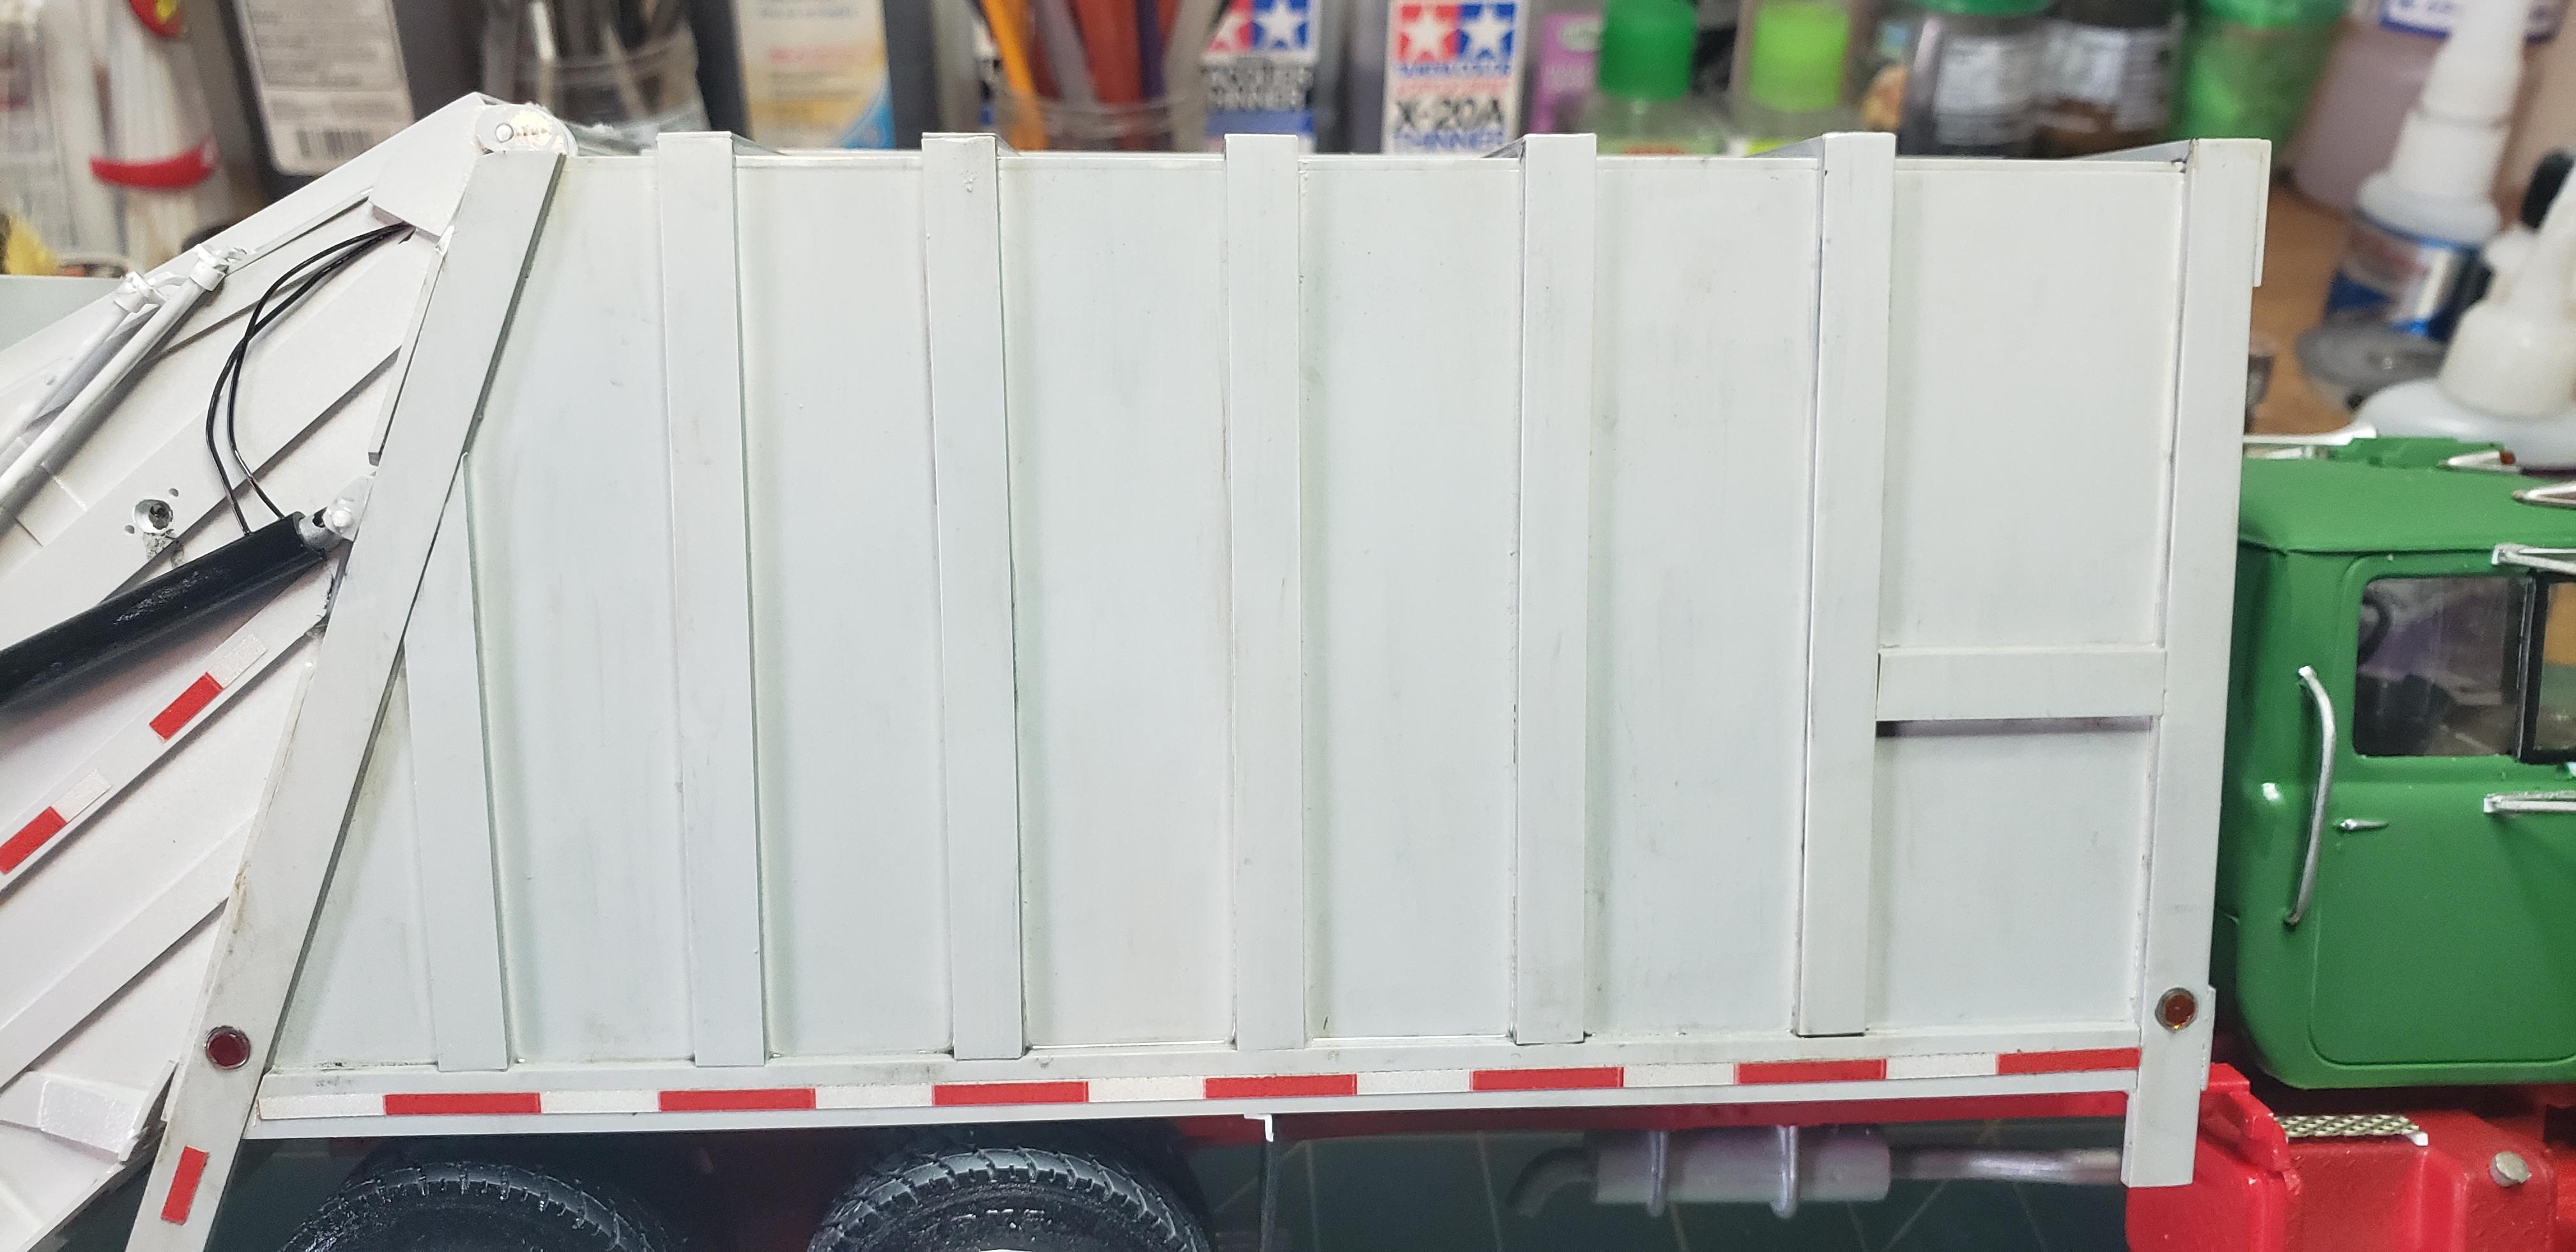
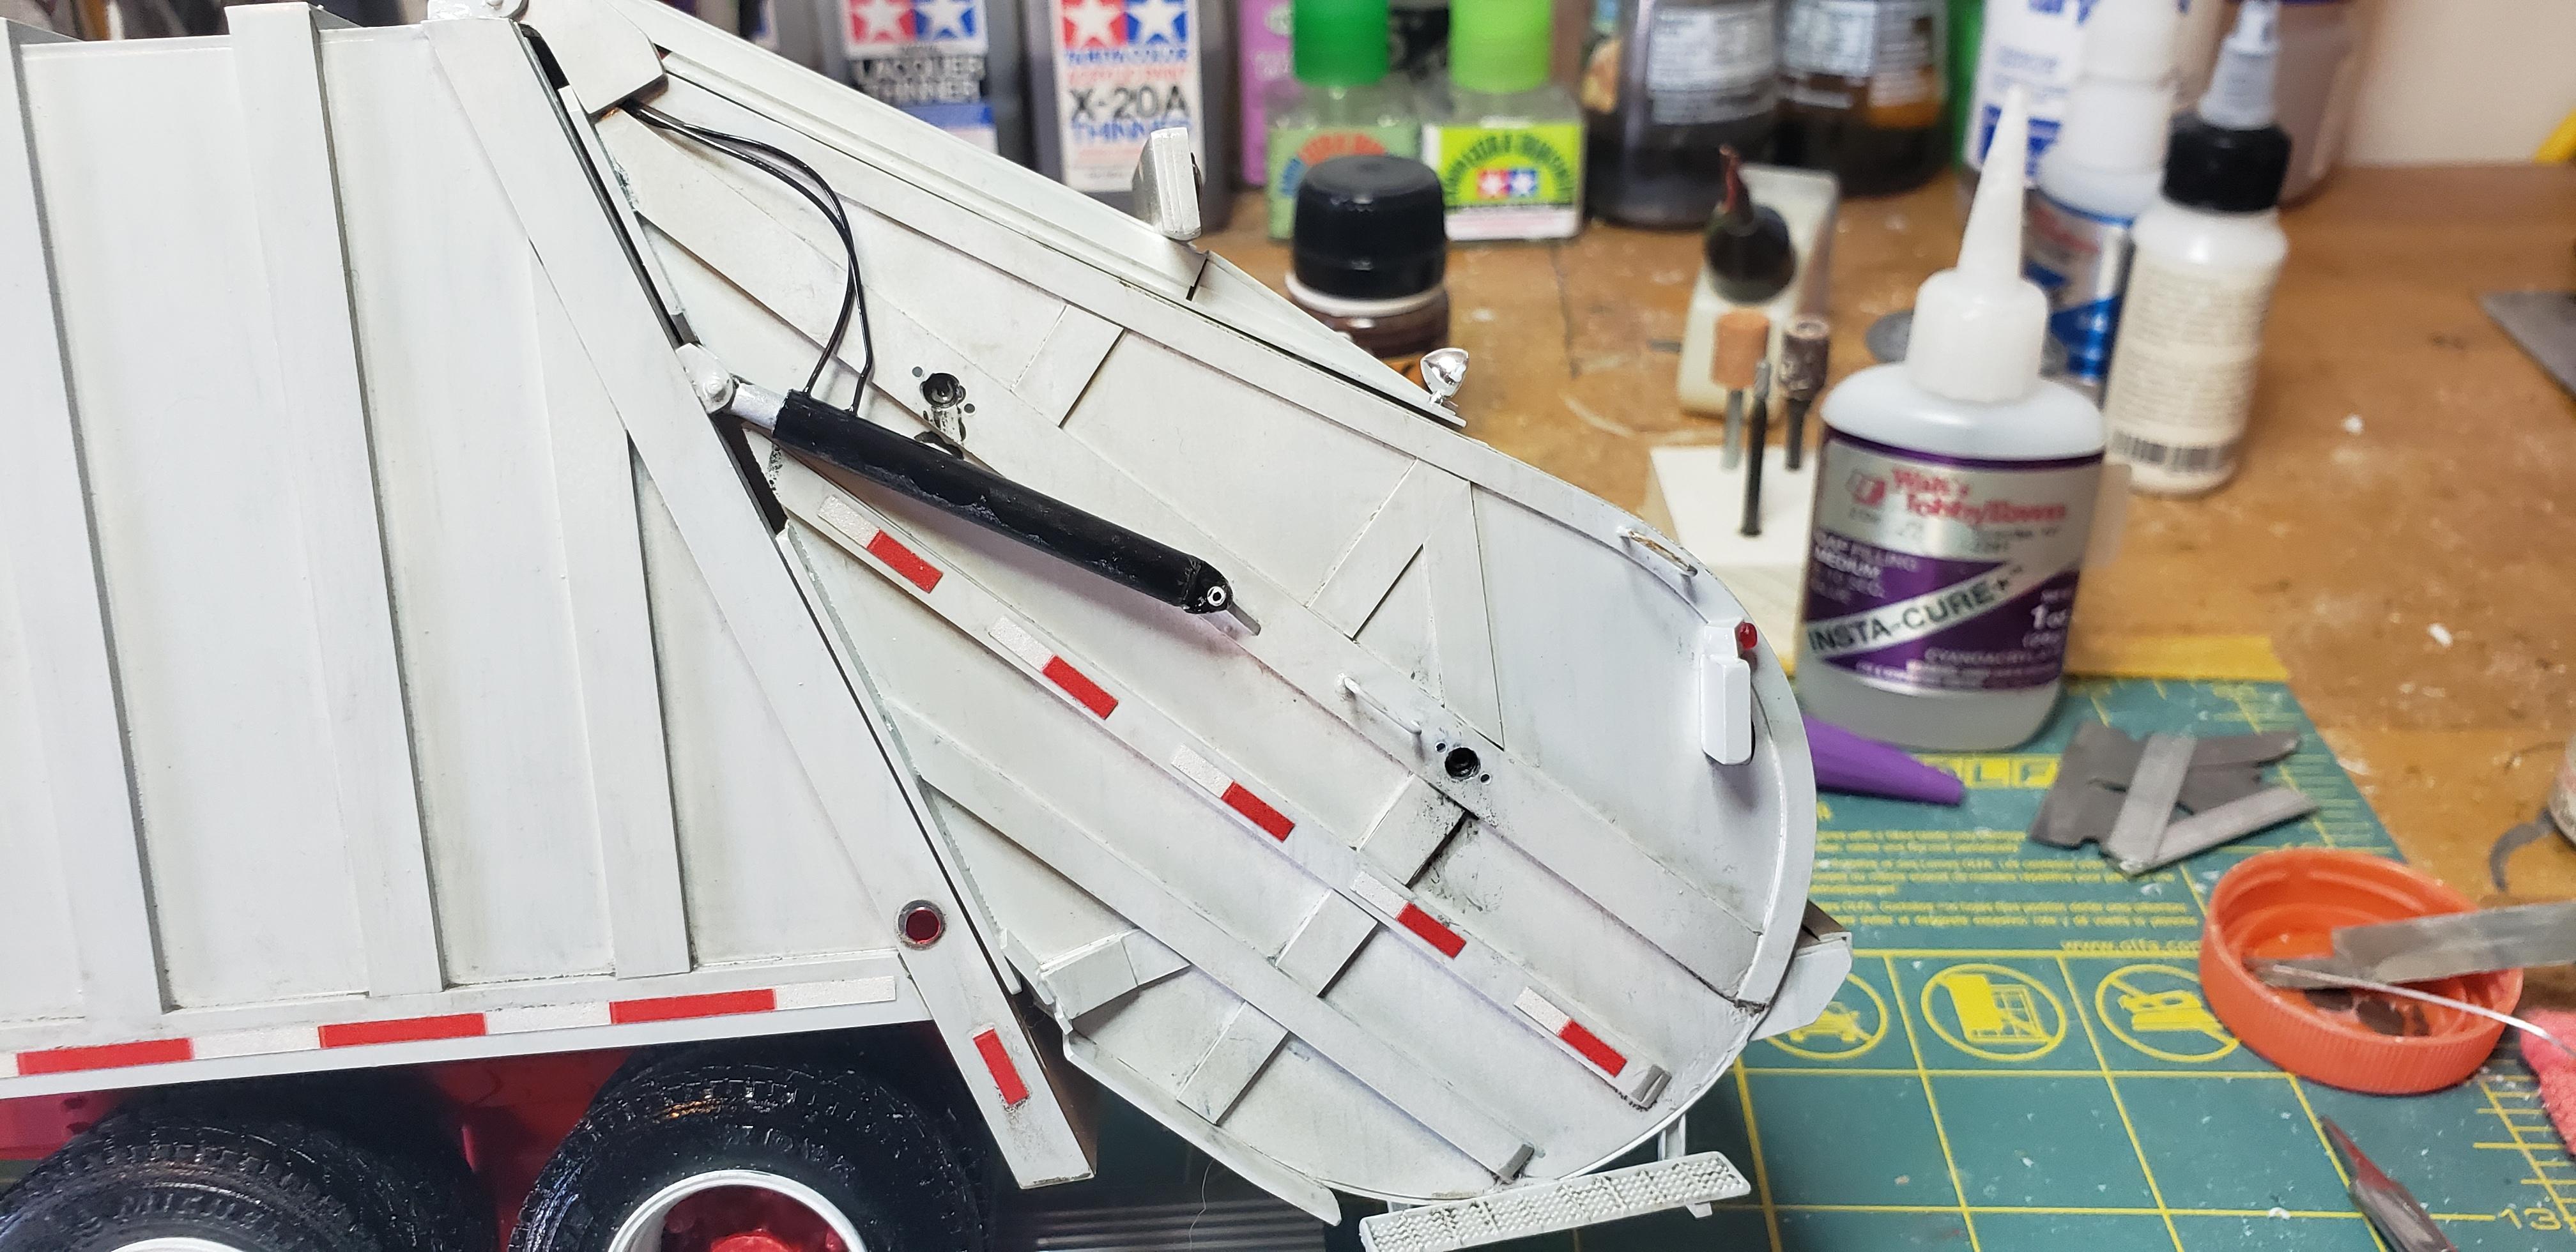
Officially calling this done, my scratchbuilt Leach garbage packer..and the R model Mack I only stretched the frame to accommodate the packer. I fabricated the 25 yd packer body using a bunch of photos, parts manual and scaled drawing my buddy Ryan shared. The body was built w evergreen materials, and nearly a bottle of Tamiya glue. The colors are krylon light gray. JD green, and regal red. I weathered everything w oils and powdered pastels for a used truck.The company name draws from local history, the 13th US president Millard Fillmore was born in Locke NY, and supposedly had the 1st bathtub in the White House. The garbage is handmade bags w yard waste, and slushie cups I made from clear straws and colored powder. The lids are googly eyes, and some plastic rod for straws. Thanks for looking Jeff

-
2× Chevy Bison
gotnitro? replied to Rockford's topic in WIP: Model Trucks: Big Rigs and Heavy Equipment
Outstanding work on both your Bisons ! All your work is really making them less toy like and more realistic, especially the smaller details -
I attended a model train show yesterday in Syracuse, and was blown away by the details they add and variety. My dad built HO scale and we spent hrs checking out all the displays noting the modern vehicles. Looking forward to seeing your IH in color
-
AMT western star and gravel trailer
gotnitro? replied to tbill's topic in Model Trucks: Big Rigs and Heavy Equipment
Good move chopping the trailer down to a double ! Fantastic work -
Very nice work
-
1944 Diamond T 6x6
gotnitro? replied to Chariots of Fire's topic in WIP: Model Trucks: Big Rigs and Heavy Equipment
fantastic work, always enjoy your skills w brass. looking forward to you starting on the wrecker body -
fabulous Topkick !! Love seeing trucks like this Brian well done
-
Caterpillar CT 680 Dump Truck
gotnitro? replied to Stevens19's topic in Model Trucks: Big Rigs and Heavy Equipment
fantastic work on your Cat dump truck -
R model Mack garbage truck Finished
gotnitro? replied to gotnitro?'s topic in WIP: Model Trucks: Big Rigs and Heavy Equipment
Thanks Gary ! Little sneak peek of the entire build, I noticed a few parts I wanted to detail paint..but heres the model
-
R model Mack garbage truck Finished
gotnitro? replied to gotnitro?'s topic in WIP: Model Trucks: Big Rigs and Heavy Equipment
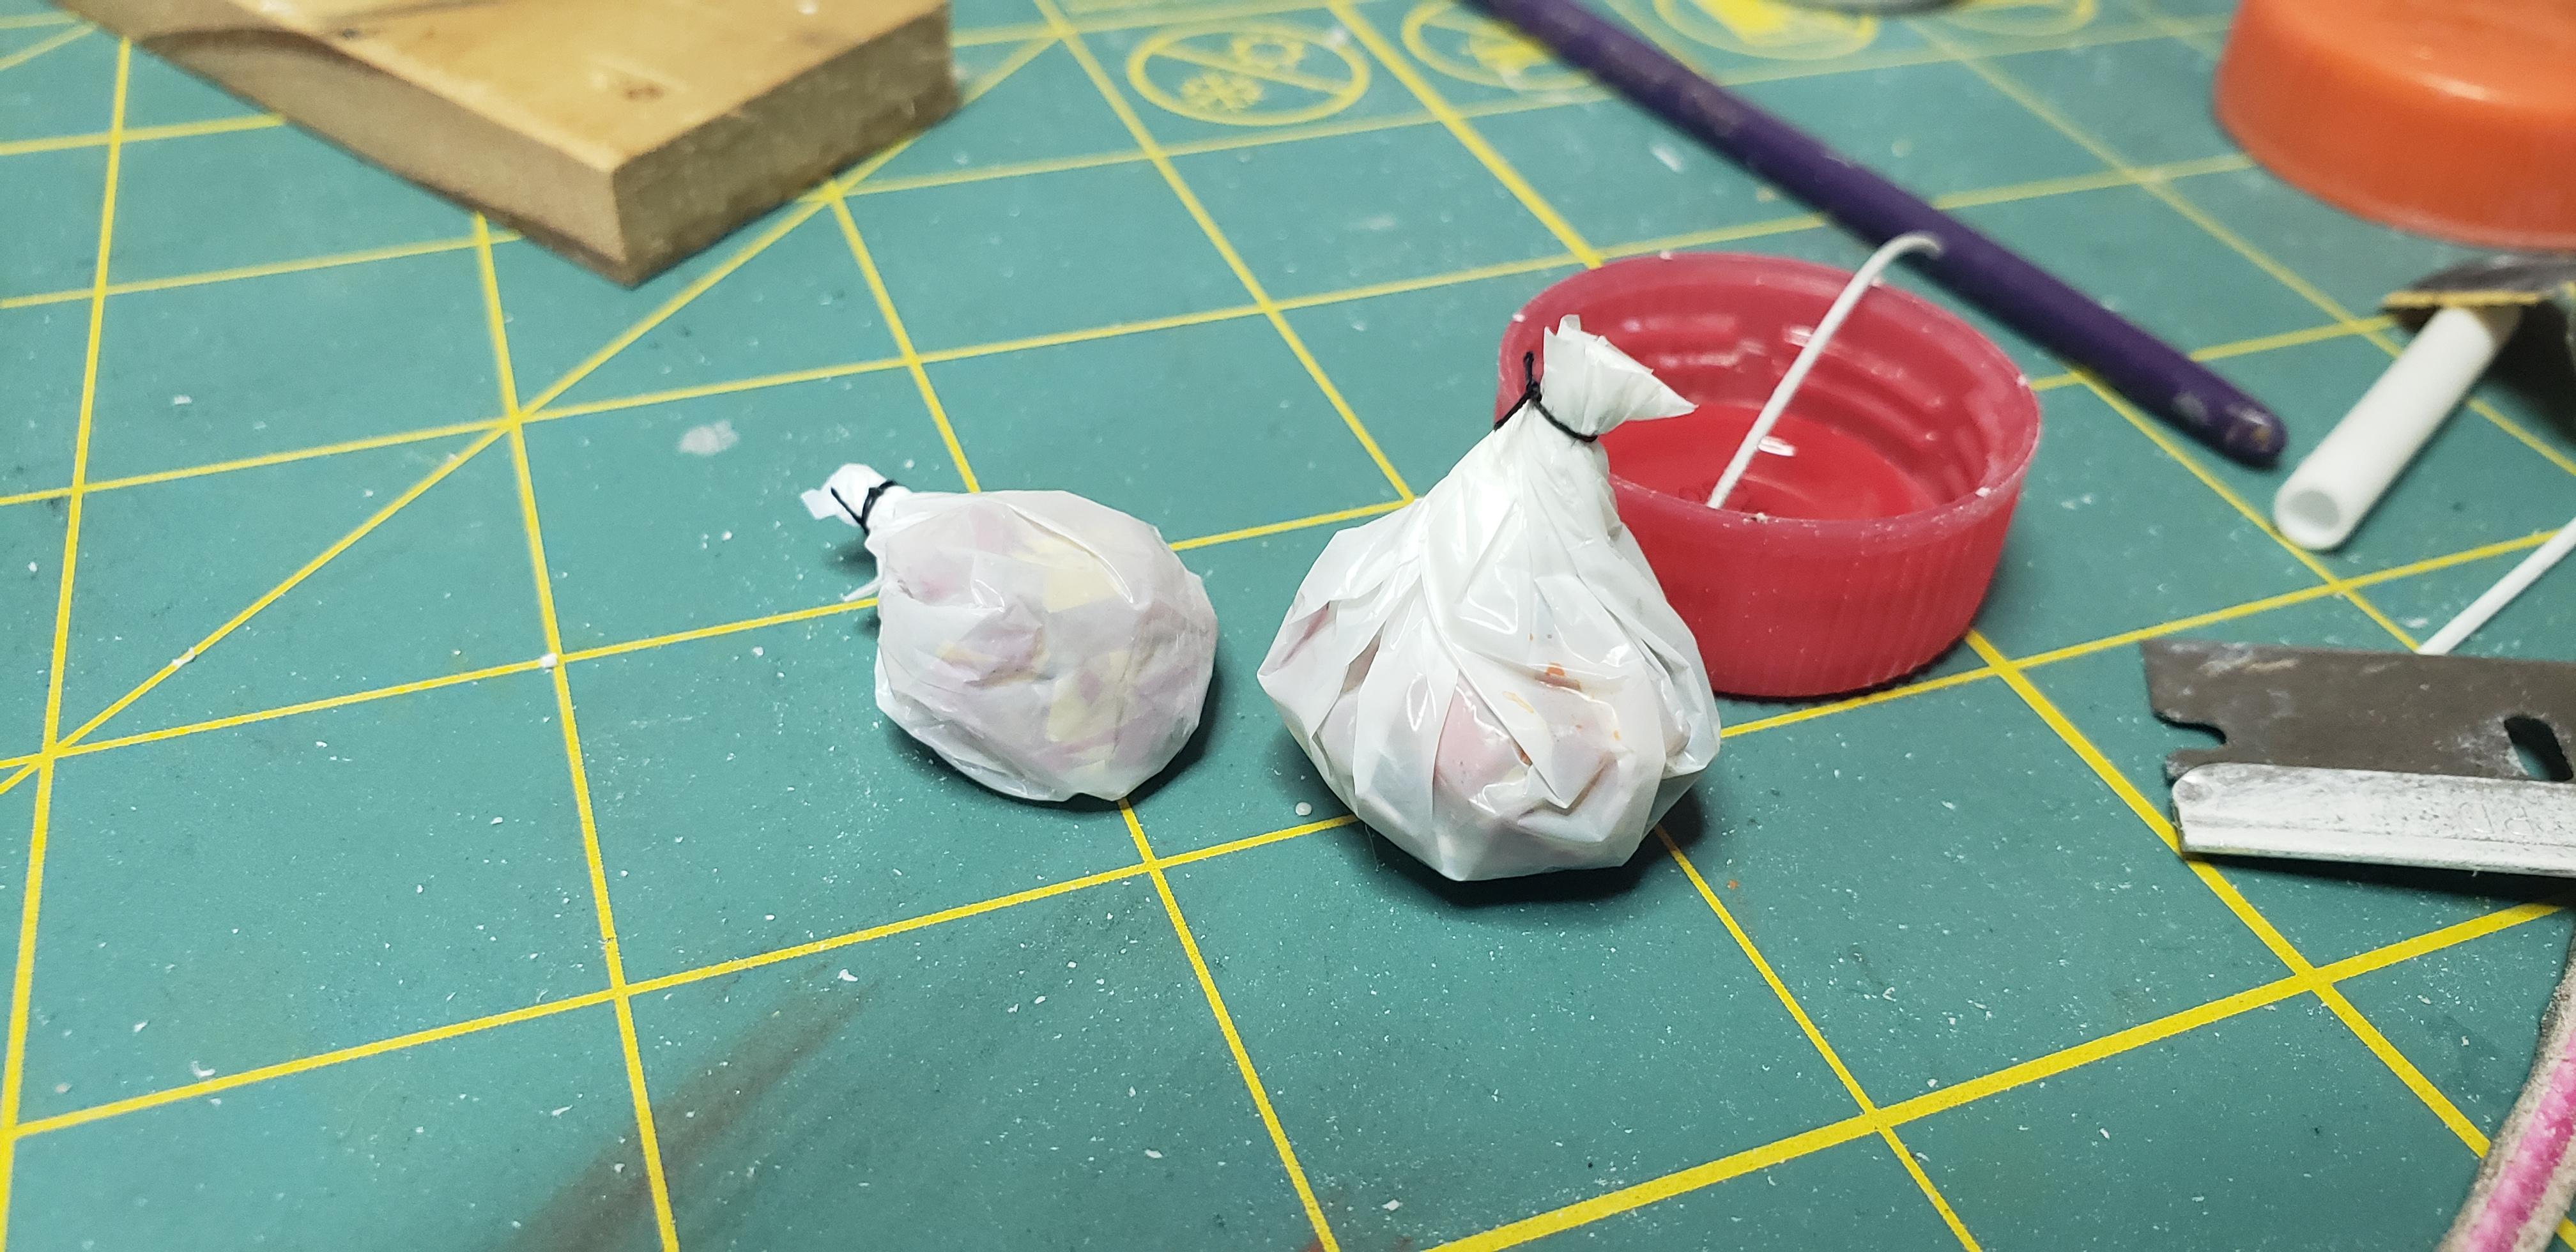
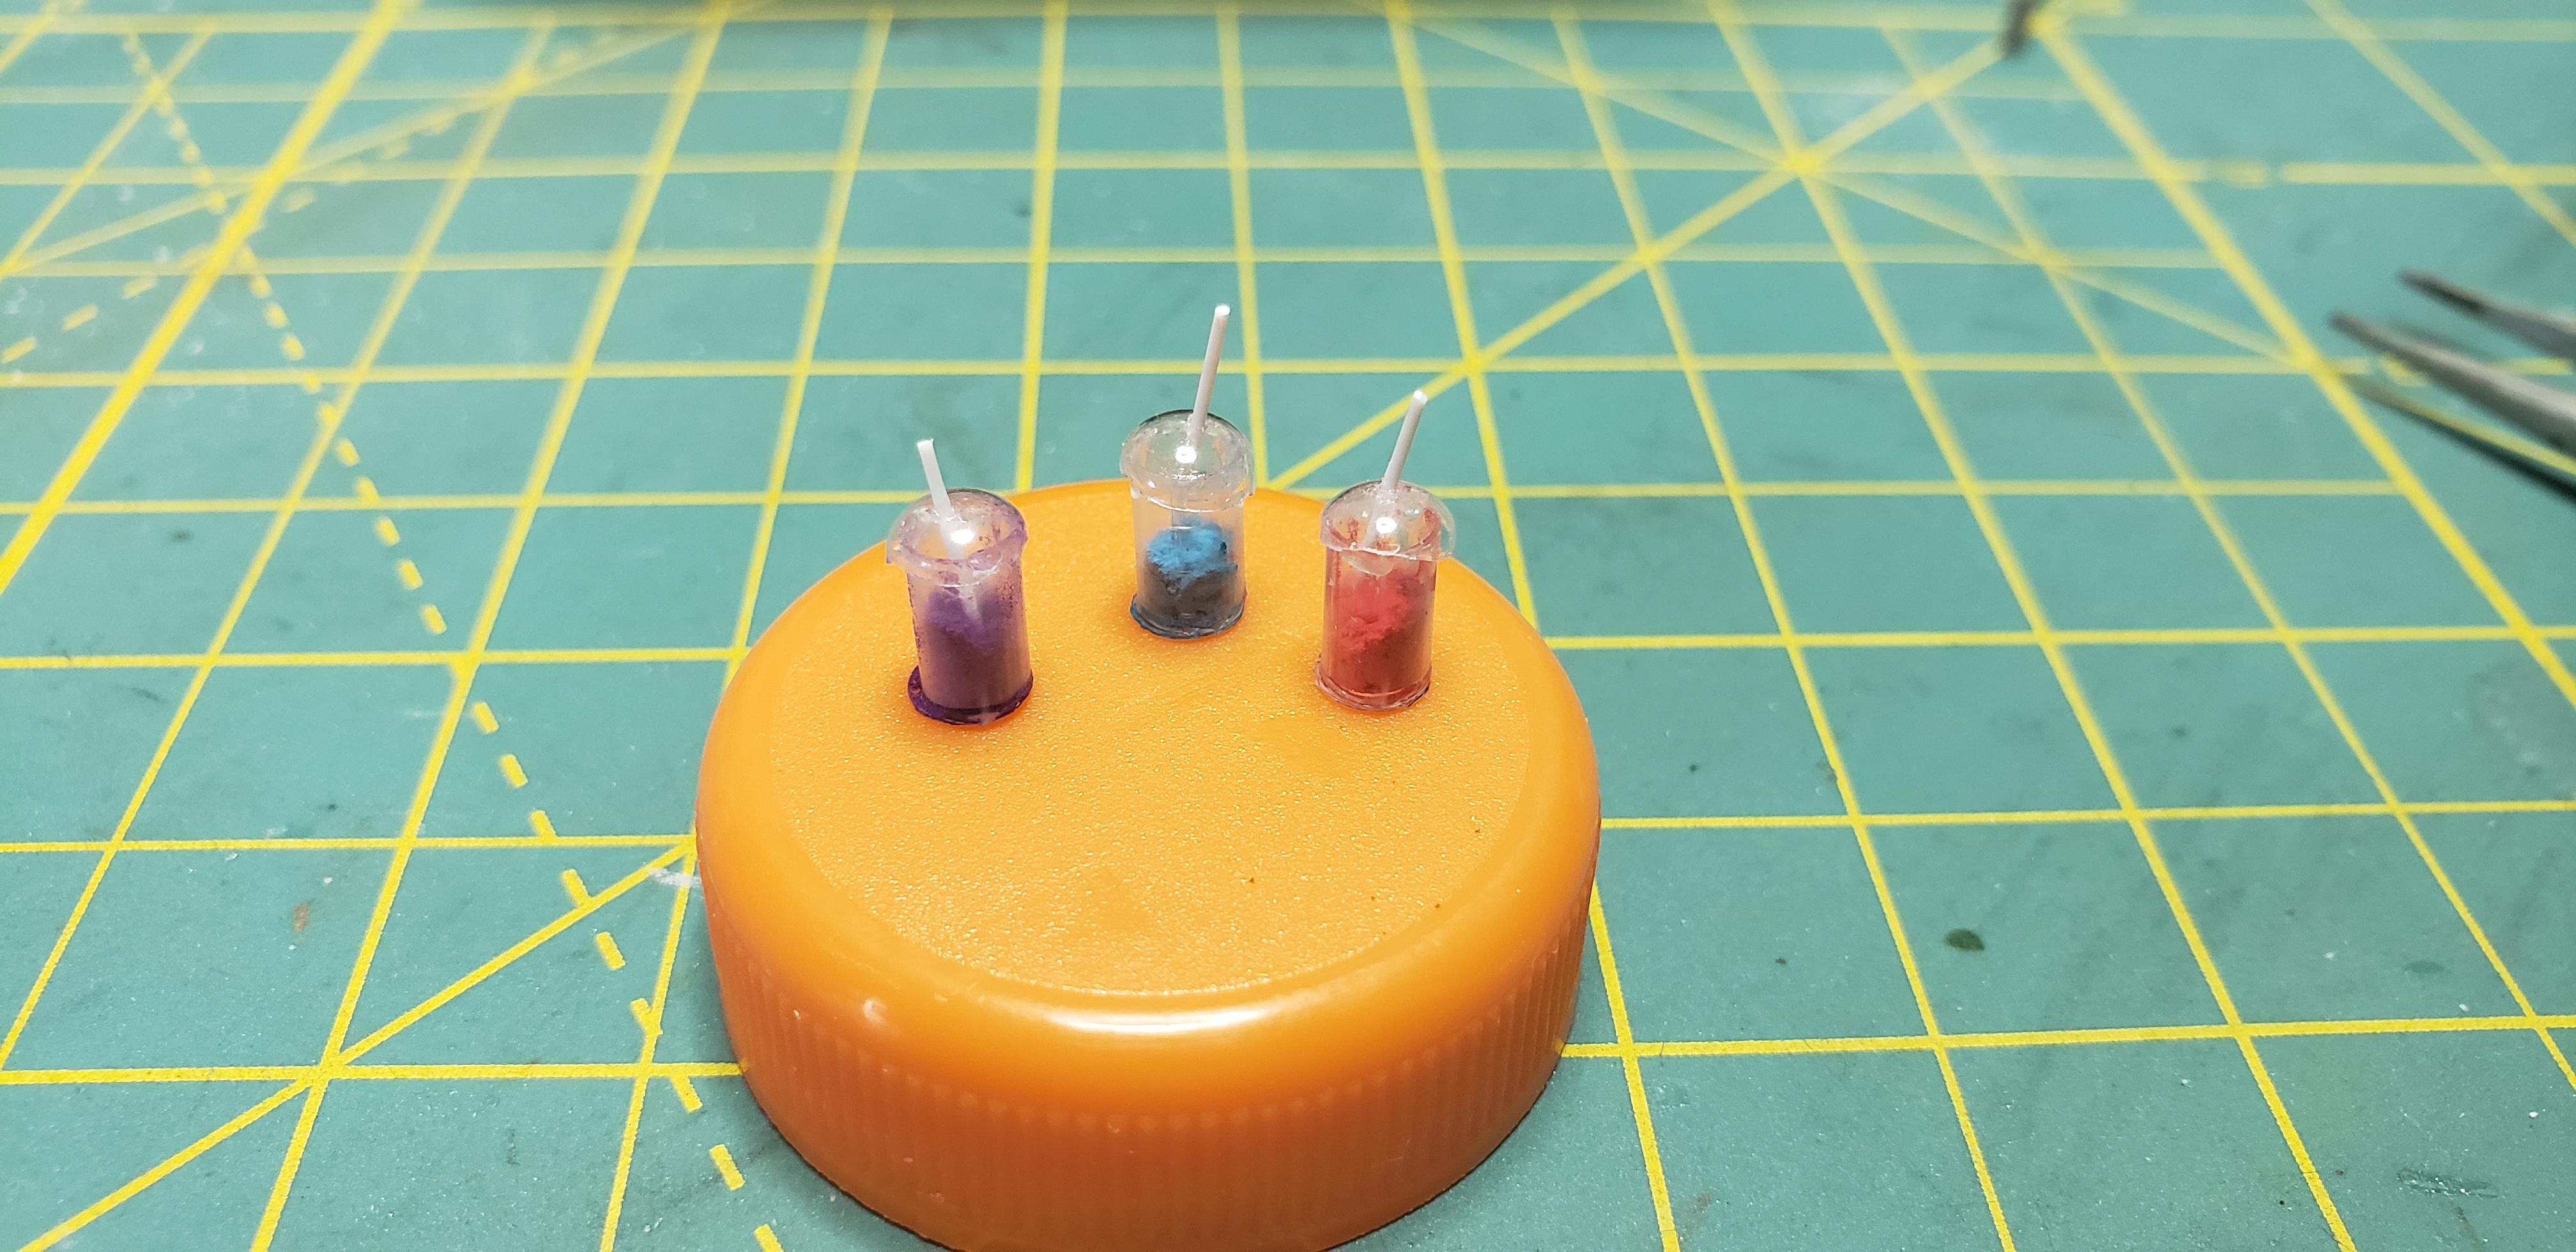
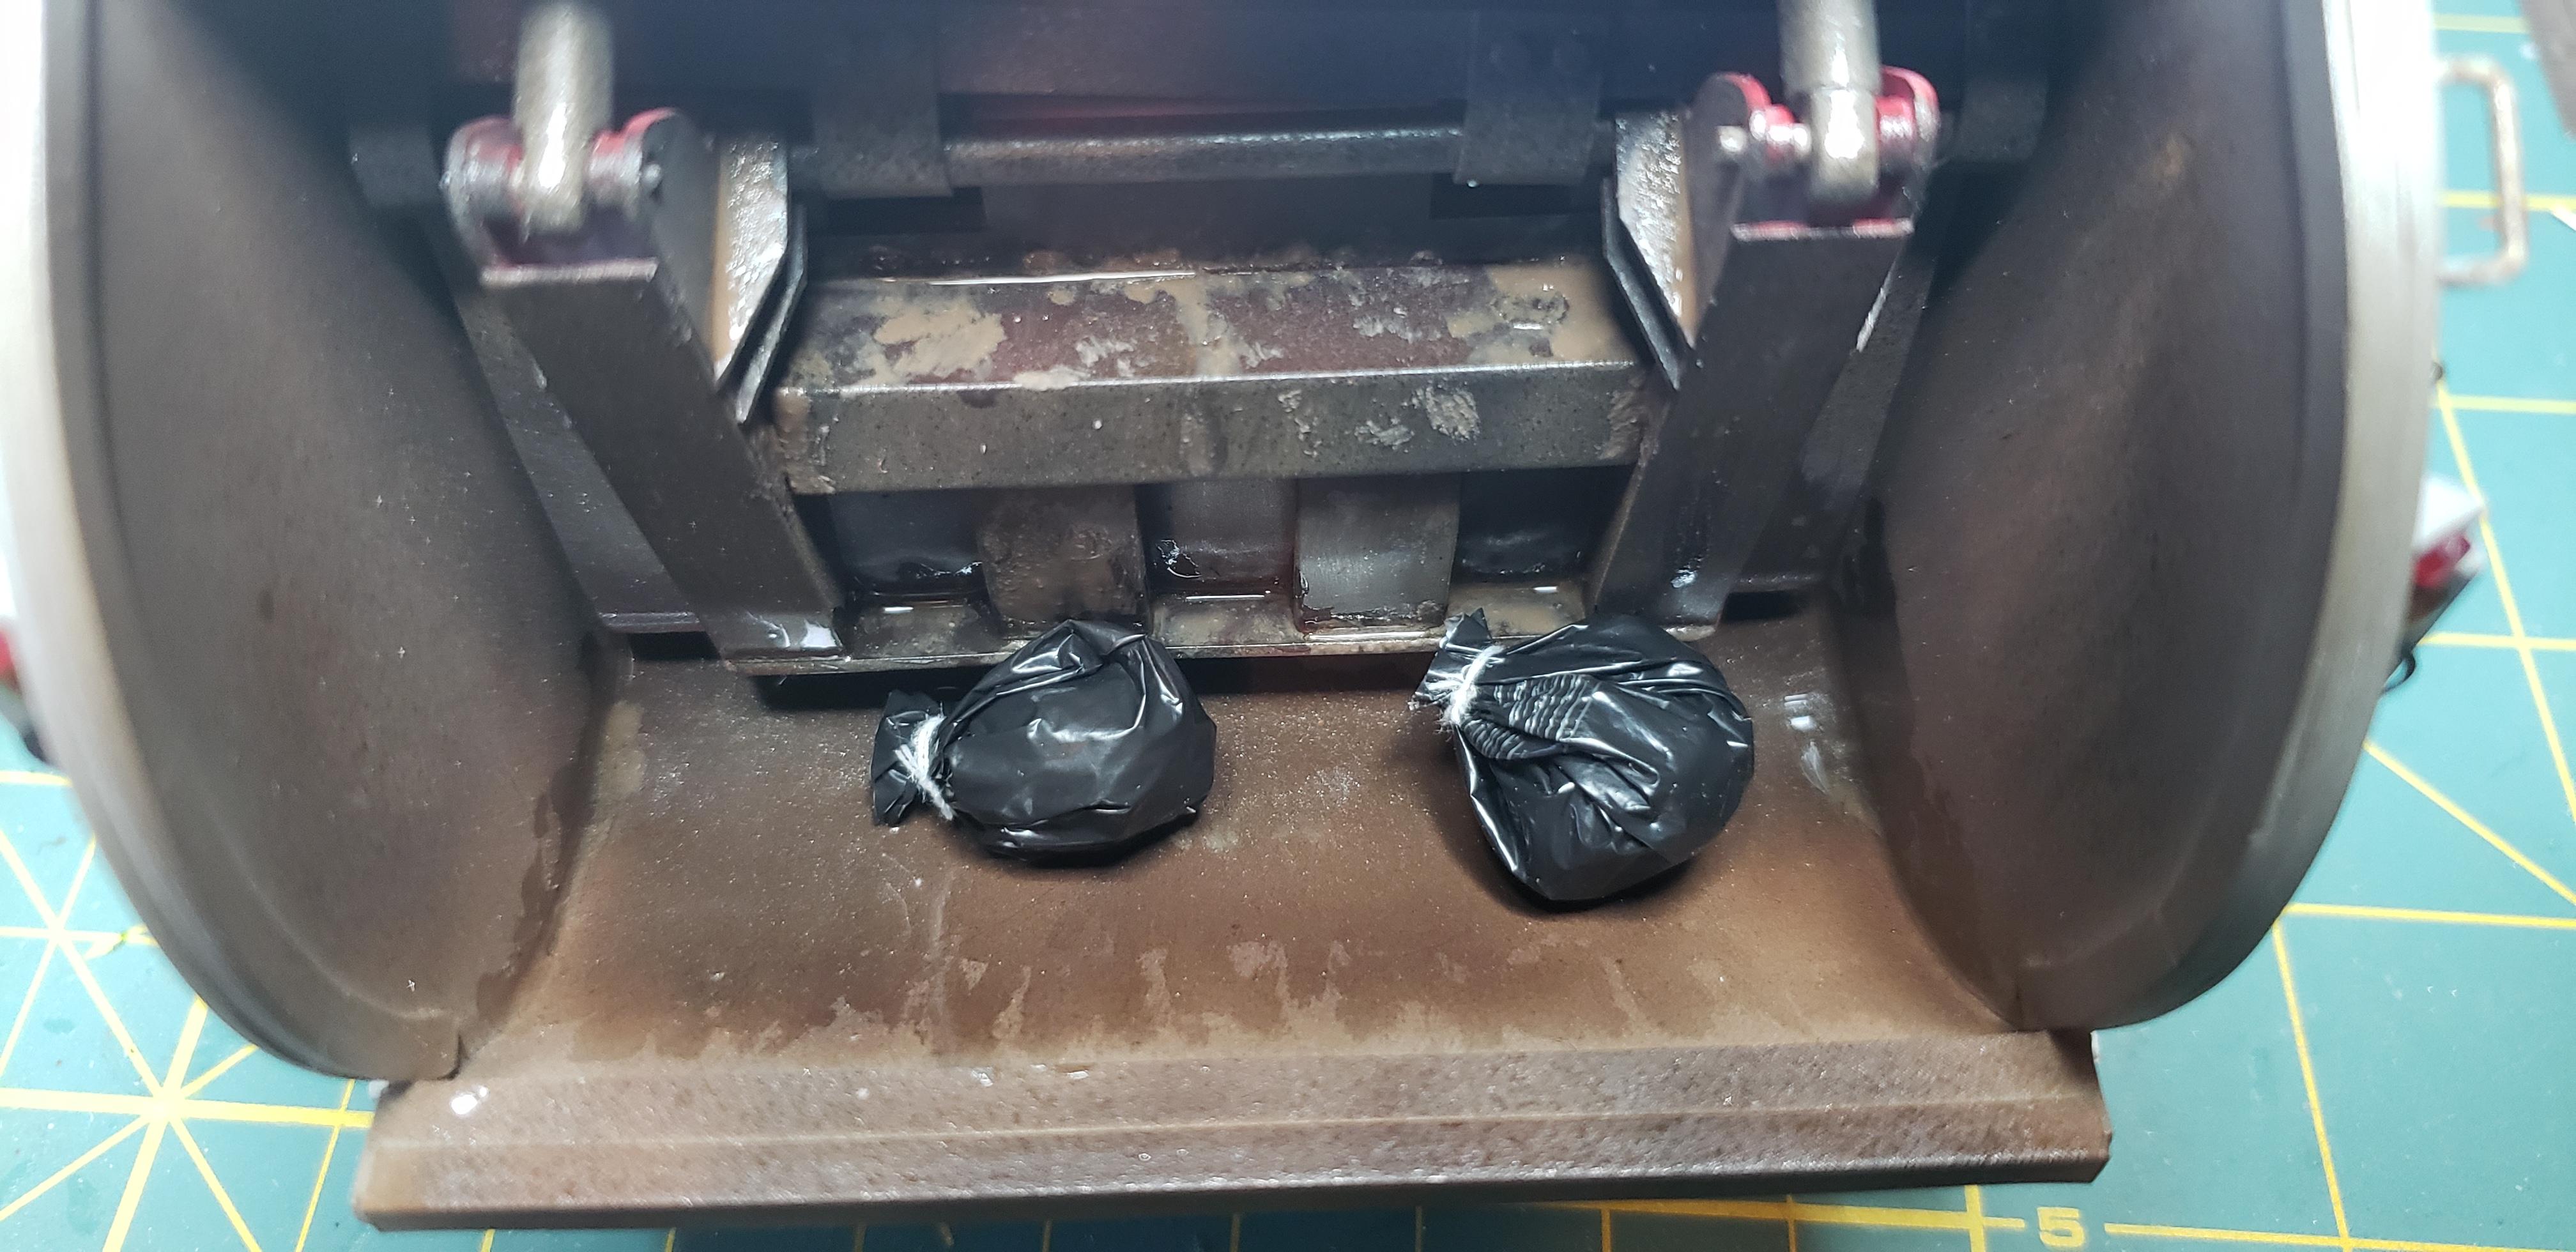
Last details before my Leach goes under glass, a couple bags of yard waste..and fabricated a couple slushie cups! I chose the white bags to show the ground up leaves ..hey its either rake them into piles for the wind to blow back into the yard..or haul em away !! The slushie cups are simply juice box straws, w googly eye tops..some 020" rod is the straws. The actual slushie is pastel dust, using my family favorite flavors as colors. A nice touch to finish off this enjoyable build Thanks for everyone who commented on the build, pics will be under glass soon
-
I use tubes from pipe insulation, those gray ones cut down for bumpers around the model. Micro fleece towels help cushion stuff too. Always take a quick fix package to shows , glue tweezers etc in case something pops off
-
Looking for ideas...trash
gotnitro? replied to gotnitro?'s topic in Model Building Questions and Answers
Here's what I have so far
-
Looking for ideas...trash
gotnitro? replied to gotnitro?'s topic in Model Building Questions and Answers
I have some using wet effects products and grimy black paint. The model is in the rig forum -
Ok friends time to get dirty !!! I'm suffering from builder block trying to come up w ideas to make my Leach packer believably dirty. I've made scale trash bags, but struggling to make it really disgusting. Help me w some ideas to make it interesting and nasty
-
Cat D8H Dozer
gotnitro? replied to Warren D's topic in WIP: Model Trucks: Big Rigs and Heavy Equipment
Gorgeous Cat dozer well done!! -
GMC General
gotnitro? replied to Gary Chastain's topic in WIP: Model Trucks: Big Rigs and Heavy Equipment
Etch can be finicky, but really adds to a finished build. I usually use flat nose pliers for bending, type found in jewelry dept for beading. One tip I've read for cutting them off the tree, was using a ceramic tile or piece of glass and new blade. Stick some masking tape doubled over to hold the parts from flying away. They sell little qtips w waxy ends for holding etch too..but can't recall who markets them. Small dots of testors canopy glue, or Elmer's white holds them. Ive been trying some different glue the ship builders are using called Gator Grip Thin Blend. Its like Elmer's w more bite. Dries clear and cleans up easy. -
BRBO Autocar tow truck (DONE)
gotnitro? replied to landman's topic in WIP: Model Trucks: Big Rigs and Heavy Equipment
Excellent work Pat ! Your details are really coming together -
R model Mack garbage truck Finished
gotnitro? replied to gotnitro?'s topic in WIP: Model Trucks: Big Rigs and Heavy Equipment
Thanks everyone I'm getting most of the weathering finished now..then finish those details I'm lacking. The broom idea was a 1st round fail back to drawing board Last night I added some gray / white powder mixed w turpenoid over the entire cab and hood . Shooting for a slightly dusty appearance..it took several times of cleaning heavy spots to finally settle in. Quick spray of Model Air matt coat will seal this and flatten the gloss of the packer body
-
R model Mack garbage truck Finished
gotnitro? replied to gotnitro?'s topic in WIP: Model Trucks: Big Rigs and Heavy Equipment
I picked up a couple rolls at model show a few yrs ago, down to slivers now and found out they quit making it -
R model Mack garbage truck Finished
gotnitro? replied to gotnitro?'s topic in WIP: Model Trucks: Big Rigs and Heavy Equipment
Thanks ! Theres a few more underway Today I added the company name, using a play on local and US history. The truck number and the door emblem is a big clue.. While those dried, I started the raw umber/ Paynes gray dot filters. Adding random dots, then wiping down w odorless turpentine blended them. I need a few more colors for variation.. Before .. way too uniform and bland After ..subtle is the key..not caked on The hopper side shows it better Once I finish this..dust pastels will add another layer then a Vallejo matt sealer wraps up this build Thanks for following