gotnitro?
-
Posts
4,498 -
Joined
-
Last visited
Content Type
Profiles
Forums
Events
Gallery
Everything posted by gotnitro?
-

GMC General
gotnitro? replied to Gary Chastain's topic in WIP: Model Trucks: Big Rigs and Heavy Equipment
Looks fantastic !!! -
R model Mack garbage truck Finished
gotnitro? replied to gotnitro?'s topic in WIP: Model Trucks: Big Rigs and Heavy Equipment
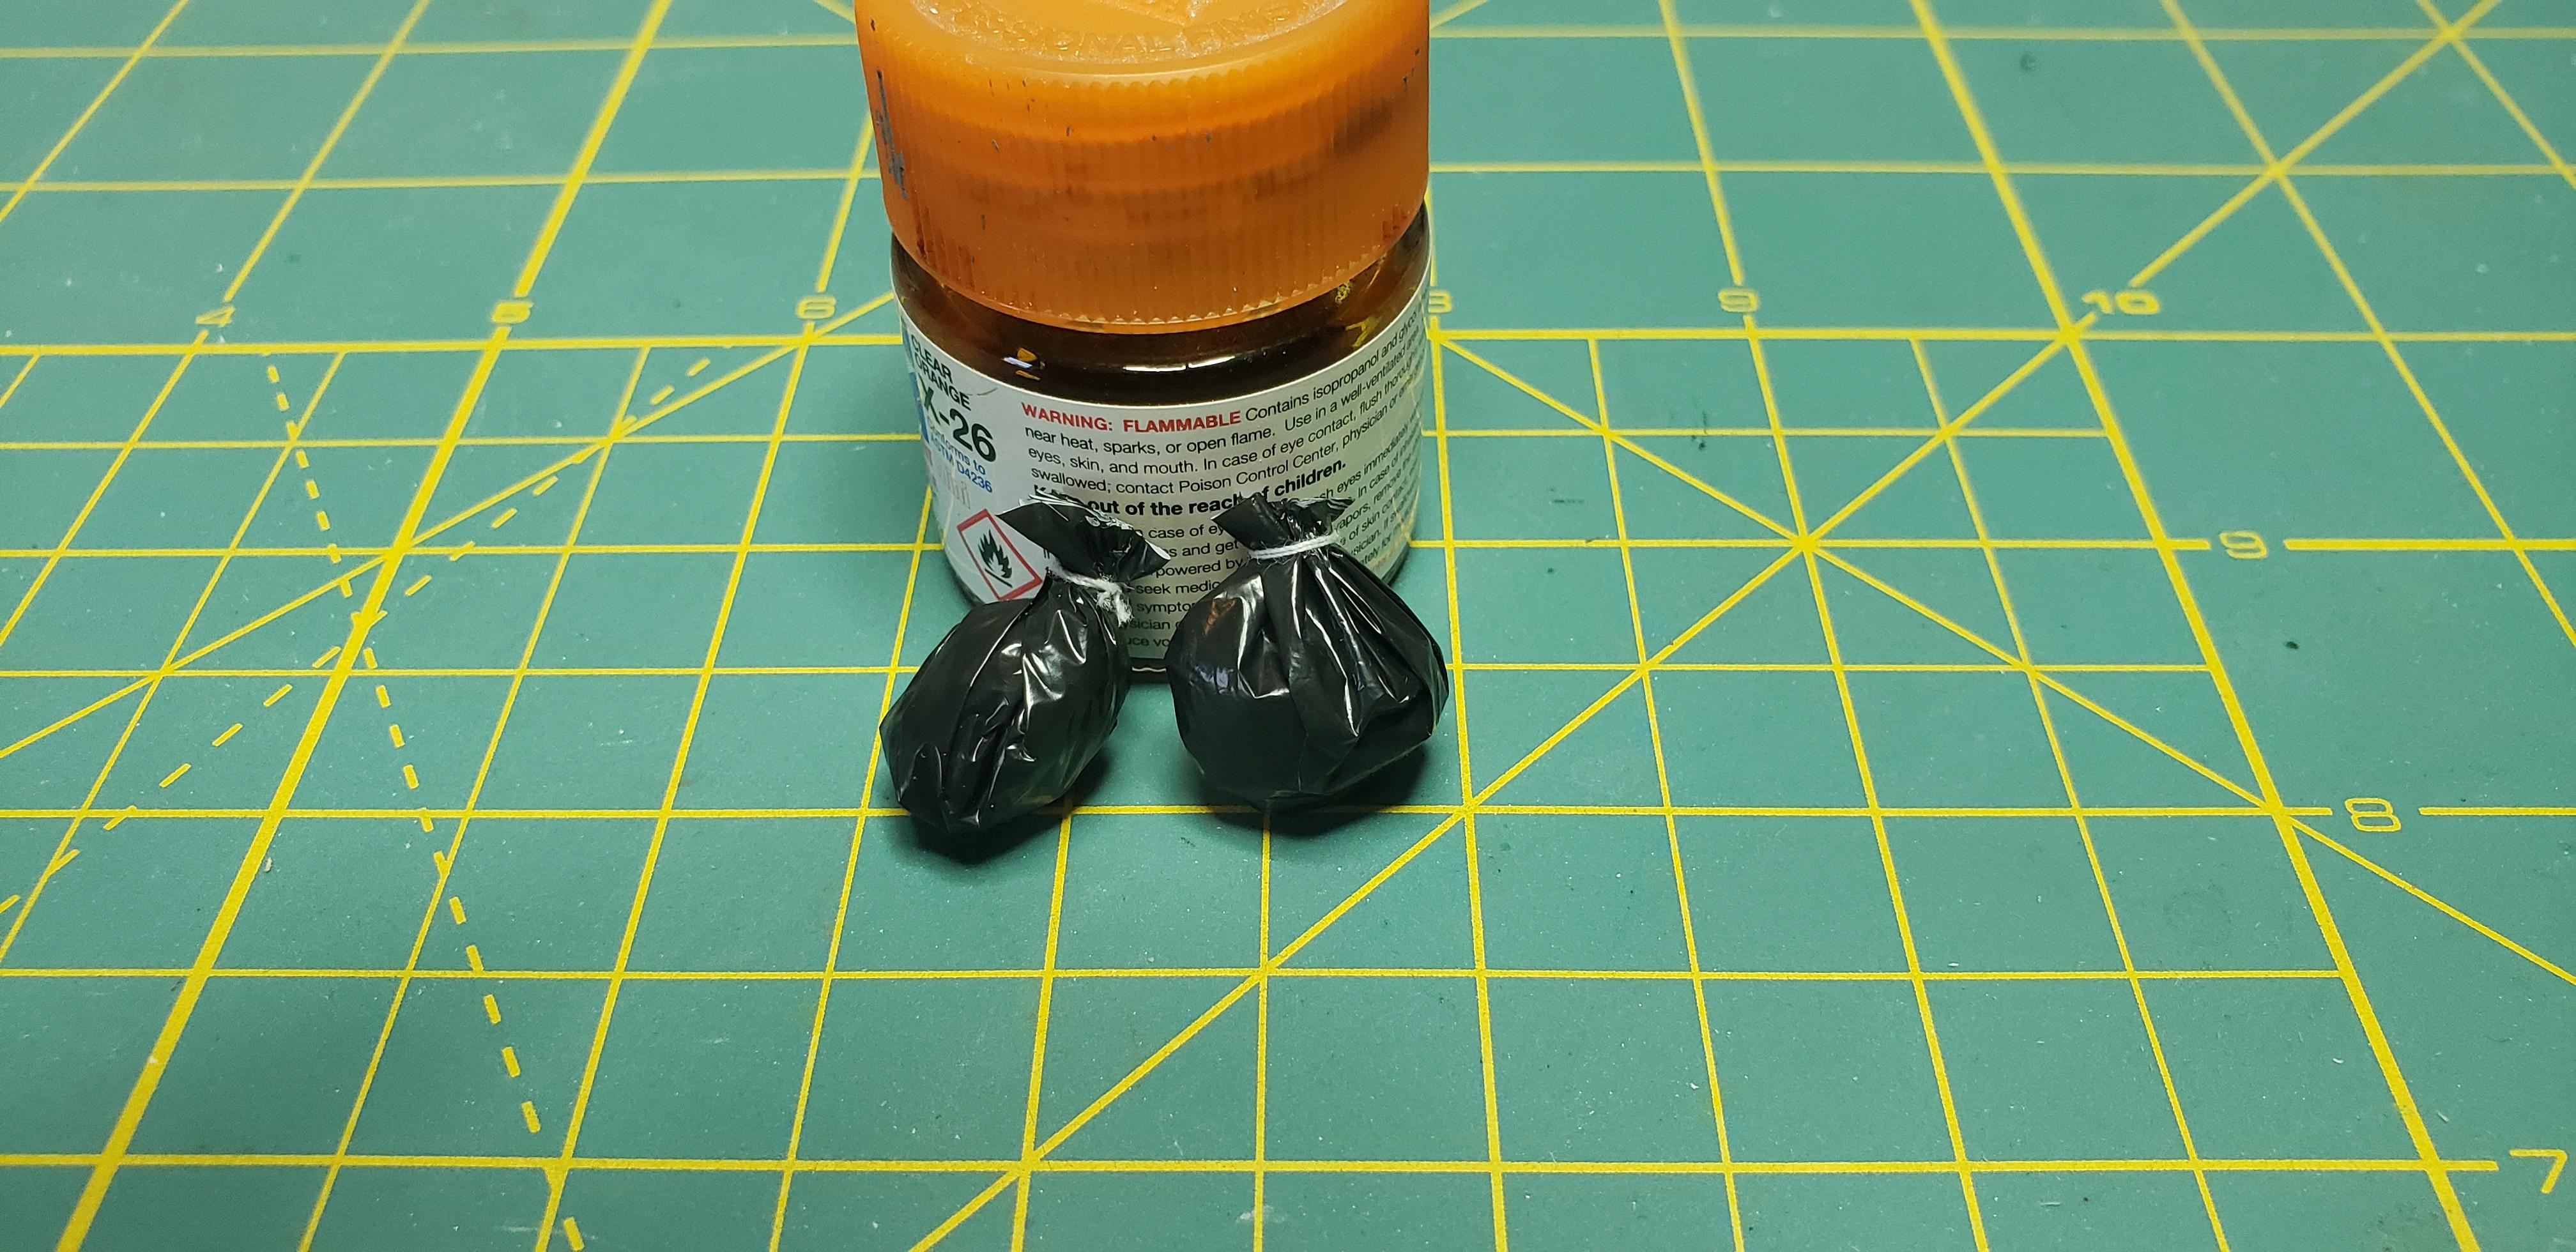
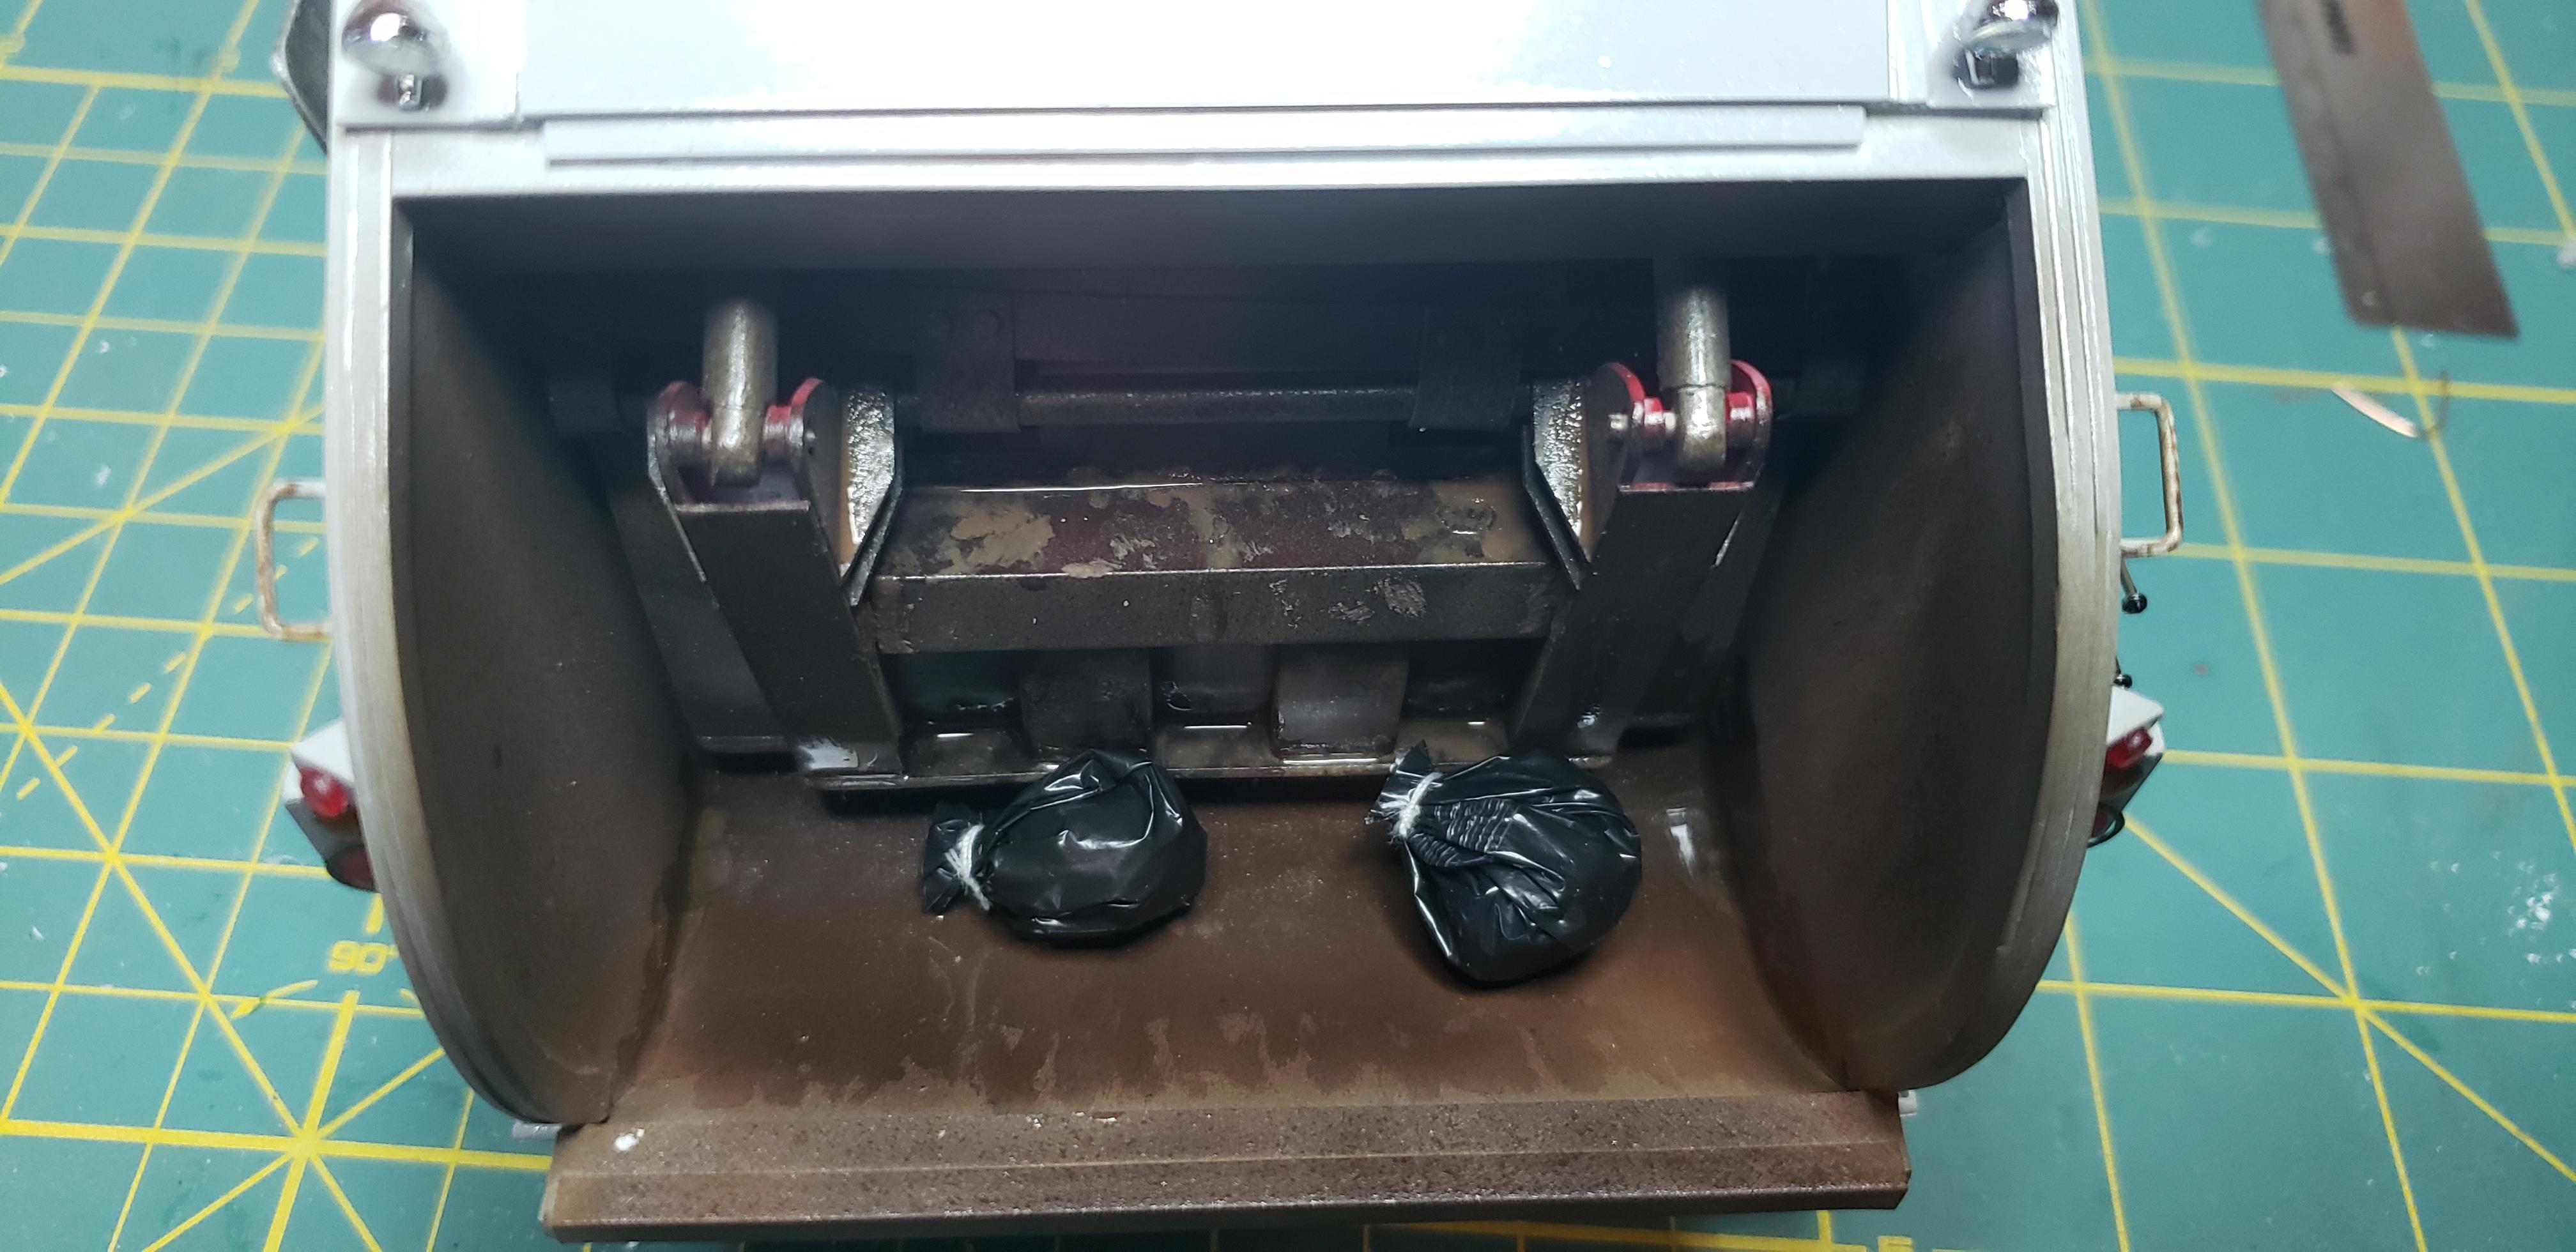
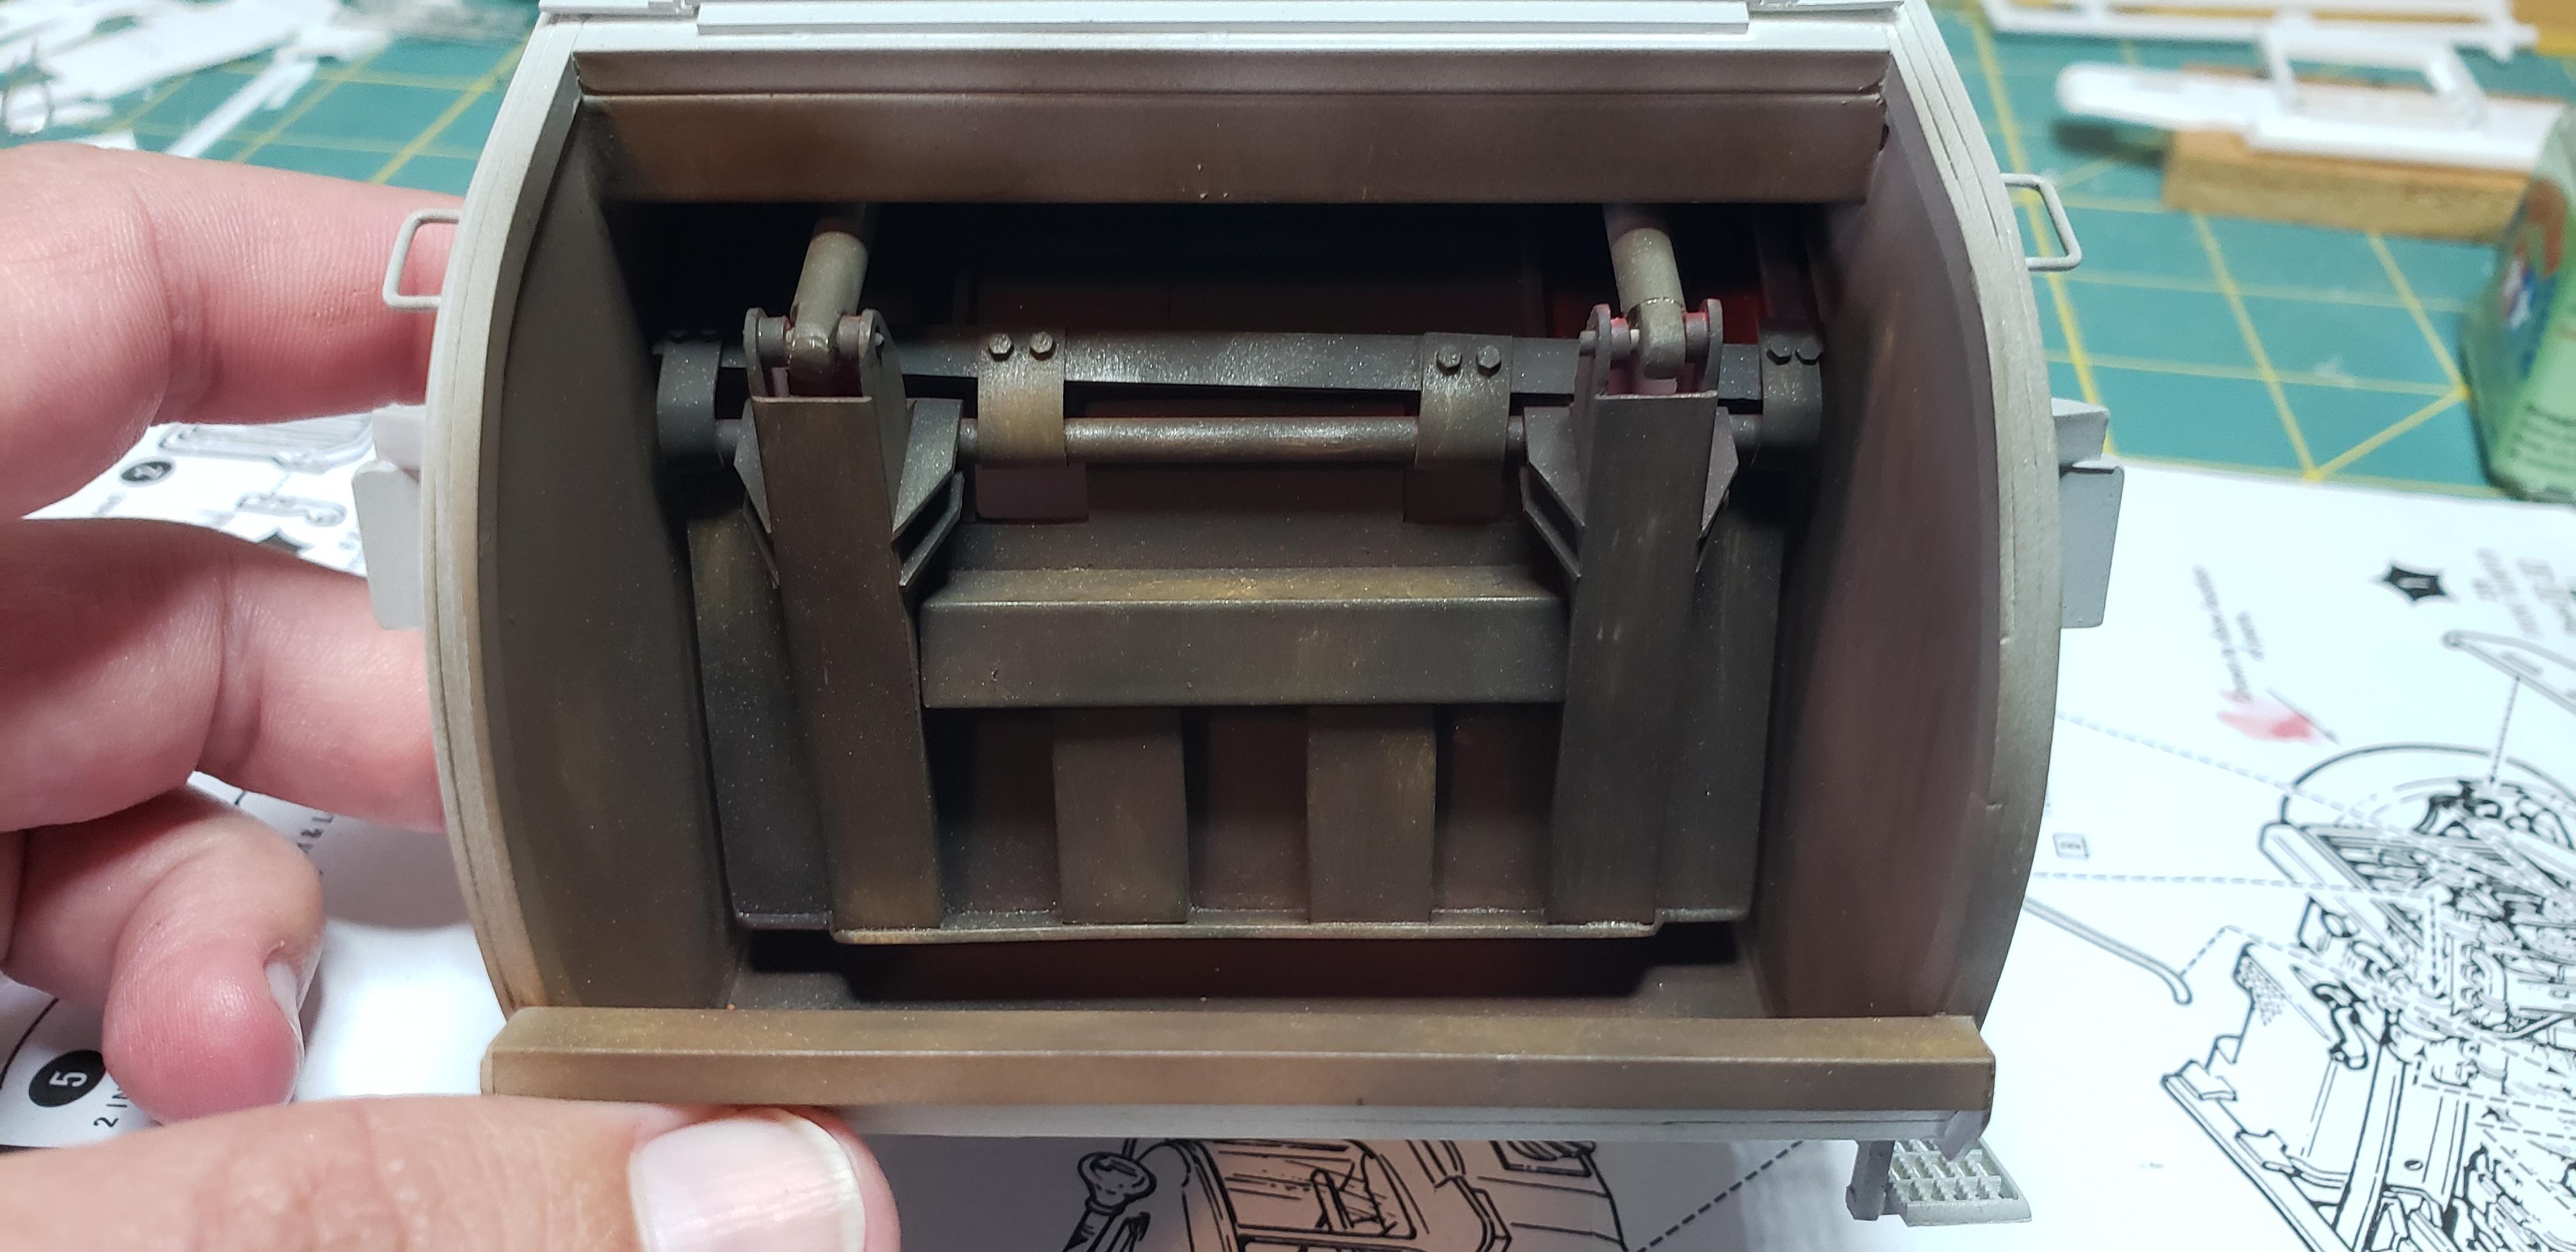
I wanted to try making garbage details for the hopper, 1st up was bags. I took a section off a 1-1 bag and stuffed a wadded up clump of tissue inside. Tying off the ends yielded a cool looking bag, so the squirrels bashed a few more. The hopper was given a coating of AK wet effects to represent the pool of soup that lingers. I tossed the bags into the hopper for fun..looked pretty good! I have several ideas for trash to add, then dusty grime to finish it off. Getting the oil "dot filters" on the sides is next, using multiple colors for common staining on these from the yrs outside in the elements.
-
Nice work, especially the hinged fender extension Looking forward to your interior updates Biggest gripe i have w these trucks is the curved thick glass , looks completely odd when installed almost like bug eyes
-
R model Mack garbage truck Finished
gotnitro? replied to gotnitro?'s topic in WIP: Model Trucks: Big Rigs and Heavy Equipment
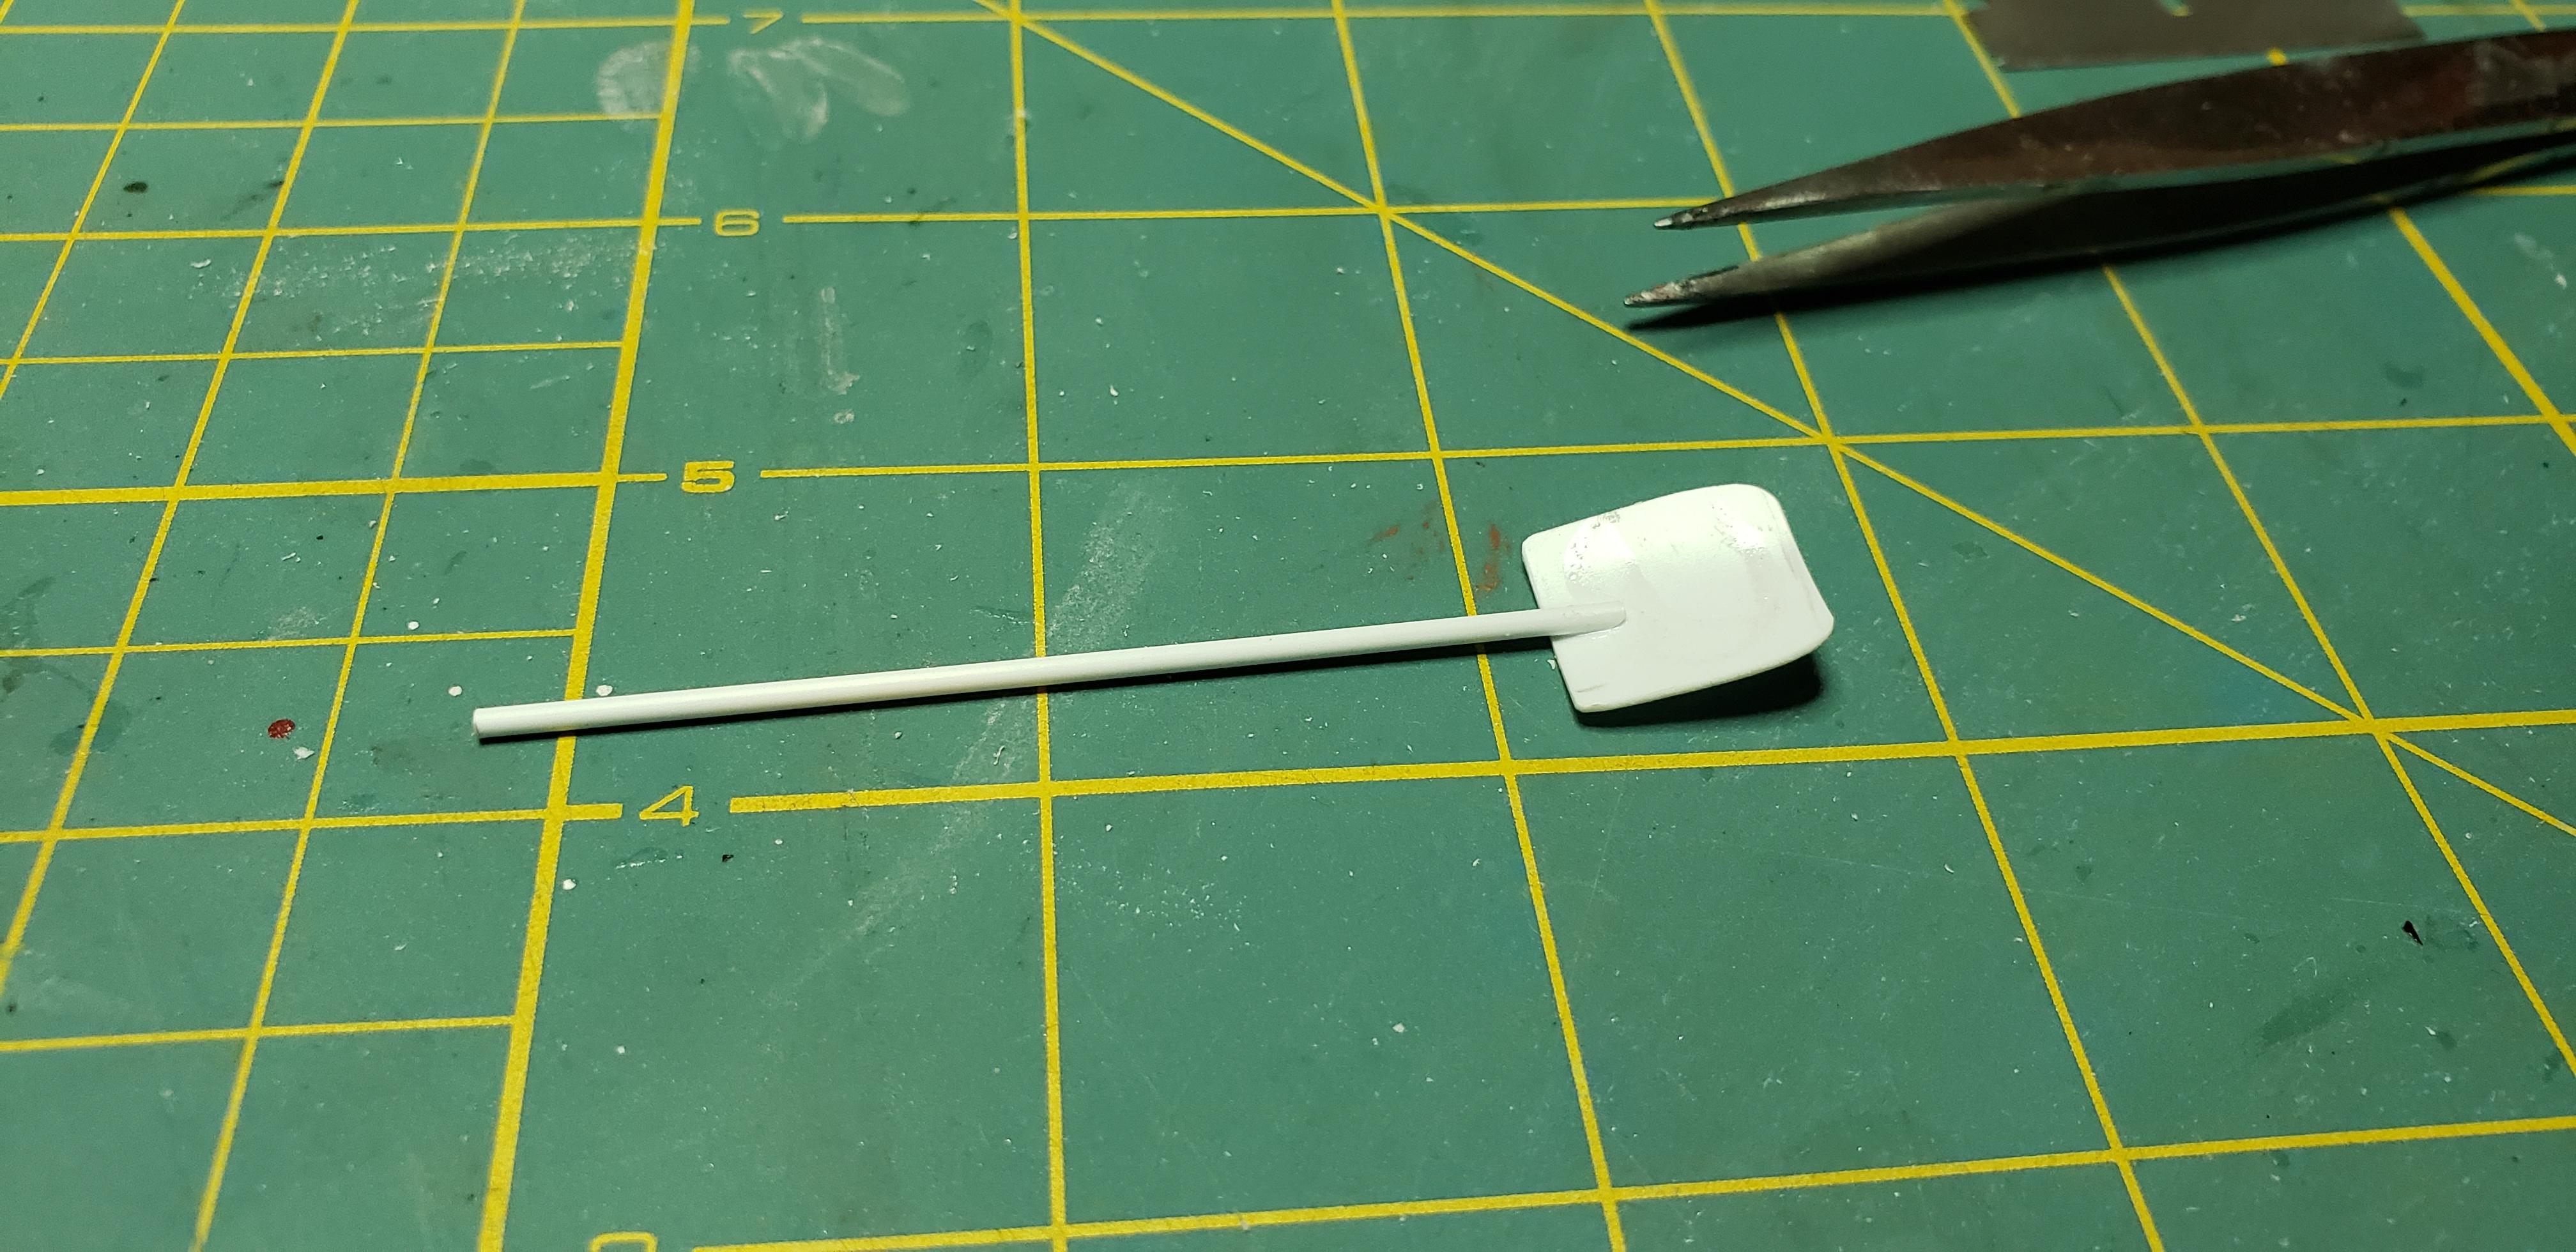
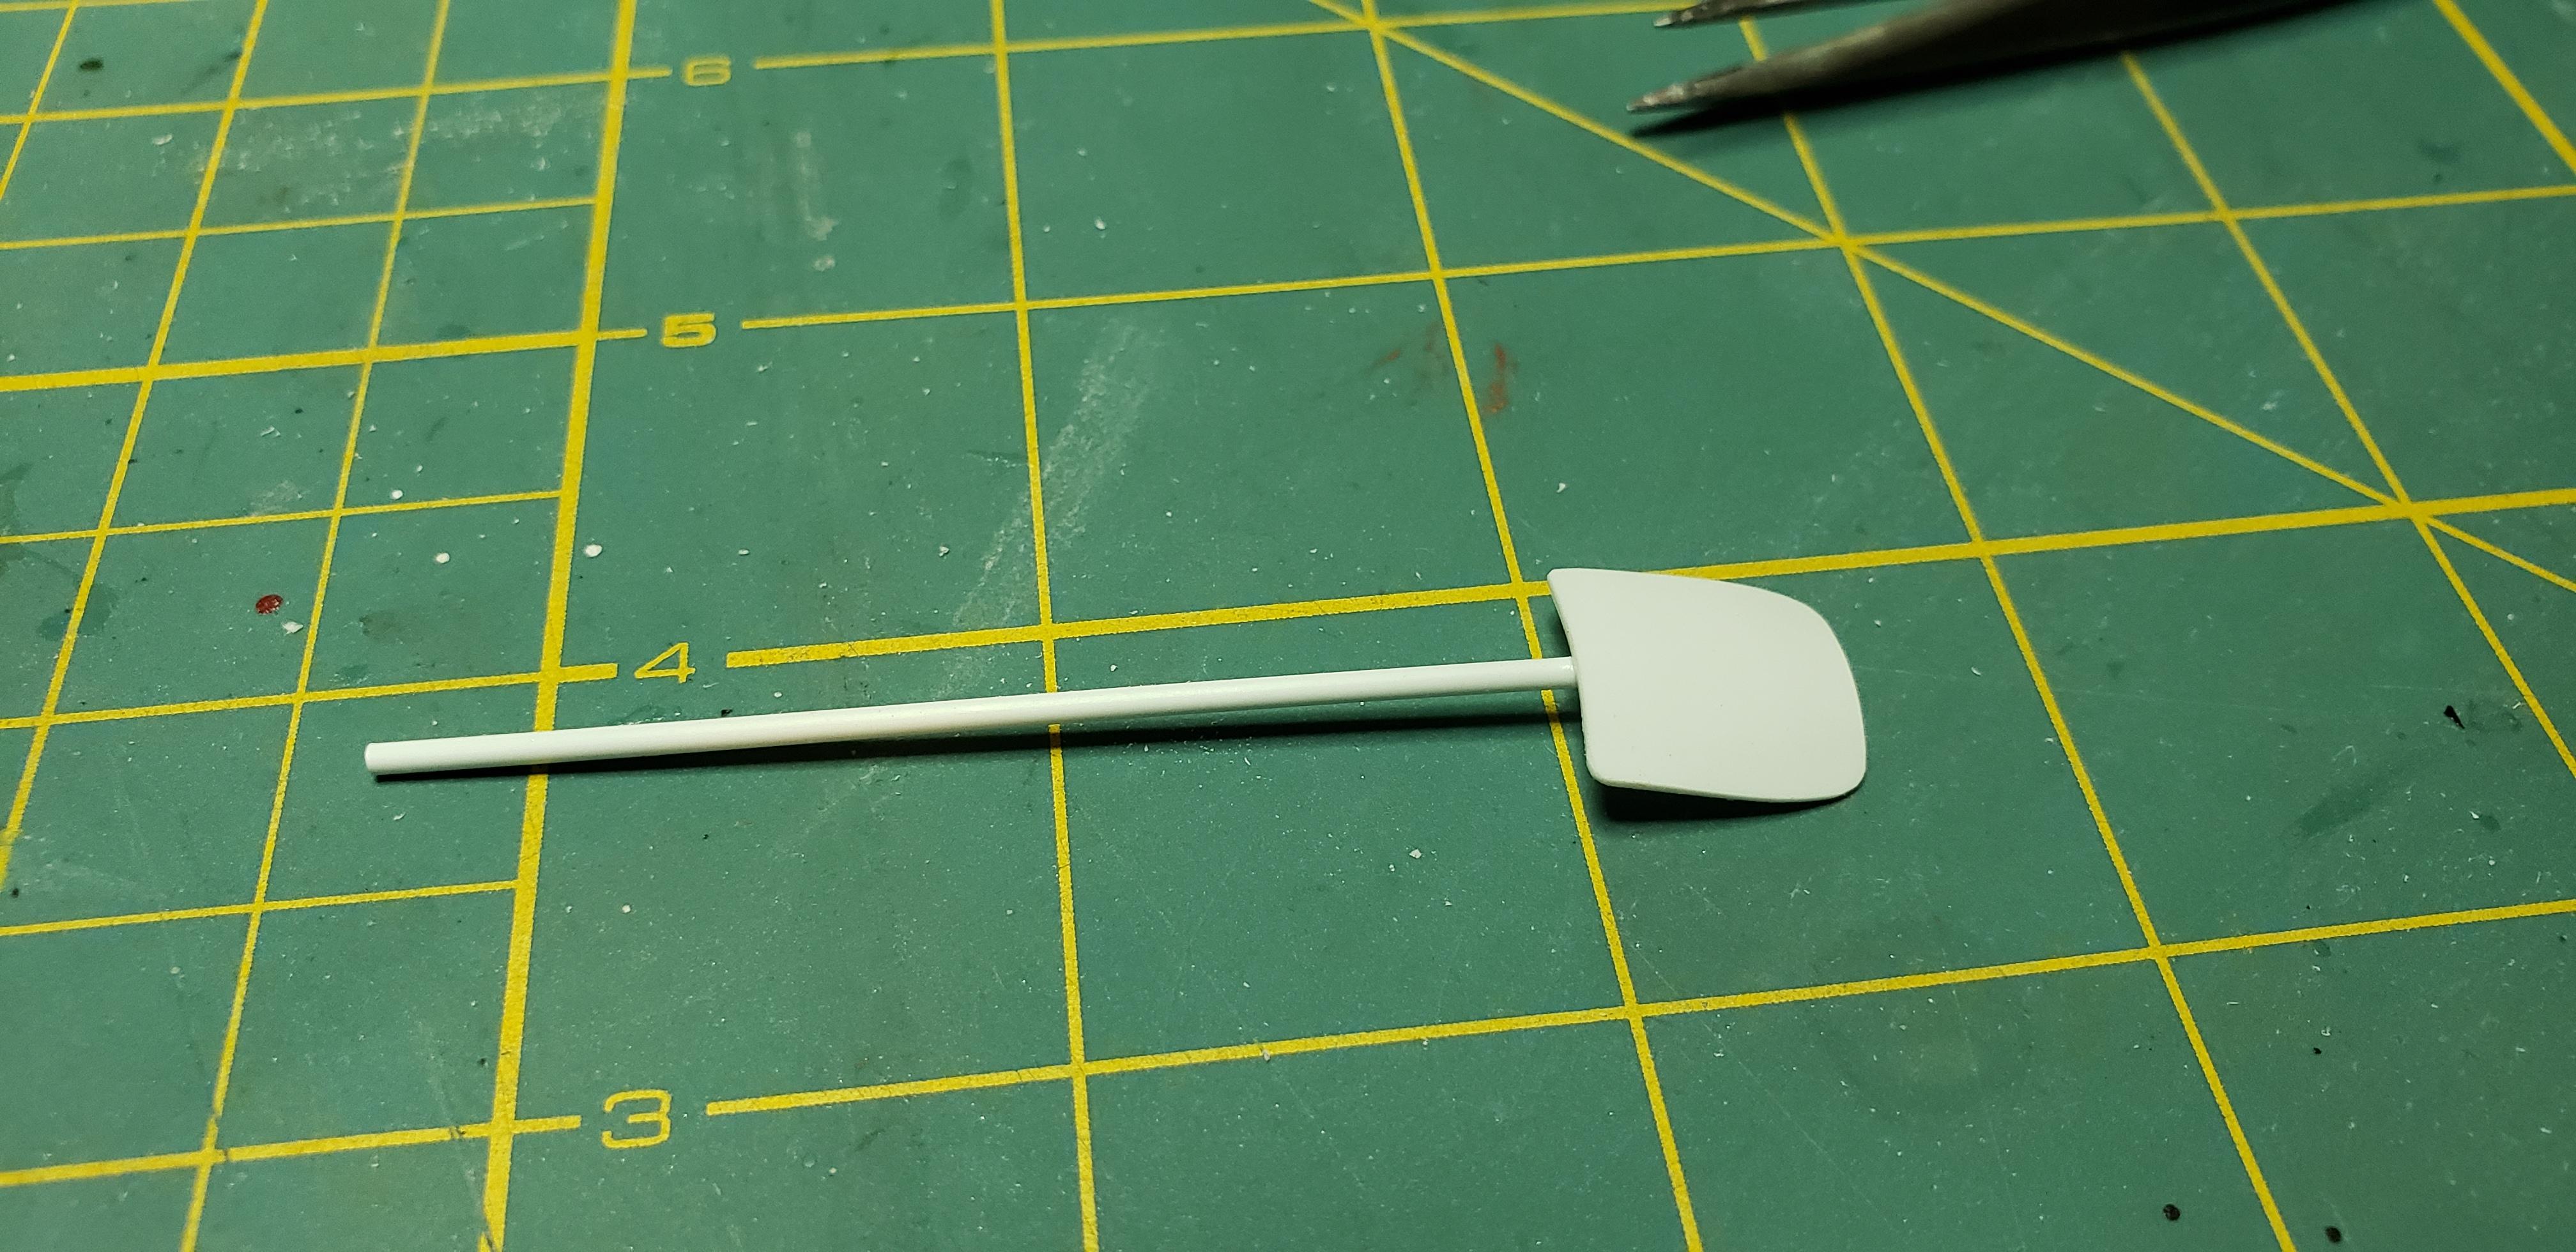
Thanks everyone I appreciate the feedback I dabbled w a few details over the wknd, starting on the clean up gear. Most photos showed a few common tools hanging off the trucks , and I wasn't about to leave them off. These are roughed in right now, but you'll know what I'm doing The broom is nearly done, spent awhile looking around house for suitable bristles for the broom head. I found course type on our door mat ..shhhhh hopefully no one notices the corner missing hahaha The quicker picker upper needs more detail, but the overall shape is done. These both should add a touch of realism, along w the debris I'm thinking about
-
Nice work! The DR kit was my 1st venture building truck kits, fun build
-
1944 Diamond T 6x6
gotnitro? replied to Chariots of Fire's topic in WIP: Model Trucks: Big Rigs and Heavy Equipment
Gorgeous work right down to the dip stick. What did you use for fan belts -
Fulton Model Car and Truck Show Video added
gotnitro? replied to 12V71's topic in Contests and Shows
Looking forward to attending the 30th annual show always a great time w tons of vendors and builds -
R model Mack garbage truck Finished
gotnitro? replied to gotnitro?'s topic in WIP: Model Trucks: Big Rigs and Heavy Equipment
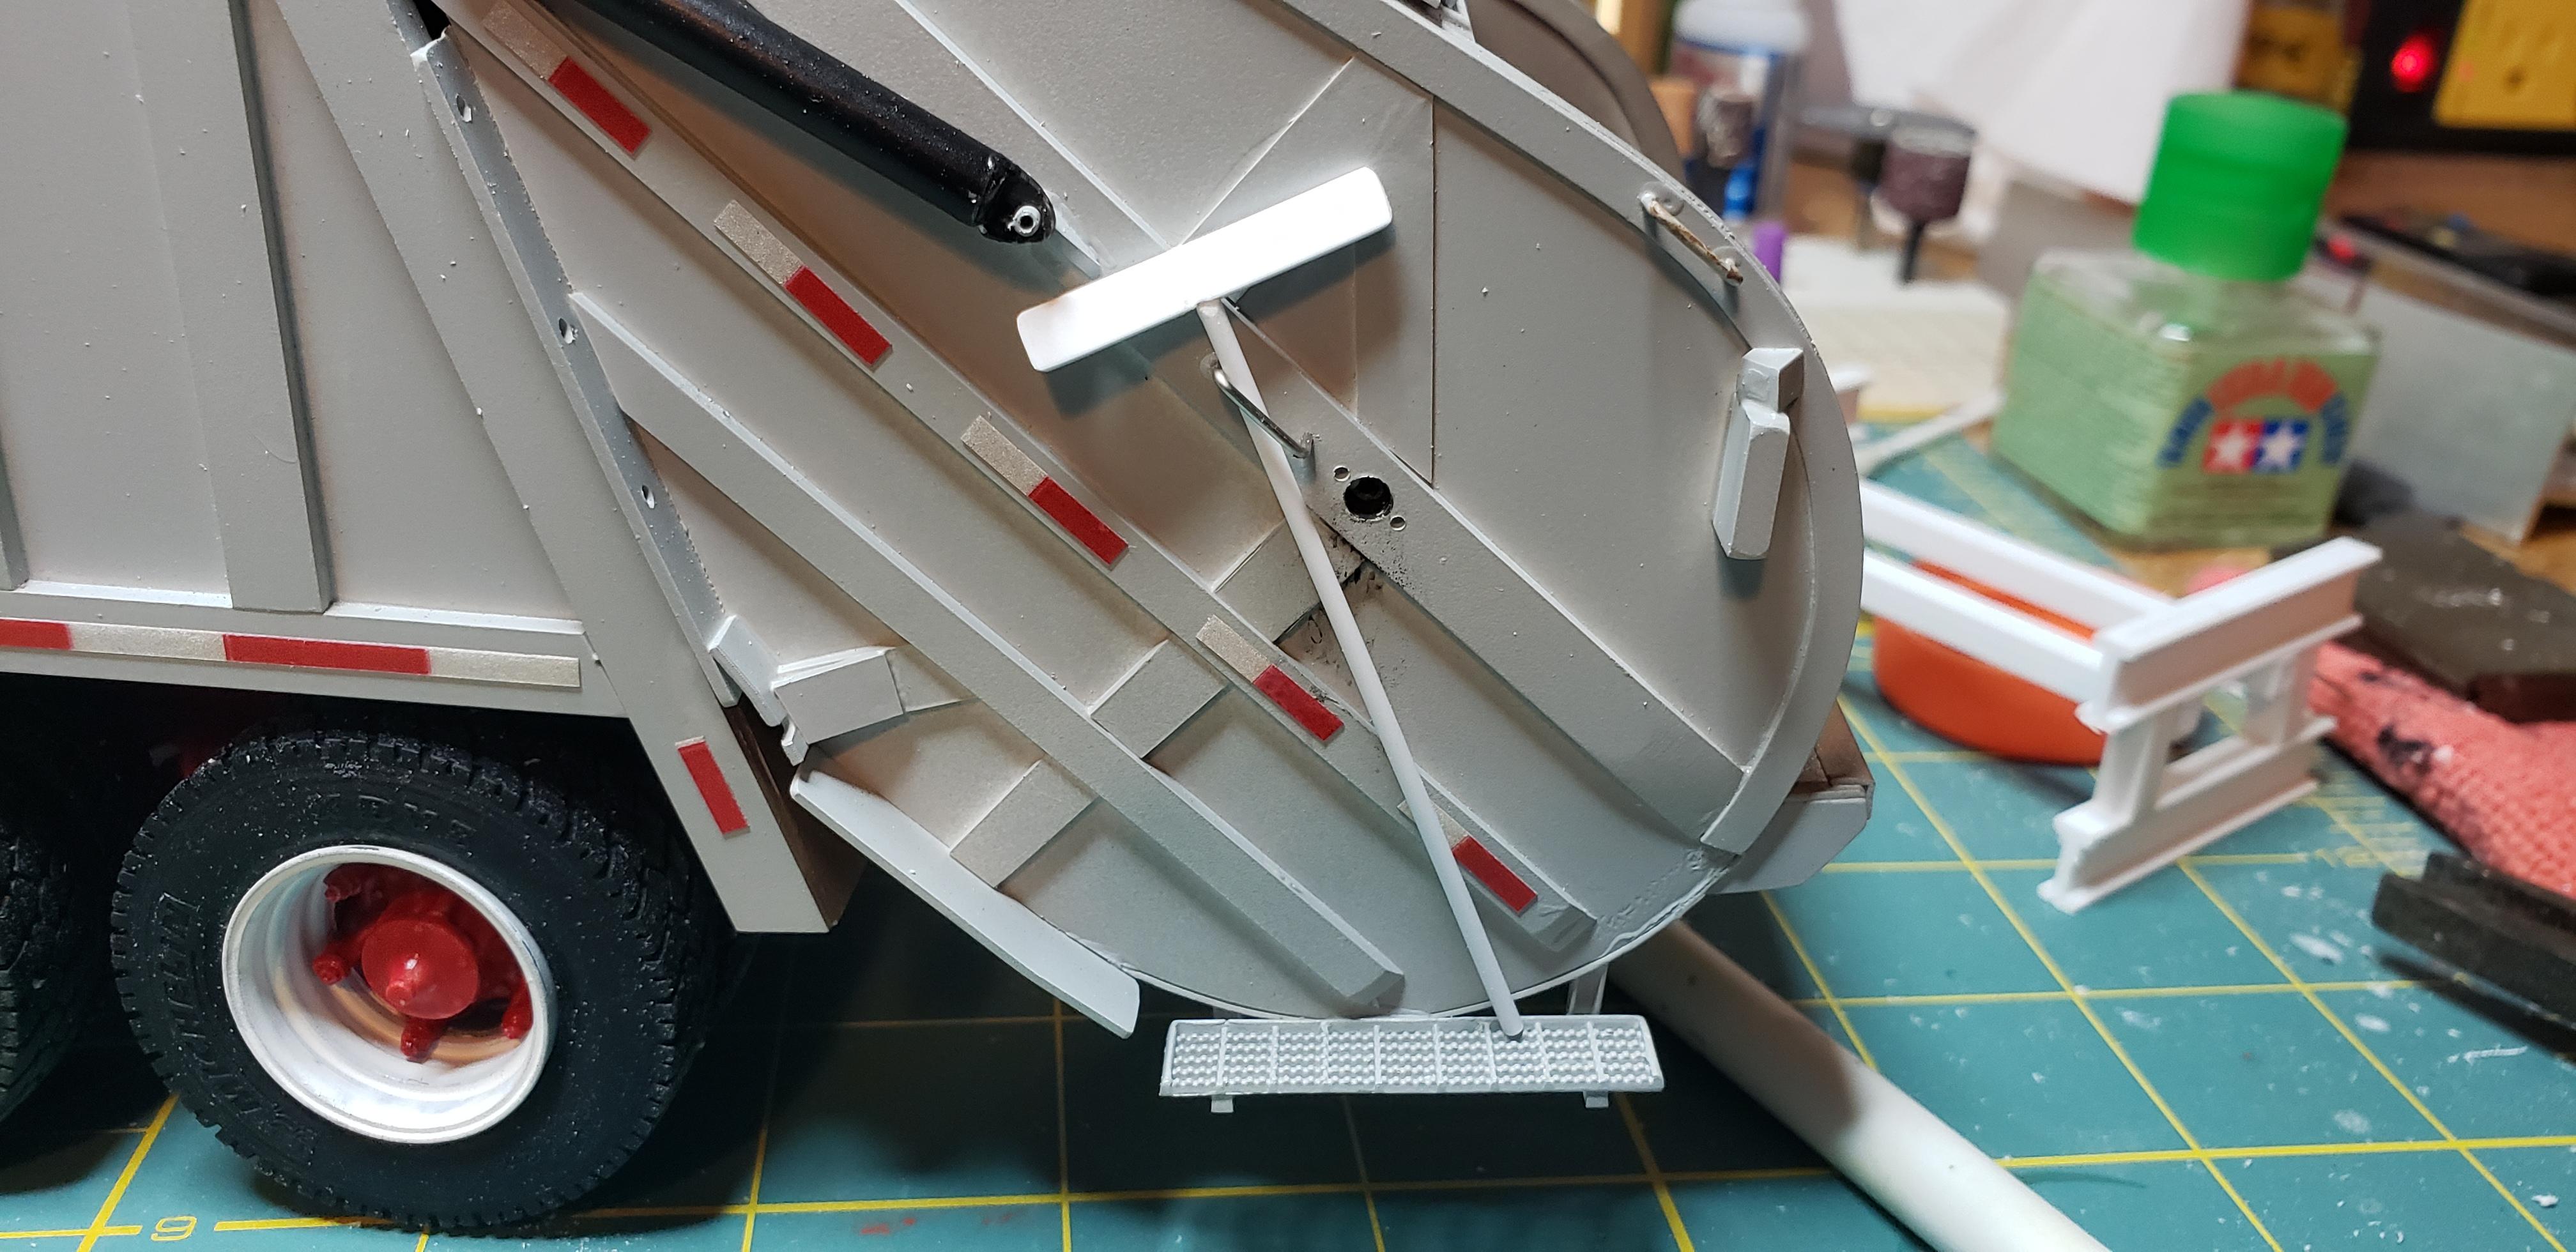
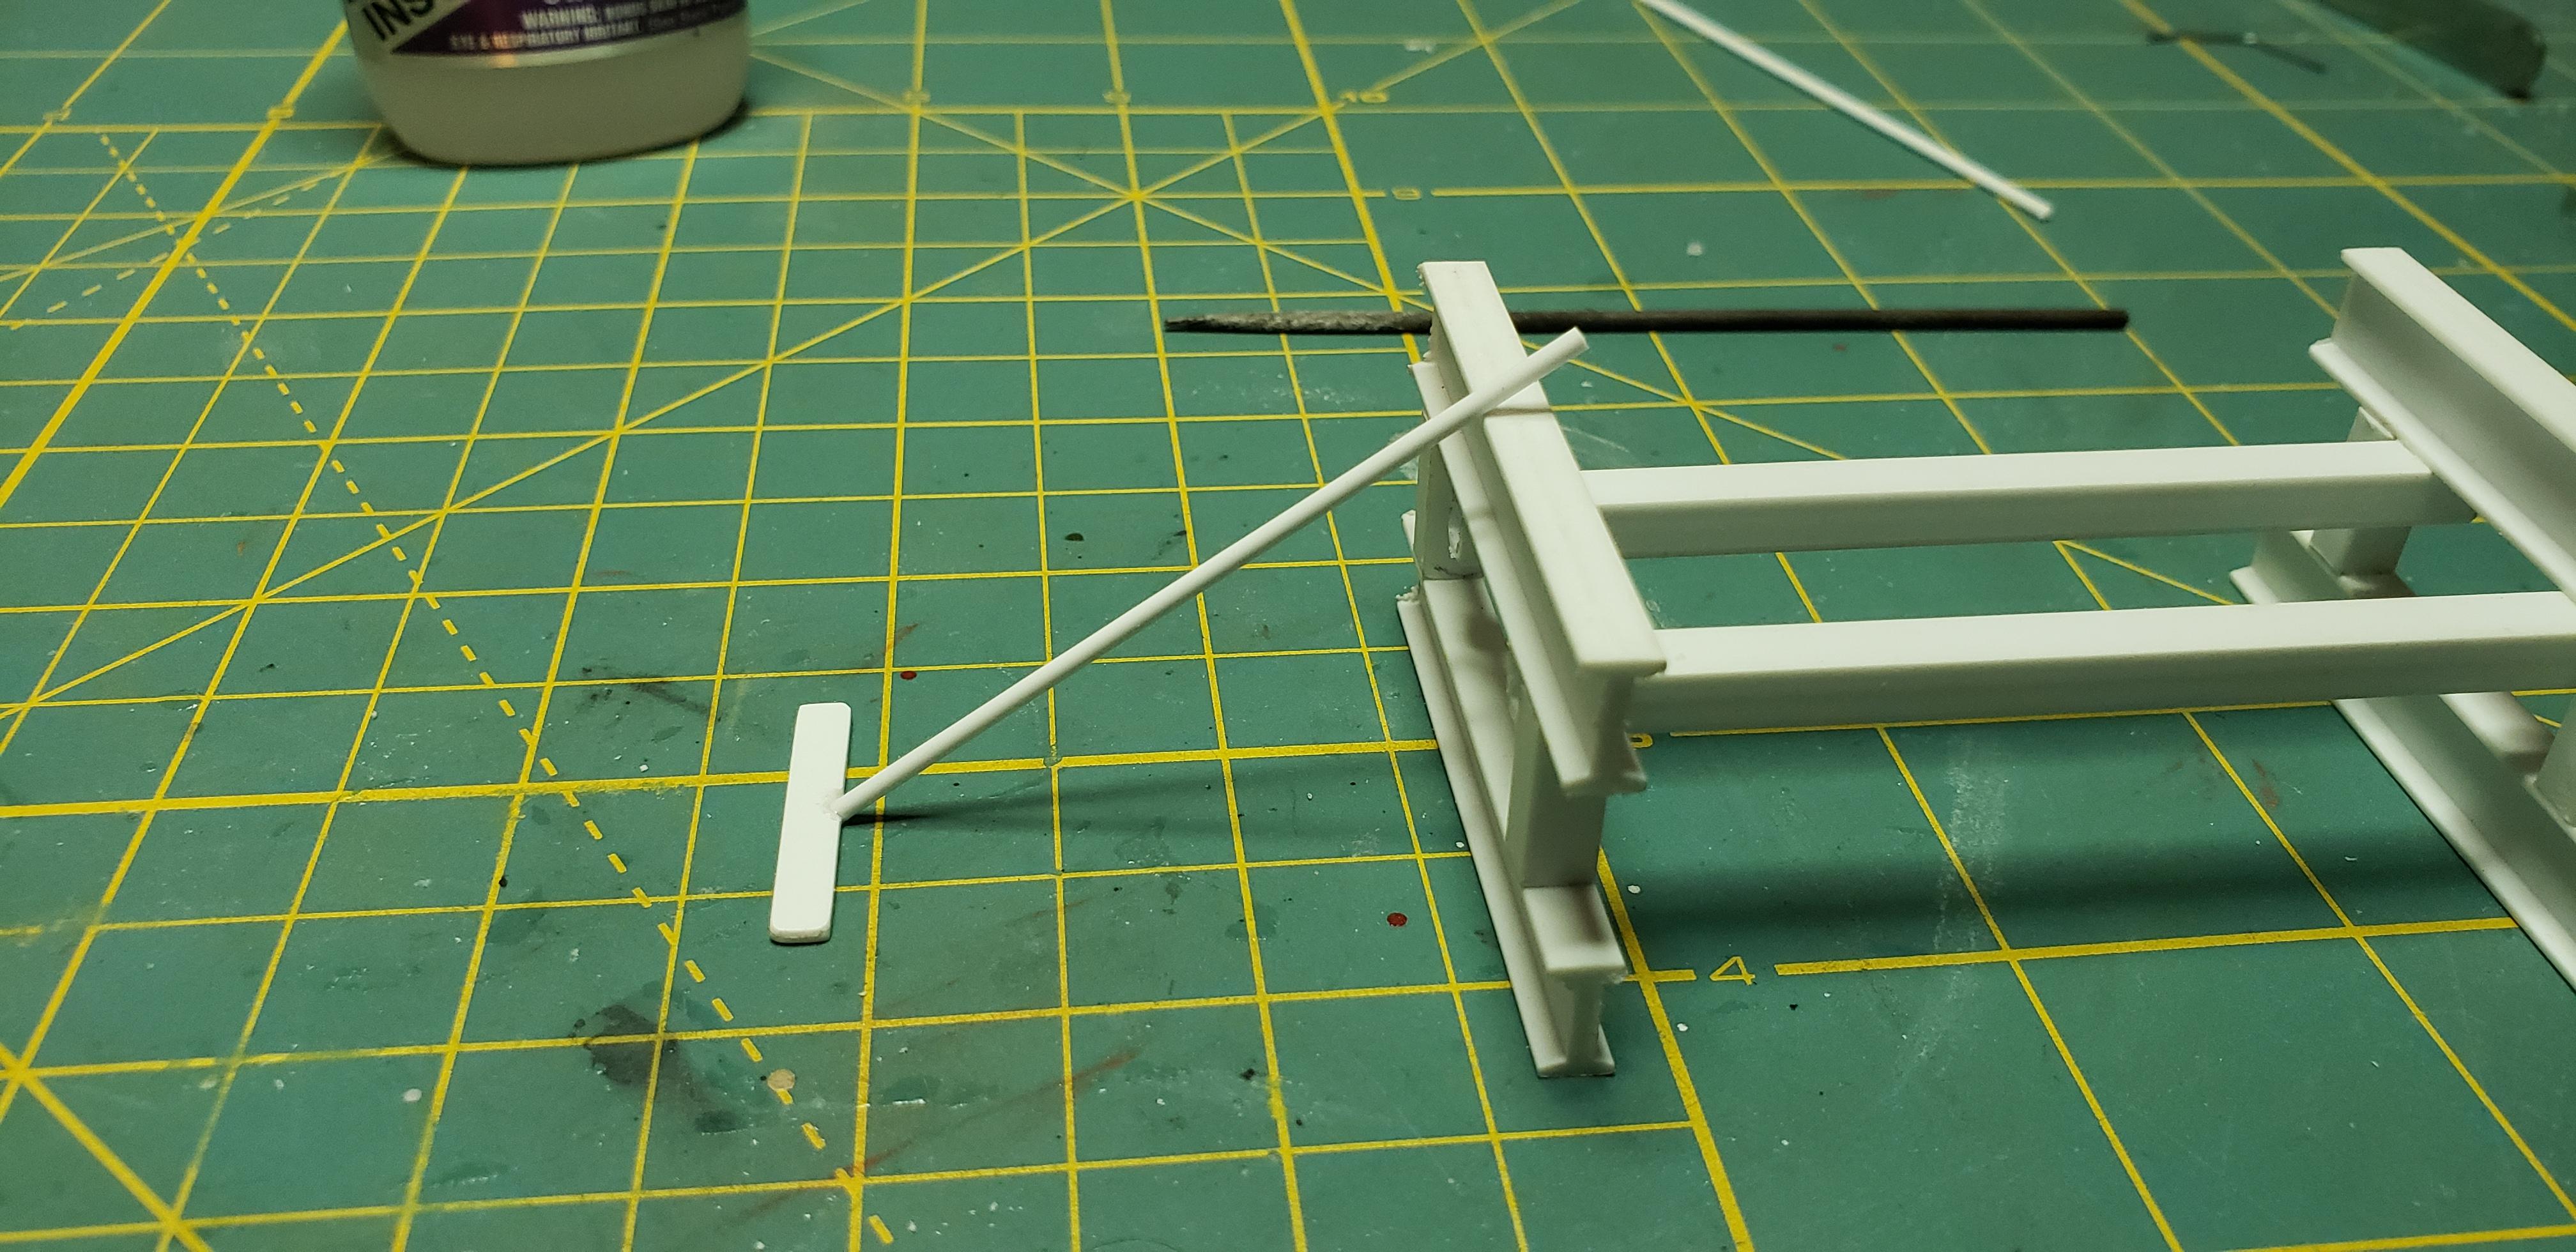
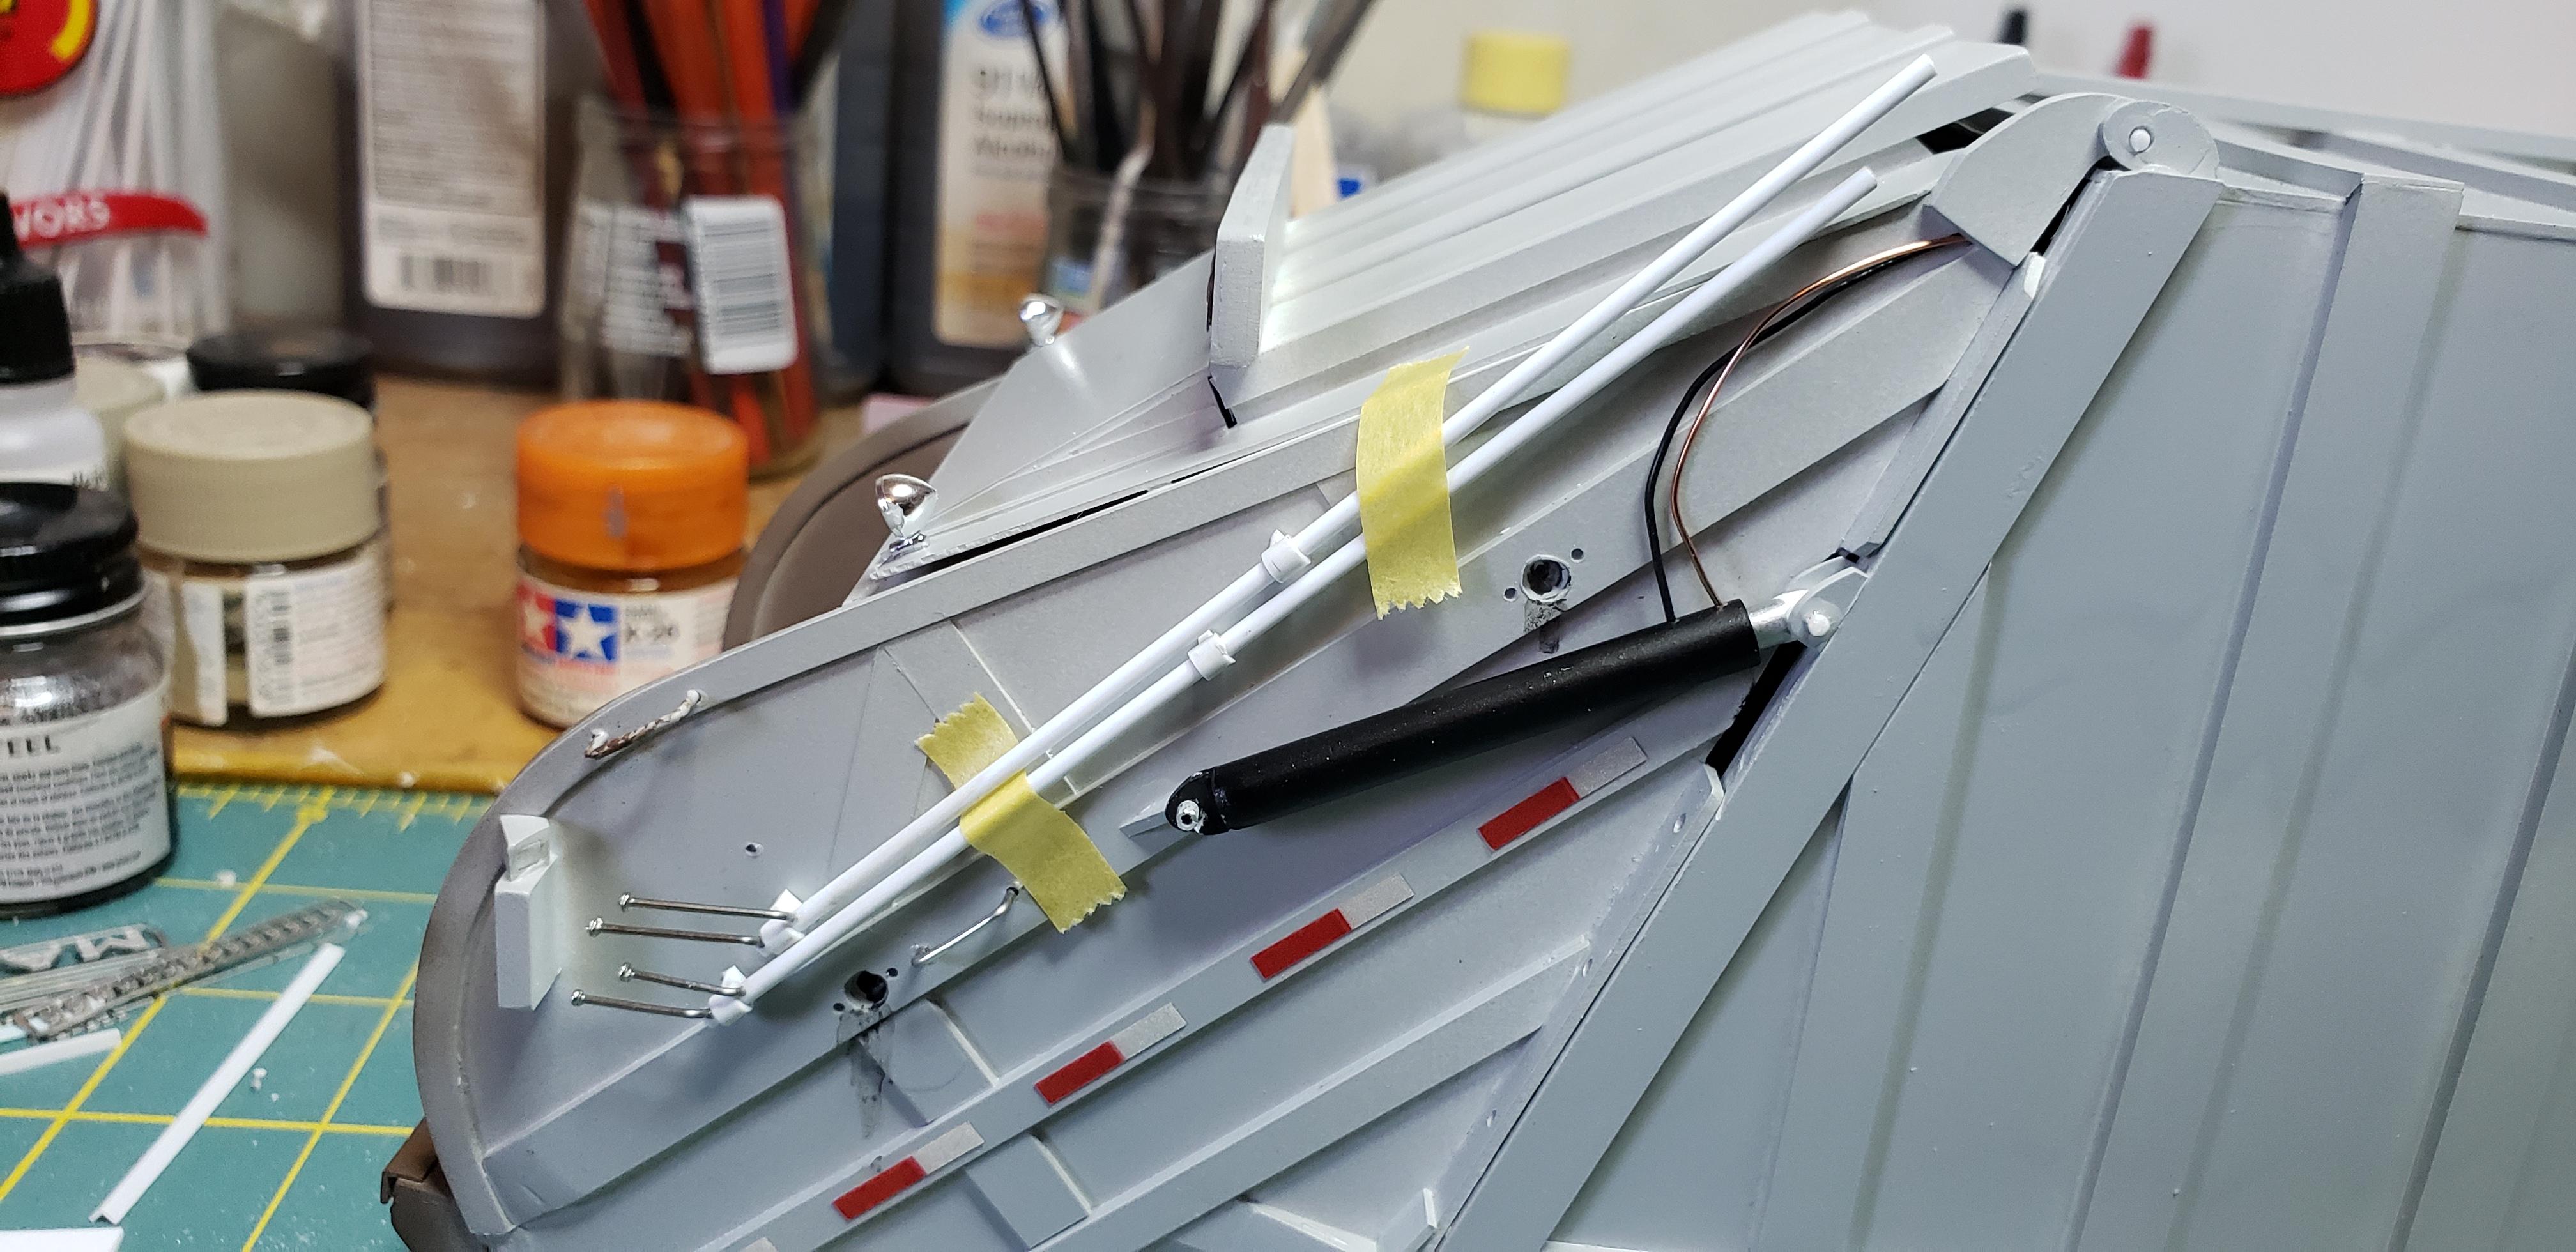
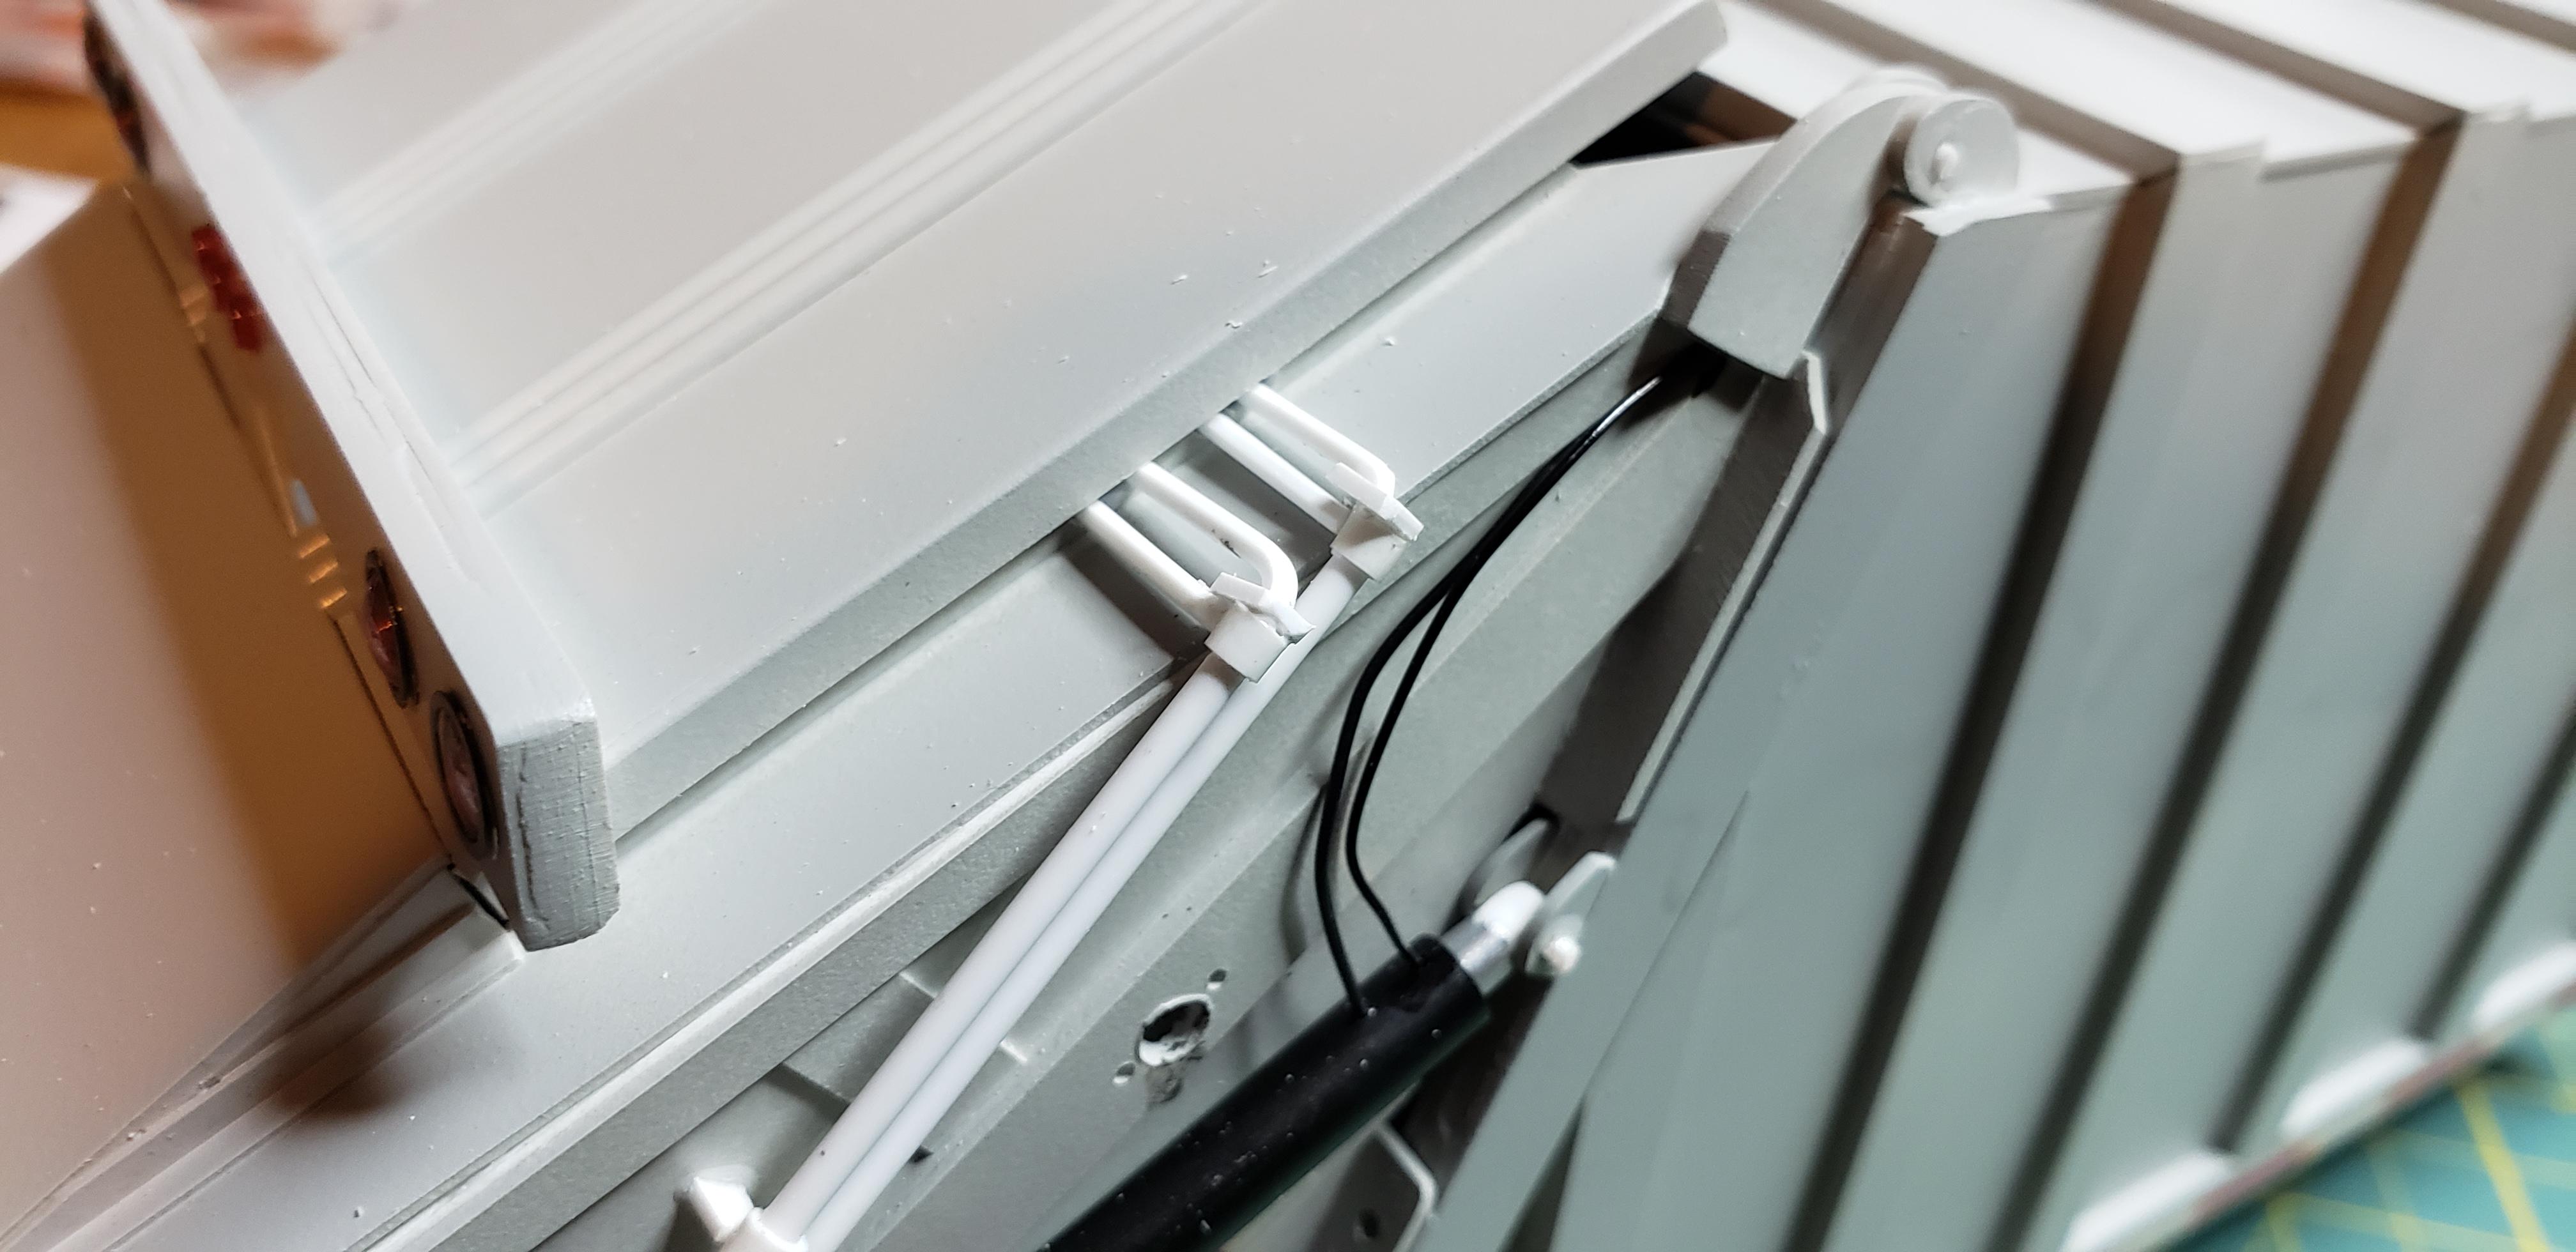
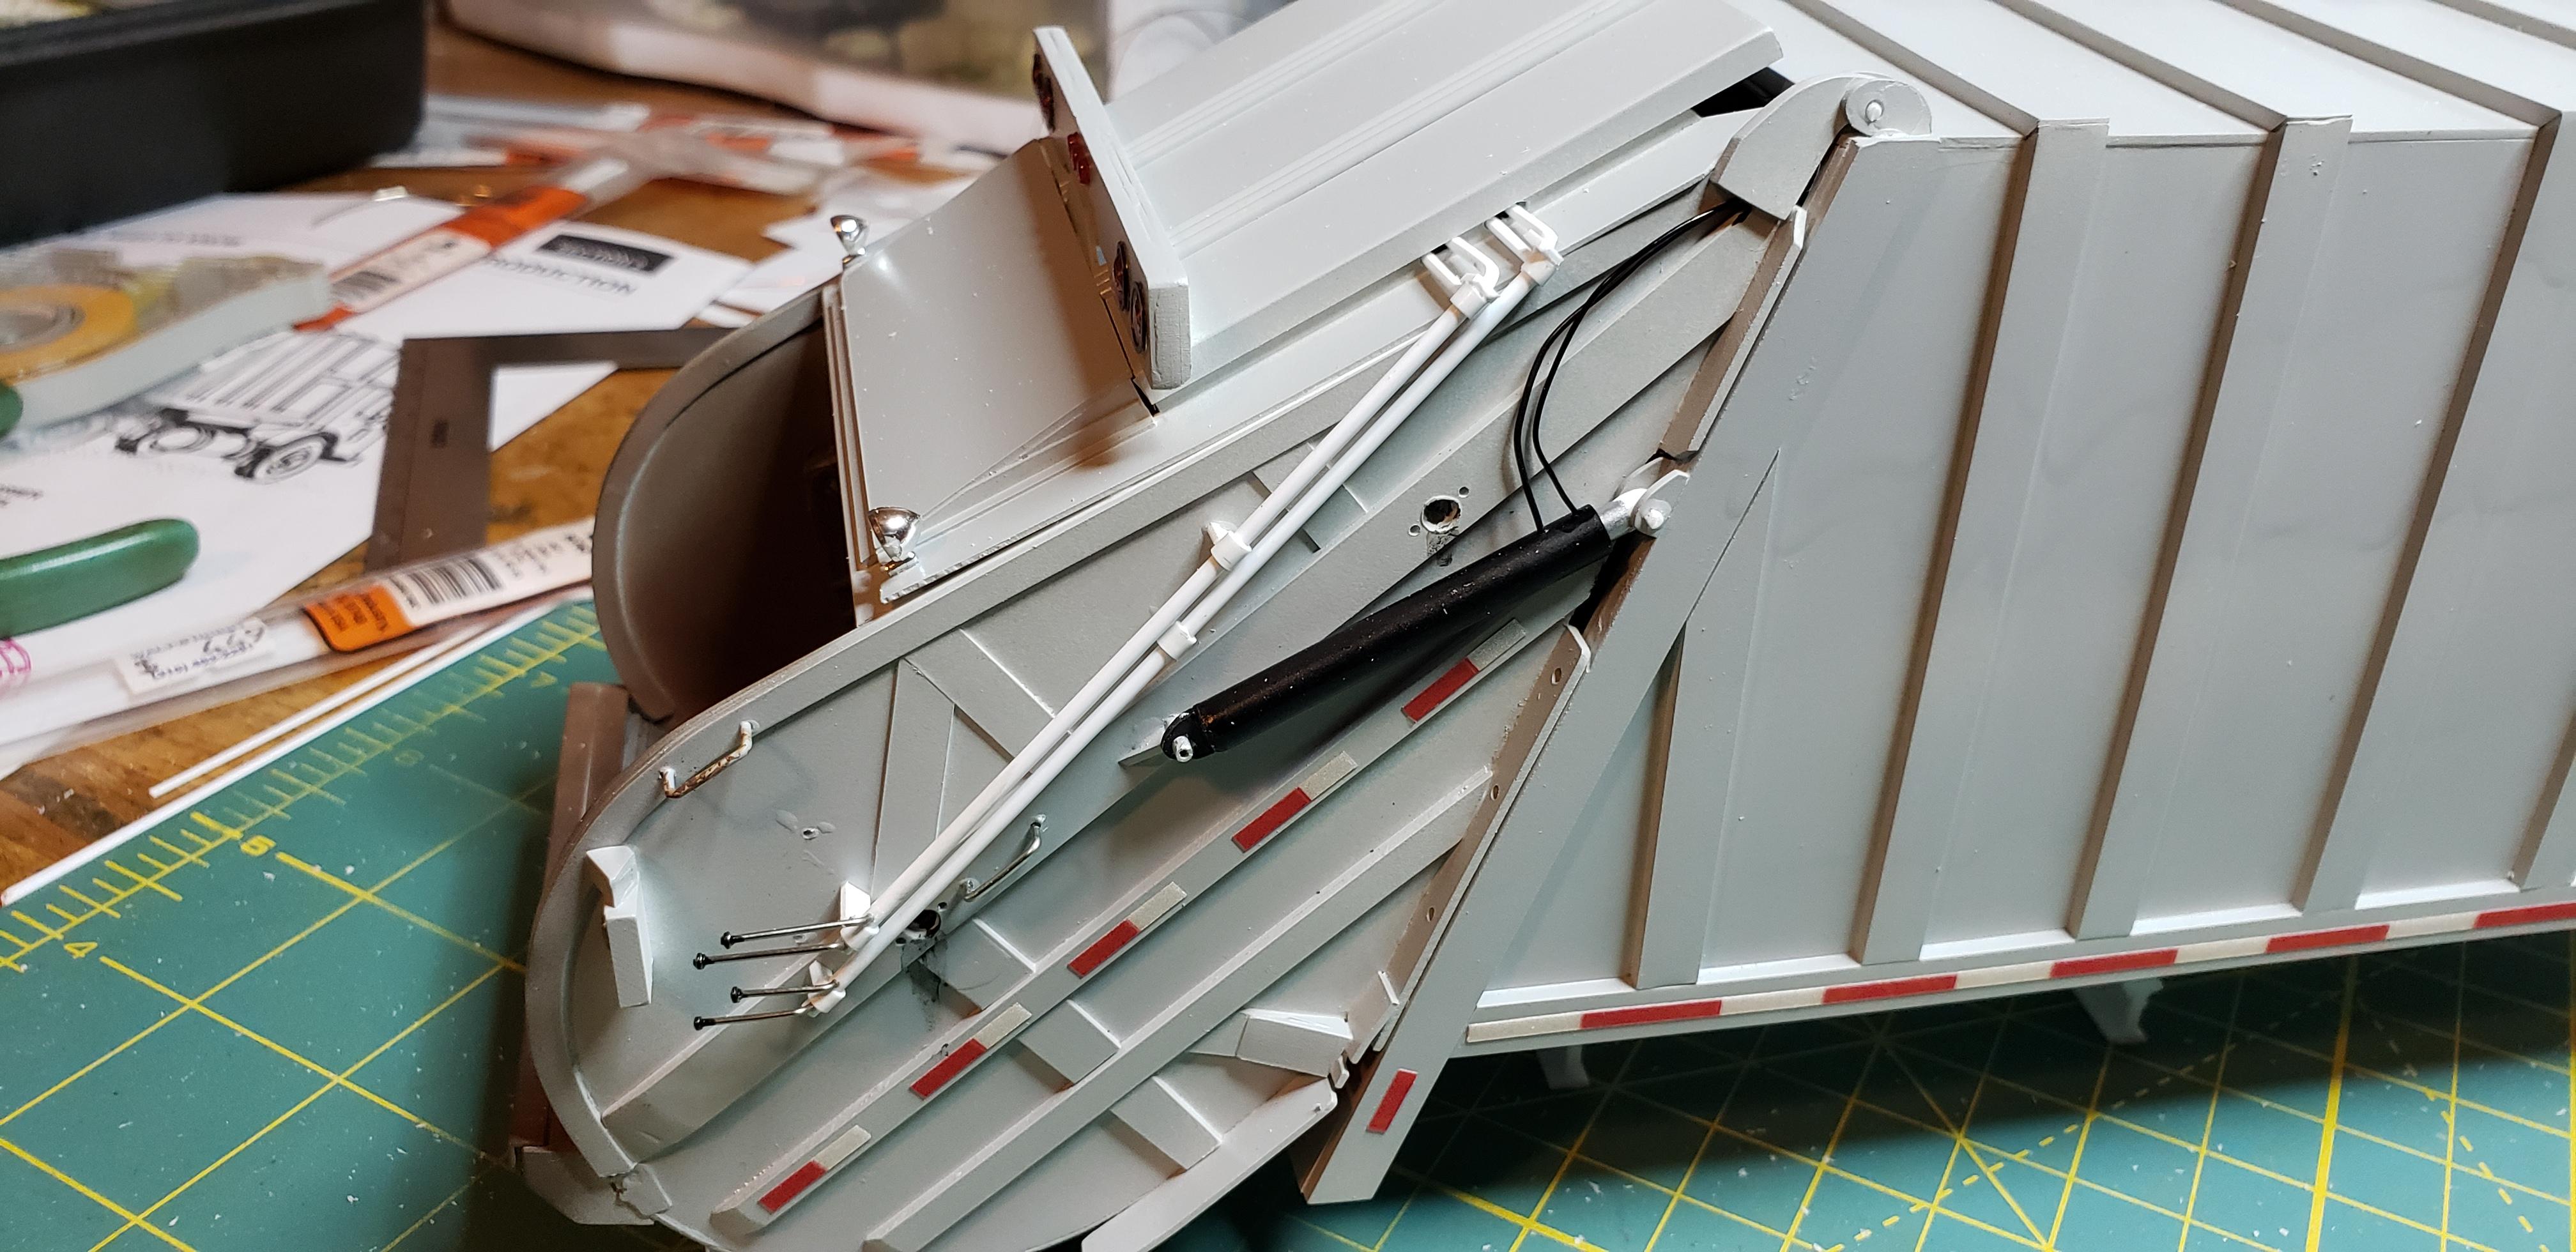
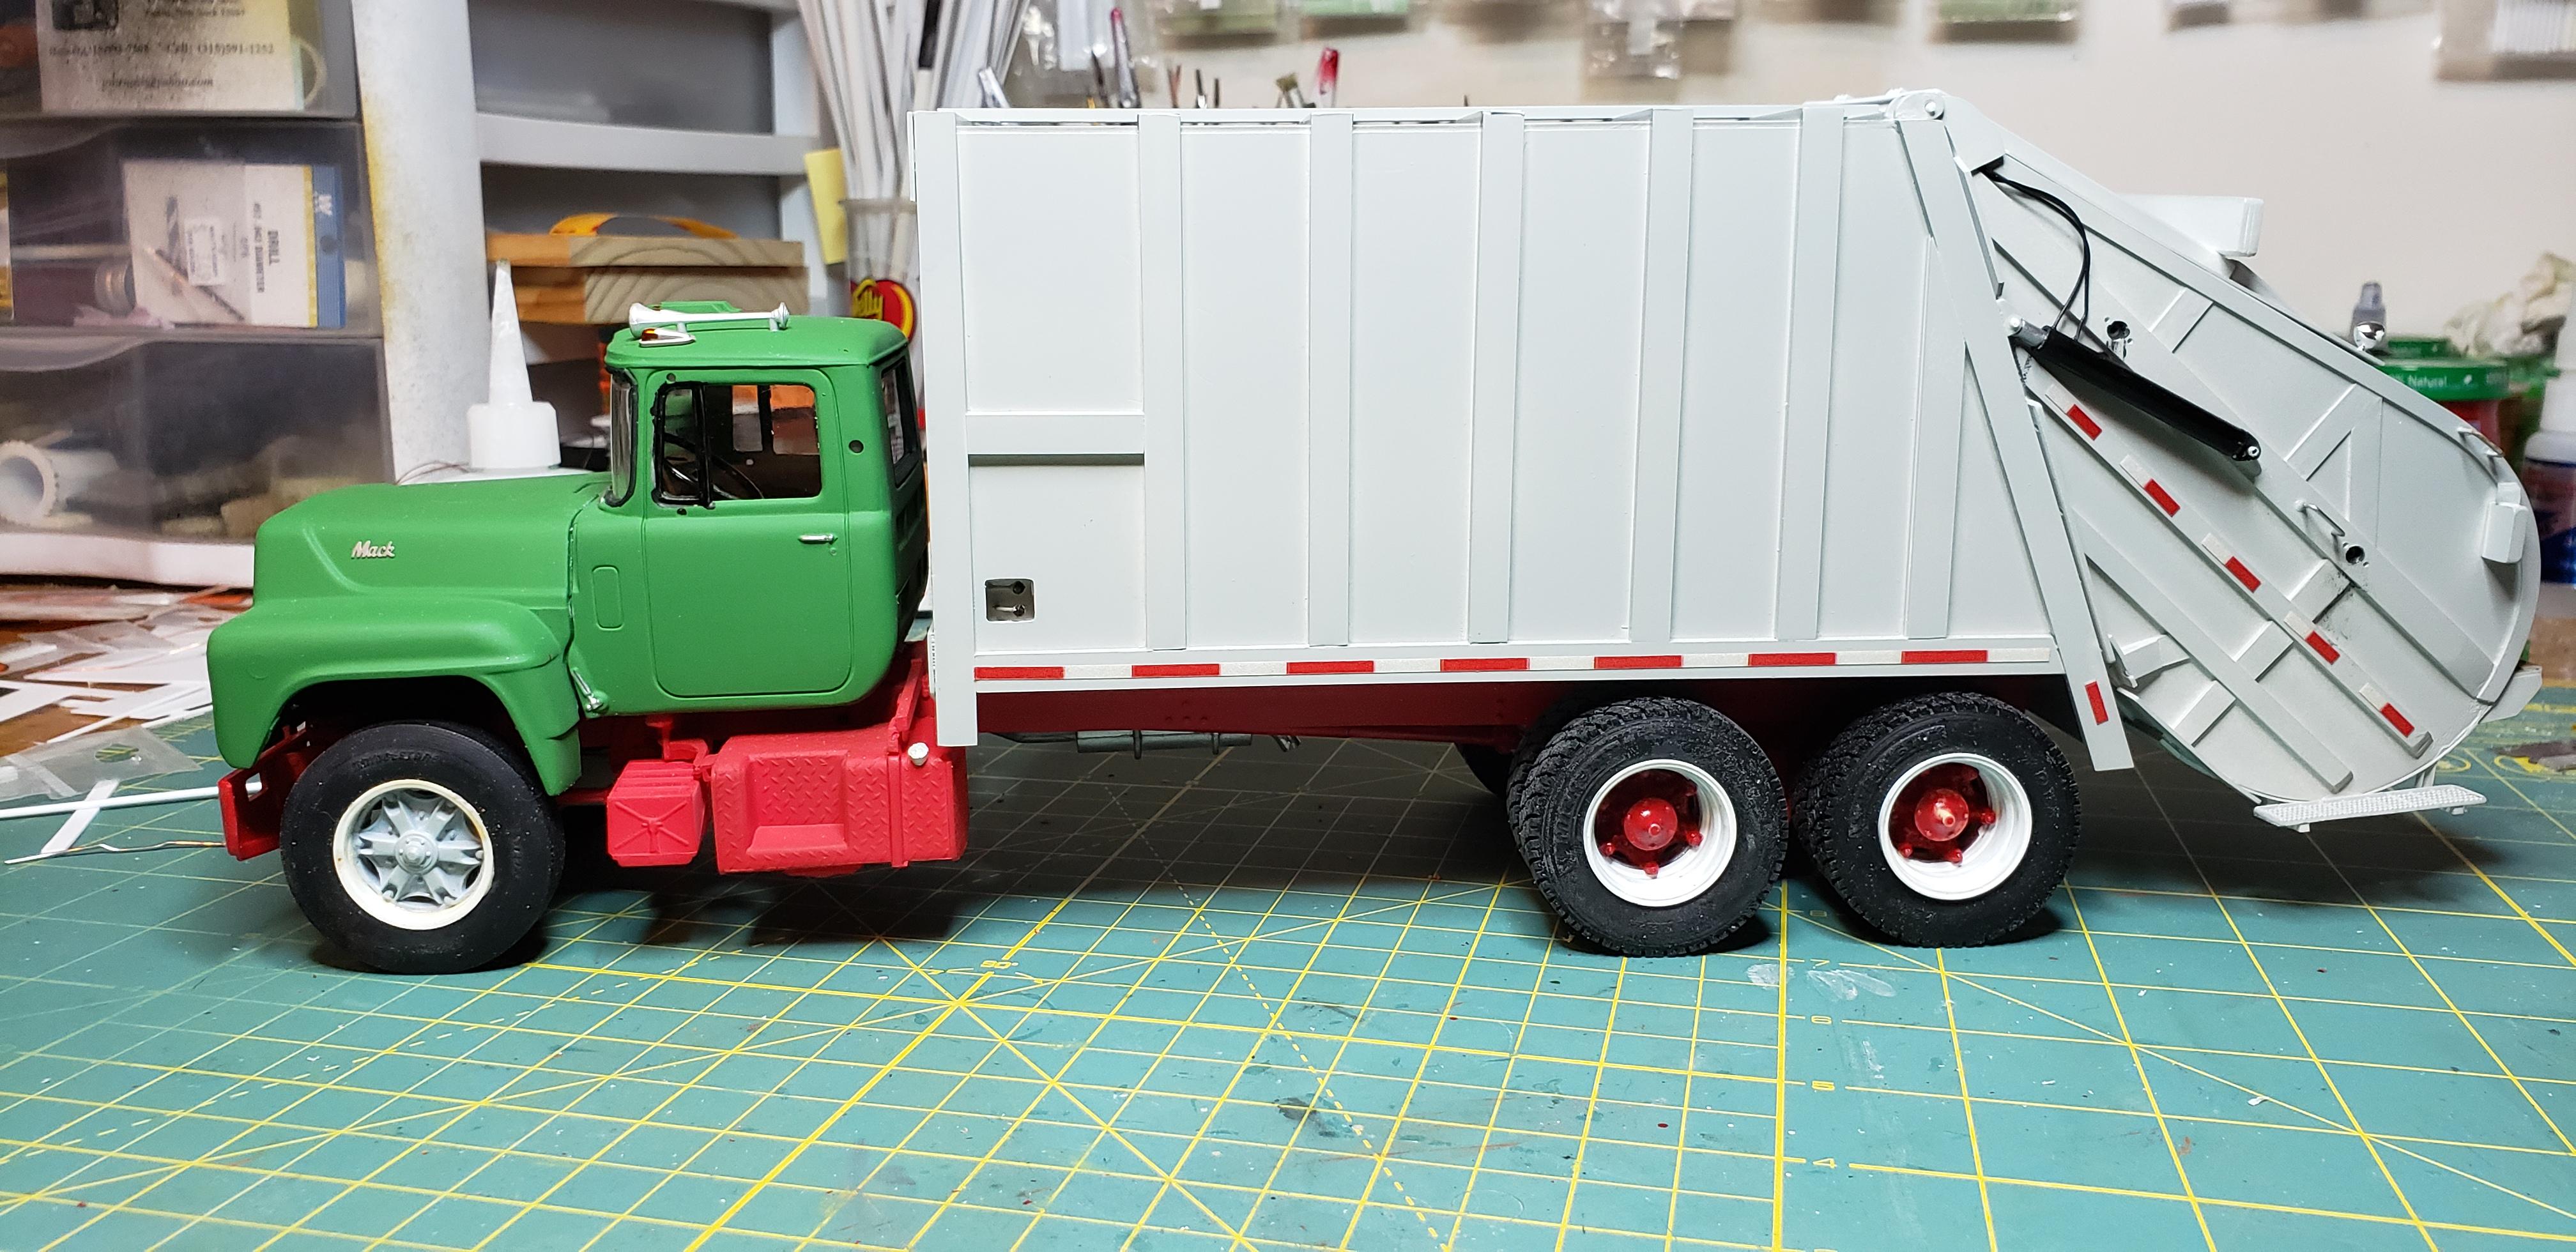
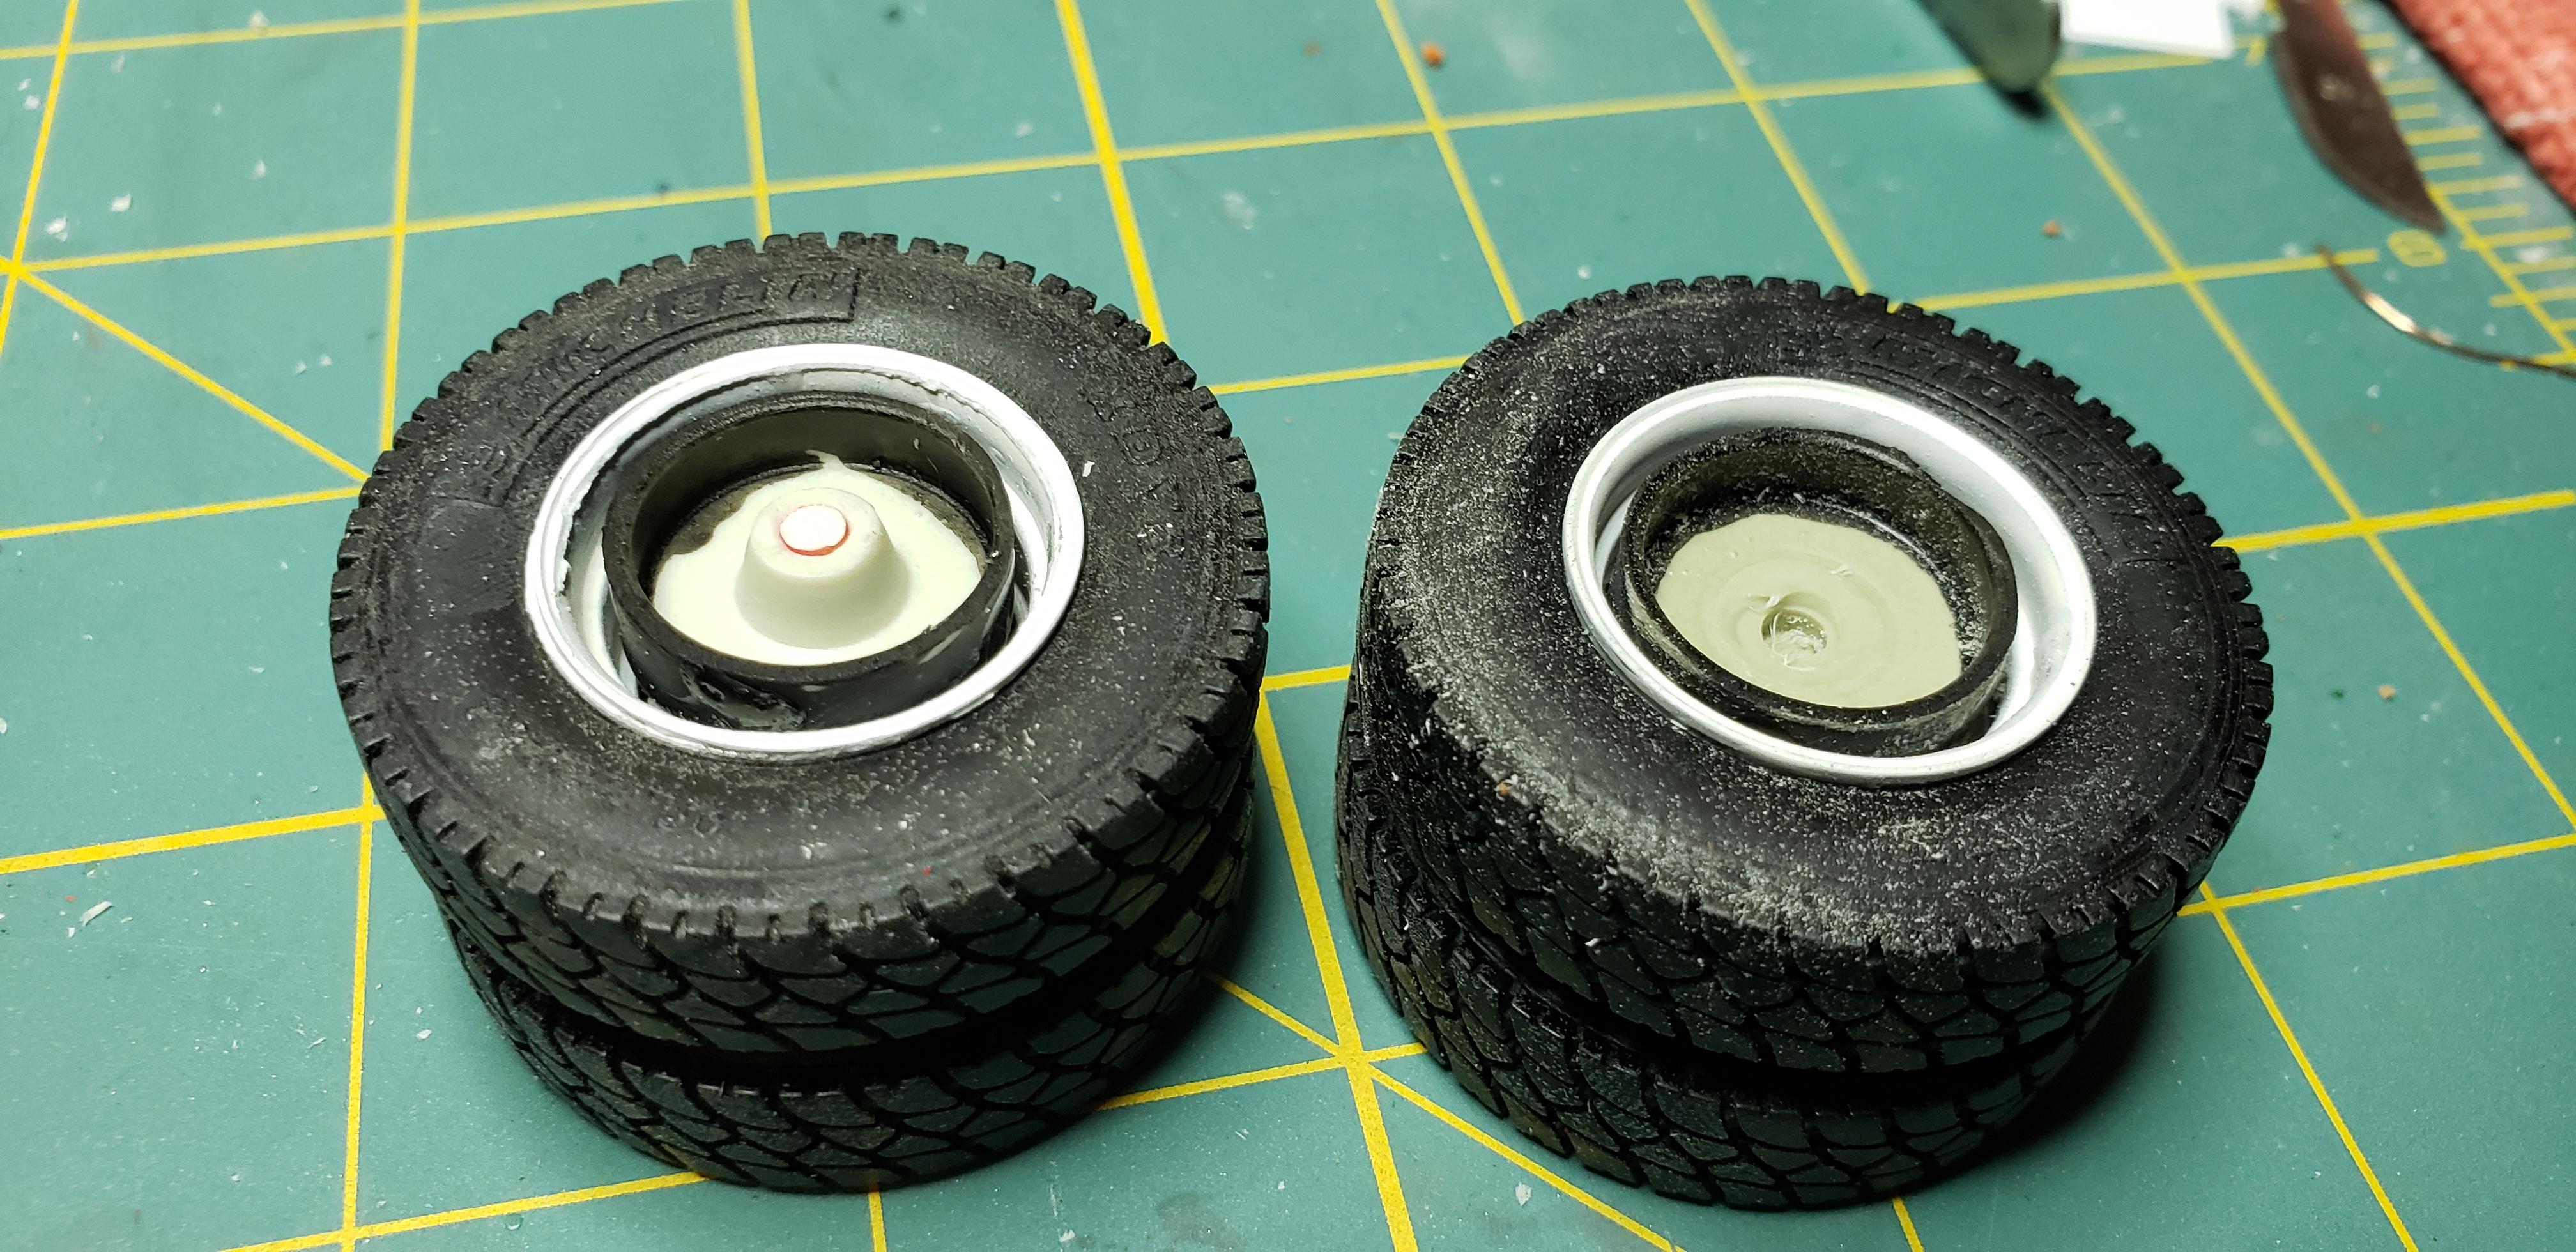
Thanks Gator ! I'm not sure how trashy I'll end up making this yet, but planning some debris and trash juice pooled in the hopper. I started building the rear controls. Every photo showed something different, so I chose one that would work with my top cover. A few length of rod, and bent pins later it started looking like I saw. One thing that kept nagging me while building the controls was getting them to stand off the body. One fairly clean photo showed welded tabs mounting the rods to what I'm calling a bushing. I copied that type. Drilling a couple holes in the top cover walls for the linkages finished it up. My wheels showed up, so they went straight from the cleaning pond to the booth for some color. It was while assembly I realized I didn't have 2 narrow front wheels . Digging thru the parts drawer yeided a pair of autocar spokes ..close enough. Removing this brake hub boss allows the wheels to tuck under the body the way I want. Now to let the glue dry overnight and touch up the paint
-
Thanks for posting this Jimb, I wasn't able to last night after receiving the word of his passing. He will be missed by everyone he ever met, and the truck community. RIP my friend
-
Another kind of Leach Garbage truck
gotnitro? replied to GLMFAA1's topic in Model Trucks: Big Rigs and Heavy Equipment
Outstanding work -
Iron Butterfly
gotnitro? replied to Terry Jessee's topic in Model Trucks: Big Rigs and Heavy Equipment
Fantastic work on your guntruck !!! Shows the resourcefulness our crews went to to protect the convoys they were tasked with. A couple even had a M113 APC in the bed for protecting the crews so much history w these trucks -
R model Mack garbage truck Finished
gotnitro? replied to gotnitro?'s topic in WIP: Model Trucks: Big Rigs and Heavy Equipment
Thanks Dan , haven't had much spare time to putter. Did spray a coat of grimy black over the shiny red packer blade and dulcoat over the cab body . Its a small step towards being ready to hit the streets
-
Well, it IS a truck.
gotnitro? replied to Terry Jessee's topic in WIP: Model Trucks: Big Rigs and Heavy Equipment
Such an enormous vehicle !!! Saw one a few yrs ago during memorial parade , still stunned how large they were Who makes the kit -
AMT C 900 refuse truck
gotnitro? replied to cobraman's topic in WIP: Model Trucks: Big Rigs and Heavy Equipment
Looking good ! The colors are especially nice Too bad about the lousy instructions though -
BRBO Autocar tow truck (DONE)
gotnitro? replied to landman's topic in WIP: Model Trucks: Big Rigs and Heavy Equipment
Too bad your going to have to hack up the bed to make everything work, but its something ya can definitely handle ! Autocars make beautiful wreckers -
What did you see on the road today?
gotnitro? replied to Harry P.'s topic in General Automotive Talk (Trucks and Cars)
Followed this home made project a few days ago, finally able to snap a photo. Frknt end was a 40s coupe w sbc
-
AMT C 900 refuse truck
gotnitro? replied to cobraman's topic in WIP: Model Trucks: Big Rigs and Heavy Equipment
Nice start on your refuse truck! It's interesting how kids find excitement w different trucks, my daughter loves watching snow plows pass the house pushing the snow onto my freshly cleaned sidewalk Looking forward to updates -
Okay where do you hide the shrink ray !! I had to re read that this was N scale..wow its come a long way. Beautiful little truck
-
GMC Topkick Rollback
gotnitro? replied to DRIPTROIT 71's topic in WIP: Model Trucks: Big Rigs and Heavy Equipment
Excellent work, perfect cab for a rollback Looks like the owner scored a barn find too -
R model Mack garbage truck Finished
gotnitro? replied to gotnitro?'s topic in WIP: Model Trucks: Big Rigs and Heavy Equipment
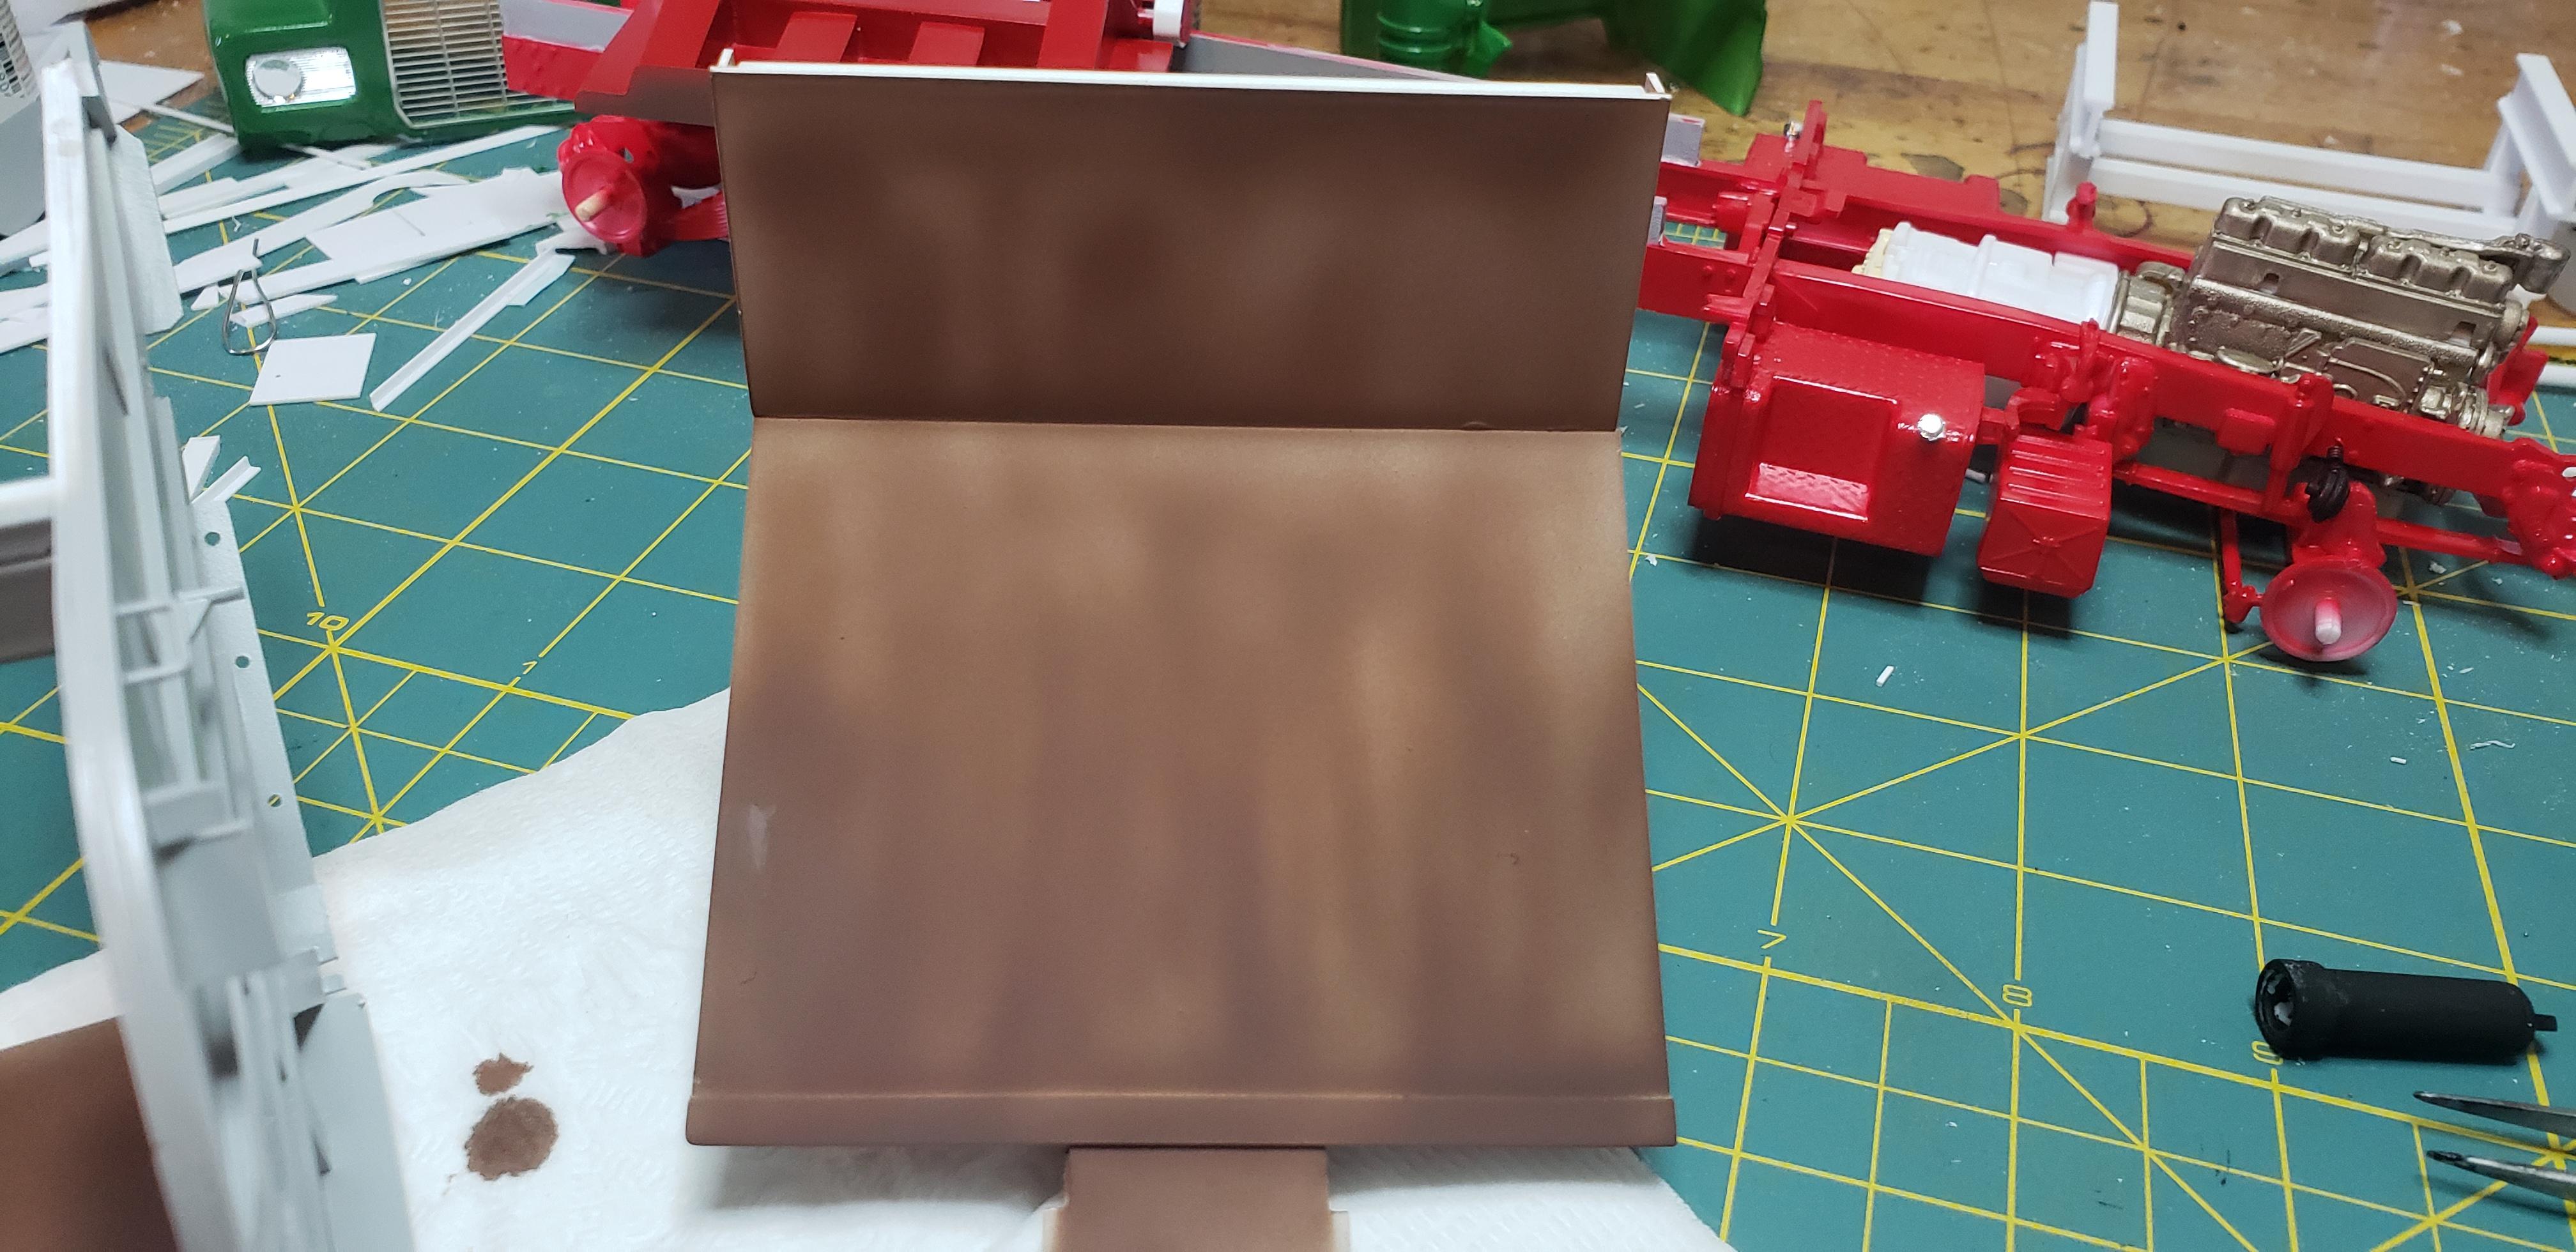
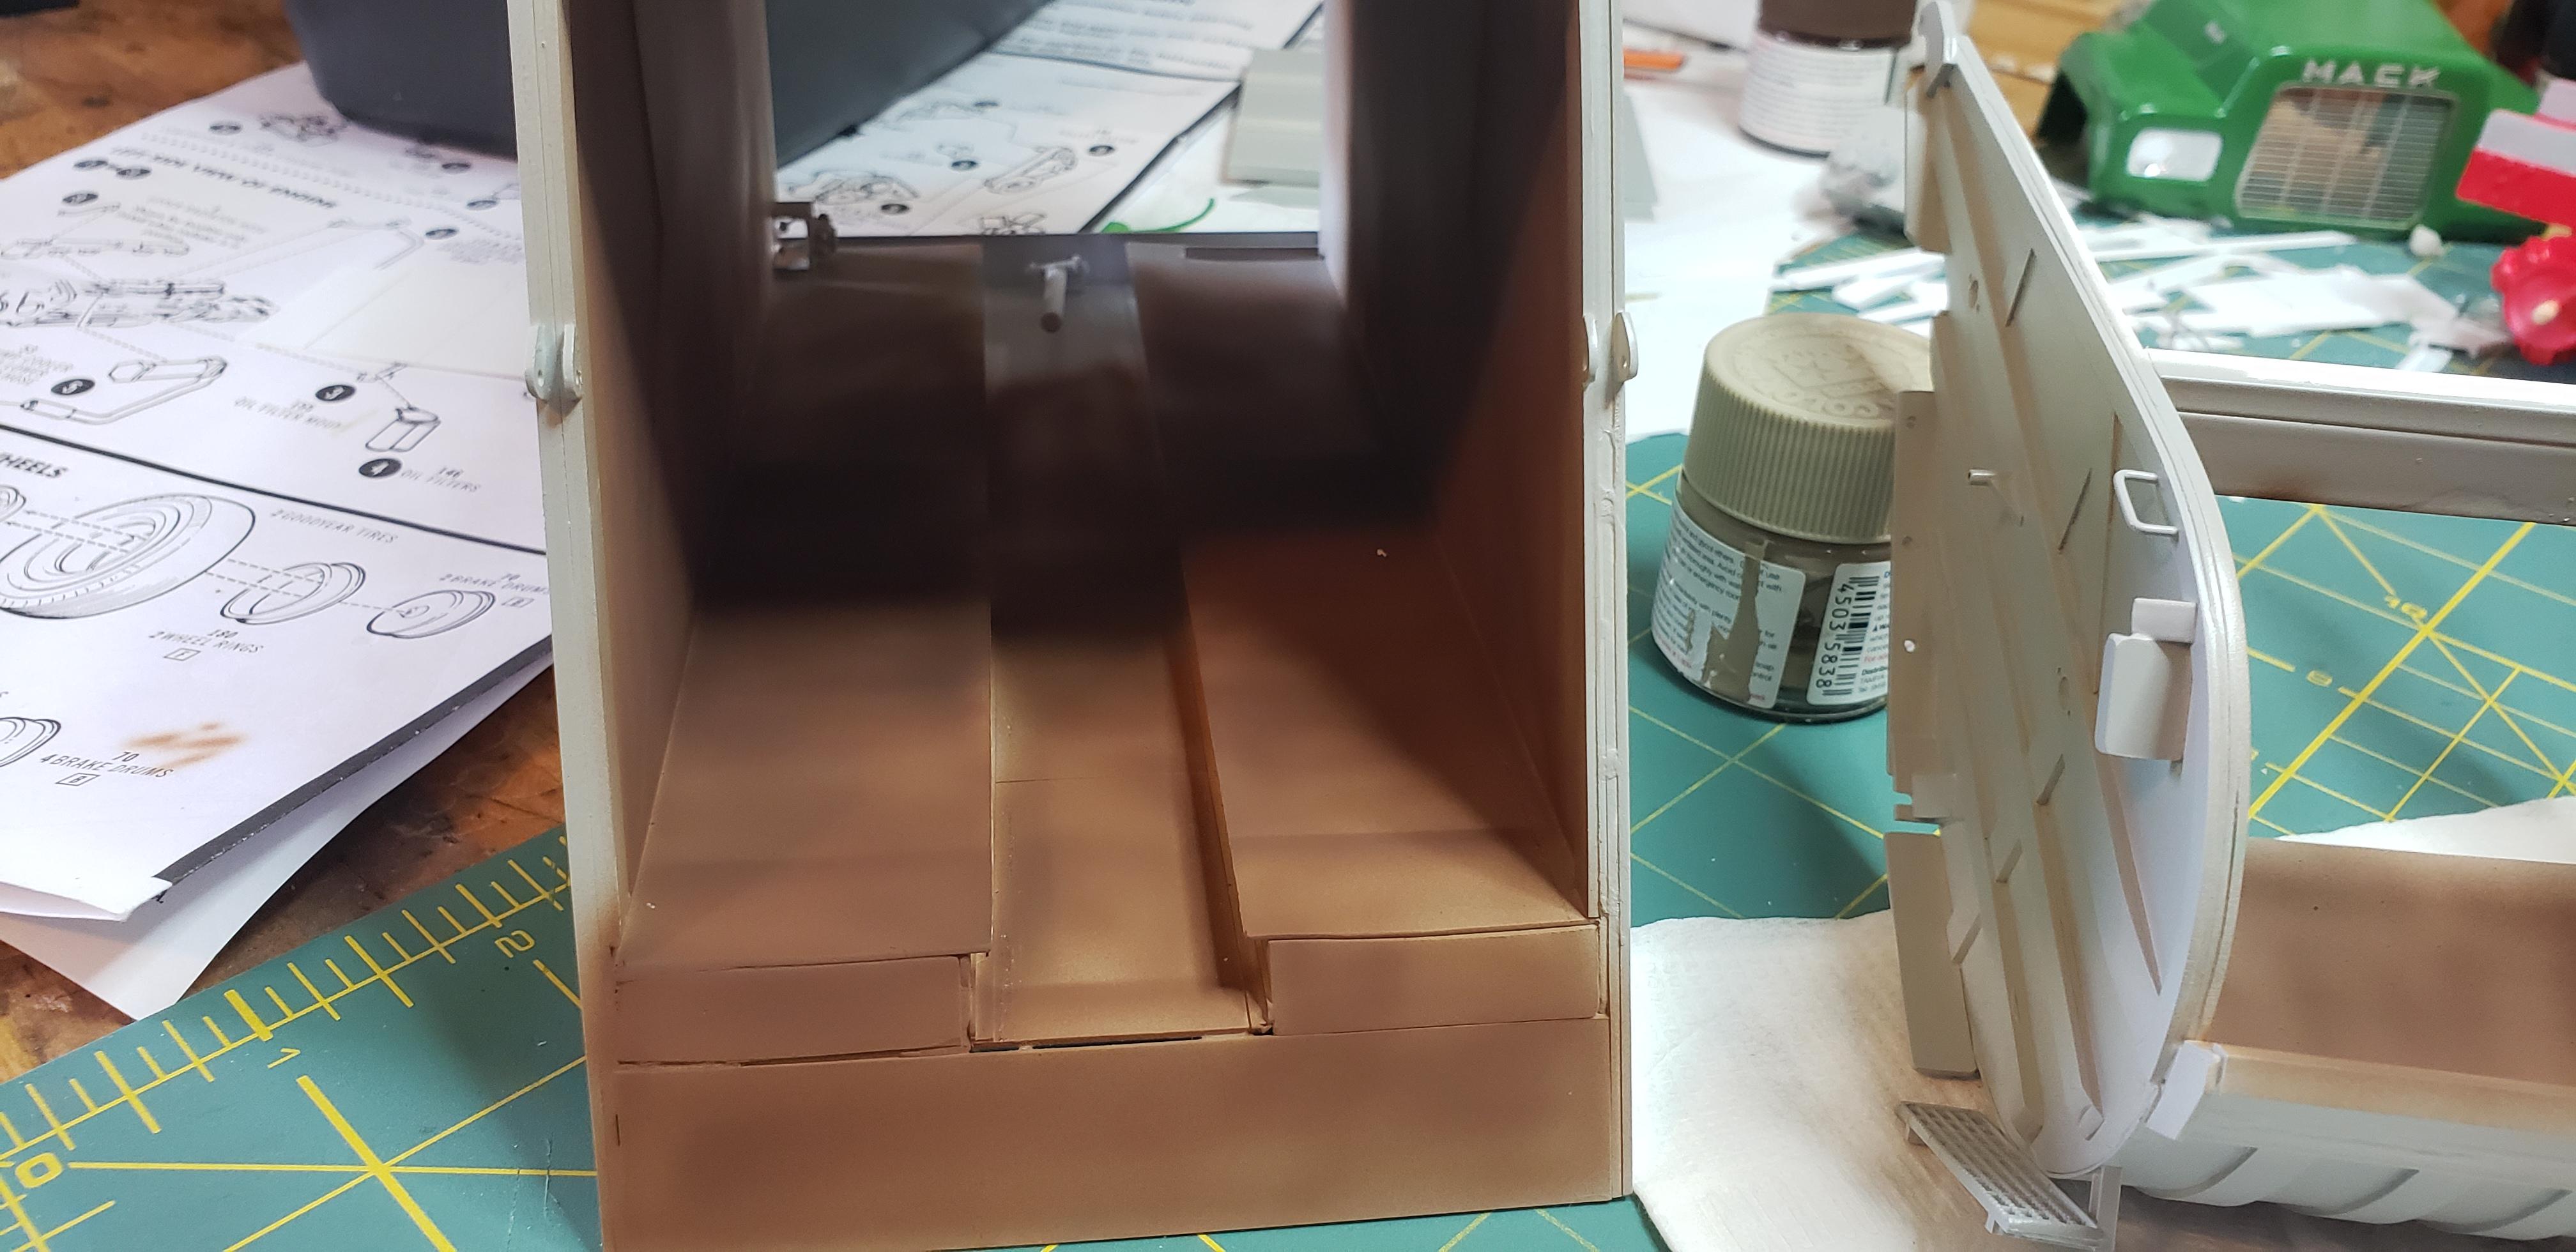
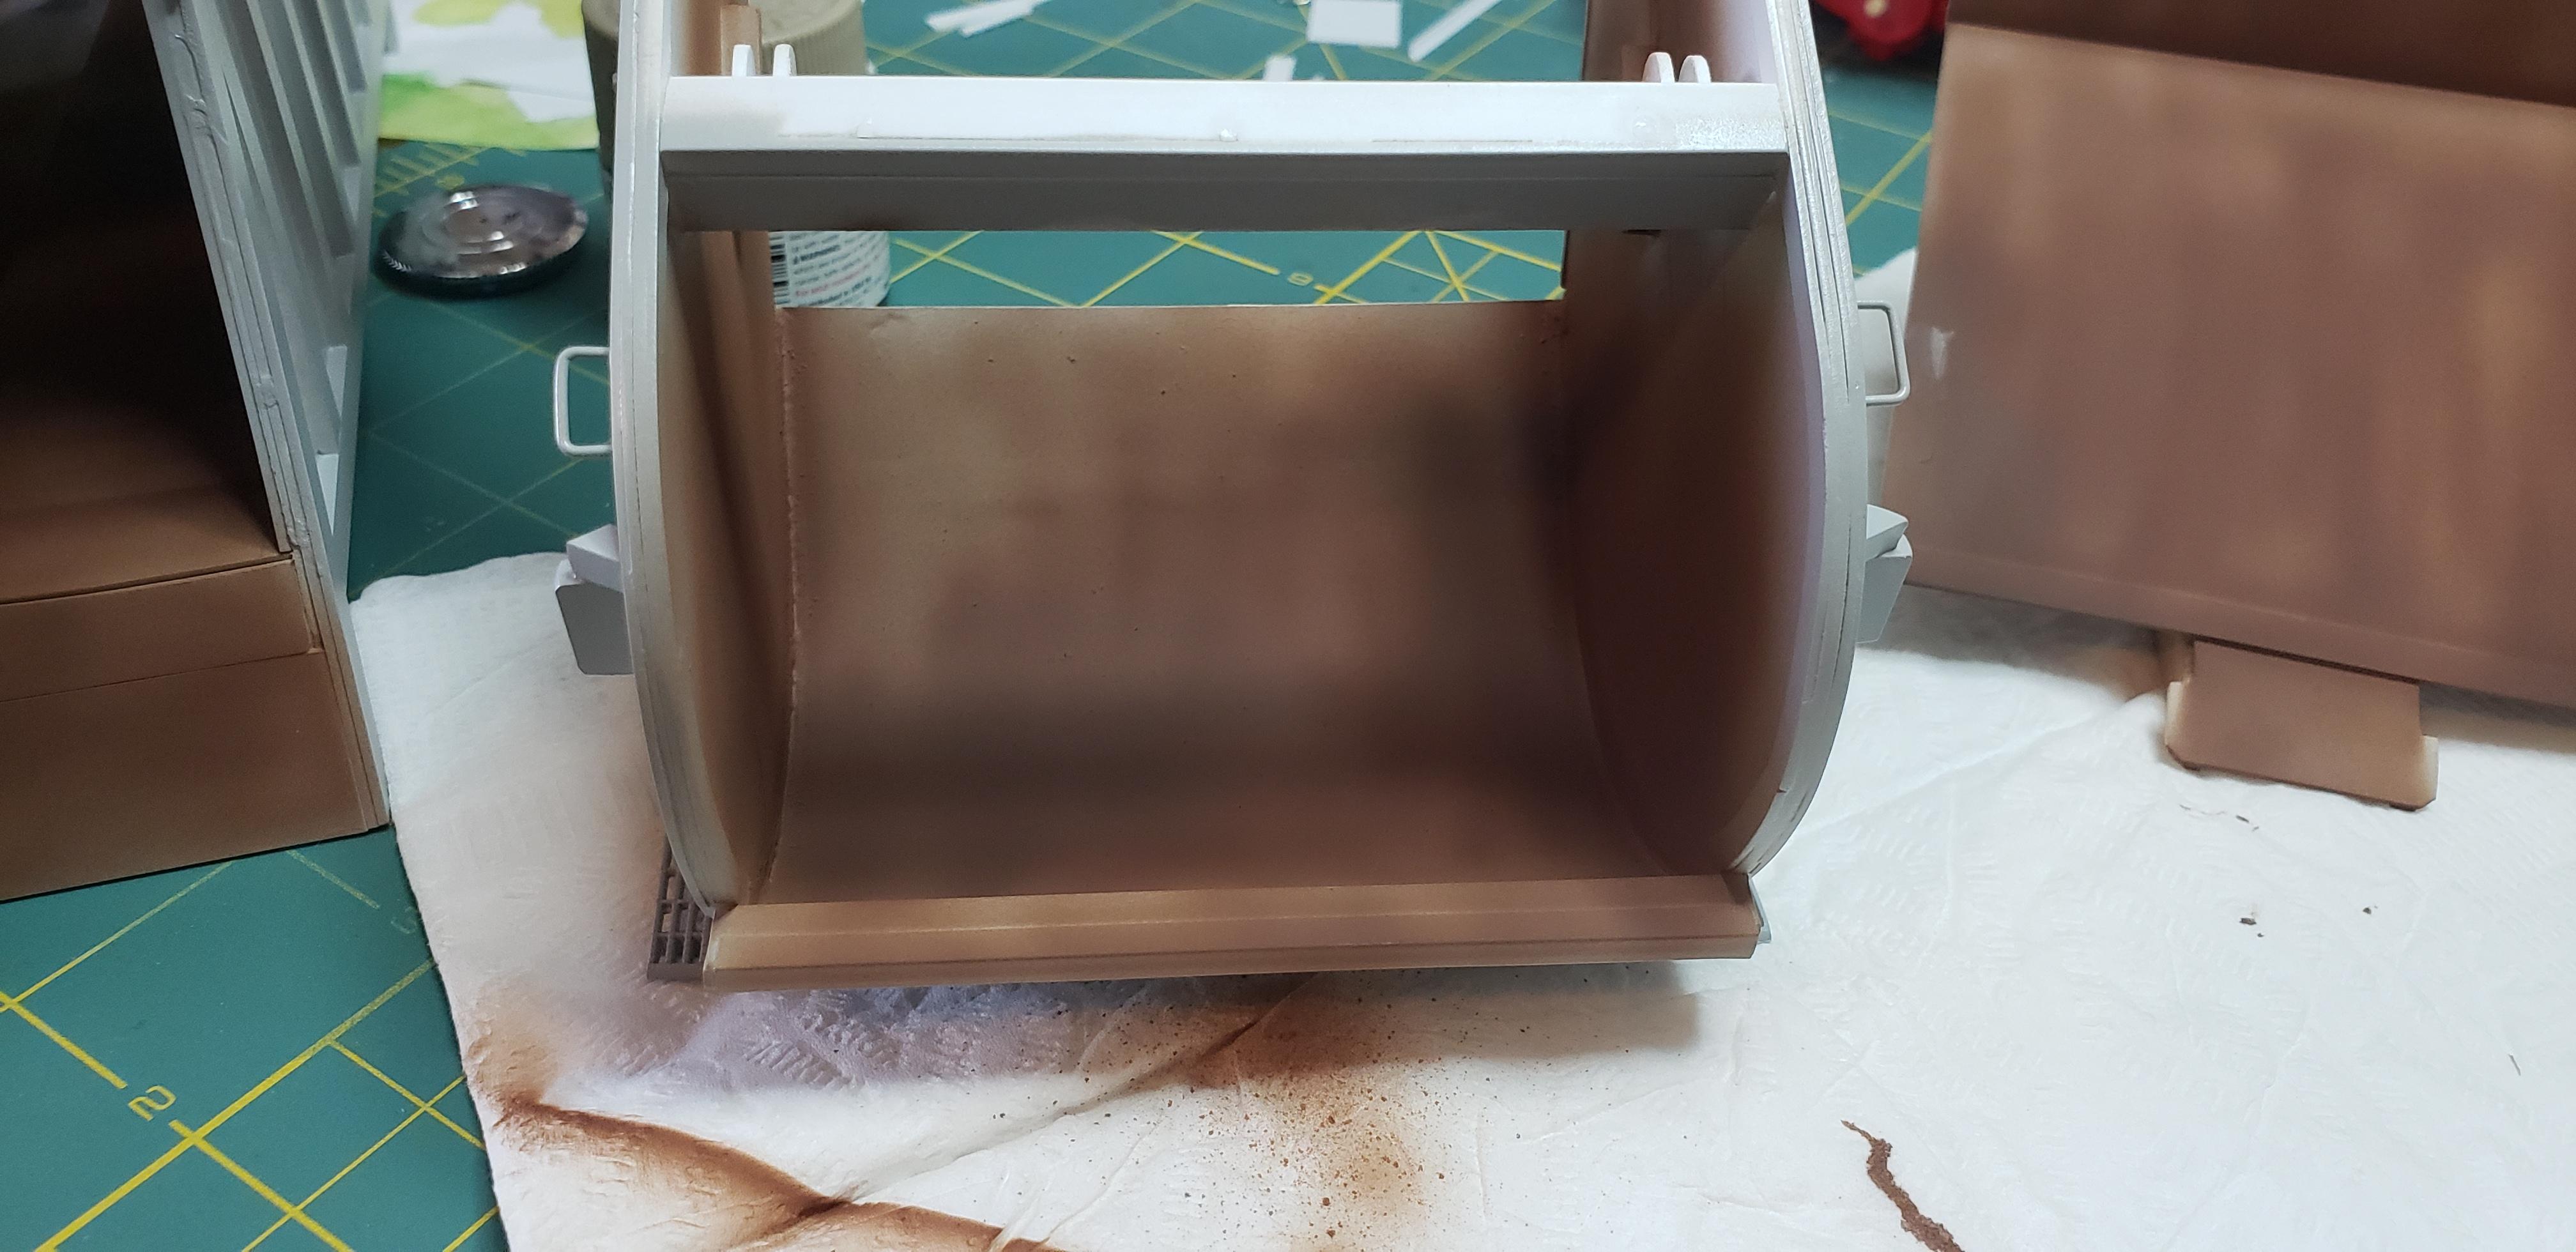
This wknd I started to ruin a decent paint job, or make the packer look realistic depending on which glass ya drink from ! I randomly sprayed tamiya red brown around the working areas trying to show where most of the trash rub away the paint. Next up will be a steel wash..and if that looks convincing, a quick application of wet effects for trash juice. I tried catching a few fruit flies, but they look like Georgian mosquitoes..so their out. Sorry..going for realism here lol Outside will be dusty w grime around the moving bits..then call it finished Thanks for everyone's feedback!!
-
R model Mack garbage truck Finished
gotnitro? replied to gotnitro?'s topic in WIP: Model Trucks: Big Rigs and Heavy Equipment
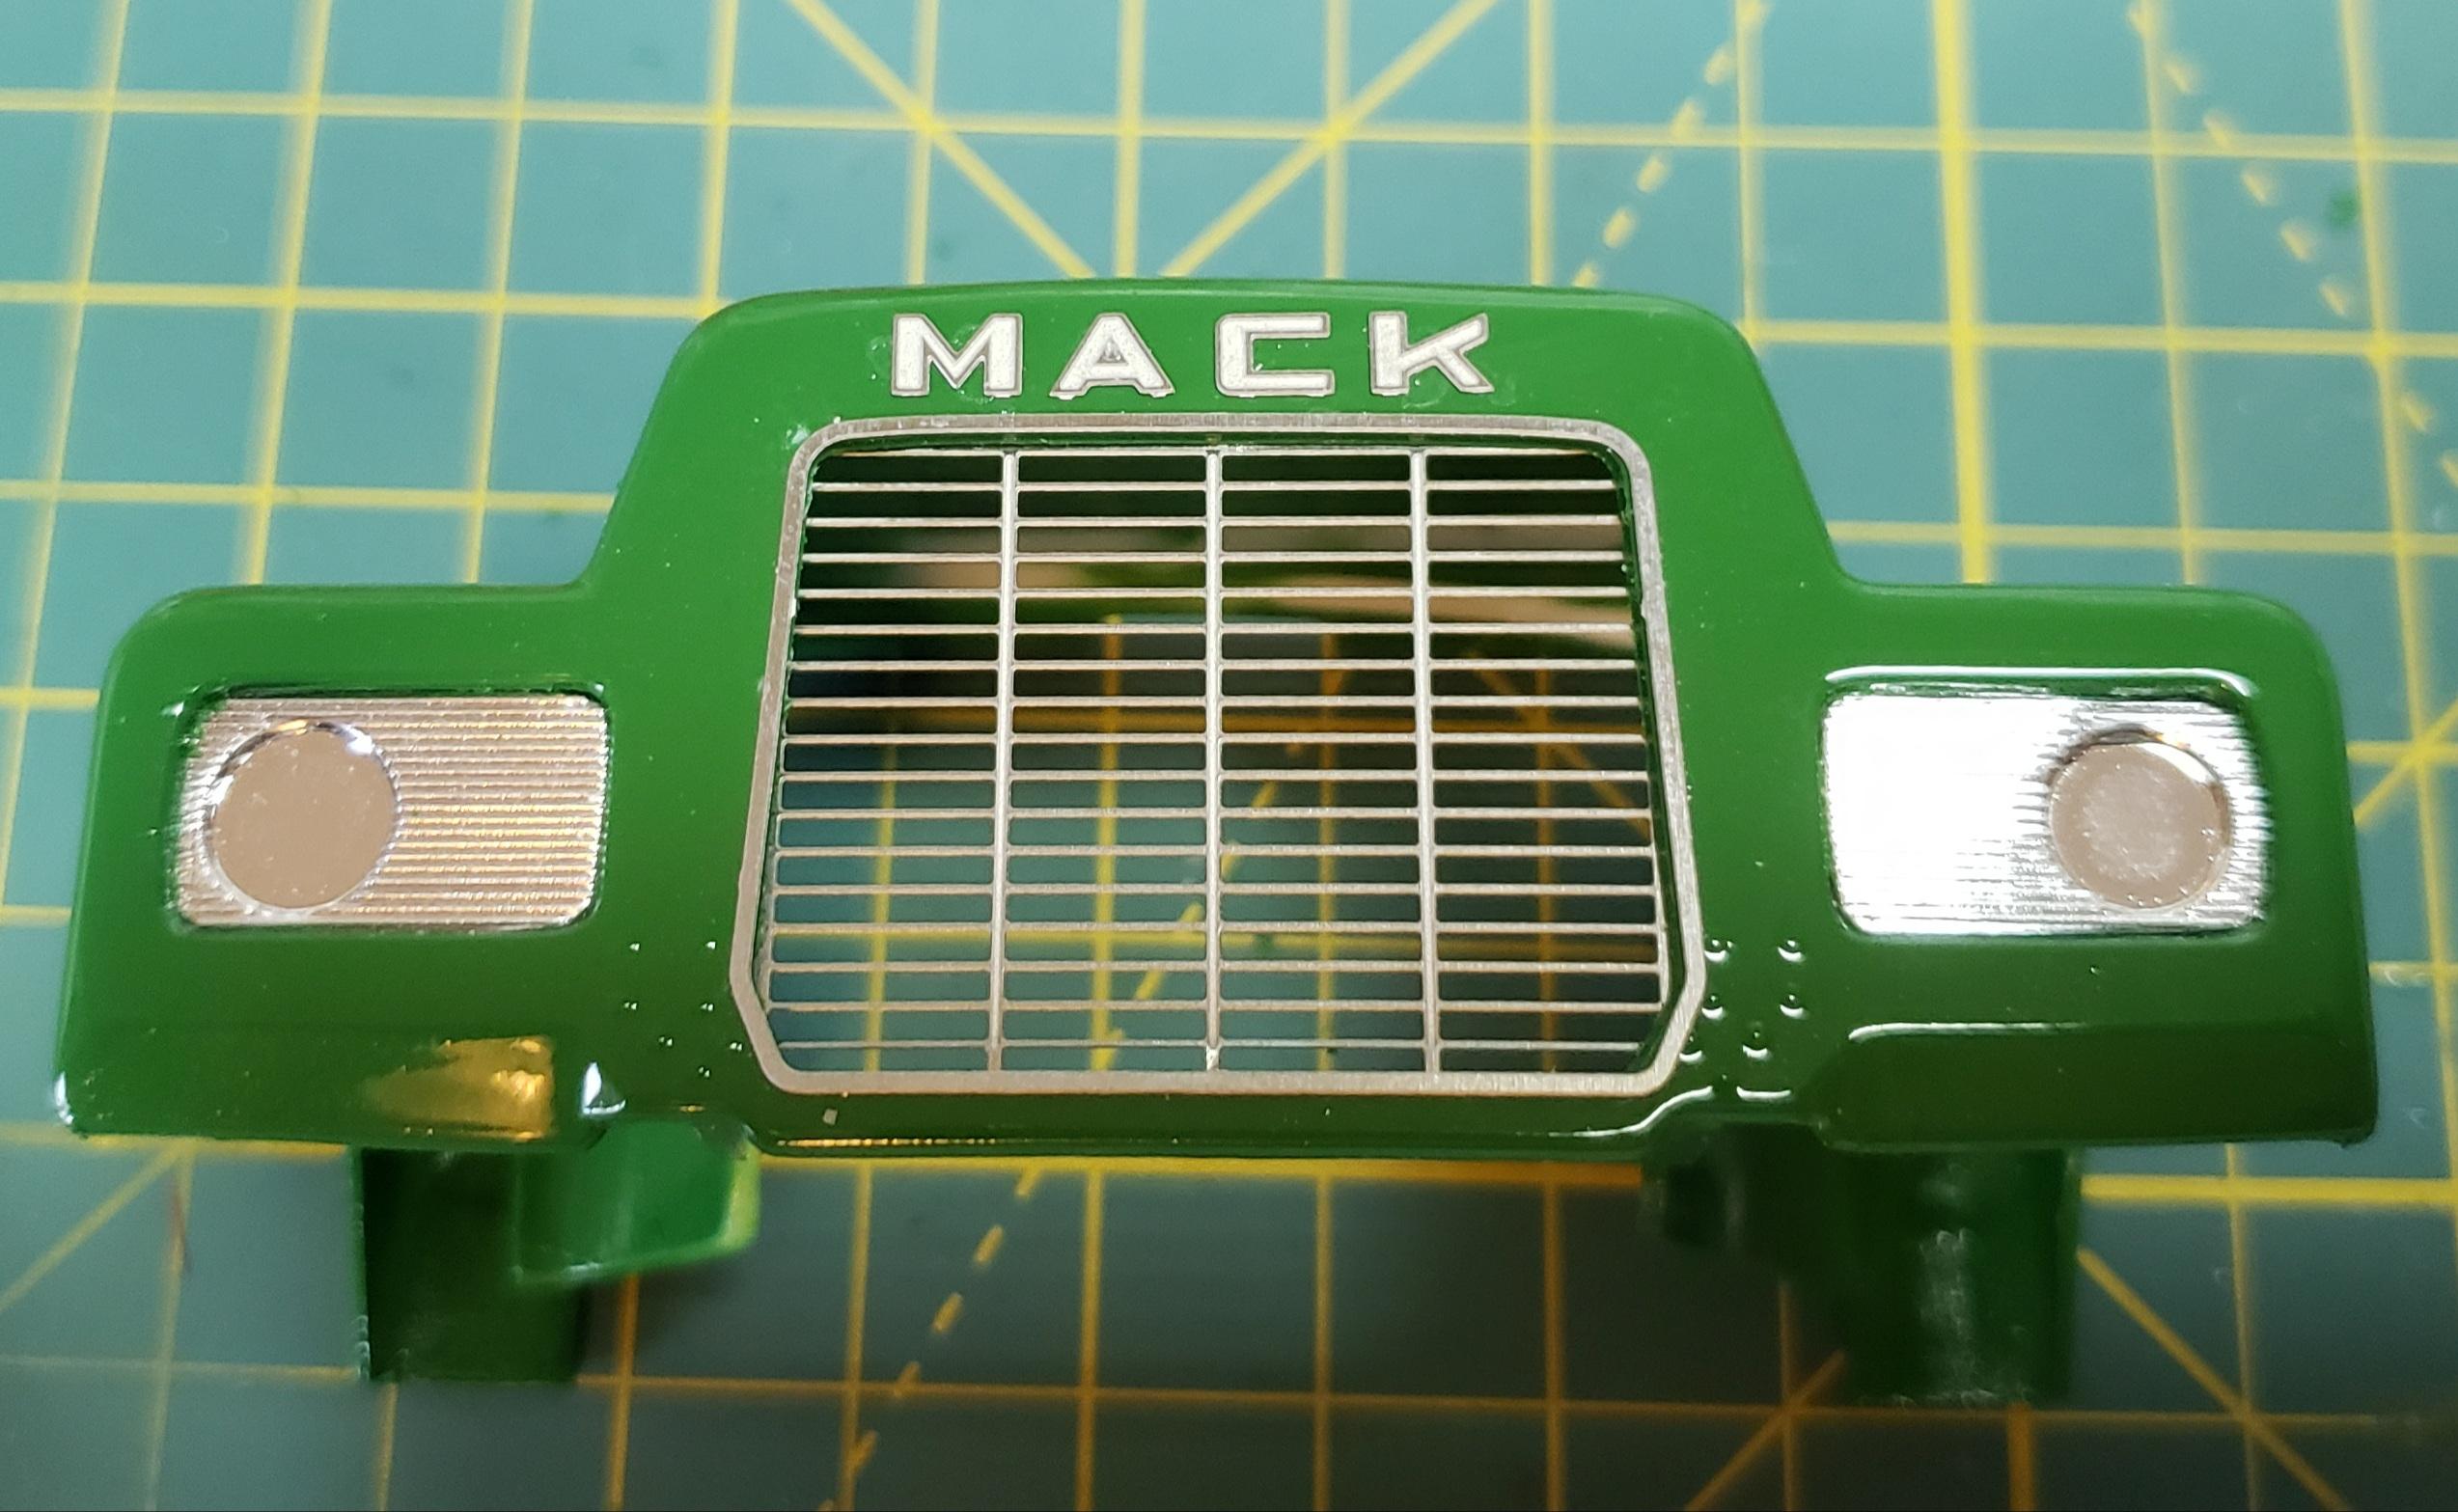
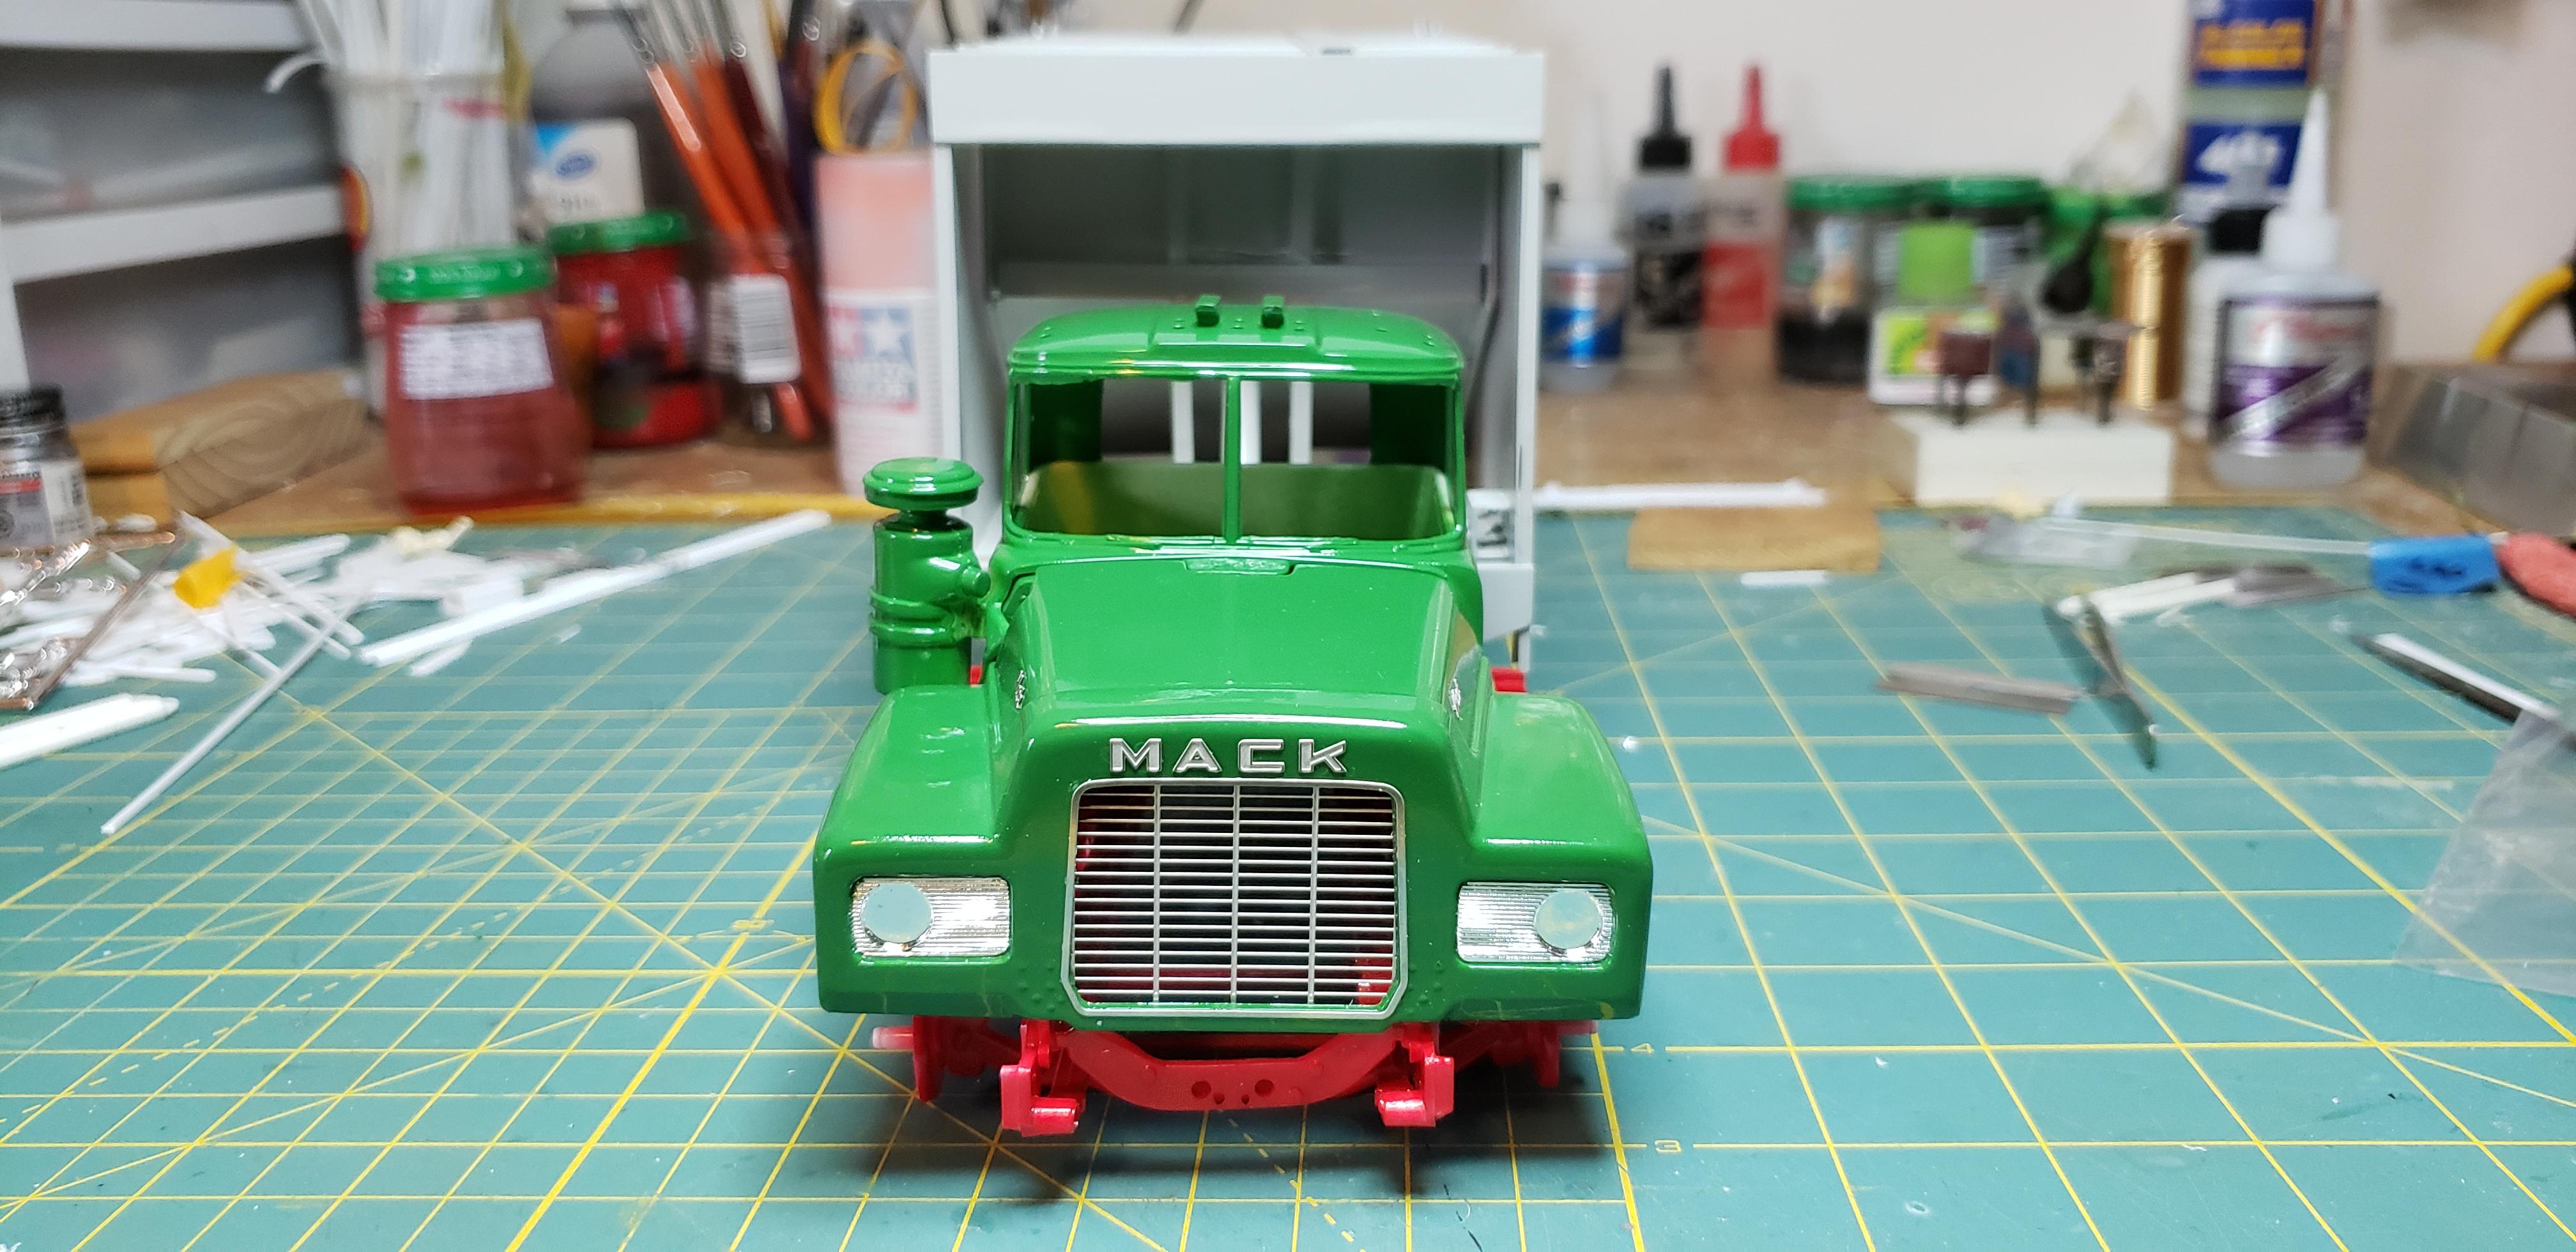
Thanks everyone for the feedback it really means alot Today I installed the detail master etch grill and lettering. I've gotta say it really makes the hood pop. While I was puttering, the packer body was painted krylon glacier gray, a matt light gray. I should've tested this first, those cans really blast paint and it caused a few sags. Overall I'm really happy how the colors work together. Now to finish the Maxi-dyne engine, and get the chassis wrapped up Jeff
-
R model Mack garbage truck Finished
gotnitro? replied to gotnitro?'s topic in WIP: Model Trucks: Big Rigs and Heavy Equipment
The tins are done , sprayed w rusto jd green. The parts dried overnight so today I set everything together for a mock up. The packer body will be a very light gray, I planned on spraying this wknd,but our daughter came down w a cold after a week in school. Dr said usual ear infection and sore throat going around. Thanks for everyone's feedback
-
Great idea pre shading the panel lines. Subtle color shifts make these stand out Keep up the progress..love watching a Countach being born
-
R model Mack garbage truck Finished
gotnitro? replied to gotnitro?'s topic in WIP: Model Trucks: Big Rigs and Heavy Equipment
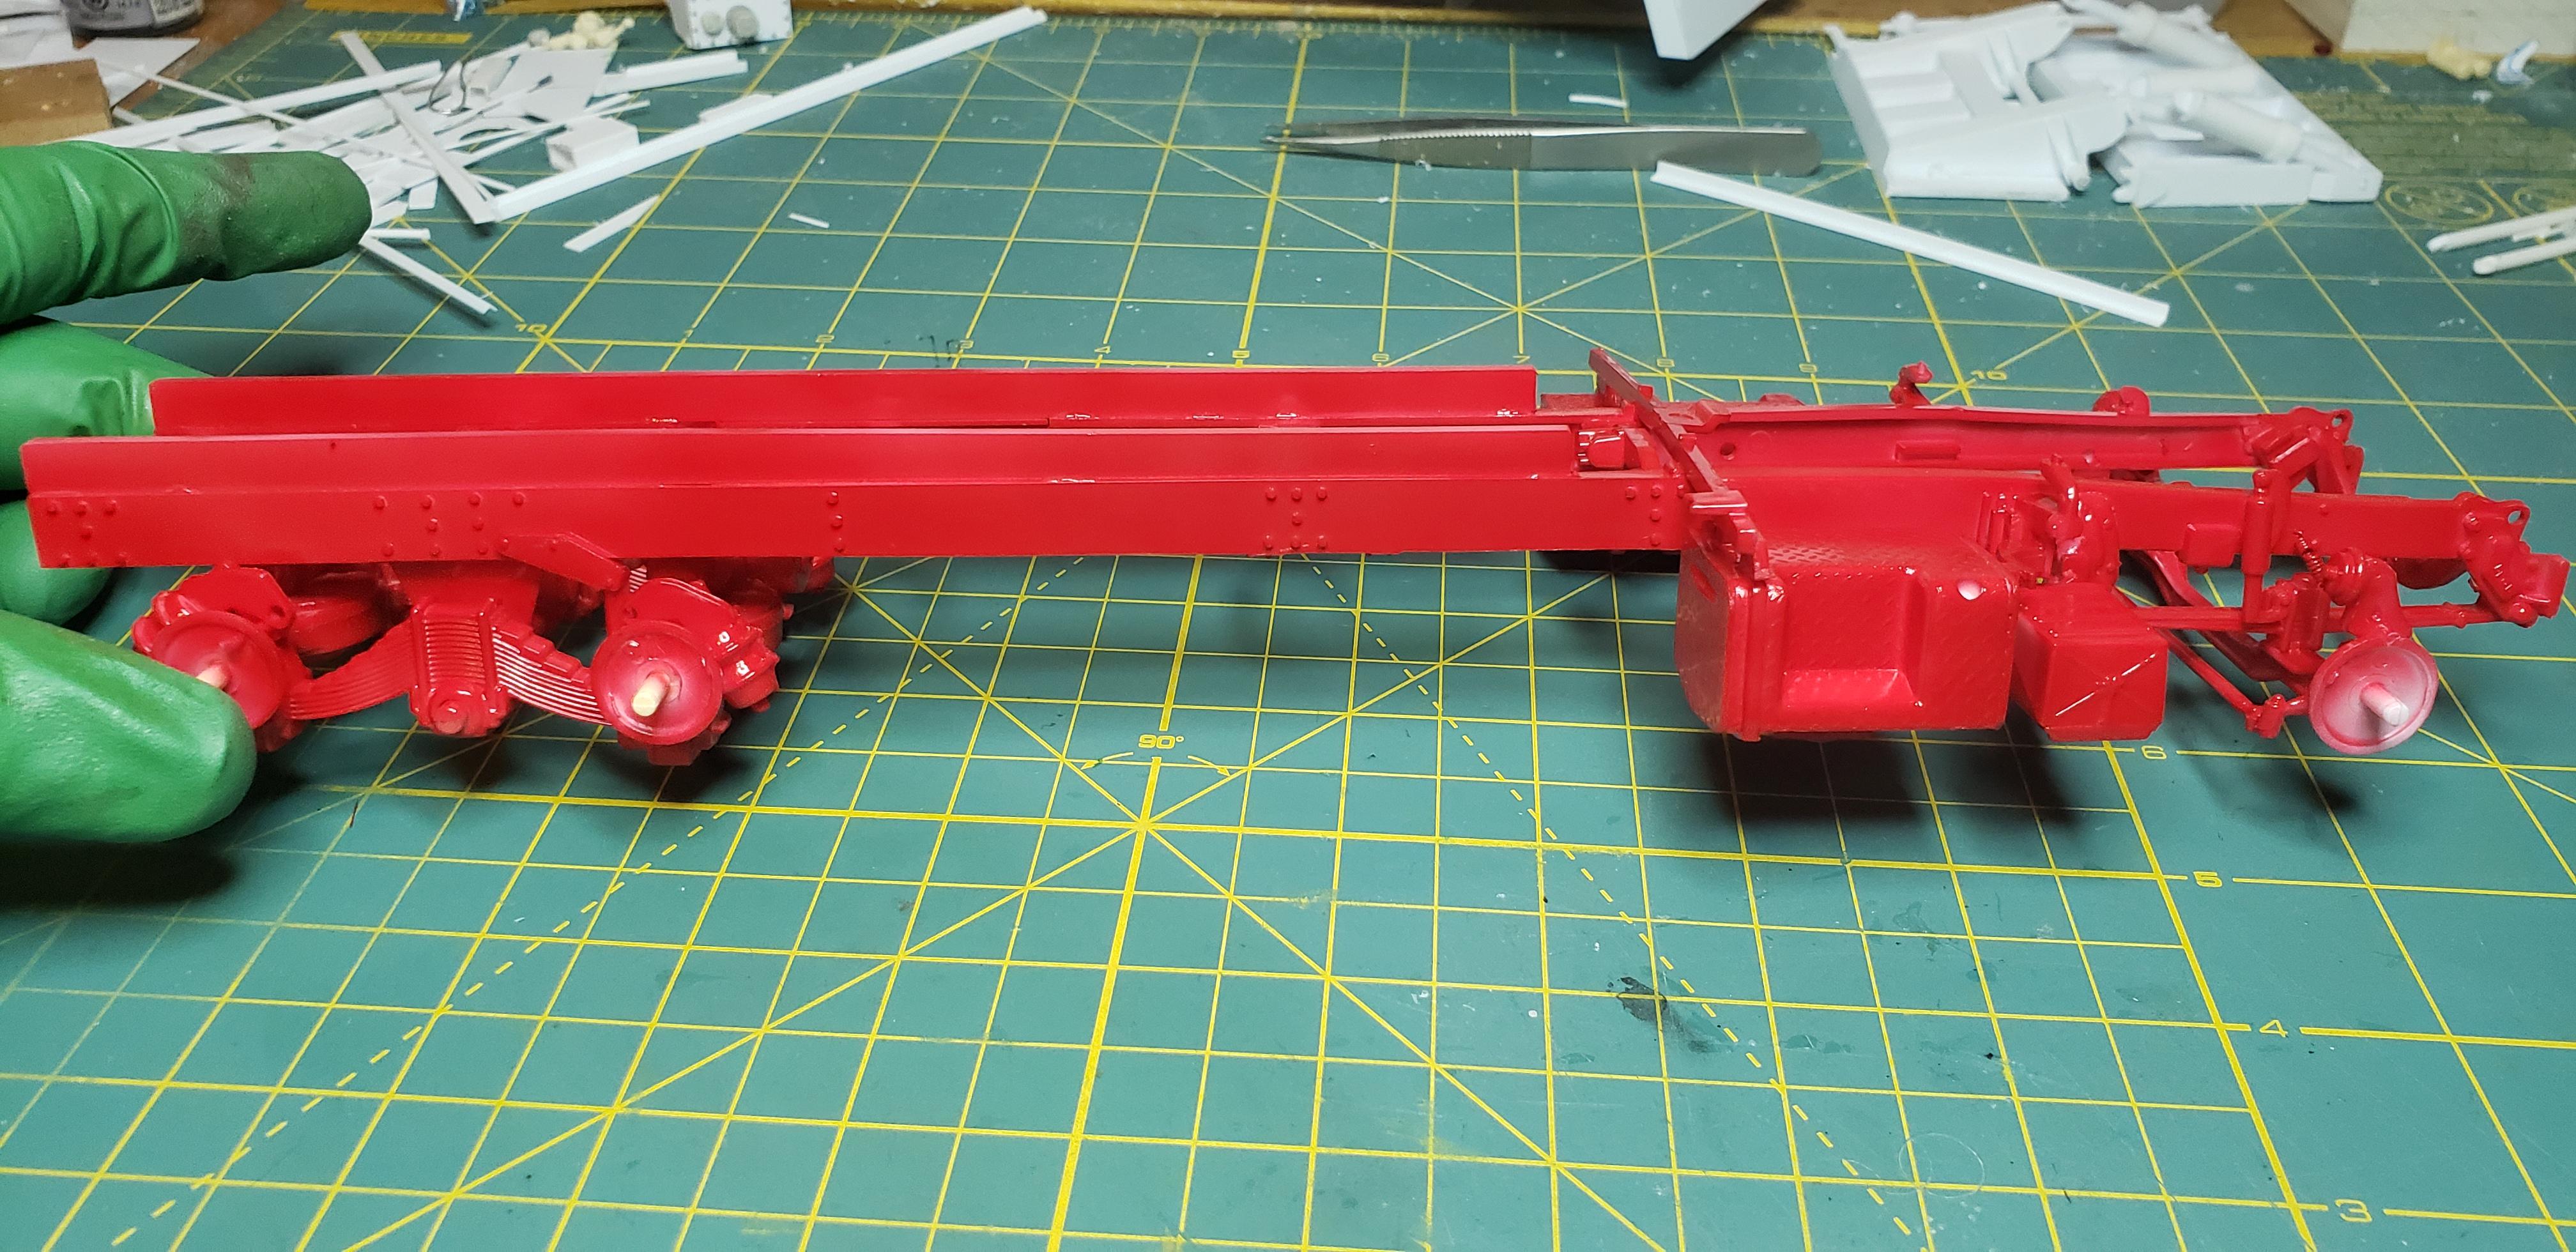
Thanks for hydraulic ram ideas..but I've had those done a few weeks now lol I sprayed the frame tonite w airbrush..man it takes forever but much less mess. Thinned rusto regal red 50/50 w tamiya lacquer. Laid down smooth w great coverage. Kinda shiny for a garbage truck..but I can address that
-
R model Mack garbage truck Finished
gotnitro? replied to gotnitro?'s topic in WIP: Model Trucks: Big Rigs and Heavy Equipment
I had a little excitement last night when I tried to paint the tins. Seems the rattle can valve was clogged inside the can. I tried cleaning the nozzle but nothing would come out. I decided to decant the can into a jar..now my yard looks like a murder scene PSA only whack a rattle can on cardboard unless ya want your green grass different colors lol I'll thin the paint and use the Iwata for now