Speedfreak
-
Posts
2,647 -
Joined
-
Last visited
Content Type
Profiles
Forums
Events
Gallery
Everything posted by Speedfreak
-

Did They Make for 69 Camaro..
Speedfreak replied to impcon's topic in Model Building Questions and Answers
That kit is deformed all over the place. -
WooooooooHooooooo! Thanks Bill! Now, if I can just get this thing to fire on styrene gas! Ok, one more question: This kit engine does not have a valley cover, isn't that where the magneto would be mounted on a 1:1 392 (or, all engines with a blower for that matter?), and , not in a 'hole' in the top of the block the way this kit has it? I have a valley cover from a 'Miss Deal' 392 that I can make work.
-
Thanks Ray, I've got two Cobra's waiting in my stash.
-
Yes! Where did you find this? Ok, now for the final question,....................... the number #1 hole coming out of the cap, is thart going to the #1 cylinder? Oh, please let it be so, please. And the the hole with #2 goes to cylinder #8 since that's the second cylinder to fire, and, so on? Or, hole (lol) #2 goes to cylinder #2? It's gotta be hole #2 goes to cylinder #8 since that's the second to fire and hole #3 goes to cylinder #4, hole #4/cylinder #3, right? Yes!
-
Cool looking boards Rob. If you read the instructions on the back of the Future (Pledge Floor Shine or whatever) label, it says it will 'dry' in 20-30 minutes, but, it also says 'wait 8 hours before applying additonal coats. It's a pain, but , that's what I do.
-
Man that color does more than pop, it booms and bangs as well.
-
Great build Al, what did you use to tint the windshield? Looks very 1:1
-
Nice looking build Scott, if you had to ride in a paddy wagon this wouldn't be too bad. Carl, I think that's the way the headers come.
-
Steve, that is Beautiful! Wow! What a great build! You're right about it popping in the sunlight, it doesn't even look like the same paint inside. What a stunner, I'm stunned.
-
Ok Bill, so,....Looking at the ebay shot the right group of four, #7-2-1-8, the top left wire (coming out of the cap) is #8, top right is #1, bottom left is #7, bottom right is #2? I have no idea, it just looks like that's how it might be layed out inside the dome of the cap. I'm still working on the left side, it's harder to see. But, top left #3, top right #4, bottom left #6, bottom right #5? If I'm gonna do this I might as well have the wires coming out of the cap in the correct places. Thanks. Gene
-
Mitch, I can take the headers off, and then put them back on. They're on right now with Microscale 'Micro Liquitape, pretty cool stuff.
-
Mitch, I have, and , wear several of Ed Roth's works, love 'em. Your build looks great, I'm in the dark though about the topic your building. And I remember when a decent school lunch could be had for .50 cents, " give me a couple of those deep fried beef and bean burrito's and some ketchup! Ya!
-
Bill, I think I've got it now, just need to do a test run with the parts I'm going to use I guess. Thanks. I thought you might find this interesting: http://www.ebay.com/itm/Rare-392-Chrysler-Hemi-Joe-Hunt-Magneto-W-Porcelain-Plug-Ends-Drag-Race-Gasser-/291134500086?pt=Vintage_Car_Truck_Parts_Accessories&hash=item43c8f7ecf6&vxp=mtr
-
Bill, So the group of 4 wires that #1 is part of would also contain #2-5-7? And the other group of 4 would be #3-4-6-8? Or, that has no relivance, and there are just two groups of four to keep things neat and orderly on the cap? The blue cap in the second photo: The four wires on the right side are #1-2-5-7? L/R top/bottom? The four wires on the left: #4-8-3-6 L/R top/bottom? I know I'll get this! Bill, thanks for going to all the trouble to illustrate this.
-
Thanks Ron and Dan. I'm having fun with this build.
-
Great work Scott, is it gonna be blue?
-
Hey Mitch, I don't think that engine's gonna get enough air! Nice work!
-
Thanks a bunch Dave! The header tips are 'carved' out, they just aren't colored yet, so , it's a little hard to see in the photo's, xact-o. One of blade tips is actually imbedded in one of the tubes! (you can't see it unless you look directly inside). As for the artist chalk, that sounds 'really' cool, talk about realism! I don't have any and how would you apply it to the inside/outer edge, artist brush? Thanks again Dave.
-
I know what the firing order is for the 392 Hemi but I can't find anything on where to place the plug wires in the magneto in relation to the firing order. The magneto for the dbl dragster 392 shows the wires coming out of the magneto , four each side, so , 'where' do you put the plug wire that goes to the #1 plug? On the same side of the engine as the #1 cylinder? And if so, is it the first wire (front) of the four on that side of the magneto? If I type the word........., no I'm not gonna do it! So that's the question, hope it makes sense Thanks.
-
Thanks Nick. Do you take your pics outside, or , are you waiting for natural light? That's what I do. Hey Nick, are you using the 392 in your car?
-
Thanks Mitch, I think I'll do some experimenting with some cleaned sprues and see what i can come up with. I can see the thinned tan as a good starting point. I'm also going to try and make my local club meeting (KC SLammers) this coming month and see what ideas I might get there. My next couple of builds are going to be simple kits so I can develope skills I've learned in the last six months.
-
Thanks Mitch and John, That light tan I can definitely do! 'cause I could put that over the white that's on there and then do something for the ends and the inside. Maybe some of the clear stuff mitch is saying over the tan? What about the inside of the tip? Thanks again for the help.
-
Thanks Carl. I think you're right about the firewall. The headers are Tamiya Matte White. The valve covers are 'gloss black. I 'might try' some weathering on them, would be very nice. But since I've never done that before, AND , it took me probably 2 hours just in prep work to get the kit headers just to look like they do, (New tooling? ya right) , I'm not sure. I mean this kit is not what I would call a stellar kit, there's LOTS of prep work that if you don't do the thing just looks like a toy. For example, the belt on the blower pulley if not reduced in thickness, (which I did with just basic tools by hand) 1:1 would be about 3" thick! So, I've spent 5-6 hours just on prep work for the engine. Oh well, that's modeling right?
-
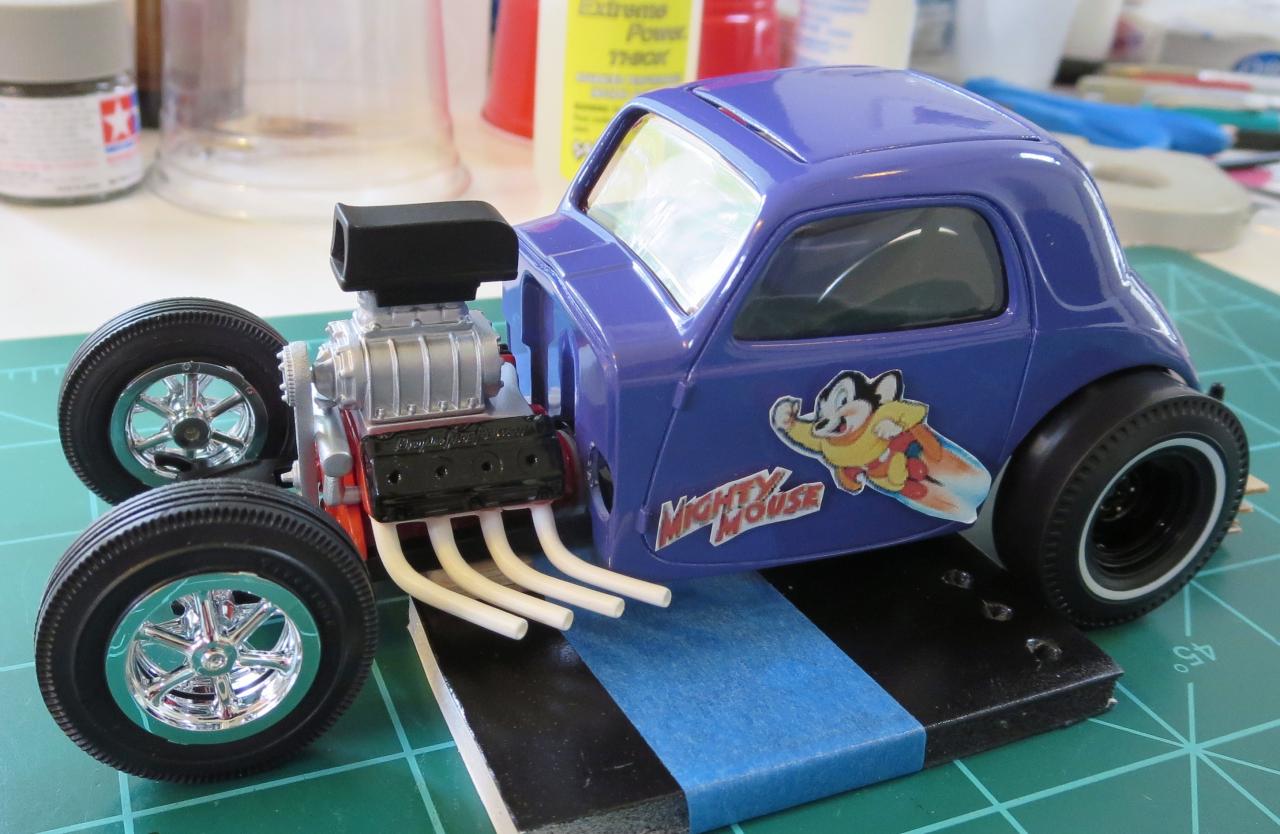
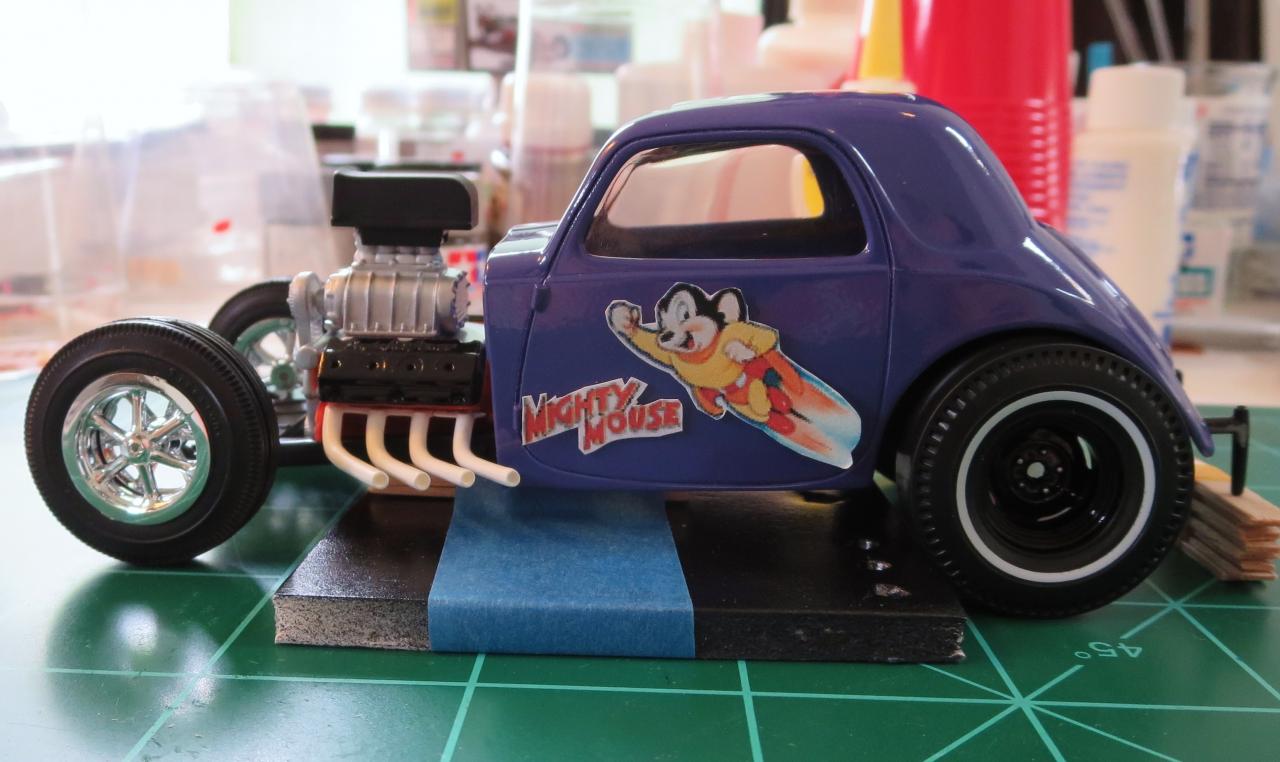
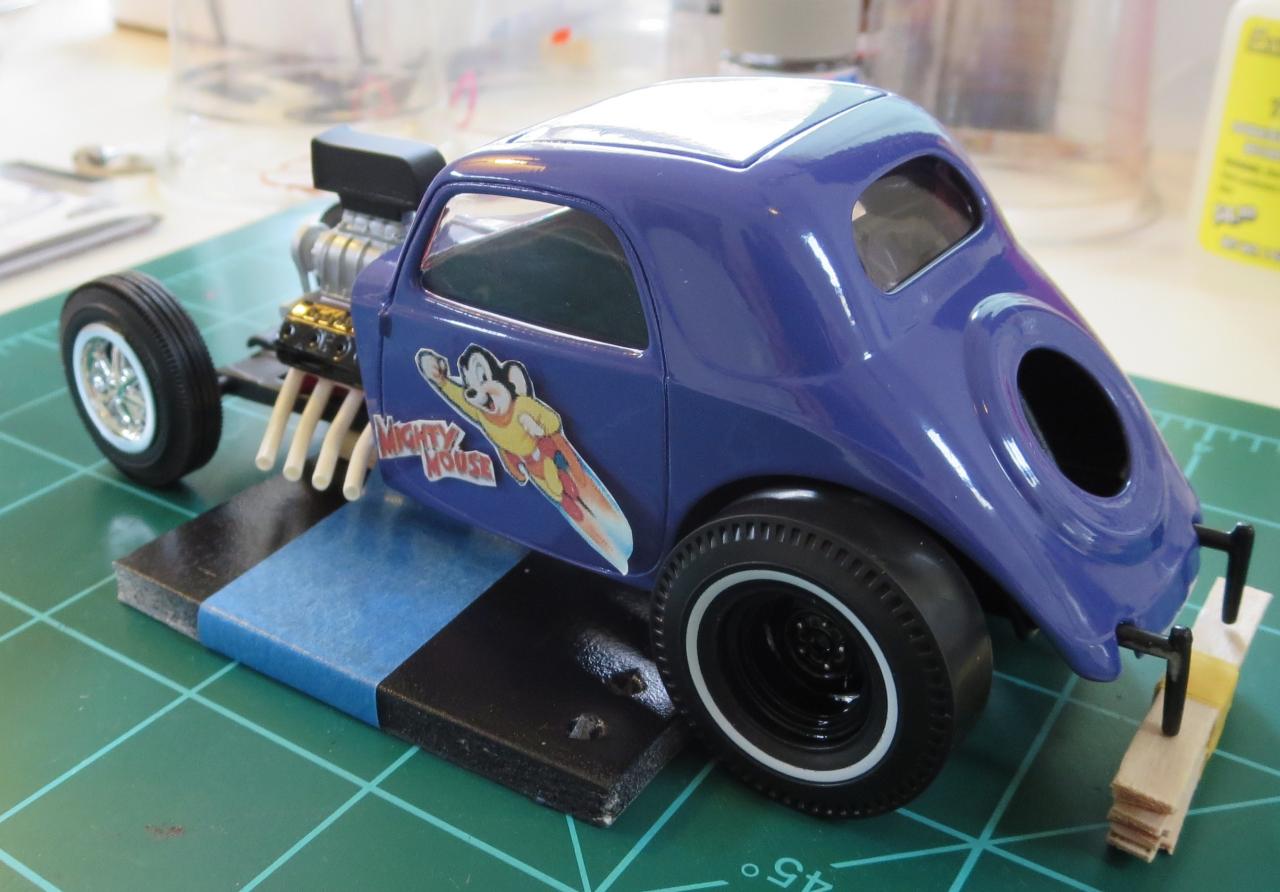
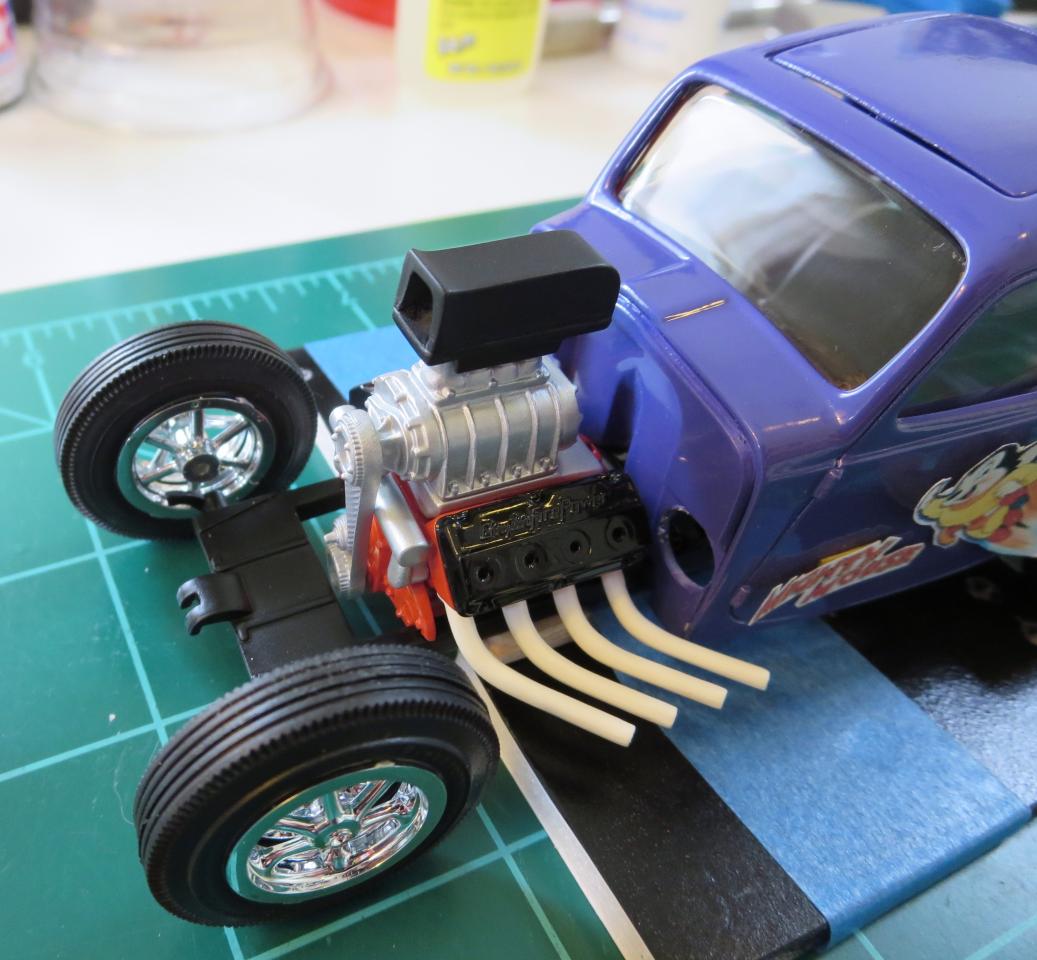
Thanks Skip and Russell, I'll be looking into that. Here's what I have done on the car so far, well, it's a mock up really. It's slow going but I keep chugging along. I'm really just working with ideas, the engine (except for block/heads/oil pan) is held together right now with Microscale Micro Liquitape, so I can take it apart, there's still some work there. The front edges of the intake scoop need to be narrowed for one thing, (on the Puffer II that was actually made from duct material by a heating/cooling guy that knew Walt Sr.) and, I'm going to wire it! The window's have about 5 dips in Future with yellow/red food coloring, (it's kind of orange) that you can barely see, but it works. I still need to work on the headers, and the front wheels/tires, and I think I'm going to do the firewall with Mate Aluminum Bare Metal Foil, any thoughts on that idea? Or, should I leave it body color? The seat is going to be reddish/brown with red seat belts? Oh ya! I just ordered today (I still have to mail it) a Drag Chute Kit from Pro Tech, that should be cool, and , I'm thinking of getting smaller tires for the front, probably from Speed City. That's about it so far, any tips, or , ideas are welcome, Thanks! " He's small, but he's Mighty!

-
Beautiful finish Ron, fits the car superbly. It makes it look modern without taking away the vintage vibe. Very cool.