Pete J.
-
Posts
3,982 -
Joined
-
Last visited
Content Type
Profiles
Forums
Events
Gallery
Everything posted by Pete J.
-
Saw this model in person last night. Photos don't do it justice. The blue color will just blow you away and the detail work in immaculate. Mark says this is a labor of love and I believe it! This one is special. Thanks for bringing to the club last night Mark!
-

How big is your... stash?
Pete J. replied to Pierre Rivard's topic in Model Building Questions and Answers
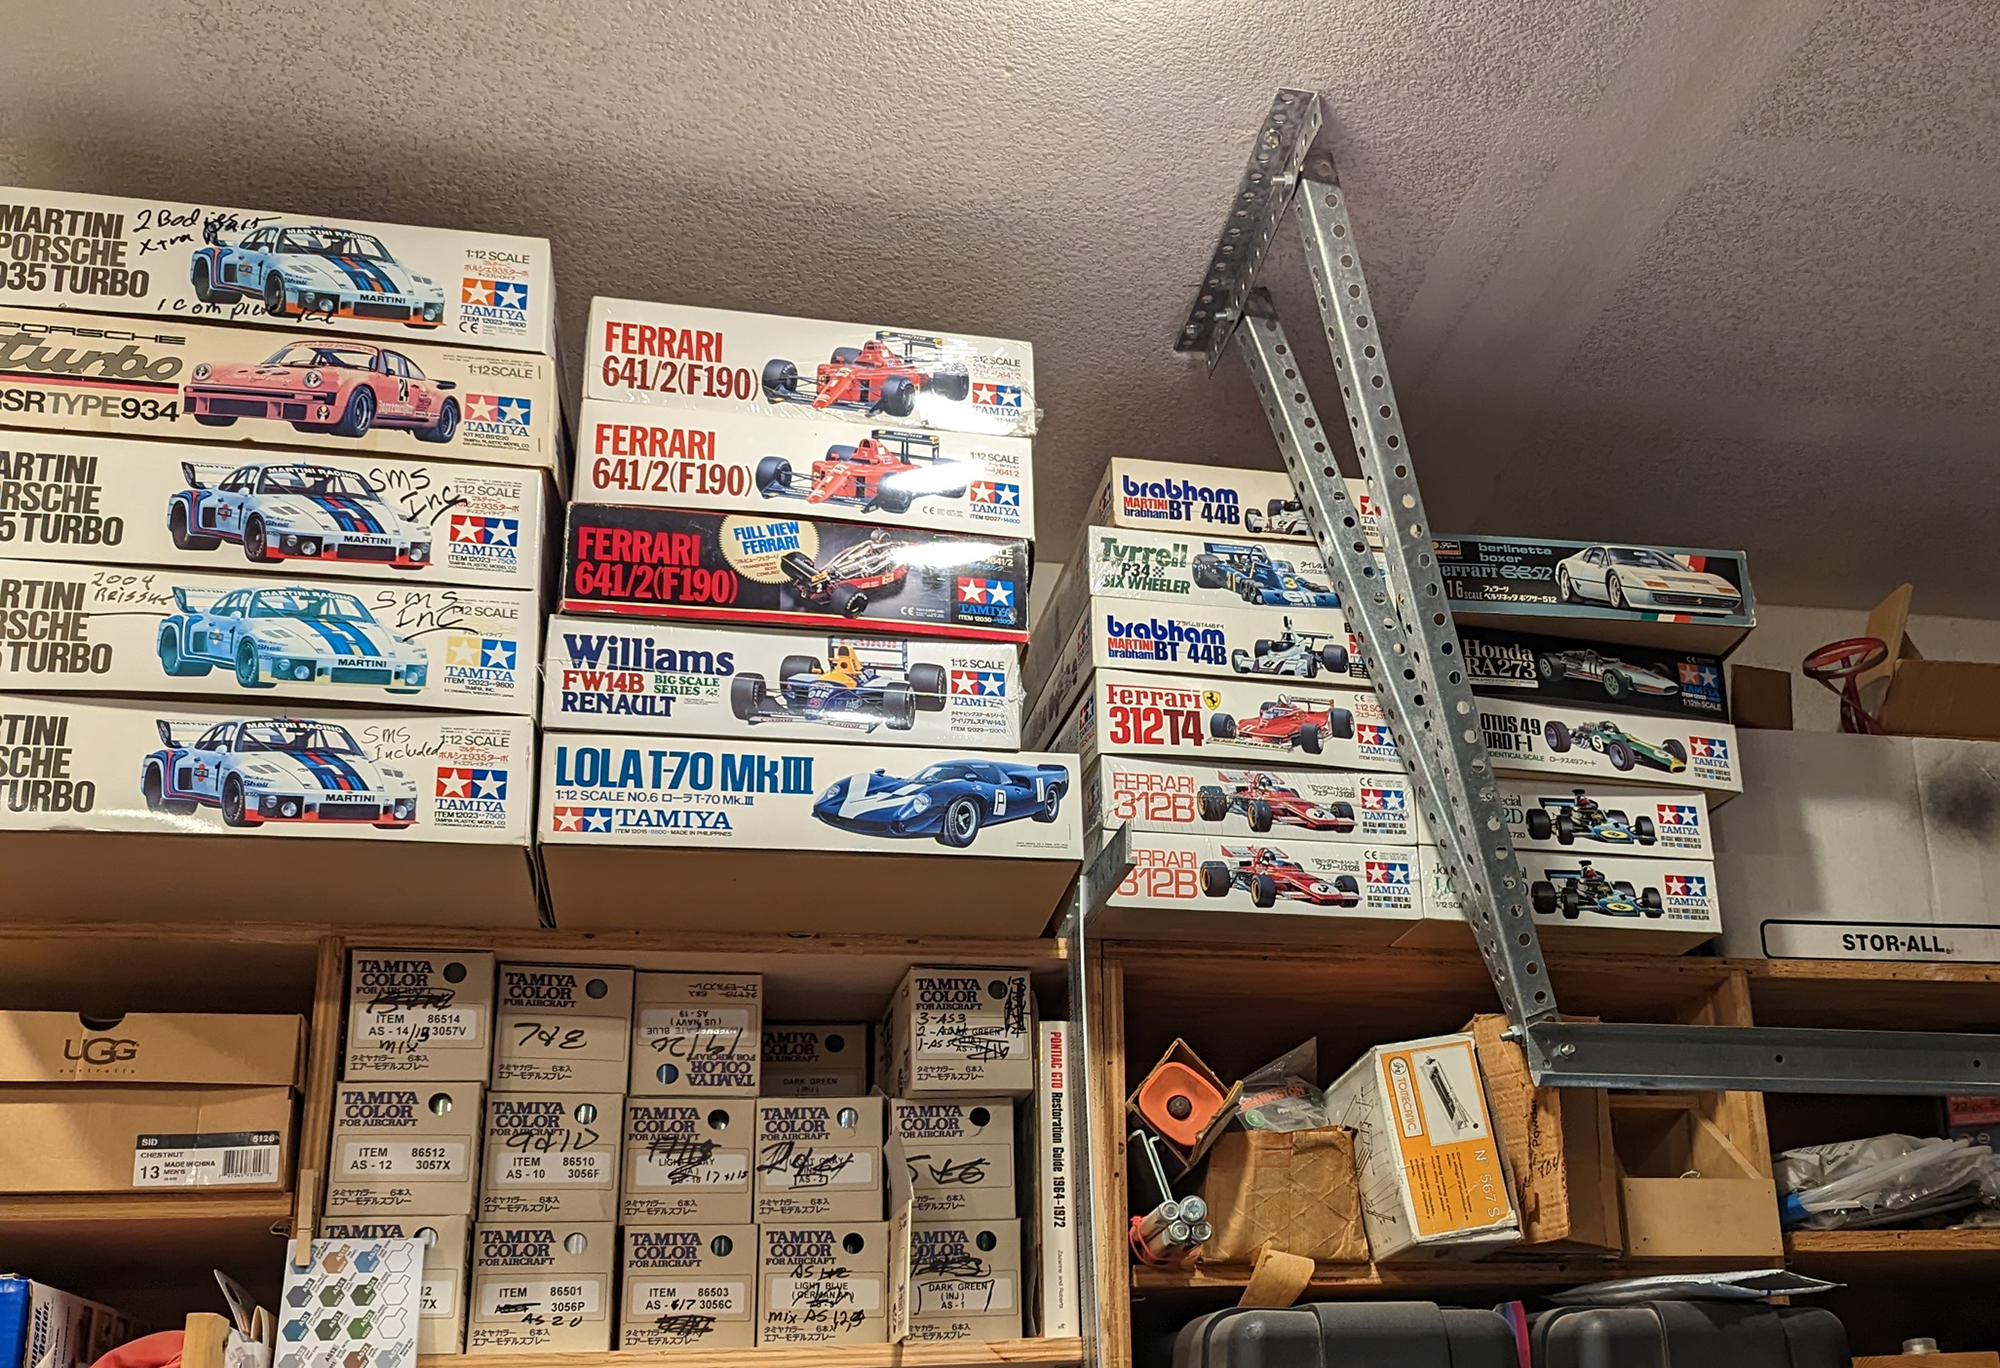
I would contend that all numbers are not the same. I have a spreadsheet that tracks all this. It helps keep me from buying duplicates, but it also keeps track of how much I have spent. Roughly $15,000. I also periodically add current value and it it way over $45,000 at this point. Here is a photo of my large scale cars shelf. At today's prices, it is pushing $7,000 Why so many? That is easy. When I got back into the hobby 30+ years ago, I paid way to much for out of production kits and decided that wasn't going to happen. Large stash means I can build what I like when the urge moves me, not when I can find the 1963 cannabis crate hot rod hauler. I got it 'cause I liked it in the past and want to build it today!
-
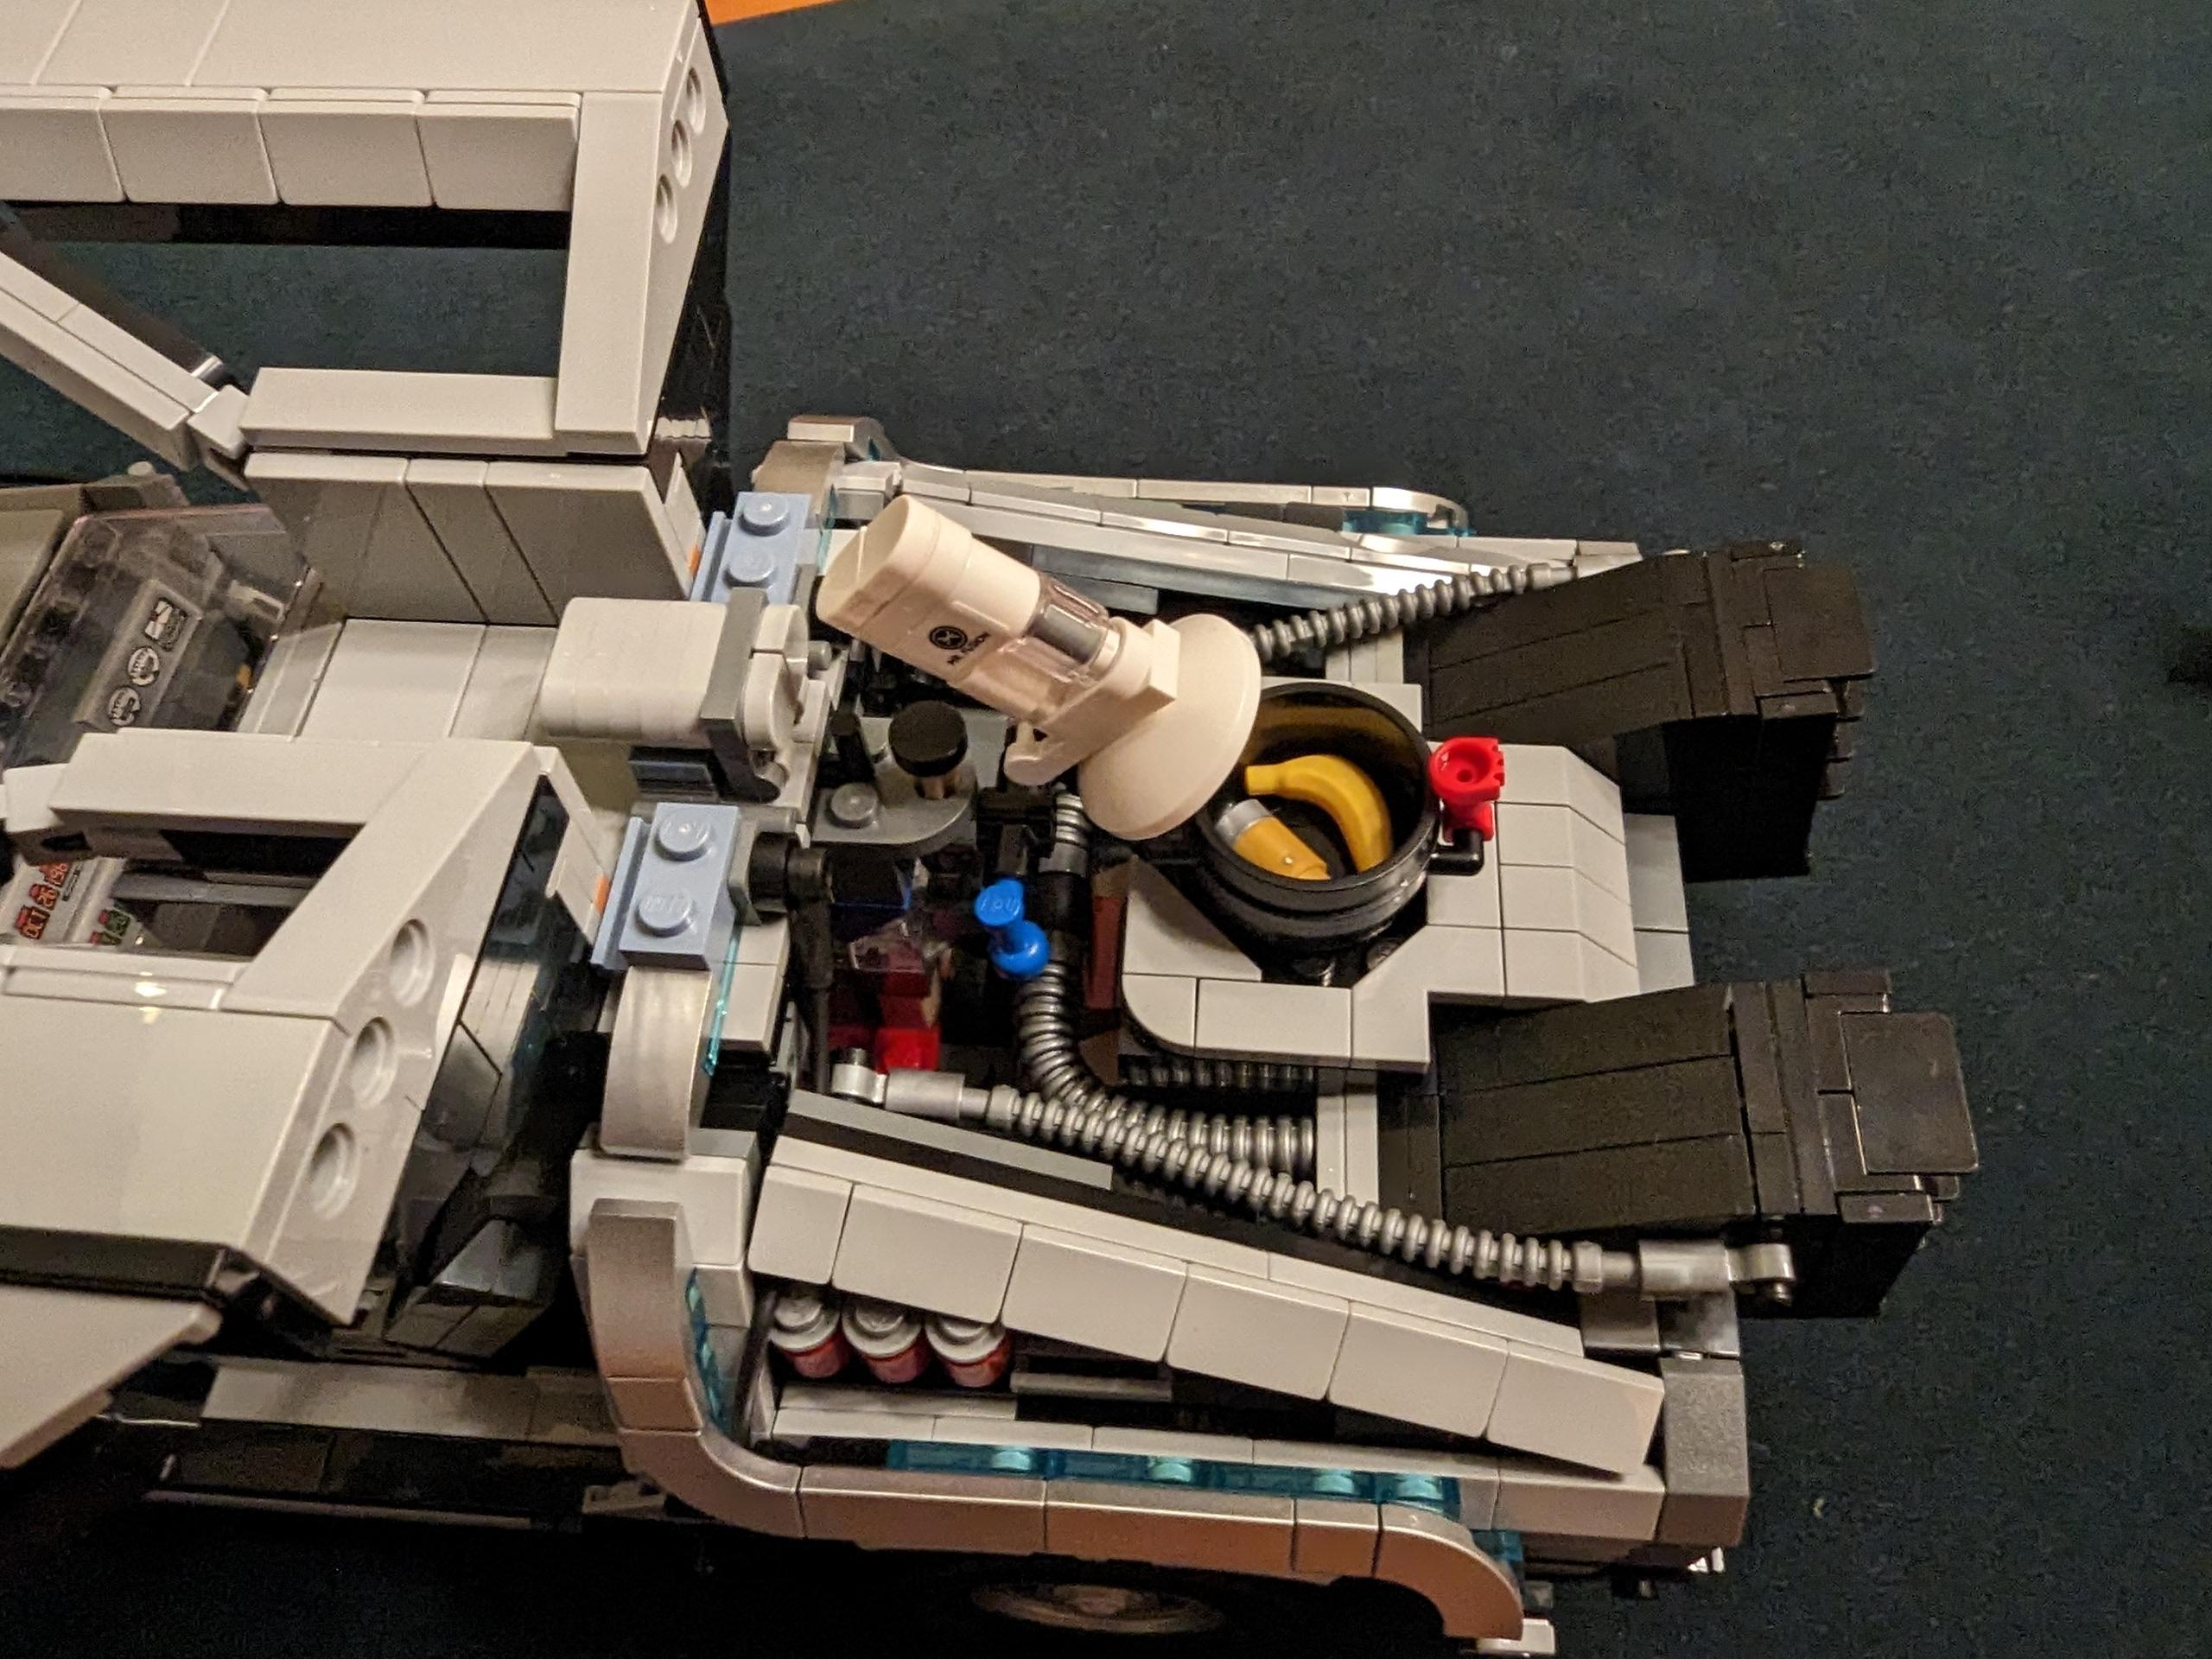
Ok, here is the story. I got nothing build or even started in 2022. I had some major health issues that involve losing sight in one eye, lost of fine motor skills and a heart that just doesn't want to behave. I am looking at open heart this year, so I am just happy to still be here My kids knew how much I missed my time with my models, so they decided that this should be my Christmas present! The thought brought me to tears. I finished it yesterday and really got back some of the pleasure. Before you blow off lego models, know this. The expert kits are very complex with a lot of parts that have to go on just right. Imagine if you will a kit with almost 1,800 parts (the largest has 10,001). I had more than one instance where I had to disassemble parts because I didn't follow the instructions(390 pages) precisely. It was great fun and really helped my mental outlook. Perhaps I will get to back out to the bench in 2023! I can only hope.
-
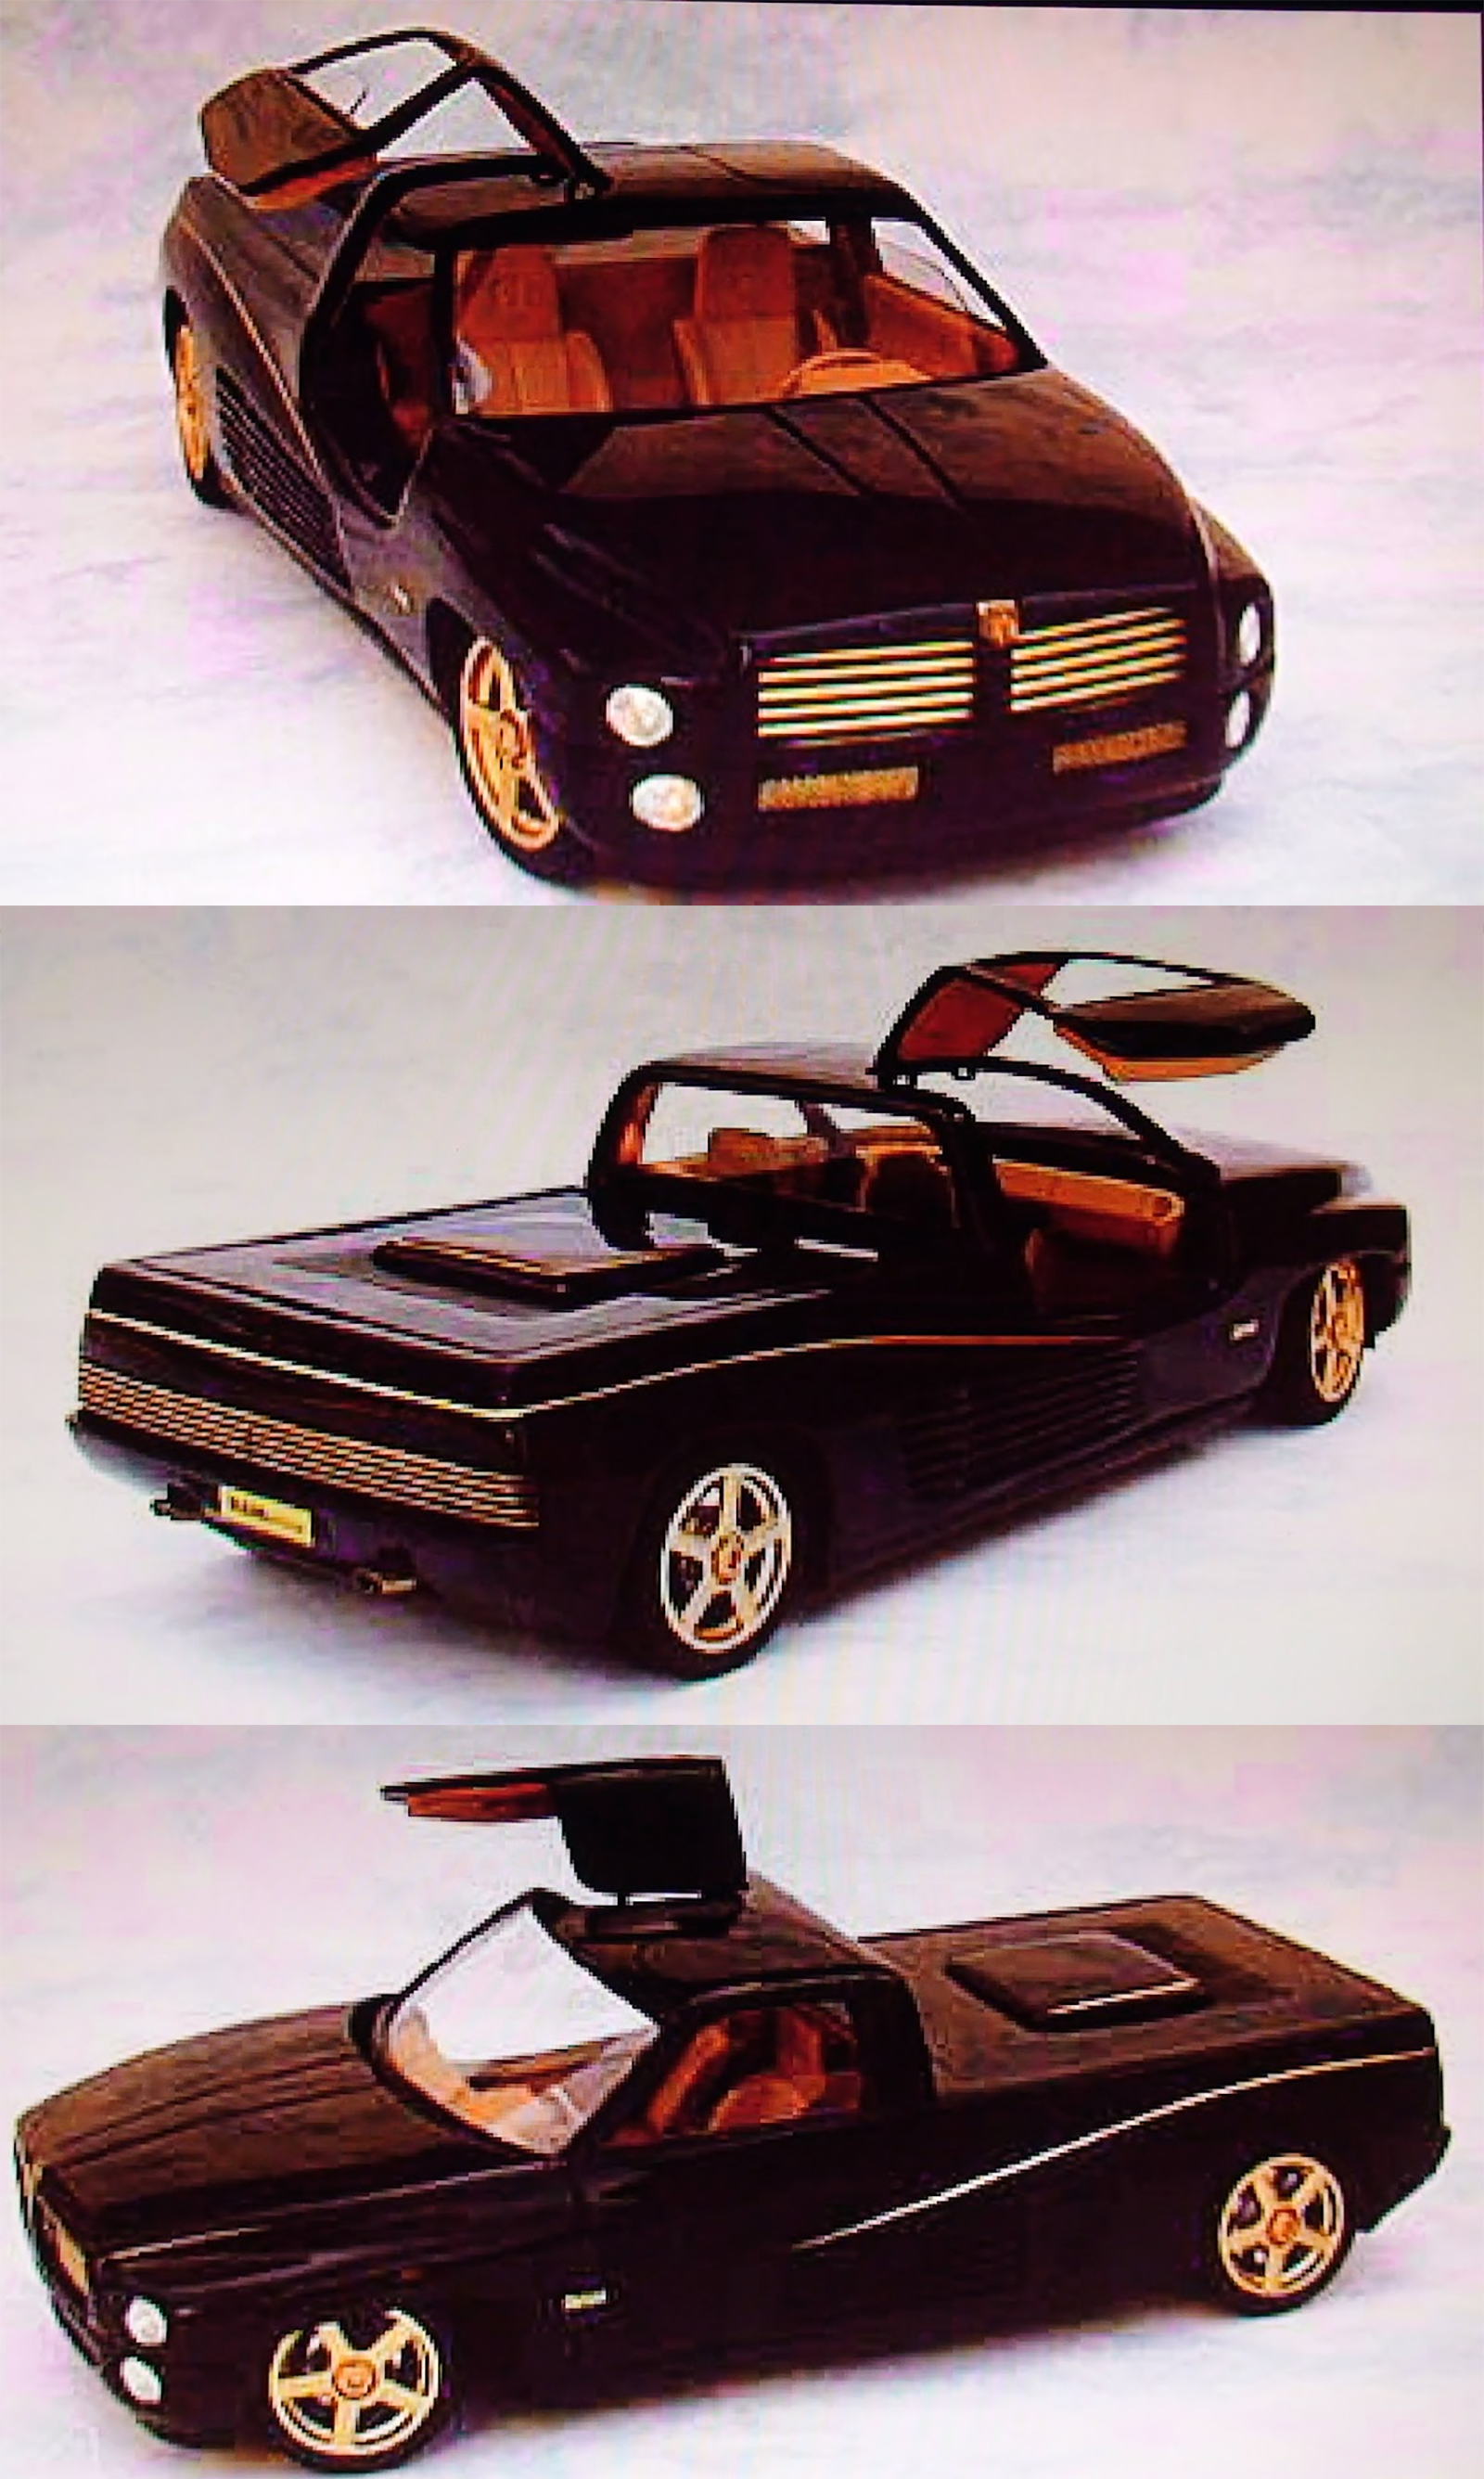
It made several model magazines and won Best conversion at Tamiya/con. Prize was a trip to Japan.
-
Black with gold accents. I'm not trying to hijack your thread, but this kit is the basis for one of my all time favorite builds. Look closely and you can still see that most of it is Ferrari. I didn't have any photos of the engine bay but the rear deck lid tilts up to show off the rear. I may need to drag the kit out and do it again!
-
Auto quiz #569 - Finished
Pete J. replied to carsntrucks4you's topic in Real or Model? / Auto ID Quiz
I had no idea what it was, so I cheated with google lens(no I didn't pm or enter). I found it but still have no idea what it is!? -
Dave, Ababa Nut and Bolt in San Marcos is great. https://abababolt.com/ They have an absolutely massive stock to pick from. Only down size is you have to buy large quantities, like 50 or 100. Found out that that quantity is about the same price as 2 plastic packs from home Depot. Check them out
-
What did you see on the road today?
Pete J. replied to Harry P.'s topic in General Automotive Talk (Trucks and Cars)
Traffic! Lots and lots of traffic. Took an hour and 20 to get to my daughter's. Normally a 45 minute drive.? -
Auto Quiz 567 - Finished
Pete J. replied to carsntrucks4you's topic in Real or Model? / Auto ID Quiz
A walk in the park kazanski! -
Okay, I'm going to be the outlier here...... and yes, I am 73!
-
Another ‘What is this, please?’
Pete J. replied to Earl Marischal's topic in General Automotive Talk (Trucks and Cars)
1969 Ford Aurora II. Google lens never fails! -
Nice to meet you all from Tokyo, Japan
Pete J. replied to gami8630's topic in Welcome! Introduce Yourself
Welcome Yoshimi! I've been to Japan twice as a guest of Taimiya and have always been amazed by the state of modeling there. So many models and stores to pick from, but you are indeed in the minority. I don't recall seeing NASCAR anywhere. We share a common problem(but a mirror image) in that my prefered build is either non-USA cars or F1 both of which are in the minority here. Hot Rods, muscle cars and NASCAR are the bulk of the auto building community. I still order most of my models and parts from Hobby Link Japan. Welcome and I am sure you will see much here that fits your interests. I look forward to seeing your builds. -
I have schlepped models all over the country, often flying, which is particularly risky because of aircraft vibration. Here are my rules. 1. Never let the wheels of a model support the weight of the model. I always put a piece of foam under the model so the chassis is supporting the model and not the wheels. Often I will cut a piece of foam to the outside dimensions of the carrying case ahd then then cut out holes for the wheels. This is the bottom layer. 2. Once the base piece of foam is done, I secure the model with a piece of 1/2" to 3/4" super smooth ribbon. The stuff is dirt cheap at the fabric store. The piece is secured to the bottom foam with t-pins and the ribbon wrapped across the roof of the model and secured on the other side. 3. I get our my 1/2" pick and pluck foam. This is foam that has been cut into squares that can easily be torn off to accommodated odd shapes. You will often see it in things like Pelican cases to protect expensive camera gear. I then pull apart pieces with the exterior dimension the same as the container I am transporting the models in. I remove sections that are just wide enough to clear the model. The first layer is the one you create in rule 1. The second surrounds the body of the model as closely as possible. I allow places for things like rear view mirrors. The top sheet is torn to remove only the foam to accommodate any model parts sticking above the middle layer layer like radio antennas or light bars. 4. Once this "model sandwich" is complete, I put it in the carrying container and put a lid on it. Ideally, the containers' lid will fit so there is light pressure on the foam. Then it is time to go. Hope this helps.
-
For and twenty black birds, .. oh, ..wrong 4
-
Mutt and Jeff was one of my old time favorite cartoons!
-
Experience the joy of model building by stopping the waste of time this game is.
-
City street courses are best for F1.
-
Roam, isn't that a town in New york?
-
Remember, on eBay anyone can ask whatever they want in the hopes of catching a sucker! I always look at the "sold" section to see what they are really going for.
-
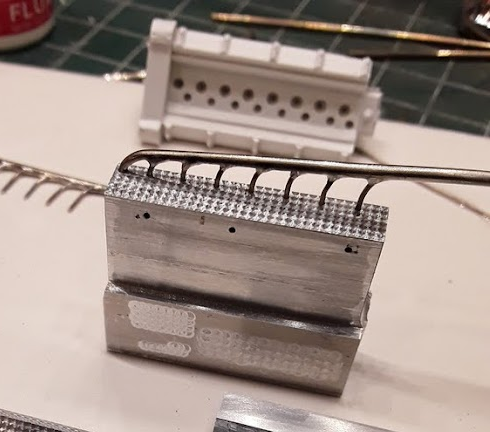
Randy, as usual great work. Your hammer work is just beyond reproach. Amazing stuff. Your cooling lines look great! Thought I might throw an idea out there for you. I have some "German silver" wire that I use for things like that. I used it for the water manifold on my Bugatti engine. It solders up amazingly well with silver solder and it polishes up very well. Perhaps something to add to your already well stocked arsenal of modeling supplies.
-
Autoquiz #564 - Finished
Pete J. replied to carsntrucks4you's topic in Real or Model? / Auto ID Quiz
Think I got it. -
1/12 Tamiya Porsche 935
Pete J. replied to Timonator's topic in Other Racing: Road Racing, Salt Flat Racers
Very nice rendition of this classic kit! Where did you get the rims? They are most certainly not the kit rims. -
Don't know. The Pledge multi-surface floor finish is currently available in retail stores or amazon. Why would you mess with something else.
-
Pascal - Thanks for telling me. No wonder it looks so real. They are real. I thought you had figured out how to paint them! I have seen so many airbrushed exhausts the just look terrible, I was hoping you had cracked the code. Oh, well, back to the bench! Thanks.
-
Beautiful work!! One question. That is the most realistic heat staining on the exhaust I have ever seen. Would you mind sharing your process?