Straightliner59
-
Posts
5,814 -
Joined
-
Last visited
Content Type
Profiles
Forums
Events
Gallery
Everything posted by Straightliner59
-
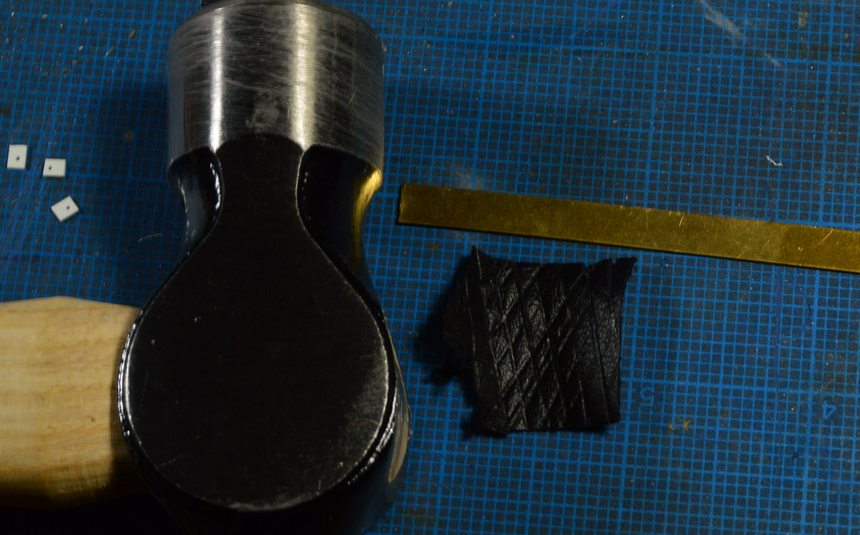
I picked up a couple of square feet of bookbinding leather. The stuff I bought is referred to as 1.5 oz. leather. The "sheet" I got averages right at .015" thick. I was looking for something to use for the upholstery in my Supermodified. My idea was to use basic leather-tooling techniques to create an upholstery pattern. For the test, I used the brass strip and ball-peen hammer in the photo. I merely eyeballed the pattern for the test. There are several areas with a finer grain than pictured, that I can work with. I really think it has some promise!

-
Thanks, Mile High. Thank you very much, Trevor. I enjoy little details, and other points of interest, no matter the level of overall detail. The paint was fun! I'd like to use the same general technique on another car, one of these days. What I'm thinking of trying might just work on my '63 Nova Wagon Stock Class racer! Thank you, all, for your interest and your comments!
-
That's the stuff you want! It works, excellently! I have used it, for decades.
-
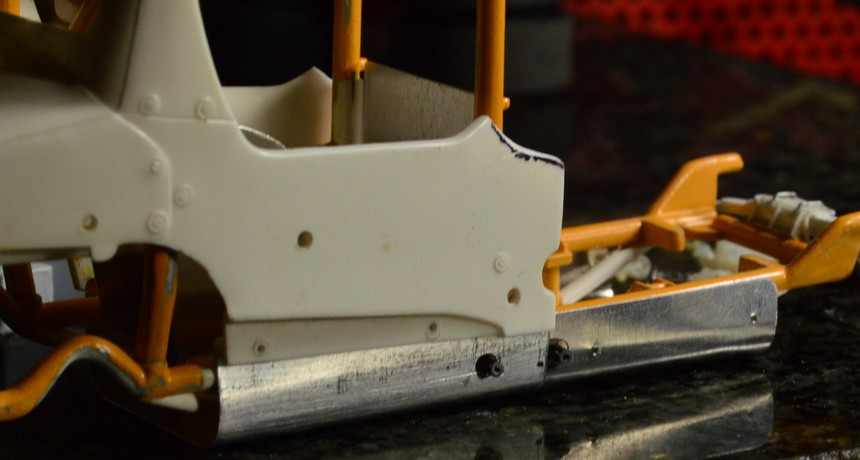
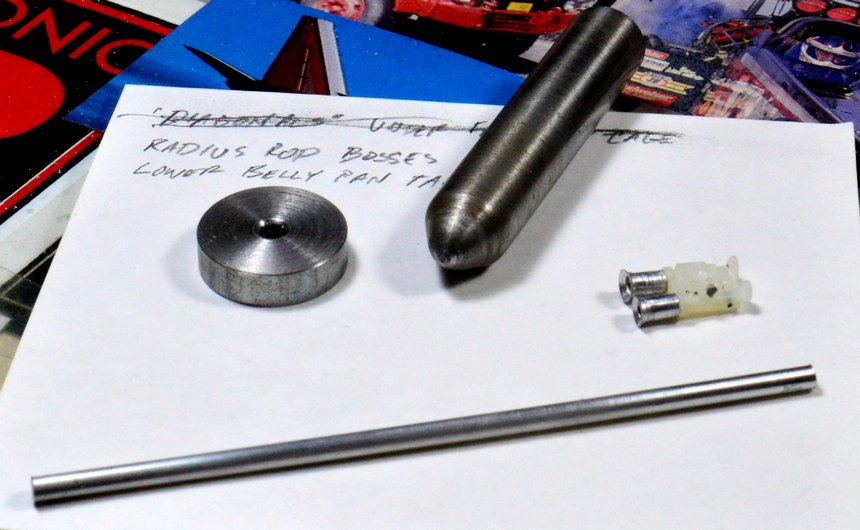
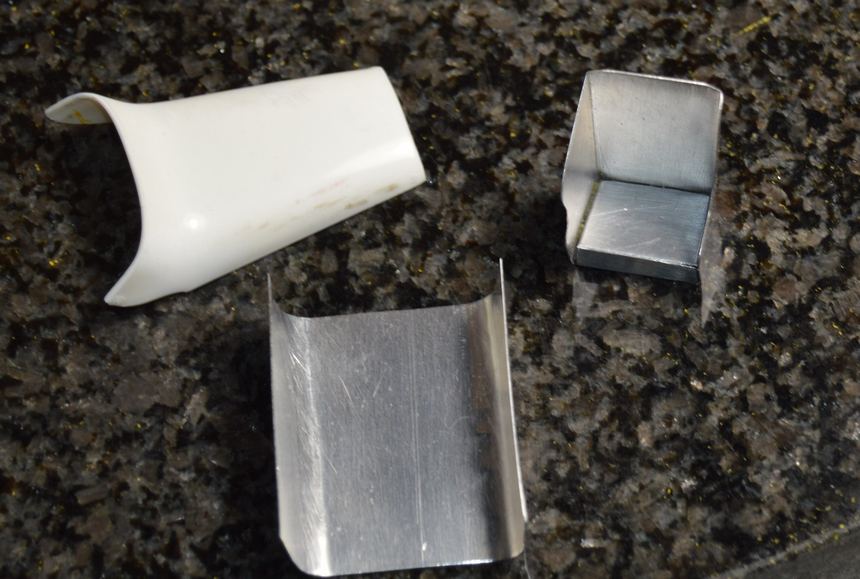
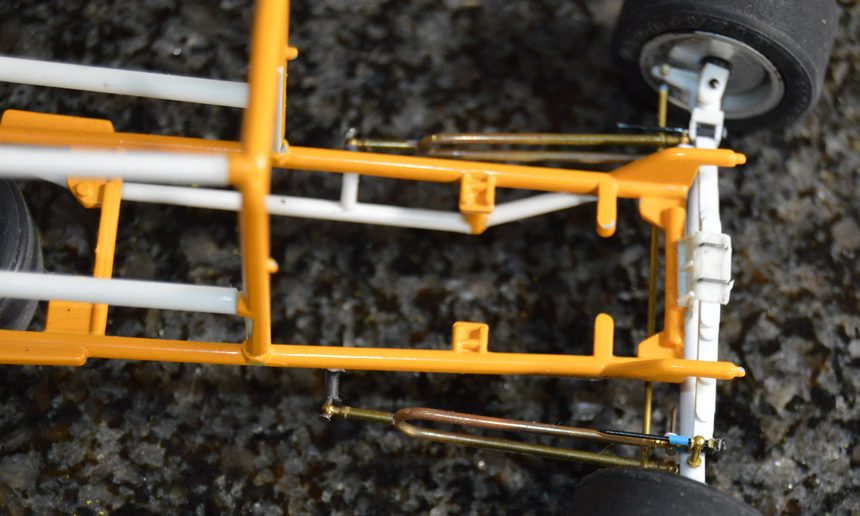
 Feels like I got lot done, yesterday morning, and overnight. I drilled a pair of rods to build the rear hairpins. I made a die to make the intake stacks for the carbs, along with a couple of test pieces. I added two new chassis tubes, to mount the bosses for the rear radius rods, and got those mounted, and drilled holes in the belly pan, to clear them. The lower body is drilled, along with the upper part of the rear pan, so that they can be pinned together. Next, I will fabricate and mount the tabs for the lower side of the rear belly pan, to match those already in place, for the front pan. Once those tabs are in place, I can begin cleaning up the chassis, to prepare it for paint. Since the body, itself is fiberglass, I will probably pick something from the Zolatone chart to duplicate for the inside surfaces of that. I also began covering the fuel tank with tooling aluminum. I have a technique I want to use on the weld seams. Anyway. questions, comments and critiques are always welcome! Thanks for looking!
-
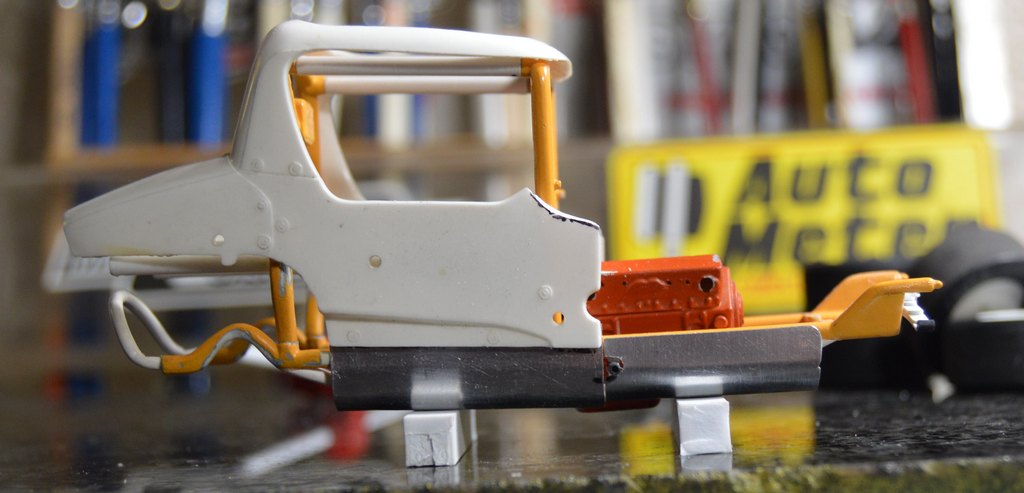
Thanks for your comments, my friend. It looks kind of cool, looking down into the cockpit, with the belly pans, firewall and seat all aluminum sheet. I think it's going to be a bit tricky, fitting the dash panel. because it has to match the hood line, since there's no cowl. I really would like to do the hood from aluminum, as well, but, we'll see how that goes! I like the oil pan, under there, as well.
-
Thank you, JT. It was my first try at weathering anything, other than a 1/72 scale tank once, years ago. I was a little nervous, going in, because of the size of the "canvas". I agree, Tom. There haven't been a ton of them from the manufacturers. Thanks, Larry. I appreciate it! Thanks, John. I wonder if Atlantis has these tools?
-
Thanks, much, Carl!
-
I've begun sorting out the body. The "fiberglass" shell and aluminum belly pans' mounting should be fairly straightforward. I cut the pans to clear the oil pan. which can be seen, protruding beneath. I need to cut the bottom section of the track roadster nose from Revell's Model A pickup kit, to mate with the upper section. The lower nose section from my Edmunds kit is AWOL, so I'll need to wait until it's on the wheels again, to take measurements for cutting and fitting. I really enjoy working with sheet metal! Comments, questions and critiques are always welcome! Thanks for looking.
-
64 Dodge D100 Pickup Pro Street
Straightliner59 replied to AmericanMuscleFan's topic in WIP: Drag Racing Models
The "Dodge" lettering is quite simply, one of the most amazing accomplishments I have ever seen. Fantastic work, my friend! -
Thank you, Mr. Sapiro!
-
I would make headers from solid core solder.
-
Thank you kindly, my friend! Care to have a seat?
-
I "bolted" the engine to the firewall/motor plate. That means I now have the engine location set. While rummaging through parts, I came across these remains of the AMT Craig Carter IMSA Camaro's induction setup I used on a project nearly forty years ago. I'll need to restore the manifold, but, it's a perfect fit--both on the engine, and with the car's theme. Perusing photos of these things, I've discovered them to be pretty wide-open, as to setups, etc. For the small block Chevys, Hilborn fuel injection is, by far, most common. However, I've seen three deuce setups, six singles, and so on, on cars from 1975. I was going to use the Hilborn setup, but I already have an Enderle injected dragster, a straight tube injected hemi dragster, and a Badman with an injected big block Chevy, so... As always, questions, critiques and comments are welcome. Thanks for looking!
-
Thank you, Jim! Here are the brakes, kind of set together. I'm pretty happy with them!
-
Got the brakes for my supermodified far enough along to mock them up...
-
Couldn't be too far away, then.
-
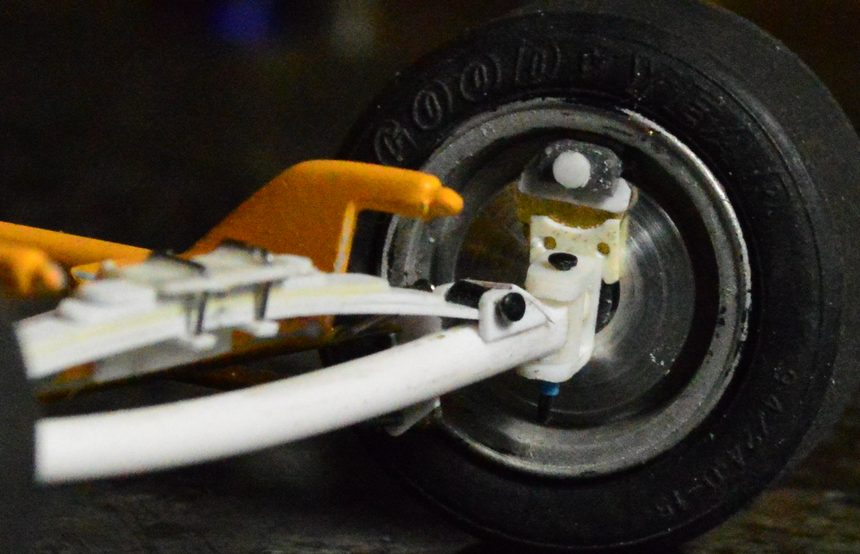
I've been working on the front brakes (thus fleshing out the rears, theoretically making those easier). After wasting a bunch of time trying to clean up my castings, when all I needed were the calipers, the little light went on! I scratched them, instead. I still have a couple of tiny details to add, but the bodies of them are built, and I think they look pretty decent! Also seen here are the "brackets" added to the spindles to attach the brake assembly. Those will be contoured, when I disassemble the suspension for paint. The main body of the caliper assembly is Plastruct "H" stock, with one side sawed off. The rest of the assembly is various sizes of Evergreen rod and strip. Critiques, questions and comments are, of course, always welcome. Thanks for looking!
-
I just picked up the Monogram-boxed version of that. Cool kit!
-
Thanks, Bill. Appreciate it. Now, to make another pair, for the rear... Thank you, Bob. You are definitely on the right track!
-
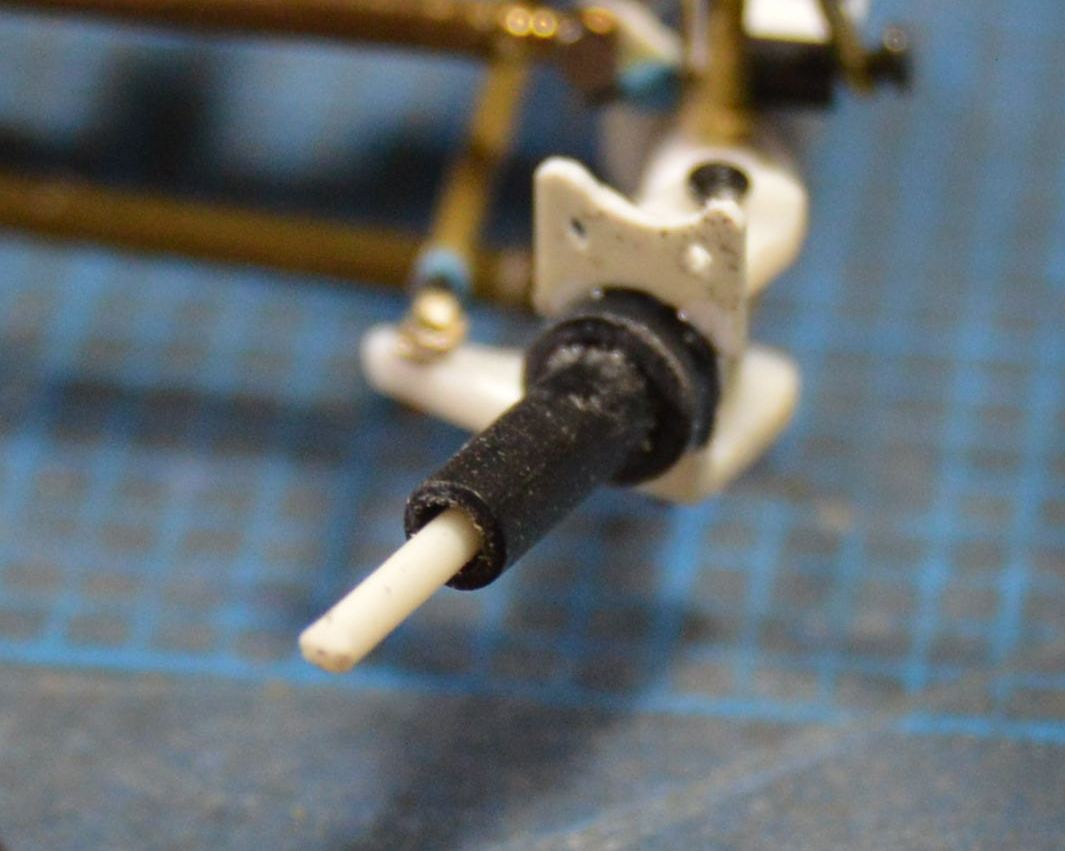
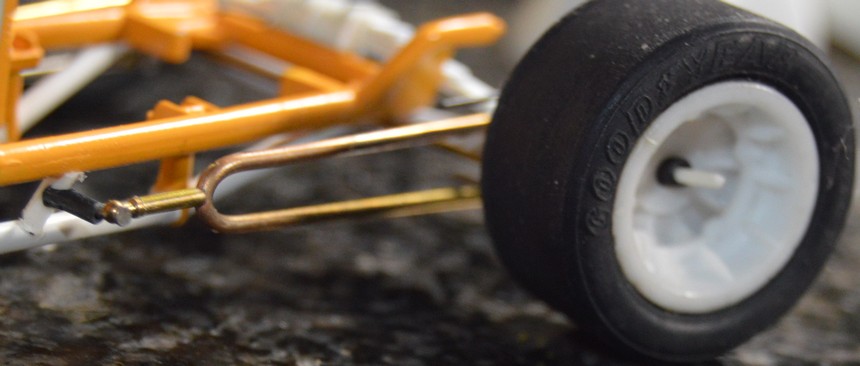
Typically, if it looks like it belongs, go for it! Like David said, they play a little fast and loose with their dimensions, at times. I would get everything set up--fit the axle and suspension to the chassis, after you've determined how you're going to mount the wheels and tires. Use a flexible (tacky) white glue to mock stiff up--or better, pin everything together, then it can be taken apart and reassembled, if/when needed. Here's the front suspension I'm building for my supermodified. The pins and wire insulation that are holding it all together are readily visible. When it's ready for paint, I can take it apart to prep and paint it, then reassemble it using the same pins. Once final assembly is made, I will install "nuts" on the pins, glue them, then cut the pins off.
-
Now, that's funny, right there! I could have used the new button, down there, but it really needed to be said!
-
Thank you, Art! Glad you're checking it out!
-
Thank you, Francis. I just ordered 20 .021" bits. I bought an assortment of resharpened bits a while back, as well. Once I add the brakes and shocks, I can move on to hanging the rear suspension. I appreciate your encouragement, my friend!
-
Where are you located? In the Denver area?
-
Thank you, JC!