Straightliner59
-
Posts
5,814 -
Joined
-
Last visited
Content Type
Profiles
Forums
Events
Gallery
Everything posted by Straightliner59
-
I have been using what is now called "acrylic nail resin" since the middle '80s, when we could only get it through a dentist. It was used to make bridges. It wasn't particularly easy to come by, either. A few years ago, I happened to notice the same smell coming from a nail salon. Soon after, I found it at a Sally Beauty Supply, so I knew I had a ready source for it. Since, I have also seen small kits of it at Walmart. Mostly, I have used it to cast small parts. It's the same stuff I used in my Pre-"drilled" distributors tutorial, a few years ago. Recently, I wondered how it would work as a filler. It works beautifully! Since it's a two-part system, there's no shrinkage. It cures very quickly. I'm at work, right now, so I don't have access to my photos. It's available on Ebay in larger quantities at very reasonable prices. Also, speaking of Sally Beauty Supply, it's a great place to buy sanding and polishing sticks much cheaper than at the hobby shop.
-

Monogram 1926 Mack
Straightliner59 replied to Straightliner59's topic in WIP: Model Trucks: Big Rigs and Heavy Equipment
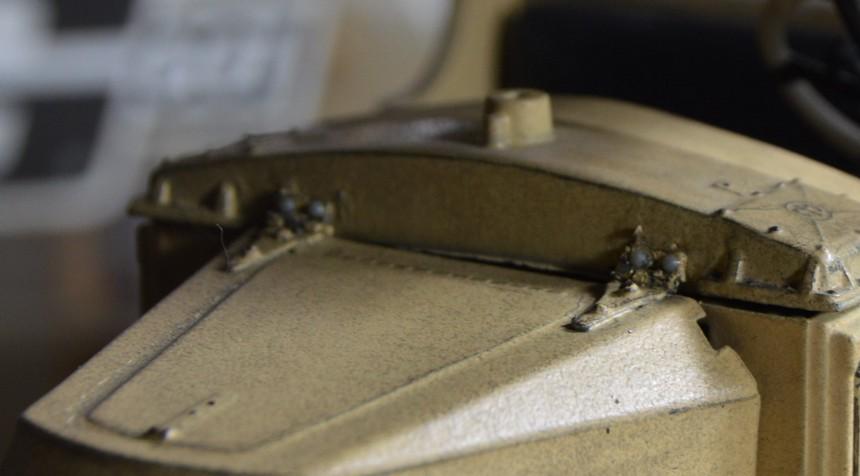
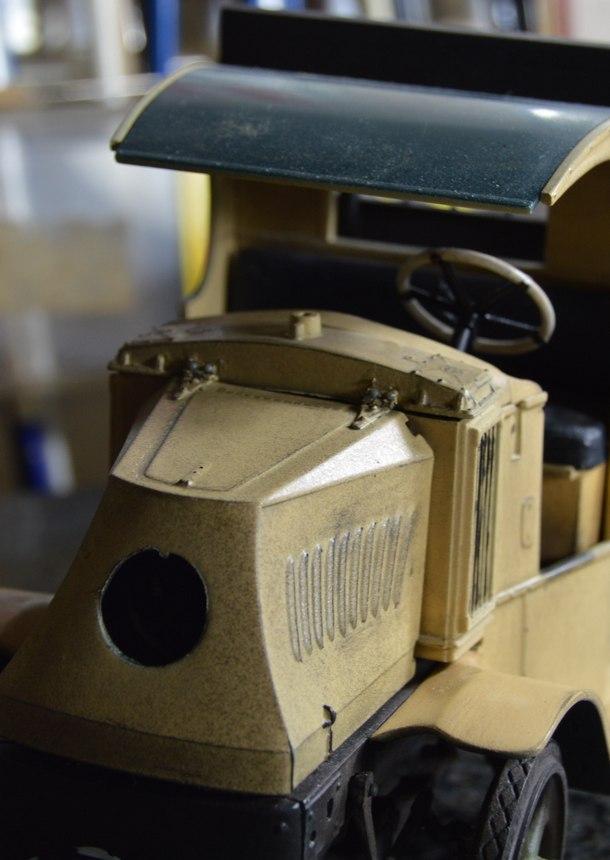
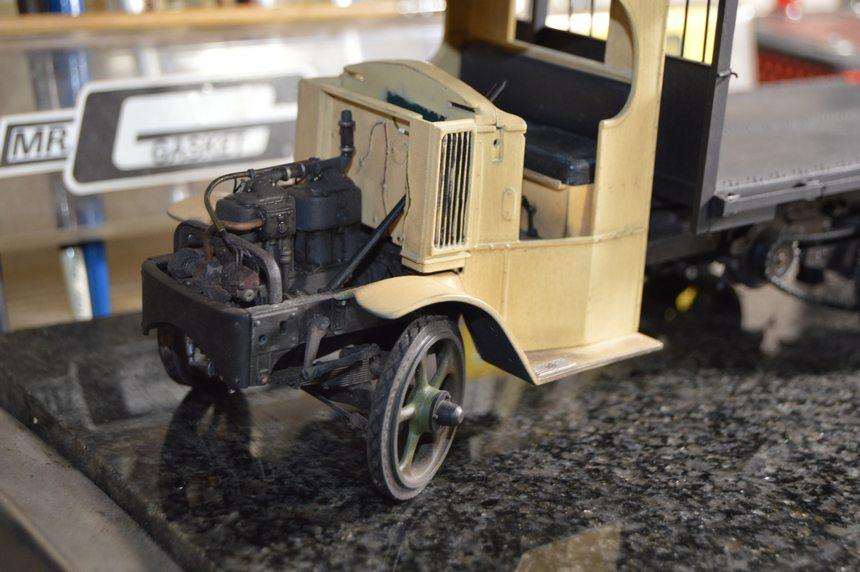
I got the radiator and hood painted and mounted. I cut up some dollhouse strap hinges to replace the cheesy molded-on hinge setup. I mounted them using model RR rivets. They're not prototypical, but they're closer to it. The Motometer in this kit is really pretty! As always, questions comments suggestions, etc., are welcome. Thanks for looking!
-
Monogram 1926 Mack
Straightliner59 replied to Straightliner59's topic in WIP: Model Trucks: Big Rigs and Heavy Equipment
Thanks, David and Phillippe, I can see the light at the end of the tunnel. I think! ? -
Monogram 1926 Mack
Straightliner59 replied to Straightliner59's topic in WIP: Model Trucks: Big Rigs and Heavy Equipment
It still needs some touch up and weathering, but, I like it!
-
#208 arrived in my mailbox, today, as well! I also won an auction for a Revell .67 Corvette coupe for $30+ shipping, oh, yeah, plus the state's cut; You know, for doing NOTHING!
-
Monogram 1926 Mack
Straightliner59 replied to Straightliner59's topic in WIP: Model Trucks: Big Rigs and Heavy Equipment
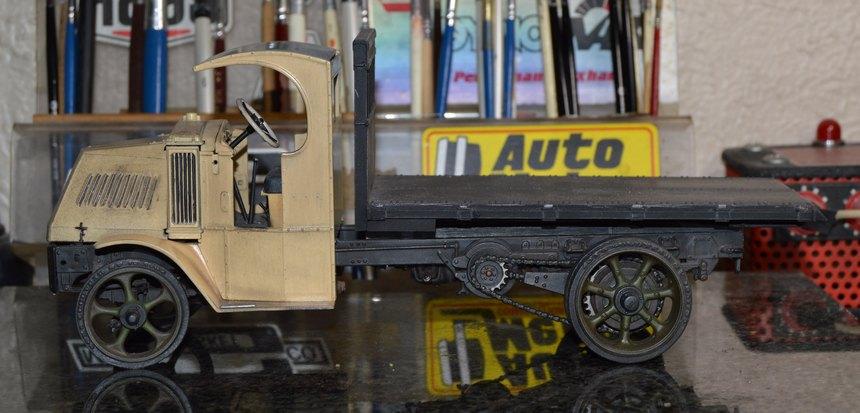
Thank you, Charles, very much! I'm happy that you're enjoying it. I haven't made up my mind as far as the roof goes. I just discovered that I completely missed two big ol' ejector pin marks on the inside of the roof! Oops! Going to have to fix that. I appreciate you following along! I'm not sure what I was thinking, when I said that! Copyright on the box is 1995. While that's 23 years into the mold's life, it's not like it was in constant use, so it's not surprising that the molds were still good. Maybe I expected it to sprout a bunch of flash, and misaligned molds, right in the box, as it aged! ? You wouldn't believe how many coats of Dullcote and other various clear coats are on this thing--I mean, I have no idea. Basically, though, I shaved/ground pastel chalks of various colors (mostly black, but also a couple of different browns, tans, etc) until it looked like the reddish-brown hue that was showing through on almost every truck I've driven. I shot the chassis with Krylon Semi-Flat Black, then, in about five minutes, I dabbed the pastel mixture into the paint with a somewhat stiff-bristled brush. Then, I blew off the excess, and shot it with a very light coat of Dullcote--just enough to seal the pastels. A few minutes after that, using the same brush, I brushed any excess away, and added more pastels in areas where necessary. I really appreciate your comments and ongoing encouragement, my friend! -
restorations
Straightliner59 replied to thomascoffey1959@gmail.com's topic in General Automotive Talk (Trucks and Cars)
I did. I don't see why you're upset with Snake. All he said was that he was sad about parts getting tossed. It wasn't a personal thing. He, and many others would say that, no matter who said it. That's why I asked. -
restorations
Straightliner59 replied to thomascoffey1959@gmail.com's topic in General Automotive Talk (Trucks and Cars)
Huh? What brought that on? -
Monogram 1926 Mack
Straightliner59 replied to Straightliner59's topic in WIP: Model Trucks: Big Rigs and Heavy Equipment
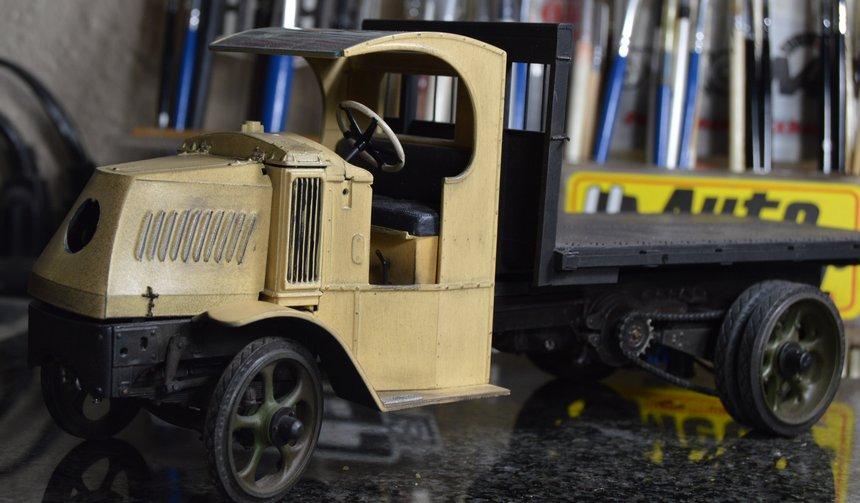
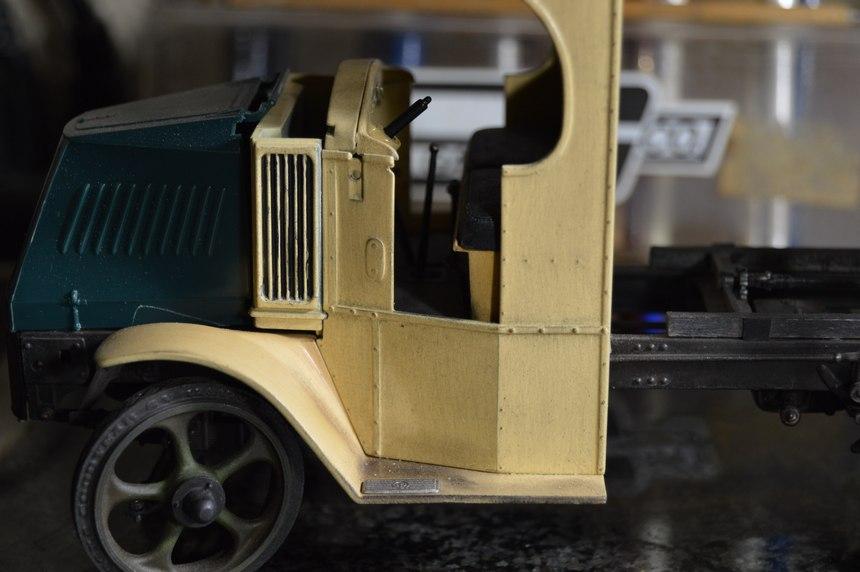
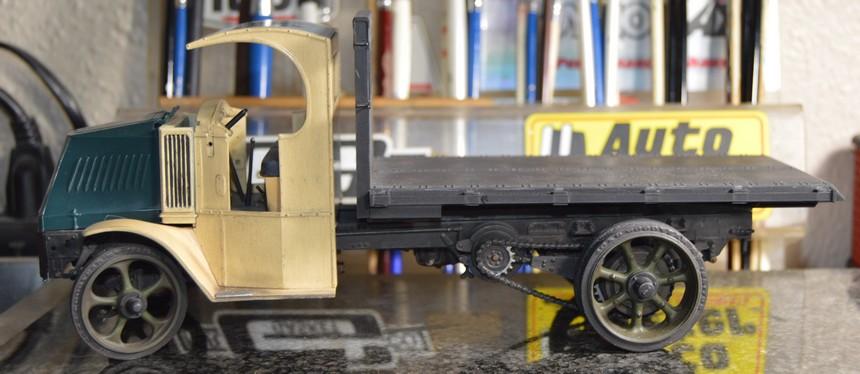
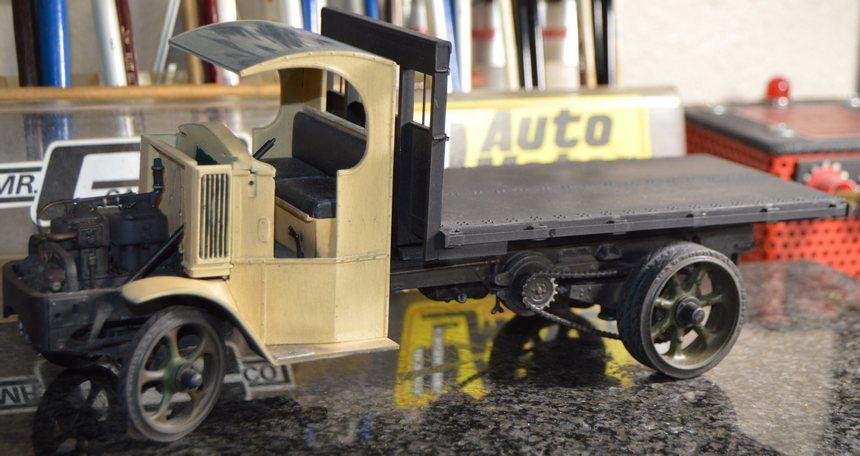
Thank you, Brians! Thanks, Carl. I appreciate it! Here's the latest. The bed is painted and installed. The cab is coming together, as I clean up the parts and paint them (including preliminary weathering). I am satisfied with the fit. It's in great shape for a kit that's nearly 50 years old. The instructions would have you install the hydraulic oil tank to the top of the cylinders. Although I tried my damndest to keep the components exactly where they aligned on the original parts, the tank rode too tall, in that location, so I moved it to the crossmember in front of the hoist. Once everything is painted and assembled, I will go back through it, and apply final weathering, overall. I'm thinking that will really tie the finish together. I need some fairly heavy weathering beneath the door opening, since I figure that area gets a workout from boot toes, as the driver enters the cab. I will likely build a support, to prop the bed up,like the real ones have, for maintenance. It's probably anachronistic, but, it's superior to, and much less obtrusive using a stick!? As always, questions, comments and critiques are welcome. Thanks for looking!
-
Monogram 1926 Mack
Straightliner59 replied to Straightliner59's topic in WIP: Model Trucks: Big Rigs and Heavy Equipment
I'll try to get some progress photos, later tonight, since I am home early, from work. -
64 Dodge D100 Pickup Pro Street
Straightliner59 replied to AmericanMuscleFan's topic in WIP: Drag Racing Models
I guess The Friendly Giant must still be around! You got him to hold the T-fitting for your brakes, I see. Bet you didn't think a "kid" from the US would even know about that show! Where I grew up, we had as much TV from Canada, as we did from this side of the border. As always, Francis, your work is exemplary. And inspirational. Excellent job, my friend! -
Man, that paint is awesome! I'm not real big on wild custom paint, but you killed this! Beautiful work, sir!
-
Monogram 1926 Mack
Straightliner59 replied to Straightliner59's topic in WIP: Model Trucks: Big Rigs and Heavy Equipment
That's great! Not only do they look better, that way, but, it's a lot more fun to build from scratch, than to just clean up and paint kit parts, anyway! The bed has been painted and mounted, and the cab is assembled. I just mounted the radiator, earlier this morning. No photos, yet. It should be finished in the next couple of weeks! -
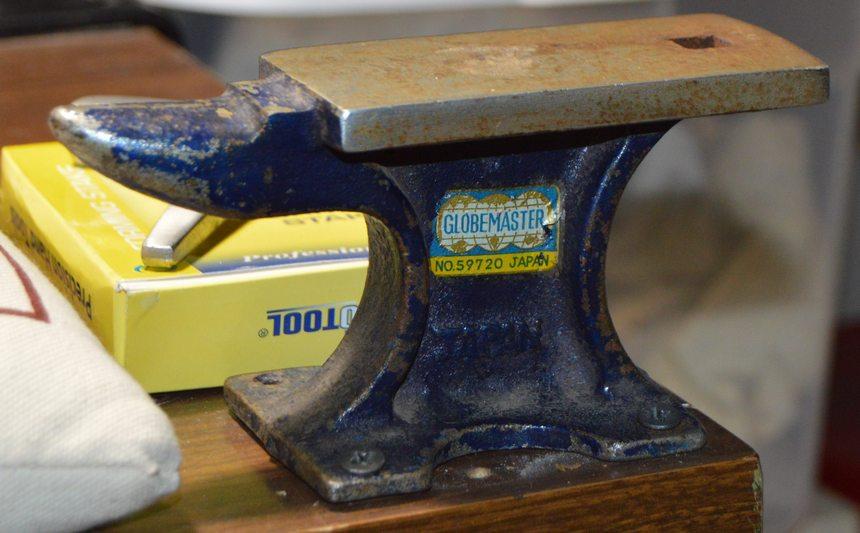
I got this ten pound bag of #8 shot to fill the black leather shot bag, beneath it. Also picked up my first forming stake, and this vintage Globemaster anvil. I also have a new chasing hammer on the way. I want to step up my sheet metal working skills. The anvil has a stake pocket that fits the jewelers stake better than the one in my 20-pounder. It also almost matches my ancient Globemaster bench vise. ? I want to clean up the anvil's work surface. I'm not sure the shot bag will be useful for modeling, but, I wanted to have it, just in case I found an instance where it might be useful. Besides, I love playing around with new techniques!
-
I can't believe that anyone would question Mr. Boyd's credibility or his integrity. I mean, he has covered the industry for decades!
-
Words seem so inadequate! Fantastic work, Tim!
-
Words seem so inadequate! Fantastic work, Tim!
-
Monogram 1926 Mack
Straightliner59 replied to Straightliner59's topic in WIP: Model Trucks: Big Rigs and Heavy Equipment
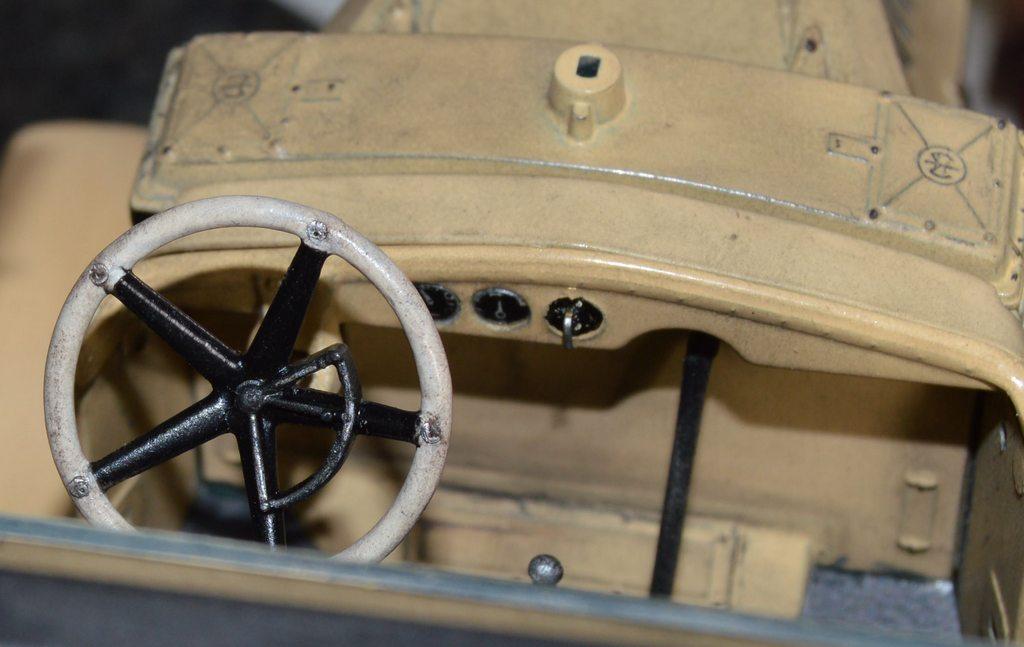
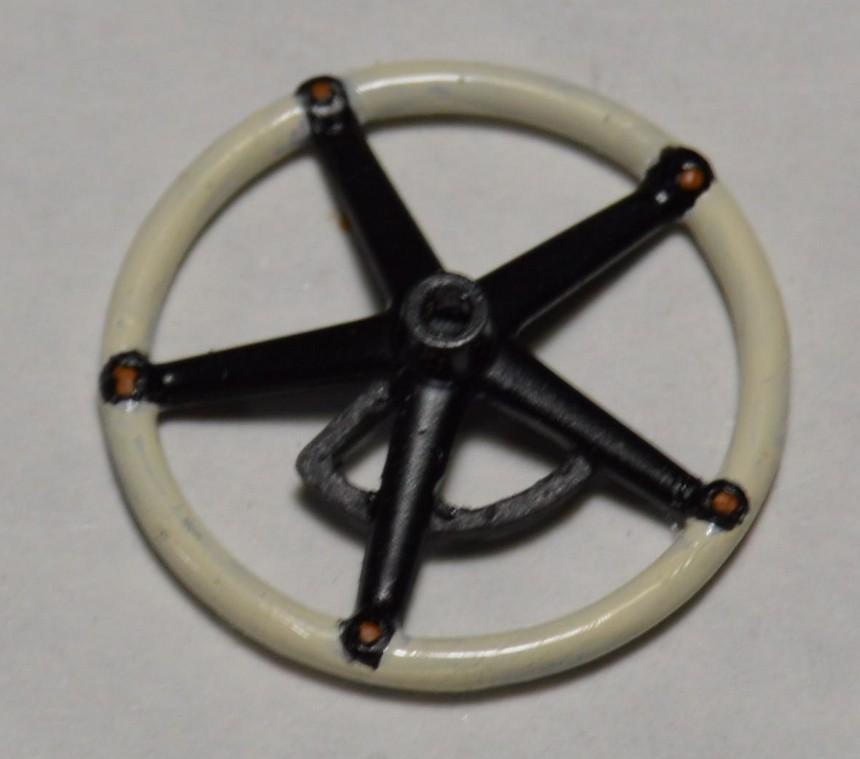
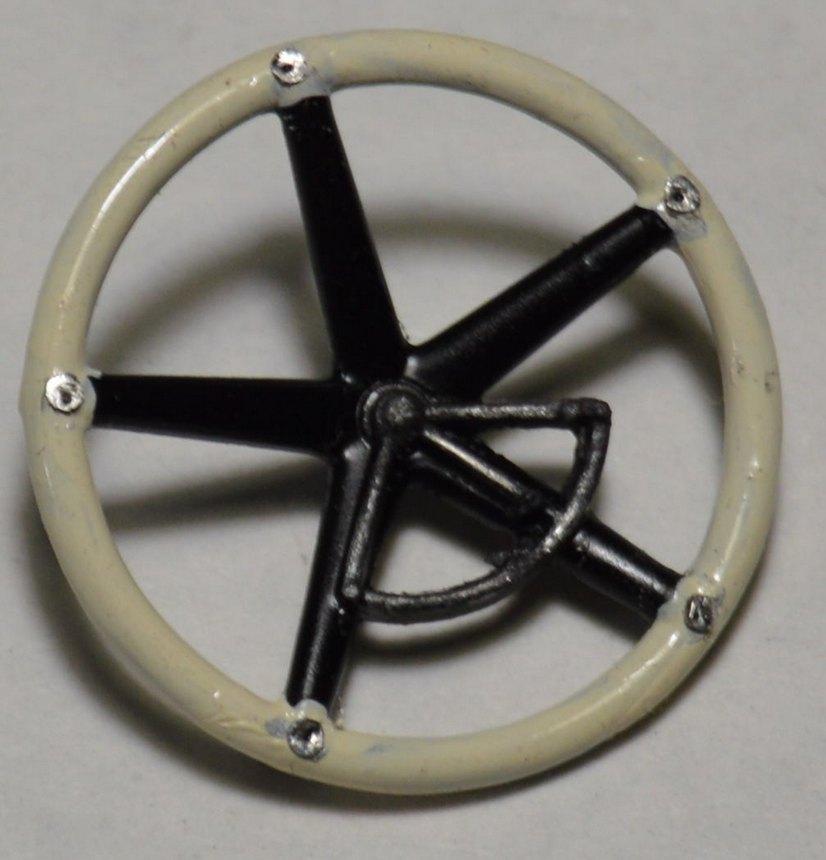
I was looking at this a while back. It's amazing, beautiful work, Charles! When I started this project, one of my goals was to keep it as simple as adding plug wires, and making the steering poseable. I have already exceeded my intended modifications! ? That's not really a surprise! While I didn't want to go nuts, with it, I couldn't live with the hinges and hydraulic cylinders attached to the wooden cushion strips. I really appreciate your commentary and interest in this! Thanks, Bill. Mine is nothing like the work Charles did with his Mack! That thing is gorgeous! It's funny how that works, with real wood, no? Thanks for your comments, sir! Thanks, Danno! I'm just about to start painting the bed... -
Monogram 1926 Mack
Straightliner59 replied to Straightliner59's topic in WIP: Model Trucks: Big Rigs and Heavy Equipment
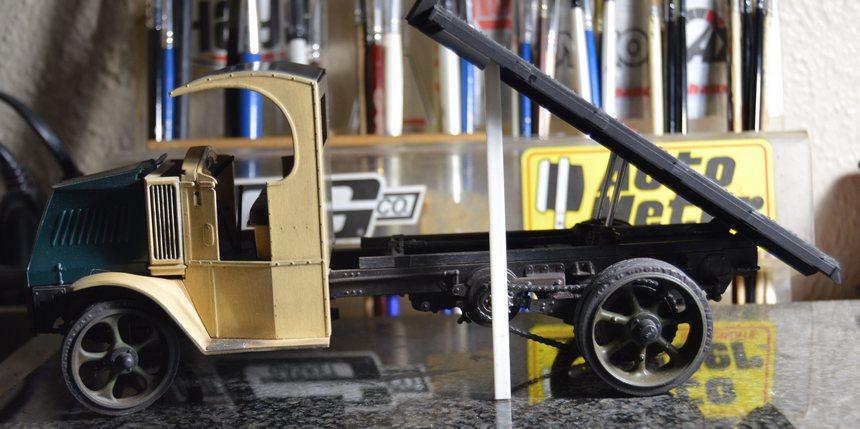
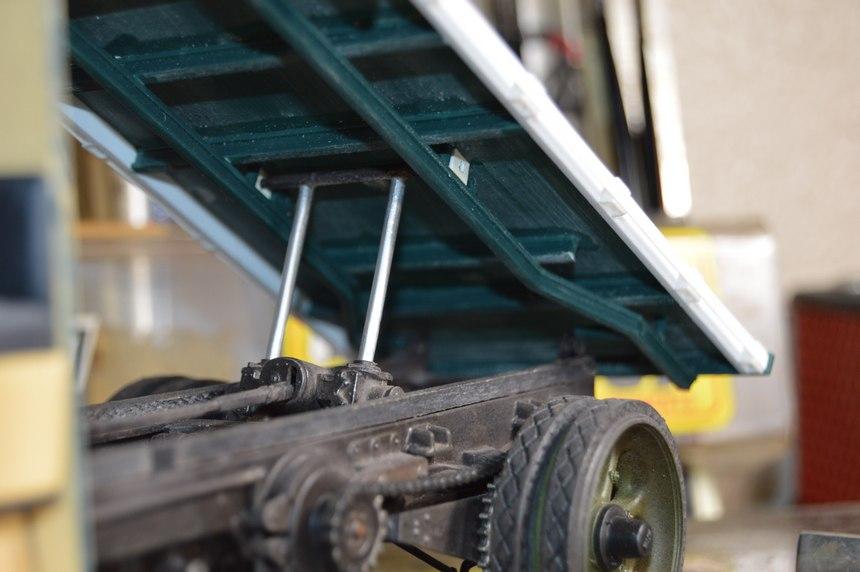
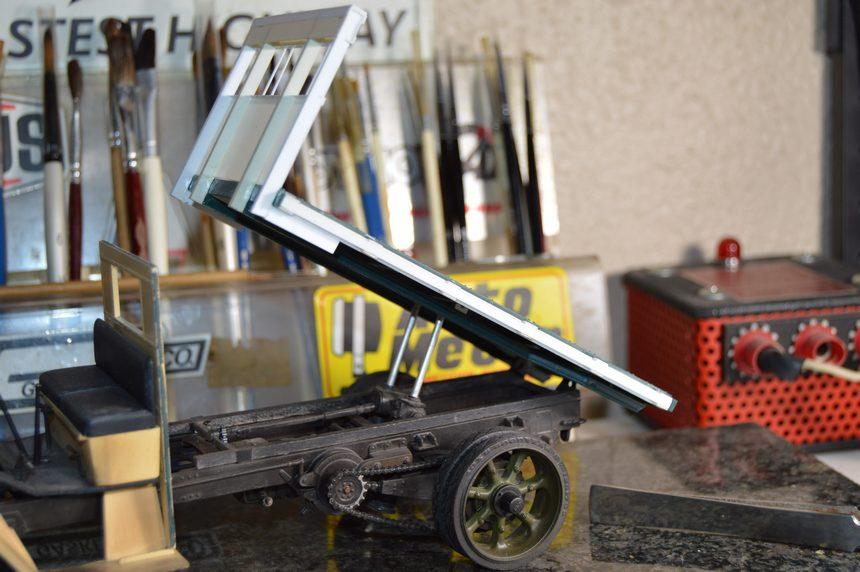
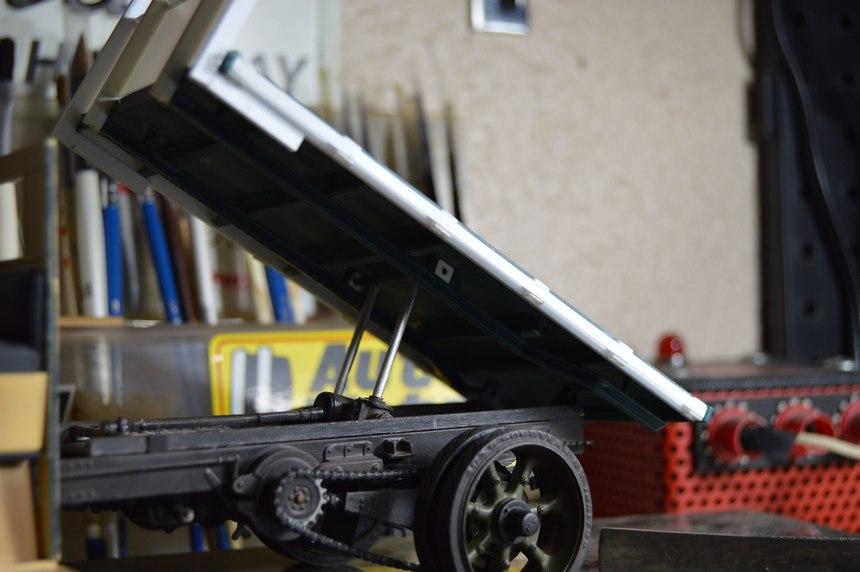
I agree, Francis--those guys were the computer developers of their day. Thanks for your remarks regarding the finish. I feel like I captured the look, pretty well. As far as lifting capacity, I'm not sure, but, at least a few thousand pounds, I'd think? I got a couple of pics with the bed raised. It ought to work! I'm almost ready to paint the bed. Then, I can mount it, permanently. -
Monogram 1926 Mack
Straightliner59 replied to Straightliner59's topic in WIP: Model Trucks: Big Rigs and Heavy Equipment
I agree, Francis--those guys were the computer developers of their day. Thanks for your remarks regarding the finish. I feel like I captured the look, pretty well. As far as lifting capacity, I'm not sure, but, at least a few thousand pounds, I'd think? I got a couple of pics with the bed raised. It ought to work! I'm almost ready to paint the bed. Then, I can mount it, permanently.
-
Monogram 1926 Mack
Straightliner59 replied to Straightliner59's topic in WIP: Model Trucks: Big Rigs and Heavy Equipment
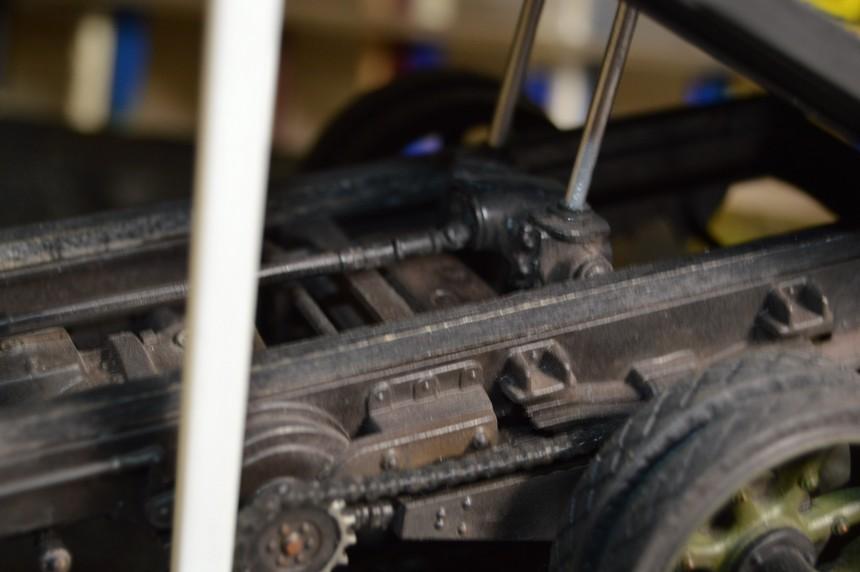
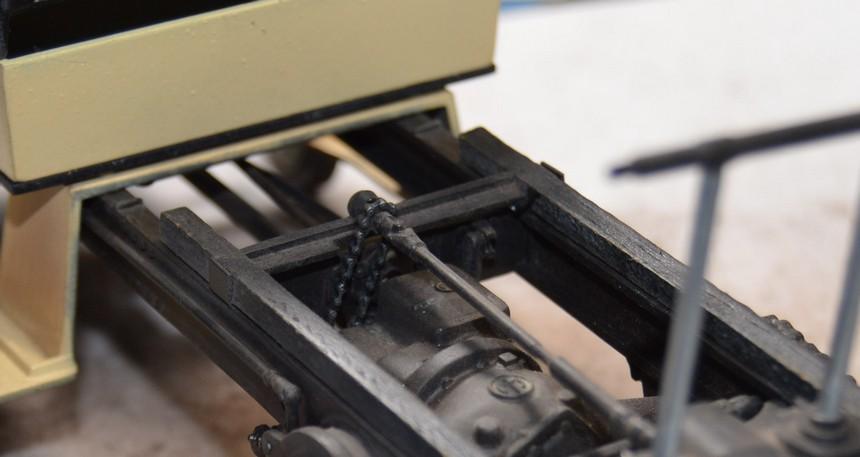
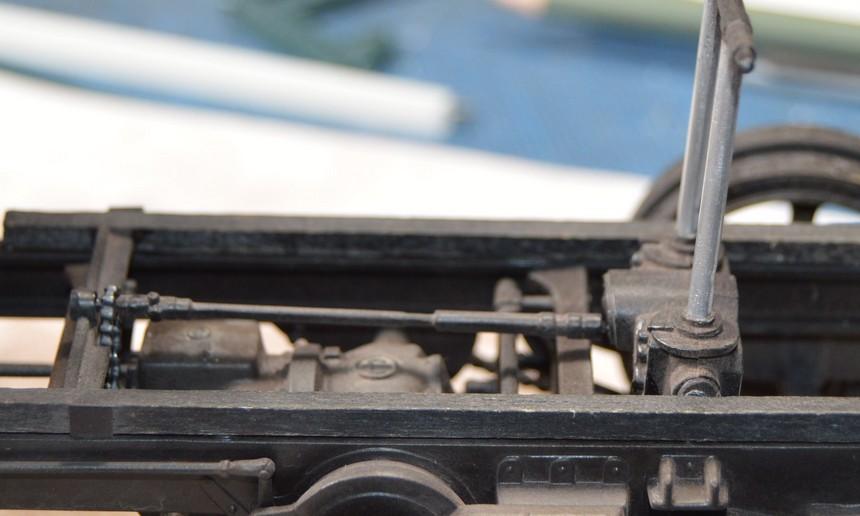
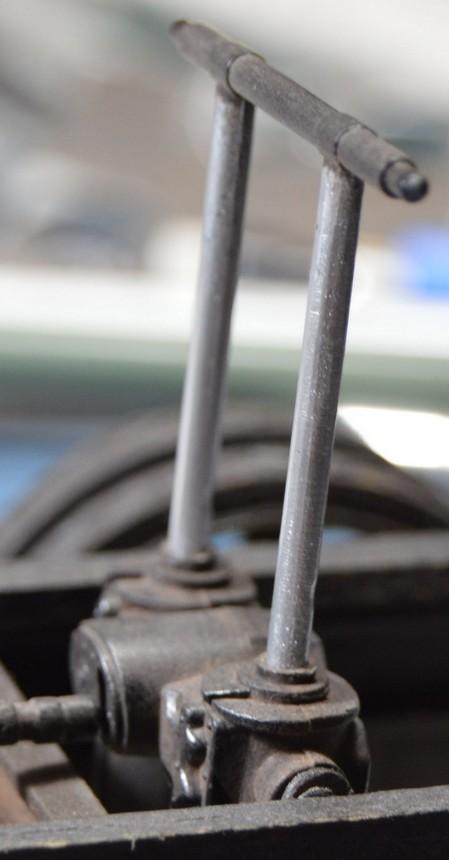
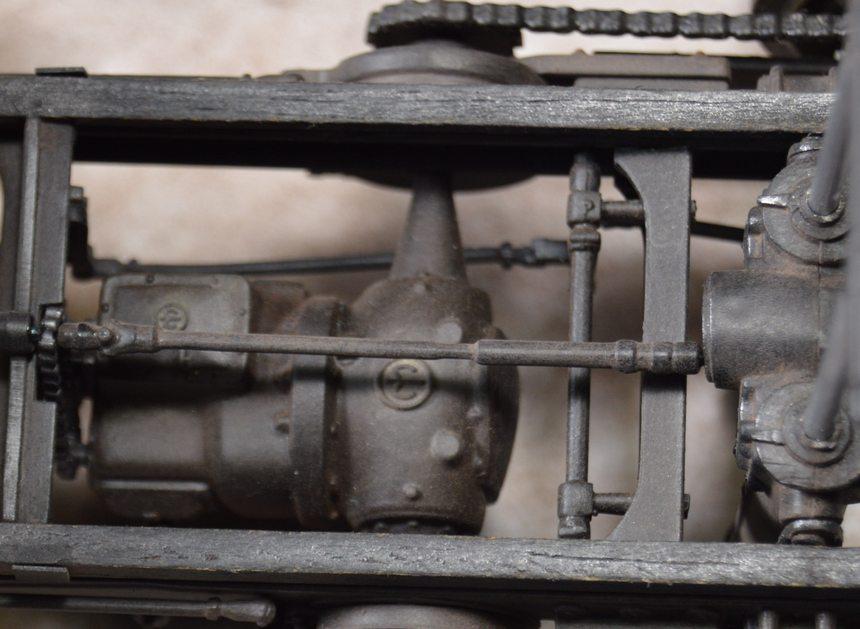
Charles, I finally installed the mechanisms for the dump bed, today. I removed the solid area that was molded in the center of the chain that drives the pump. It was solid, like a chainsaw blade. I think it looks better, this way, although I couldn't find reference to illustrate how it should be. I still want to do some detail paint, and add appropriate grease and oil stains. I've been using a 6B drawing pencil to highlight some of the edges, and to replicate worn-through paint. I'm pretty happy with it, so far! I am planning to do final detail painting and weathering on the chassis, next, before moving on to the cab. As always, questions, comments and critiques are welcome! Thanks for having a look!
-
Agreed. Start with a triangular file to create a notch, then finish it with a round file. I use this method for brass, as well. Makes for neater, stronger joints, in either medium.
-
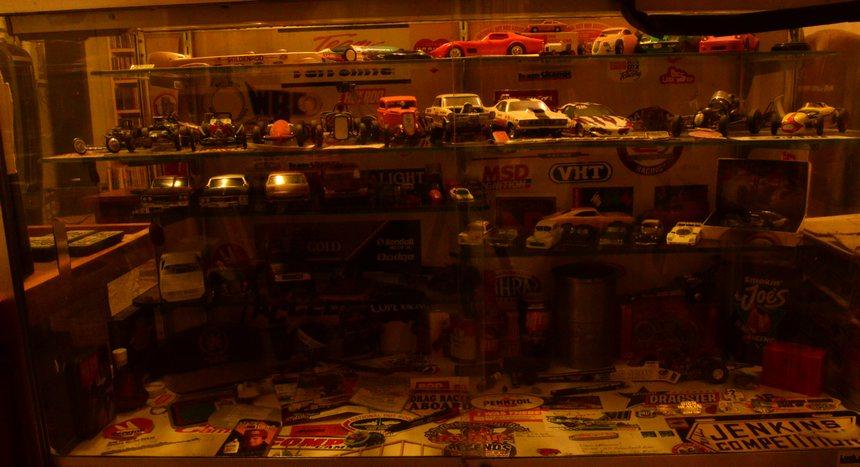
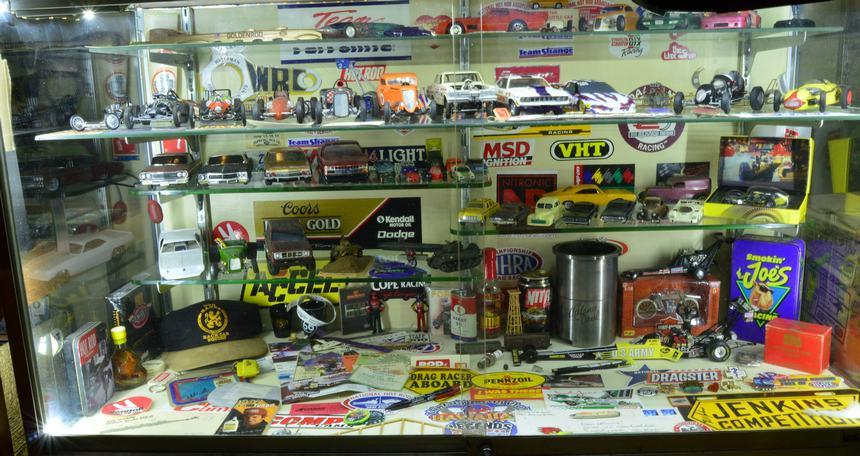
I actually installed these lights in my display case on Saturday, but just got a chance to take comparative photos. Same aperture and shutter speed. Only difference in lighting between photos are the LEDs in the display case. Before and after. I had no idea what I was missing!...Dan ?
-
64 Dodge D100 Pickup Pro Street
Straightliner59 replied to AmericanMuscleFan's topic in WIP: Drag Racing Models
Oh, man! I love this thing, so much! This body style is probably my favorite pickup. I will say, that, if I was building it, I would go with the base white bumpers/grille, etc. I would also probably go with steelies and dog dish hubcaps. But, then, I'm not a big fan of chrome. No matter what you go with, finish-wise, this truck's a winner, all day, every day. It's b***hin', Francis! -
Monogram 1926 Mack
Straightliner59 replied to Straightliner59's topic in WIP: Model Trucks: Big Rigs and Heavy Equipment
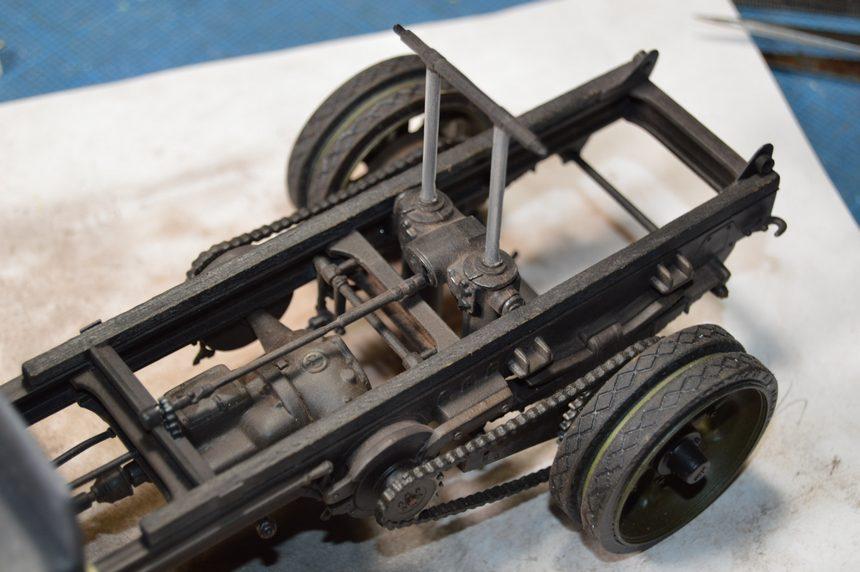
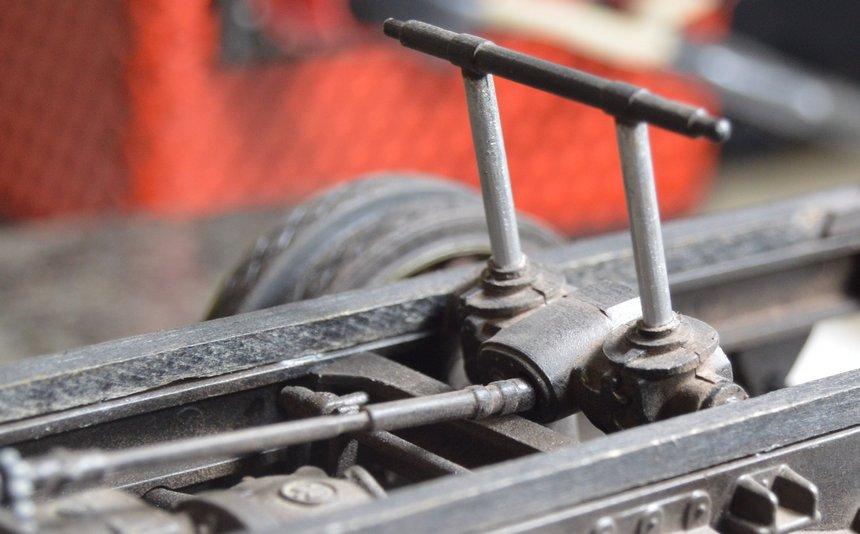
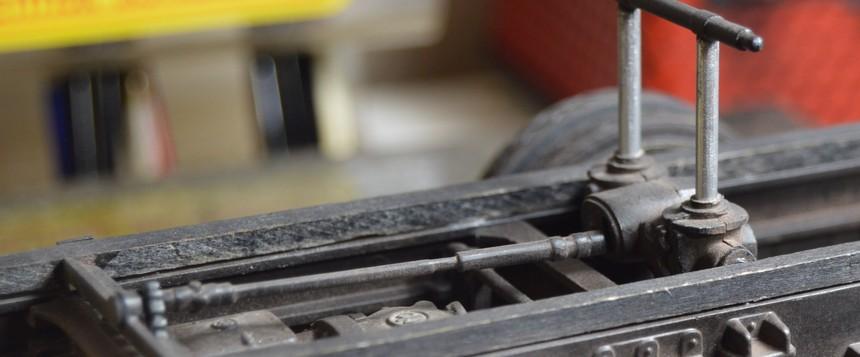
It does, indeed! The carriers/pivots will mount rigidly to the chassis, while the cylinders will swing between them. It's funny, to me, the way the kit's designed. The pivots for the cylinders, and the hinges for the bed are molded to the wooden cushion strip. I couldn't leave it, that way, even though I had planned to keep this project simpler. Thank you for the kind words and encouragement, Charles!