Straightliner59
-
Posts
5,814 -
Joined
-
Last visited
Content Type
Profiles
Forums
Events
Gallery
Everything posted by Straightliner59
-
 Thank you, JC. Thanks, Brian. Glad you like it, sir! I wonder what that must have been like? Especially with the open cab. The ones I drove were at least a few years newer! Thank you, Dave! Thank you very much, Jim!
 -
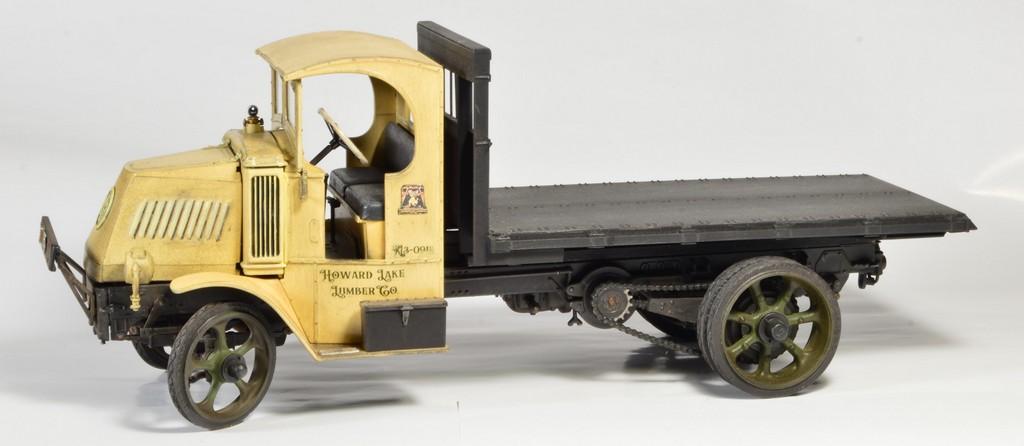
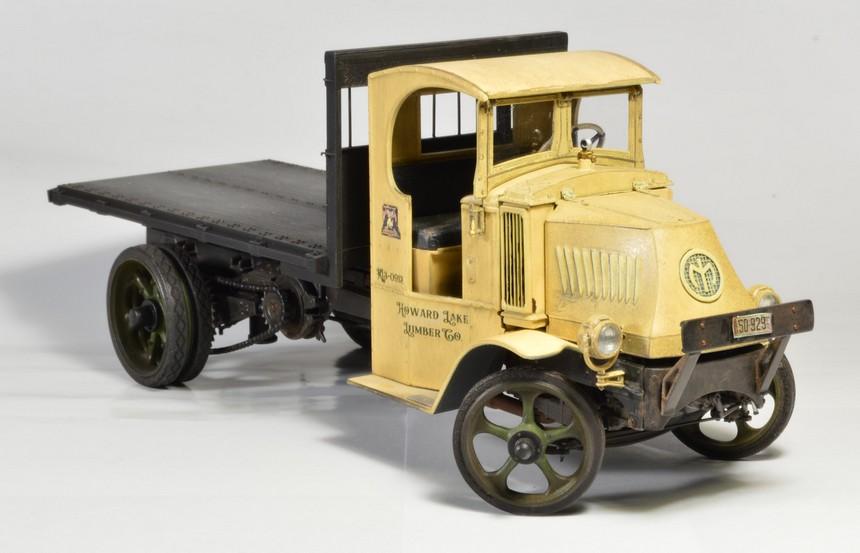
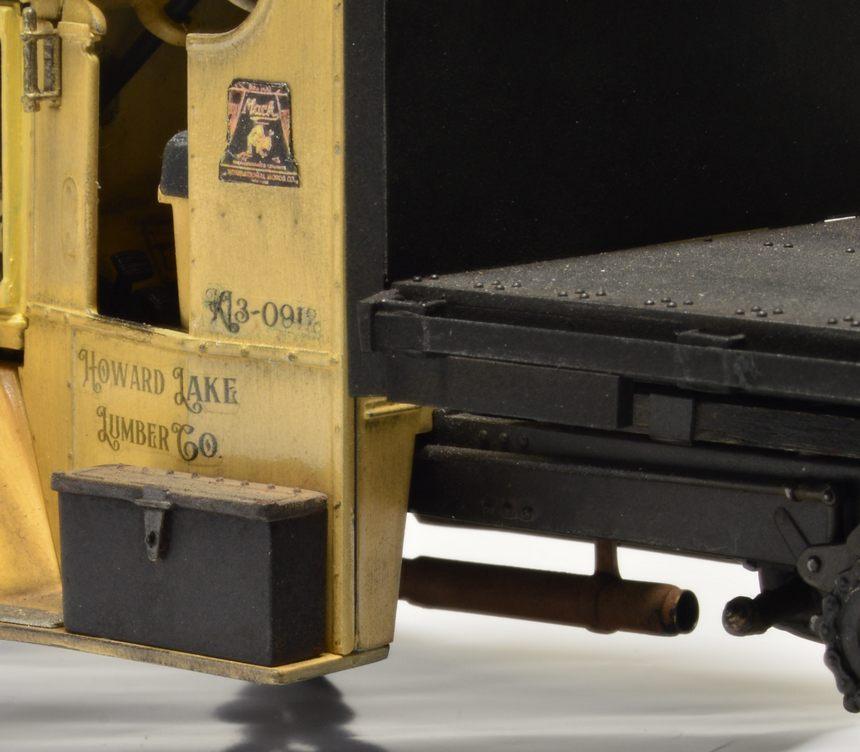
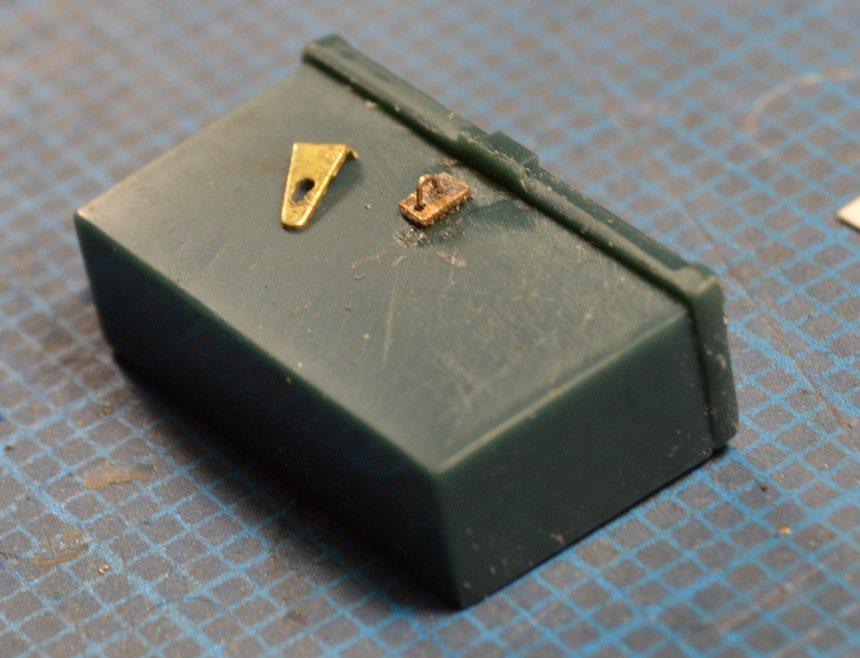
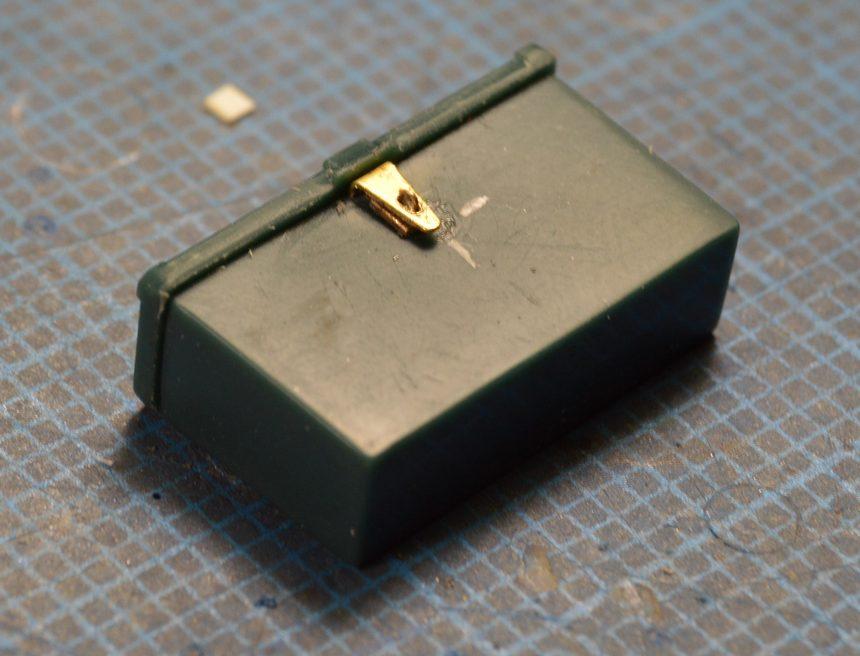
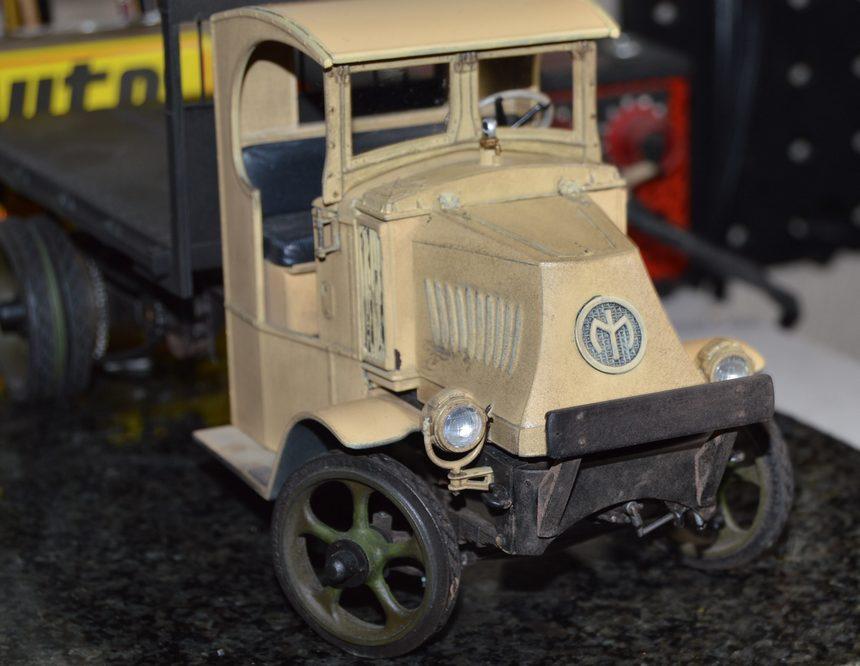
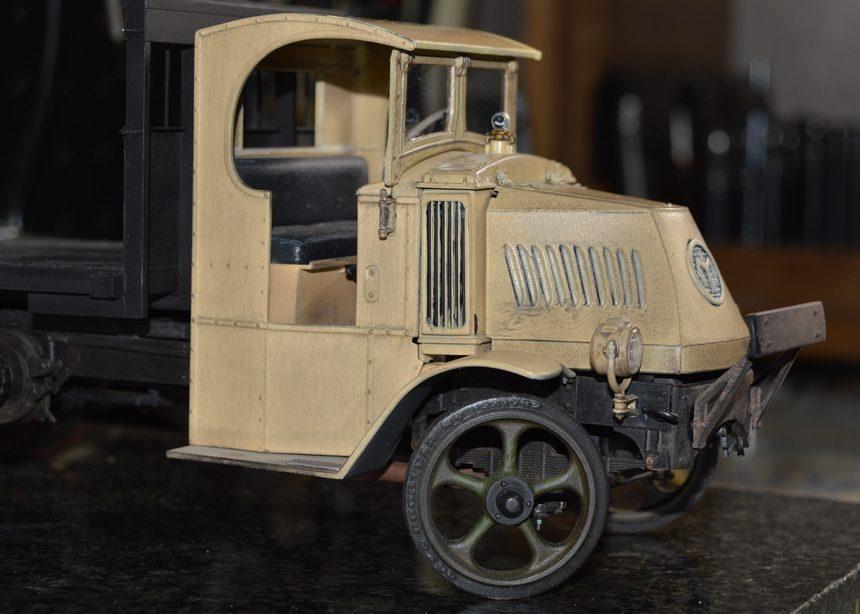
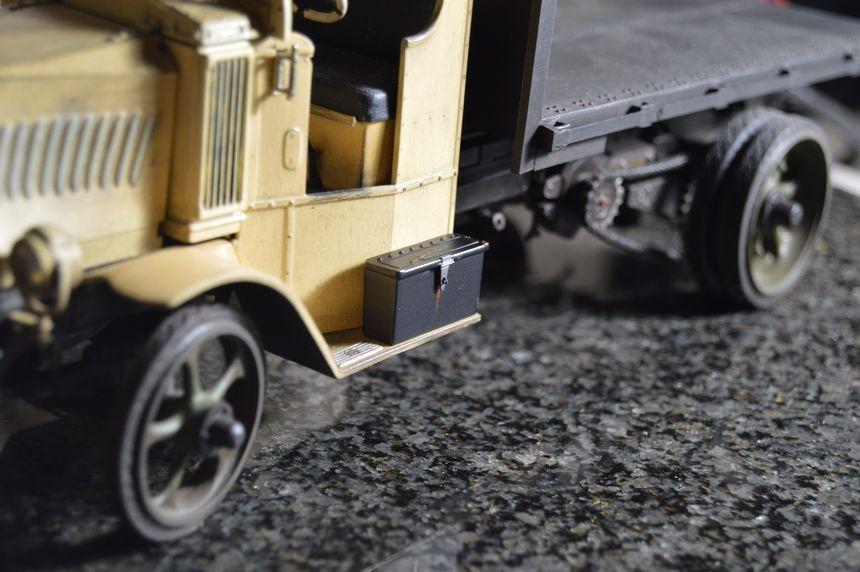
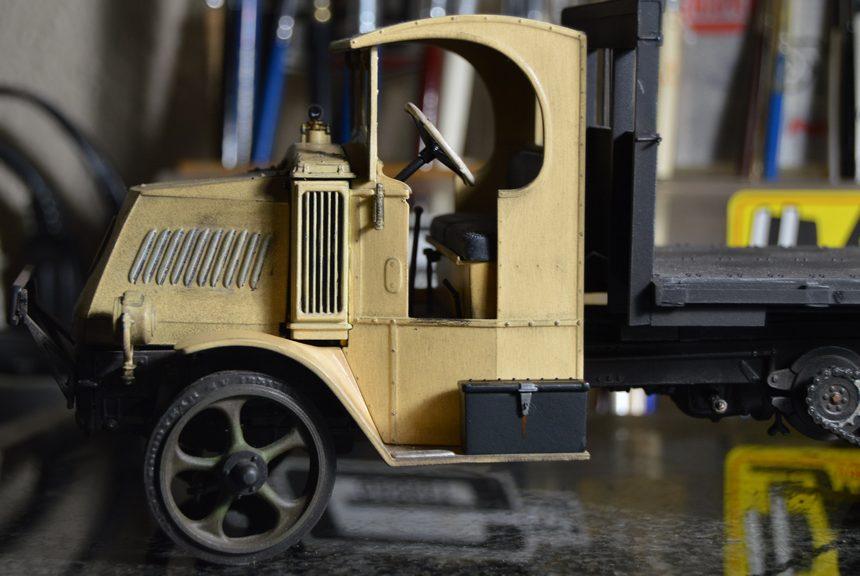
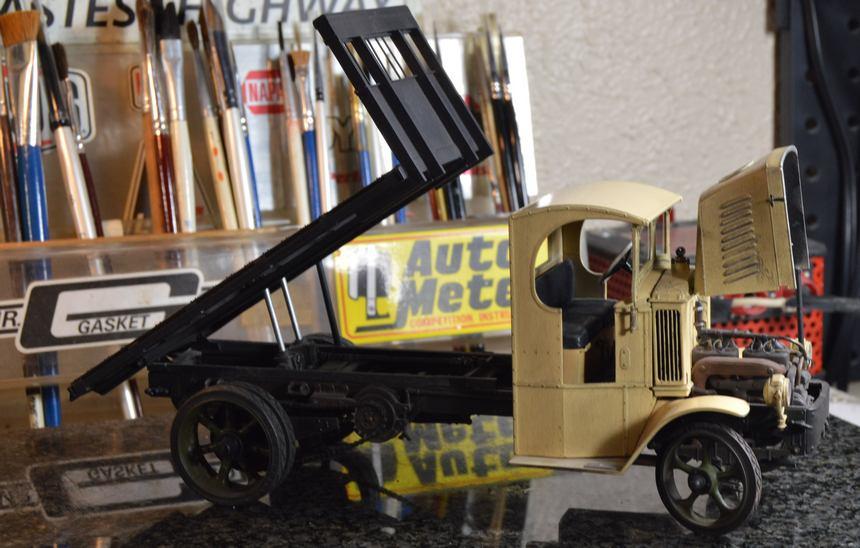
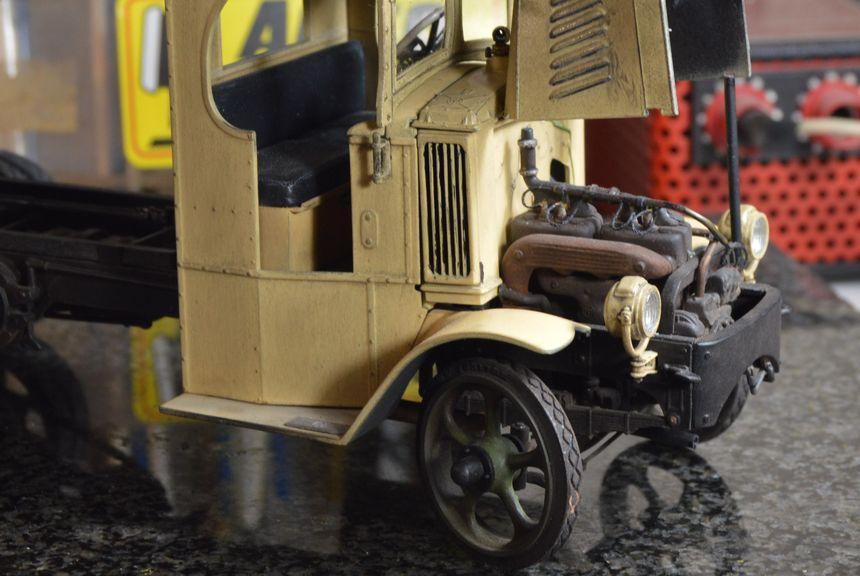
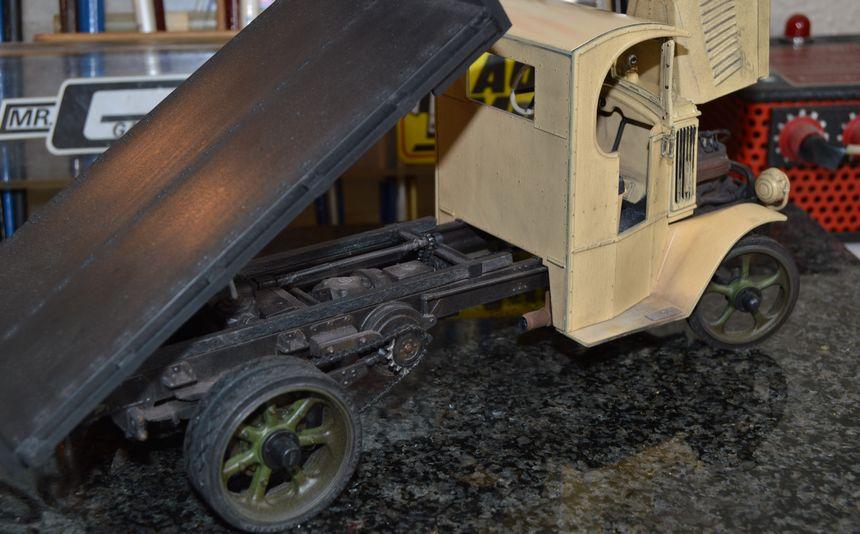
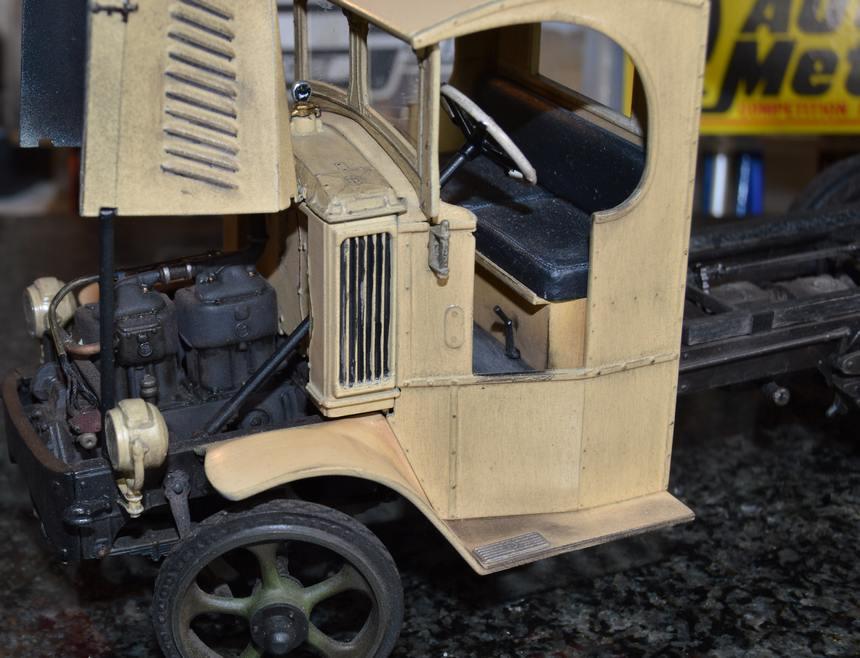
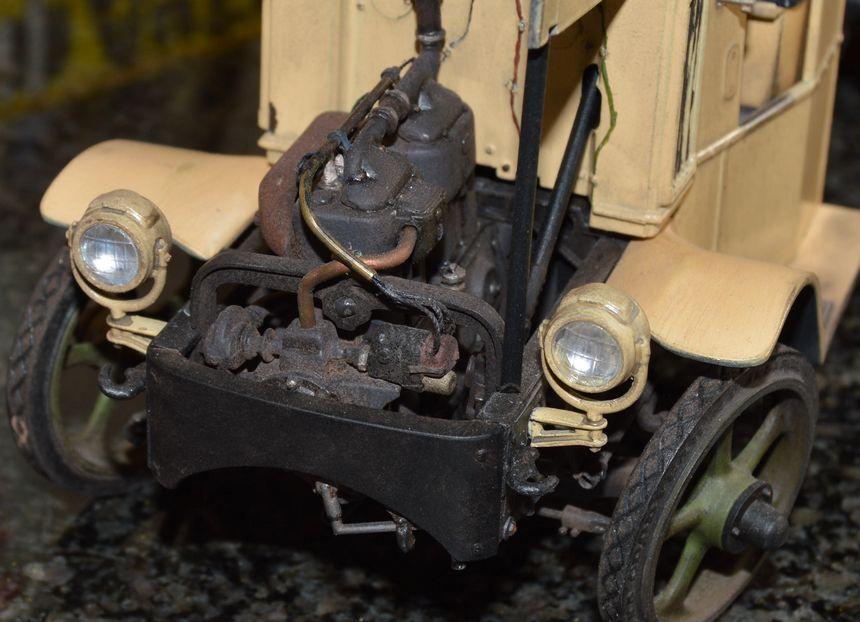
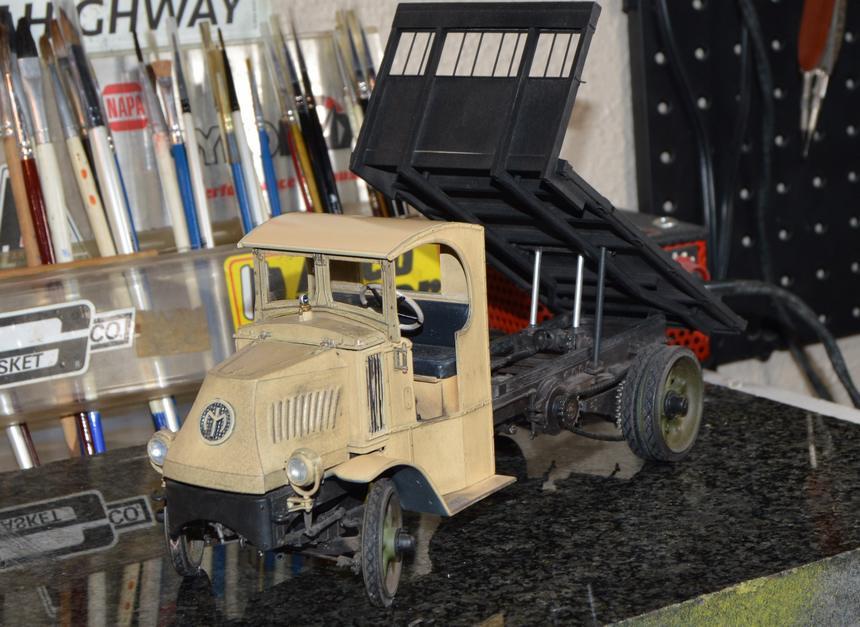
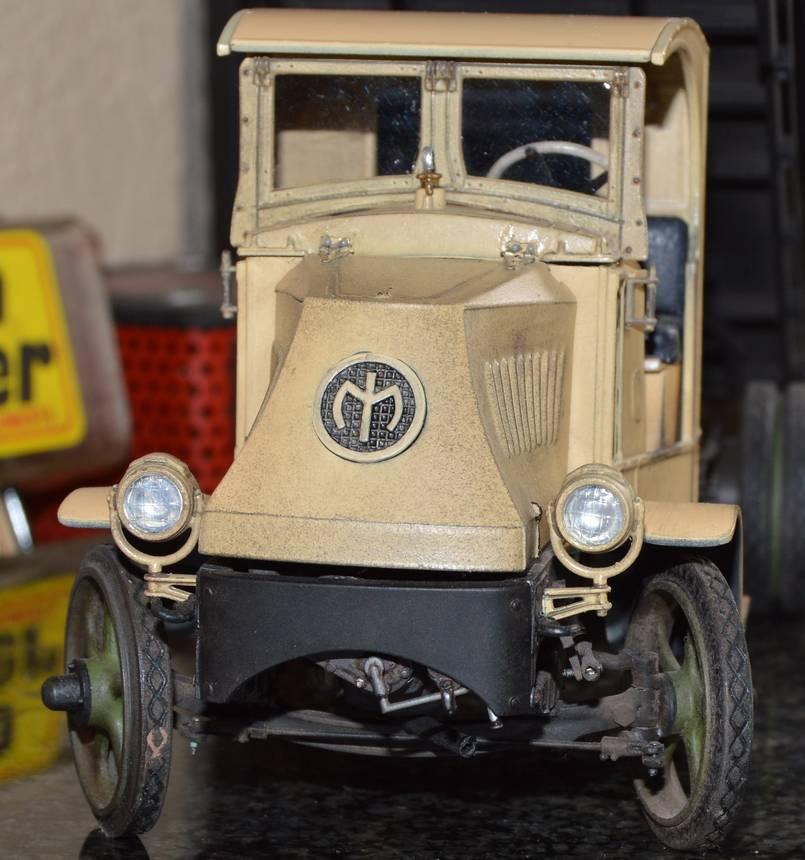
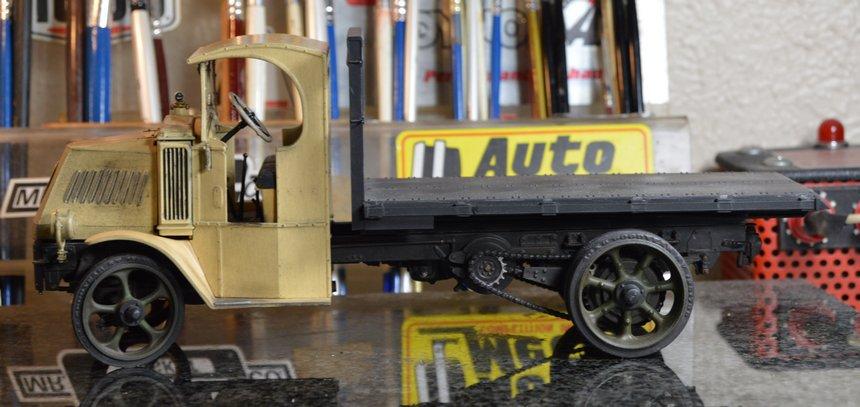
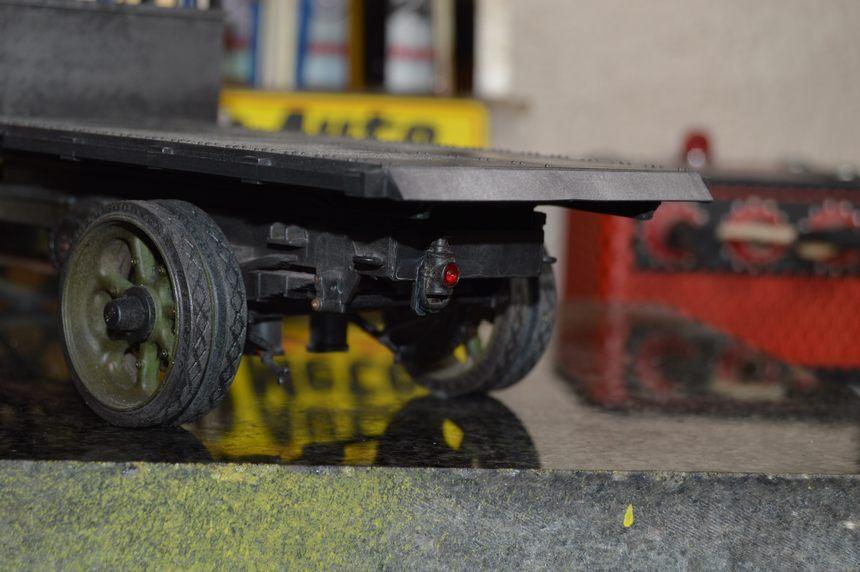
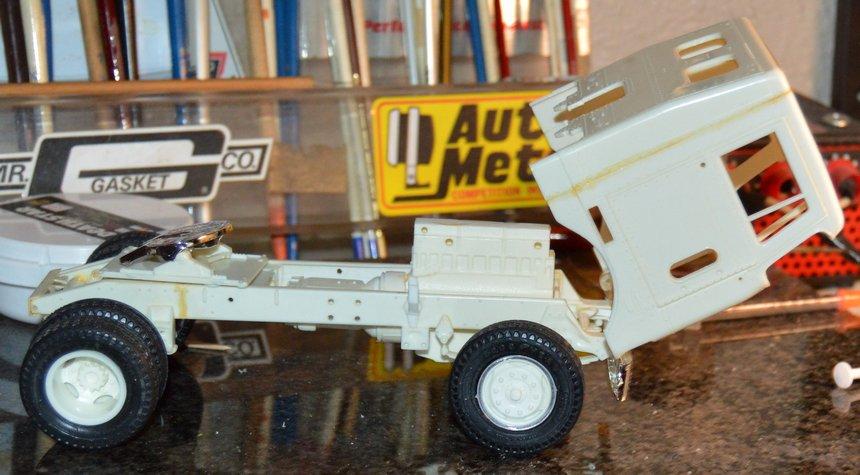
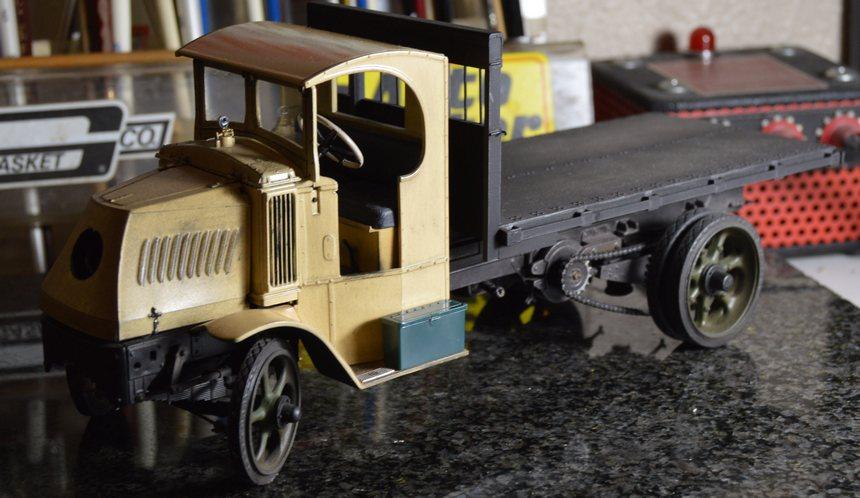
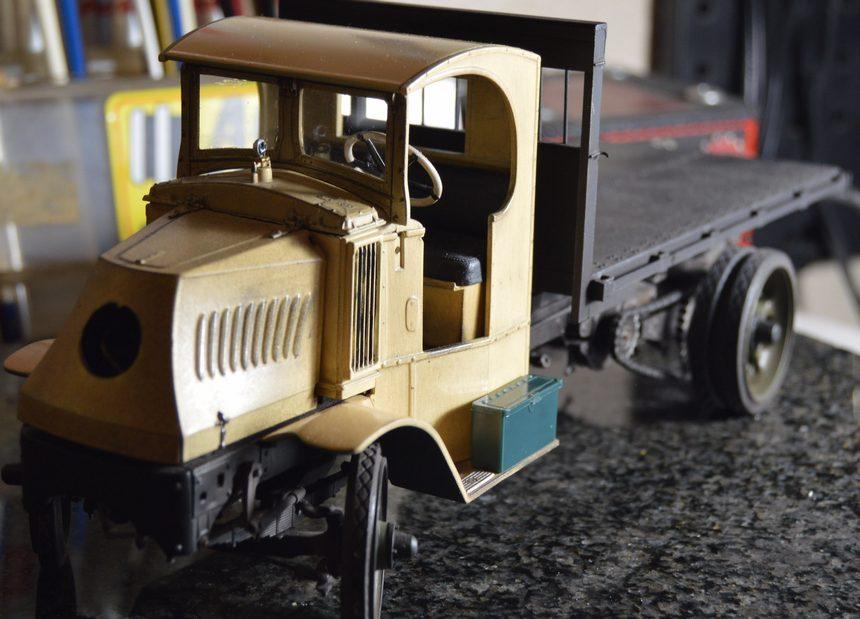
Most of my working years have been spent behind the wheels of various straight trucks. A great deal of those years were spent in the "board yards". Lumber trucks have long been my favorite work trucks--they're just the coolest! And, I can tell you from experience that one of them, running empty, handles unbelievably well, on a curvy road! I have been planning to build a lumber truck for almost forty years. Given that this model was built from Monogram's 1926 Mack Dump Truck, which already had the hydraulic hoist, I figured "why not?" I simply left the sides and gate off the bed and added stake pockets and rub strips, along with a headboard, and, there I was! My goal with this project was to improve my overall technique, and work on my weathering and finishing skills. Therefore, I aimed to keep it fairly simple. Most of the weathering was done with pastels, although I used oil paints in a few "greasy" spots. The "Howard Lake Lumber Co." livery is fictitious. Keeping simplicity in mind, I only made a few simple changes. I added ignition wiring, and made the steering poseable. As the kit was designed, the hoist mechanism and the bed hinges were molded in to what should, actually, be wood rub strips, or cushions, between the truck's chassis and the bed. I replaced Monogram's pieces with wood strips. I made the hardware for the hoist and bed hinges from Evergreen styrene stock. I used a doming block and punch to create reflectors for the headlights. Those reflectors make a huge difference in their appearance! I made the hasp for the toolbox from a part left over from one of the hood hinges. I elongated the hole. Then I soldered a tiny brass "u" to a brass plate. I attached it so that the bottom end of the "u" protrudes through the elongated hole in the hinge. The model is painted with Krylon Sweet Cream. The wheels are painted with a color called "Basil" from Michael's Design Master line. The kit's decals had no usable adhesive left, so I printed new Mack placards for the cab sides. I applied those decals to thin aluminum sheet (tooling aluminum), and fastened them to the cab with tacky glue. In looking at the photos, I see a couple of things I want to do, before I turn it over, and add a bit of dust and other smut, to the underside. That said, I could put it in the display case, now, and be happy calling it done! So, here it is! Questions comments and critiques are always welcome! Thanks for looking!...Dan

-
I have an old Starrett paper micrometer I got from friend who used to work in a paper warehouse. I use it all the time.
-
64 Dodge D100 Pickup Pro Street
Straightliner59 replied to AmericanMuscleFan's topic in WIP: Drag Racing Models
Dadgum, Francis! Incredible work, my friend! Everything is just right! -
The Zen of Model Building
Straightliner59 replied to afx's topic in General Automotive Talk (Trucks and Cars)
I wholly agree on all points! New techniques, etc. keeps the hobby interesting! They are our babies, because they are realization of our vision. -
The Zen of Model Building
Straightliner59 replied to afx's topic in General Automotive Talk (Trucks and Cars)
One man's Zen is another's frustration. I see many who say that super-detailing requires too much time, or that it takes the fun from the hobby. Scratch building and detailing are the things that provide me the most relaxation and satisfaction. -
Those are from the Monogram 26 Mack truck.
-
Monogram 1926 Mack
Straightliner59 replied to Straightliner59's topic in WIP: Model Trucks: Big Rigs and Heavy Equipment
Thanks so much, Gator! I thought my next photo post would be in "Under Glass", but, I like the bumper enough to post that, and the toolbox, which is about to be weathered, prior to installation. These literally are the final parts that are going on the model. Next, I will layout and print the decals, and apply them. After that, only final touchup, weathering and stray detail paint is all that will be left! Thanks for looking!
-
Monogram 1926 Mack
Straightliner59 replied to Straightliner59's topic in WIP: Model Trucks: Big Rigs and Heavy Equipment
Thank you, Francis. I'm pretty happy with it, so far. I might have even decided on the lettering!? I managed to get the high bumper installed. Now, I'm working on the tool box that mounts to the step. I really hope to get it completely finished, before bedtime, in the morning! -
That looks great! Nice work, sir!
-
Hey, man. I only know about the containers! ?
-
Reo Gold Comet
Straightliner59 replied to Chariots of Fire's topic in WIP: Model Trucks: Big Rigs and Heavy Equipment
A masterful job, sir! There's no room for error, with these beautiful pieces of equipment, and nobody builds them better! -
Monogram 1926 Mack
Straightliner59 replied to Straightliner59's topic in WIP: Model Trucks: Big Rigs and Heavy Equipment
It is, as Ricky from Trailer Park Boys would say, "For all intensive purposes", done! I will still add the tool box to the step, but, that isn't critical. I was/am debating adding the "high bumper". I forgot to open the holes for it, but, that should still be a doable proposition. I need to either decant some of the Krylon spray I used to paint it, or mix some oils, to do some drybrushing, and to touch up some spots. Still final/overall weathering to do, as well. I haven't pastelled the roof, yet, because I like the idea of the canvas overlay, but haven't found photos to be sure it's done as I theorize. I am still finalizing the livery. So far, I'm pretty happy with it! Next photos will be "Under Glass". Comments, critiques and questions are always welcome. Thanks for looking!...Dan
-
I would have to build one of those for my mom! Oh, she hated that car! Dad loved anything Corvair.
-
Peterbilt 352 to daycab
Straightliner59 replied to Steve Kelly's topic in Model Building Questions and Answers
I just cut out enough length to match one of the available cab lengths, and cut the rear window out of this one.
-
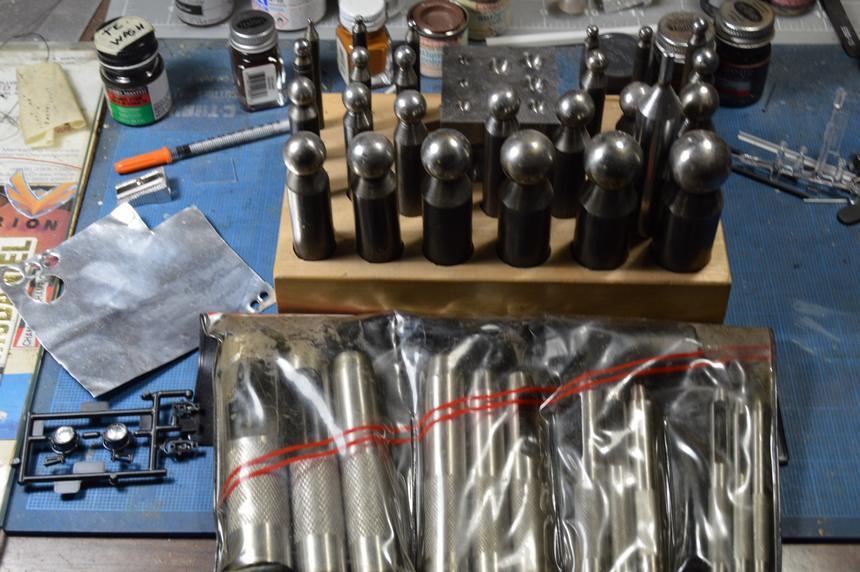
What an excellent way to create texture! I will definitely keep this in mind! For a bit more cash outlay for tools, you can use this doming block and these punches to make the reflectors. I got mine at Harbor Freight. I just made these, today.
-
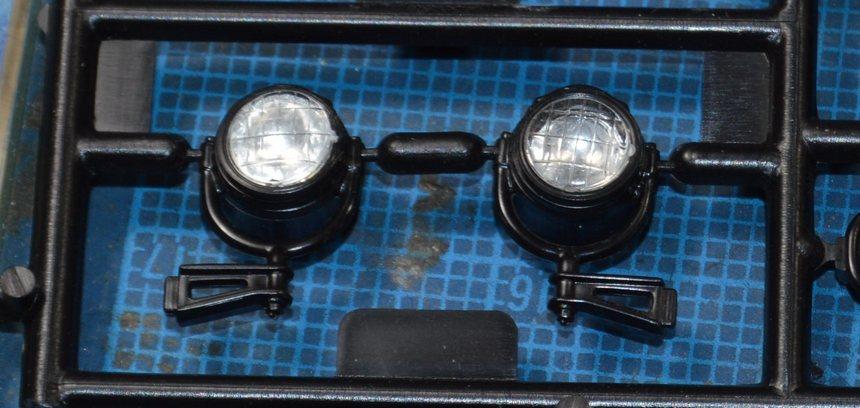
I had the same issue, and boxed it up, and sent it to a friend. Figured that, if I was going to be sanding, anyway, I might as well save the space. I have a couple of contributions to make, here. First, I bought these punches and this doming block and punch set, and the set of hole punches at Harbor Freight. Granted, they not something that everyone needs, or would use. I have used them, in conjunction with one another, many times, over the years I've owned them. Typically, when I use the doming block, I've used the punches first. Vice-versa isn't always the case. Together, I used them to make the reflectors for these headlights from tooling aluminum. They can also be used to form tank ends, or any other partially spherical piece. I found some of these plastic containers at one of the dispensaries (I probably should go back there, just to acquire more of these, they've proved so useful!). They work beautifully for things like pins, small parts for a specific project, and leftover bits and pieces that are just too tiny to live amongst the general population of scratchbuilding materials! Their wide tops make them super-easily accessible. And they stack nicely.
-
Monogram 1926 Mack
Straightliner59 replied to Straightliner59's topic in WIP: Model Trucks: Big Rigs and Heavy Equipment
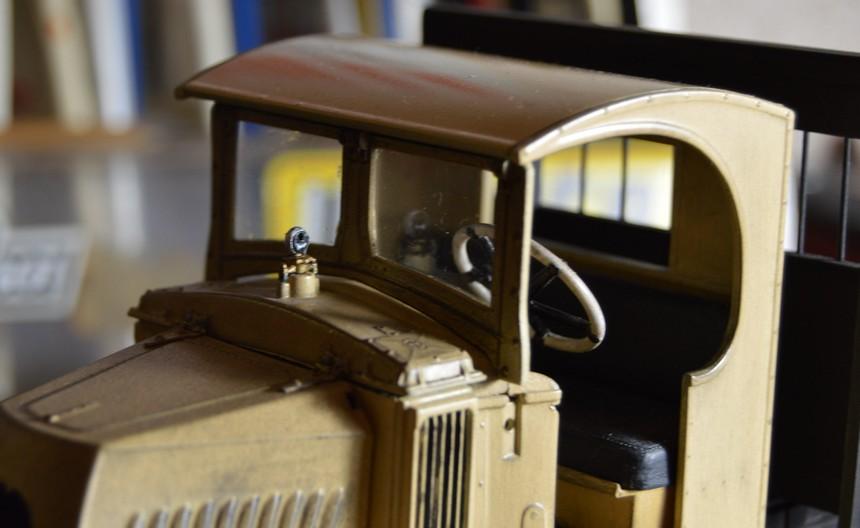
Thanks, my friend! I always appreciate those little things, on models: those little things that just keep catching your eye as you look! A flashy paint job? Cool! For a minute. Neat little details? Hours of enjoyment! ? I have the windshield finished and installed. I made new glass from some .010" K&S clear sheet. I did some preliminary work on the headlights, as well. Assembly really should be finished in the next day or so! Then, it's on to finishing up weathering. Then, into the display case, she goes!
-
Micro Pin Vice Bits.
Straightliner59 replied to StevenGuthmiller's topic in Model Building Questions and Answers
Yep! I use .023" wire brads, and always keep a pin vise out and ready, specifically for that purpose. -
These look like the old Gates Commandos, from the AMT Blazer. I might have some floating around here. I can look, if you'd like. Unless someone's already helped you out, in the future (farther down the thread!).
-
Monogram 1926 Mack
Straightliner59 replied to Straightliner59's topic in WIP: Model Trucks: Big Rigs and Heavy Equipment
Thank you, Gareth. With any luck, I should have the assembly done, by morning (my bedtime, being a night worker), and be down to touch up, and final, overall and spot weathering. It's really getting there! -
"Bring Out Your Dead" Completion Build--ROUND 2 Is On!
Straightliner59 replied to Snake45's topic in WIP: Model Cars
Depending on how it goes finishing up the Mack, I might throw in. If it's done in the next couple of weeks, I can probably come up with something that's been sitting a while. My Don Edmunds Modified comes to mind. I know. Another Monogram model! -
Such impressive and amazing work, Tim. Definitely something to aspire to! I wish I had gotten in on the discussion of the finish. I'd have suggested the rear cover as you have it, but media-blast the pumpkin. No matter. Where does a hack, like me get off suggesting anything, to a guy like you? ? Fantastic work, sir!
-
Monogram 1926 Mack
Straightliner59 replied to Straightliner59's topic in WIP: Model Trucks: Big Rigs and Heavy Equipment
Thank you, so much, Charles! It's getting pretty close, now. -
Acrylic Nail Resin
Straightliner59 replied to Straightliner59's topic in Tips, Tricks, and Tutorials
Thanks, Pete! I had forgotten all about that thread. I even replied to it, under my previous handle, Straightliner1. It's proven to be a very useful modeling substance. A little of this and some two-part mold putty provides a great, quick way to replicate parts.