Straightliner59
-
Posts
5,814 -
Joined
-
Last visited
Content Type
Profiles
Forums
Events
Gallery
Everything posted by Straightliner59
-
 That car was running at about the time many teams quit painting chassis, in order to spend the weight, elsewhere. I am sure that, at one time, I read what color the body was, but, I can't recall, now.
 -
Here are jpegs of a tutorial I did about four years ago. It's a subject that comes up frequently, so it bears a re-post, this time with tags. Everybody has their favorite way of accomplishing this task. There are some very nice aftermarket items out there, to be sure. I think that, back in the early-mid '70's, I built a couple of pieces with nine wires stuffed into a single hole drilled in the cap, before I decided that just wasn't acceptable, for me. Next, I began drilling nine holes (or five, or seven...) that's what's called a "painus in the anus"! Some time around 1985, Don Fahrni obtained some dental casting resin. We sought out a supply house from which to buy Dow RTV silicone rubber to make molds, and began making parts, mostly for fuel cars. One day Don noticed that he could fit "Bell wire" insulation into the nubs of a distributor cap mold. He added the dental resin, and, for us, at least, the rest was history. Neither of us ever used anything else for distributor/mag caps, again. These materials are relatively inexpensive, and once you've acquired them, you'll find many uses for them. Just the other day, I made a two-piece mold from it, so that I could make a set of knock-offs for my supermodified. I only had a single copy. Within an hour and a half, I had a set of four that simply need to be cleaned up. These are the kind of supplies it's always helpful to have around! I think everything is pretty clearly explained. If you have any questions, ask away!

-
Thank you, Jim! I think I might finally have the wheels and tires sorted out, as to how they'll fit together. I am hoping to get the suspension worked out, over the weekend.
-
Wiring for engine details
Straightliner59 replied to rob1957's topic in Model Building Questions and Answers
I did a tutorial a few years ago, on making your own "pre-drilled" distributors. Over the weekend, I will try to repost it, adding hashtags. -
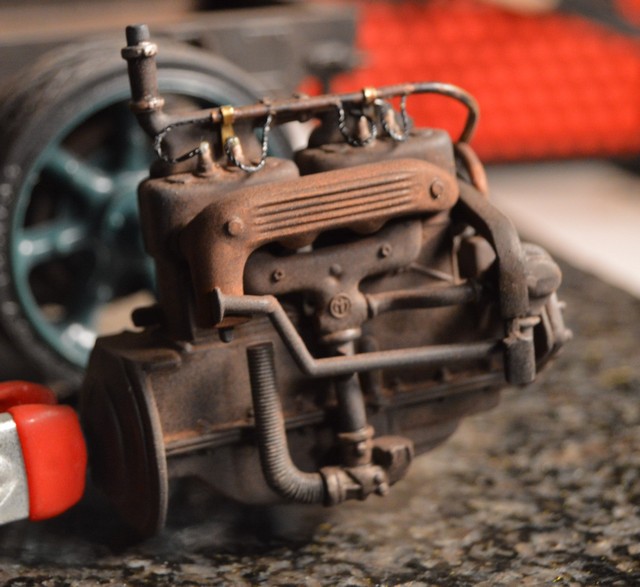
I used it on the engine for my Mack. It makes for a nice textured finish, like cast iron or aluminum.
-
That's "purty". Very nice work!
-
We've seen a lot of improvement in your work! Good job, Michelle.
-
"Bring Out Your Dead" Completion Build--ROUND 2 Is On!
Straightliner59 replied to Snake45's topic in WIP: Model Cars
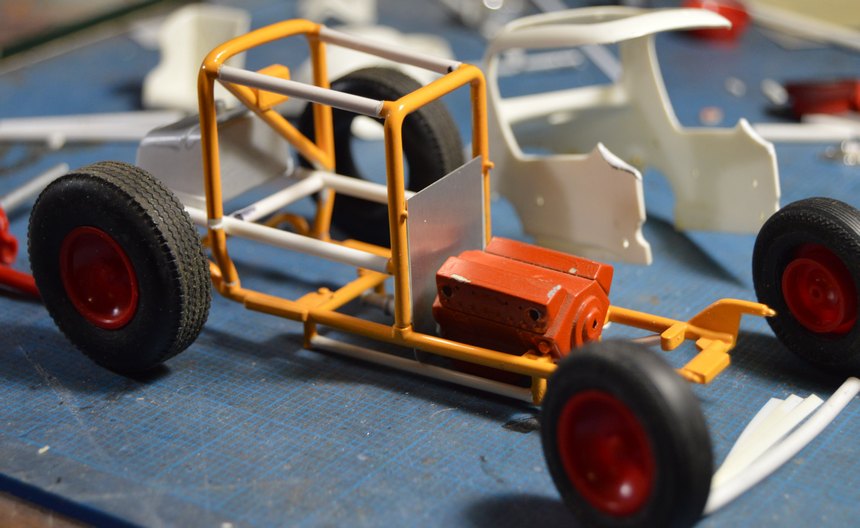
Been sorting this out: Finding tires, making wheels, reworking parts of the chassis, gathering bits and pieces...a bit of progress! I've determined it to be predominantly red, because I don't have a red car, yet.
-
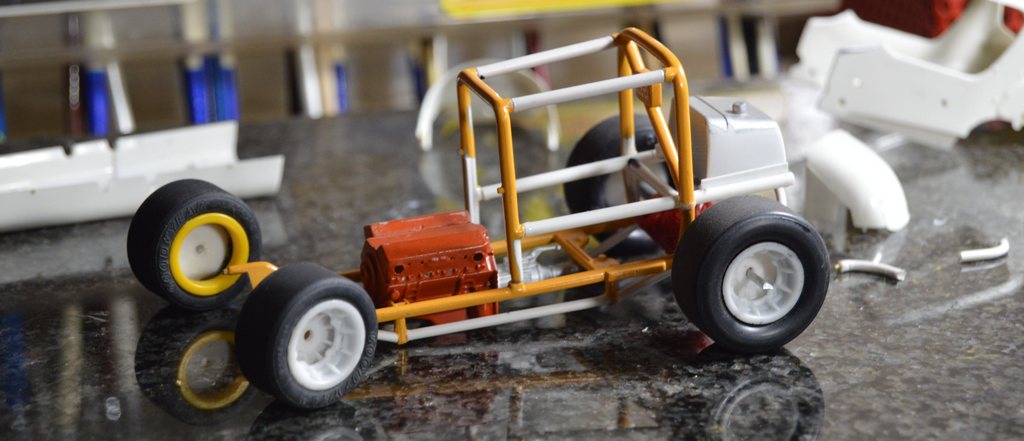
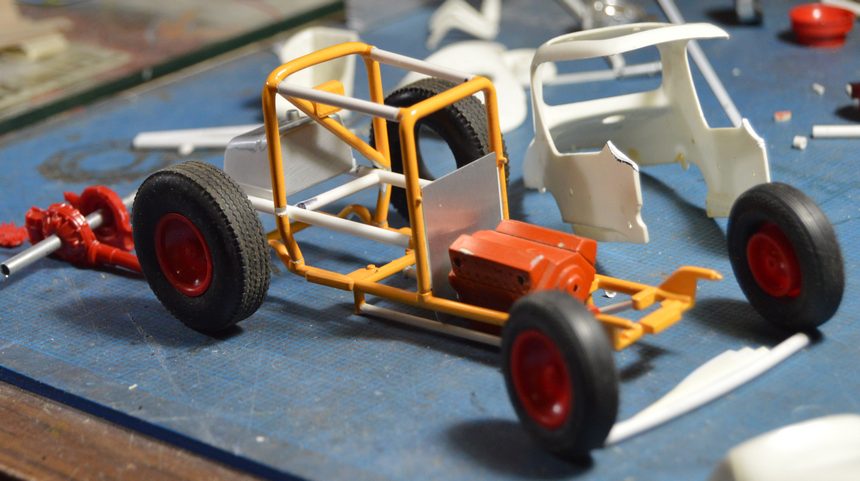
Thanks,Alan. Yes, indeed, that's exactly where they're from! I've made some changes. First, I found some photos, circa '73-'74 of some of these with speedway tires, as opposed to the more commonly seen dirt tires. I found some tires that have the proper look to them, but, will need to have sidewall lettering removed, and possibly replaced with something more appropriate for the time. The kit's rear axle is molded with the top open. Replacing it with one from Monograms '80s sprint cars require removal/replacement of the rear chassis bar. I've begun work on the front spring and axle assembly. Note the different heights of the handrail stanchion spring mounts, Ala the kit piece. I really like the look of this tire/wheel combo. As always, comments, questions and critiques are welcome! Thanks fer lookin'!
-
Yeah, what if they just have one blue? If it's a blue shade, you get the blue! ?
-
That looks like the old Testors Copenhagen Blue! Definitely looks darker than what I see in the photo. Thanks for sharing that.
-
Thanks, Miles. I would definitely be interested in seeing that. I bought mine a few years ago, for a '70 Chevelle that I haven't got back around to working on.
-
I ordered a can of Mulsanne Blue from Automotive Touchup. They "canned" it, for me. Seeing "Youpey'''s response, above, I hope they got it correct!
-
Atlantis models for 2021 !!!!
Straightliner59 replied to gbdolfans's topic in Car Kit News & Reviews
Those two aren't snappers. They're quite nice little glue kits. There was a pair of each, along with a pair of Chargers. There was a street machine and a stock (-ish?) version of each. -
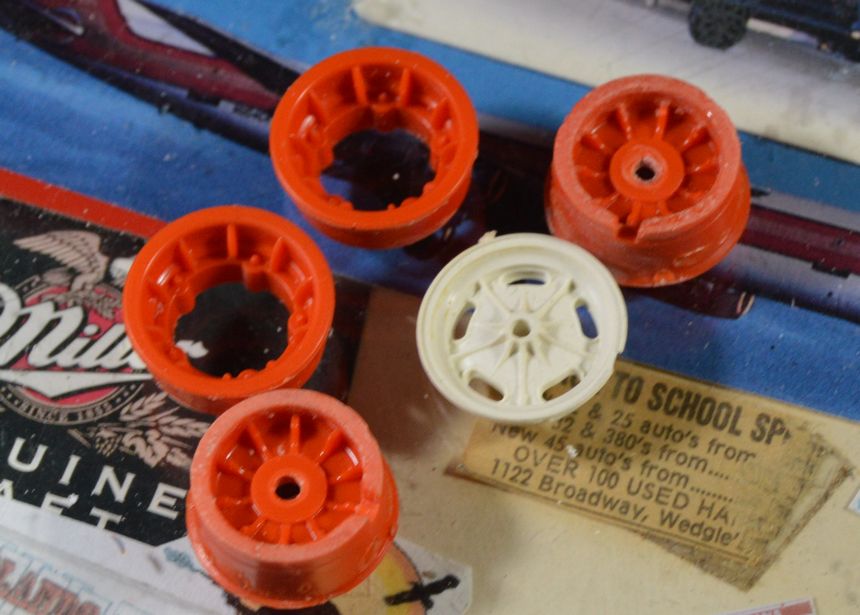
Yeah! I like these! I still need to cast another pair, but, these are narrowed. As with anything I post, questions, comments and critiques are always welcome. Thanks fer lookin'!
-
I rearranged the model stash in my shop closet. Partly because they needed to be straightened up, but, mostly, so I would have different stuff to look at!
-
I used a length of guitar string for the return spring on my dragster. I don't think it's too large, at all. I'm not sure what gauge or brand they are--or even where I got them, anymore. It was just in a baggie of wadded up strings I picked up, somewhere!
-
I made this mold, so that I could have some of these sprint car wheels to whack on. As they are, they are too wide for my application--by quite a lot. I now know that I can make them narrow enough to fit my tires! I like it, too! Going with these on all four corners...
-
I am truly grateful for those comments, my friend! When I began modeling, I was fortunate enough to make the acquaintance of two modelers who were willing to share their work, and how they accomplished it, with me. It's that openness and willingness to share that make this such a wonderful hobby. I've only run across maybe a handful of guys who kept modeling secrets, and it always left me shaking my head. I always hope that someone will look at something I've done and think "Hey! I can do that, too!" That makes me as happy as anything else in modeling. Thanks again, for your kind words, Francis! I was happy to see your comments, and to know that you were interested, as I was building this, Charles. That was inspiring to know. Thank you very much for following it, and for your kind words. I enjoyed the project! Thank you, as well, Mark! Thanks to everyone who followed its construction, and to everyone who's looked here. It means a lot, to me!
-
Thank you, JC. I appreciate that! I'll try not to disappoint! ☺️
-
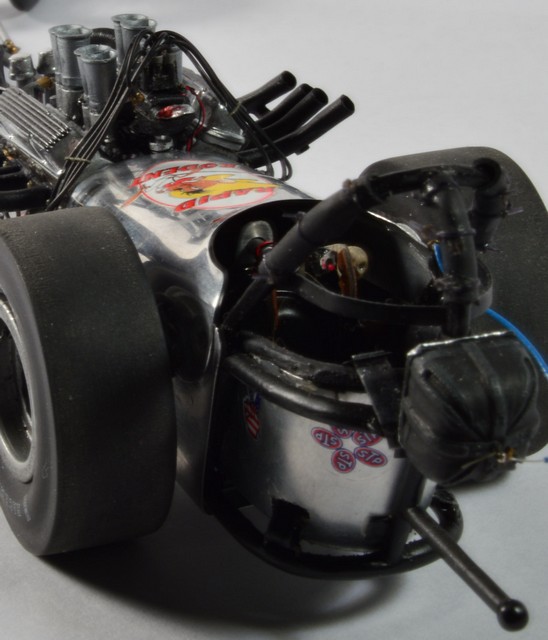
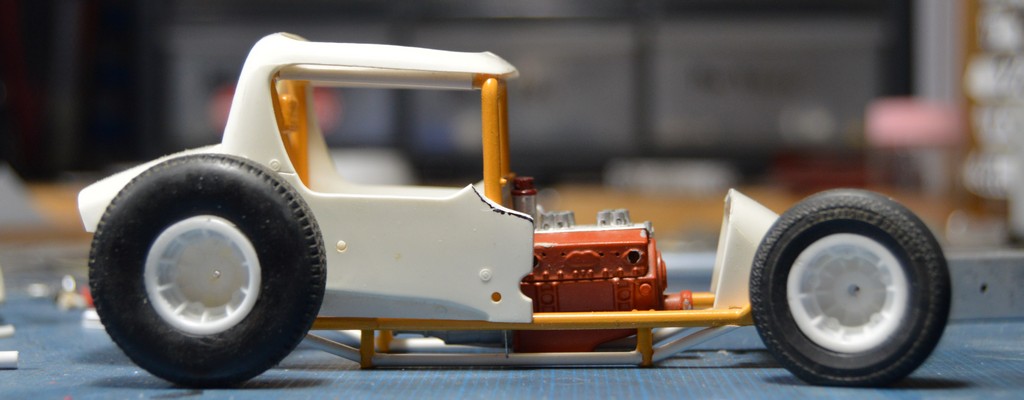
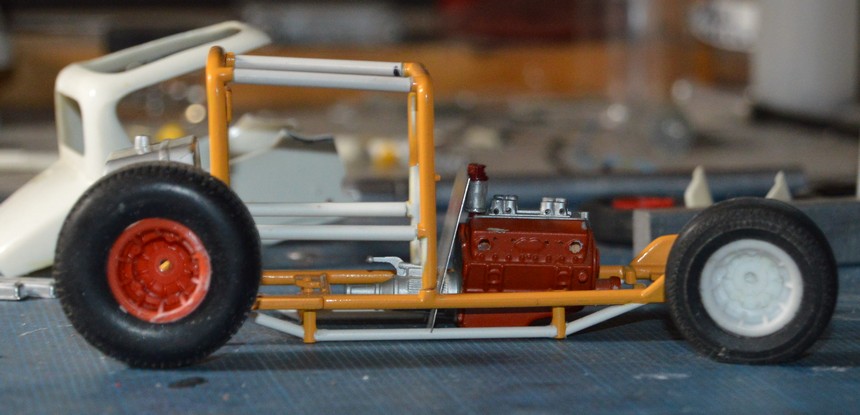
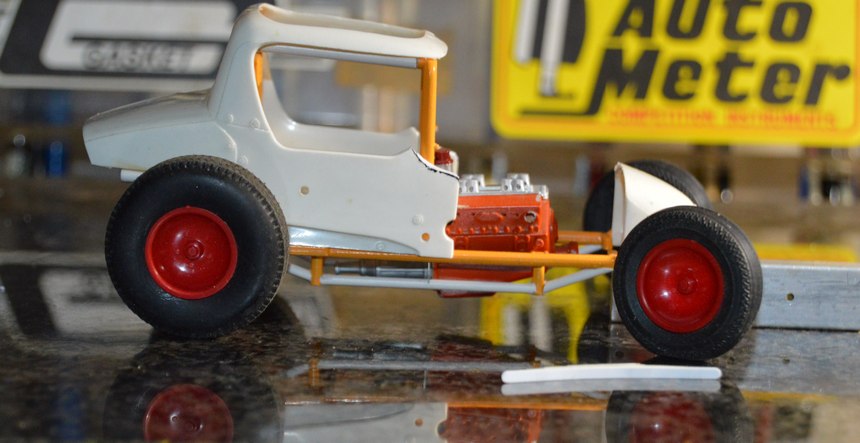
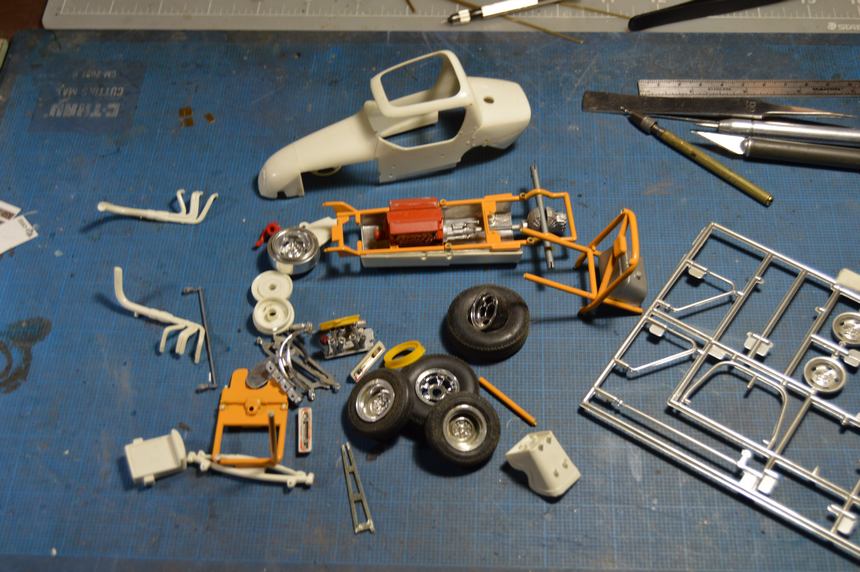
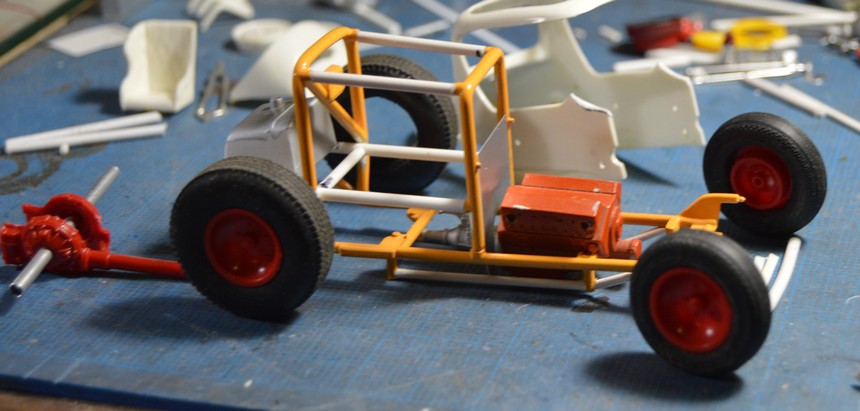
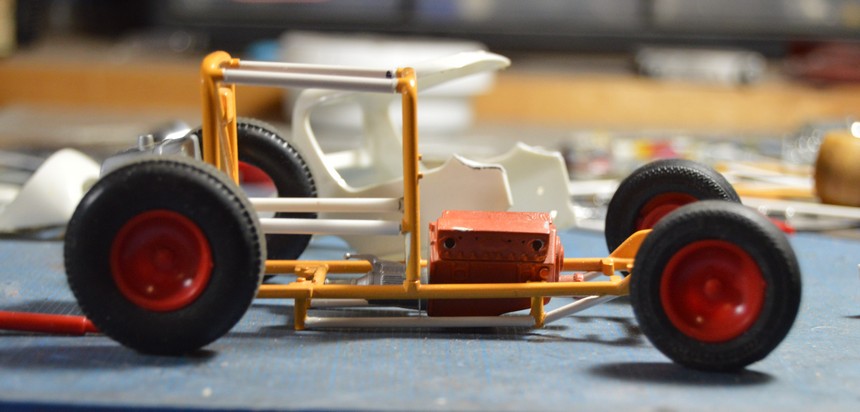
Here's another project that's been sitting around here, for a couple of decades. Interestingly, it's yet another Monogram model, as well! I gave consideration to redoing the California Street Vette, once the Mack was completed, but decided to go into the current quarterly "Bring Out Your Dead" thread, with this, instead. This was begun probably before the turn of the century--although I don't recall when, exactly. Since I took it back out of the box in pieces, I have done some work to the chassis. I added bottom frame tubes, and rebuilt the side bars in the cockpit, along with the fuel tank support/brackets. I'm not completely decided, as far as wheels. I like the dished Halibrands (I think that's what they are), but the two-piece wheels look cool, as well; Those, however, will need to be narrowed. I've made molds, in case I choose that direction, since I only have the pair, as well. I had already selected a set of nice Corvette valve covers for the car, so I will use them. Hilborn fuel injection. Quick-change rear from a Monogram sprint car. Although it's too small, I am using a steering box from one of the old MPC funny cars. It's not all that visible, anyway, and it fits! I removed the kit firewall and replaced it with aluminum flashing. I also removed the hood. I want to make it from flashing, as well. It's curvier than any sheet work I have done, before, so it will be a nice challenge! If that goes well, I may attempt the nose, as well. I'm unsure of the origin of the rear tires. I think they may be from an AMT Lotus or the Willard battery car. The fronts look like AMT's from the early '70s--they look like the tires from my original Pepper Shaker--and they may well be! I started work on a new front spring and axle. The headers will need to be redone, between the ports and the dumps. Since these photos, I have notched the lower firewall to clear the lower chassis tubes, removed the nose from the hood, and filled that hole on the right rear cage upright with acrylic nail resin. Speaking of the spring assembly: I've known this for a couple of years, now, and have mentioned it before, but it bears repeating--in bold Italics!: There is no better way to precisely apply liquid plastic cement (NOT superglue--MEK, etc.) than an insulin syringe. None! Don't tell me "I like this", or "I prefer that". There is absolutely no debate! ? Using the plunger, you can push out the tiniest drop of cement. Just touch the joint with that, and you're done. Need another tiny drop? Just squeeze out another, and go. No mess. No excess. Need to flood it on? Hey! That syringe has you covered. Anyhoo, without further ado... As always, questions, critiques and comments are welcomed and appreciated! Thanks for looking.
-
*Portable Spray Booth*
Straightliner59 replied to Zippi's topic in Model Building Questions and Answers
You can find the same ones on Ebay. That's where I got mine. -
*Portable Spray Booth*
Straightliner59 replied to Zippi's topic in Model Building Questions and Answers
I just cut up cheap furnace filters. If I am spraying pretty heavily, I might need to replace them weekly. It works fine, and sounds like it would be a lot less messy than trying to clean them. I might mess with that, if I was buying commercial spray booth electrostatic filters, because those ain't cheap! -
I really like what you do with the foil under the paint technique, Steve. You always make it look great on your scripts, etc. Always!
-
I'm with you, Trevor. I have a bunch of those punches I made! I also have a set from Micro Mark, an old set from Tandy Leather, and a set from Harbor Freight that ranges from about 3/16" up to 3/4", or so. I firmly believe that a man can never have too many tools!