Straightliner59
-
Posts
5,814 -
Joined
-
Last visited
Content Type
Profiles
Forums
Events
Gallery
Everything posted by Straightliner59
-
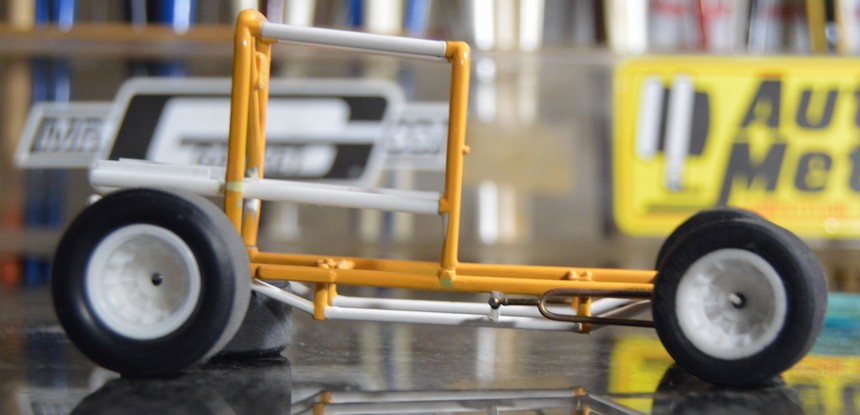
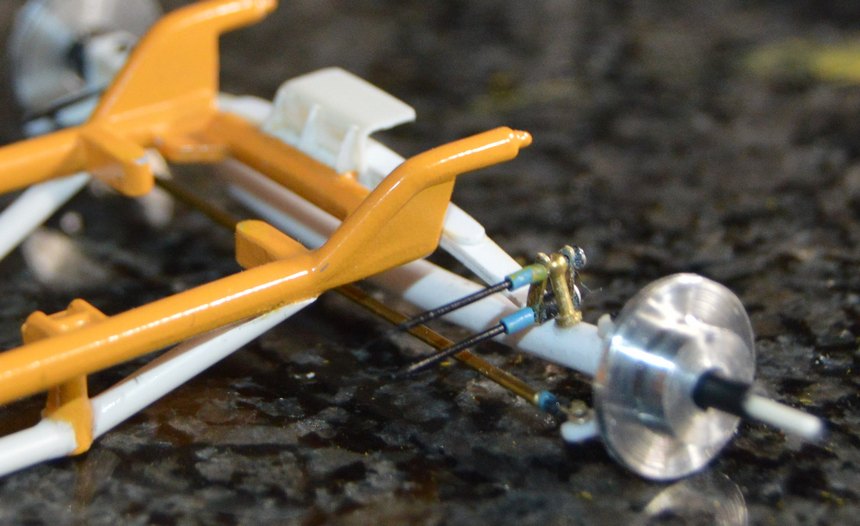
 A quick update. Hairpin mounts installed. Rear ride height mocked up. Front end is on the wheels!
-
"Bring Out Your Dead" Completion Build--ROUND 2 Is On!
Straightliner59 replied to Snake45's topic in WIP: Model Cars
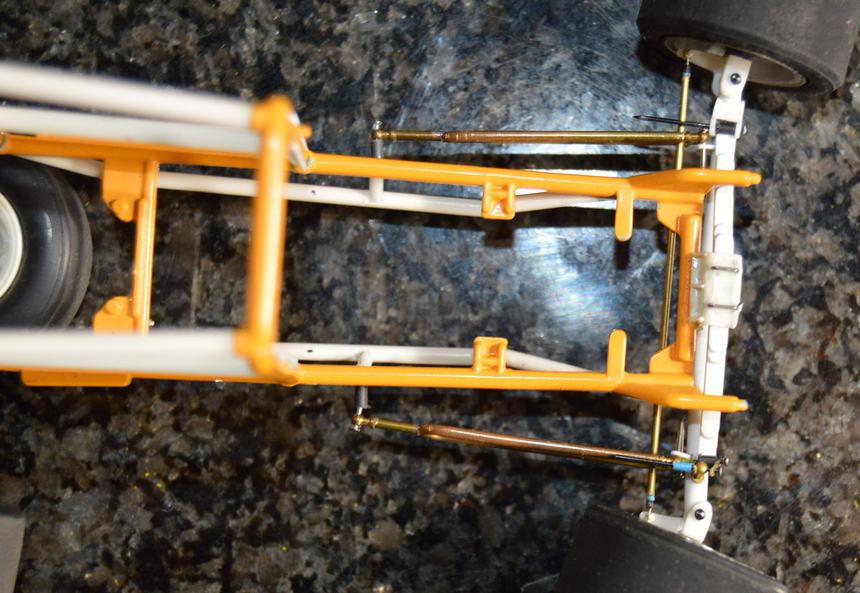
I have the front suspension almost completely sorted out and built. Still need to do the brakes. Here's the front end on the wheels. The rear is mocked to the correct ride height. I'm likin' it!
-
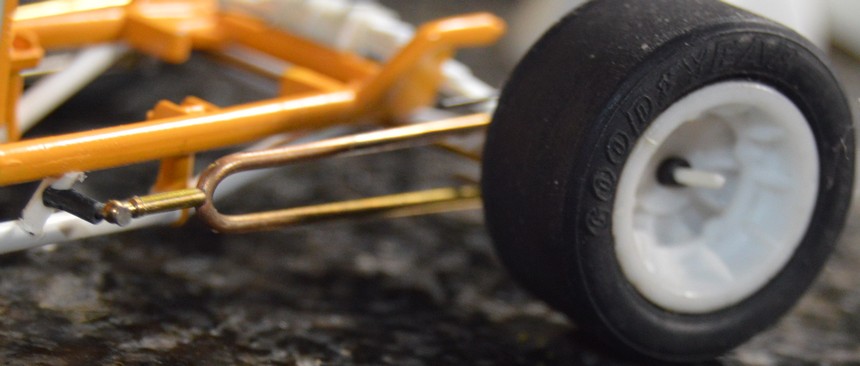
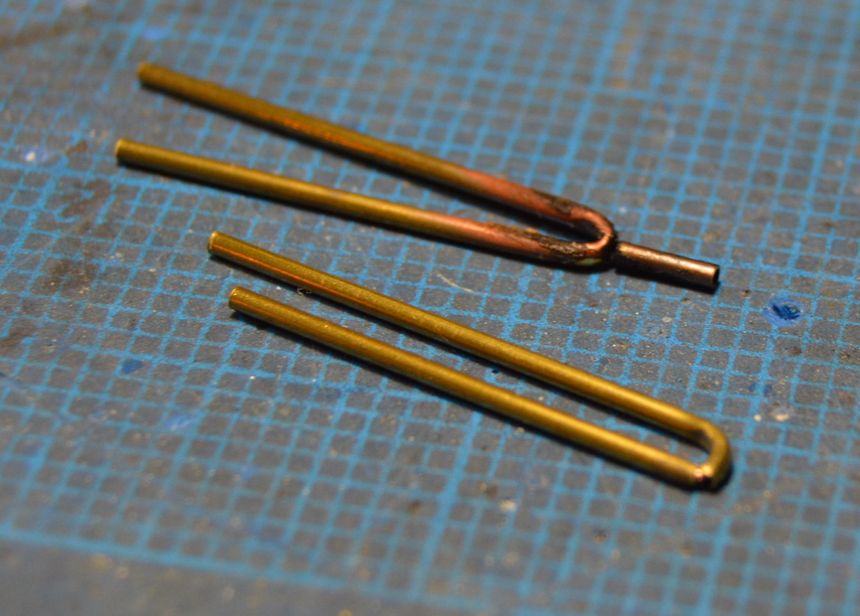
I got my radius rods built. The rod bent very nicely, once annealed! Before that, I added the plate gusset Richard mentioned. Of course, I forgot to take a clear photo of it while I had the camera out. It will still be there, next time! Since the photos, I've added a tube from the upper to the lower chassis rails, so that I will have a solid mounting point for the radius rods. Thanks for looking! As always, questions comments and critiques are welcome.
-
Can anyone identify a source for this?
Straightliner59 replied to iBorg's topic in General Automotive Talk (Trucks and Cars)
AMT '32 Ford? -
That gusset will be the next addition! I love subtle little details, like that. I just went with my go-to, for spindles--rectangular tube stock, split. I can alter things like steering arms, etc, to change the overall appearance of them, or for clearance. I've been using a lot more heat-swaging, recently. I mushroomed the ends of the axles, and inserted them from the inside. Then, I cemented them. I'm pretty happy with the way it's looking. I really appreciate your knowledge, and sharing it with me! Thanks, Richard, That truck looks great. The road lights are a nice touch. Those five-slot wheels were always my favorites. Thanks again, sir!
-
Thank you, sir! This is so easy, it's ridiculous!
-
John MacGowan's Willys pickup comes to mind. Steve Catron's belly tanker, too.
-
NHRA Museum Model Collection
Straightliner59 replied to papajohn97's topic in General Automotive Talk (Trucks and Cars)
I remember Barry sharing them on the old StraightLineModeler Yahoo group. I think he built every iconic drag racer! It sure seems like it. He was retiring from modeling, and wanted his models to go somewhere that others could enjoy them, in perpetuity. His collection is amazing! -
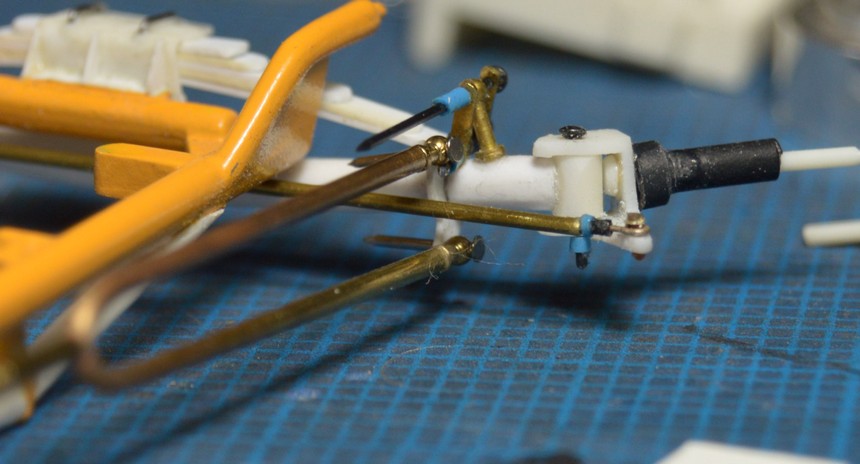
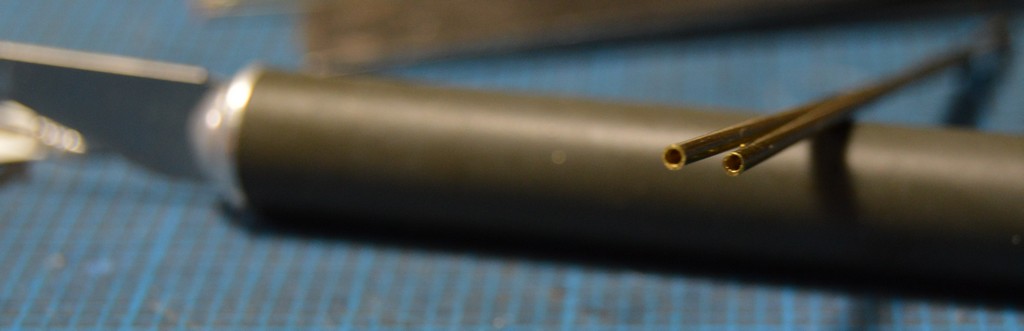
I was attempting to make radius rods for this supermodified, from 3/64" (.048") brass tubing. By inserting a length of wire into the tubing, I was hoping to keep it from crushing at the bend. It seemed not to crush, but it kept breaking. That tubing isn't particularly cheap. I quit after two attempts. I have quite a lot of 3/64" brass rod, I kept coming back to the dilemma of attaching the heim joints/eyebolts (I use HO scale handrail stanchions) to the ends. The chassis mount end is easy enough--solder a length of 3/64" tube onto the hairpin. The axle end is a different story. The rods need to be open-ended, so that the stanchions can insert into the ends. I cut two lengths of 3/64" rod, and cleaned up the ends with a file. I mounted it in the lathe chuck and put a .0325" PC board bit in a Jacobs chuck in the tailstock. To my utter amazement, and great joy, the PC board bit ran straight and true, not even requiring center-drilling! The math says that's a .00775" wall thickness! Yeah. That was cool!
-
That looks very promising!
-
The numbers look fantastic! I've been planning to cut some number markings masks and use them to apply leafing cement then apply metal leaf. It should look great! In four-and-a-half years, I still haven't spent any quality time (or any time, for that matter) with my Cricut. When they came out, my then girlfriend bought one. At the time, they were limited to their proprietary cartridges, as to what they would cut. I repeatedly told her that if they would make them so that people can use their own art, they would open themselves up to a whole new market. Once I had enough money, and they became more versatile, I bought one. I have yet to use it, in spite of the great things that can be accomplished, with one. I just brushed the adhesive on this one, to try out the leaf.
-
So far, I'm fortunate enough only to need 3.00+ reading glasses. I have some "Mag Eyes" a friend sent me that I use for really fine work. Snake is right about disorientation with the magnifiers. I don't use mine frequently enough (yet) to be completely used to that.
-
The mold putty is at Hobby Lobby, or, I usually just order it on Ebay. The nail resin can also be ordered online. Some Walmarts carry it, as well. Also, Sally Beauty Supply carries it. It's much easier to find, that it once was.
-
No problem. I appreciate the effort! Thank you, JC.
-
Looks like it could be. It's not a transverse leaf, though. I think I got it figured out. Once Richard explained it, I could tell what I was looking at, with the kit piece. This s what I came up with. Next, on to the radius rods. I need them to keep that axle pushed forward! It's rolling, back under the chassis, right now. I have the first idea of how it will sit--especially up front! The rear will be slightly higher. There's a lot of work in the front suspension. It ain't done, yet! As always, critiques, questions, comments and requests for clarification, are welcome! Thanks fer lookin'!
-
I was wondering about that. The way the kit's part is molded, it resembled a short, laid-down shackle. I need to find more photos, so can fix it! Thanks, Richard. I was in the process of hanging the axle, and it was fighting me. It should be much easier to only actually have to hang one side. I'm surprised those safety wheels are so heavy. They look cool. You may have just convinced me to go with the wing. I was debating that, but, I like the dual front brakes, and speedway tires. Thanks for your advice!
-
More work on the front suspension. I turned a set of hubs/rotors, and made a set of spring shackles. Next up, I'll add the needed hardware for the radius rods and shocks and get it mounted. Your comments are always welcome, be they complimentary, or realistic! ? Thanks for lookin'!...Dan
-
Always happy to share anything I have been taught, or have learned!
-
This thing seems to be taking a circuitous route to everything! I think I finally have the wheels/tires ironed out. Here's hoping, anyway! In the tutorial I recently posted about distributor caps, I mentioned some mold putty, and how handy it is to have around. Here are two quickie molds I made for brake calipers, and knock-offs. I only had one good knock-off. I needed four. Thanks to that stuff, I have all I need, now! Also got the front axle mostly built. I still need to add mounting points for radius rods and shocks. Anyway, here's what progress I have made. As always, questions, comments and critiques are welcome. Thanks for looking!
-
Glad to see you, my friend! As you can see, I had a devil, getting my wheels and tires sorted out--even as to overall look. I'm sure there will be at least a few more brass pieces to come. Thanks for your comments, Francis!
-
I would guess that somebody has the proper Miller red for that car.
-
You still have this. And it's simple and accessible! ☺️
-
The former makes perfect sense. I'm sure you're right about the latter. That car was absolutely gorgeous!
-
I have found it difficult to get tiny holes to fill with rubber. I don't have a vacuum tank or pressure pot, however. I think that will make a difference.
-
That's an excellent idea. I use my old one to use punches on.