StevenGuthmiller
-
Posts
15,071 -
Joined
-
Last visited
Content Type
Profiles
Forums
Events
Gallery
Everything posted by StevenGuthmiller
-

Machining Steering Columns
StevenGuthmiller replied to bill-e-boy's topic in Tips, Tricks, and Tutorials
Absolutely Bill. There are times that I wish that I had a lathe for making various parts, but for me, it would be another piece of equipment that I would never be able to find room for. Just thought that I'd offer up an alternative for those of us that don't have the option of a lathe. Steve -
Machining Steering Columns
StevenGuthmiller replied to bill-e-boy's topic in Tips, Tricks, and Tutorials
If you're planning on painting your columns, they're pretty easy to make with various sizes of plastic rod and some drilling and sanding. No lathes required. Steve
-
I've been tracking a package for an item that I purchased on Amazon a week or so ago. It started in Salt Lake City, Utah and then made it's way all the way to Bismarck North Dakota, (approximately 220 miles from my home) It then moved to Fargo, (about 23 miles from my front door) Today I find that from a stones throw away in Fargo, it's now traveled to Minneapolis Minnesota!! (233 miles away) What the hell? They do realize that they could have thrown it from Fargo to Hawley, right? Steve
-
Looks great! ? Steve
-
I guess, if that’s your thing...... ? Steve
-
Thank you Bob. I appreciate that! Steve
-
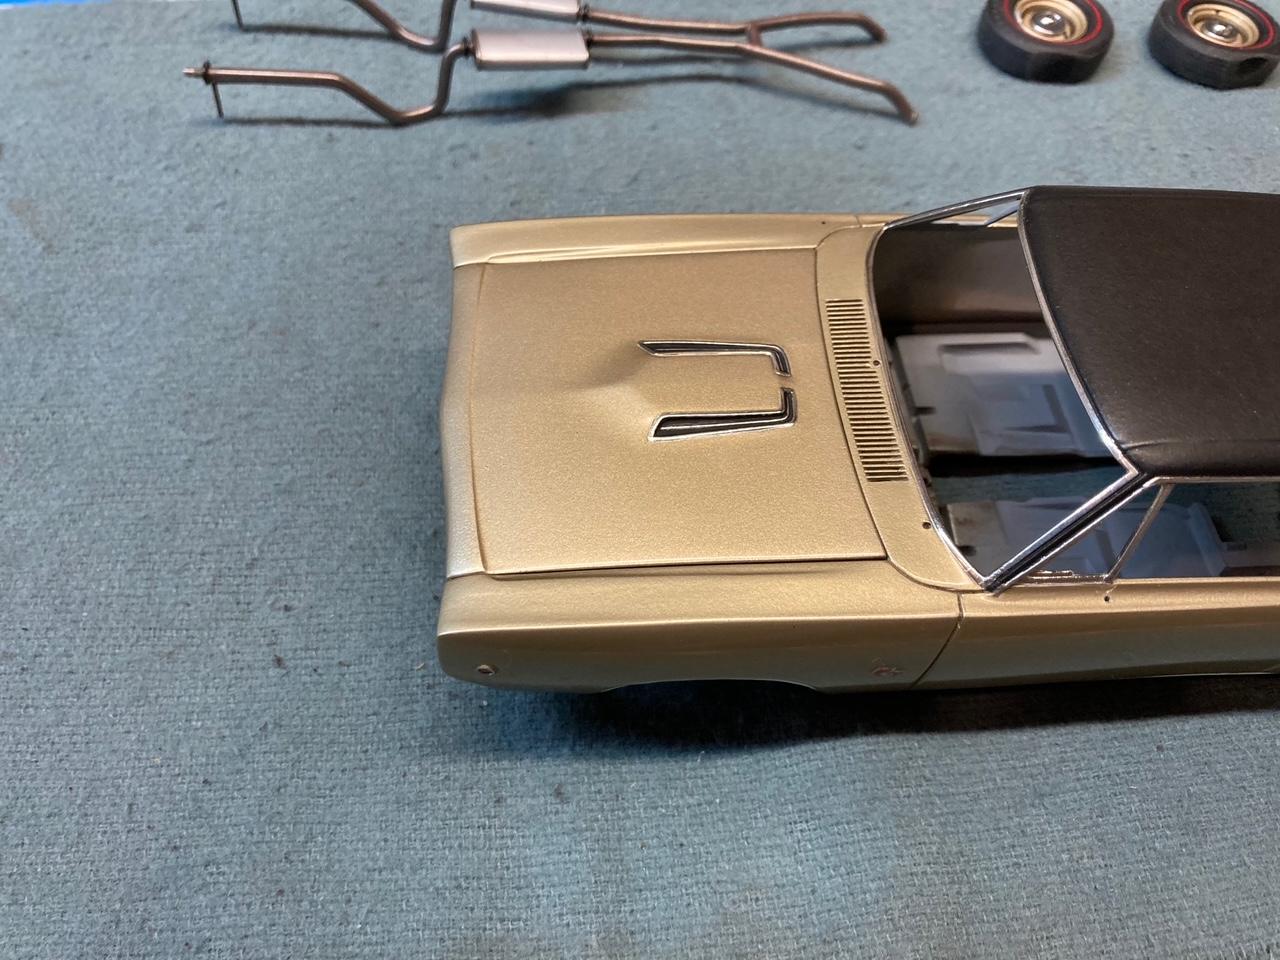
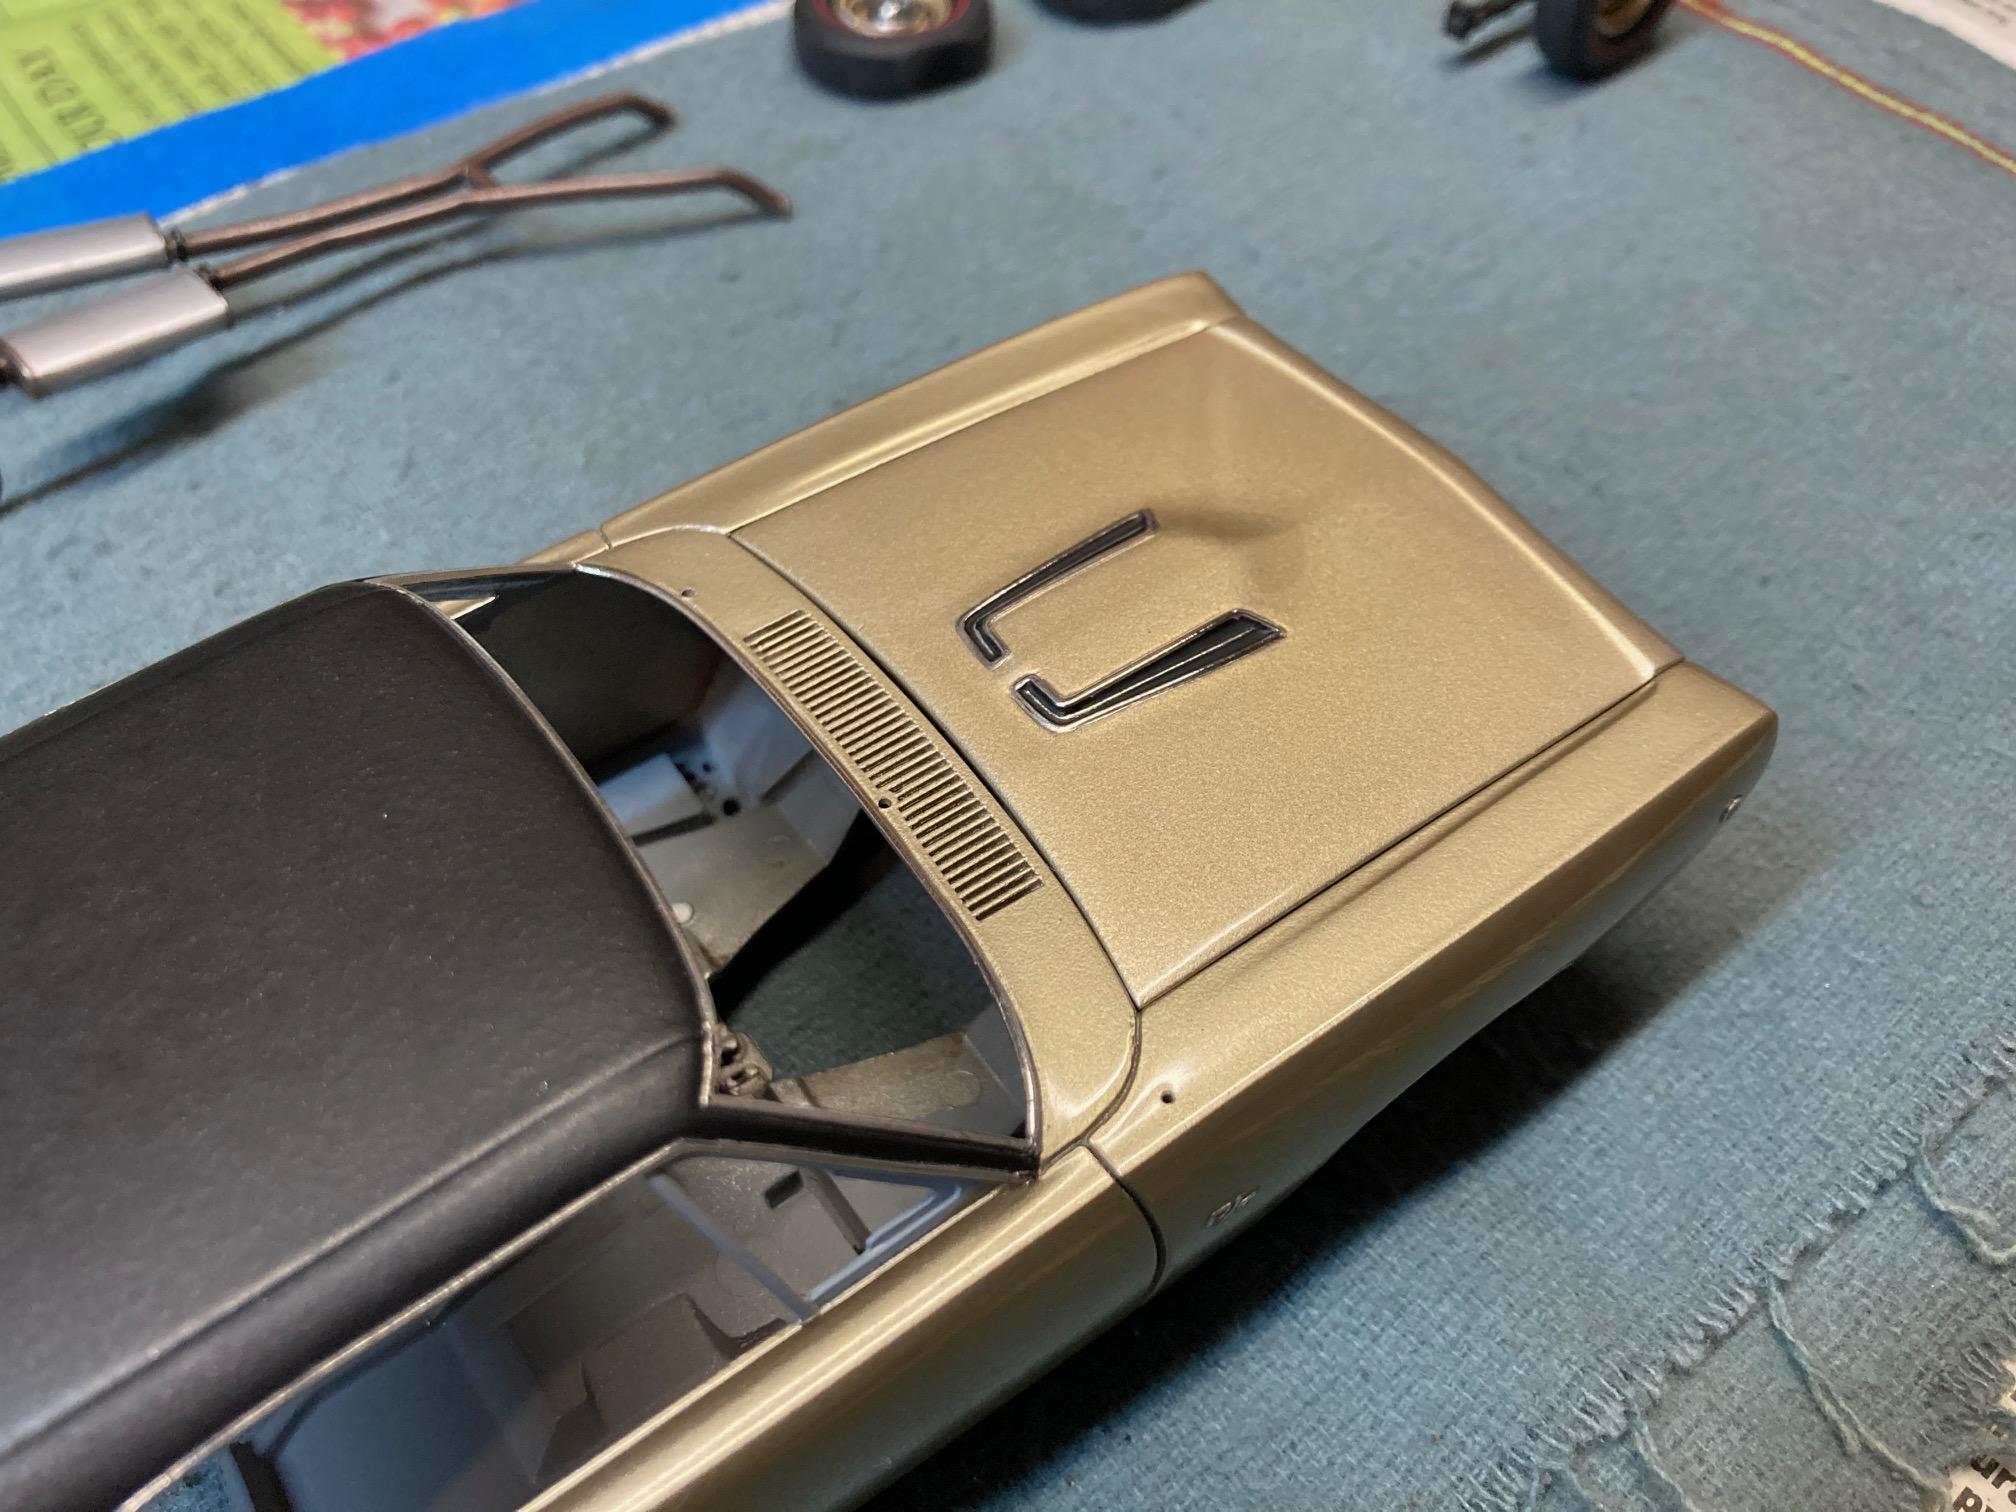
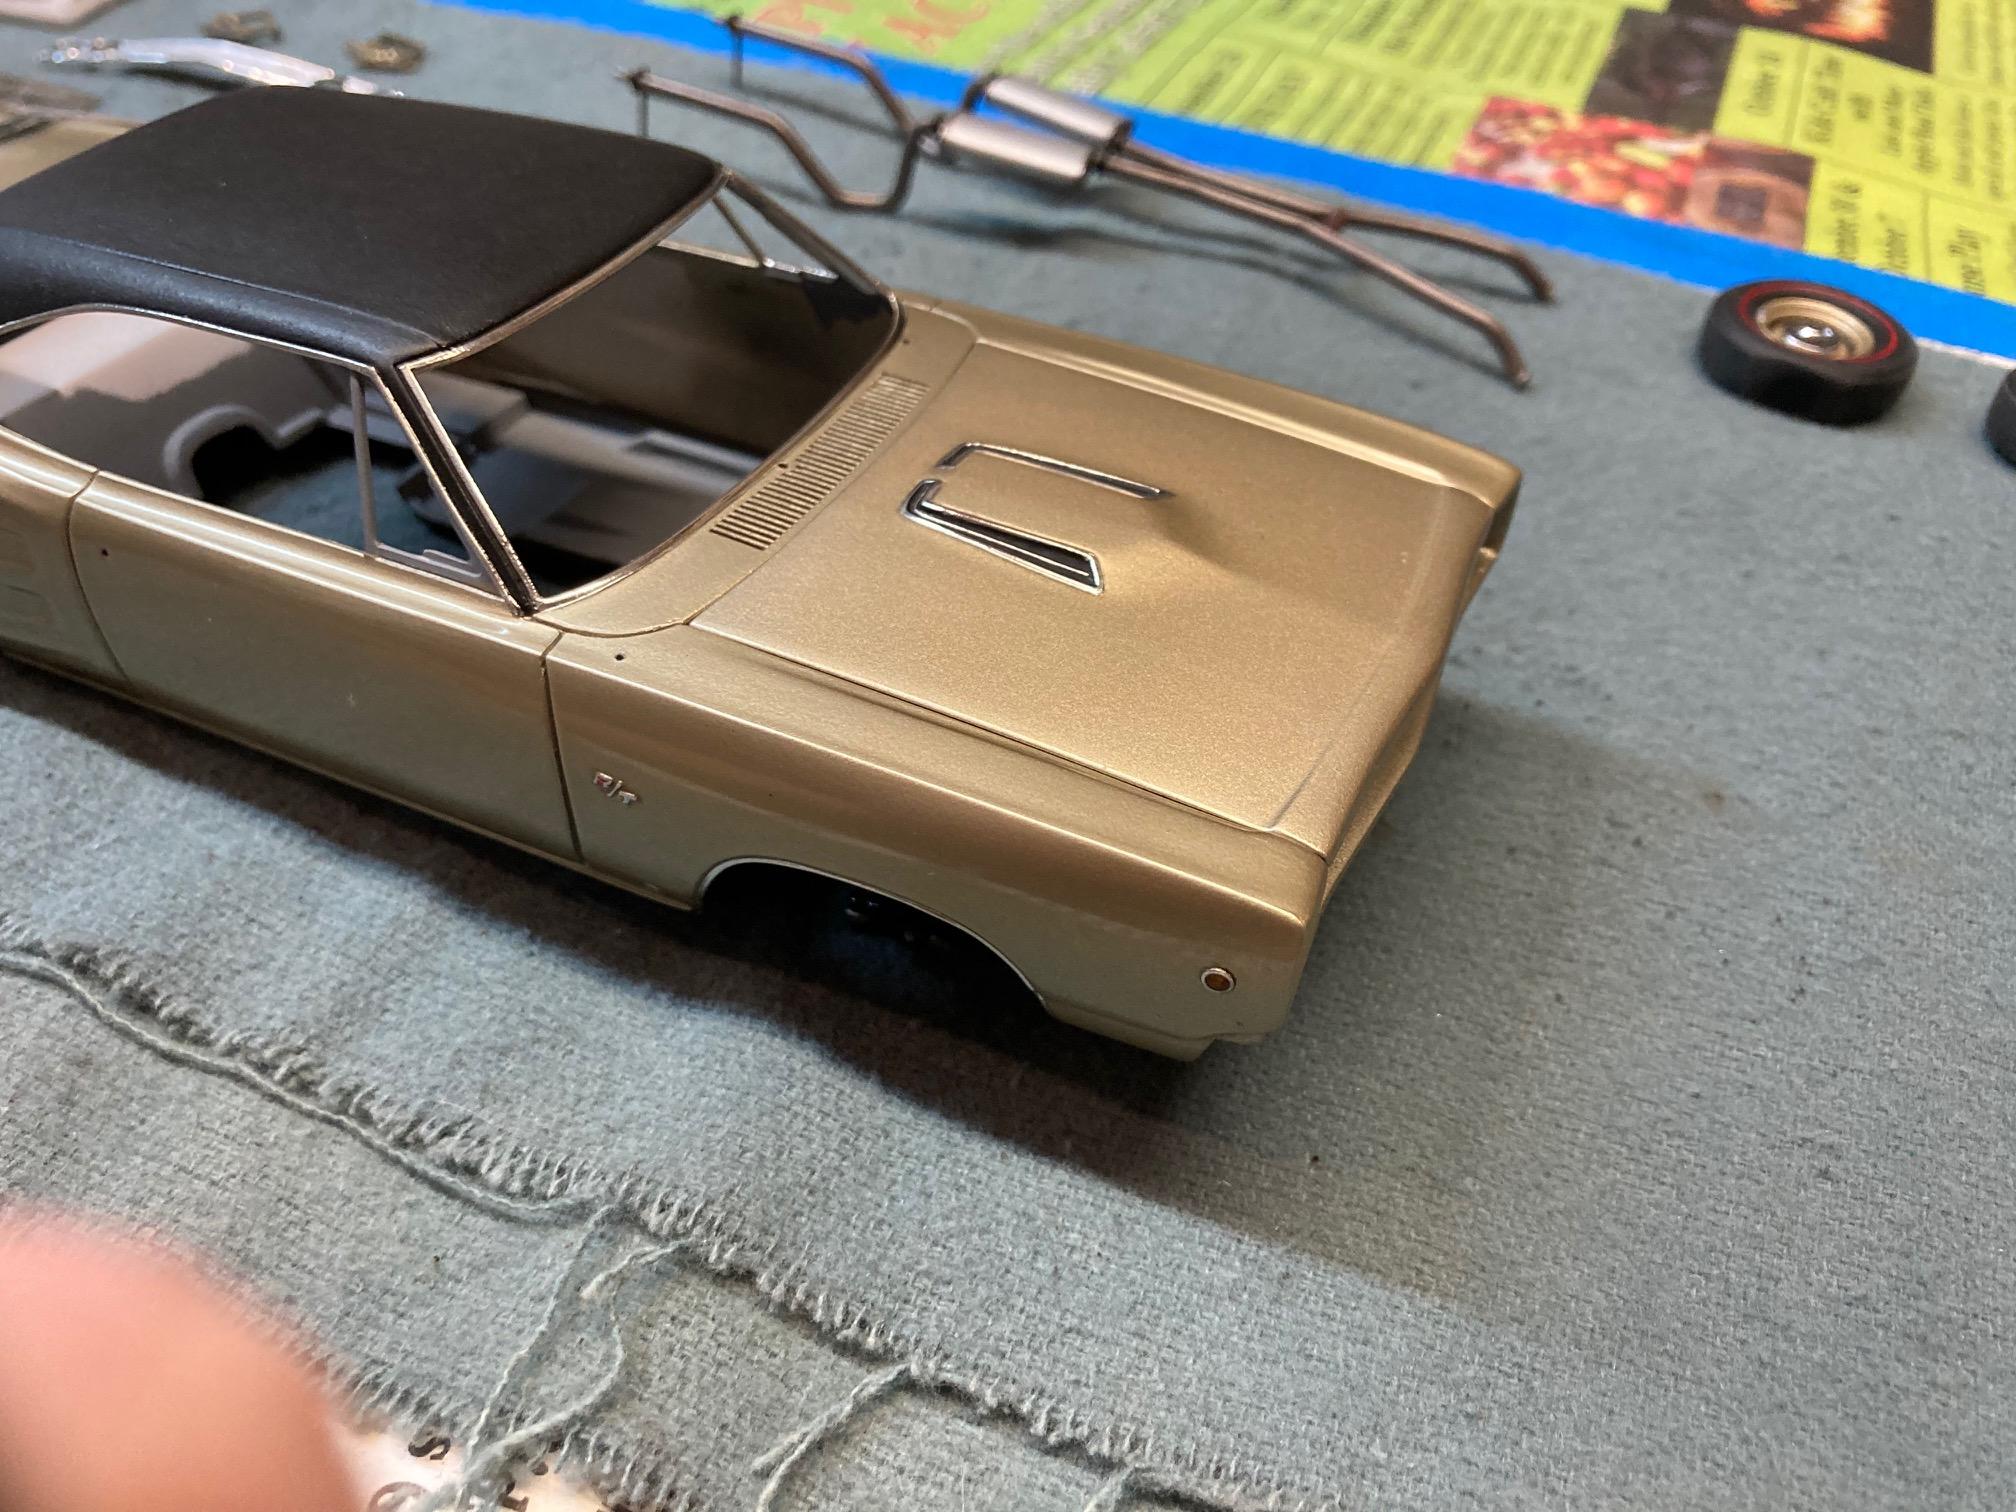
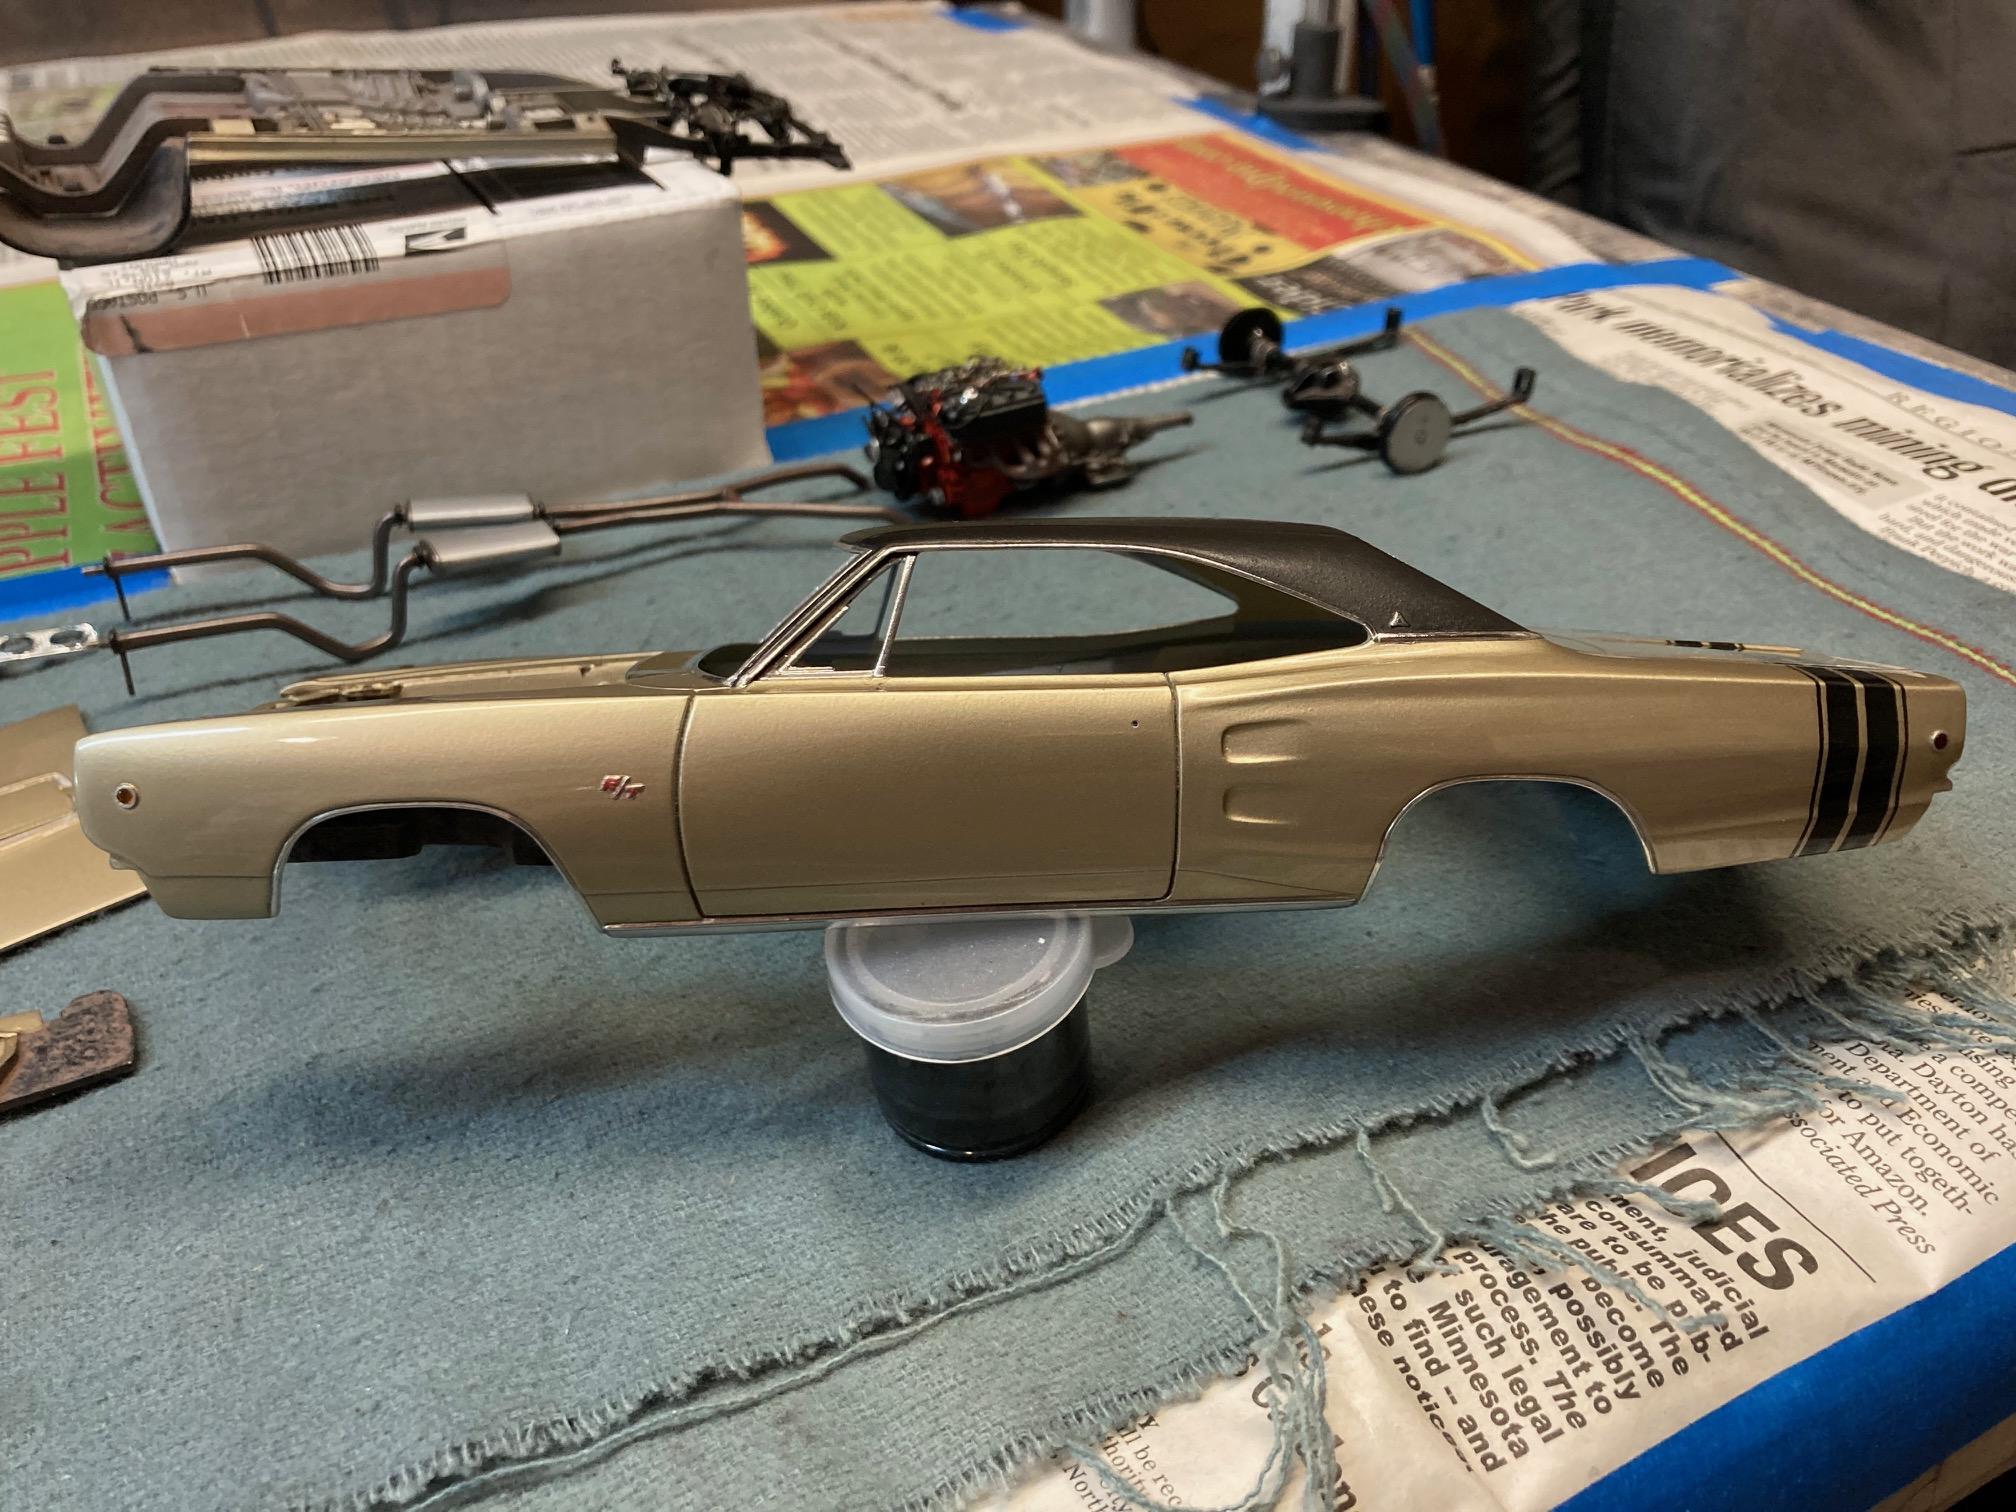
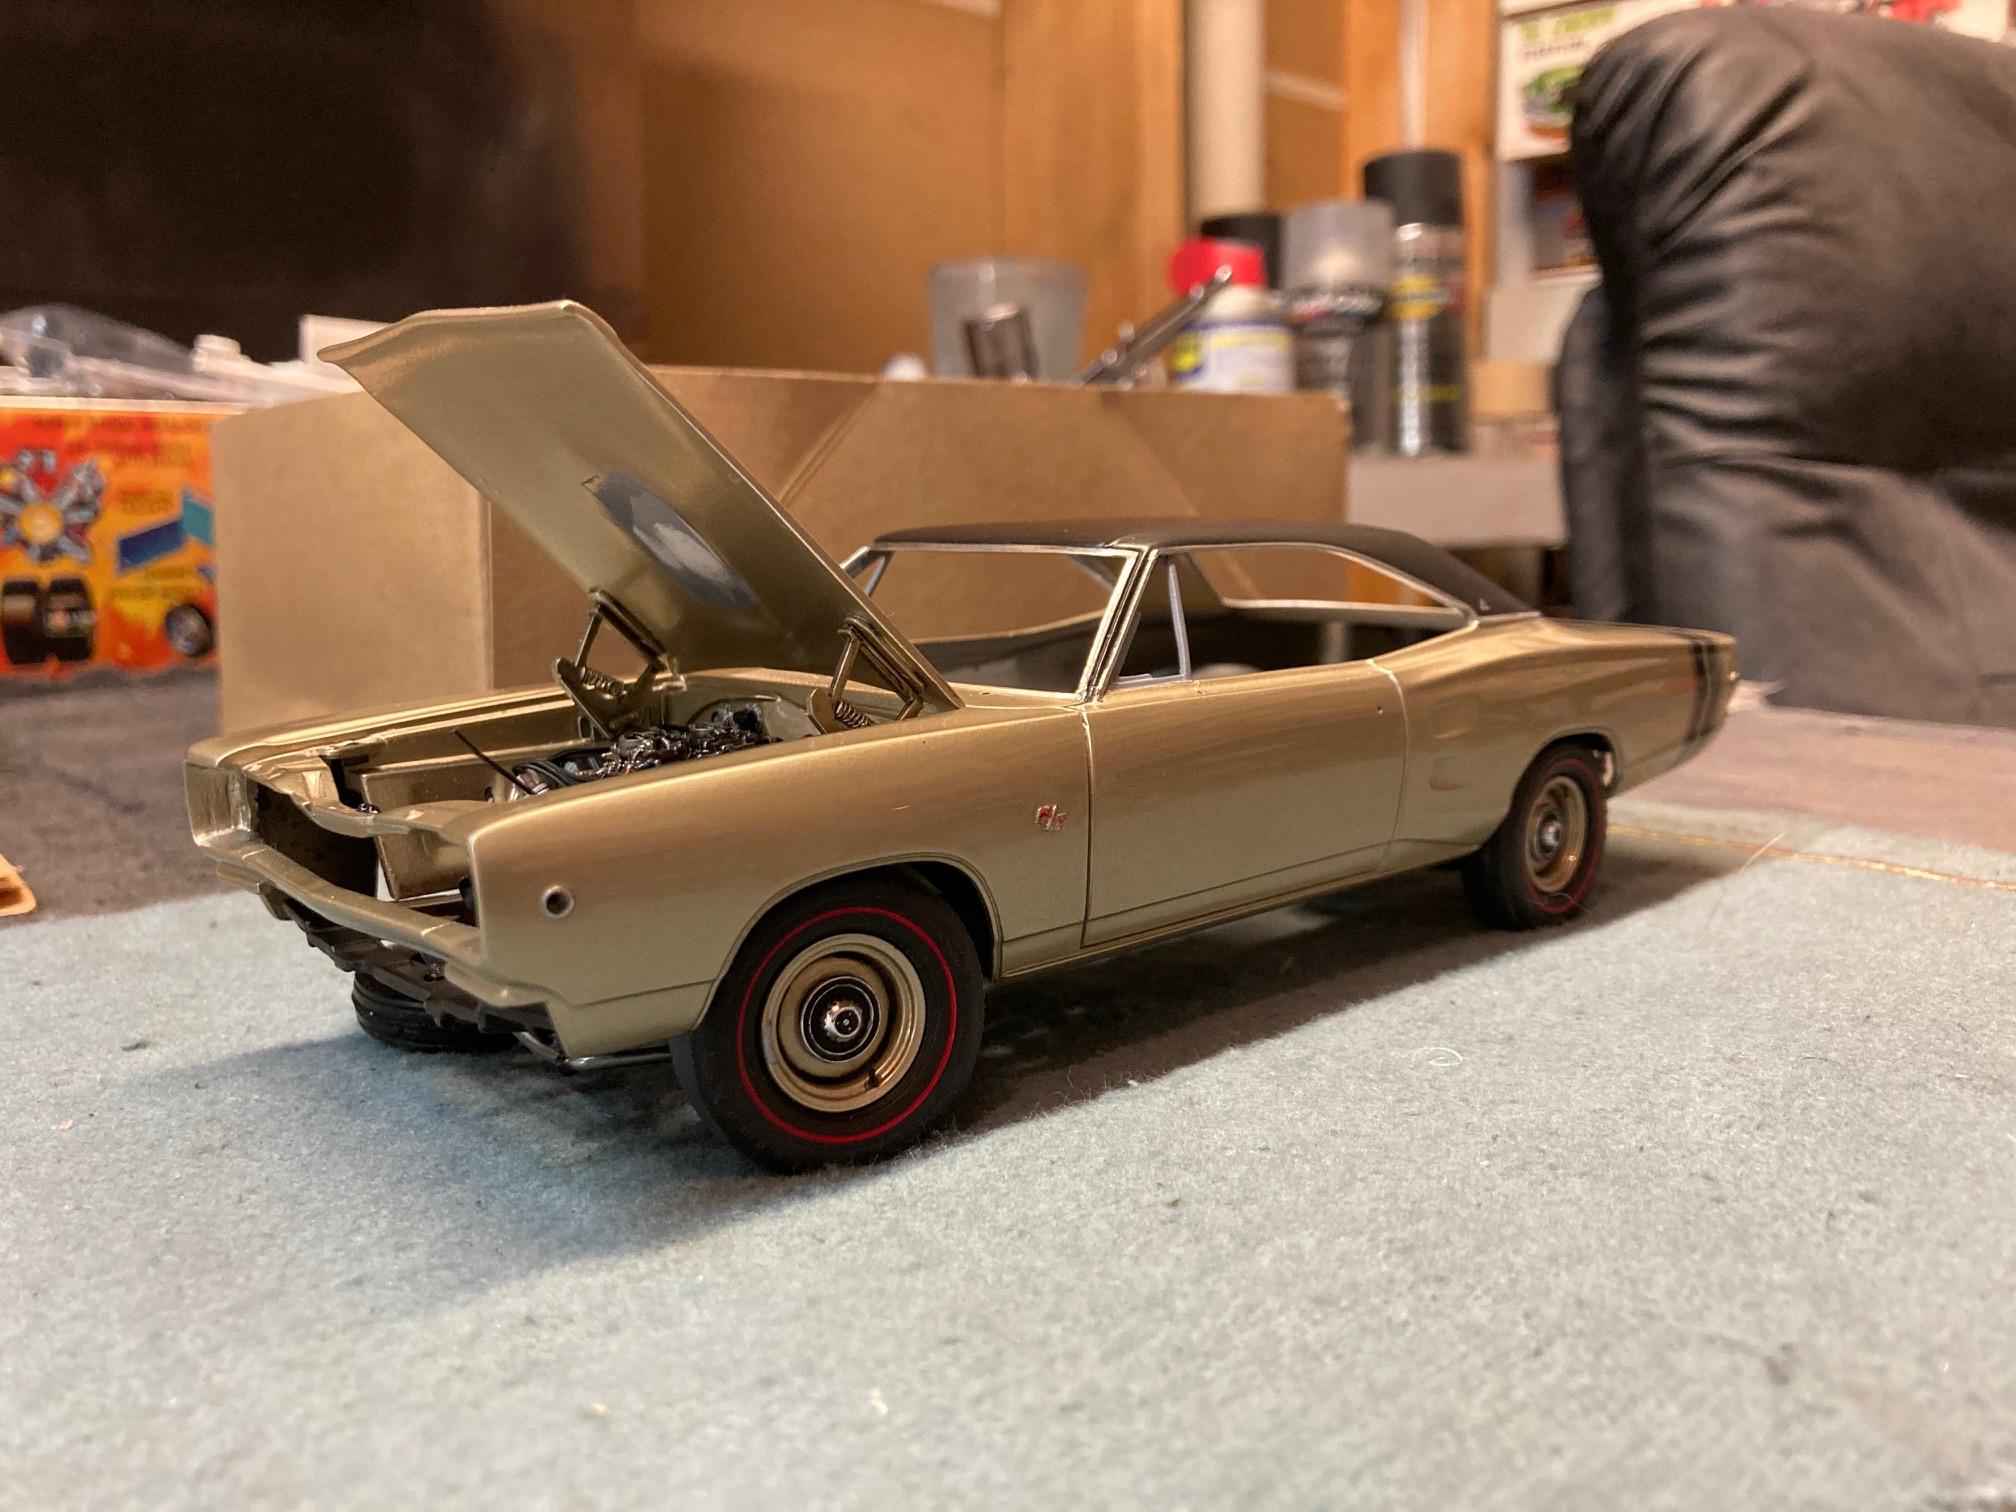
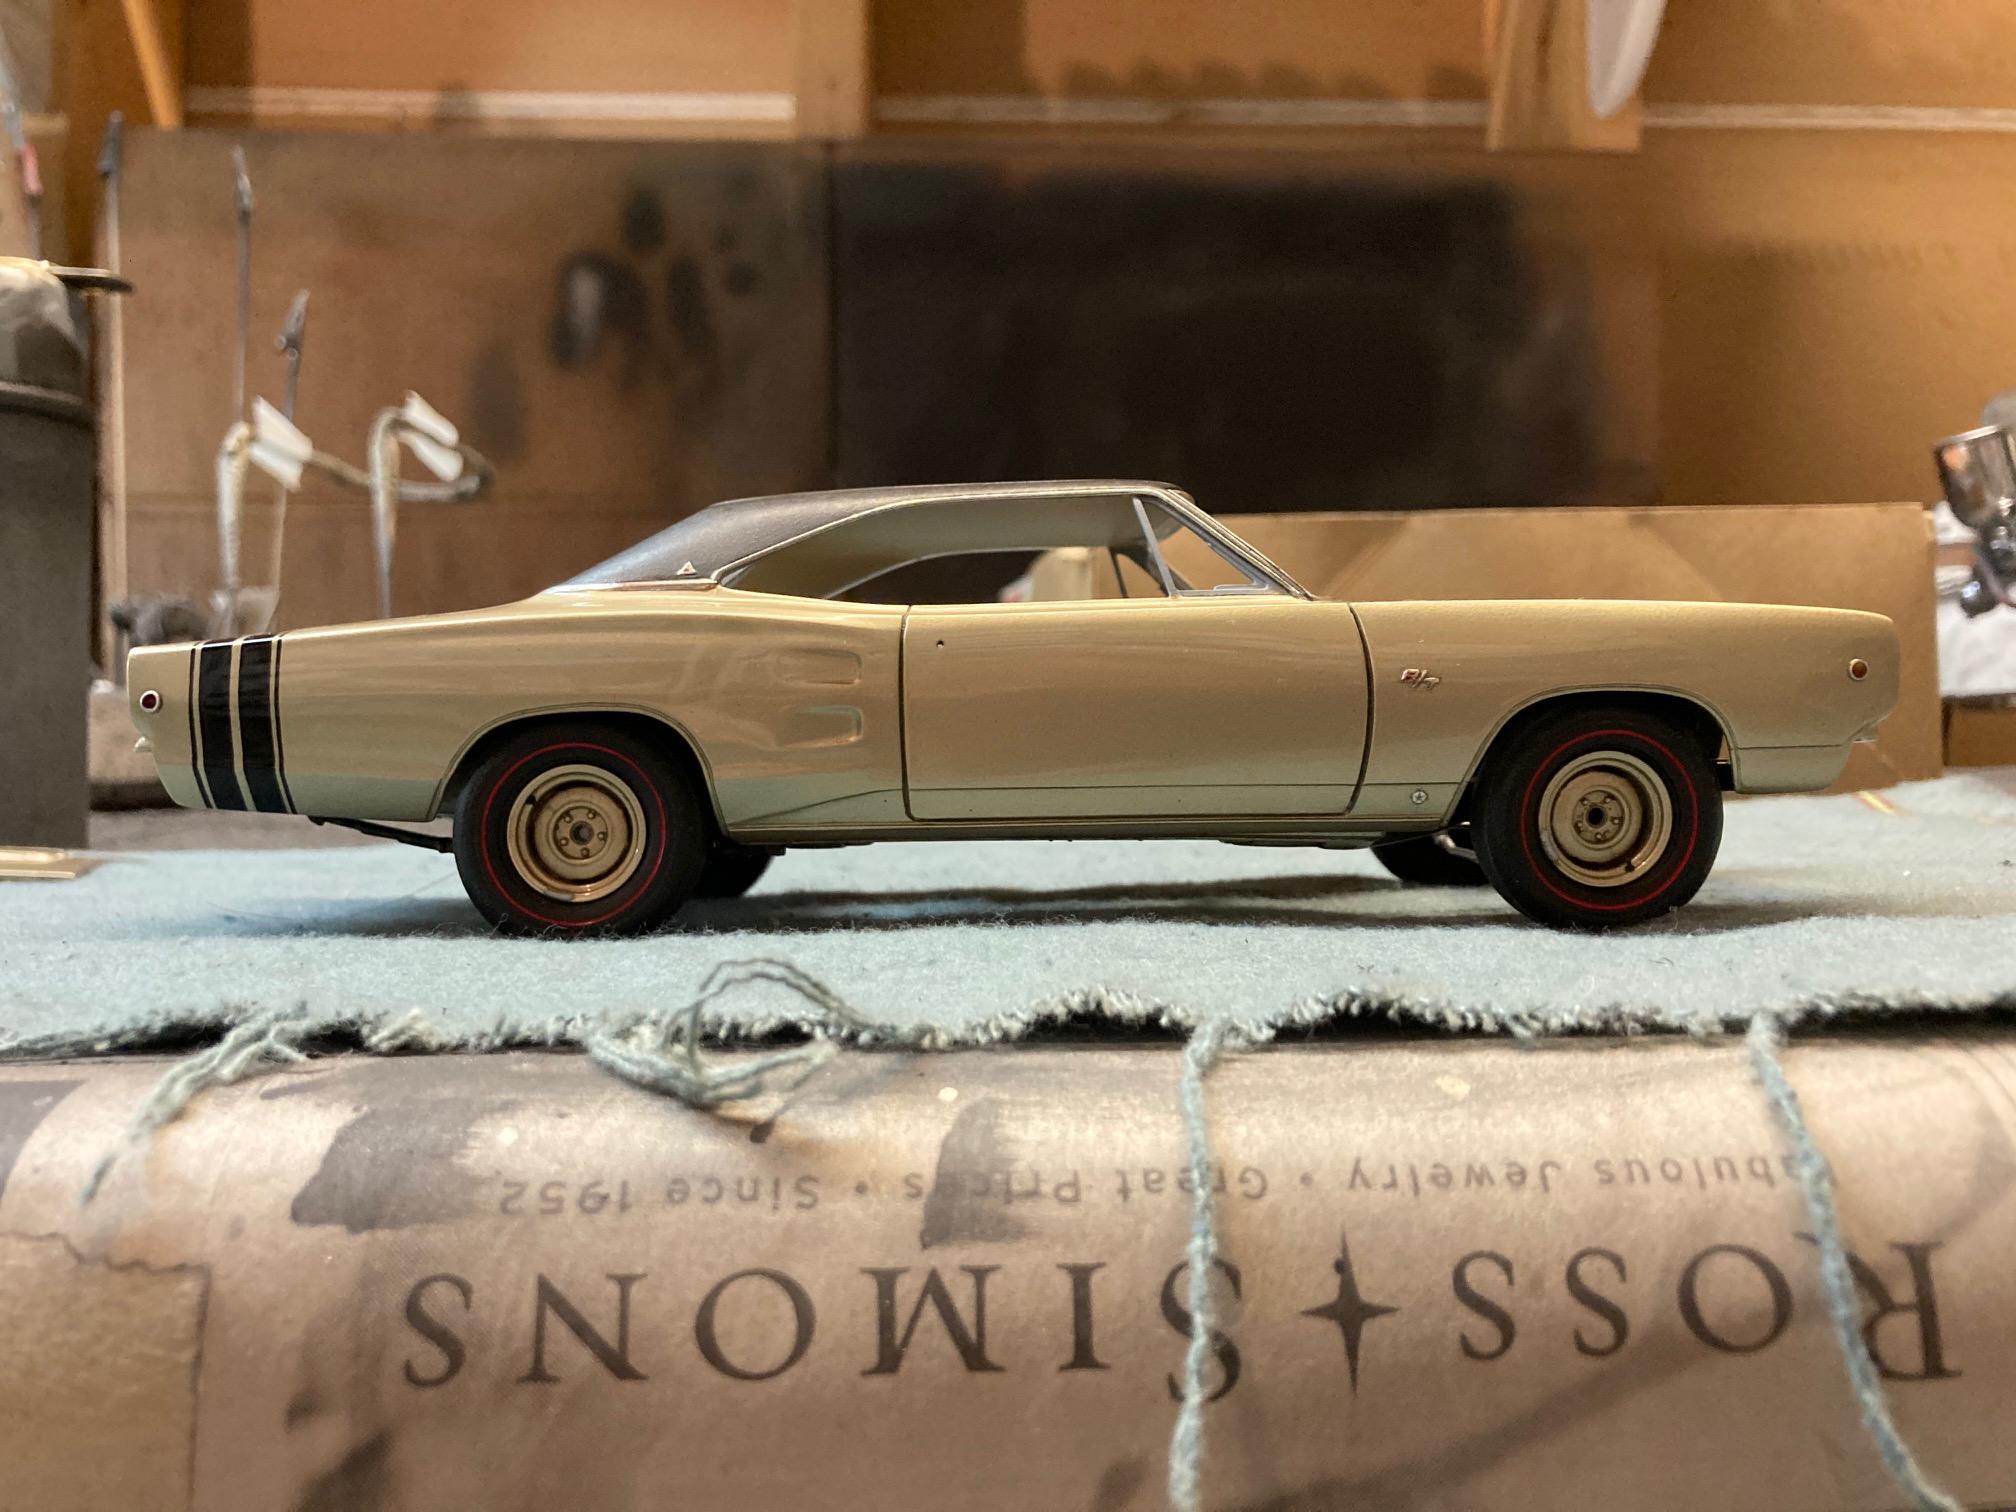
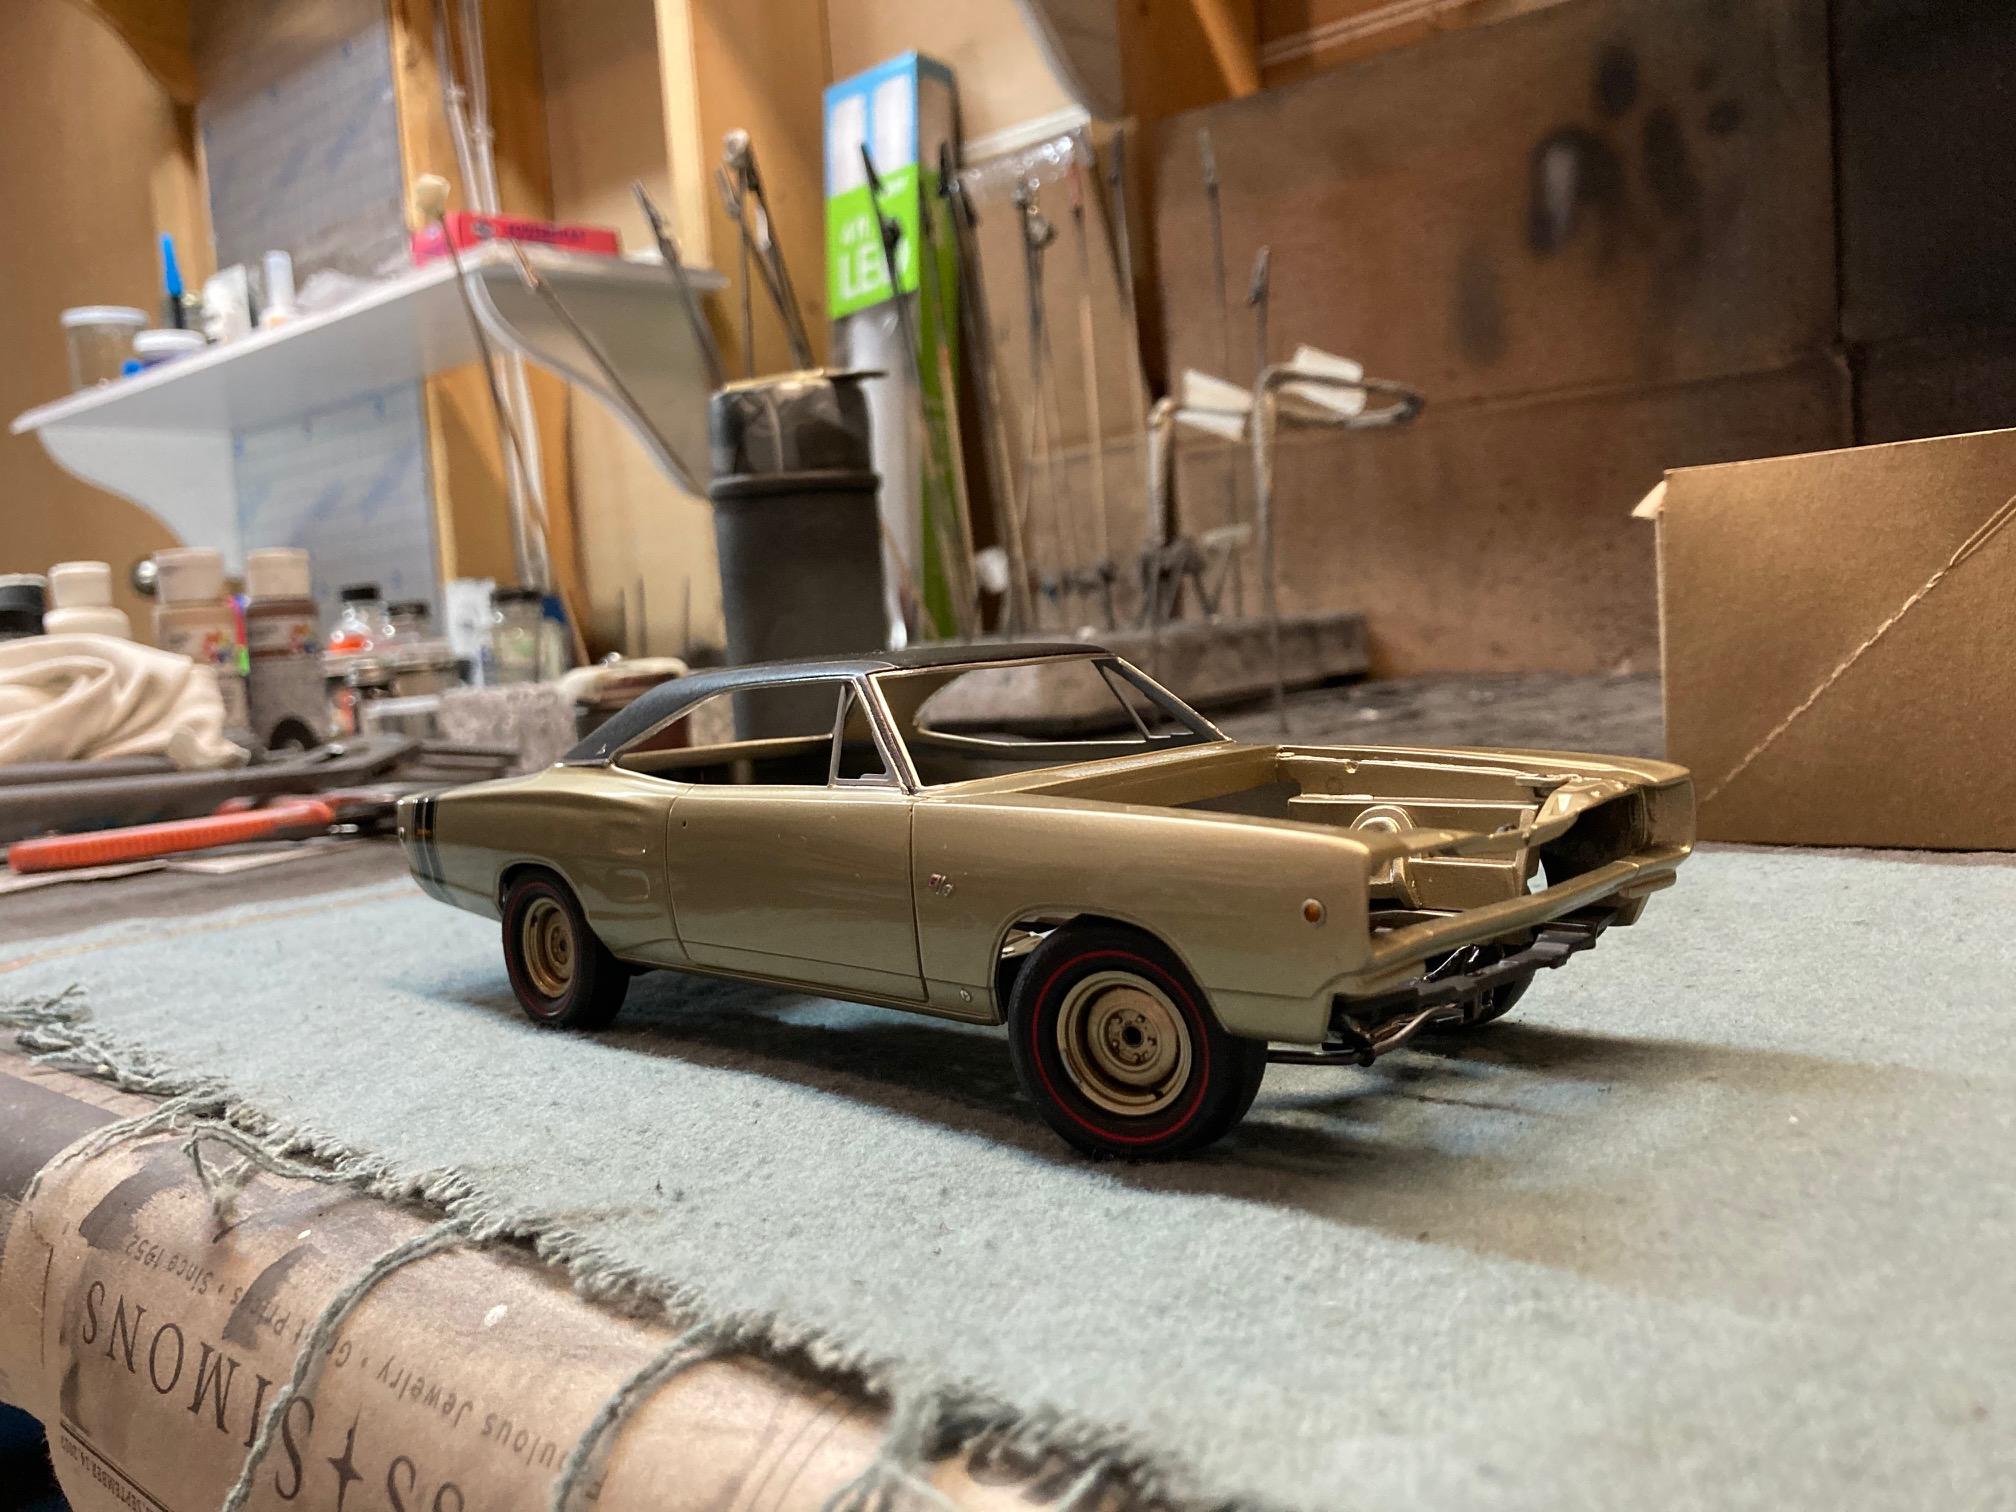
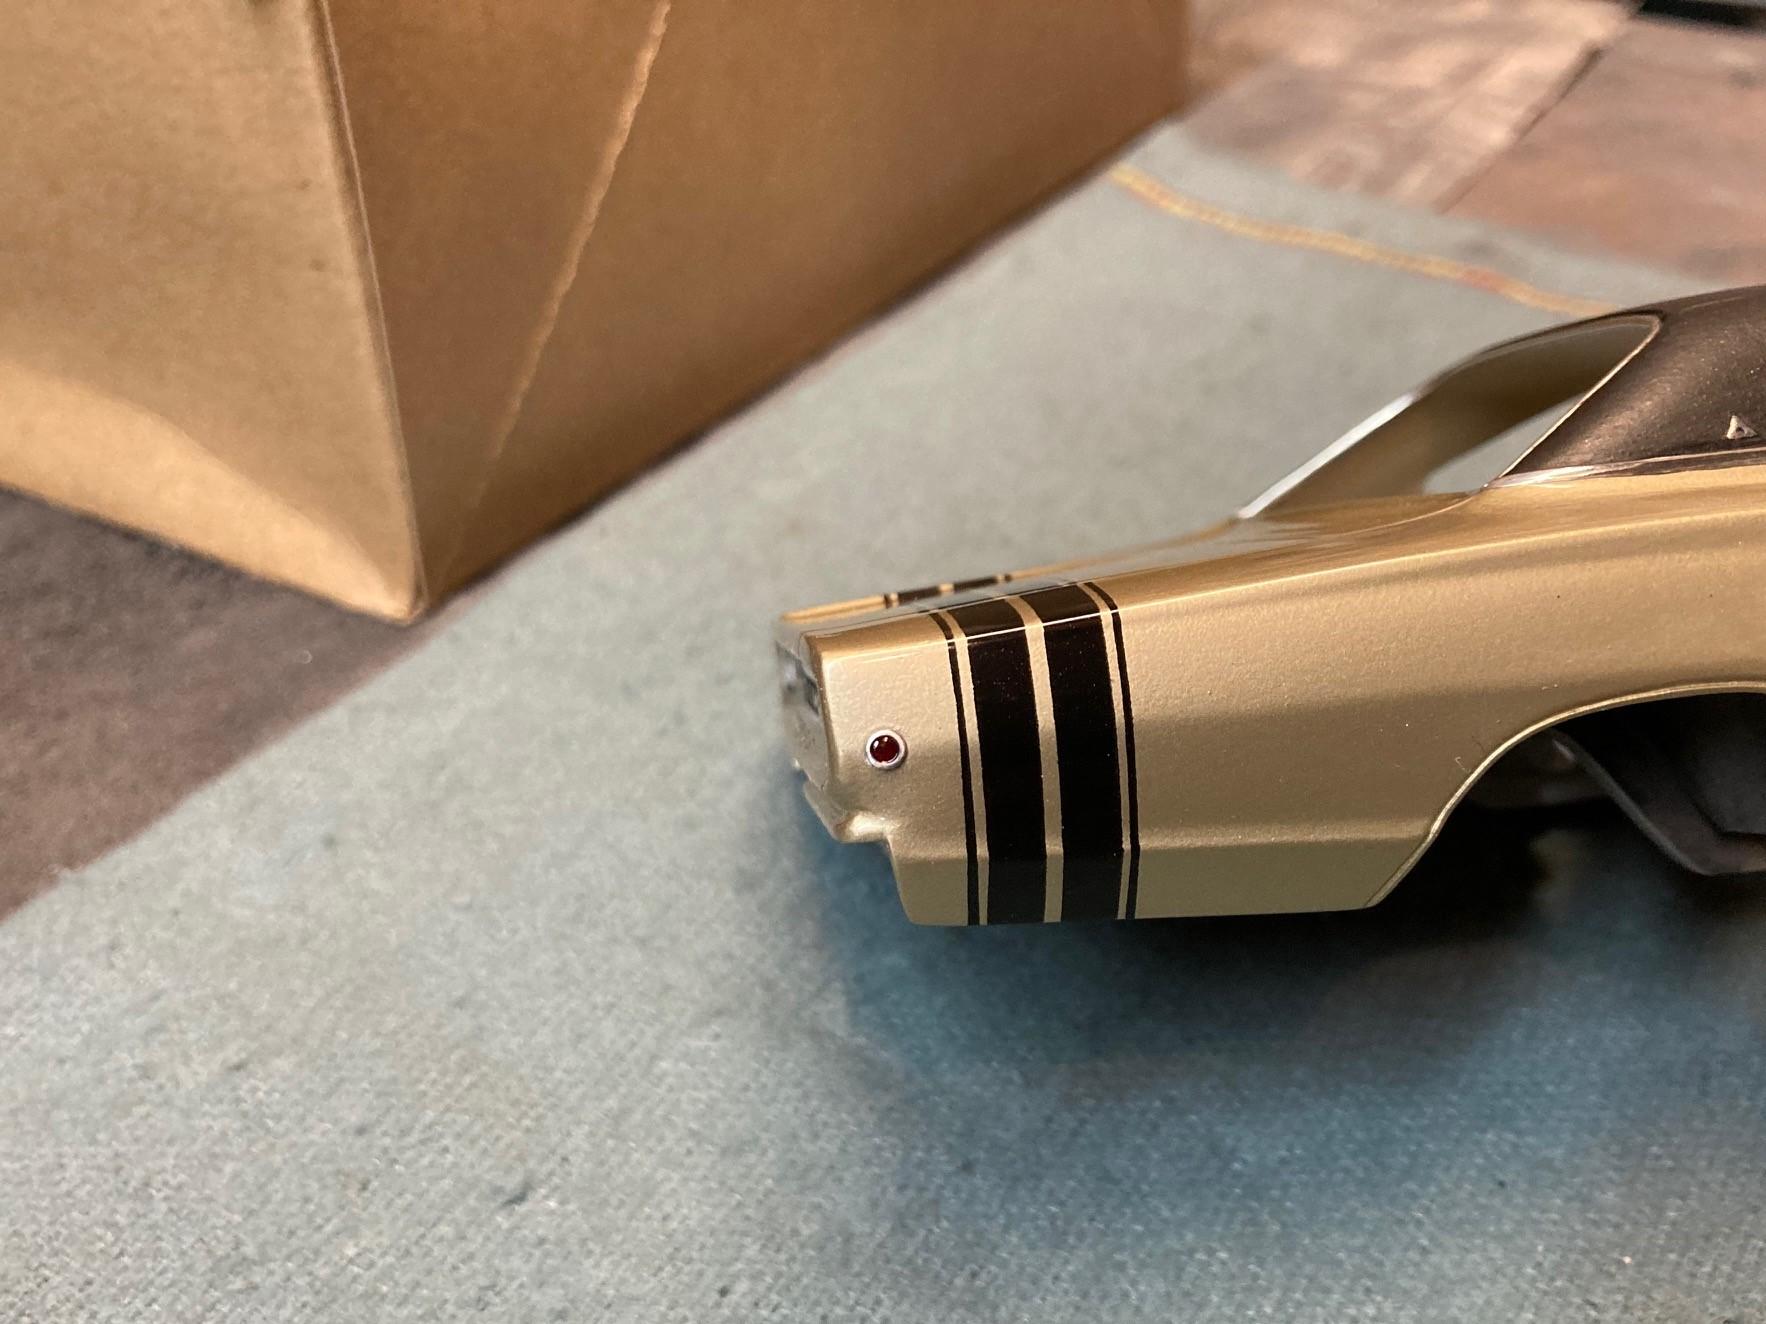
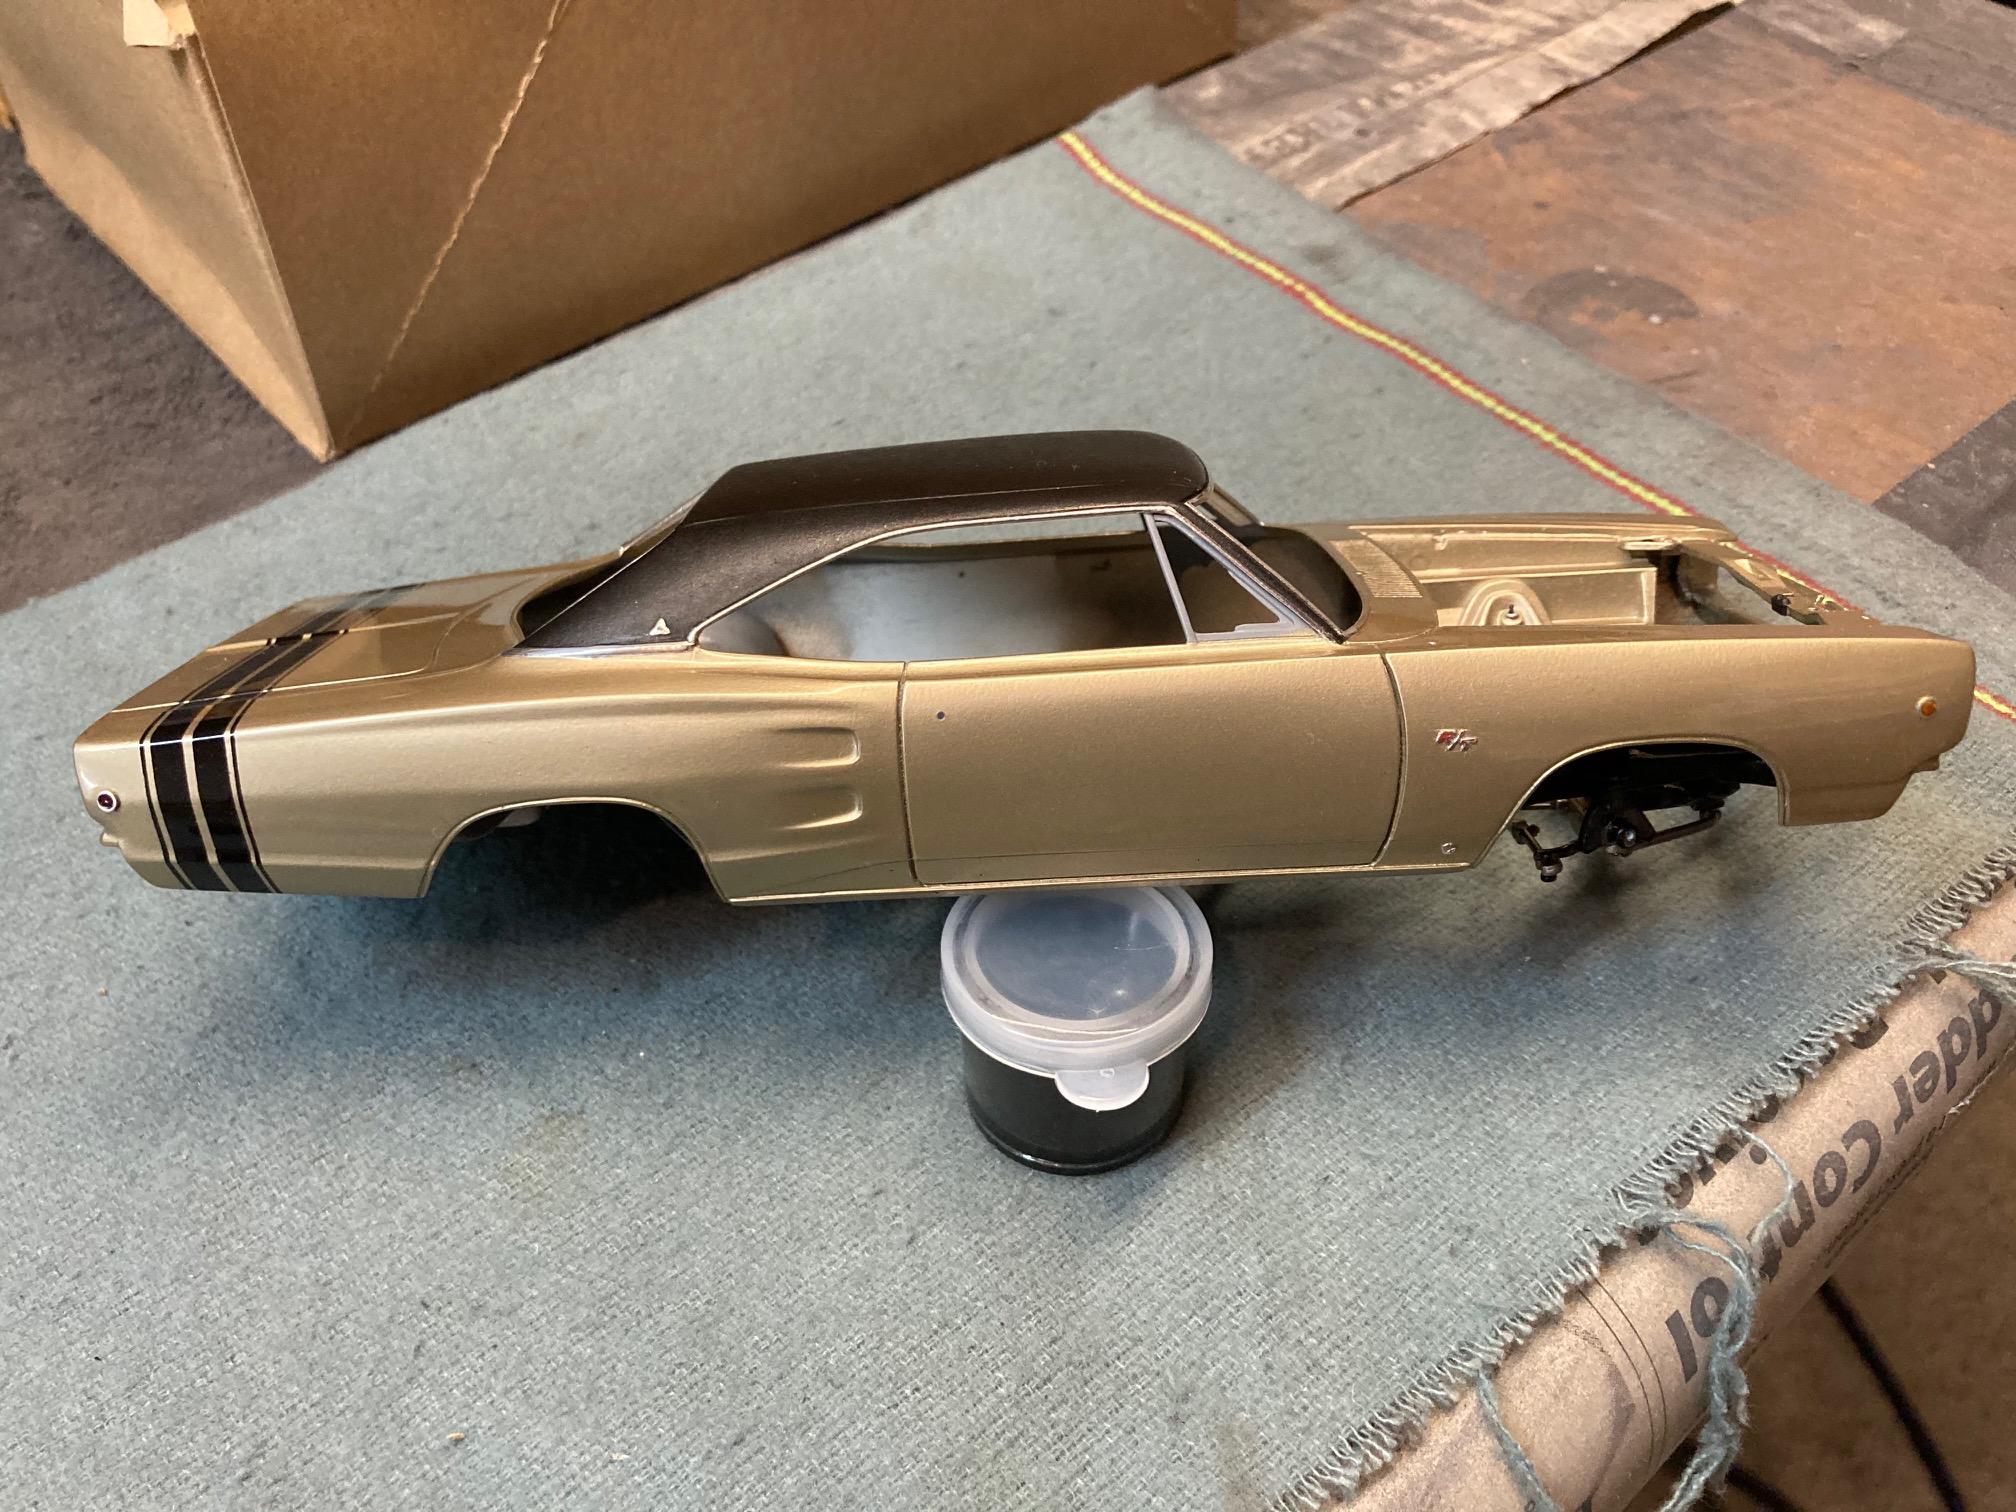
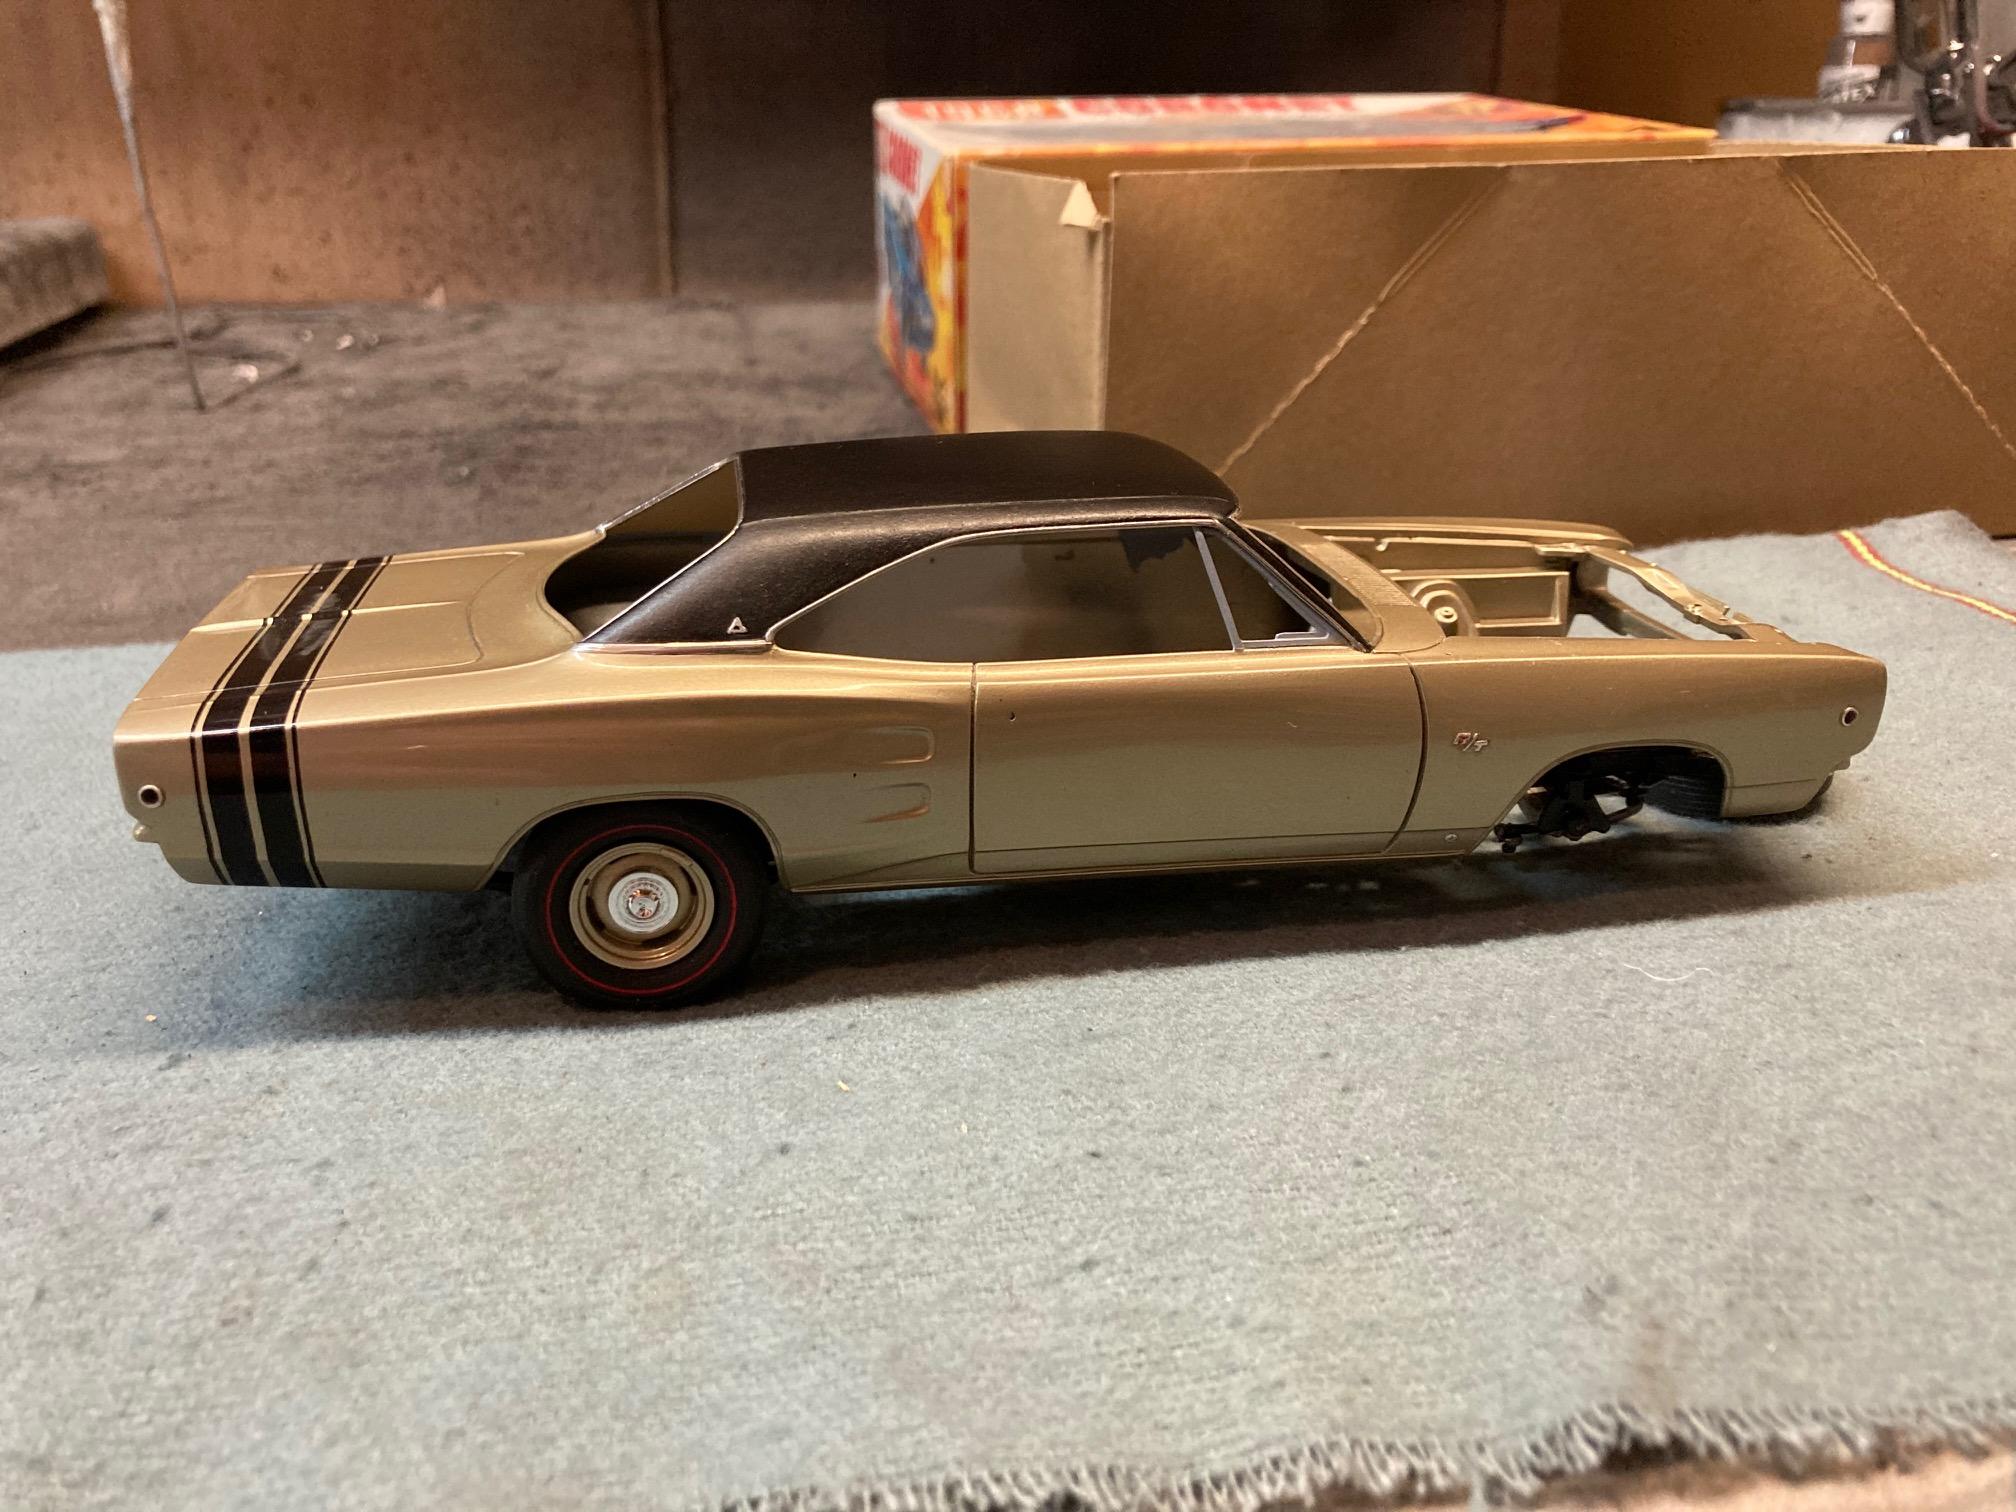
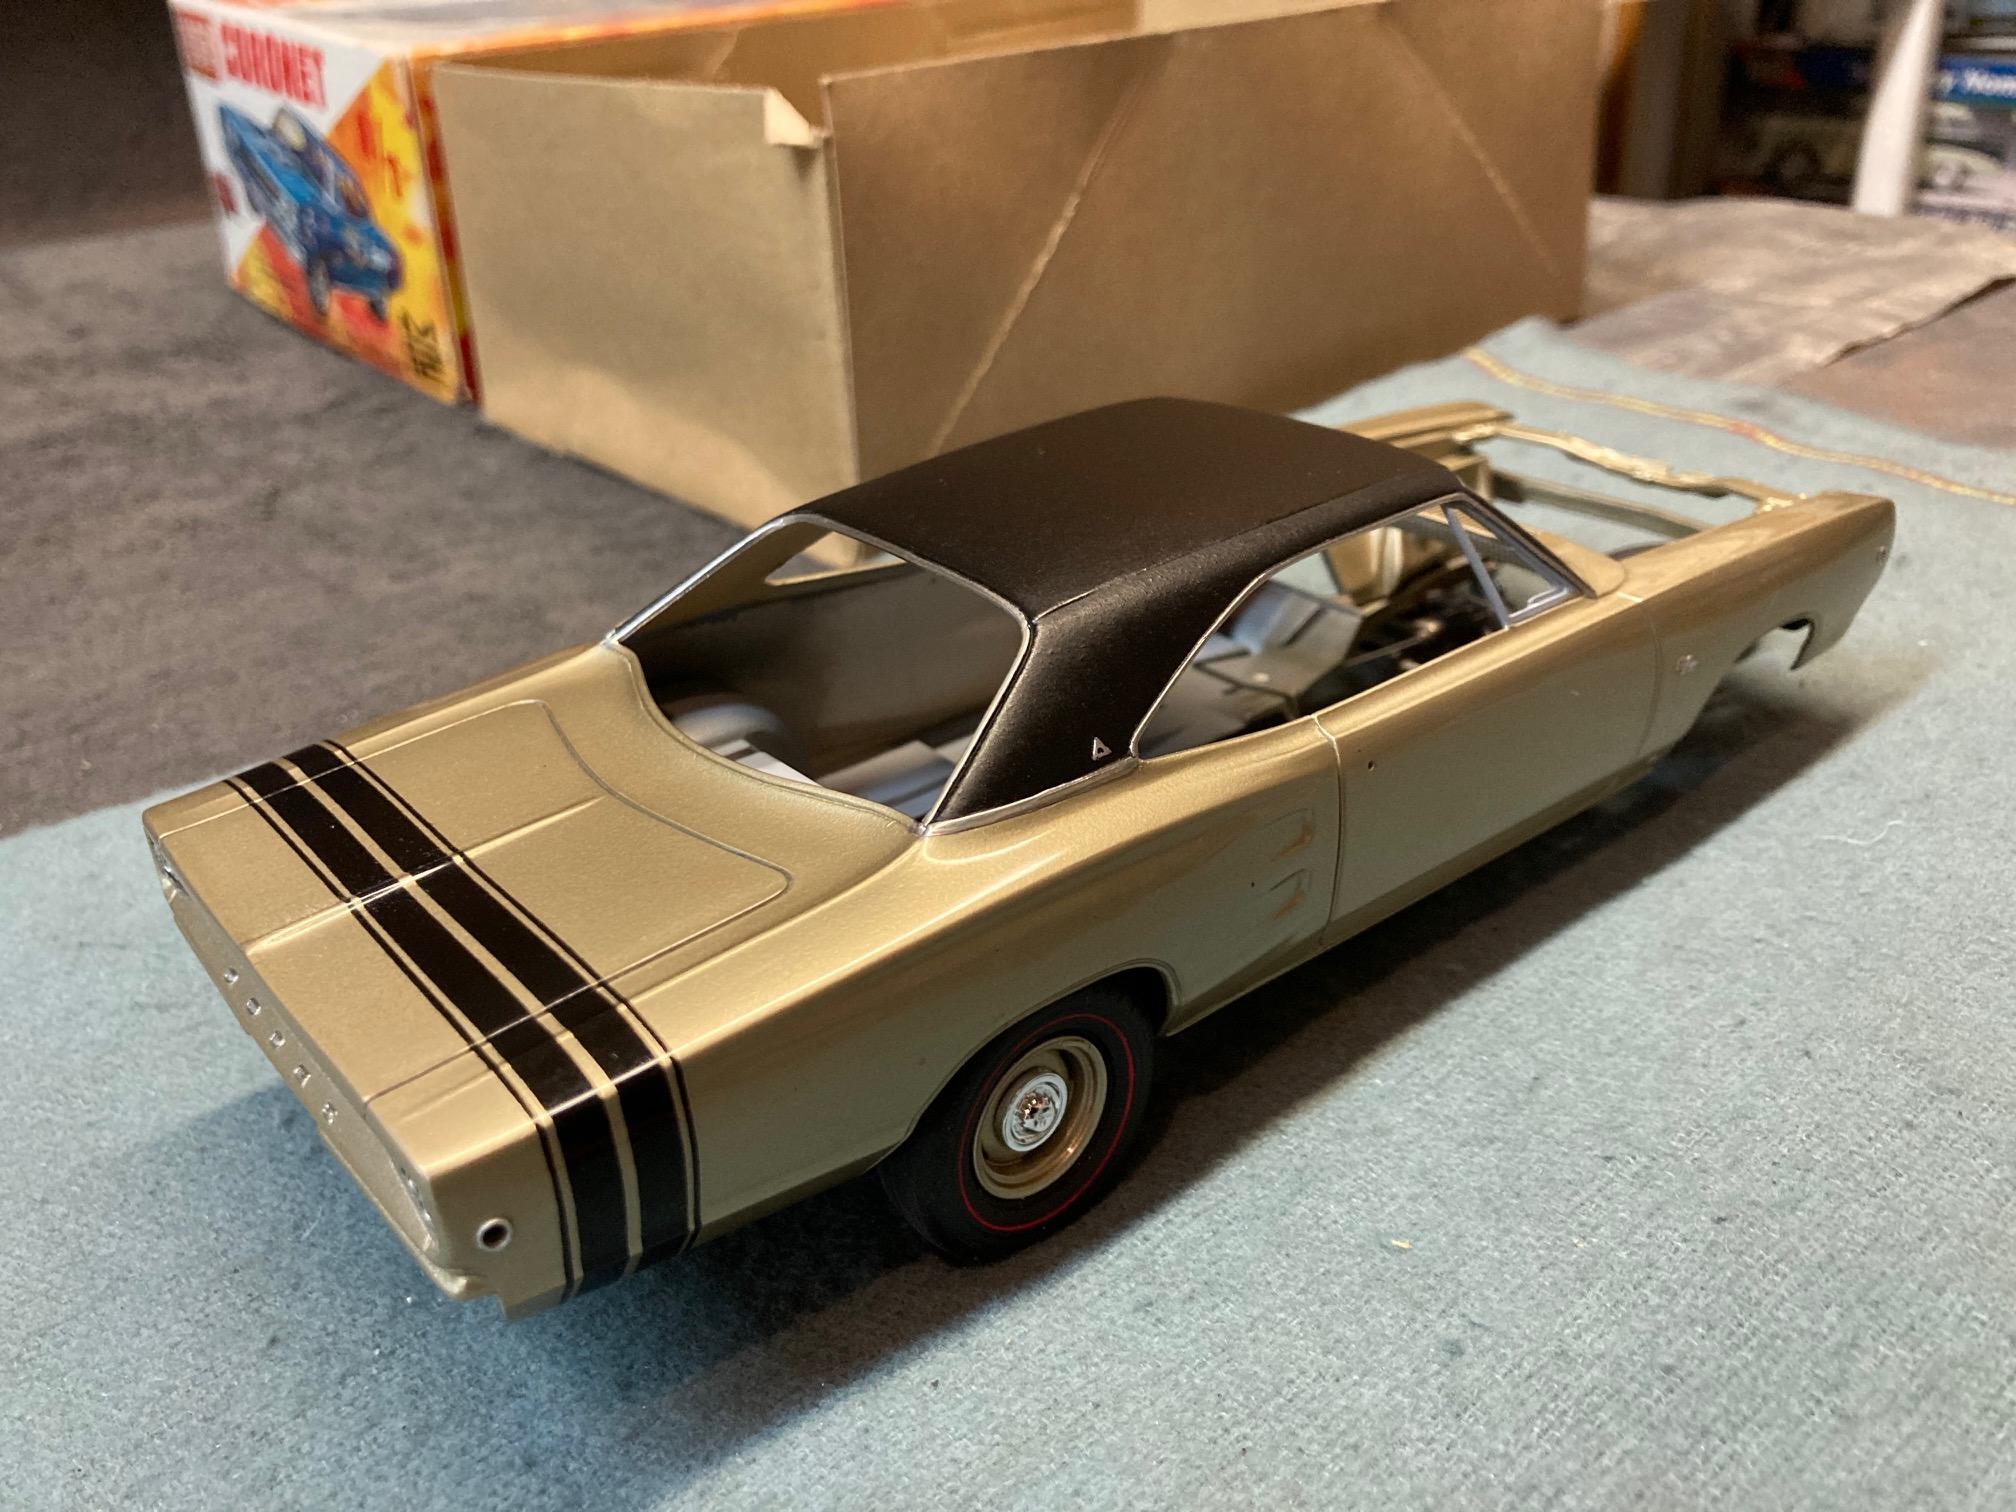
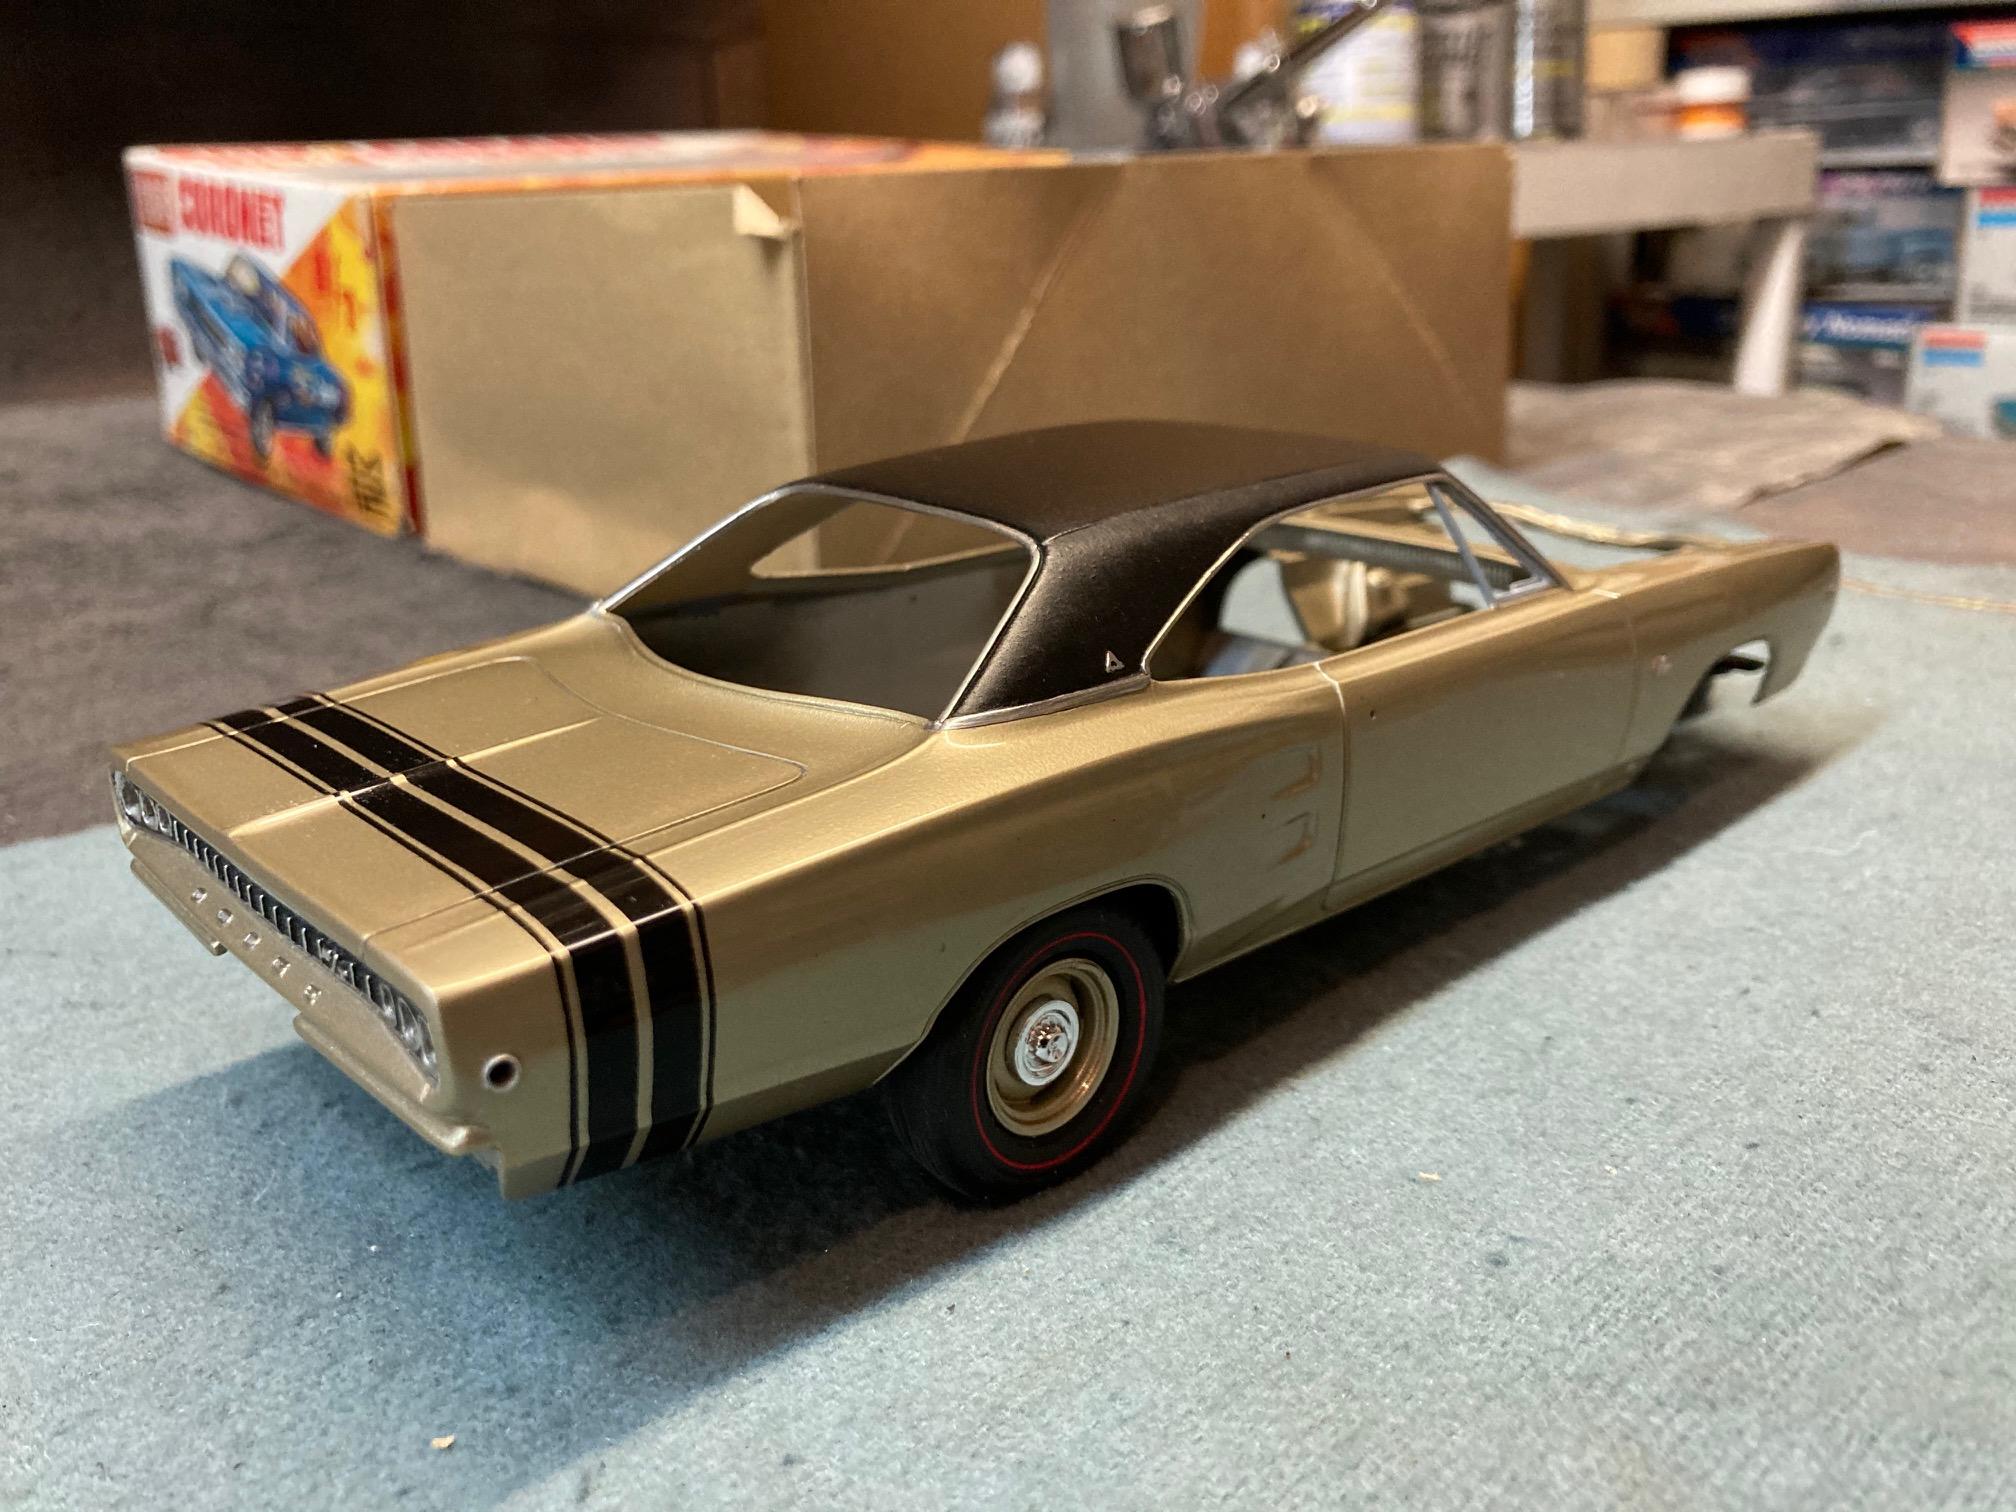
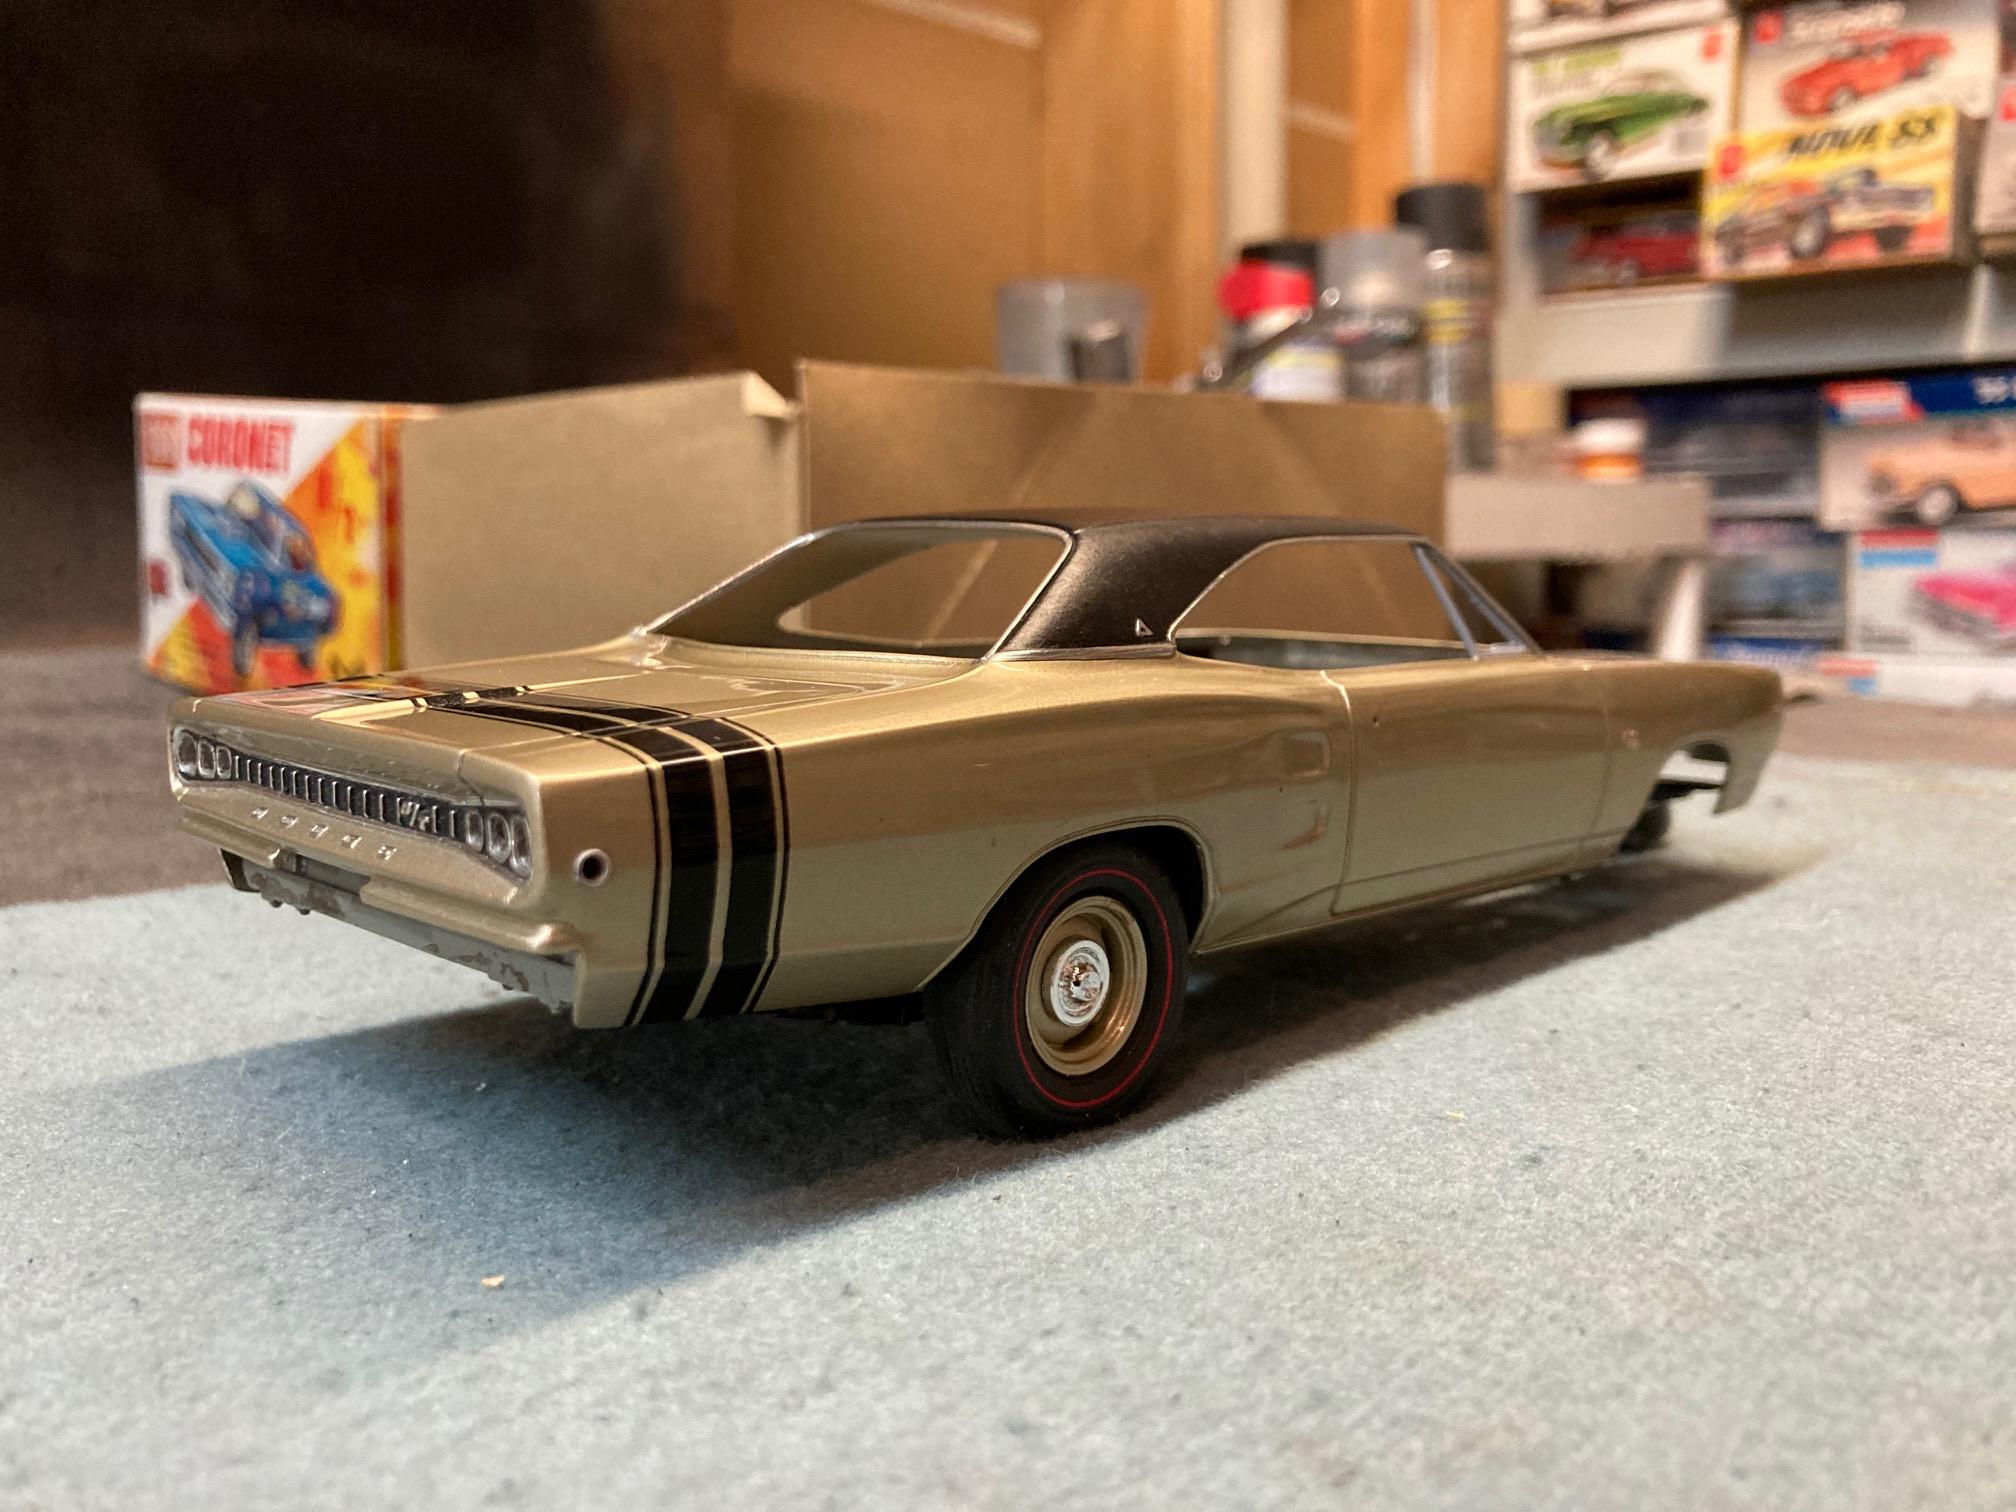
Got the trim on the "power bulge" foiled and painted. Steve
-
Thanks! I can't wait until this one is done! It's been far too long in the making! But, then again, it won't matter much. I suppose I'll spend as much time on the next one too! Steve
-
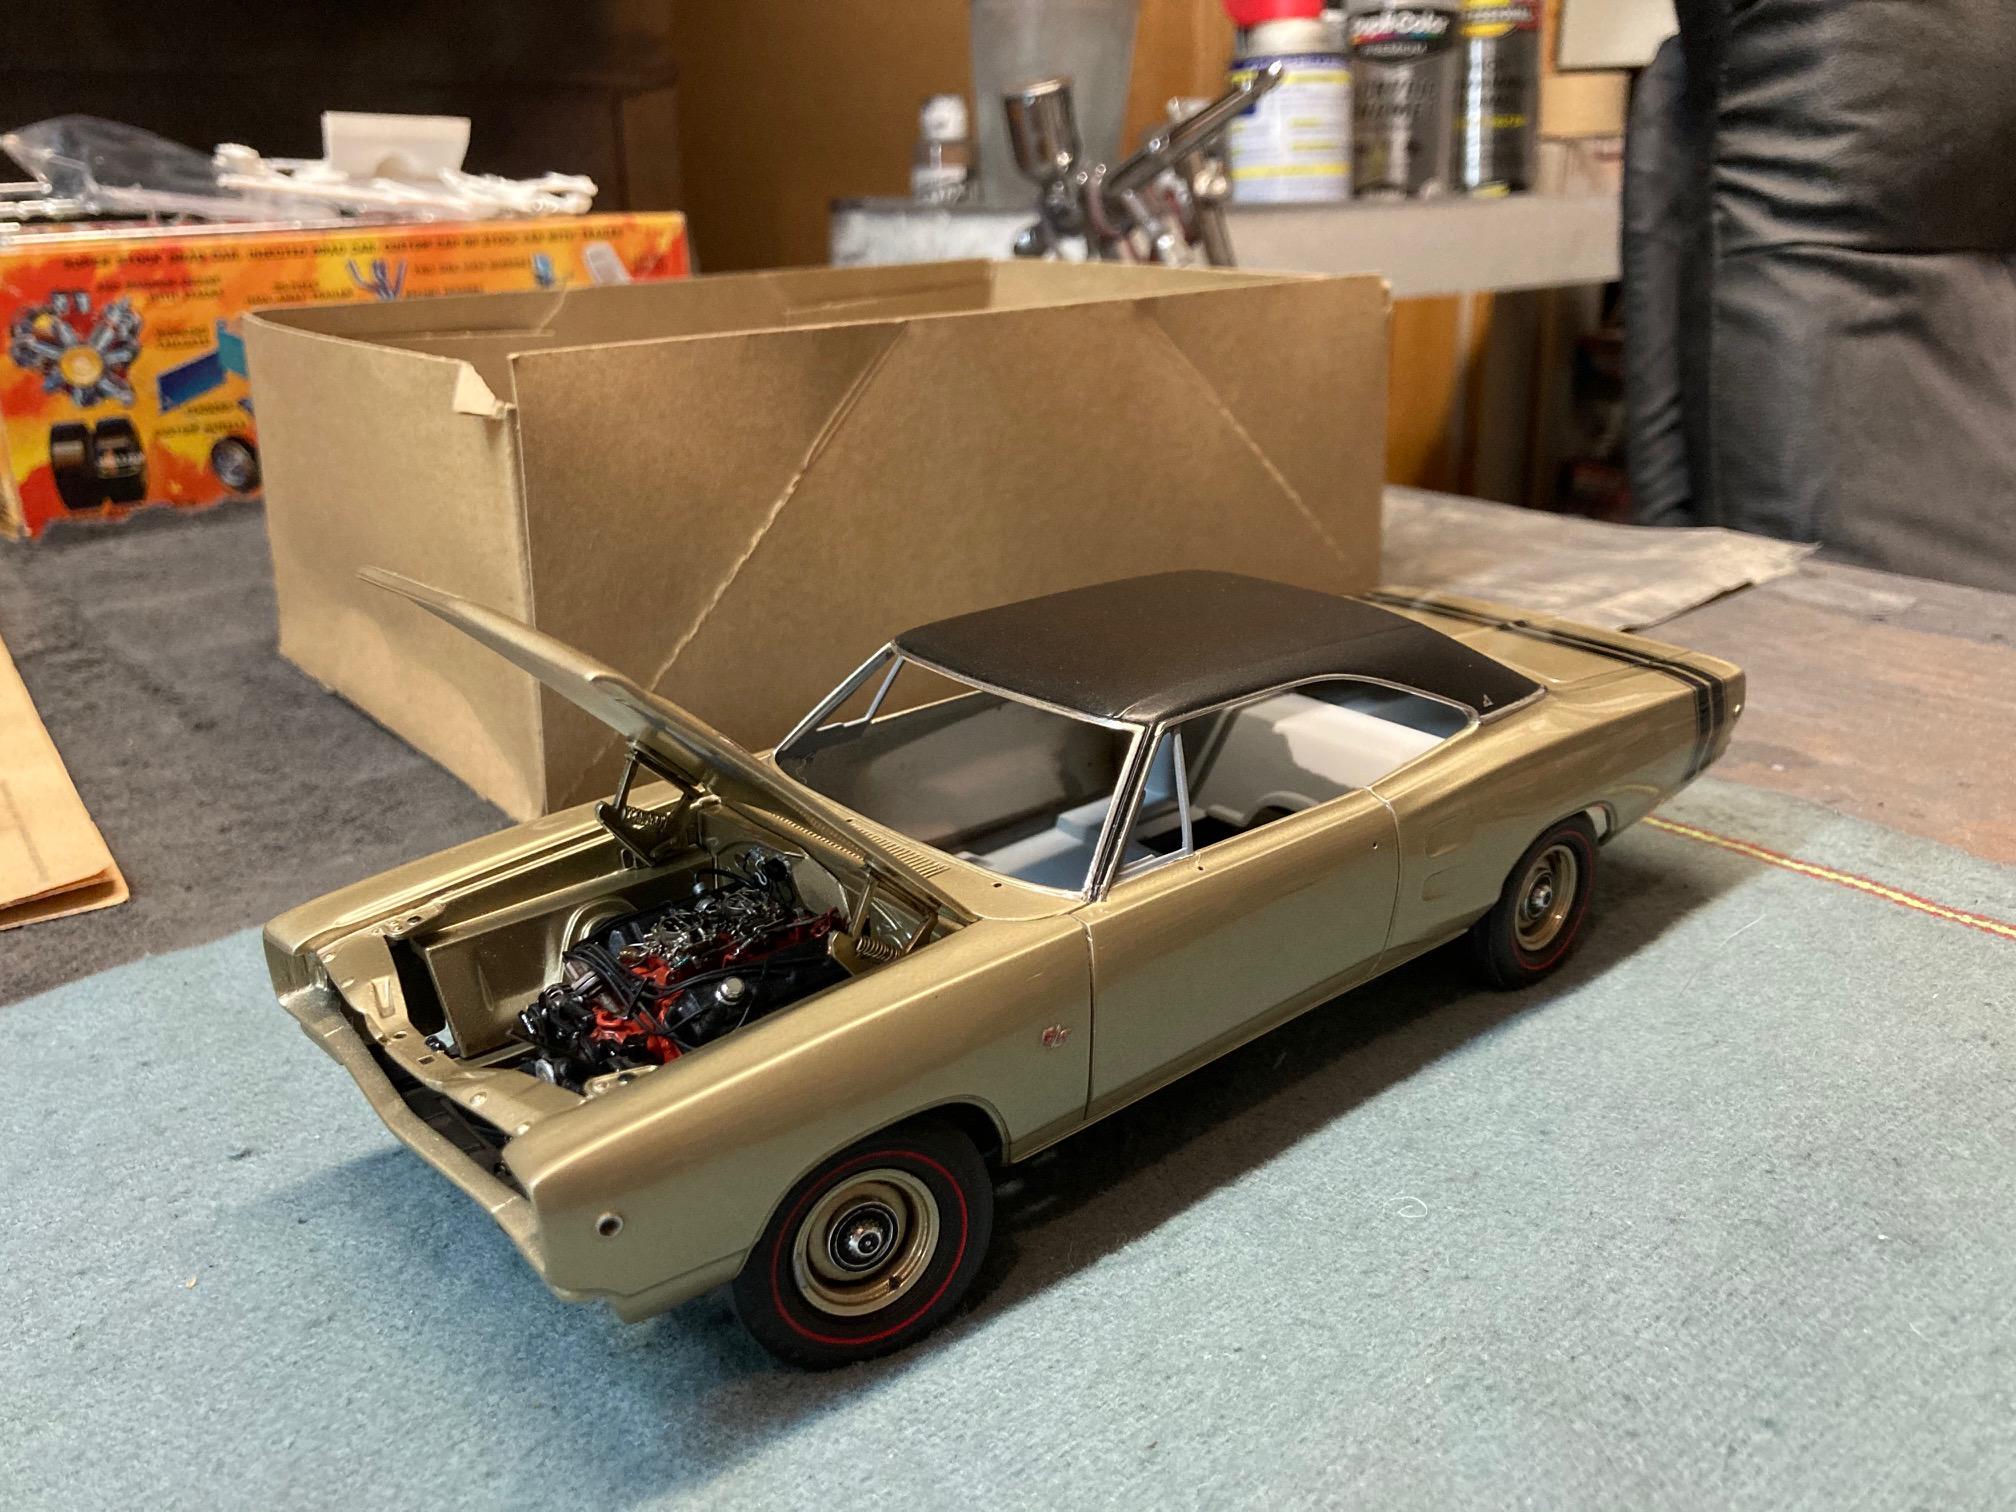
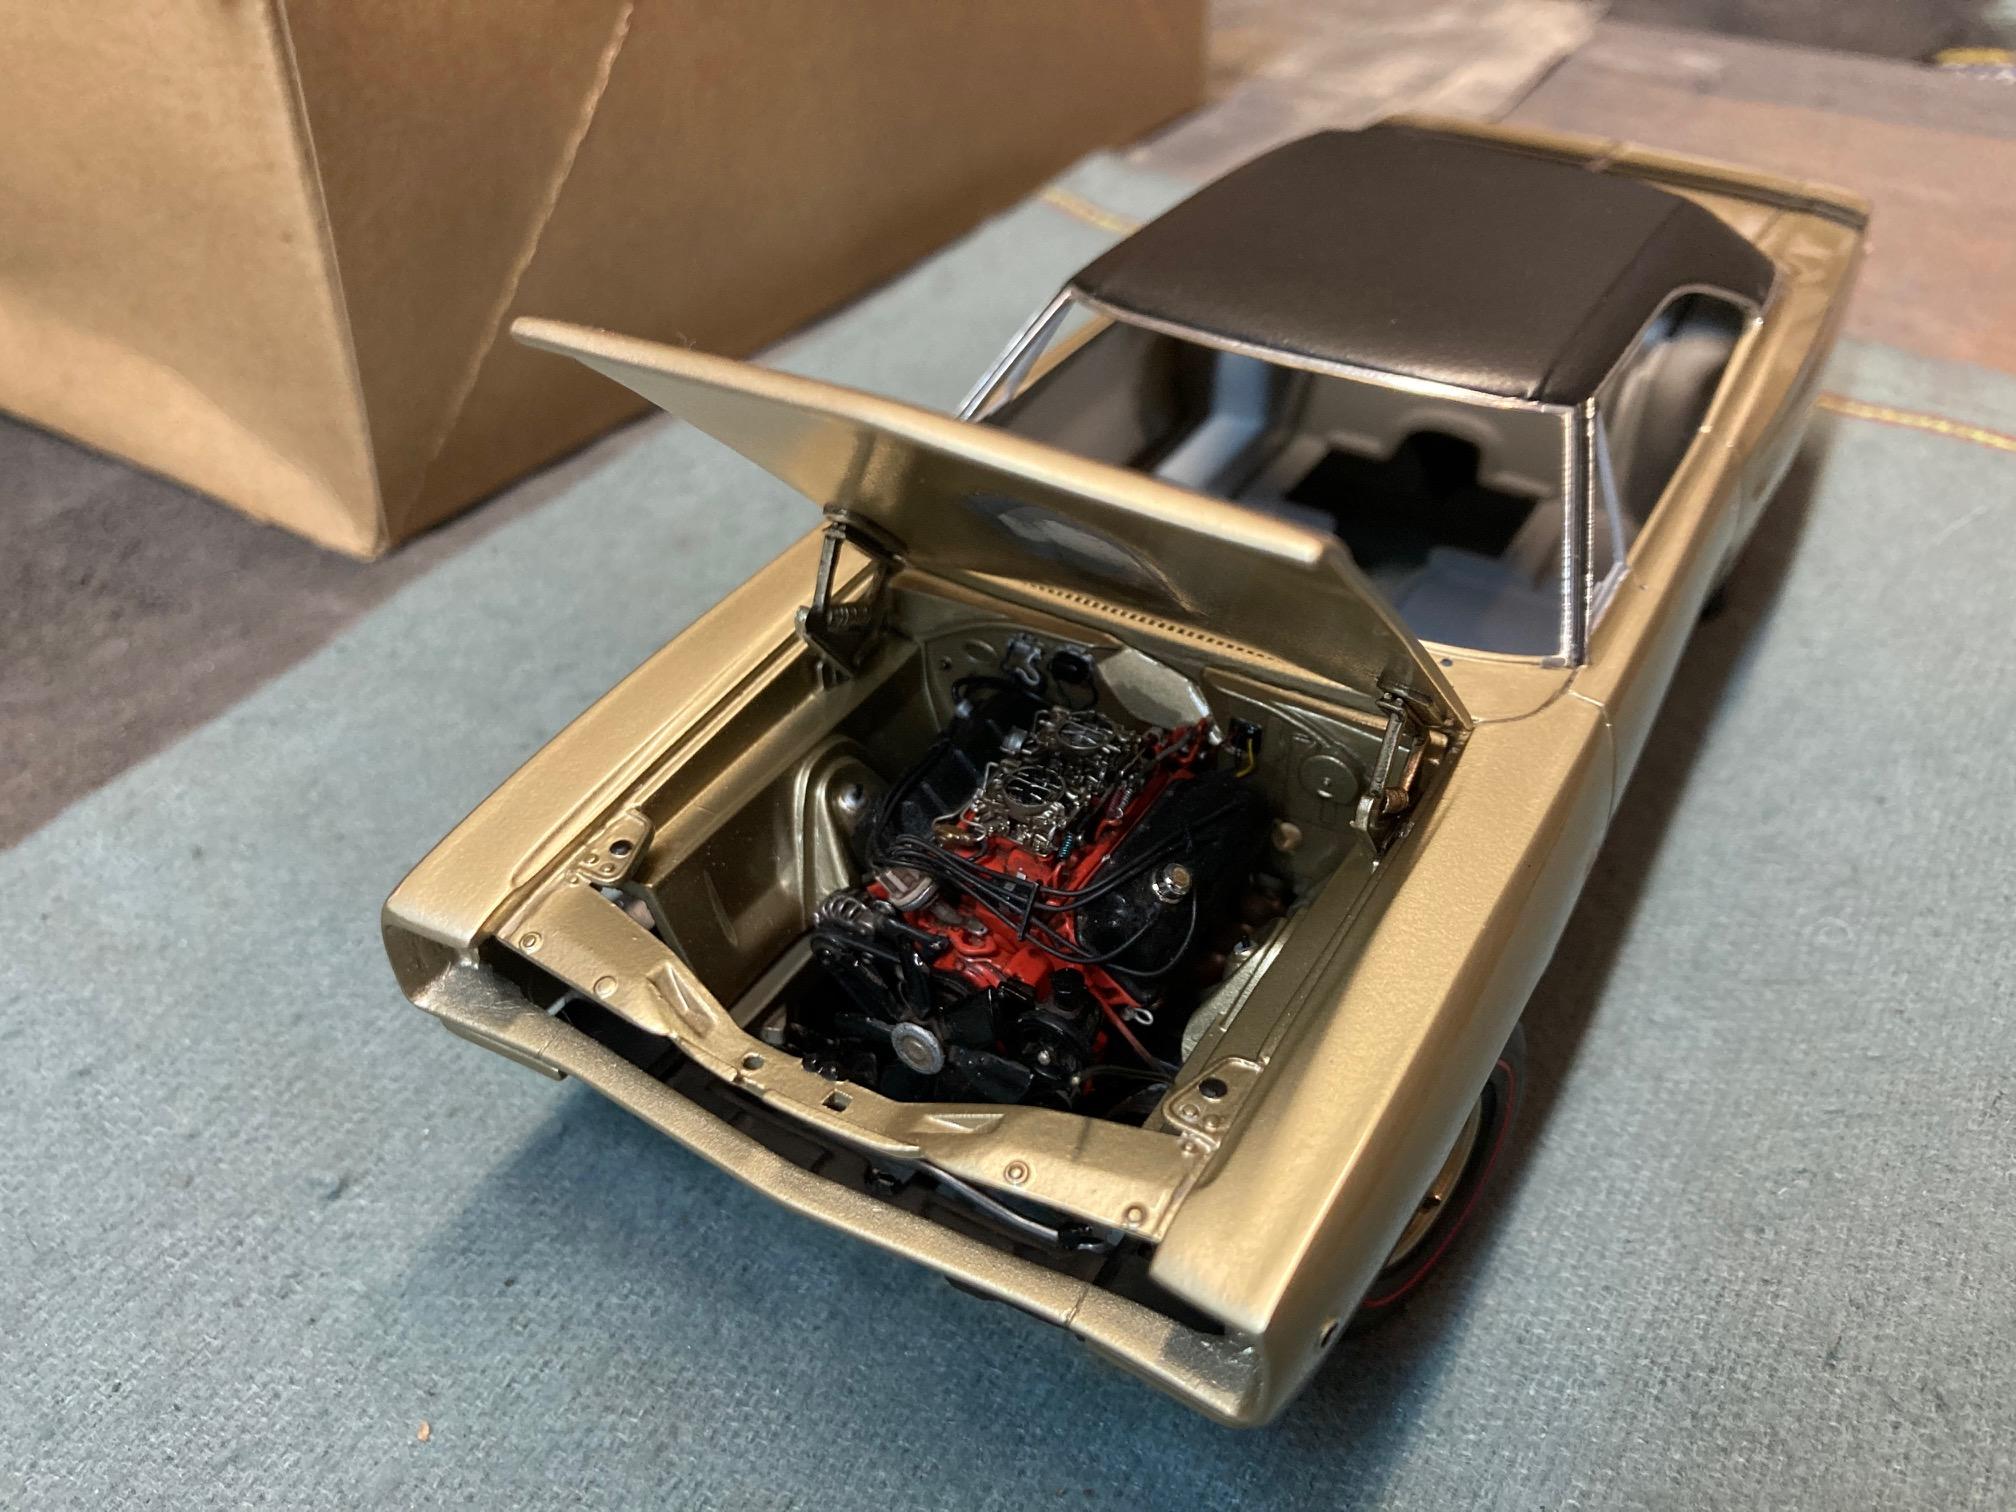
Thanks David. I still have a little ways to go with the engine bay stuff, but it's likely that I will begin to tackle more of that coming up right after the foil is finished. slicing a little off of these resin tires proved to be a lot more difficult than I thought! That stuff is tougher than nails! I wound up using one of my best and sharpest Wusthof chef's knives to do it with!! Thanks Bill. I was aware of the brake booster color, but hadn't gotten as far as the plate behind it. Likely would have missed that as I am adding the booster, but it's something that I can easily add to the list now. Steve
-
Thanks guys! Just trying to finish up the foil work now. Steve
-
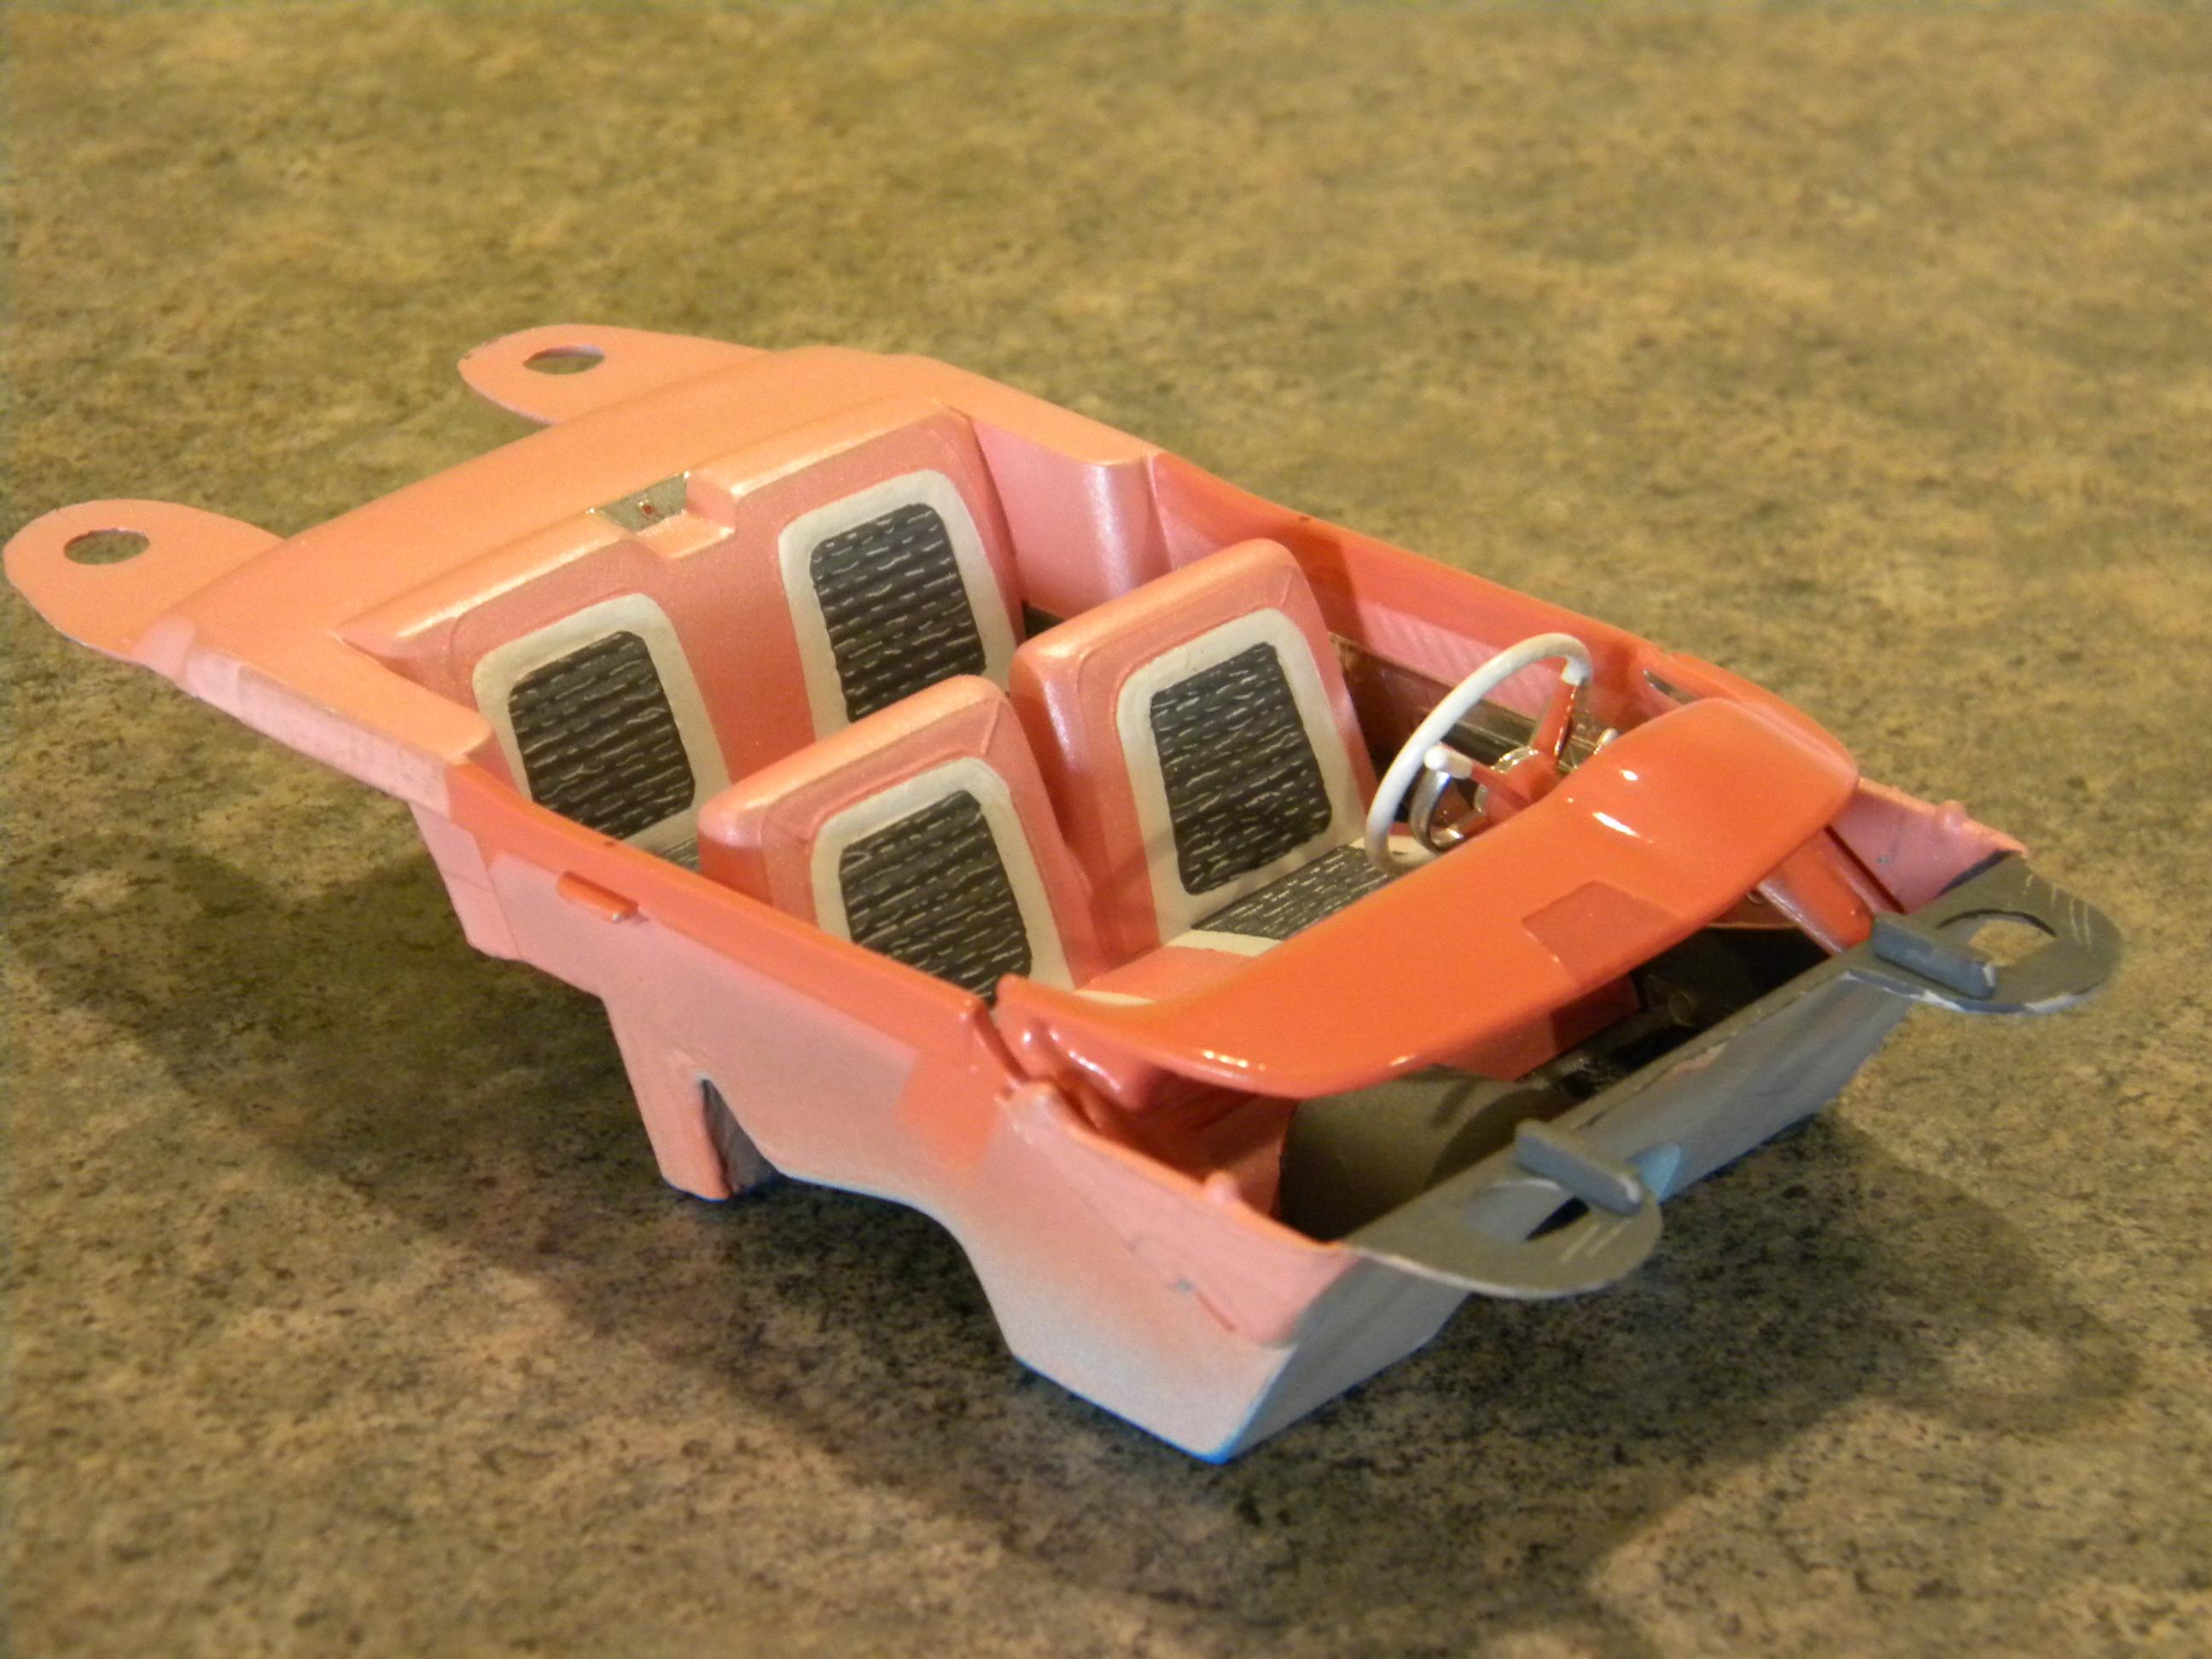
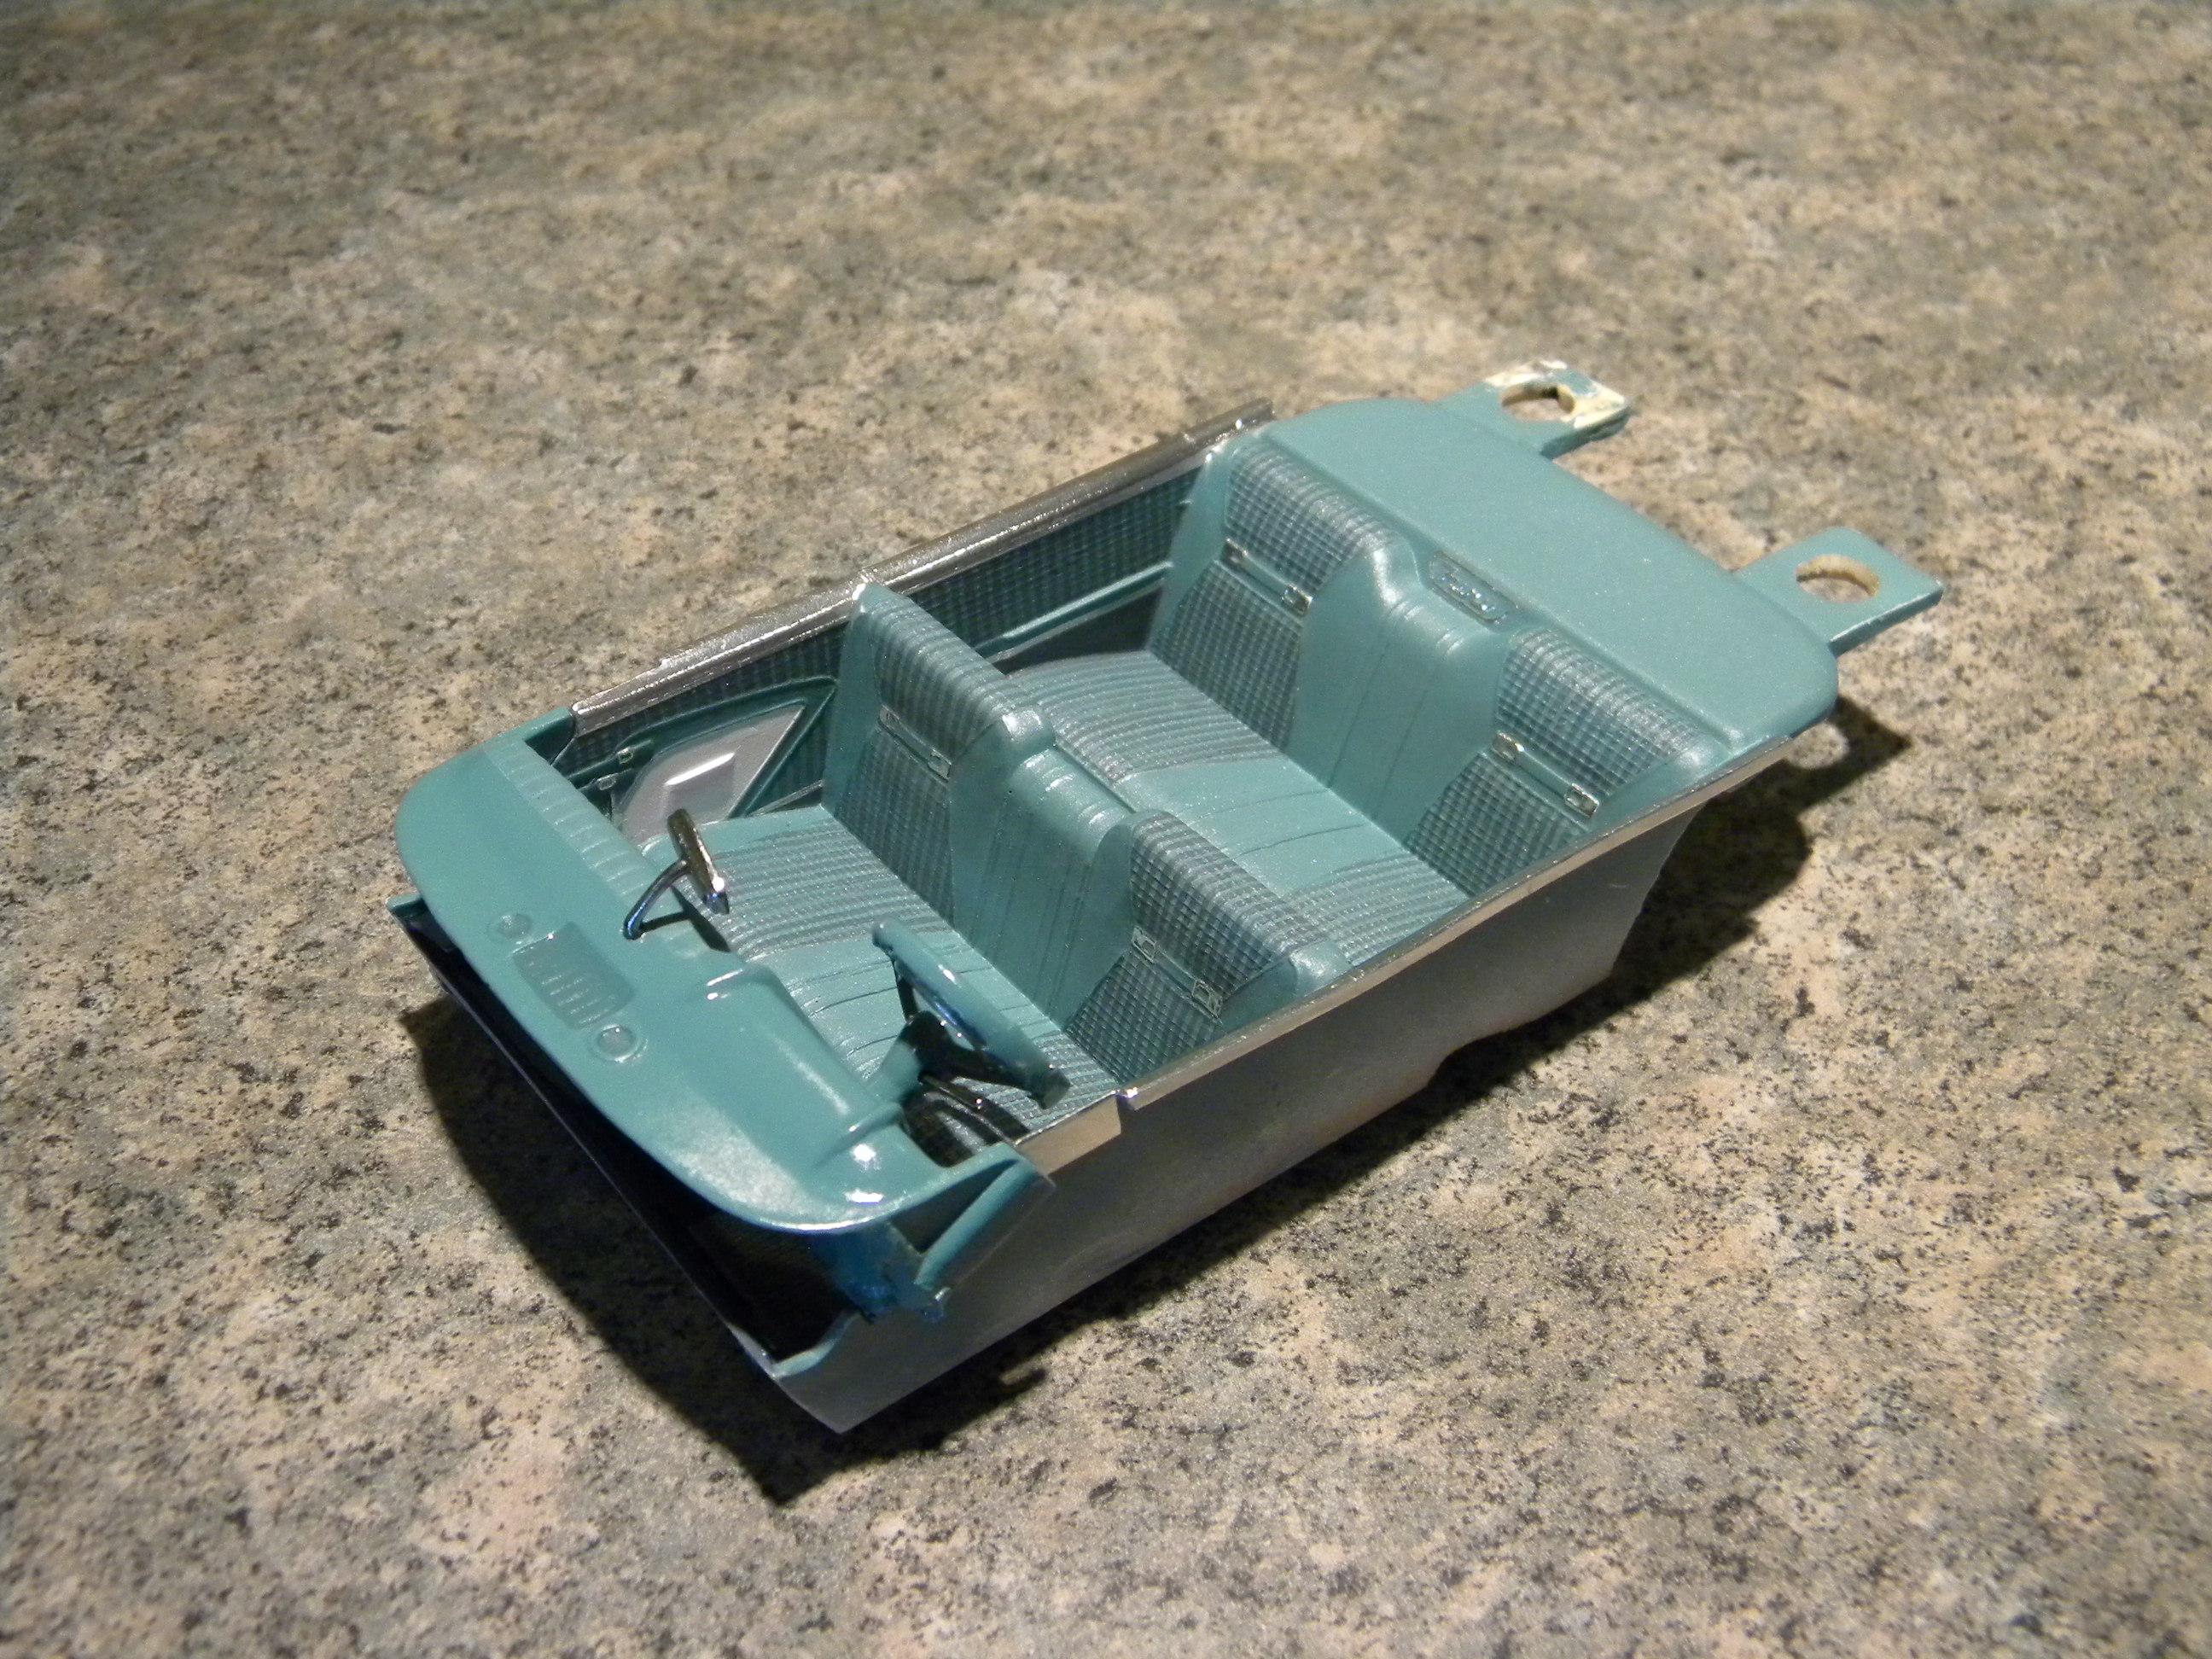
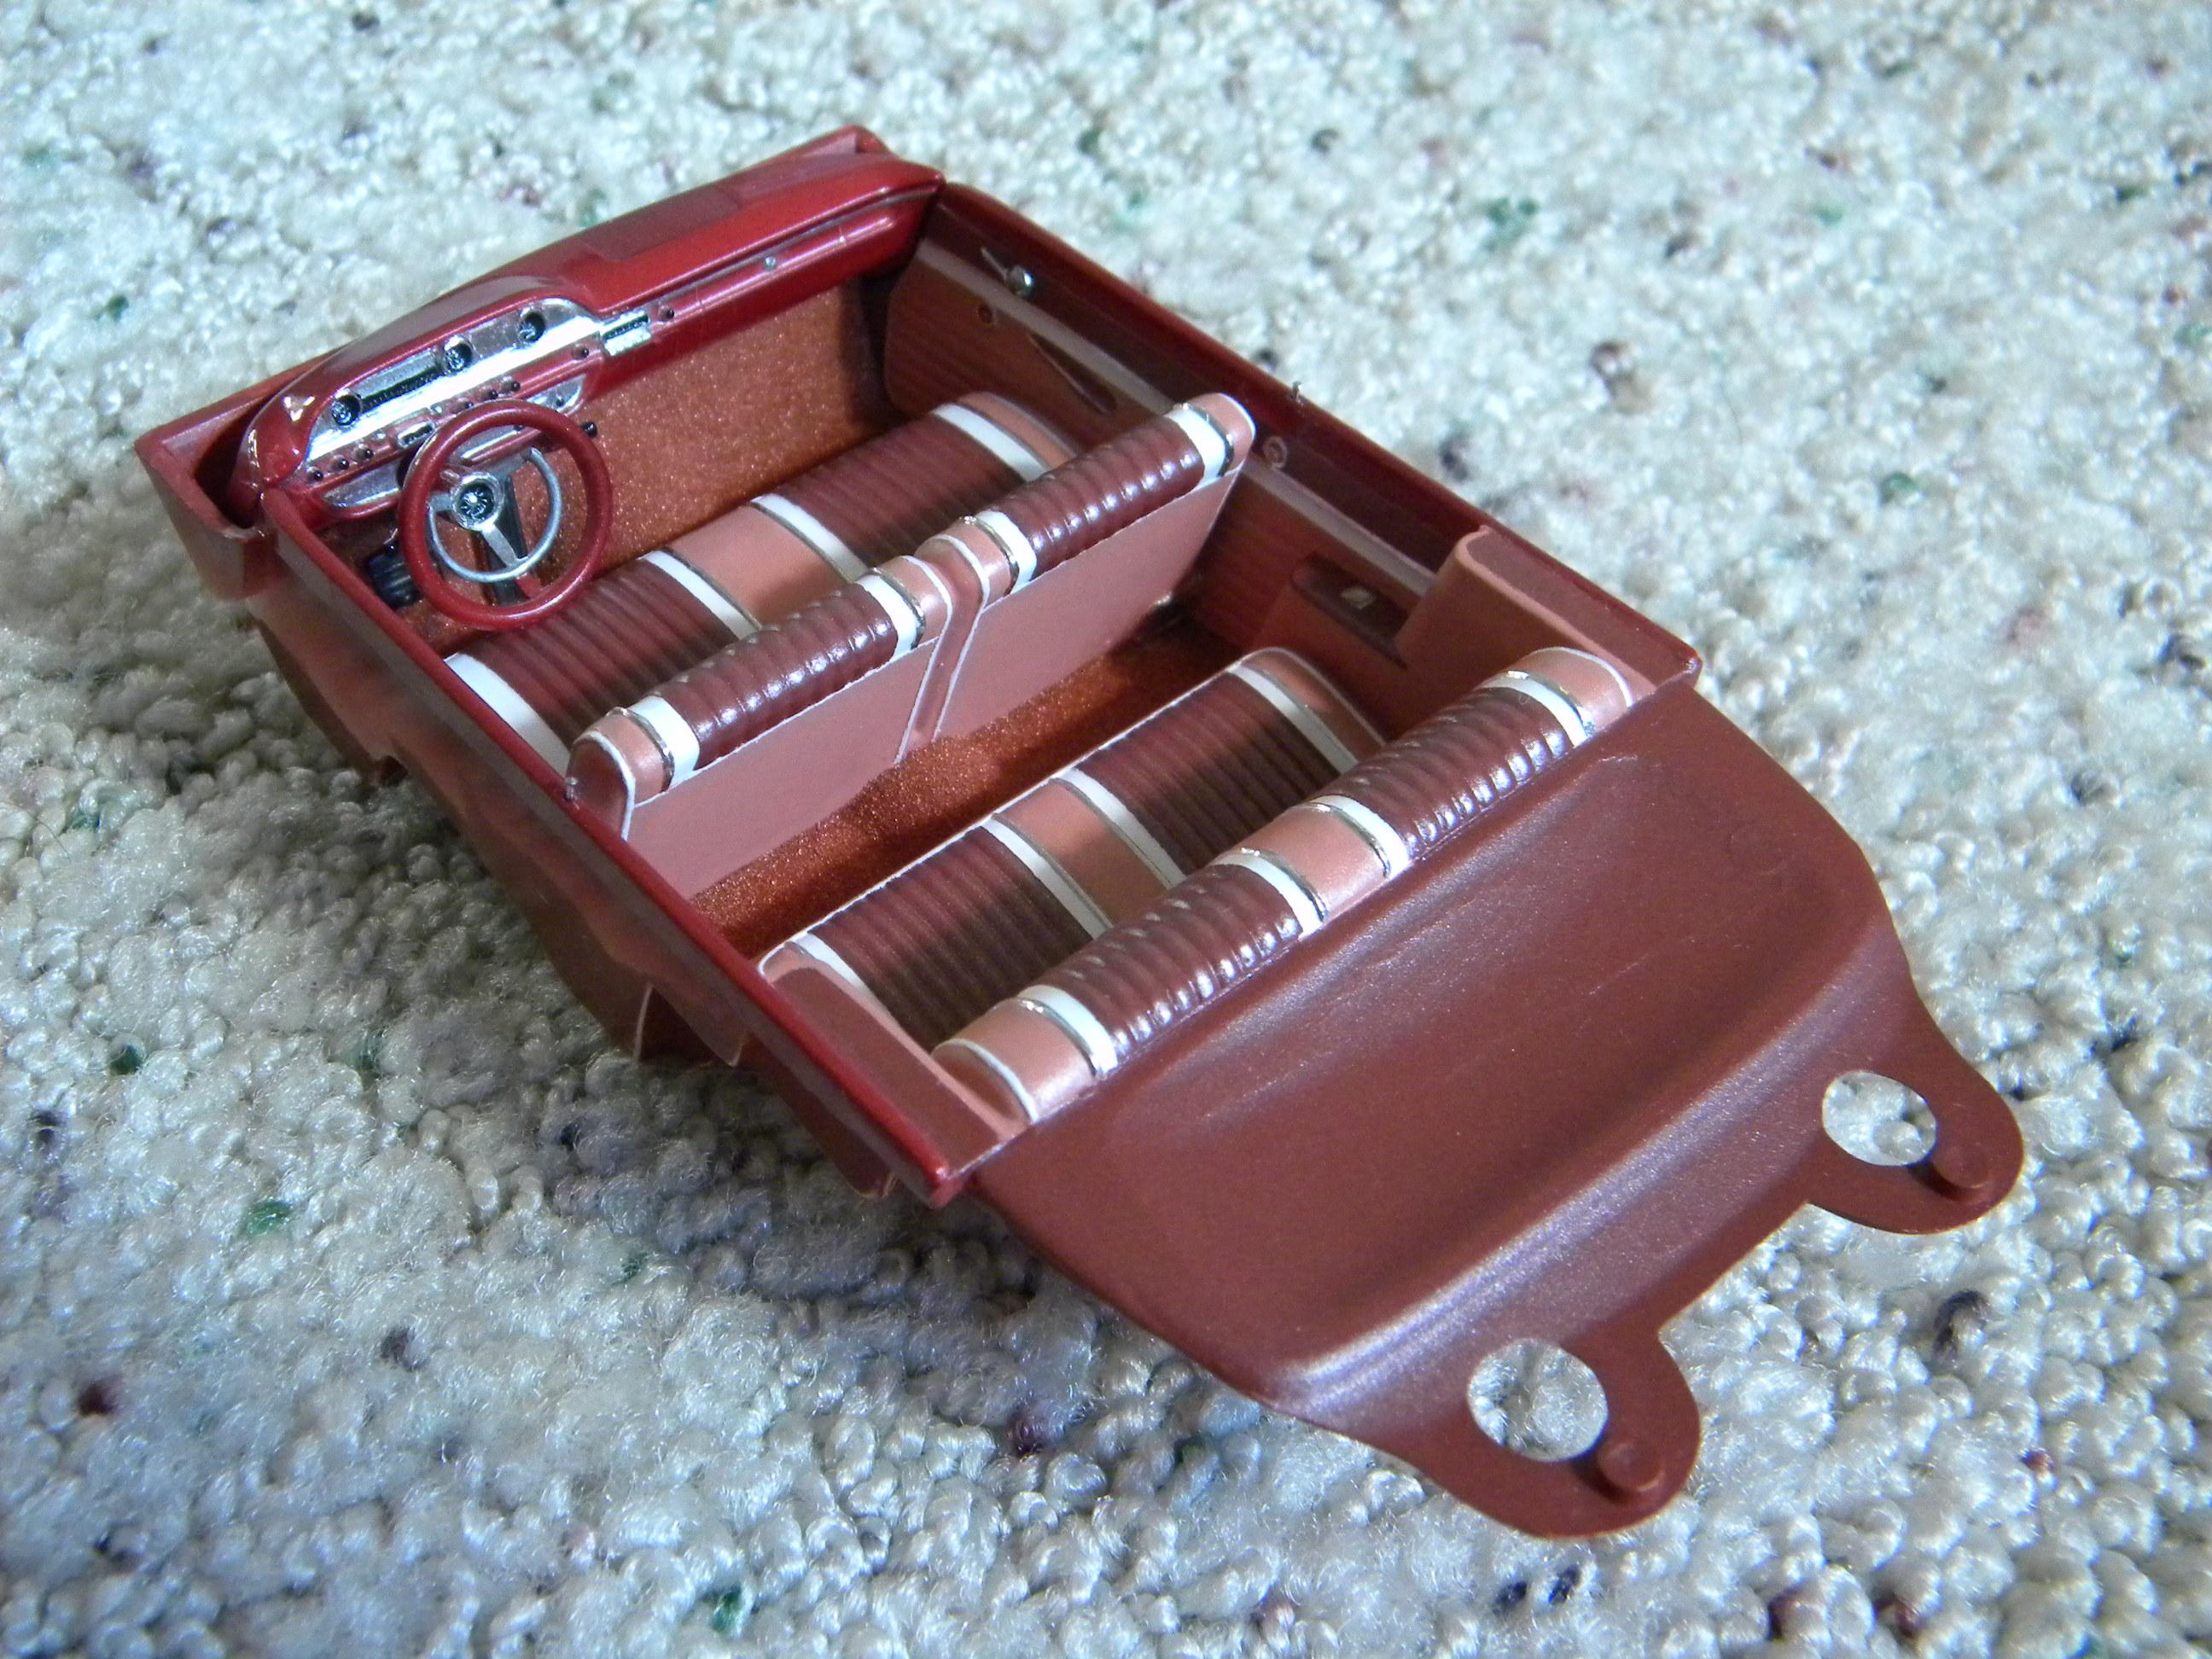
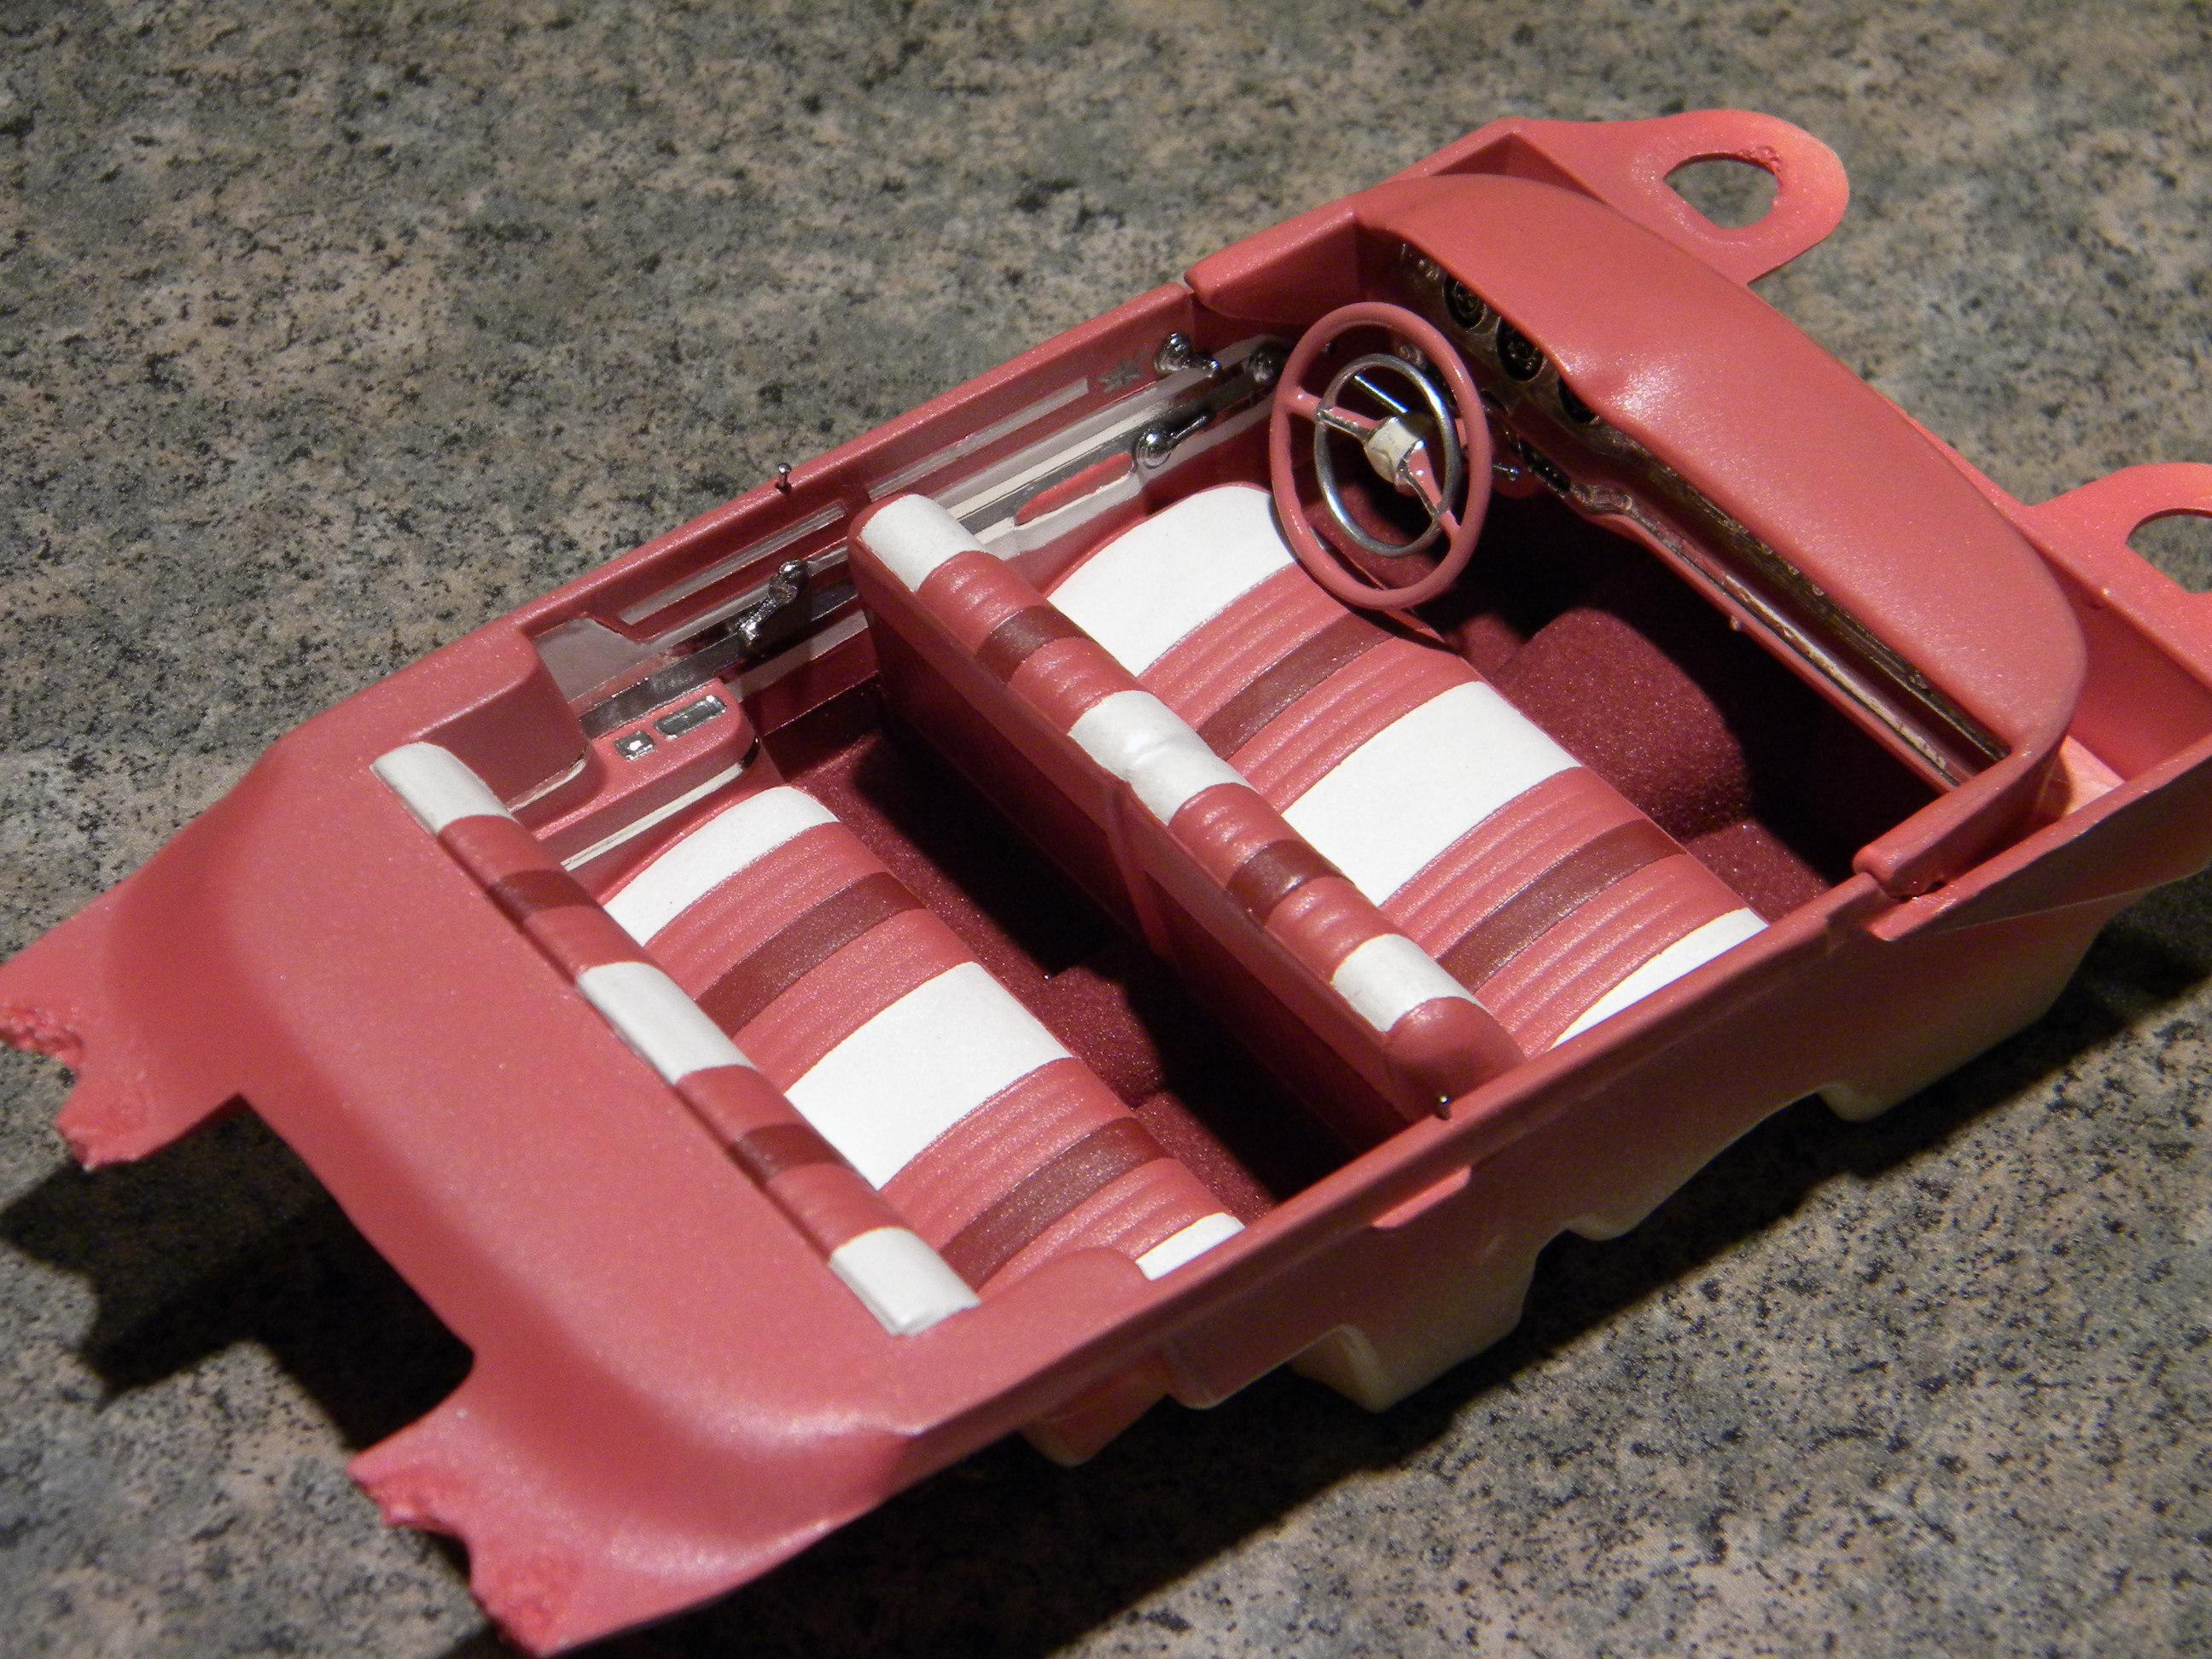
There's really no silver bullet, and short of using photo reduced decals, there are no short cuts for painting a multi-color interior. You just have to take your time, use good masking tape, (Tamiya) and do the masking under magnification so that you can see what you're doing in detail. I spray the overall color first, (lighter color first works best) but then if the remaining colors cover small areas, you can use a brush. Use flat paint and be sure that it's sufficiently thin to lay down flat to eliminate brush marks. Don't over load the brush with paint, at least for the first coats to keep from getting any bleed under. Use 2 or 3 light coats of color before removing the mask, and remove it before the last coat is thoroughly dry to prevent pulling up any paint and for a nice, clean line. As far as masking goes, use Tamiya tape for the bulk of it and cut a fresh edge on it with a steel ruler before applying. You can cut thin pieces of tape the same way if needed. I do use foil occasionally for masking, but usually only for curved areas where tape would be difficult to cut to get a sharp line. Work in small sections to avoid getting burned out on masking. I might do one door panel, or a half of a seat cushion at a time. If you understand that you might have to spend real some time on an interior with masking and painting, you can achieve some pretty spectacular results, even with the old one piece annual interior tubs. 1961 Buick Invicta 1959 Edsel Corsair 1959 Dodge Custom Royal Lancer 1959 Ford Galaxie 1959 Plymouth Fury 1962 Ford Sunliner 1959 Pontiac Bonneville Steve
-
Passenger side? Who knew. I'm just having a hard time finding any reference photos of the rear part of the top of the engine without the air cleaner in place. Steve
-
Any body have a photo of exactly where the power brake vacuum line attaches to the manifold on a '68-'69 B-Body Hemi car? Thanks!! Steve
-
Thanks fellas! Another quick mock-up to check clearances. You can't do enough of these. Steve
-
I don't have any subscriptions to any magazines either, and I rarely buy them anymore. I used to buy them for the reference material, ideas, etc. but now all of that can be found easily on line. I do however pick one up when I get word that one of my models has made an appearance in one. It's just nice to have a record of that. I suppose I'll have to get a copy of this one. Apparently, my '64 Grand Prix is in there somewhere. Steve
-
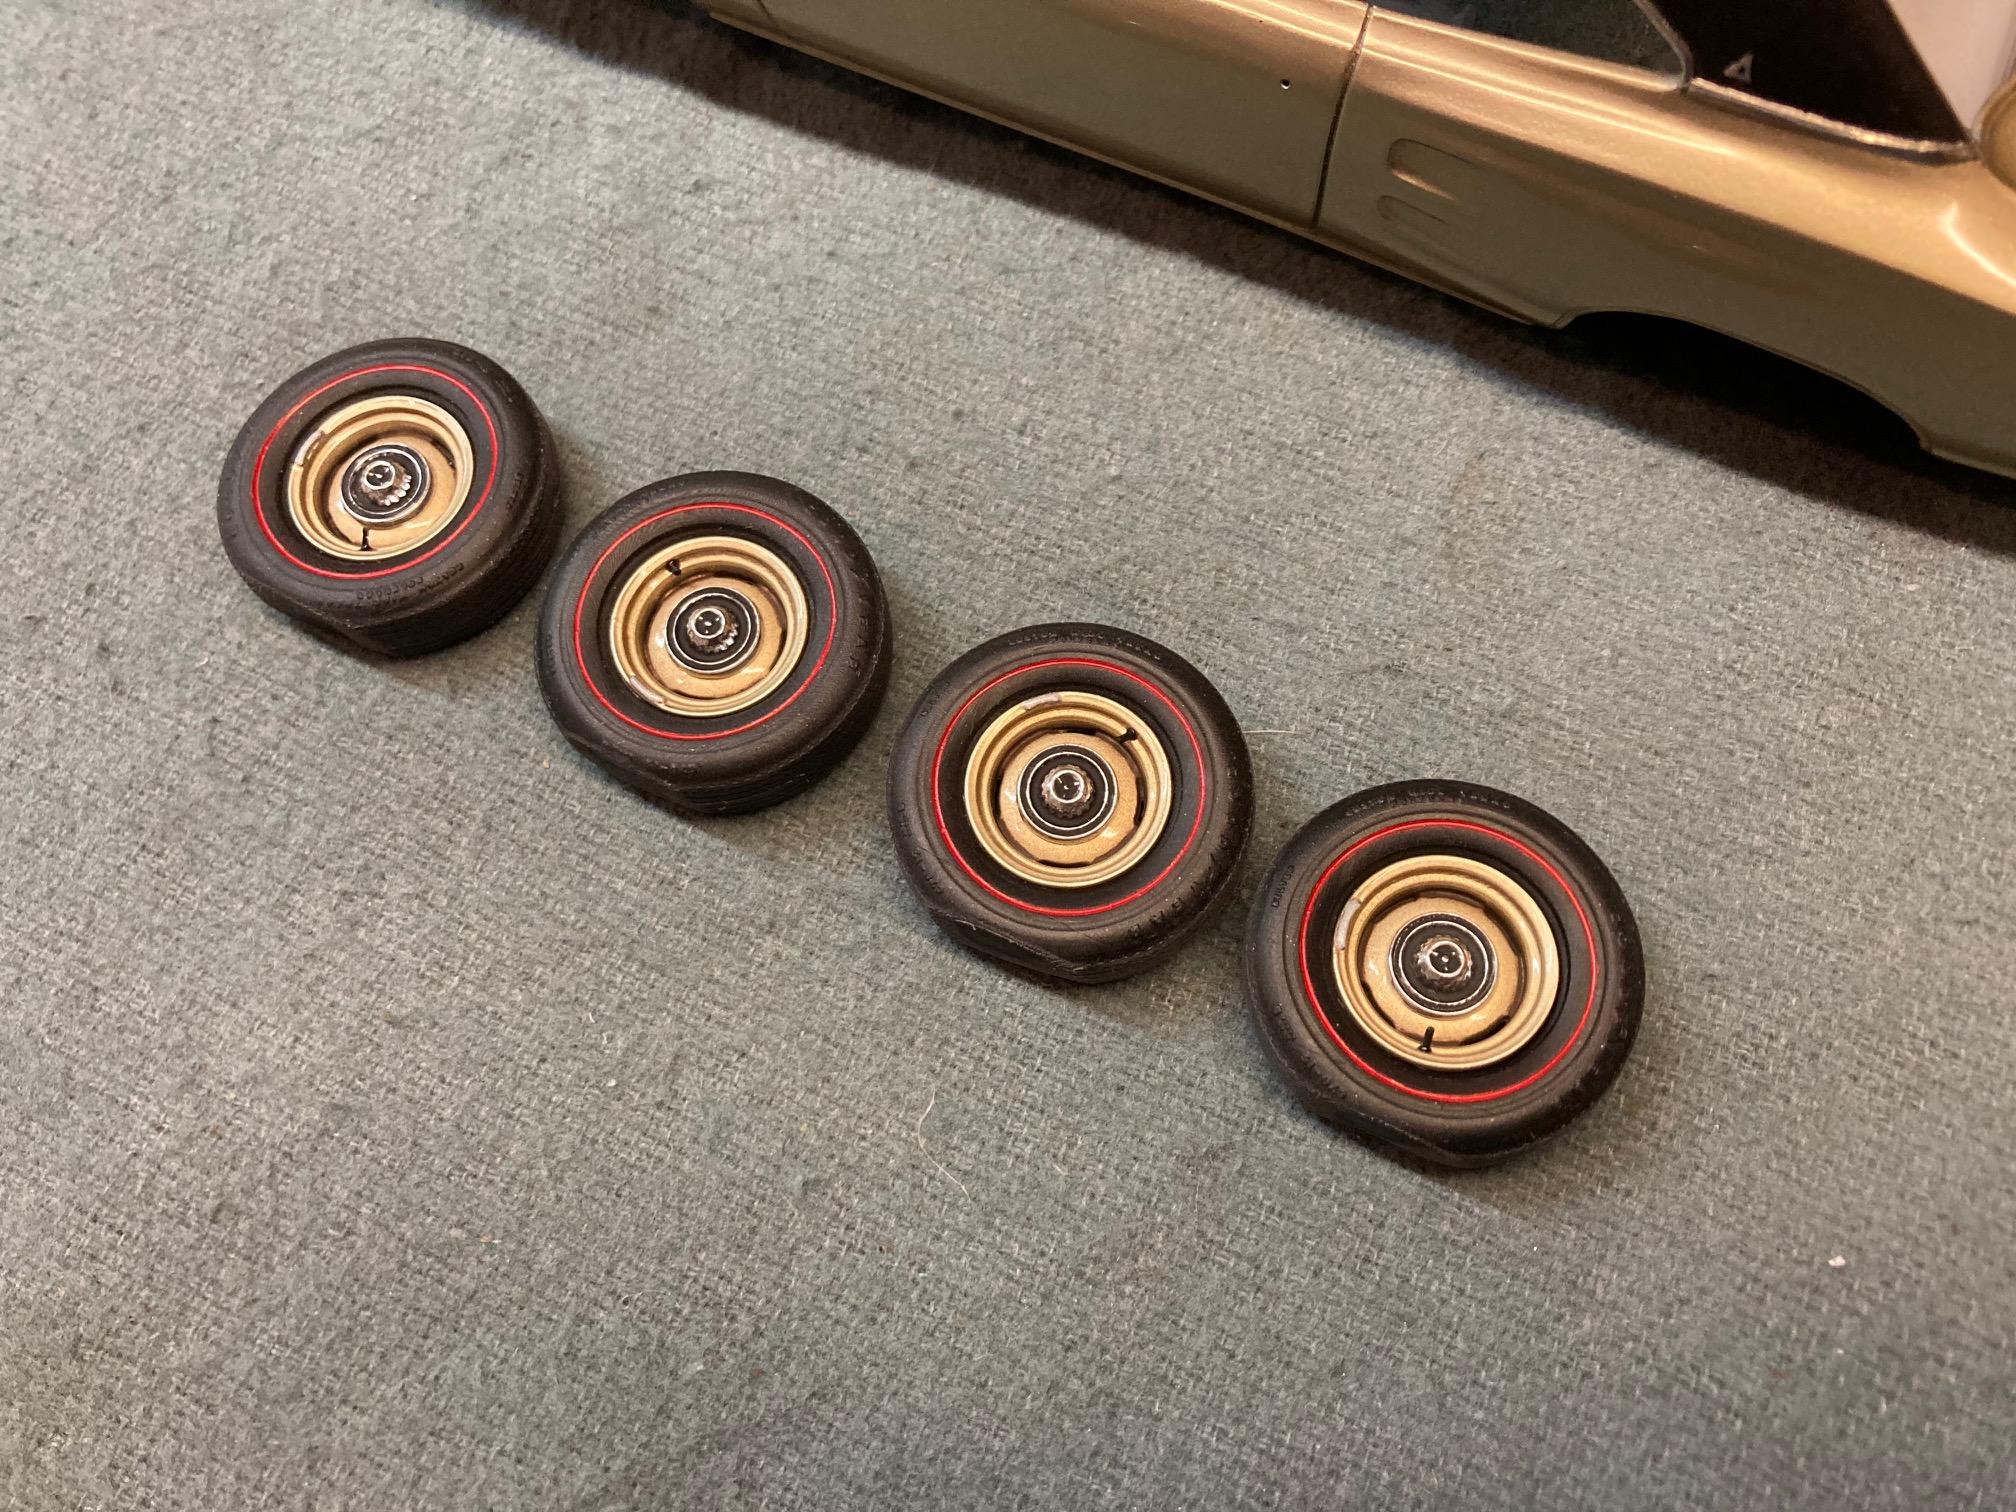
Finished up the hubcaps as well. Just need to glue them in place. Steve
-
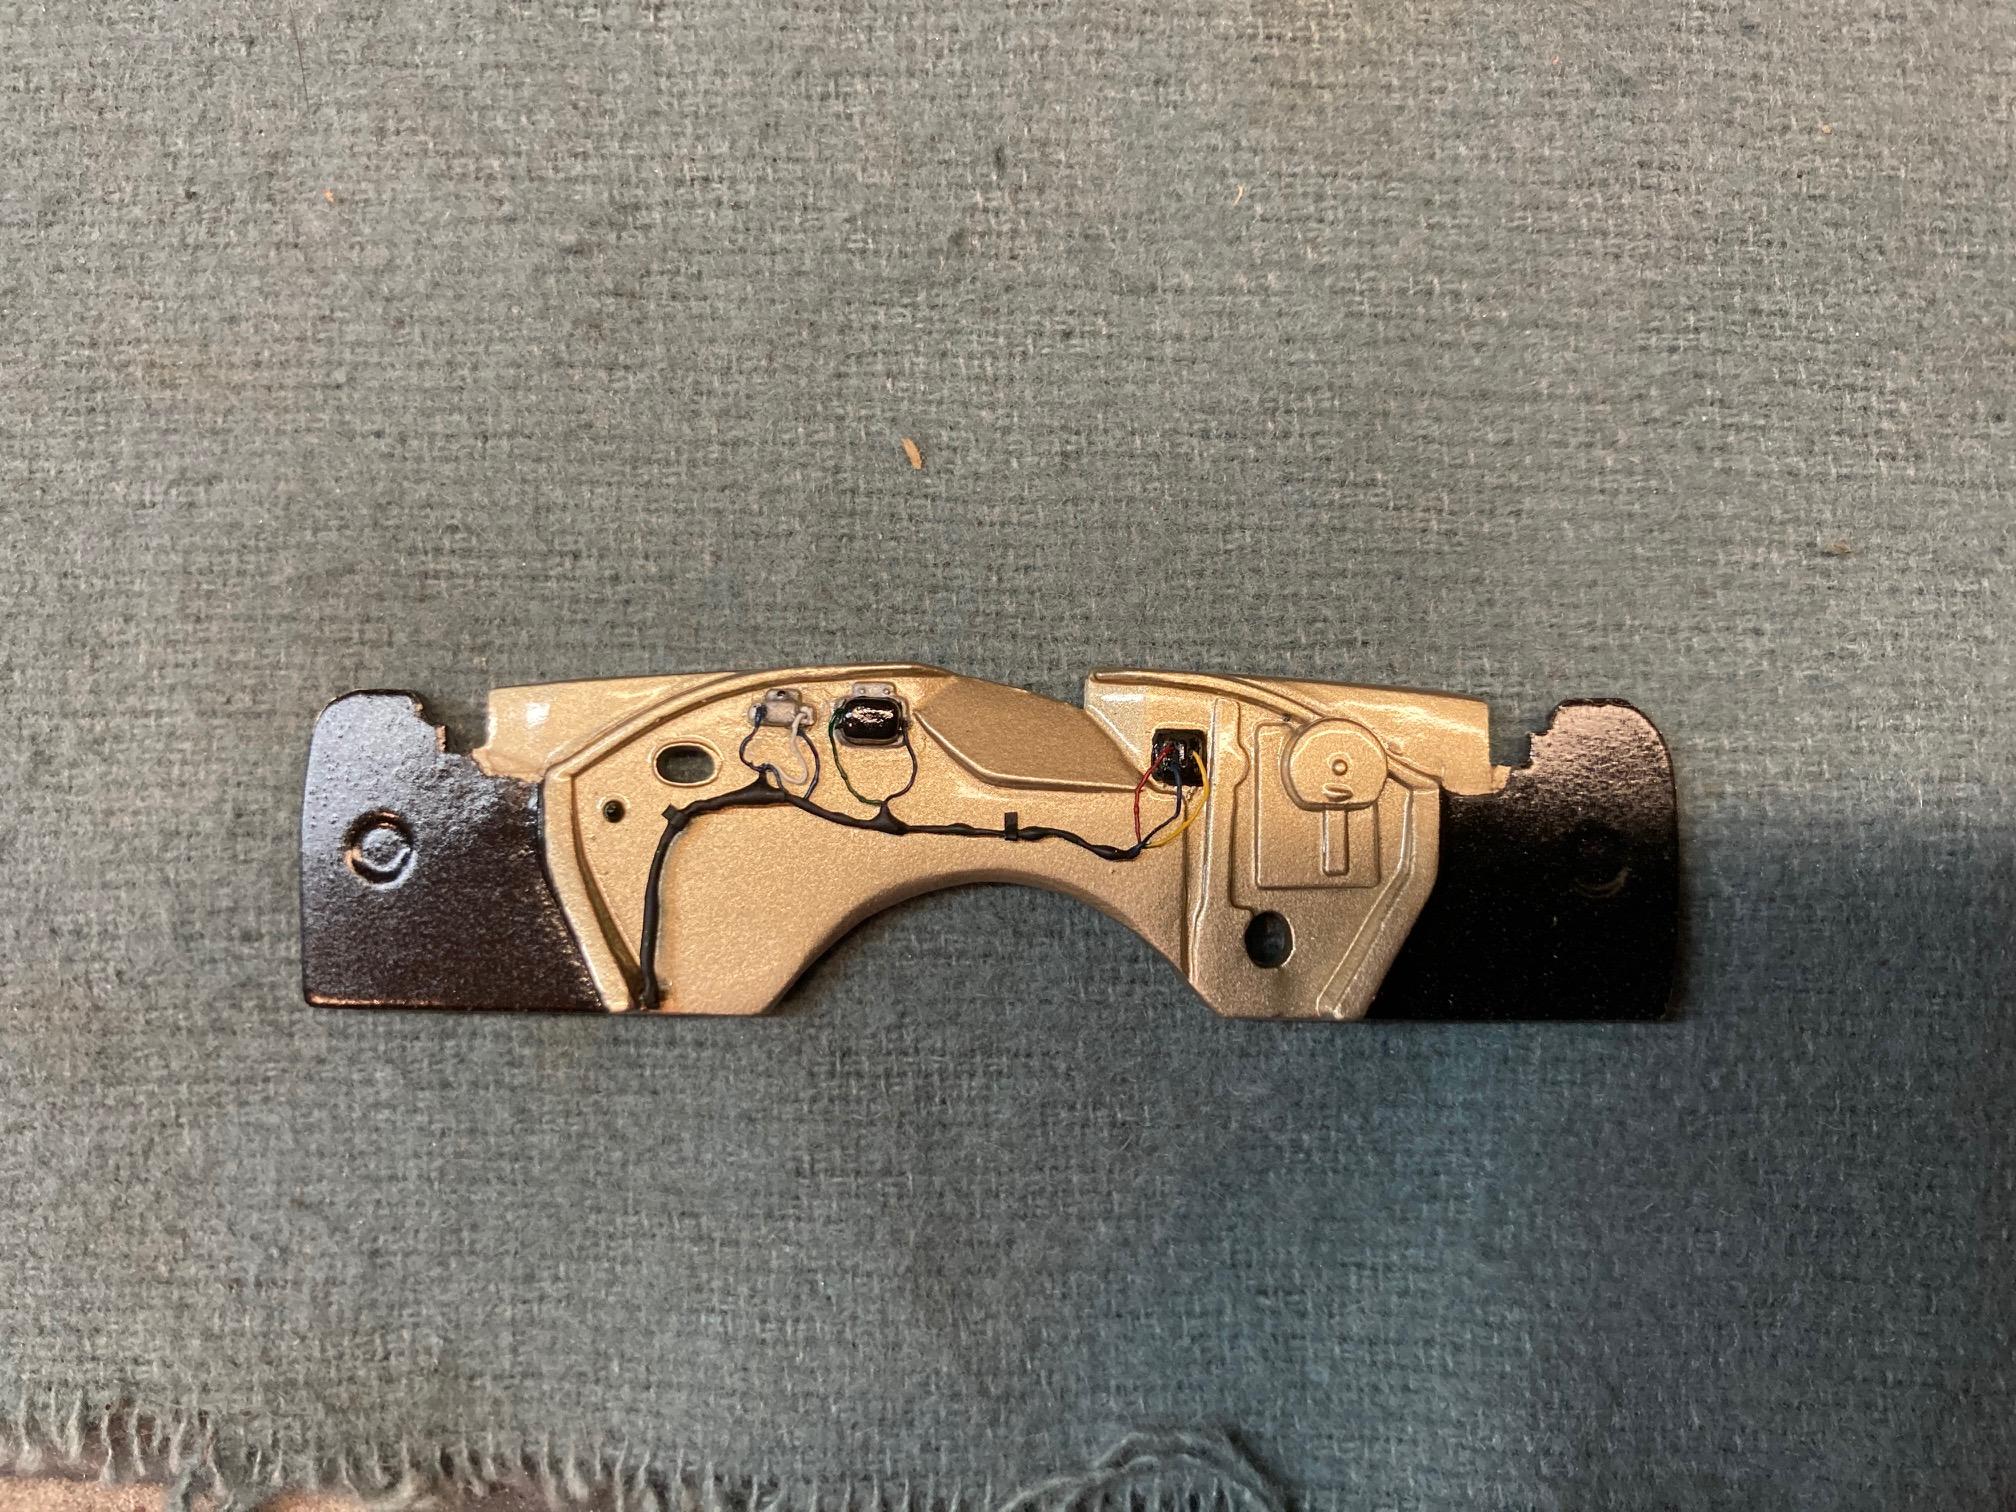
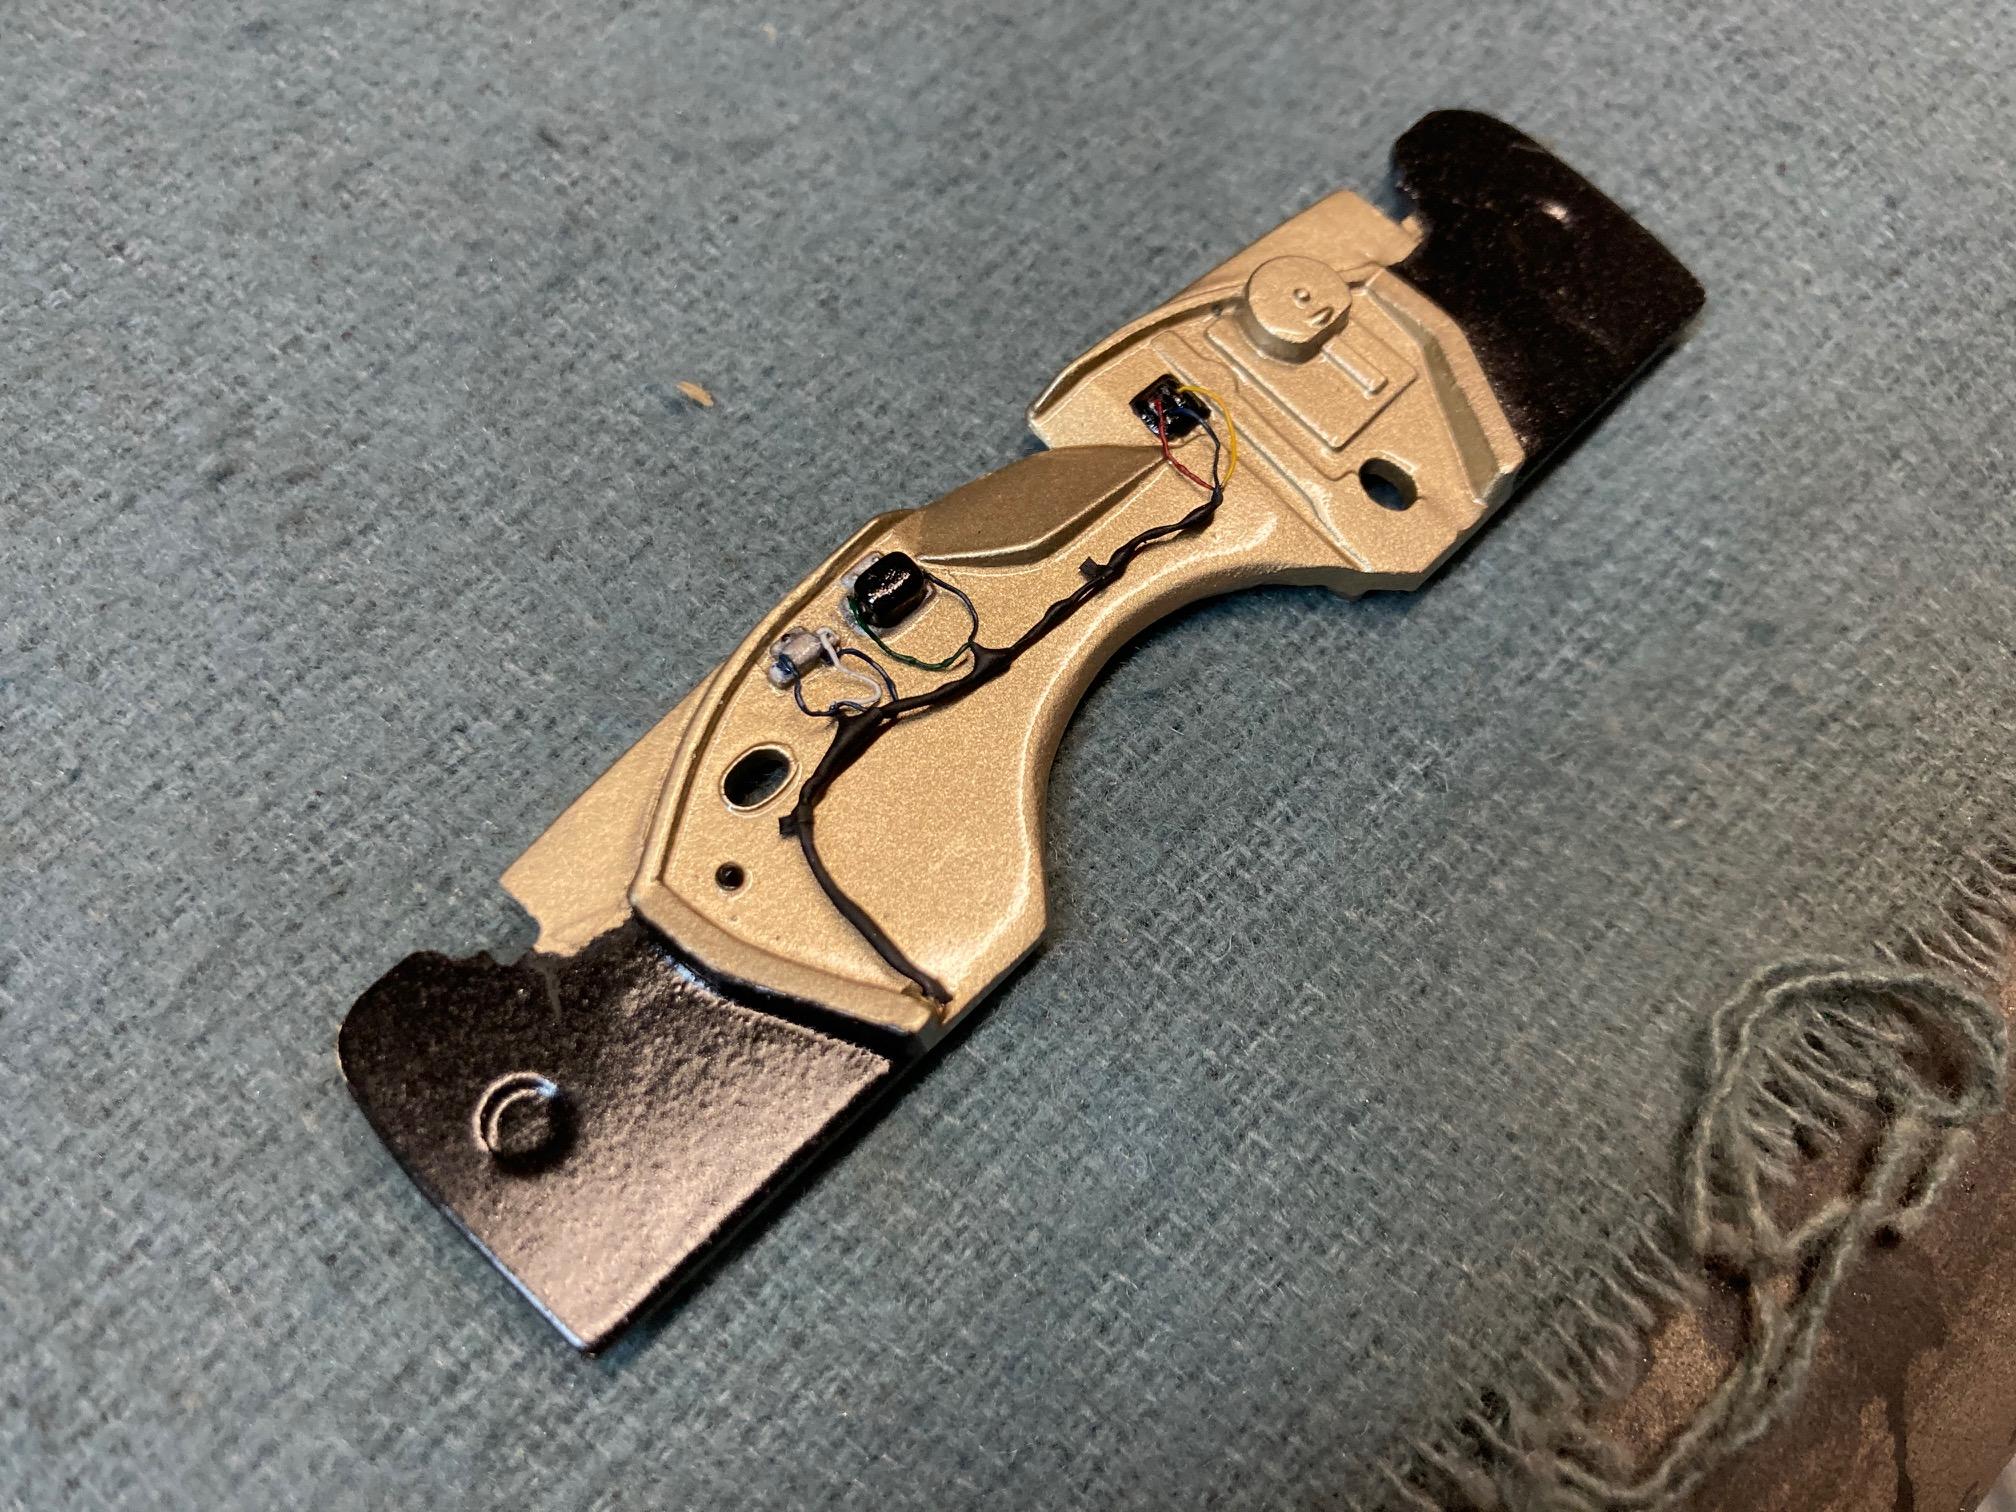
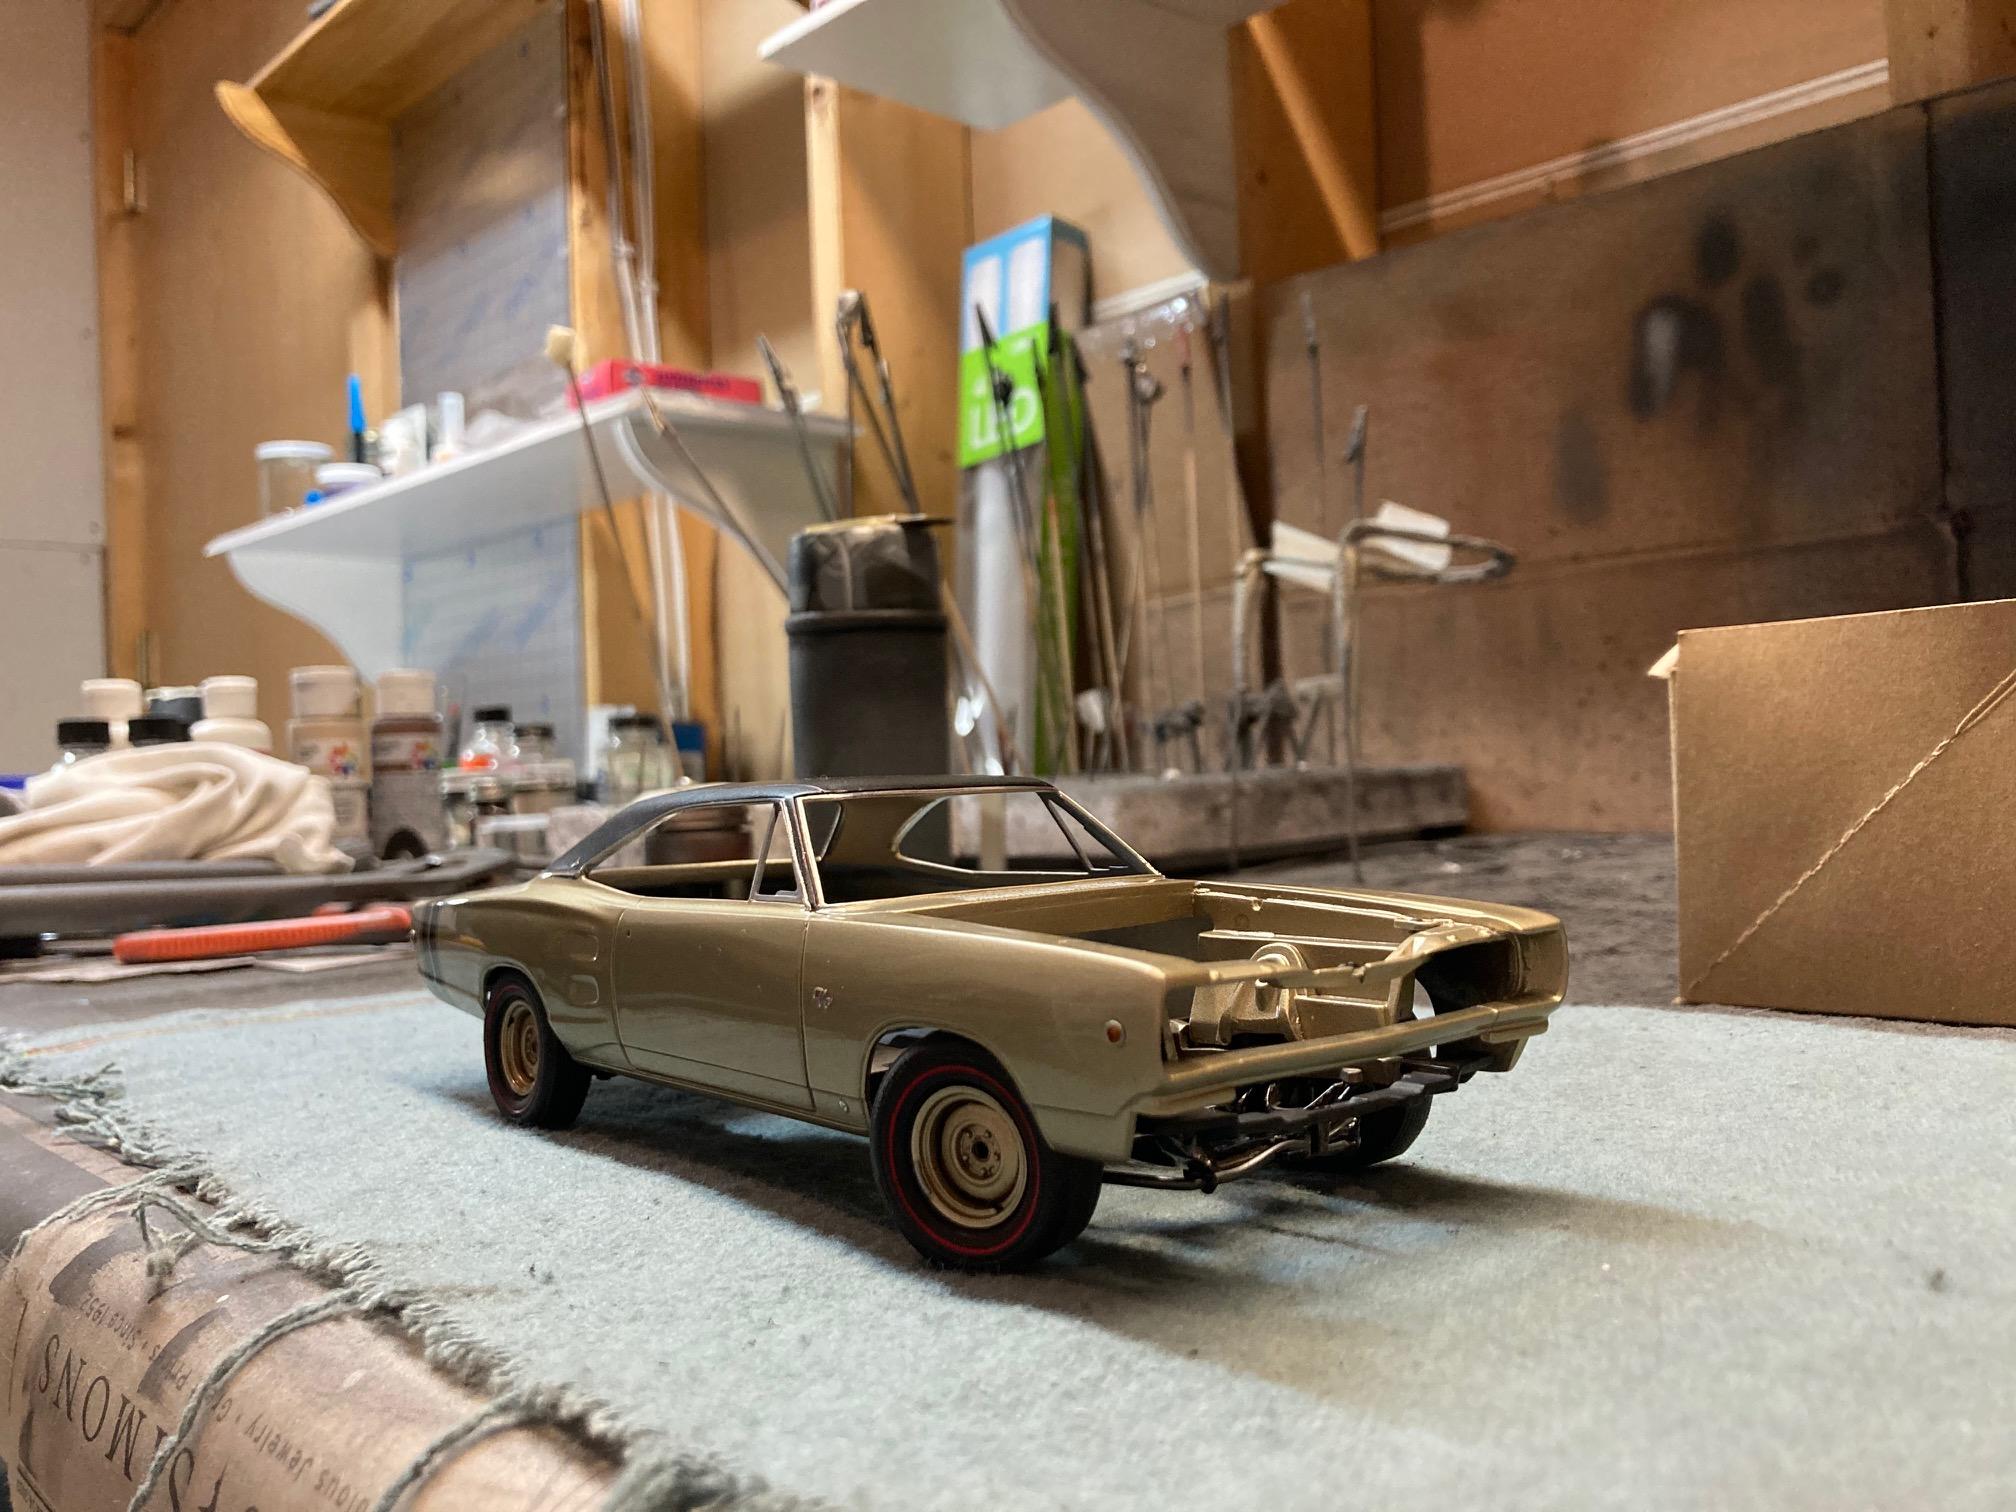
Thanks guys! I finally installed the wiring harness to the firewall this evening, and I black washed the Hemi badges. I'm thinking that there's a possibility that I might use the R/T badges on the grille and rear panel as well if they fit properly. Steve
-
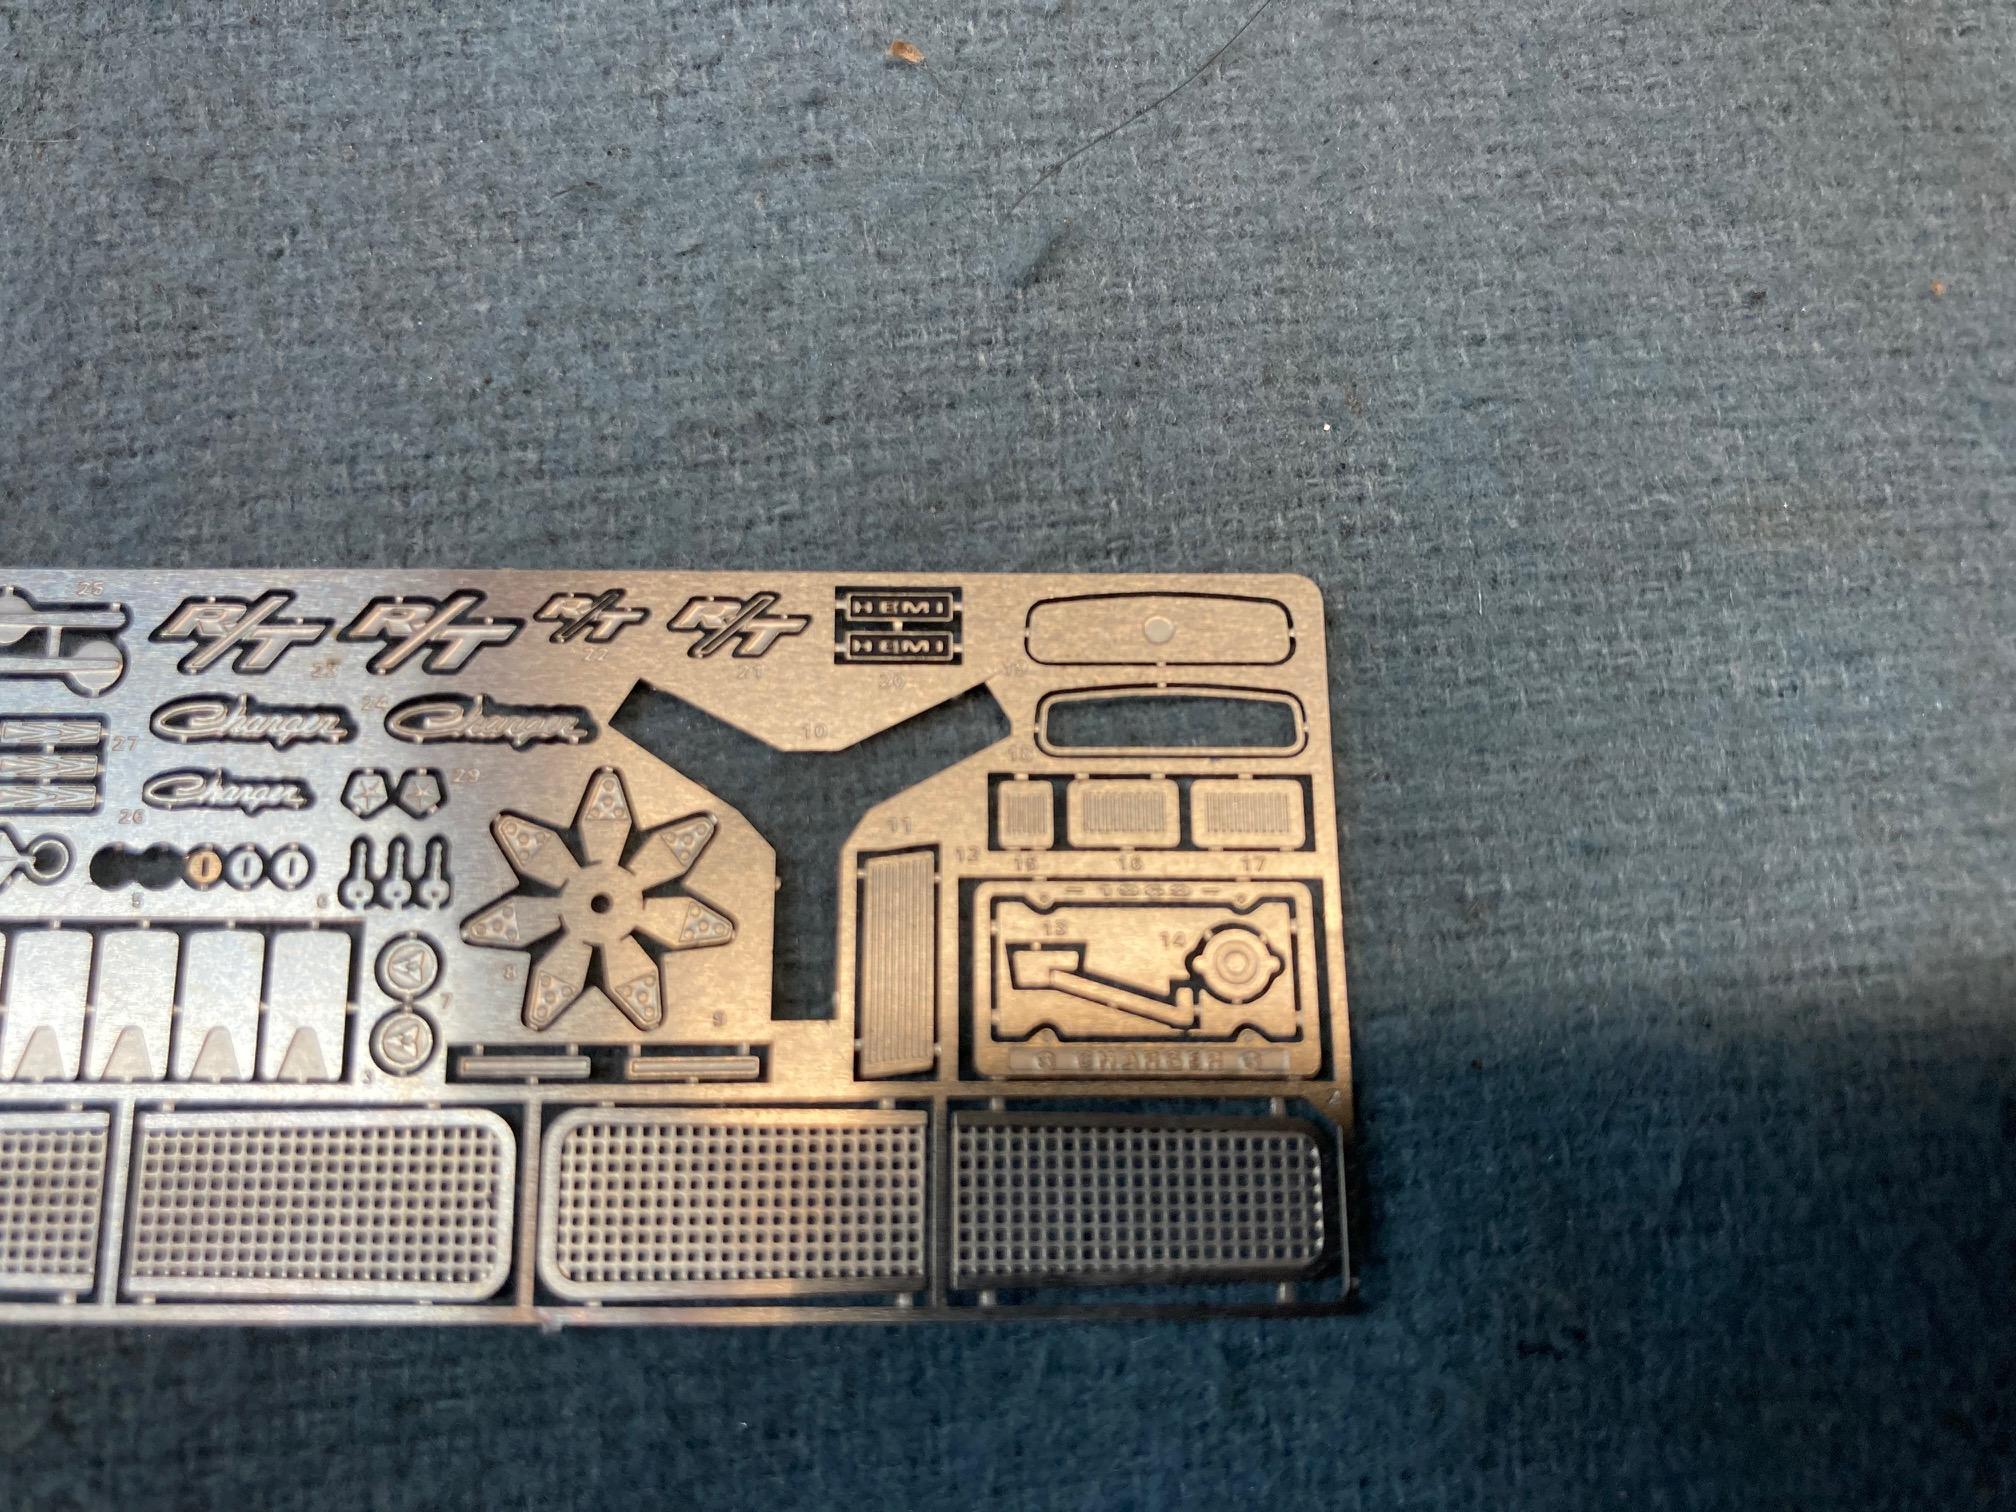
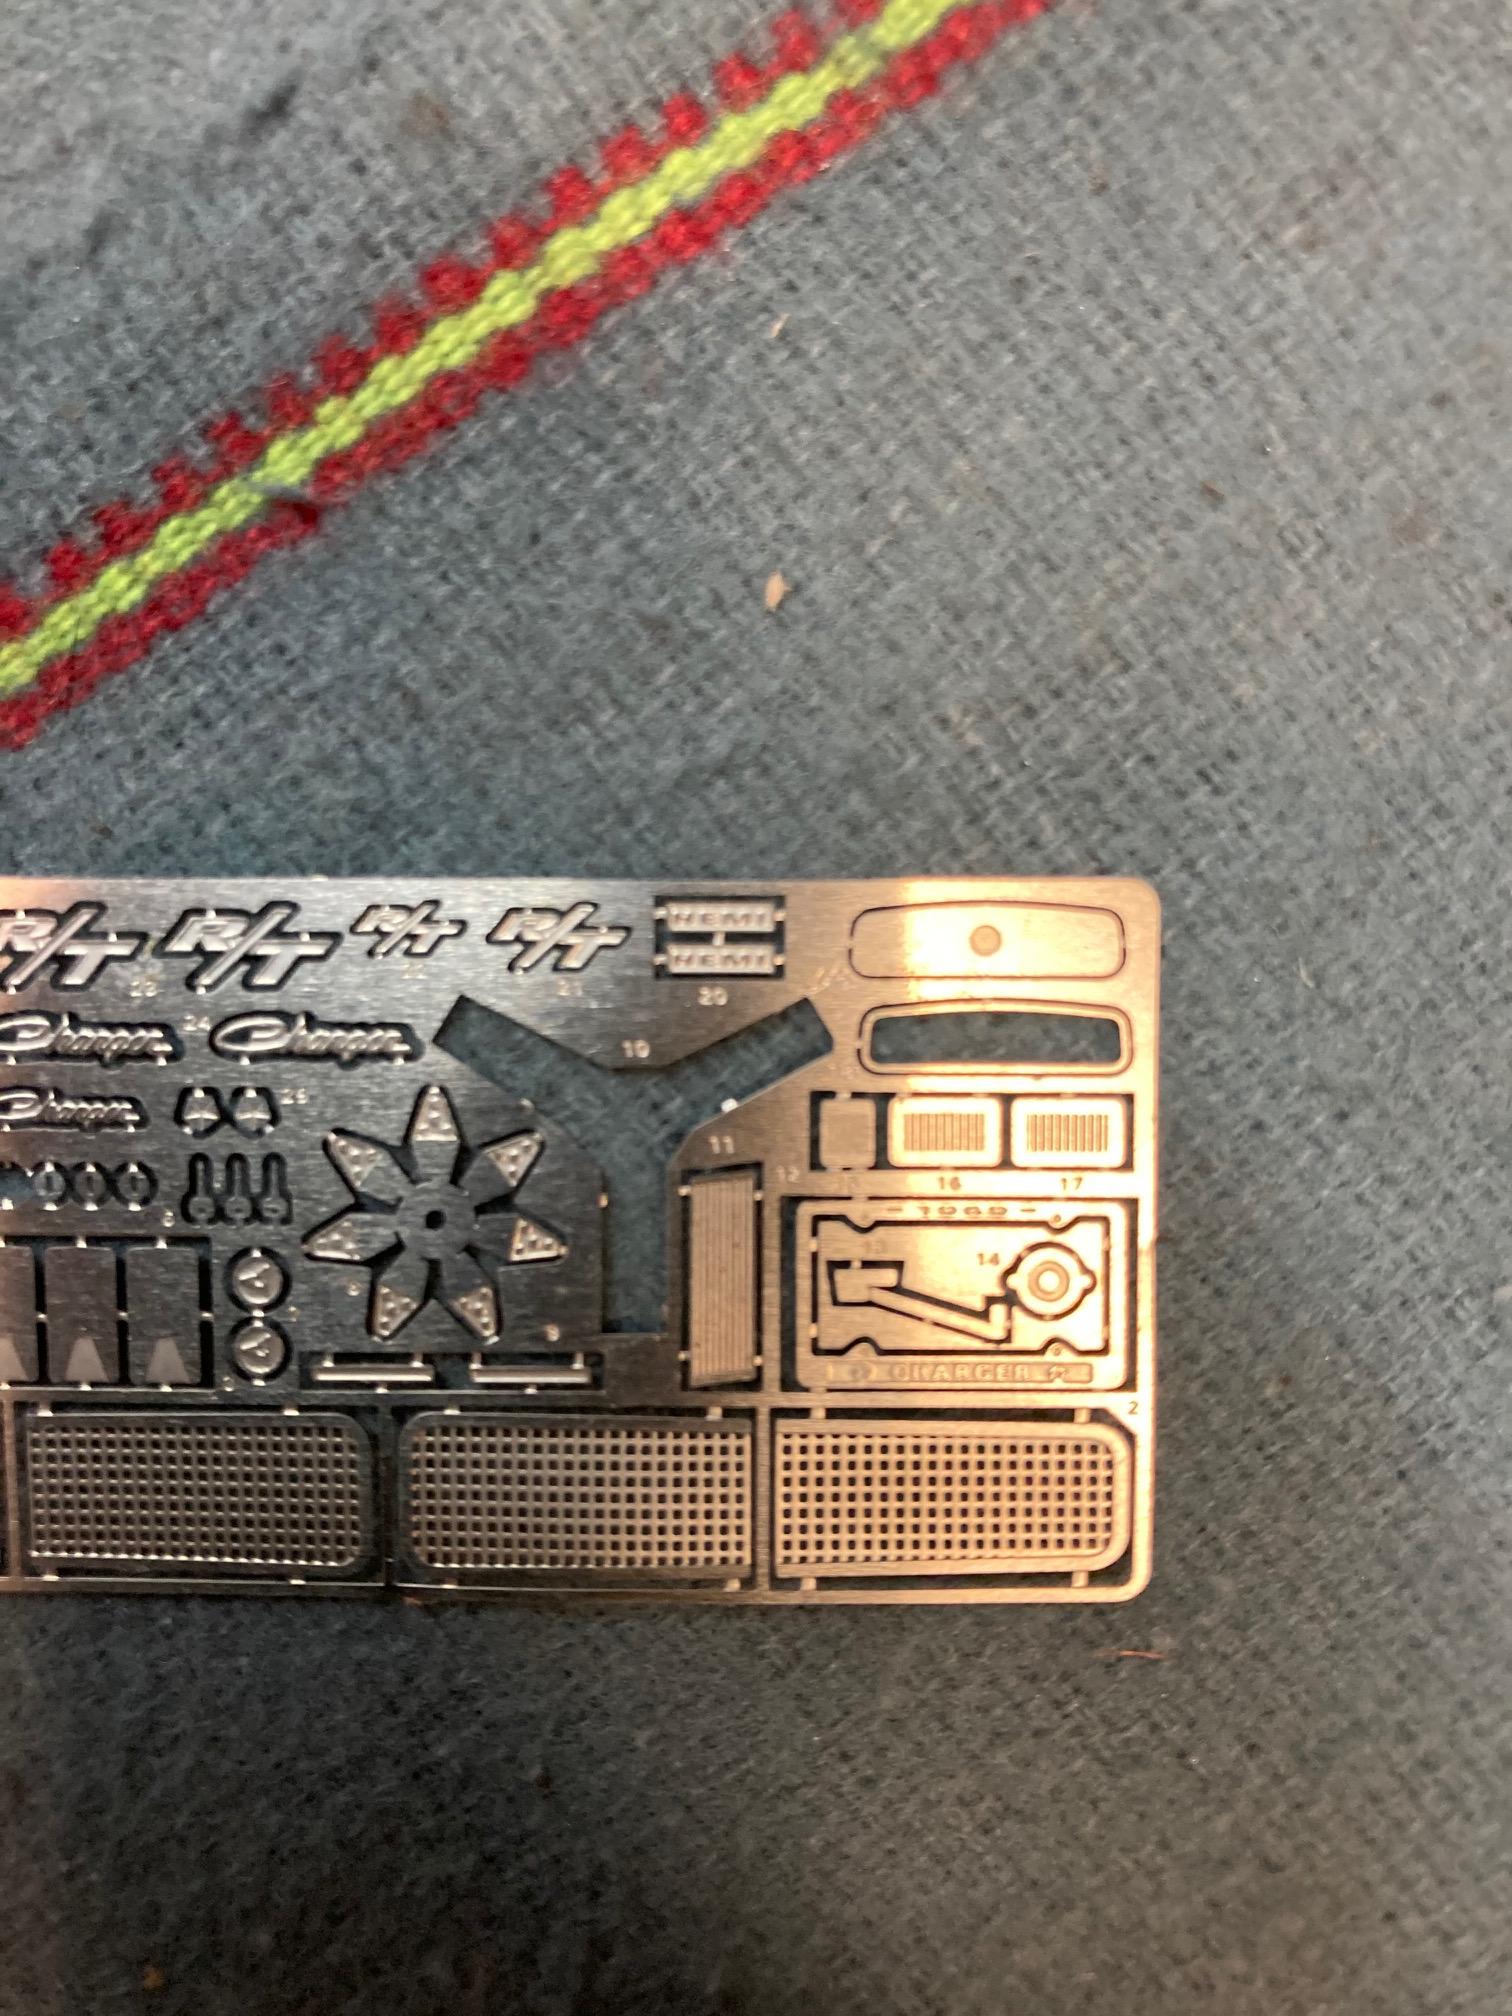
Yes. I have a pair of Hemi badges from a Charger PE set. Had to get it up on the wheels one more time just to get a visual of where I stand. Steve
-
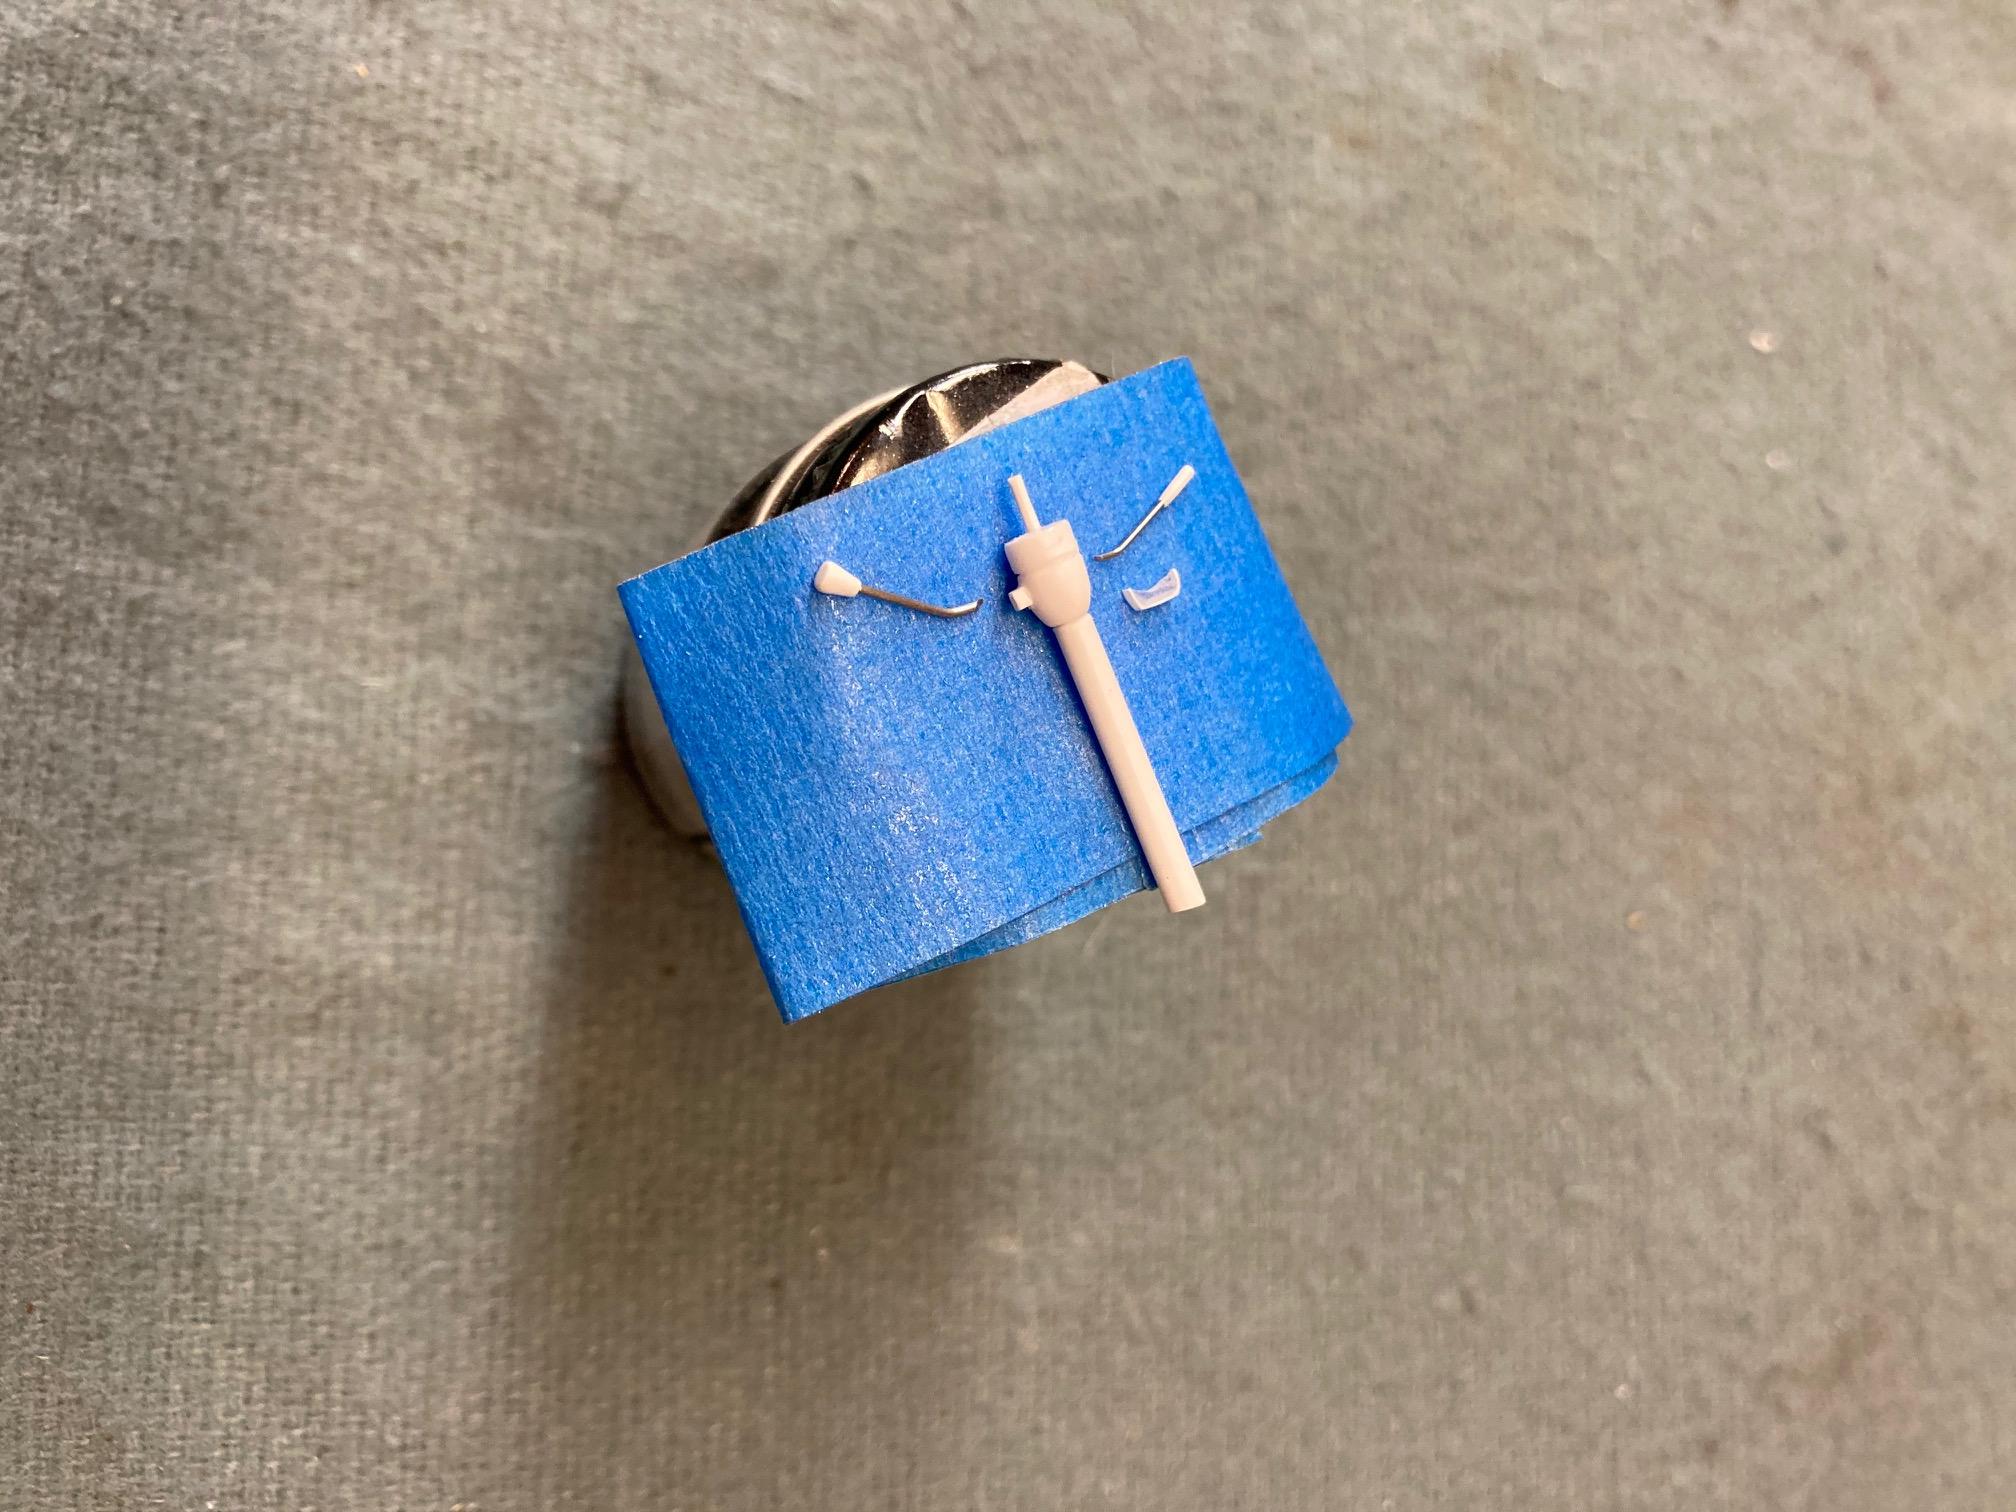
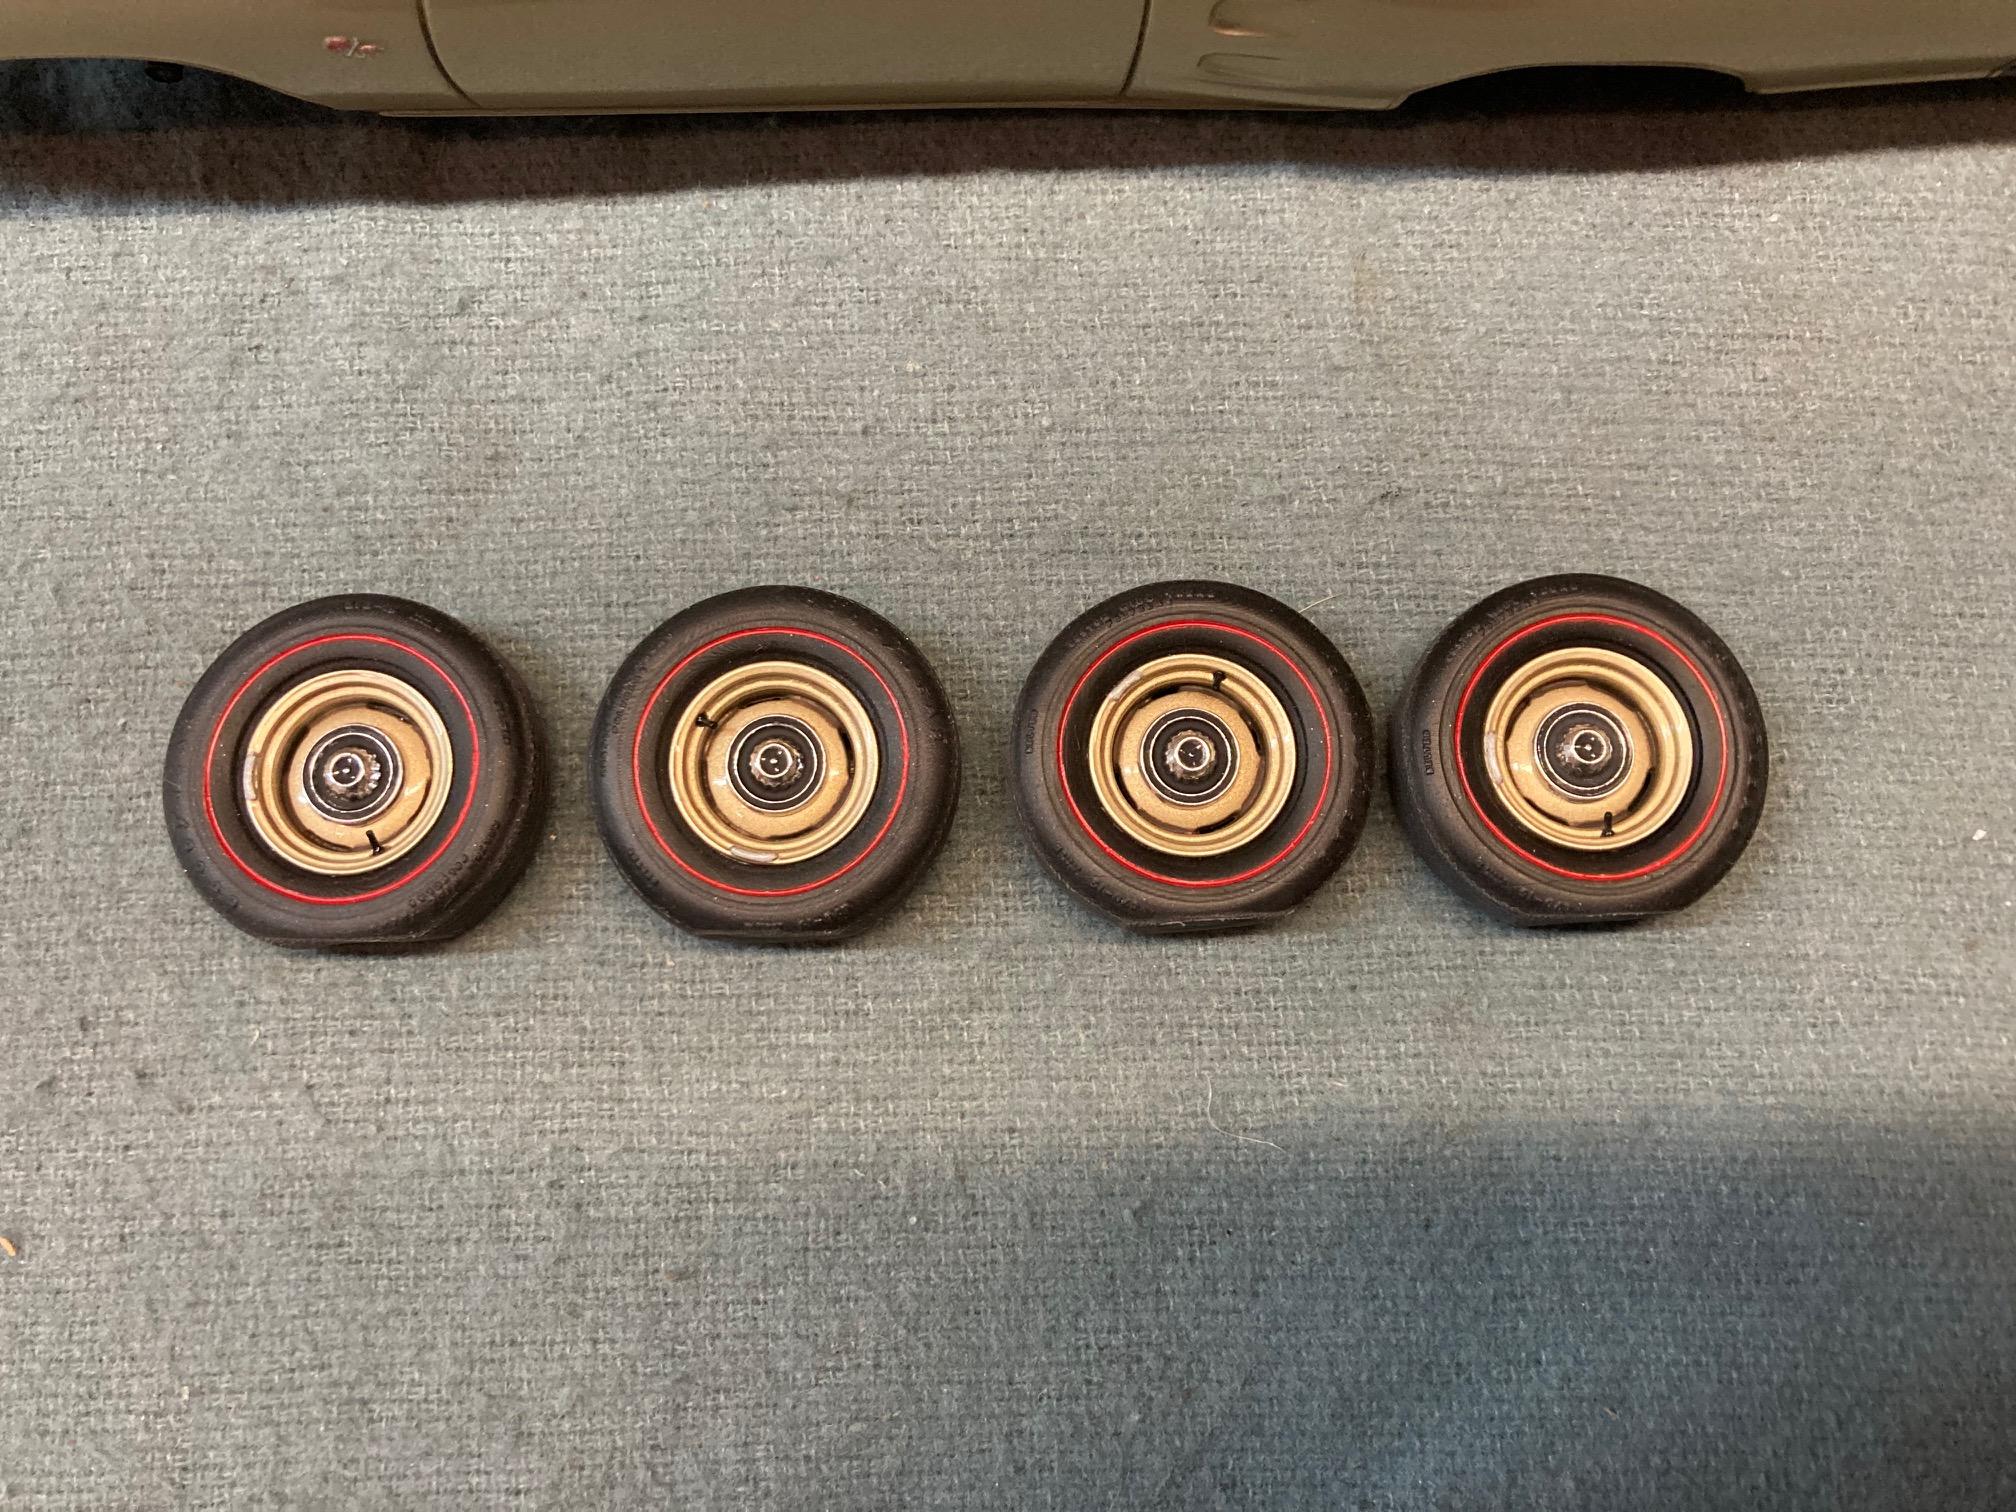
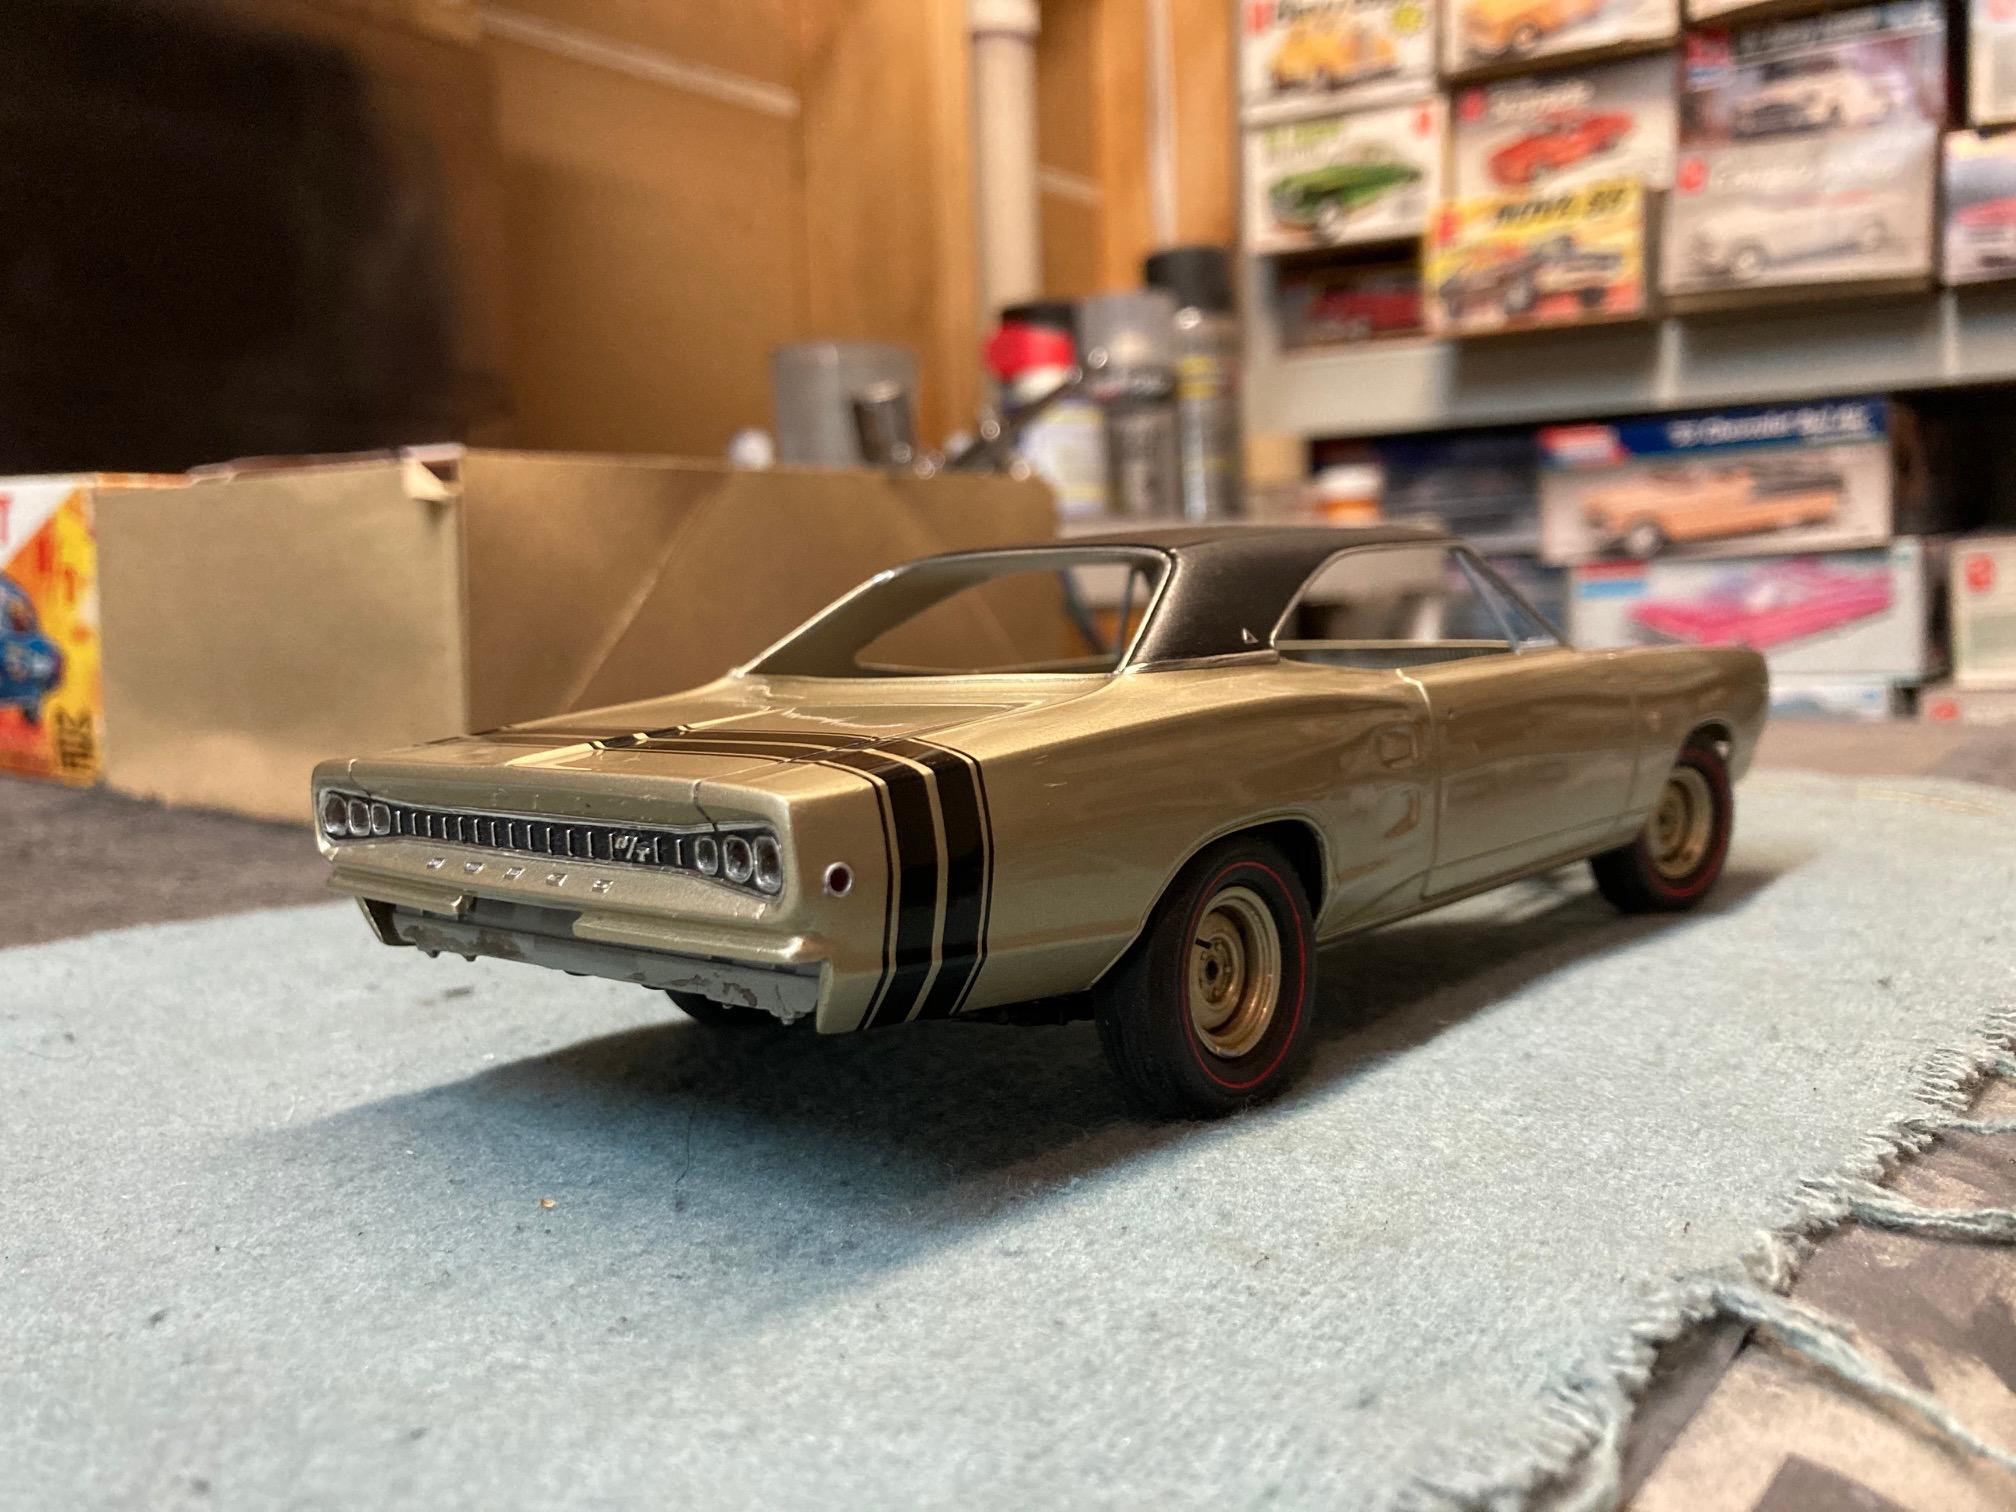
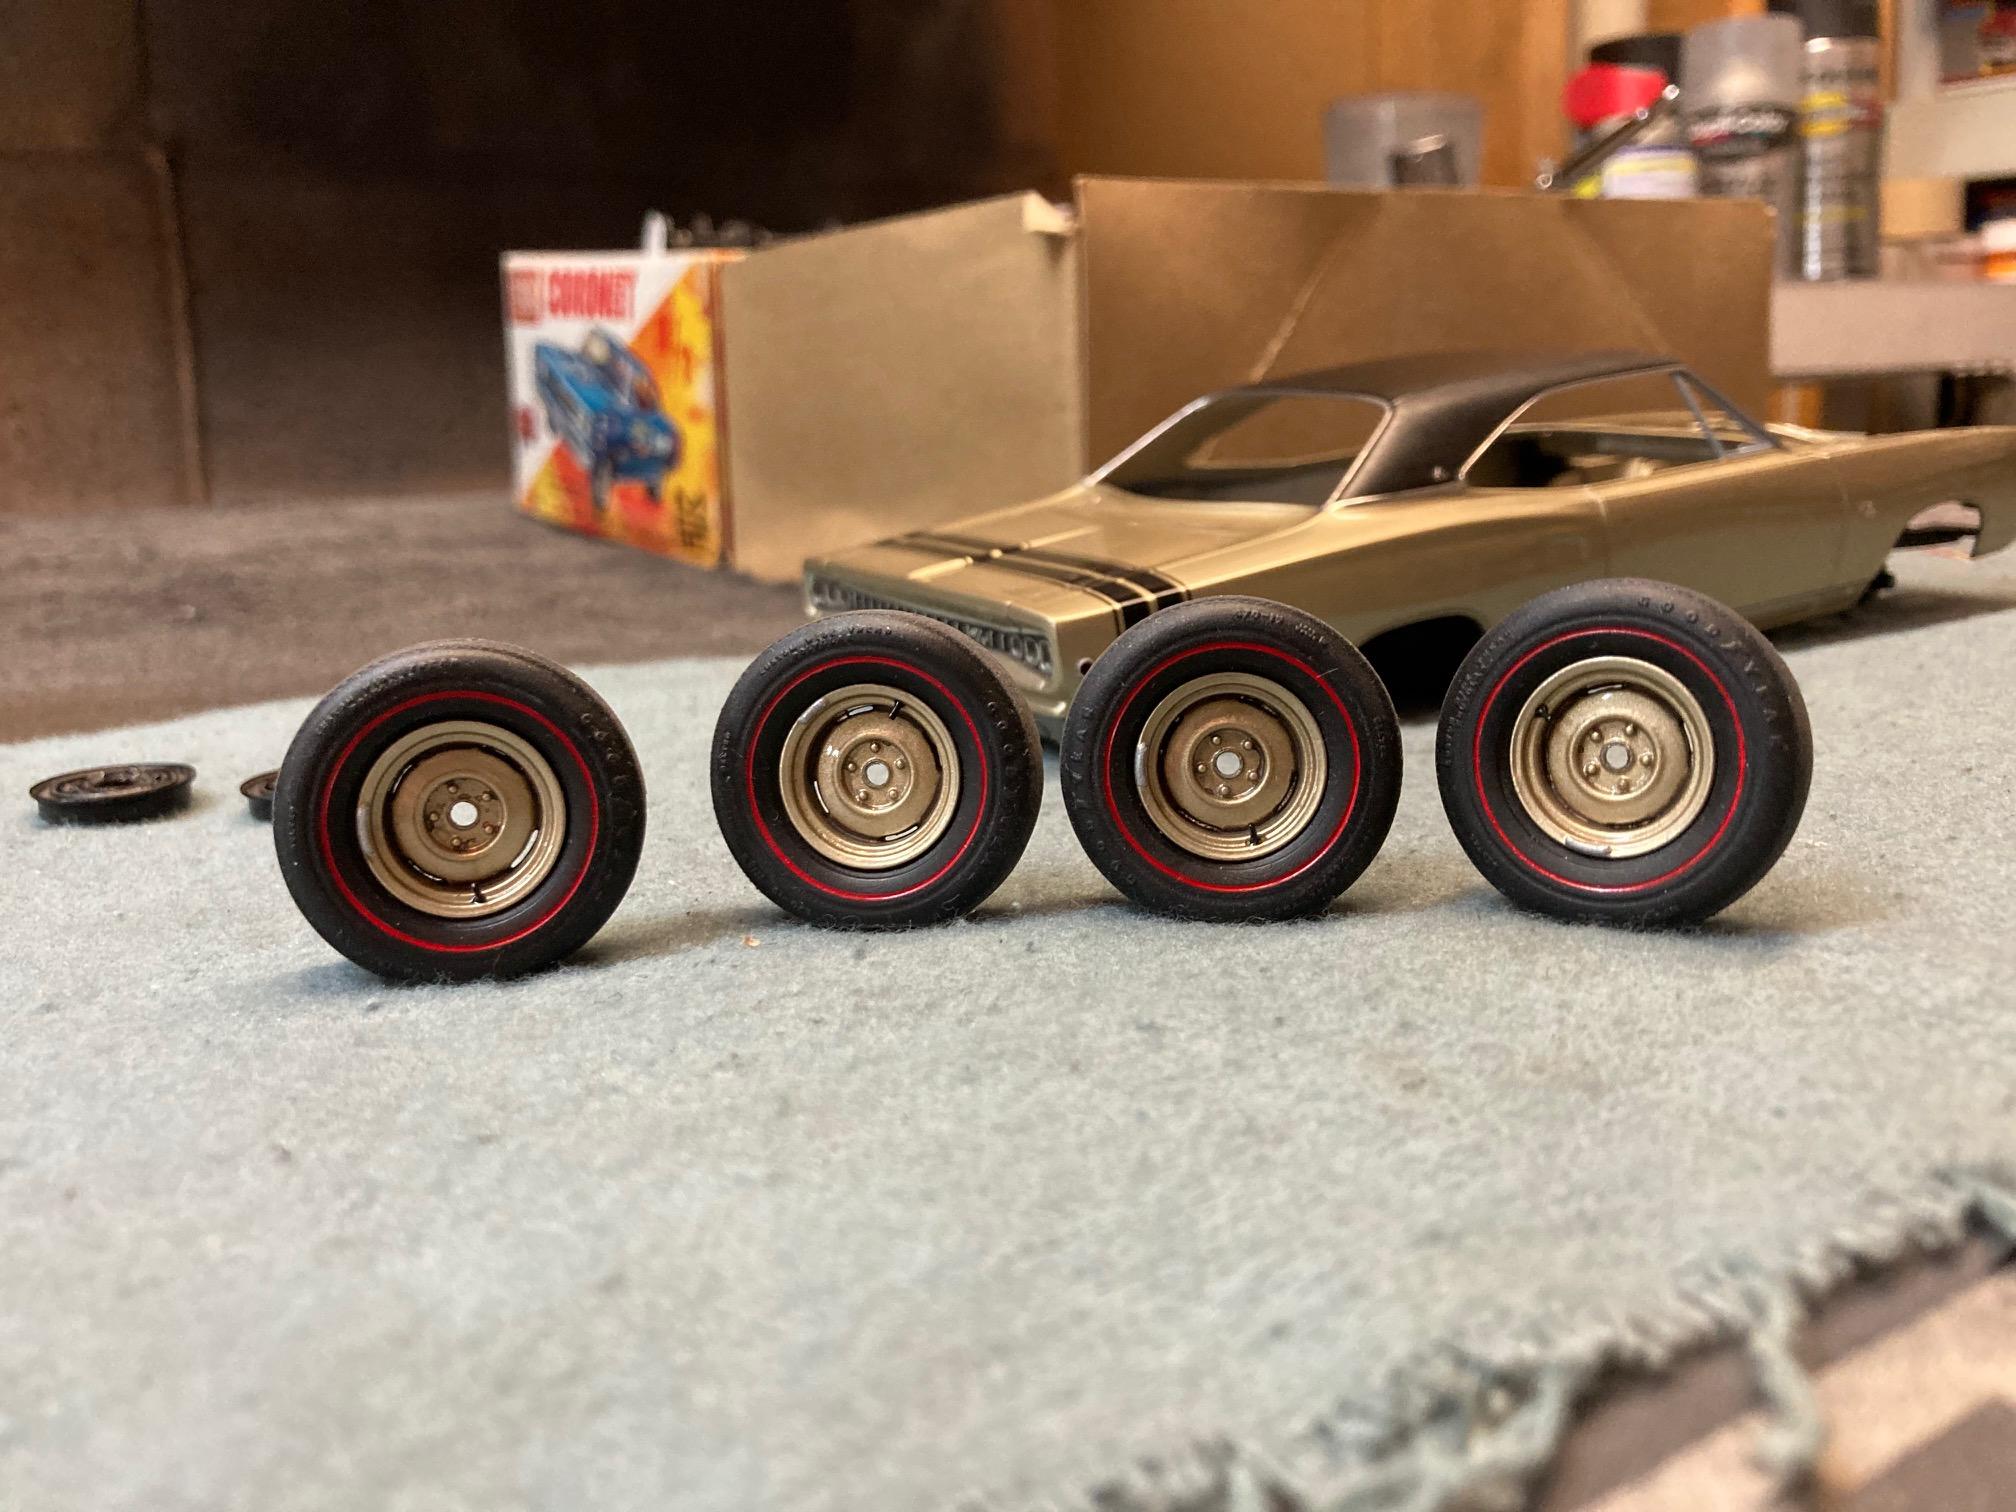
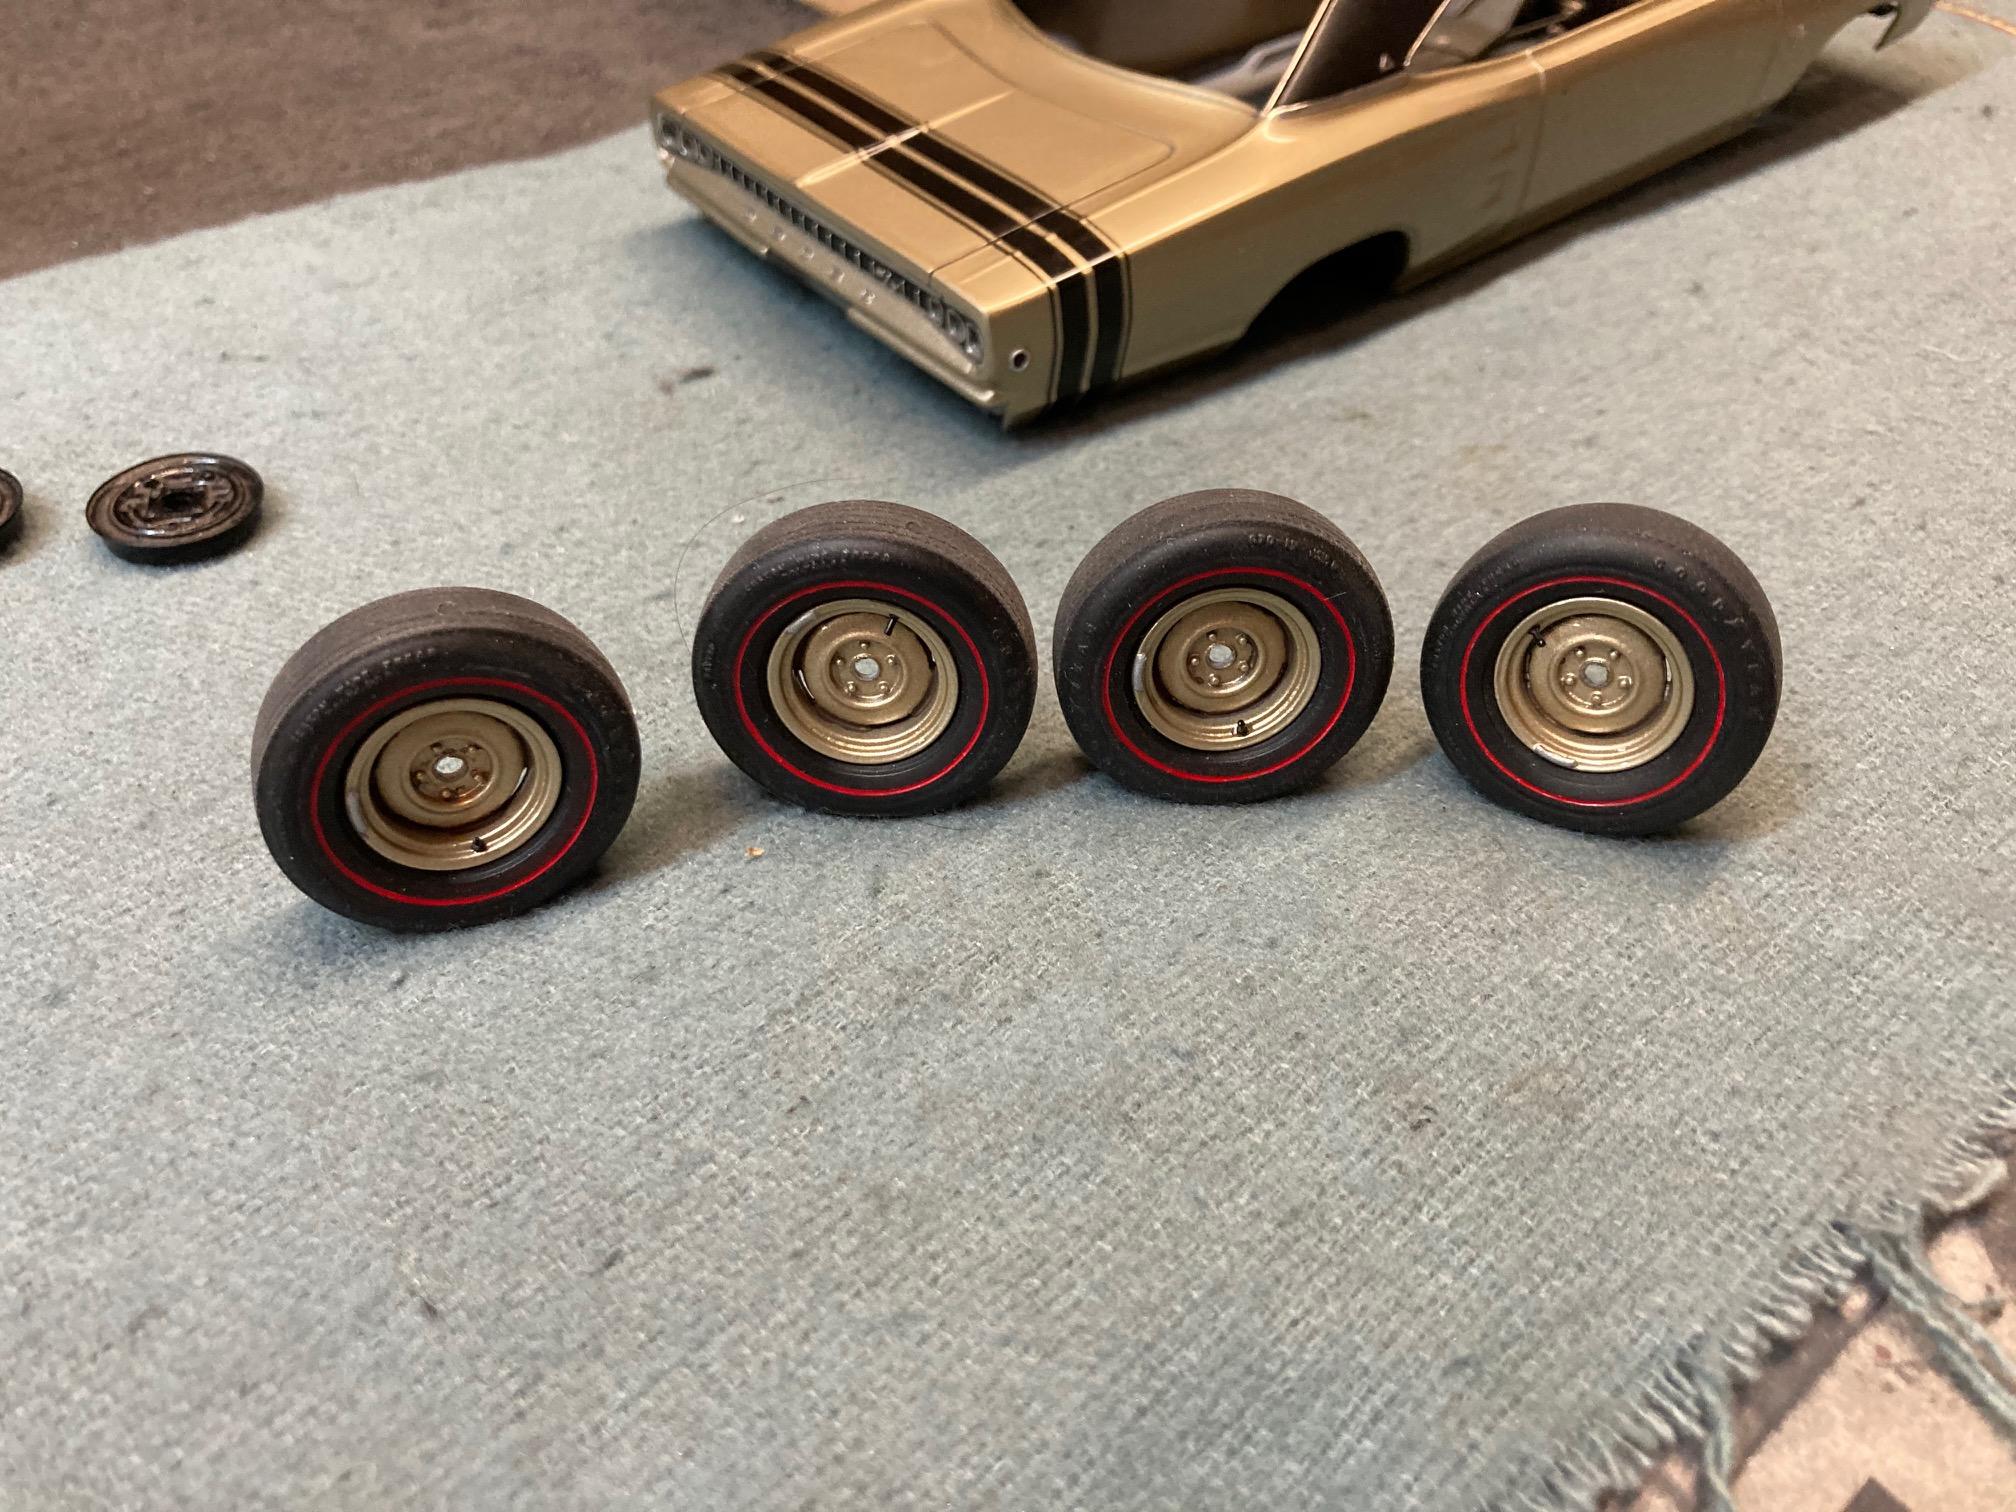
Thanks guys. Started working out the lenses for the side markers today, as well as detailing the wheels and finishing the red lines on the tires. Steve
-
Not only that, but as has been discussed before, nobody knows what the long term viability of Molotow is. Could be great. Could be that it turns into cr*p in a few years. I have models in my collection that I foiled more than 25 years ago that look as good as the day that I did them. Who knows what 25 years will do to Molotow. Steve
-
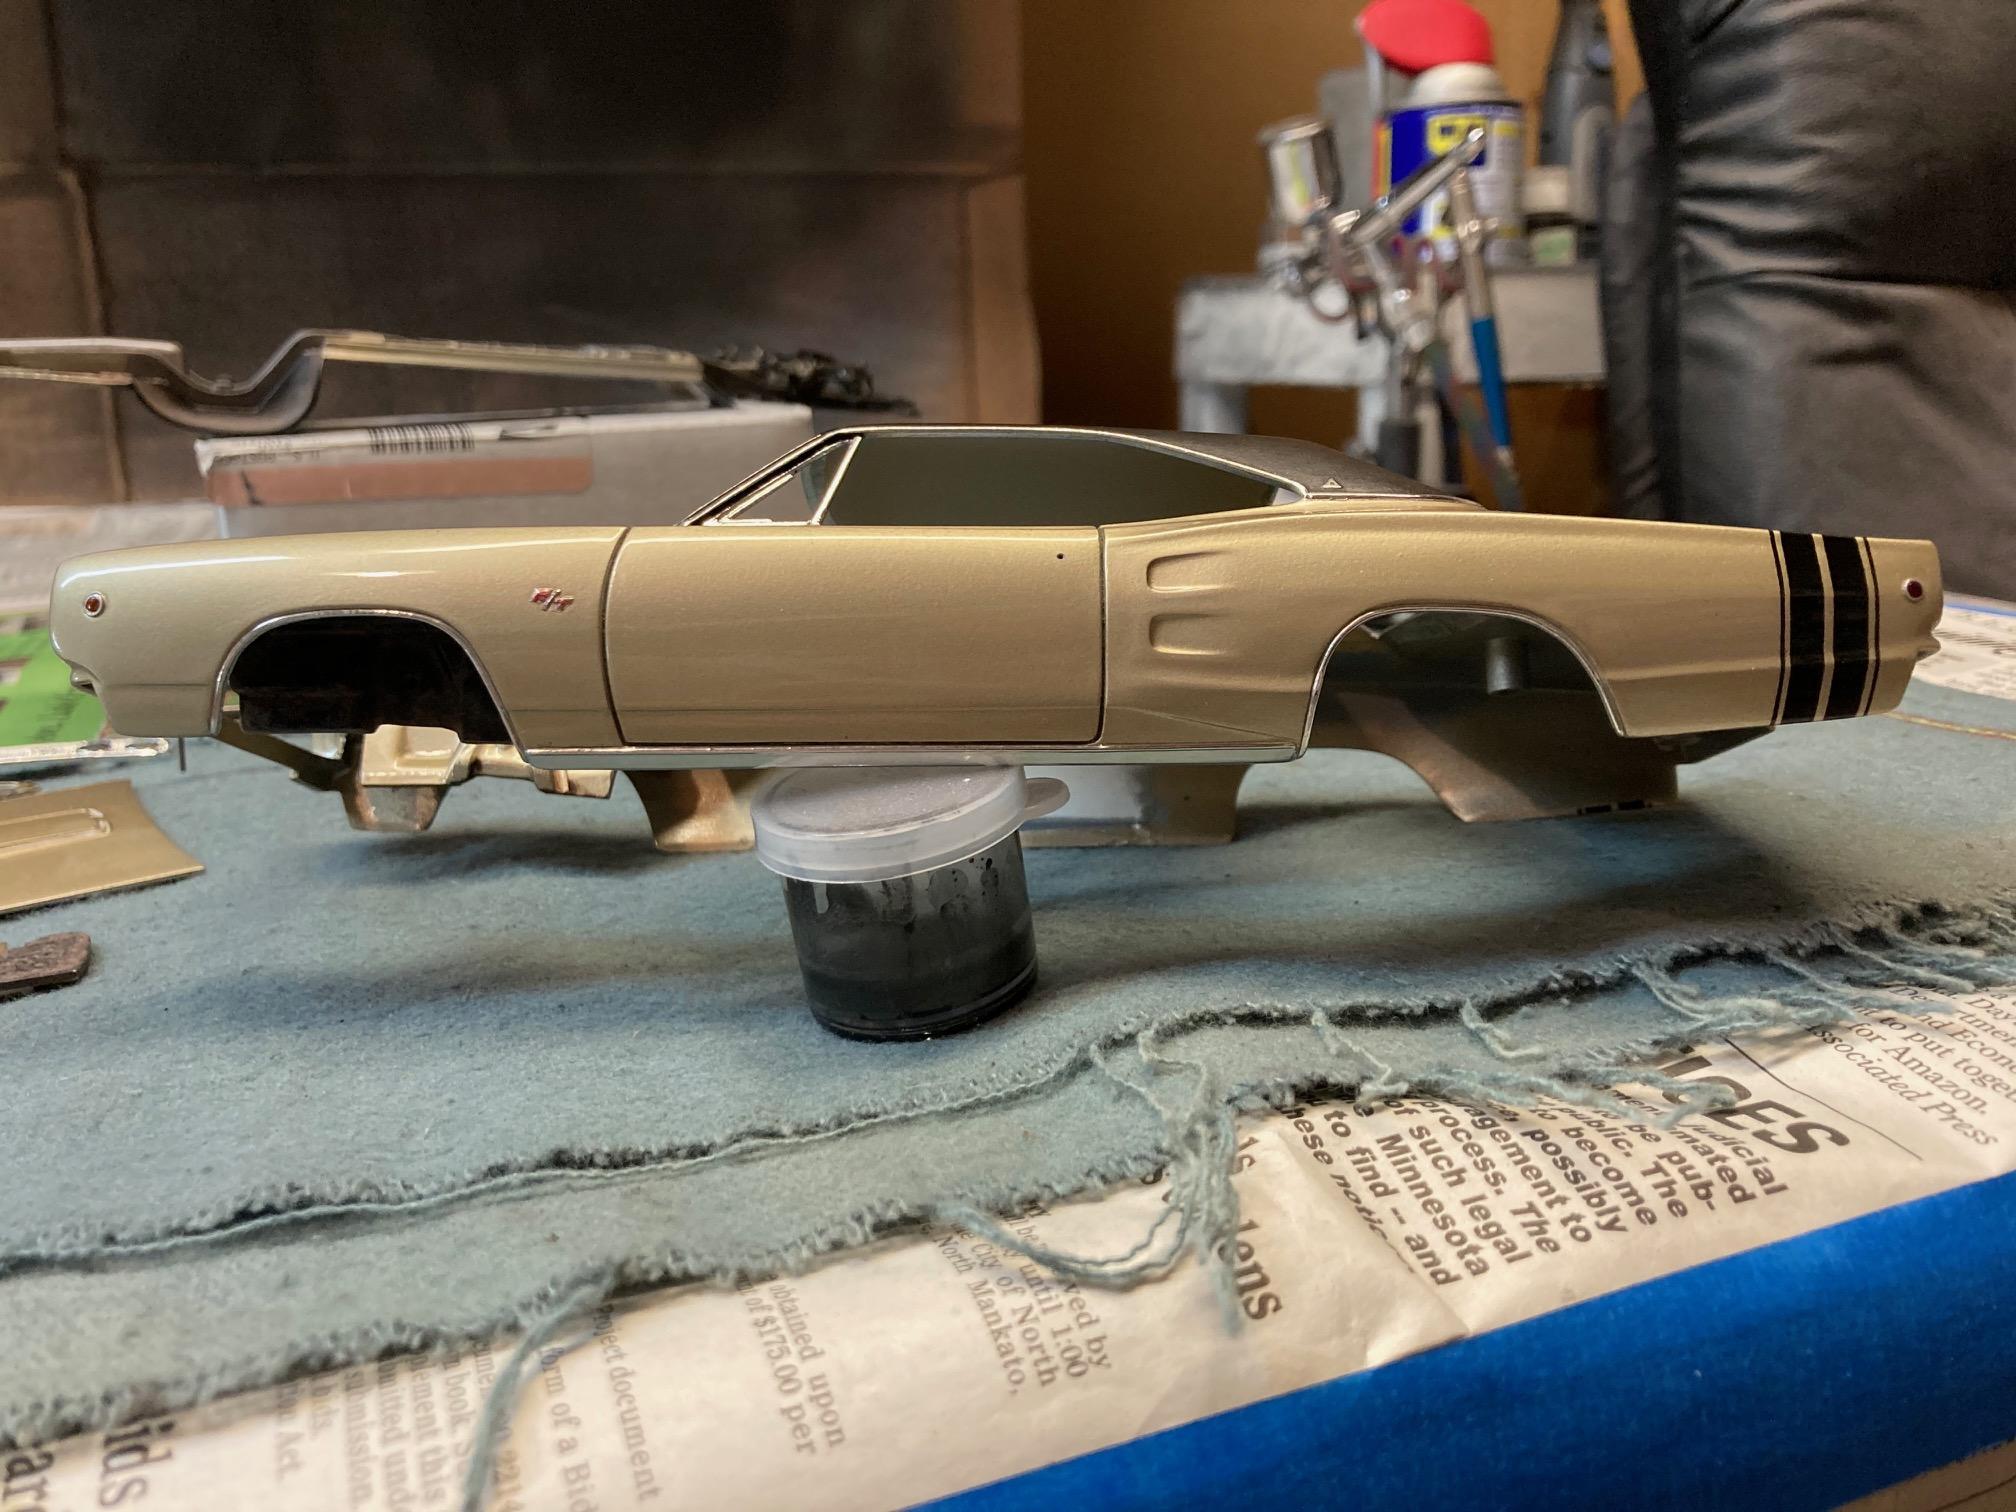
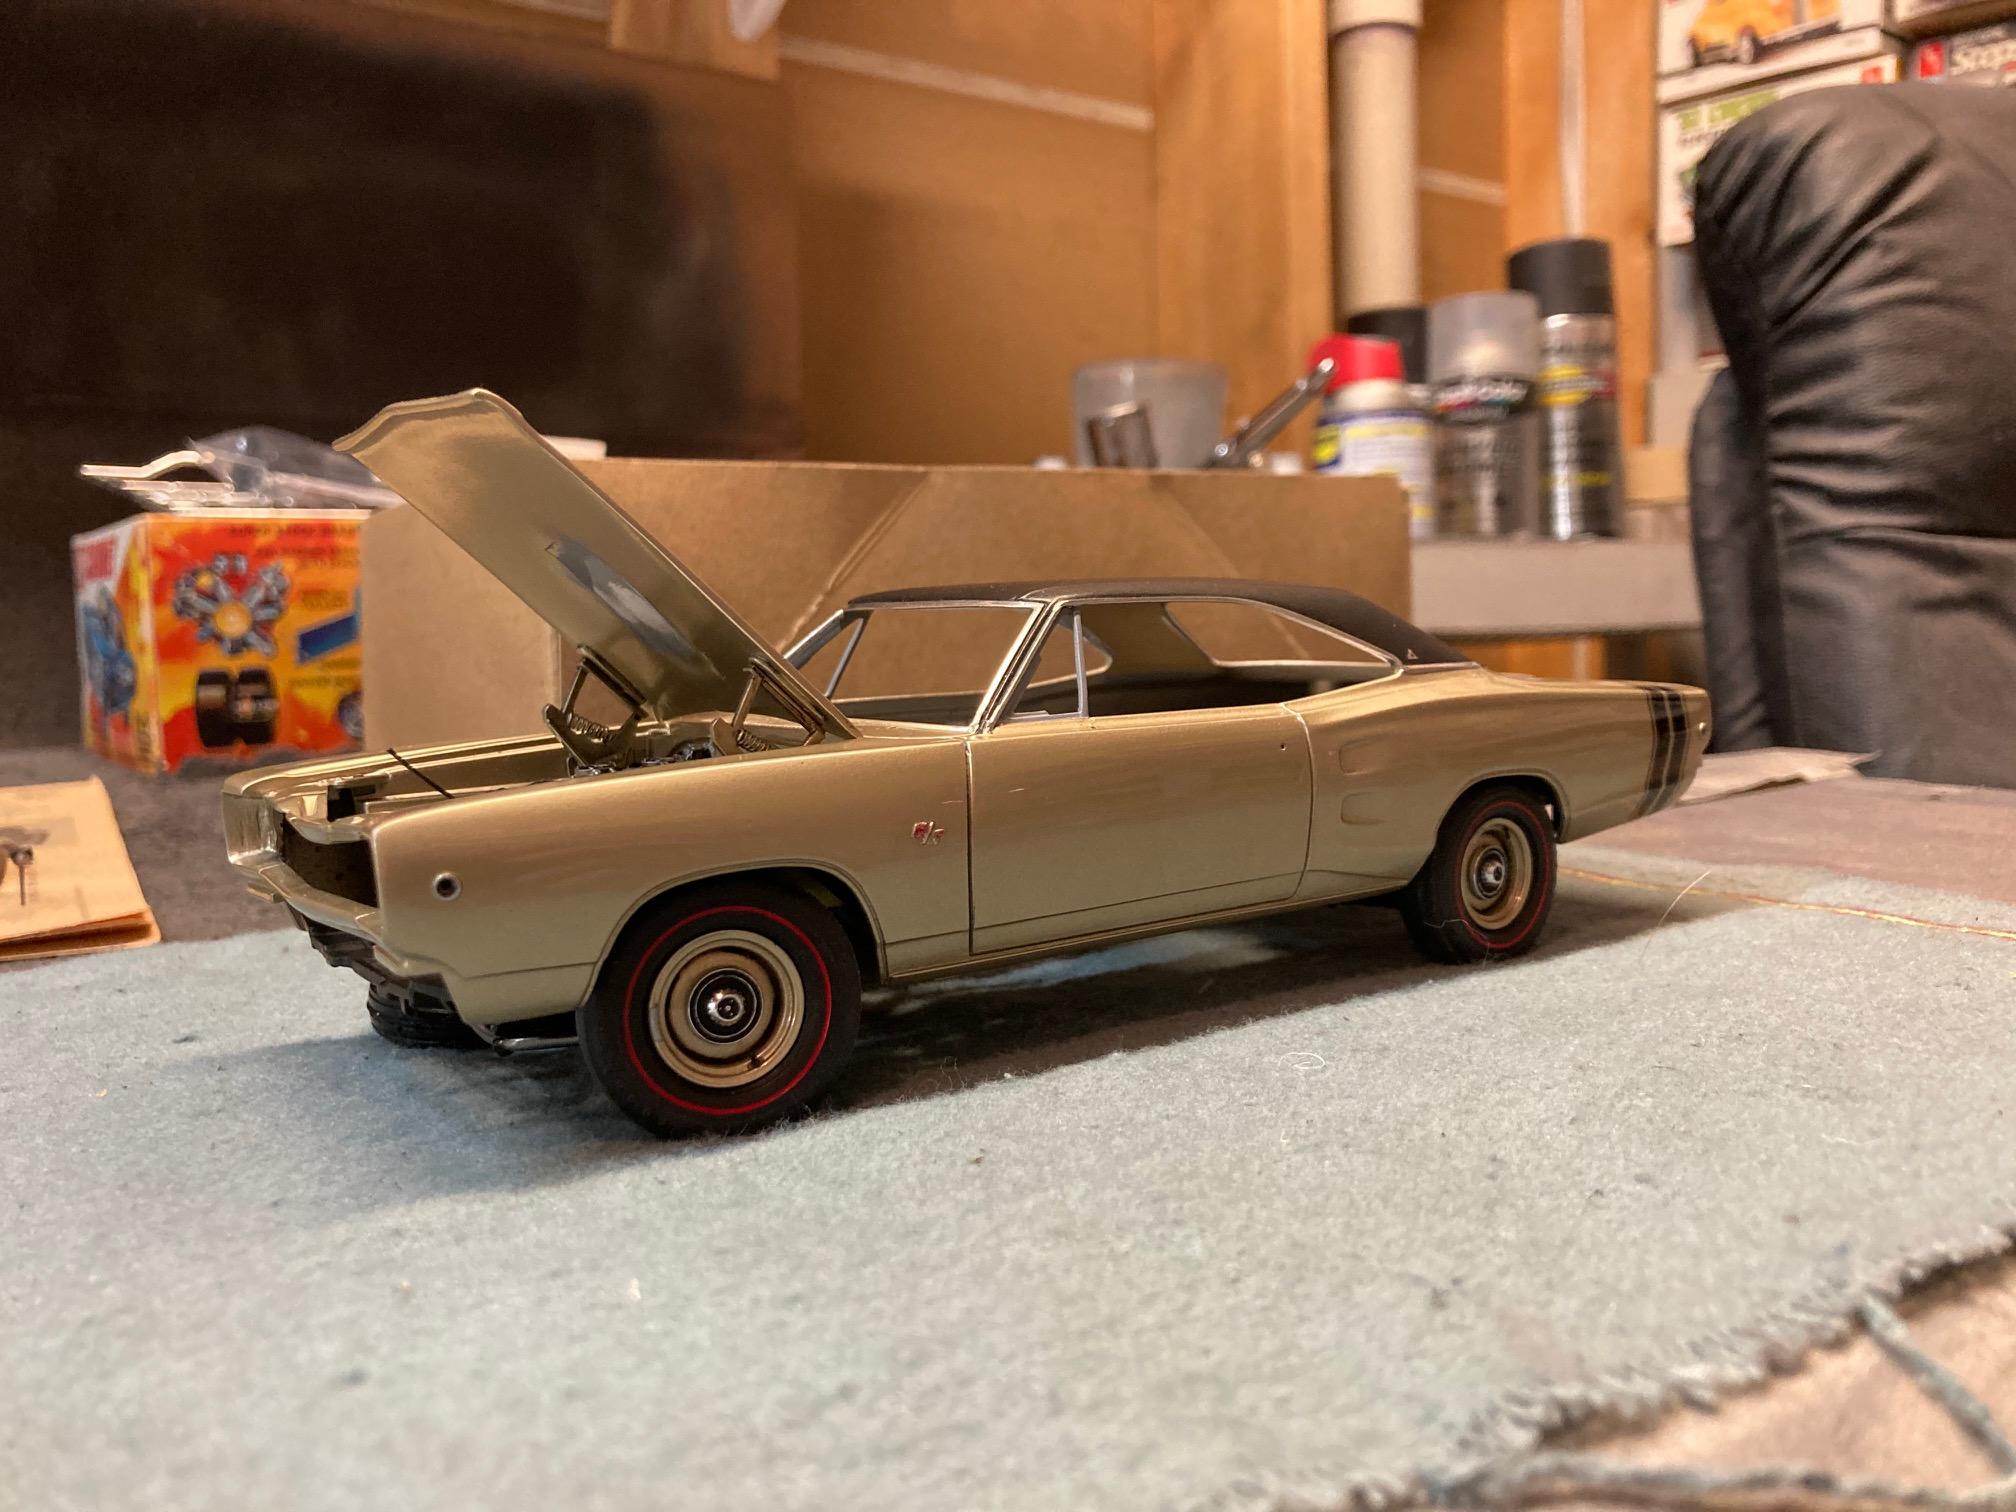
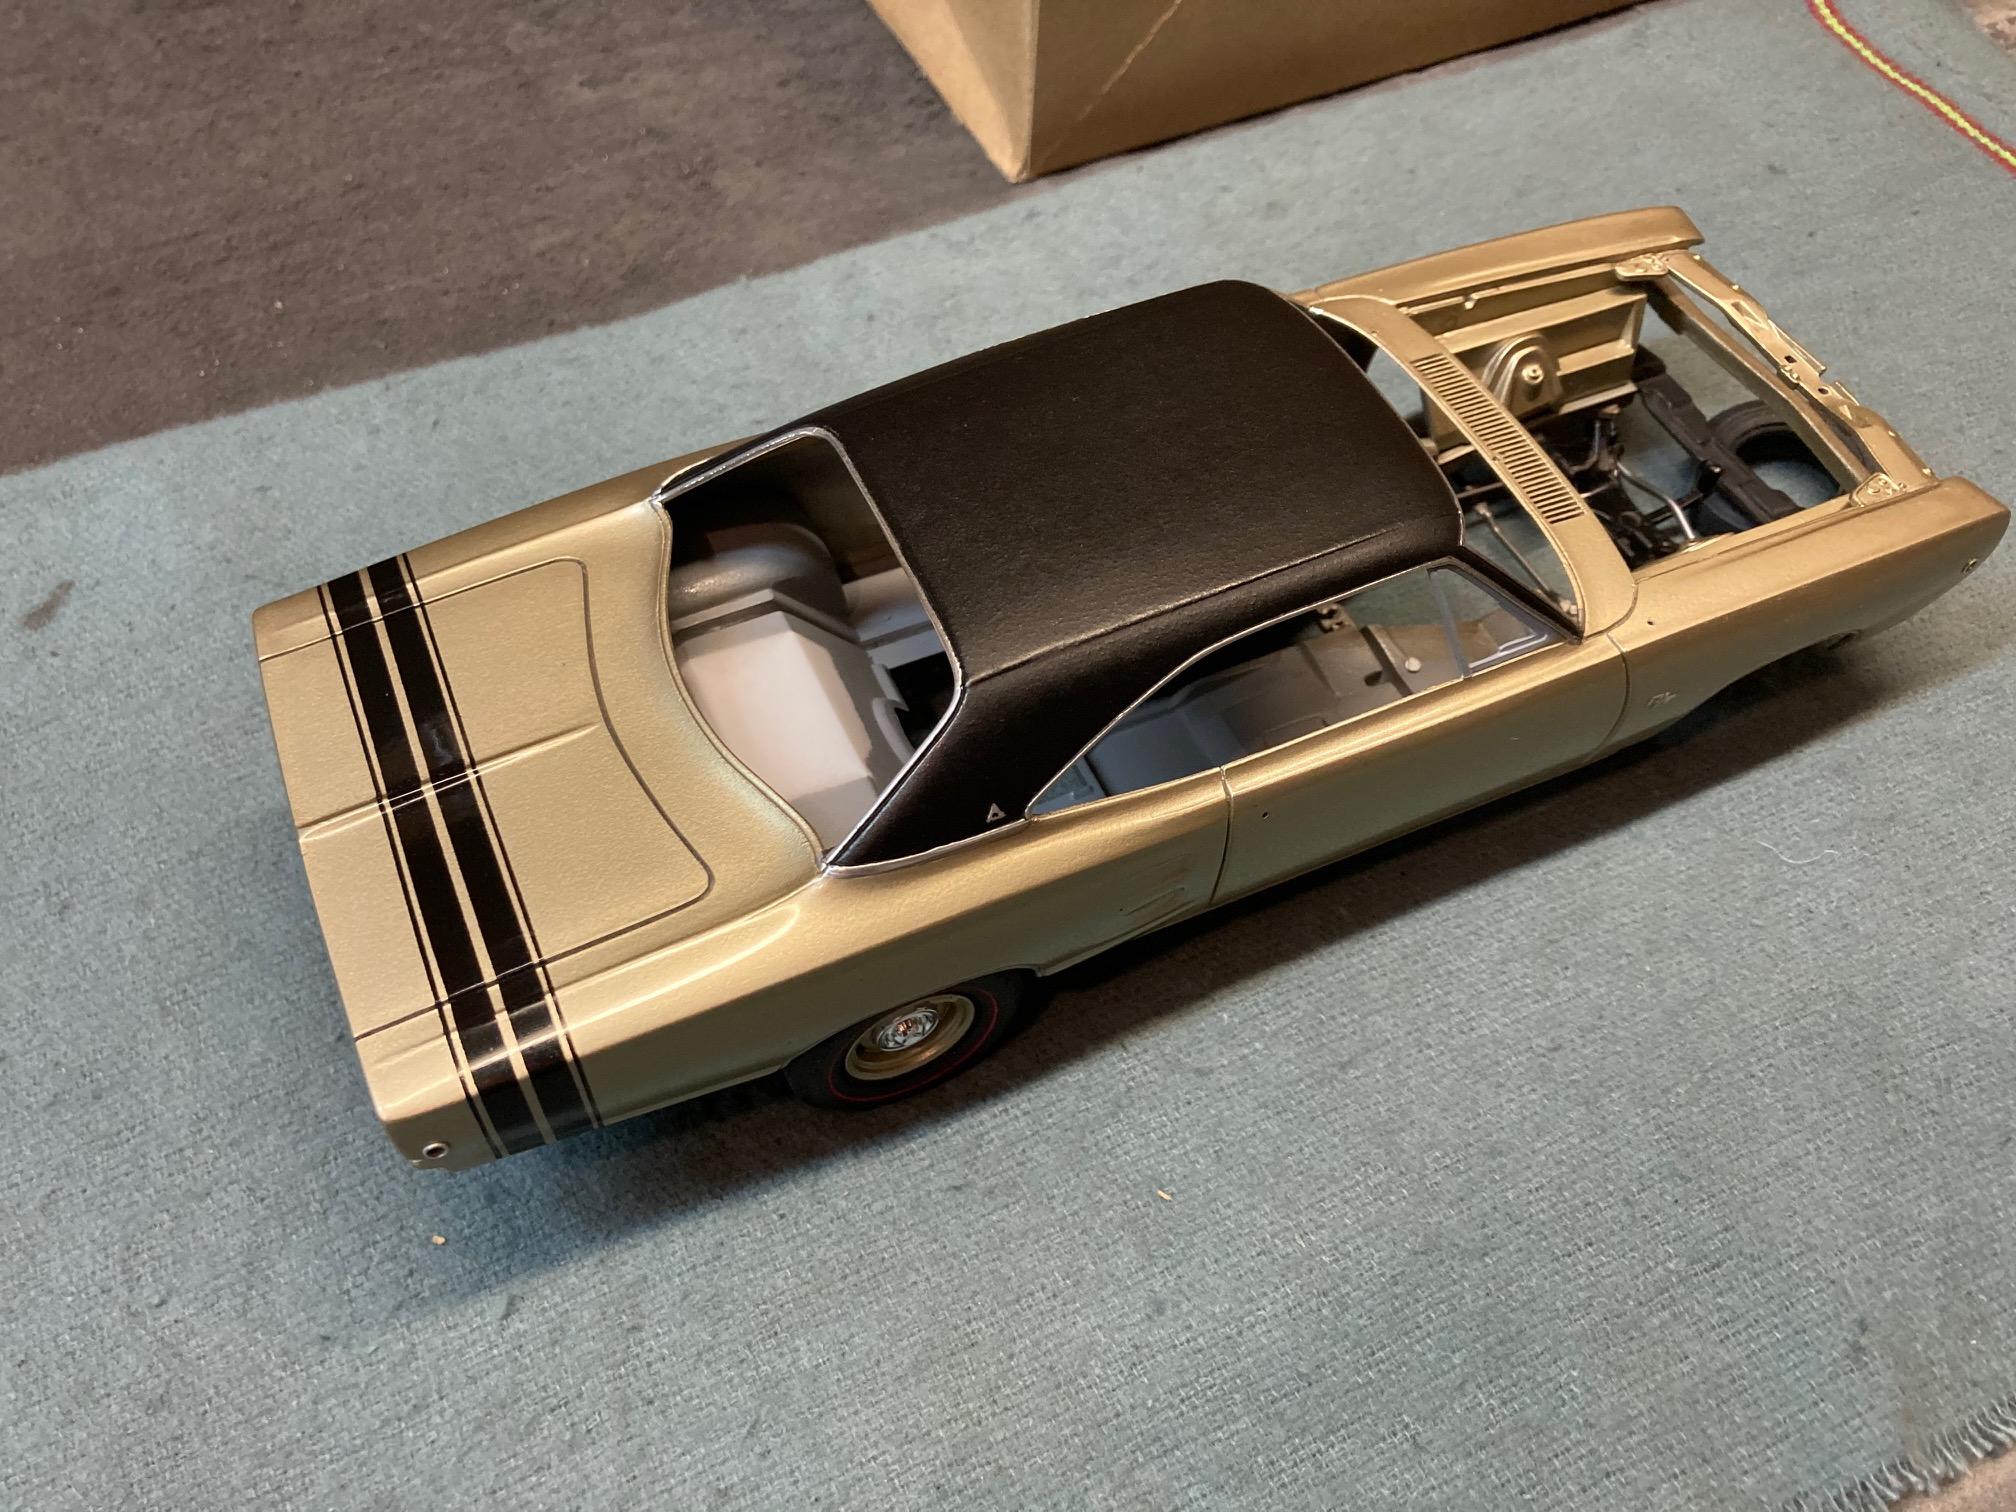
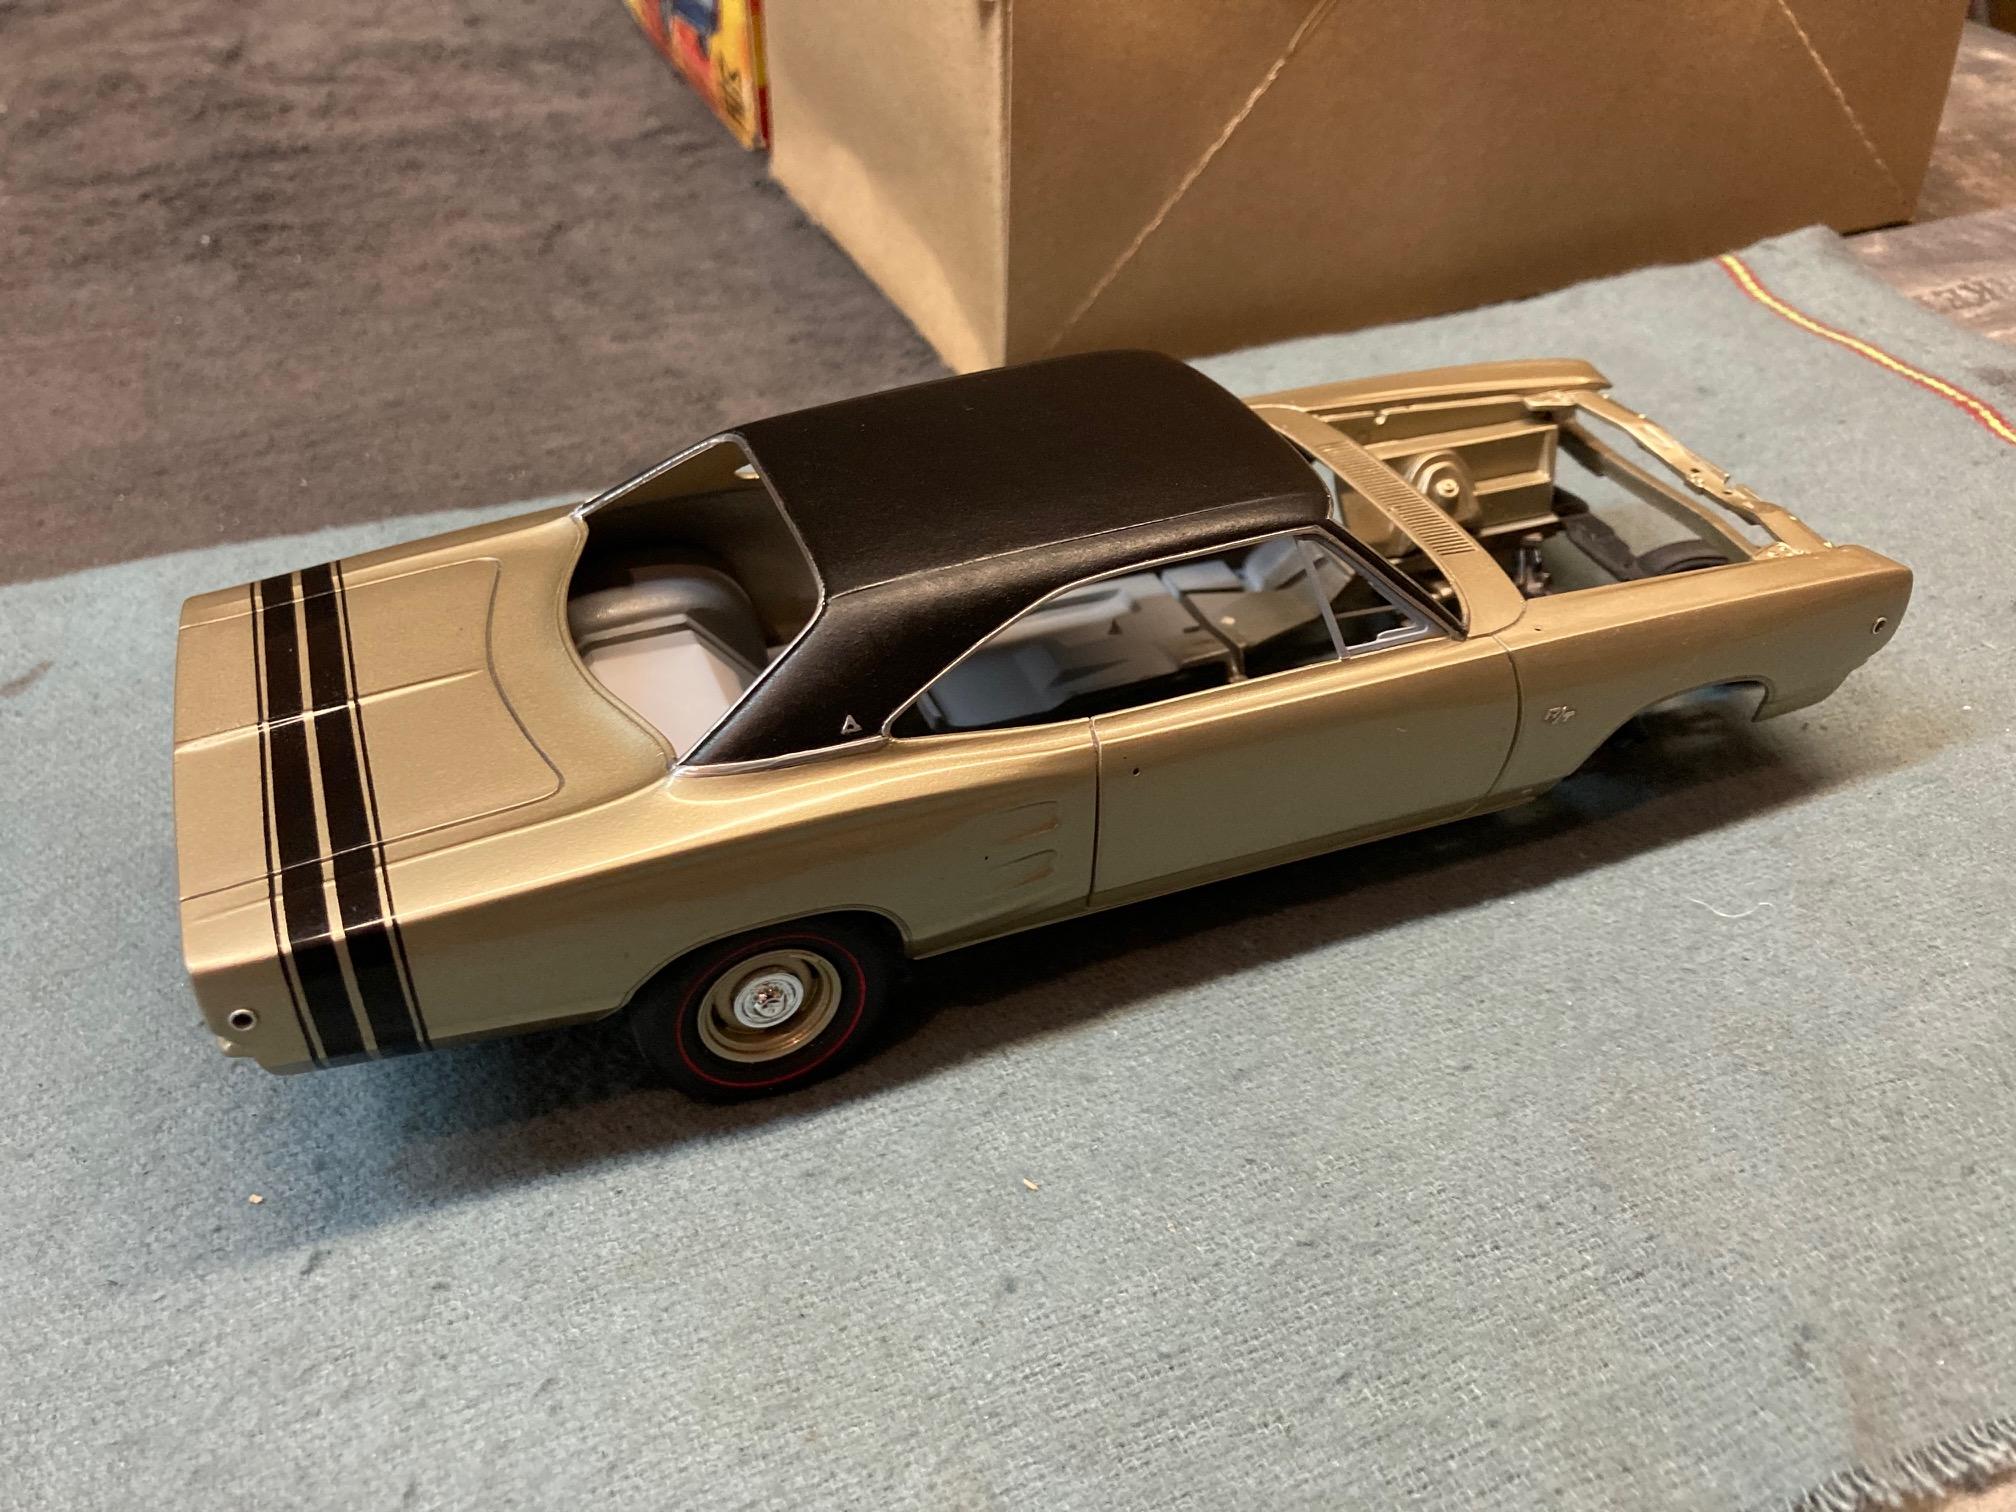
Thanks everyone. After some contemplation, I decided that I wasn't happy with the finish on the vinyl top. It was too shiny for me. So I added a couple of coats of black primer, rubbed it down a little, and finished with a little Armor All. It's still a little blotchier than I would like, but then again, this model is supposed to represent a car that's a few months old, so it shouldn't be perfect. In any event, I like it better now. Steve
-
Yes, this was already brought up earlier, but there’s no changing it now without a complete repaint. I’ll have to live with it. Steve
-
Yes, I felt that it was too shiny as well. I’ve already addressed this by adding some more black primer over it. It might be a little more dull than desired, but I like it better. I’ll post a couple of photos later. Steve
-
Yeah, I still have some of the old BMF. ? Steve
-
Yeah, but that was just me experimenting. I had never used the MCW vinyl top paint before, and I thought it looked a little too shiny. So I sprayed another light coat of the black primer over the top........at which point it looked too dull. So I rubbed a little WD over it to help bring back a little of the sheen. Steve