StevenGuthmiller
-
Posts
15,071 -
Joined
-
Last visited
Content Type
Profiles
Forums
Events
Gallery
Everything posted by StevenGuthmiller
-
I remember foiling those tail light bezels on my '60 Dodge! If you can foil those, you can foil anything!!! Steve
-

Paint-How much is enough??
StevenGuthmiller replied to TransAmMike's topic in Model Building Questions and Answers
Agree completely. I wouldn't even consider trying to polish a metallic paint job without clear coating anymore. Been burned a couple of times, and that's enough. Steve -
Paint-How much is enough??
StevenGuthmiller replied to TransAmMike's topic in Model Building Questions and Answers
I agree. There’s really no set formula given all of the variables possible. I use a lot of primer because I want to ensure a good impenetrable barrier to the automotive lacquer that I use. I use just enough color to get a good even distribution and acceptable depth, but even that usually equates to four or five coats. Finally, I generally use about 5 coats of clear to ensure sufficient thickness for polishing eliminating the fear of polishing through to the paint. That’s probably enough to be considered “overkill” by a lot of modelers, but it’s a regimen that I’ve developed over the years that has since treated me very well with an extremely low rate of having to strip and repaint, which makes it well worth it in my eyes. If it ain’t broke, don’t fix it. ? Steve -
Well, that’s convenient, considering that I’ll be using a good portion of the other parts from that kit. ? Steve
-
Just short pieces of aluminum tubing, drilled out a little to thin the wall thickness and then polished on the ends. Actually a pretty easy upgrade. Steve
-
Yup, this was my plan. The engine will need to be a complete swap anyway, so unless there’s some other issue that I don’t know about, I’ll plan on using the belts and pulleys from the El Camino on a yet to be determined Pontiac engine. Probably the Revell ‘68 Firebird’s. Anybody have a suggestion for the best automatic transmission to use? Steve
-
You can make a Profit
StevenGuthmiller replied to Boss31's topic in General Automotive Talk (Trucks and Cars)
I look at it from the same perspective as my other hobby, cooking. I like to cook, but I want to cook what I feel like cooking when I feel like cooking it, and when it’s finished, I consume it, and if it’s not up to someone else’s standards, it doesn’t matter. You start bringing in all of the complications of a restaurant operation and having to please all of your customers all of the time and it looses all of its appeal. Steve -
You can make a Profit
StevenGuthmiller replied to Boss31's topic in General Automotive Talk (Trucks and Cars)
An absolute killer for me! I wouldn't last 5 minutes building a Porsche for somebody. There's no possible way that I could sustain any excitement trying to build a subject that doesn't interest me in the least. Too bad the OP had to pick up his toys and go home. Some insight from him might have been valuable to this discussion. Steve -
You can make a Profit
StevenGuthmiller replied to Boss31's topic in General Automotive Talk (Trucks and Cars)
I don't think anyone has questioned his motives. Did he want people's opinion on the subject, or not? If not, I don't know why he posted. This is a forum, where discussions take place. If he didn't want any opinions of what others think on the matter, he's in the wrong place. Or he should have stated that he didn't want any feedback at the very least. Although I have to say, I can't imagine why anyone would come to an online forum and not want to engage with other hobbyists. Steve -
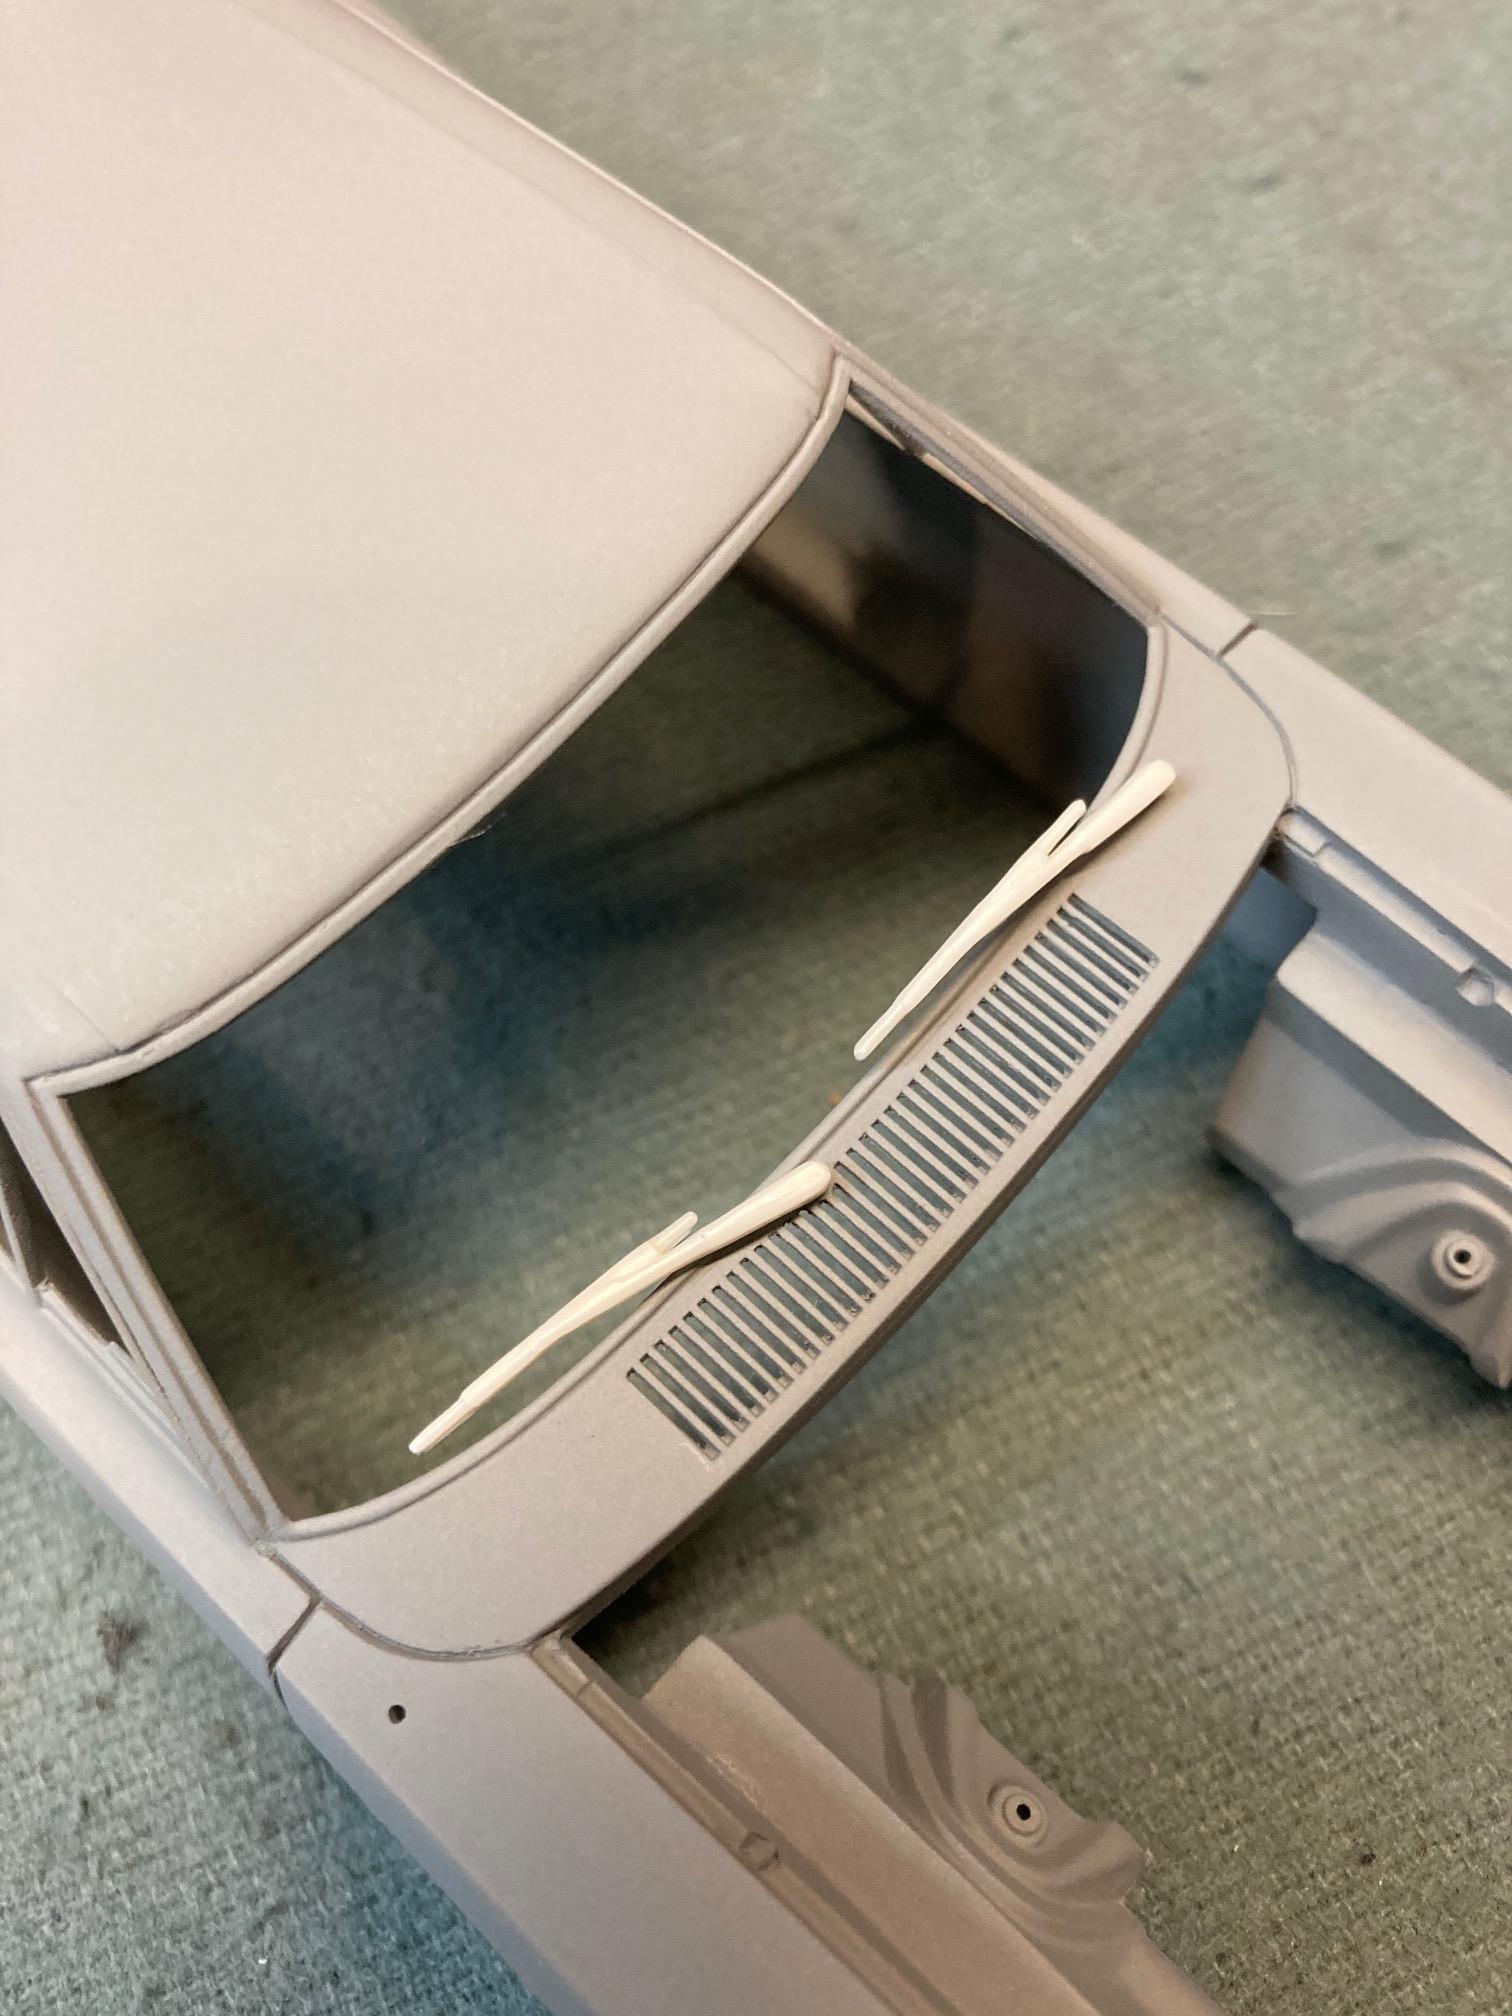
Got some wipers stripped and pinned as well. I'll paint them with some Alclad aluminum when the time comes. Steve

-
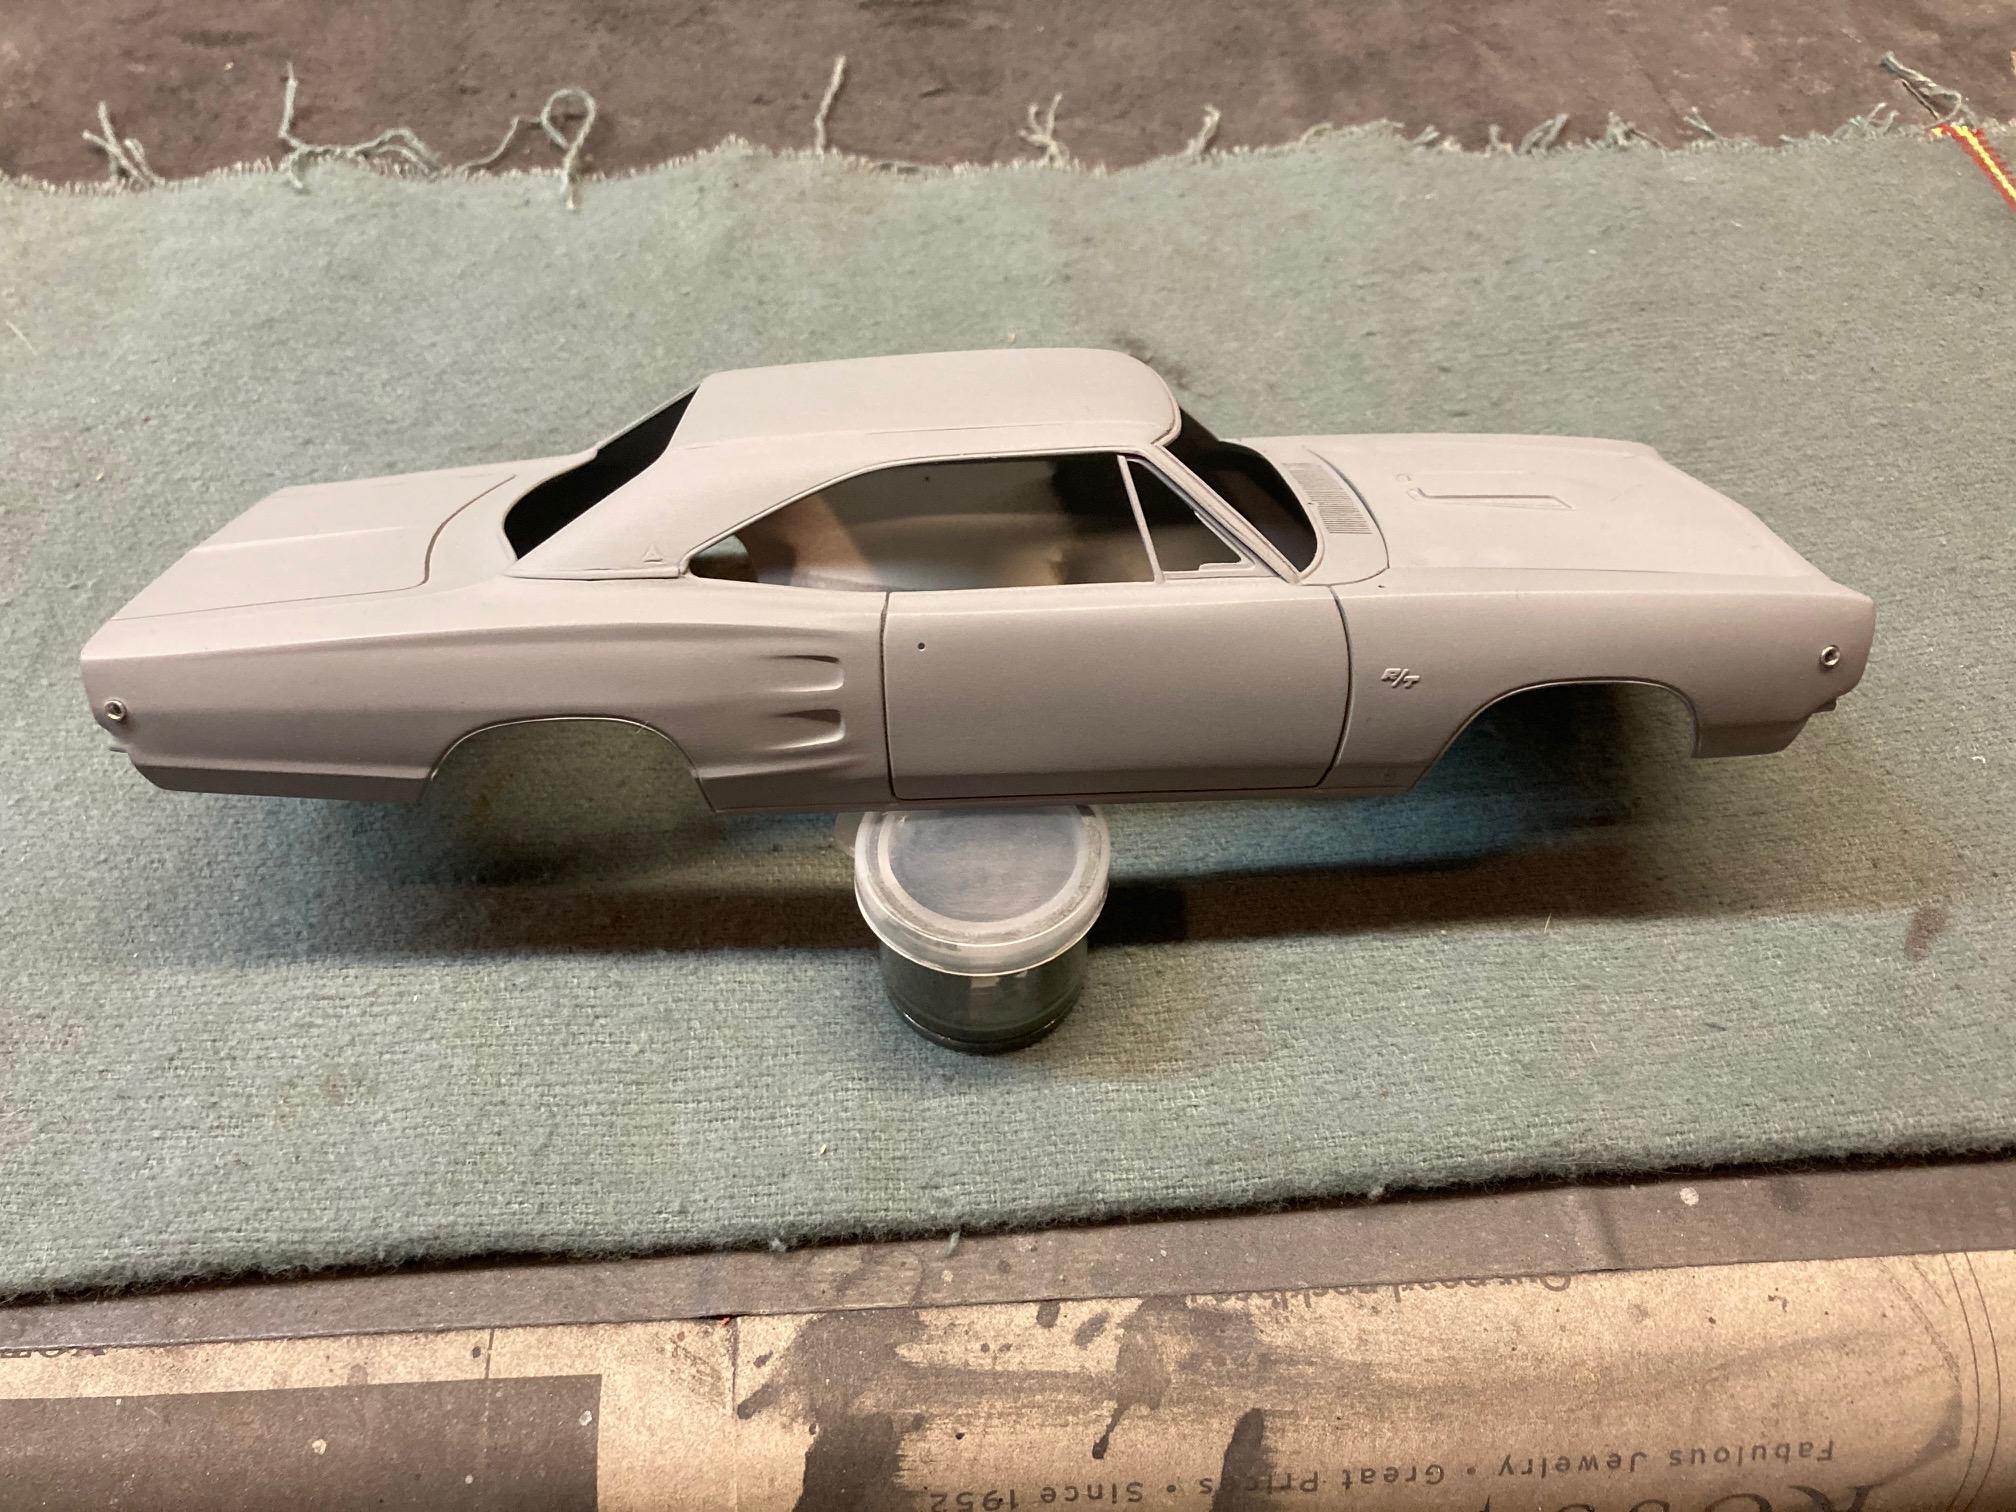
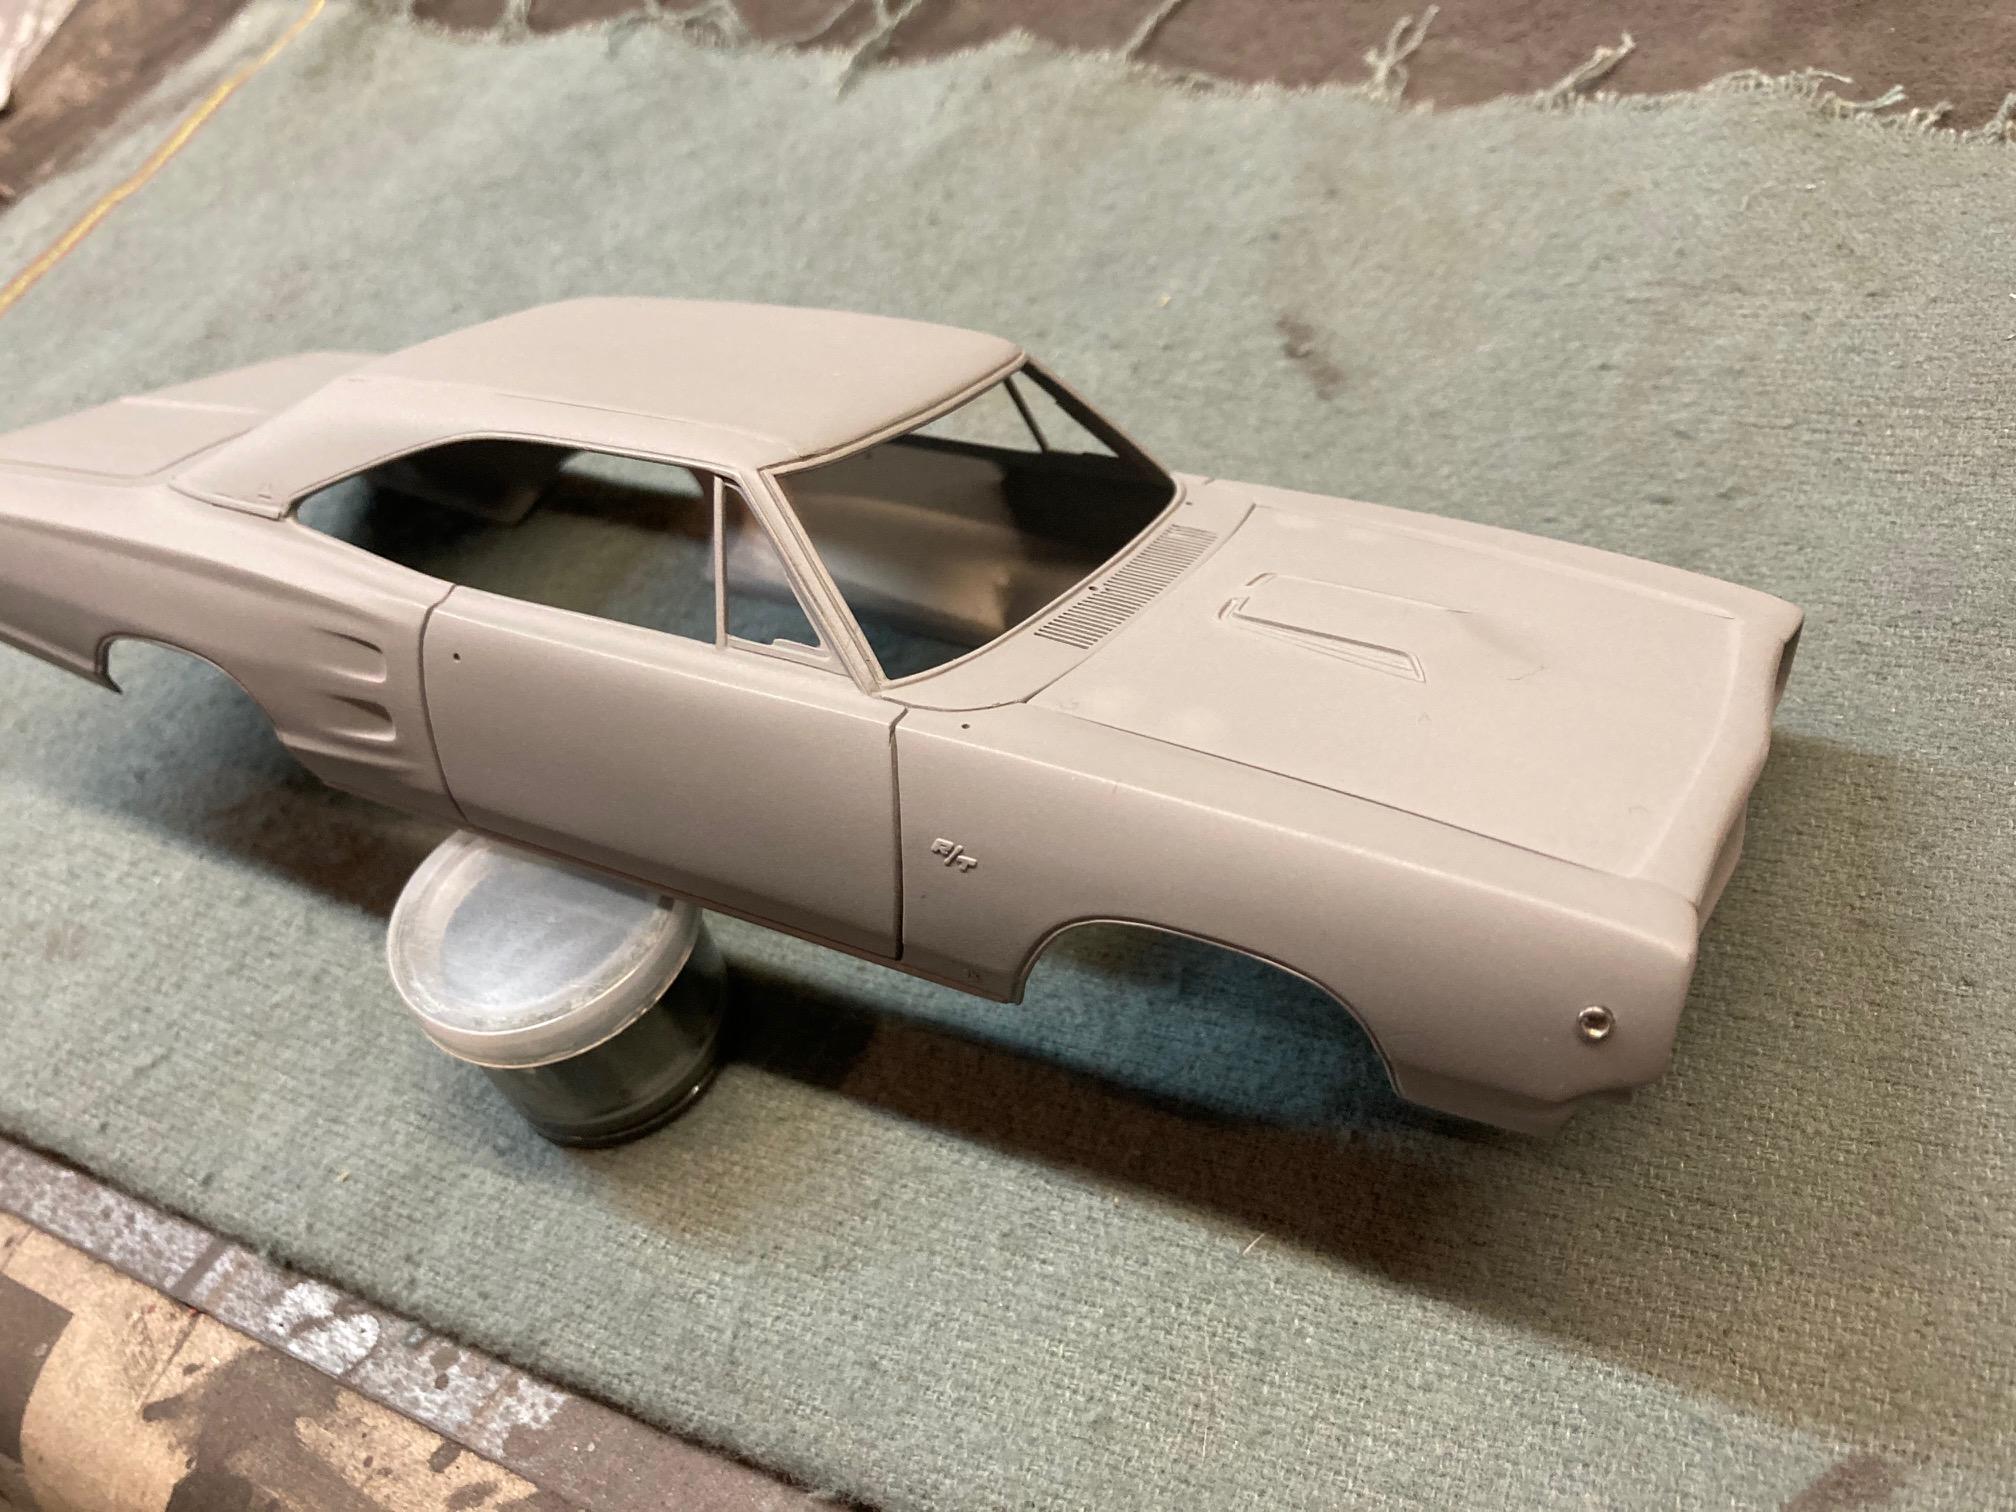
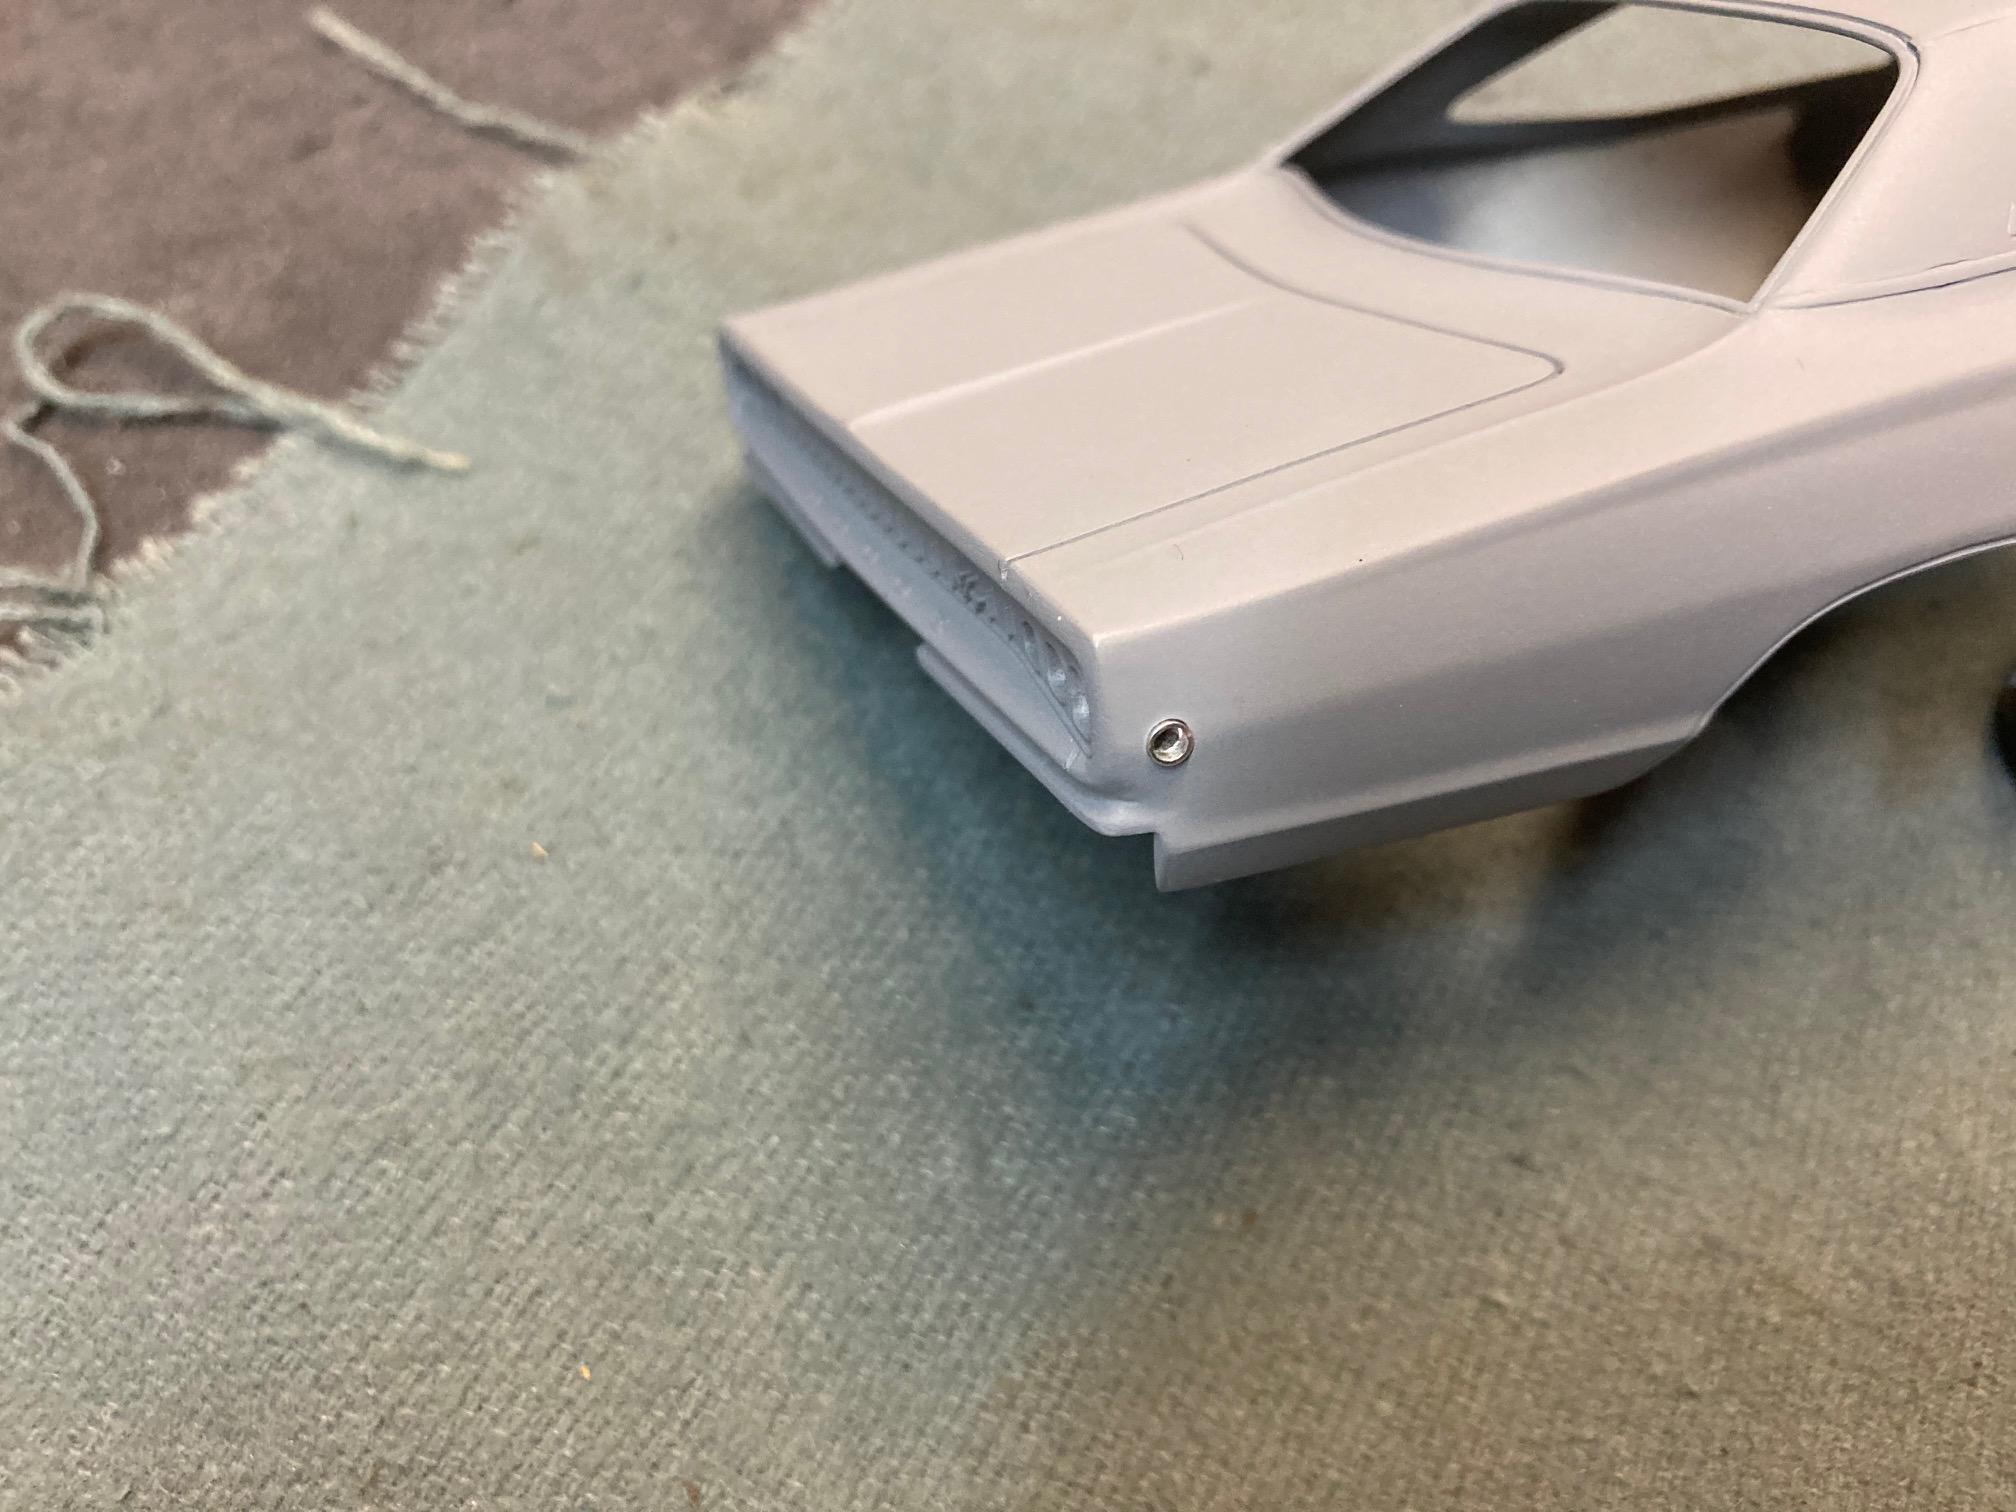
Thanks everyone! Finally got started on laying down some primer on the body parts. I got the side marker bezels installed, will add another coat of primer, do a light sanding and then I can begin applying some color. Steve
-
You can make a Profit
StevenGuthmiller replied to Boss31's topic in General Automotive Talk (Trucks and Cars)
Who said anything about being "pissed off"? You have to understand that when you come onto a "forum" and make a post, people are going to respond with their thoughts and opinions on the subject. That's the nature of a "forum". If you don't want any reaction, or if you expect to get only positive, glowing reactions, you're barking up the wrong tree, dude. You might need to thicken up your skin just a little around here, or you'll get eaten alive. Steve -
'62 Ford Galaxie 500 Update! 12/23/22 Finally Done! Pic pg. 7
StevenGuthmiller replied to Plowboy's topic in WIP: Model Cars
Yeah, I'm pretty certain that I never would have attempted to open that grille! Next time I have one that I want to open that appears impossible, I'll send it to you! Steve -
Steve
-
I will have all of the reference that I need. I have one sitting in my garage! Steve
-
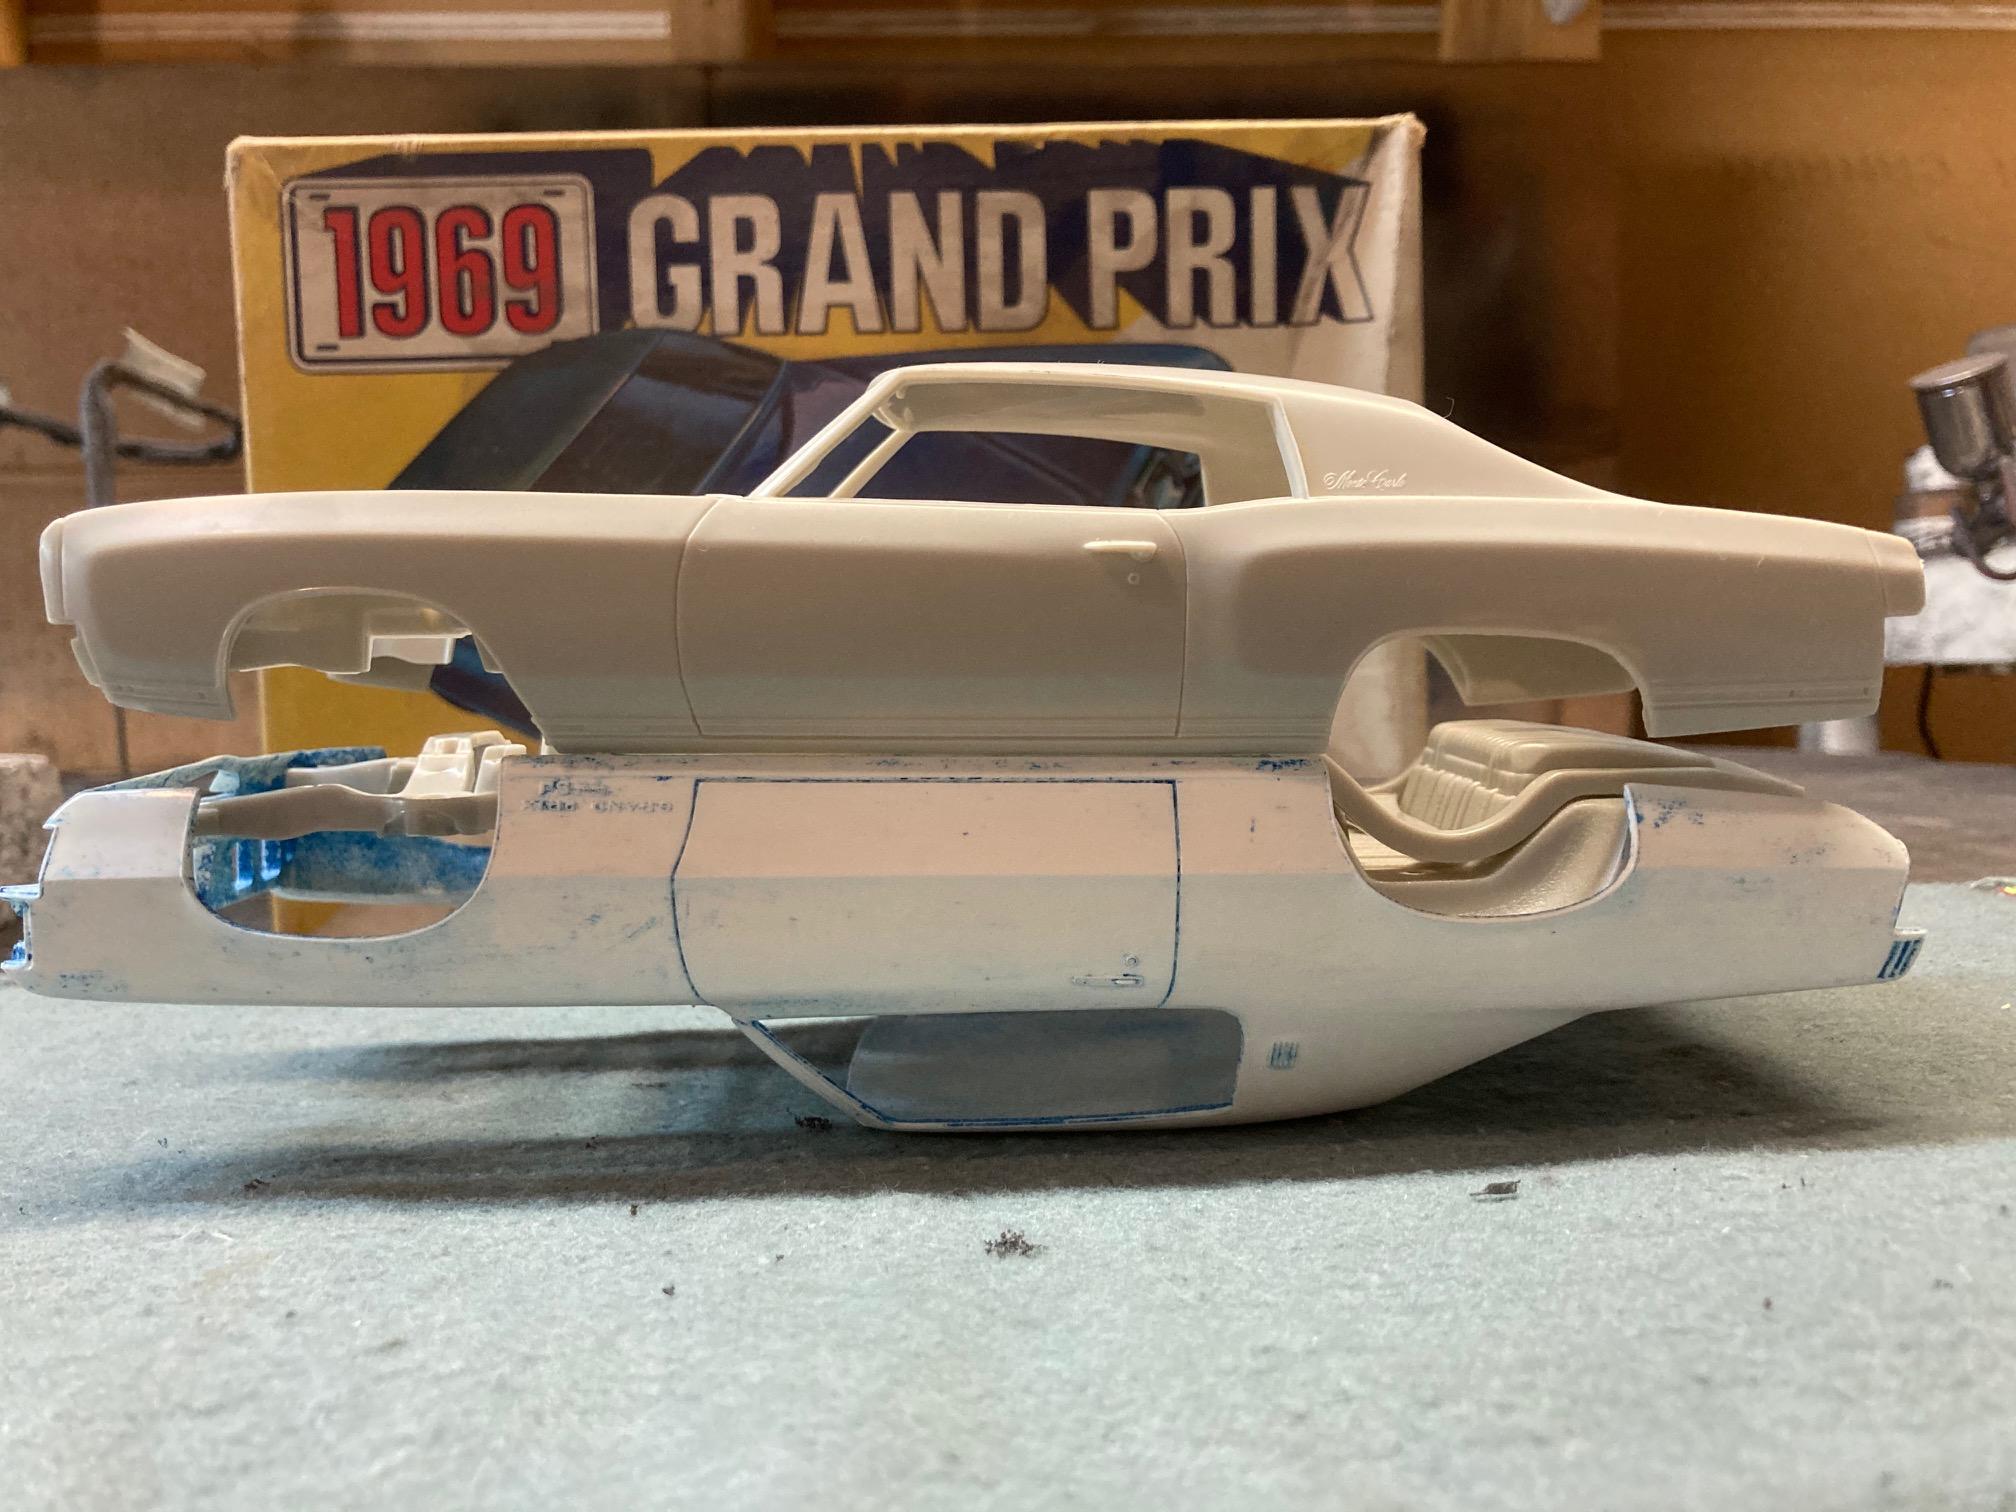
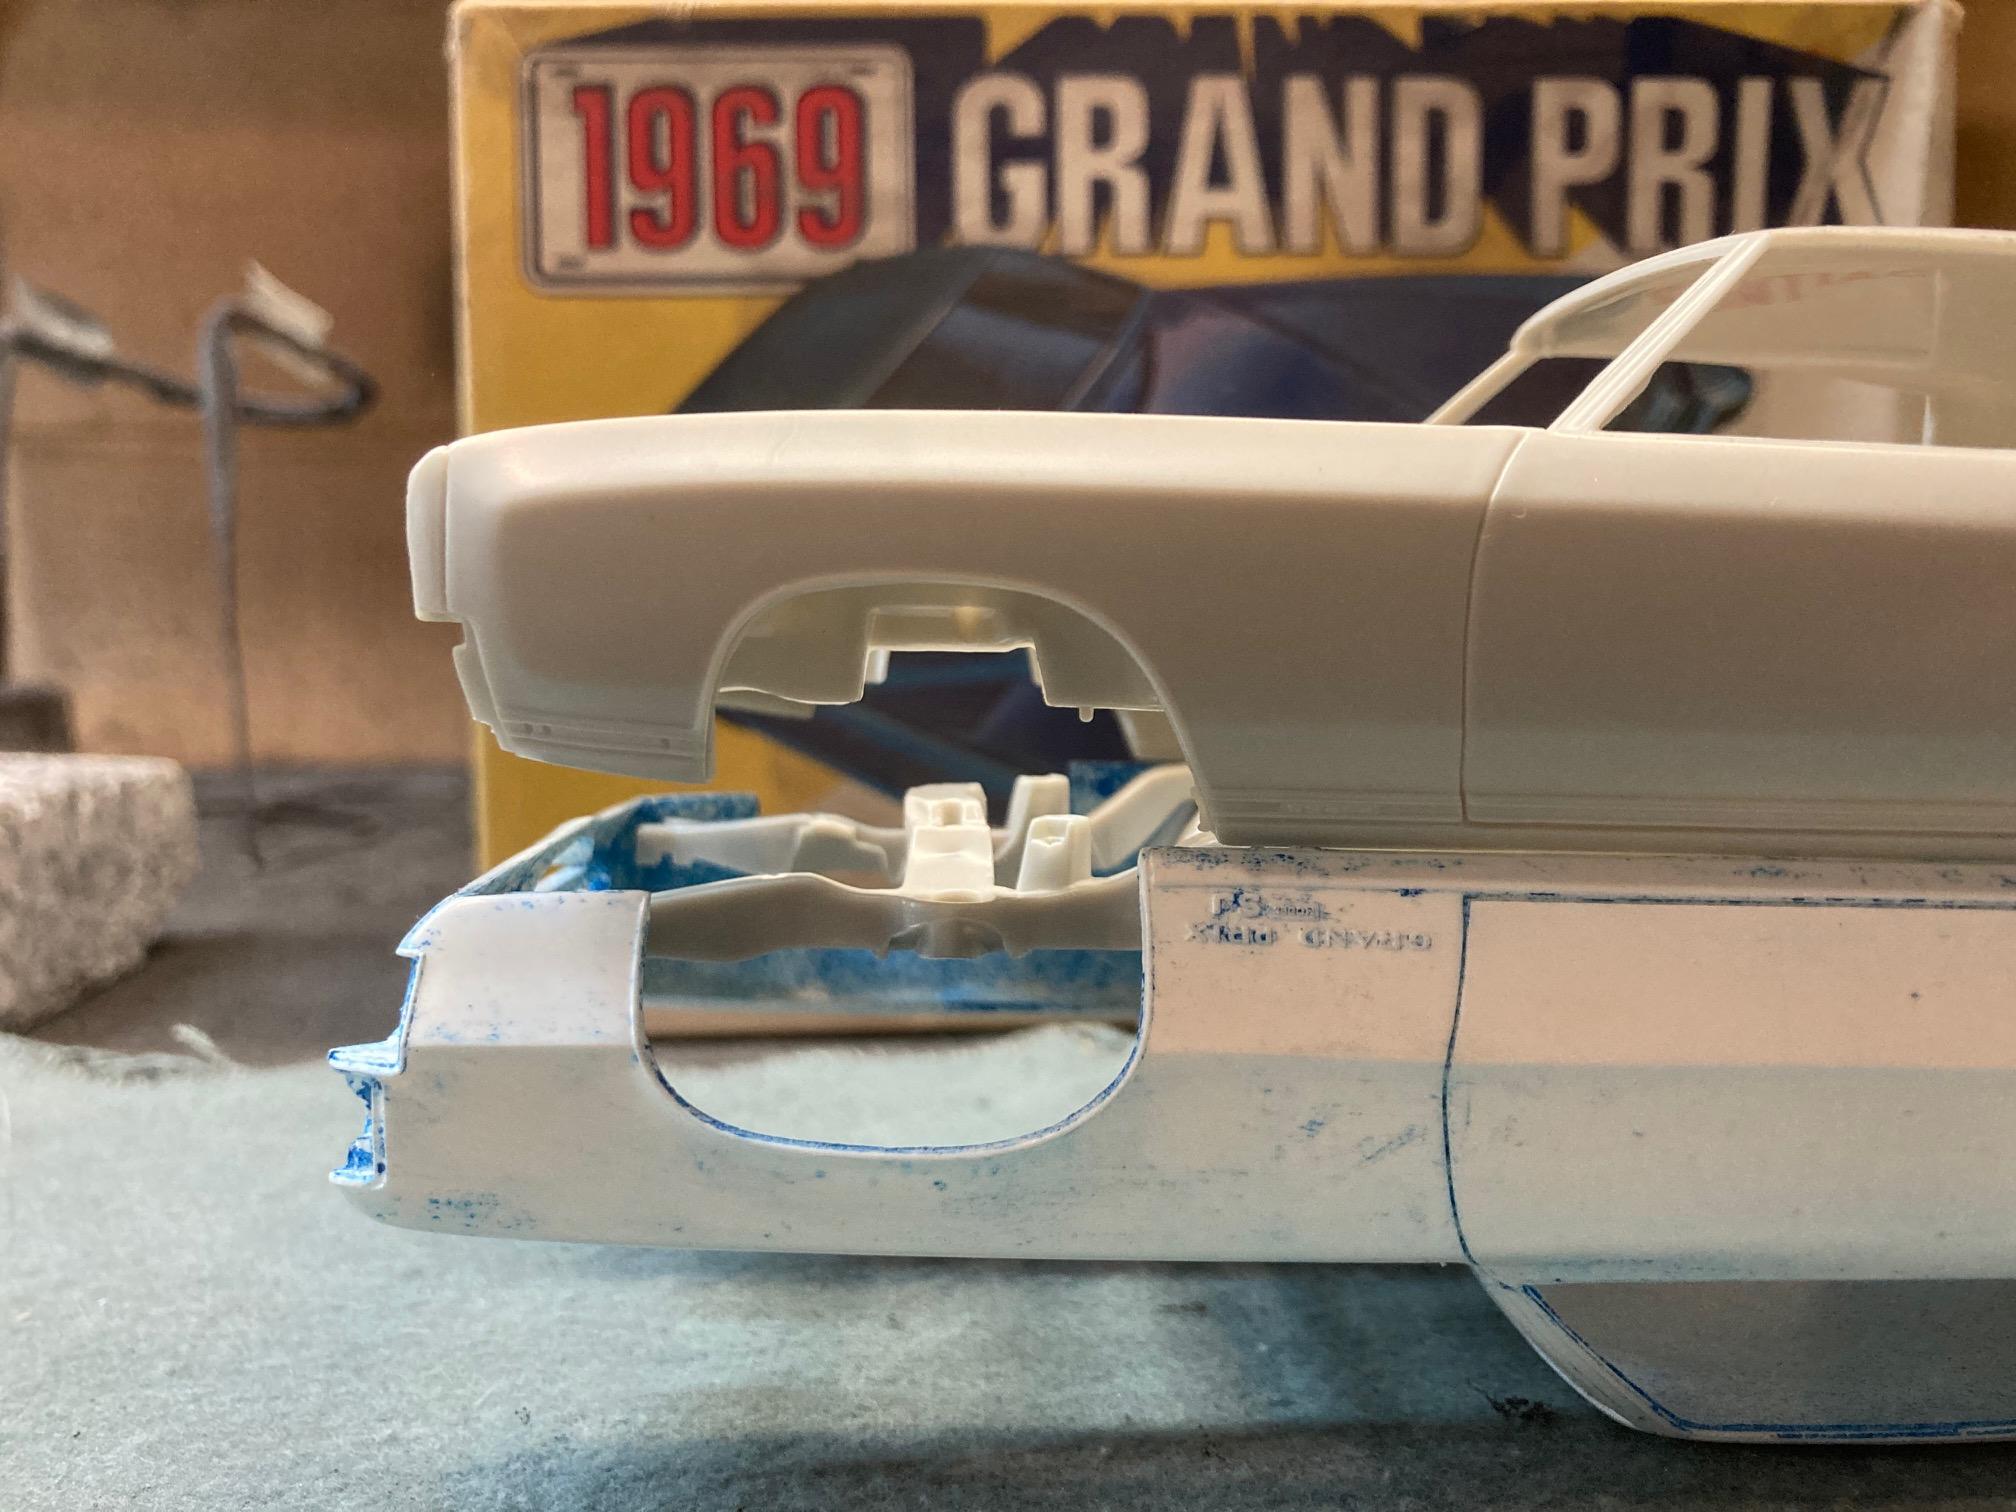
Just out of curiosity, I checked the GTO chassis, and this is my assessment. First, the chassis is a little too long in the rear. This would create a problem with shortening as the fuel tank would be affected. The chassis is a bit too wide in the rear, which wouldn't be a problem, and a little too narrow in the center, which could be a little bit of a problem. The biggest issue is the fact that the floor pan and frame are molded as one piece which would make it more difficult to stretch in my opinion. The floor pan stampings appear to be relatively close, (at least the Monte's is close enough for me) but I could cut the transmission mount from the GTO and install it in place of the Monte's. I'm beginning to get a picture in my mind for what will likely need to be done. At this point, I'm probably going to go with the Monte Carlo chassis, and just to ensure that parts will mate more easily, I'll use as many of the Monte's parts as possible. I will likely need to start with removing the rudimentary cowl vent section from the Grand Prix body and scratch building a new one as the Monte's is not the same as the Grand Prix's The firewall from the Monte appears to be pretty much a spot on match for the Grand Prix's. I'm thinking that lengthening the floor pan from the Monte Carlo may not be necessary, so lengthening the frame directly behind front suspension may be required. I'll know for sure when I see where the joint between the floor pan and firewall comes together in the body. Another issue will be the inner fender wells. The front quarter panels on the Grand Prix are much thinner across the top than the Monte, so a simple engine bay swap will likely not be possible. I will probably need to remove the fender wells from the Monte Carlo, widen them and then mount them into the correct position on the frame, so that when it all goes together, there won't be any issues. There will be room to fudge position of the fender wells between the radiator bulkhead and firewall, but they will have to sit correctly over the suspension. Anyway, I have time to work all of this out as it will still be while before my '68 Coronet is finished, but I wanted to get a jump on the situation. I'm not even sure that the Grand Prix will be my next project. I've been contemplating whether it will be the Grand Prix, a '64 Bonneville convertible, a '67 Plymouth Fury or possibly a '66 Bonneville. Decisions, decisions. Steve
-
You can make a Profit
StevenGuthmiller replied to Boss31's topic in General Automotive Talk (Trucks and Cars)
There’s no way that I could make a profit with my building style. My current project has been in the works for over a year already with some time to go. With the time and materials that I have into it at this point, I would most likely have to get in the thousands of dollars just to break even. Just doing some quick math, if I had just three hours a week in the shop, and figured that my time is worth at least $20.00 an hour, labor alone for the year would be about $3,000.00! There’s no way that I could ever stay interested in building if I had to build the simplified builds that would be required to make any profit. I’d be bored fecal matter-less in very short order! Steve -
Yes. Make no mistake, Ed will fulfill his commitments. He’s just still playing catch-up. This interior set contains a lot of parts and takes some time to cast and get out the door. I assume that it’s a little more involved than casting an shipping a single part. Steve
-
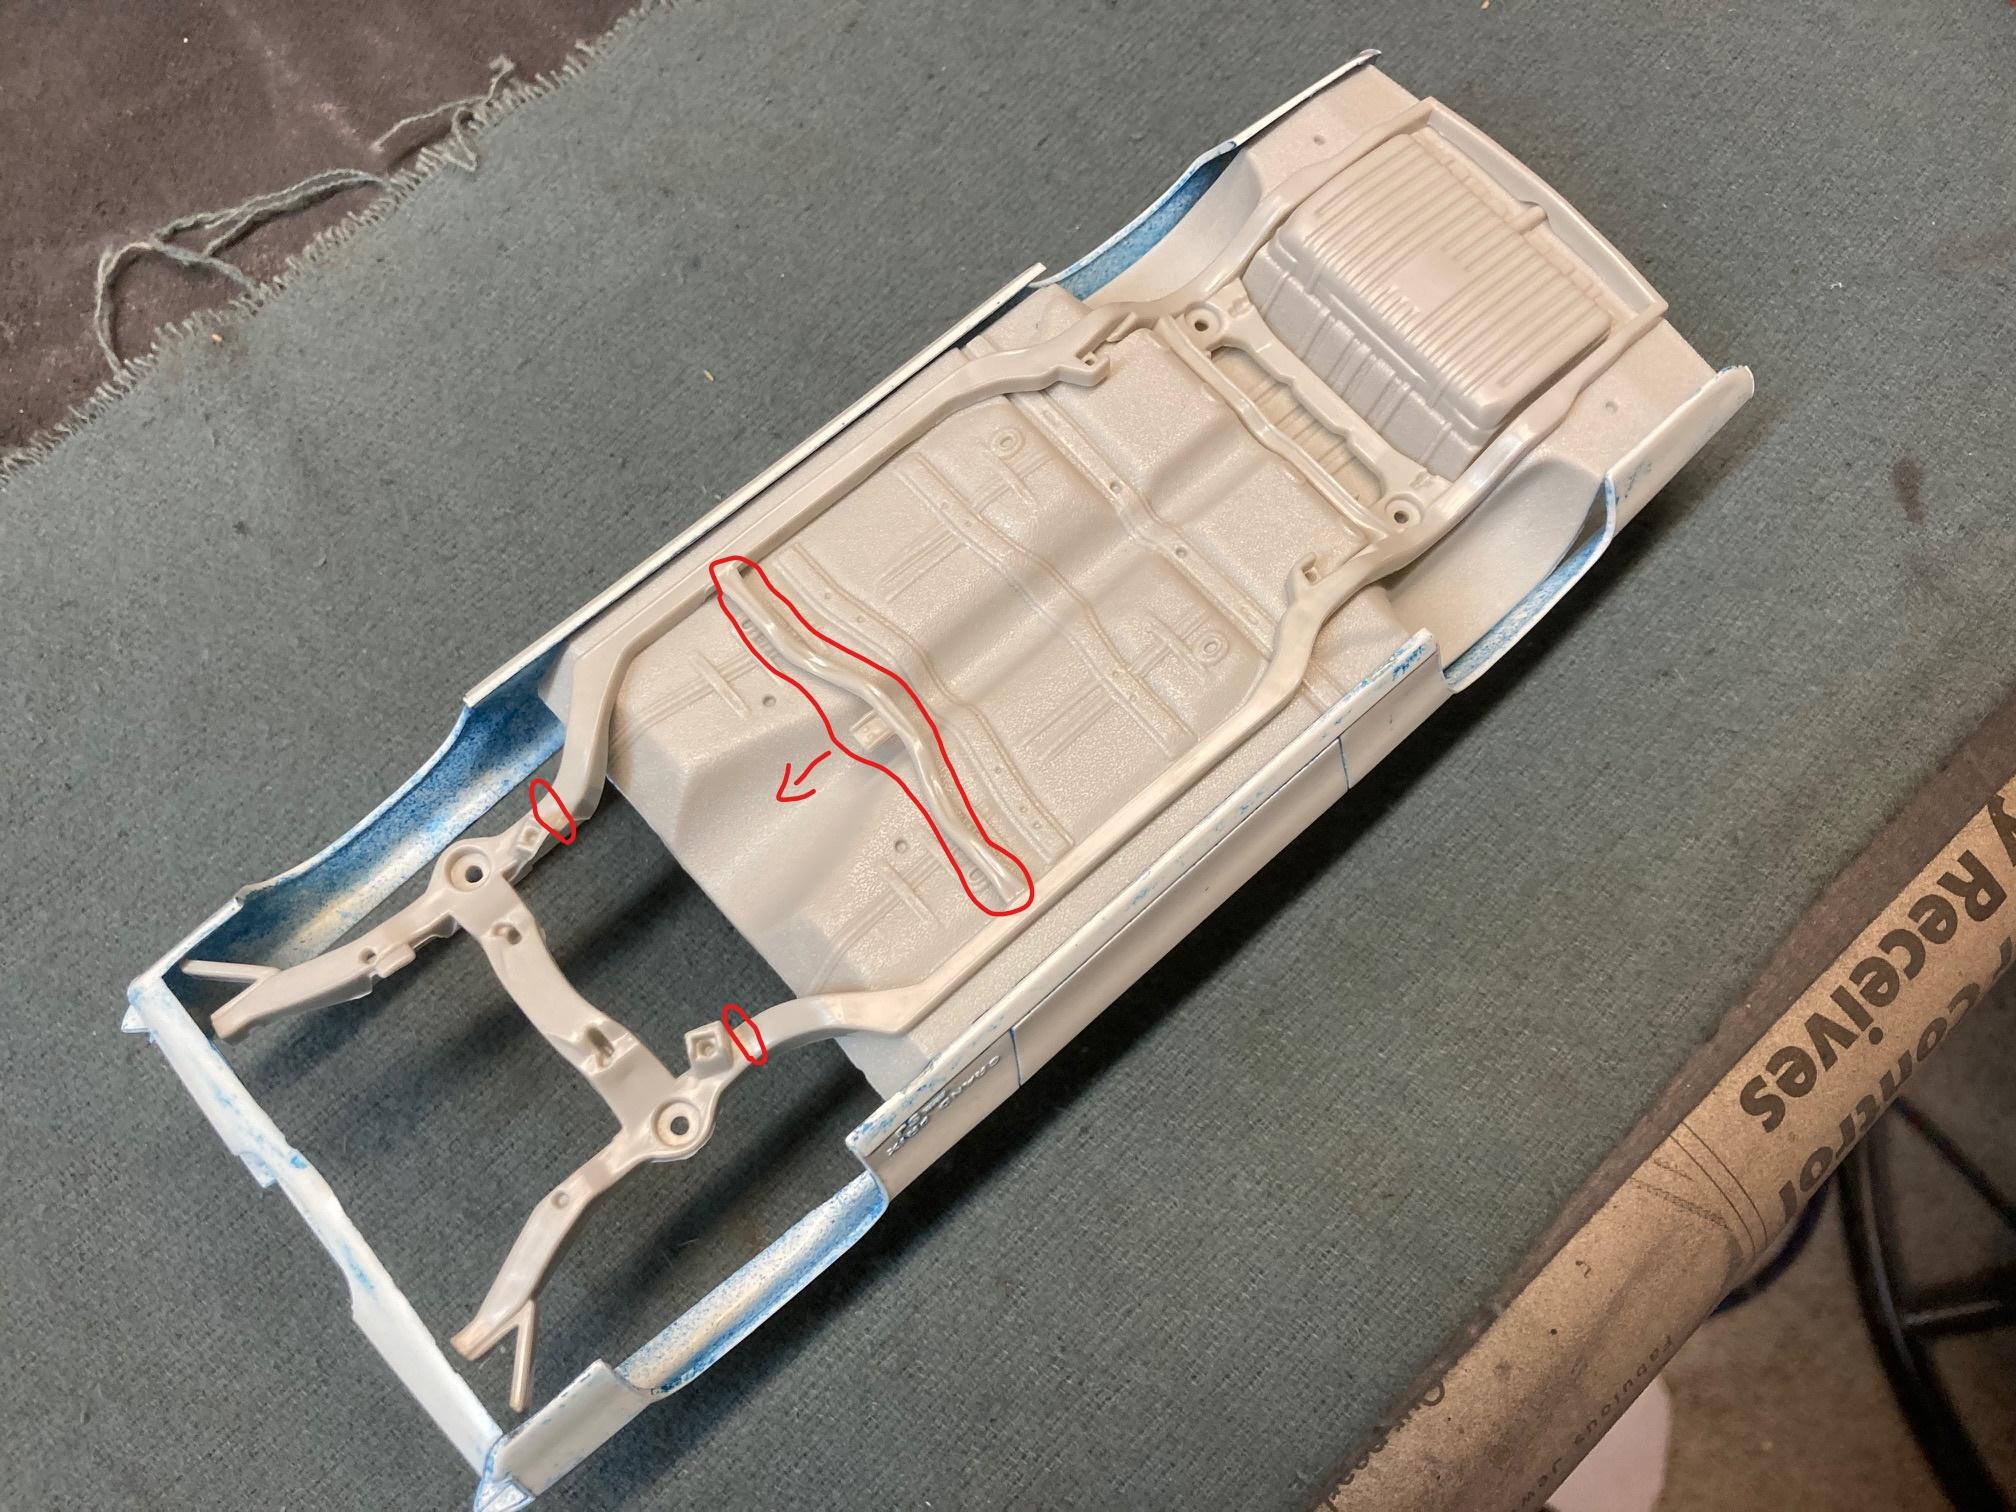
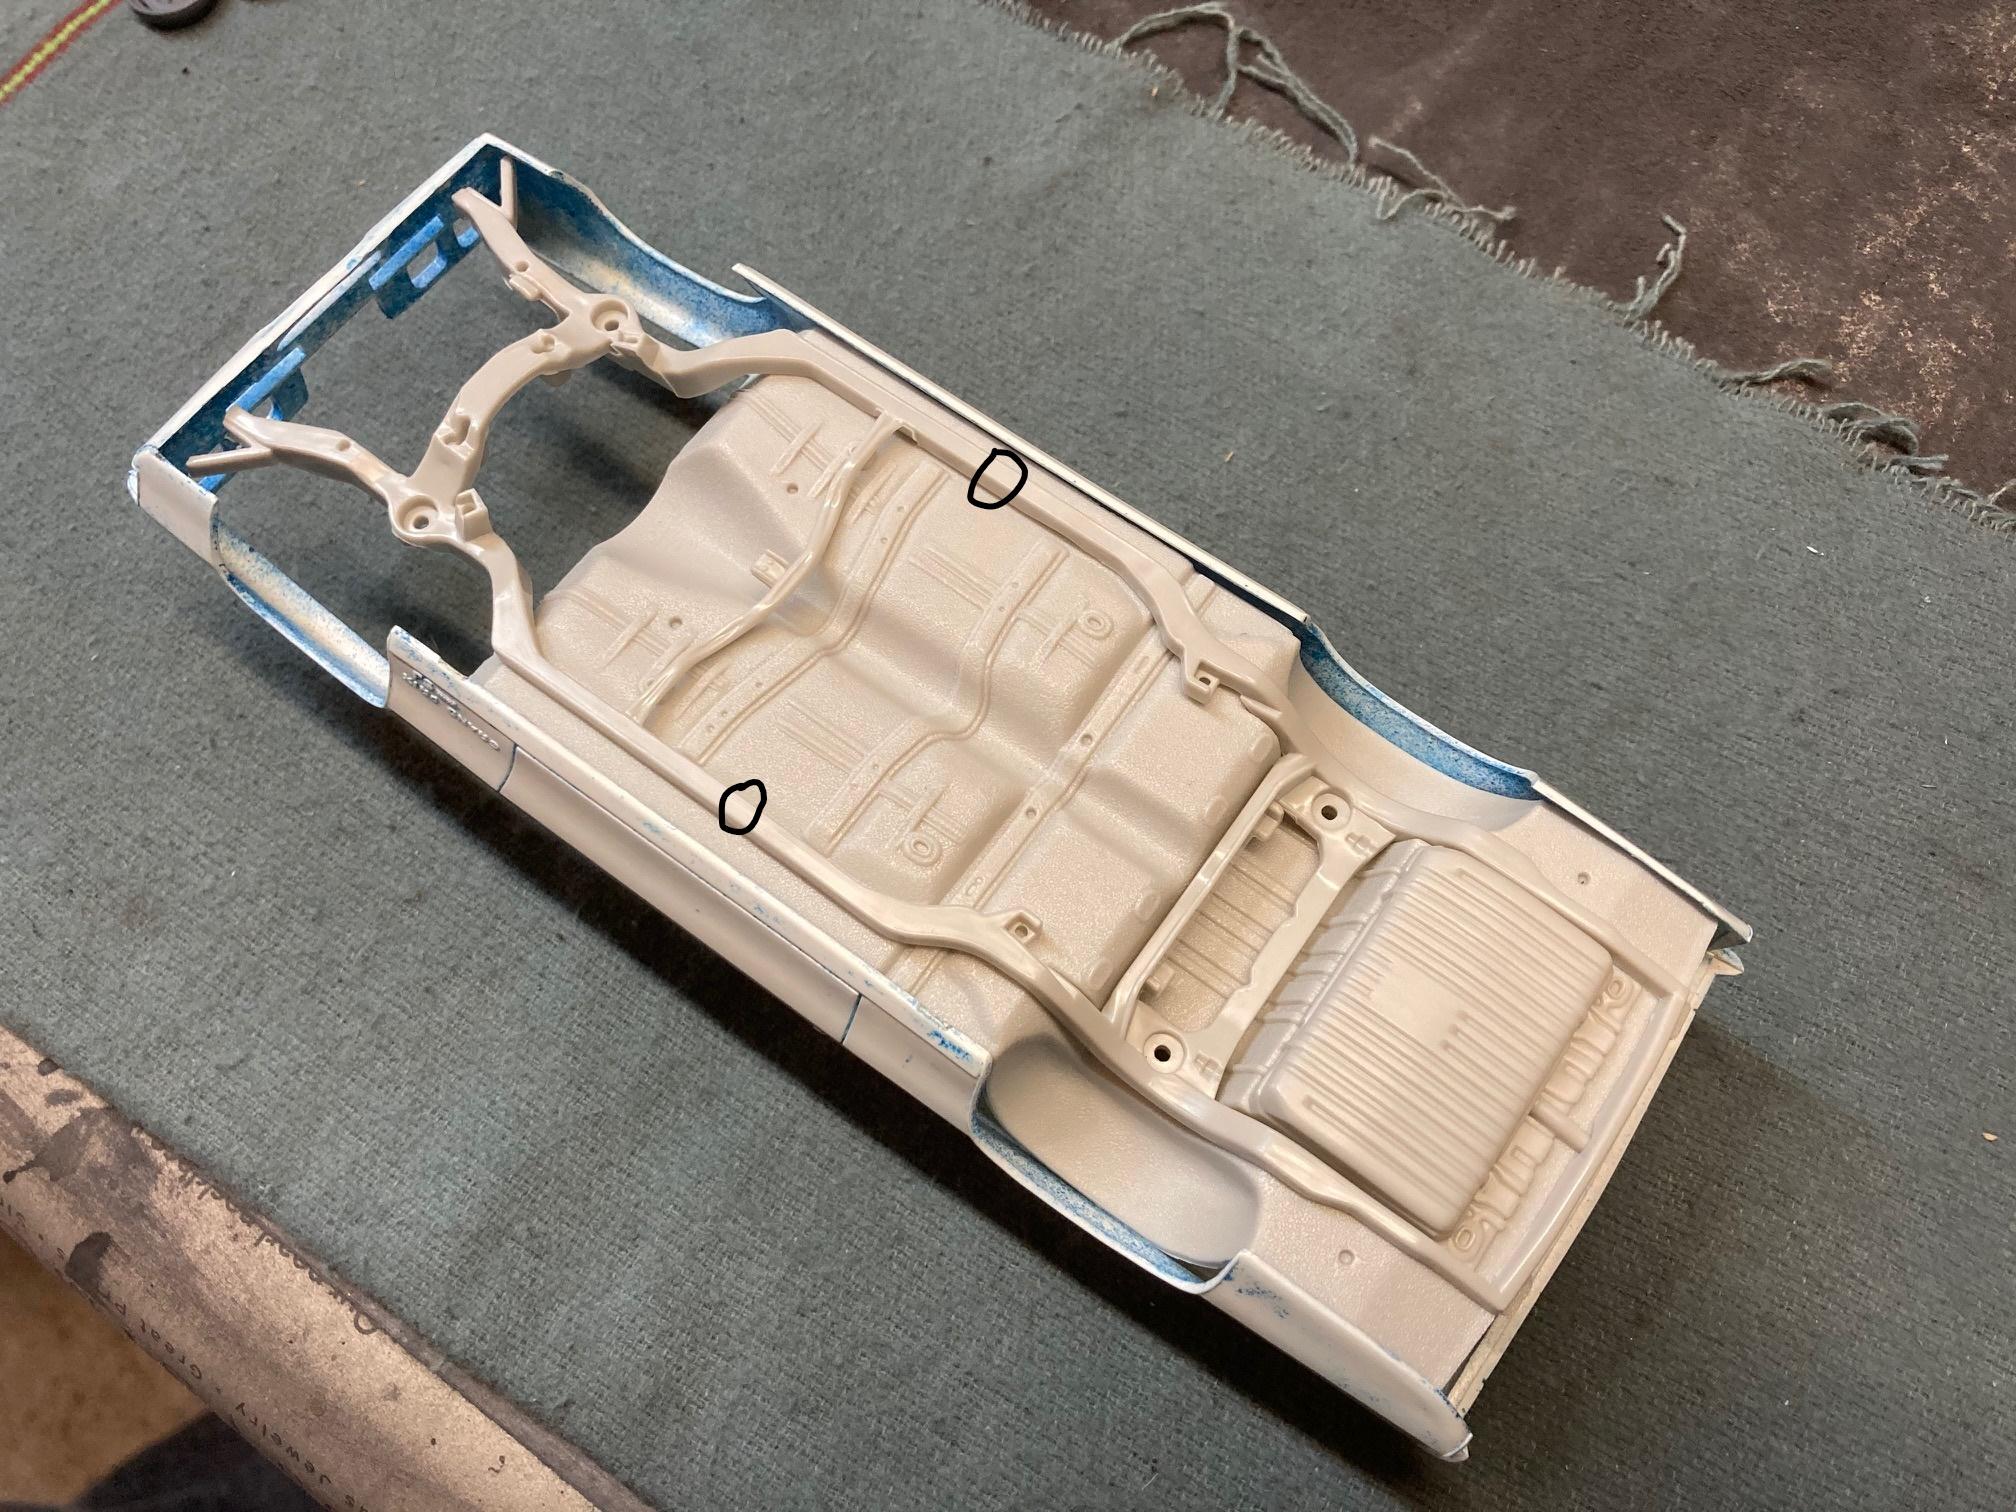
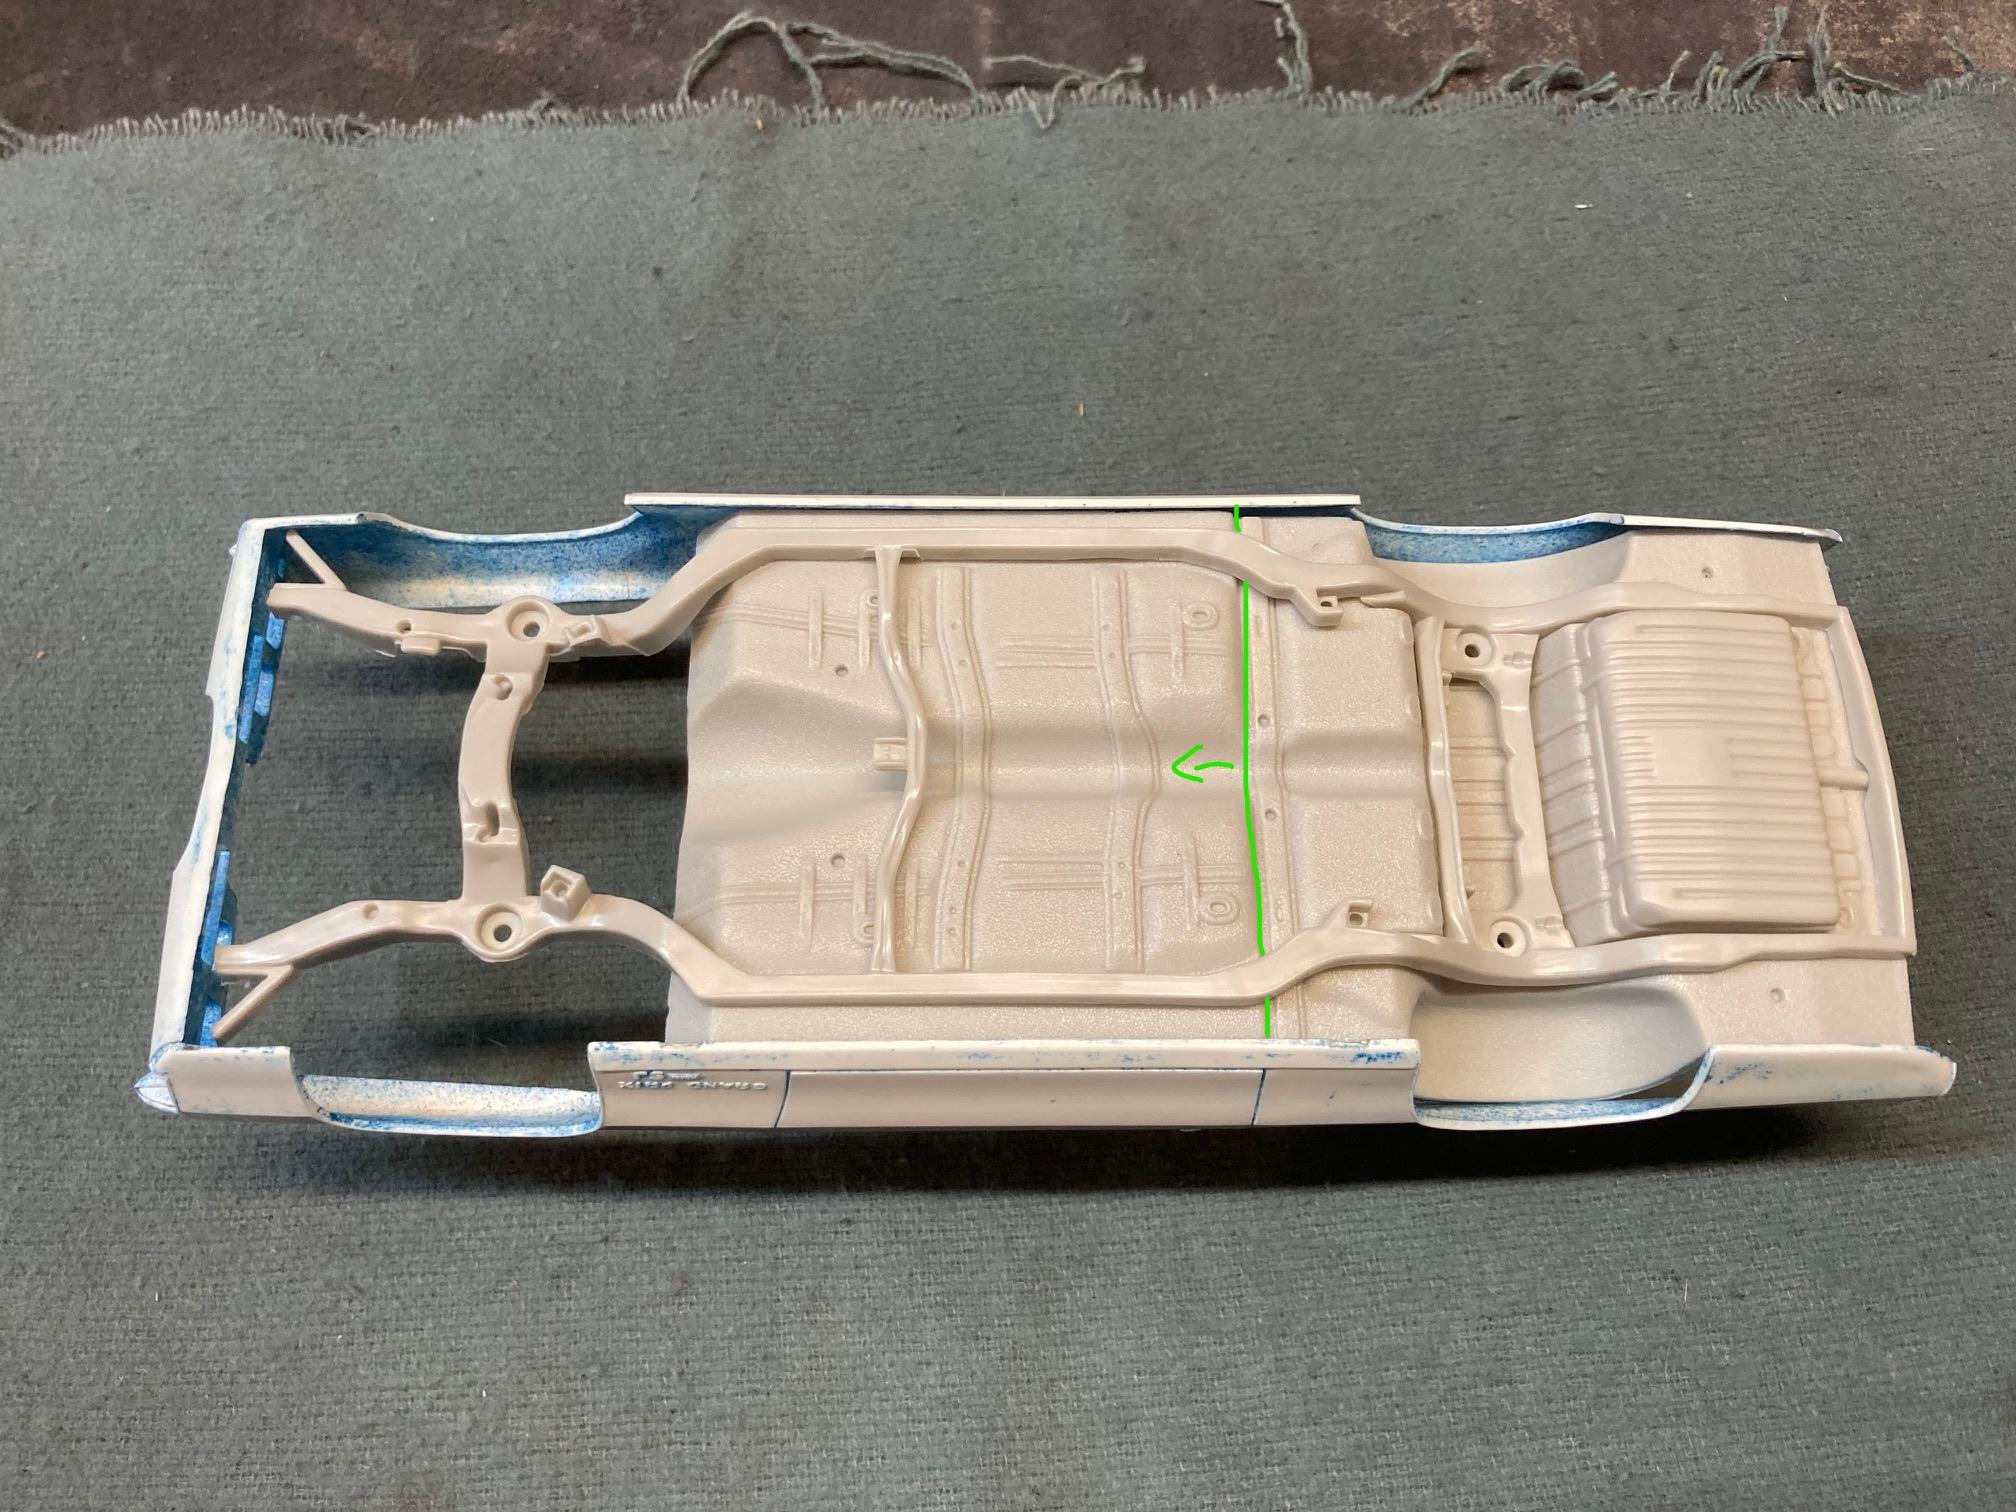
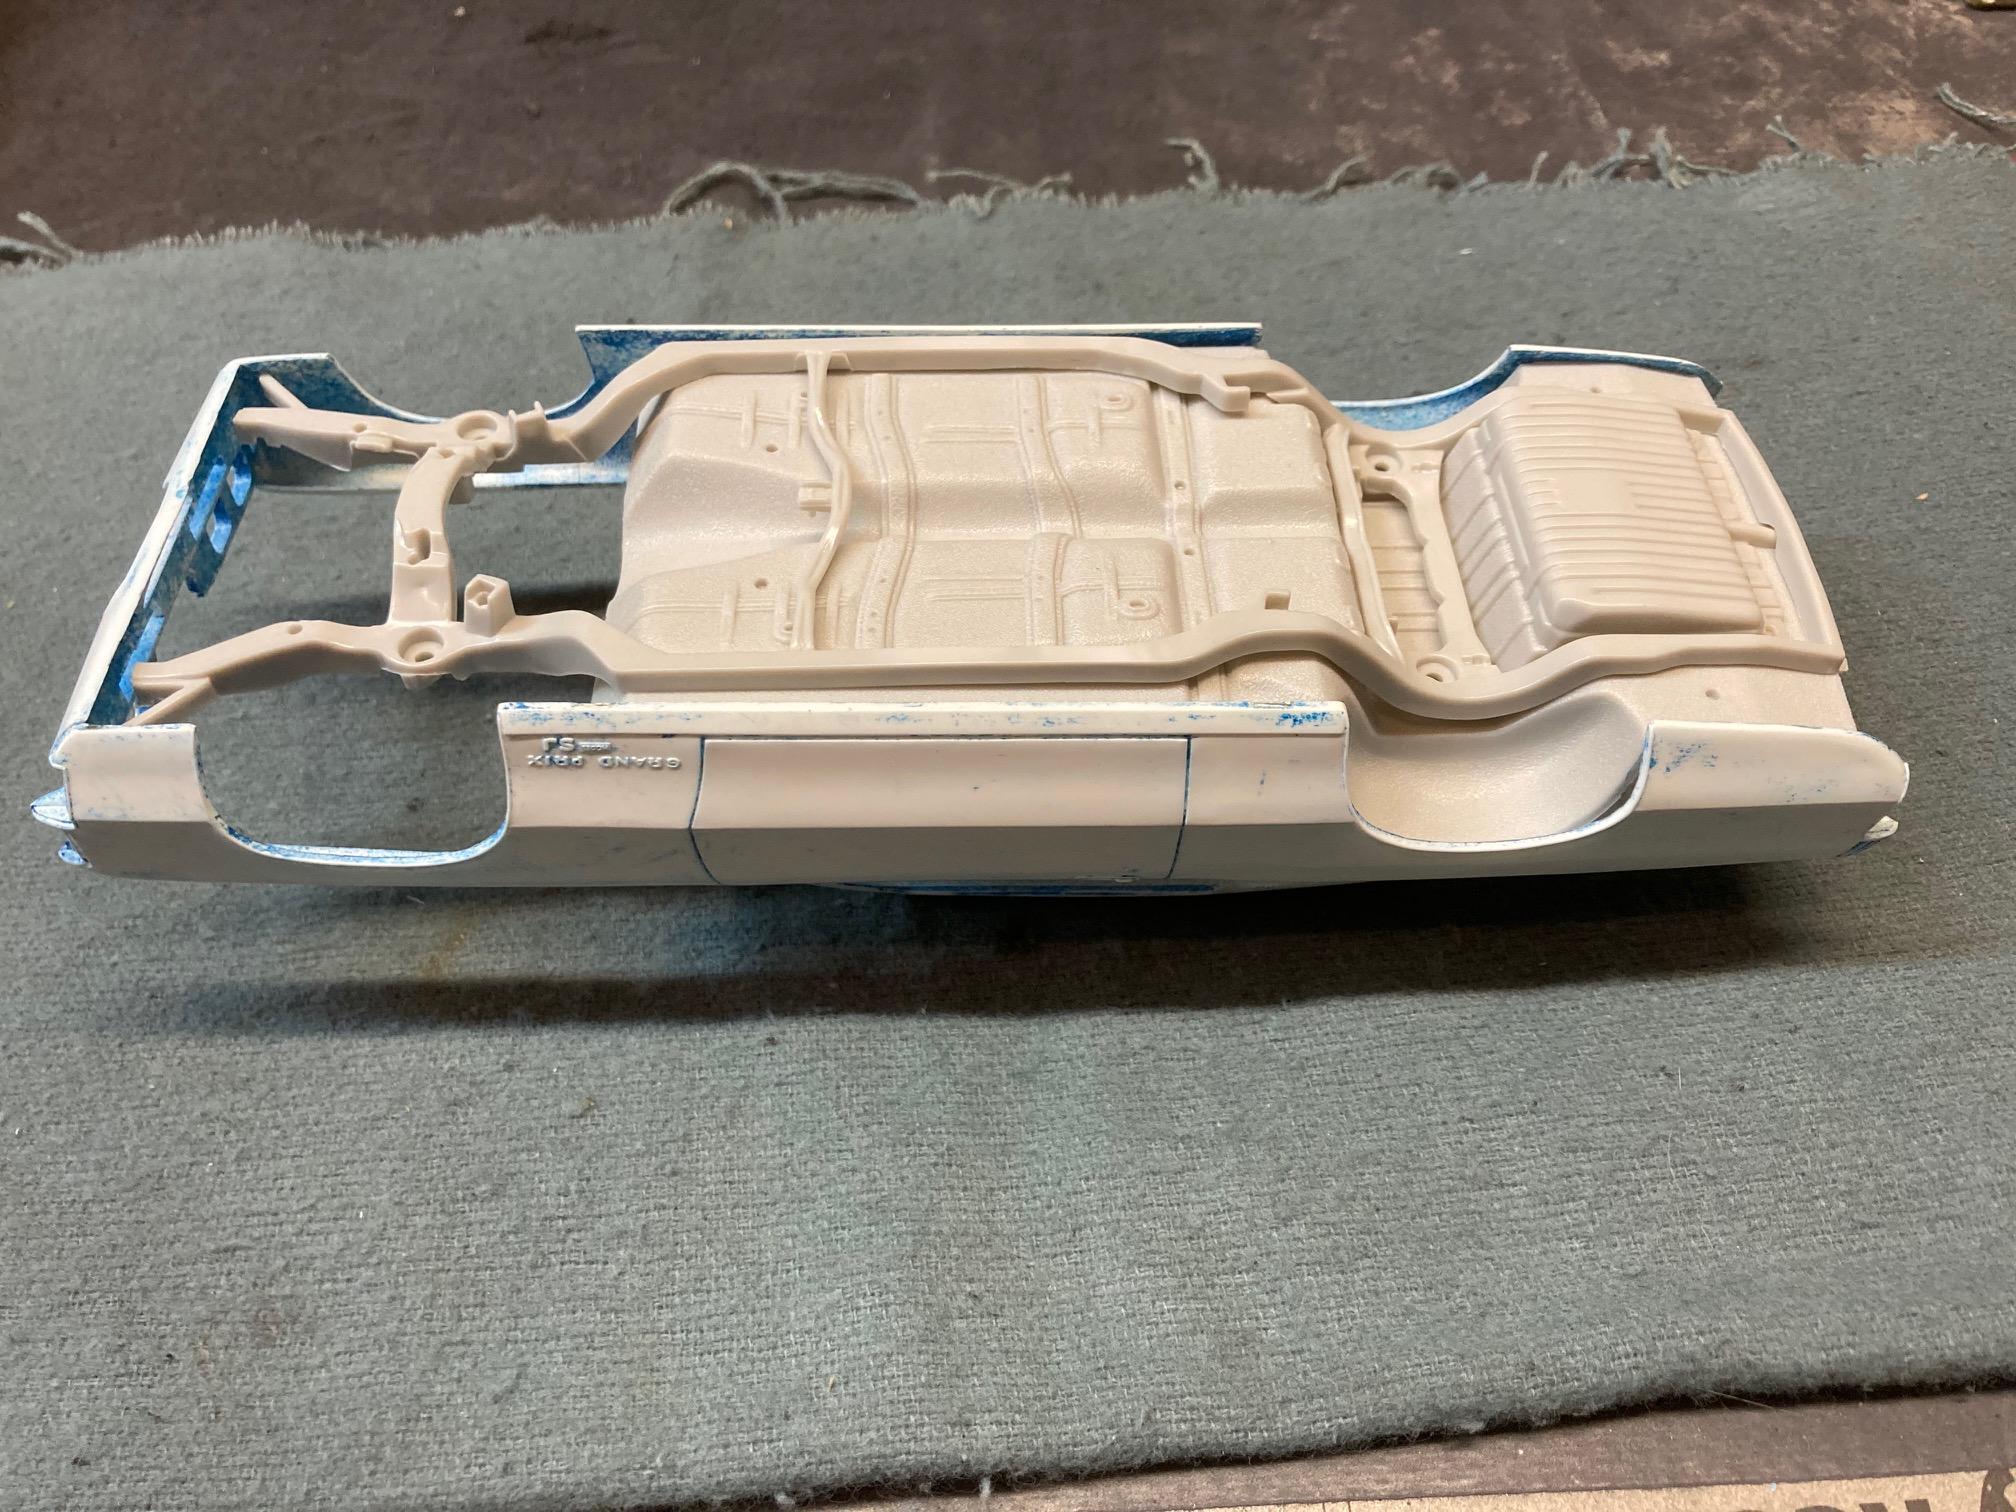
Thanks for the input everyone. I guess I suspected that the Monte Carlo was going to be the most likely candidate, but I thought that it would be good to pick your brains to see if there was a kit out there that I don't have and was missing. I checked the frames on several cars, including the Monte Carlo and '67 Impala and found that the Impala was too wide and far too long in the rear, including a much too large gas tank, so that's out. My inspection of the Monte's chassis leads me to believe that not only will the frame itself need a slight stretch, but the floor pan might need a little stretching as well, depending on where the firewall falls in the body. It's pretty obvious when doing a side by side comparison, that the added length is in the section between the front wheel well and door. (front suspension and firewall) so in order for the patch to fall in the correct location, it looks to me as if the stretch would need to take place directly behind the front suspension, (red circles) unless of course, the floor pan needs stretching, in which case it could be done further back. (black circles) I'm going to have to ruminate on this one for a while. There are going to be a whole bunch of changes done on this model in order for it to match my 1:1. My car is a "Model J", not an "SJ", so along with a couple of minor trim modifications, (ie, removing the "S" from the lower front quarter script) there will be major interior upholstery pattern changes. I already began sanding off all of the vinyl top trim and detail some time ago. It's going to be a time consuming project, but I really need to have a model of my 1:1 on my shelf, and if I'm going to do it, I just as well go all in. This is where the frame would need to be stretched if the floor pan is not. If the stretch took place here, there's a possibility that the tranny brace would also need to be moved forward. If the floor pan needs stretching, it would probably actually make everything easier! This is where I think the cuts and splices would be needed with a floor pan stretch. Steve
-
Sorry, some of the grilles had imperfections, and I’ve already given the remainder to other members. I’m fresh out! ? Steve
-
Either way, it would need stretching. I was wondering more along the lines of something like a Riviera? Steve
-
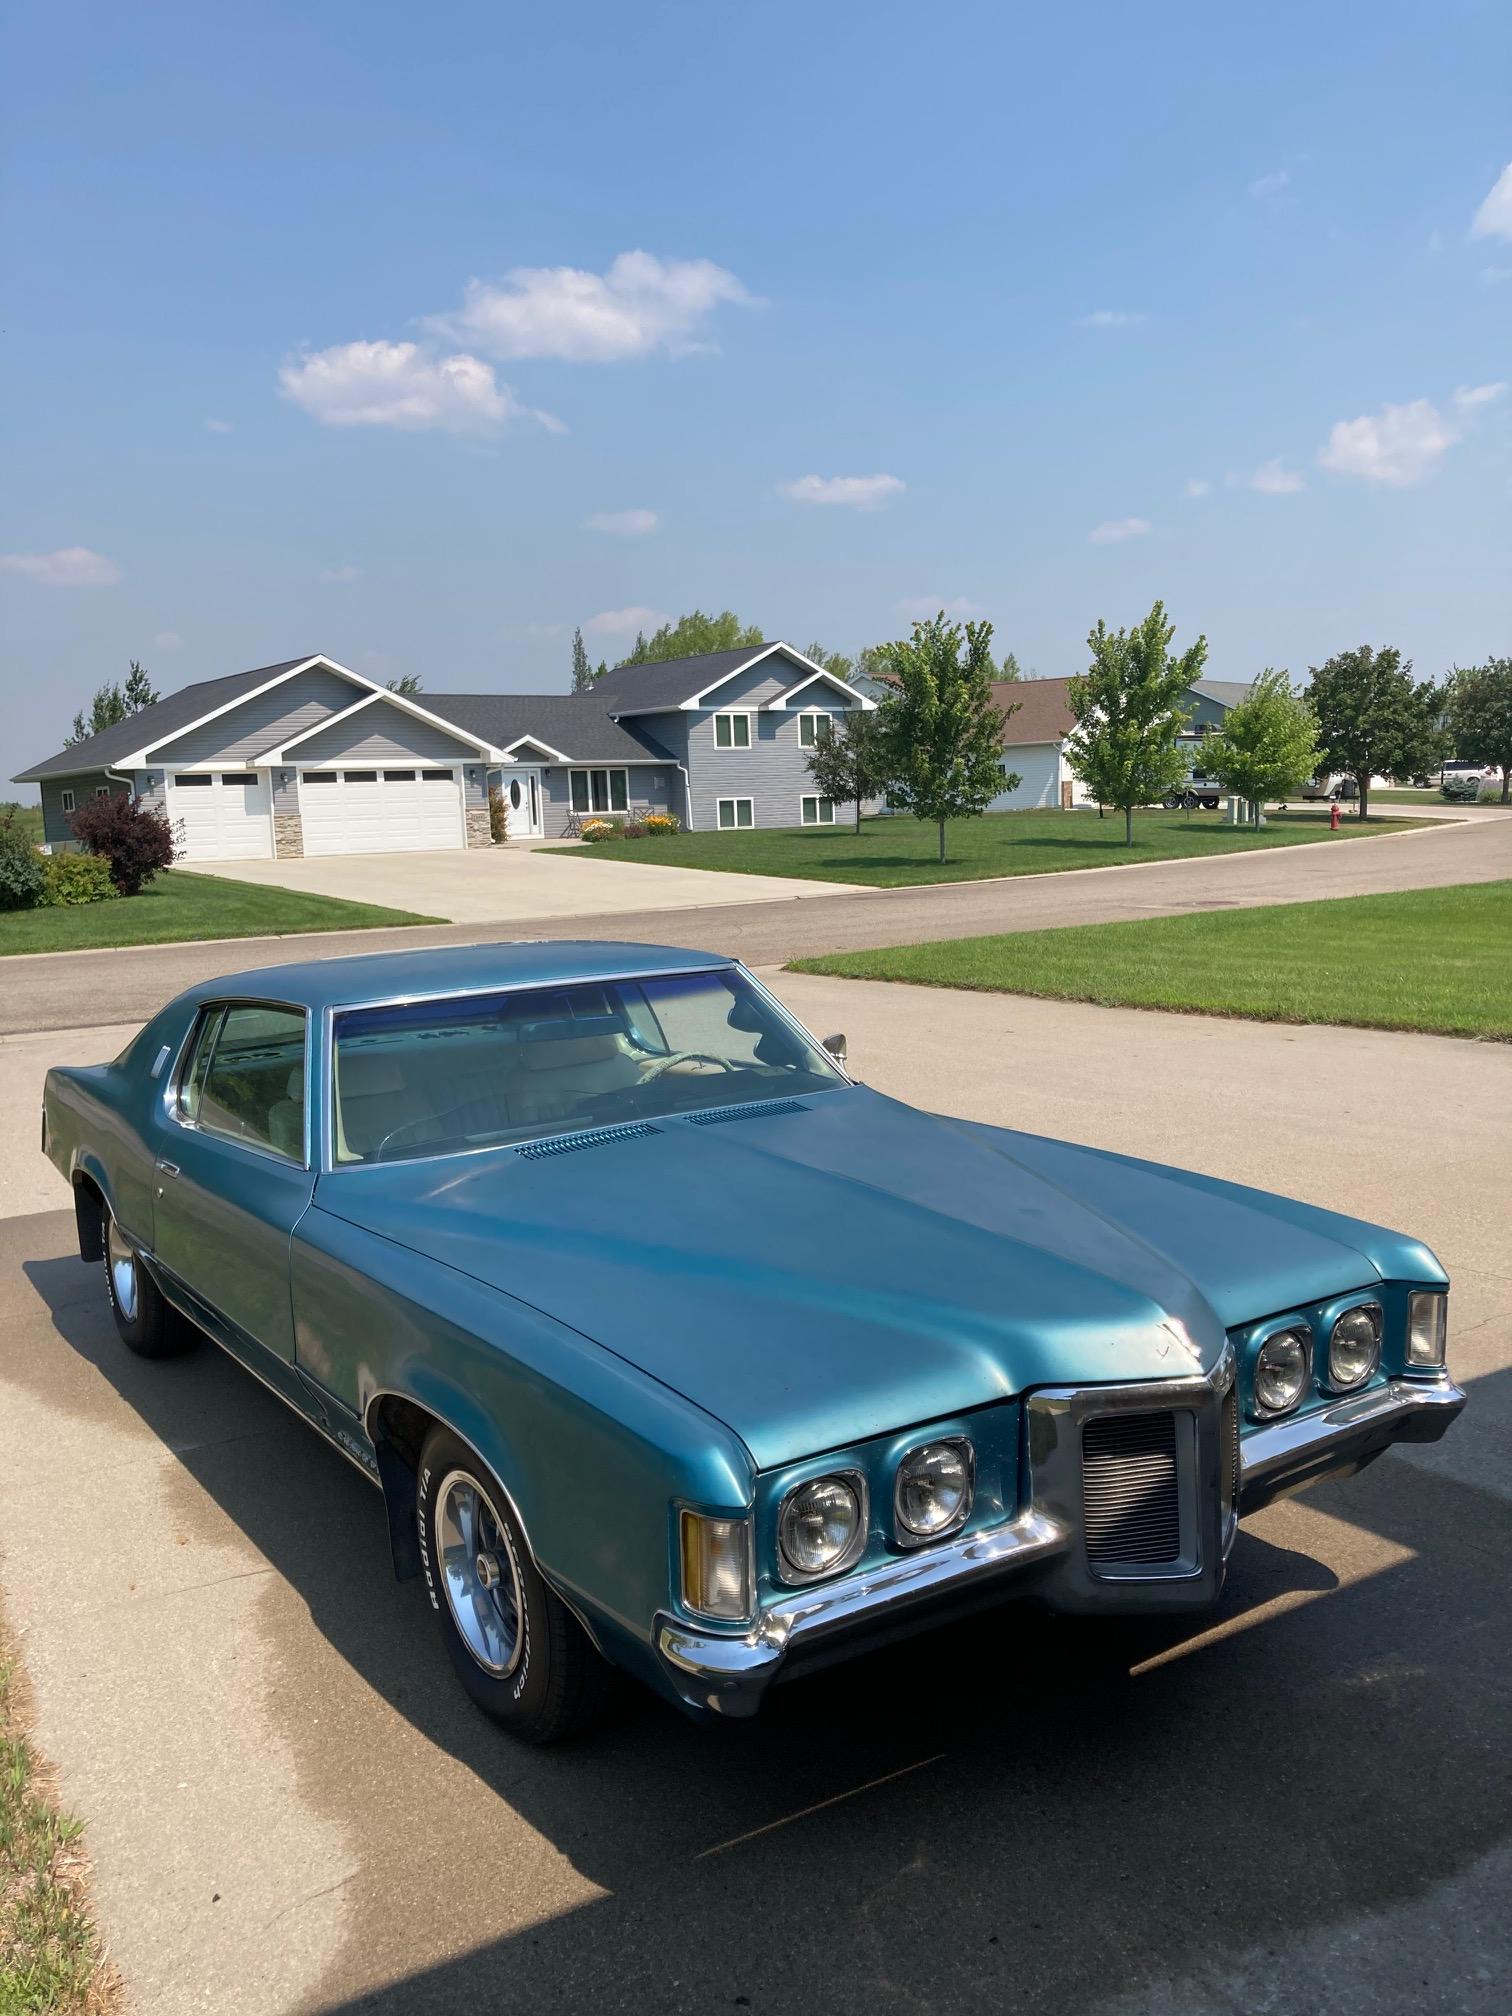
Hi folks. In the very near future, I’m planning on getting to work on a full detail version of the MPC 1969 Pontiac Grand Prix to represent my 1:1, and while the AMT ‘70 Monte Carlo is the most obvious choice for some of the guts, the wheel base is too short for the Grand Prix and will require a chassis stretch to fit. While that’s not a big deal, I keep thinking that I might be missing something. So, the question is, does anybody know of a modern kit with a detailed chassis that would be compatible with the Grand Prix that I’m missing, other than the Monte Carlo? Steve
-
Oooo! Bad idea! Now you're prompting him to read an entire book!! Steve
-
Punk rock band, right? ? Steve
-
What's wrong with that? That's what my wife would call it. Steve