StevenGuthmiller
-
Posts
15,083 -
Joined
-
Last visited
Content Type
Profiles
Forums
Events
Gallery
Everything posted by StevenGuthmiller
-
Steve
-

Help with paint job!
StevenGuthmiller replied to Bigtrain's topic in Model Building Questions and Answers
That is my thought as well. This is a major mess! I've never seen anything like this with MM enamel and lacquer thinner. Steve -
Modelhaus Resincast 1960 Dodge Dart Phoenix
StevenGuthmiller replied to THarrison351's topic in Model Cars
Great results Tim! You can be proud of that one. Steve -
It's nice to see that the caster included some inner front fender wells. That's one of the more time consuming changes to make on the original Johan kit when doing a chassis swap. I also see that he added a front bench seat. It will be interesting to see what the quality of those parts is like. Steve
-
That's all there is. These "I wish" arguments have become perennial subjects on all of the forums. It's wasted energy in my opinion. I love building, so that's what I'm going to focus my attention on. All of this other stuff is just noise. Steve
-
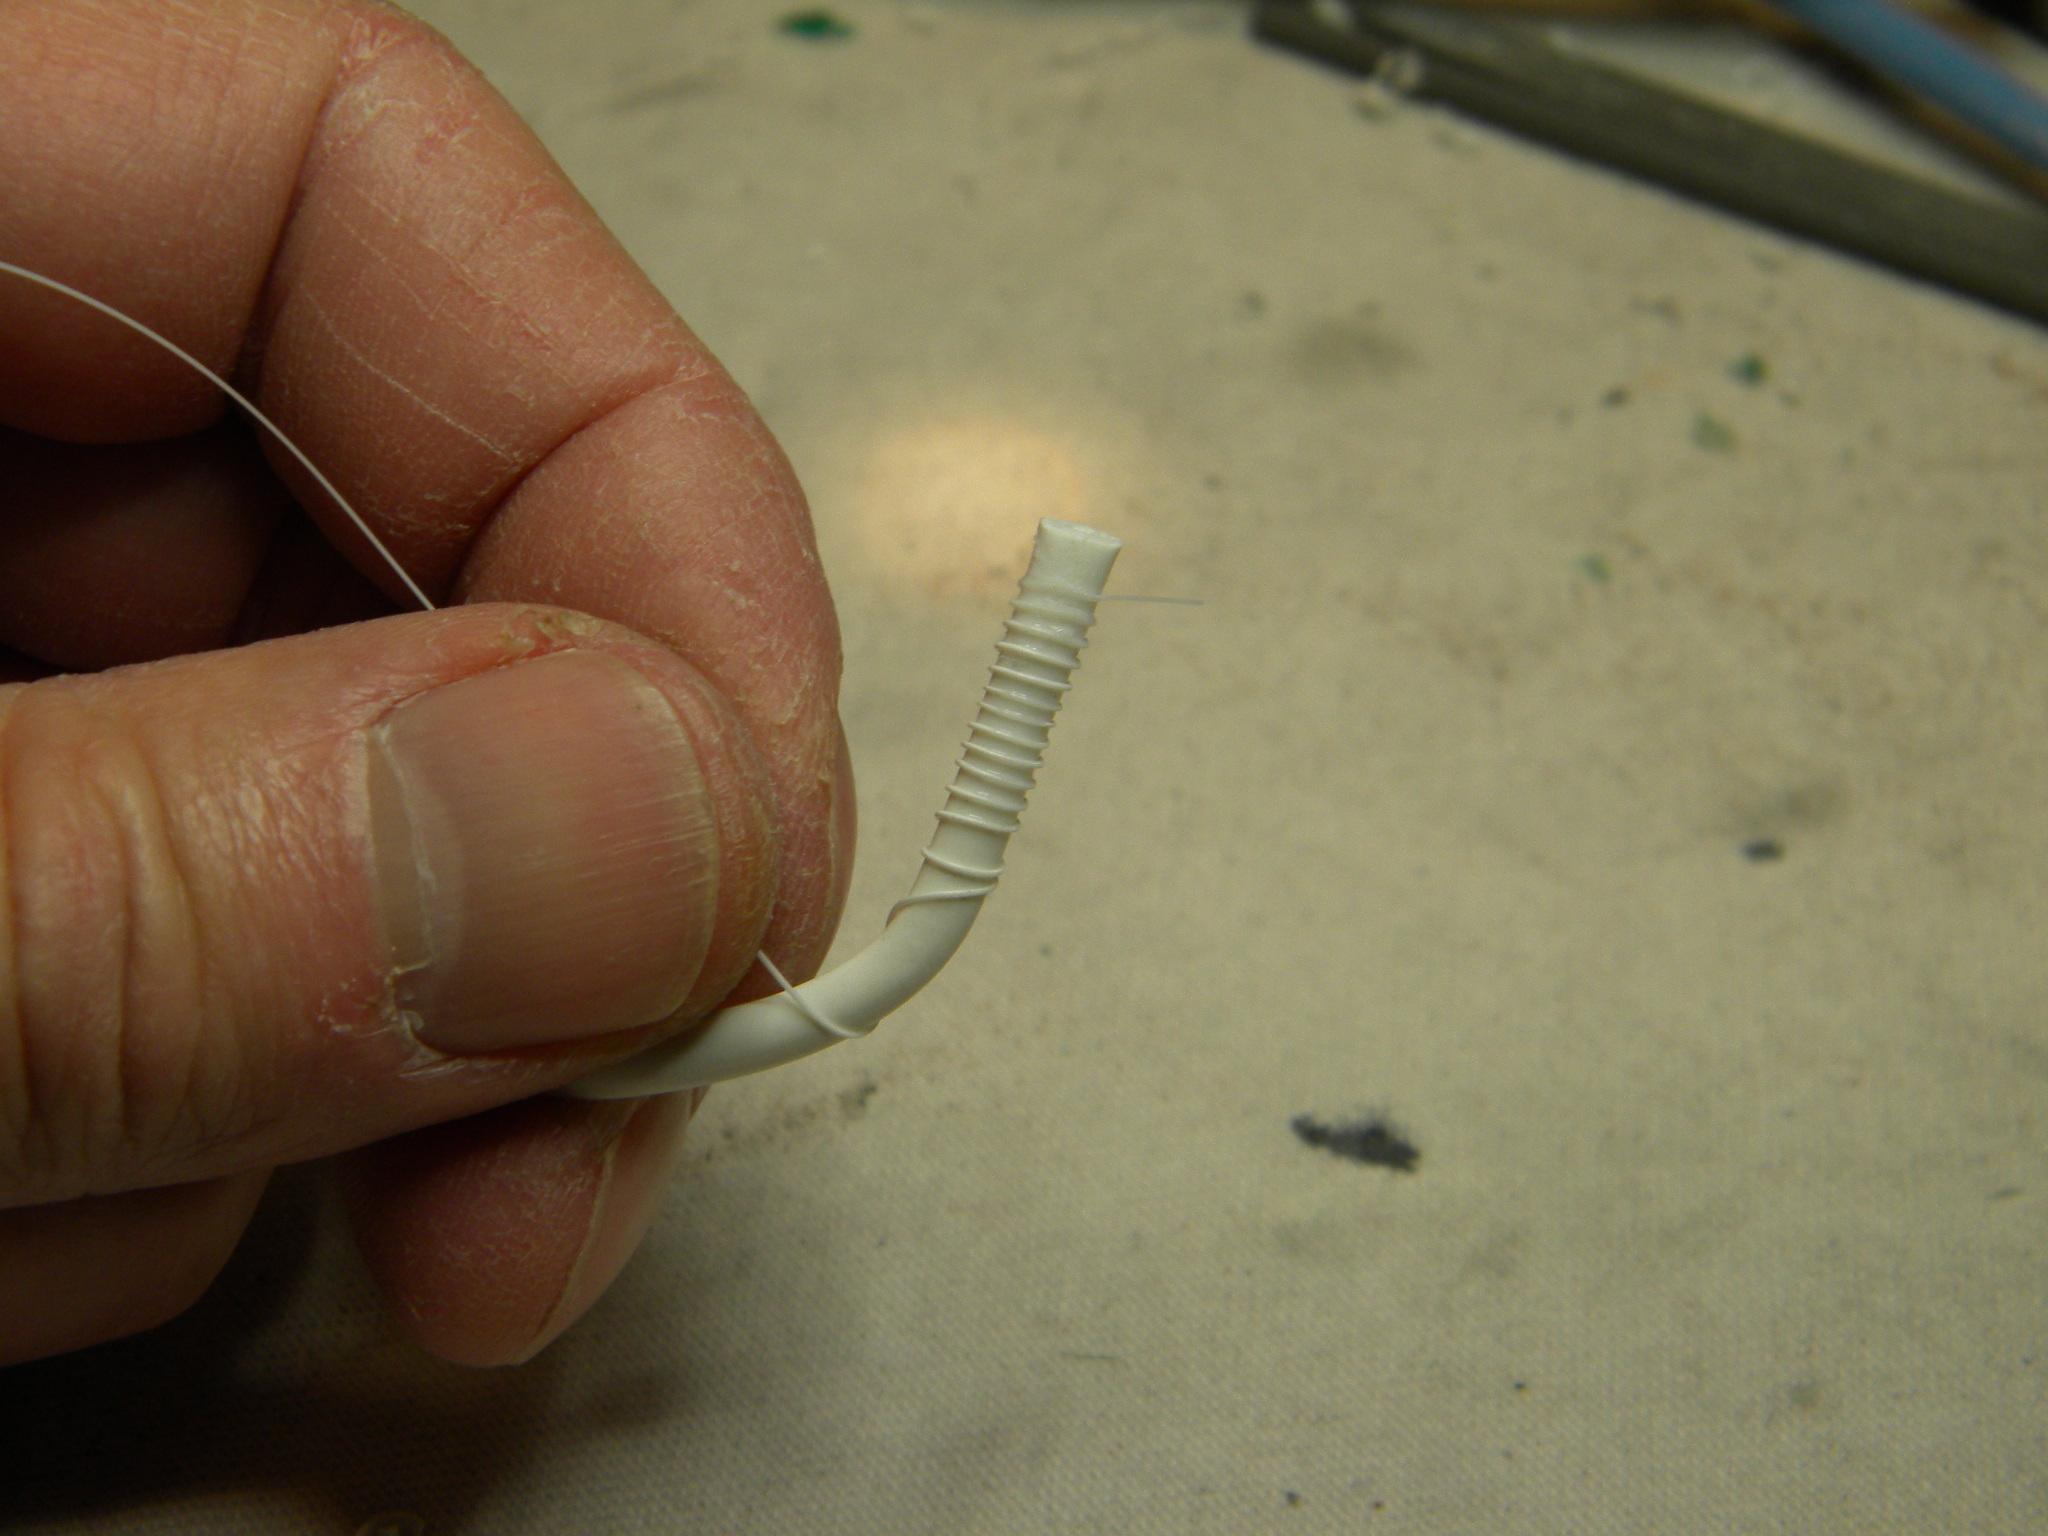
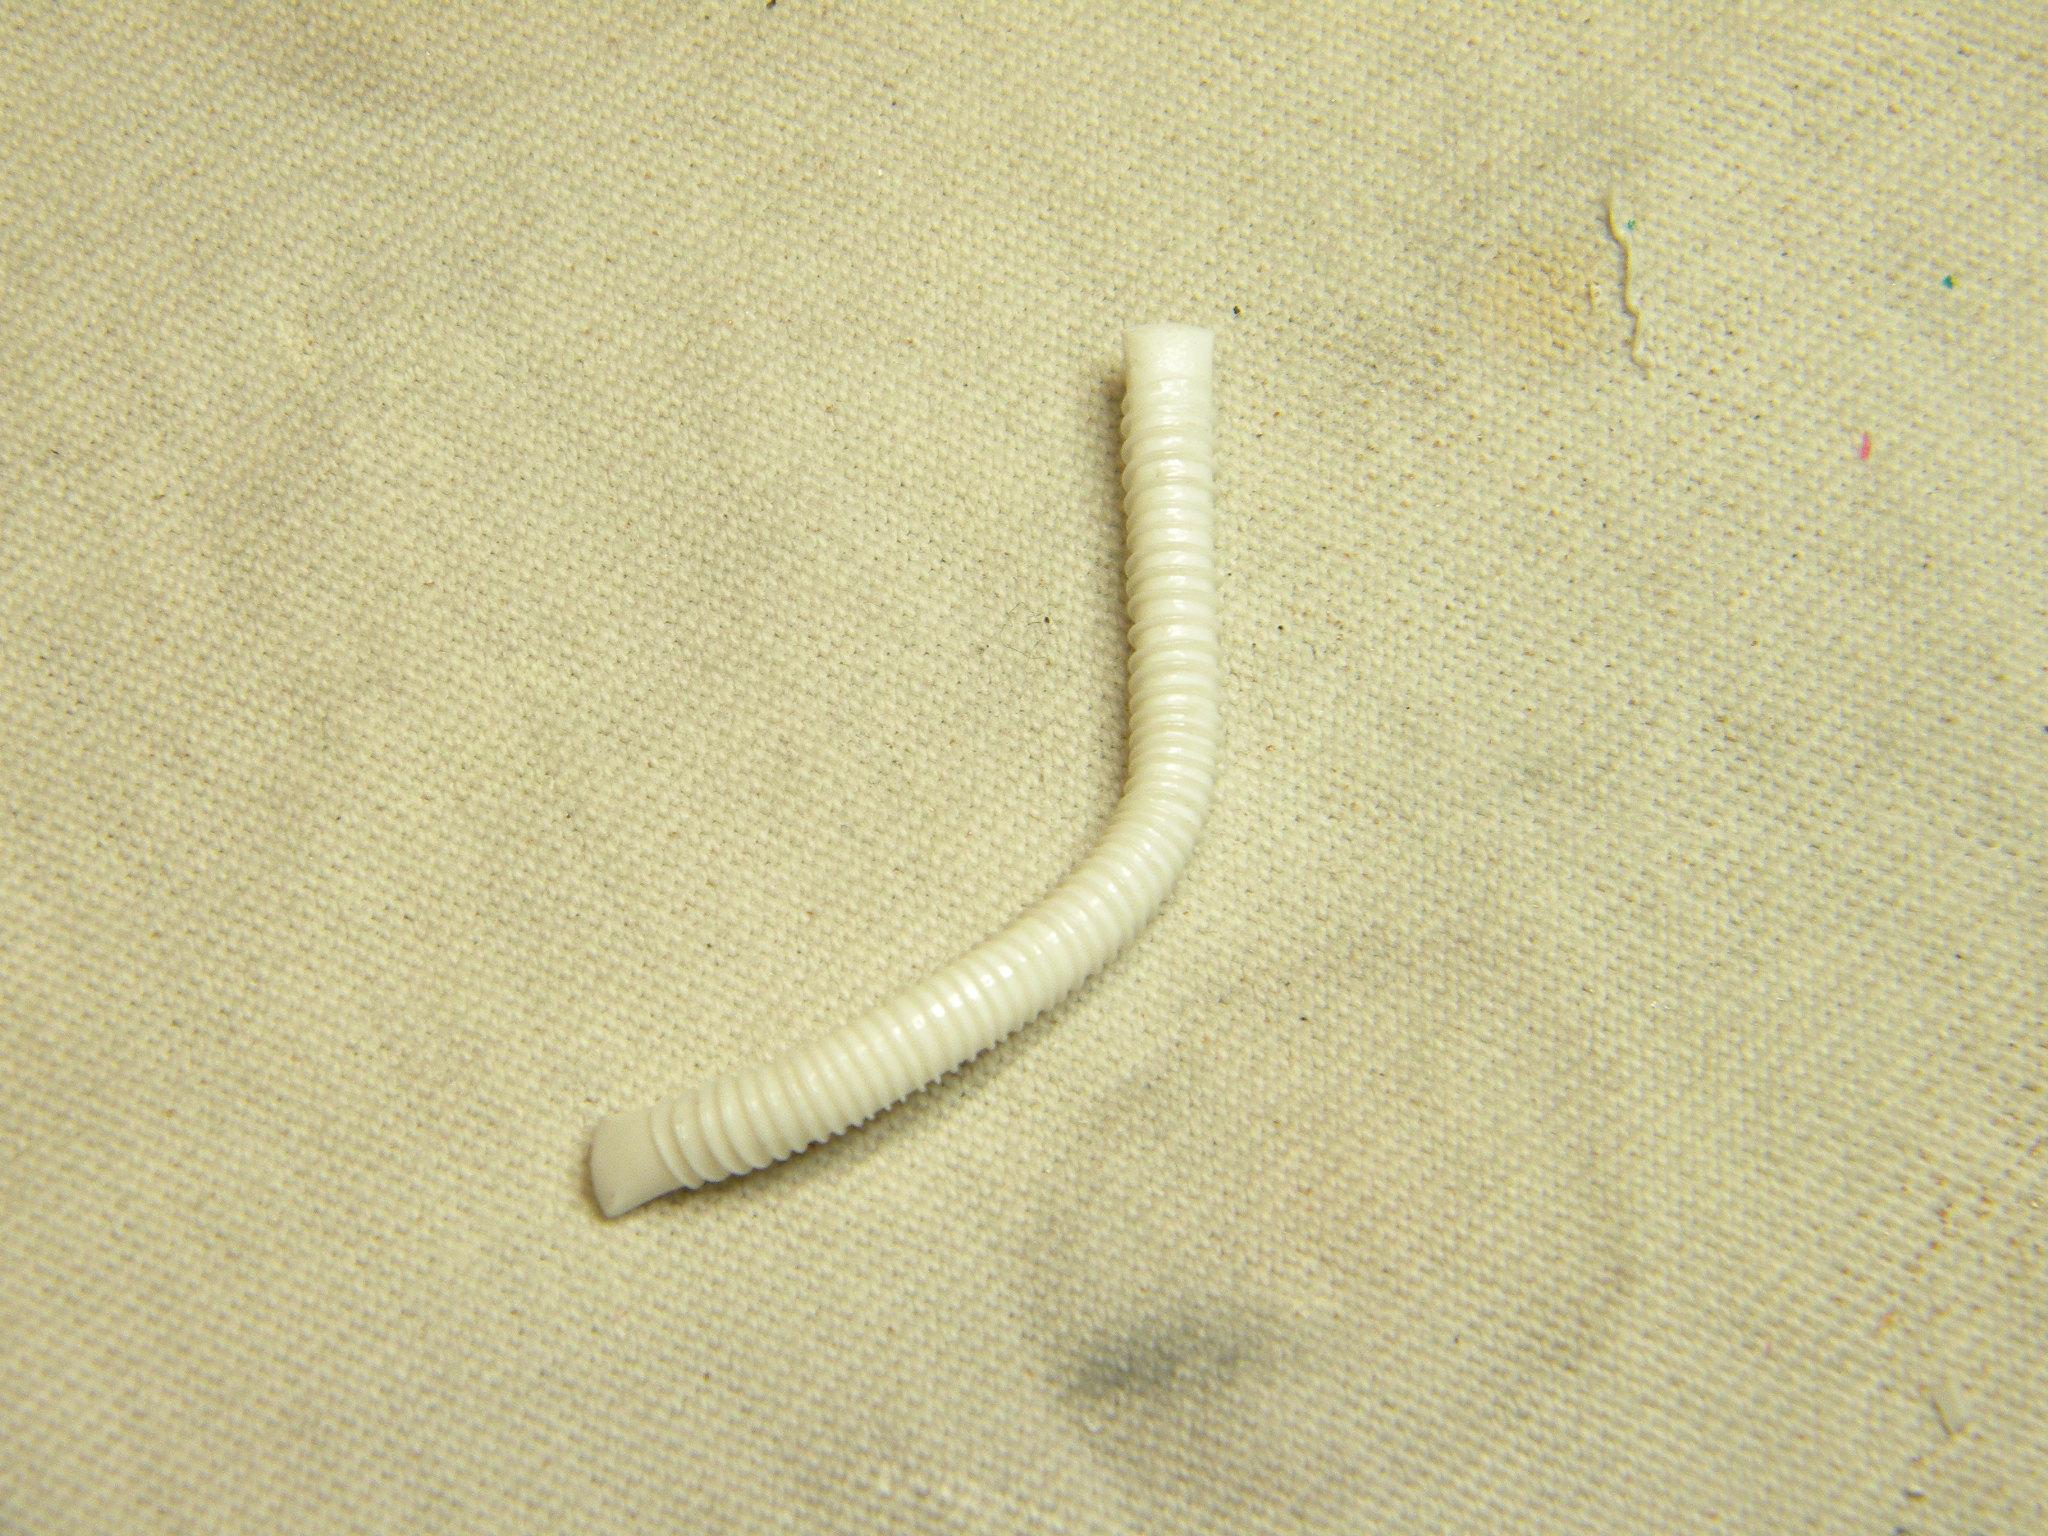
Curving narrow styrene strips
StevenGuthmiller replied to NOBLNG's topic in Model Building Questions and Answers
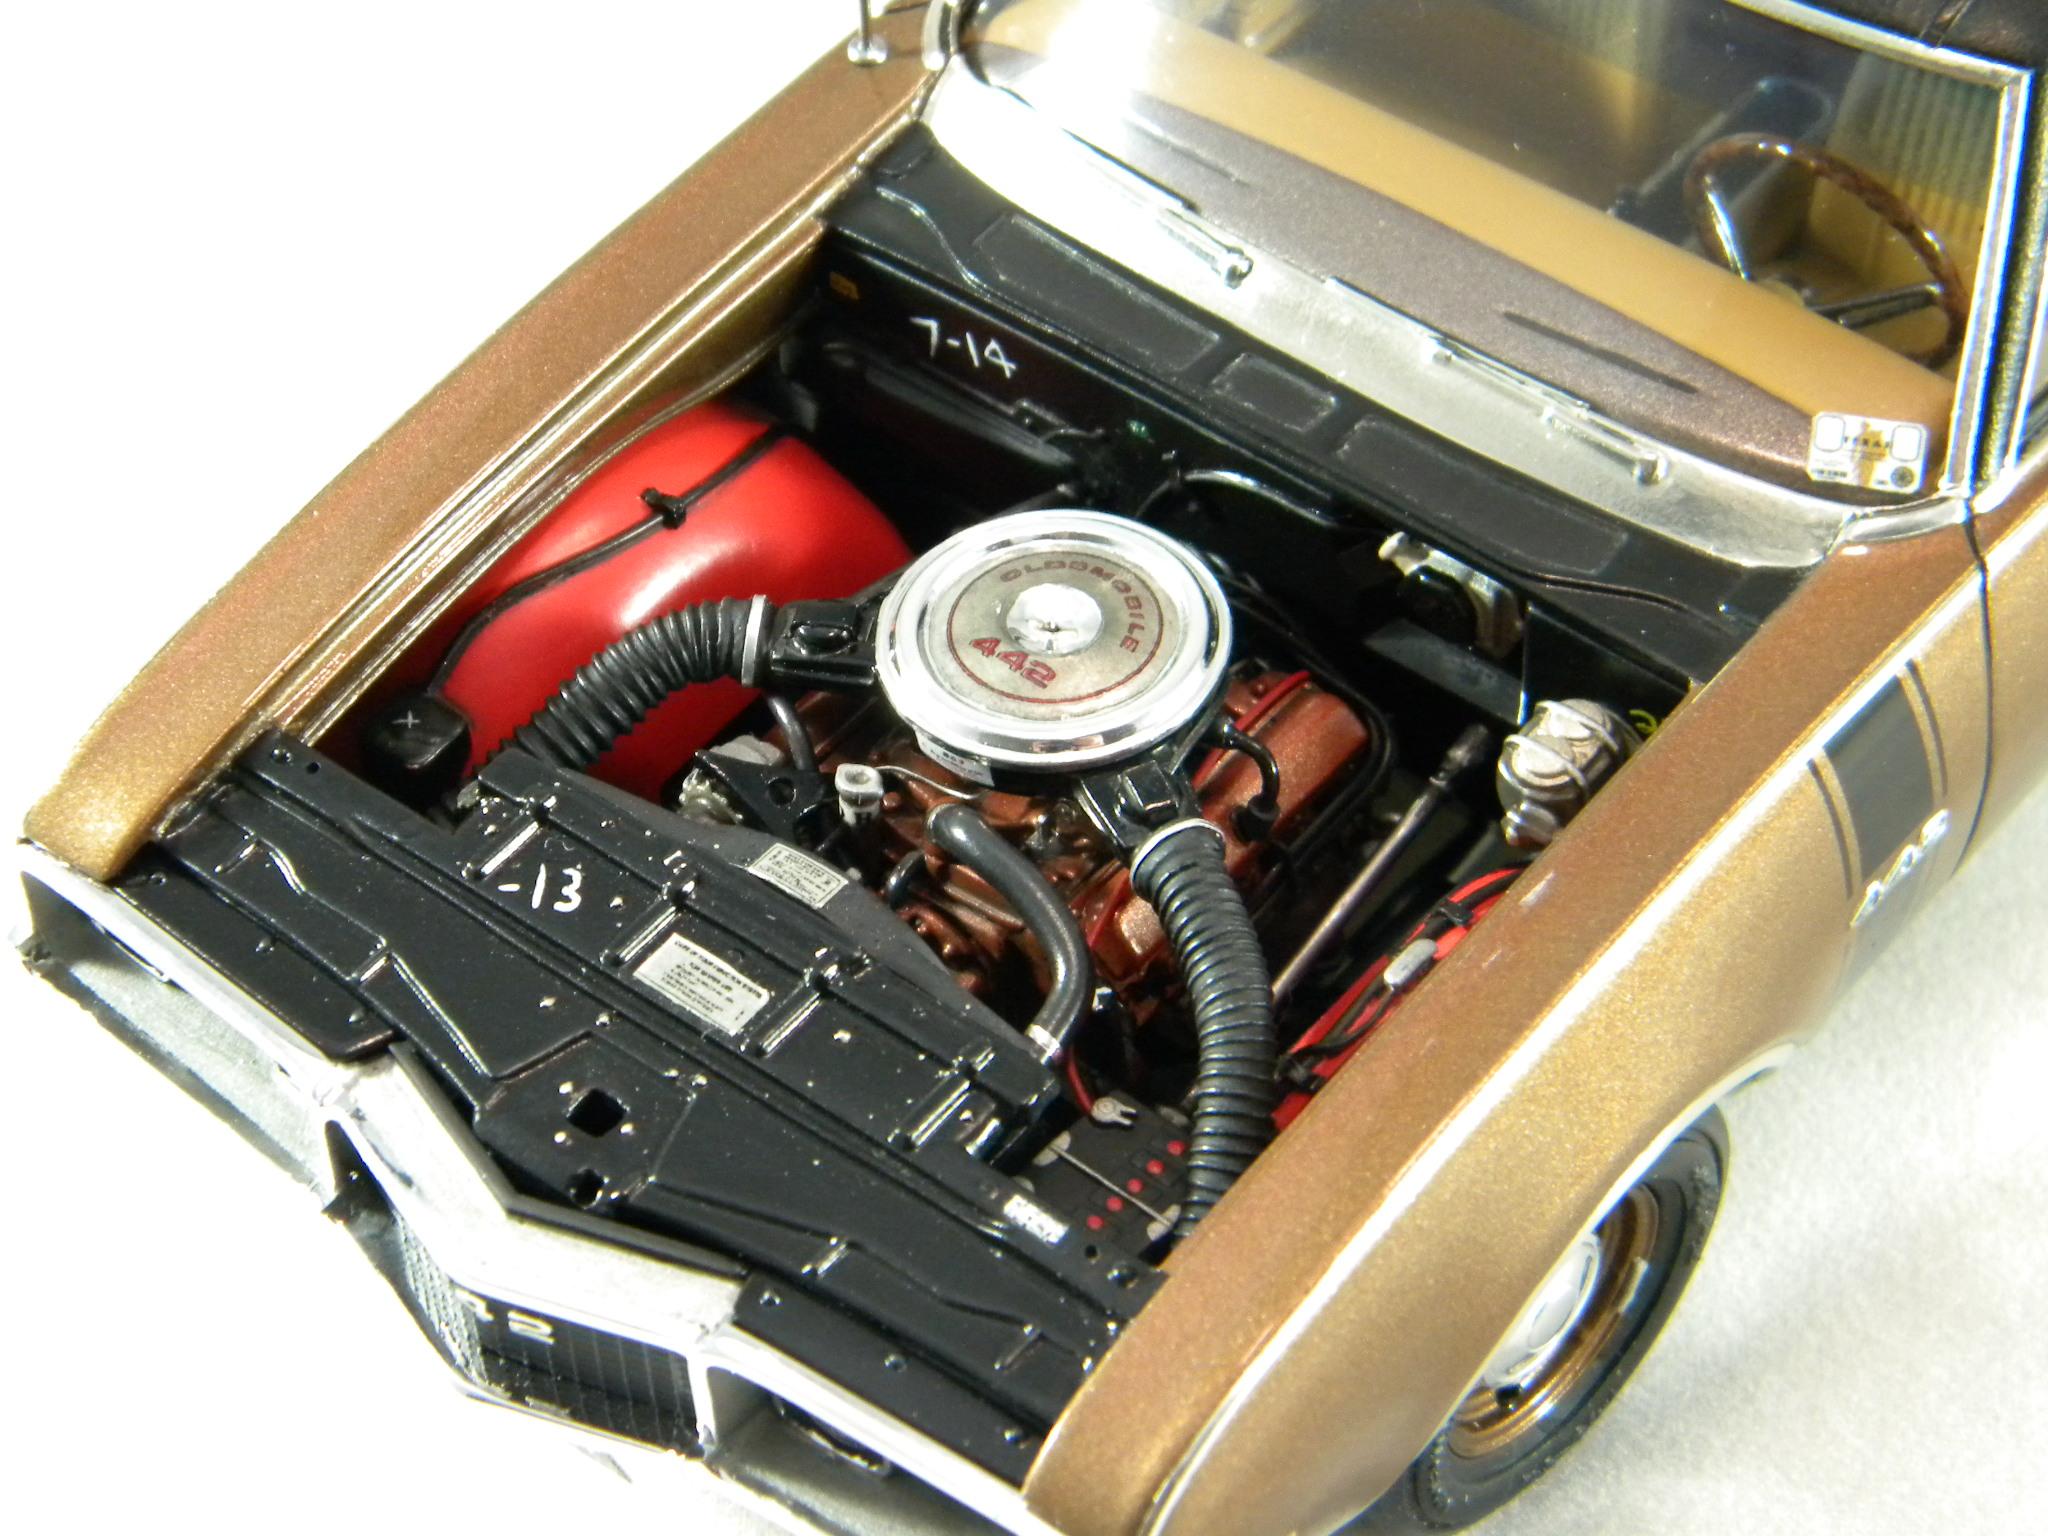
Using a MEK based liquid cement, you can work your way around a little bit at a time. Not exactly the same, but I used a similar technique for the intake hoses on my '68 442 project. Of course it's a little more time consuming with thicker plastic, but it's absolutely do-able. Steve
-
Poll-1970 Chrysler 300; or 300H
StevenGuthmiller replied to mopardes's topic in Car Aftermarket / Resin / 3D Printed
I understand, but the Hurst model was called a "Hurst 300". Your caption says "300 H", which is this car. Just thought that it would be worth clarifying. Steve -
Pretty sad. It's hard for me to comprehend why anyone would want to steal a built model that you had no hand in creating. Takes a special kind of loser. Steve
-
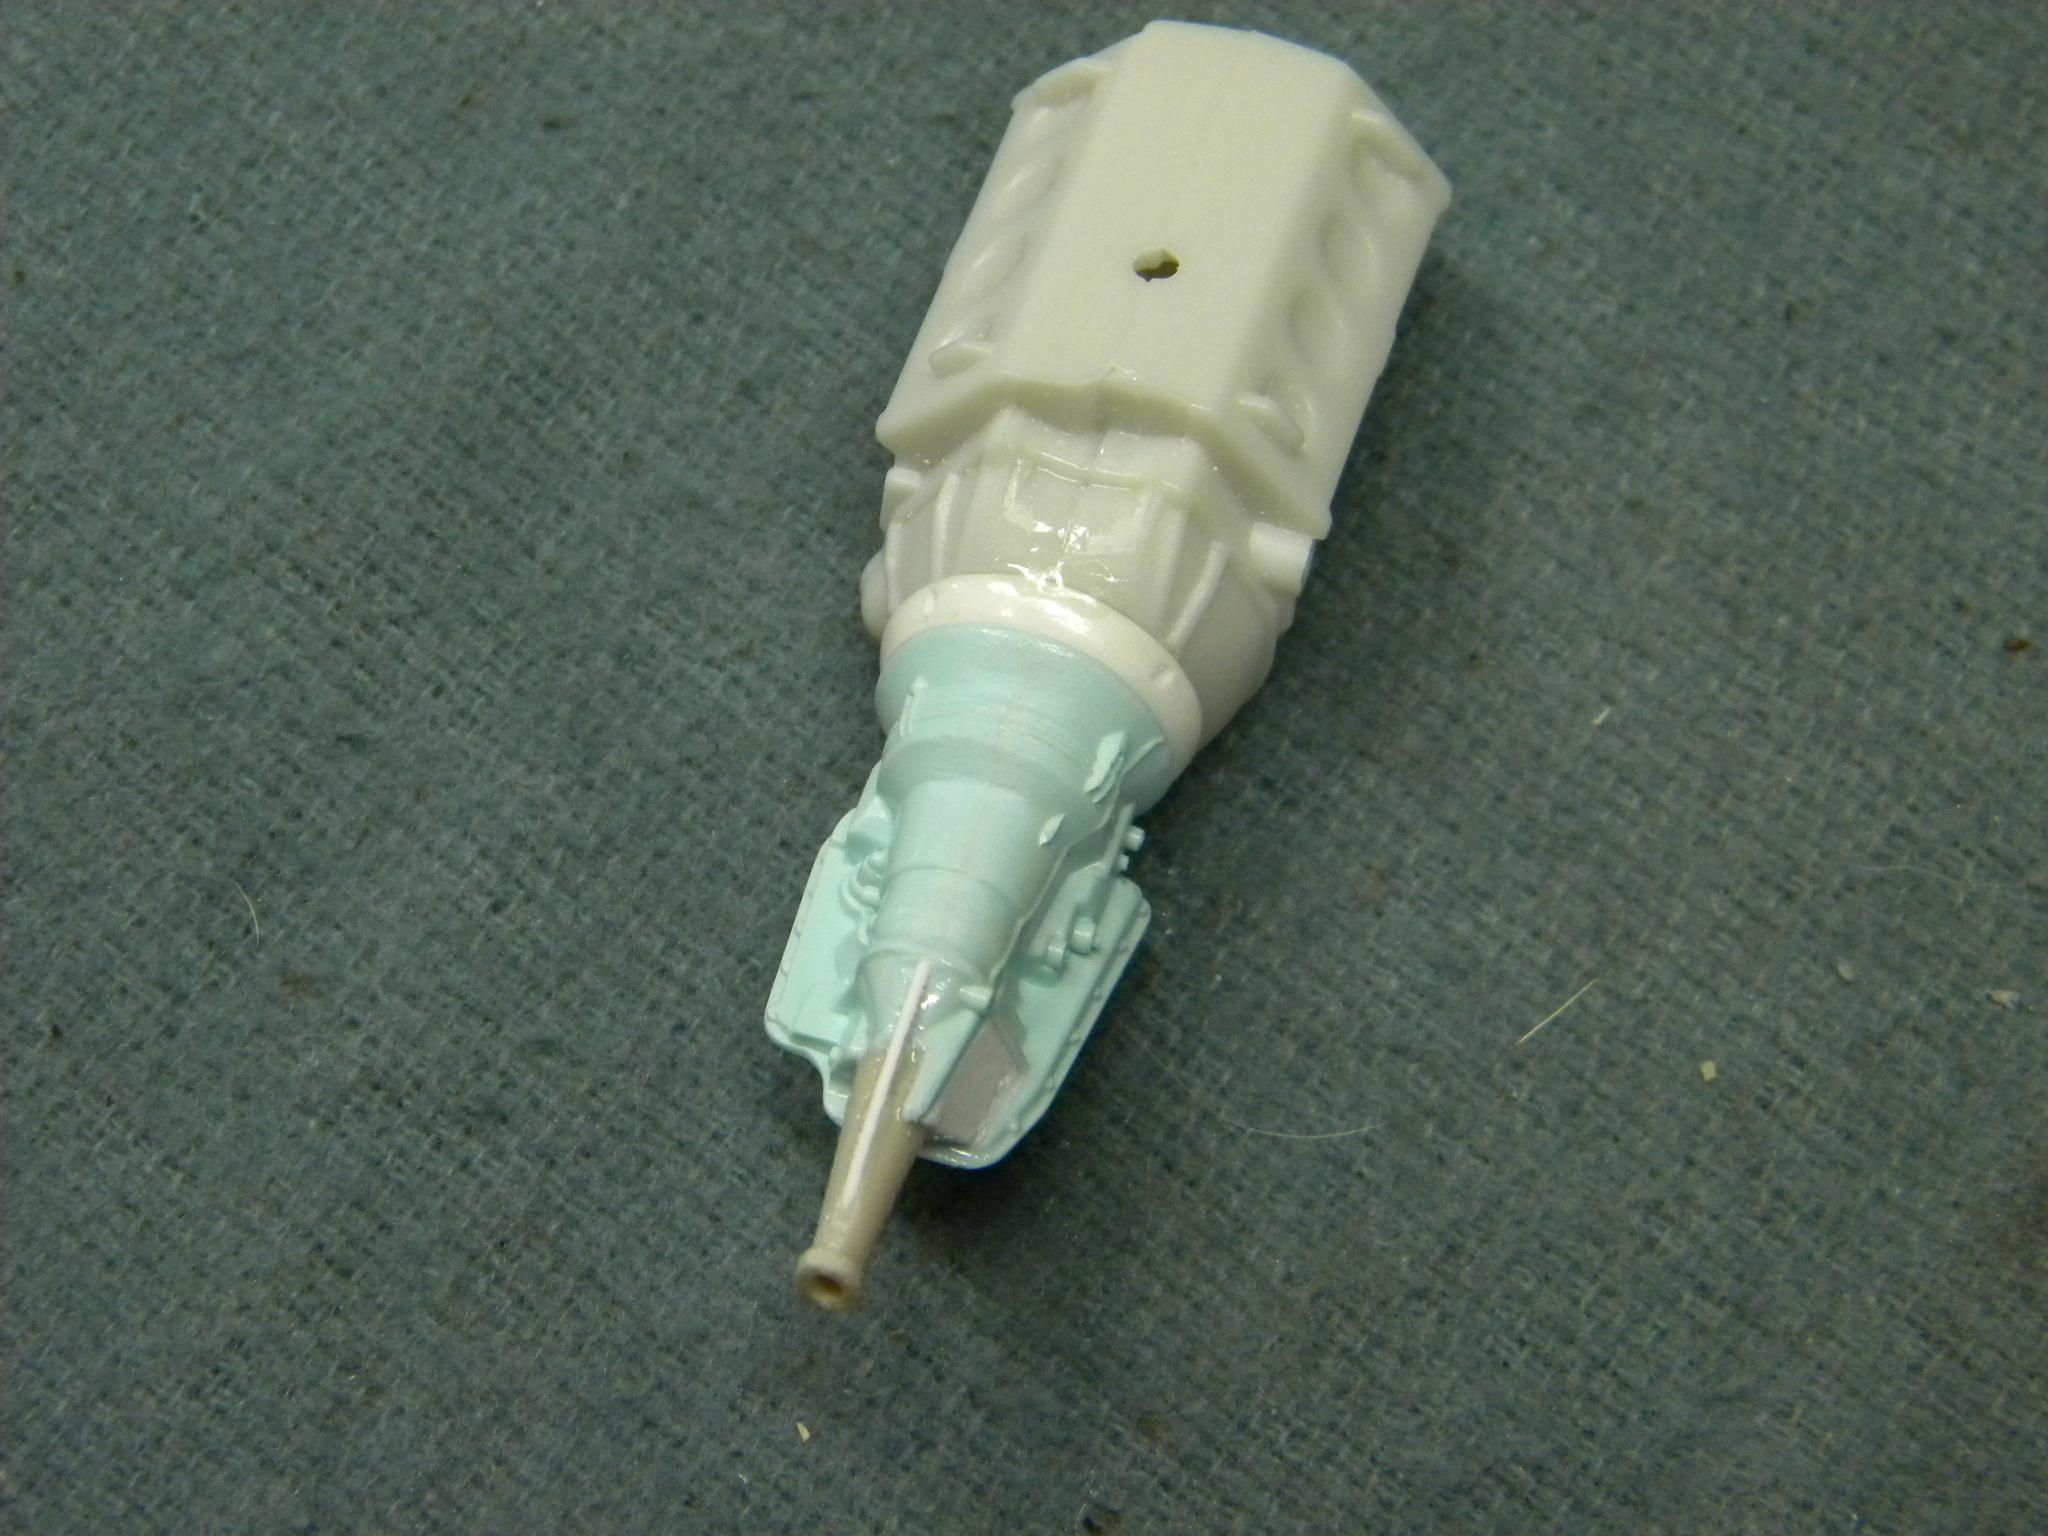
The Slim Jim is ready for primer. Steve
-
Thanks Francis. It will be as close as it really needs to be I suppose. Steve
-
Modelhaus Resincast 1960 Dodge Dart Phoenix WIP
StevenGuthmiller replied to THarrison351's topic in WIP: Model Cars
Looks great to me Tim! Personally, I would refer to that as "Knock yer eyeballs out red"! Great color! Steve -
Exceptional work!! I do have to ask, were the Yenko stripes supposed to end in the center of the front wheel opening? Steve
-
My wife will be finishing up teaching the final semester with her nursing students next Tuesday. Just today she accepted a job with the state of North Dakota to begin COVID testing at sites throughout the state beginning next week Steve
-
I hear you. Last year at the NNL North show in Minnesota, as people were packing up after the show, one of the entrants knocked a model off of the table, and KABLOOEY!!!, parts scattered all over the floor! Lucky for the rest of us, it was his own model. Steve
-
Maybe. But that would come later. Thanks again for the Olds tranny Keith!! Couldn't do much of anything without that! Steve
-
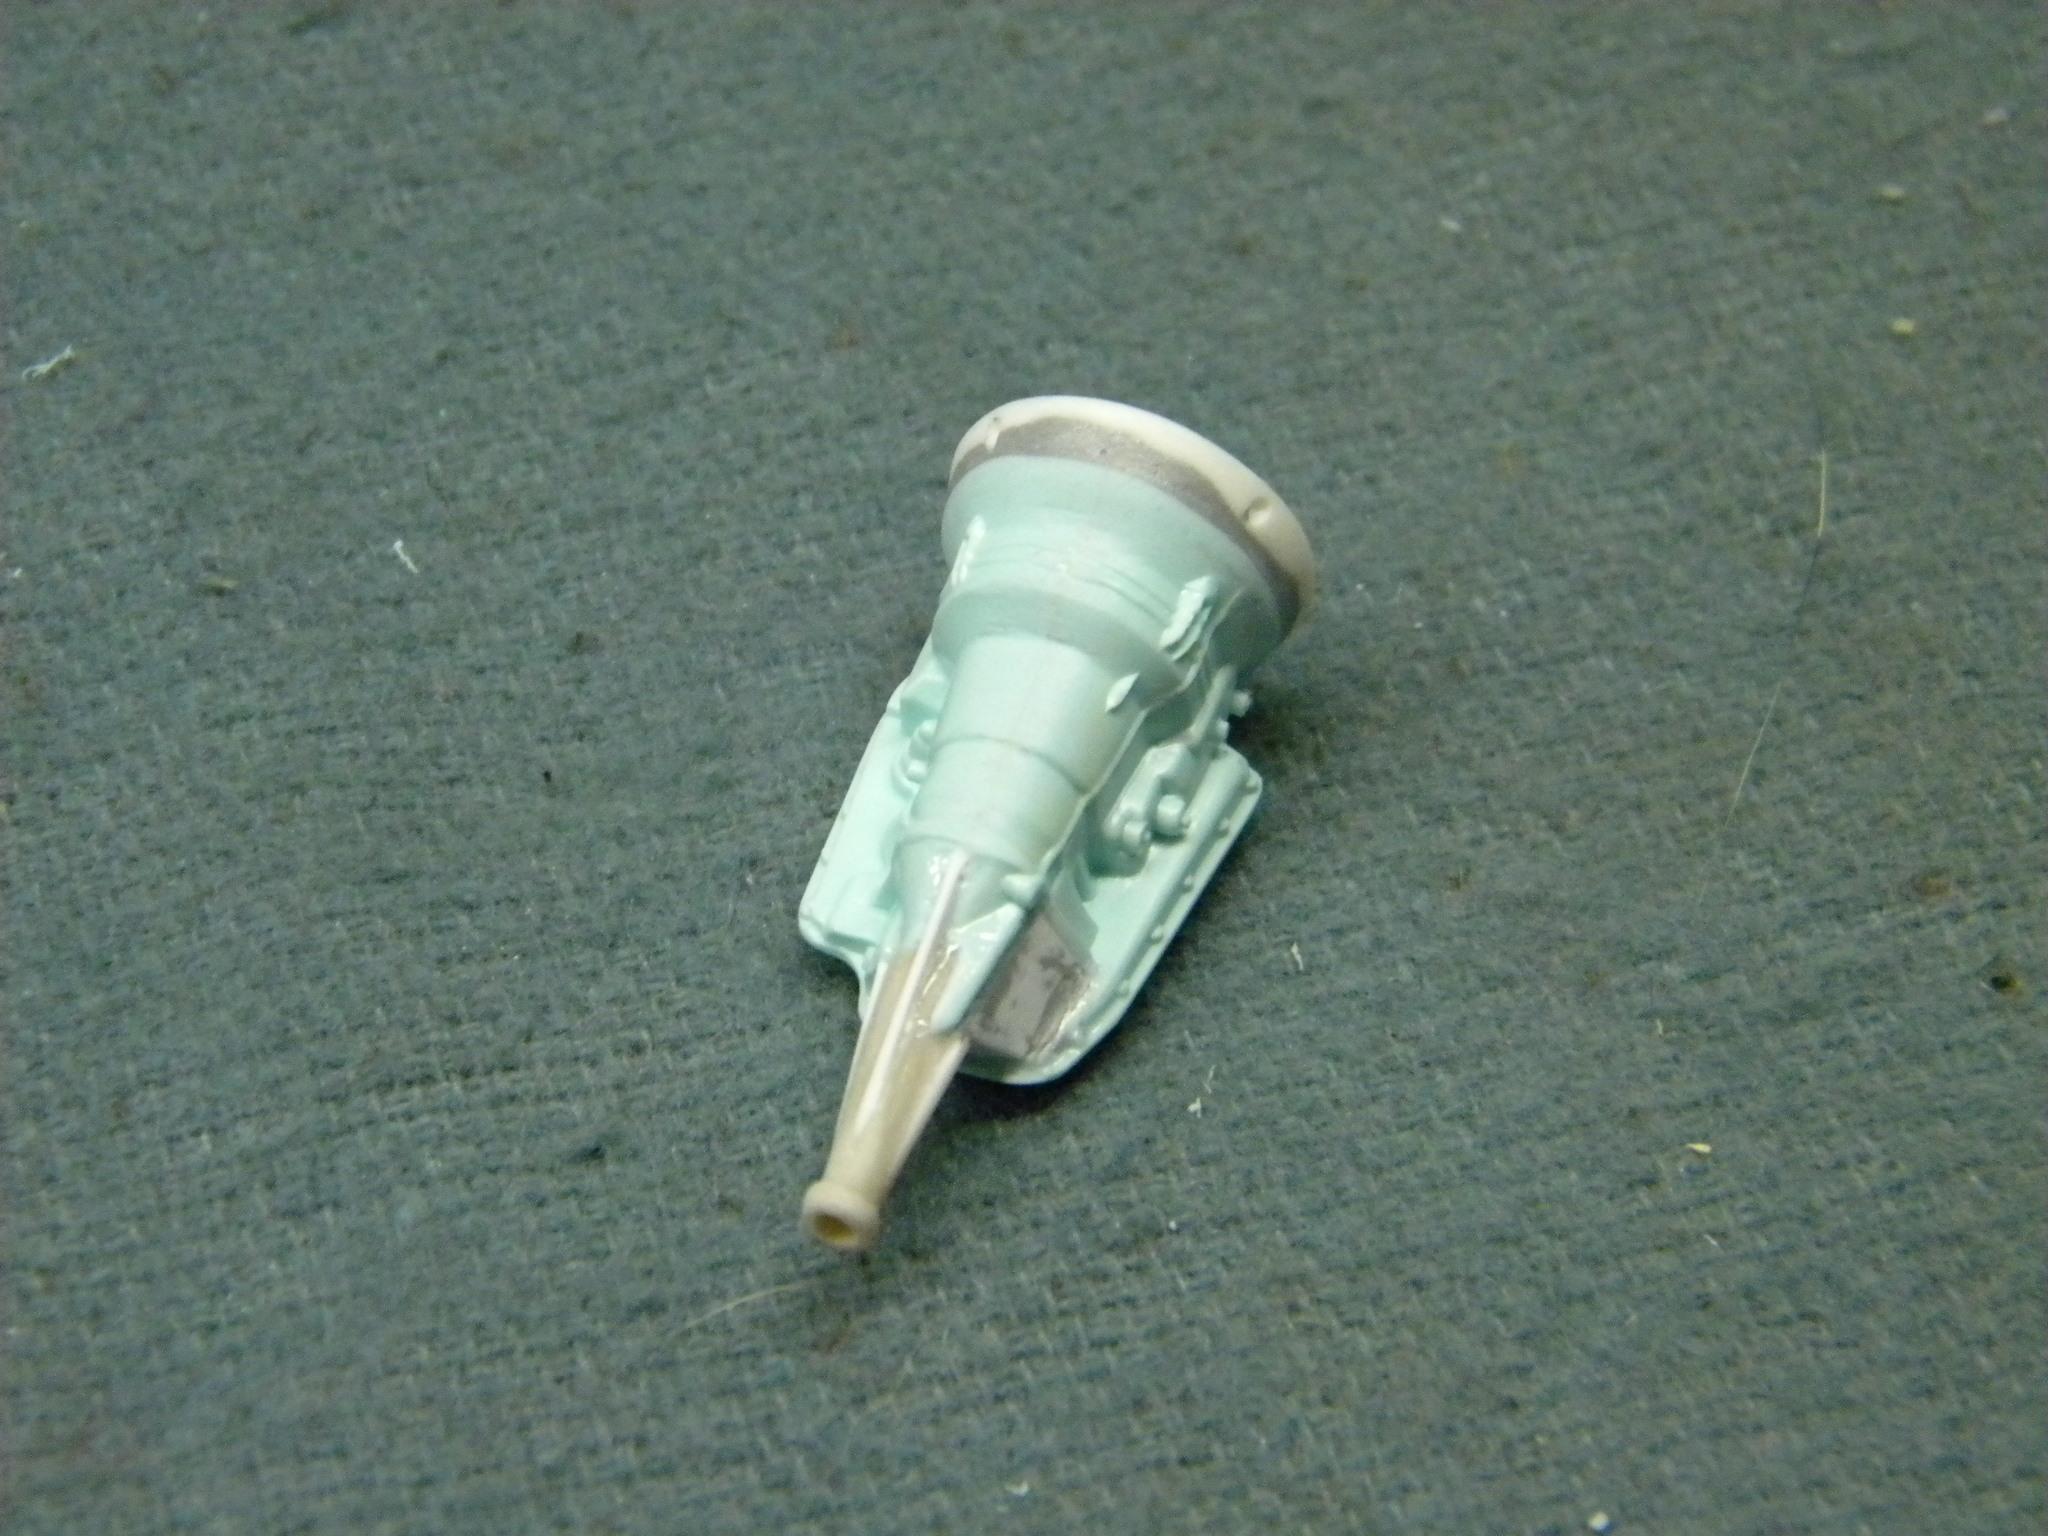
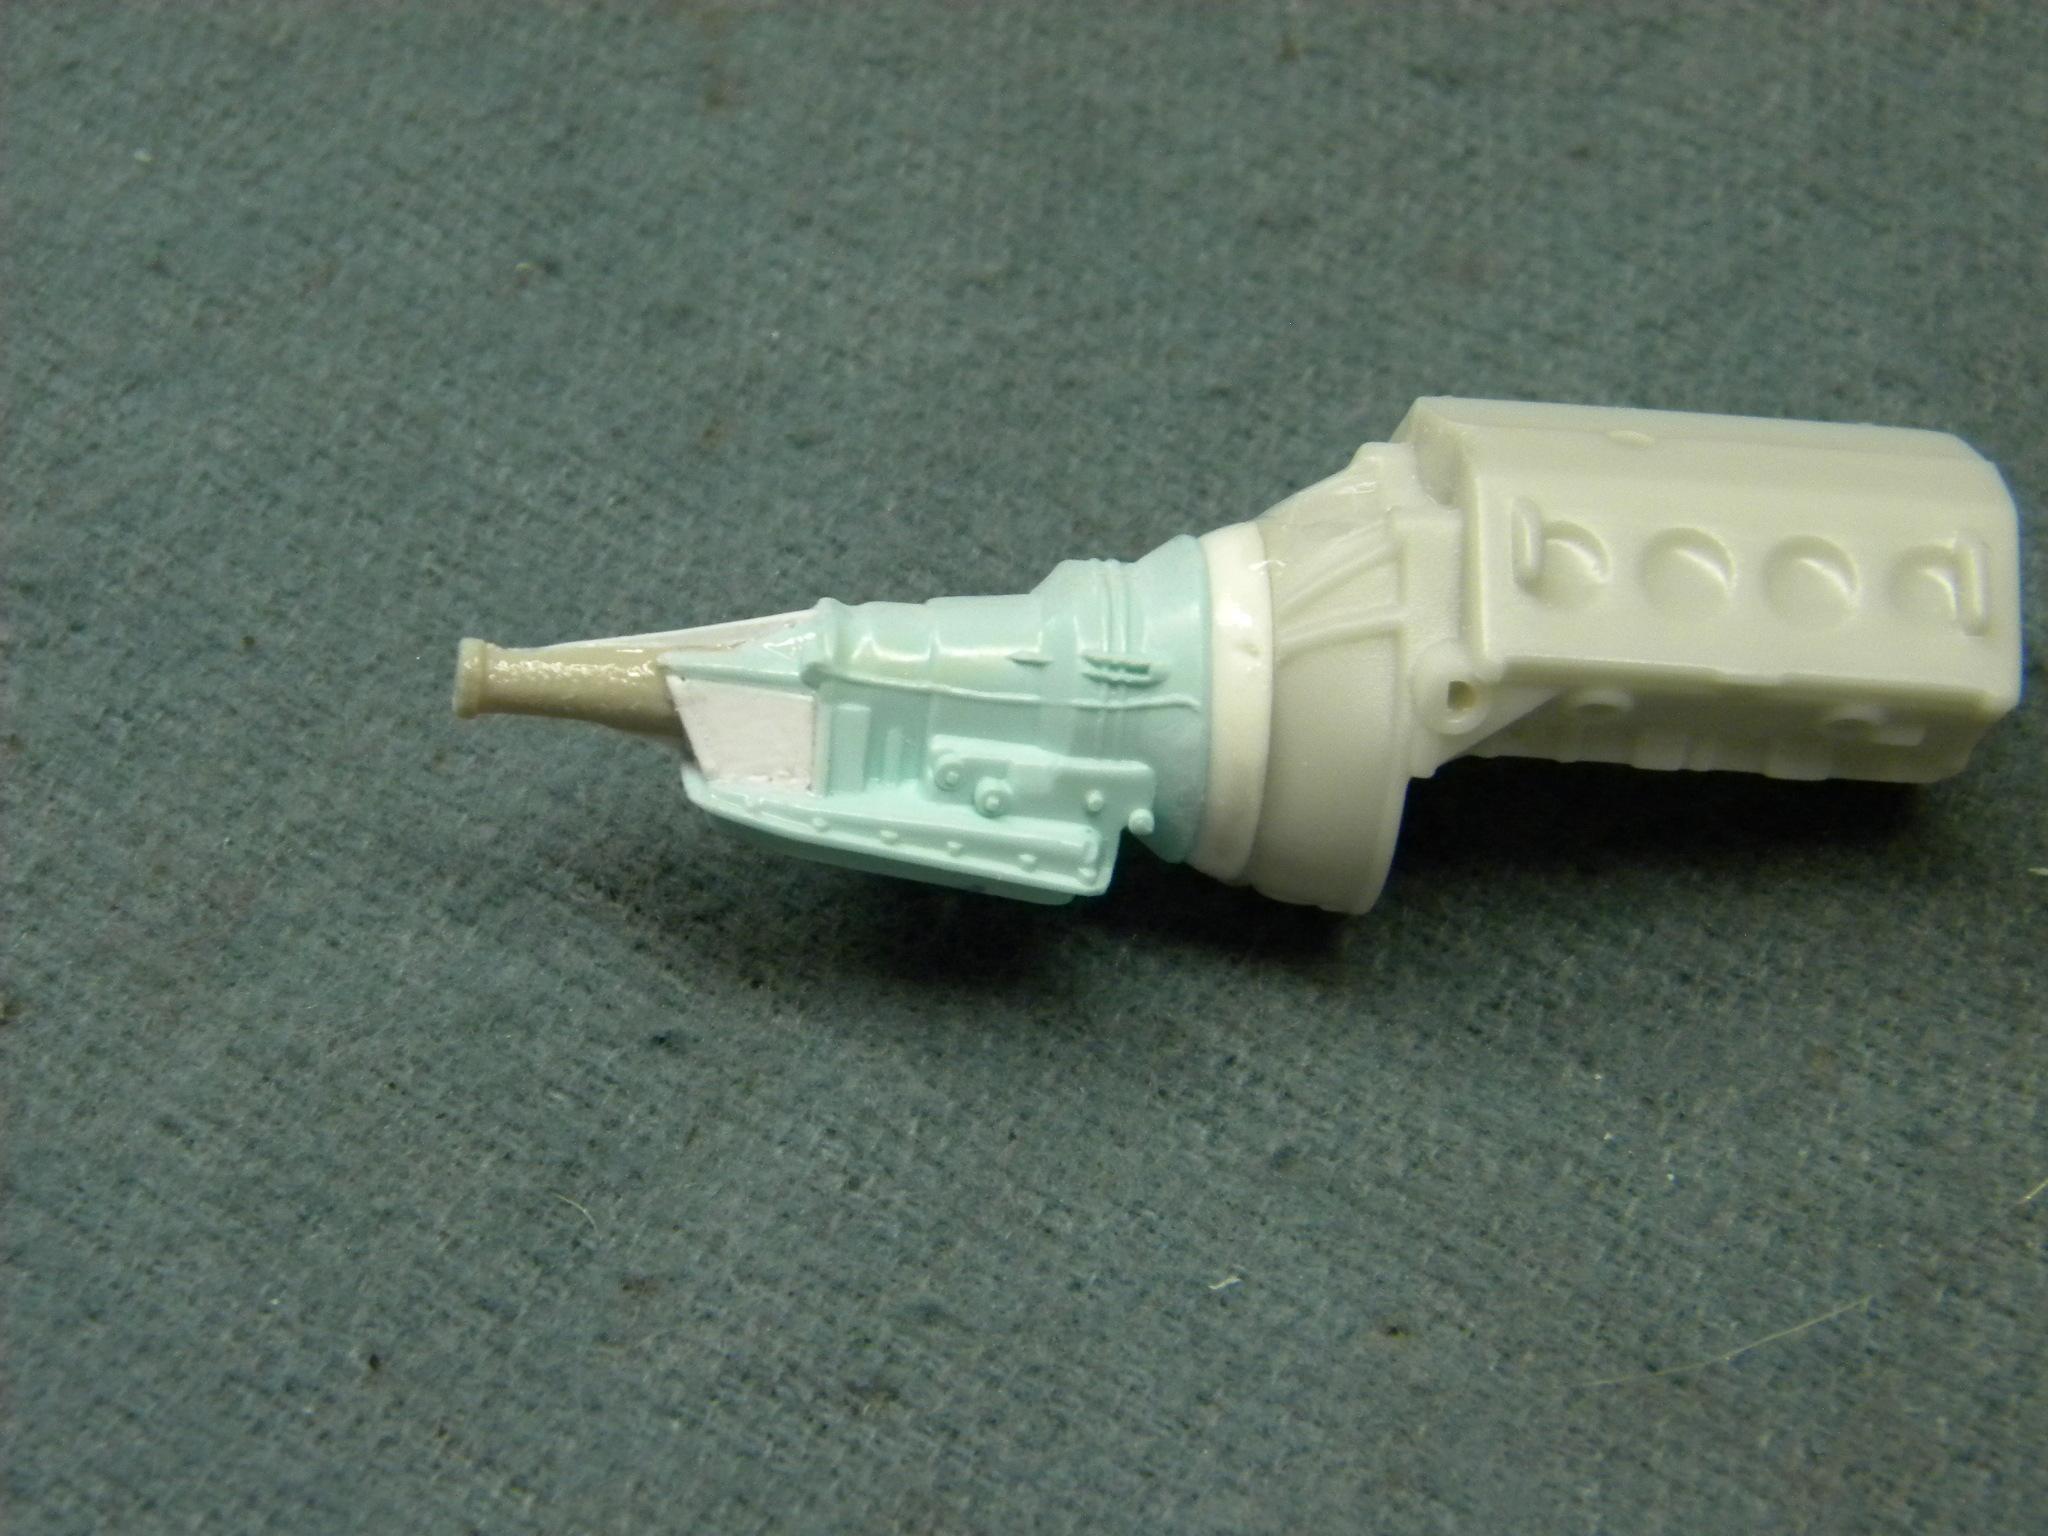
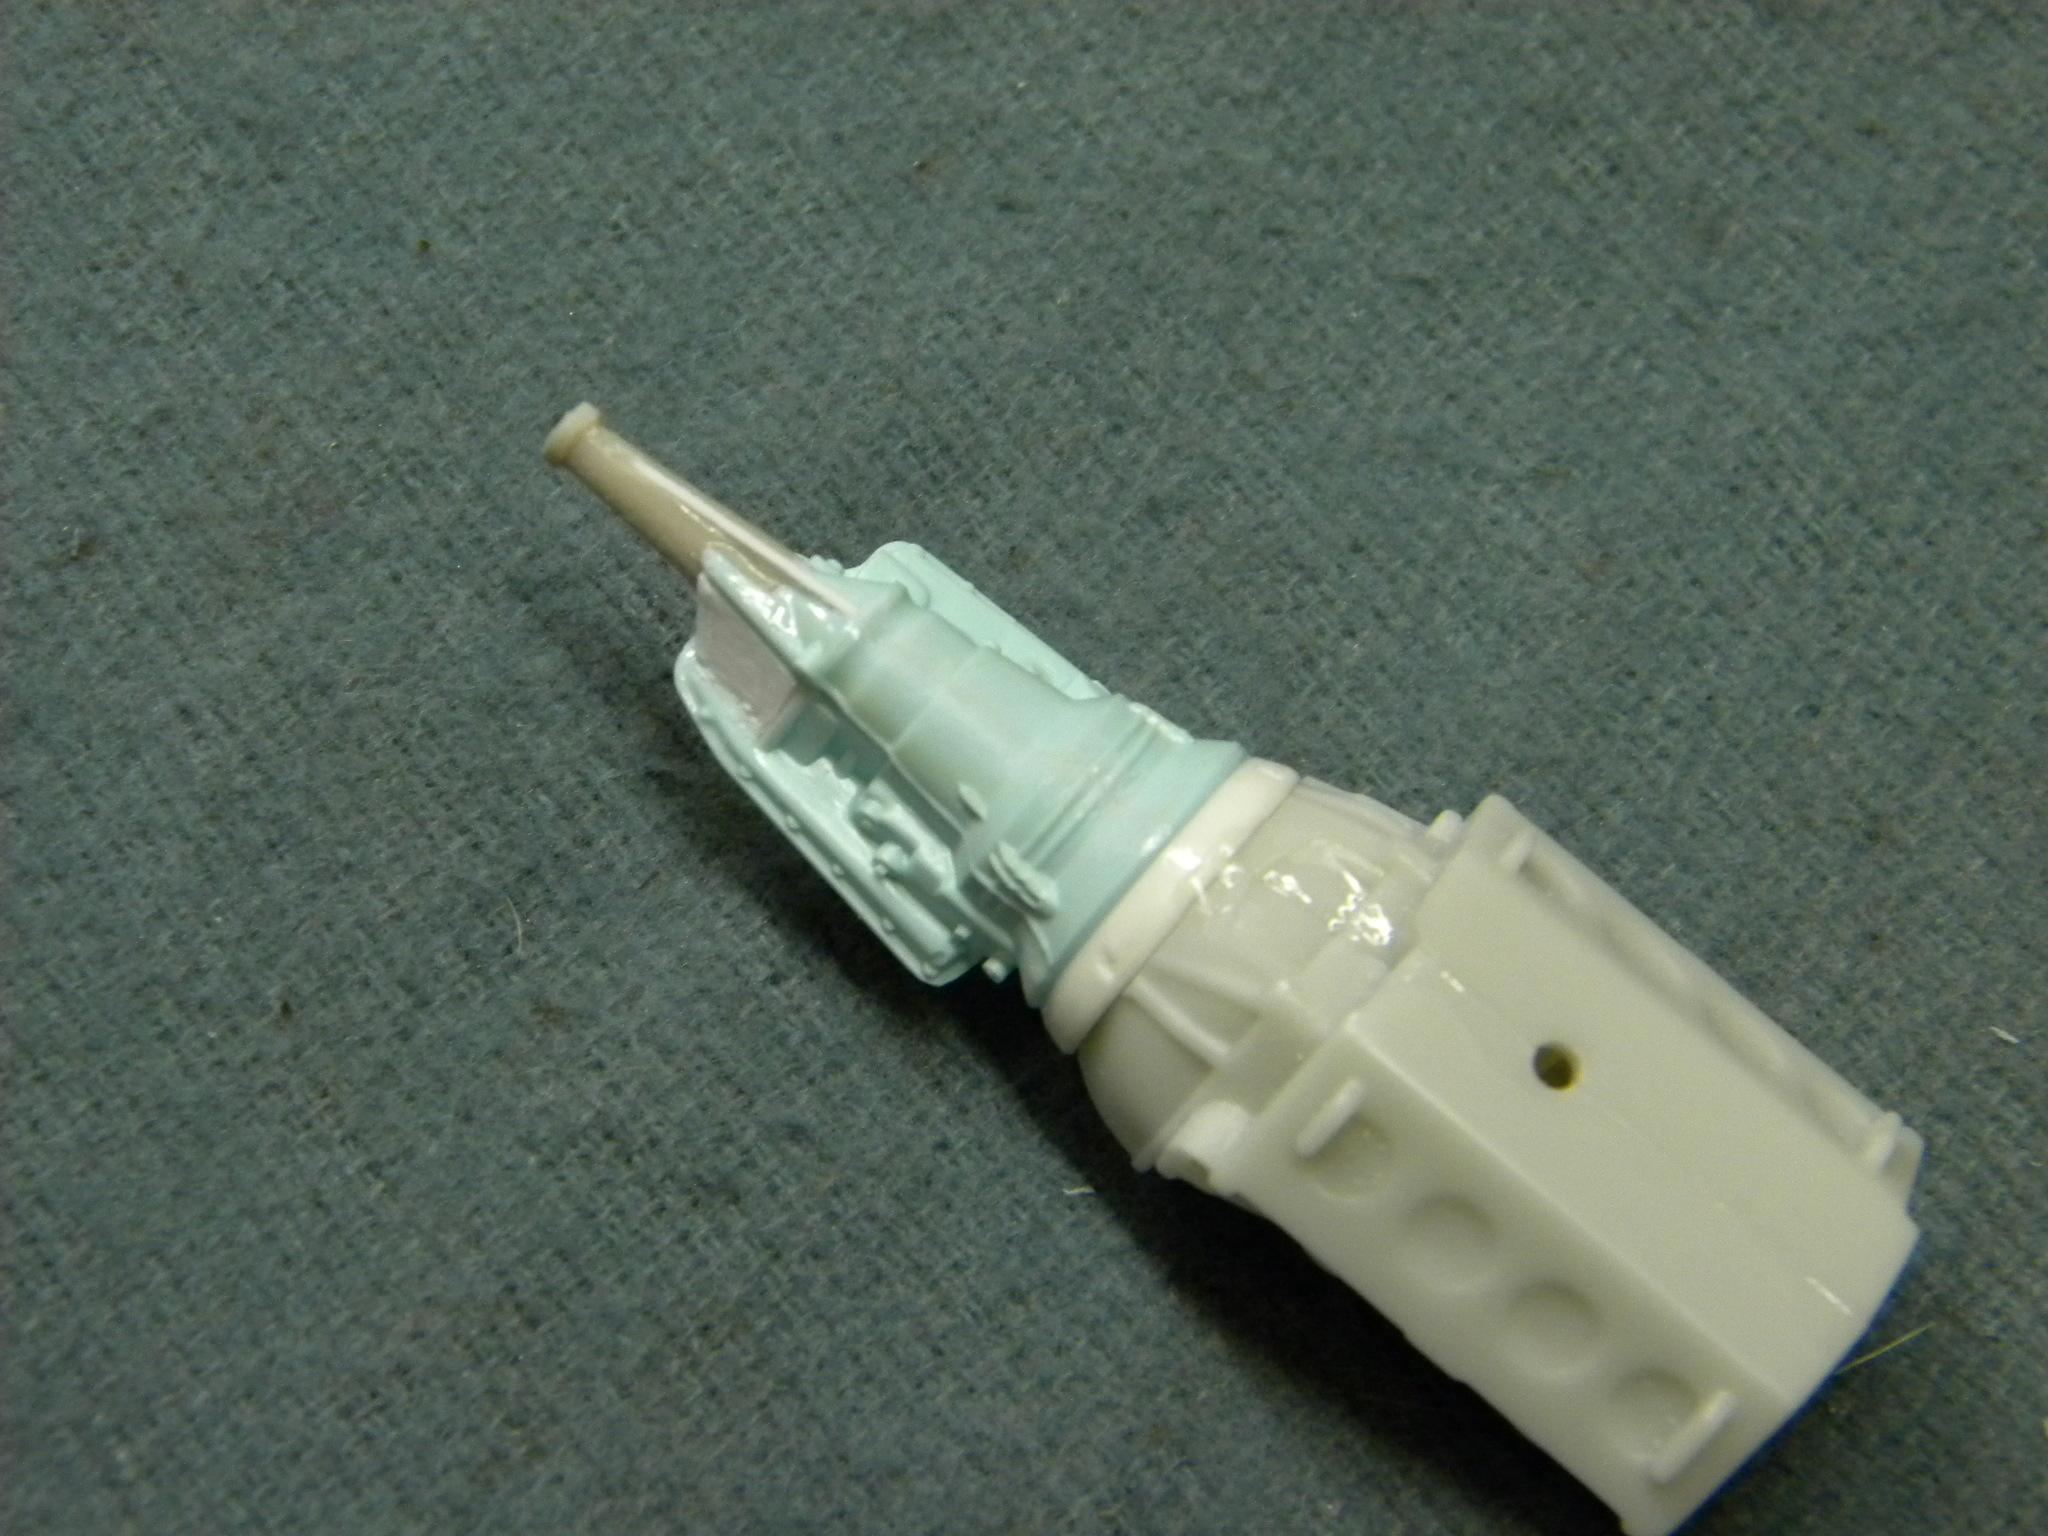
And of course, not being able to leave well enough alone, I started adding a few more details to the tranny. Steve
-
Not being able to leave well enough alone, I added a few more things to the Pontiac auto. Probably still not done! Steve
-
I tried my hand at replicating a '64 Pontiac automatic transmission. Not a very accurate representation, but with so little available to work from, this was the best that I could come up with. Steve
-
Well, not exactly an exact replica of a '64 Pontiac "Slim Jim" automatic transmission, but thanks to Keith Buckner for the donation of the transmission from the Johan '62 Olds Cutlass, I think this is about as close as I'm going to get. Thanks again Keith!! Steve
-
Poll-1970 Chrysler 300; or 300H
StevenGuthmiller replied to mopardes's topic in Car Aftermarket / Resin / 3D Printed
I assume that by "H" you mean Hurst? The Chrysler 300 H letter car was produced in 1962. A little confusing, so you might want to clarify. Steve -
Oldsmobile 442 air cleaner decal
StevenGuthmiller replied to Jan S's topic in Car Aftermarket / Resin / 3D Printed
He also now lists the decal for the '68 442 air cleaner. Something he didn't have a couple of months ago when I needed it! Steve -
Okay guys, some of your comments have convinced me to revisit the hinge attachment question. I decided to try the channel technique instead. This should be somewhat more stable, and paint thickness should actually benefit the fit. As it sits now, the hinge slides into place extremely easily, a little paint on the hood and hinge should actually tighten up the fit a bit. As I worked on this, I thought about the fact that in the future, this technique could be streamlined considerably by using some inverted pieces of Plastistruct "L" channel for the hood pieces. The ideas sometimes evolve faster than I can keep up. Steve
-
I agree. Every show that I have attended to this point has been relatively free of morons. Steve
-
That's funny Rob! I suppose anything could happen at a show, including someone who might just decide that they want to break something. But there's really no way to guard against all possibilities. I just have faith that most of the people present at a show are either modelers, or have spent enough time around models to be smart enough to keep their grubby little fingers to themselves. Steve
-
Bare metal foil small writing
StevenGuthmiller replied to Ctmodeler's topic in Model Building Questions and Answers
I use exactly the same technique described above for those block letters. My first question would be, what type of BMF are you using? If you're using the "Ultra Bright", dump it and get the "original", or "New Improved". The Ultra Bright is too thick to work with on these small areas, and the adhesive is often very insufficient. All that I can say other than that is that I apply the foil to those letters as I would any other badge or script. I put a piece over the letter that's a little too large, burnish it down extremely well, cut as close to the letter as possible and then burnish again with a soft cloth. I've never had much of an issue with doing them this way. It only becomes an adhesion issue for me with very tiny details such as door and trunk locks. Steve