DynoMight
-
Posts
1,323 -
Joined
-
Last visited
Content Type
Profiles
Forums
Events
Gallery
Everything posted by DynoMight
-
Nice to meet you Jake! My brothers name is Jake haha! Don't be afraid to ask questions and when you do, people will usually have a answer for ya! Hope to see some pics from you! This forum is a tight knit community, we're all friends here. -Glenn And try something new, don't hesitate to try something!
-
Is This For Real?
DynoMight replied to Dale W. Verts's topic in General Automotive Talk (Trucks and Cars)
It's probably not real haha -
I've had ingrown toenails and also broken fingers and concussions! I also have a shake in my hands that makes it hard to paint small details Not much compared to you guys but it's still annoying..
-
ahhahahhaha
-
I'd buy it in a heartbeat!
-
Janis Joplin's Porsche 356C and Janis figure...
DynoMight replied to Brizio's topic in WIP: Model Cars
shhhhhh don't tell Brizio!!! -
1955 Nomad Drag Wagon AKA The 9 Second Grocery Getter FINISHED
DynoMight replied to DynoMight's topic in WIP: Model Cars
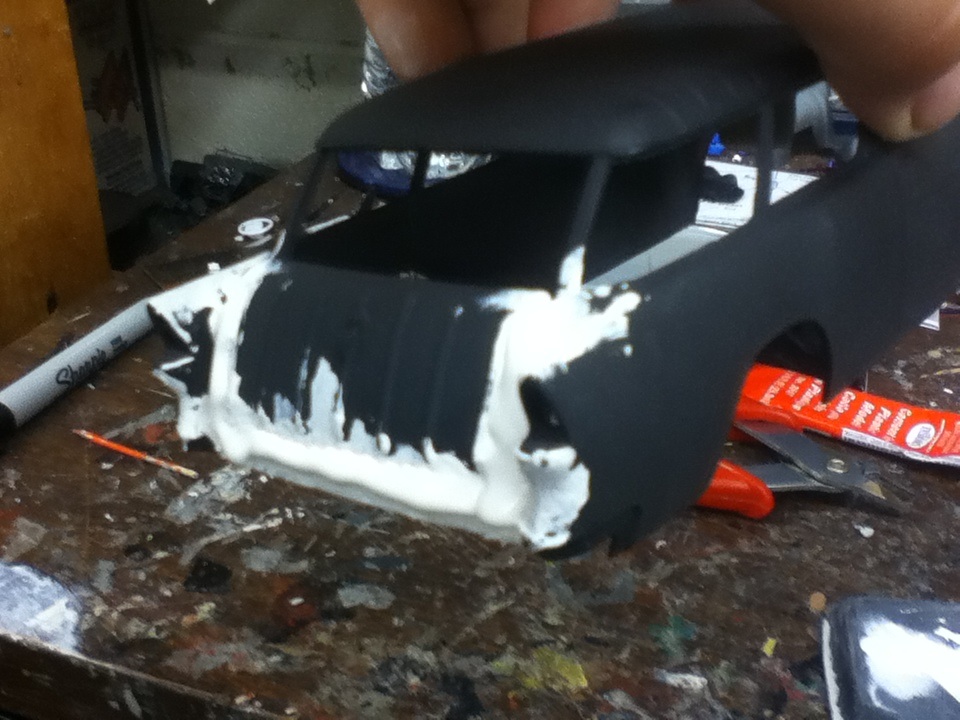
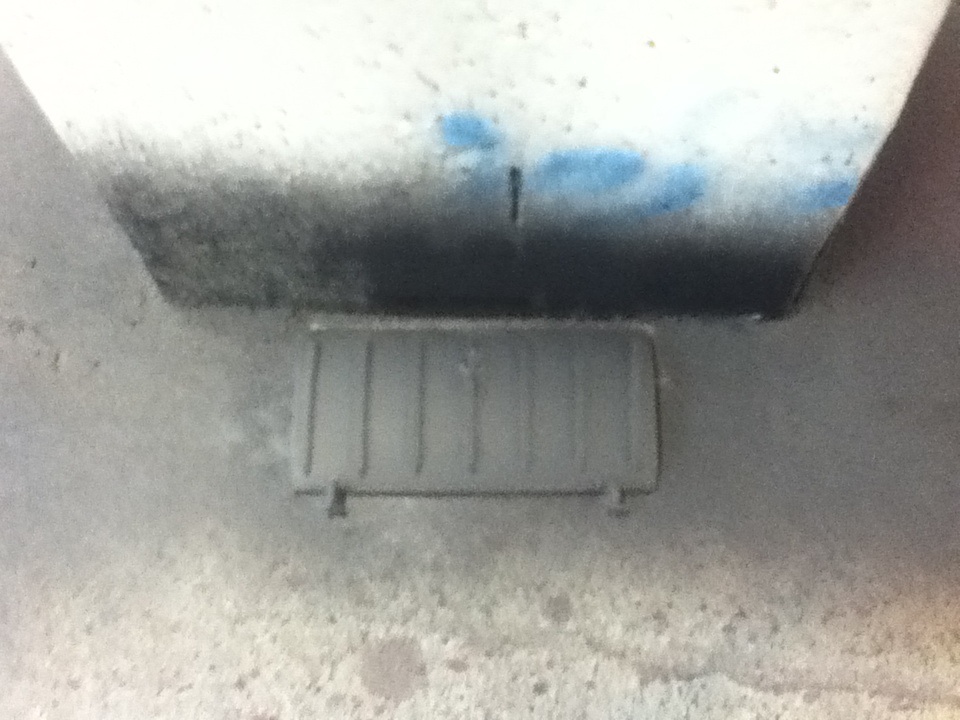
Here's the aftermath of wetsanding! I discovered multiple seams after this, so I sanded it a little more and re-primed it. I glued the trunk to the body because the brackets broke off and I thought why you would want to open the trunk just to see the back of the tub.. These are various angles of my wet sanding, the rear quarter panel had the Chevy symbol on it and belair written on it, and I didn't like how it looked so I sanded it off. After I wetsanded, I noticed multiple molding seams and lines so I resprayed the body with primer. I picked up some Tamiya Putty and I filled in the gaps. Mostly in the front bumper, back clip and trunk, and also the hood had a large gouge in it. The B pillar had a large molding seam so I puttied over it. I puttied the tub and also under it (not pictured) Eventually I'm going to sand the arches down so it is even with the floor pan and also it'll fit in the body better. Thanks for looking at my build guys! I'll sand the putty down tomorrow and hopefully start with the frame and figure out the rear suspension. Advice/recommendations are welcome! -Glenn
-
Hope to see this model finished and looking good under the glass!
-
1967 corvette. for leukemia patient, done
DynoMight replied to goodwin3224's topic in WIP: Model Cars
Good job, better than I built that kit a couple of years ago over a 2 month period haha Looking to seeing more from you. -
Wow, those rotors... KUTGW
-
1955 Nomad Drag Wagon AKA The 9 Second Grocery Getter FINISHED
DynoMight replied to DynoMight's topic in WIP: Model Cars
Yea, I was kind of going for the Henry J type hood, if you know what that looks like. I think I'll save it for the next project. Thanks for the support Thanks! I got Tamiya putty so I'll get some seams and molding lines to disappear and be fixed. I'm probably going to wet sand it after I let the putty dry tomorrow. -Glenn -
That should turn out amazing, that decal should just set it off
-
KUTGW!
-
1955 Nomad Drag Wagon AKA The 9 Second Grocery Getter FINISHED
DynoMight replied to DynoMight's topic in WIP: Model Cars
I decided I didn't want the trunk open (I didn't decide, the brackets breaking did, and besides, why would the trunk need to be opened anyways?) so I glued it shut. I'm going to have to putty the gaps and the front clip has a lot of molding lines, which I tried to get to when I was wet-sanding (pics later) but I couldn't get to them so I'll have to either putty over them or sand them away. I'm also debating on whether or not to have a flip up hood, like this Or not to have one. I think it'll be cool either way, but I want to know what you guys think about what I should do. Maybe I could also not make it hinging and just have it a completely removable hood like a gasser (kind of, not really sure what to compare it too). I can't really decide what I want to do.. Put in your five cents about what I should do. Advice/Recommendations welcome! -Glenn
-
haha no problem. Glad to help.
-
1/16th 69 Camaro ProMod 7/22/14 motor painted
DynoMight replied to Romell R's topic in WIP: Drag Racing Models
Wow. I subscribed to your channel haha. Put more videos up there if you have them! KUTGW -
Those wheels would look good on a 32 ford, painted flat black or maybe gray...
-
Hey, next time you spray black, paint it flat black, it goes on much easier and smoother, and then get a very glossy clear coat and boom! you have an almost perfect gloss black. Good job, it looks good.
-
Craig Clements "Head Hunter" : new project 4/16/14
DynoMight replied to John Teresi's topic in WIP: Model Cars
Wow oh wow oh wow amazing! -
I'M BATMAN Awesome job, looks good
-
1955 Nomad Drag Wagon AKA The 9 Second Grocery Getter FINISHED
DynoMight replied to DynoMight's topic in WIP: Model Cars
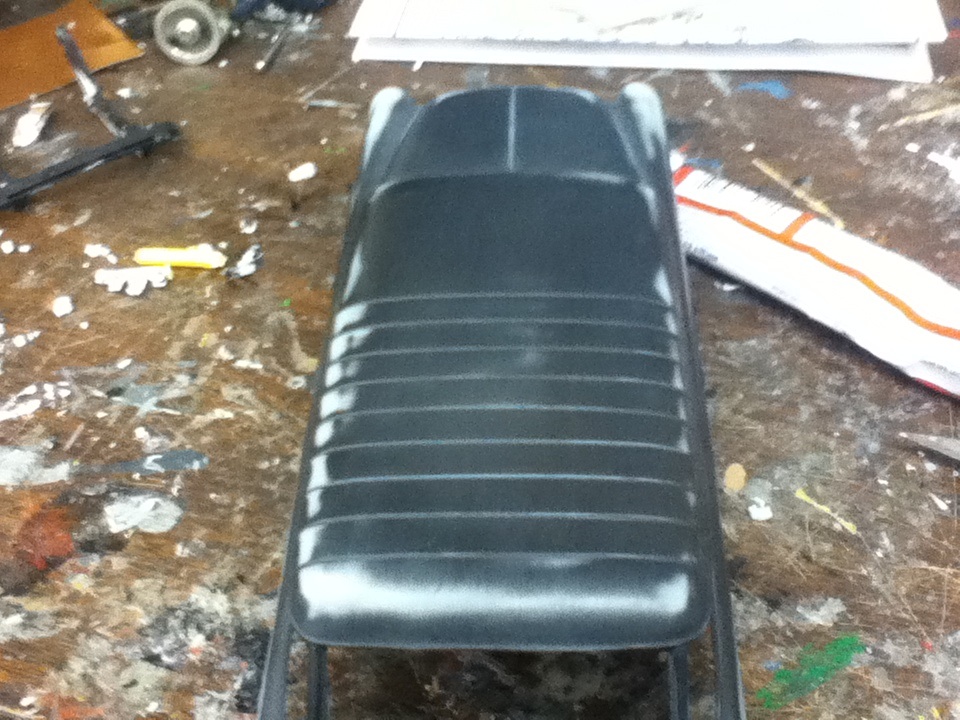
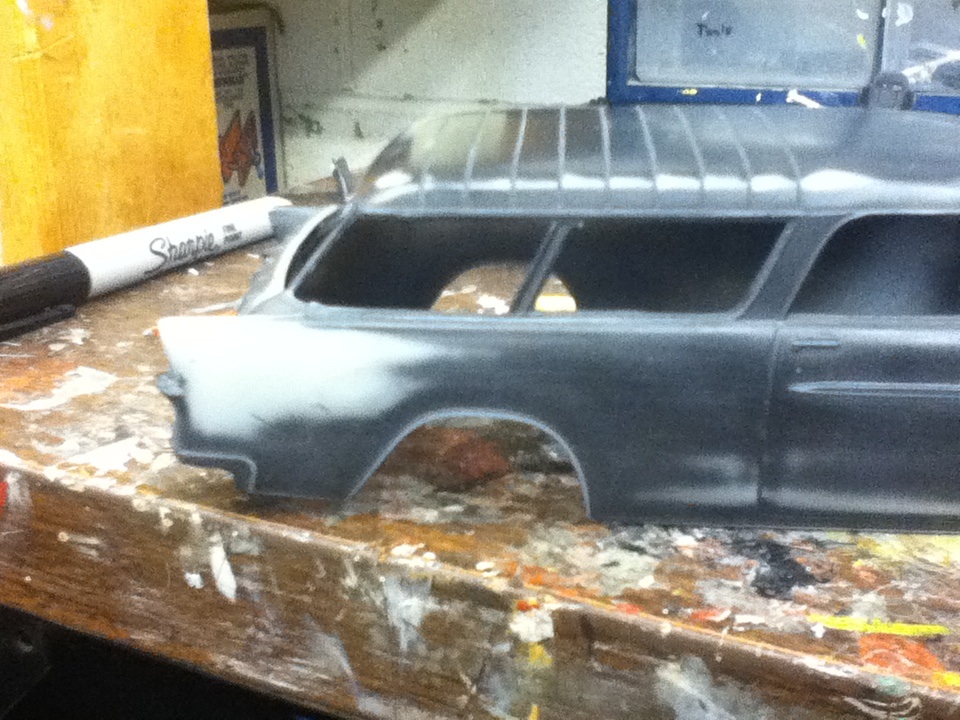
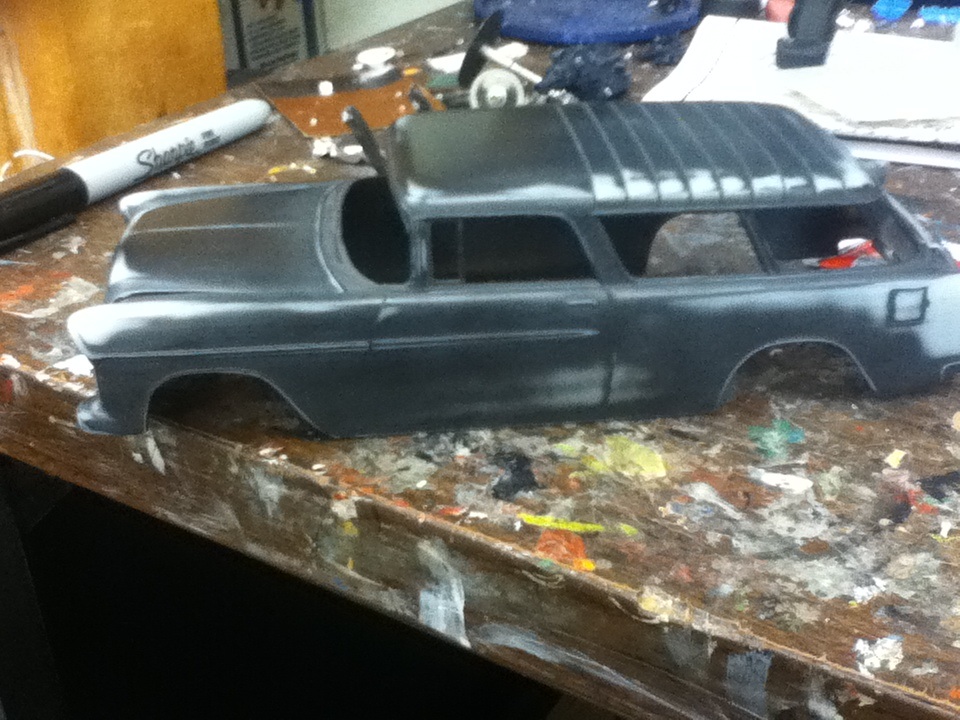
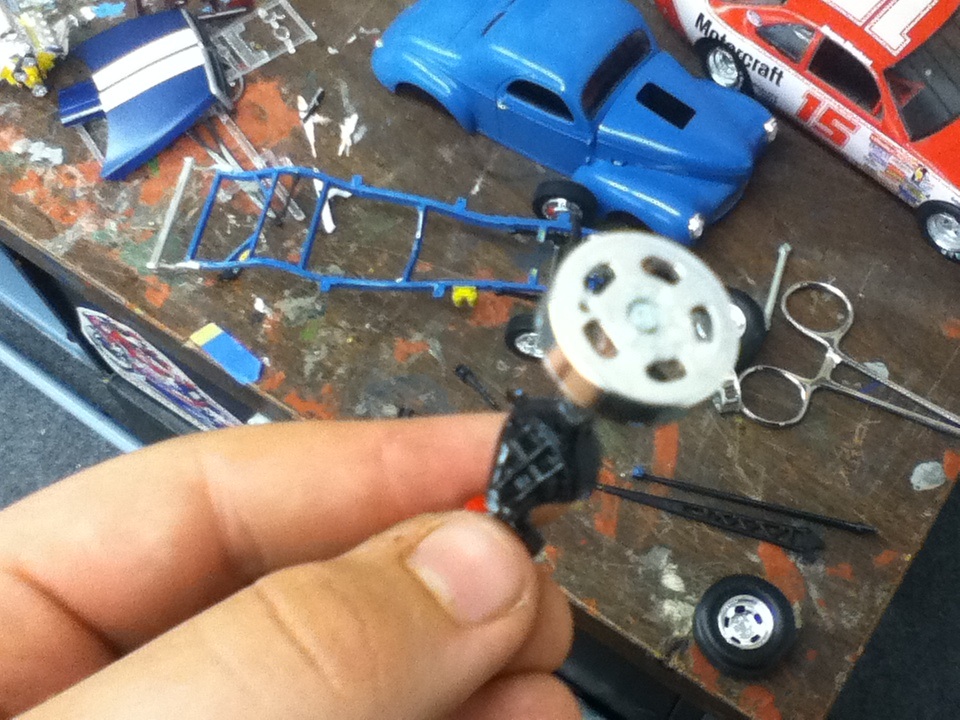
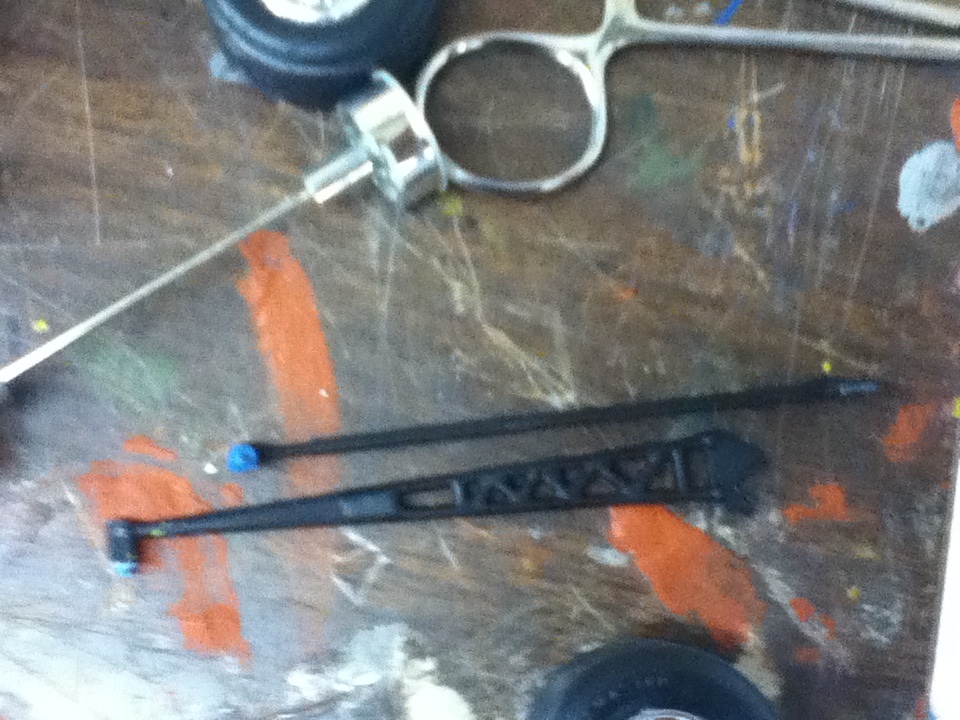
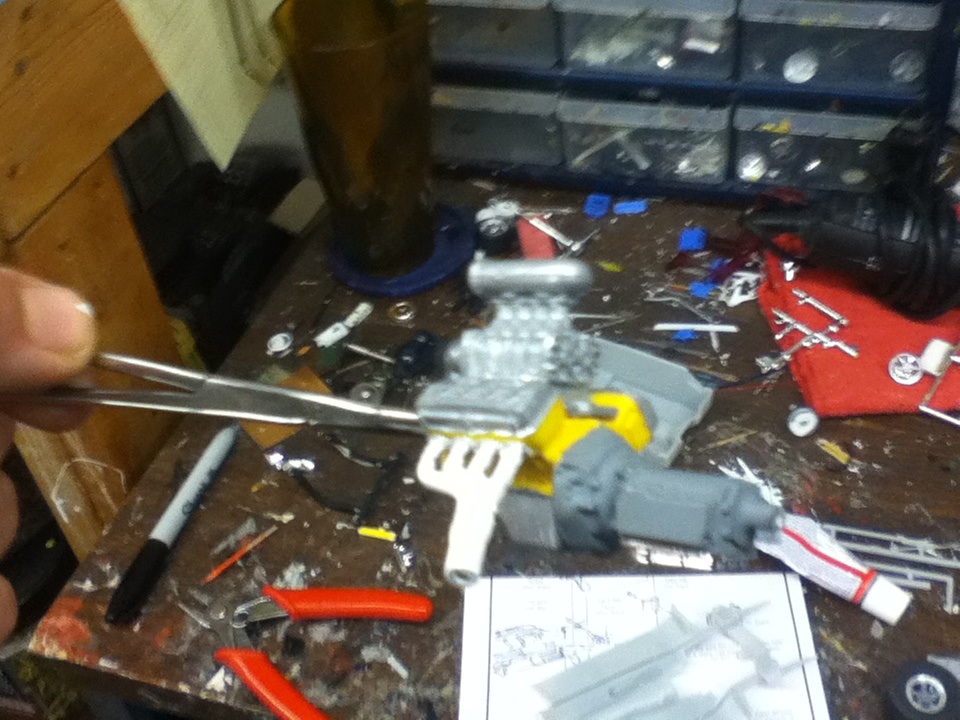
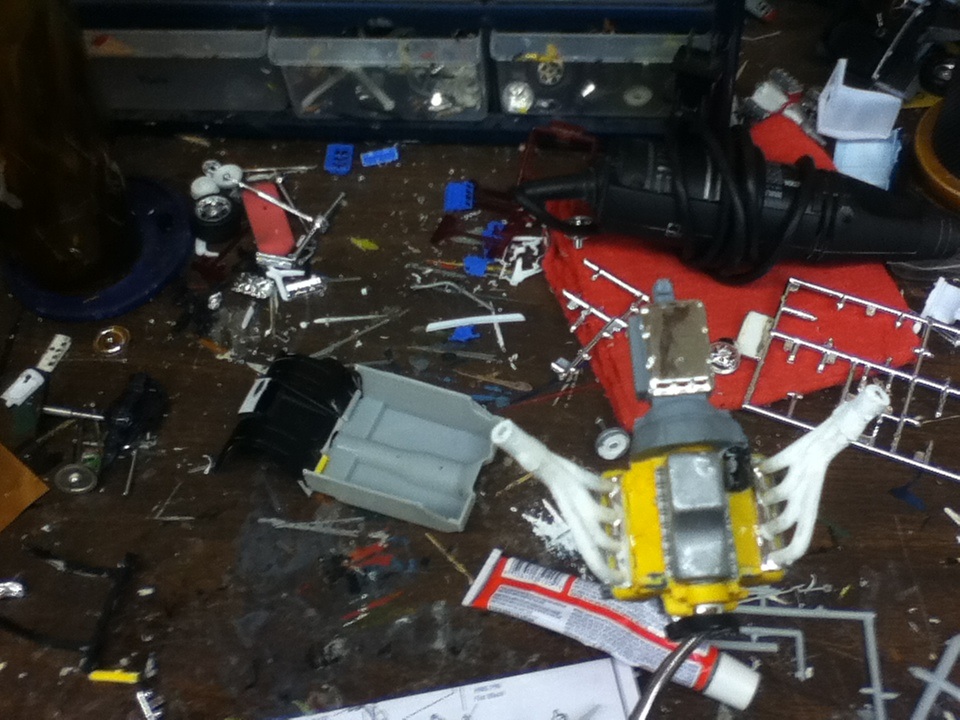
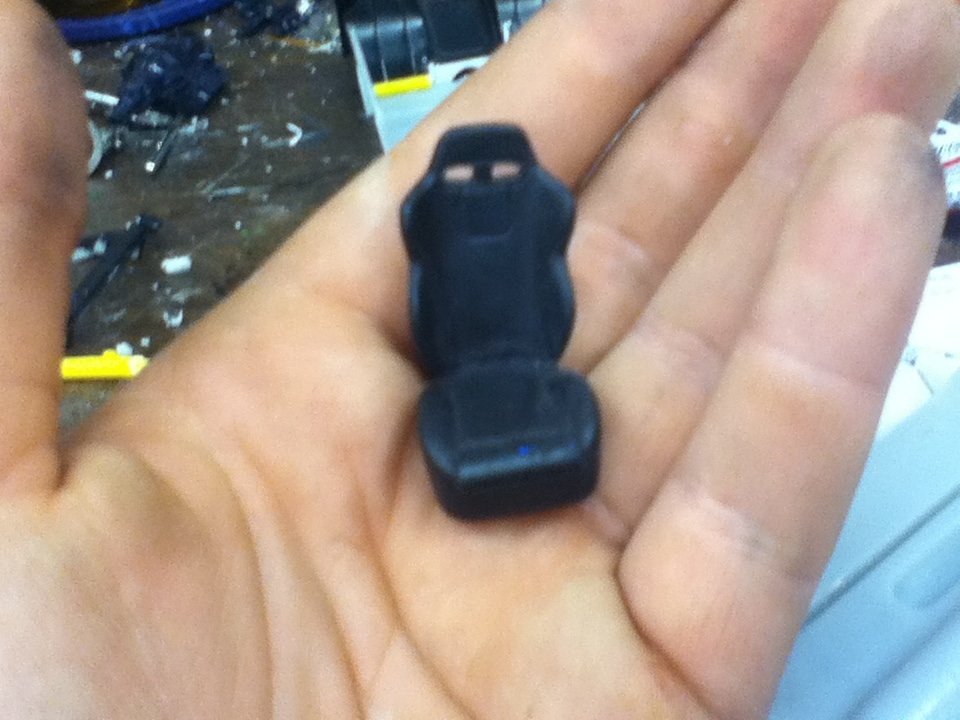
Hey guys, got a lot done since 12:30! This is the ladder bars and the axle from the Stone, Woods, and Cook 1940 Willys. My brother glue-bombed (with superglue, of course) the axle to the wheel so the axle is pretty much useless because I don't want to cut the inner rim off and possibly damage the axle or snap it. The ladder bars were already snapped off so I kept them. I am probably going to save the front suspension and maybe the frame for a future build. The slicks off of the STC are gasser slicks, so they are pretty skinny, so I'll keep them for maybe a street machine. This is the motor I got from the Stone, Woods and Cook 1940 Willys. I believe Niko said that for this kit it should have a bigger motor than the Badman motor; and so I found this one. It is way taller and sticks out of the hood. I painted the chrome blower, headers, and rocker covers flat aluminum, because again, the chrome was way too shiny and where the parts were cut off the tree it wasn't chrome so I decided the paint them. I plan to wire it, the first time I have ever done something like that. Here's a picture of the tub. I put styrene tubing from the tree to reinforce it. Eventually I'll bondo it and rebuild the wheel arches on the wall. I got these slicks from a 66 Nova Prostreet and switched them with the ones I was using, they seemed to fit the Nomad better. I found this seat and decided I should use it I sanded the body and primed it. I think it came out ok. Thanks for looking at my build guys! More updates well come soon, I am really excited about this build and hopefully it'll come out pretty good! -Glenn
-
Just read through this whole thread, looks awesome, hope it turns out good, even though you weren't able to use the wheels you wanted!
-
Modeling disaster stories?
DynoMight replied to JPS_Lotus's topic in General Automotive Talk (Trucks and Cars)
Not the MufflerMobile hahah -
Wow, amazing job! I hope my Nomad looks as awesome as this!
-
Janis Joplin's Porsche 356C and Janis figure...
DynoMight replied to Brizio's topic in WIP: Model Cars
Yay progress! Keep up the good work man!