atomicholiday
-
Posts
2,281 -
Joined
-
Last visited
Content Type
Profiles
Forums
Events
Gallery
Everything posted by atomicholiday
-
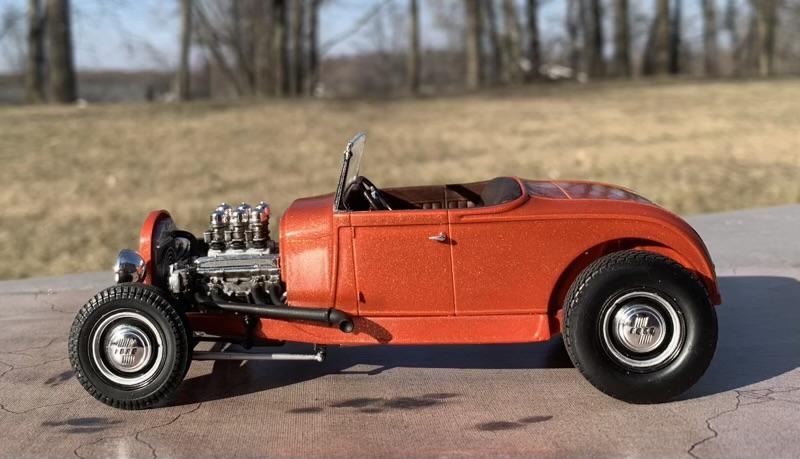
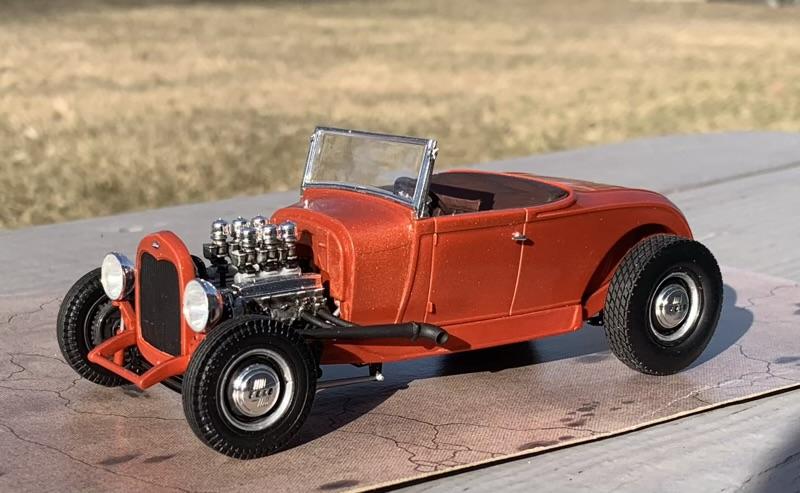
Group 29 - the thread for everyone's '29 Ford Roadster builds
atomicholiday replied to Phildaupho's topic in Model Cars
So what’s with all the ‘29s lately? I’ll play though-
-
I’m not big on primer normally but that looks awesome! Great work.
-
Cool. I rarely hear of anyone mention Fort Wayne. I'm about half an hour north of there. We now resume your regularly scheduled thread, already in progress! ?
-
Great looking race car!
-
Cool car! I'm a huge Honda fan. Always wanted a Prelude.
-
Which Wal-mart was it? The one on Lima at the north end of town had models last time I was in there. Most around town don’t I don’t think.
-
That's a great looking old Ford. Nice job!
-
That undercarriage looks spectacular. Really nice use of panel liner or wash. Looks great.
-
I can’t speak for that specific car, but I think most factory stock vehicles back then were either black or red oxide, with body color over spray at the edges. I usually do a google search like “68 charger undercarriage” and look at the pictures. I’ll go with whatever I see the most of. Hope that helps.
-
Yup, I I built one of those when I was a kid too. Wish I had one now. Cool model. Thanks for sharing!
-
Revell 1968 Chevelle SS396. New Pics after wet-sand/polish/wax.
atomicholiday replied to Dragonhawk1066's topic in Model Cars
That looks great! -
On the Salt and Sand
atomicholiday replied to Terry Jessee's topic in Other Racing: Road Racing, Salt Flat Racers
Those are really cool. Love seeing kits that you rarely see built. -
Help in disassembly of a built model
atomicholiday replied to slusher's topic in Model Building Questions and Answers
Some good advice up there. The only thing I’ll add is don’t force it. It’s been my experience that if you try to separate parts by force, the plastic will almost always break in an area you don’t want, and the glue joint will hold strong. I’ve ruined a couple of glue bombs through impatience. -
Great build! Those colors work perfect together.
-
Crazy, wild, Box art designs
atomicholiday replied to H.A.K's topic in General Automotive Talk (Trucks and Cars)
Must be the Generic brand. -
Camaro Late Model
atomicholiday replied to raisin27's topic in Stock Cars (NASCAR, Super Stock, Late Model, etc.)
Wow, that really looks awesome. Nice work! -
That looks great! Nice to see one of these built.
-
RTS 'Cuda Show Car Discovered !
atomicholiday replied to 1972coronet's topic in General Automotive Talk (Trucks and Cars)
Someone on here needs to build one of these. How cool would that be! -
Beautiful build.
-
I actually found one of those Transtar kits in a thrift store recently. Box was a little rough but the parts are still in bags. I’m not a big rig guy but I couldn’t pass it up. Might build it with a car hauler someday…
-
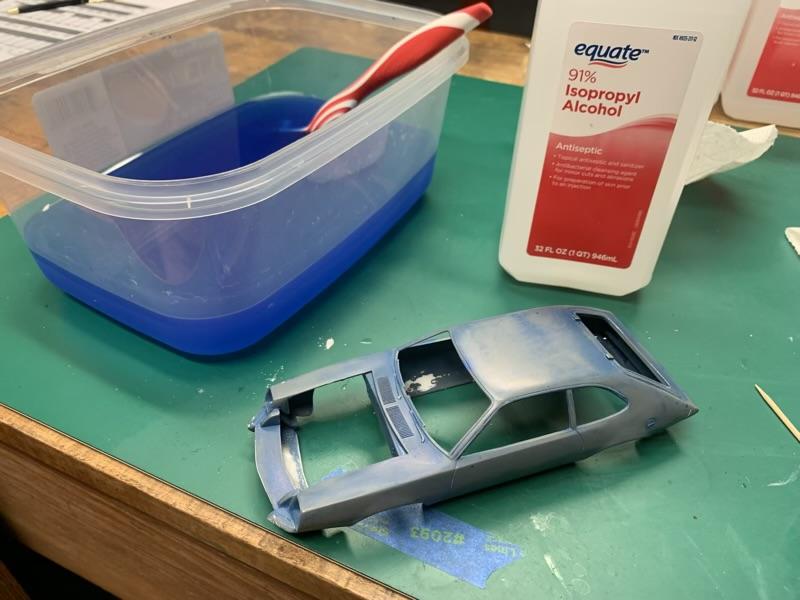
Finally got to the store to pick up some alcohol. Party time!! Oh wait, not that kind… I soaked the body in 91% isopropyl alcohol for about 15 minutes and then scrubbed it with a toothbrush. The results were amazing. The old paint brushed off with very little effort. *Good tip for future reference: to remove Testors Extreme Lacquer, use 91% isopropyl alcohol. Job done! And the best part? Most of the primer stayed on the body and the body filler is almost totally unaffected! I was really dreading having to redo all the body work. So this one is back on track (sort of). Next steps - hit it with a very light coat of primer, scuff it, and repaint. That’s gonna have to wait a while though. Our warm weather from the last couple of weeks is gone. It actually snowed again (!) the last two days in a row. Indiana weather. What can you do? It’s actually holding me up on a number of projects, not the least of which is getting my boat ready to go in the water. Thanks for following along!
-
Nunu Audi R8 Red Bull
atomicholiday replied to Paul Waymouth's topic in Other Racing: Road Racing, Salt Flat Racers
That looks awesome. Really impressive decal work. That must have taken some time. -
Kit bashed 1:32 Jungle Jim '74 Vega Funny Car
atomicholiday replied to magicmustang's topic in Drag Racing
Sweet build! I really like these little 1/32 funny cars. Need to pick some up. -
Magnifying Lenses for Myopic Folks
atomicholiday replied to 1972coronet's topic in Model Building Questions and Answers
Side note to this subject. Don’t know if this is true for everyone or not. I have tremors pretty bad. I find that the magnification actually seems to “scale down” the shaking. I still shake, but it seems more controlled for some reason, allowing me to still do some fairly detailed work with the glasses on. -
Magnifying Lenses for Myopic Folks
atomicholiday replied to 1972coronet's topic in Model Building Questions and Answers
Hey do you happen to have a link to those? I was trying to find a pair with higher magnification than 3x on Amazon and couldn’t.