bh1701
-
Posts
390 -
Joined
-
Last visited
Content Type
Profiles
Forums
Events
Gallery
Everything posted by bh1701
-
You might try here - some of the brochures may show dimensions, and some owners manuals can also be found with their specifications. https://www.oldcarbrochures.com/ Bart
-
Very nice work on both models! Bart
-
Everything about this one looks great! Bart
-
Looks fantastic! I liked your build of it so much that I went online today and I bought one myself. Hope mine turns out as good as yours did. Bart
-
An interesting subject. You did a great job capturing the look and feel of the real car.
-
Looks great - good work!
-
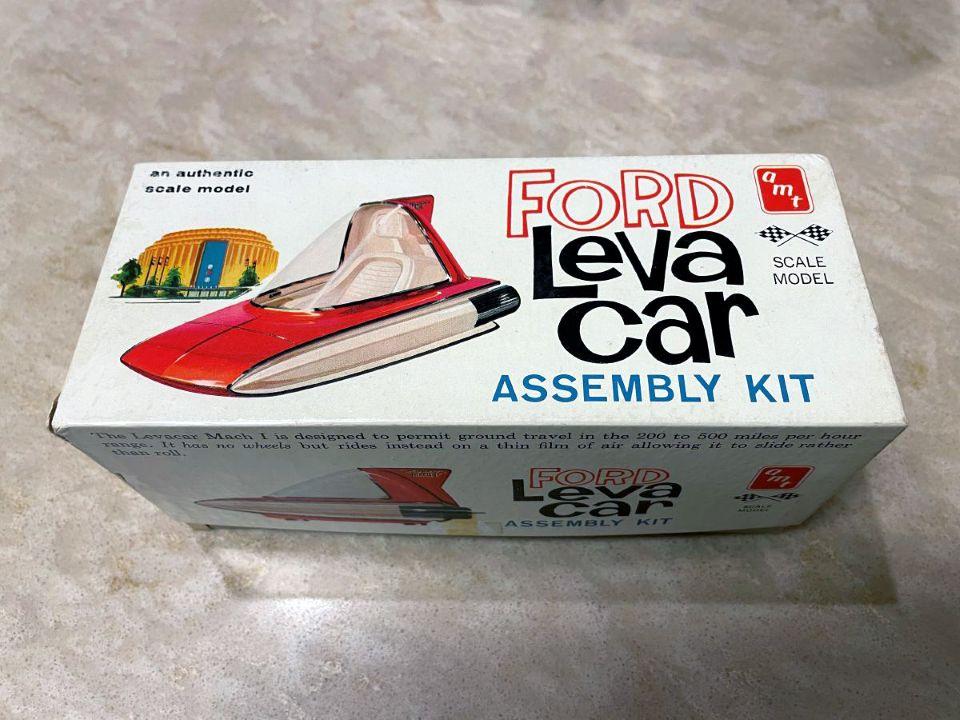
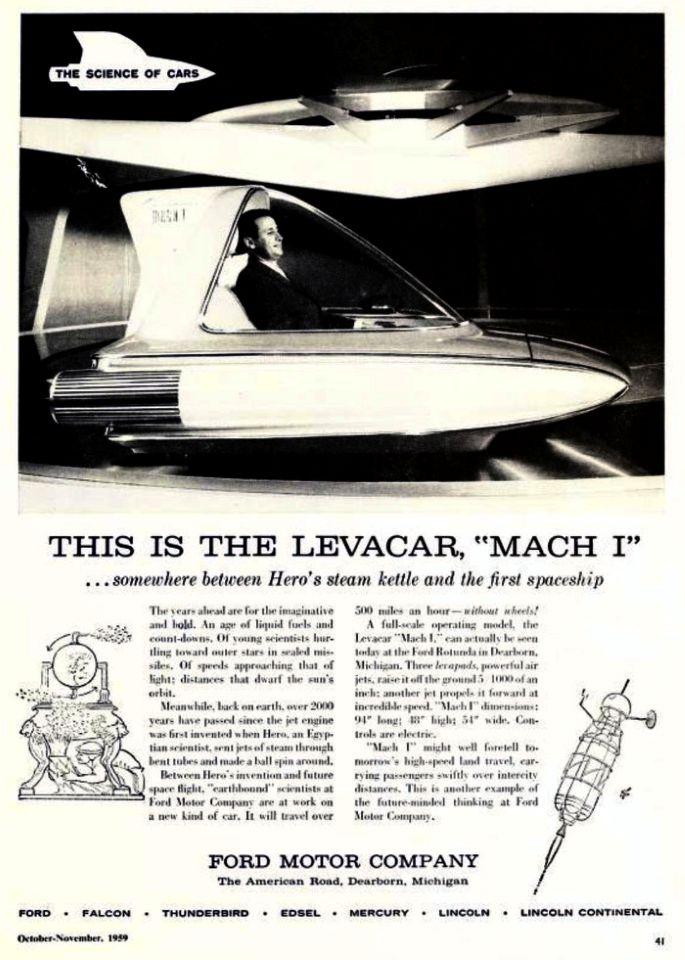
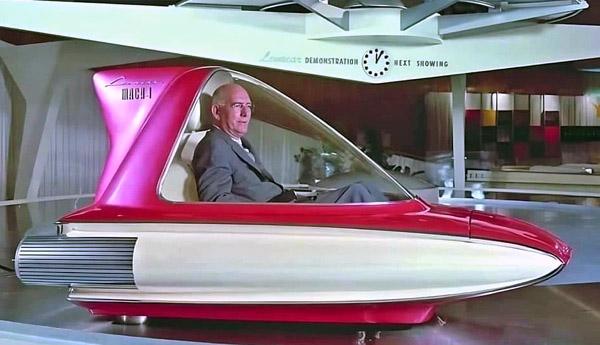
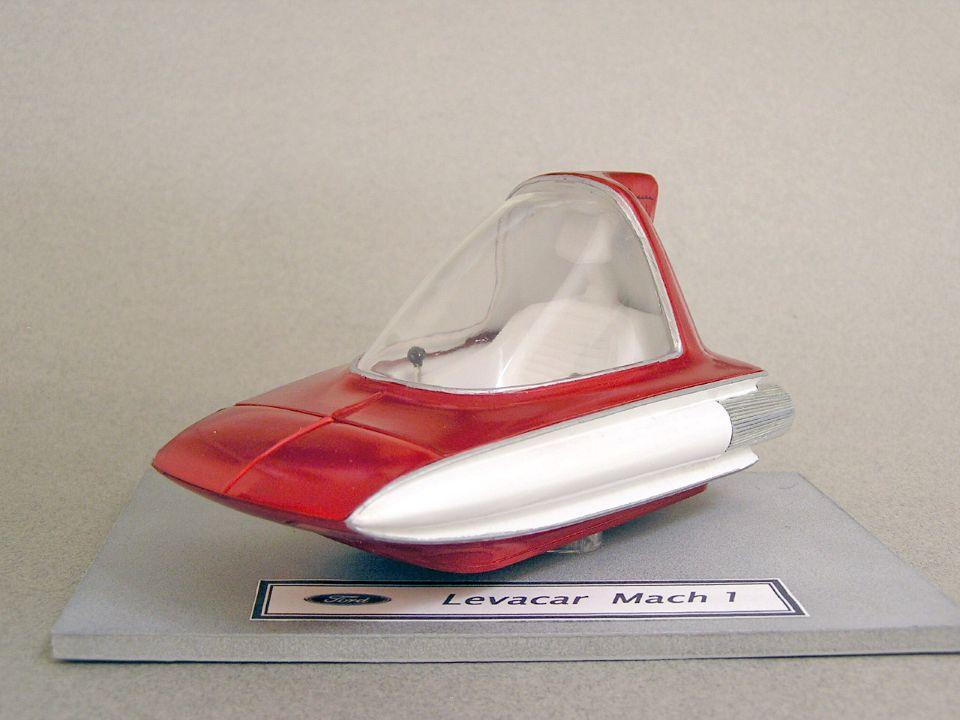
...and now for something completely different! The Ford Levacar Mach 1 Around 1959, Ford developed this concept car that was basically a hovercar that blew air out of vents on its bottom to lift it up about 1/4" to 1/2" off the ground. When it was displayed, it was on the outside a circular platform and was tethered to the center of the circle. It would glide around the outside edge of the circle. AMT made a model of it at that time, and it came with a rubber hose you could attach to the back. When you blew into the tube, the model would rise up off the ground. I remember building this kit back around 1960, and was lucky enough to find an unbuilt kit recently on an auction site. The color is Tamiya TS-95 Pure Metallic Red. The decals for the rear fin were unusable, so i created my own replacement decals. When it sits on the display base, there is a small clear plastic block under the center of the model that lifts it up from the base. Thanks for checking out this blast from the past! Bart

- 25 replies
-
- 14
-

-

-
I don't know if any kits ever had them. I think Ford started using the Blue Oval on their cars until around the 90's on Taurus, Tempo and the like. I think there was a Taurus kit made at one time, but don't know if the Ford Ovals were decals or just molded into the body. Bart
-
Thanks, but they'd also be a bit too big. I need them to fit the size of the Ford Oval in the grill opening on the Explorer Sport Trac. The size of the oval in that grill is 3/16" - so these would be much larger than the oval shape I am trying to fill. Thanks again for searching for these. Bart
-
Thanks for looking for them. They'd be too big for me to use. I'll let you keep them in case you ever might need them yourself. Bart
-
Thanks, Melvin! Keep in mind that I need ovals that are about 3/16" wide. Bart
-
Looking for 1/25 scale Ford Blue Oval decals
bh1701 replied to bh1701's topic in Model Building Questions and Answers
Thanks - those look really nice. Thanks for letting me know about them! Bart -
Thanks! And hoping all goes well with the kidney stones! I have had a couple and they are definitely no fun. Bart
-
I would need them to be around 3/16" wide (.1875"). They are being used on the front grill and rear tailgate of a 1/25 Ford Explorer Sport Trac. Bart
-
Does anyone have any 1/25 scale Ford Blue Oval decals? I just need 2 for a model I am working on. But a couple extra would be good in case I would mess something up! Thanks, Bart
-
Does anyone have a source for 1/25 scale Ford Blue Oval decals? I just need 2 for a model I am working on. Thanks, Bart
-
Source for white decal paper?
bh1701 replied to bh1701's topic in Model Building Questions and Answers
Bill, Thanks for the info. I forgot that Bare Metal makes decal paper, too. Not exactly what I think of when I hear the word "Bare Metal"! A question for you: Let's say that my decal would be a colored dark red rectangle with some white text inside of it. If I cut the decal tight to the edges of the decal, would any of the white decal base be visible at the edges when it is applied? Bart -
I am looking for some white decal paper (for Laser printers). I am not having much luck finding anything on the internet. Do any of you have a good source for a quality product? Thanks, Bart
-
Thanks, Phil I found this kit on eBay. I had eBay alerts to notify me when any Cougar models were listed. I considered both unbuilt and built models. It took a while, but I finally found this unbuilt kit that was 99% complete. I also saw others that were way overpriced or were missing too many pieces. If you aren't already doing this, you may want to consider it. I found it interesting that for a while you will see nothing, then all of a sudden 4 or 5 items show up! Bart
-
Al, I added some pics to the Community Build forum for my 67 and 69 Cougars. Didn't know that there was a section exclusively for Cougars! Thanks, Bart
-
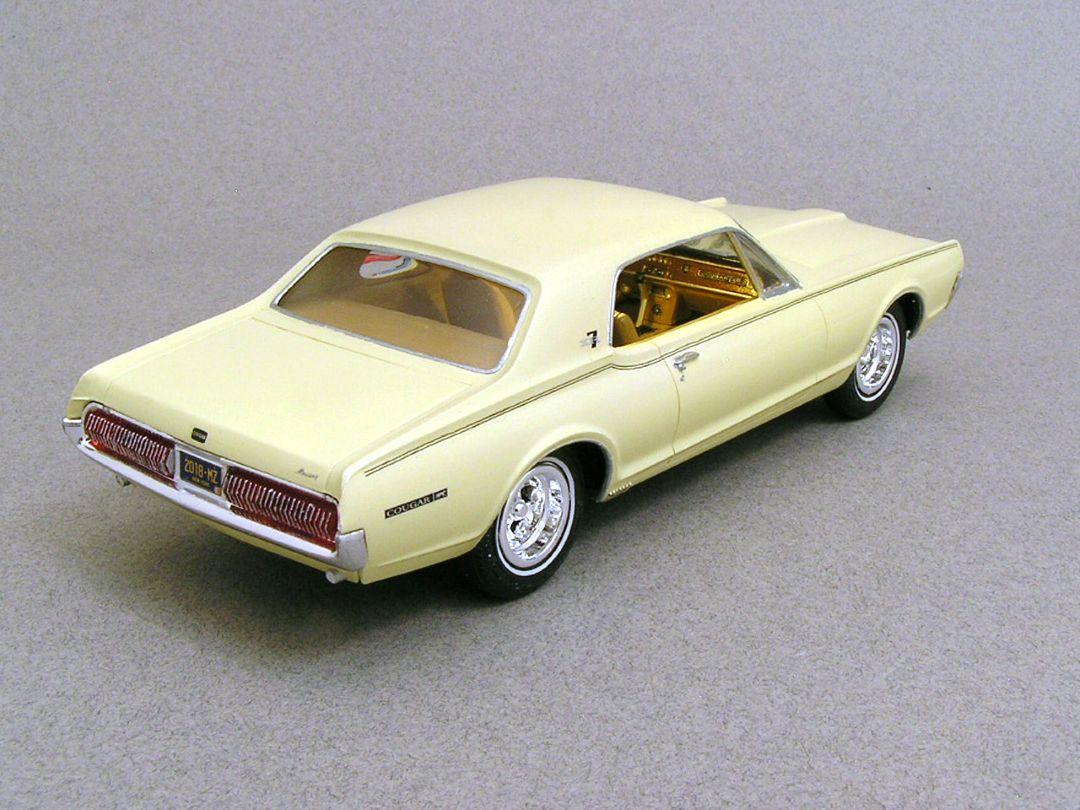
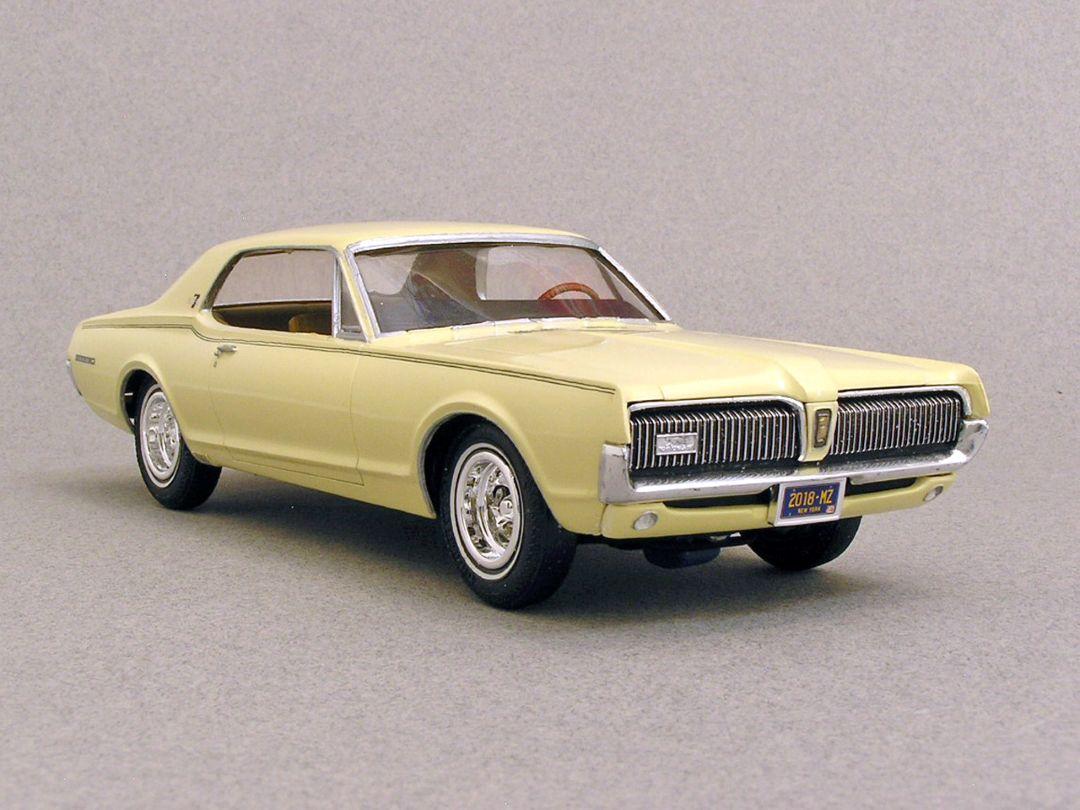
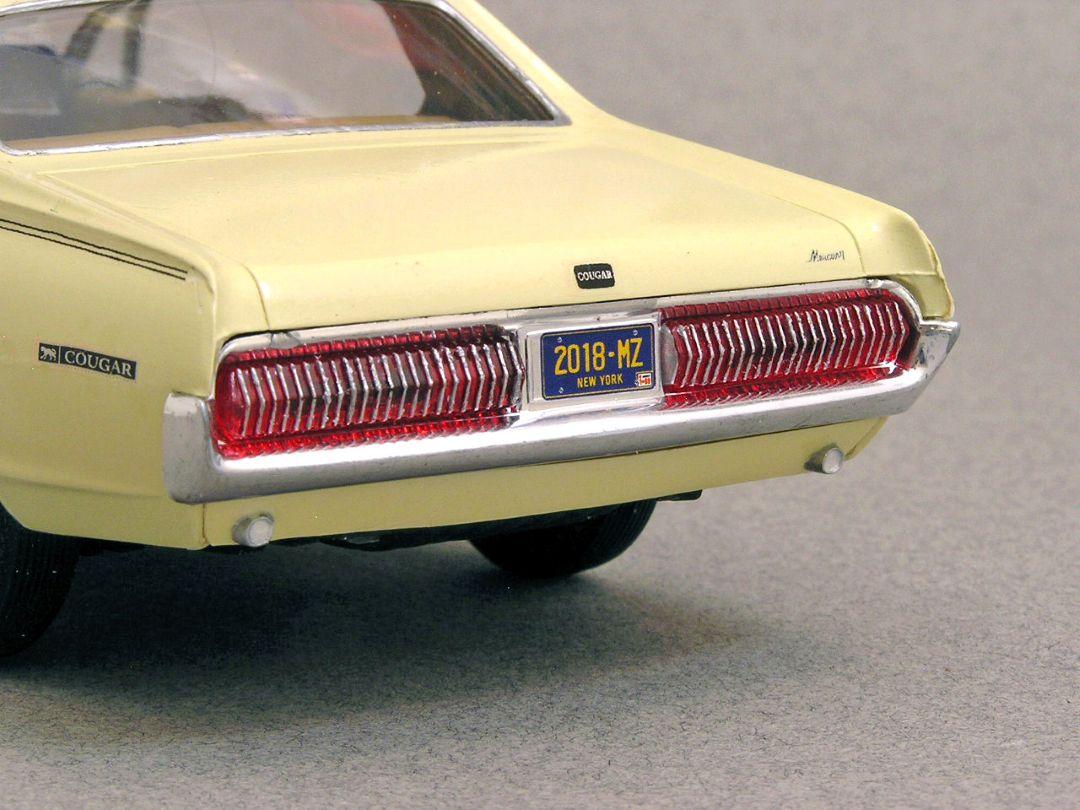
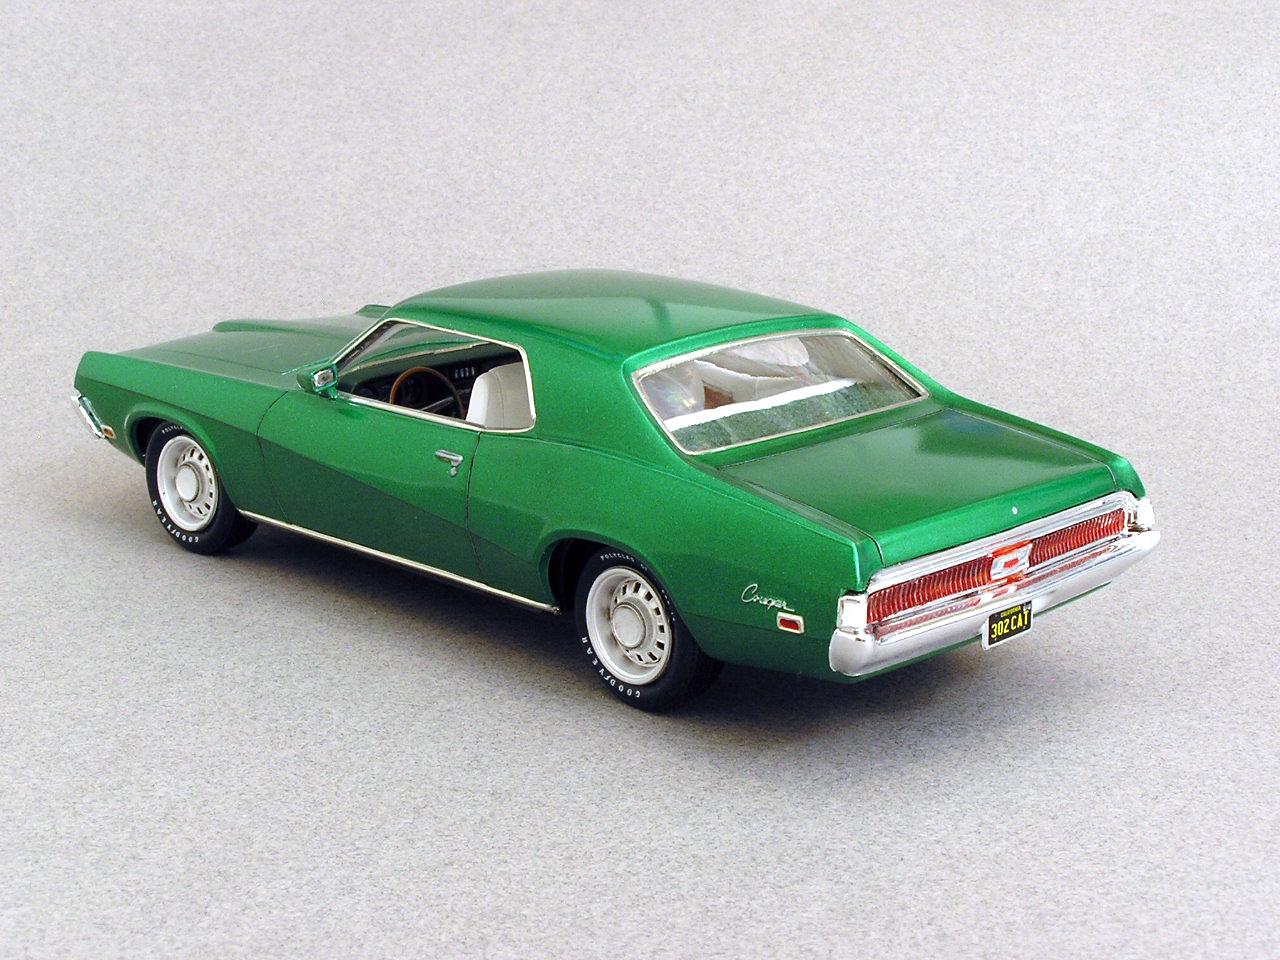
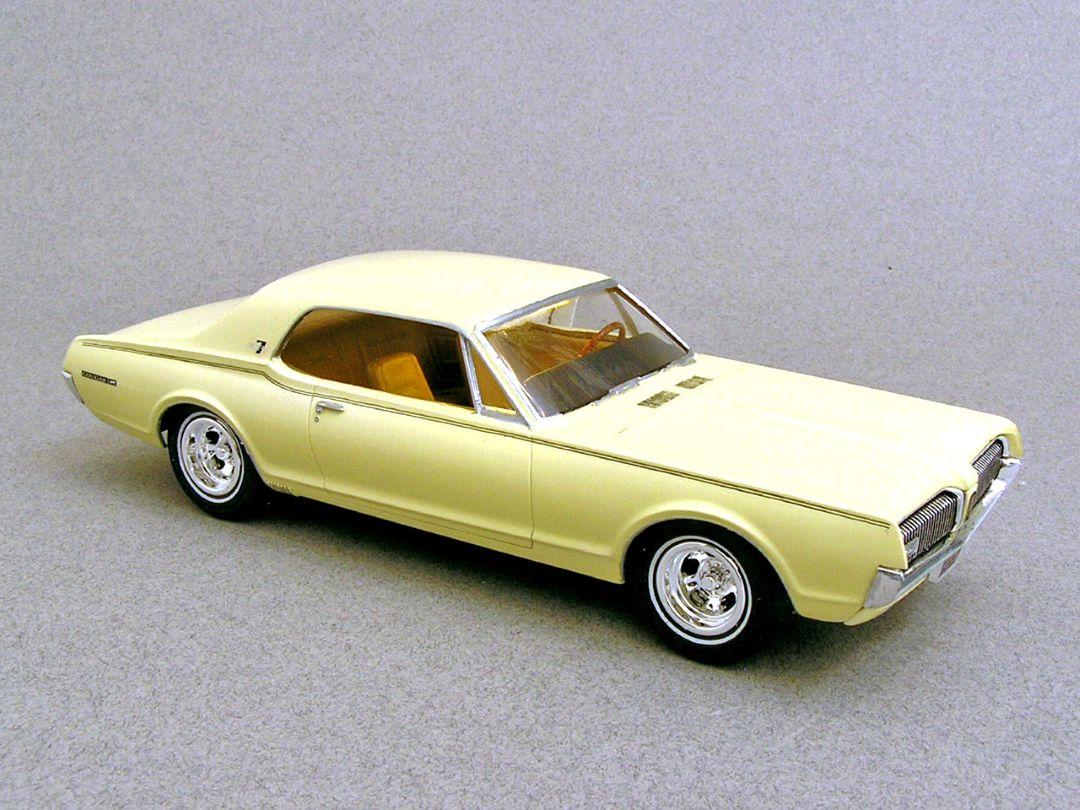
Here are my 2 Cougars to share. A 1969 Cougar and a 1967 Cougar (which started life as a 68 Cougar and was back-dated to look like the 67 Cougar).
-
Keith, The technique I used was a "stamping method". I used a pencil with a clean, unused flat-top eraser. It was one of the cheap plastic pencils with refillable lead that had a flat-topped eraser on it. If the eraser is rounded at the top, I don't think that would work as well. I used Metallic Silver craft paint and would get just a little bit of paint on the head of the eraser, and then would touch it gently to the taillight ribs. Don't drag the eraser across the ribs; just tap it gently to the surface like you'd do with a rubber stamp. It sometimes took multiple "stampings" to get the paint built up to where it was visible. I like the craft paints since you can remove paint from any unwanted areas with a sharp toothpick that has been lightly moistened with water. That worked well to remove any paint that ended up between the ribs where the red taillight should be seen. If you really screw up, you can remove everything with water while the paint is still wet and just start over again. I did create a post a while ago where I asked for ideas on how to do this. You had made some comments on that post. You may want to revisit it to see the different ideas that were suggested. Good luck with your taillights! Bart
-
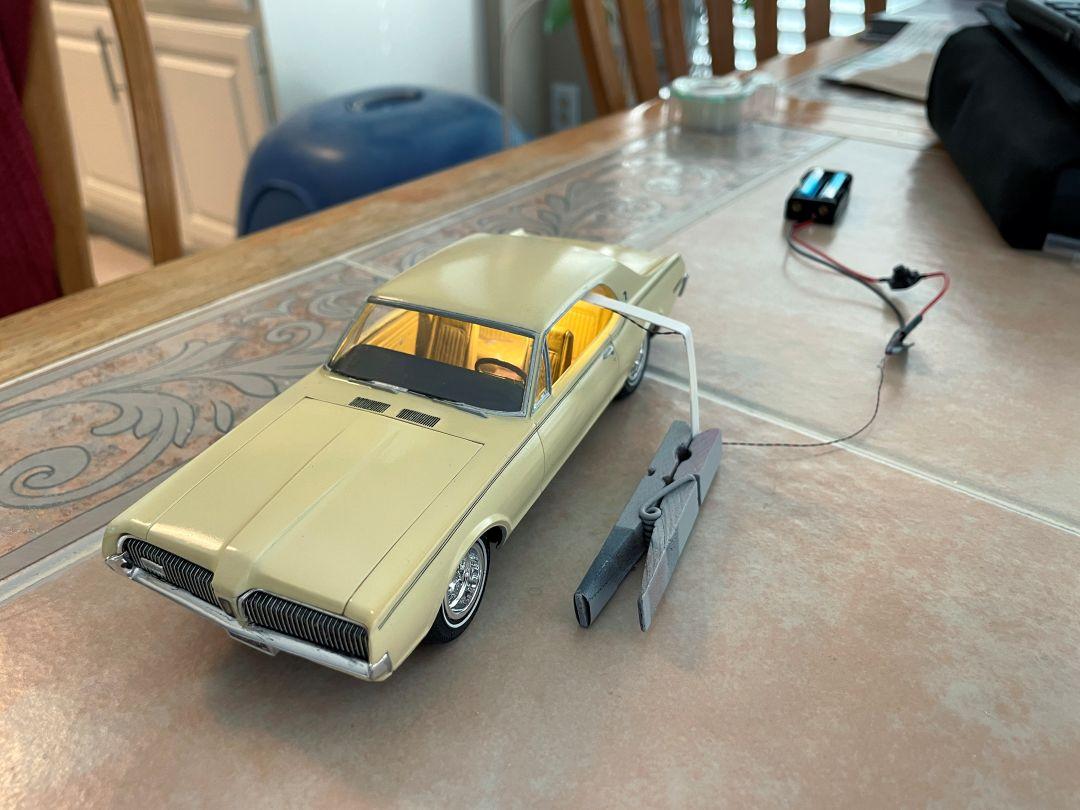
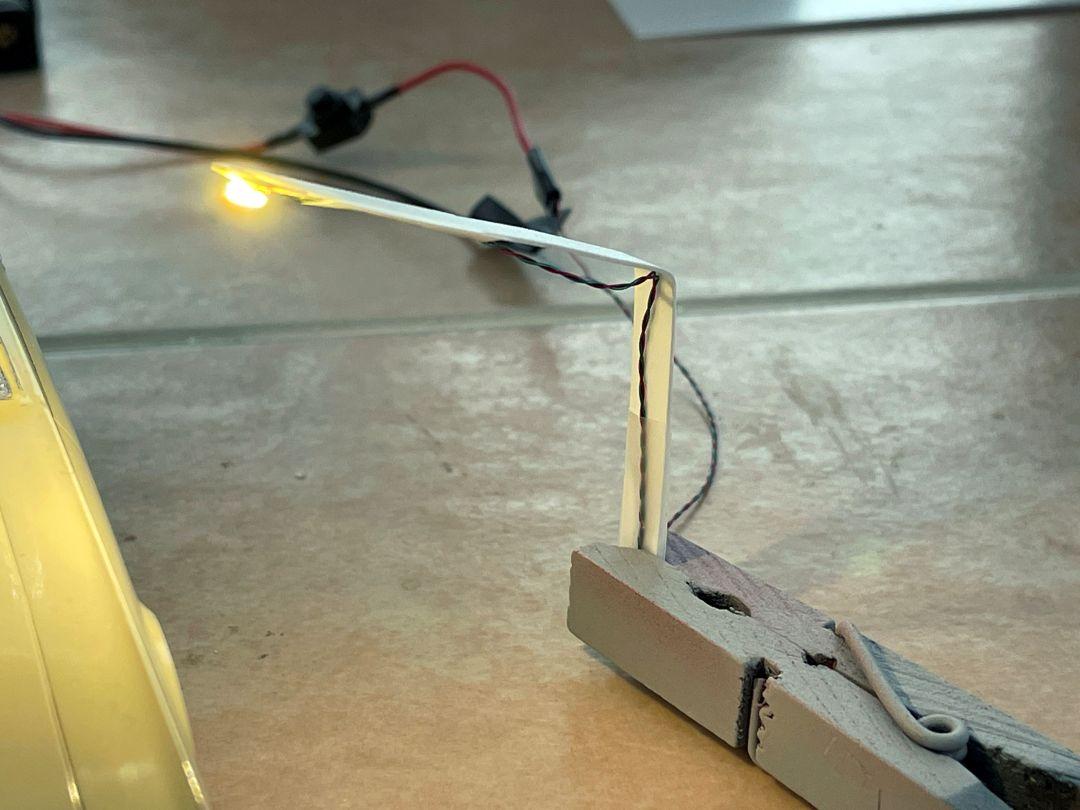
A tool I made to light car interiors in photos
bh1701 replied to bh1701's topic in Tips, Tricks, and Tutorials
Steve, The use of wire might be a good idea. It would probably be easier to hide in the photos. If I am paying better attention when shooting photos, I would try to put the plastic strip in a position where it would be hidden by the sides of the roof. One of the features I like about the plastic strip is that it is flexible enough that the horizontal portion of it can be bent up or down as needed to fit close to the underside of the roof. I had also considered using thin clear tube or a thin plastic tube for the vertical section with the wires running inside the tube. This whole contraption was something I thought up while falling asleep one night. My prototype was thrown together quickly, I will continue to try to come up with an improved version of it. I will be interested in seeing what you come up with. Bart -
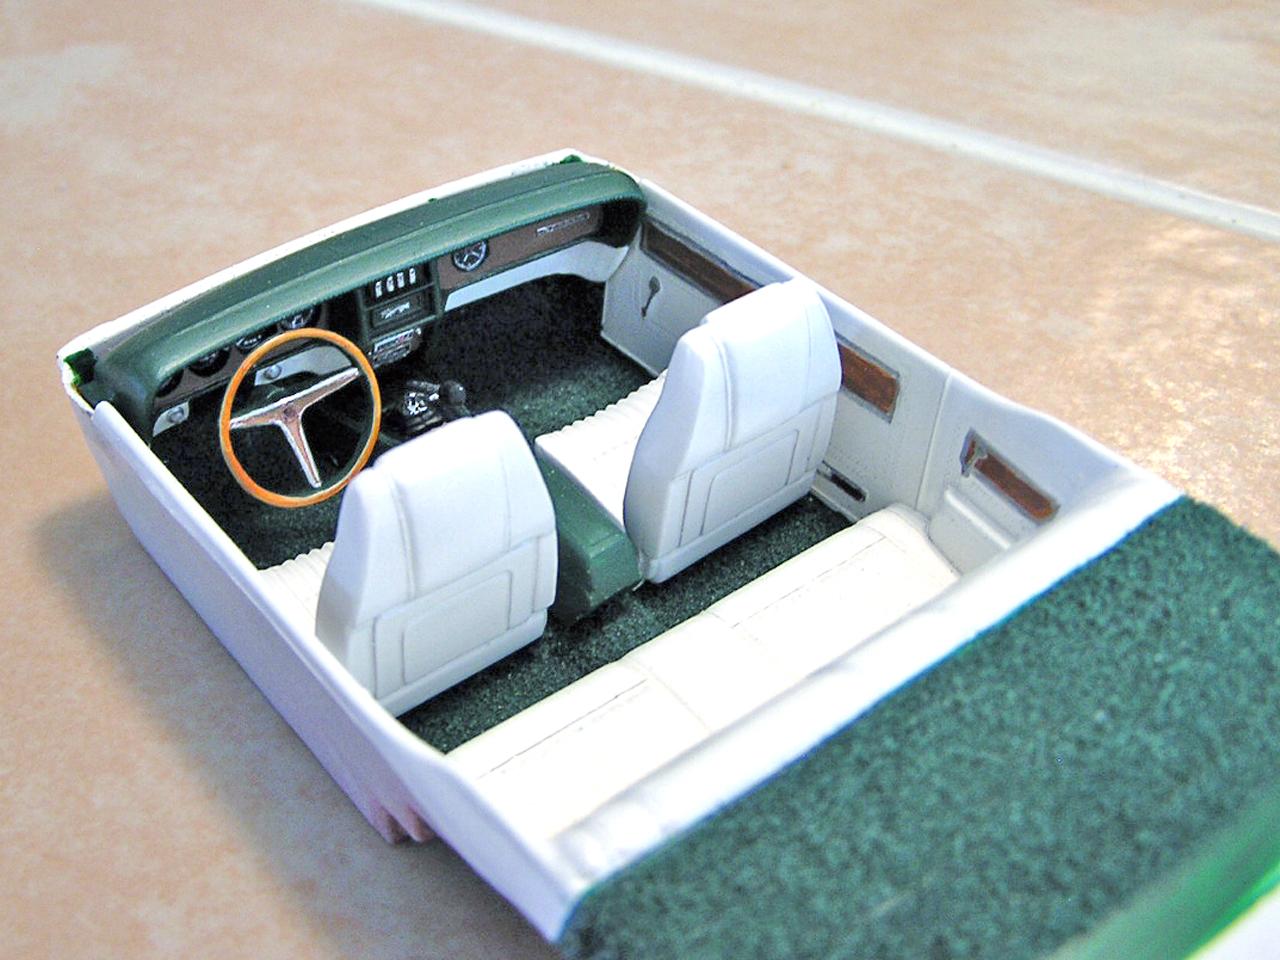
No good reason for using the 68 steering wheel - except laziness. I considered trying to modify it by adding that big projection out from the center, but figured not too many people would notice the 68 steering wheel in it! But, good catch on your part to notice it! Plus, I always thought those steering wheels with the big projections on them were pretty ugly! Bart
-
Being able to see the interiors of cars in photos is sometimes hard to accomplish. It's especially hard since the lighting on the car is lighting up the exterior and not the interior. For my latest model photos, I took an extra battery box and an LED light to make this contraption that slides in under the roof of the model. It's mounted to a thin piece of plastic that has a 90 degree bend to it. I also made several paper sleeves that can go over the LED to dim it down if it is too bright. If you position it correctly, it should not be visible in the photos. The contraption How it slides in to the body (the interior looks bright in this shot since the exterior was not lit up for this shot) A finished photo ( I should have done a better job of hiding the contraption from view!)
- 5 replies
-
- 10
-