bh1701
Members-
Posts
389 -
Joined
-
Last visited
Content Type
Profiles
Forums
Events
Gallery
Everything posted by bh1701
-
2007 Jeep Liberty (1/18 diecast - branded for State Farm agent)
bh1701 replied to bh1701's topic in Model Cars
Thanks! The windows were painted with a white base first and then the decals with the text and graphics were applied. I create my own decals and have them printed at my local Fed Ex Printing office. The printers that they use for my decals cannot print white (as most printers cannot do). Bart -
Looks really nice! Especially like the interior! Bart
-
One of my friends is a State Farm agent and he asked me to make a model of his business vehicle - a 2007 Jeep Liberty. I started with a 1/18th scale diecast model and took it apart (which is not an easy task - I think you could drop it from 10 feet and it wouldn't be harmed!). I used Aviation Paint Stripper to get the paint off - which was really effective. It is a gel that you brush onto the model - and about 5 minutes later you use the brush to remove the paint which has bubbled into piles of goo. Krylon white paint with primer was used for the body. I created the decals using Photoshop with photos I had taken and some of the artwork that was created by the company that made the wrap used on the actual car. Thanks for checking this out! Bart The disassembled model The paint stripper I used After paint has been removed The actual vehicle
-
Here is my latest completion - a 1961 Ford Galaxie Club Victoria. The paint is Tamiya TS-94 Metallic Gray - which is a really dark metallic gray, which is pretty close to black. Chrome trim and scripts were done with Bare Metal foil for some, and hand painting for others. Thanks for checking this out! Bart
- 15 replies
-
- 18
-

-

-
I hope my question makes sense. I have some decals from Keith Marks. The decal layer on the blue transfer paper covers the entire decal sheet. I need to be able to cut individual elements from the sheet. I want to be able to cut as closely as possible to each element. Would decal scissors be the best tool to use? If so, any recommendations on the best ones to get? ...or are there other methods you'd recommend using? Thanks, Bart
-
Excellent work! I especially like the scenes with the mailbox diorama. Bart
-
Sounds like you have quite the collection of VW Beetles! I just have the one Beetle. However, if you ask me about Mustangs, I have around 25-30 of those - plastic models, die cast models, Matchbox and Johnny Lightning, etc.! Bart
-
That really catches your eye! Great work! Bart
-
Here is my 1968 VW Beetle. This is the Revell 1/25th scale kit. The model went together very well - I have to hand it to Revell-Germany for a well engineered kit. It is finished in Rustoleum 2x paint - the color is Spa Blue. The rear engine cover hinge was the only part I omitted. I test fit it and it felt kind of stiff. I was also afraid that the paint on edges of the body and cover might get chipped in the process of opening and closing it.. So, the cover just rests in place. Thanks, Bart
-
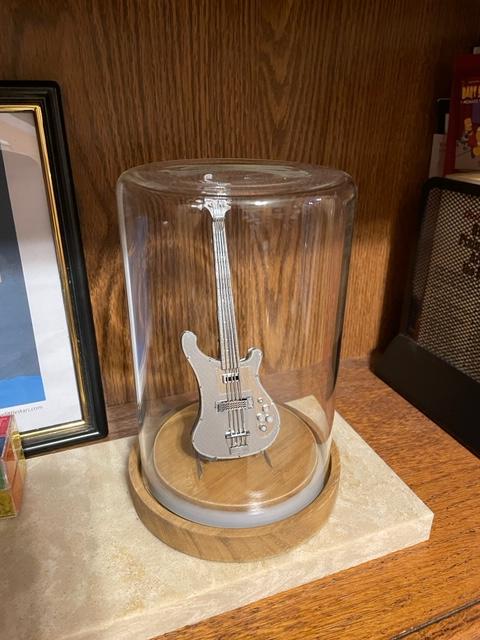
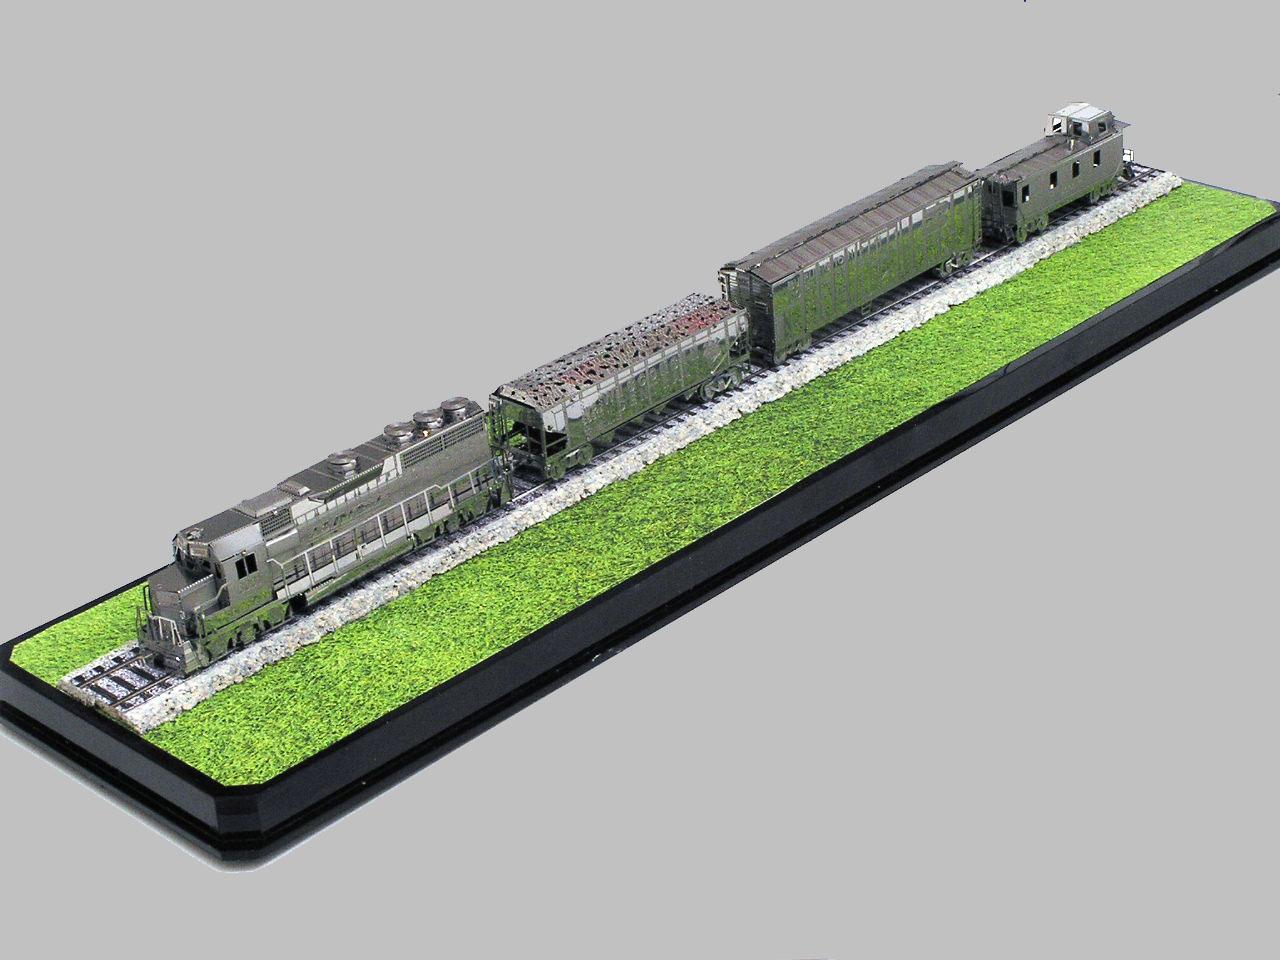
I have tackled a few Metal Earth kits - a guitar for a musician friend, and a BNSF train for a friend when he retired from BNSF. I have a few of the Star Trek kits to build, and also the Fokker tri-plane. I will work on these someday when I want a challenge and want to practice my swearing. 😊. They definitely require a lot of patience to build them. Good luck with the Arizona! Can't wait to see the finished product. Bart
-
Fixing Broken or Missing A Pillars
bh1701 replied to LennyB's topic in Model Building Questions and Answers
Len, I recently repaired a 67 T-Bird with a broken A-Pillar. I did what I think most people do - which is to use various sizes and thicknesses of plastic strips to rebuild the pillar and roofline. I used a wider strip for the back of the pillars, and then used thin narrow strips to build out the exposed portion of them. Some body putty and some very gentle sanding were also used to fill in any small gaps that still existed Hopefully these photos will give you some idea of how I did it. I think it was a pretty "solid" repair. The window glass behind the pillars also helps to provide support. Good luck with your T-Bird. It has more damage than I started with, but you should be able to rescue it! Bart Almost there - still had a little bit of sanding and body putty to be done. The finished restoration -
Need ideas - painting 67 Cougar tail lights
bh1701 replied to bh1701's topic in Model Building Questions and Answers
Thanks everyone for your ideas and suggestions. I had tried stamping some script with the eraser method before, but was not very successful with it. However, I decided to try the stamping method again with the tail lights. I used a Metallic Silver craft paint and a fresh flat eraser from a retractable pencil. The craft paint was easy to remove with a sharpened toothpick if the paint strayed too far from the ribs. Here are my results. I think it came out very well. If this method didn't work, my second choice probably would have been to try bare metal foil over the tail lights, apply Tamiya Transparent Red carefully, and then remove any red that strayed onto the ridges. I did like this approach since you could peel the foil off and try again if your results weren't that good. But, I do agree with others that the tail lights look better when you keep the original transparent red plastic in place. Bart -
Need ideas - painting 67 Cougar tail lights
bh1701 replied to bh1701's topic in Model Building Questions and Answers
Brian, Do you have a photo of the gel pen you used - that shows the product name/info on it? I looked online and find several different types of Pentel Metallic pens. Thanks, Bart -
I am working on a 1967 Mercury Cougar. Trying to figure out how to paint the vertical chrome strips on the tail lights. My first idea was to paint the entire piece silver/chrome, and then use Tamiya Clear Red (maybe thinned down a bit) to act as a wash with the hopes that the red would settle down into the areas between the chrome strips. What do you think of my approach? Any other ideas on how I might approach this? Thanks, Bart
-
Enterprise D 1:1400
bh1701 replied to Sonorandog's topic in All The Rest: Motorcycles, Aviation, Military, Sci-Fi, Figures
Commander Data would be proud of your work! Looks great! Bart -
I have also used Krylon paints and have been satisfied with them. Rustoleum had colors that were closer to what I needed. No clogged nozzles yet with Rustoleum; but that may eventually happen to me. Let's not turn this into a debate about paint brands; instead, let's please focus on my questions about dehydrators. Thanks, Bart
-
I have used Rustoleum 2x Paint w/Primer on my last two kits. The can says that it takes about 5-7 days for paint to fully dry and harden on plastic. I definitely agree - since the models are tacky to the touch for quite a few days! Would a dehydrator help speed up the drying time for this paint? If so, any recommendations for an affordable one that can be found in today's market? I've seen that 105 degrees seems to be the preferred temperature to use. How long would you generally leave the model in the dehydrator? Thanks for any advice you can offer! Bart
-
Great save! It looks fantastic! Bart
-
Recommendations For Iphone Photography?
bh1701 replied to oldcarfan's topic in Tips, Tricks, and Tutorials
I usually use an older Olympus digital camera - nothing fancy, no interchangeable lenses. Some key points that others have mentioned which I also use are good lighting and good depth of field (range of focus). For the lighting, I shoot models on top of my washing machine with a sheet of gray art paper taped to the top of it. I bring in my torch lamp (a pole lamp with 2 bulbs in it). The laundry room is fairly small and has white walls and ceilings, so the light from the lamp is reflected very well throughout the room. If i need additional light on the sides/front/back of the model, I have some inexpensive battery powered LED lights that I will use - however, I don't find this necessary to do very often. For depth of field, the camera is on a tripod and I use the camera settings to shoot at the the highest F-stop I can. The higher the F-stop, the greater the range of focus will be. The tripod is needed since the exposure time is well beyond what you could hold the camera steady for. I also use the timer on the camera to snap the picture so there is no chance of me shaking the camera by pressing the button to take the picture. Finally, I always use Photoshop to enhance the image - usually using color correction and adjusting the Levels to brighten up the image. Sometimes, I will use the Shadows/Highlight feature to bring out details that are in the shadows. I also use my iPhone sometimes to grab shots - I find that it is able to get closer shots than my simple camera can get. I'd use this for close-ups of interiors or close up details on the body. I can usually hand-hold the camera for these shots, but also have a tripod mount for the iPhone if needed. Here is some samples of the results I get. Thanks, Bart


