restoman
-
Posts
1,129 -
Joined
-
Last visited
Content Type
Profiles
Forums
Events
Gallery
Everything posted by restoman
-
Canadian International Auto Show
restoman replied to Howard Cohen's topic in General Automotive Talk (Trucks and Cars)
Wow! Some gorgeous cars and some really great photography! -
Dodge Q3 light turquoise
restoman replied to restoman's topic in General Automotive Talk (Trucks and Cars)
Thanks. That's one of the colour book pages I've got. Way, way back, I remember as a kid one of my school teachers had a '70 Super Bee, Turquoise, white top and white tail stripe. I didn't like her, but I fell in love with the car, at the tender age of 6. Finally picked up a '70 so it'll be done to the best of my memory. Just read that Q3 was a Chrysler & Dodge colour, A/B/C bodies, no Plymouths. -
Dodge Q3 light turquoise
restoman replied to restoman's topic in General Automotive Talk (Trucks and Cars)
'70 Bee. The other turquoise looks too dark on my monitor... How would I find out if Q3 was available on B bods? -
Dodge Q3 light turquoise
restoman replied to restoman's topic in General Automotive Talk (Trucks and Cars)
Excellent, thanks folks! -
Dodge Q3 light turquoise
restoman replied to restoman's topic in General Automotive Talk (Trucks and Cars)
I've got several paint book pages and they all show pretty similar shades. The problem is trying to match something to the colour online. Nothing in the local hobby shop and he is hesitant to order something in if I won't guarantee it what I'm looking for. -
Any one know of a decent match for 1970 Dodge Q3 Light Turquoise? Monitor colours on various websites seem to be way off... Thanks.
-
Donation sent. Thanks for the reminder Bill.
-
Thieves...
-
HVLP Mini Spray Gun
restoman replied to StevenGuthmiller's topic in General Automotive Talk (Trucks and Cars)
I've been using mini HVLP guns for years to spray models. After spraying real cars with full size production guns, HVLP, RP, and LVLP equipment, I just can't get my fingers to contort enough to operate an air brush with any accuracy - it's like learning to ride a bicycle backwards... I have a cheapo gun like the one pictured and it works fine. Also have a MAC copy of a SATA gun and an ANEST-IWATA HVLP. Of course, the IWATA outshines them all, but it cost almost $300 while the cheapy was $14 on sale at Princess Auto. The tricks to the mini guns are to use the right sized tip - nothing bigger than .8 - fully break it down for cleaning after every job, NEVER use anything other than a sharp toothpick to clean out any deposits, NEVER immerse it in thinners or any other solvent, keep the needle packing lightly lube'd with vaseline, and like with any spray equipment - practice, practice, practice. You'll find your paint and clears may need to be thinned differently than what you put in an airbrush and it's best to cut the fluid back until you get the hang of things, but in my not-so-humble opinion, they outshine an airbrush for over-all spray jobs, no question. Rattle cans... not even in the same ballpark. -
Stock engine... may put some dual carbs on it and a wired distributor but that's about it.
-
How Do You Select Your Projects?
restoman replied to afx's topic in General Automotive Talk (Trucks and Cars)
^^^ This^^^ I typically build something the way I would have it were it a real 1:1 car. Sometimes, to me, a look or a theme will pop out and that's the way it goes... -
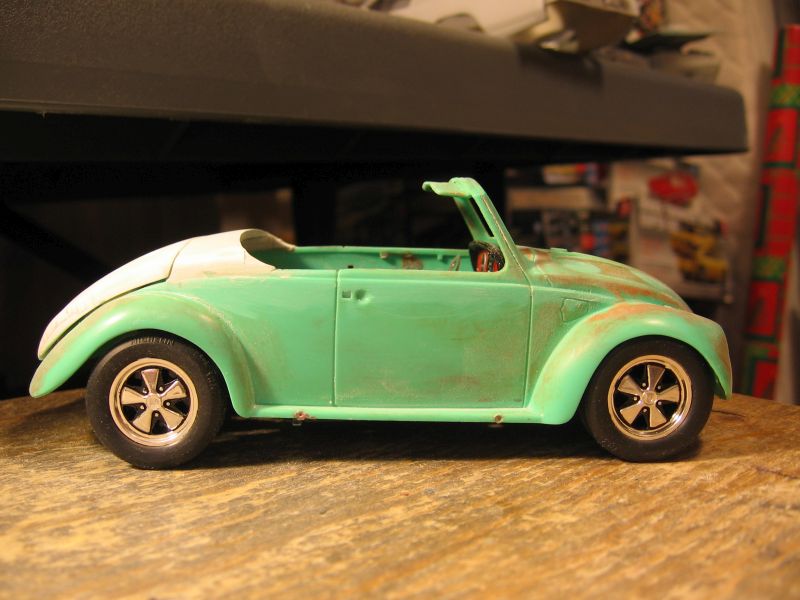
This one won't be an accurate representation of a real Heb... I don't have the skills or the ambition to do that. Instead, it'll be a modern-day tribute to one, based off of Revell's '69ish Beetle Convertible. Newer dash panel. turn signals, taillights, etc., etc., etc.. I've wanted to build a real full-sized replica for a long time and may some day do so, but for now, this will have to do. The '49 Hebmuller is one the most beautifully designed cars I've ever seen.
-
Something I've been wanting to do for some time... Lots to do on it yet - windshield chop, lots of gap filling and clean-up, decklid hinges, rear seat, etc. This is after two or three hours of cutting, fitting, gluing and filling. The Revell body is off a bit dimension-wise so getting the rear panel and decklid to look correct is a challenge but I'm liking the look so far. It will never be an accurate representation of a true Hebmuller, more of a modern-day tribute kind of machine. Comments most welcome.

-
Thanks! This is only the first light coat of primer but I sure don't want too many more on there... I'll try this.
-
I really like what you're doing here.
-
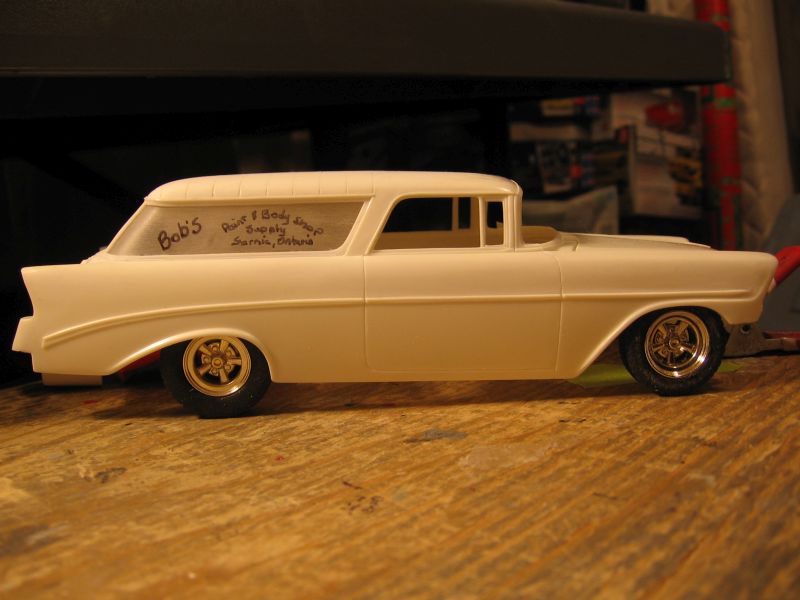
First coat of primer... two full-wet coats, no putty yet. Getting rid of those chrome strips on the tailgate was a rare treat! I took the side glass and tailgate reveal mouldings off completely. Might need to round over the edges slightly. So far, I'm liking it. Comments most welcome!
-
Thanks for the comments. I've heard of that splash pan/bumper overhang but haven't gotten that far yet. It's my idea to leave the bumper stock but pull it back toward the body anyway, so it may be a necessity rather than a custom touch. Those torq-thrust style wheels are off of a diecast I butchered, they do look good there, but I'm looking for a bit more of a what-a-70s-bodyshop-might-have-run kind of look. The chrome wheels almost look too new period-wise, though I really do like them. Yep... those tailgate chrome strips... not looking forward to that. Wide open on engine choices at this point but I'd rather keep it simple for that period look. Headers are a definite, though...if I can find some.
-
Beautiful! I thought about the same two tone treatment for the one I'm fiddling with. It looks pretty classy.
-
I bought this Revell kit 16 or 17 years ago and was all gung-ho to start it. Got the engine glued together and then, for some reason, it got shelved. Drug it out yesterday, gave it some thought and started back at it. My plan is to have it look like something a body shop or garage might have pressed into service as a pick-up and delivery wagon. A bit of a mild custom with the side glass filled in, most of the trim and emblems shaved off, slightly lowered with a set of Camaro rally wheels. Maybe a small block a little more potent looking than the kit's 265 engine. Thinking of an antique white and an antique red roof
-
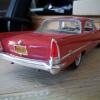
Very nice! Is that the car the Presley flipped near the start of the Daytona 500? Landed on his wheels?
-
Nice job. I built this one myself, almost 20 years ago like you.
-
WOW! That is fantastic! Nice, clean and subtle... the way customs should be. Super job.
-
Again, thanks for the comment. It could well be too long. This is my first try at something like this... If it's too long-ish, the next one won't be. Thanks. I hope my reply to your comment didn't come off as a**holish. Feedback of any kind is great to me.
-
Thanks for the comment. The whole idea was to build something that might have been built by an amateur builder, back when hot rods were still bought and not bought and assembled like today's version. Most every picture I've found of something built back then doesn't fit today's idea of what a hot rod should look like. To me, the abbreviated, shortened-style that emerged in the late fifties, early sixties is too doodlebug-ish. There are enough of those around, I didn't want to add to the collection.
-
Mocked up for the first time...