restoman
-
Posts
1,129 -
Joined
-
Last visited
Content Type
Profiles
Forums
Events
Gallery
Everything posted by restoman
-
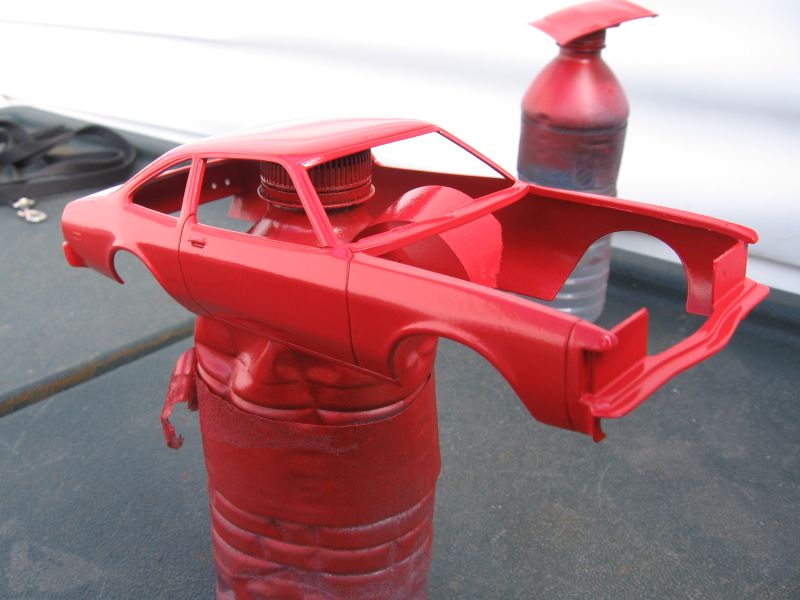
Yep, '71 Charger for the donor. But... the Charger rear end is an 8 3/4" which was not available in the Cordoba/300 B body. I found a 9.25" corporate rear that will do the trick, but the 8.25" rear was the most common. I'm not aware of such an animal in any kit, so the 9.25 will have to do... I also found the windshield from the Charger is just a bit too small, so I'll be making a copy with a clear plastic bottle and a heat gun. Hopefully, it's a bit bigger.
-
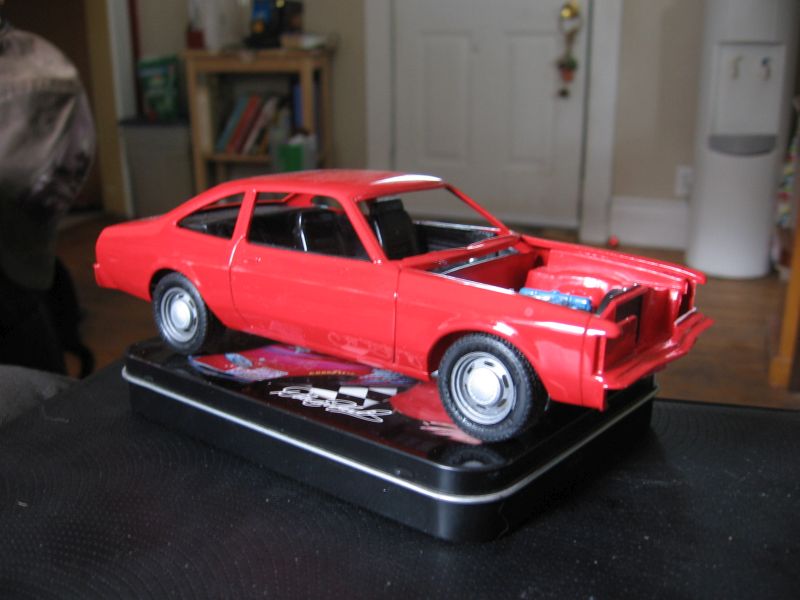
A little more... primer makes everything look better! Still lots to do, but it's coming along... slowly. Comments always welcome.

-
Two door. I haven't done much to it yet other than a little flash clean-up. It's on the build list for this summer.
-
I got that '79 Cordoba/300 last year and am part way through it. It's very nice. Also picked up the '69 300 from them.
-
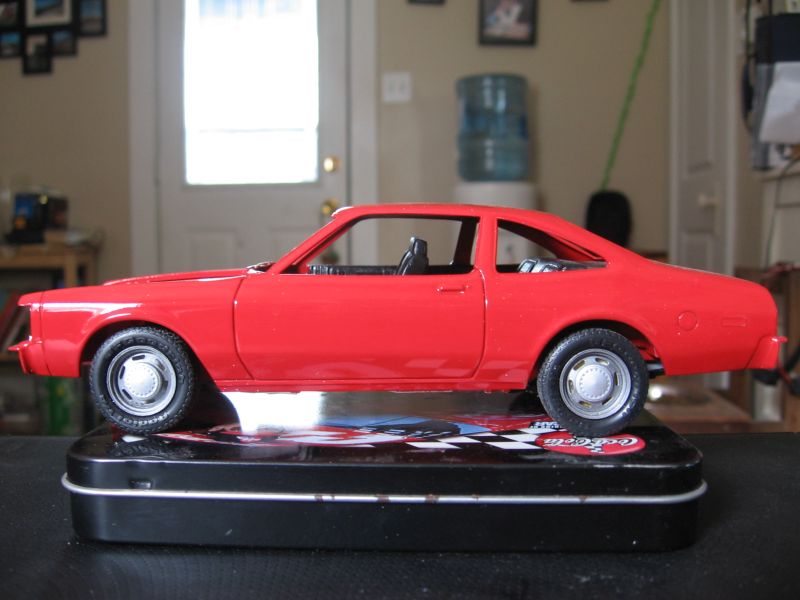
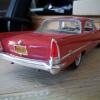
Freshly painted, so I had to mock it up! Testors Insignia Red on the roof, Chrysler Cool Vanilla car paint on the body and a coat of urethane clear.
-
MPC Fuzz Buster Volare - lets kick it around
restoman replied to Jantrix's topic in Car Kit News & Reviews
I was going to use those pad printed tires right up until I spotted these slightly wider ones in the GTO kit. The printed ones would fit right in with the street car look but they are just a tick on the skinny side compared to the GTO rubber. They'll get used somewhere else, though. They're pretty nice. -
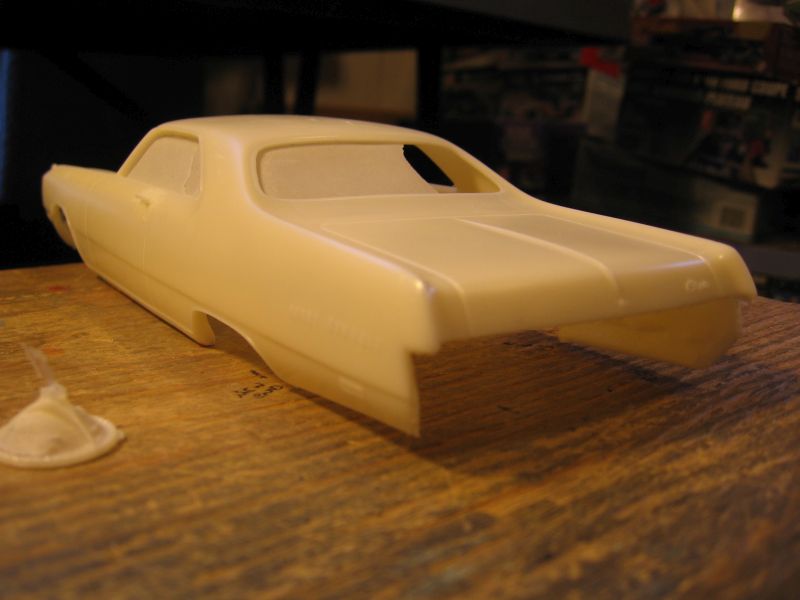
I eliminated the T roofs for starters. I didn't think I could get them to look right, so they were sanded smooth and the thin cut-areas on the underside got filled in. Spent a fair bit of time scribing around the side drip rail (which relly isn't a drip rail in 1:1) and the quarter glass moldings. They were almost non-existent in places. Discarded that factory fuel cap and scribed a more-correct-to-me looking one in the body. Deepened the rear bumper filler lines, extending them fully from side to side. Scribed some front fender extension seams and front bumper filler seams. Deepened the door and deck lid seams, as well as the rocker molding trim for some better definition. Ditto for the front and rear glass reveal moldings. I also put in the lower front fender seam along the rocker panel. The body contours on the front fenders and doors seemed too sharp to me so I smoothed them a bit. The rear spoiler - not pictured - I cut into three pieces to simulate the gaps a real one would have. From the kit, the spoiler was too wide, so this lets me fit it properly. I'll paint it matte black but as of right now, I'm still undecided whether it'll get used or not. Not done yet, but the foiling will be done in chrome, as would it would be on a simple Volare. Also working on clear rectangular headlamps to replace the molded in ones. Might do the same for the front signal light lenses...? It took a couple hours at least for all this stuff, but I like how it turned out.
-
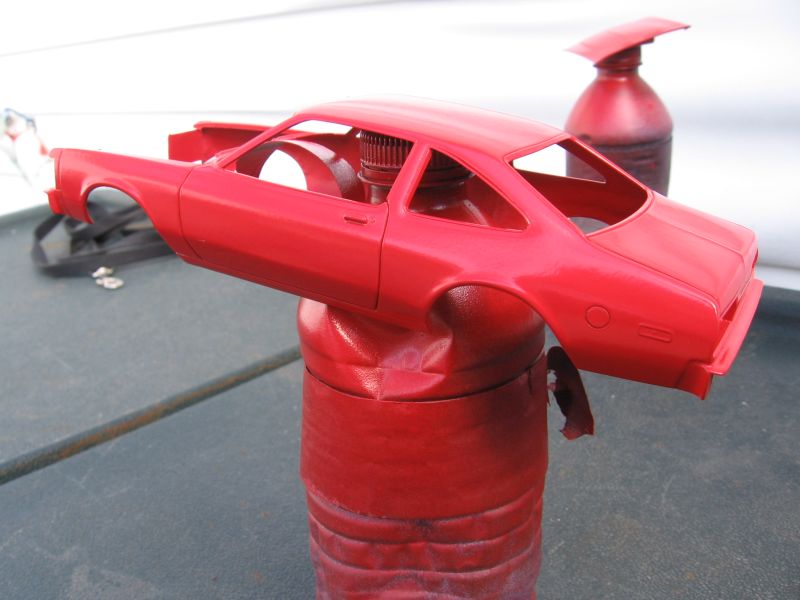
This is the Fuzz Duster kit, but I'm building it as a 1980 Volare, not a Road Runner. Lots of subtle mods to the body to make it look more like it should. I'm using one of my resin cast engines from the '71 Duster, with a MAD distributor, Fireball Holley carb and one of my resin copies of a dual snorkel air breather. Ditched the kit rear end and used on of my 8.75 copies. Headers are from the Hemi Charger kit - a little on the big side and the port spacing is wrong but... better than manifolds. Tires are from the '67 GTO kit and those nice cop car wheels are Fireball products. Love 'em! The paint is Testors red, cleared with One Coat Clear. Not sure if I'll polish it out or not... It's a basic kit, but with a little effort it's turning out all right. Comments welcome.
-
MPC Fuzz Buster Volare - lets kick it around
restoman replied to Jantrix's topic in Car Kit News & Reviews
Yes they are. Love 'em! -
MPC Fuzz Buster Volare - lets kick it around
restoman replied to Jantrix's topic in Car Kit News & Reviews
Some slow progress on mine... I used one of my cast copies of the Duster engine and I'll top it with a Fireball carb, a MAD distributor and one of my dual snorkel breathers. The headers are from the '66 or '67 Hemi Charger. Not quite right in the size or port department but good enough. Replaced the kit rearend with a cast of an proper 8.75 and used the kit springs. Lots to do still but I'm happy with how it's looking so far. Not a bad kit if some time is spent on it...
-
1977 Dodge Monaco/Crestwood wagon.
restoman replied to om617's topic in Car Aftermarket / Resin / 3D Printed
I'd be interested in it, providing it's half-ways decent. -
Good to see him get out on his own terms and that he discovered there's life after racing. Jr. is easily my #1 favourite active driver. His leaving will leave a big hole to fill as I'm sure he's the reason a lot of fans still watch. Hopefully, the new guys like Elliot. Larson and Blayney can pick up the slack, 'cause the Kyle Buschs and Joey Lagonos of the sport can't keep people coming back.
-
Monte Walsh! Great movie!
-
Why Glue Bombs ?
restoman replied to D. Battista's topic in General Automotive Talk (Trucks and Cars)
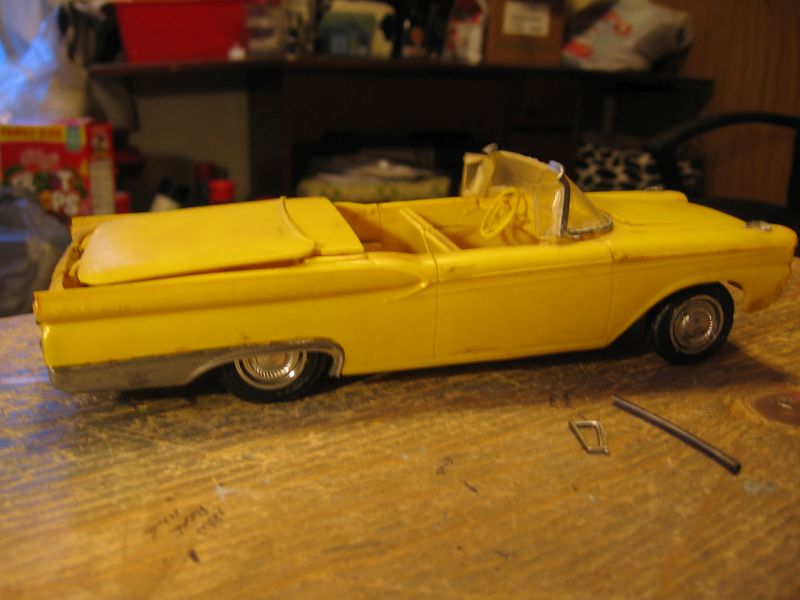
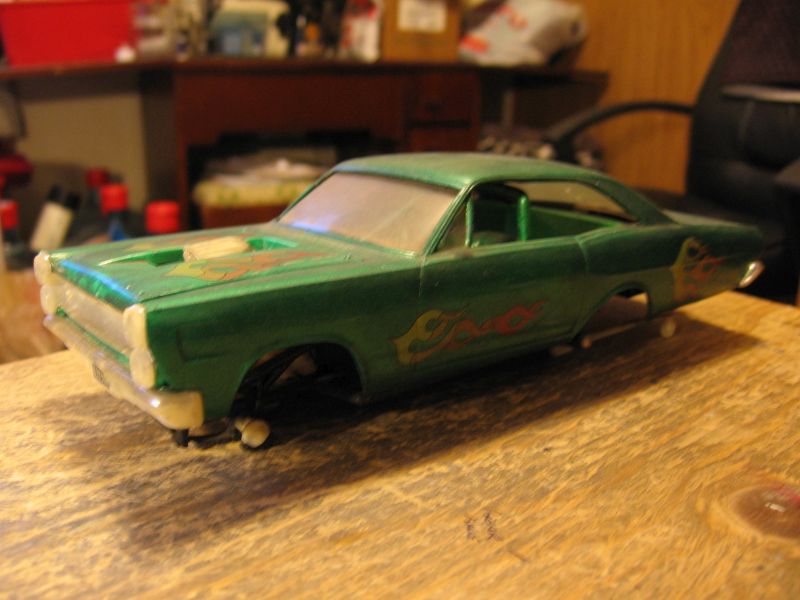
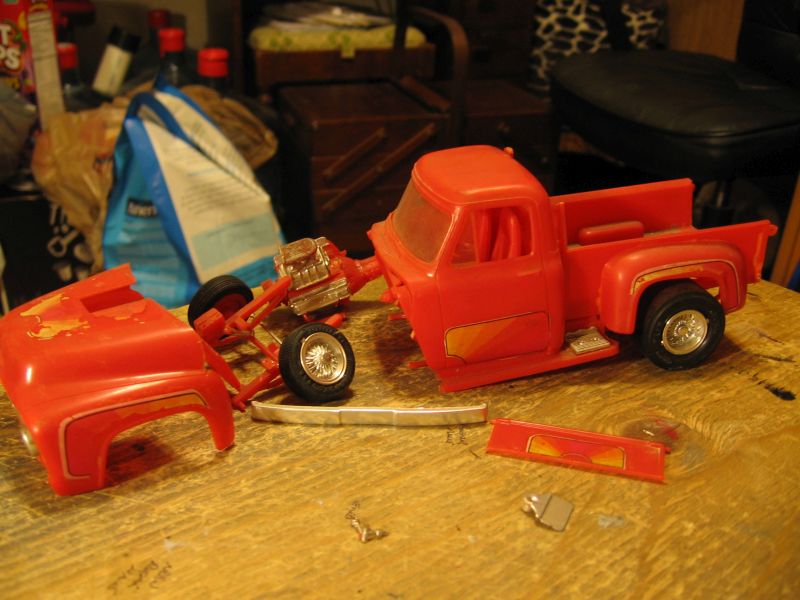
I bought all these for about $3.00. I don't think any are really worth anything - maybe the '59 Ford is? - but I like the challenge of fixing someone that would normally be trash to someone else. I spent my working years doing it with cars and it's carried over into retirement. None of these are anywhere near finished but I drag them out now and then and tinker with them. The '57 'Bird was a welded-together mess but I managed to get it all apart without damaging anything, other than the windshield which was distorted from soooo much glue.
-
MPC Fuzz Buster Volare - lets kick it around
restoman replied to Jantrix's topic in Car Kit News & Reviews
Allllllllrighty then..... How about "I didn't like the look of the gas cap - thought it looked goofy - so I changed it over to an earlier style. Better? Geez... it's only a model kit... -
MPC Fuzz Buster Volare - lets kick it around
restoman replied to Jantrix's topic in Car Kit News & Reviews
My '76 Runner and '80 Volare both had a flush fitting fuel cap...? -
MPC Fuzz Buster Volare - lets kick it around
restoman replied to Jantrix's topic in Car Kit News & Reviews
I've been playing around with this kit for a couple months, off and on. The very first thing I did was eliminate the molded-in T roof and then spent a little time adding some better detail around the quarter window/ drip rail area. I scribed below the taillights where the flexible ruber filler pieces go, and down the edges of the lower quarters the way they are in real life. Scribed some panel lines on the front fenders to replicate the fender extensions, and did the flexible filler pieces there as well. Sanded away some of the too-high body contour on the sides and scribed in a fuel filler cap, instead of the goody glue-on one in the kit. Also deepened the existing panel lines and sharpened up the rocker molding. Painted with Testor's red enamel, it's ready for polishing. I've done away with the kit's rear end and used a 8.34 rear from my home-cast collection. Ditto with the driveshaft. Thought about trying something with the front suspension... and decided it would work as-is. The kit's V8 is tiny. I'm going with a Duster engine and trans from my home-cast pile, along with some slimmed down headers from the '67 Hemi Charger. Need to still scratch- build some engine mounts. The molded-in headlights will be replaced with some clear ones, as soon as I get around to making a mold. The pad printed tires are ok, so I'm using some of Fireball's cop car wheels for that tough look... One of his Holley carbs is going to sit on the 360 engine as well, topped with a copy of the dual snorkel breather from the '71 Charger.
-
Sad Sad Sad News: Our Harry Passed Away
restoman replied to Gregg's topic in General Automotive Talk (Trucks and Cars)
I'm very sorry to read this. I liked Harry's builds and comments - it was obvious he held a great passion for model building and helping others achieve the same. He will be missed. -
I can die happy now
restoman replied to signguy2108's topic in General Automotive Talk (Trucks and Cars)
That would be a ton of fun! Lucky you! -
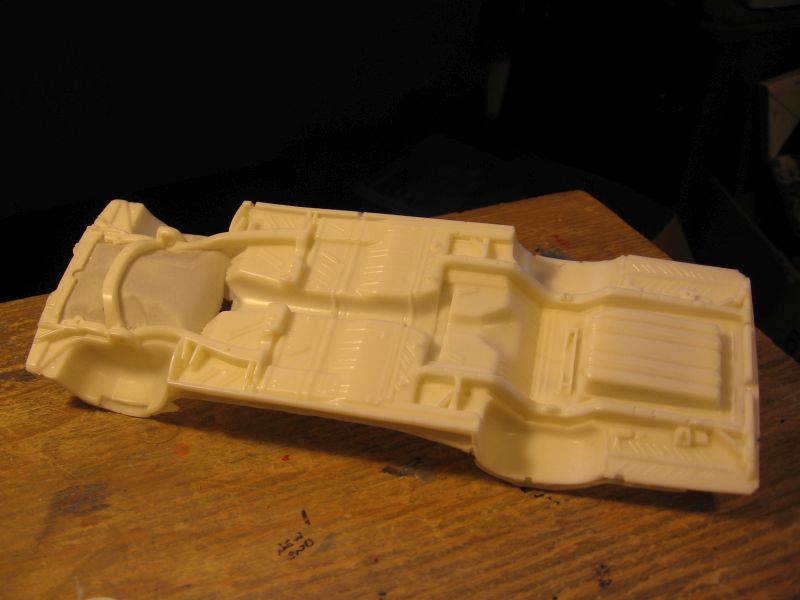
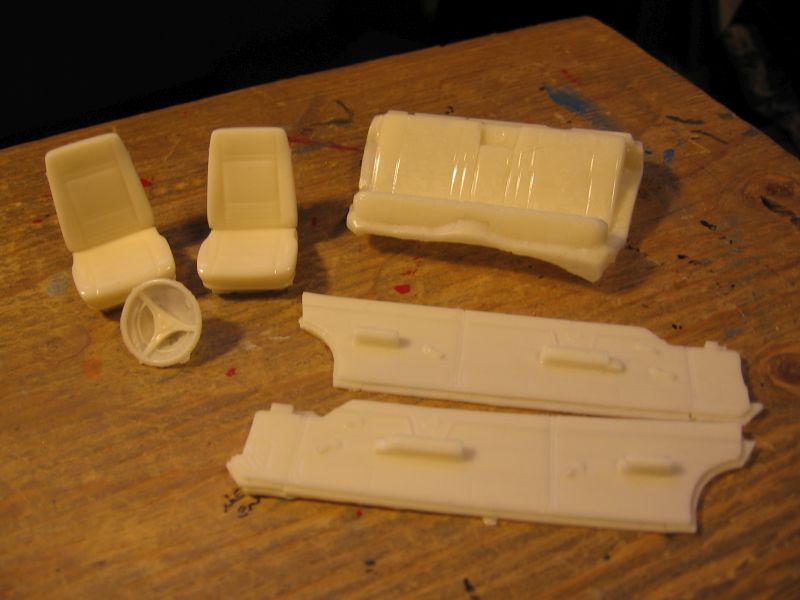
Nothing too drastic for the interior. I modified the rear seat cushion so the seat back (without the cushion) will lay flat, the rear floor mat will be black and the side panels will be a combo of red and white. ... And the correct number of pedals under the dashboard and a Hurst shifter poking through the tunnel...
-
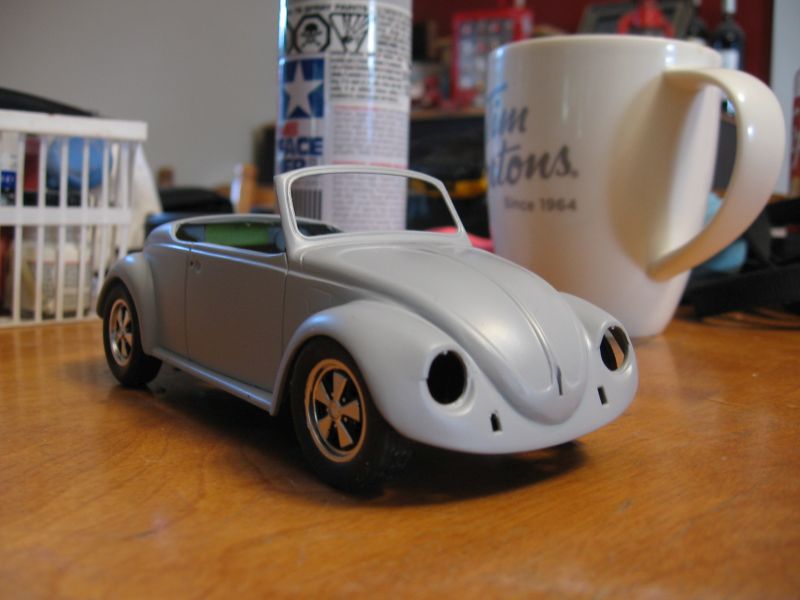
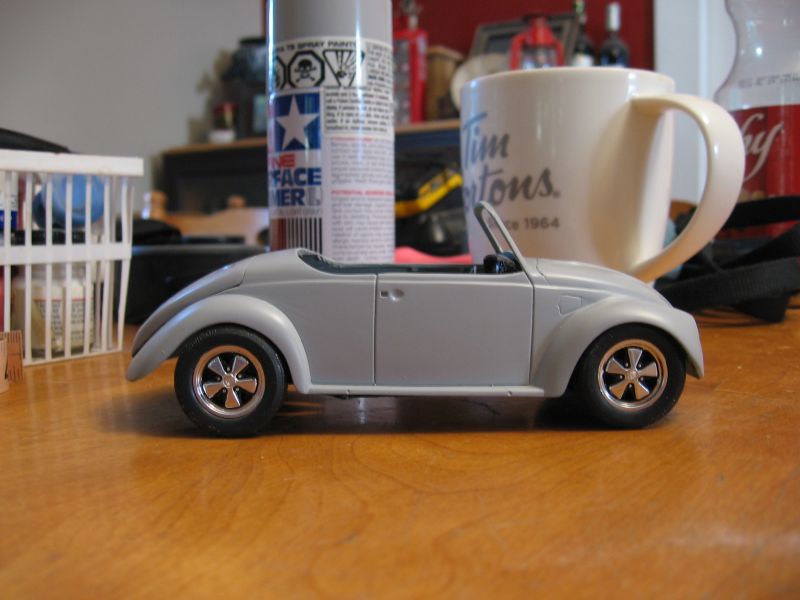
First mock up... A couple small putty spots to deal with and then it'll be ready for paint - off white with an antique red roof. I used the styrene tires from the Fuzz Duster kit and the chrome slots from the '60 Corvette for that early 70s look. The front should sit a little lower when done. Swapped the slip n'slide trans over to a four speed, modified some headers to fit, added a better intake and now the little 265 becomes a 327 or a 350. Topped off with one of Joseph's beautiful Quadra-Jets ~ it's going to be a shame to hide it under an air breather. Comments welcome.
-
HVLP Mini Spray Gun
restoman replied to StevenGuthmiller's topic in General Automotive Talk (Trucks and Cars)
-
Slowly coming together... I robbed the white wall cheater slicks from the Gas Man kit. I like 'em!
-
Gremlins in model building (not AMC type).
restoman replied to ranma's topic in General Automotive Talk (Trucks and Cars)
Around here, there are few Gremlins in the work area. There are, however, several cats that like to lay on the bench occasionally, and a Great Dane who will bench surf whenever possible... makes life interesting. -
Duplicolor Perfect Match Primer question?
restoman replied to crowe-t's topic in Model Building Questions and Answers
I've used the Scratch Filler Duplicolor several times. Definitely thicker than Tamiya primer but it's not really thick enough to cover a lot of detail. Scripts and Emblems are still plainly visible after several light coats. I like full-wet coats but not the spray-it-till-it-runs kind of coats... You really need to shake the BLAH_BLAH_BLAH_BLAH out of the can, it settles out pretty quick. It does NOT sand as well as Tamiya primer though. It will clog paper like it's a little on the soft/gummy side of things. The hold-out seems pretty good though.