
Impalow
-
Posts
1,065 -
Joined
-
Last visited
Content Type
Profiles
Forums
Events
Gallery
Everything posted by Impalow
-
Here is a project ive been working on for a while. Using the Gremlin X kit, and the 1933 Willys Gasser kit as the main donors. The main idea was a wild chromed out gasser show car. Something from the late 70's early 80's show car circuit. Name = Gizmo Color Scheme = Bright Green with Purple Windows and Accents, Chrome Everything Interior = Metal Flake Silver Vinyl with Diamond Pleats Engine = Early 392 Hemi with Hilborn Injection Overall Look = Wild. Here is the progess so far: First thing was to lop off the factory front end and make some new frame rails. I made these the correct width to accept the Willys front axle and springs. Rough Suspension Mockup Check the stance and fit of the hemi Removal of pesky fuel tank, and chassis smoothing. Suspension Mounts and new wheels and tires from Comp Resins. Switch out from the funky willys rear end to the 9" out of the AMT 62 Thunderbird Scratch built some ladder bars, and finished up the chassis mounts. (still need shocks and steering linkage)
-
X2... I have been stockpiling parts for the accord wagon tho...
-
 I already started my 1:1 scale build...
 -
man i love that truck... outstanding job!
-
Very Pretty!! Great job!
-
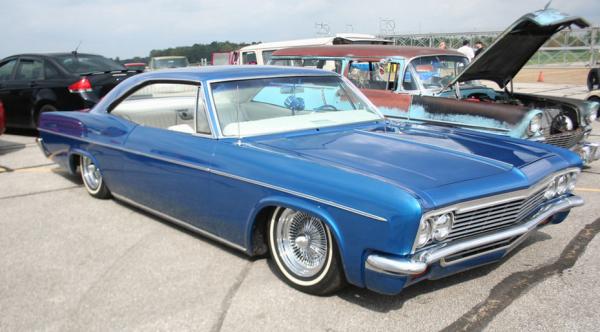
I saw this at a car show. Seriously.
Impalow replied to johnbuzzed's topic in General Automotive Talk (Trucks and Cars)
I approve of the "clean carfax" bumper sticker... -
thats super pretty!
-
Love it!!
-
Thats just amazing! So clean and classy... Thank you for sharing your interior process with us, it was a huge help on my last build!
-
Thank you all for the compliments. Thank you James2, That means a lot coming from a builder whos work I admire.
-
So cool.... and even cooler in the larger photos! Awesome detail work.
-
I just used cheapo lacquer thinner... It worked pretty good, it's pretty hot so it tacked off really quick.
-
Thank you all for the kind words!!! Took the car to a show today and brought home a 1st in class and a people's choice best paint!
-
It was great meeting you James, and seeing your work in person. I agree great show and it was nice to bring home some hardware too!!
-
It's a value line urethane clear... Luckily the cheaper stuff is usually a bit thinner. It's probably too thick for scale, but it really popped the color.
-
Thank you guys!! I really love how this turned out, especially since it's been about 17 years since I completed a 1/24-1/25 scale build. Here's a shot of the custom front I somehow omitted from my first post.
-
Finally wrapped this bad boy up. Build thread is here: http://www.modelcarsmag.com/forums/index.php?showtopic=101146&page=3#entry1413413
-
It's done!!! Under glass thread here: http://www.modelcarsmag.com/forums/index.php?showtopic=101372&st=0&p=1413415
-
Thank you! Nice work! That is a really good idea.. Im intriguied by the acrylic paint technique as well. However, i am a bit worried about durability over time, some part of me thinks that will dry out and crack after a few years. But i've never tried it either, so it may not be an issue.
-
Found it!!
-
Thank you all!! Im excited to wrap this thing up. It is just evergreen .060 half round layed next to each other. I scuffed each seat with some coarse sandpaper, then started in the middle and worked my way outward. I took the tamiya extra thin glue and layed a strip of it down at a time. Make sure you keep them tight together so there are no gaps. If you do get gaps the primer fills it, but you also dont want to bury it in primer. The only tricky spot is the curve over the top of the front seats, if you put glue on the strip then tried to make that bend it would break... so i had to put the glue onto the seat and work quickly to bend and press it into place all at once. It really wasnt that difficult once you get started you get a good feel for it, just takes a lot of time.
-
Just a piece of piano wire to apply Extra thick CA, and a toothpick to press the wire in place... its tricky at first, but once you do a seat or 2 you get the feel for it. I started drilling holes at the end to hide the wire end, then i tried it without and it looked about the same so i stopped on the rear seats. As of last night... interior done! Shift knob made from some 1/16" acrylic rod, sanded to shape, fogged with body color then dipped in future.
-
Welp...Tom I lied to you... I cant find my flyer.. Maybe one of these nice fellas can post it for both of us. Sorry.
-
yes tom... i have it at home on my hobby bench, i will snap a photo and post it tonight. I will going to this as well.
-
Thank you all for the kind words! This forum does a lot to keep me motivated, and moving forward on a project. All these compliments from all of you guys that know what you are doing, really means a lot. Last night I got distracted and played a game of musical wheels/tires for awhile...I thought that the wide whites would bring out the interior more, at the end of it i decided to stick with the pegasus supemes.. but it was an exercise i would have regretted not doing. So to at least make some progress, I created some gauge faces in Adobe Illustrator and printed them out and installed with a drop of future on top. Tonights plan is to finish up that interior, and start alclad'in some bumpers.