DRIPTROIT 71
-
Posts
7,190 -
Joined
-
Last visited
Content Type
Profiles
Forums
Events
Gallery
Everything posted by DRIPTROIT 71
-
 Real eye catchers here!
 -
B.R.B.O 22. Pete 378/flatbed
DRIPTROIT 71 replied to tbill's topic in WIP: Model Trucks: Big Rigs and Heavy Equipment
Going to be a great looking rig! -
You are the master of realism!! Excellent work!
-
Peterbilt 352 Pacemaker
DRIPTROIT 71 replied to TruckerAL's topic in Model Trucks: Big Rigs and Heavy Equipment
Nice looking Peterbilt!! Great work! -
Thanks Mark!! Thanks Chris!! Thanks Brian!!
-
Tiny4x4.com has all the parts except for the body. I assume that you can use a model body.
-
What did you learn to drive in?
DRIPTROIT 71 replied to slusher's topic in General Automotive Talk (Trucks and Cars)
I started driving the lawn mower when I was so little that my feet wouldn’t reach the running boards. My Grandpa would set the throttle, let out the clutch and turn me loose. Up and down the driveway I would go, of course I would have to pull back up beside him to stop. I progressed to go carts, then fork lifts, then tractors. The first vehicle was my dad’s 69 Chevrolet long bed pickup. It had a T-10 Borg Warner 4 speed in it. My first car (that would run) was a 66 Plymouth Satellite. I took my driving test in my aunt’s 78 Honda Civic because everything that we had was huge. The first big truck that I drove was an R-Model Mack. Great thread Carl! -
Just a little more progress today.

-
They will make you jump out of your skin if you are standing beside it and are not expecting the noise. There is a company here that has an old Western Star dump truck that they have ran for years. When they first got it, the driver used to cut the truck off at stop lights and hit the air starter just to scare people.
-
Looks sharp!
-
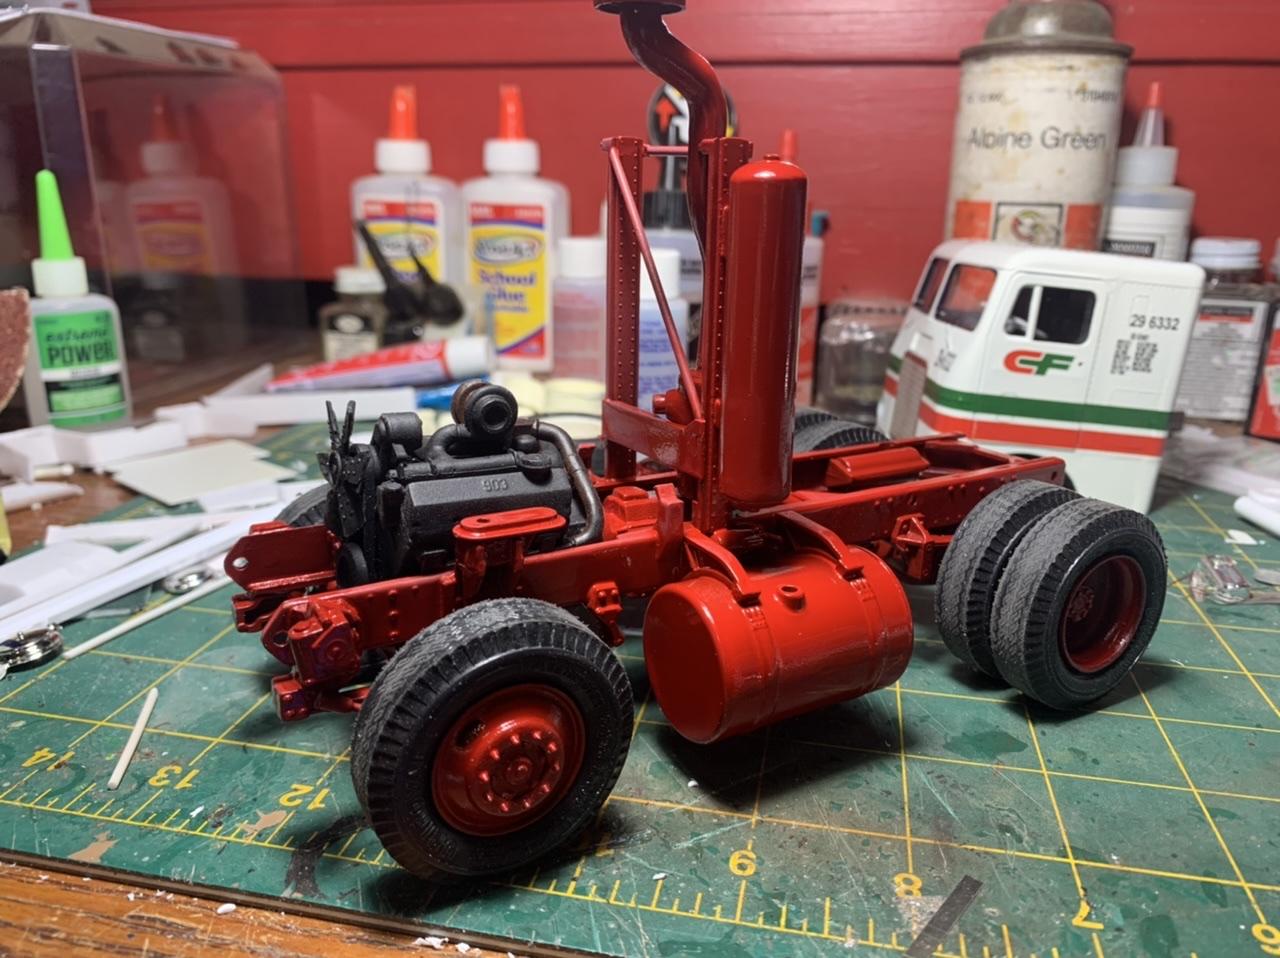
Thanks Alex! The engine is a Johnny Cash combo just like the rest of the build. It originated in a 4200 glue bomb that I got in a trade here on the forum. I was missing the exhaust manifolds and someone on the forum sent me the manifolds and turbo setup for it.
-
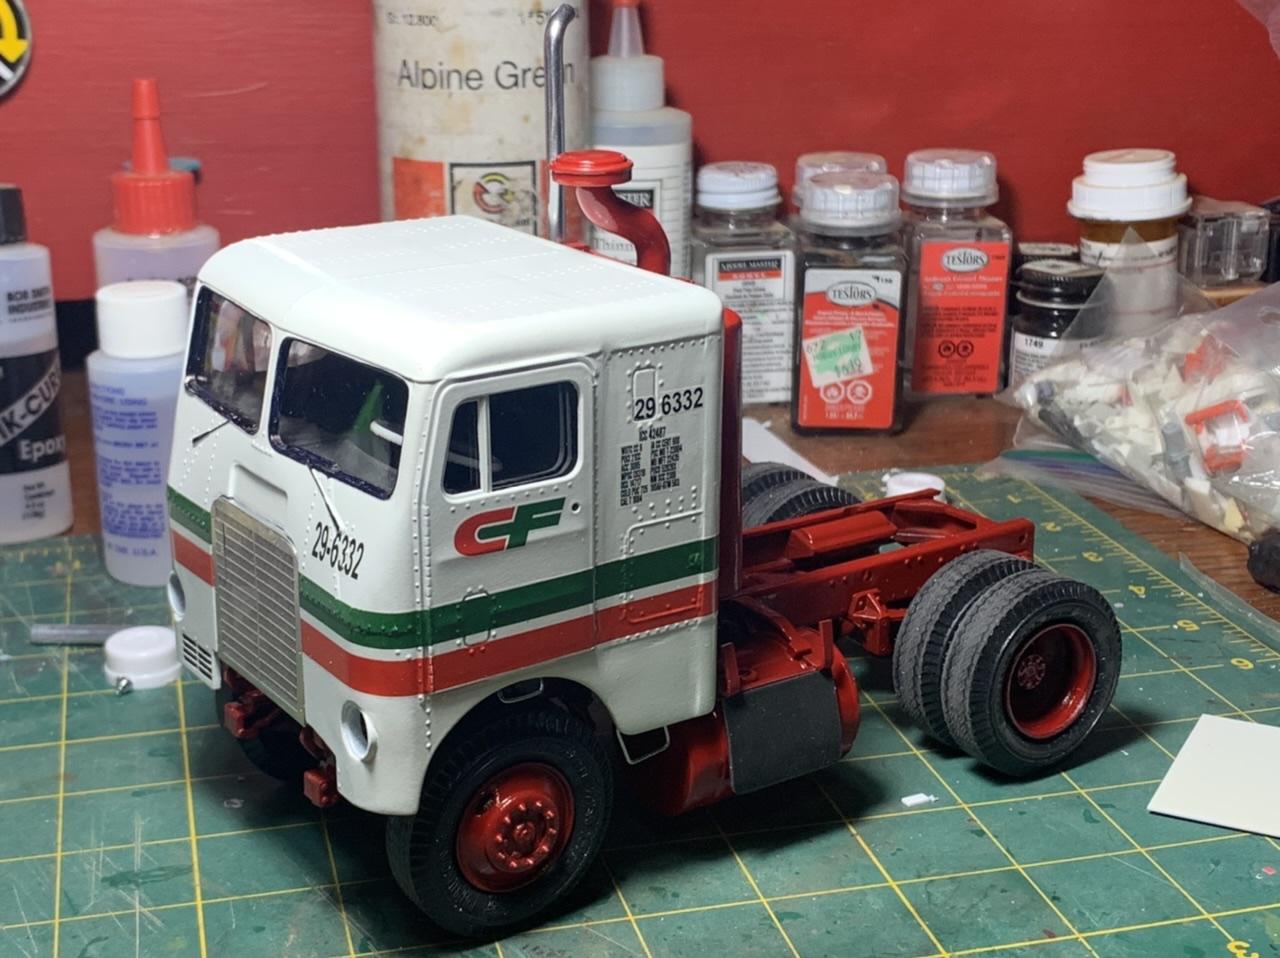
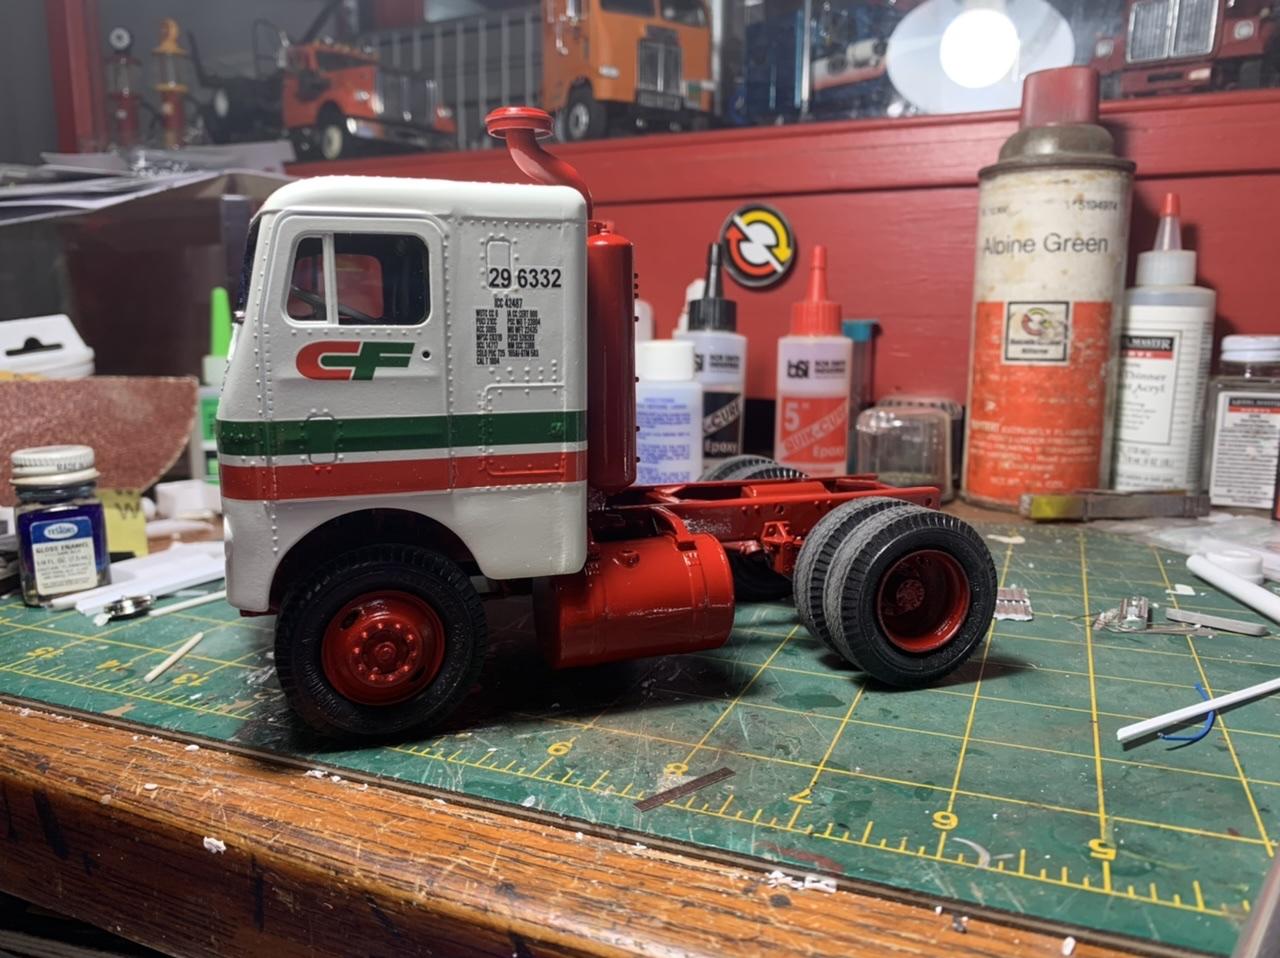
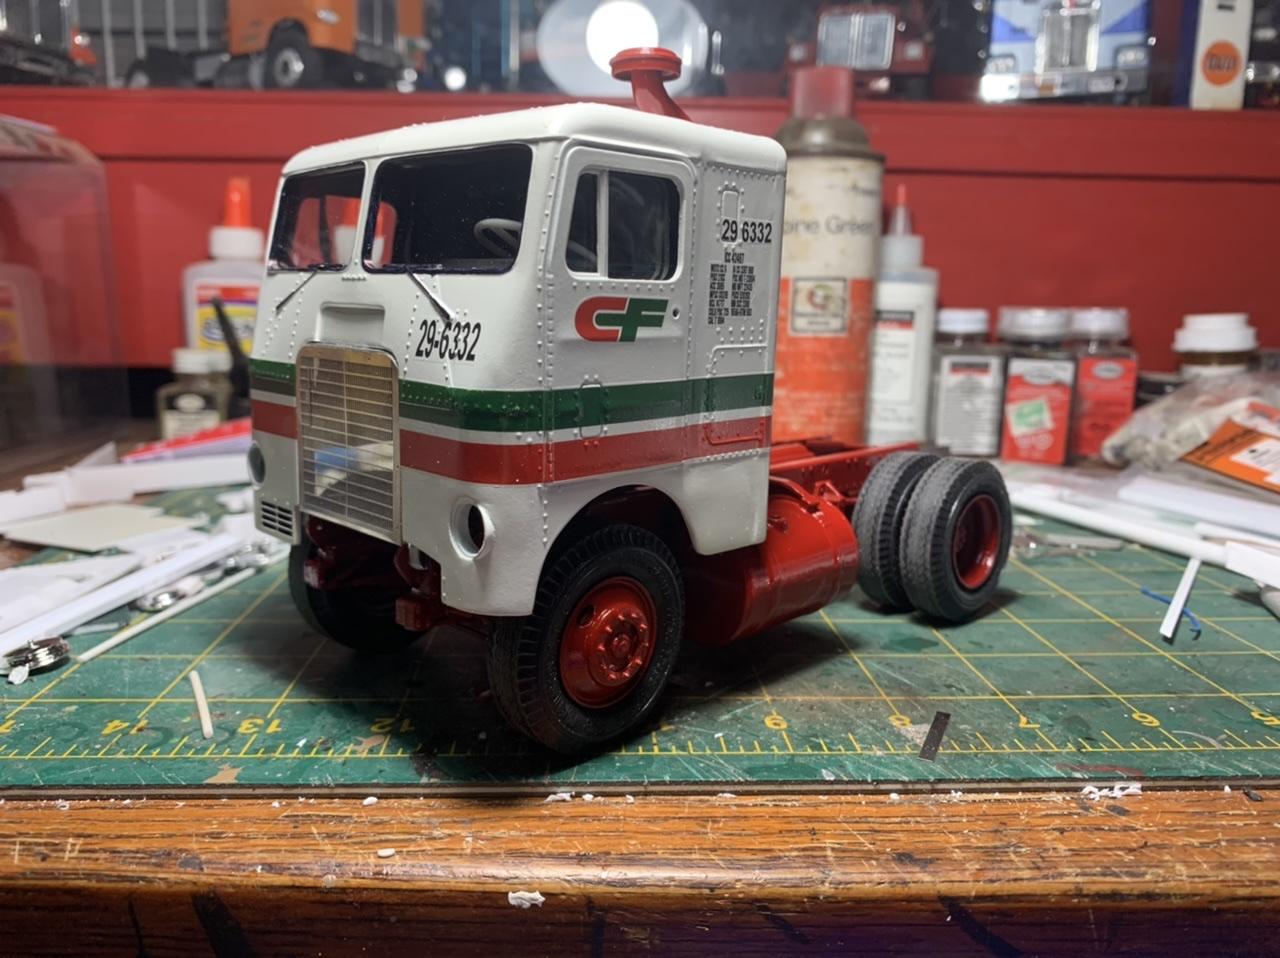
A little more progress. The engine is in. From what I understand CF liked air starters. The newer pusher truck definitely had one. I’m not sure about the older one, but I like the look of the big tank on the back, so I went with it.
-
'84 GMC
DRIPTROIT 71 replied to Plowboy's topic in Model Trucks: Pickups, Vans, SUVs, Light Commercial
Very nice! I like it!! -
kenworth k123 coe
DRIPTROIT 71 replied to Bronzekeg's topic in Model Trucks: Big Rigs and Heavy Equipment
I think that this might be my favorite of all of your builds! -
Weathered Tyres & Rims
DRIPTROIT 71 replied to tiking's topic in Model Trucks: Big Rigs and Heavy Equipment
Your work is always amazing! Very realistic! -
Very nice! I like it!
-
Very nice! I remember watching this car race. Nice work!
-
Peterbilt 352
DRIPTROIT 71 replied to Rockford's topic in WIP: Model Trucks: Big Rigs and Heavy Equipment
Very impressive work going on here! -
Awesome looking pair!
-
Schneider CO-4070A
DRIPTROIT 71 replied to k100's topic in WIP: Model Trucks: Big Rigs and Heavy Equipment
The black and orange just looks awesome together!! -
First of all with everything red, this is just an eye catcher! The weathering is spot on! Very nice work on the entire build! I really like this one!!
-
Thanks for all the comments guys! Brian, that was an experiment as with most of my projects. It is seat repair tape. It has a vinyl texture, it is very flexible and conforms very well although it has more of a canvas look in scale. I was looking for an alternative to the diamond tuck interior and wanted to give this a try. It looks better in person than it does on camera.
-
This will be good!!
-
Excellent scratch building! Nice looking rig!
-
B.R.B.O 22. Pete 378/flatbed
DRIPTROIT 71 replied to tbill's topic in WIP: Model Trucks: Big Rigs and Heavy Equipment
That is one beautiful build!! Excellent work!!