Helper Monkey
-
Posts
109 -
Joined
-
Last visited
Content Type
Profiles
Forums
Events
Gallery
Everything posted by Helper Monkey
-

Life after the purple pond question
Helper Monkey replied to Againmikewins's topic in Model Building Questions and Answers
I have tried the Super Clean / Purple Stuff. It works pretty good. I needed to leave things in for a while to get the primer I had to come off. I discovered that If i used a very stiff nylon watercolor scrubber brush and some brake fluid, the primer / paint came right off with some scrubbing. I tried the same thing with the other stuff. It took a whole lot more elbow grease to remove the paint / primer. Of course I kept a bucket of water nearby and dunked the part in water to keep the amount of time brake fluid was in contact with the part. I hear brake fluid will eat plastic. I have yet to see it happen but I did not leave it on for any long period of time. -
Revell '29 kitbash - an RPU - final update 10/30
Helper Monkey replied to Jantrix's topic in WIP: Model Cars
That engine color is perfect. I am working on an 37 Ford Panel Truck and I need to start on the motor. I want that color. Did you mix it or buy it? -
Trouble With Colors
Helper Monkey replied to StevenGuthmiller's topic in Model Building Questions and Answers
That looks good to me. I would have mixed it using a burnt sienna, a red or a indian red and white. but what you have looks really good to me. -
A True Gluebomb Restoration 10/26 Finished
Helper Monkey replied to Porscheman's topic in WIP: Model Cars
Its nice that the paint stripped right off despite the age and the amount of paint on it. -
Question on decal softener
Helper Monkey replied to Helper Monkey's topic in Model Building Questions and Answers
Thanks! I think I just need to mess with the settings. I was busy at work today so I never got the chance to see if it would work. Then again my gauges may be too small for that detail. the small ones are only 1.5mm and the large one is 4mm. not exactly large. Your stickers look really great. with a lot of good detail. -
Wow! Thanks guys. Everyone was super helpful. I am really diggin on the idea of the Caddy motor. I think I may order one from e-bay.
-
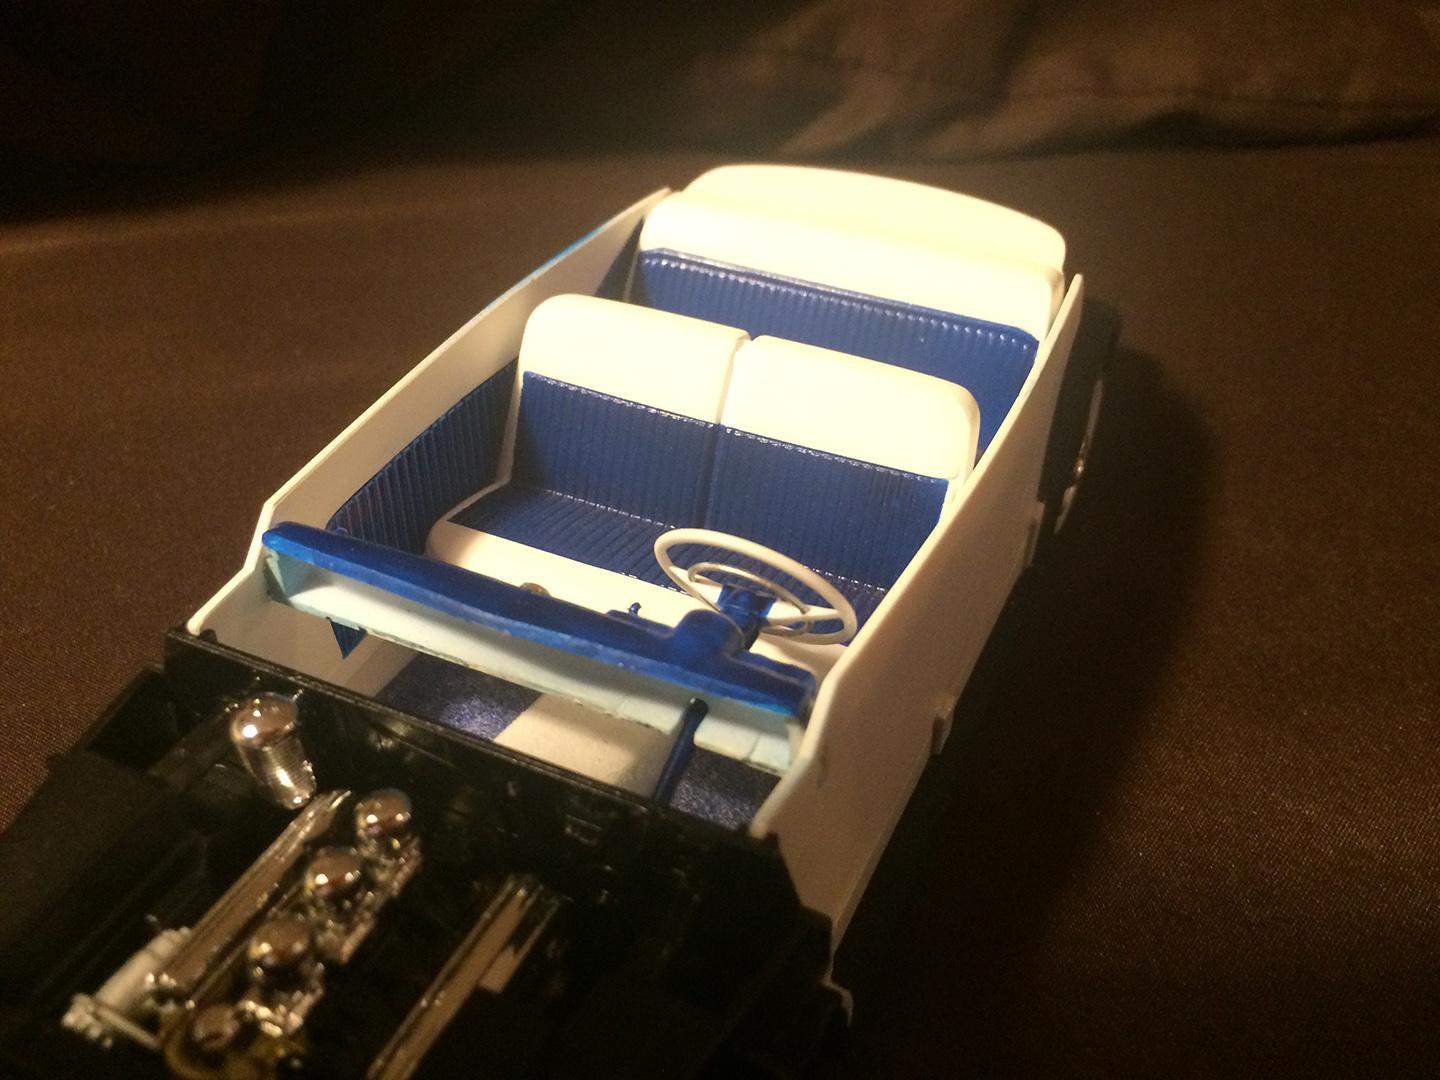
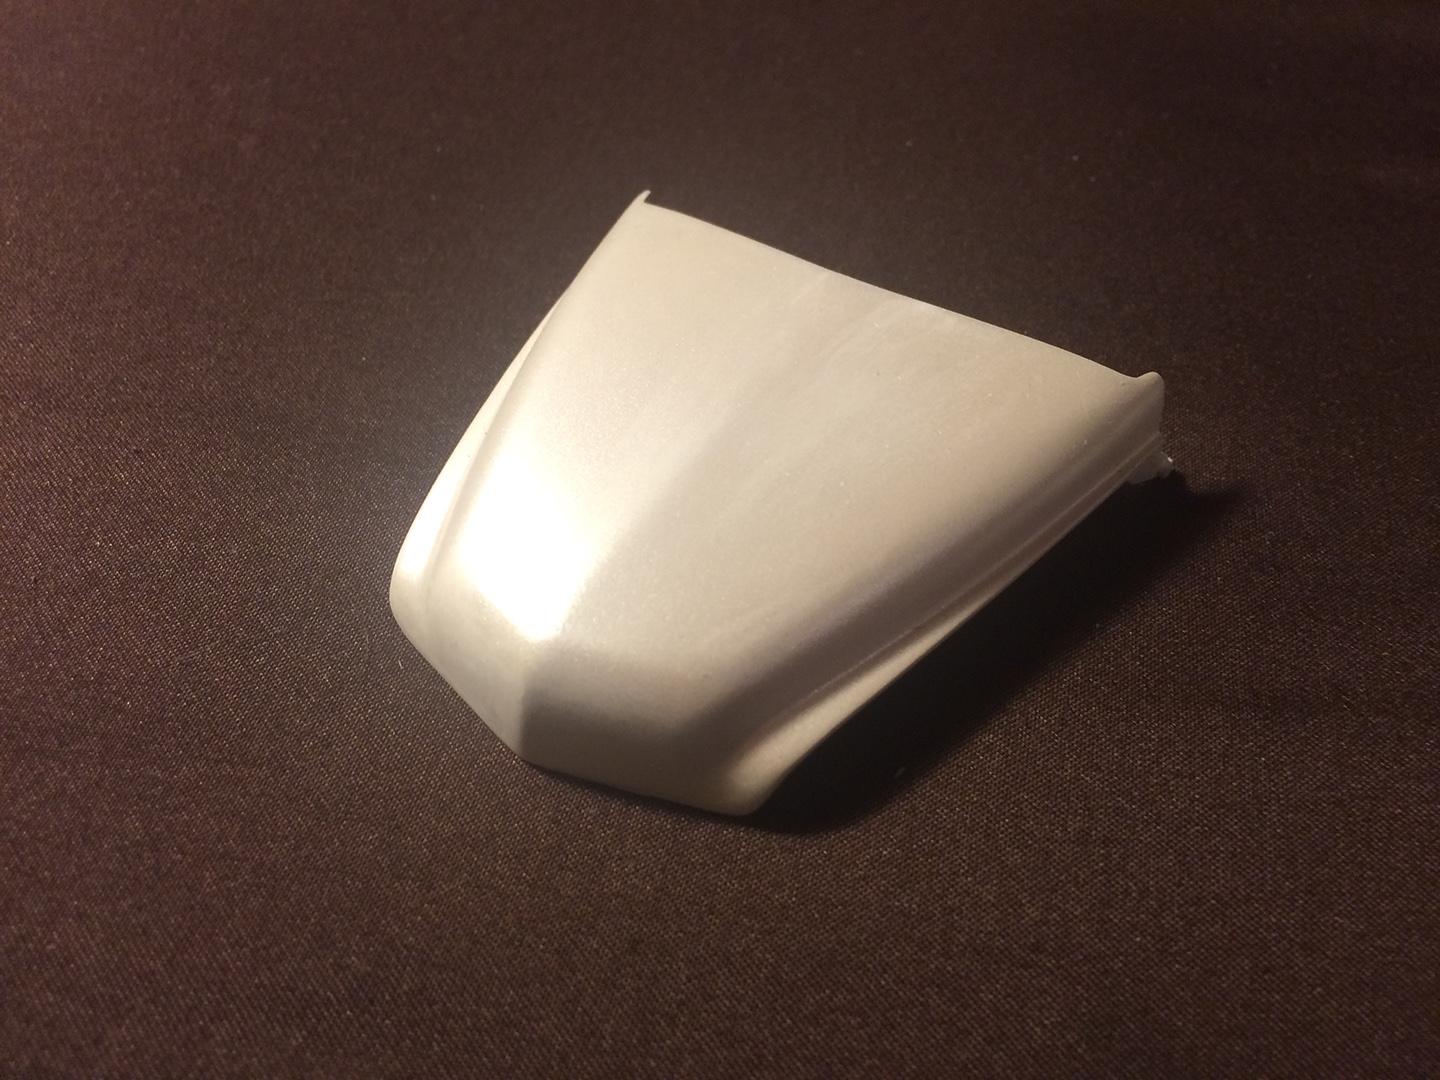
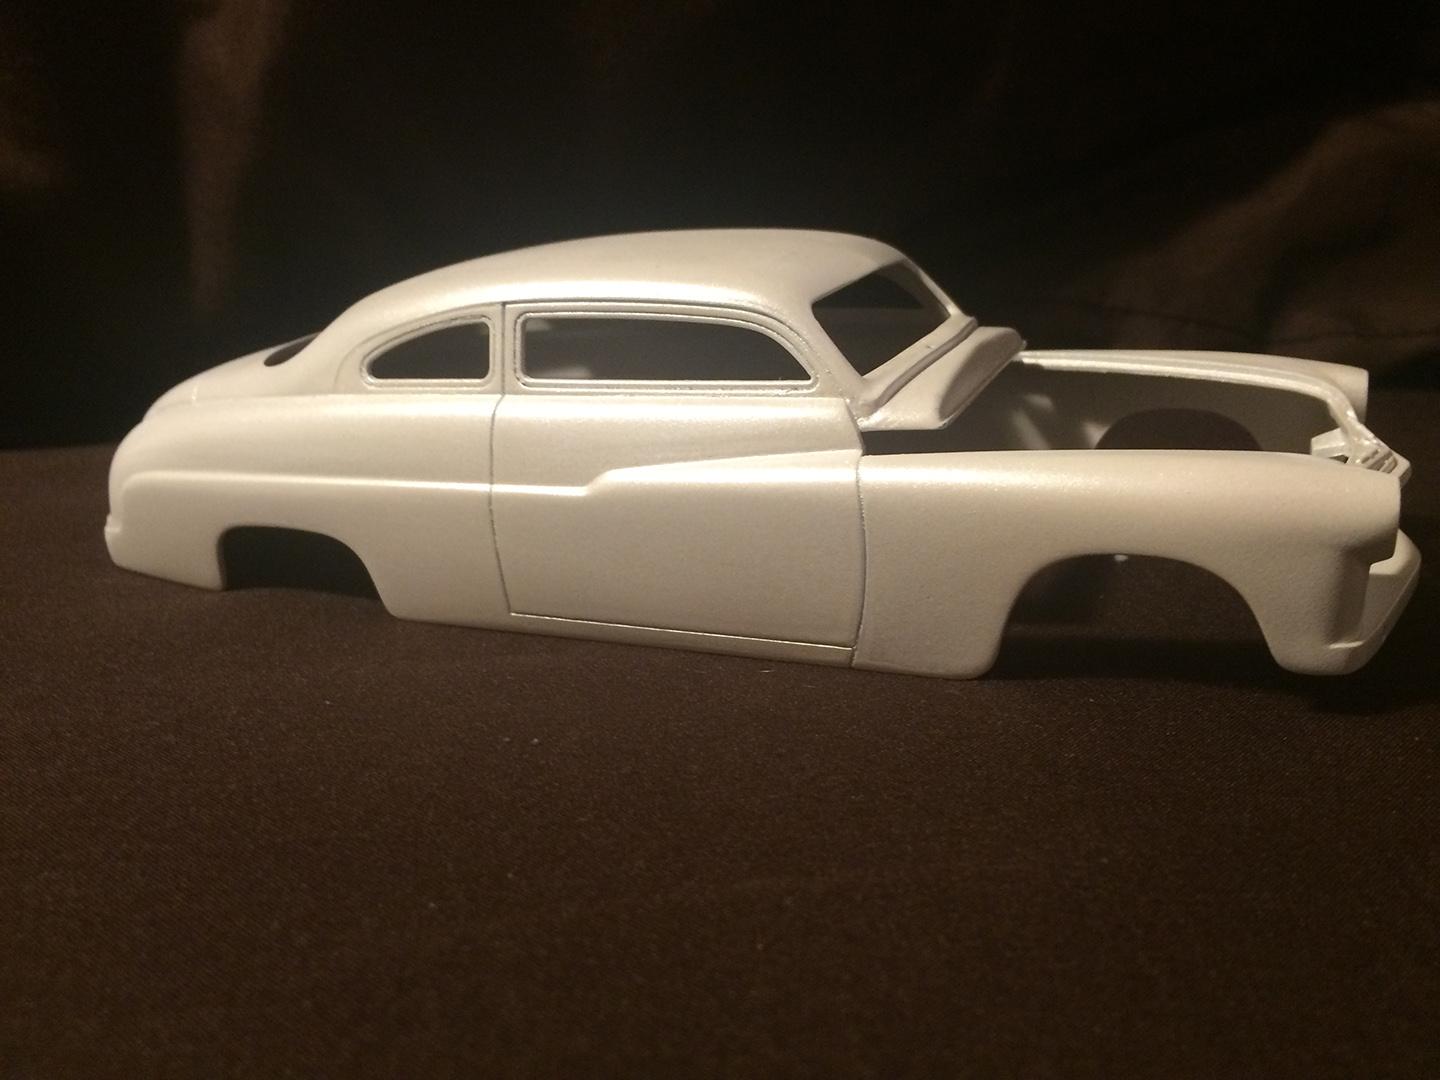
Some updates. I have put off working on this for a while cause I was waiting to be able to paint it. I finally got the dash, steering wheel and the side panels repainted and installed. I am a a little unhappy with the way the blue paint turned out on the dash. It has a lot of flaws in my opinion. A few stray particles and the paint did not come out even like it did on the seats and doors. I decided to just go with it other wise I will never get this one done. I had decals on the gauges but but they kept falling off. They were also inaccurate. I decided to recreate them and print them myself. Only problem now is finding a printer capable of the high resolution I need. I repainted the body in Golden's High Flow colors Iridescent Pearl Fine. I also noticed a few blemishes, uneven and pooling spots, so I sanded the areas out with a 1500 sand paper. I am gonna spray a second coat in a few days weather permitting. The first time I painted the body I had problems with my primer choice and ill body prep. This time It was technique. I will get it down one of these days. What I really need is a spray booth. As it stands I have to paint outside or bring the parts into work and do it there. Working in an art store has its advantages, no one cares if there is paint all over the studio. After I finish the touch up of the pearl I will paint the whole thing with Golden's High Flow Transparent Phthalo Blue. I hope the shimmer will show through the blue and make it pop. Once I get the blue done, It will install the chrome items and trim. I plan on trying a leafing technique using faux silver leaf to see how it works out.

-
I recently bought AMT's 1941 Plymouth Kit. It had the stock motor and a V8 in it. Someone on the boards mentioned that it was a LA Block. If I remember correctly, production on the LA was started in the mid 60s. Not exactly period accurate. I would like to put a V8 into the Plymouth but I am looking for something that would be available during the 40's. Does not need to be the early 40s, it can be from the 40s to the early 50s. A Chrysler engine would be great but not necessary. Basically any motor popular for a power gain. I am not looking to modify the body styling to make the engine clear a. I am not opposed to engine bay or frame tweaks. My goal here is to make a completely stock looking Chrysler but has a whole lot more power.
-
Question on decal softener
Helper Monkey replied to Helper Monkey's topic in Model Building Questions and Answers
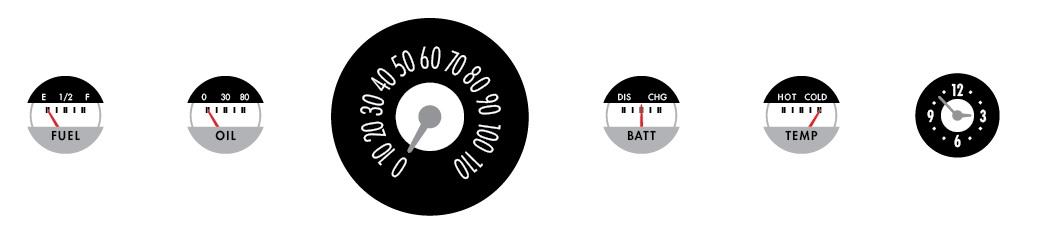
Thank you. I am going to look into the detail master gauges too. For some reason I never thought to check aftermarket. The glue sounds a lot like the White PVA bookbinding glue I use. It dries super clear and flexible. I used the Epson 4880 at work today on glossy photo paper. I exported my Illustrator file as a pdf and printed it. It did not turn out good. I am going to try bringing the native file and print it strait from photoshop. cause there is no Illustrator at work. I also created a 600 dpi and a 900 dpi tiff file to see if i can get better detail. I think I need to mess with the printer settings too in order to get the results I want. -
I like it. I am working on the same kit I believe. Going bone stock on mine however. I did so much work on the body it was not even funny. Of course I was trying to make mine with hinged doors.
-
Question on decal softener
Helper Monkey replied to Helper Monkey's topic in Model Building Questions and Answers
First off, Thank you everyone for your responses. I think I have decided to head in another direction. After looking at images of 49 mercury interiors I realize that the gauges supplied in the kit are not accurate. In addition they kept falling off and they have chipped a little now. I decided to create my own in Illustrator and print them on paper. Down worry the image below is blown up. The small gauges are 1.5mm and the big one is 4mm. I have a japanese screw hole punch, I just need to get the really small bits for it to cut them out of the paper. I may even put resin to simulate glass. Now My Epson R220 may work but I need new cartridges for it, Once I get those I will be all set. If it does not then maybe the big Epson at work will print that fine. It's made for Art Reproductions.
-
Question on decal softener
Helper Monkey replied to Helper Monkey's topic in Model Building Questions and Answers
Ohhh BLAH_BLAH_BLAH_BLAH. Here I thought it might be a simple answer. Anyone have a preference for decal softeners? Not that I think I will get an answer, but it is a Revell kit. -
I am applying decals to the dash of my 49 merc. I notice they are a little bit larger than the holes for the gauges. I have trimmed them down a little. I would like to know if I used the softener after the fact or after they dry will it still soften them up to allow them to conform to the ridges? I only ask cause I have already applied them and I do not have any softener ATM. I have never tried to do it after the fact.
-
How to Make Decals
Helper Monkey replied to DoctorLarry's topic in Model Building Questions and Answers
the alps printer? is that a UV curable printer? -
A True Gluebomb Restoration 10/26 Finished
Helper Monkey replied to Porscheman's topic in WIP: Model Cars
That is a lot of paint. -
Drilling holes in clear plastic parts...
Helper Monkey replied to CountryJoe's topic in Model Building Questions and Answers
I figured that is why it would not work. If you really wanted to, one could carve the wood to have the same curve as the parts. It is a lot of work. I do not think anyone would do that. -
This thing gets more and more amazing every time I see it.
-
Drilling holes in clear plastic parts...
Helper Monkey replied to CountryJoe's topic in Model Building Questions and Answers
I am not sure it will work for model parts but i have used a power drill on acrylics and lexans. I used masking tape on both sides and then sandwiched the plastic between 2 pieces of wood and drilled through both. Make sure to keep the wood clamped together really tight. -
Paint Strippers - What to Use?
Helper Monkey replied to pbj59's topic in Model Building Questions and Answers
I was wondering if people who use the super clean have used it to strip the Tamiya Fine White Primer from a spray can? -
Painting and paint fumes question
Helper Monkey replied to ERIK88's topic in Model Building Questions and Answers
Createx I have no experience with. I however am using Golden's High Flow Acrylics. I still use Tamiya metallic for my metal paints. Golden only has a Iridescent Pearl (fine), Gold (fine), Silver (fine) and a Copper (fine). Now I do fine them to flake off easy because they are plain ol' artists acrylics, not meant to be used on plastics so I find myself modifying them to make them work. I modify them with about 25% Golden GAC-200 (which promoted adhesion to nonporous surfaces such as plastic and 25% Transparent Airbrush Extender. I find the GAC-200 thickens up the paint a little bit so I add in the transparent extender to make them retain their original viscosity. Now they do look a lot better airbrushed then hand painted but I feel that way about all paint. I hand painted an engine the other day with no primer and found that like everything other paint I needed to strip the motor and airbrush it. I really do not like how uneven hand brushed paint looks. When I tried to strip the engine I found that it was kinda a paint in the butt to strip off. It really wanted to stay on. I have also tried the FW Pearlescent Acrylics Inks. The first time I airbrushed them, I got a lot of unevenness in the paint. They seemed to stick pretty well to the plastic but I was unhappy with them. In addition to the paint being uneven there were also a lot of blemishes. Most of the due to poor body prep. I have since stripped the body, primed it and I am waiting for a good day to spray it again. I plan on using the Golden's instead of the FW's but if I were to use the FWs again, I would modify them with GAC-200 and transparent extender. -
Artist Tape for Masking
Helper Monkey replied to Miatatom's topic in Model Building Questions and Answers
I use the tamiya stuff for masking off the small stuff. other wise I use 3m blue painters tape for most stuff. I have found artists masking tape works better than the 3m stuff. the 3m is just cheaper. -
I need to do one of these soon.
-
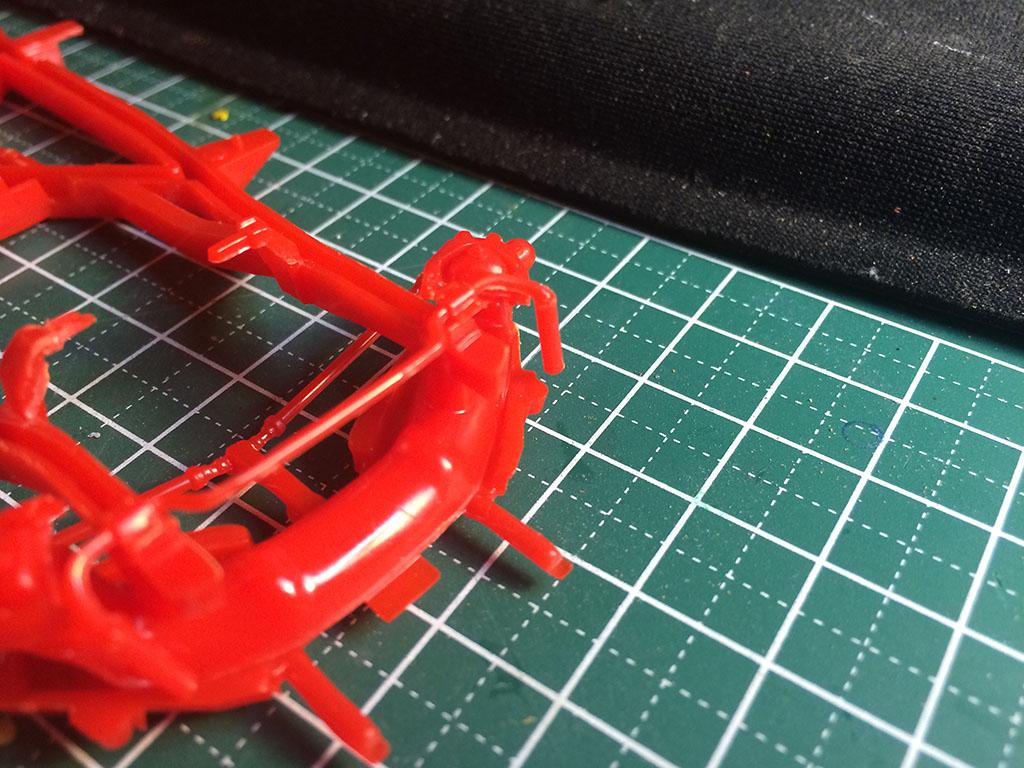
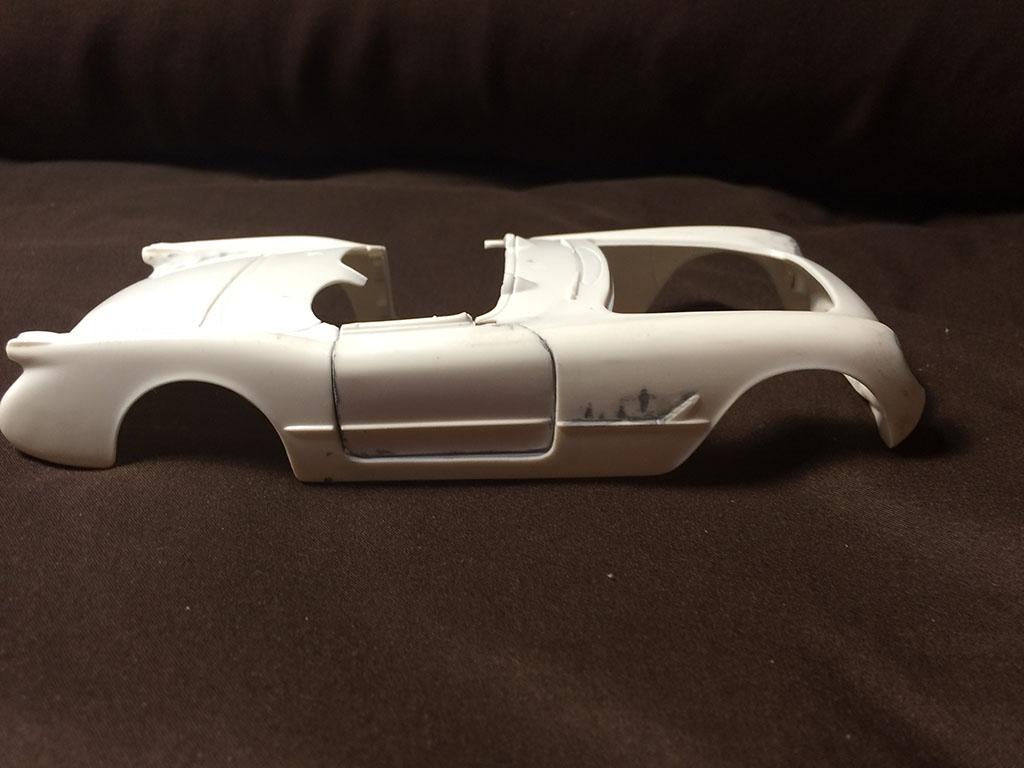
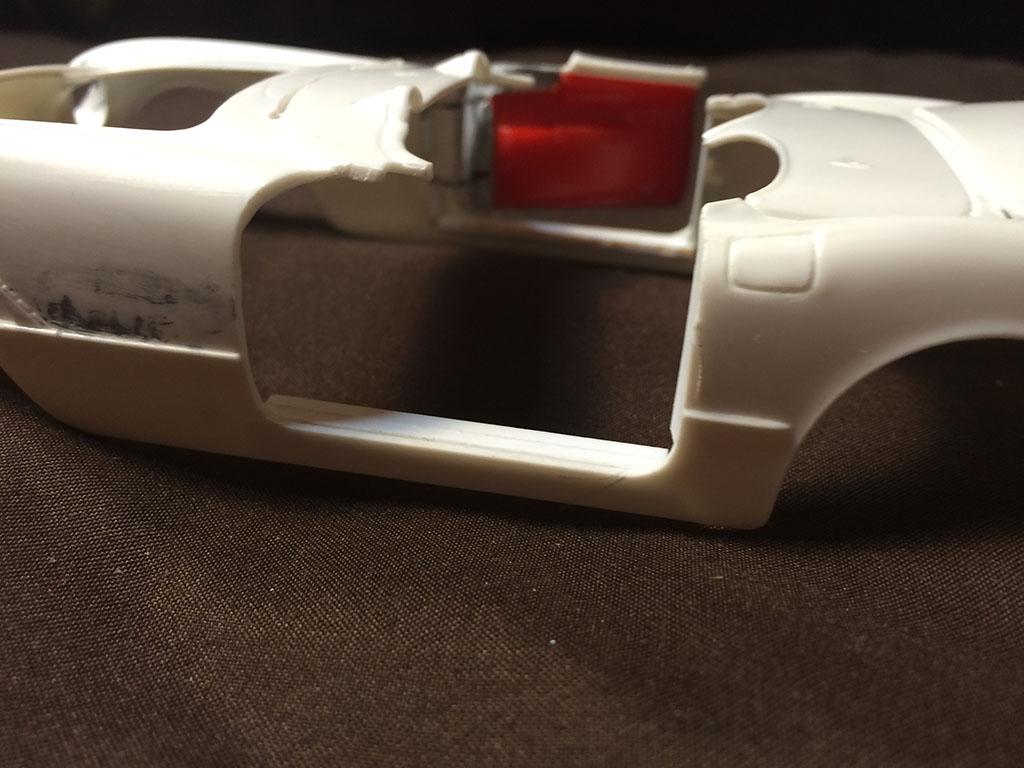
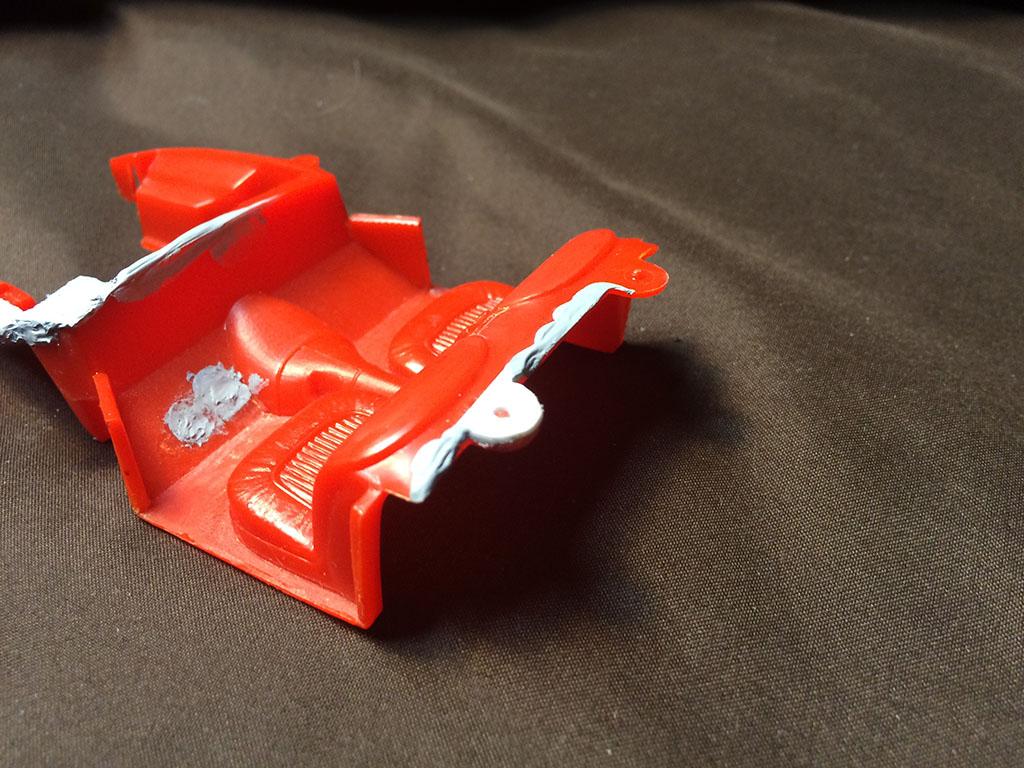
I picked up this model to tie me over until I can paint my 49 Merc. I picked it up at the local model shop for pretty cheap. I started with the frame and the suspension. I should have know there would be a problem when I noticed the sway bar was warped. my solution was to cut it in half set the pieces and then glue the center back together and use some filler to finish it. Then I turned my attention to the body. There were so many mold lines it was ridiculous. I found that the head lamps had huge gaps in between the body and the seats so I had to fill those in. I also filed off and filled in where the emblems go. I plan on using the 53' vette photo-etch detail set for this one. After I removed the doors and trunk I started to build the jams, when I discovered that the interior did not line up with the body. I had to add styrene to one side to even it out and fill in the rest with filler. I have not yet sanded down the filler. The trunk went together fairly well. I just need to build the trunk jams? would that be the proper term? either way. I fitted the doors and build them up. I needed to make them pretty thick to make them work. Even now I need to do a little more work to the hinges to make the door fit better. I still have not completely finished on the door jams. The motor so far is strait forward. I have not seen any problems yet. I basically just used filler on the seams and sanded them down. I plan on keeping to stock for this one. White exterior, red interior, black engine bay, frame and light blue engine. I plant on flocking the carpet too. These are the colors I plan on using.
-
I like those wheels.
-
I am really diggin the color choices. All of the scratch building things using a plotter are awesome. I love how industrial it also looks.