68shortfleet
-
Posts
611 -
Joined
-
Last visited
Content Type
Profiles
Forums
Events
Gallery
Everything posted by 68shortfleet
-
My New Years Modeling Resolution
68shortfleet replied to Renegade's topic in General Automotive Talk (Trucks and Cars)
Resolution for me I think will be to build for ME, This year I fell victim to several club build challenges. One of those competitions is already over and two other get displayed in March. For some reason I"m just not feeling the same passion for the build on these two I am finishing up. Second resolution would simply be to finish what I start. -
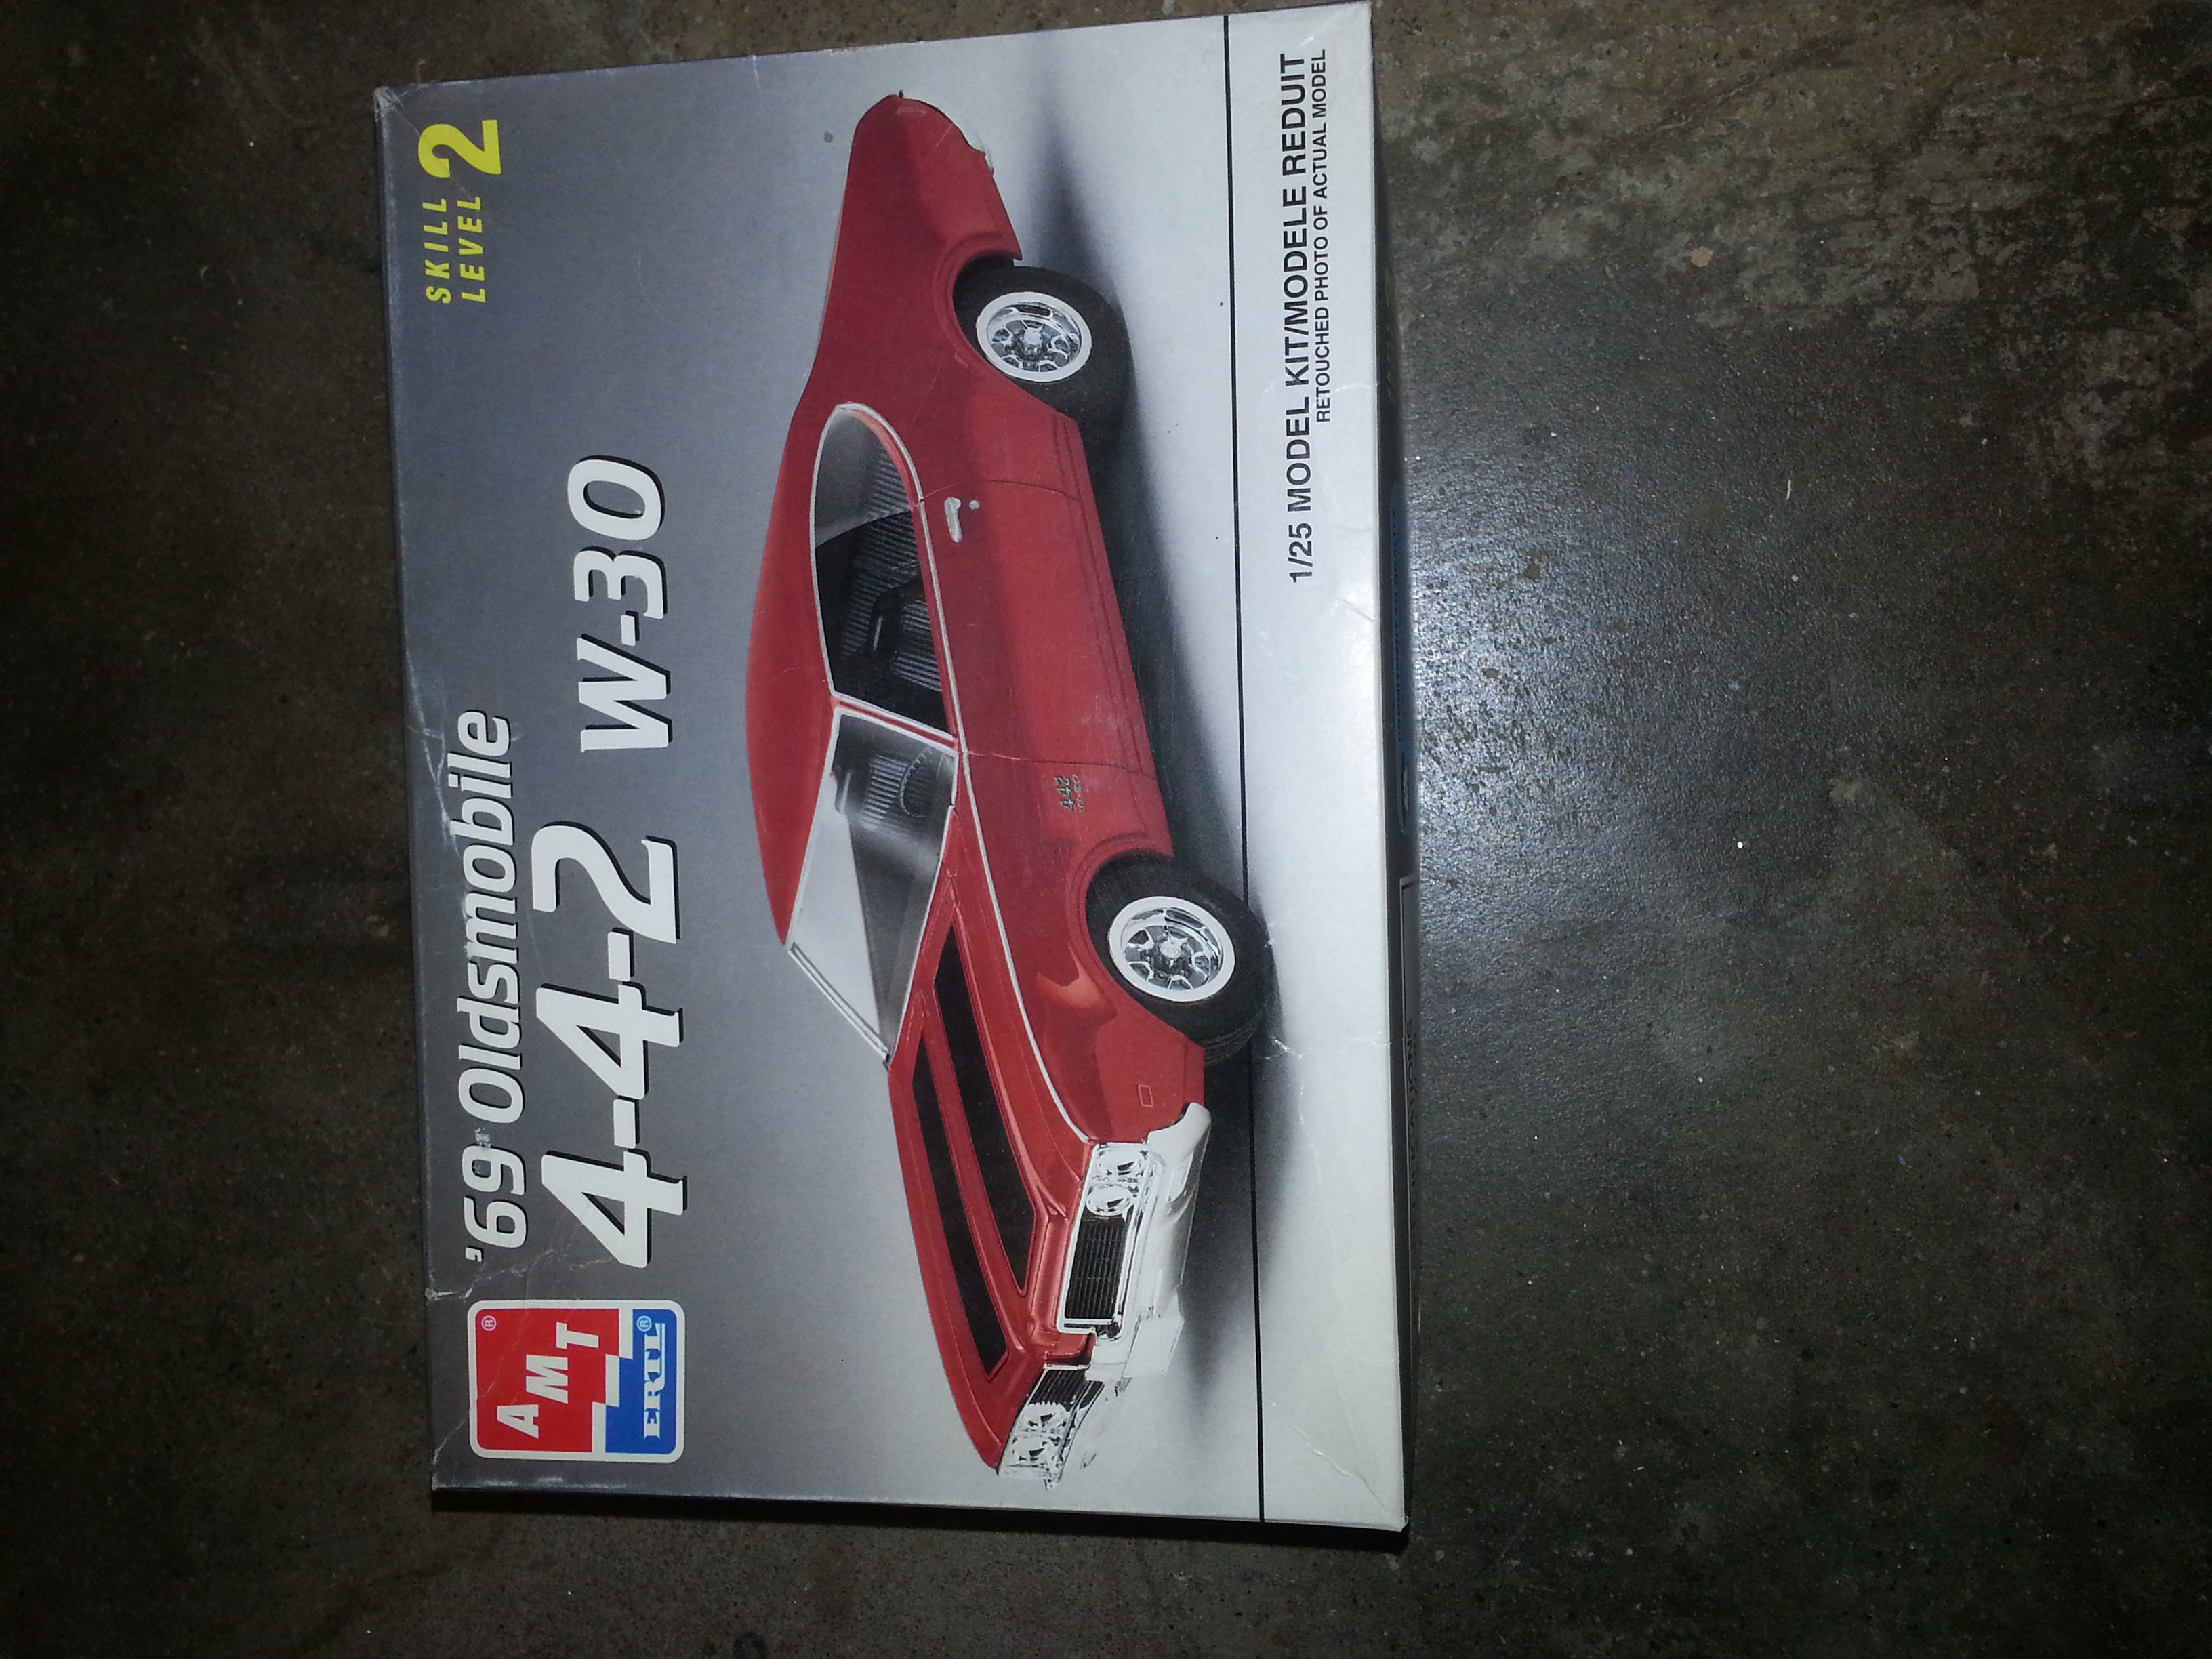
69 Olds 442- Swap-N-Build CBP project
68shortfleet replied to 68shortfleet's topic in WIP: Model Cars
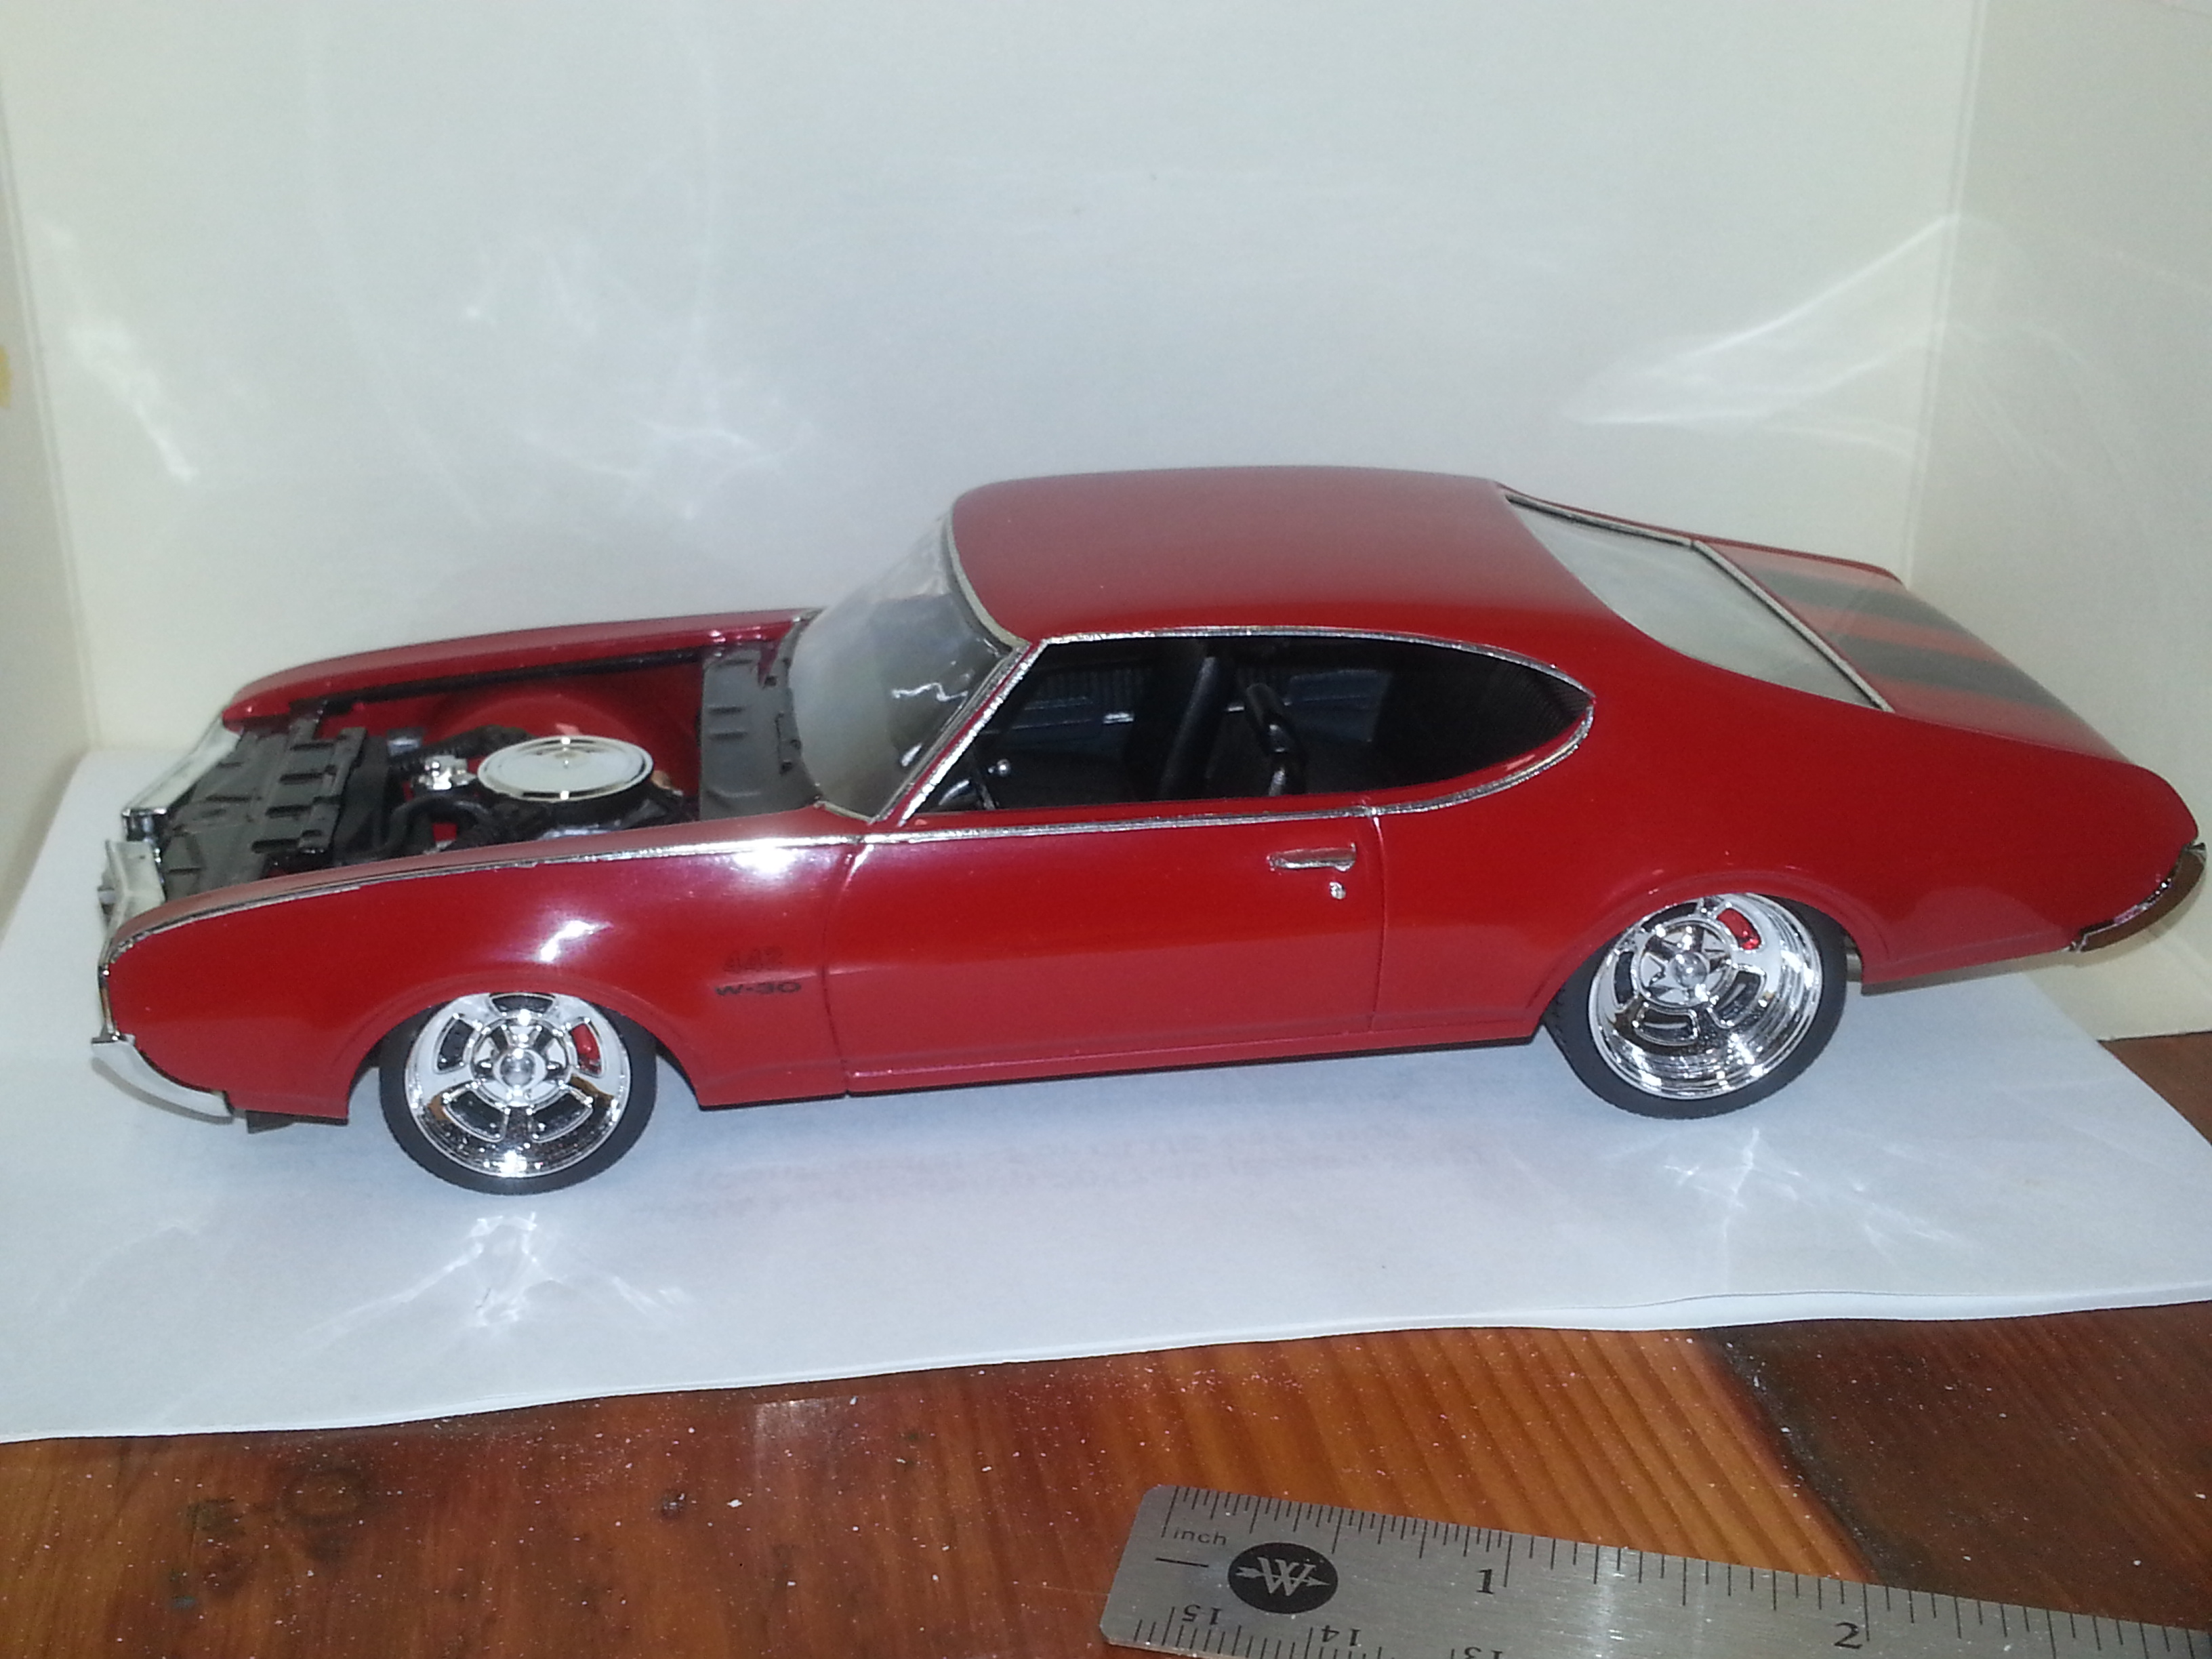
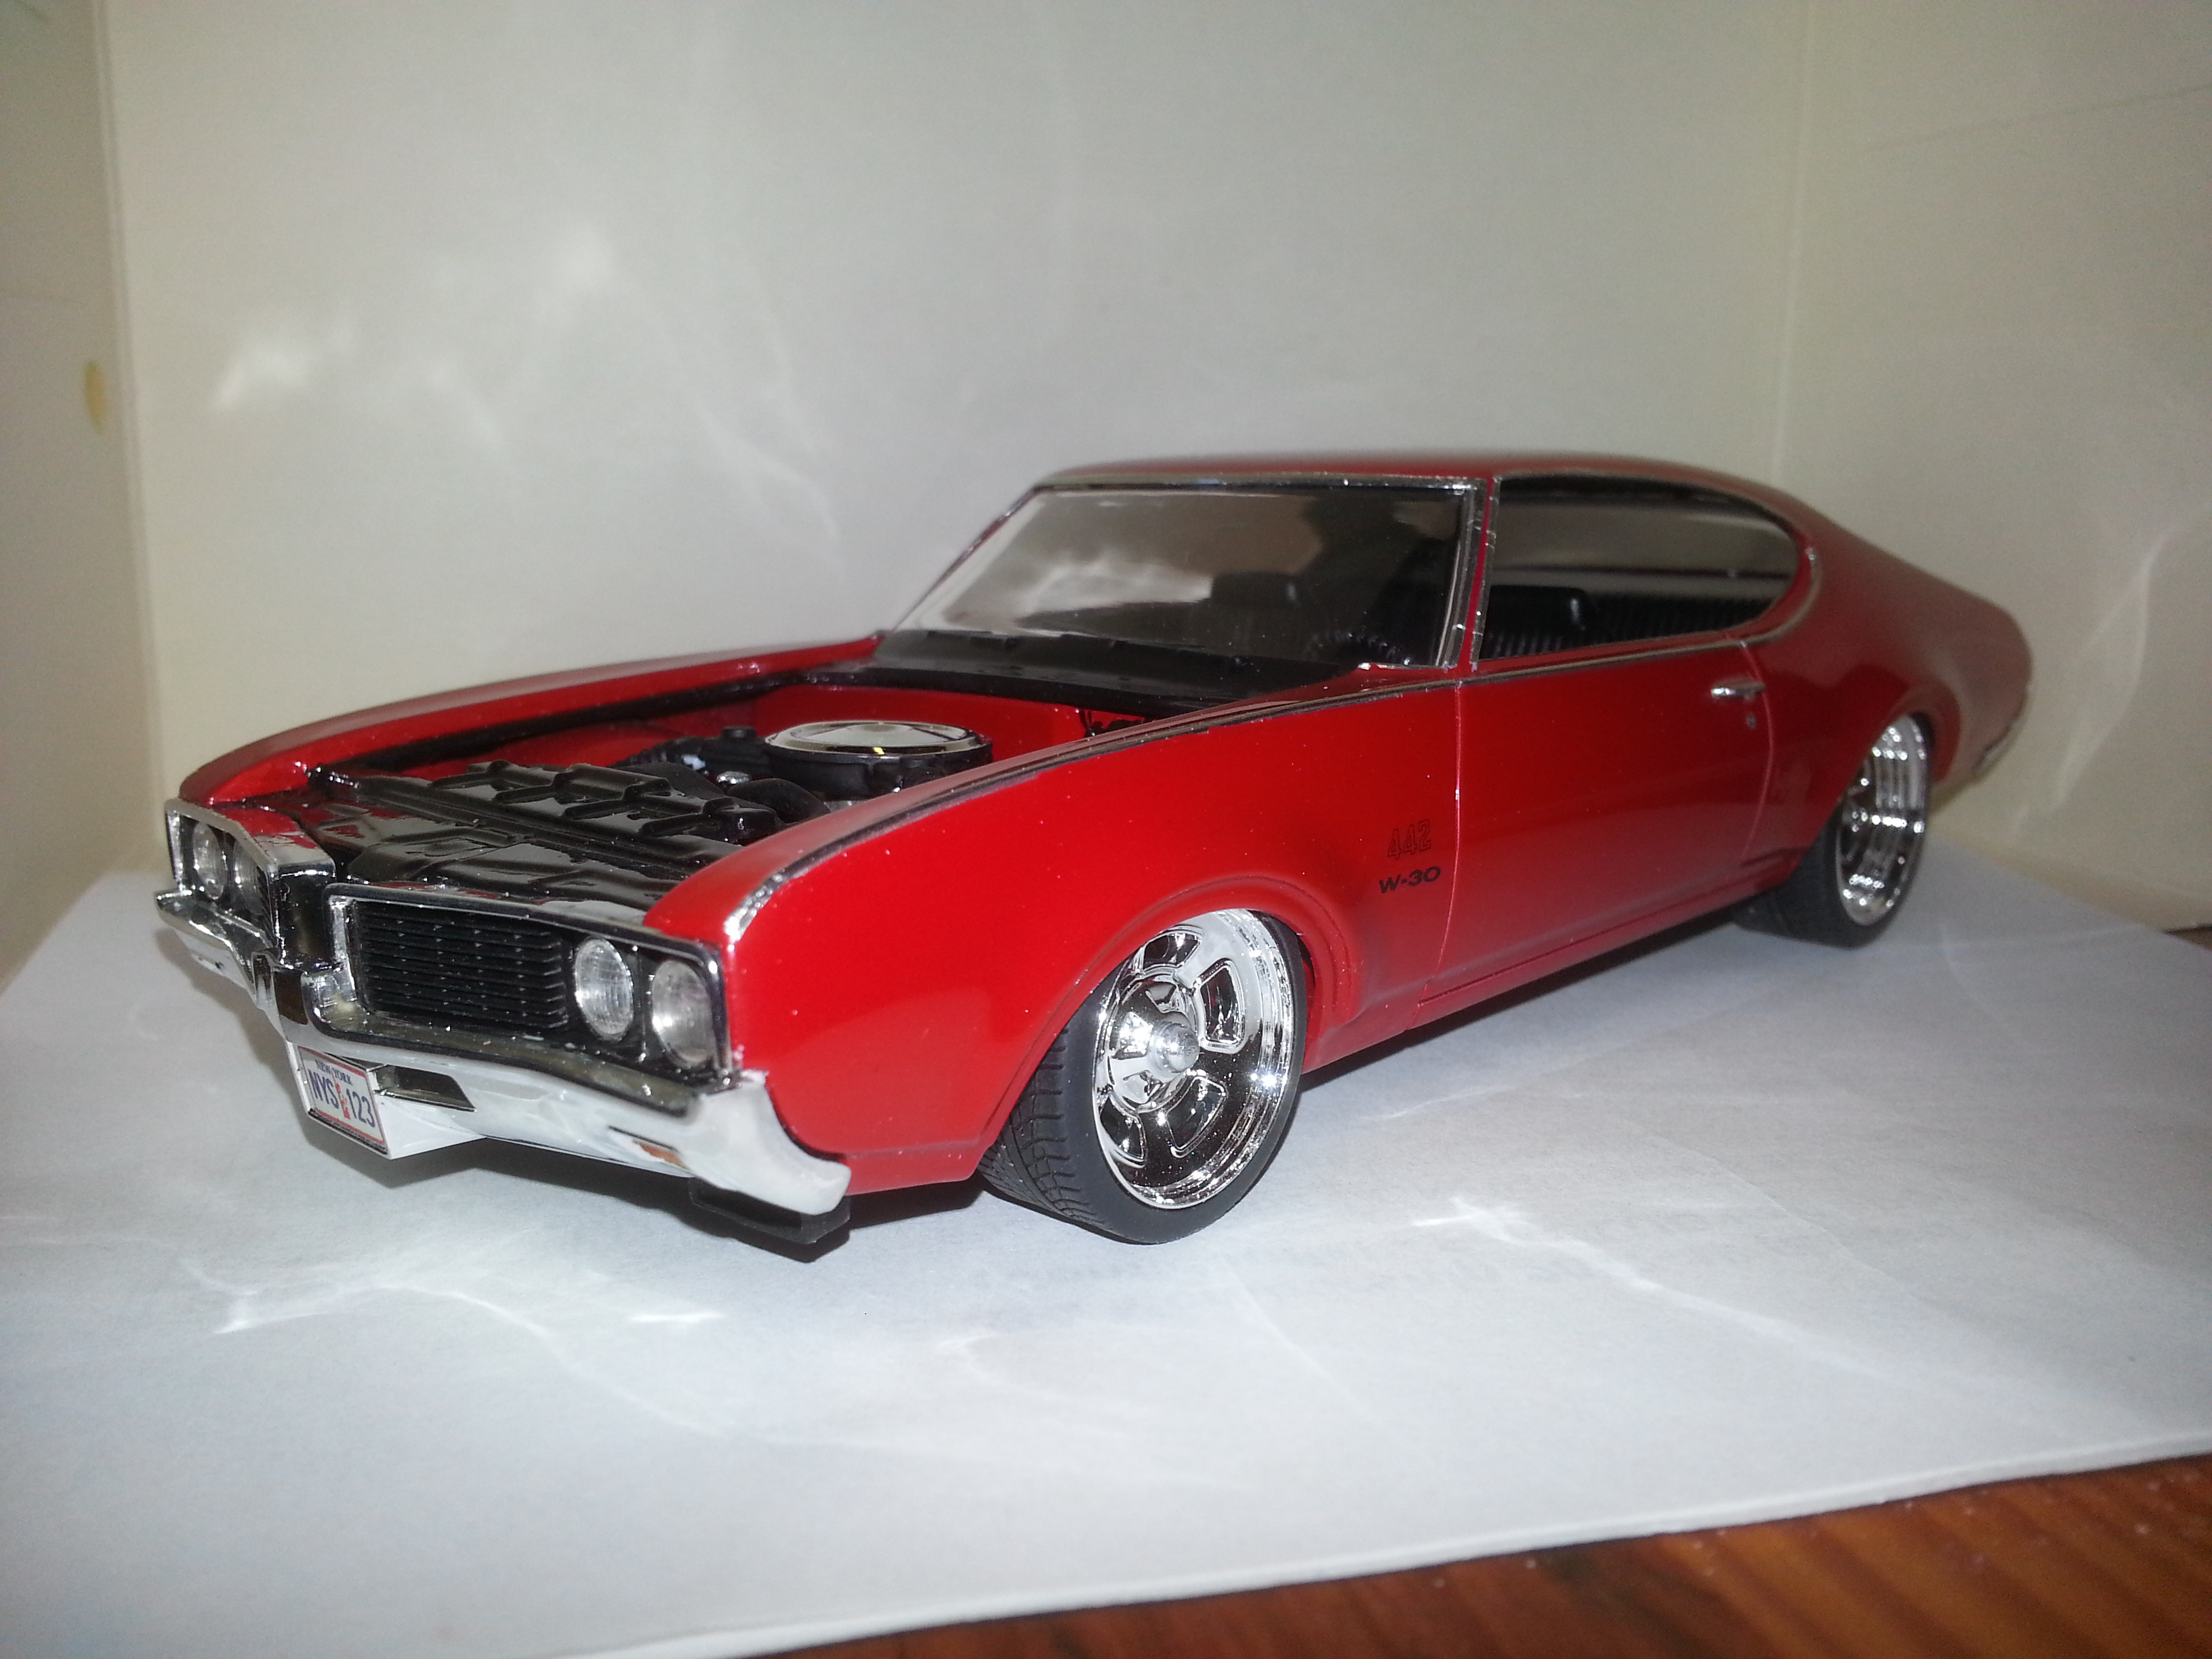
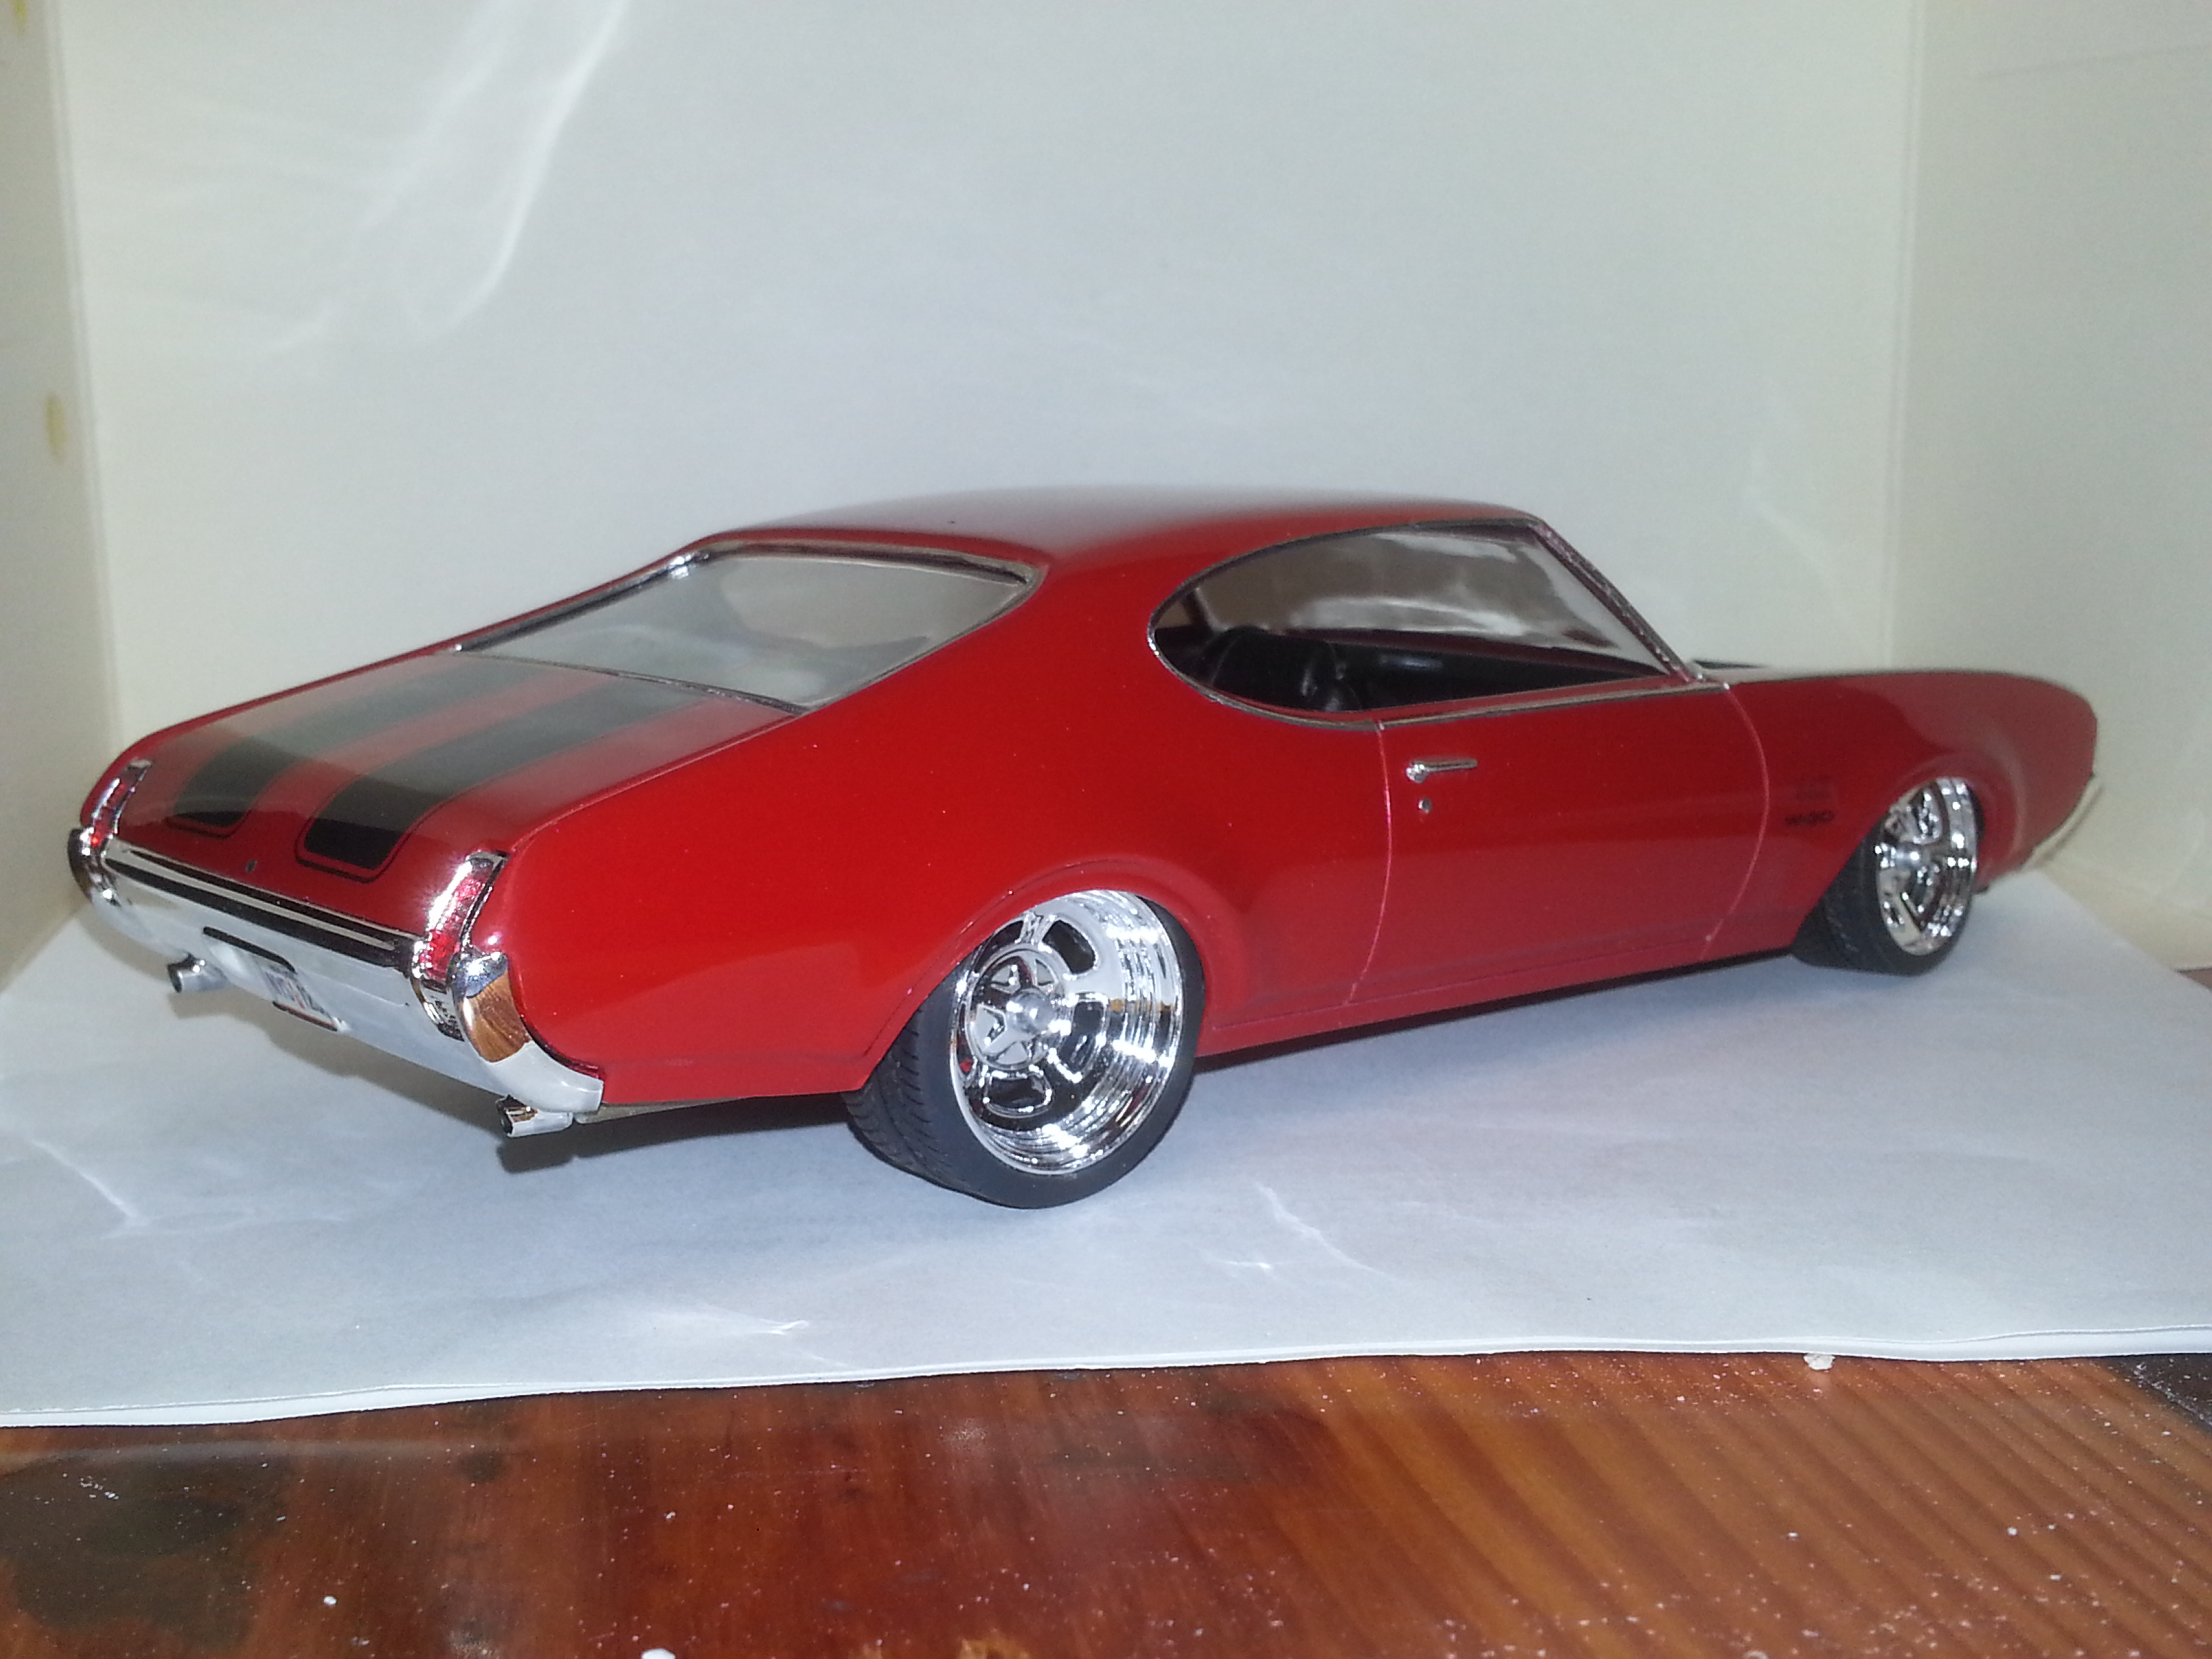
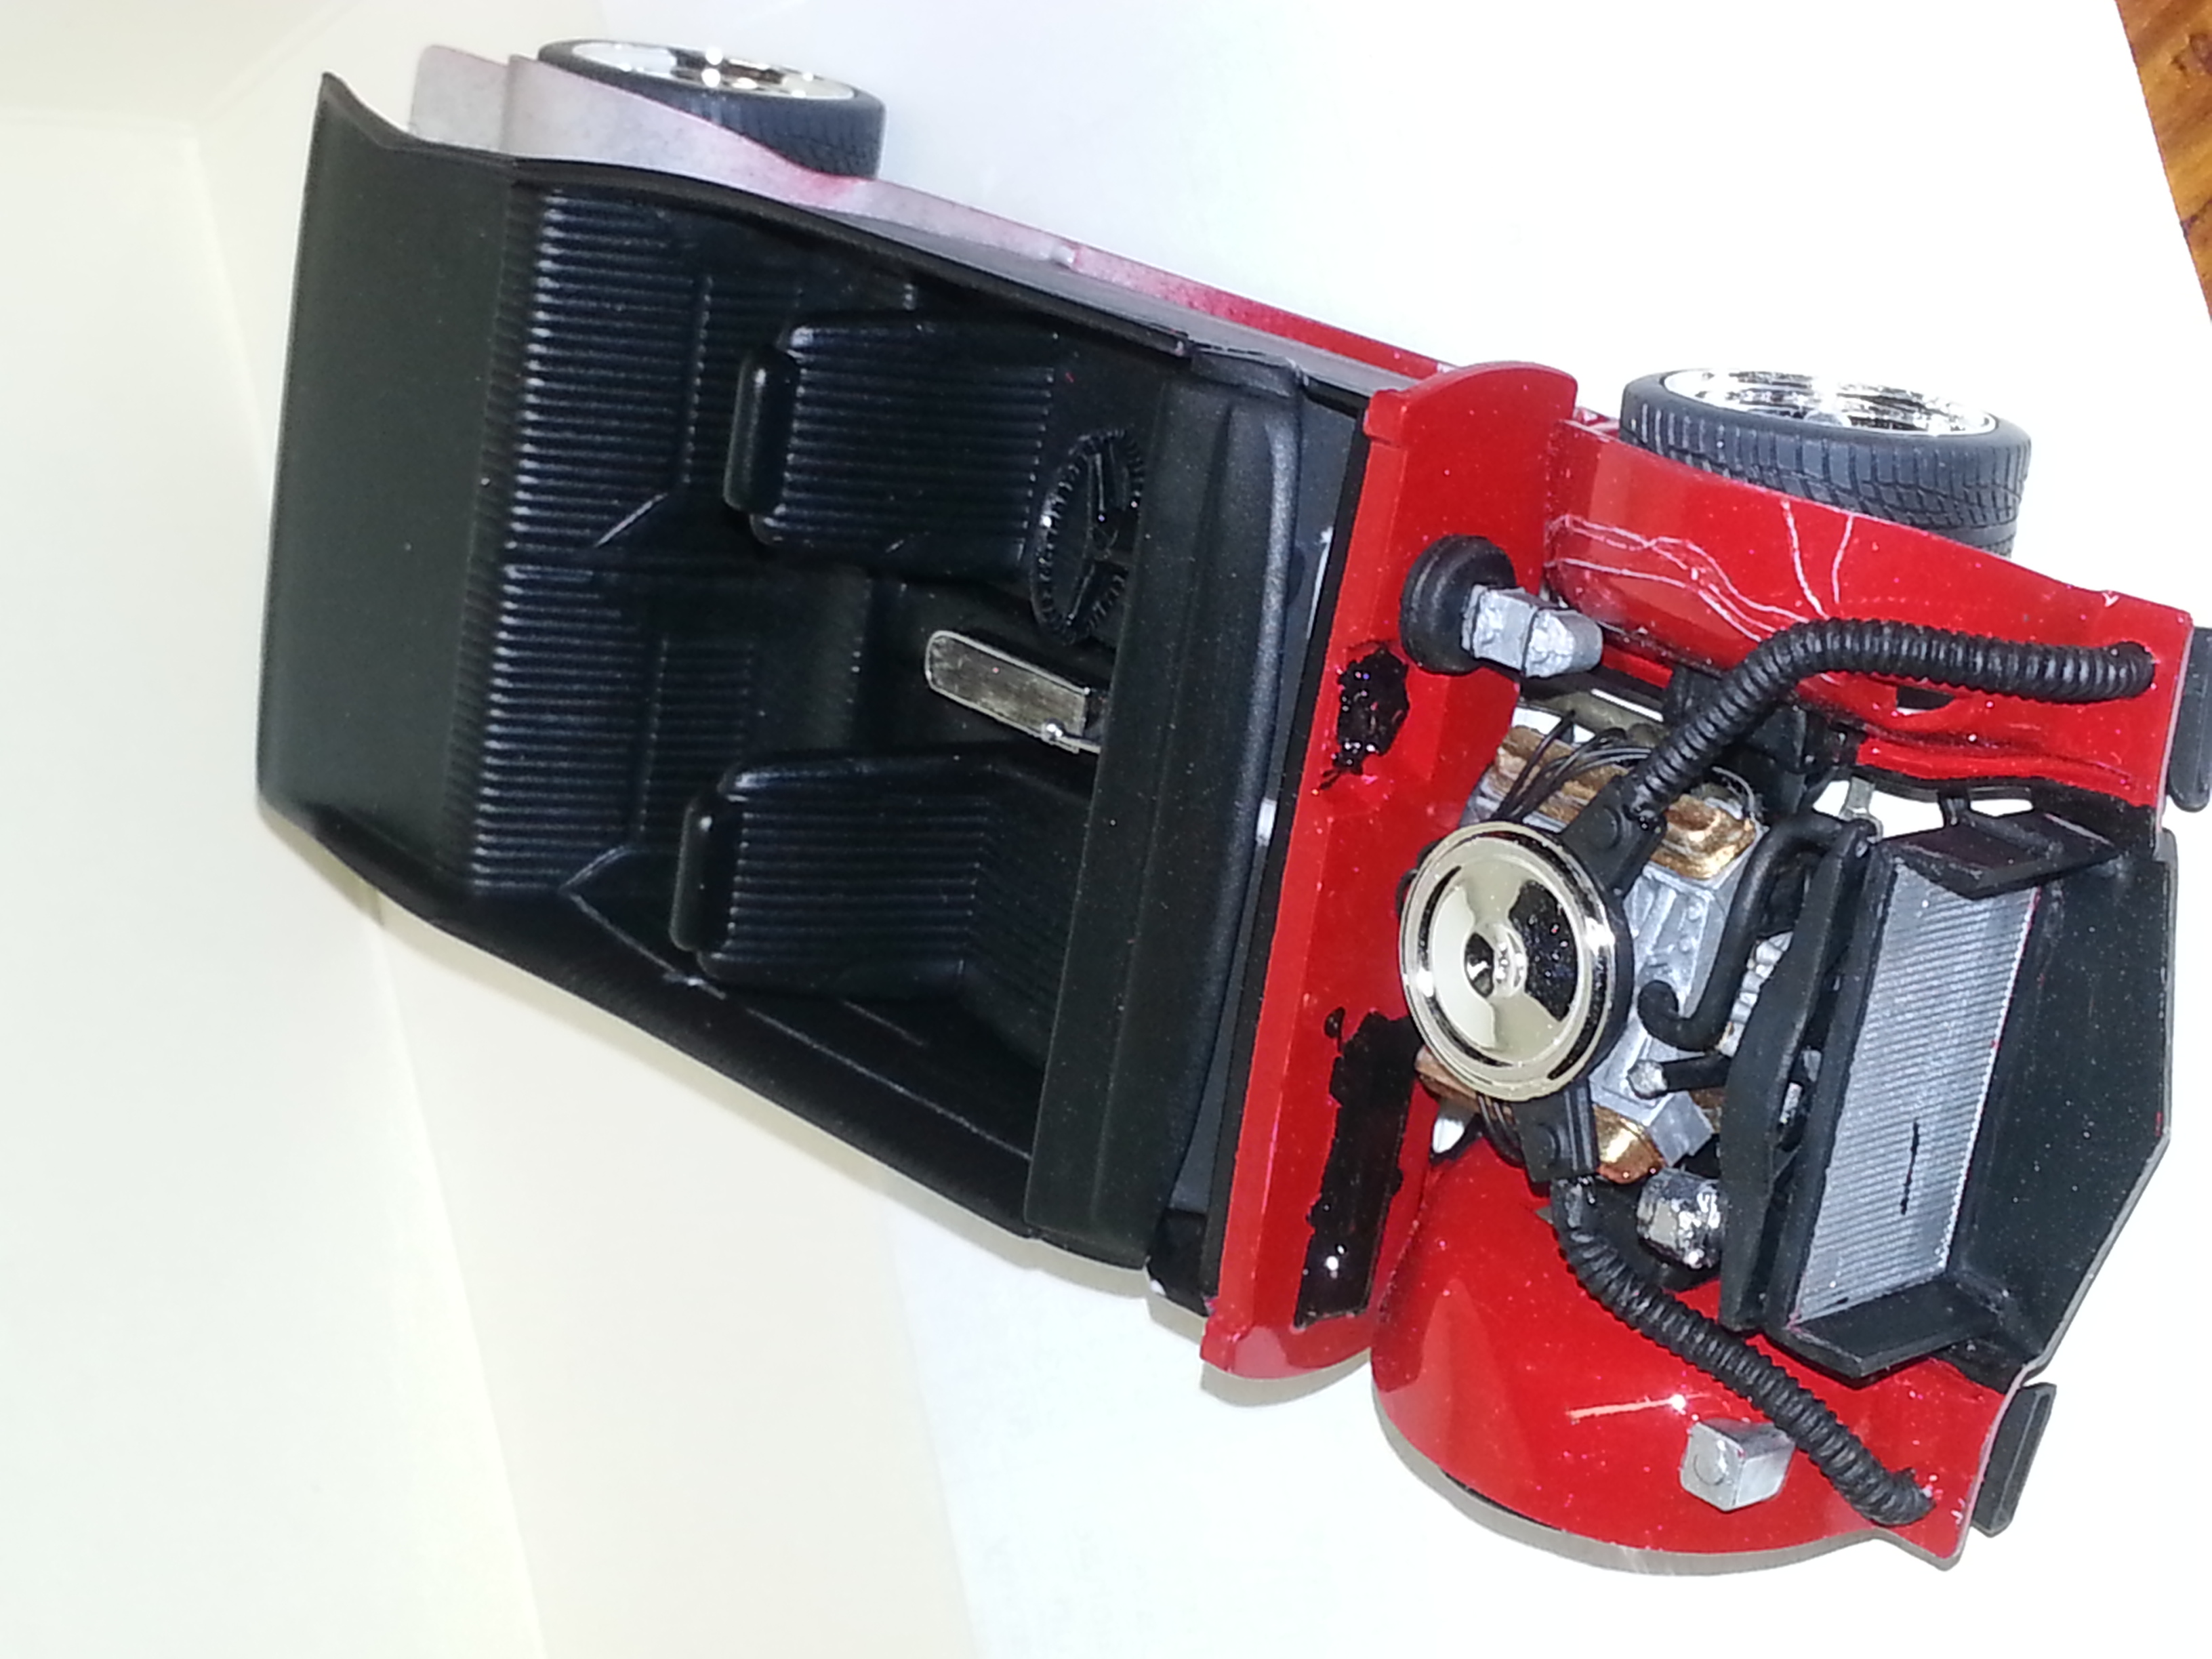
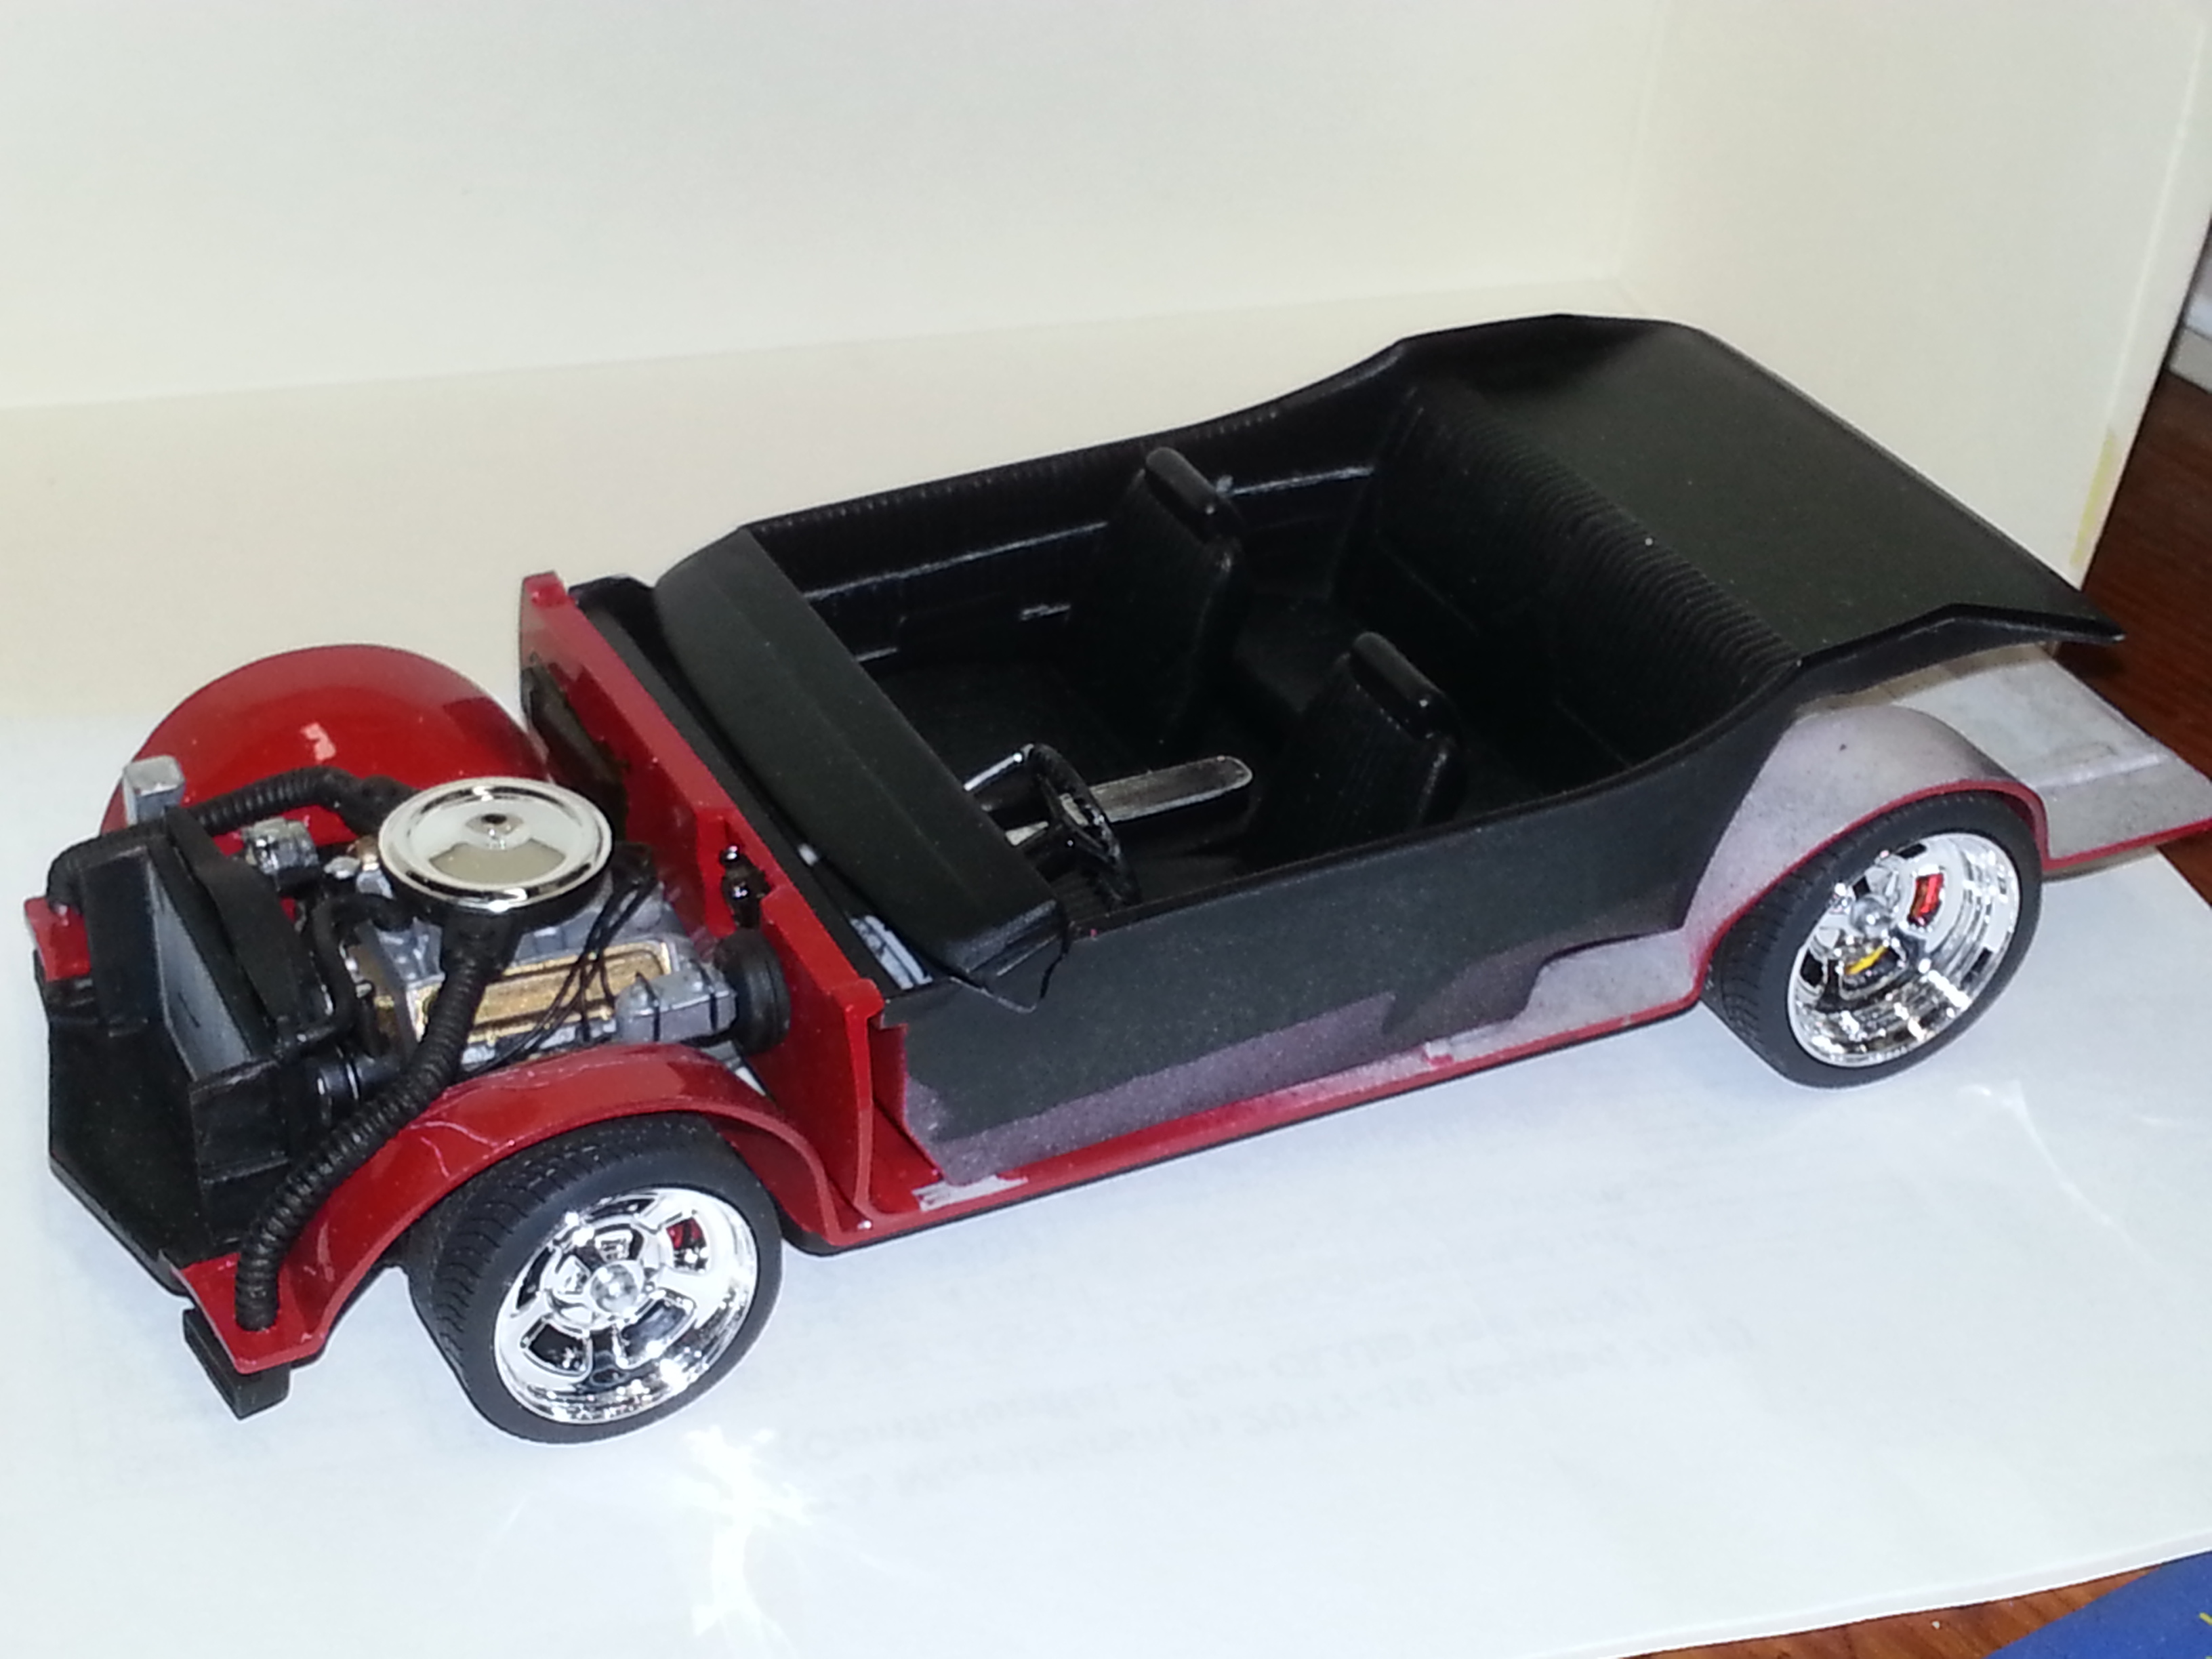
Getting close to finishing this car up after my hood decal mistake. Got the chassis/interior glued into the body, then got the bumpers installed. Hood repainted, decals on, and first coat of clear applied(still wet in pic).
-
Art, here is a quick pic of the Elcamino I built. I'll try to make an Under Glass thread for it here soon with some additional pictures. Nothing too special, Basically just the resin body, and rear bumper. I think all other parts came from the donor kit except the Pegasus wheels and centercaps I made. This car was a few firsts for me. First resin body, first hinged hood, first bare metal foil. Also had to splice the rally stripe decals on the hood to get them long enough(another first). Donor kit didn't come with any decals, so I swiped some from a Camaro kit. And let me know if you want my images out of your thread.
-
Wow. Well done.
-
Early Years Resin products
68shortfleet replied to modelfink's topic in Car Aftermarket / Resin / 3D Printed
I think that Big Donkey resin offers tr center steer and the quick change. -
69 Olds 442- Swap-N-Build CBP project
68shortfleet replied to 68shortfleet's topic in WIP: Model Cars
Haven't taken any new pictures, but have made a little progress. Body has been wet sanded, the polished with meguires scratchX 2.0, and then waxed. Windows have been glued in place. Got the hood primed and some color back on it. Still need to get color on the bottom of the hood though. Making small bits of progress. I'm still running with a moment of inspiration on another build which is taking a lot of time. -
Sorry Art, feels like we are hi-jacking your thread here. Hope you find some of this useful info for your build. I found the resin chassis to be about 2mm too long(for the body) and very poorly cast. Basically it was going to take a massive amount of cleanup to be acceptable. While the styrene chassis was about a 1mm(maybe 1.5) too short and just needed normal chassis mold line, ejector pin and sink mark cleanup. The styrene chassis front suspension(spindles) were really easy to modify to fudge a little bit of wheelbase length. this same method could have easily been used to "shorten" the resin chassis too. I think that is was a combination of several things that made the wheelbase length an issue. I think the chassis was easy for somebody to have accurately lengthened it 4mm(4in), I think that if we were to really get into measuring one that the rear fender arches are not long enough. I think the front side of them was really close to correct, but the rear of them should have been closer to the rear bumper. I also felt like the wheelbase didn't quite match from left to right, really close, but I struggled with getting both front tires centered in the wheelwell, it seemed different every time I mocked it up.
-
Art, I recently built this Flintstone 72 Elcamino. I really like what you did making the split bench. I am doing something very similar with a 60 starliner bench right now. I found a few things out as I built mine that I wish I had known before I started the car. The rear side marker light are wrong for a 72, they need removed. The resin chassis that mine came with was too long of a wheelbase, the styrene chassis actually fit better. I did move the front wheels forward about 1mm for a better fit. The way the headlight surrounds meet to hood is completely wrong to the real car. Hard to describe, but studying so Google images will help. The styrene car body is correct. I found the styrene grill assembly to fit far better than the resin, resin was too wide. Rear bumper was way to wide for the body. I think I took about 4mm out of mine, also cut the tail lights off the bumper and made new ones. Styrene housing and red lenses cut from the tailgate reflector stripe on the 92-96 f150 kit. I too cut the kit interior bucket down as the fit of the resin bucket was terrible. I've been meaning to get a few pictures posted of mine. Didn't do a build thread as I built it right in the middle of the photobucket issues. Maybe this will prompt me to get it done. Can't wait to see how this one turns out.
-
69 Olds 442- Swap-N-Build CBP project
68shortfleet replied to 68shortfleet's topic in WIP: Model Cars
Went to the SABAnw monthly build night yesterday and got this 442 body wet sanded and ready for polish, well, all but the hood. Hope to be able to start polishing it on Wed or Thurs. Also hoping to get the hood repainted and ready for decals then too. Sorry, no pics. Wet sanding pics are pretty boring anyways. -
Looking good. Glad to see somebody making progress on their Swap-n-build project. I am a bit stalled on mine right now. Mostly because I had a good breakthrough on another stalled project. Needed to fully scratch build an interior tub/running boards for a 53 ford PU and finally figured out how I wanted to do it. Just ran with that momentum. And my 442 hood decal debacle has be a bit slowed on my Swap-n-build project, Not to worry though, it will be completed, and soon
-
Fremont Racing Specialities
68shortfleet replied to JPolli's topic in Car Aftermarket / Resin / 3D Printed
The email posted earlier in this thread is still good. I sent him mail yesterday evening and heard back within two hours. -
69 Olds 442- Swap-N-Build CBP project
68shortfleet replied to 68shortfleet's topic in WIP: Model Cars
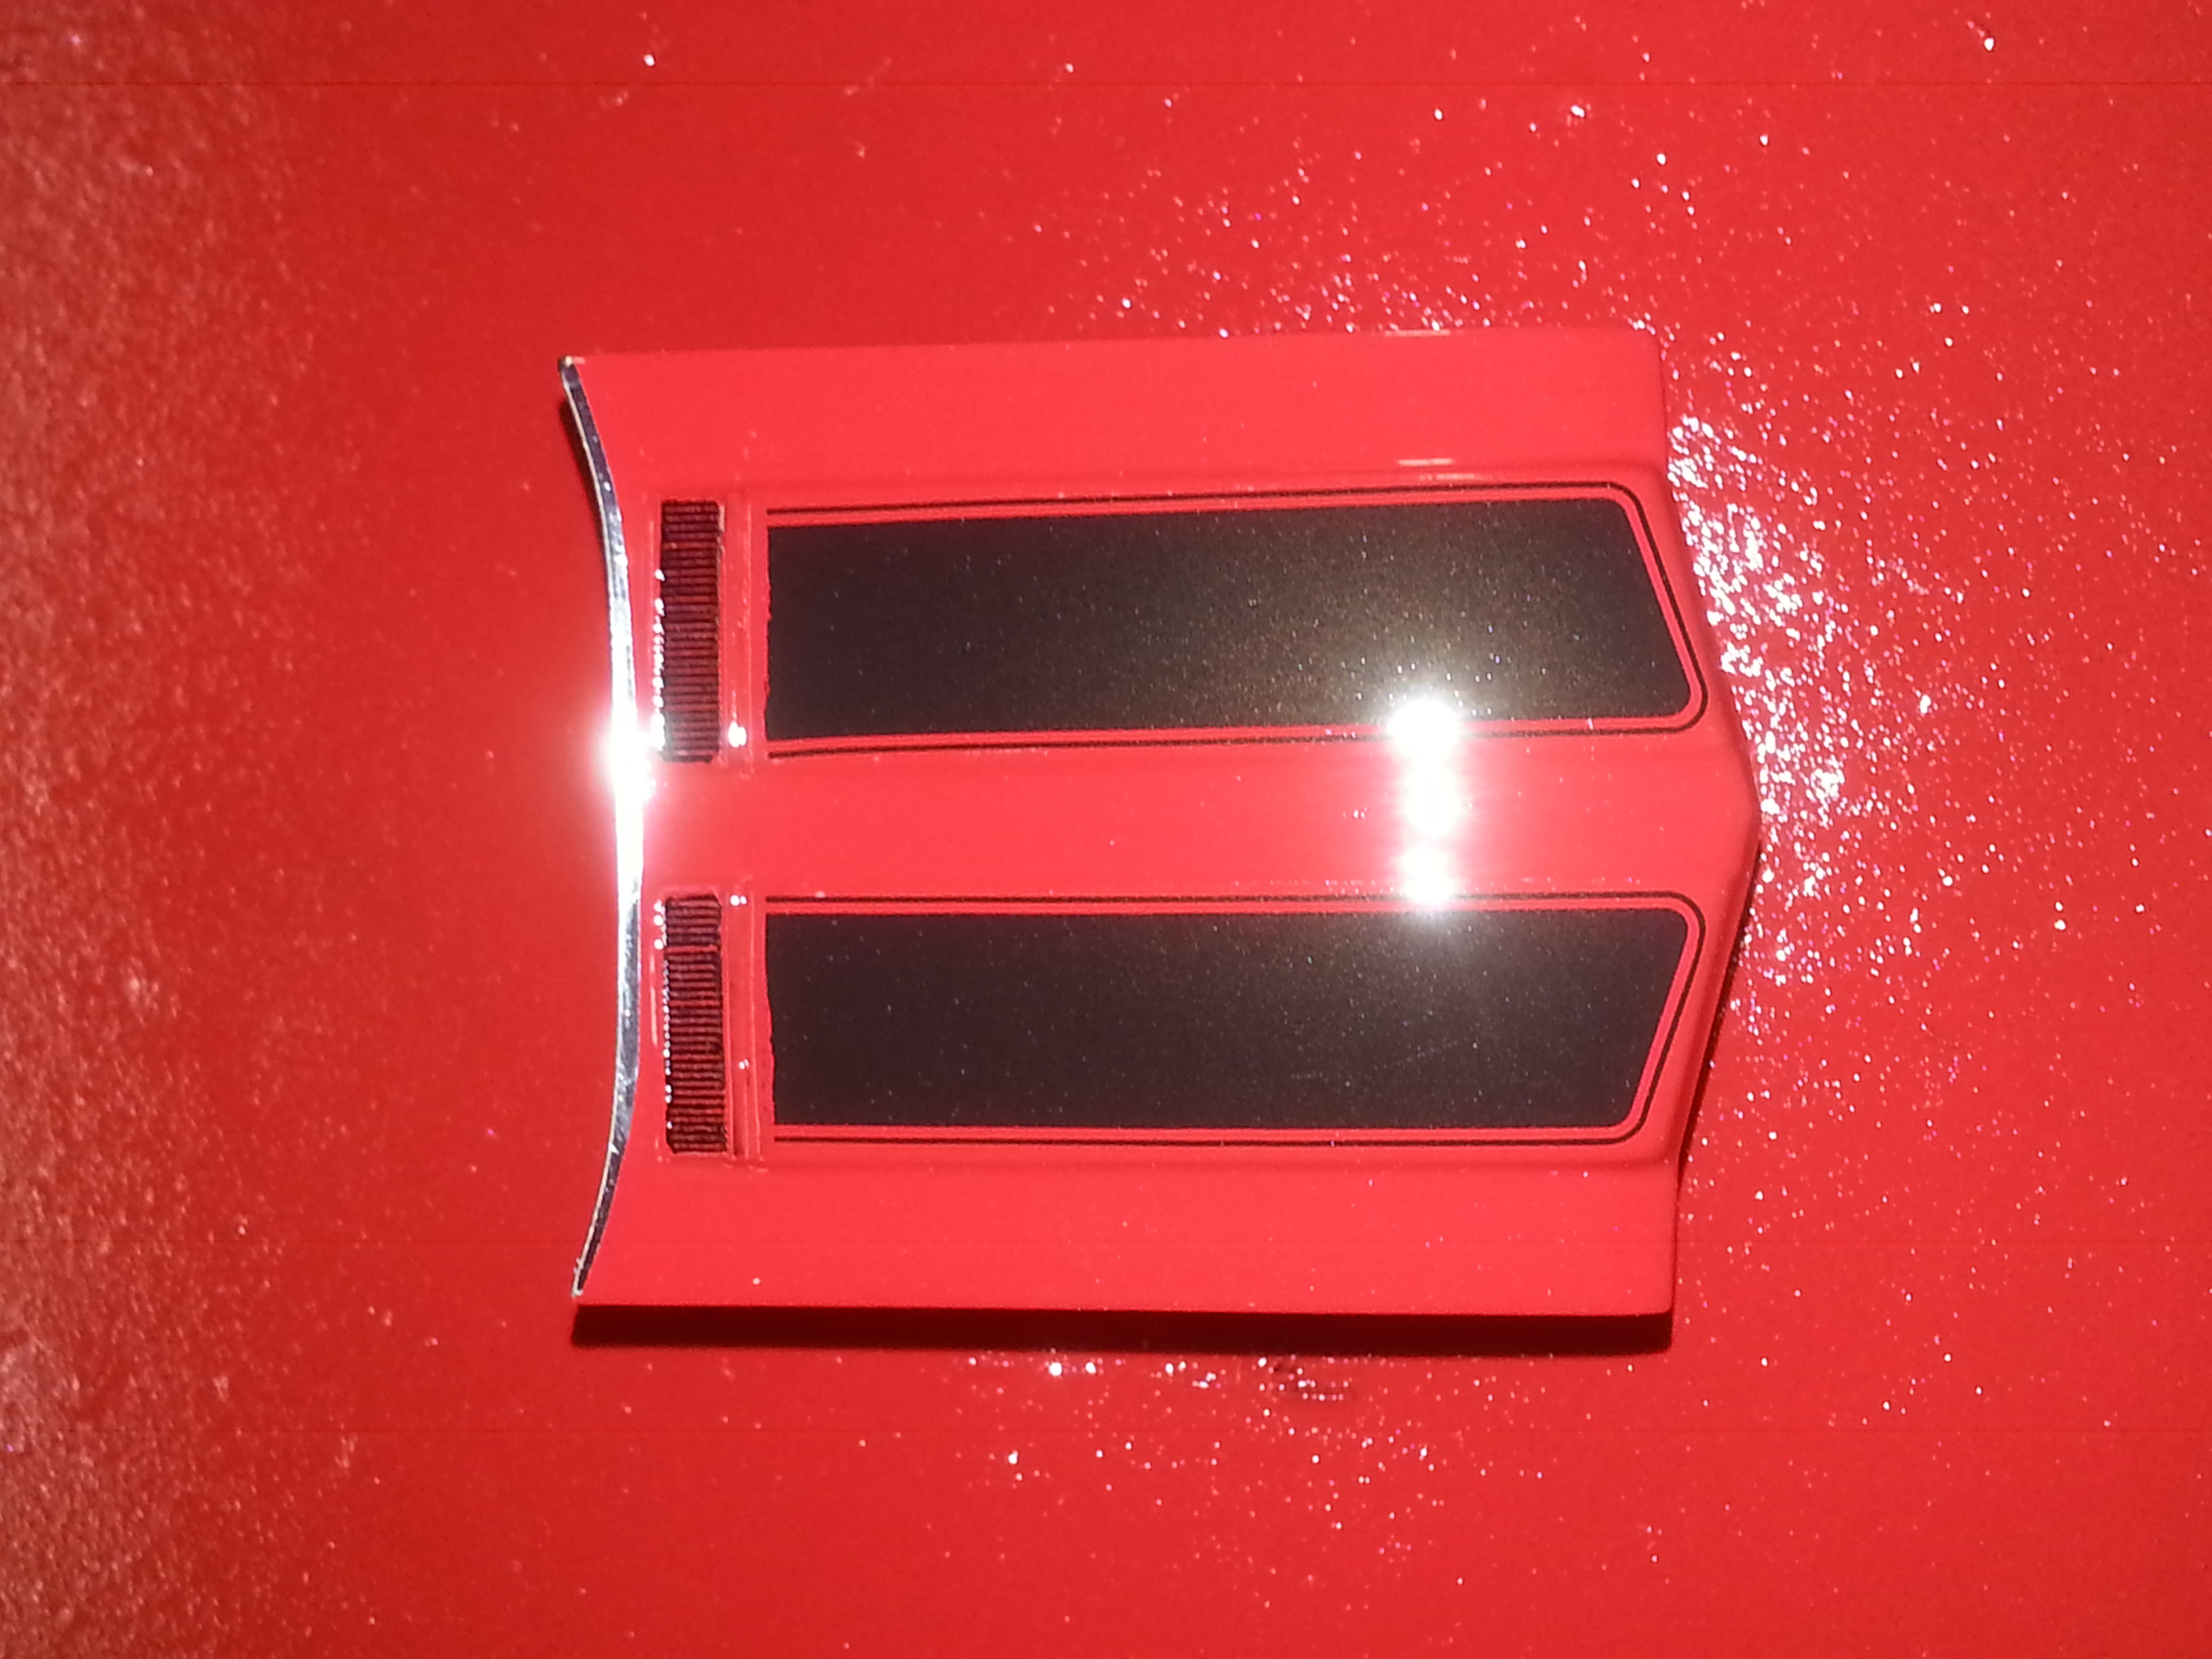
As it sits tonight. Basically ready to put the body on. Clear coat is drying on the body for hopefully its last wet sanding. Thought I wax to this point once already though. I got a little carried away and sanded all the way to plastic in three different spots on the rear of the car. First time ever I have attempted masking a small spot off and doing a spot repair. Went pretty smooth though and can't even tell where I did it. The hood is an entirely different story. It landed in the purple pond today. Hoping I can find a replacement set of rally stripes for the hood.
-
69 Olds 442- Swap-N-Build CBP project
68shortfleet replied to 68shortfleet's topic in WIP: Model Cars
Actually yes. I mixed a little yellow and red together to come up with a better color tha doesn't look like it would glow in the dark. Had something go wrong with the clearcoat on the hood. I created a wrinkle line in four low spot lines down the length of the hood. Thought I could sand it out. Was going great on the sanding until I sanded clear through to plastic in a spot. Even that I thought I could salvage. Taped it off and touched up the paint spot and had it looking really good. Then when removing my tape, it destroyed the hood strip decal on the right side far beyond me being able to salvage it. So, now I am off to create a wanted request for some decals. -
69 Olds 442- Swap-N-Build CBP project
68shortfleet replied to 68shortfleet's topic in WIP: Model Cars
Hmmm, looking at my posted pictures, The signal yellow I used on the marker lights in the front bumper looks even worse than it does in person. It looked a little too yellow in person, and WAY too yellow in the images. Looks like "I am going to have to find something to "orange" thme up a bit. Suggestions?? -
69 Olds 442- Swap-N-Build CBP project
68shortfleet replied to 68shortfleet's topic in WIP: Model Cars
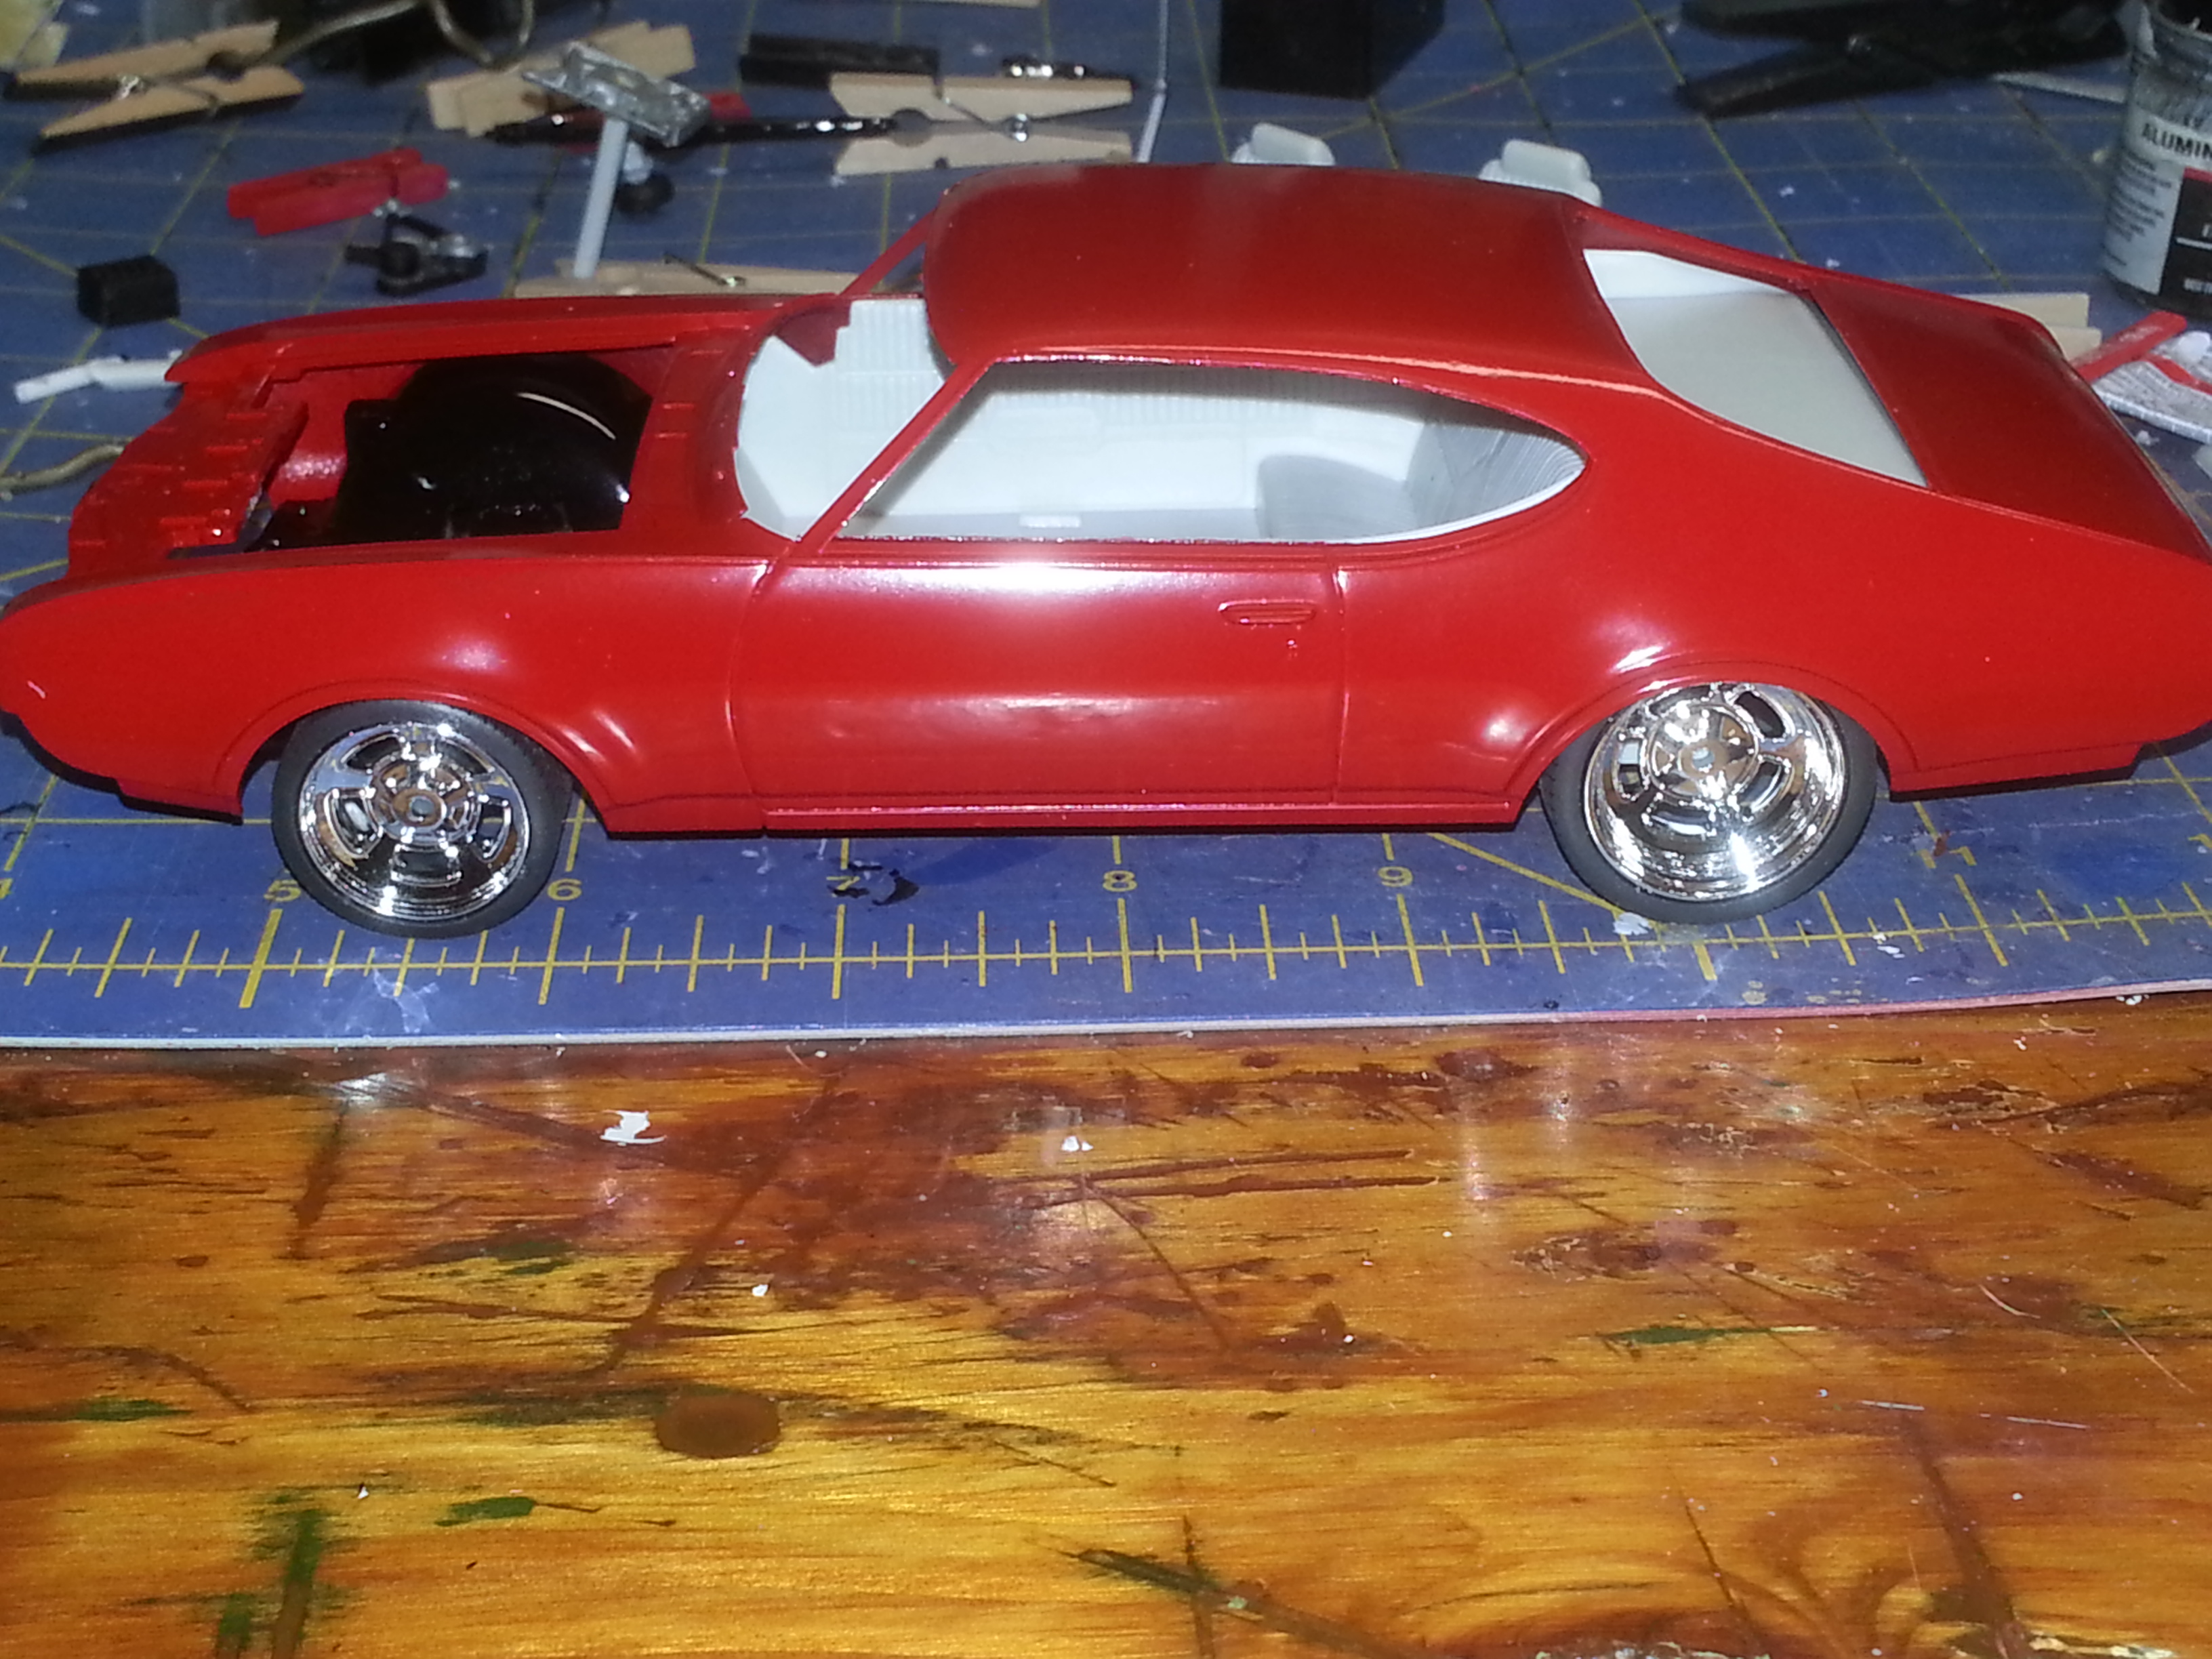
I've made a small bit of progress on the 442. Body painted, BMF'd, first coat of clear applied. For some reason, I got a crazy amount of dust in the clearcoat, hoping that I will be able to wet sand it and get it smoothed out. Other problem is that my can of clear decided to vomit on the car, leaving a terrible finish. Ohhh, and some dummy forgot to put the decals on the body before the first coat of clear. Remembered them right before I grabbed the clear for the hood. Got the decals on the hood then before clear. The stripe on the right side started to rip a little though. BARELY noticeable after one coat of clear though it will probably show up well in pictures. Most of the engine bay area is complete, some small paint touch up area to address. Machined some new center caps for the Pegasus wheels, not terribly fond of the three spoke spinners that they come with. -
I've made a small bit of progress on the 442. Body painted, BMF'd, first coat of clear applied. For some reason, I got a crazy amount of dust in the clearcoat, hoping that I will be able to wet sand it and get it smoothed out. Other problem is that my can of clear decided to vomit on the car, leaving a terrible finish. Ohhh, and some dummy forgot to put the decals on the body before the first coat of clear. Remembered them right before I grabbed the clear for the hood. Got the decals on the hood then before clear. The stripe on the right side started to rip a little though. BARELY noticeable after one coat of clear though it will probably show up well in pictures. Most of the engine bay area is complete, some small paint touch up area to address. Machined some new center caps for the Pegasus wheels, not terribly fond of the three spoke spinners that they come with.
-
69 Olds 442- Swap-N-Build CBP project
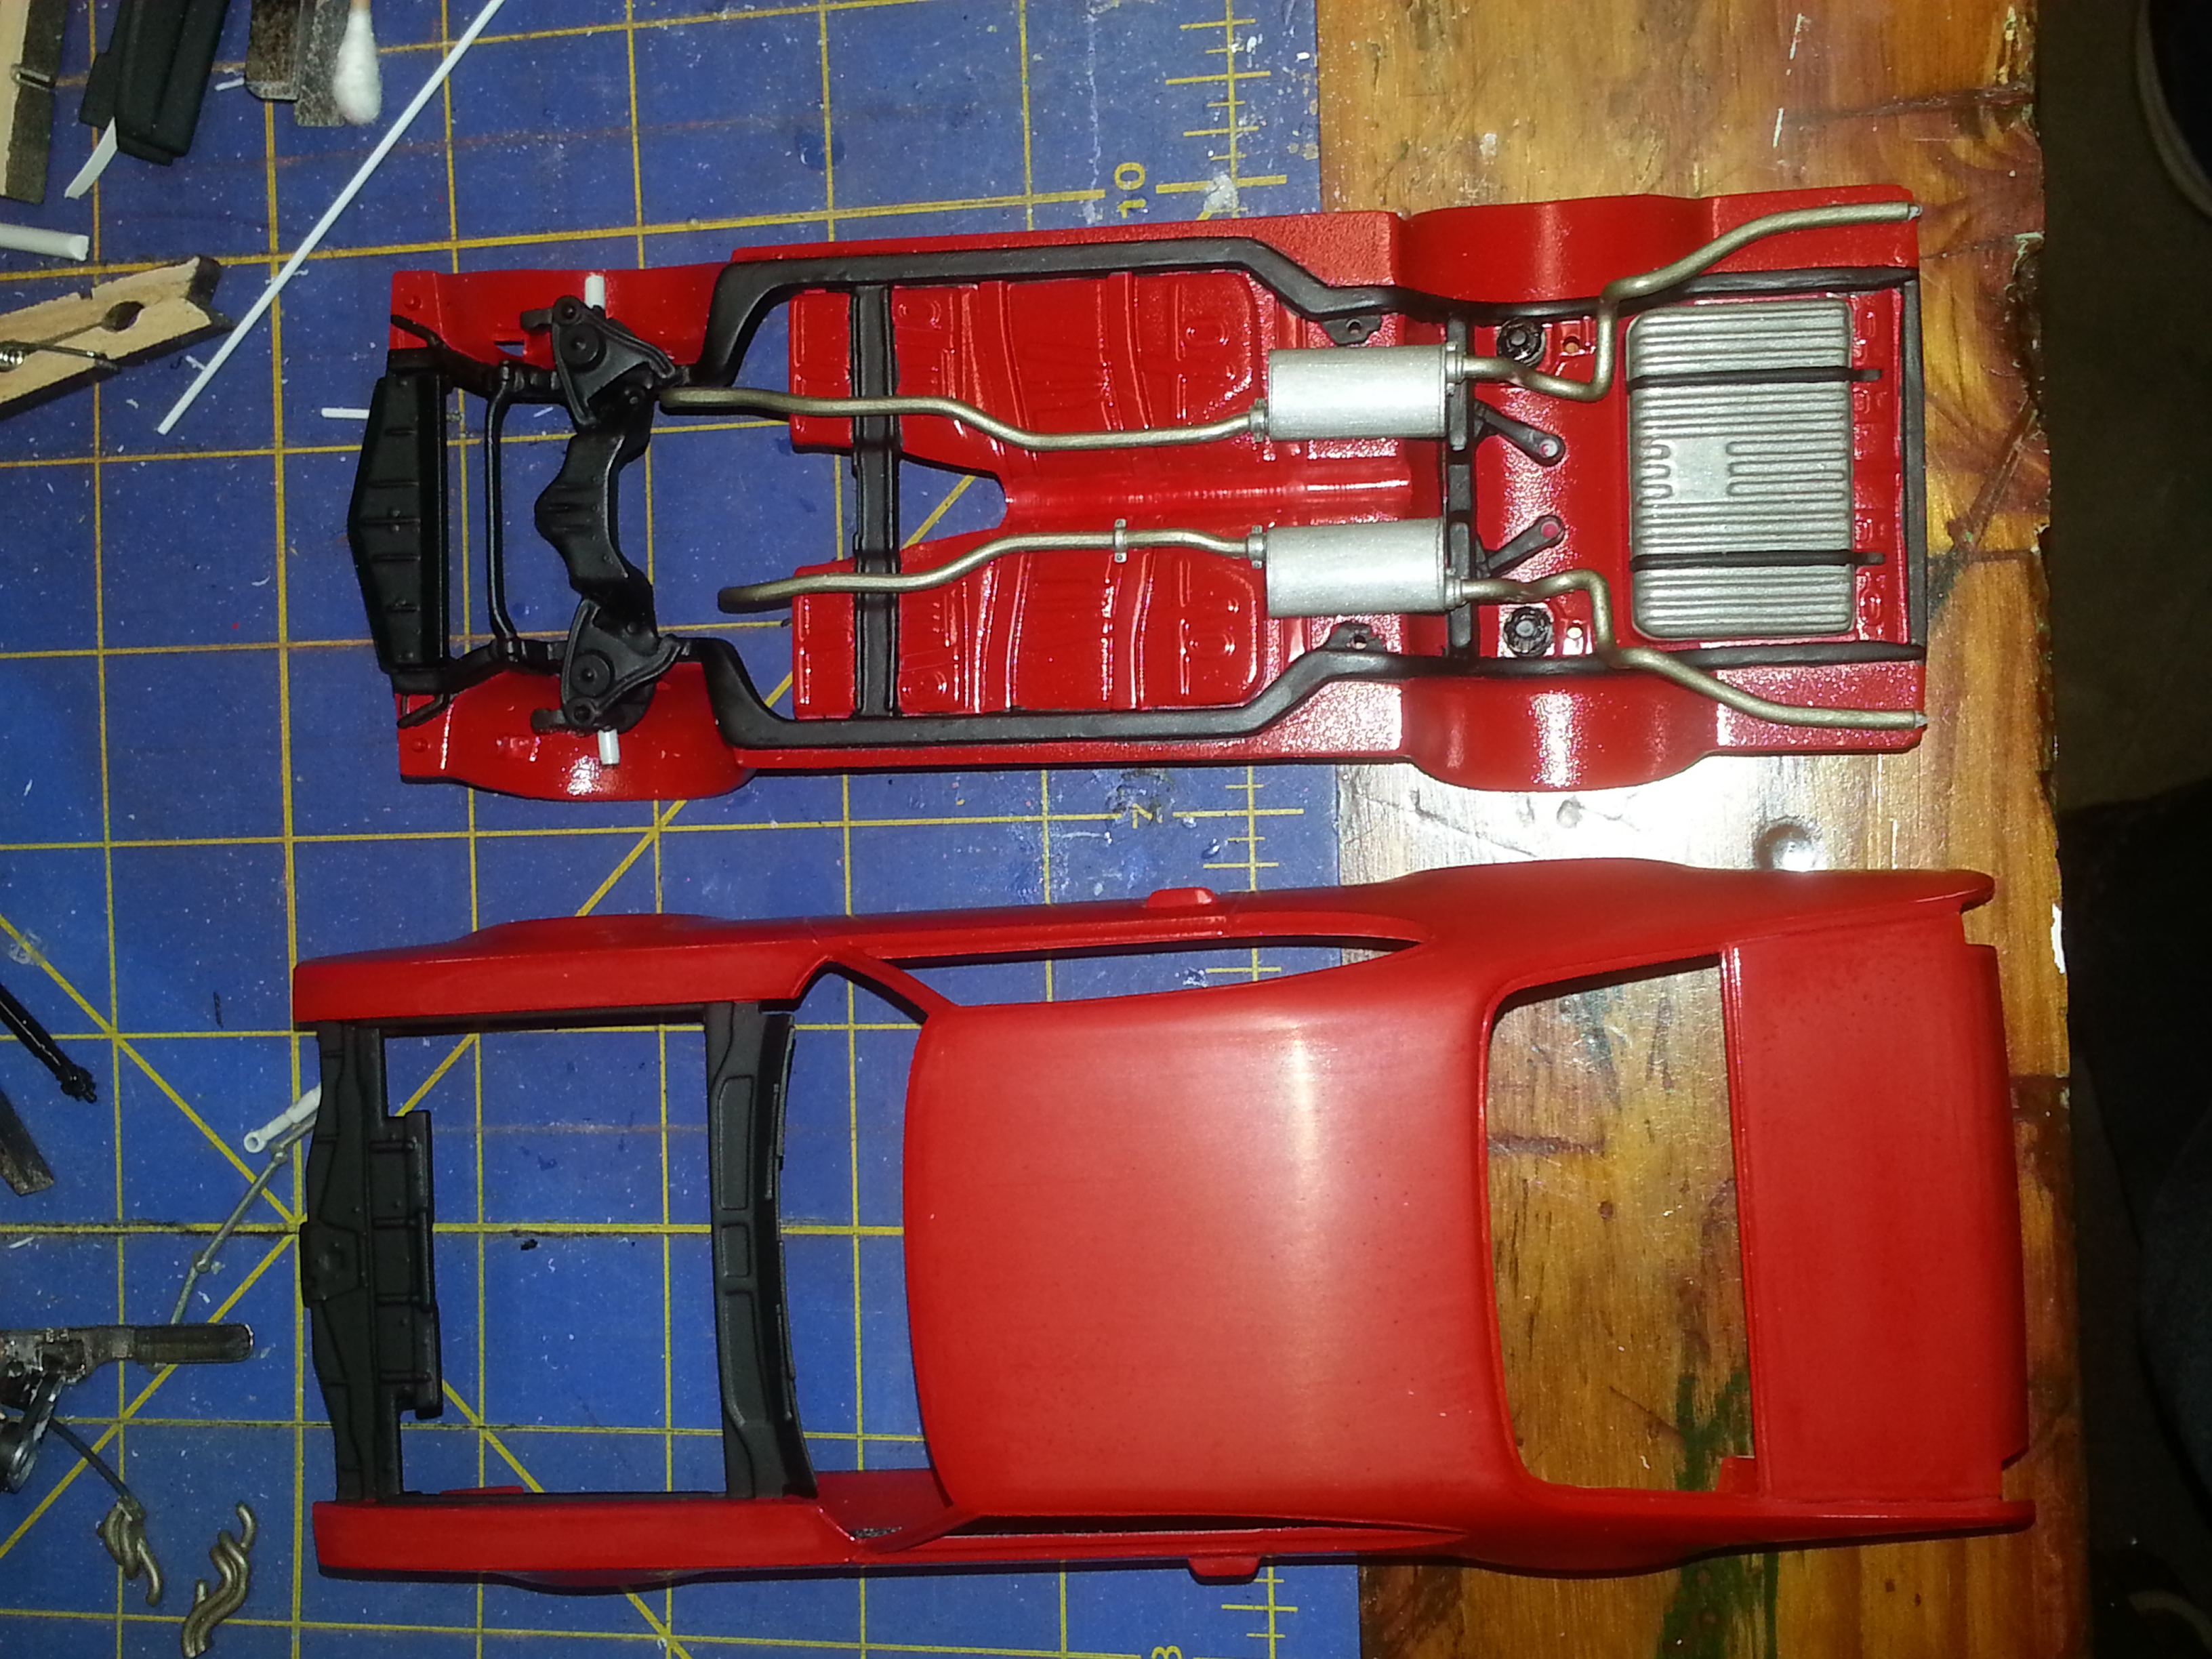
68shortfleet replied to 68shortfleet's topic in WIP: Model Cars
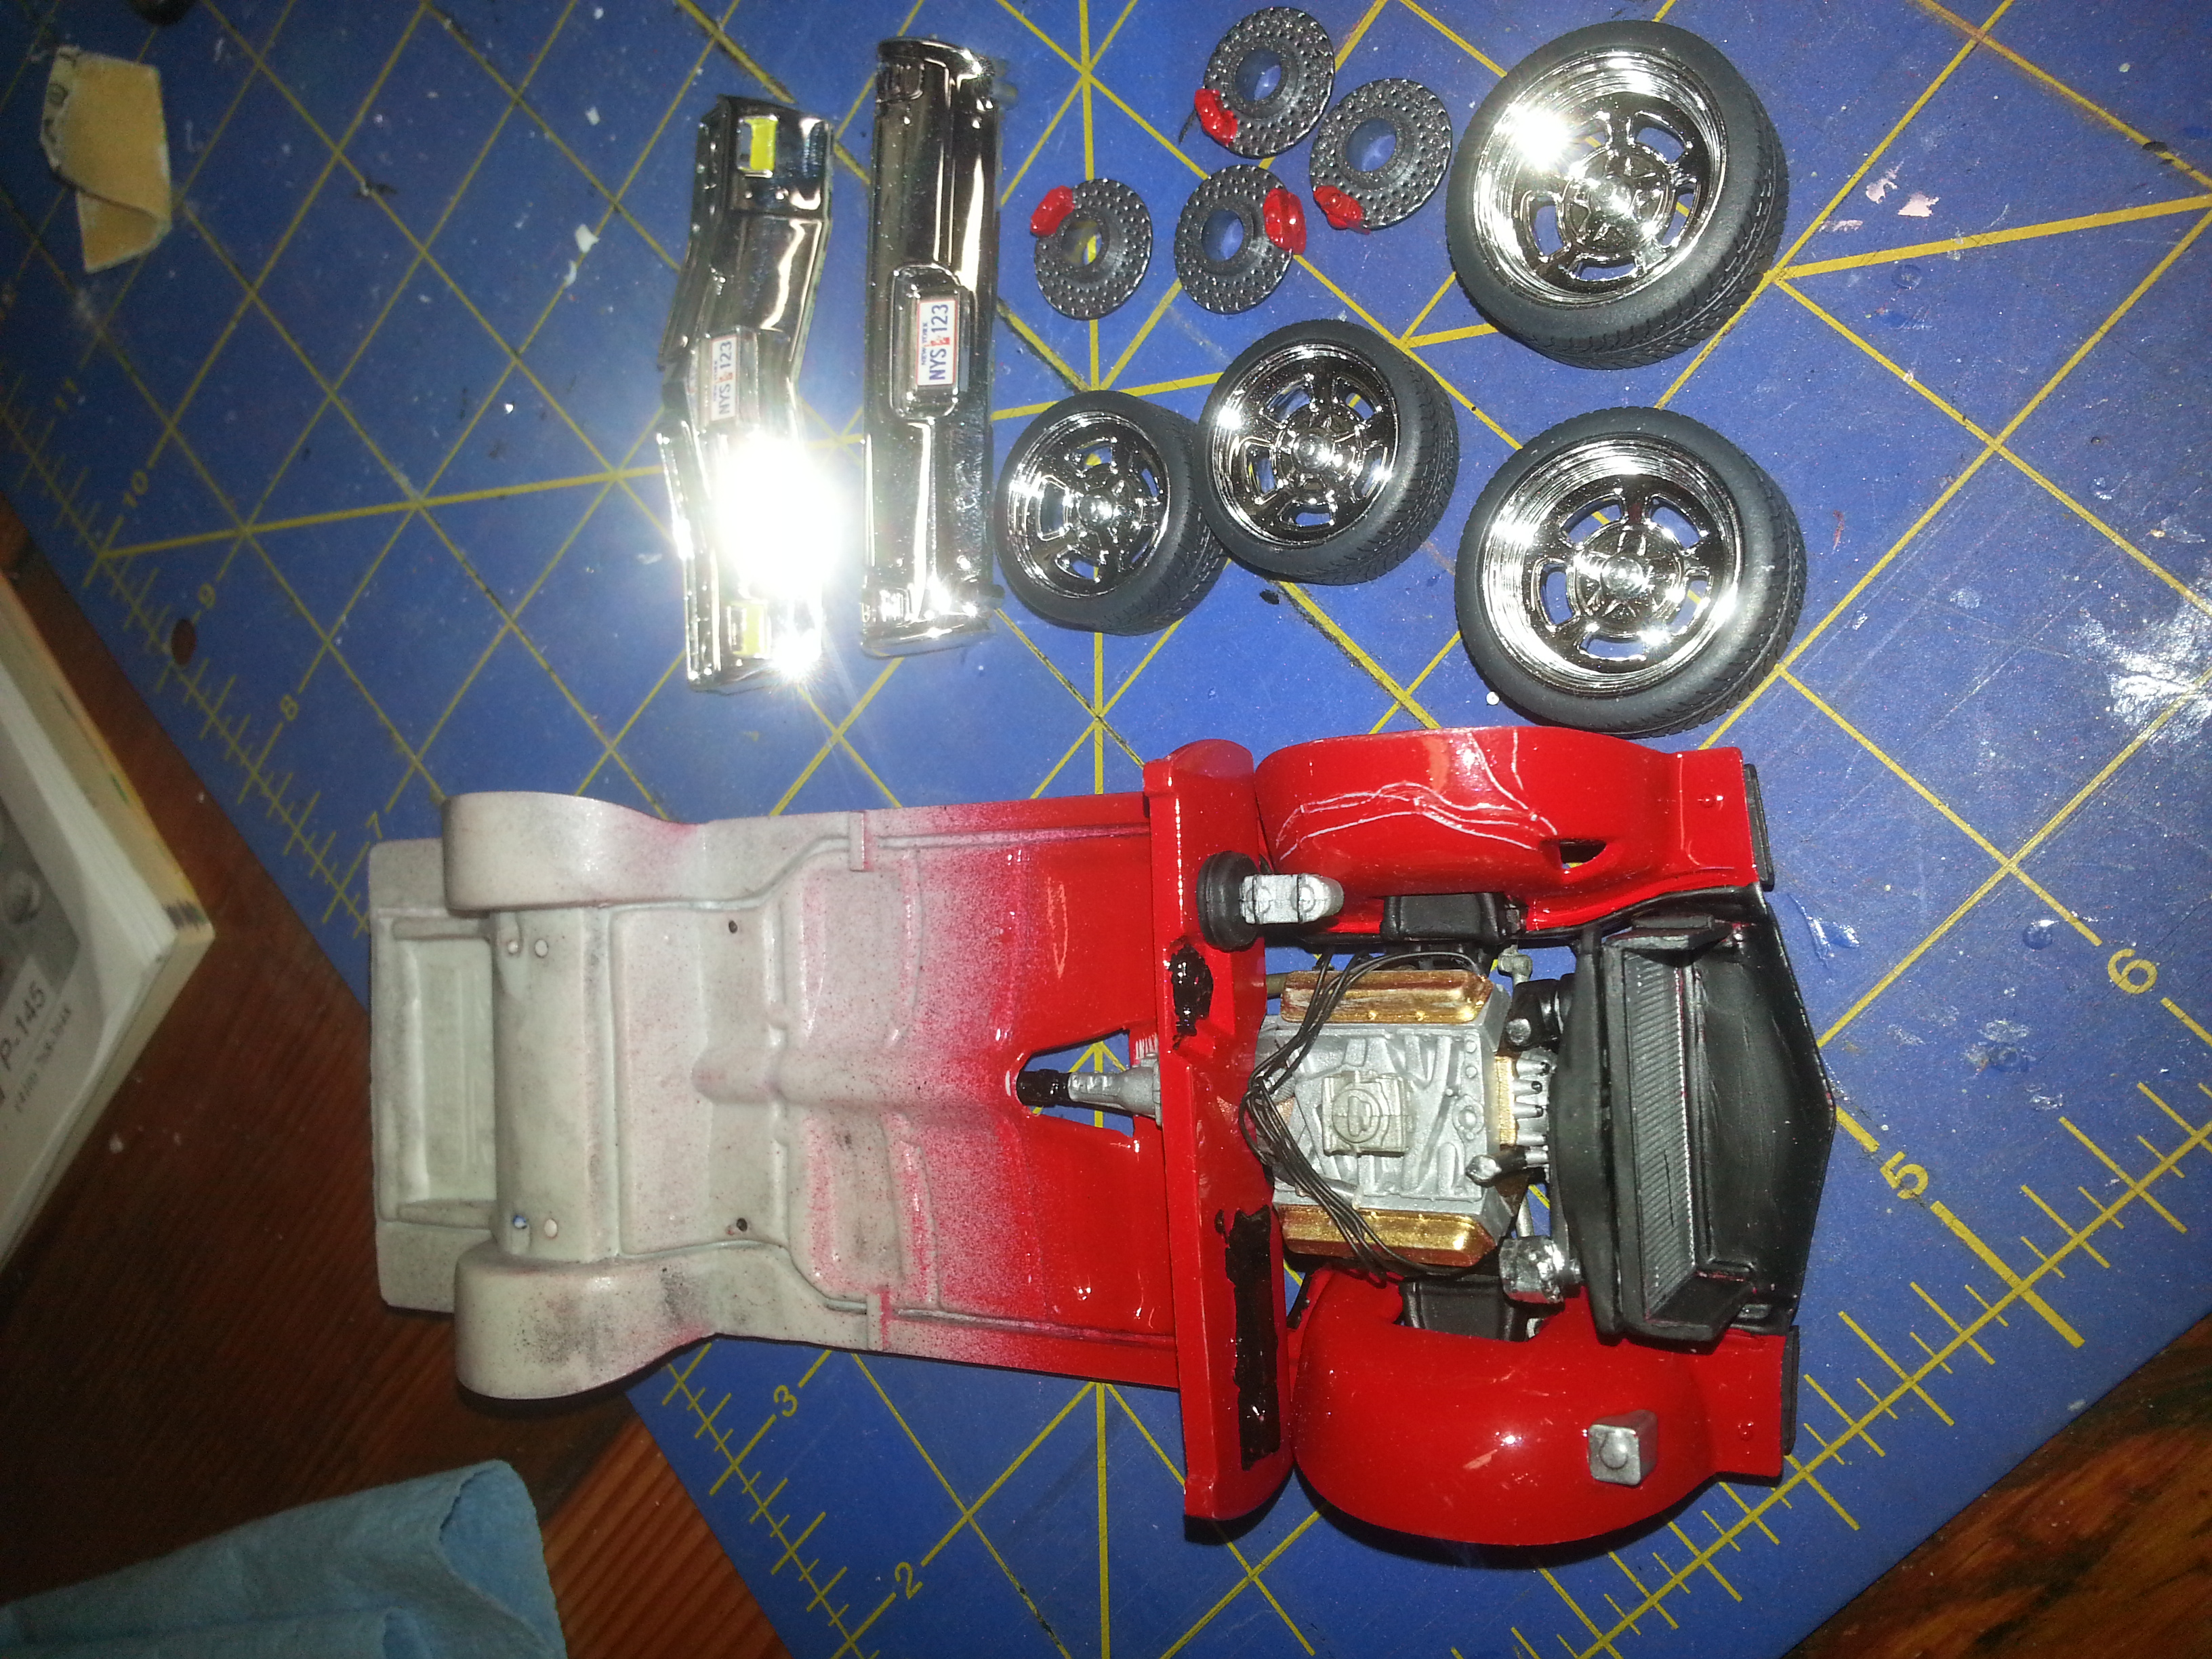
Making progress, Chassis painted and assembly started. Body painted and wet sanded, will apply BMF next, then clearcoat it. Finding a few small details I don't like about my work, but that's part of this hobby I think. If I was happy with all my work, I would never improve.
-
Looking excellent, My favorite year of C10's. Ya, I might be partial to them since I drive one daily.
-
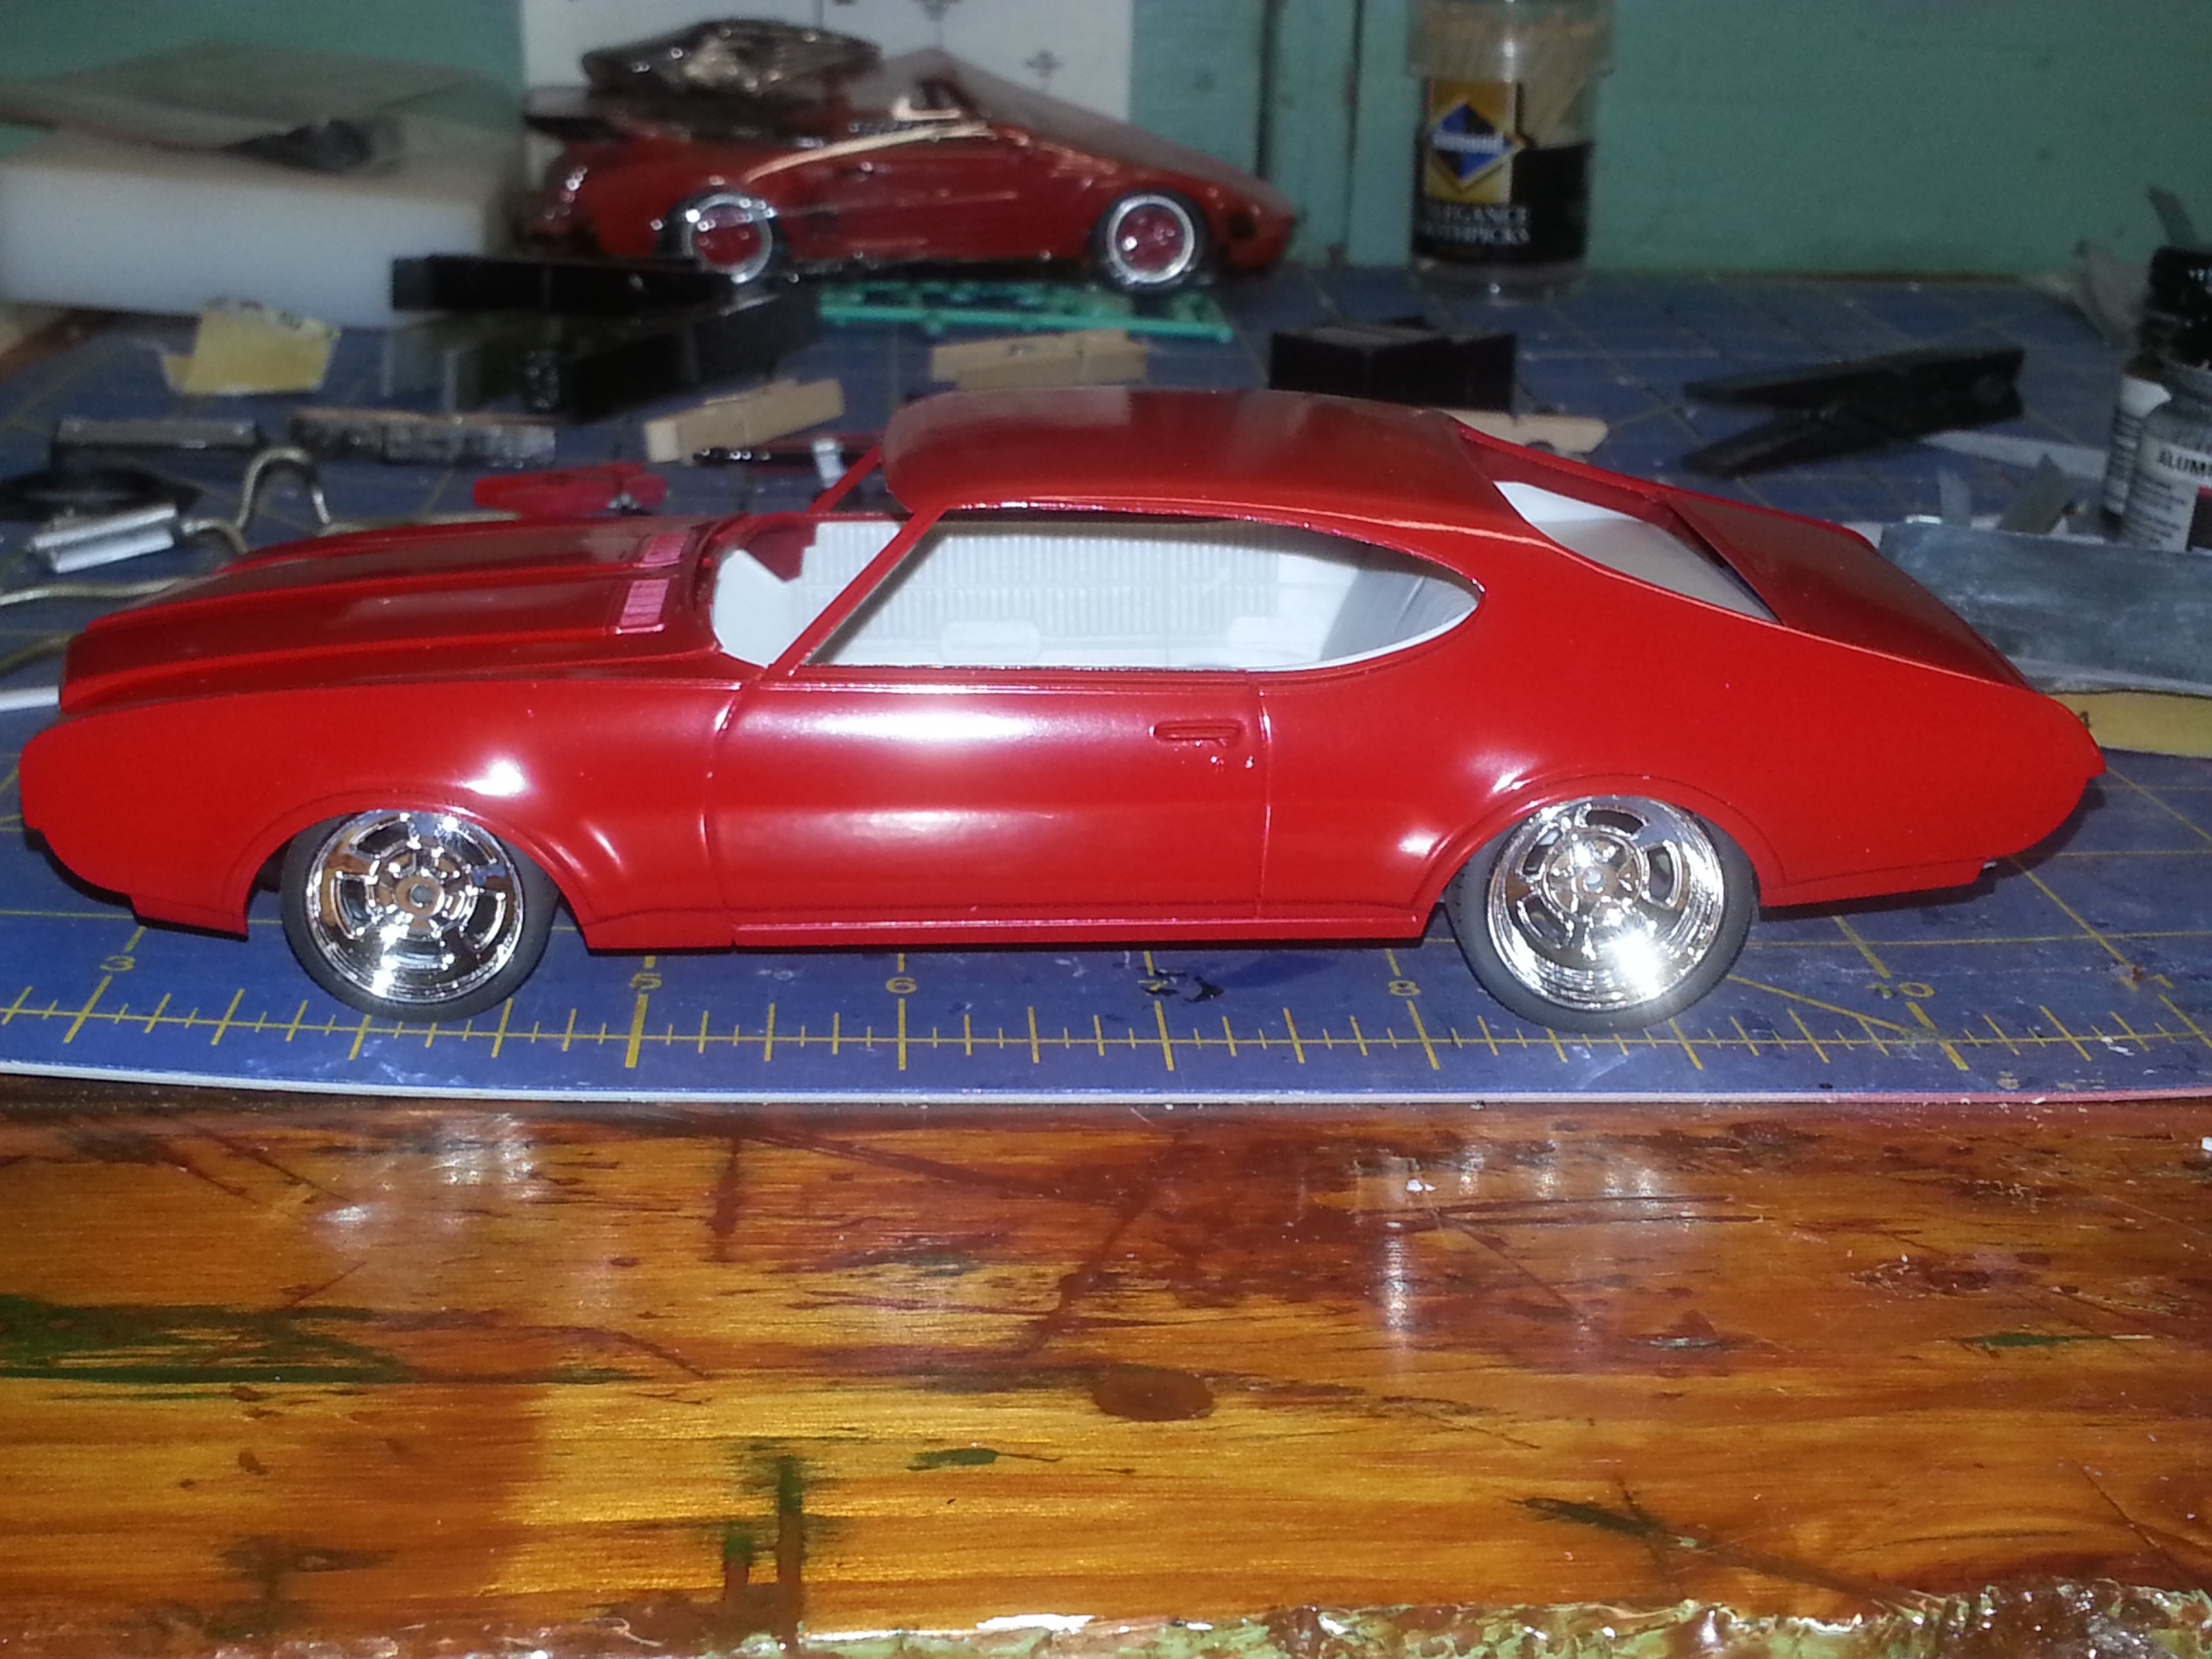
69 Olds 442- Swap-N-Build CBP project
68shortfleet replied to 68shortfleet's topic in WIP: Model Cars
This is looking better for ride height to me.
-
69 Olds 442- Swap-N-Build CBP project
68shortfleet replied to 68shortfleet's topic in WIP: Model Cars
Well, I am reasonably happy with the rear height, but the front just isn't going to cut it. Must come down much more.
-
69 Olds 442- Swap-N-Build CBP project
68shortfleet replied to 68shortfleet's topic in WIP: Model Cars
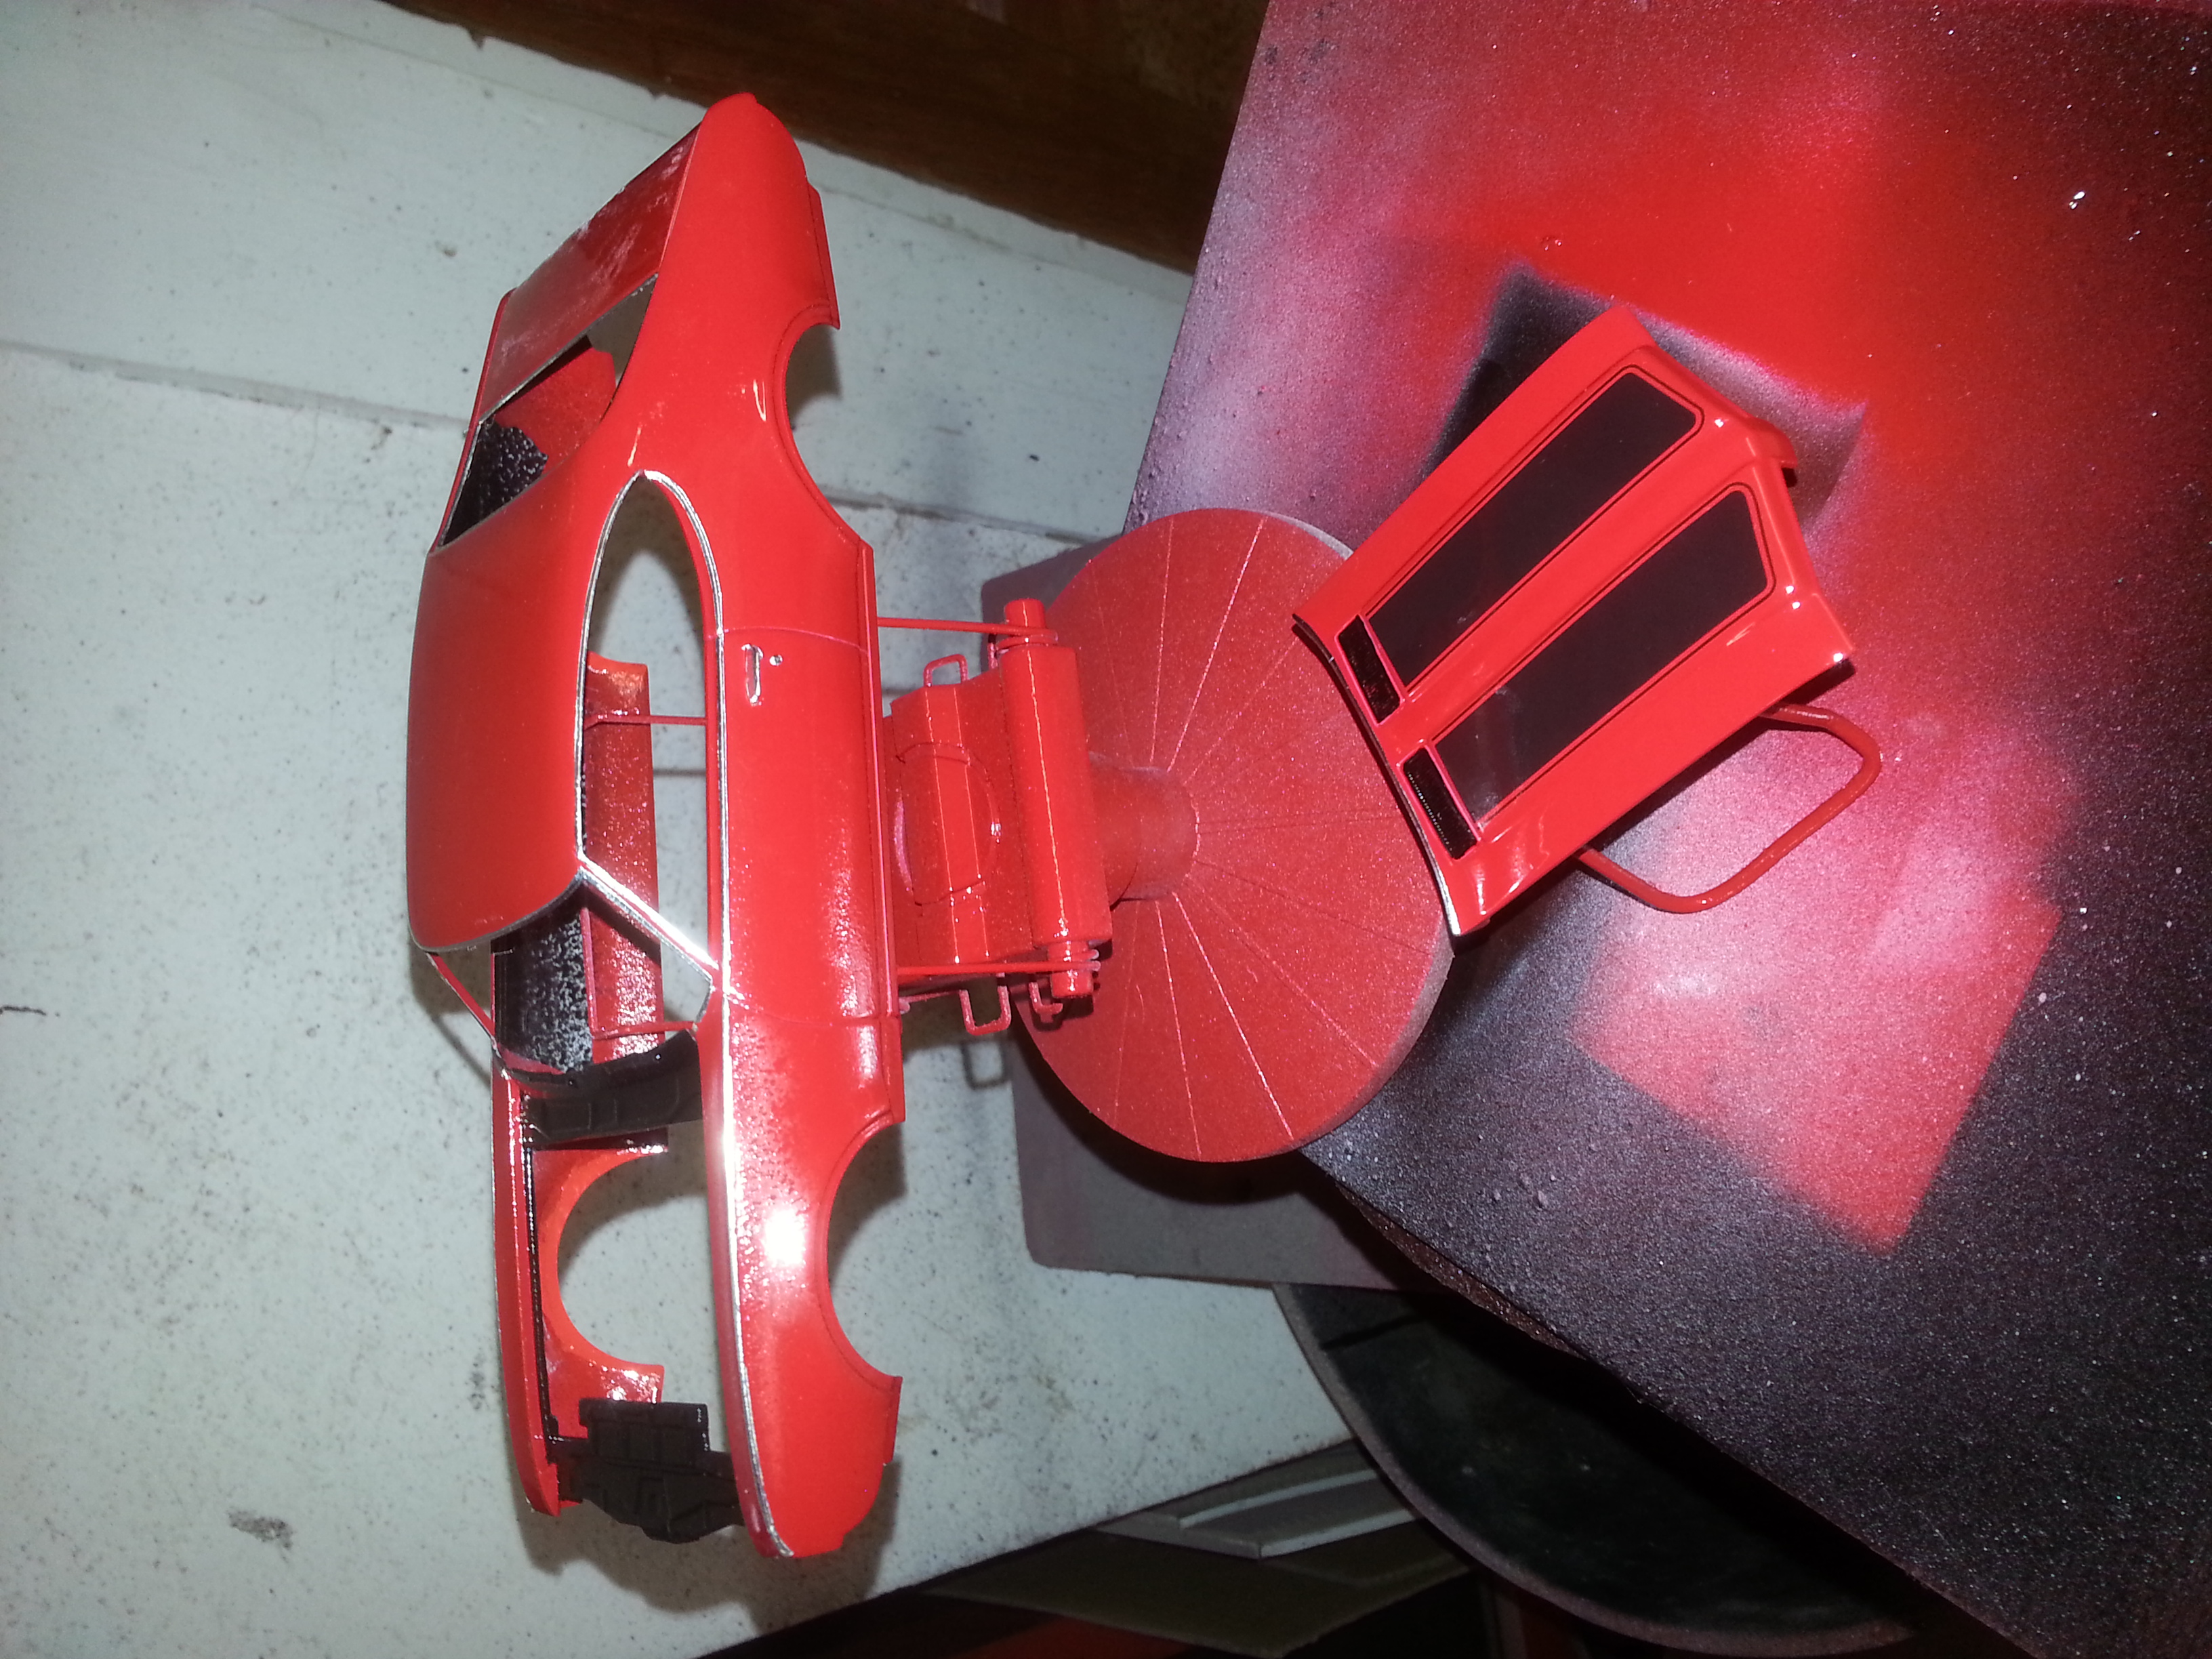
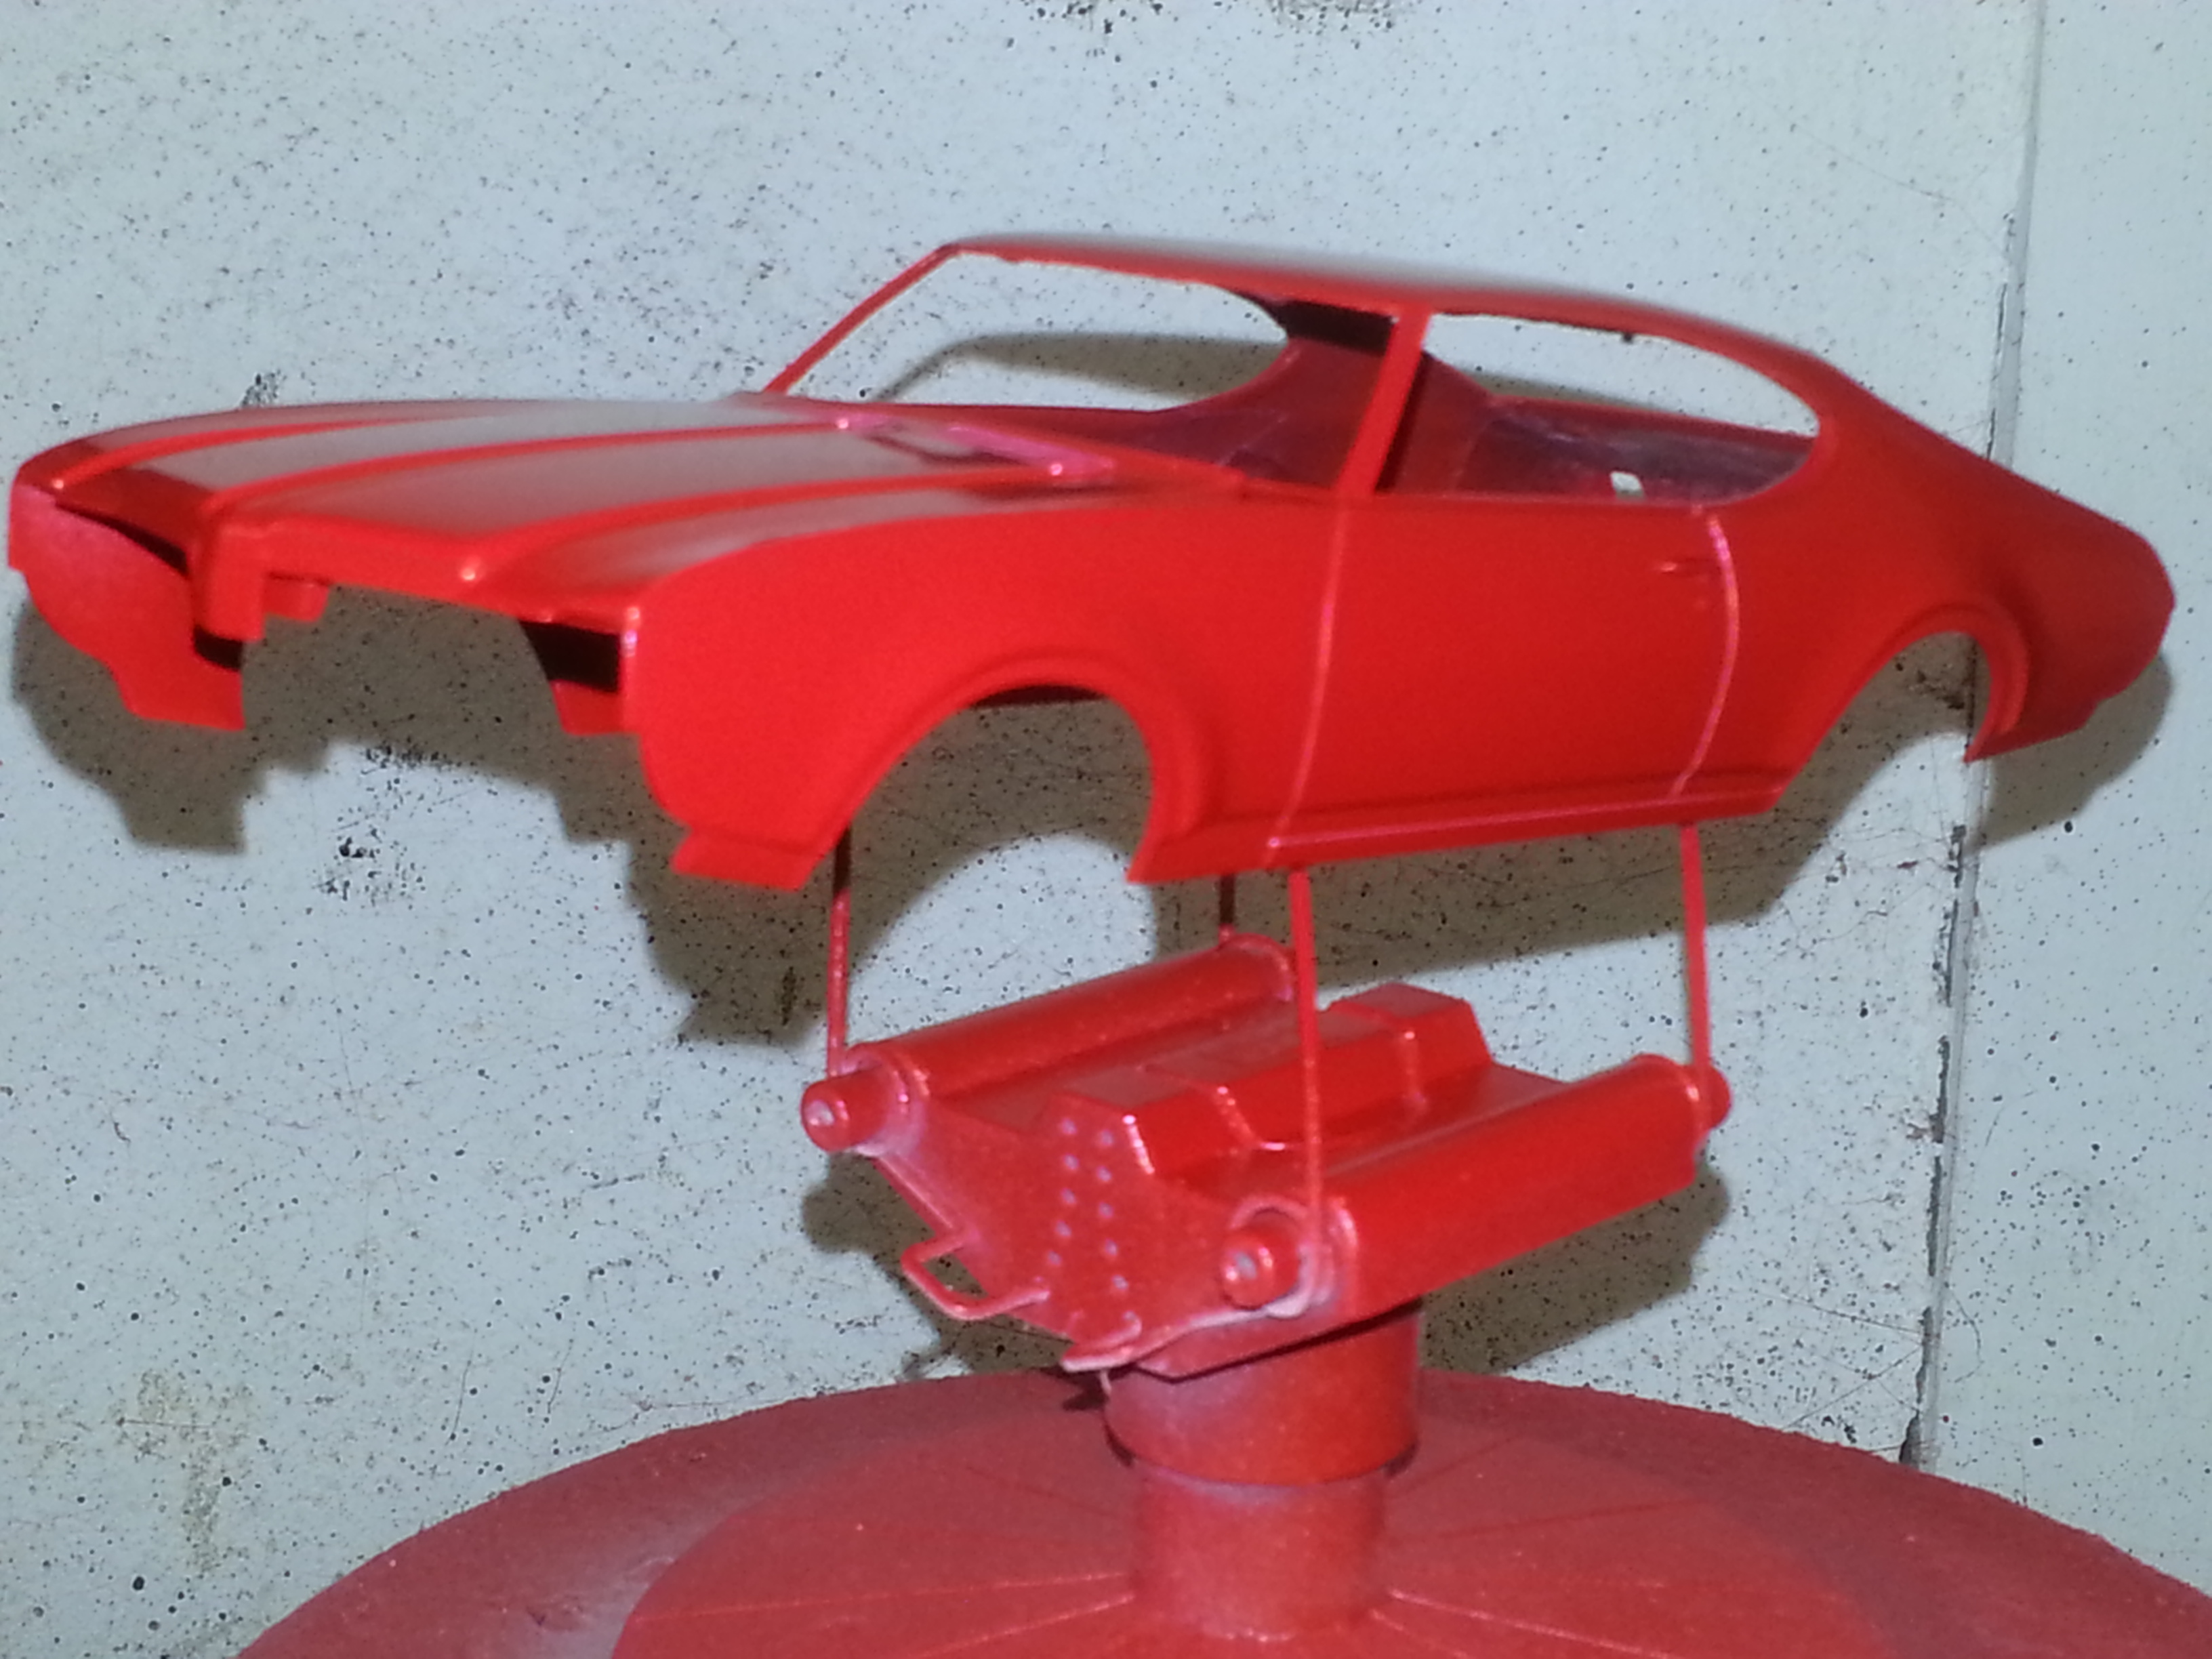
Color is Testors Italian red. This is two coats right now. Will wet sand this coat and give it one more coat and see how it looks. -
69 Olds 442- Swap-N-Build CBP project
68shortfleet replied to 68shortfleet's topic in WIP: Model Cars
A very small amount of progress.
-
So I joined in on this swap - and - build thread and will be building the Olds 442. Original thread idea can be seen here: http://www.modelcarsmag.com/forums/topic/126318-swap-n-build-cbp/ I have not started a build thread for my last few builds, got pretty frustrated trying to post pics via photobucket long before they screwed us. Yes, I know it is much easier now, I just kinda quite. So, I will try to get some pics attached to this build thread. Since and Olds is probably not a car/kit that I would have picked of the shelves at the hobby shop, I had to try doing some Googling for inspiration. I didn't find anything that inspired at all in 1:1 or 1:25. Everything I found was basically a stock purist appearing build. The small vision in my head was much better than that, without going very far from stock. So here goes, we'll see how my vision transfers to plastic. Car will be Testors Italian red, Pegasus wheels and some lowering. Again, not far from stock. Currently, the body is in primer, chassis pan has been painted and several of the small parts have been painted.
-
After spending some time looking at Google images of the 442 in 1/25 and 1/1 scale it seems to me that the people that build these Oldsmobile's are kinda purists of stock cars. Really didn't find anything that inspired me at all. So, I will be building this to the vision in my head. Hope it transfer to plastic reasonably well. I did some test fitting of the bumpers and glass to the body yesterday. All parts fit incredibly well. With that, I got the body into primer.
-
I have stared at this on auction a couple of times and wondered about the quality, great to hear that he does nice work. I have been stumped about which AMT kit it is using for a conversion though. Albeit, I have done zero research to find out. But nothing comes to mind off the top of my head except using a 53-56 truck frame and stepside bed.