.jpg.54ecf0d4a006234146ea24c7f6762038.jpg)
redneckrigger
-
Posts
1,578 -
Joined
-
Last visited
Content Type
Profiles
Forums
Events
Gallery
Everything posted by redneckrigger
-
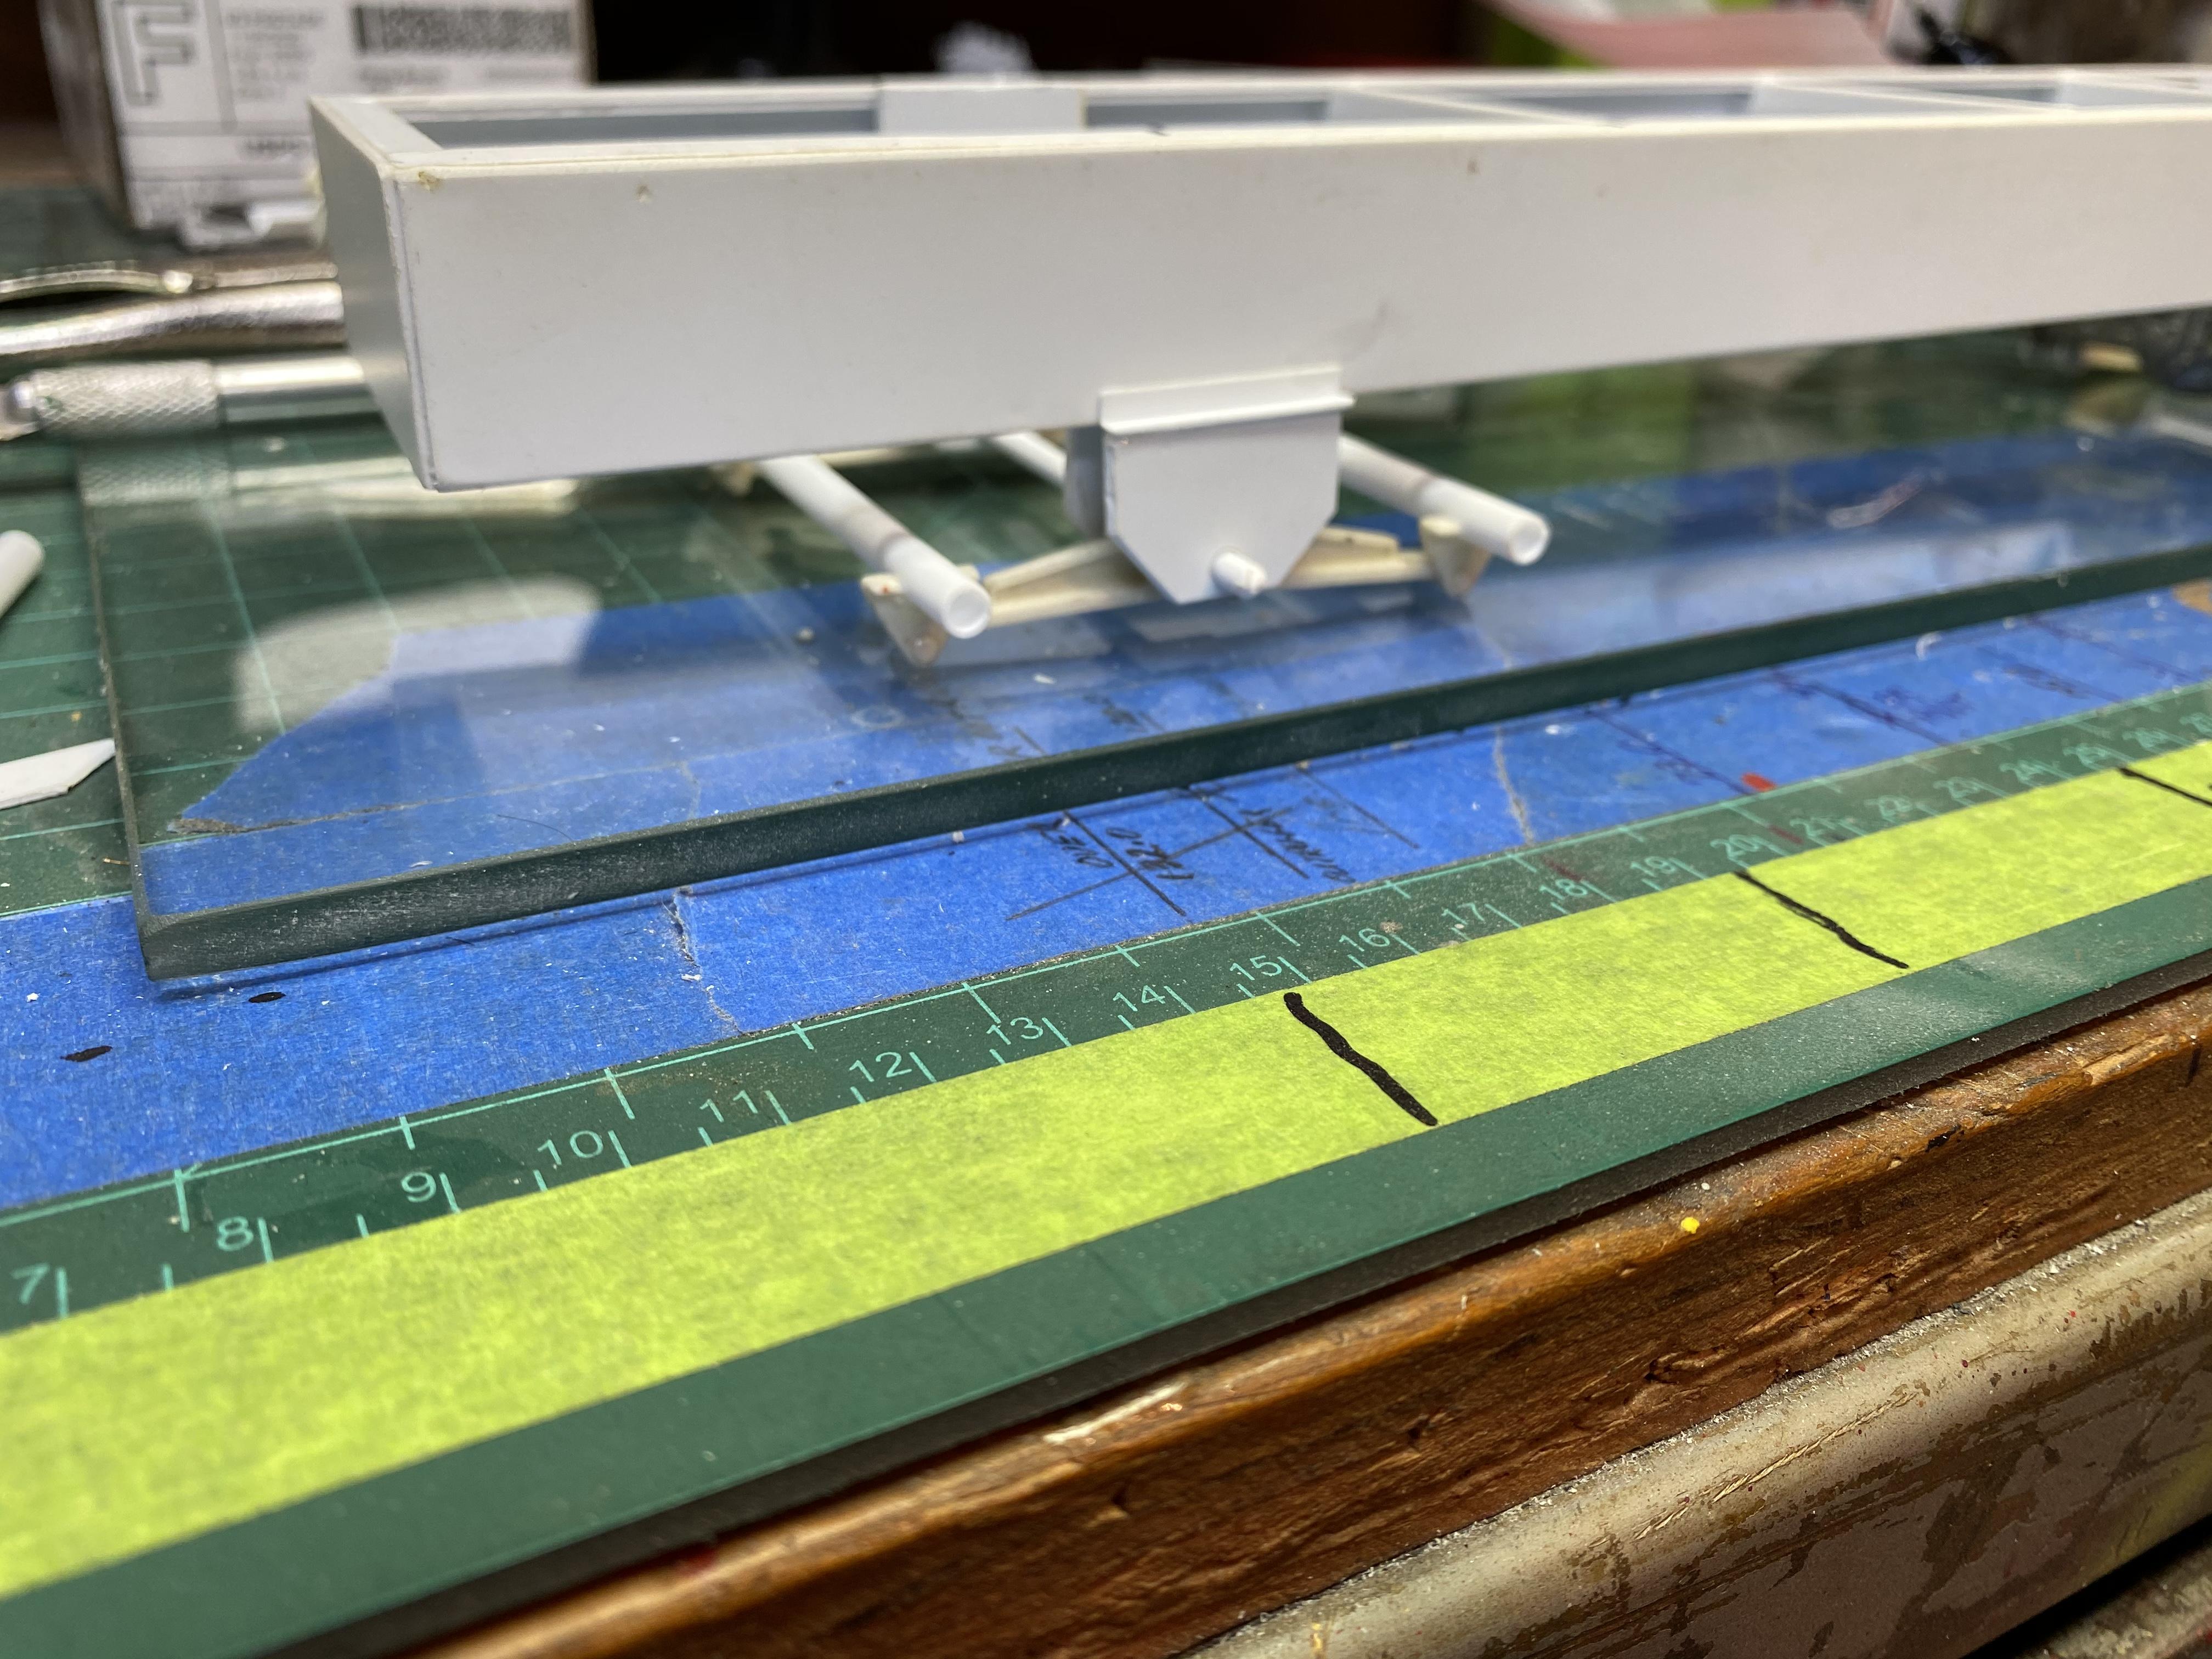
.thumb.jpg.4bca3333e1da4027c381d8d56a564ec1.jpg) Giving this a try on the front steering. Knuckles from an IHC COE and heavily reinforced tie rods and metal rod pivots and axles. Still have to make the drag links, radius rods, steering cylinders and steering box, but I think it will work well.
Giving this a try on the front steering. Knuckles from an IHC COE and heavily reinforced tie rods and metal rod pivots and axles. Still have to make the drag links, radius rods, steering cylinders and steering box, but I think it will work well.
-
RM Mack w snowblower....
redneckrigger replied to gotnitro?'s topic in WIP: Model Trucks: Big Rigs and Heavy Equipment
Outstanding work Jeff. Love the auger....................same exact construction method I used on my paver................shapes and pieces. Absolutely beautiful, and very timely with the snow upon us! -
Chevrolet Titan
redneckrigger replied to Sam I Am's topic in WIP: Model Trucks: Big Rigs and Heavy Equipment
Outstanding rescue job! -
Oshkosh & Mack Dumper.
redneckrigger replied to The Brush's topic in Model Trucks: Big Rigs and Heavy Equipment
That is STUNNING work! Looks like the real deal put through a shrinking machine! Great weathering as well. Nicely done sir. -
You keep raising the bar Charlie! Pretty soon, I figure they will have working pumps and tanks full of H2O!
-
Gonna have to give that a serious look! Though I dont solder anything other than copper tubing I may give it a go machining out of aluminum.
-
The rivets are actually very close to an actual REAL rivet........ .030” holes drilled through frame and crossmembers etc, then a piece of .030” Evergreen rod glued in and trimmed off. Works well enough to satisfy my worst critic.....me!
-
Oh yeah.........gonna even look st machining the whole knuckle from aluminum. What I have here may just be a test run to get the engineering correct.
-
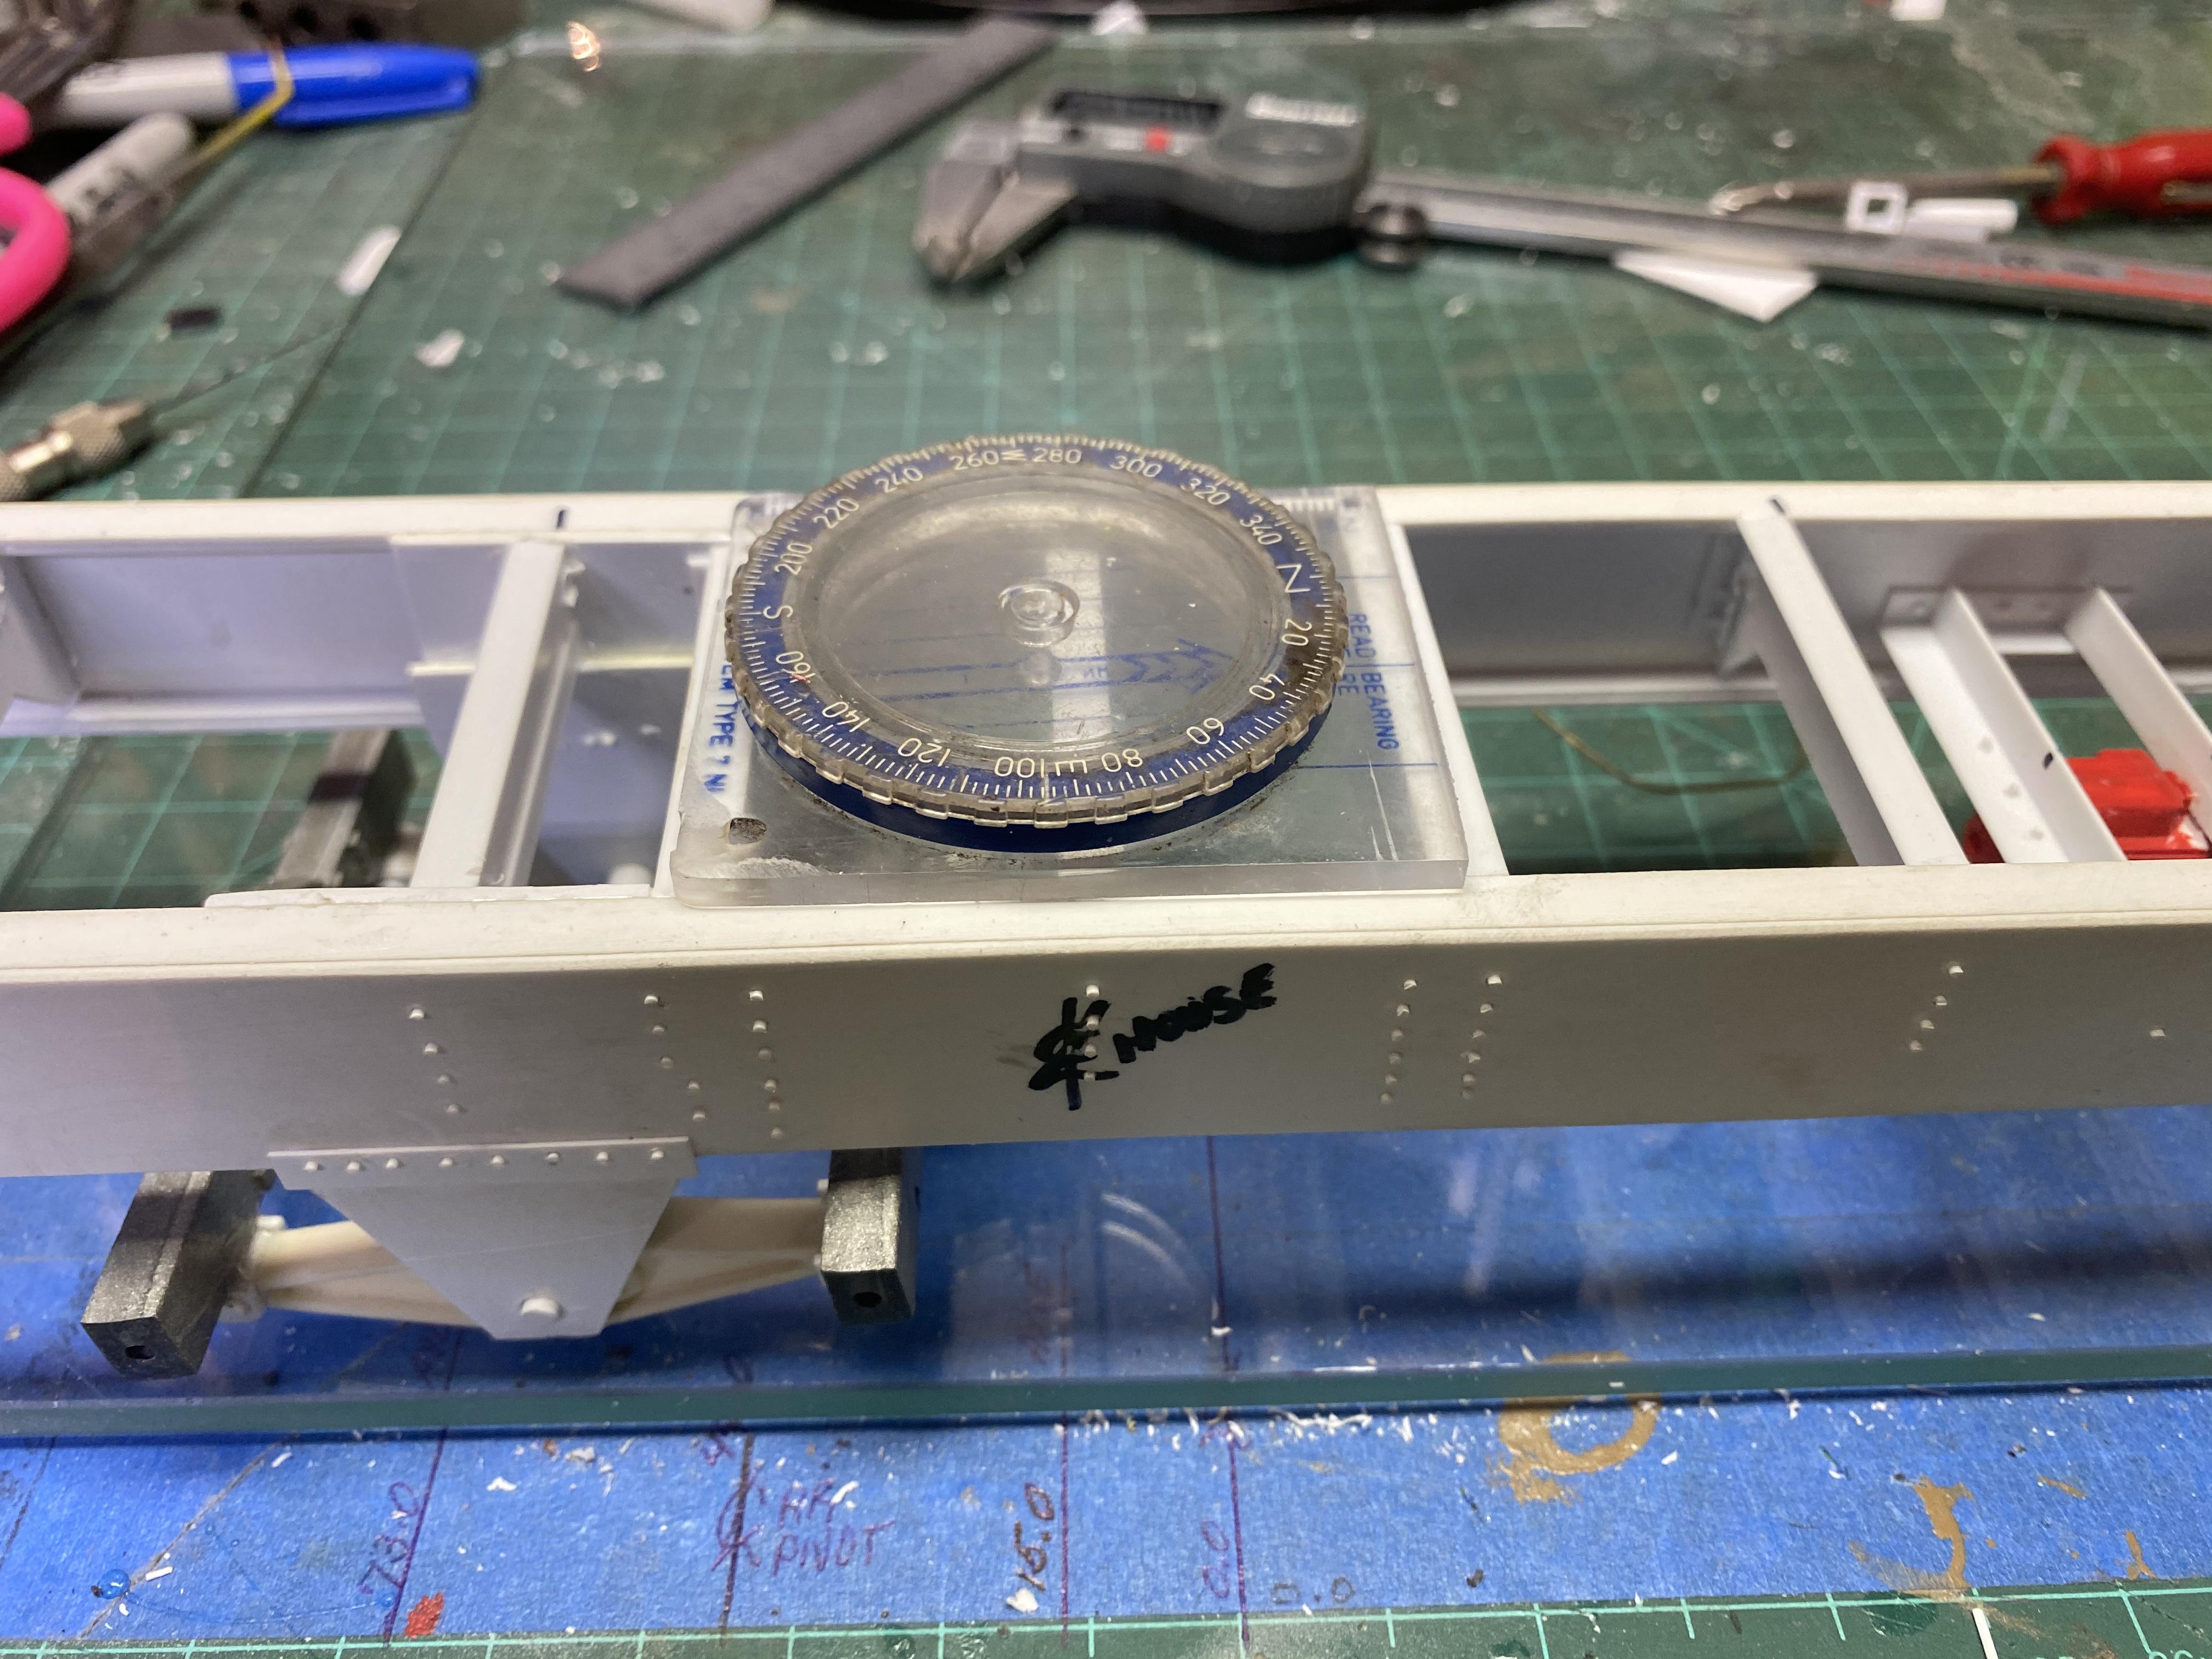
Steering knuckles in place.......Also got creative with the turntable for the upperworks. Using an old Boy Scout Compass with a few modifications!
-
Yeah, feels great to be back at the bench!!!! Thanks Gator, you and yours be safe as well!
-
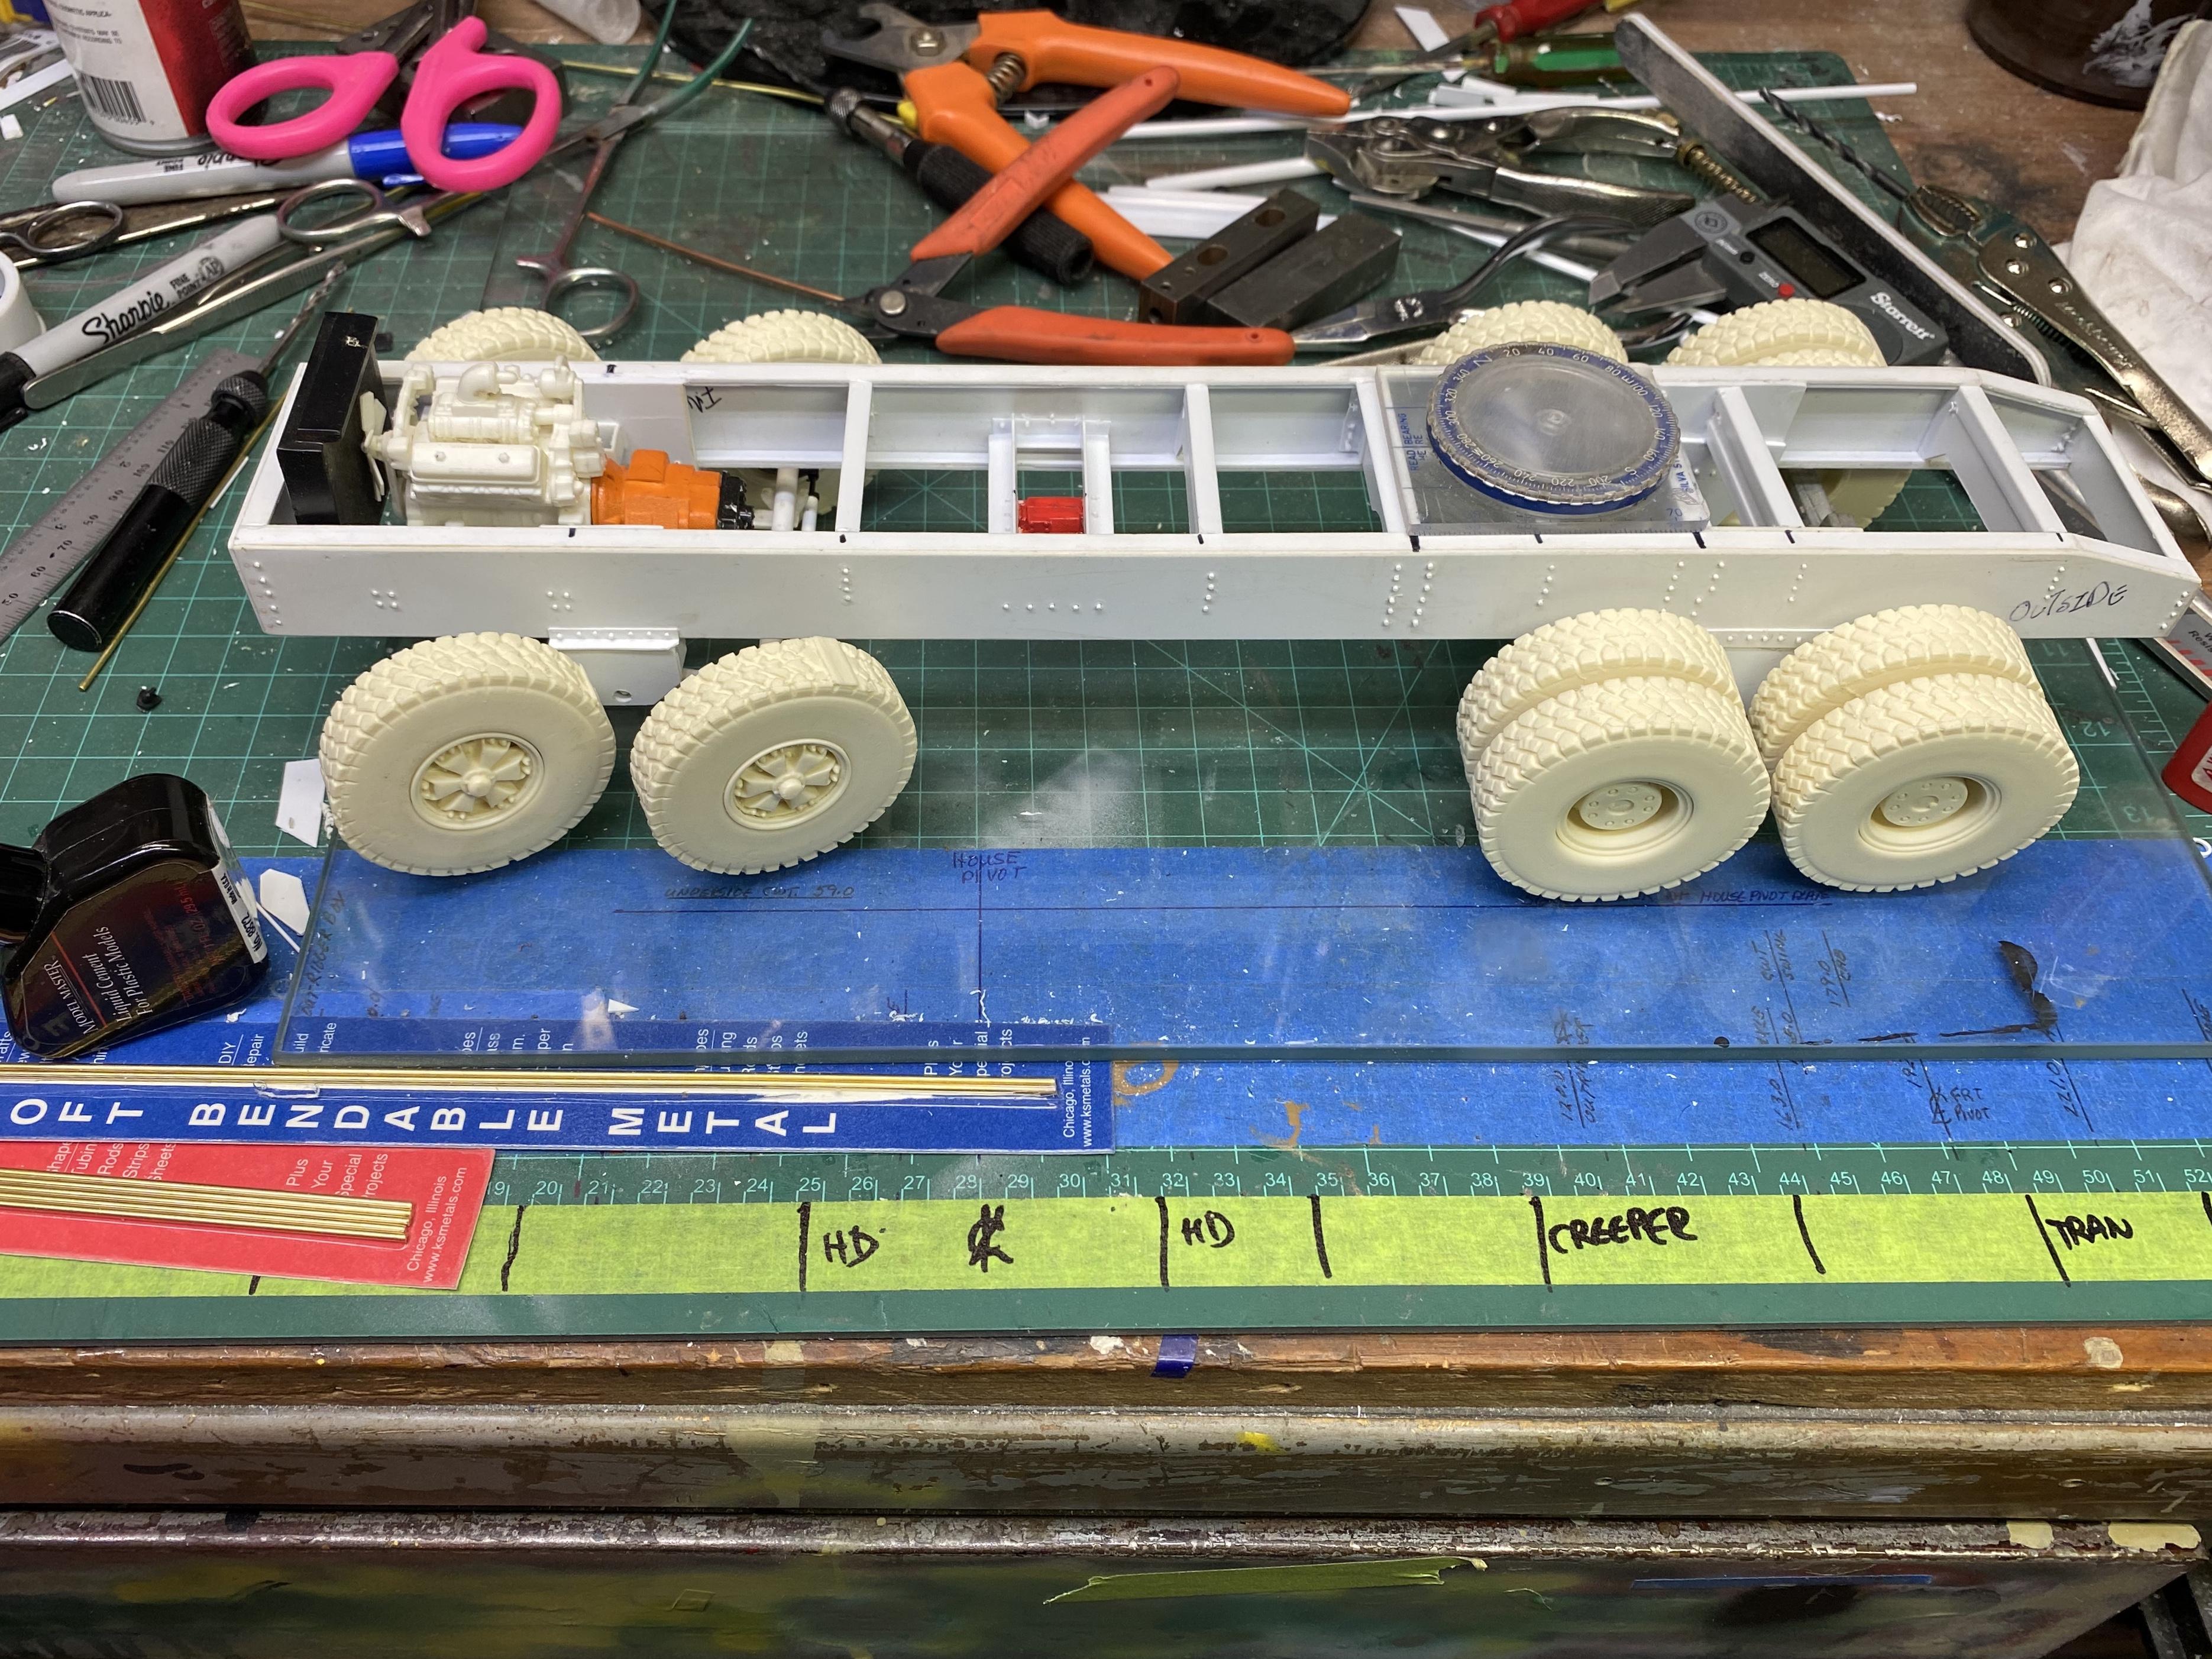
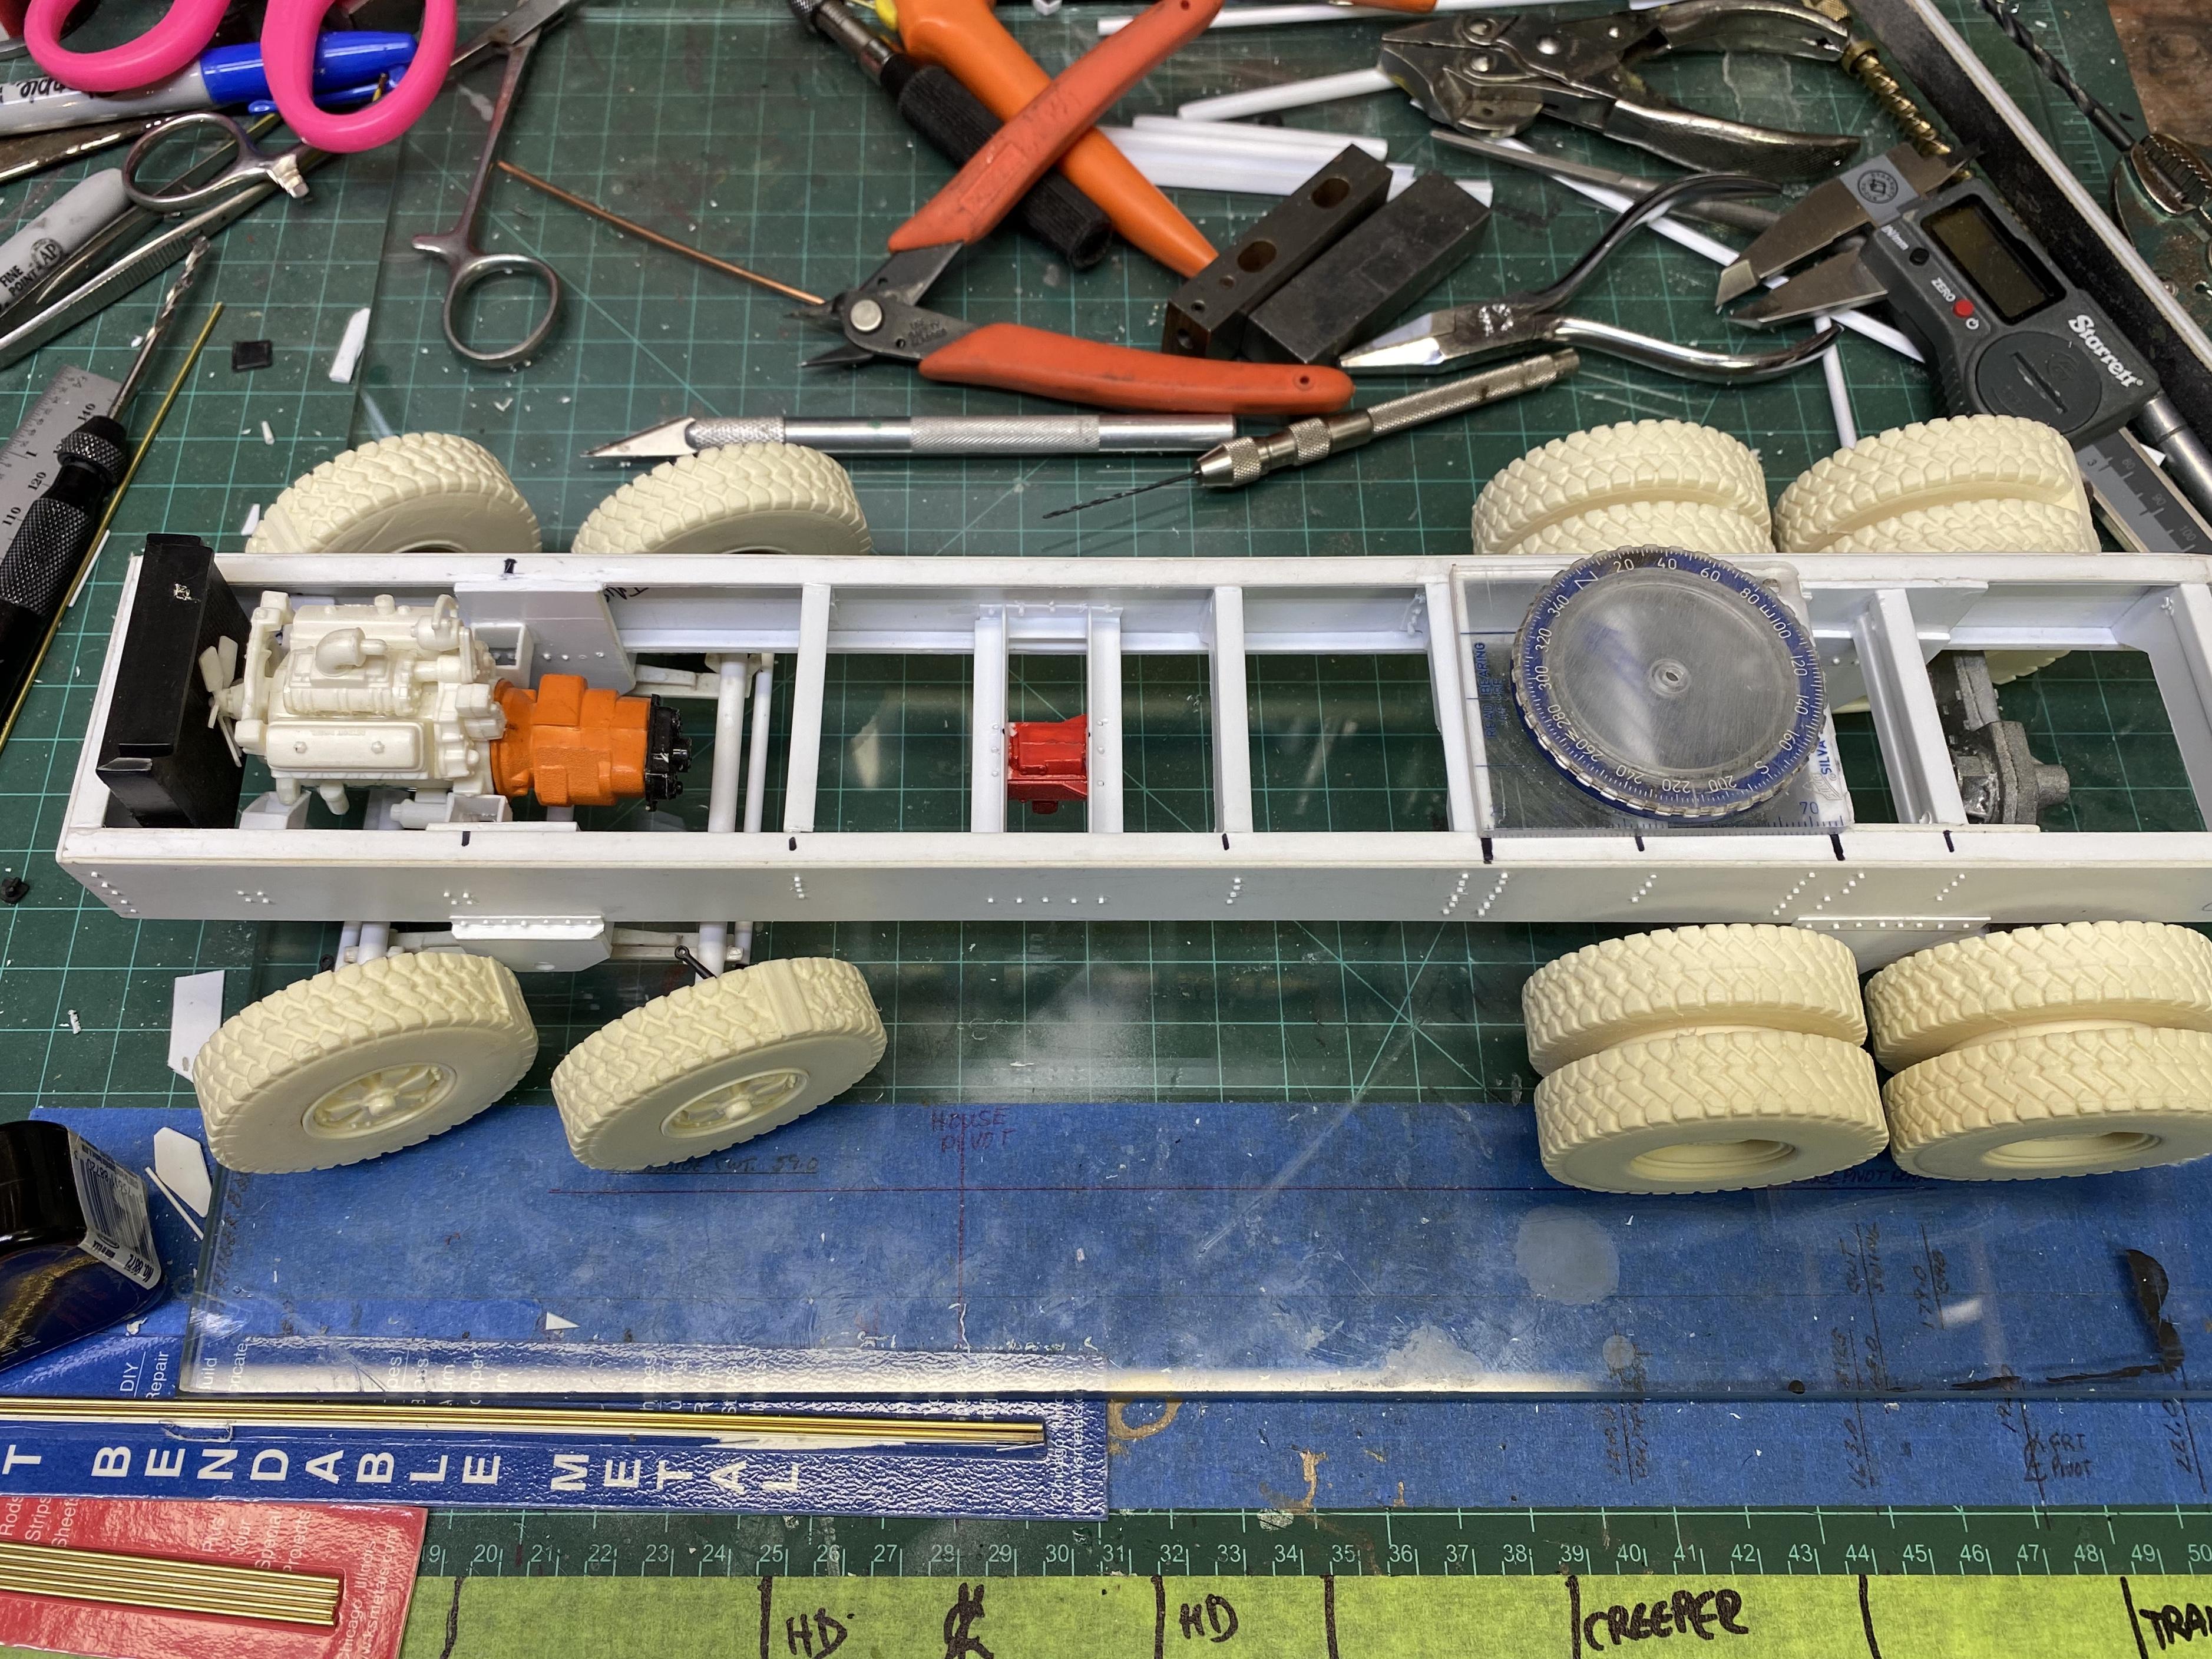
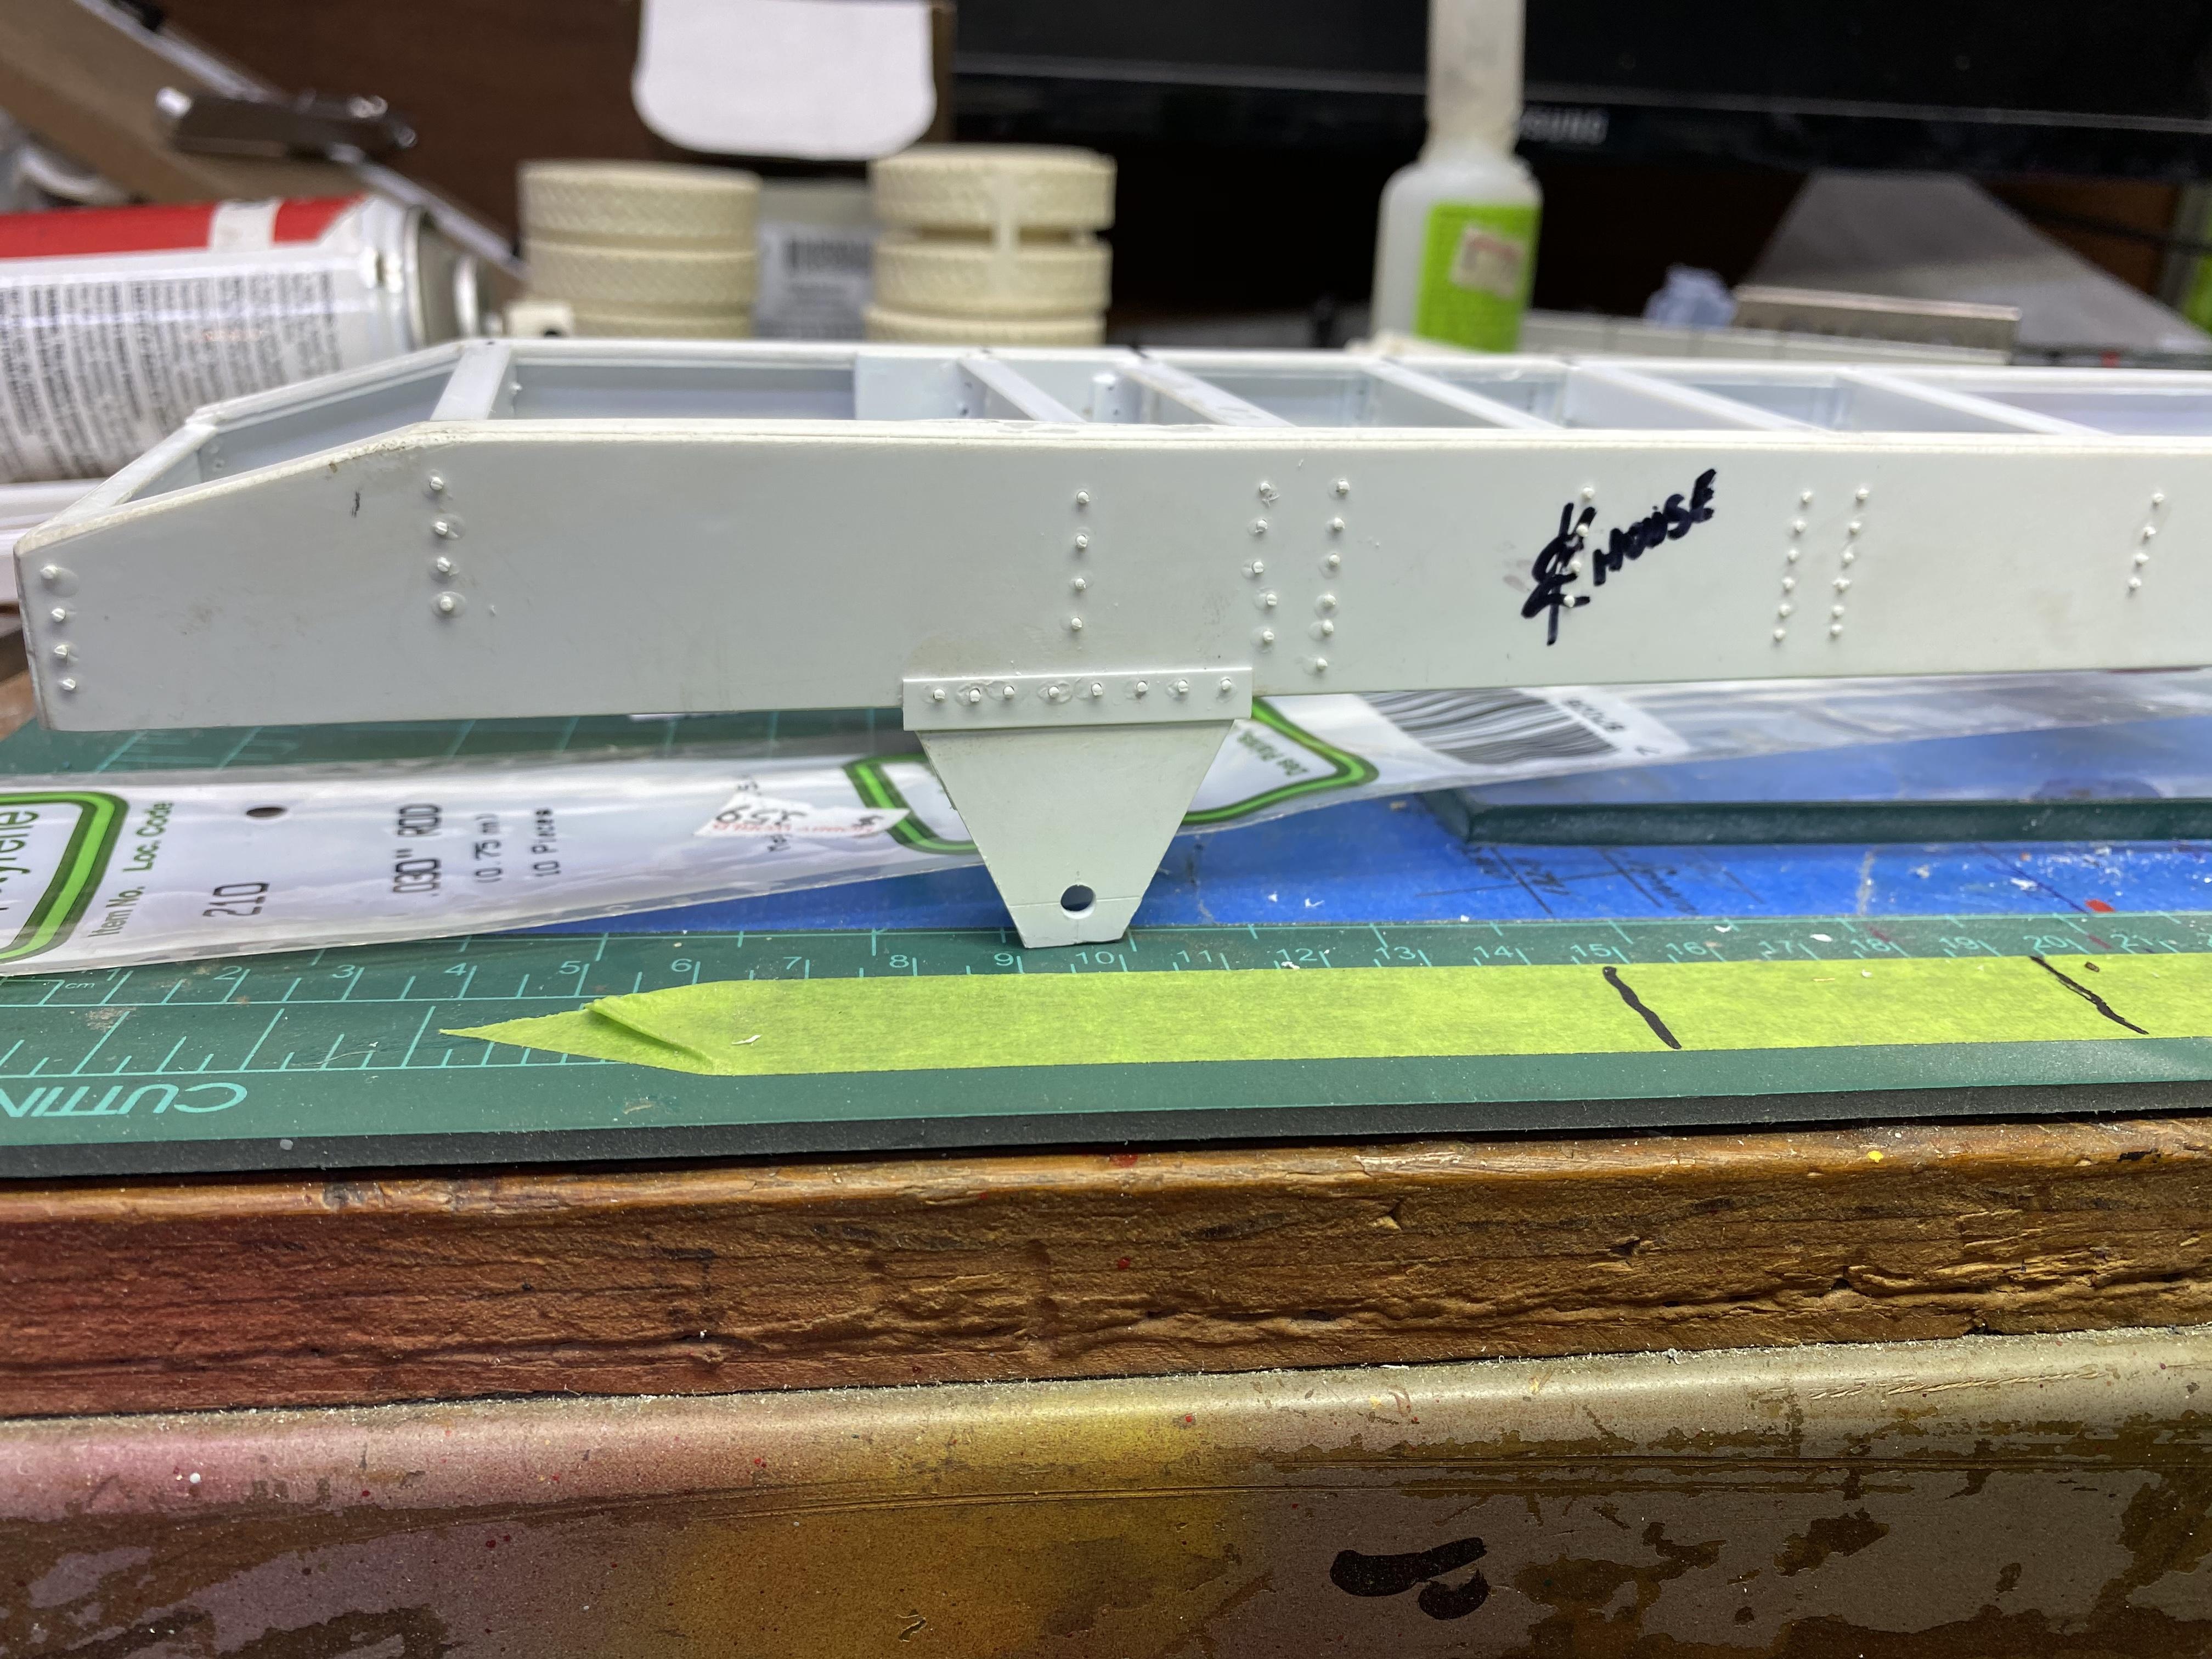
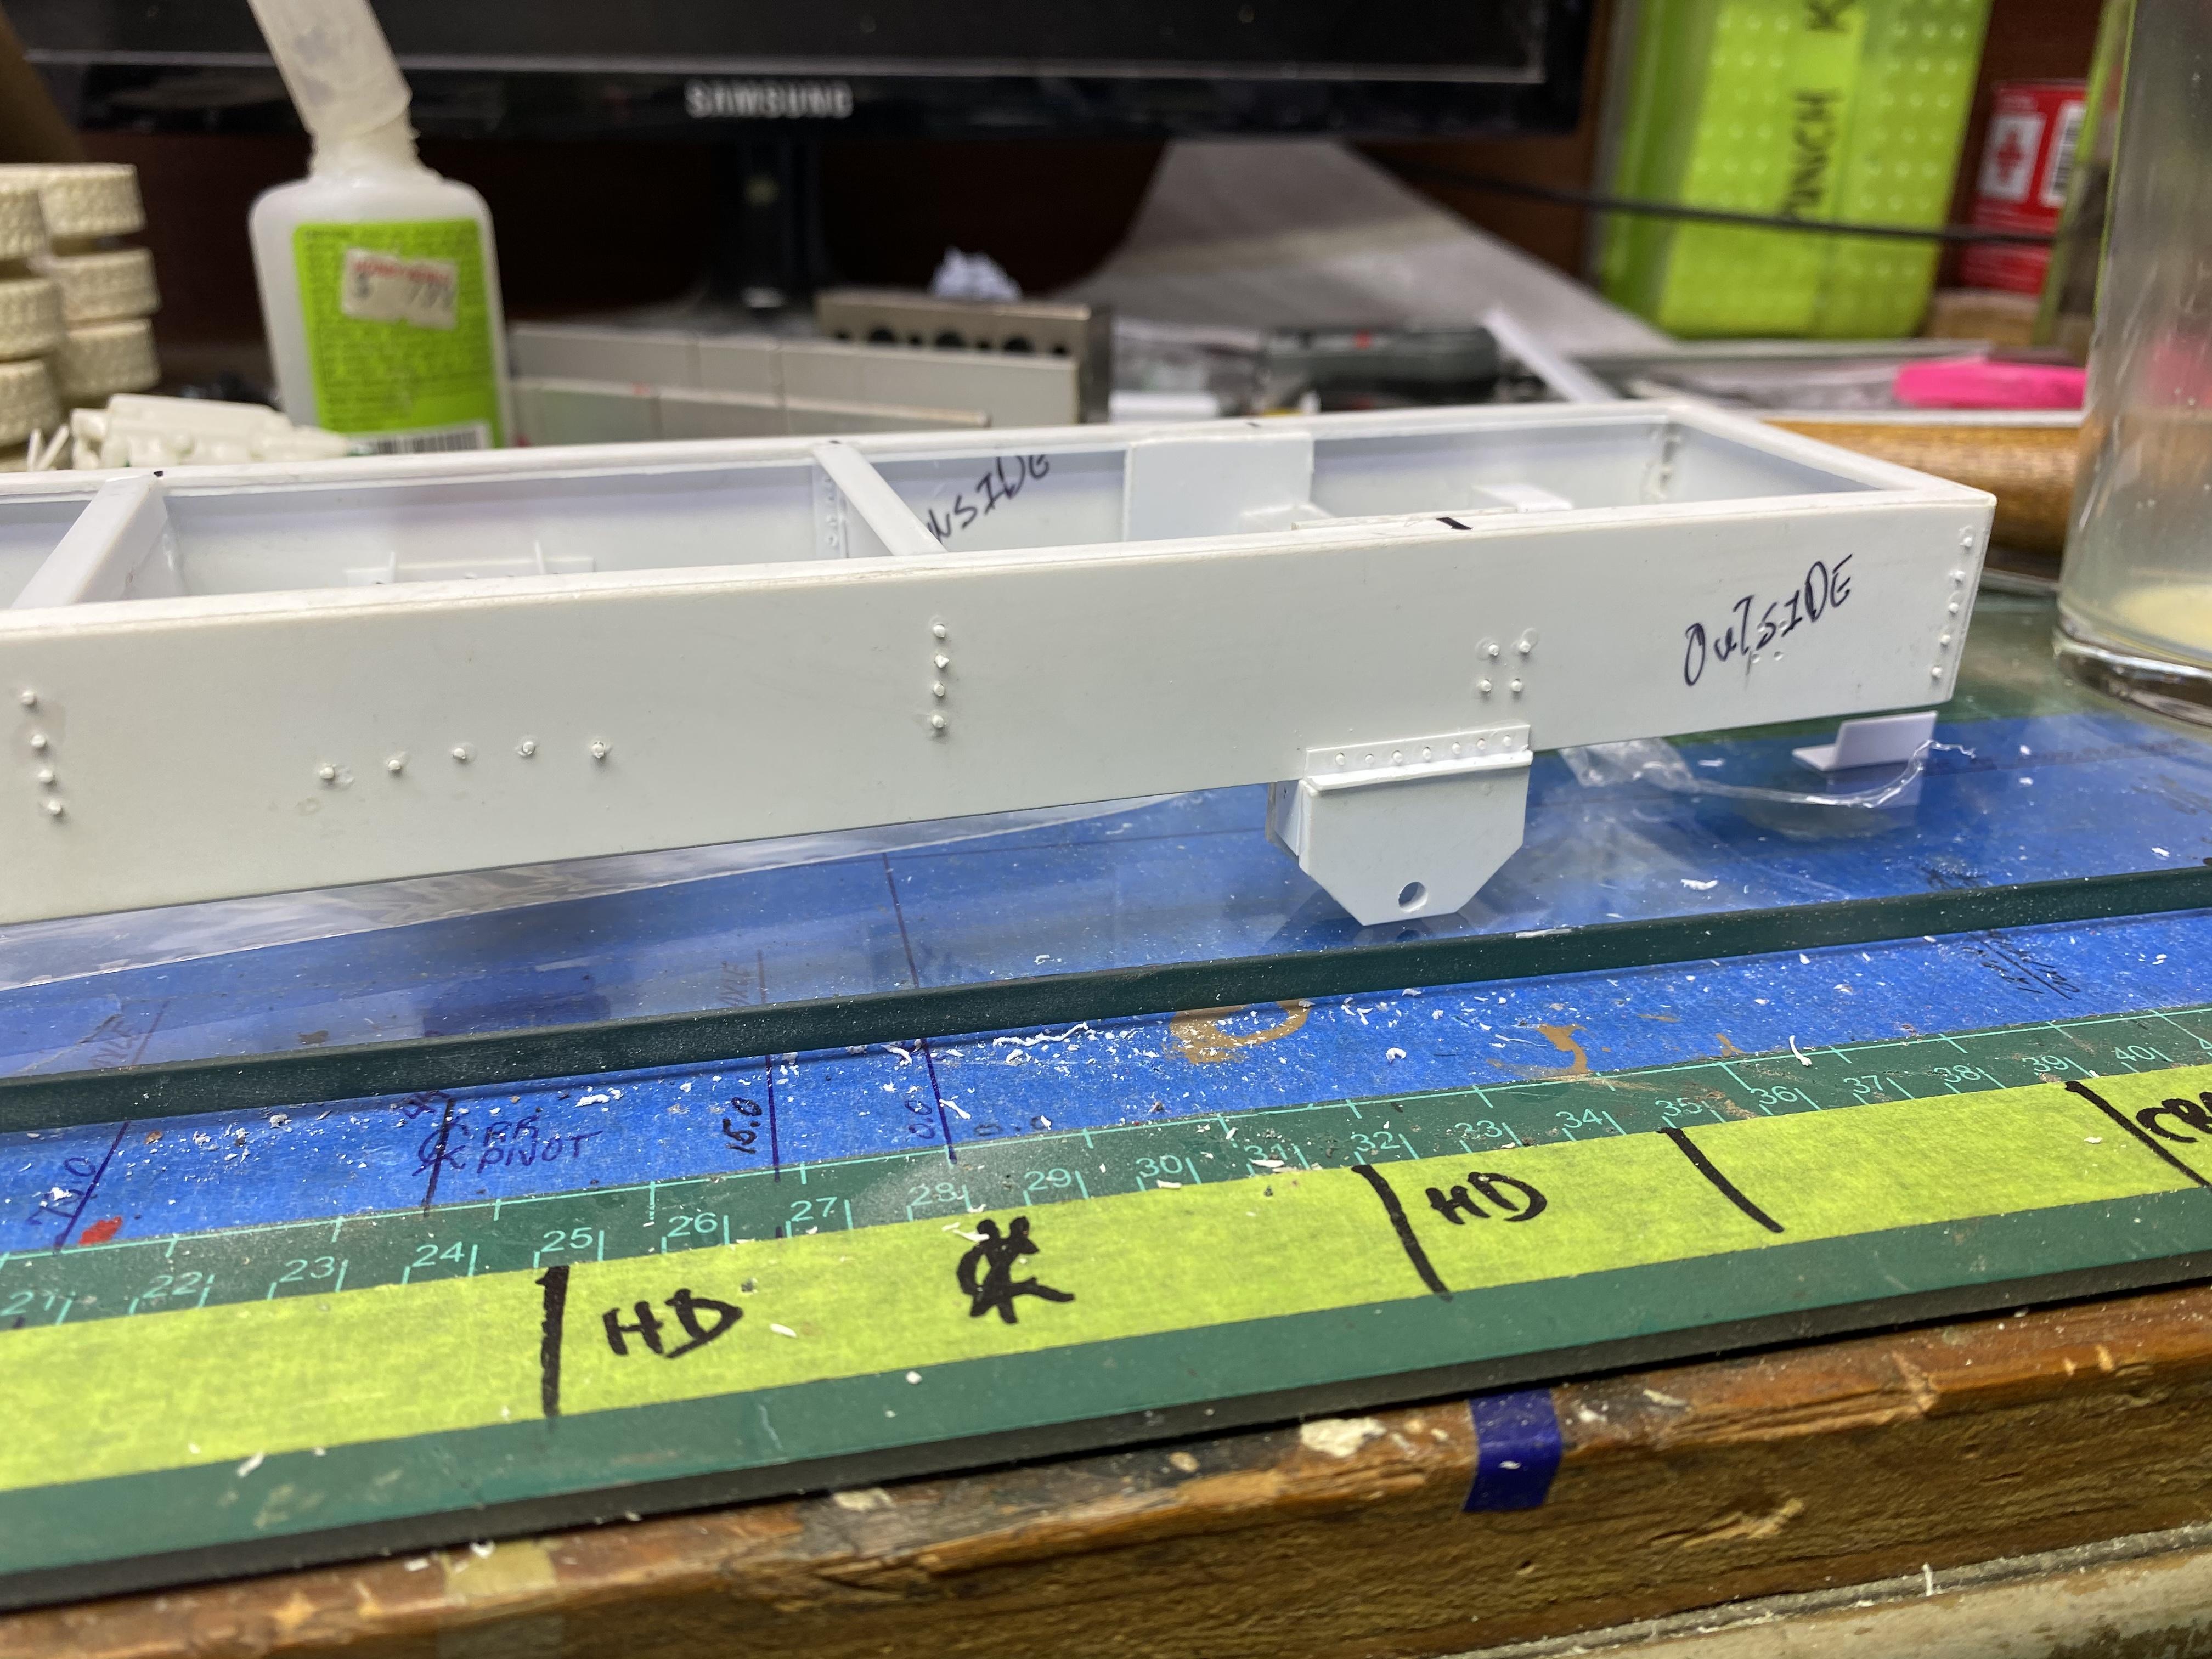
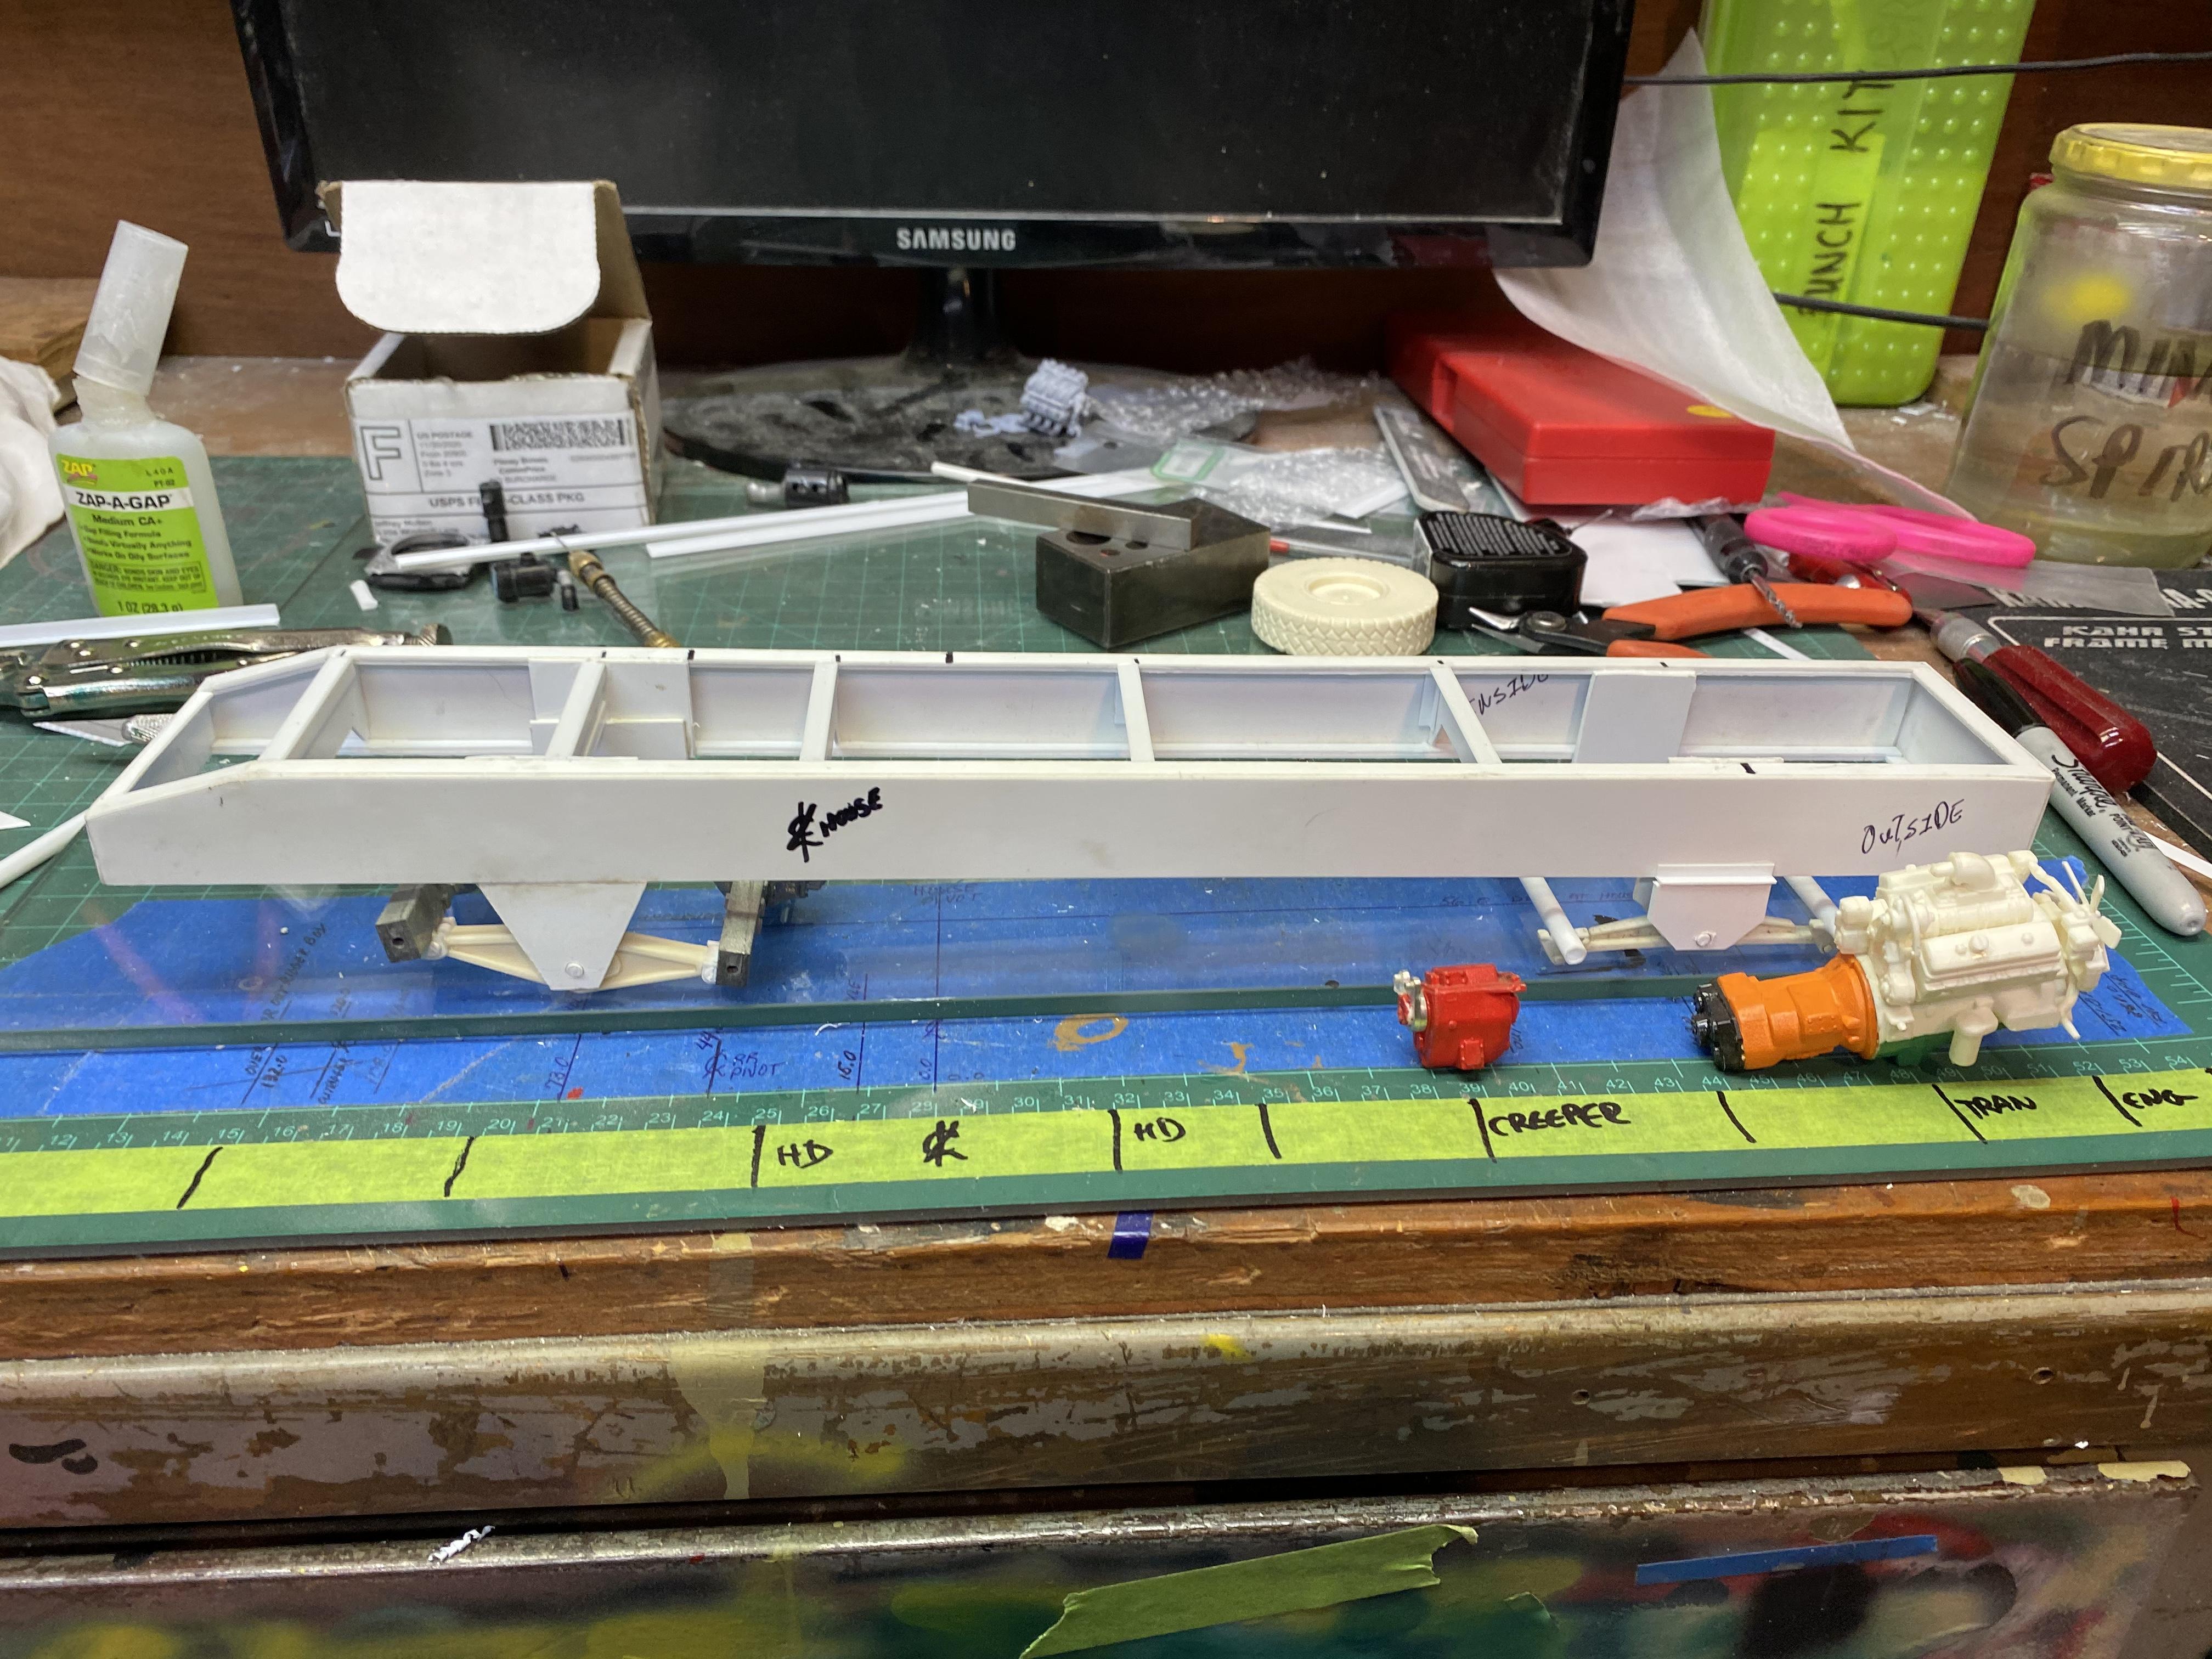
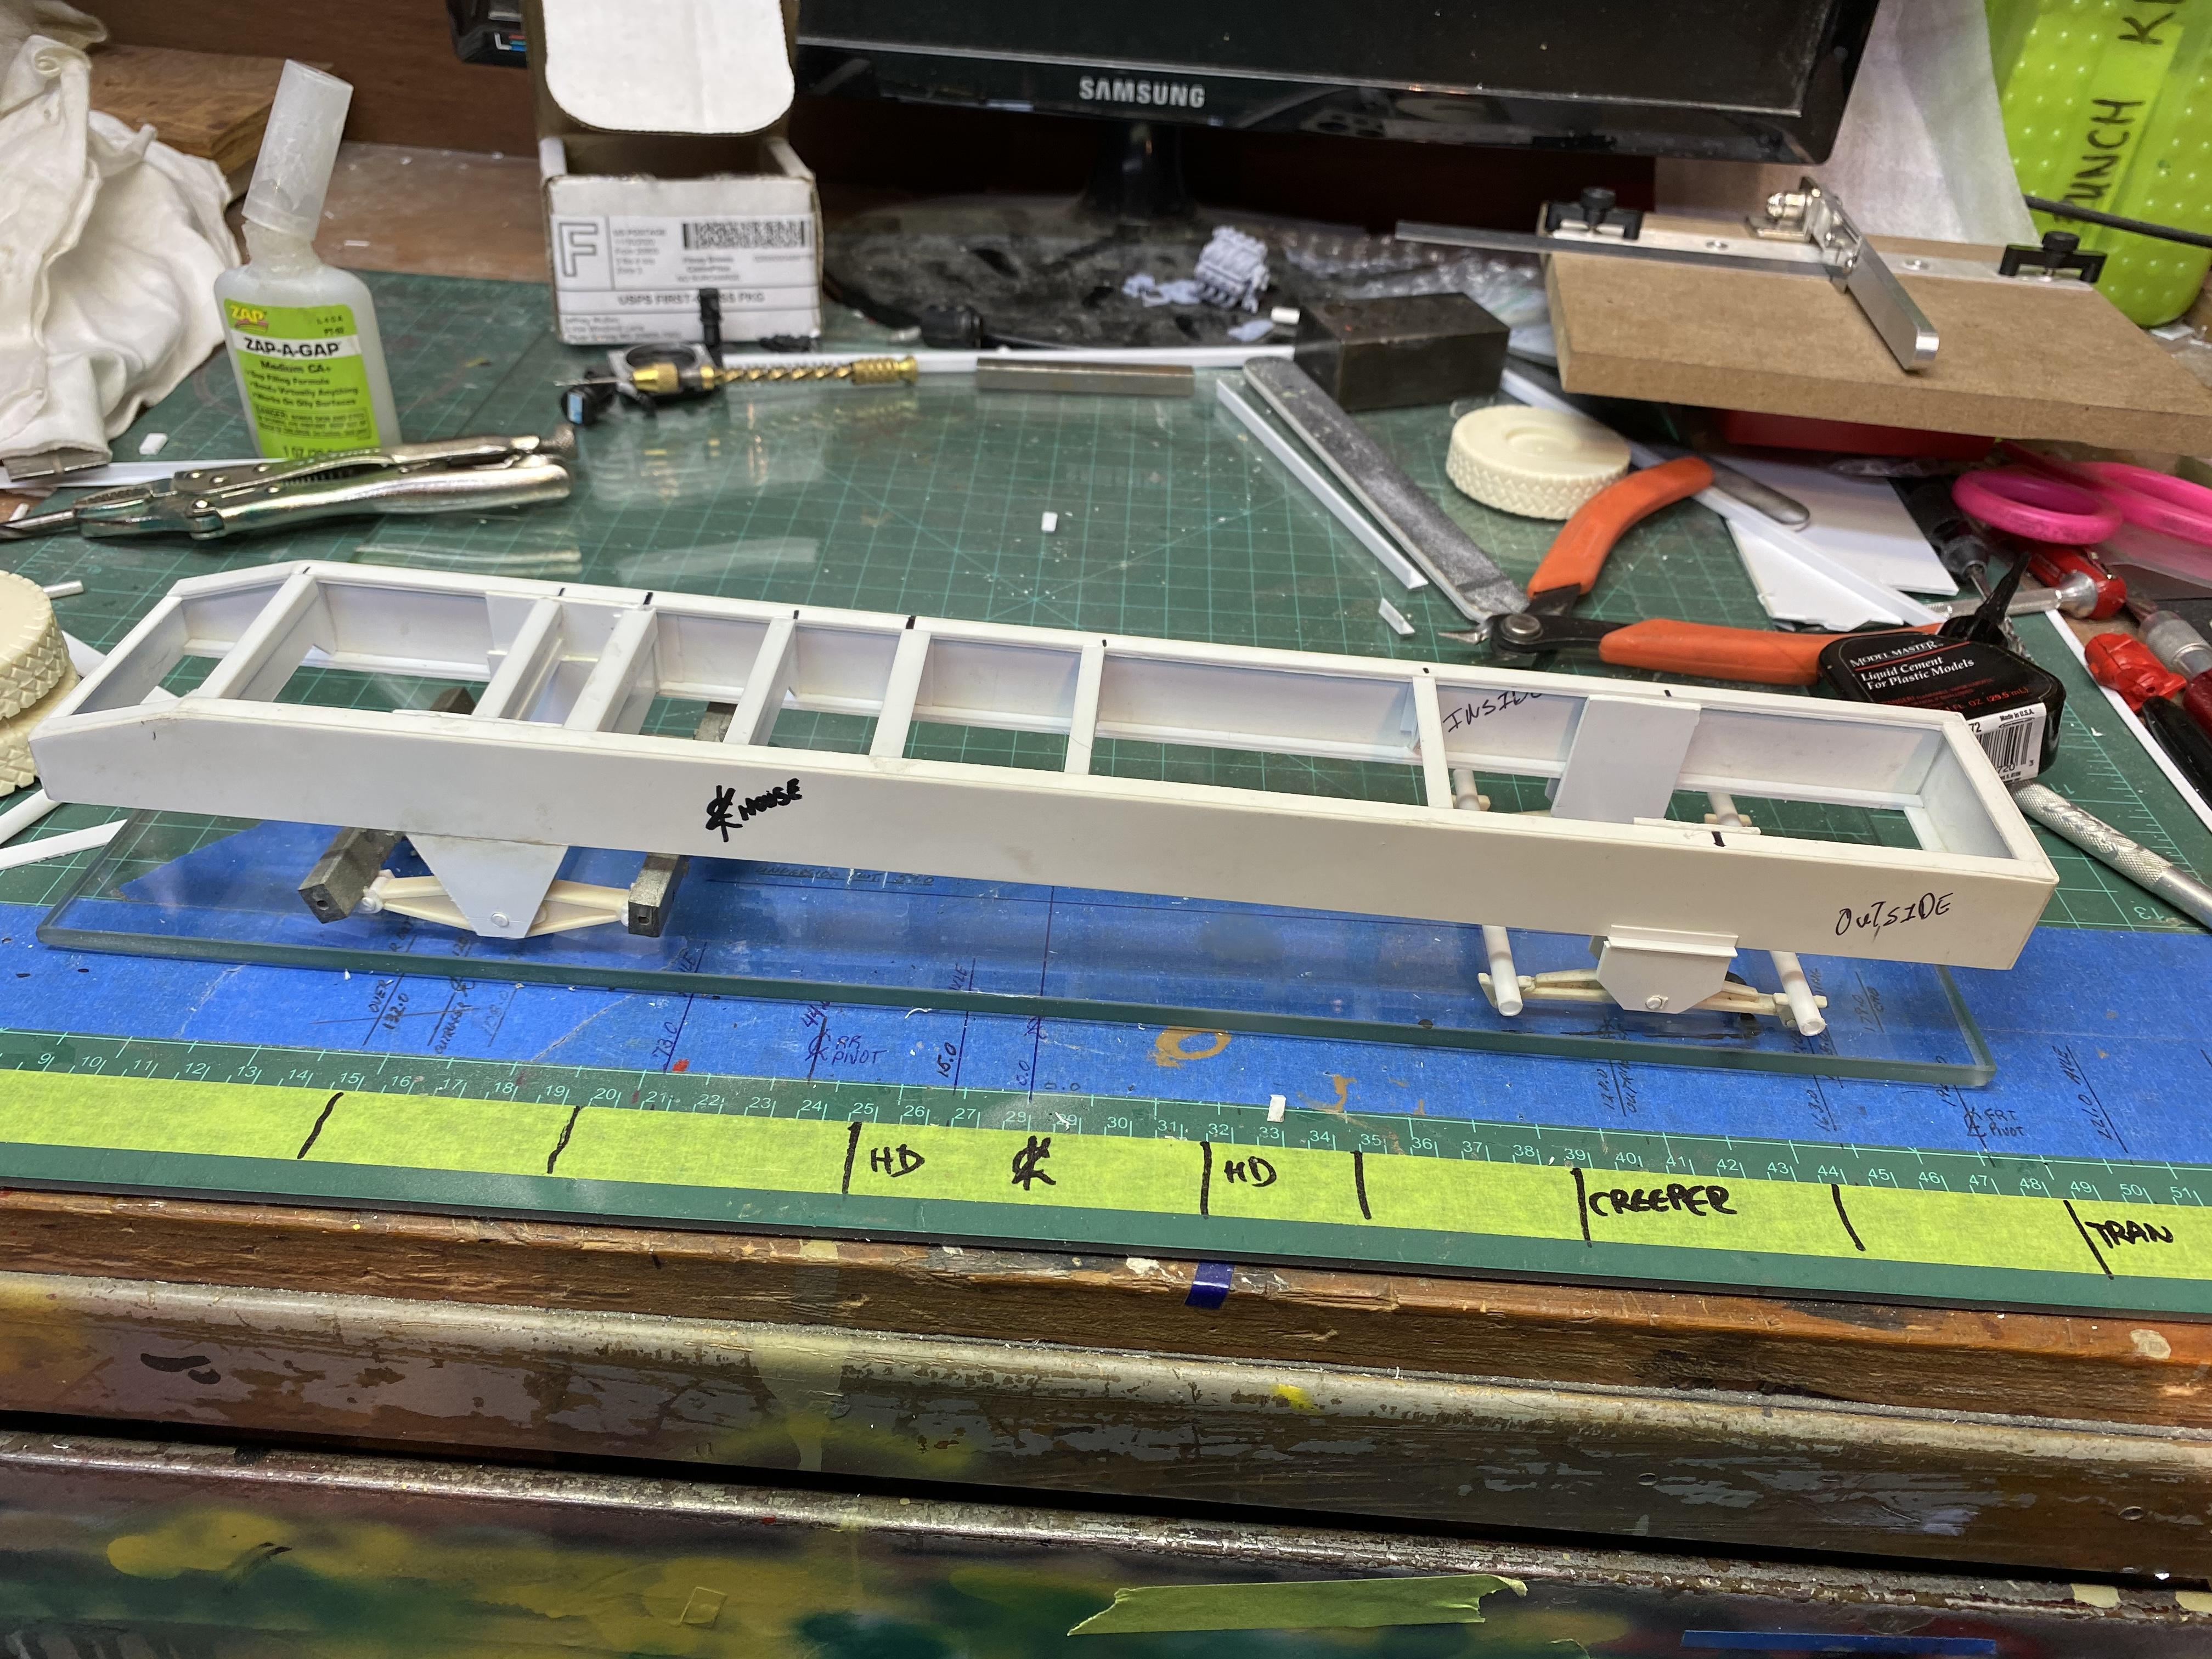
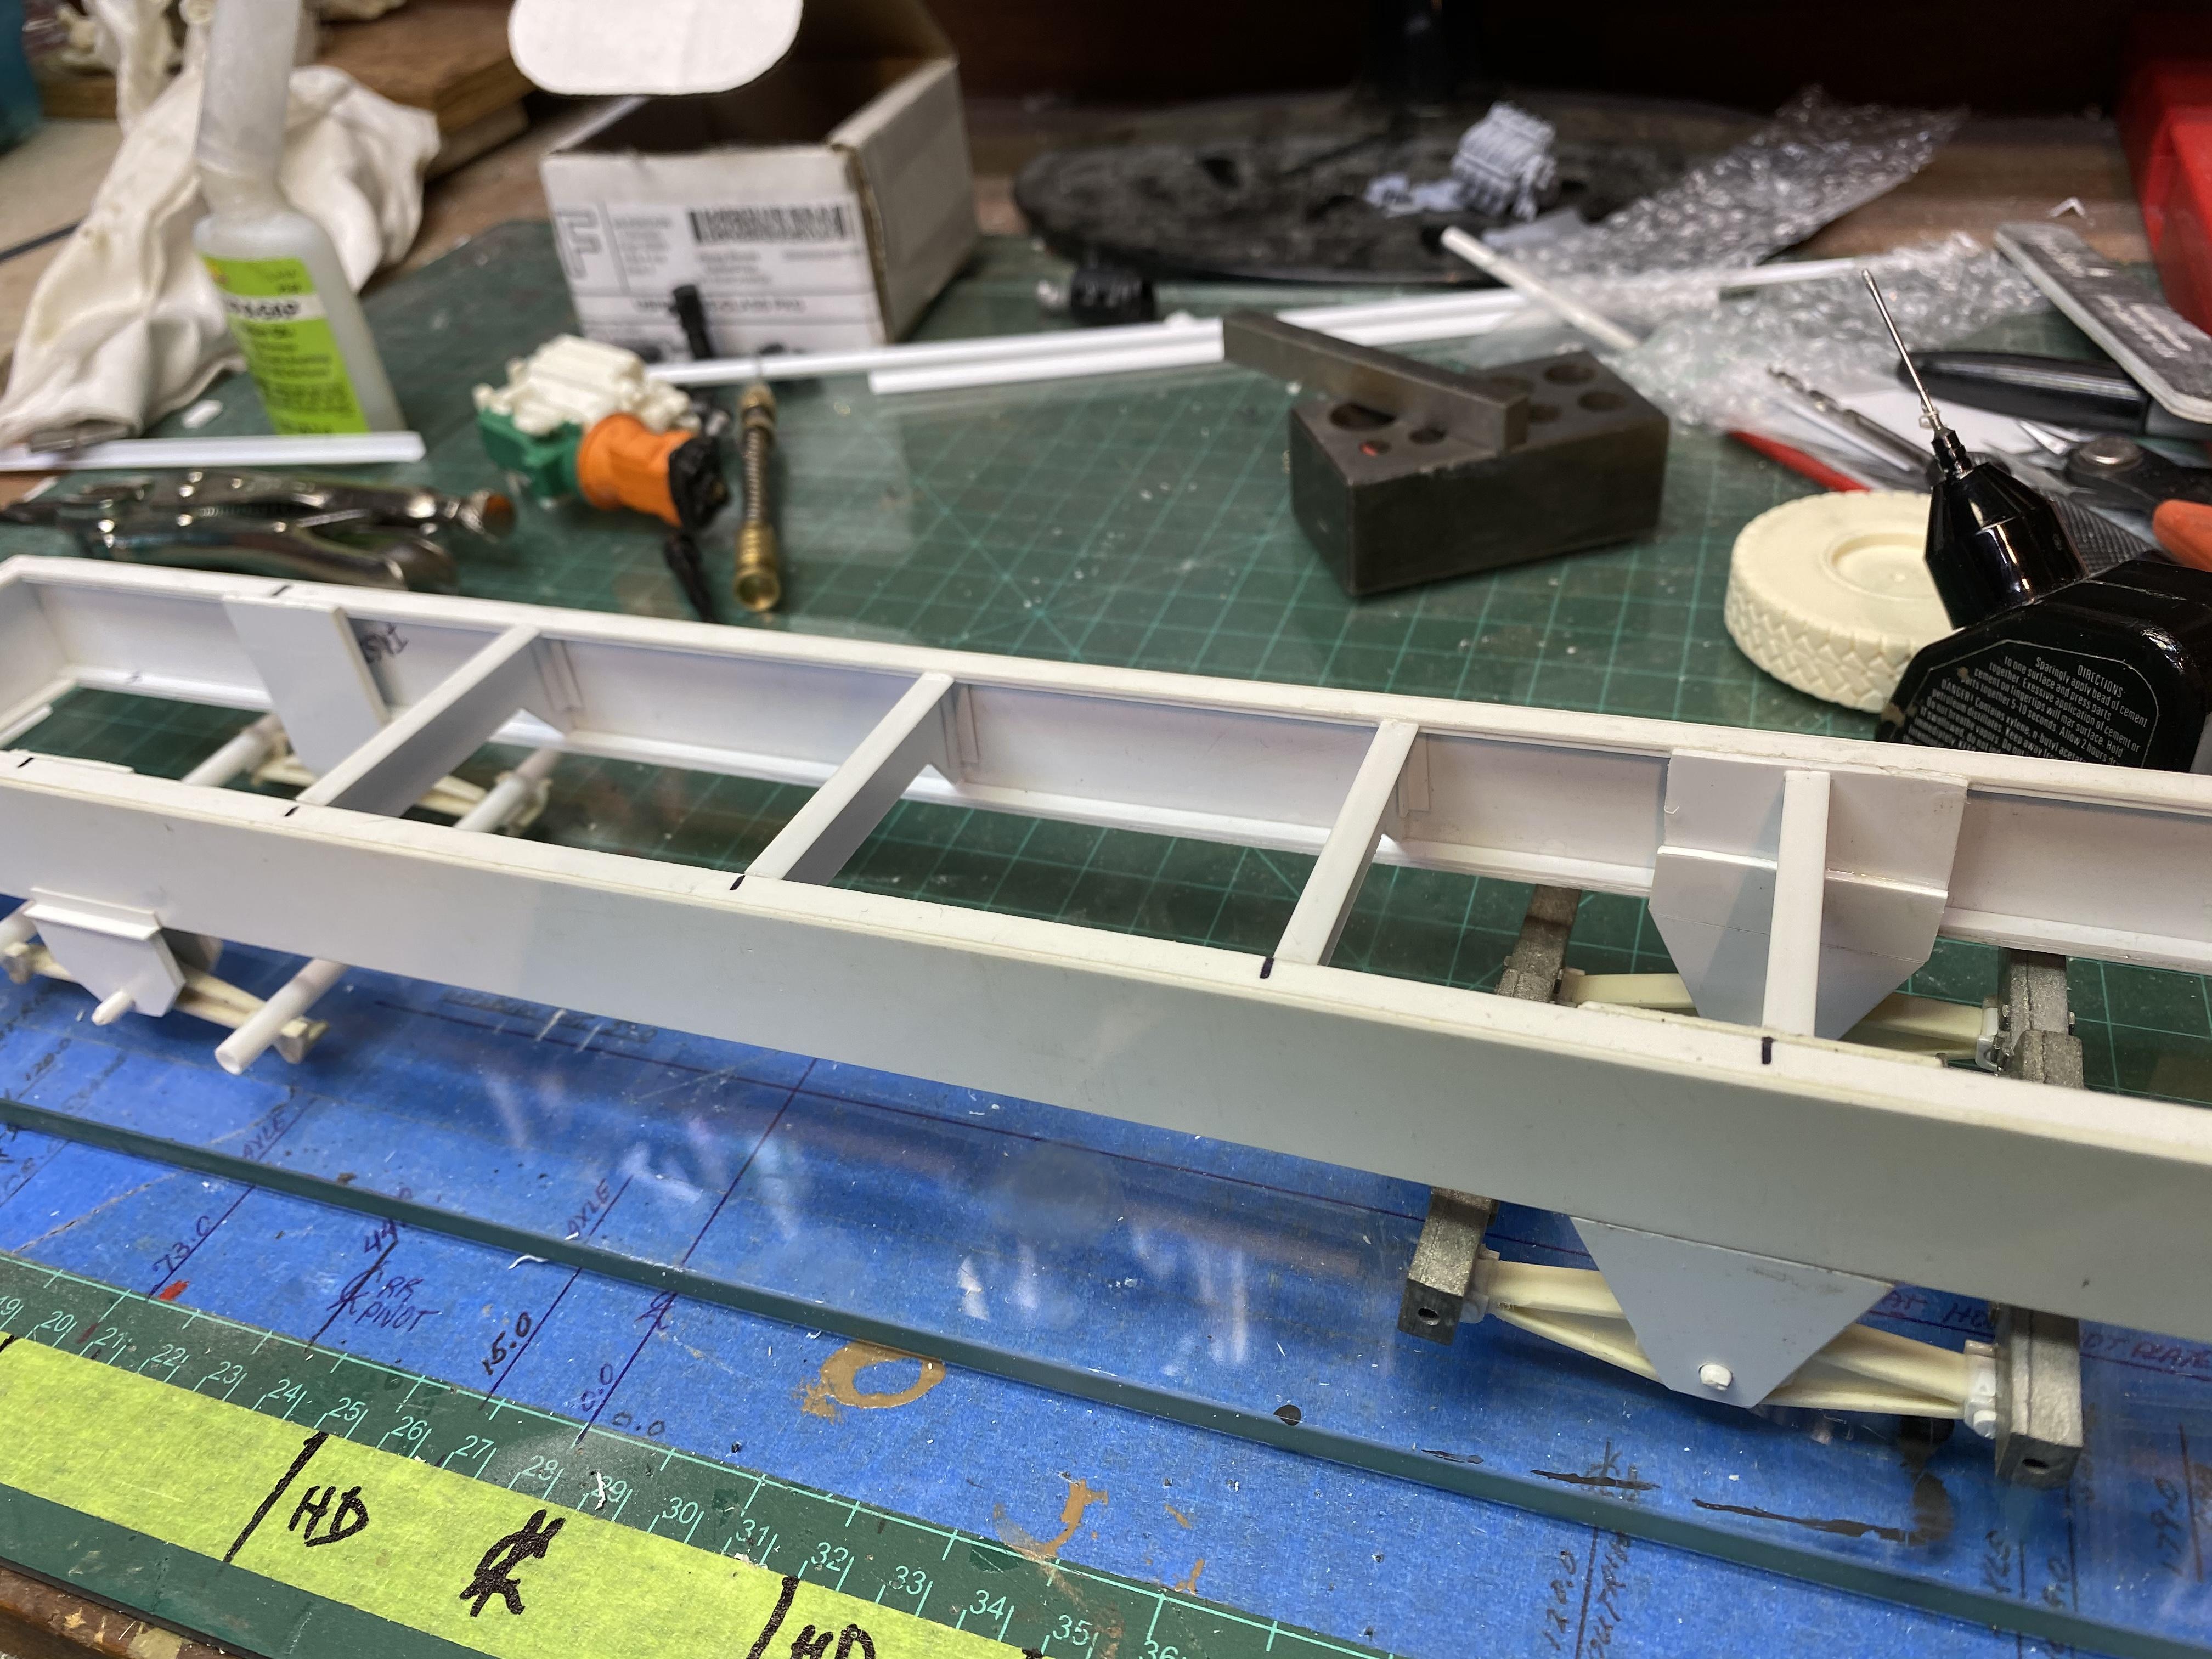
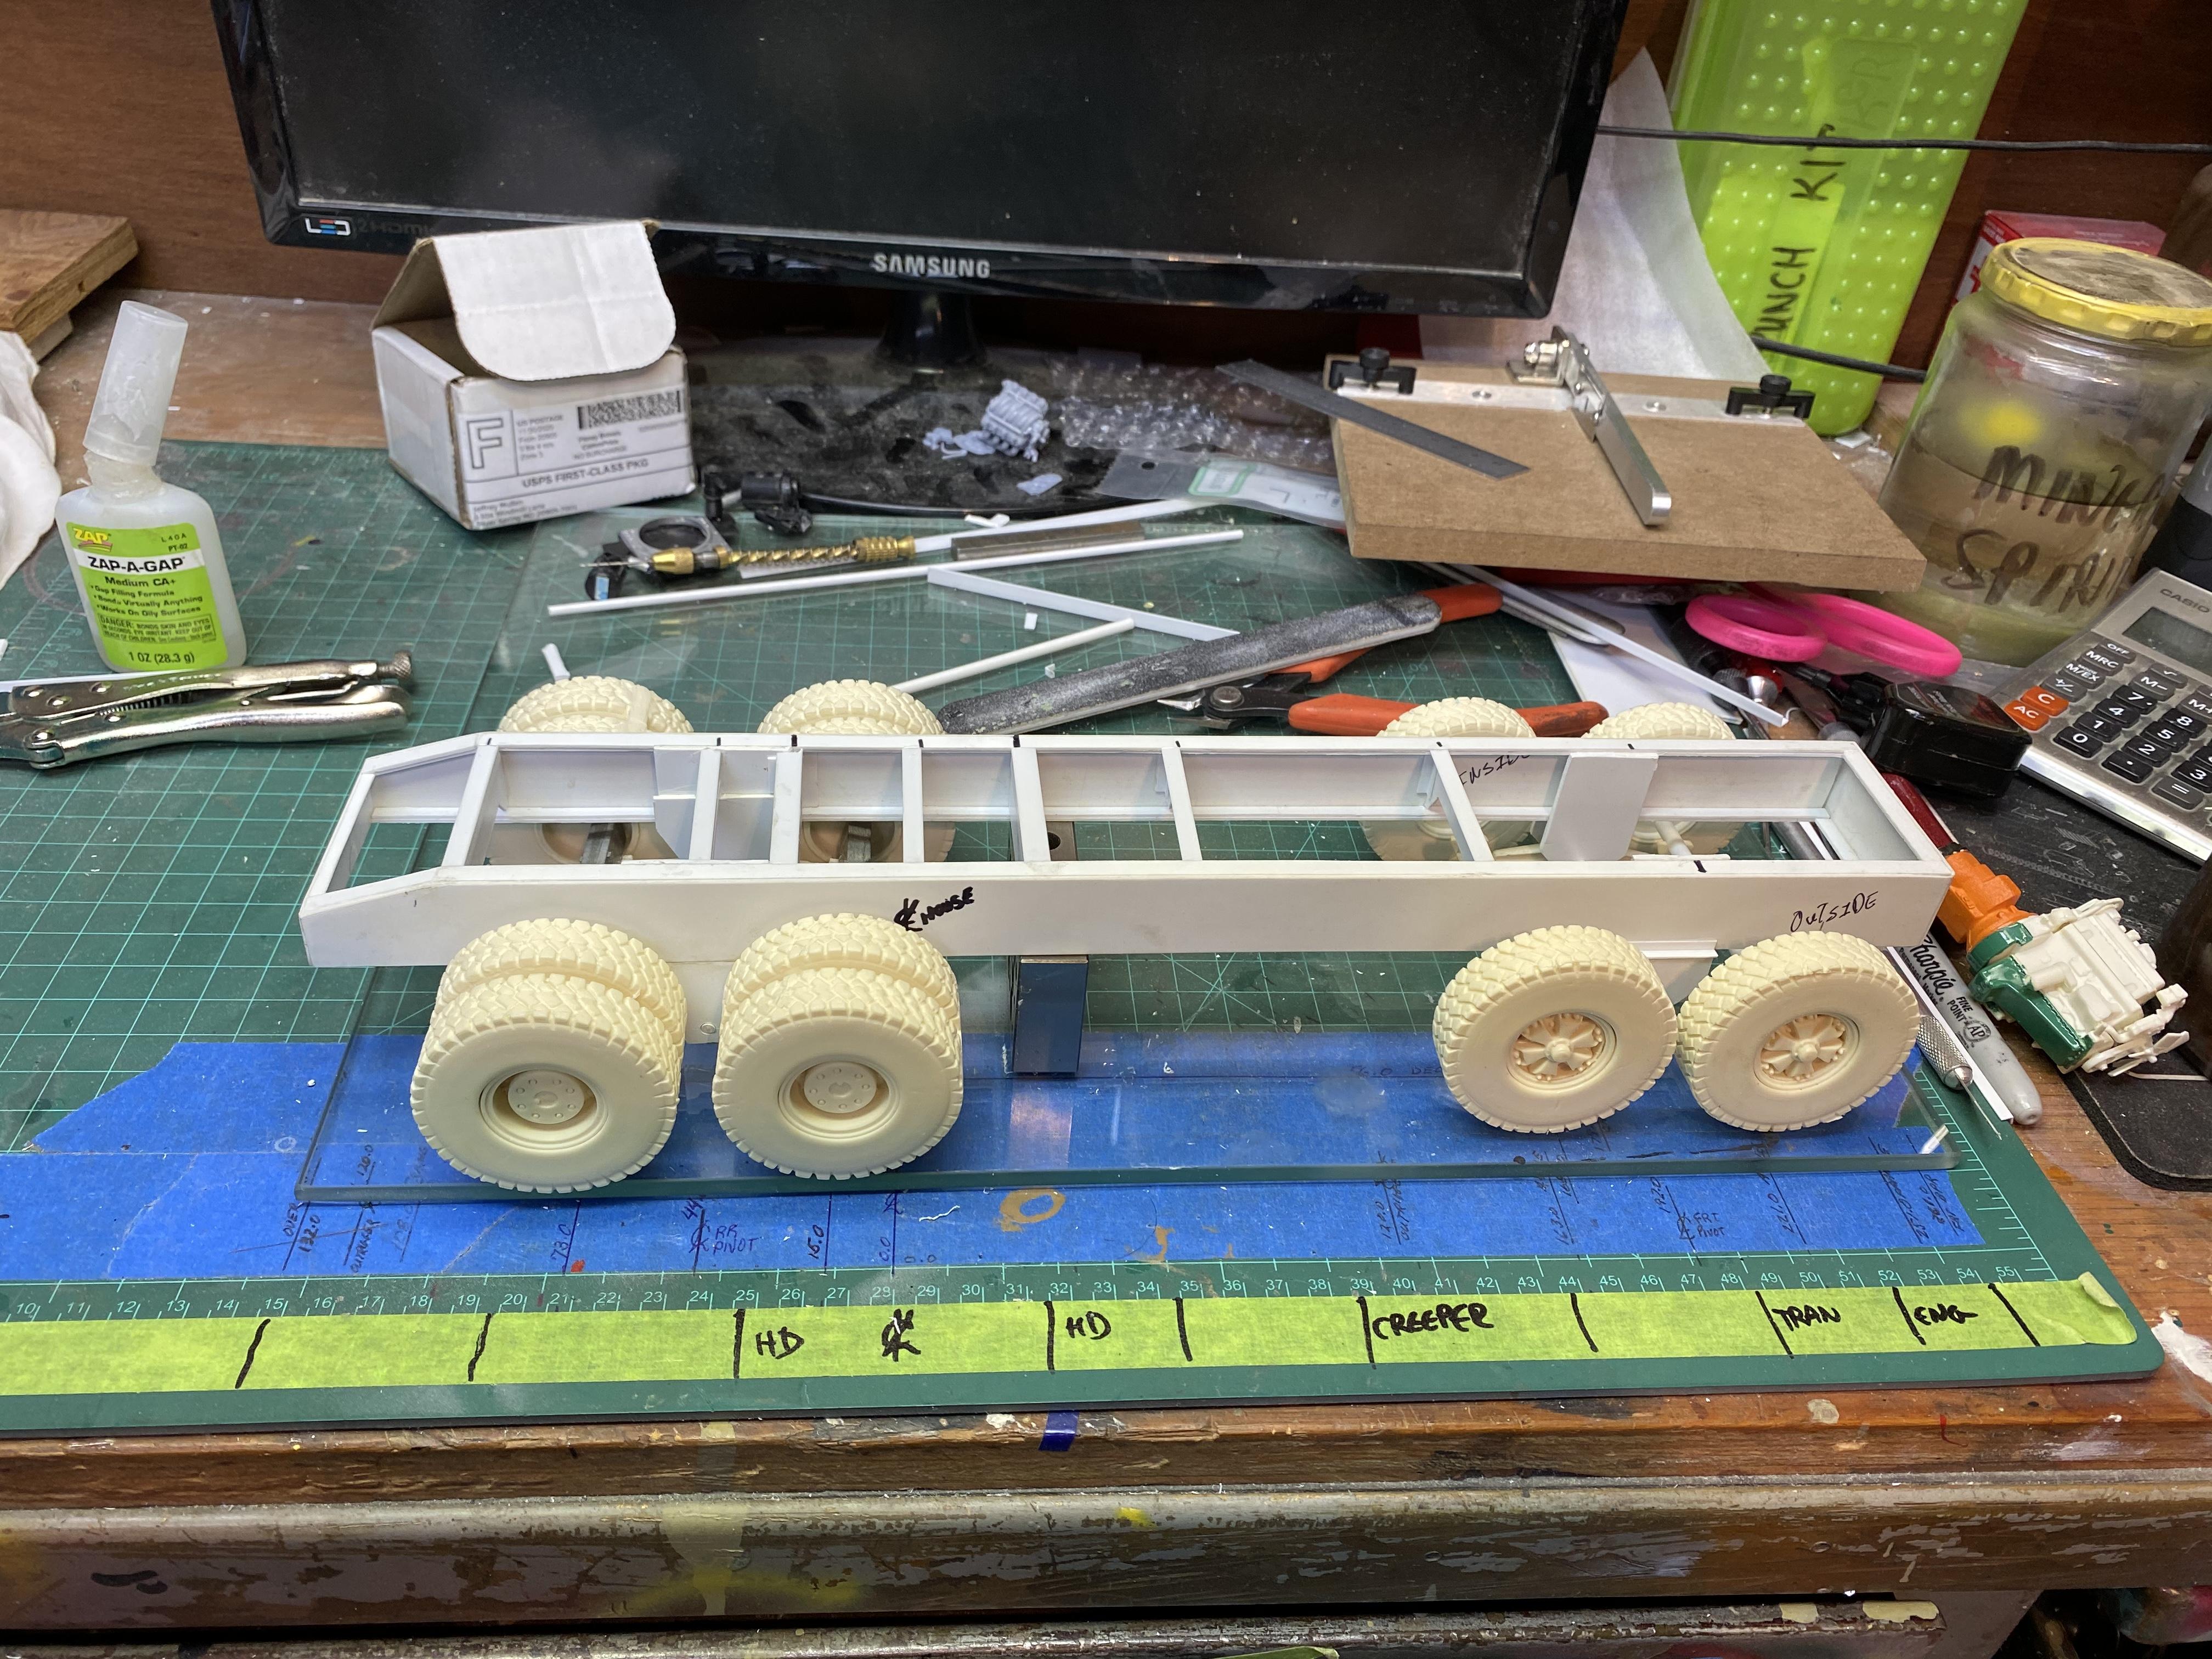
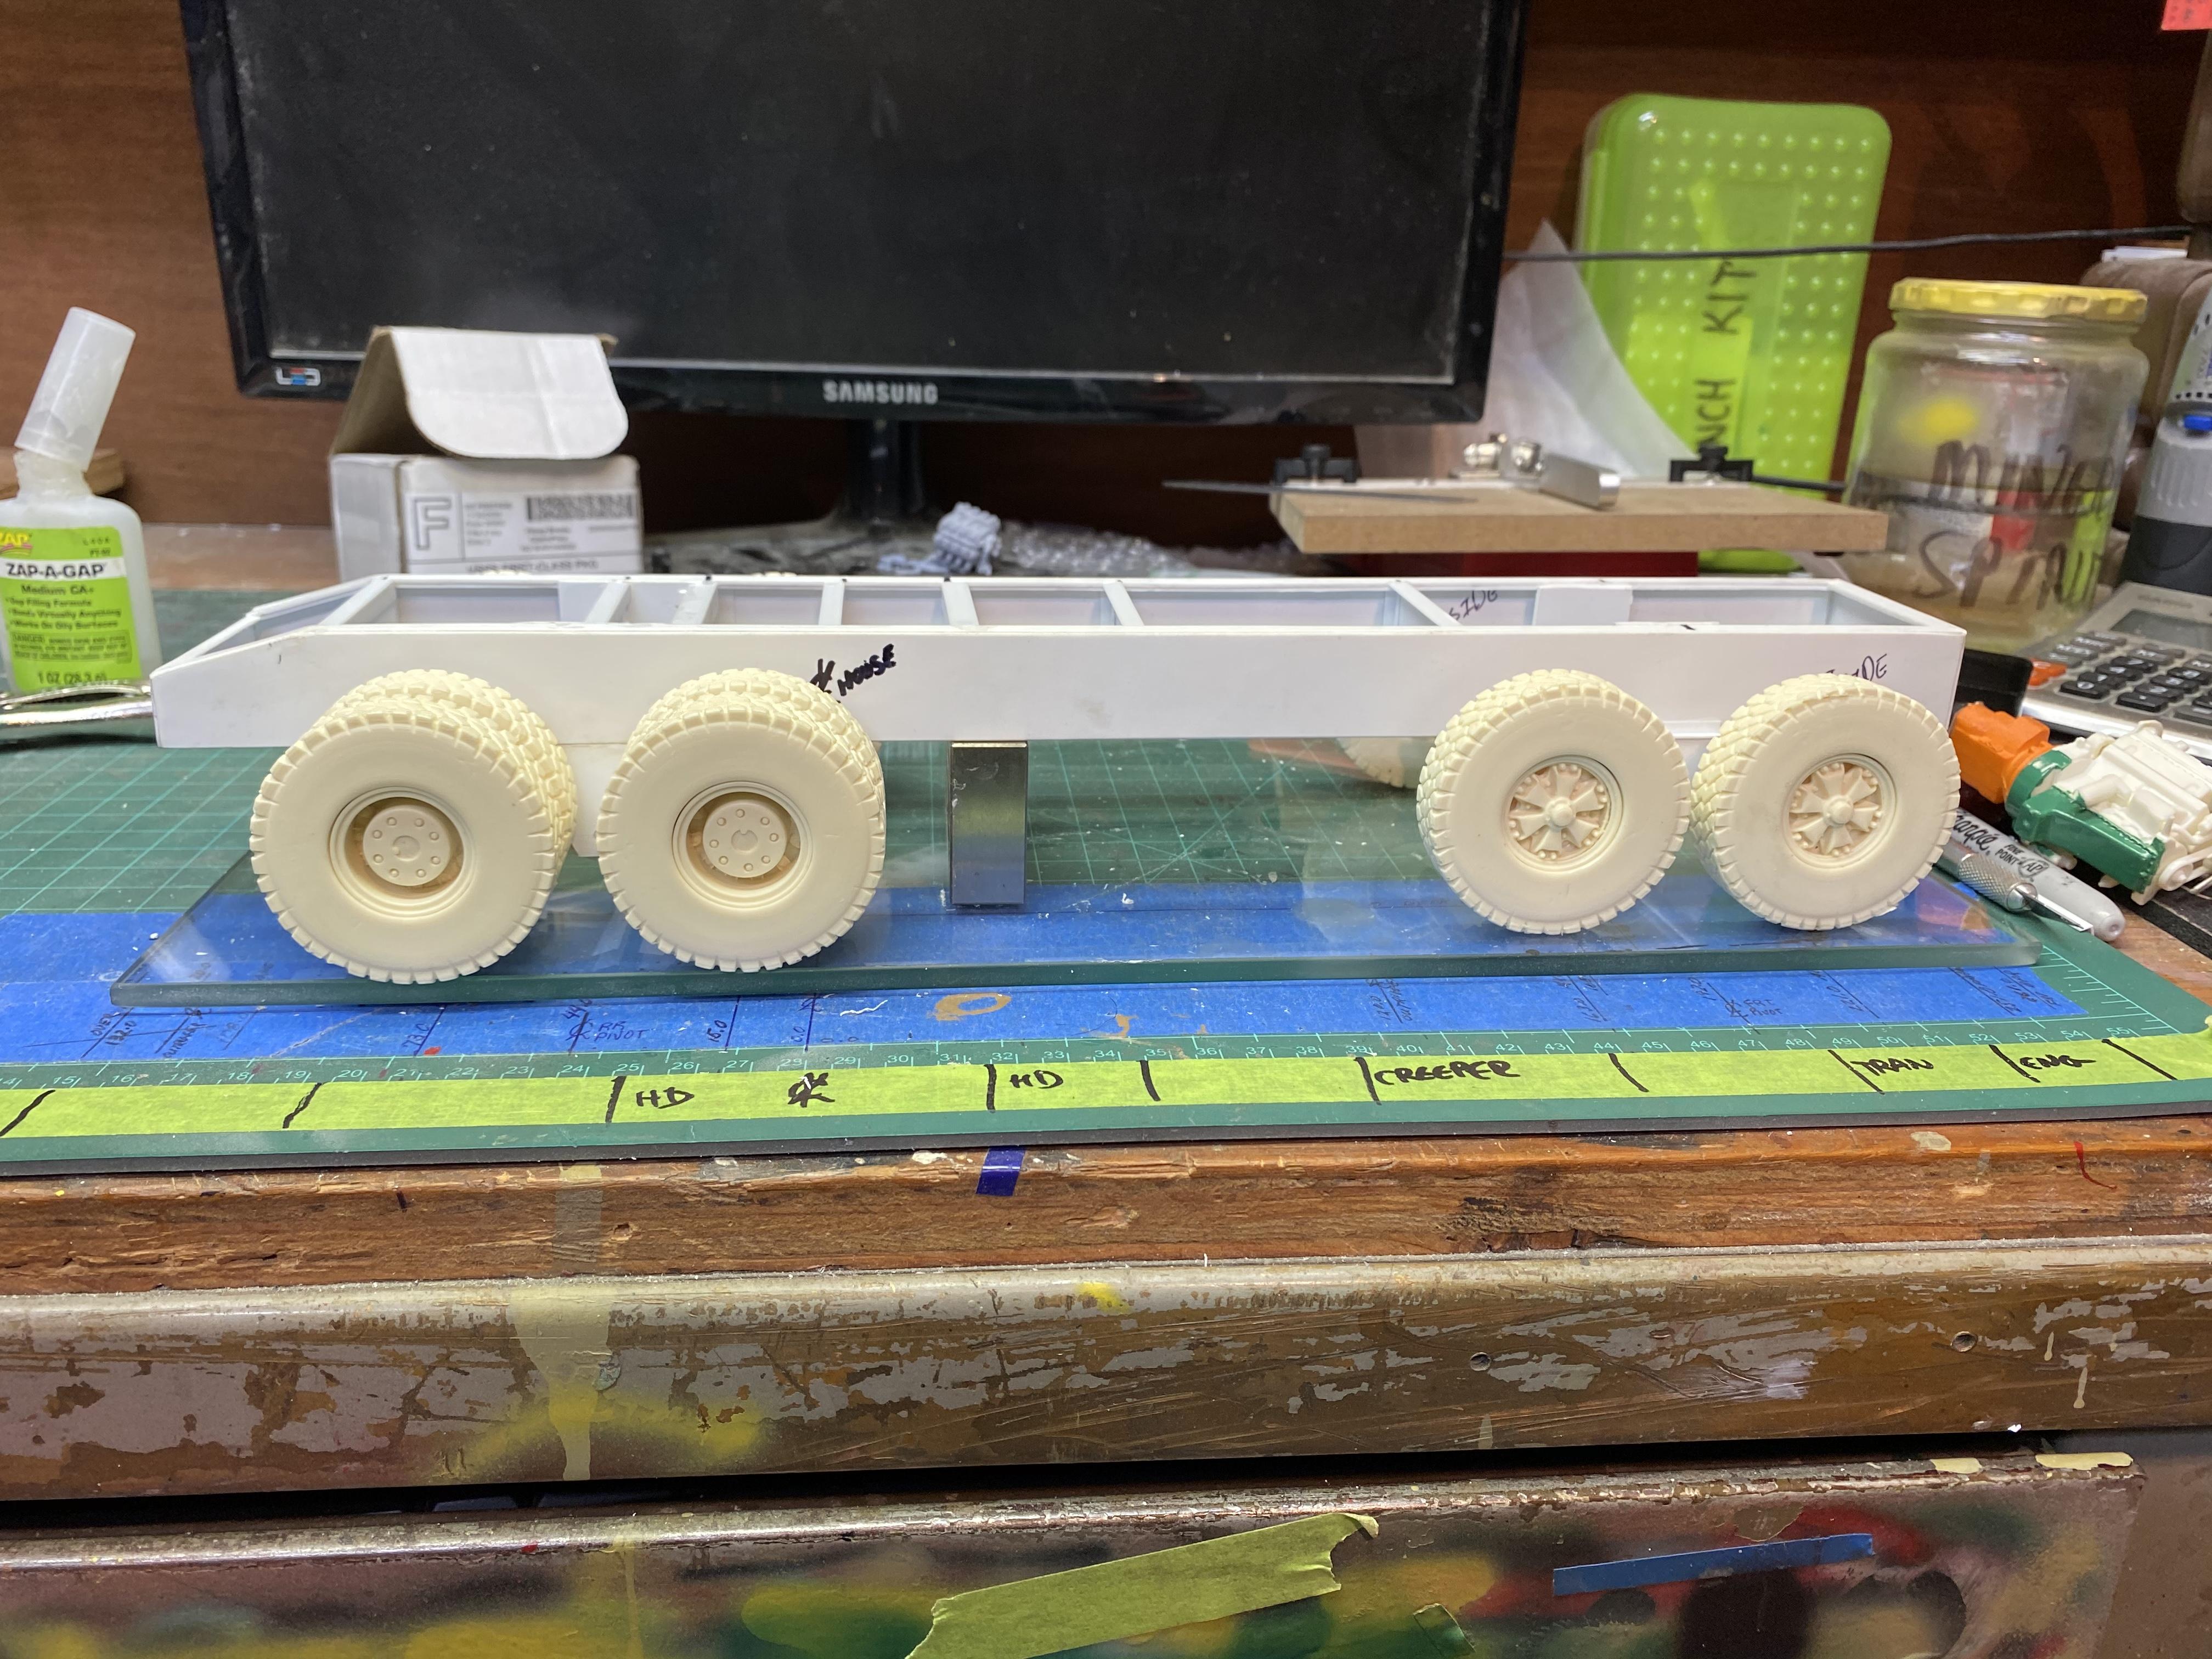
Pretty much all of the frame is done, and all crossmembers are in with all of the rivets (166 of them), that hold it all together. Lots of tiny bits!!!
-
That’s a great idea Charlie..........will convert to metal axles and bushings shortly!!!! Thanks!
-
Will check out my Simba kit.......THANKS!
-
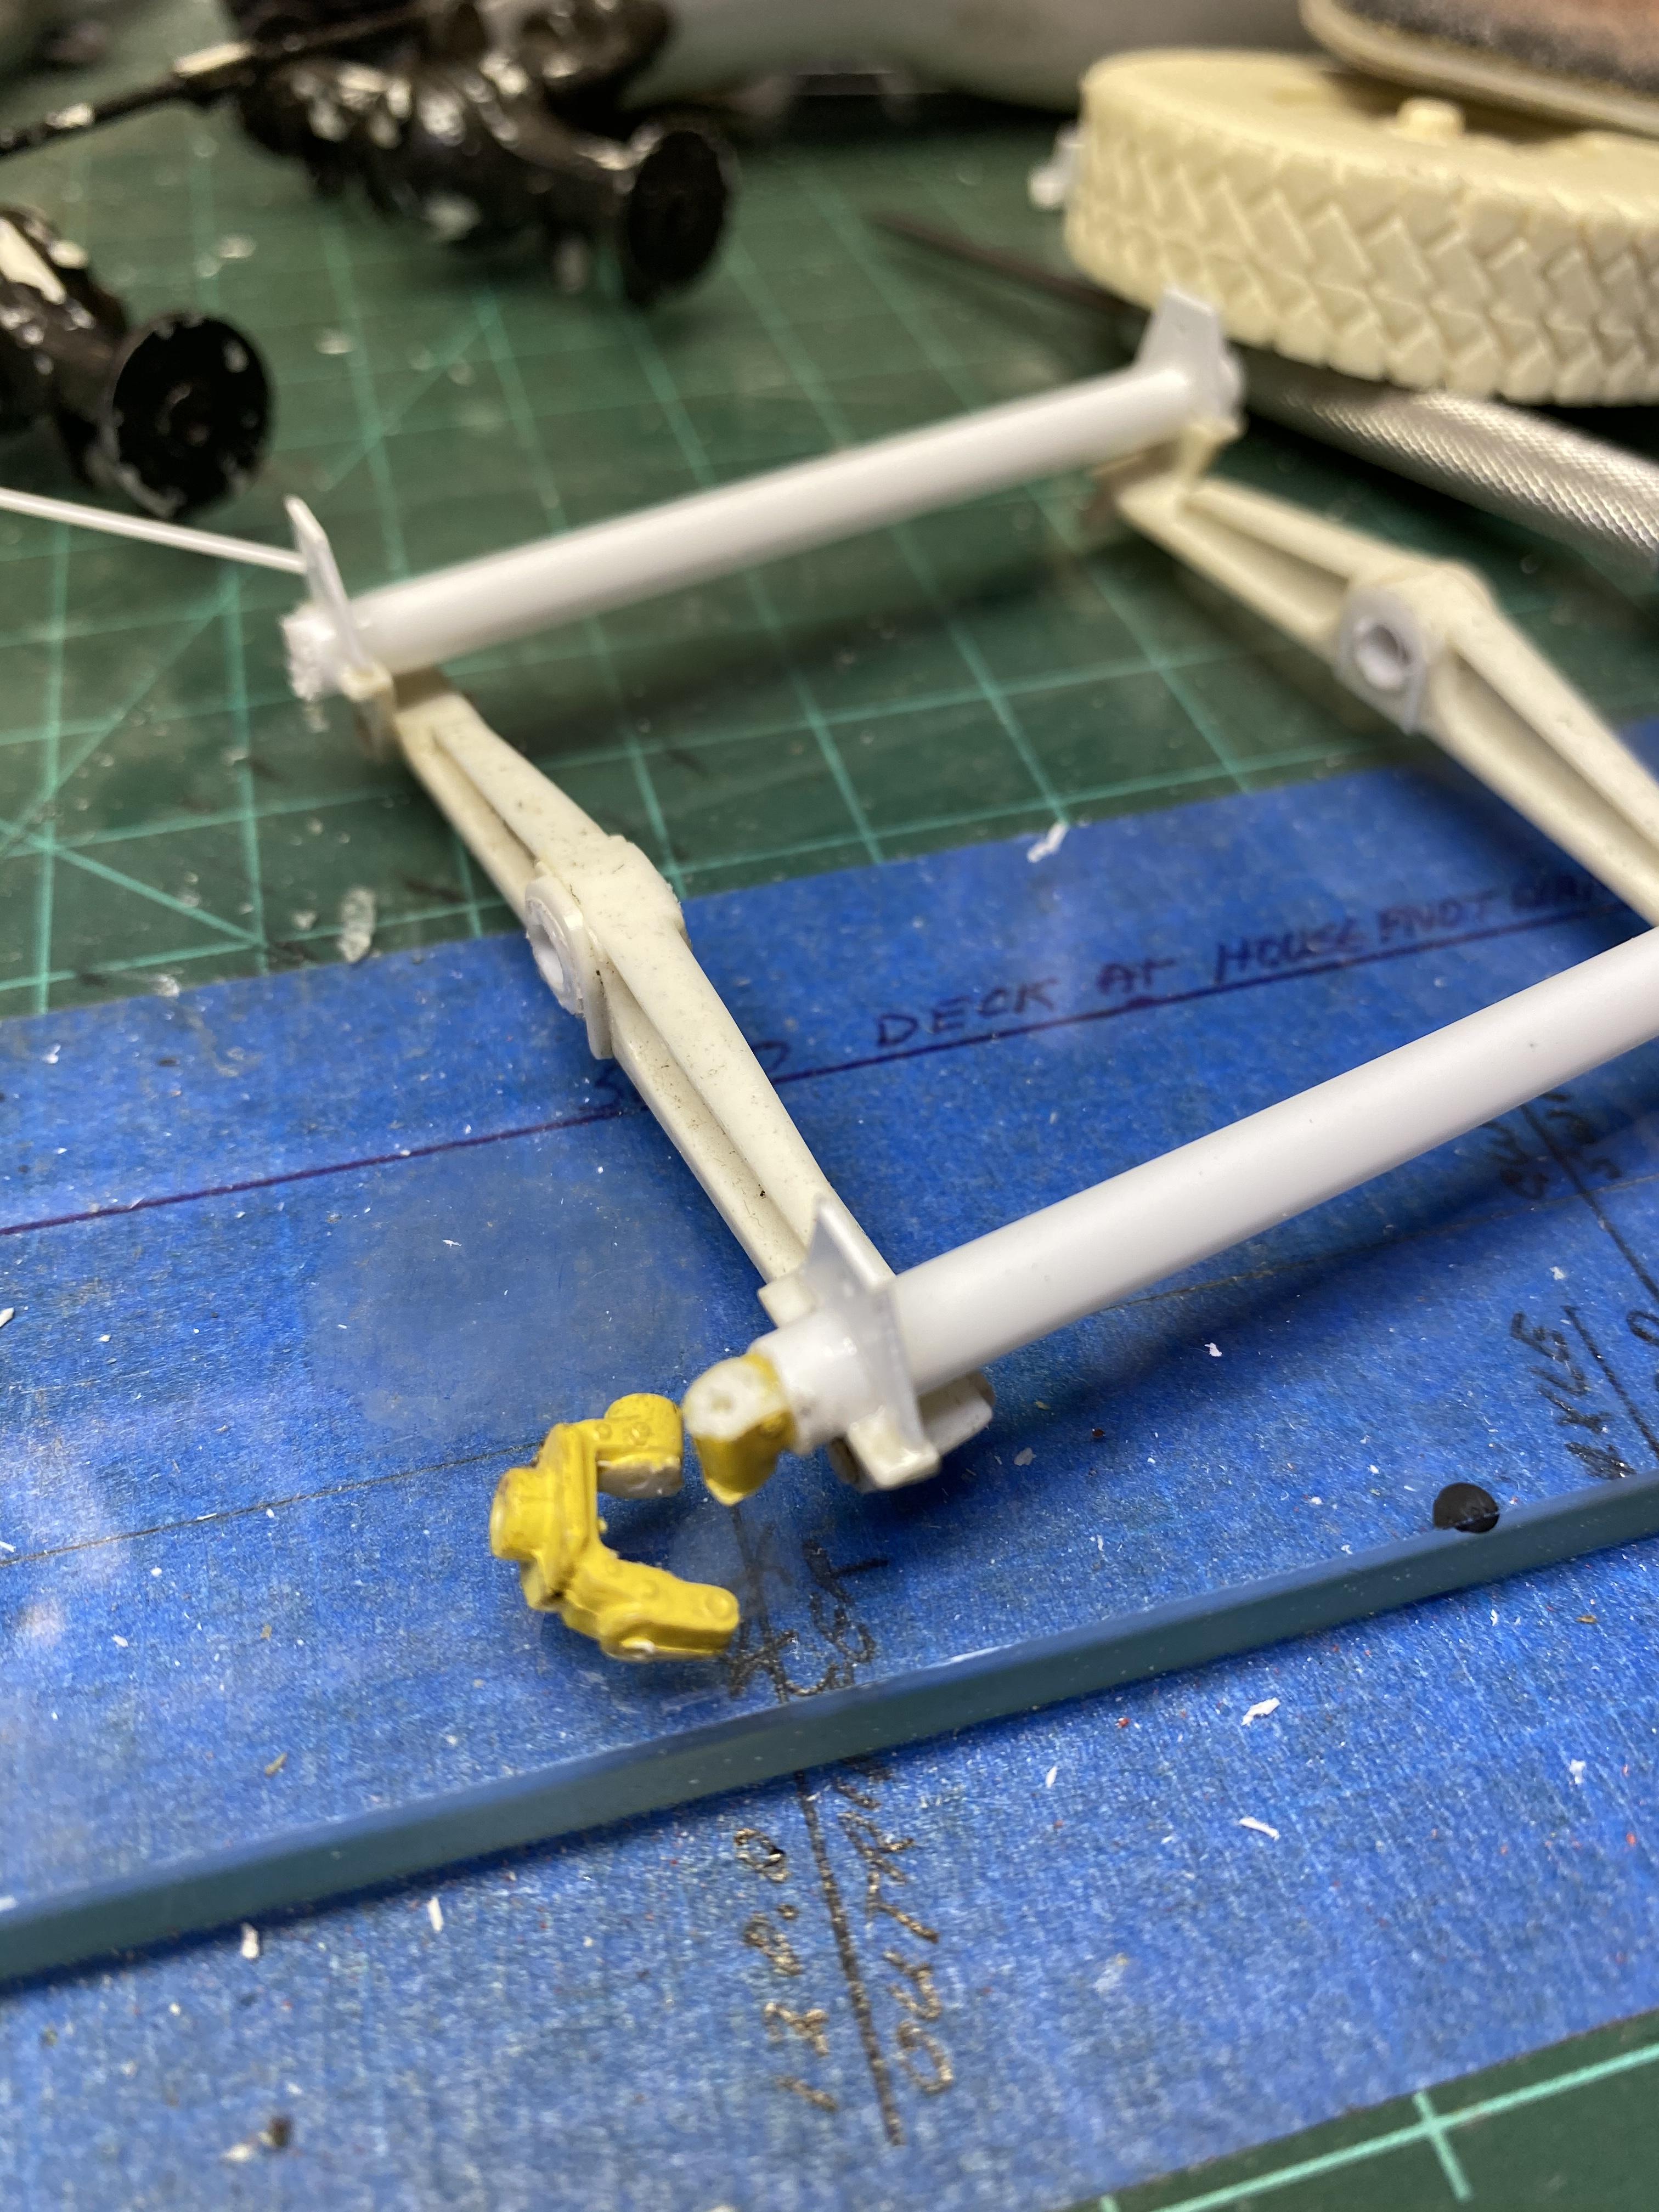
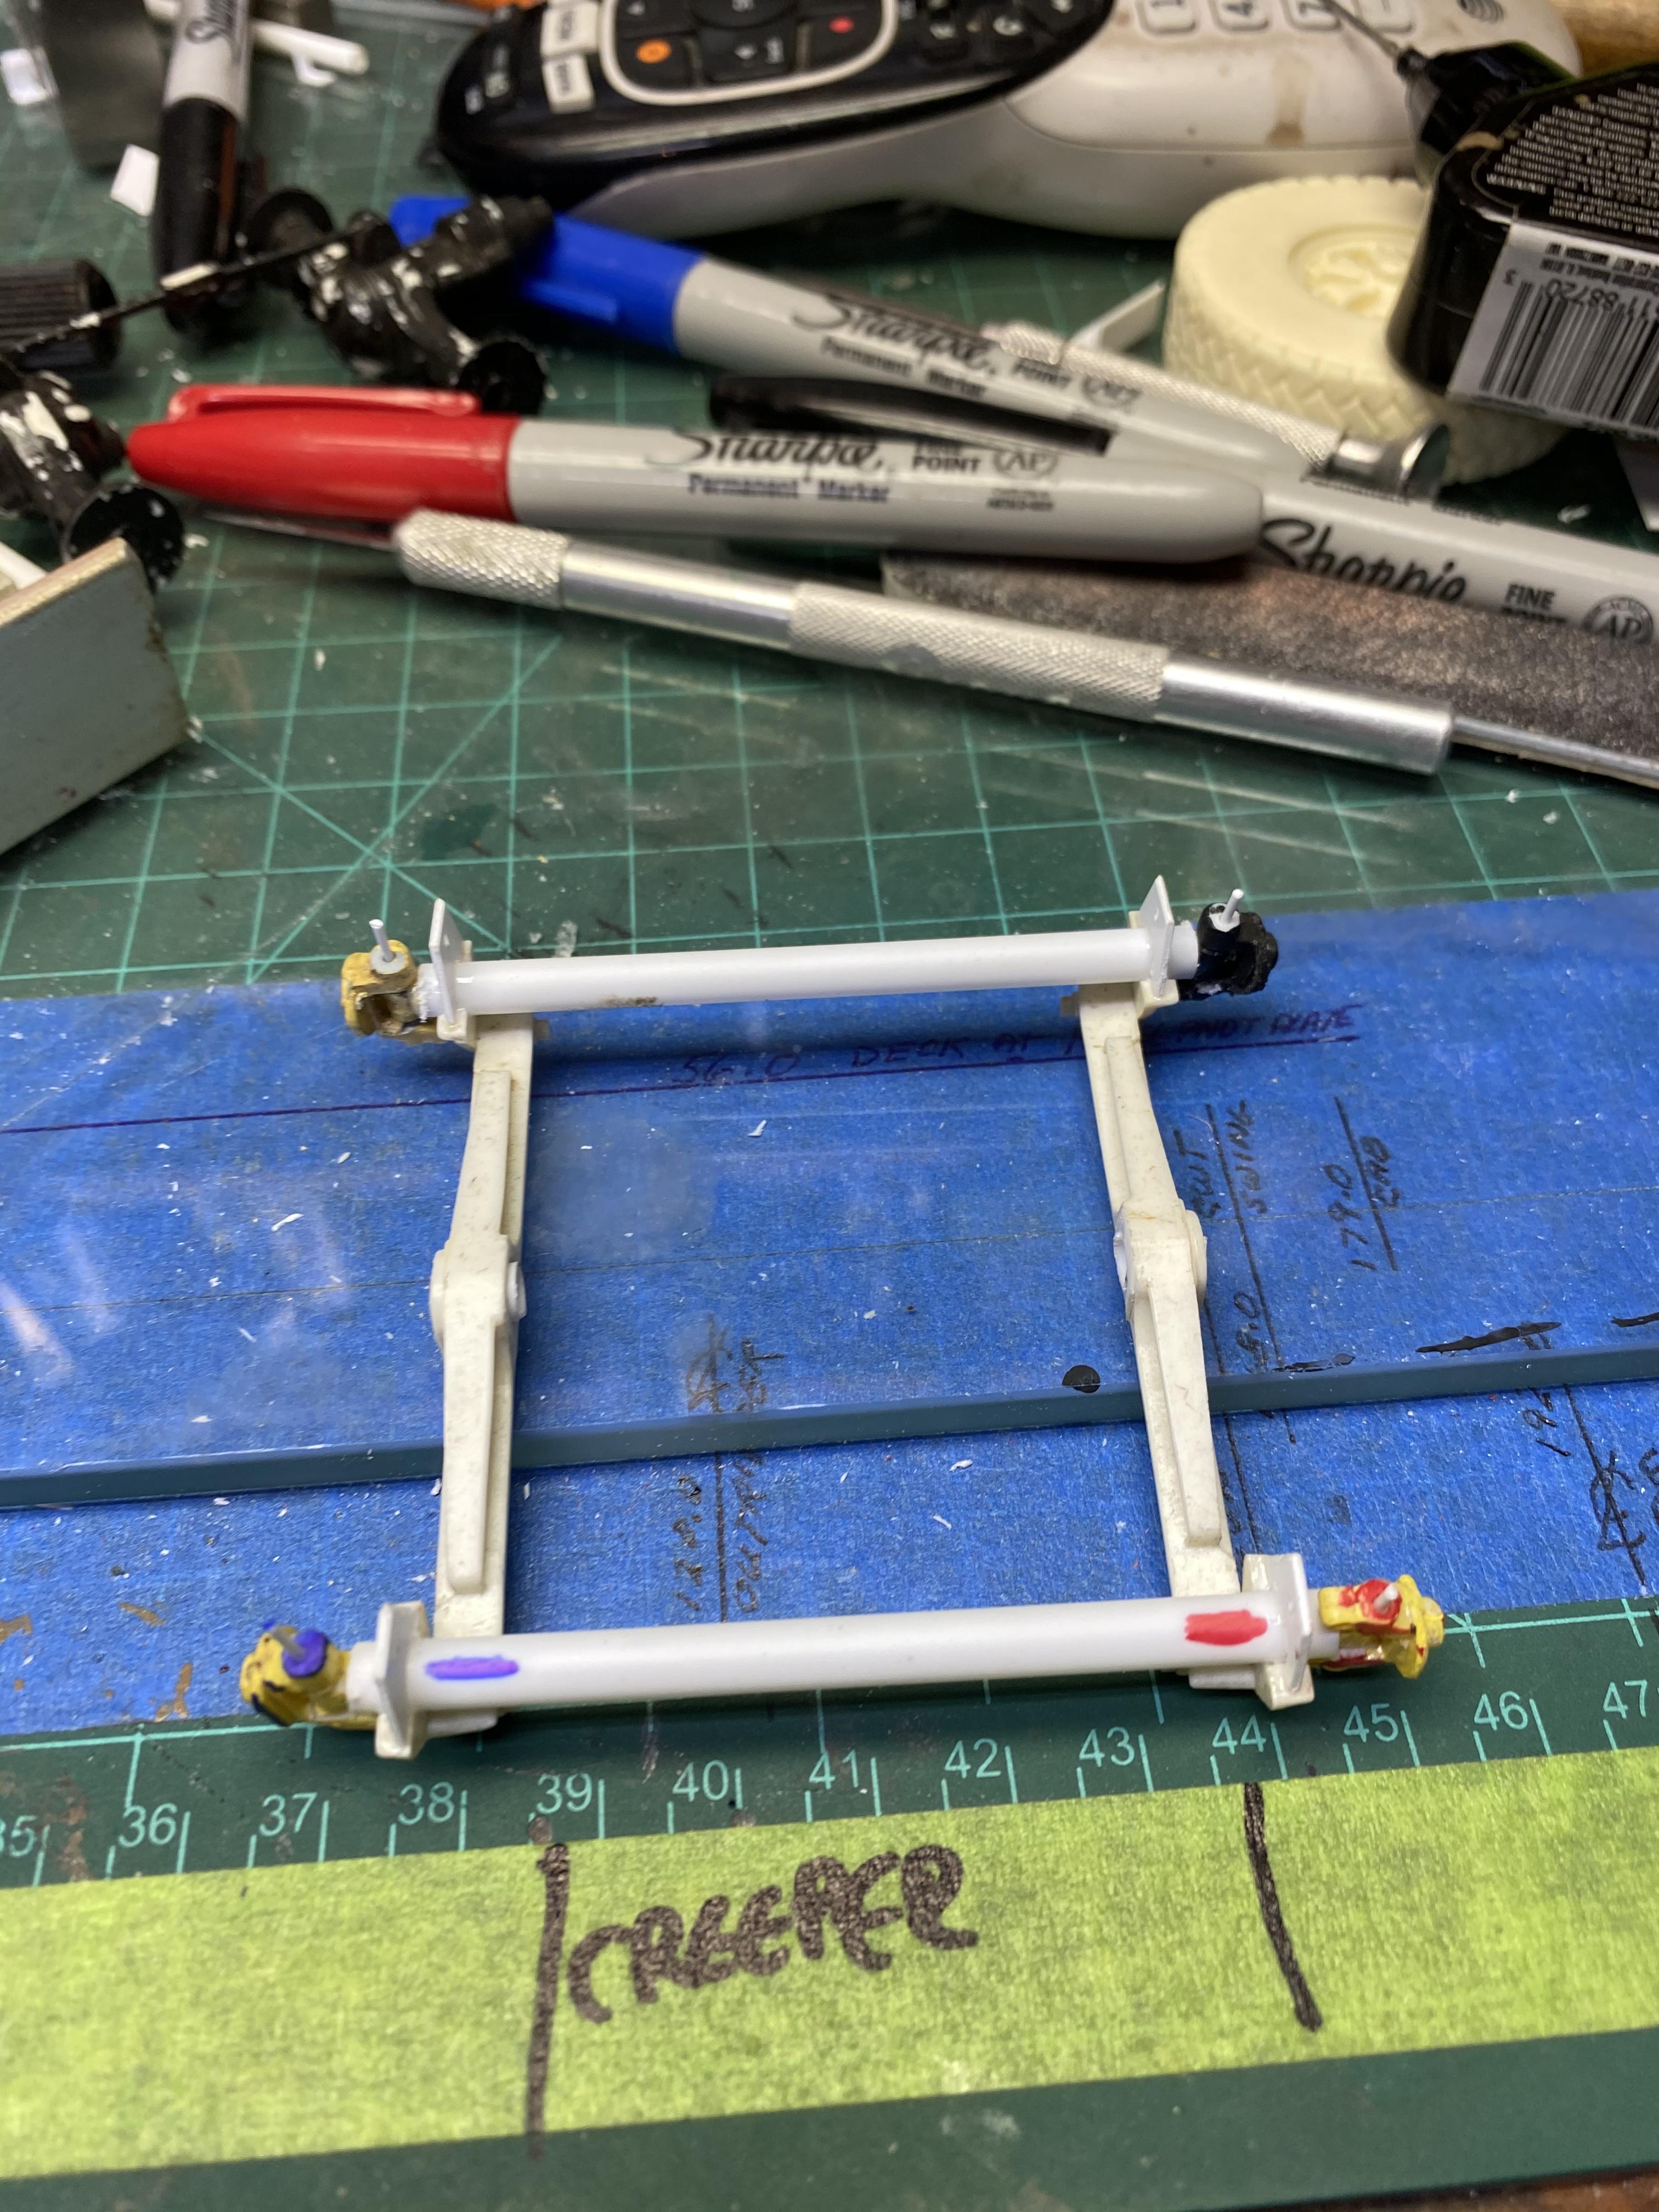
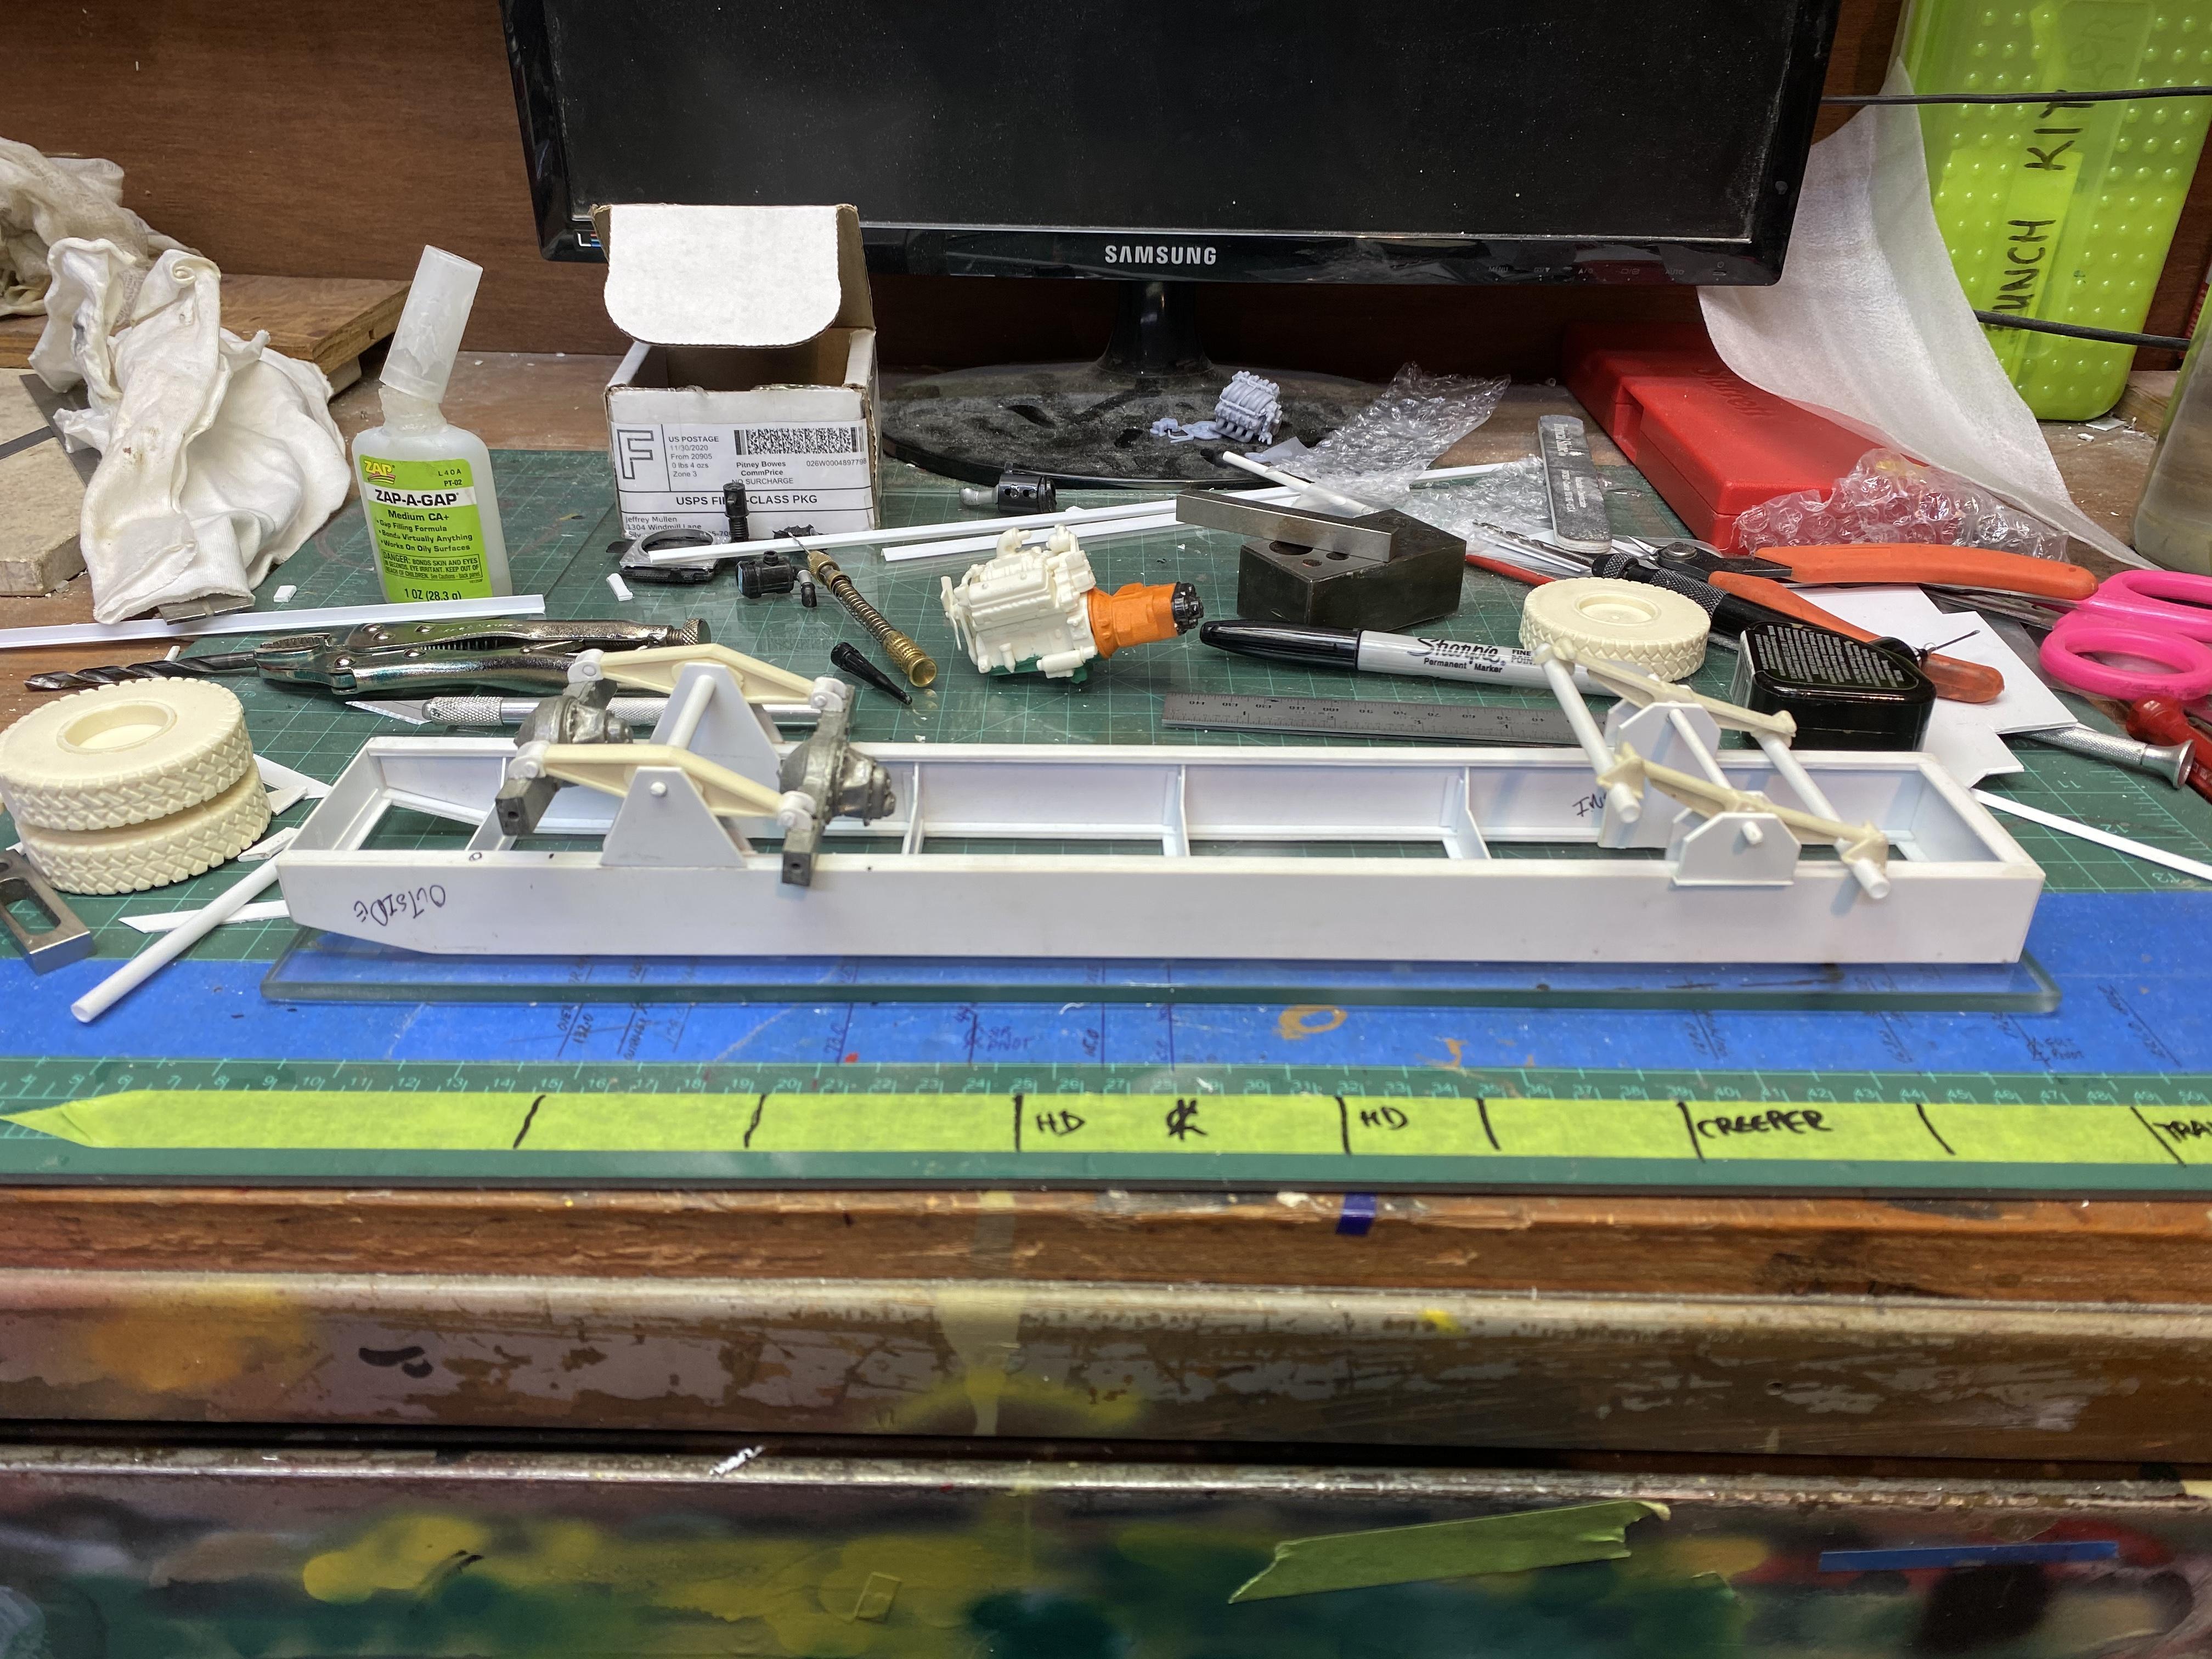
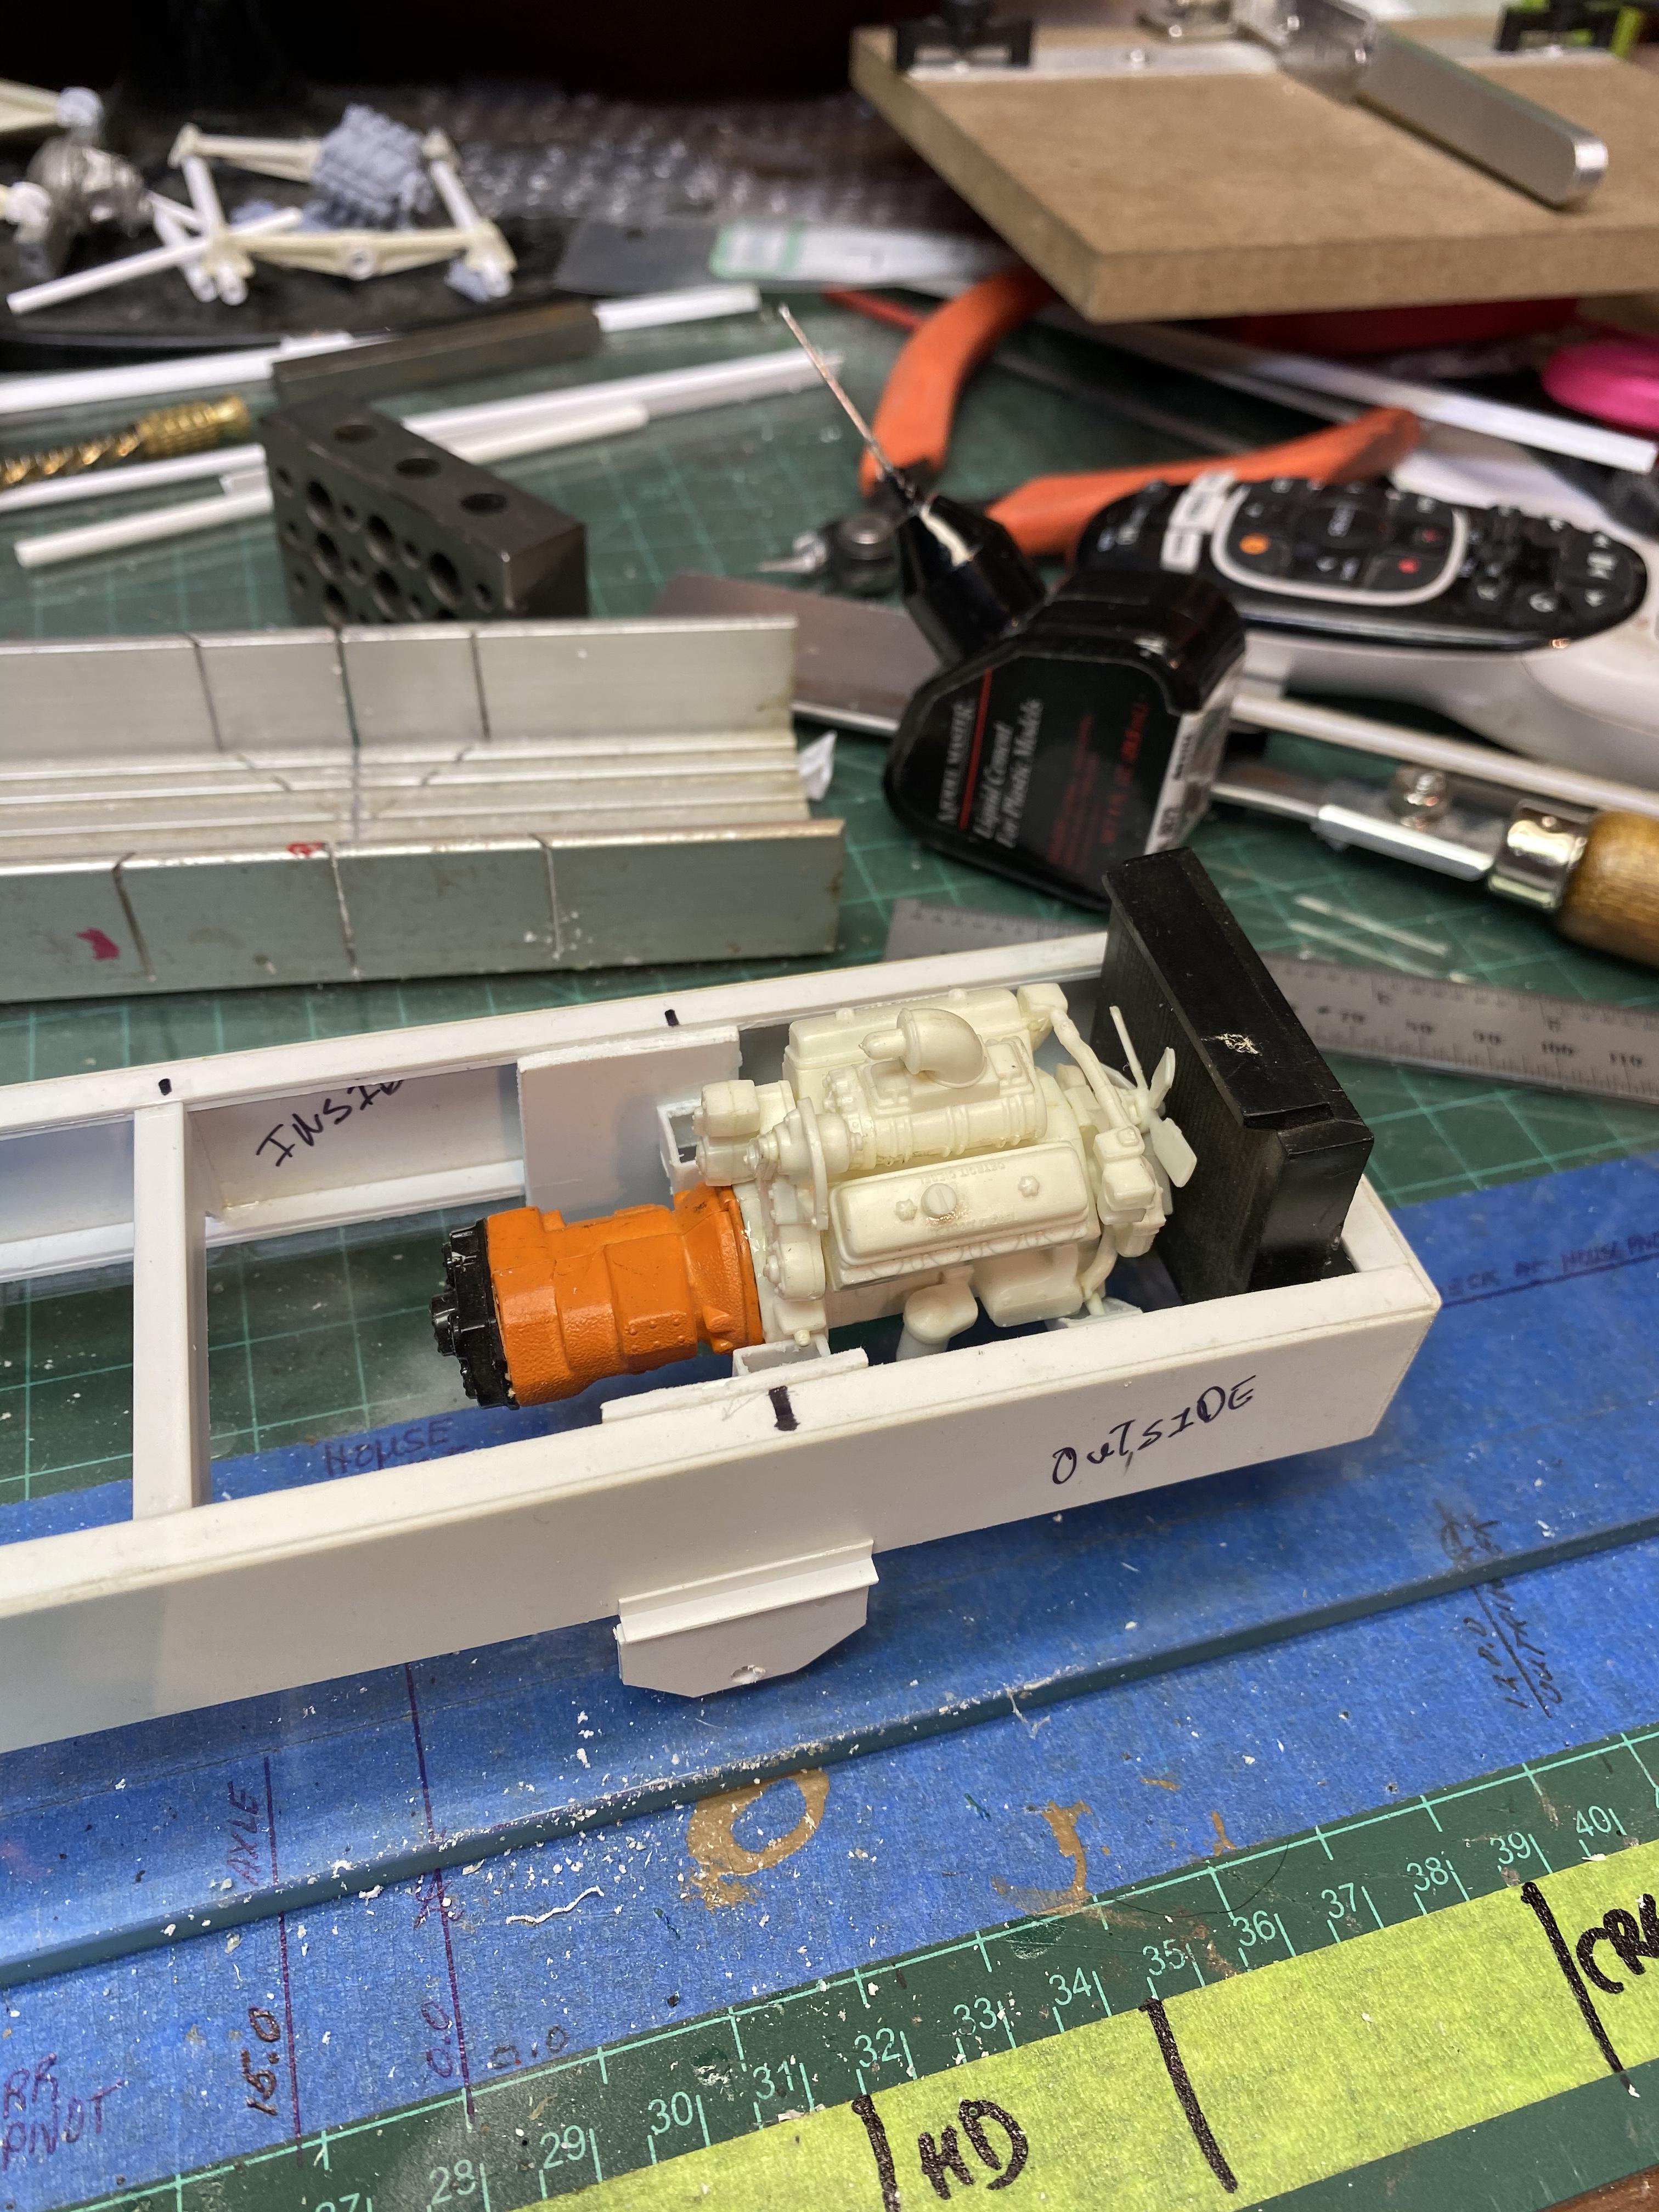
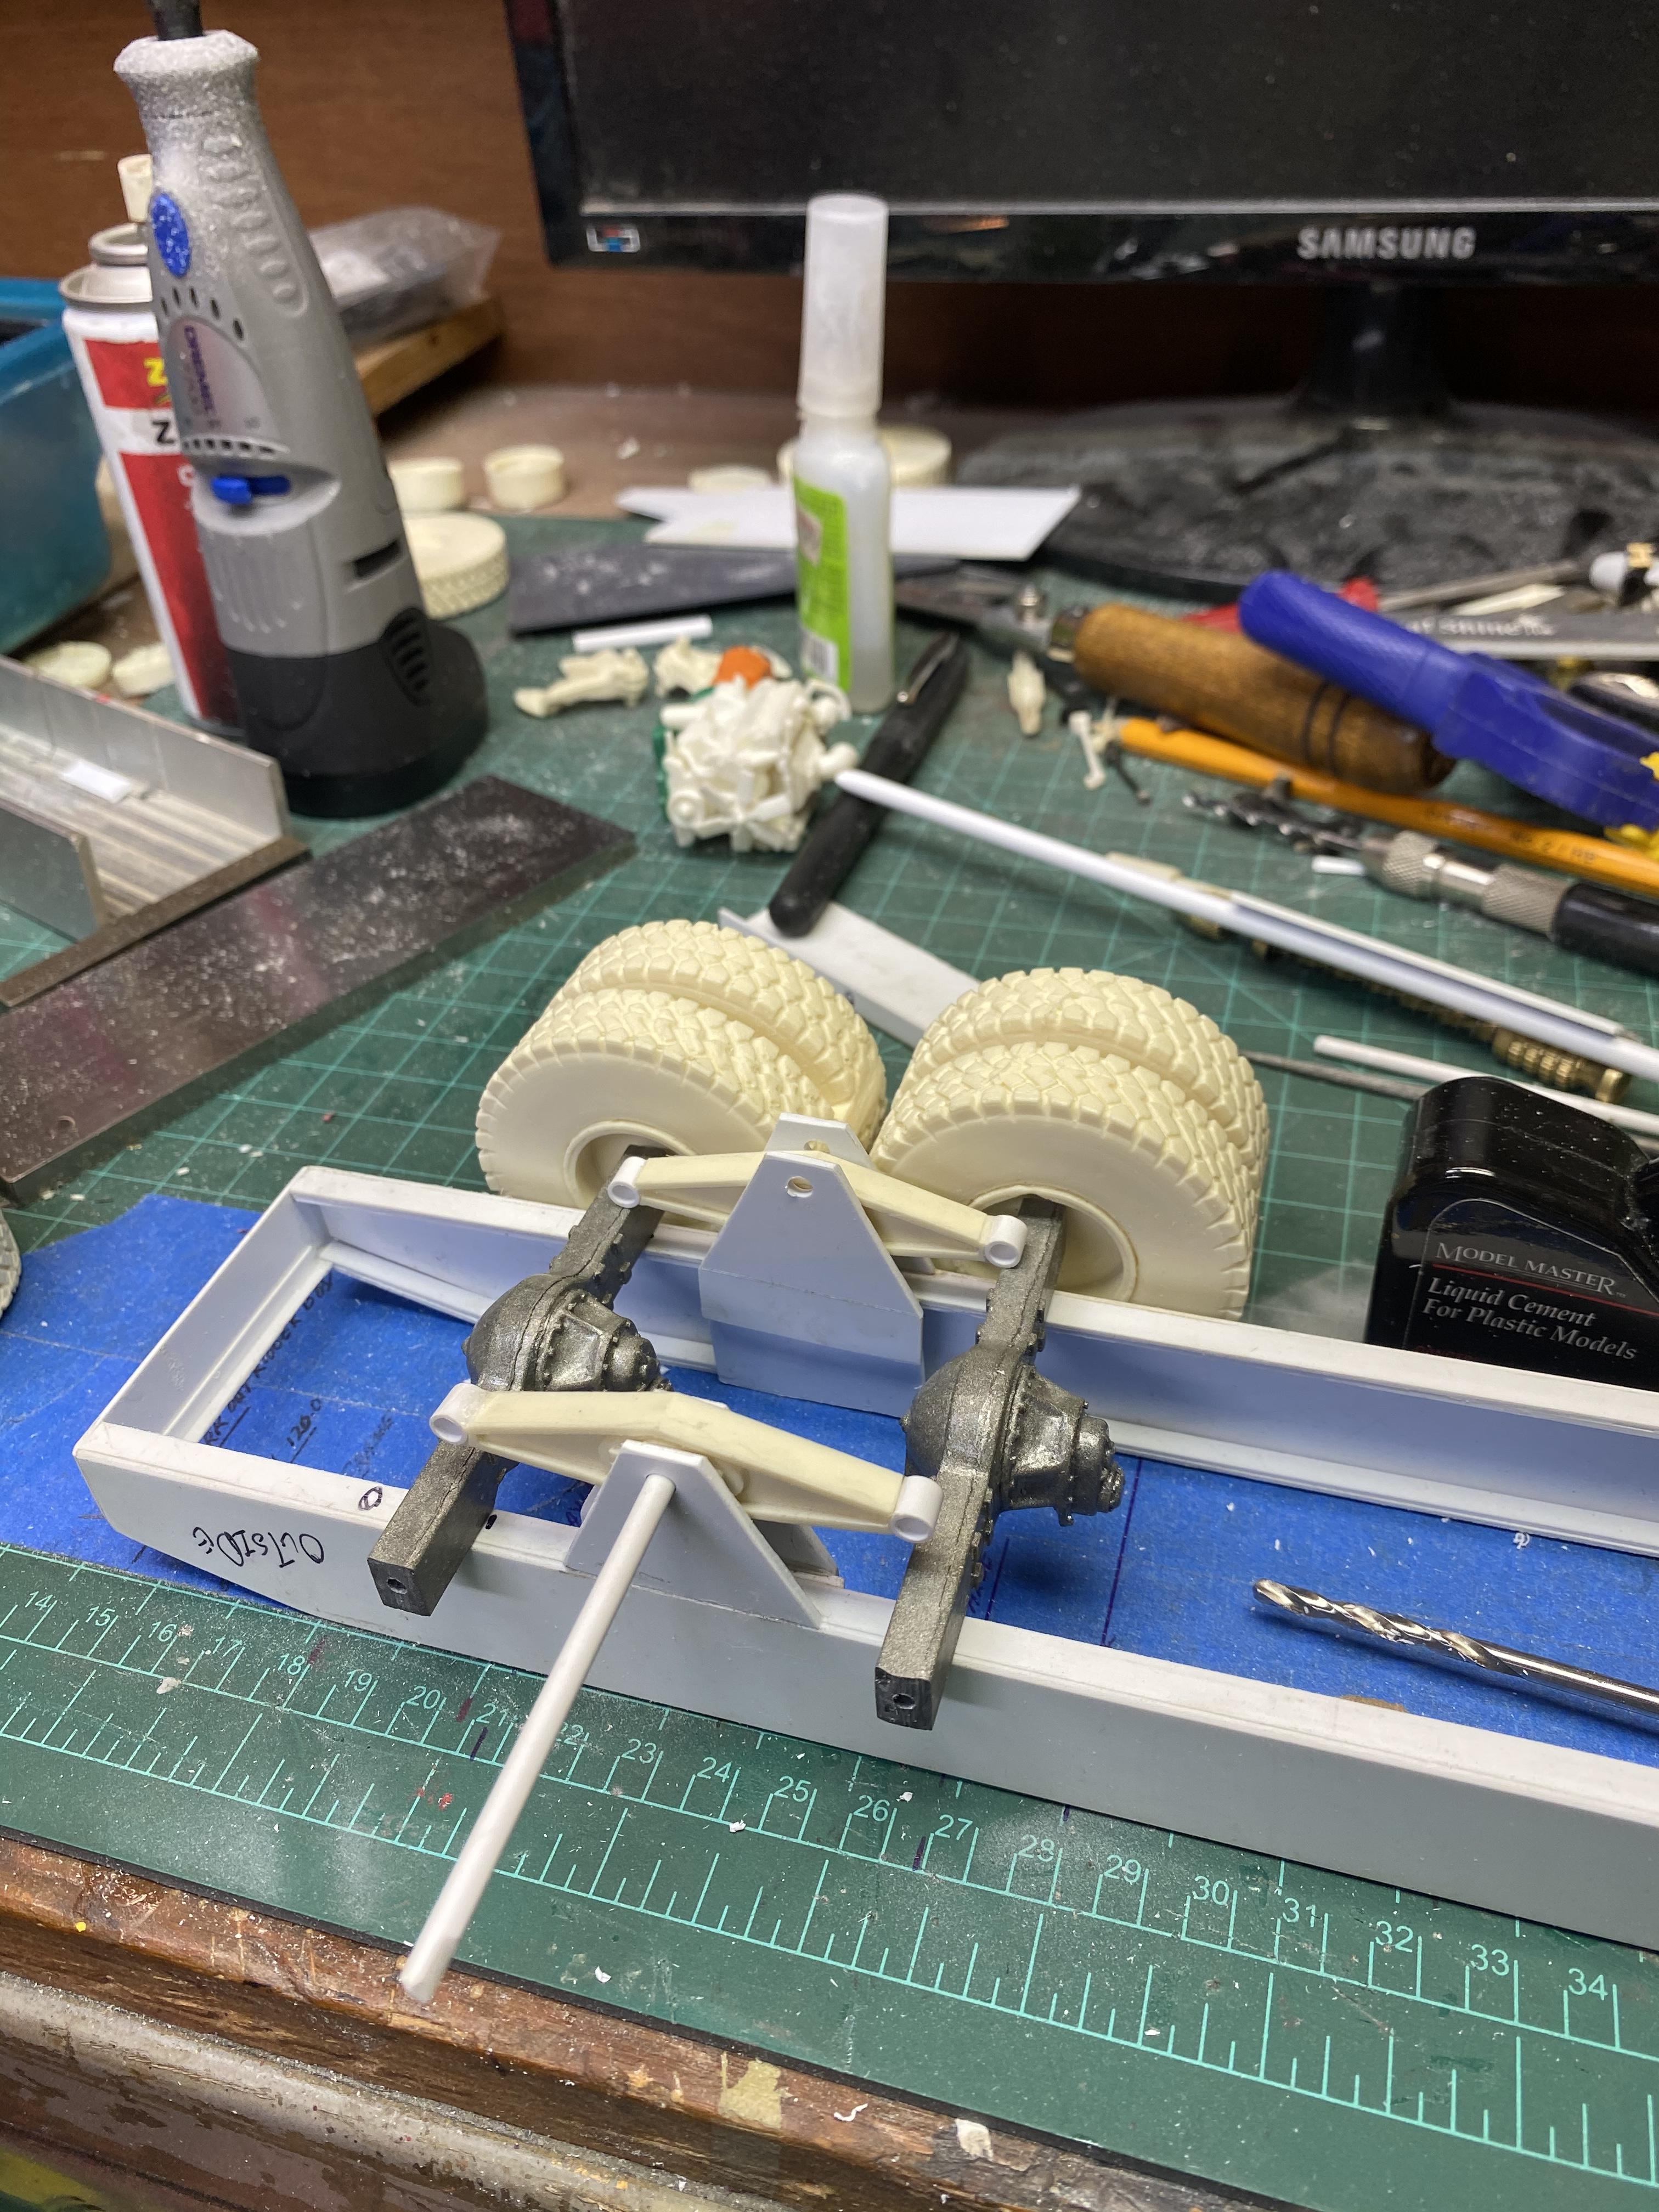
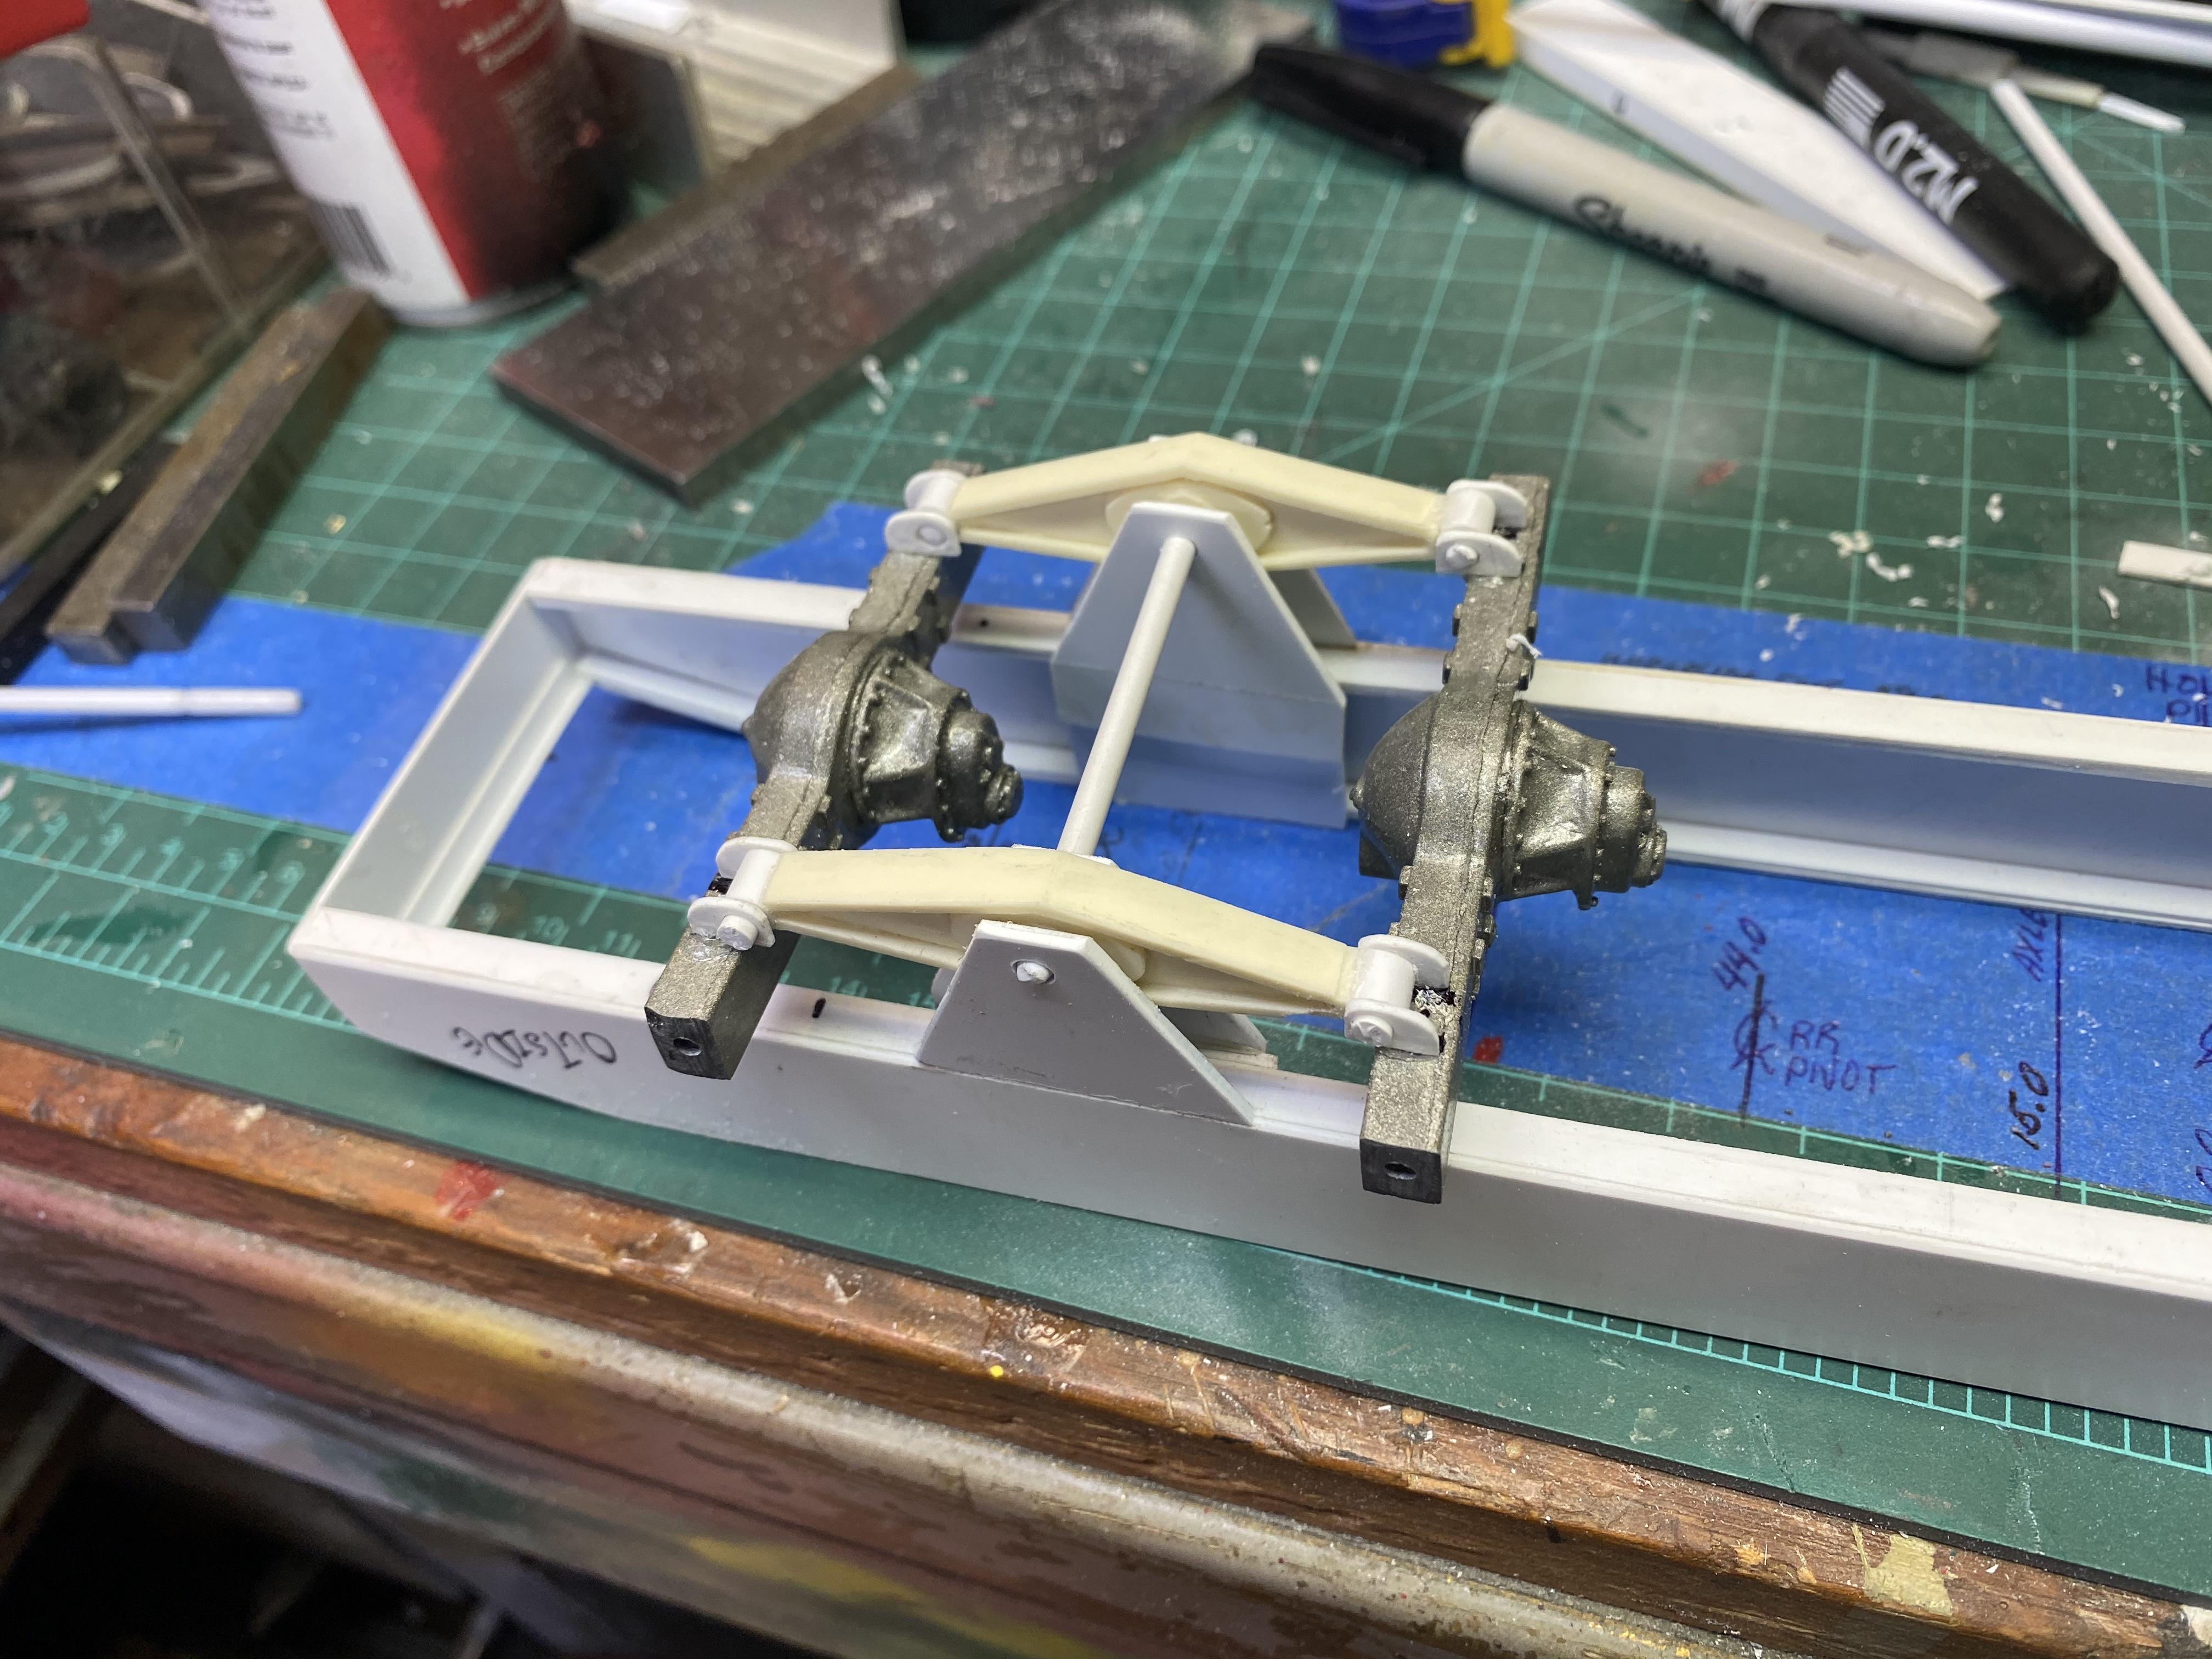
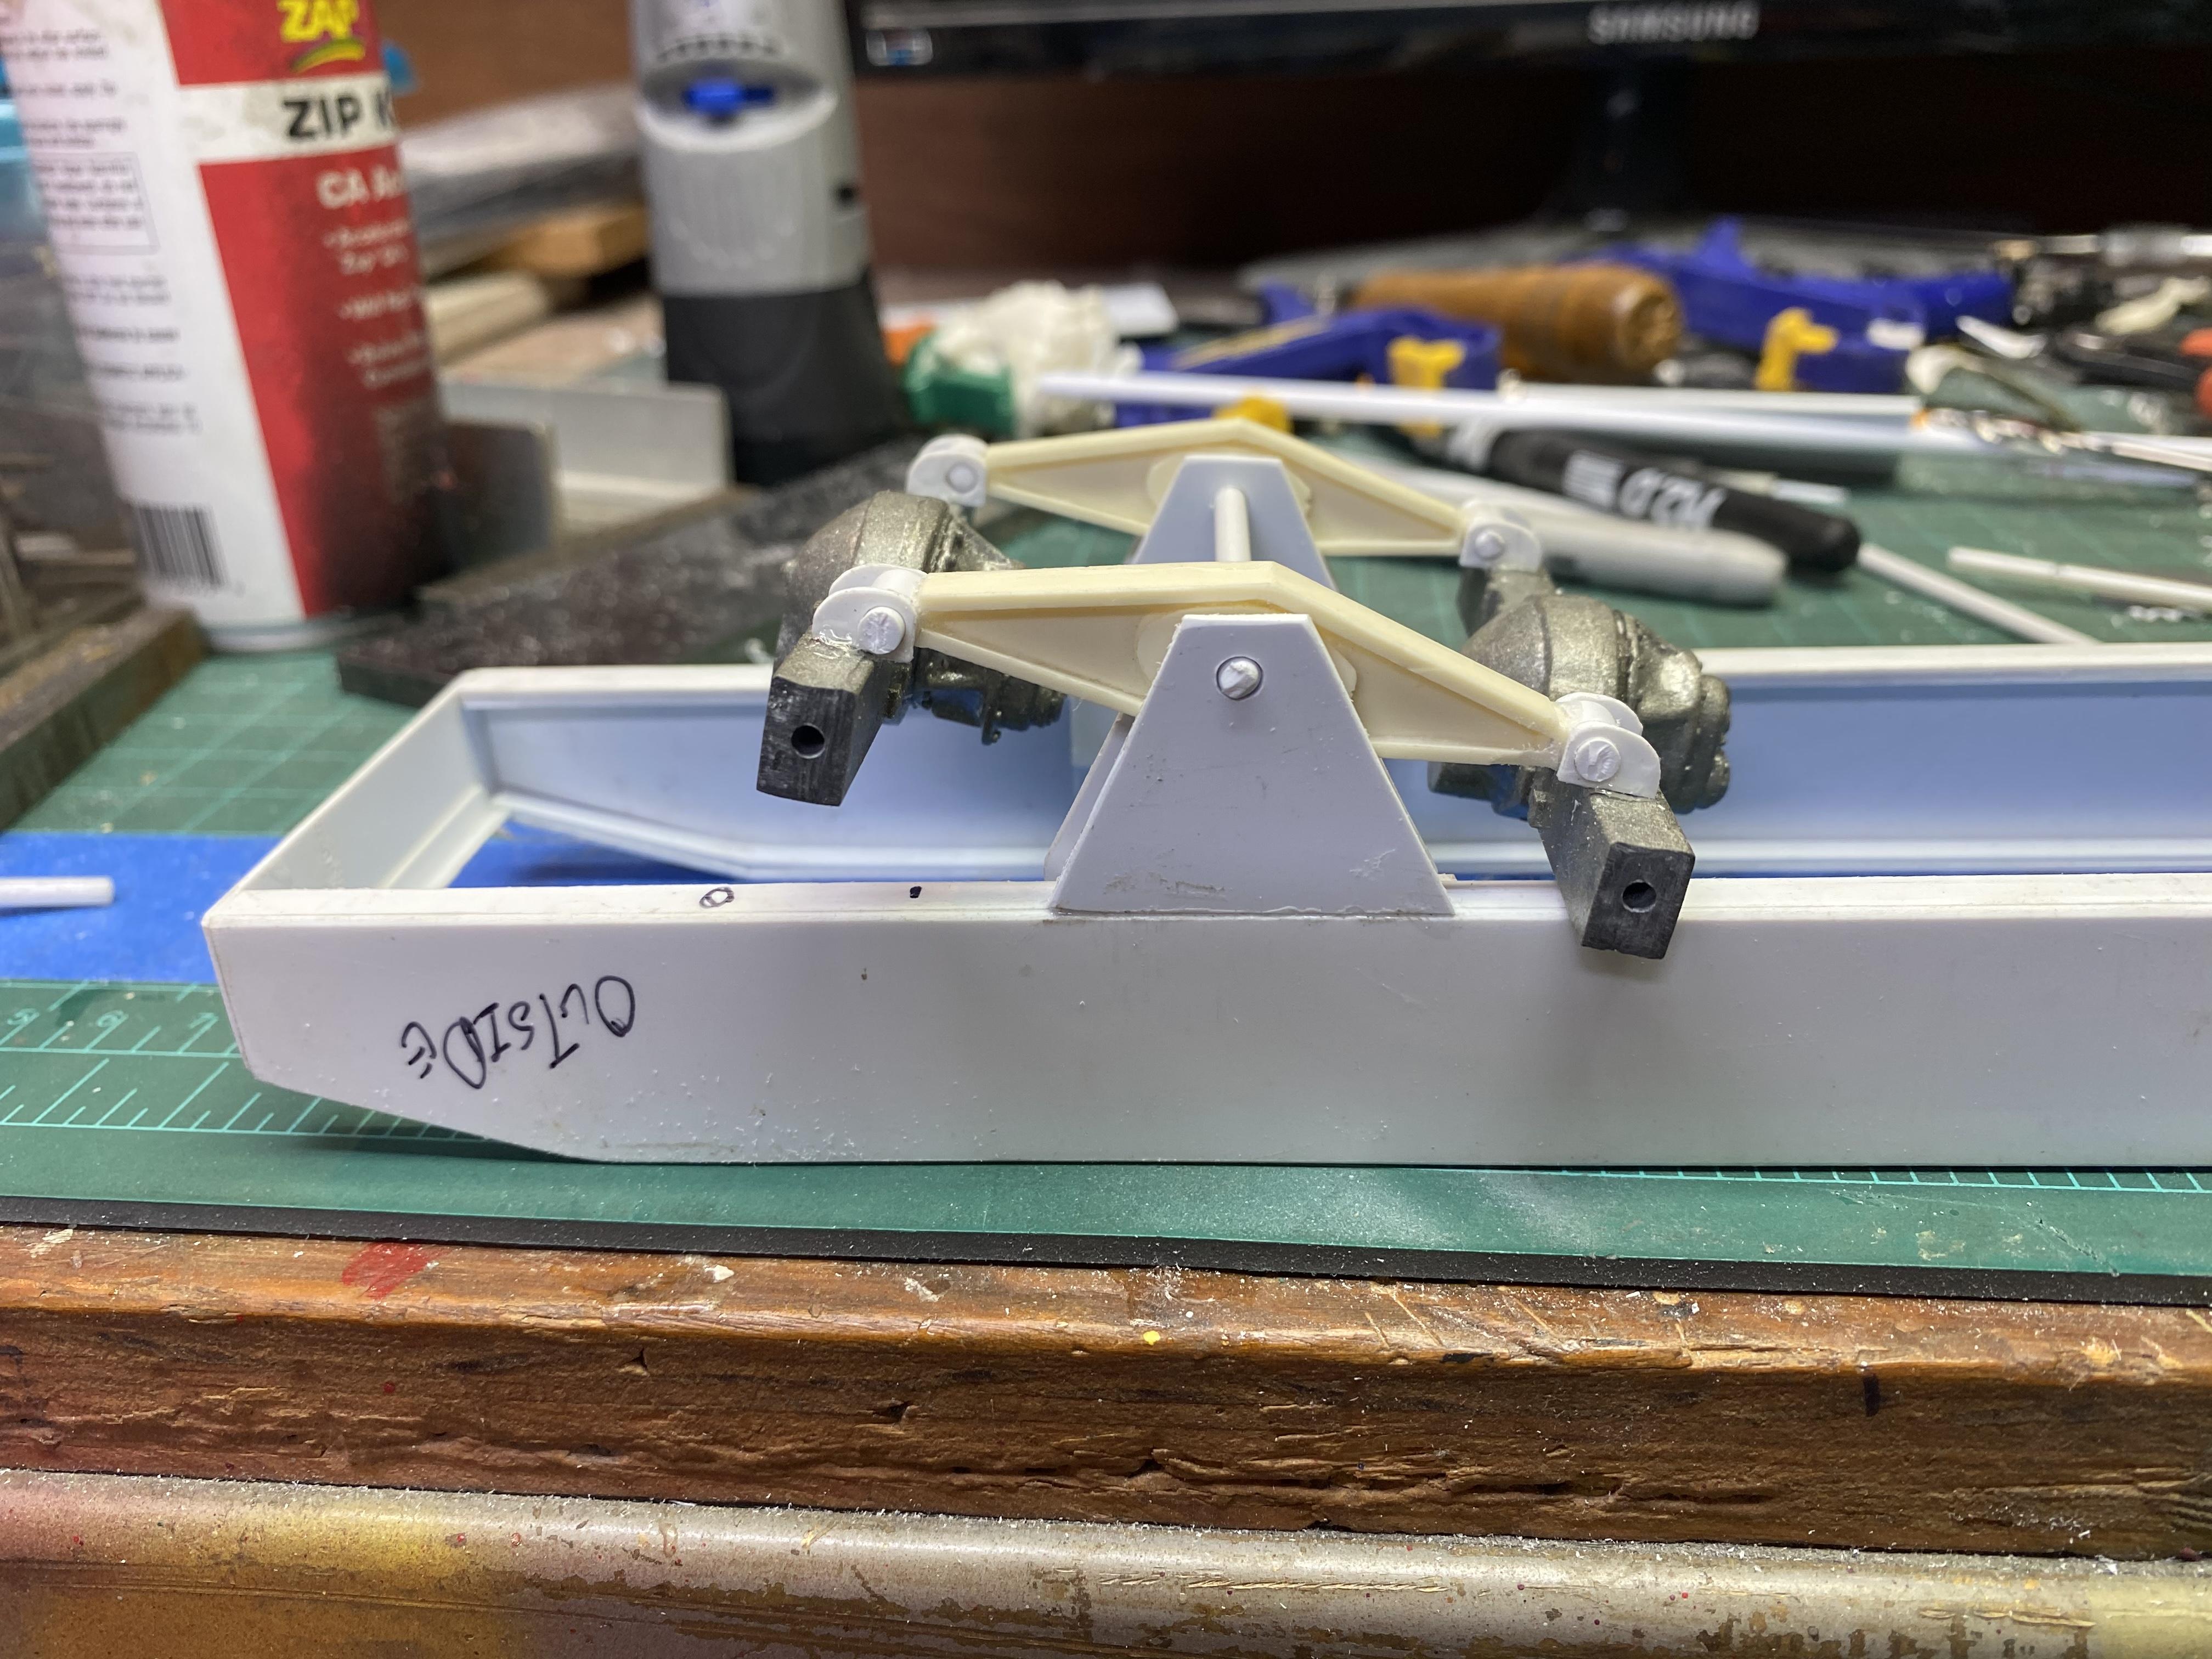
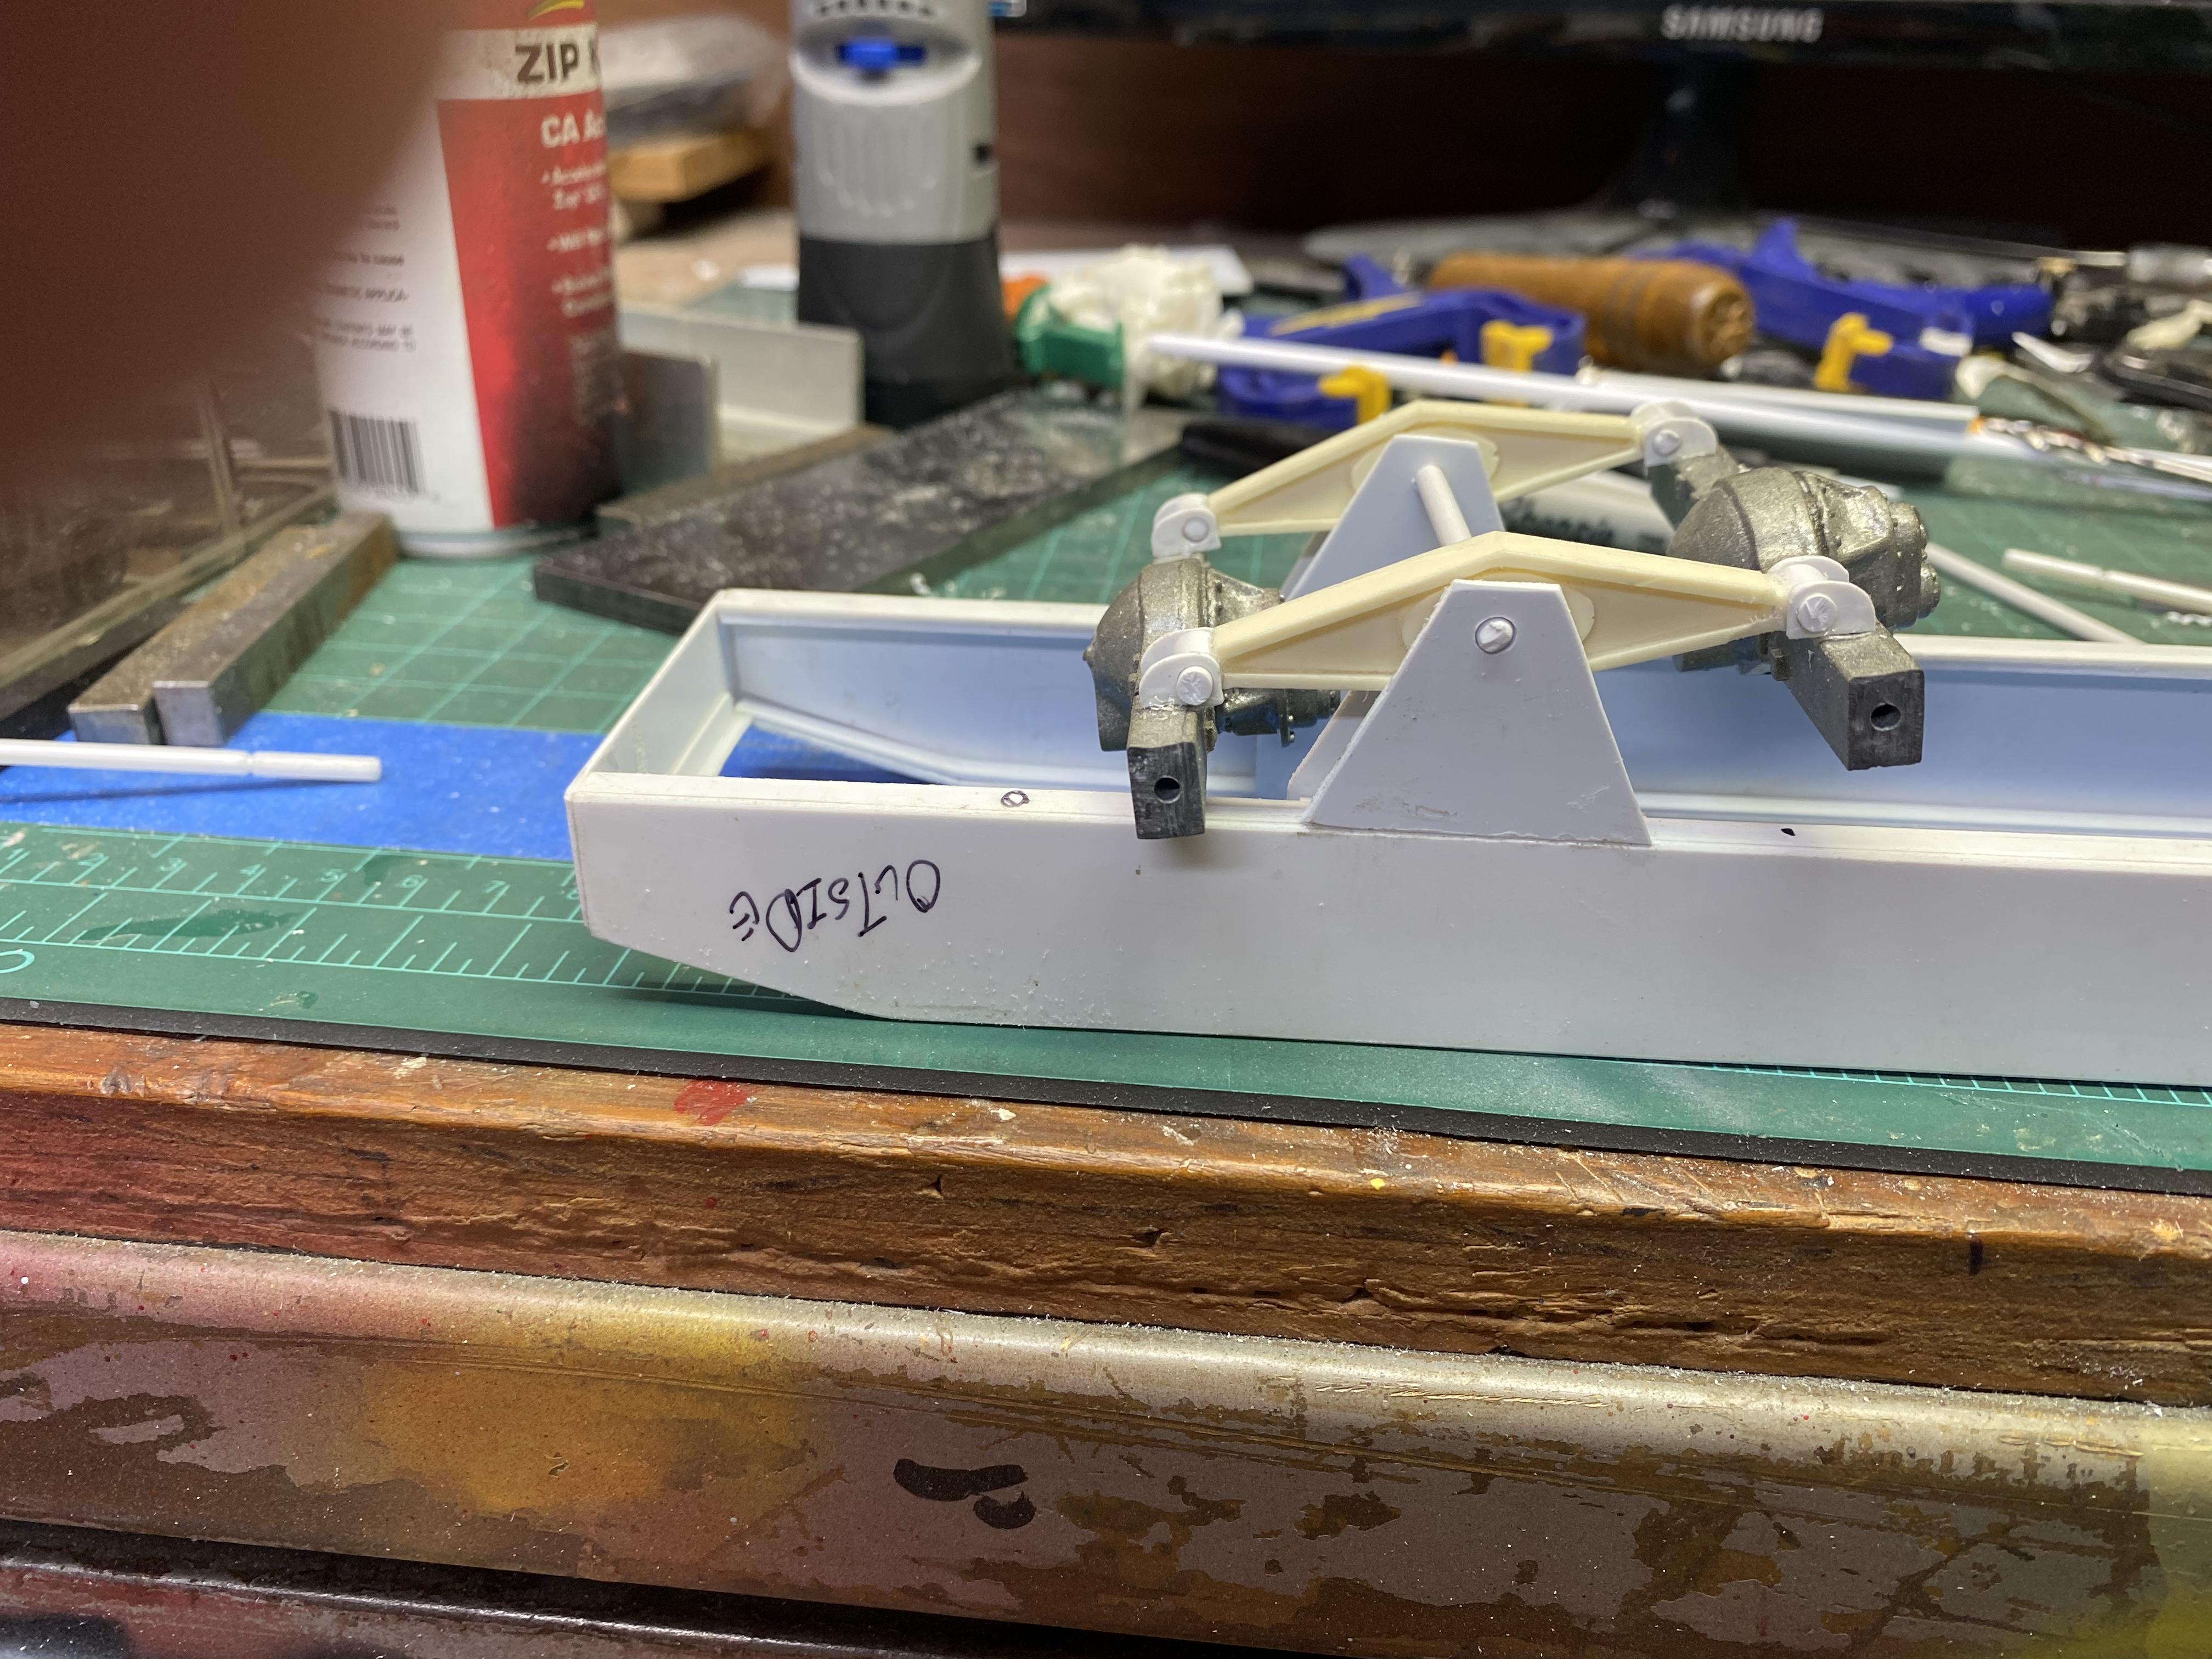
FINALLY found the time and energy to get back to work on this build. Roughed in the front and rear suspensions and all of the crossmembers. Also roughed in the engine mounts and the creeper transmission and mount. Got down to take some photos of the real one as well. My gun shop is going crazy right now, and added to deer season, available time to work on this is about non existent. Add that to a nasty bout of builder’s block and its sure been a while! Hope to keep it going now. Need to figure out tandem front axle steering next
-
Just got caught up with your build here, Charlie...............as always, totally amazing. Haven't had time to do anything on my bench, but am completely enjoying what you are doing on yours, and am learning yet more tips to help when I get the time, someday, to drag myself back to the bench. Keep it going Charlie.......................priceless!
-
Beautiful work, Charlie, and a great tutorial as well. I've never tried Alclad, but I have airbrushed Molotow, and am very pleased with it. Carry on!
-
What do you drive?
redneckrigger replied to gasman's topic in General Automotive Talk (Trucks and Cars)
My garage now houses a 1991 Mustang GT hatchback 5.0/5 speed, a 2012 Chevrolet K2500HD extra cab pickup with the 6.0, a 2000 Harley Davidson Ultra Classic, and the latest addition two weeks ago, (birthday gift to myself), a 1995 Corvette , LT1/6 speed Z07 coupe. Everyone is flat out fun to drive.......................just not enough time to drive 'em all, every day! -
Have been totally tied up at the gun shop all summer with all that is going on........working harder than we ever have in these unprecedented times and uncharted waters. Absolutely no time to do any building. Teaching safety classes at night and falling asleep as soon as I get home. Only good part is the addition of a new toy to the garage.....a 95 Corvette. But no time to drive it! Hoping soon to find time and energy to return to the bench.
-
1948 Sterling HC 175
redneckrigger replied to Chariots of Fire's topic in WIP: Model Trucks: Big Rigs and Heavy Equipment
Love the hoist engineering! And the truck is pretty cool too! Awesome work, Charlie! -
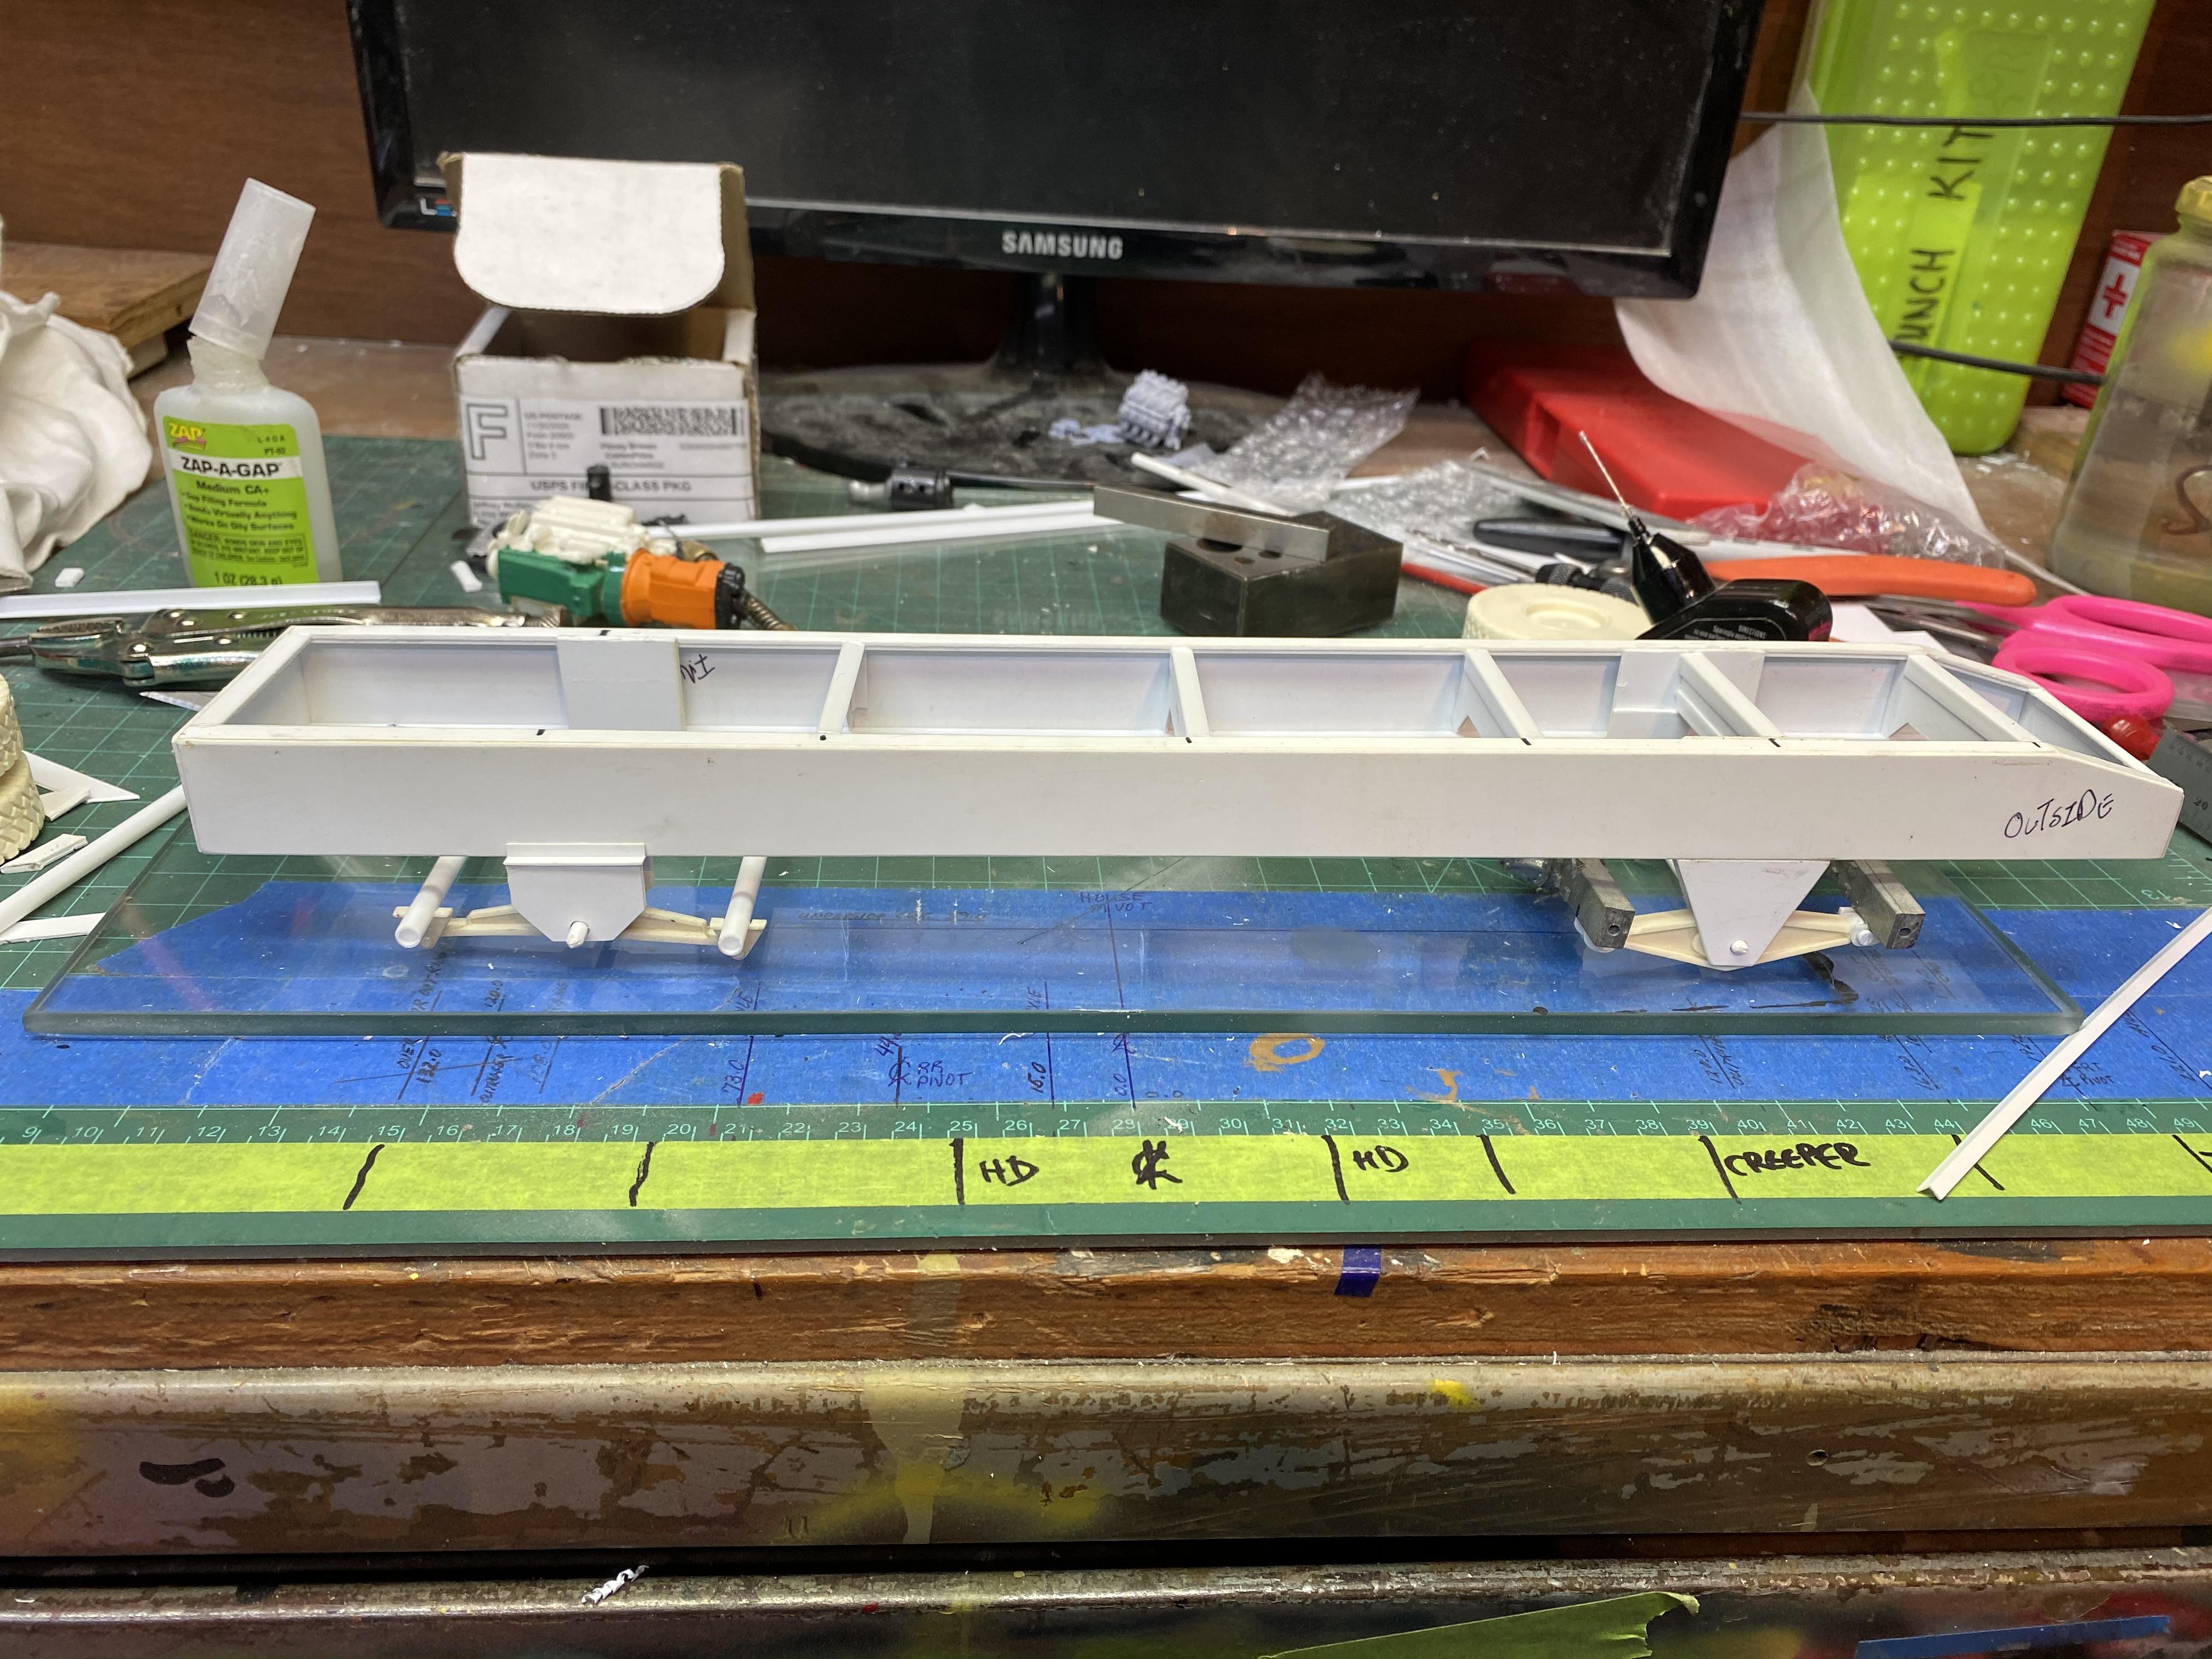
Found some bench time.........roughed in the rear suspension. The axles are old Mark Savage resin casts, and the walking beam is a modified AITM resin. There is no spring or air suspension on this crane, just a super heavy duty walking beam. Lots of bits and pieces and several cross members to be added, but it’s looking the part quite well.
-
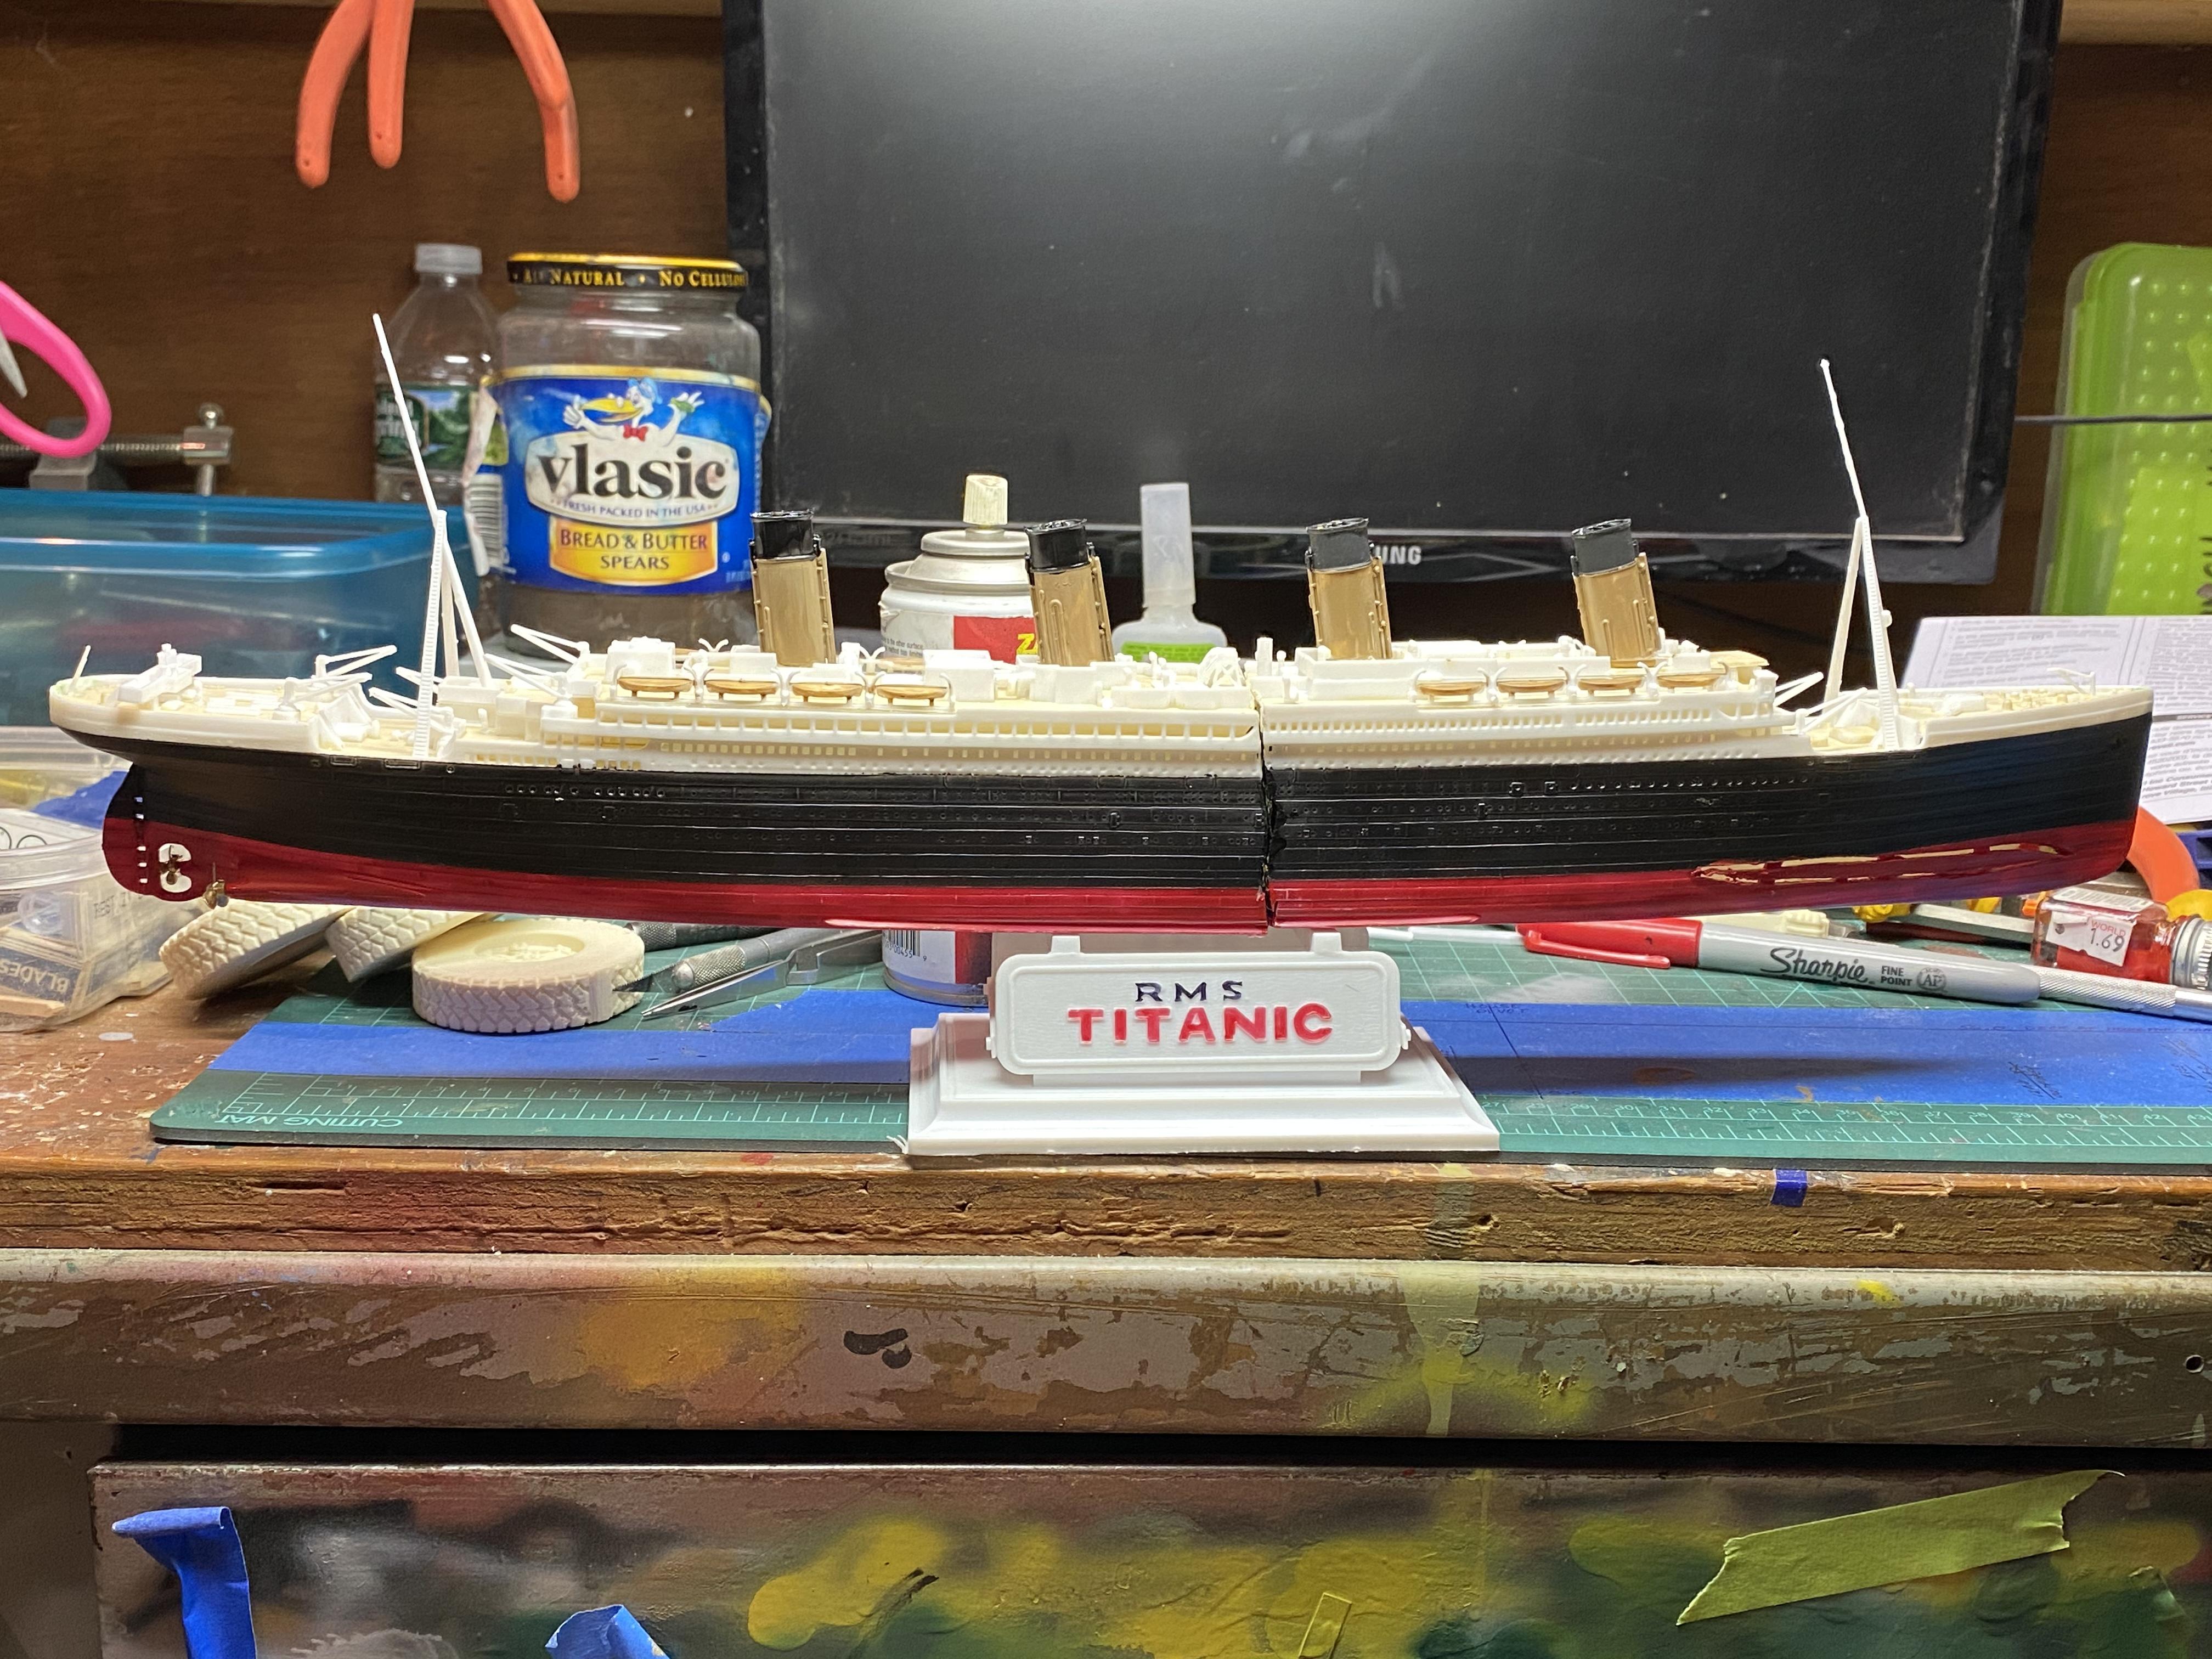
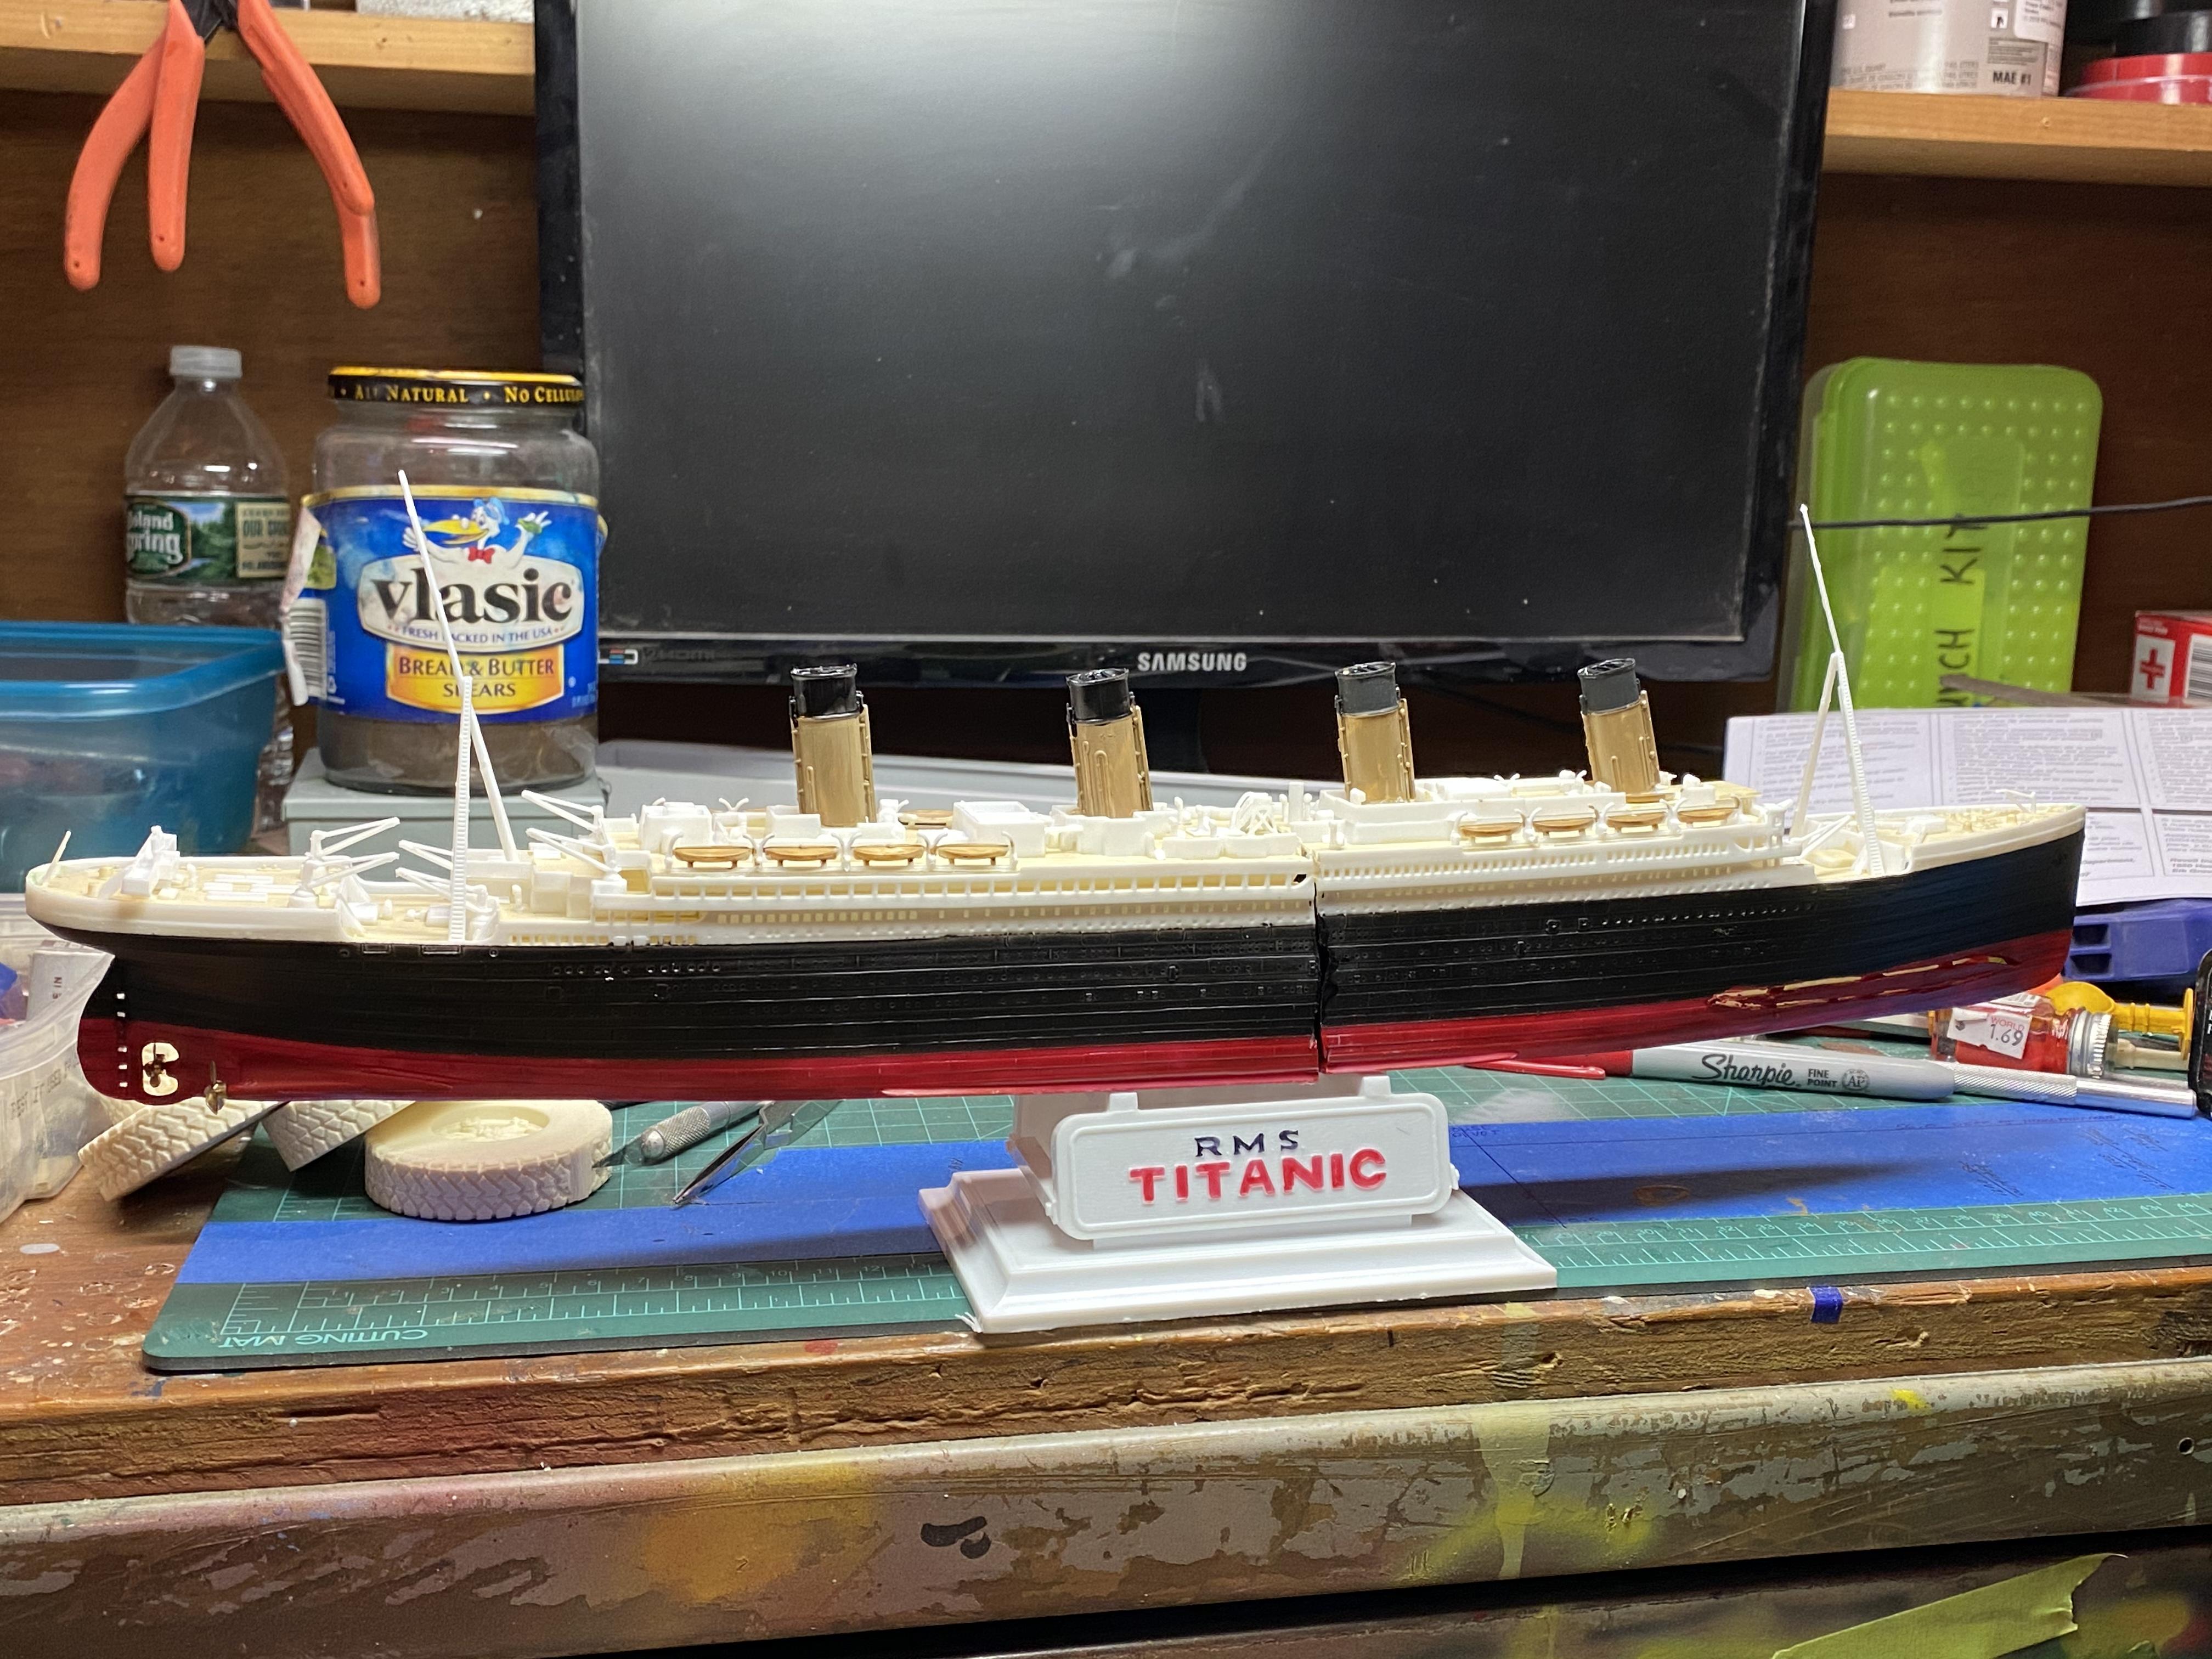
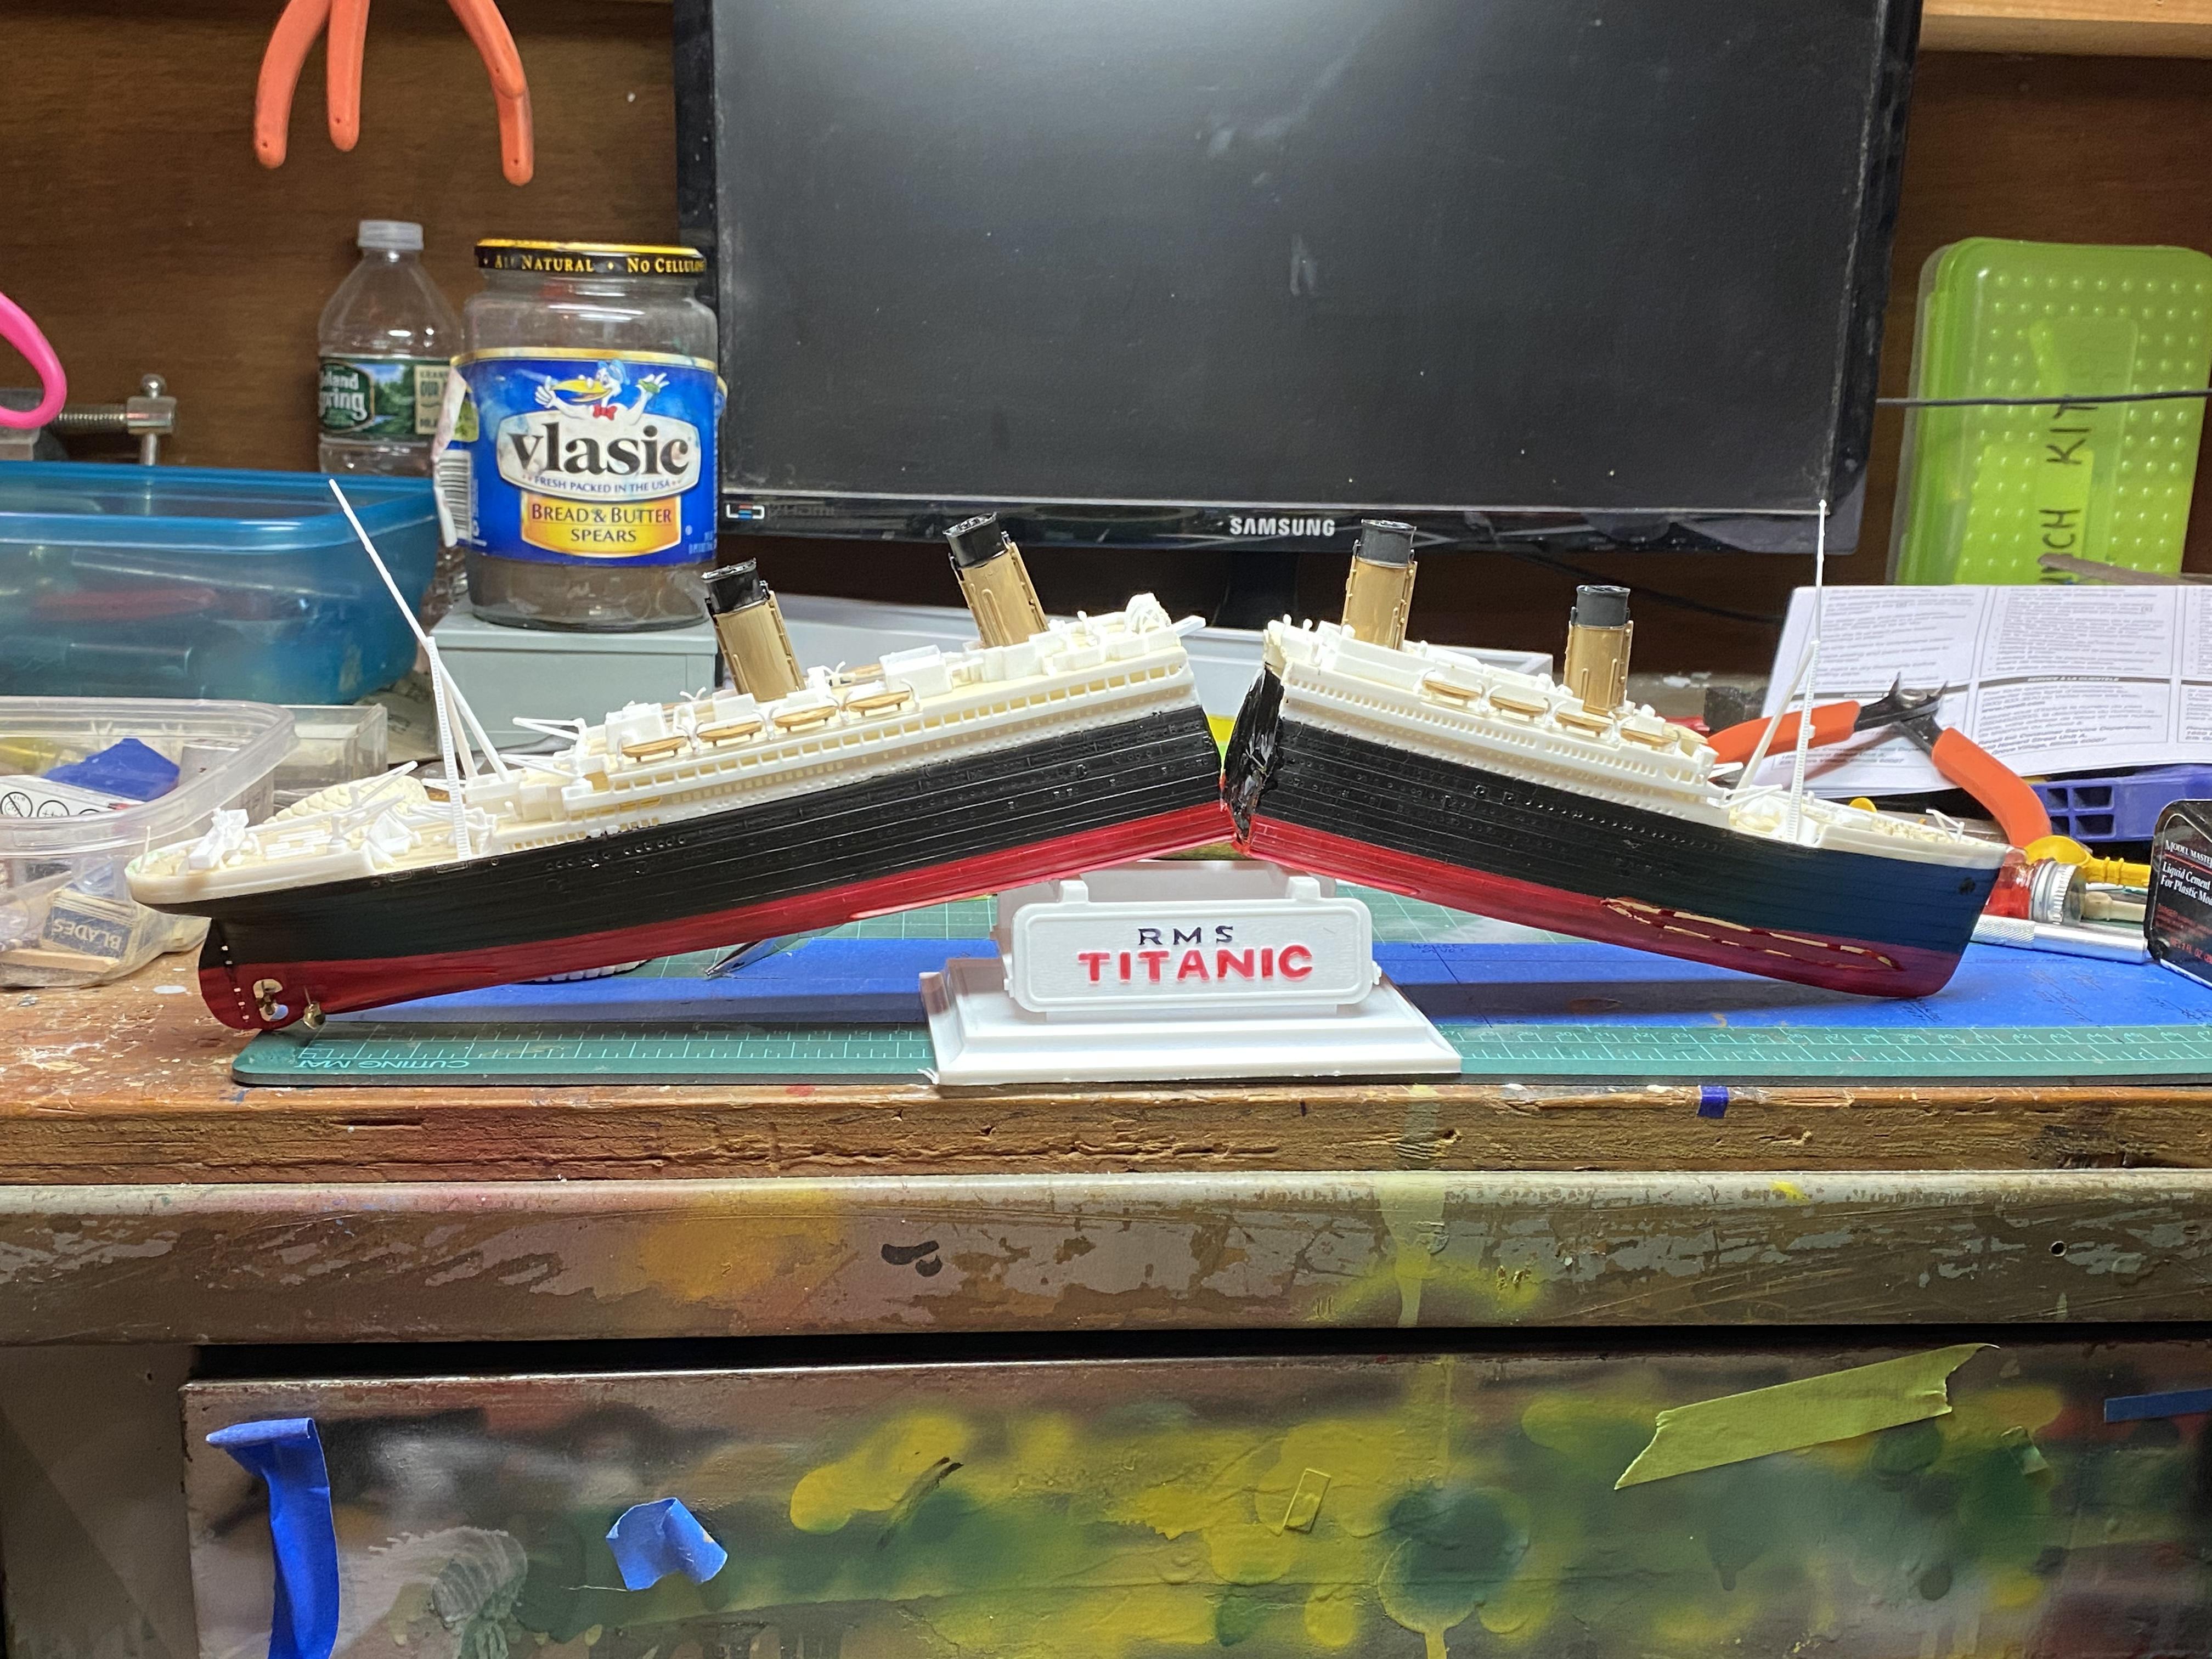
My six year old grandson Avry is totally enamored with the Titanic. He has books, videos and all sorts of data about that great ship and it’s sinking. He actually knows facts about it that I had never heard of. So, when he asked me to build him a model of it that breaks in half, I of course said sure! Then I had to figure out how to deliver! Off to the hobby shop, and got the Revell Titanic. He worked with me as we assembled it, and he actually painted the deck and I let him operate my airbrush to paint the black on the hull. Then I got out the Dremel and a cutoff disc and chopped her in half. Gouged a gash in her bow, and made it so it would hook together and come apart easily. Gonna give it to him tomorrow night. Was a good build for me as Avry helped me, but it served as a reminder of why I like building trucks!
-
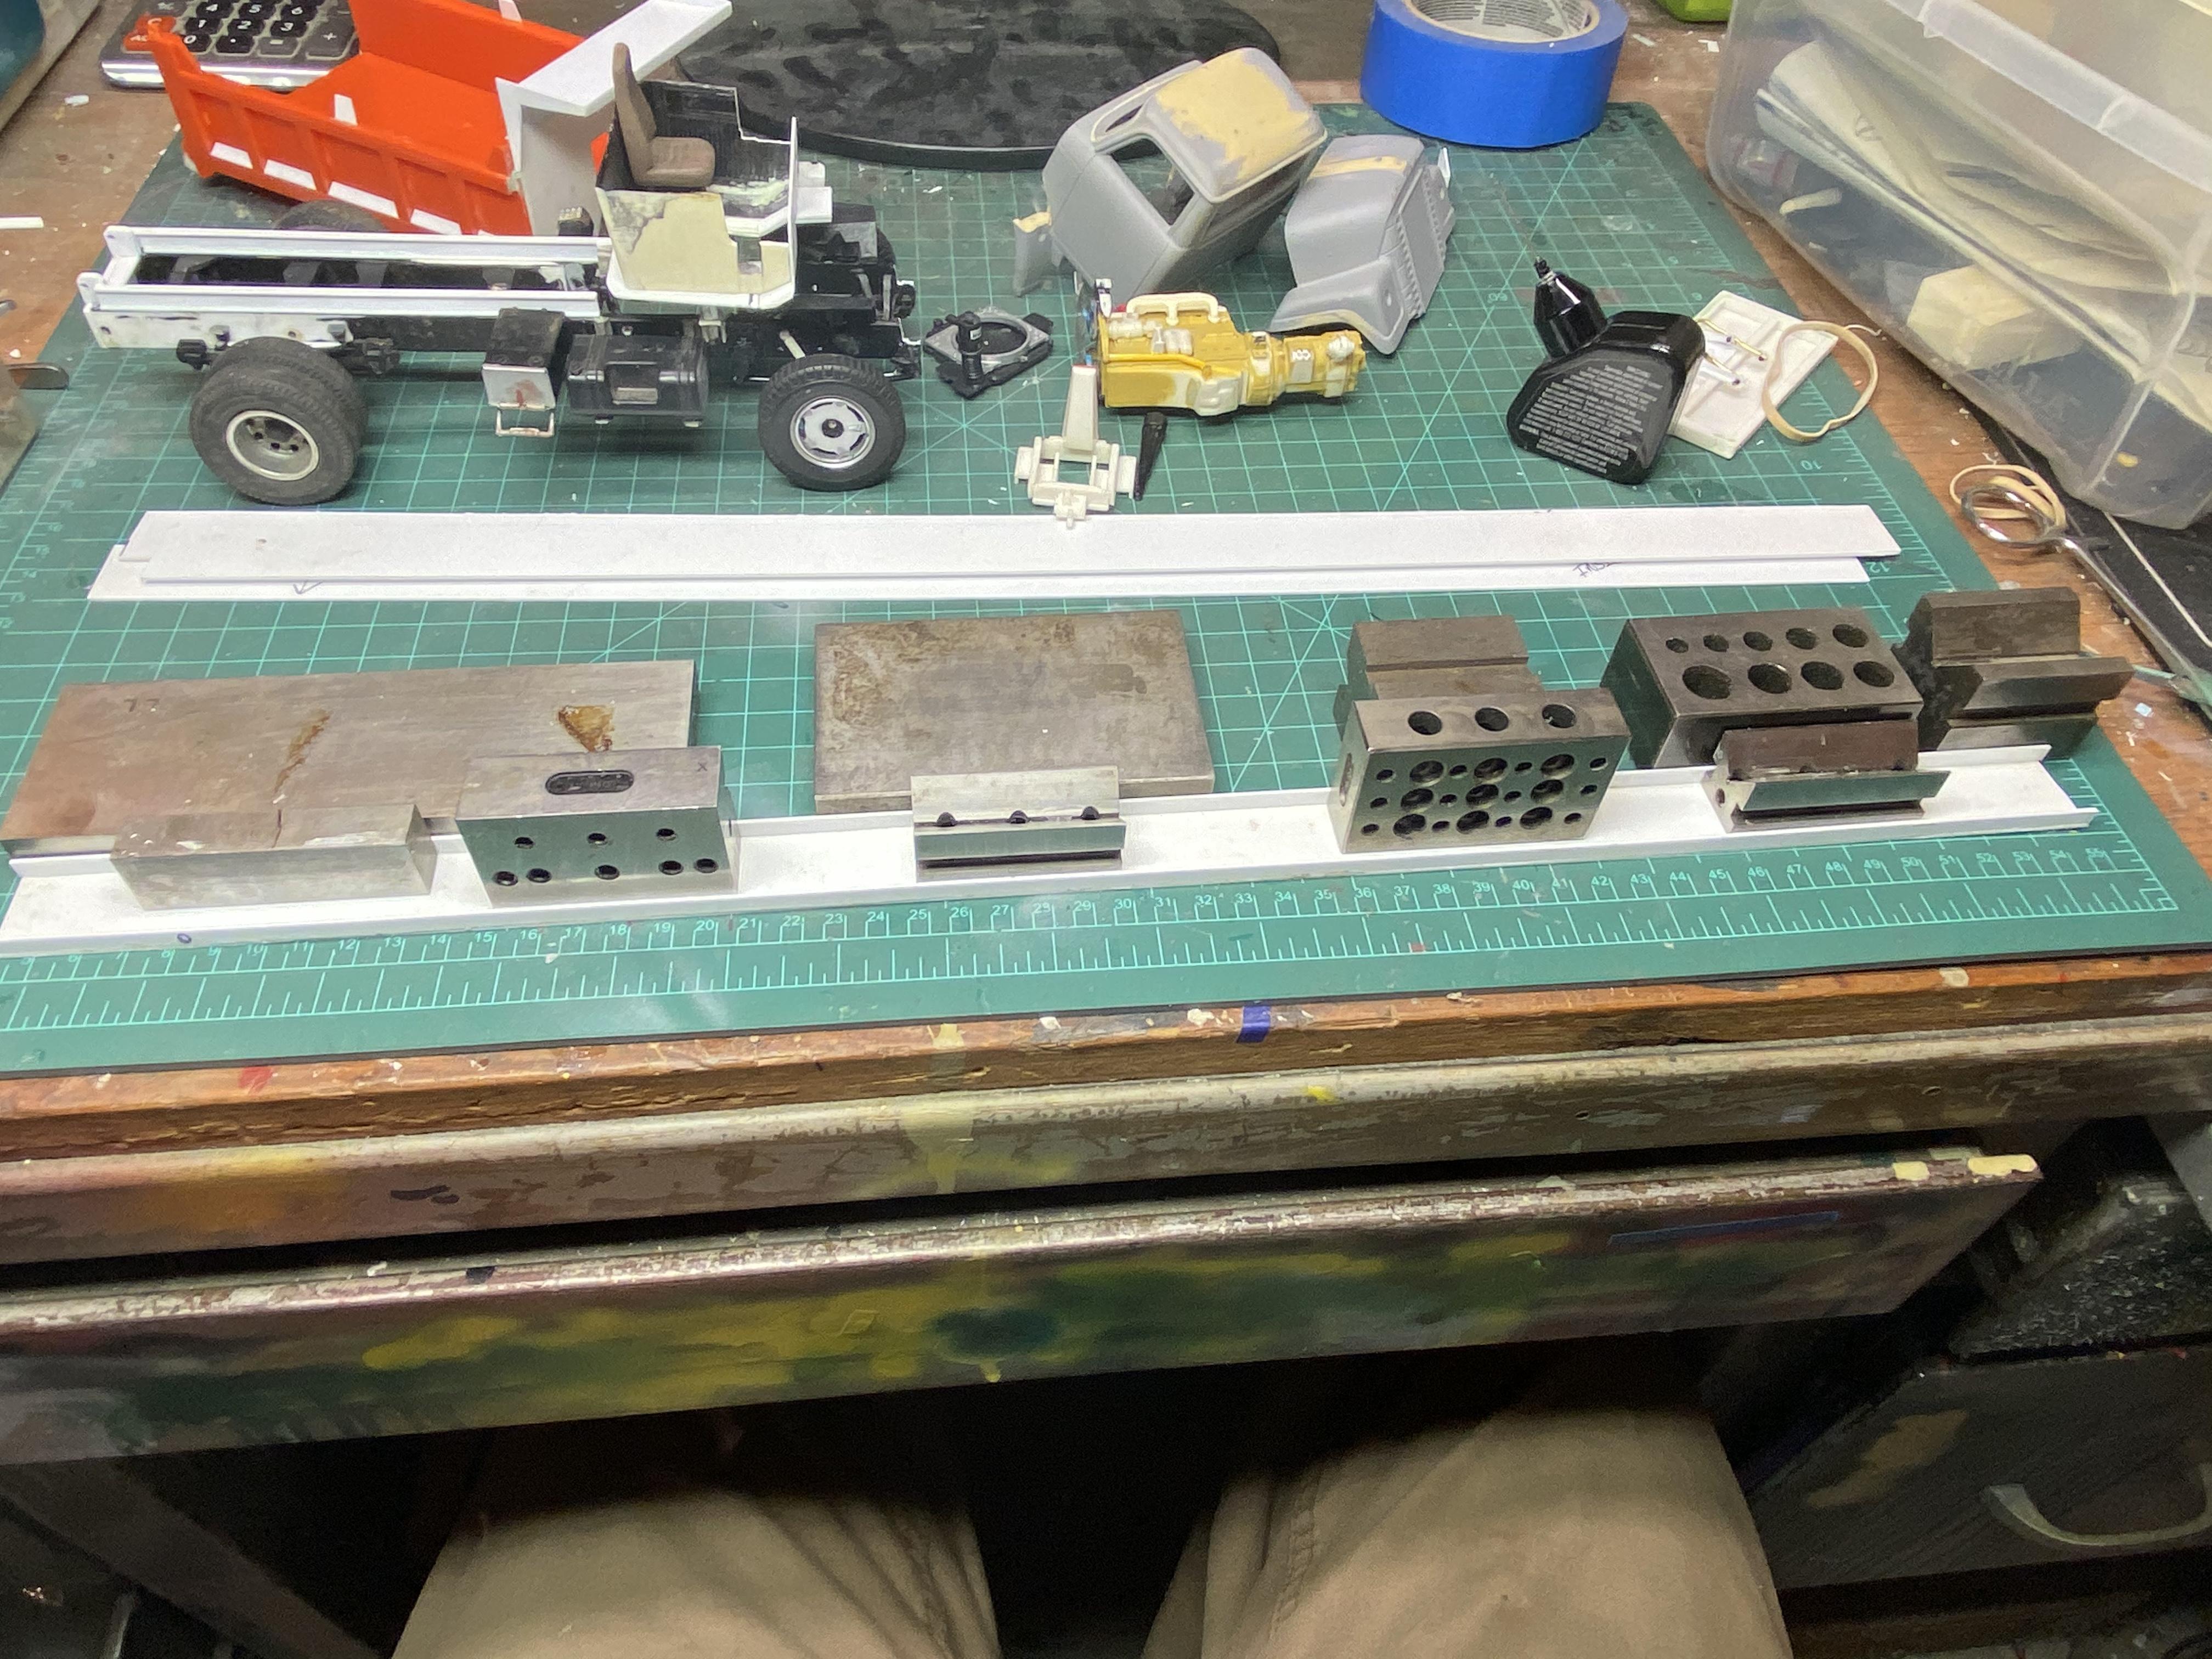
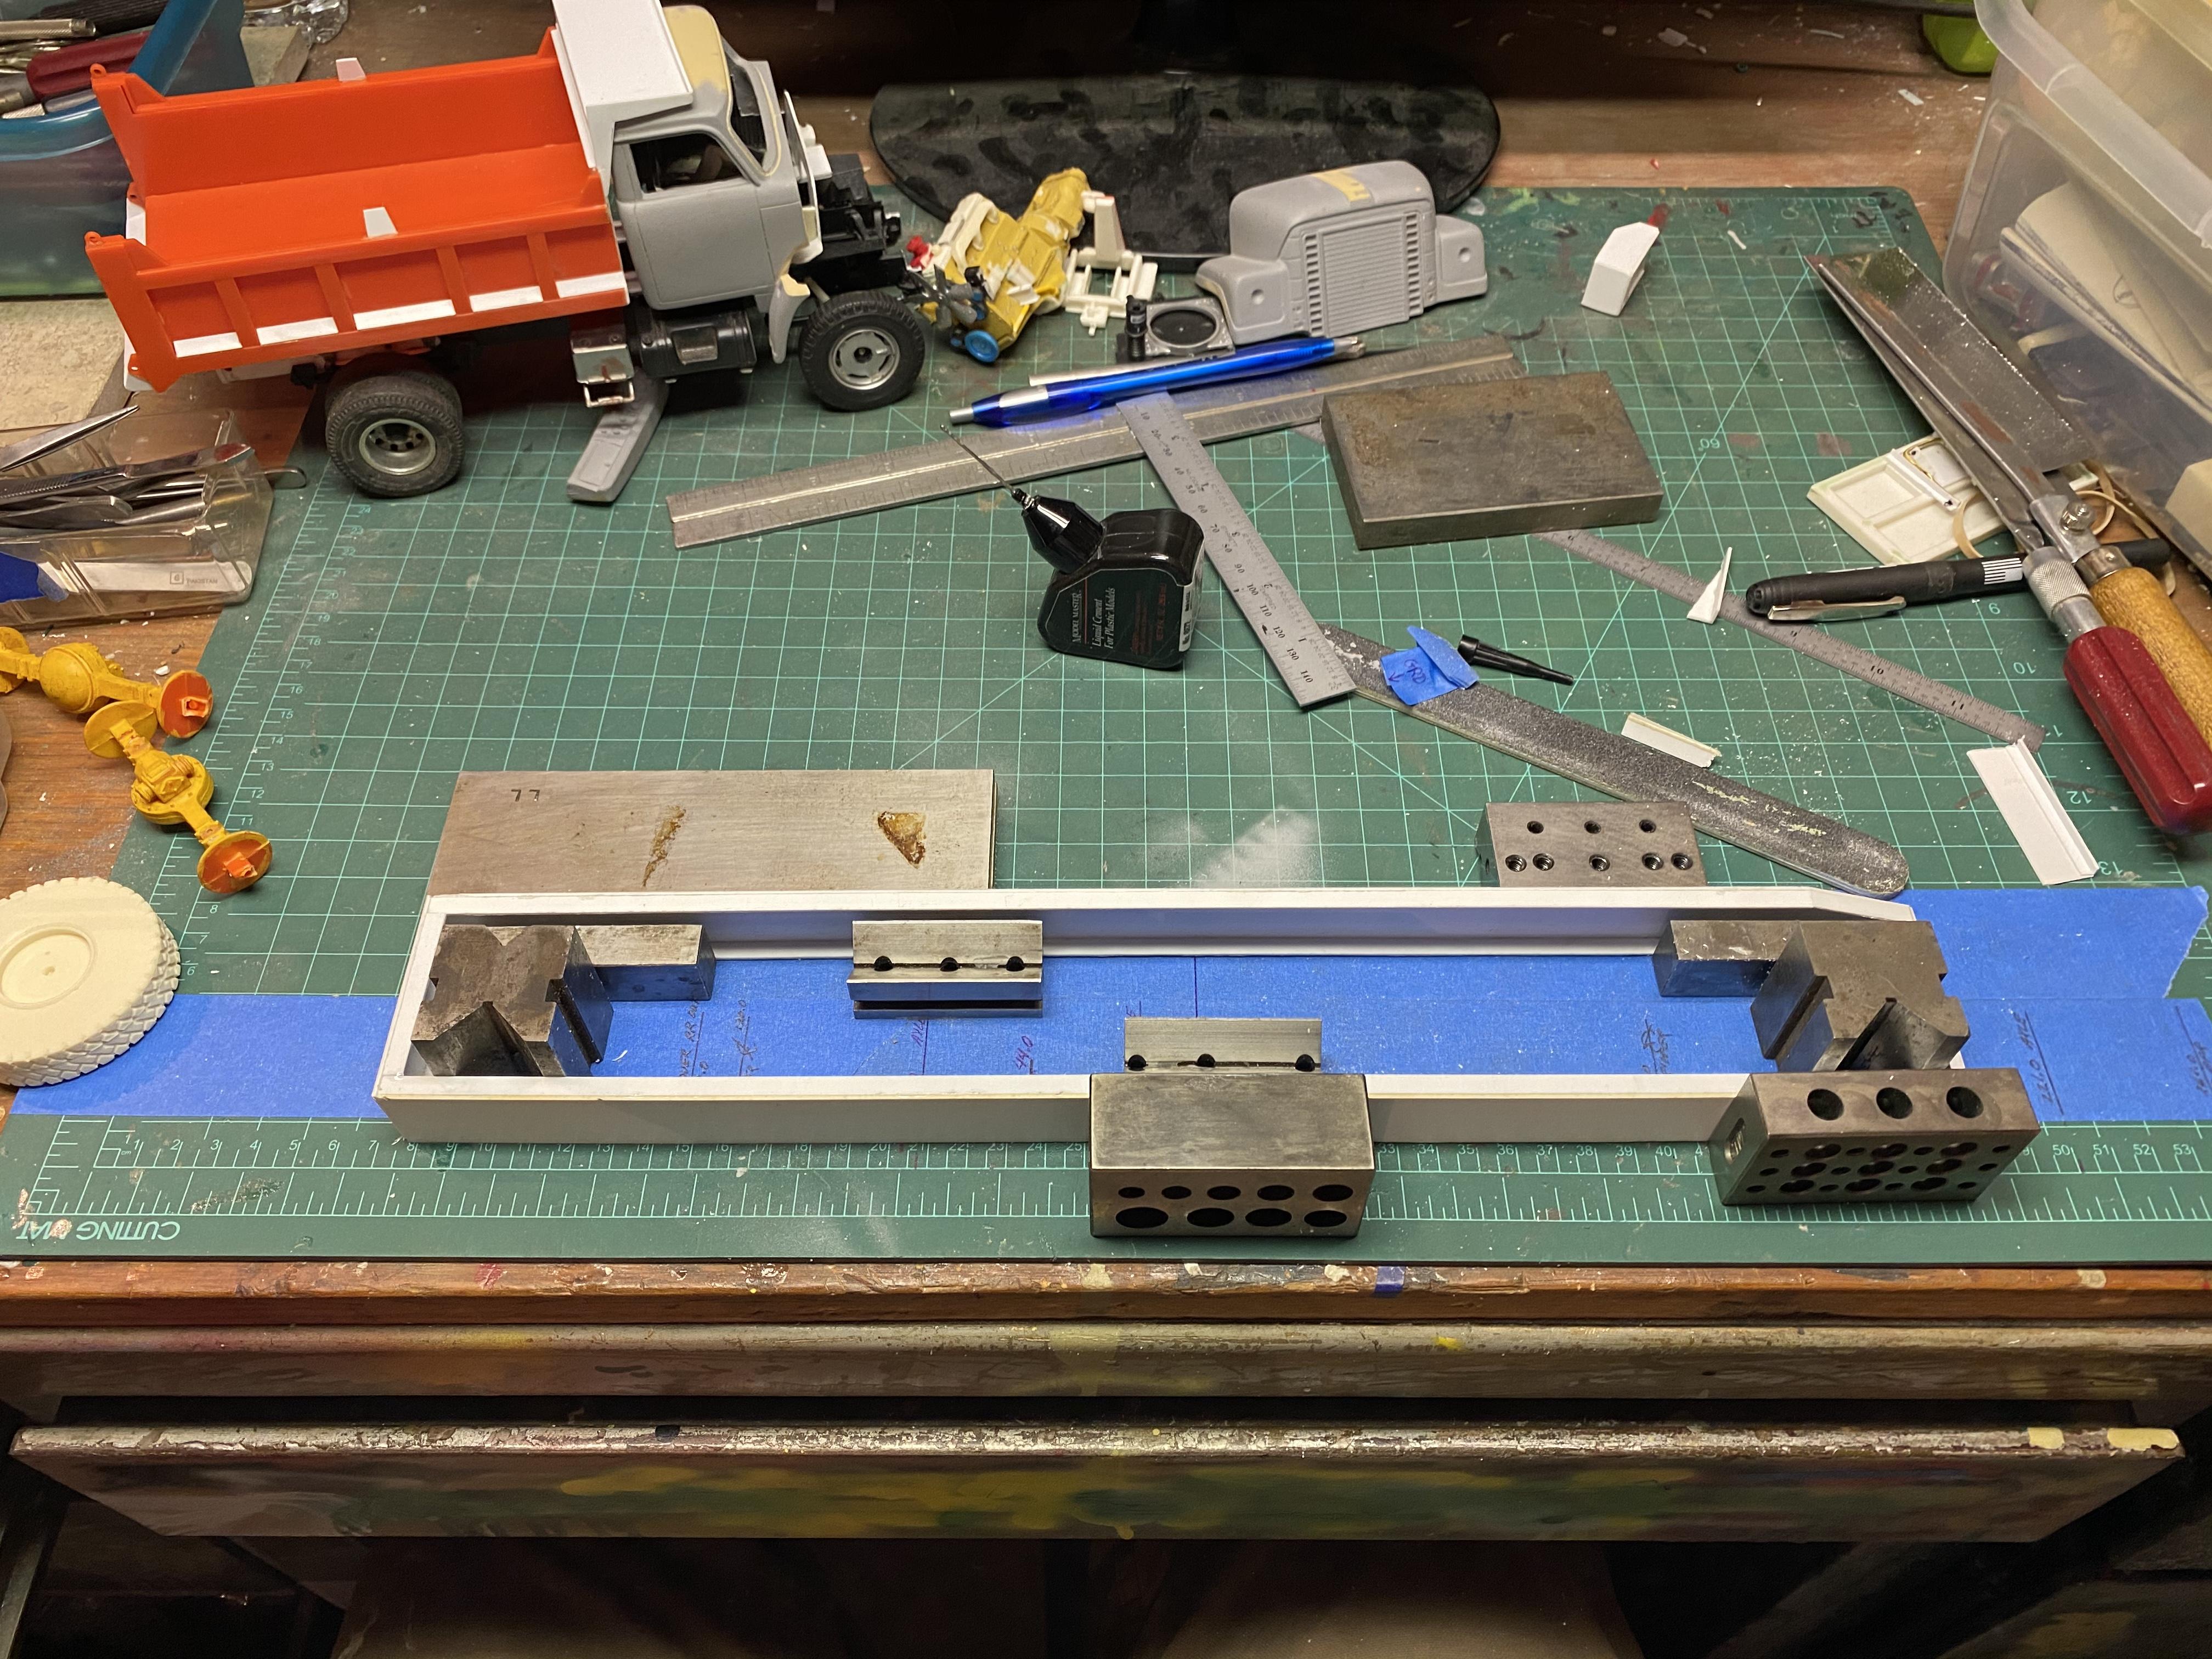
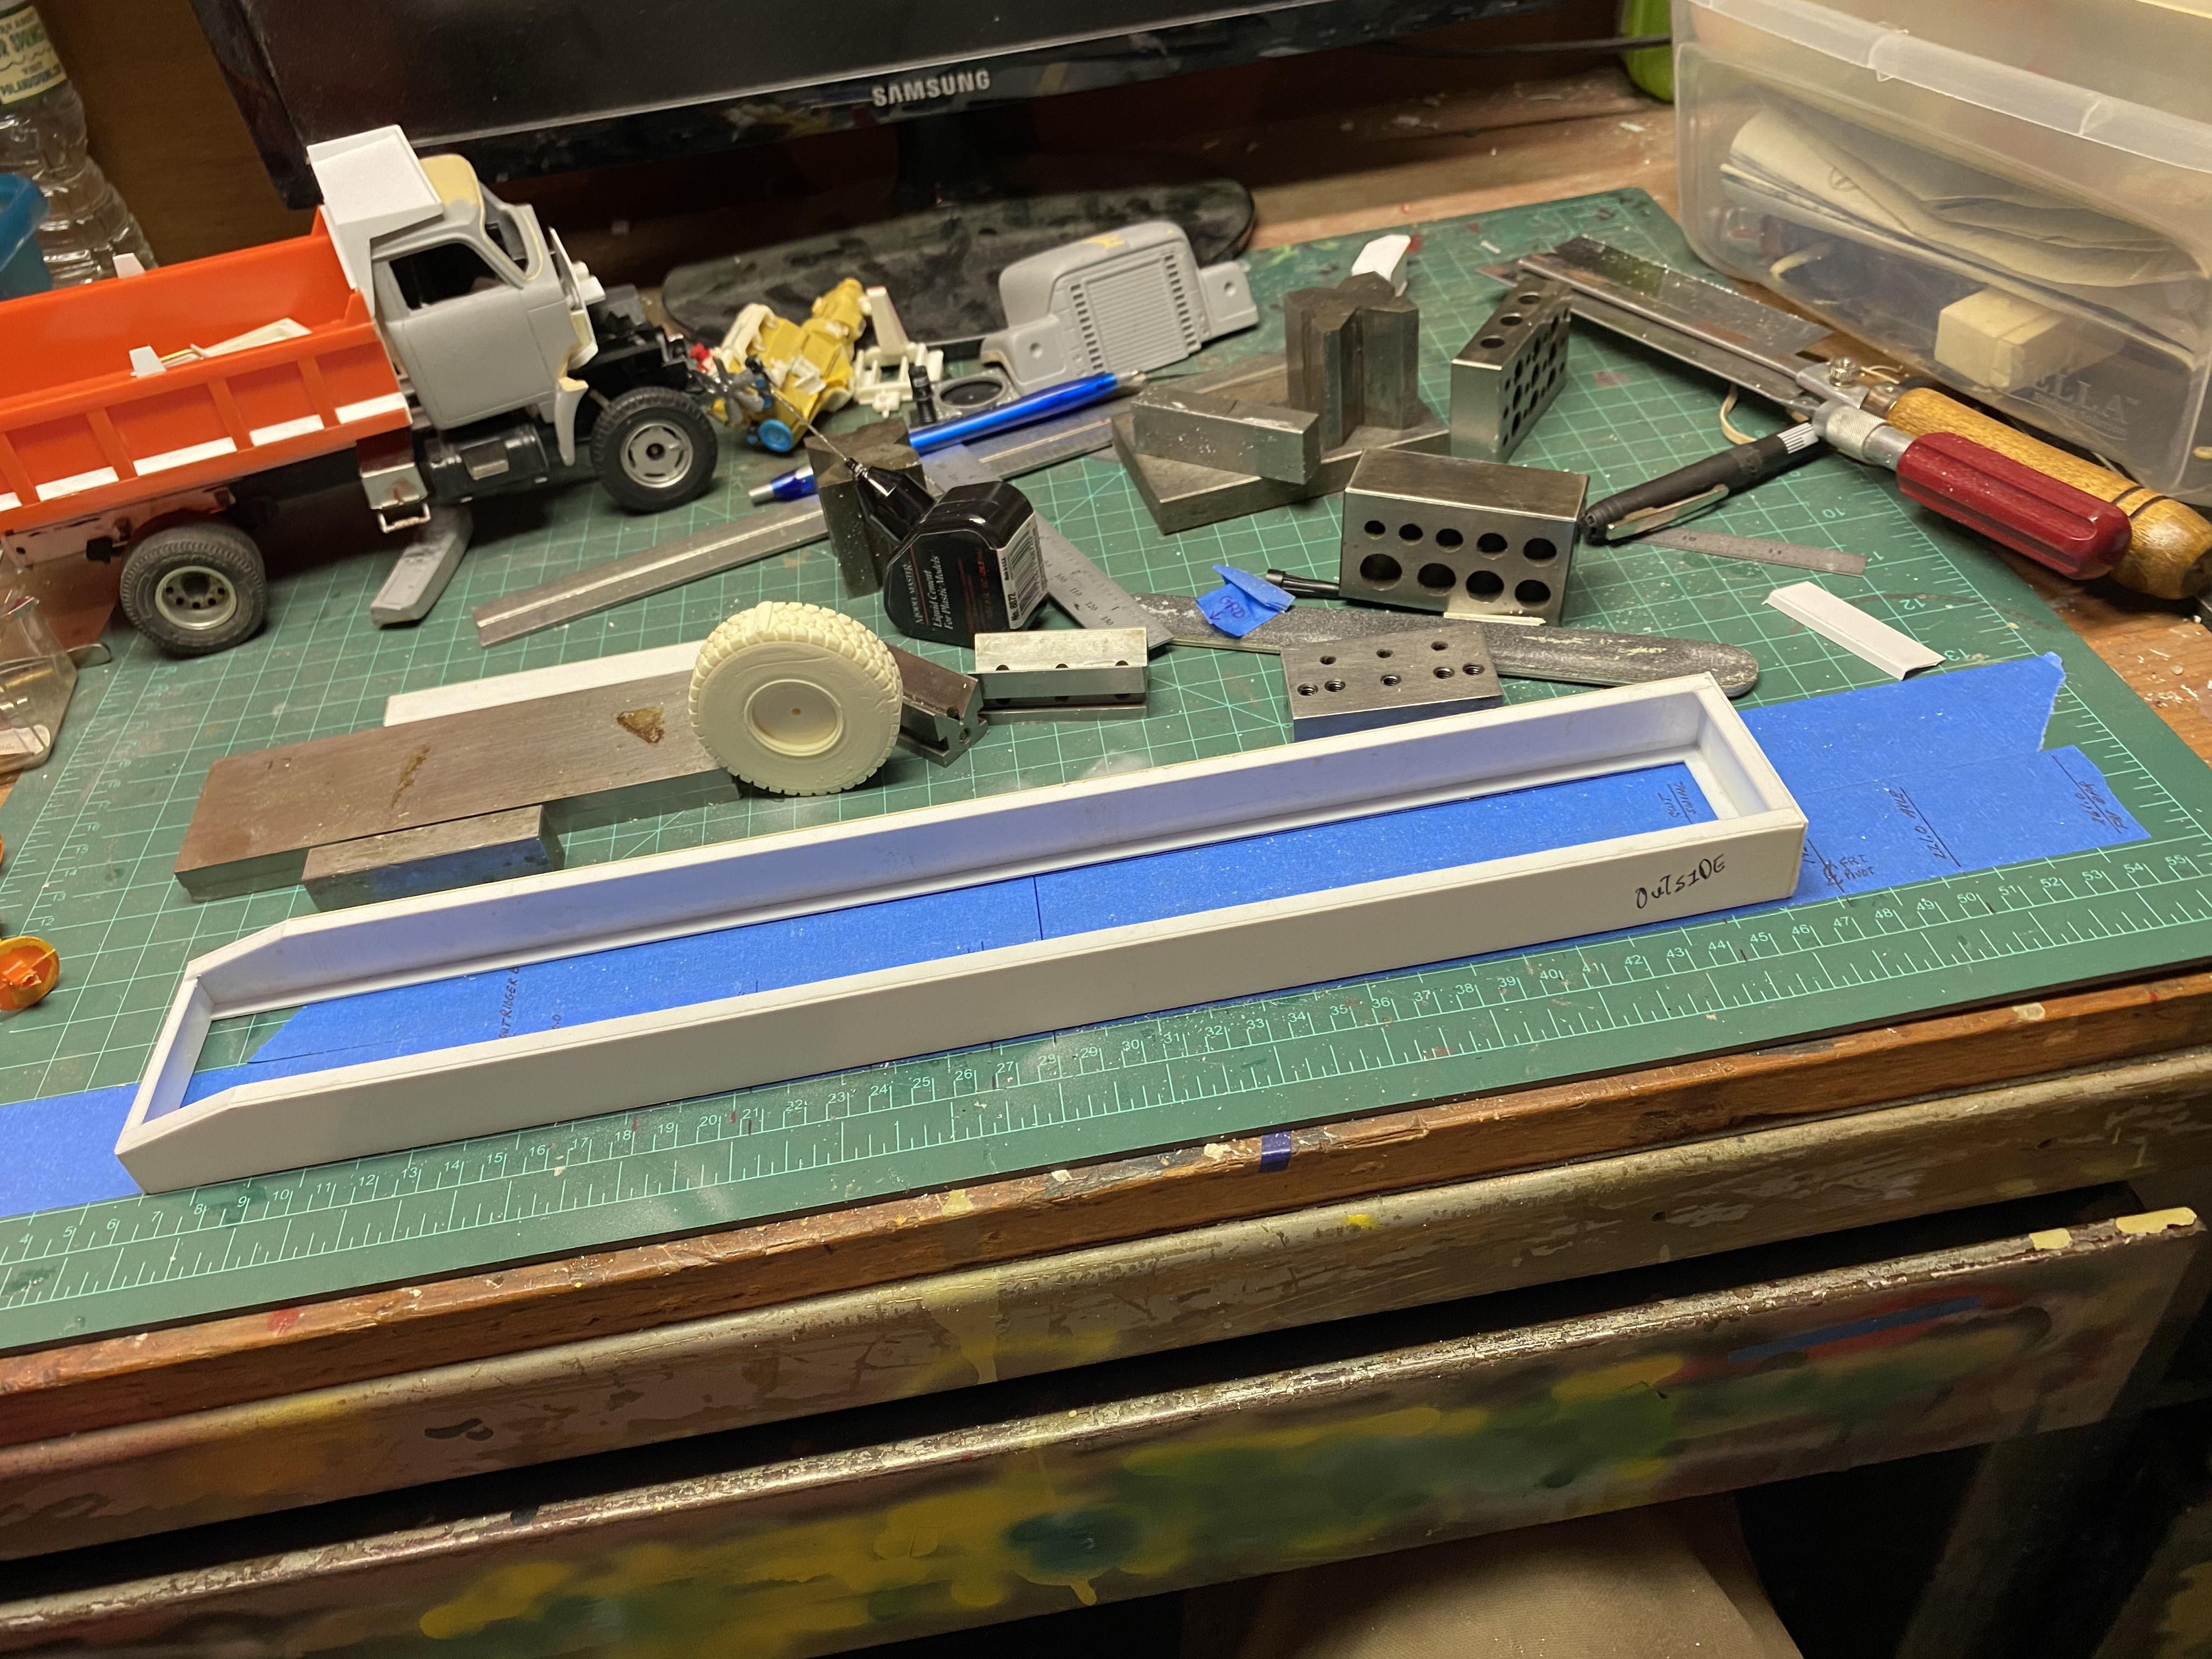
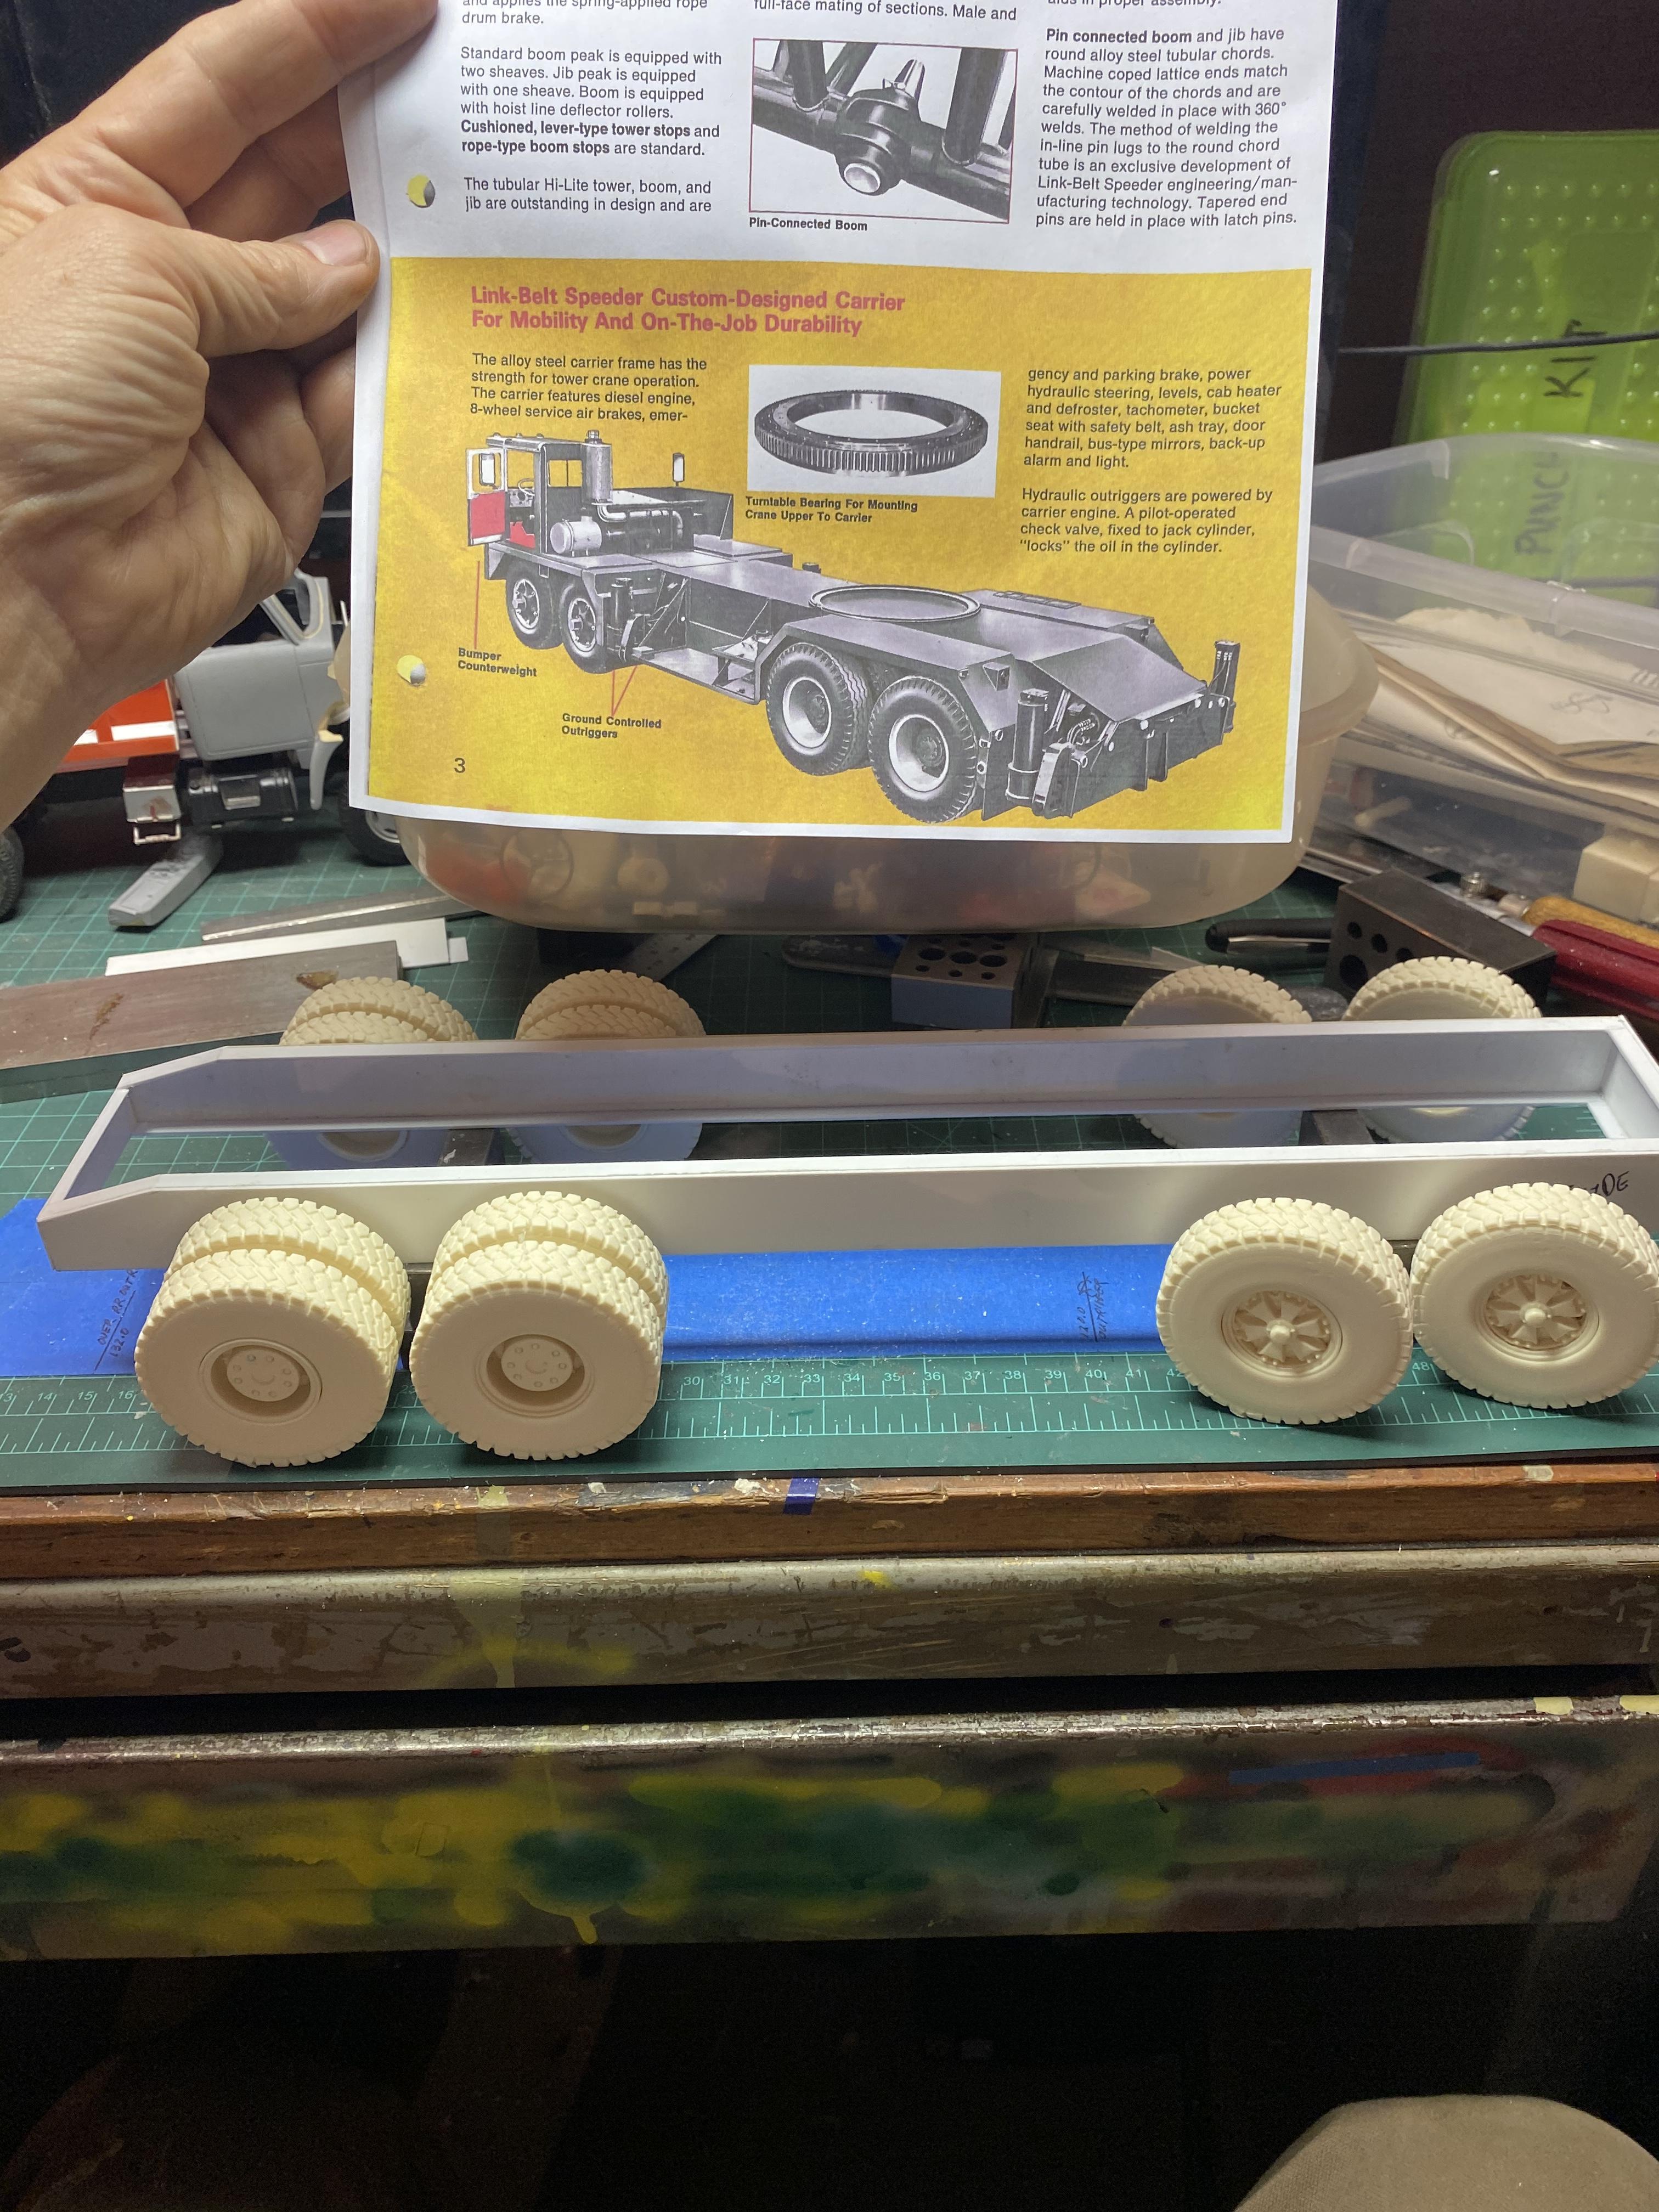
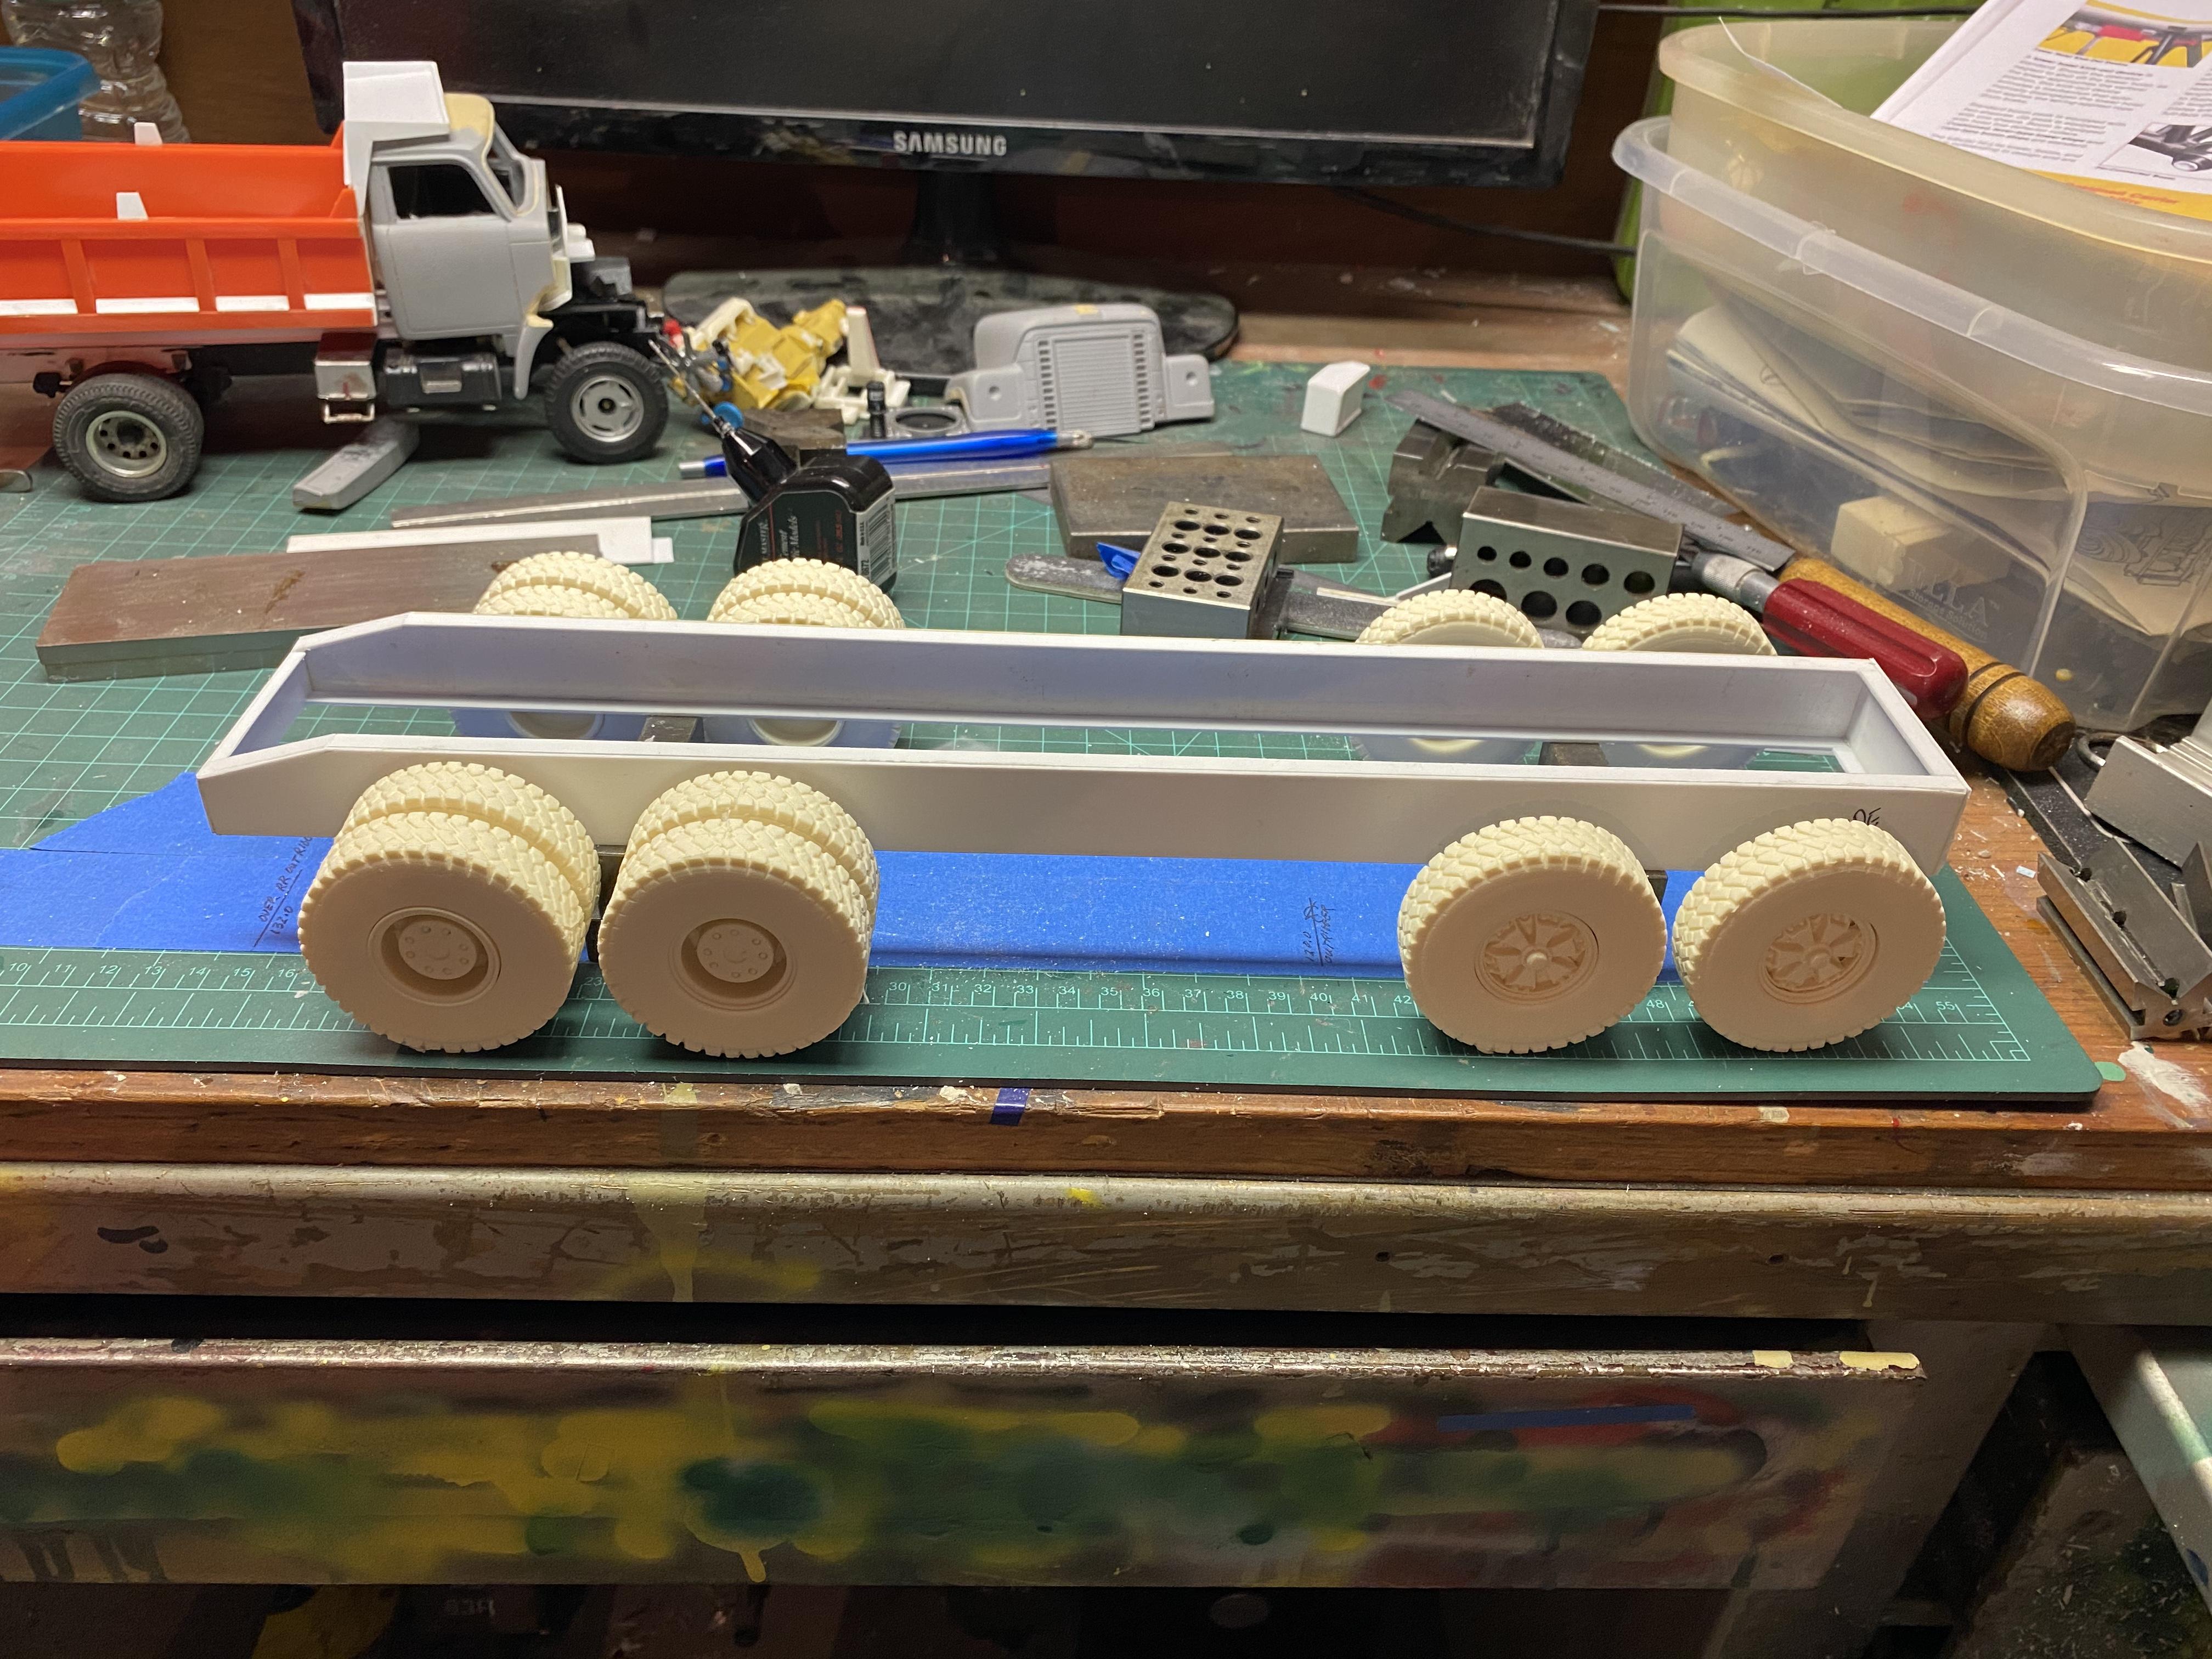
Finally got enough parts together to get this show on the road! Laid out all the dimensions on the bench, and made up the frame rails and front and rear crossmembers. The frame is a double frame and is very heavy duty. The tires are 14.00 x 24. This is going to be a huge build!
-
New Dodge build
redneckrigger replied to Repstock's topic in WIP: Model Trucks: Big Rigs and Heavy Equipment
That is VERY nice work! Love the engine, as well as the cab! -
Hi Pat, those come from Jamie at Moluminum. I sand them on a piece of sandpaper on a flat piece of glass to get the openings to show. They are superbly done resin.
-
1948 Sterling HC 175
redneckrigger replied to Chariots of Fire's topic in WIP: Model Trucks: Big Rigs and Heavy Equipment
Fantastic Charlie! It is always enjoyable to watch your builds. What with everything going on right now, I come home at night and collapse, BUT, I always spend time here on the forums, watching builds by incredibly talented friends....................and you always lead the way sir!