.jpg.54ecf0d4a006234146ea24c7f6762038.jpg)
redneckrigger
-
Posts
1,578 -
Joined
-
Last visited
Content Type
Profiles
Forums
Events
Gallery
Everything posted by redneckrigger
-
.thumb.jpg.4bca3333e1da4027c381d8d56a564ec1.jpg)
BRBO Aeromax and 53’ reefer
redneckrigger replied to tbill's topic in Model Trucks: Big Rigs and Heavy Equipment
THAT is a VERY cool build! Love the colors, decals, every little thing about it! Awesome! -
BRBO International KB8
redneckrigger replied to landman's topic in Model Trucks: Big Rigs and Heavy Equipment
Now THAT is an awesome job Pat! It looks like it just drove here from 60+ years ago. Great work, as always! -
BRBO Mack B815 Logger
redneckrigger replied to Warren D's topic in Model Trucks: Big Rigs and Heavy Equipment
Absolutely incredible old Mack! Have a soft spot for old dogs, and you hit this one out of the park! Love the details, the chains, the grapple, and the weathering! Beautiful! -
IH CO 4070B Johnson
redneckrigger replied to DRIPTROIT 71's topic in Model Trucks: Big Rigs and Heavy Equipment
Great recycling! And great details and combo of color, decals, and engine! All on one of the nicest kits ever offered! Well done. -
Beautifully done build of a hard to build kit! Nice!
-
Wonderful build sir! Great colors, awesome details, and all on a Mack. Doesn’t get any better than that!
-
Paystar with snow plow.
redneckrigger replied to mackd's topic in Model Trucks: Big Rigs and Heavy Equipment
Good things come in small packages! Very nice! -
Mashpee 354 is finished.
redneckrigger replied to Chariots of Fire's topic in Model Trucks: Big Rigs and Heavy Equipment
Charlie, you keep raising the bar on your builds! That is absolutely awesome and beautiful. Love all the details, especially the brass work. The inspiration you provide with every build is priceless. So, I guess the next question is, what are you going to top this one with??!! Great work sir! -
Army HEMTT M983 Tractor
redneckrigger replied to delta99's topic in Model Trucks: Big Rigs and Heavy Equipment
Very nicely done build! Lots of detail in that scale, only wish one was available in 1/24 or 1/25.......old eyes see the parts better! Great weathering too! Nice! -
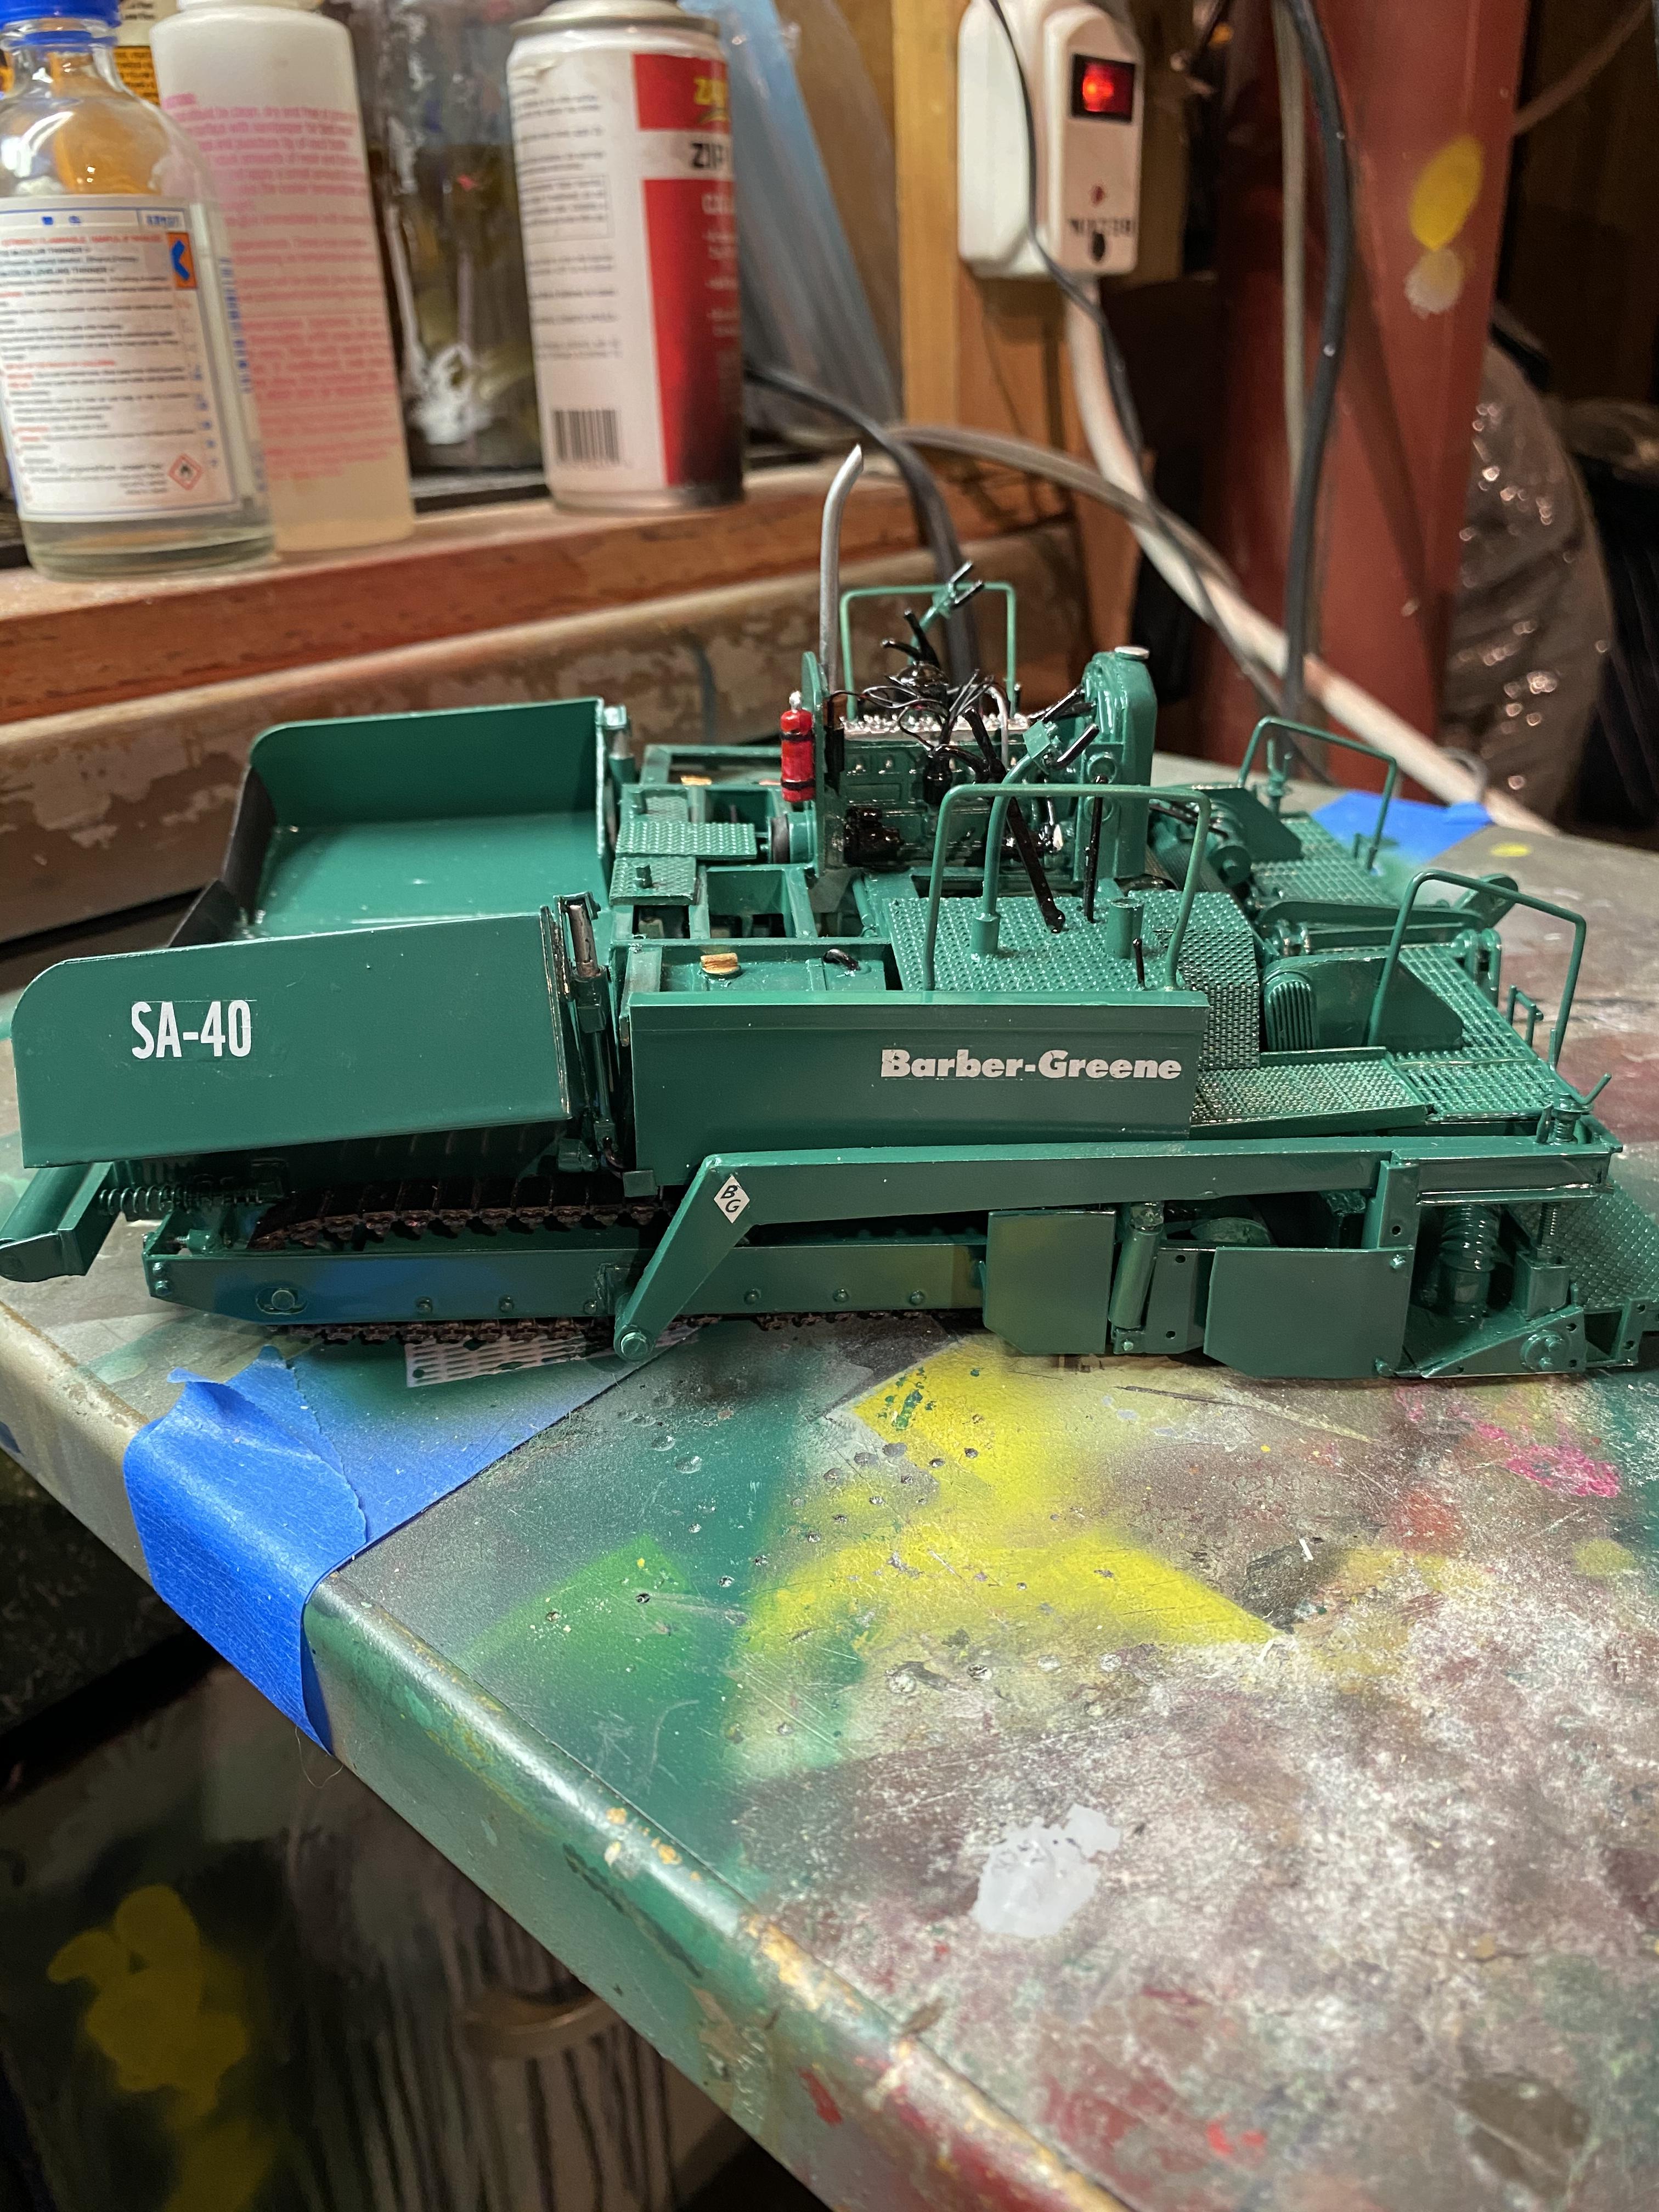
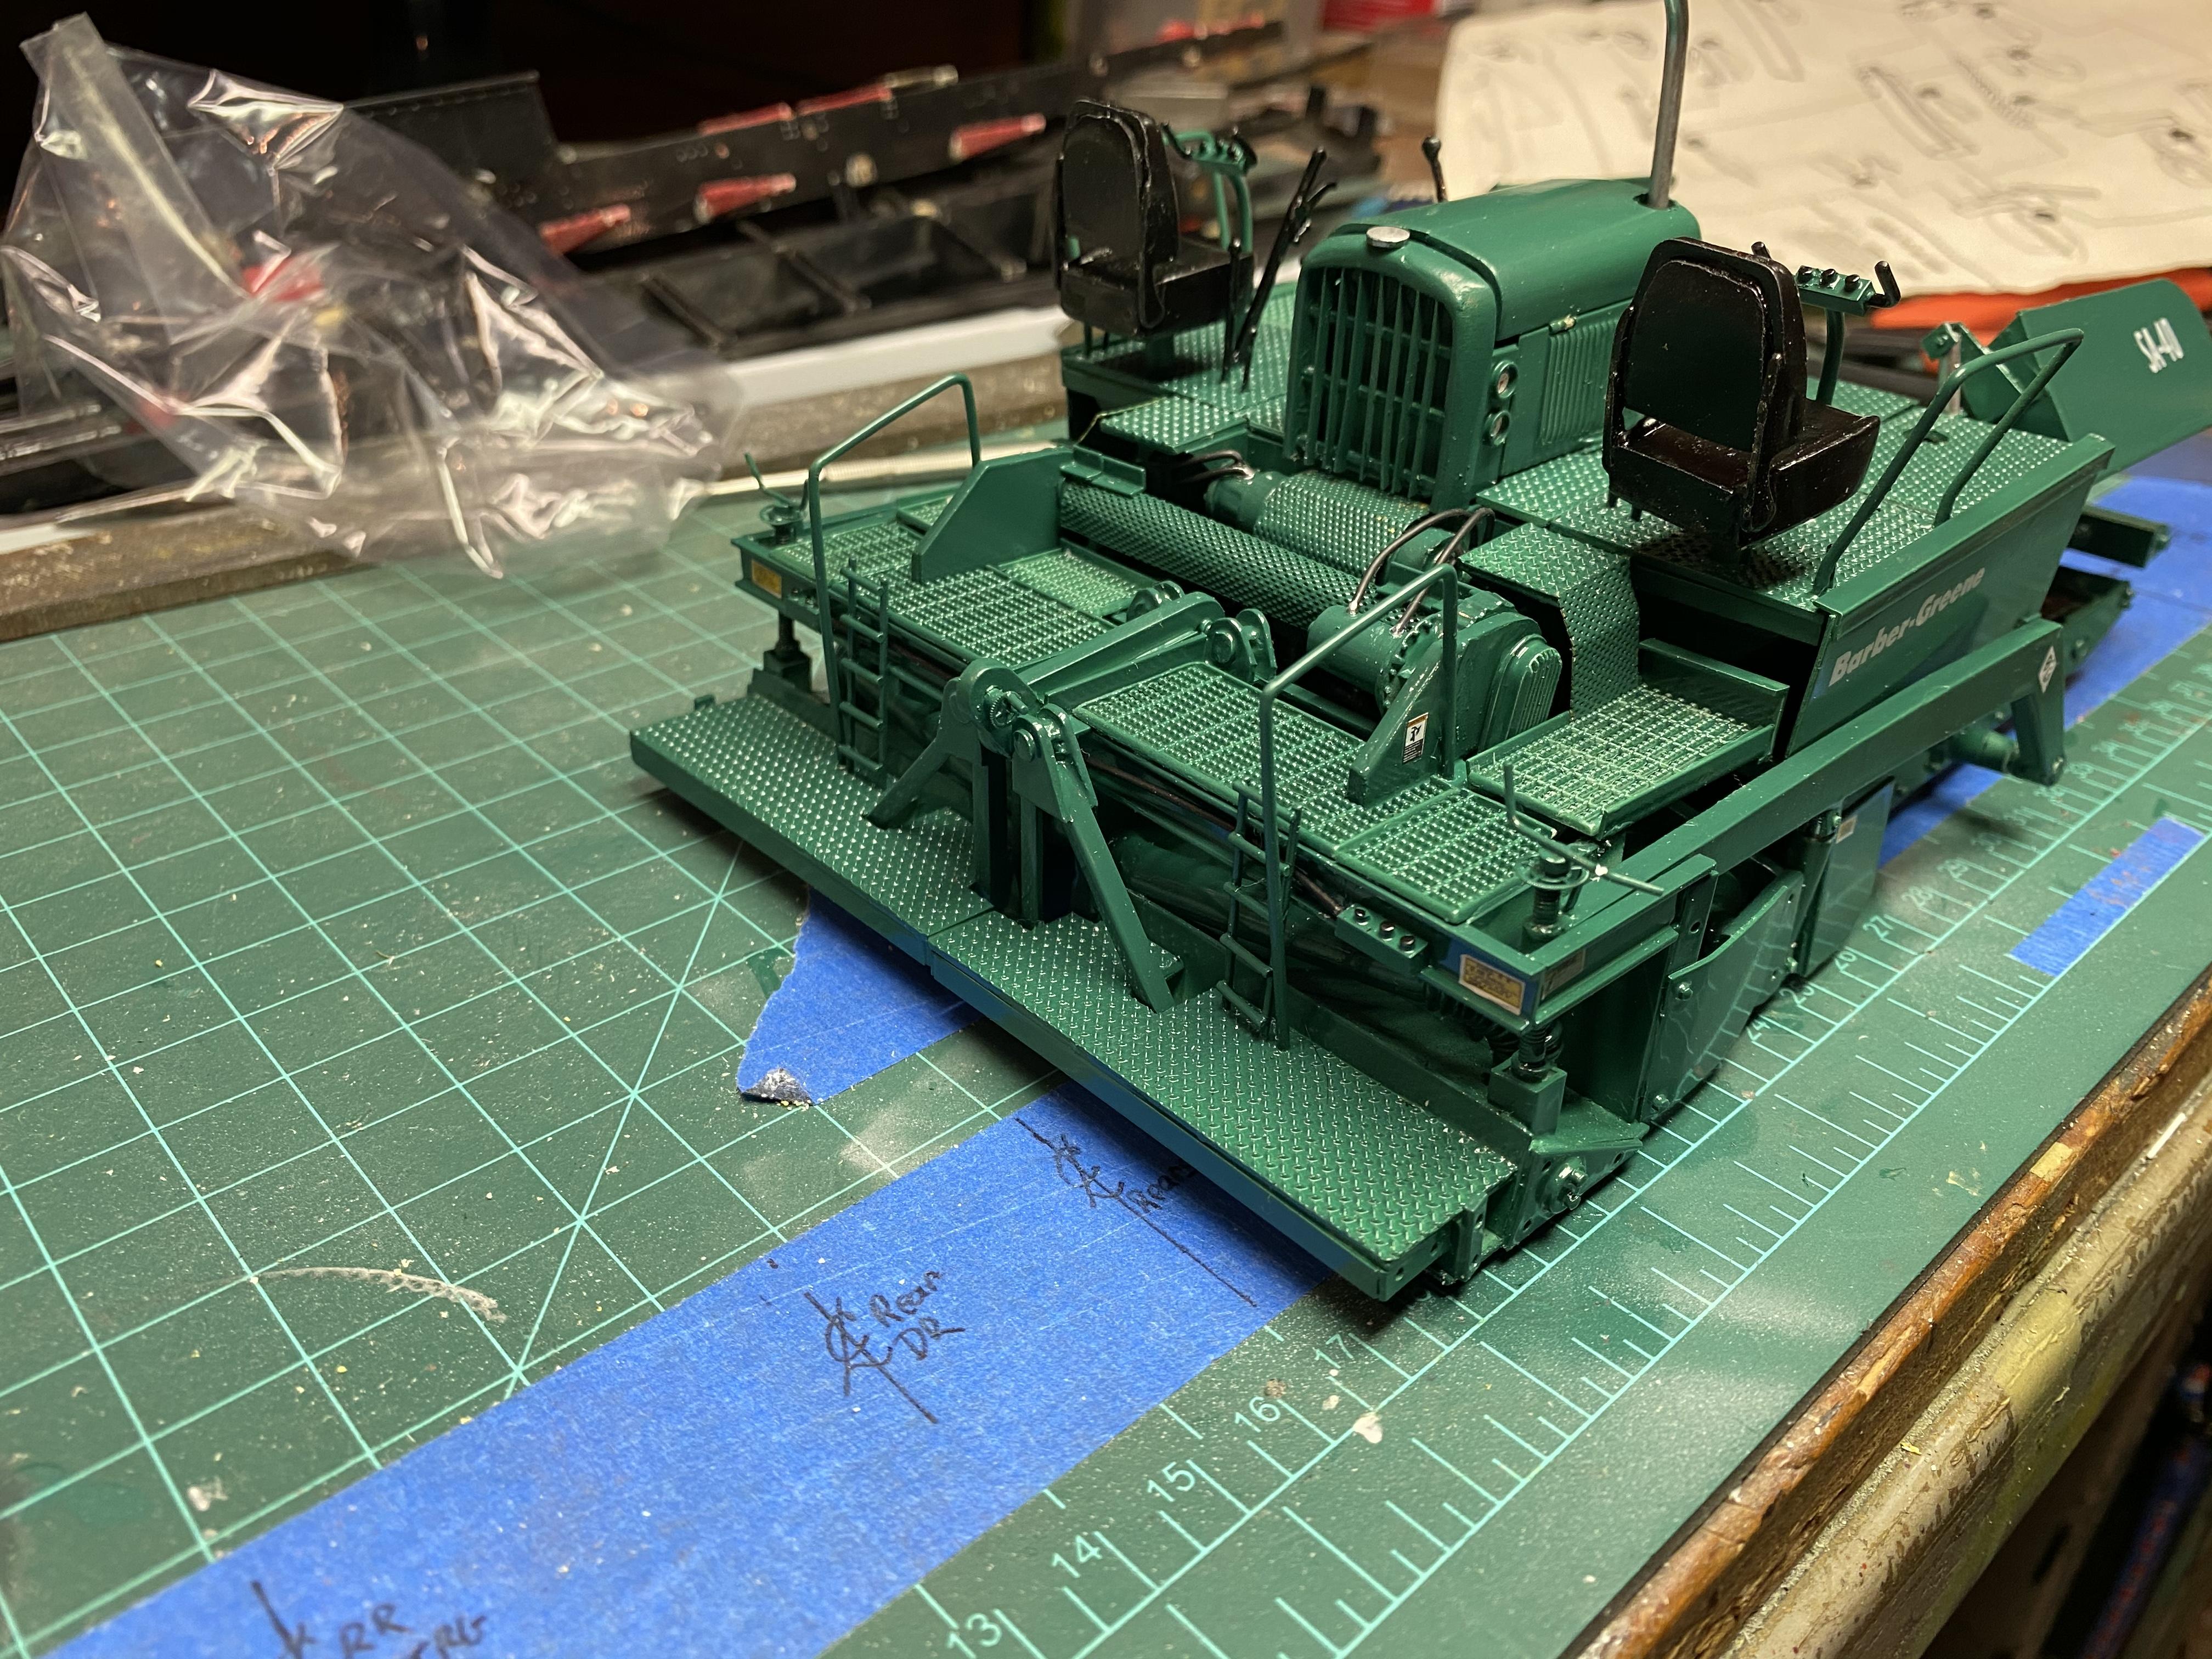
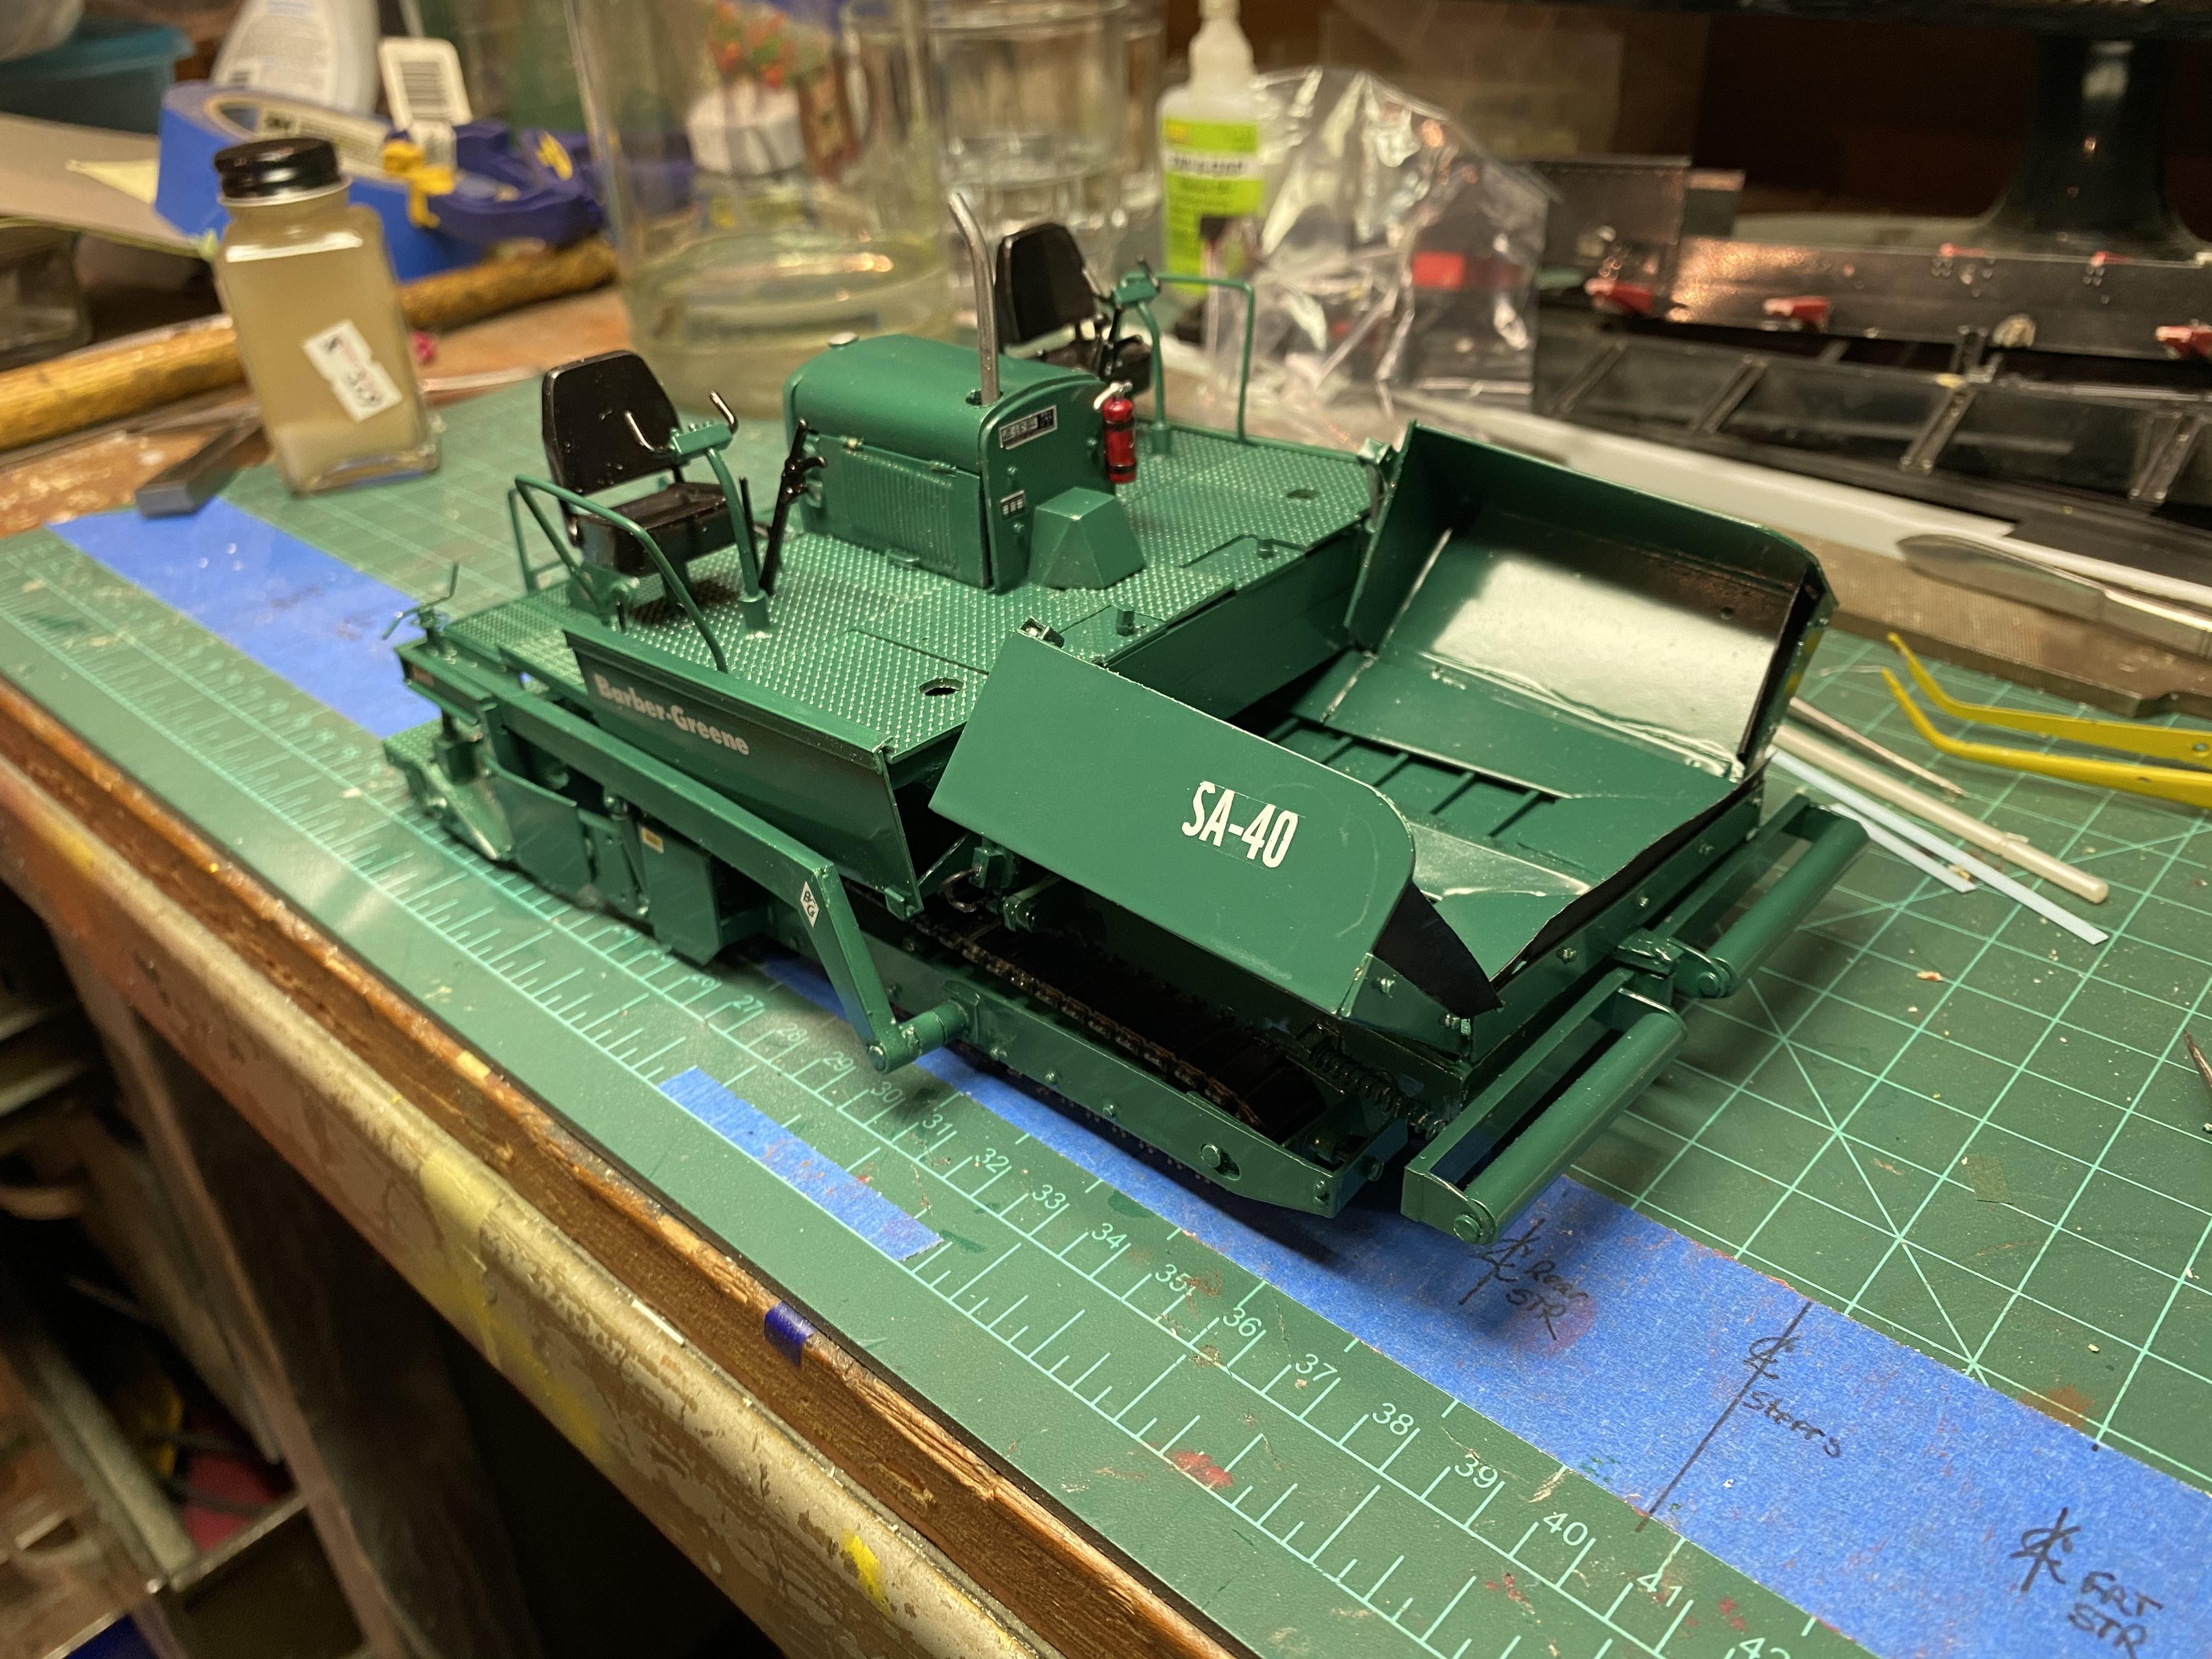
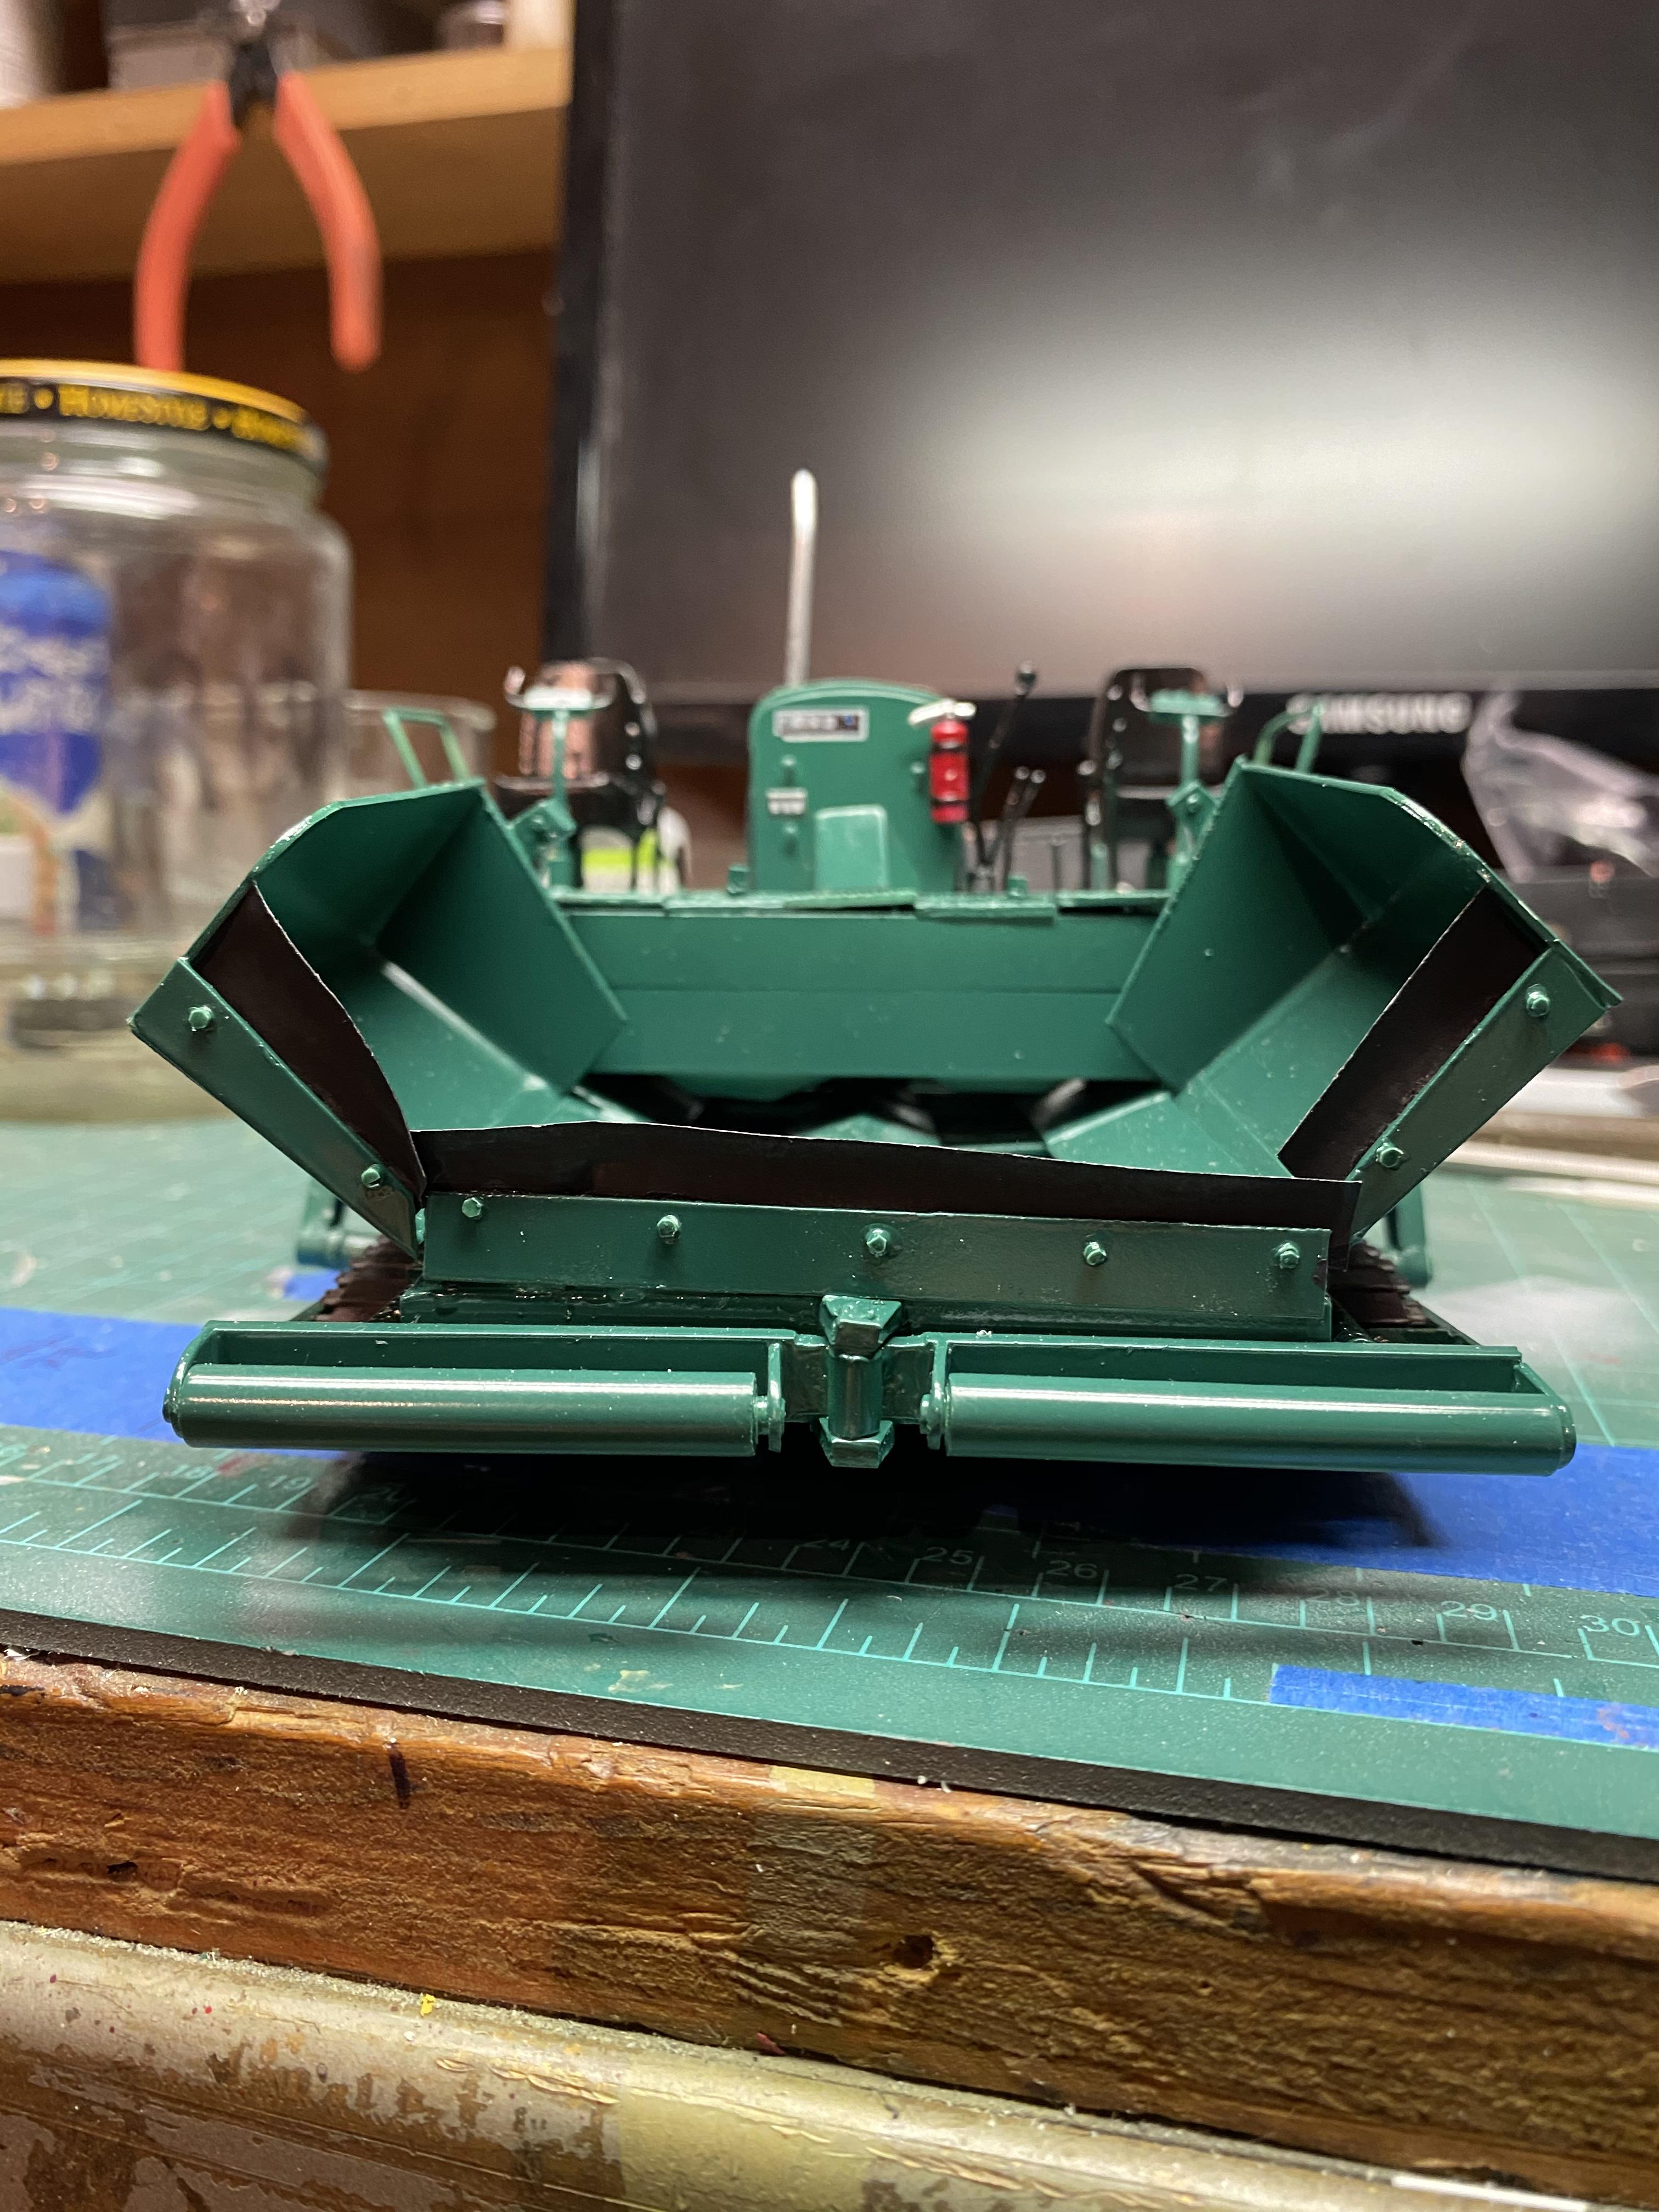
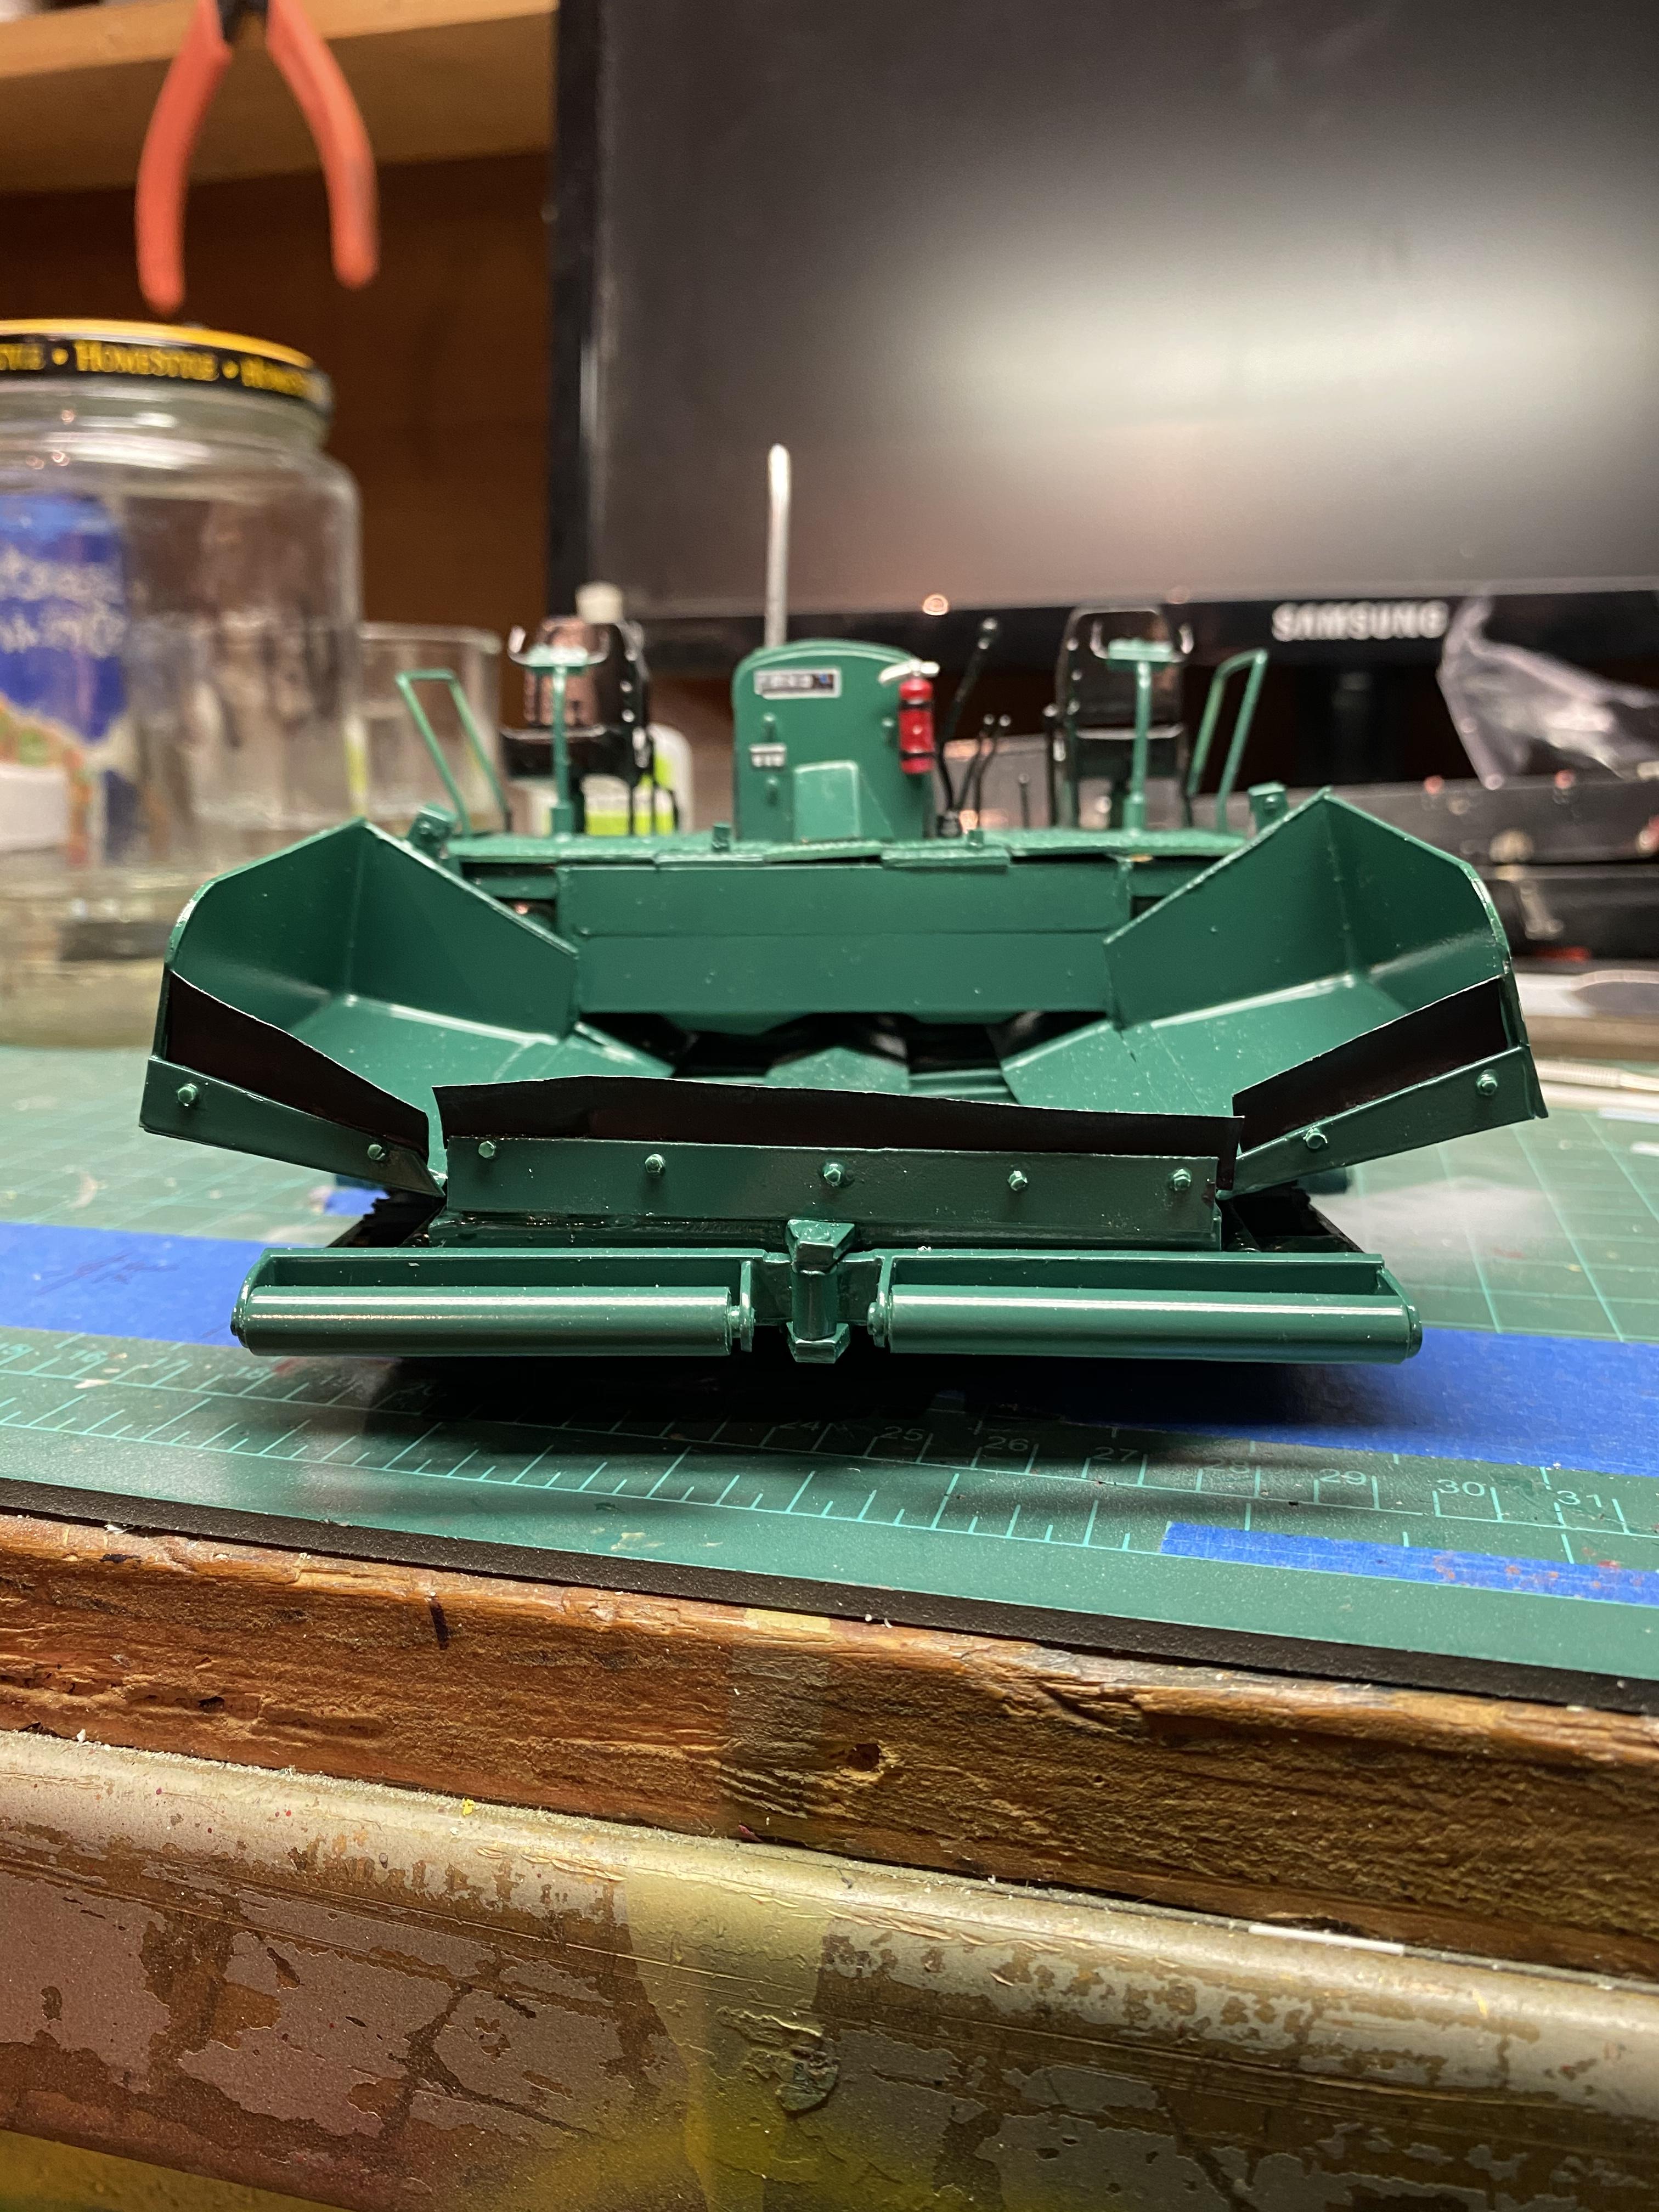
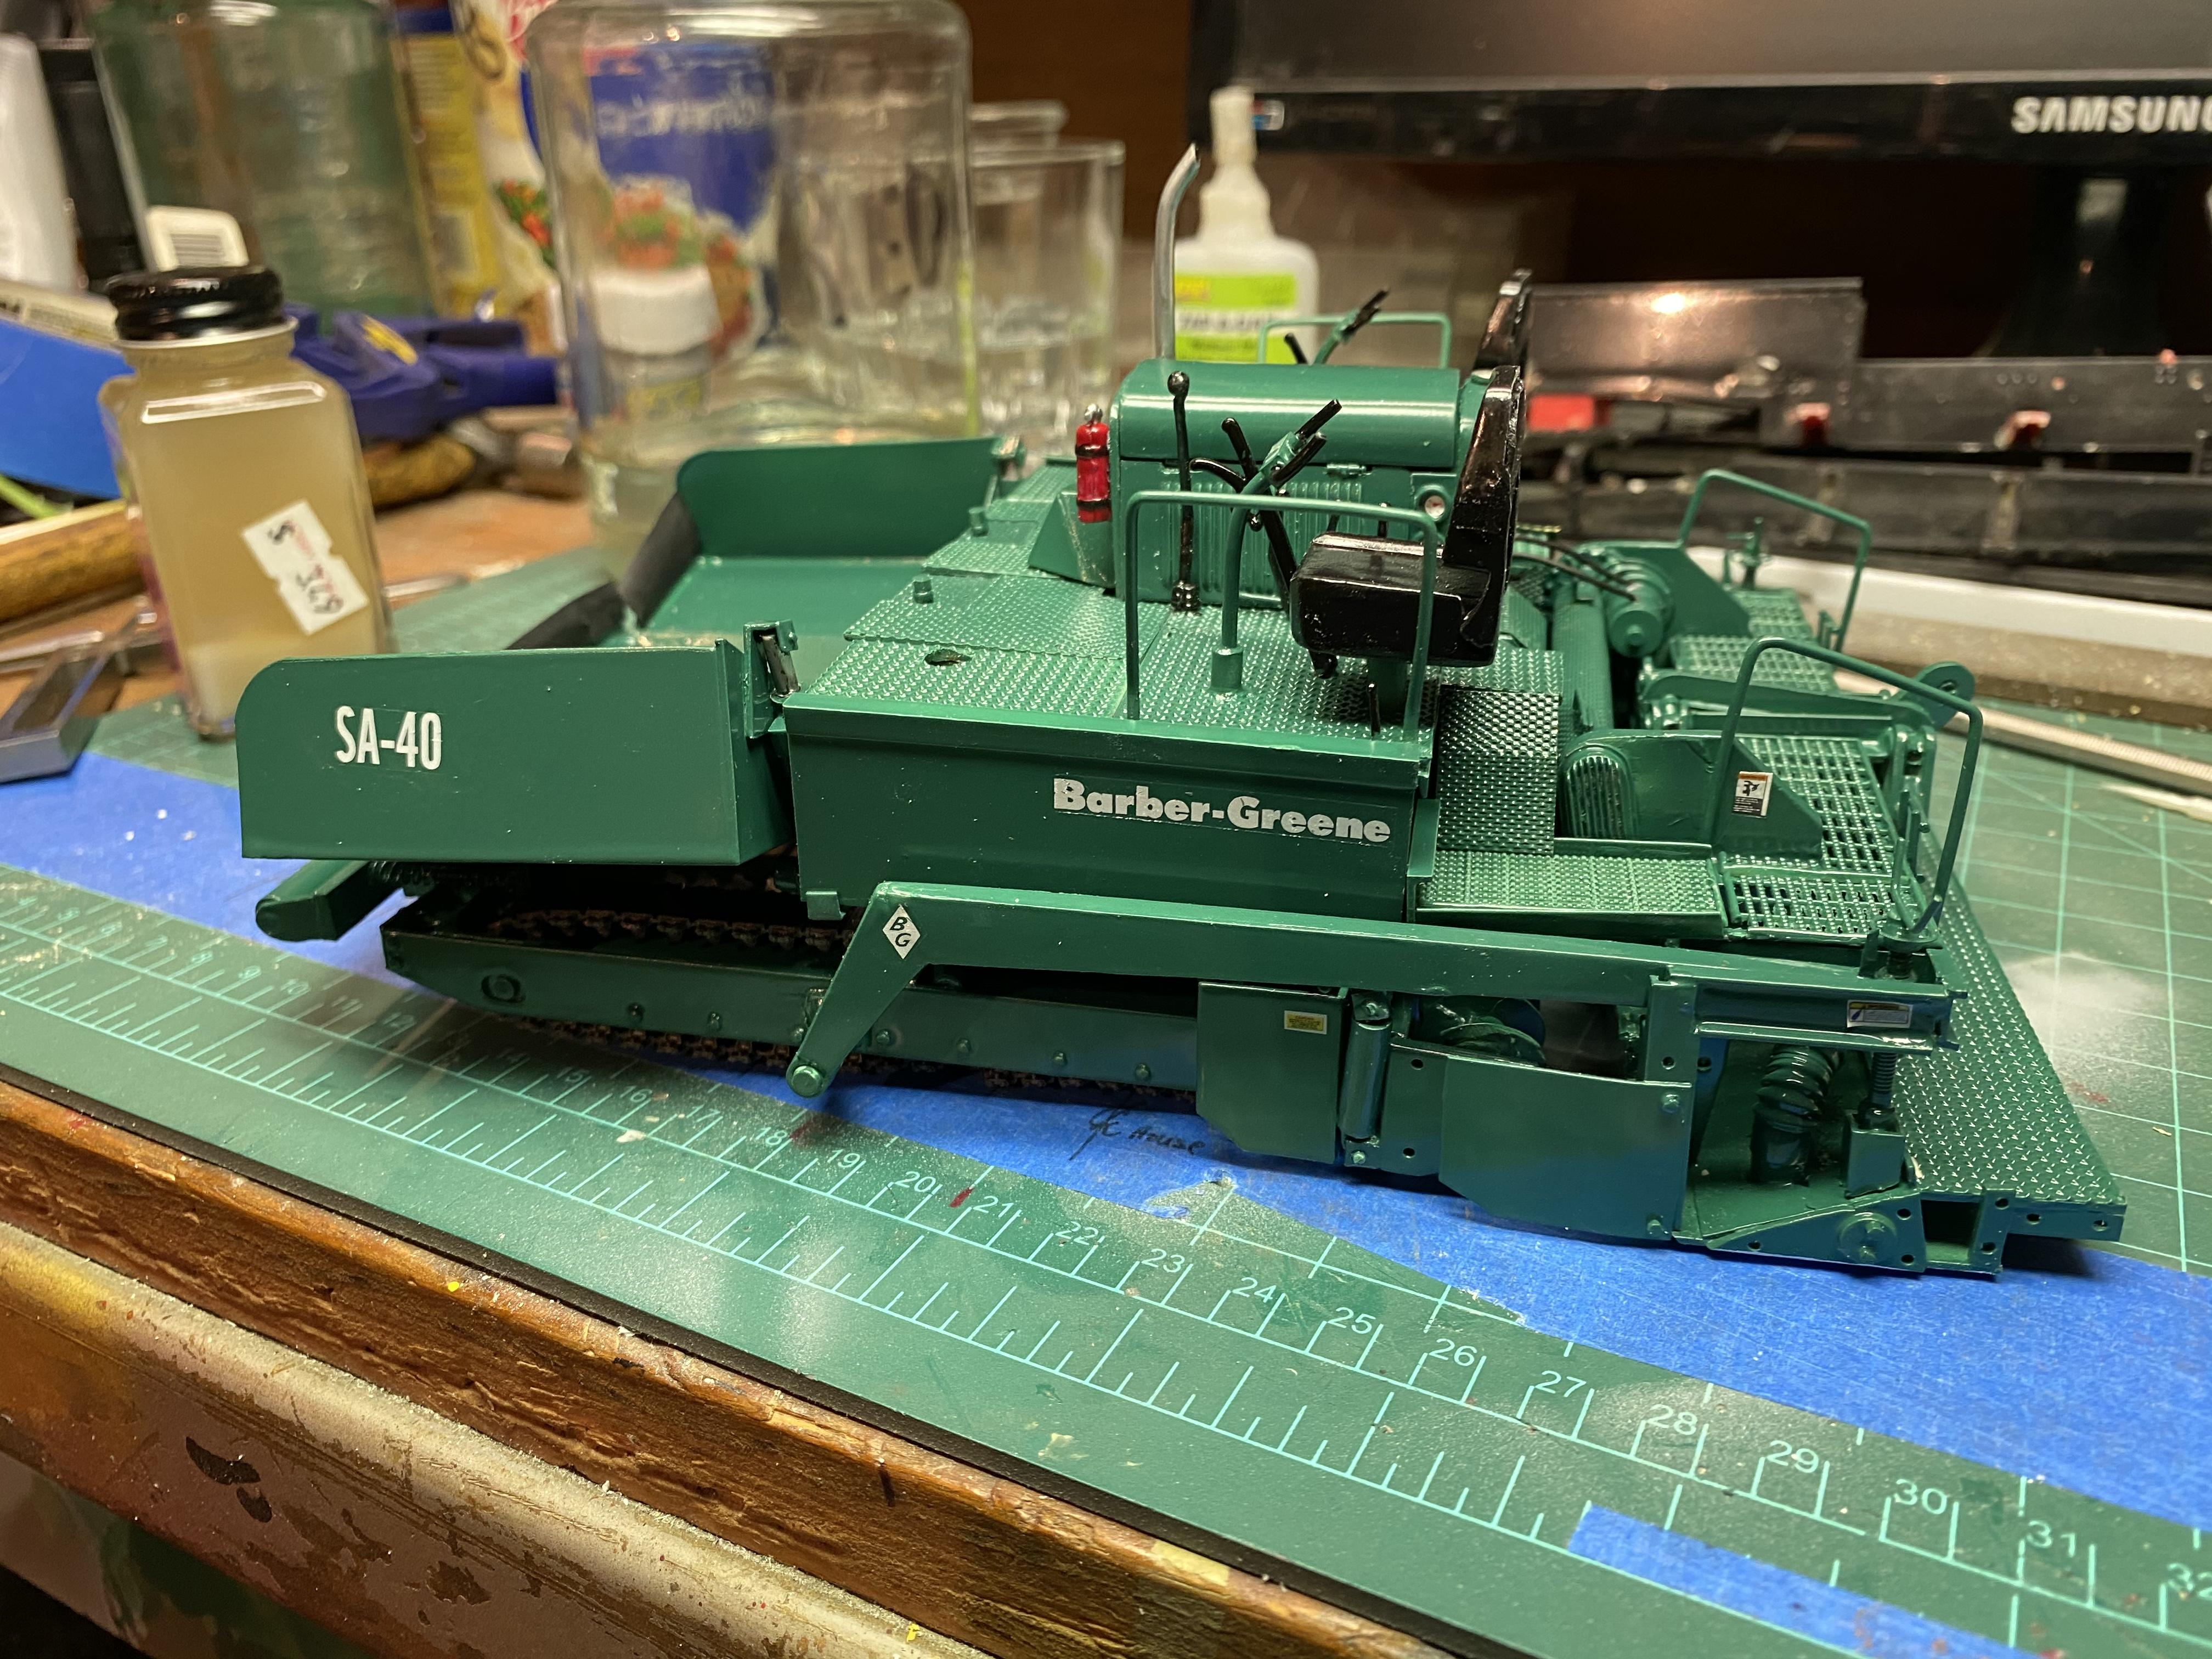
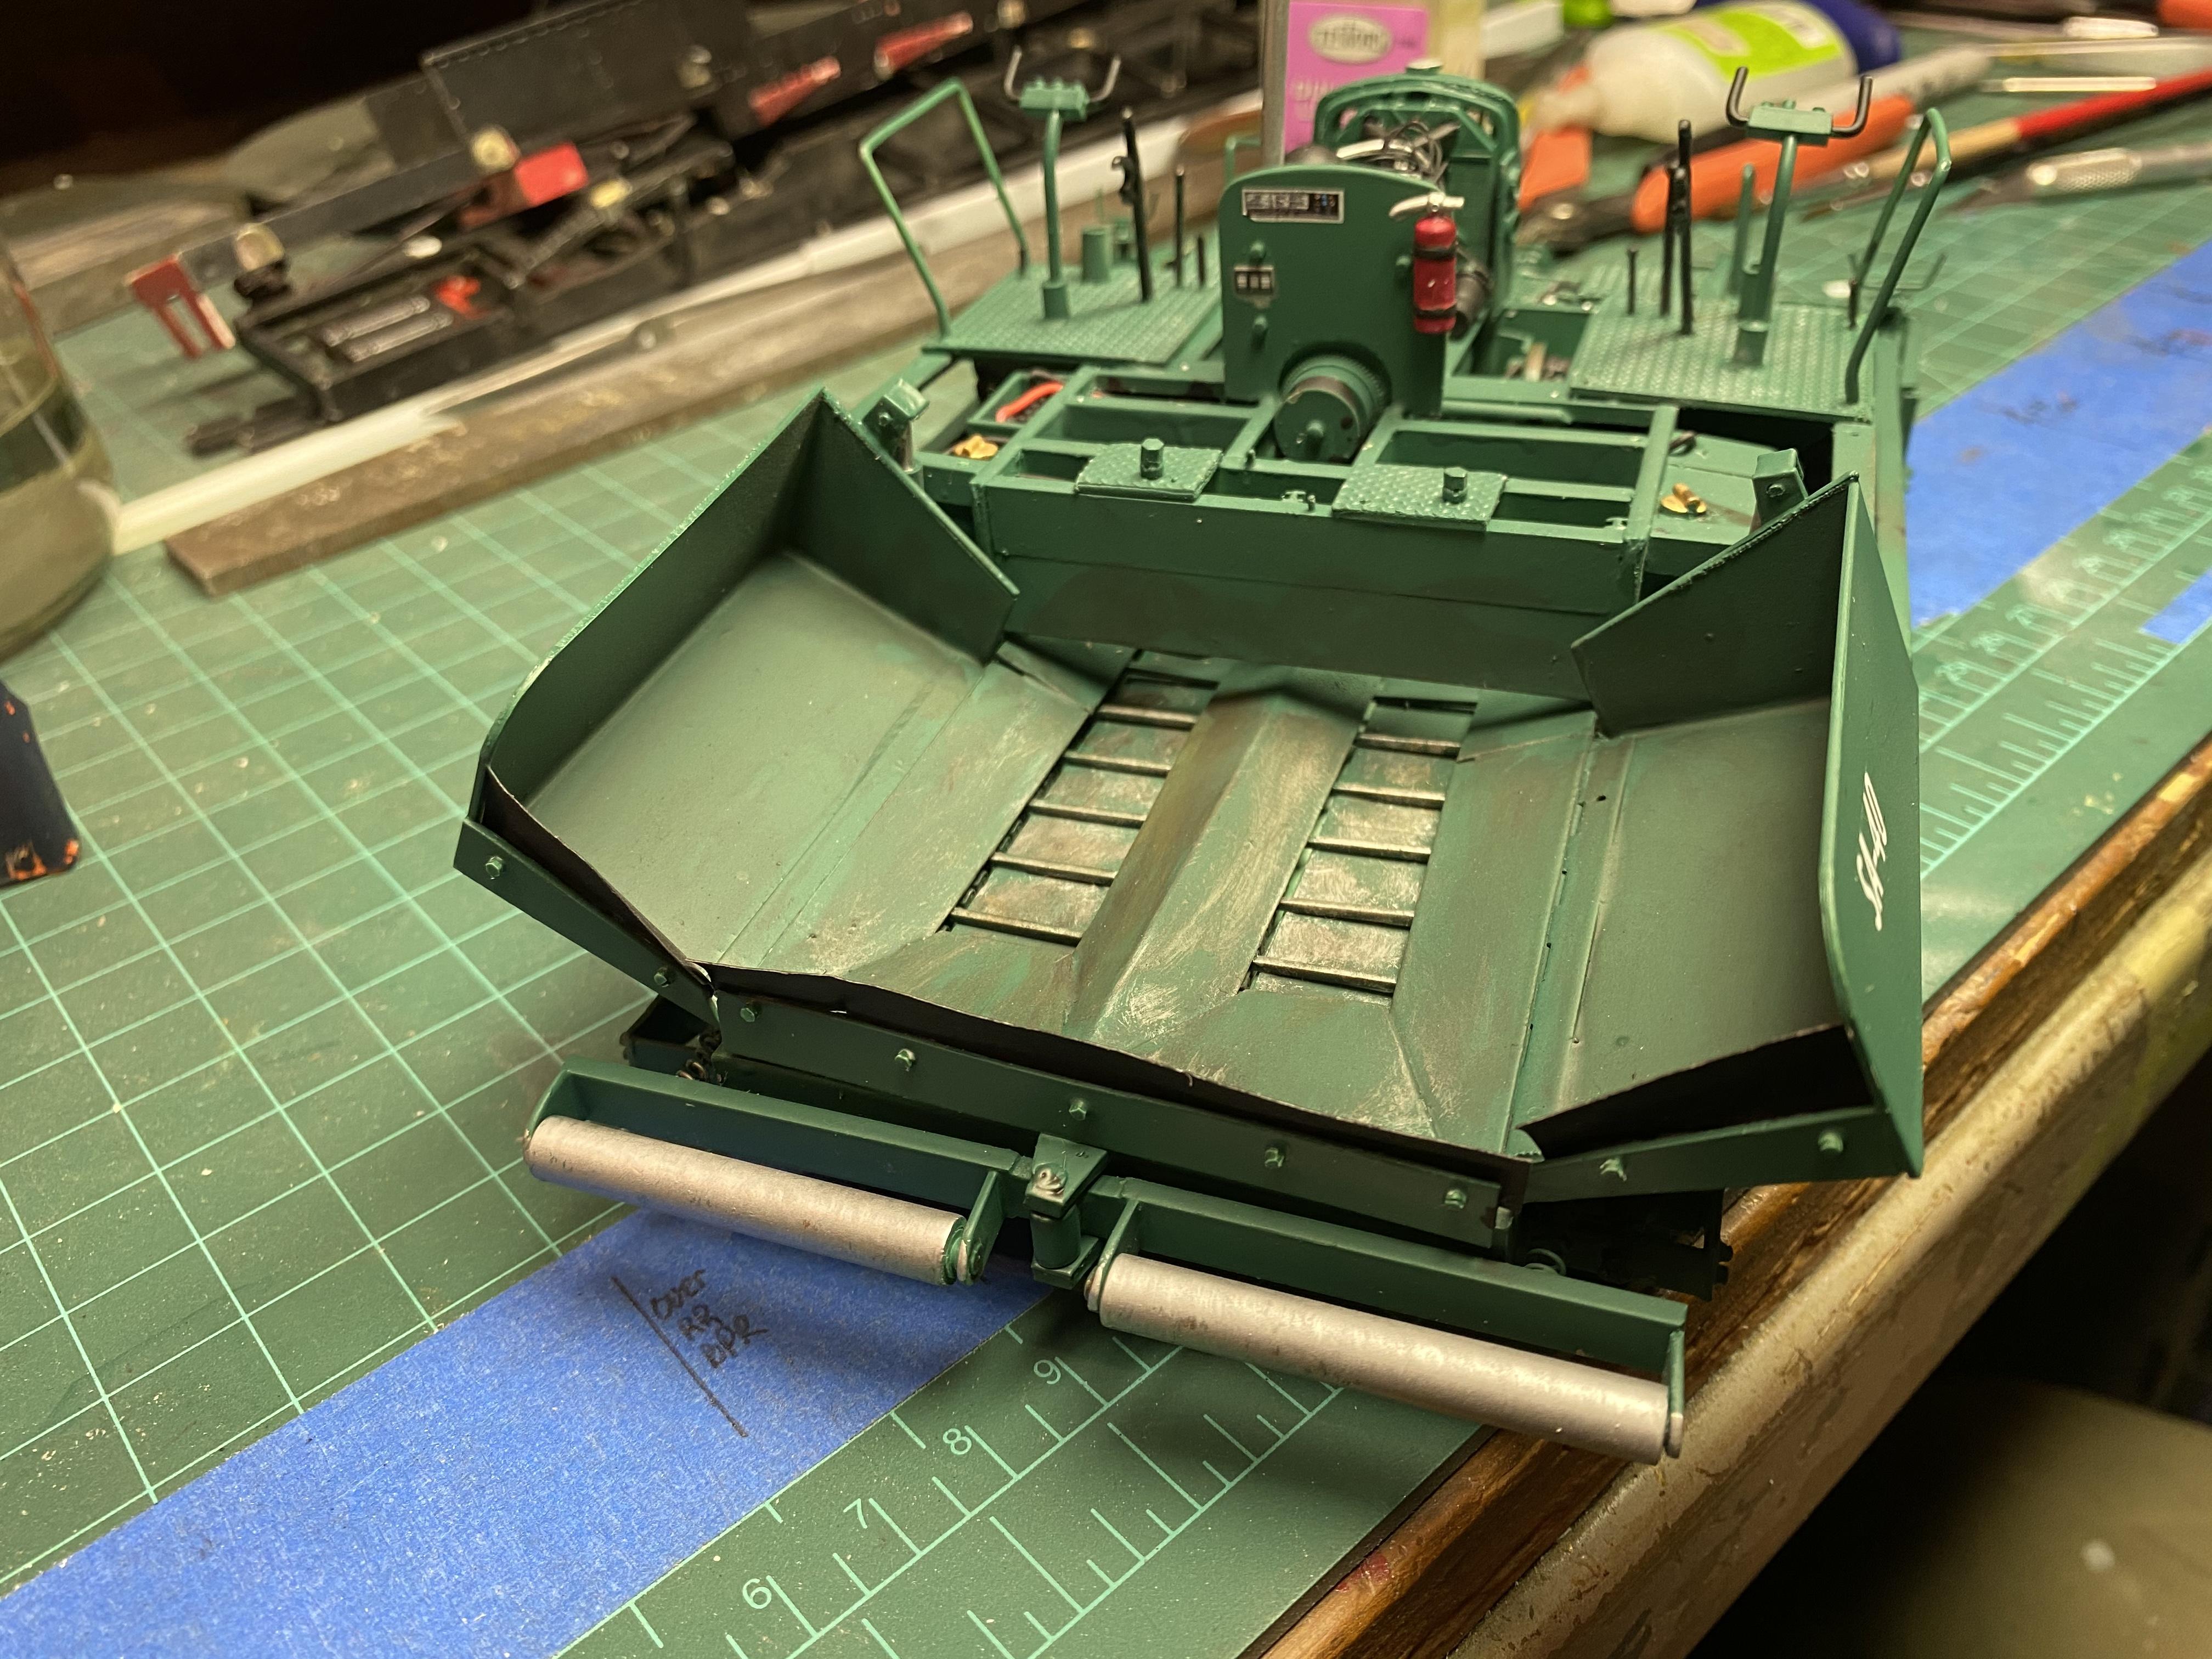
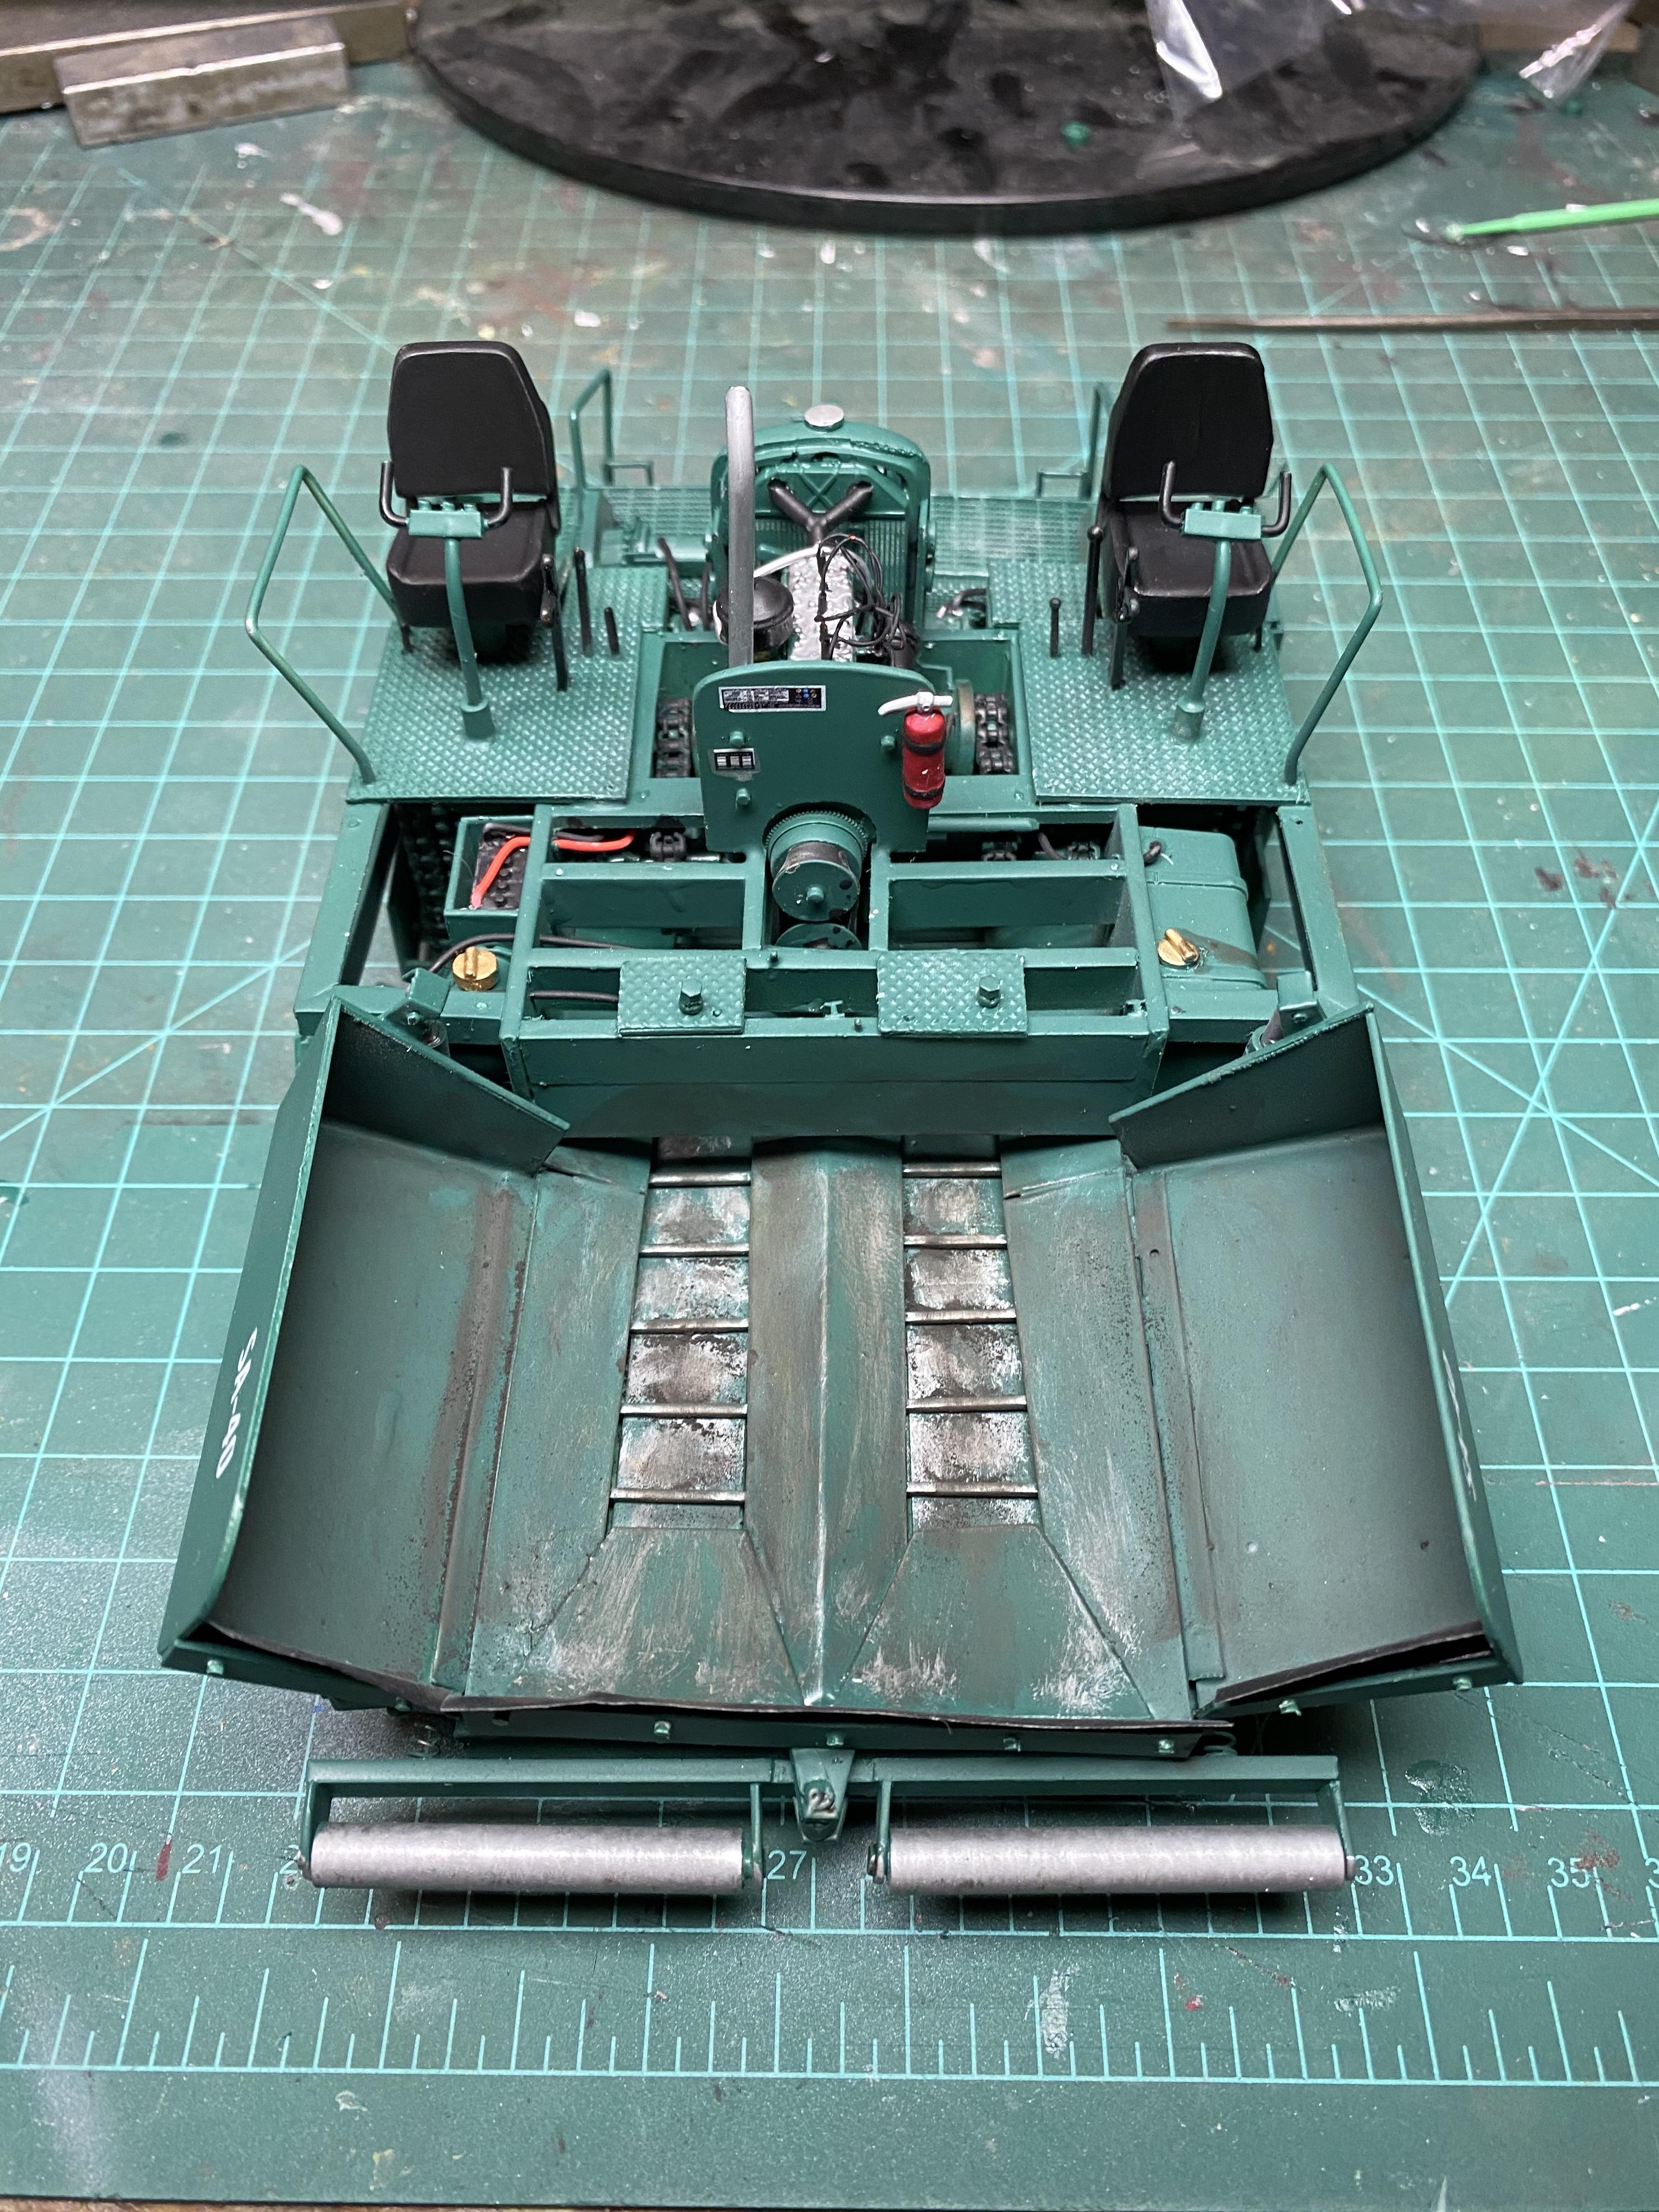
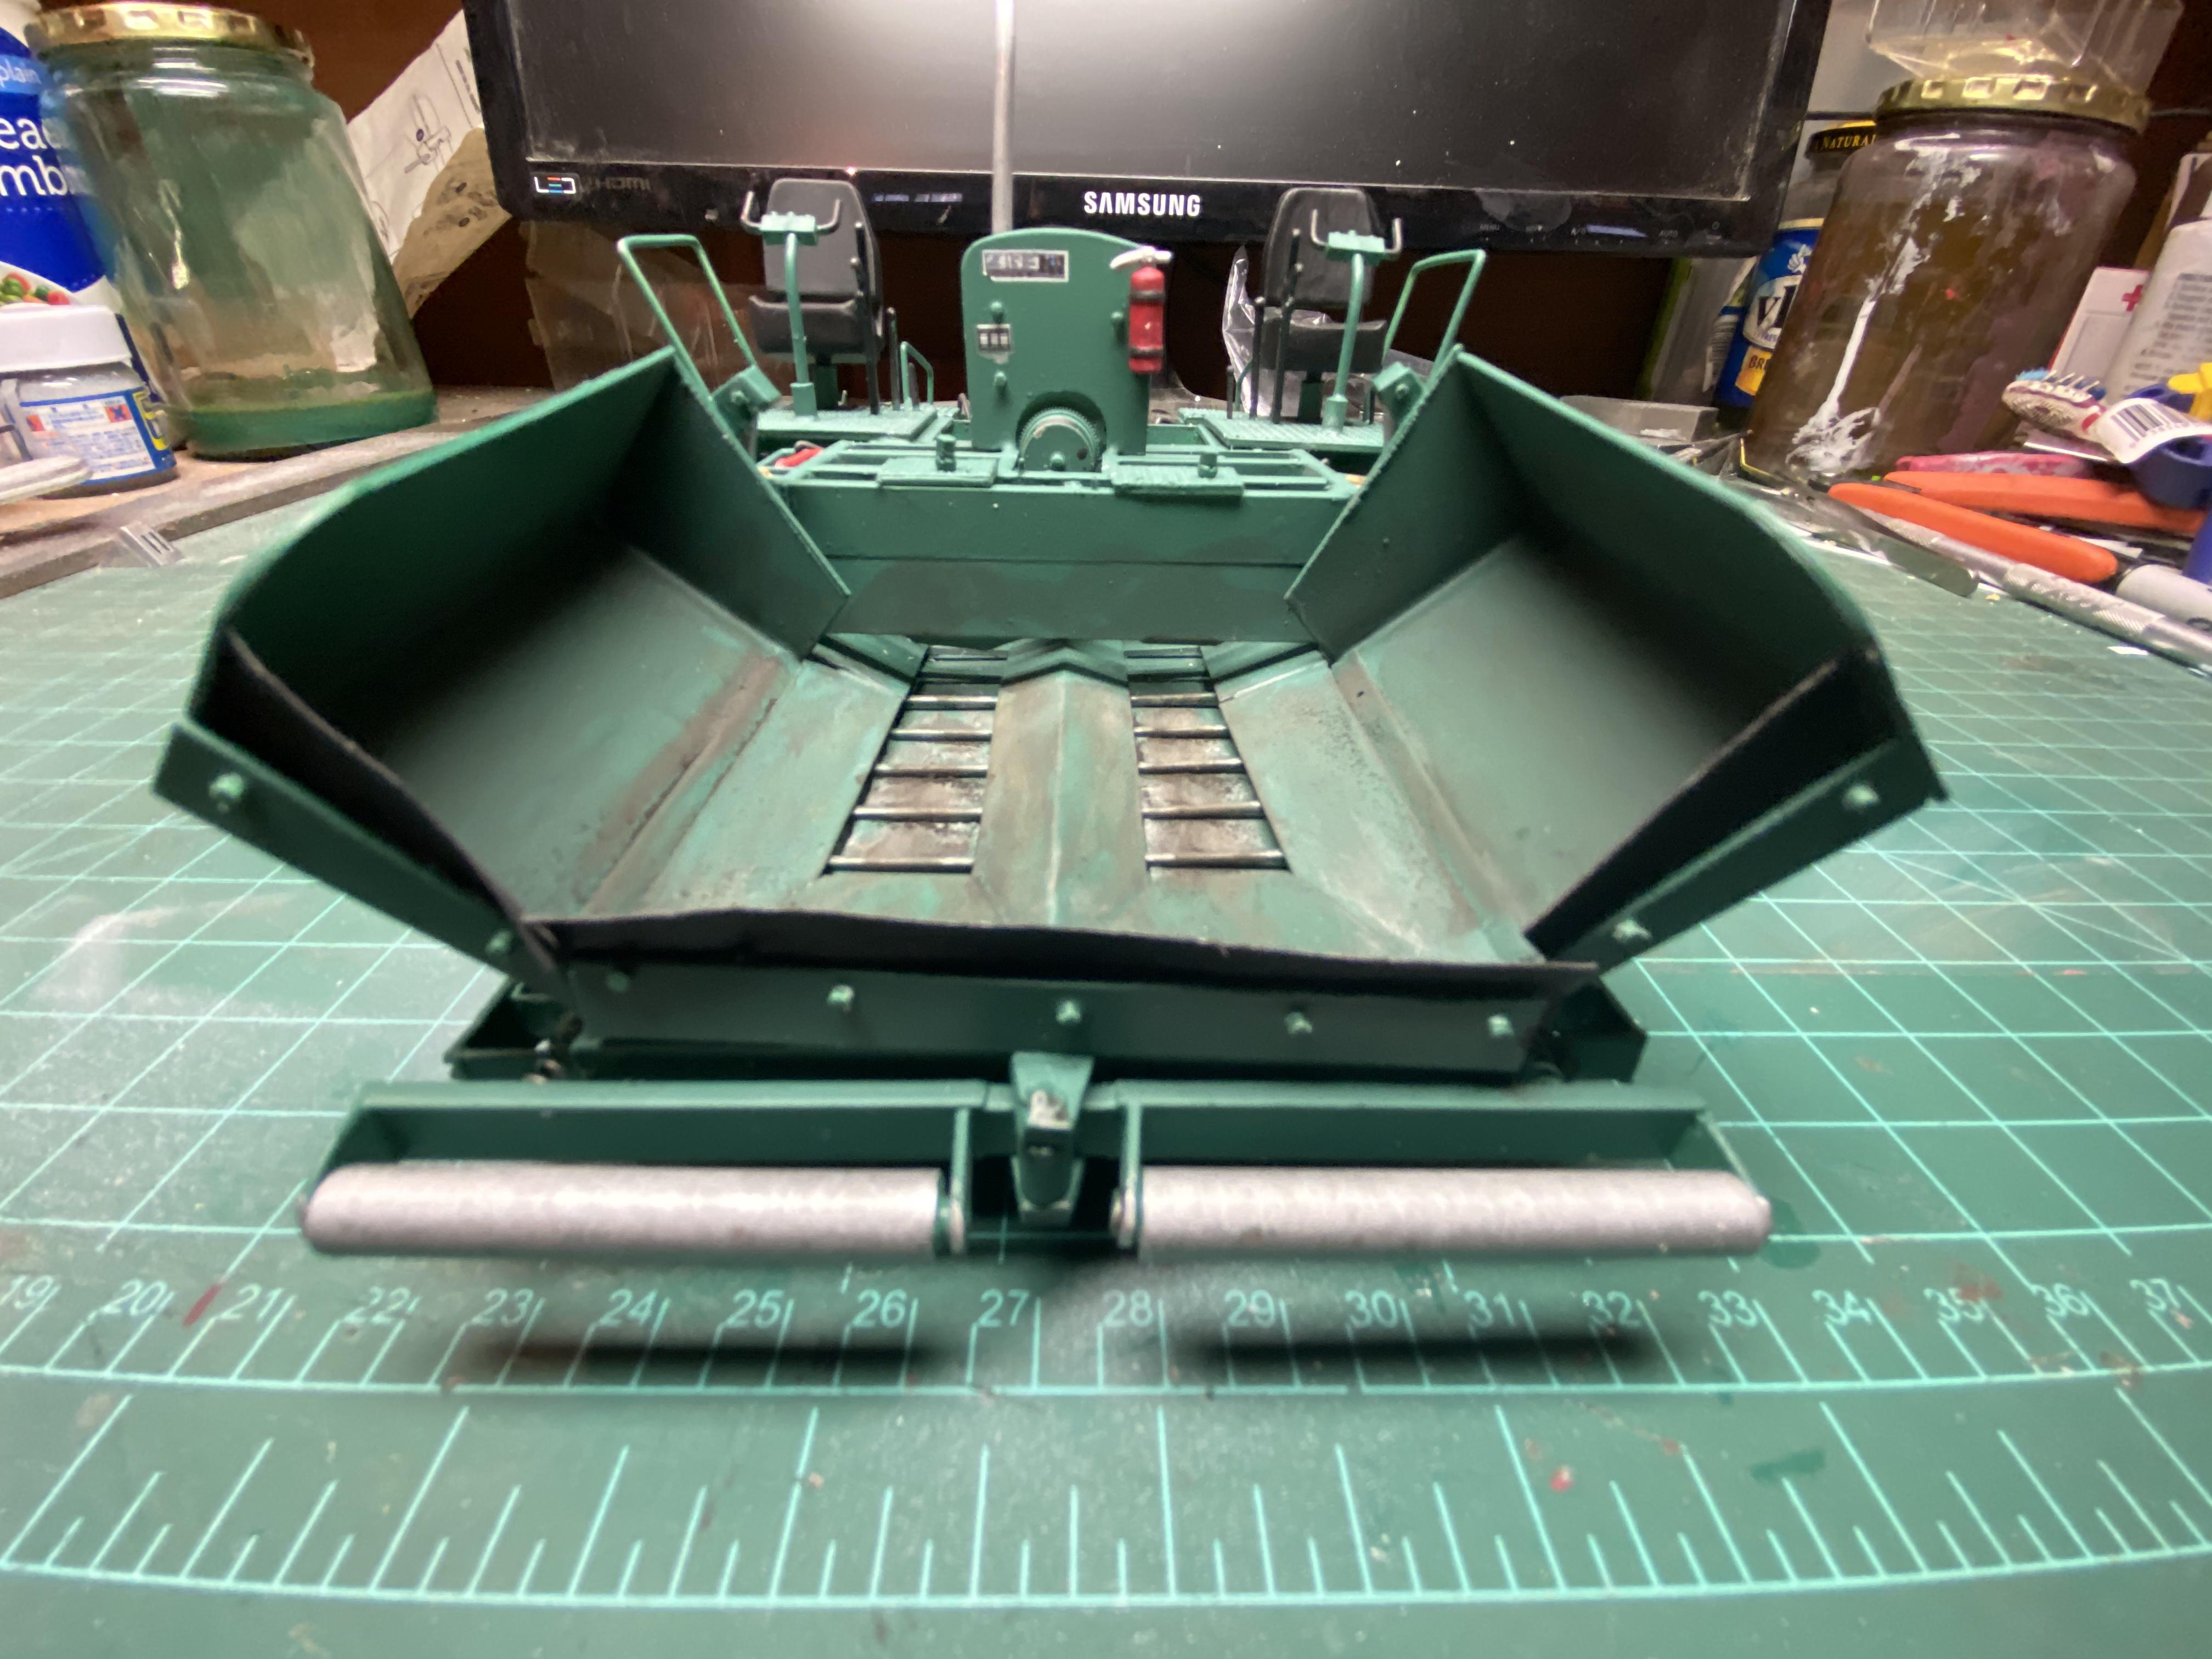
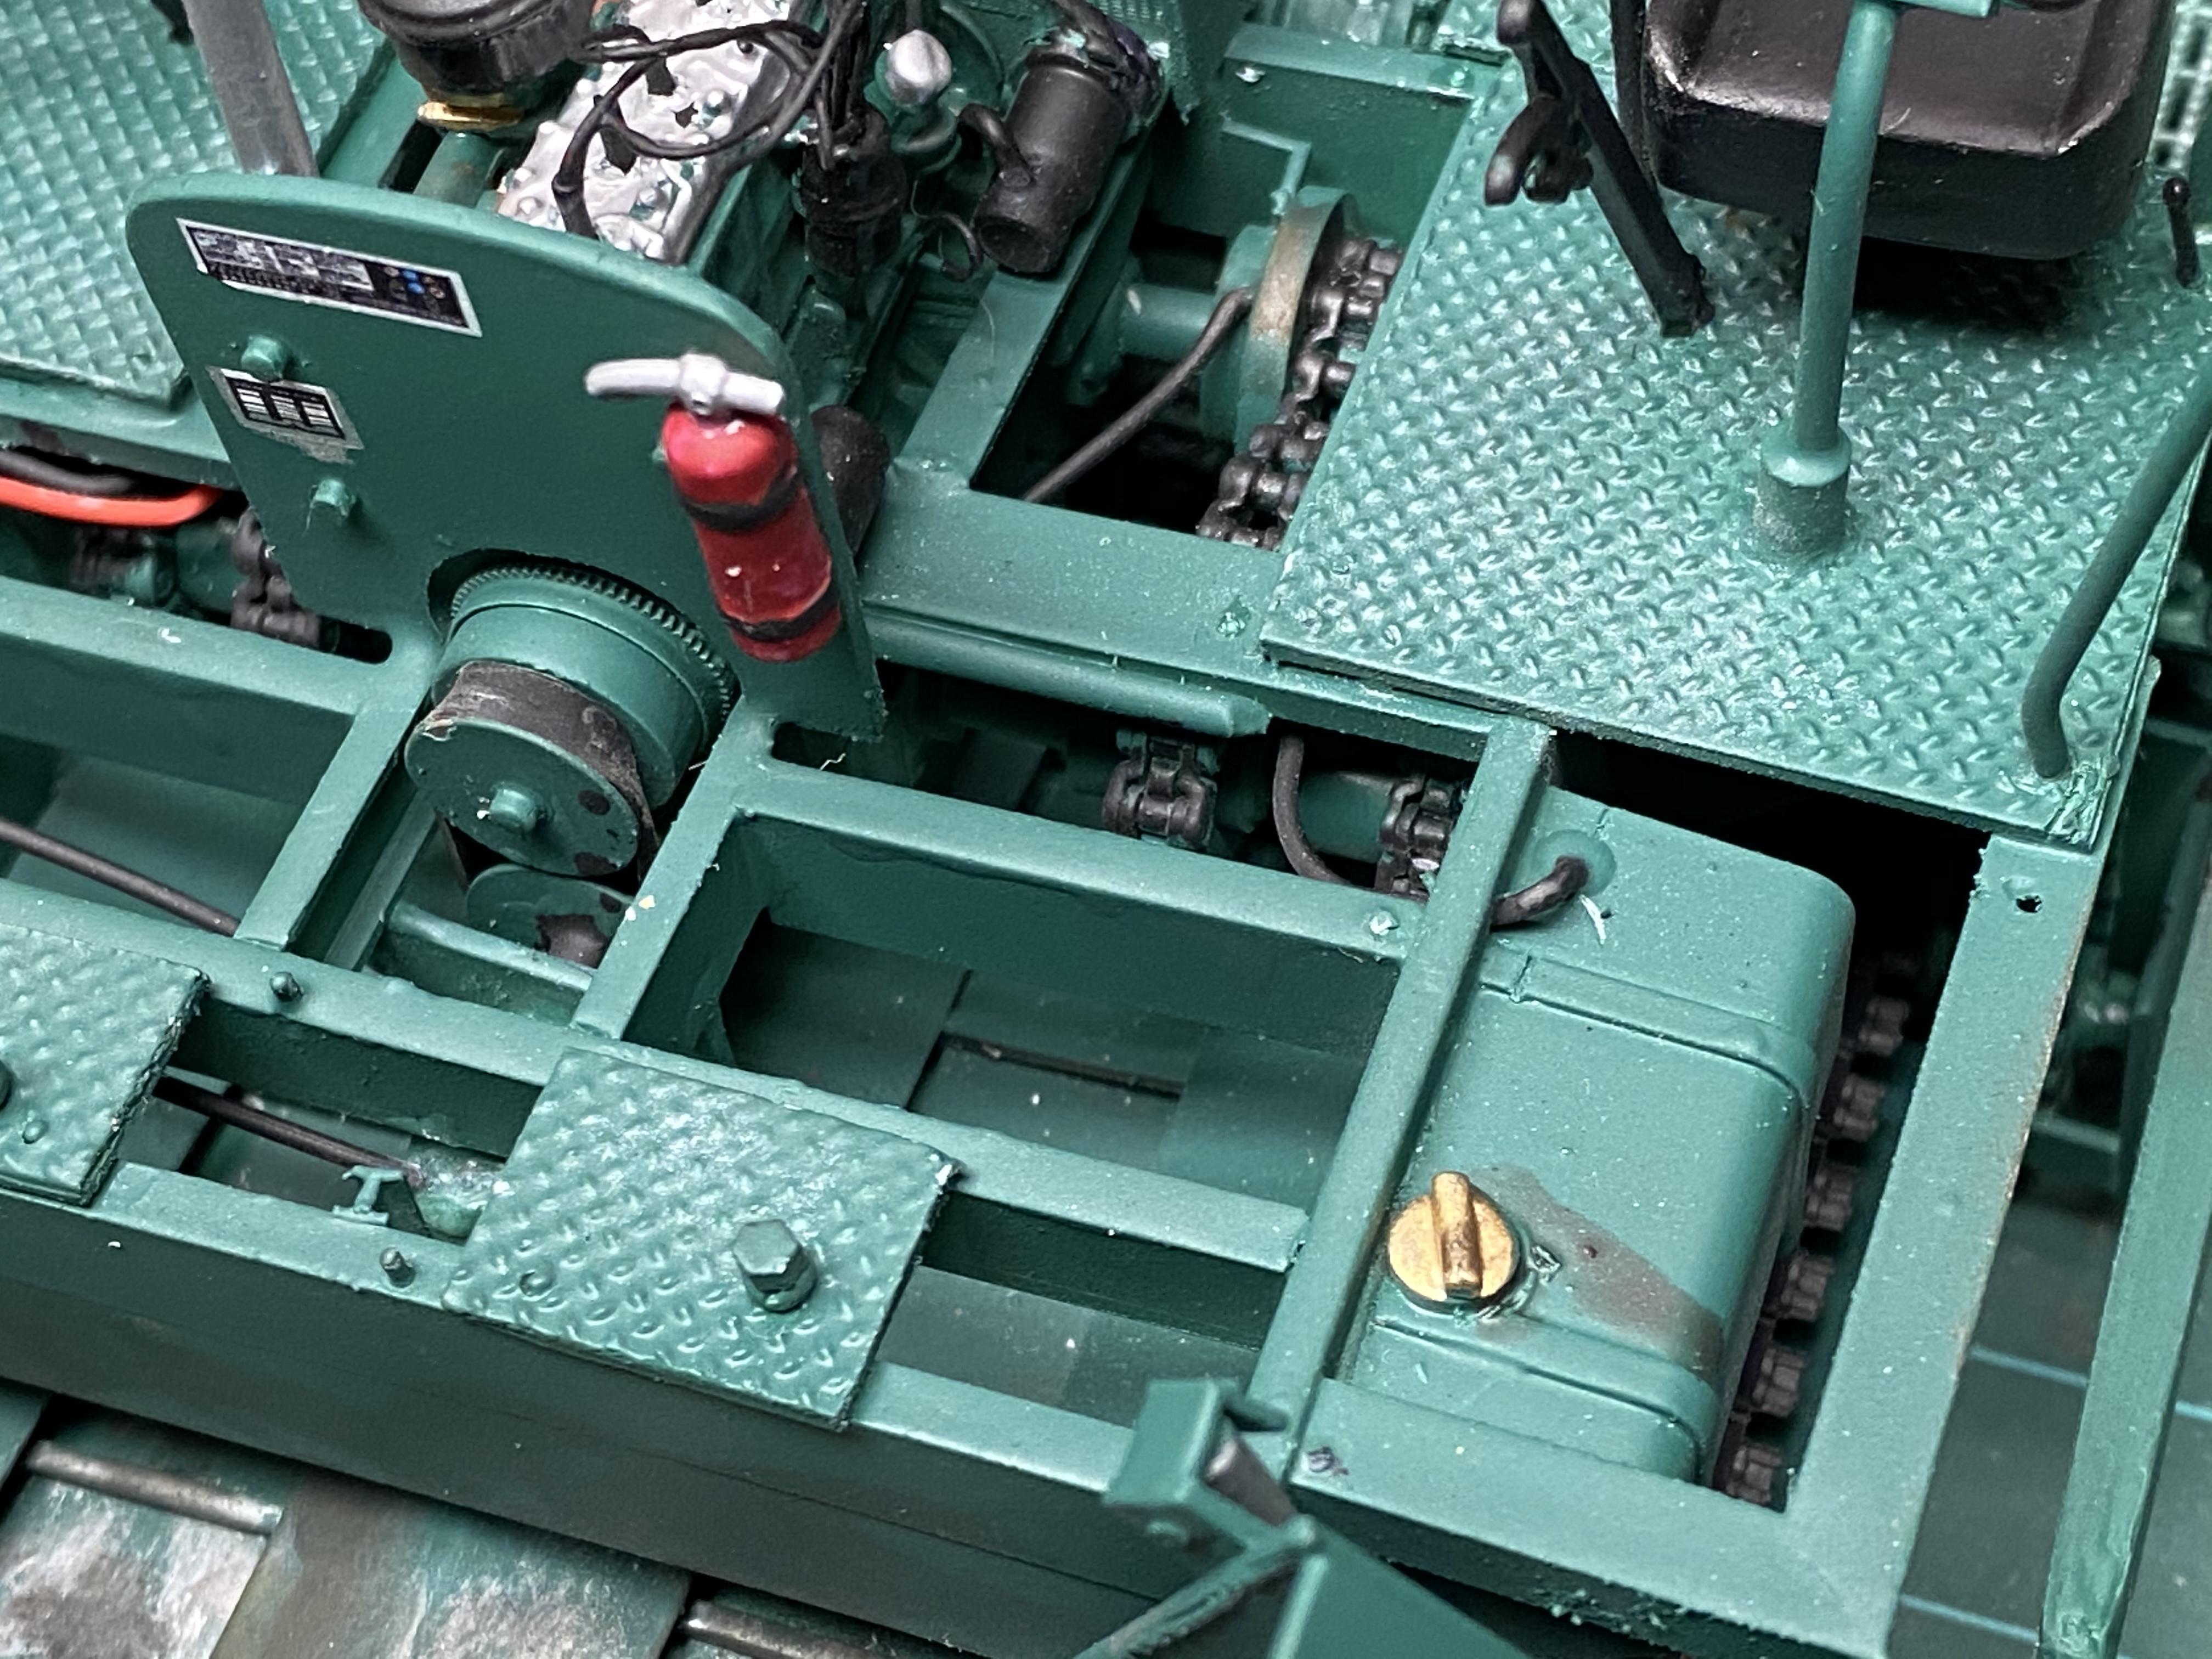
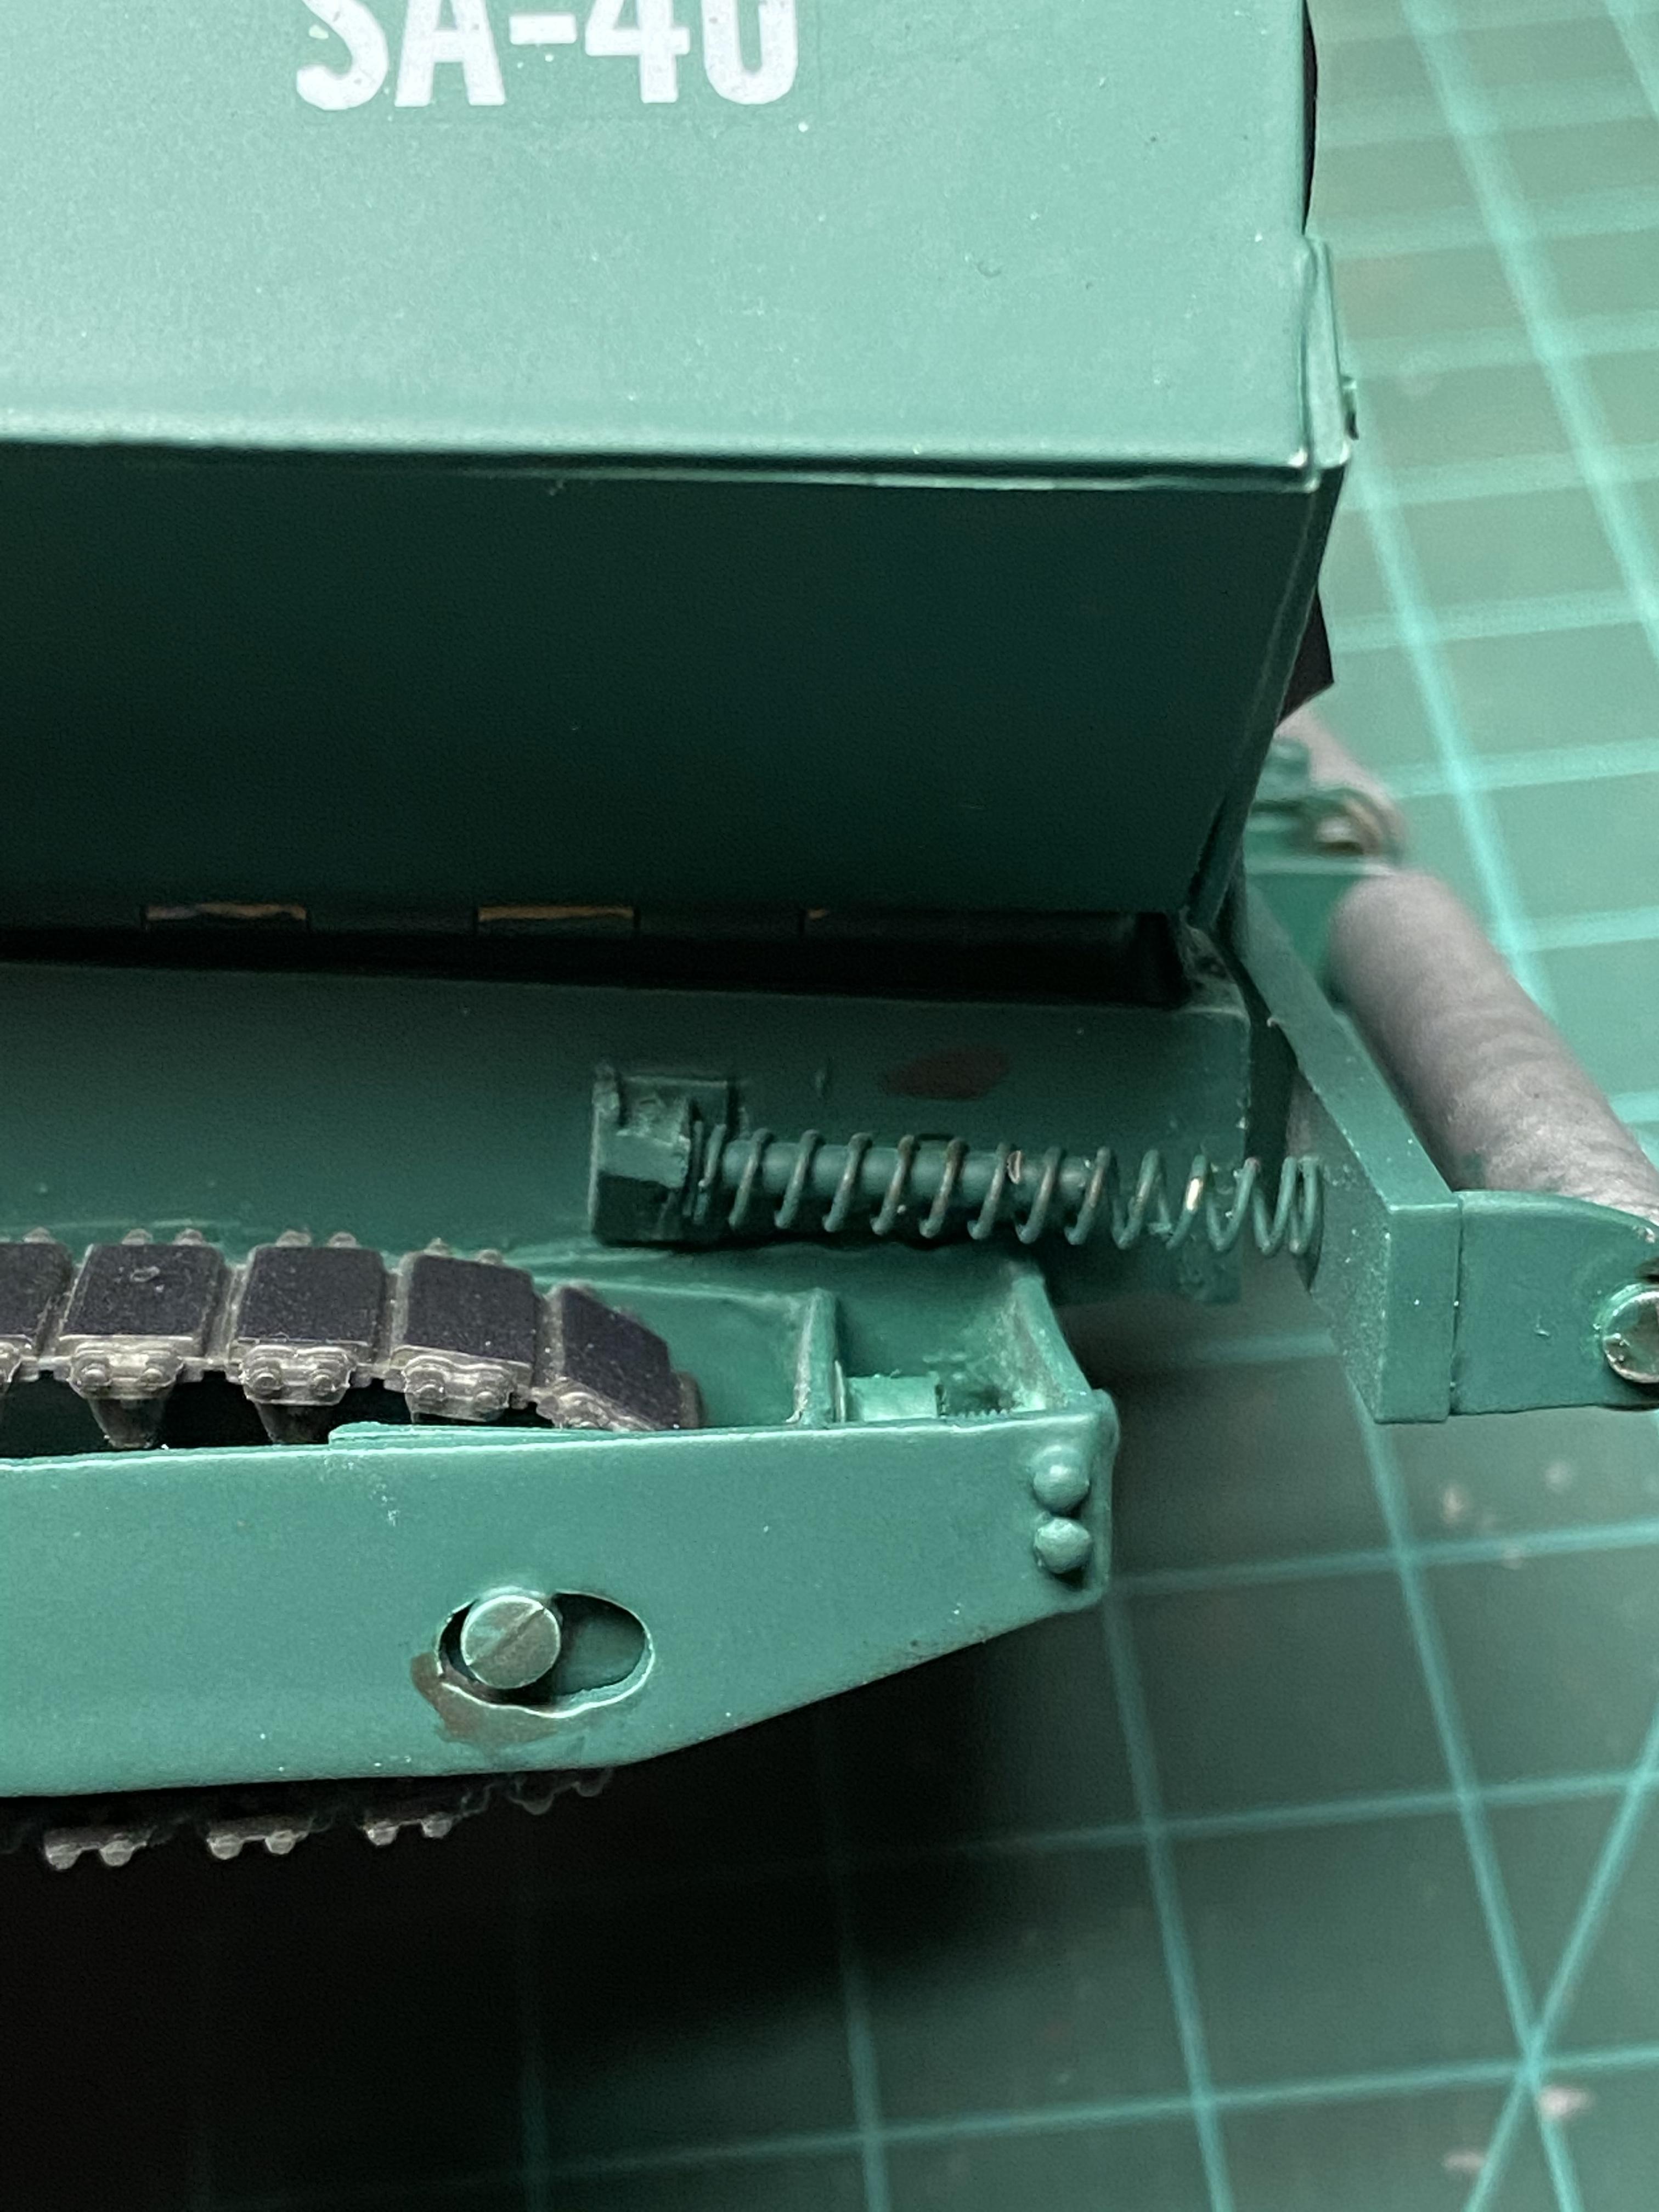
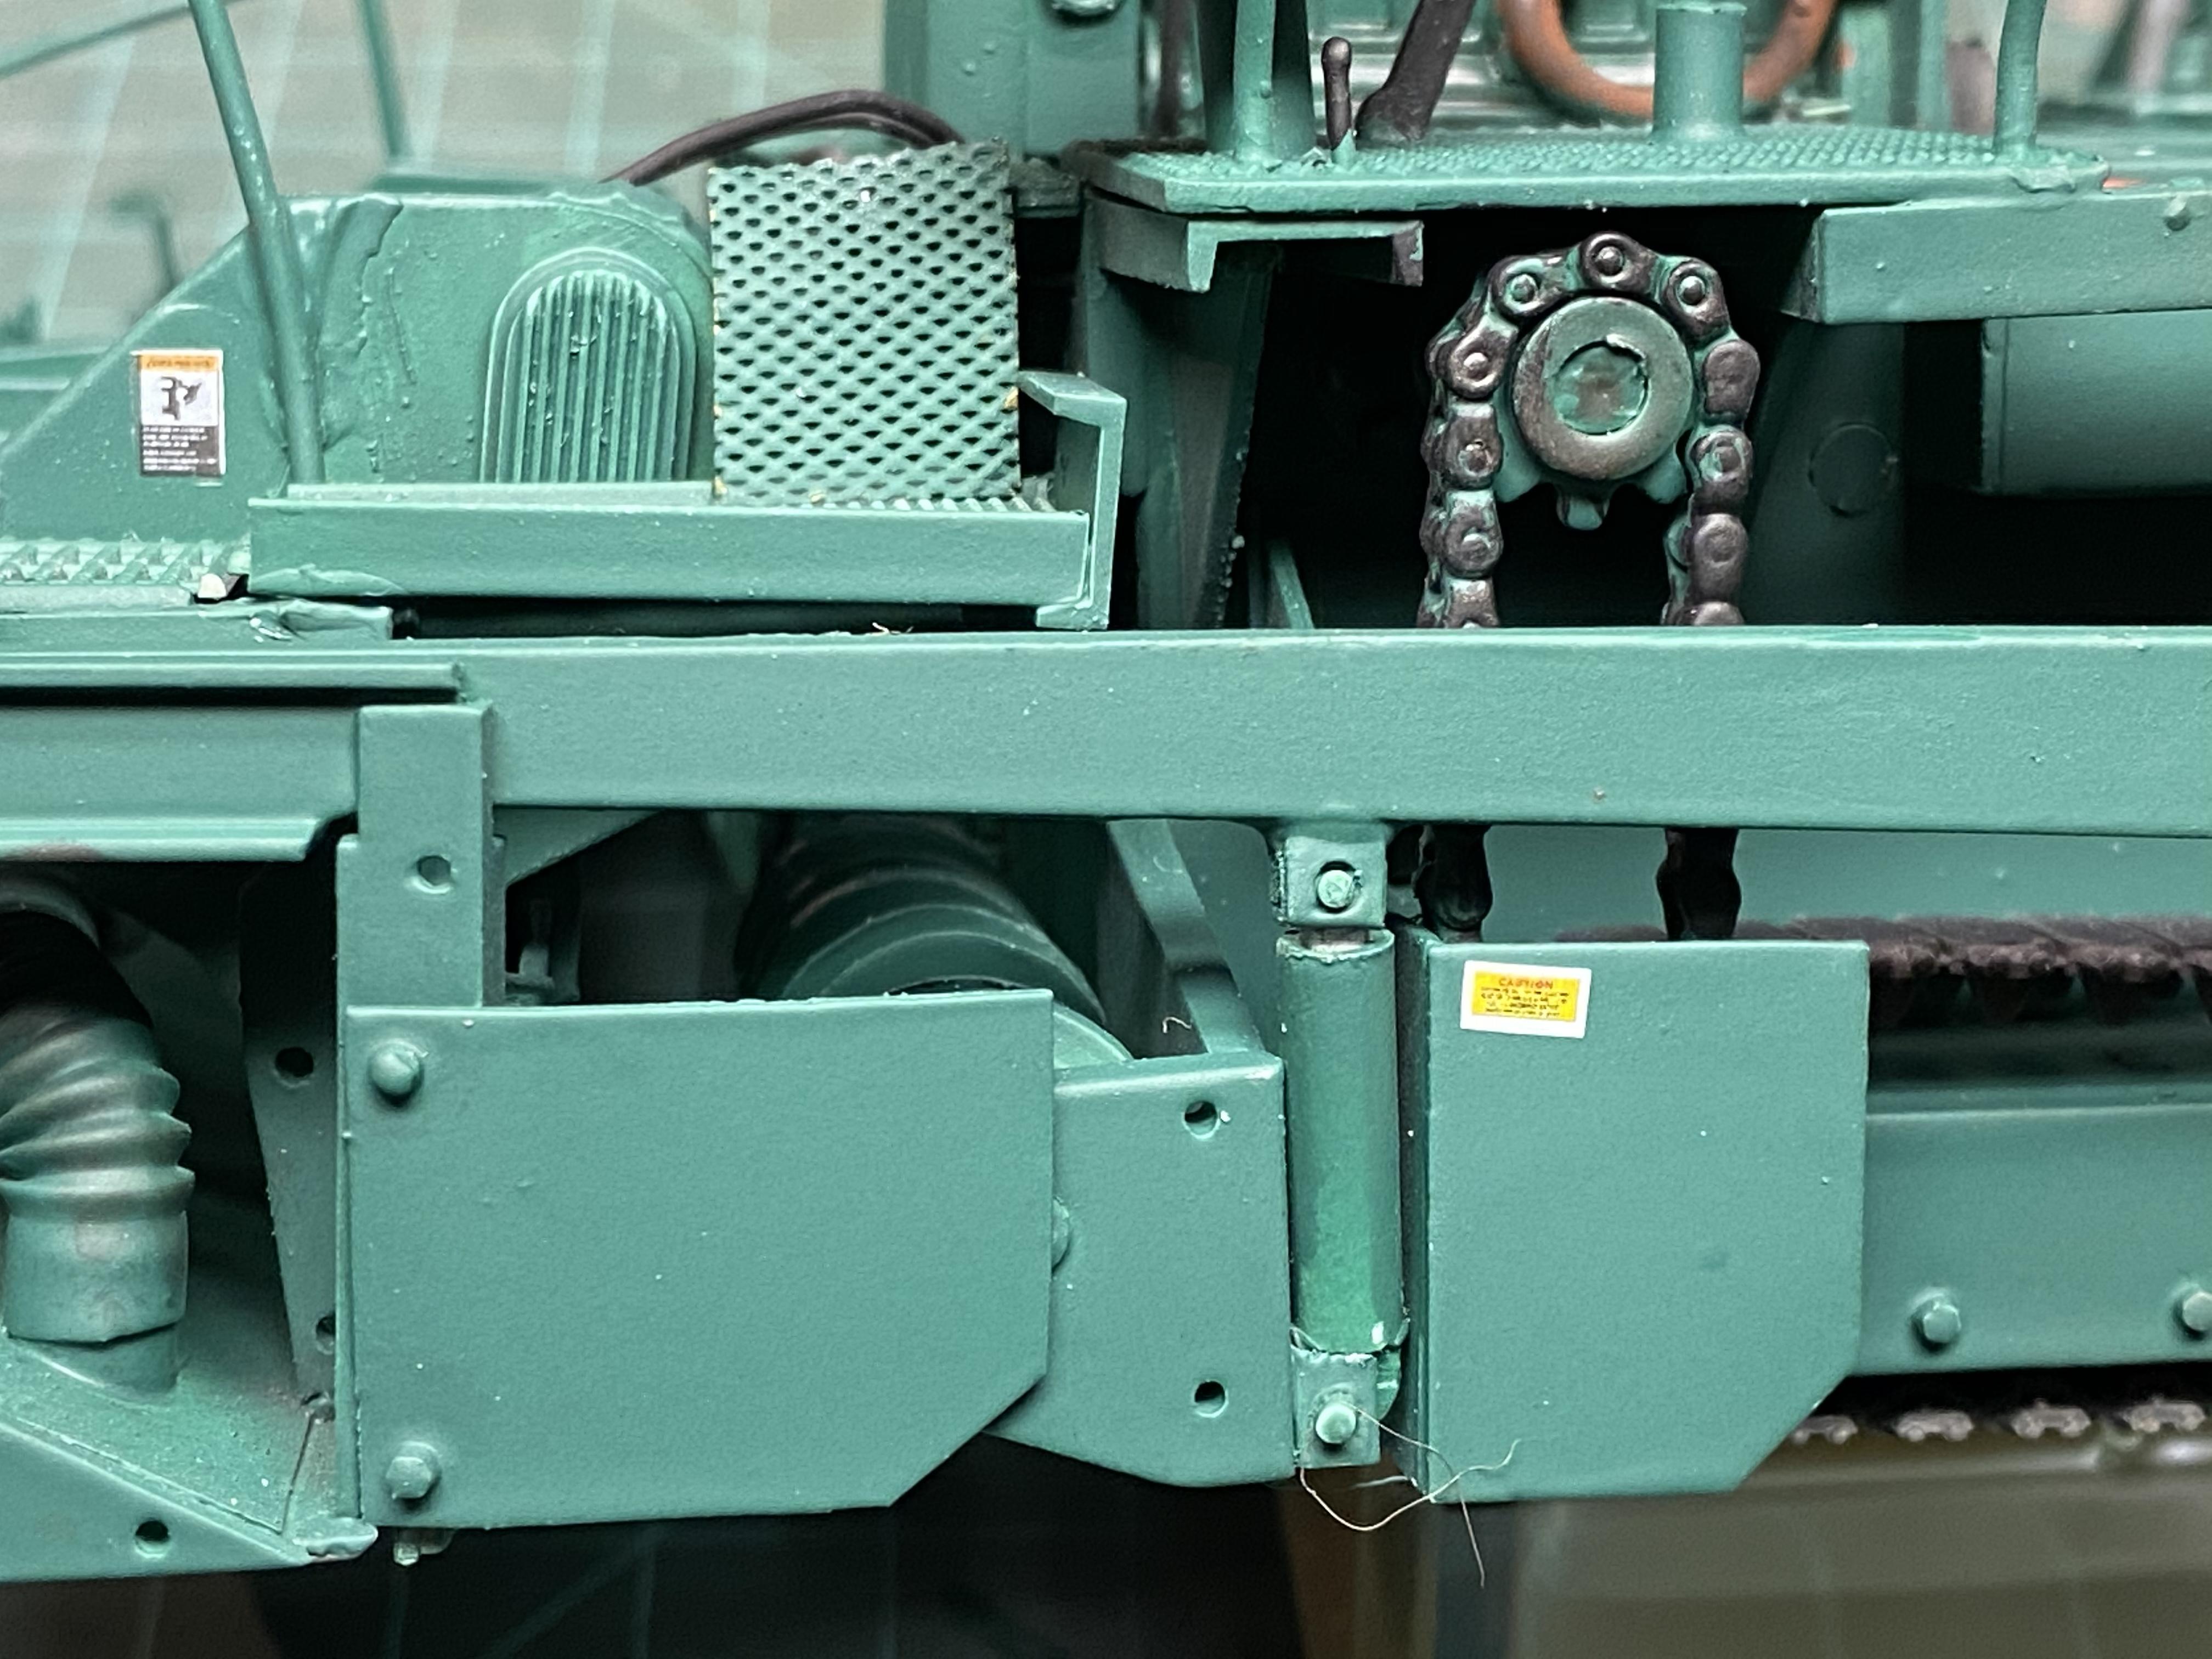
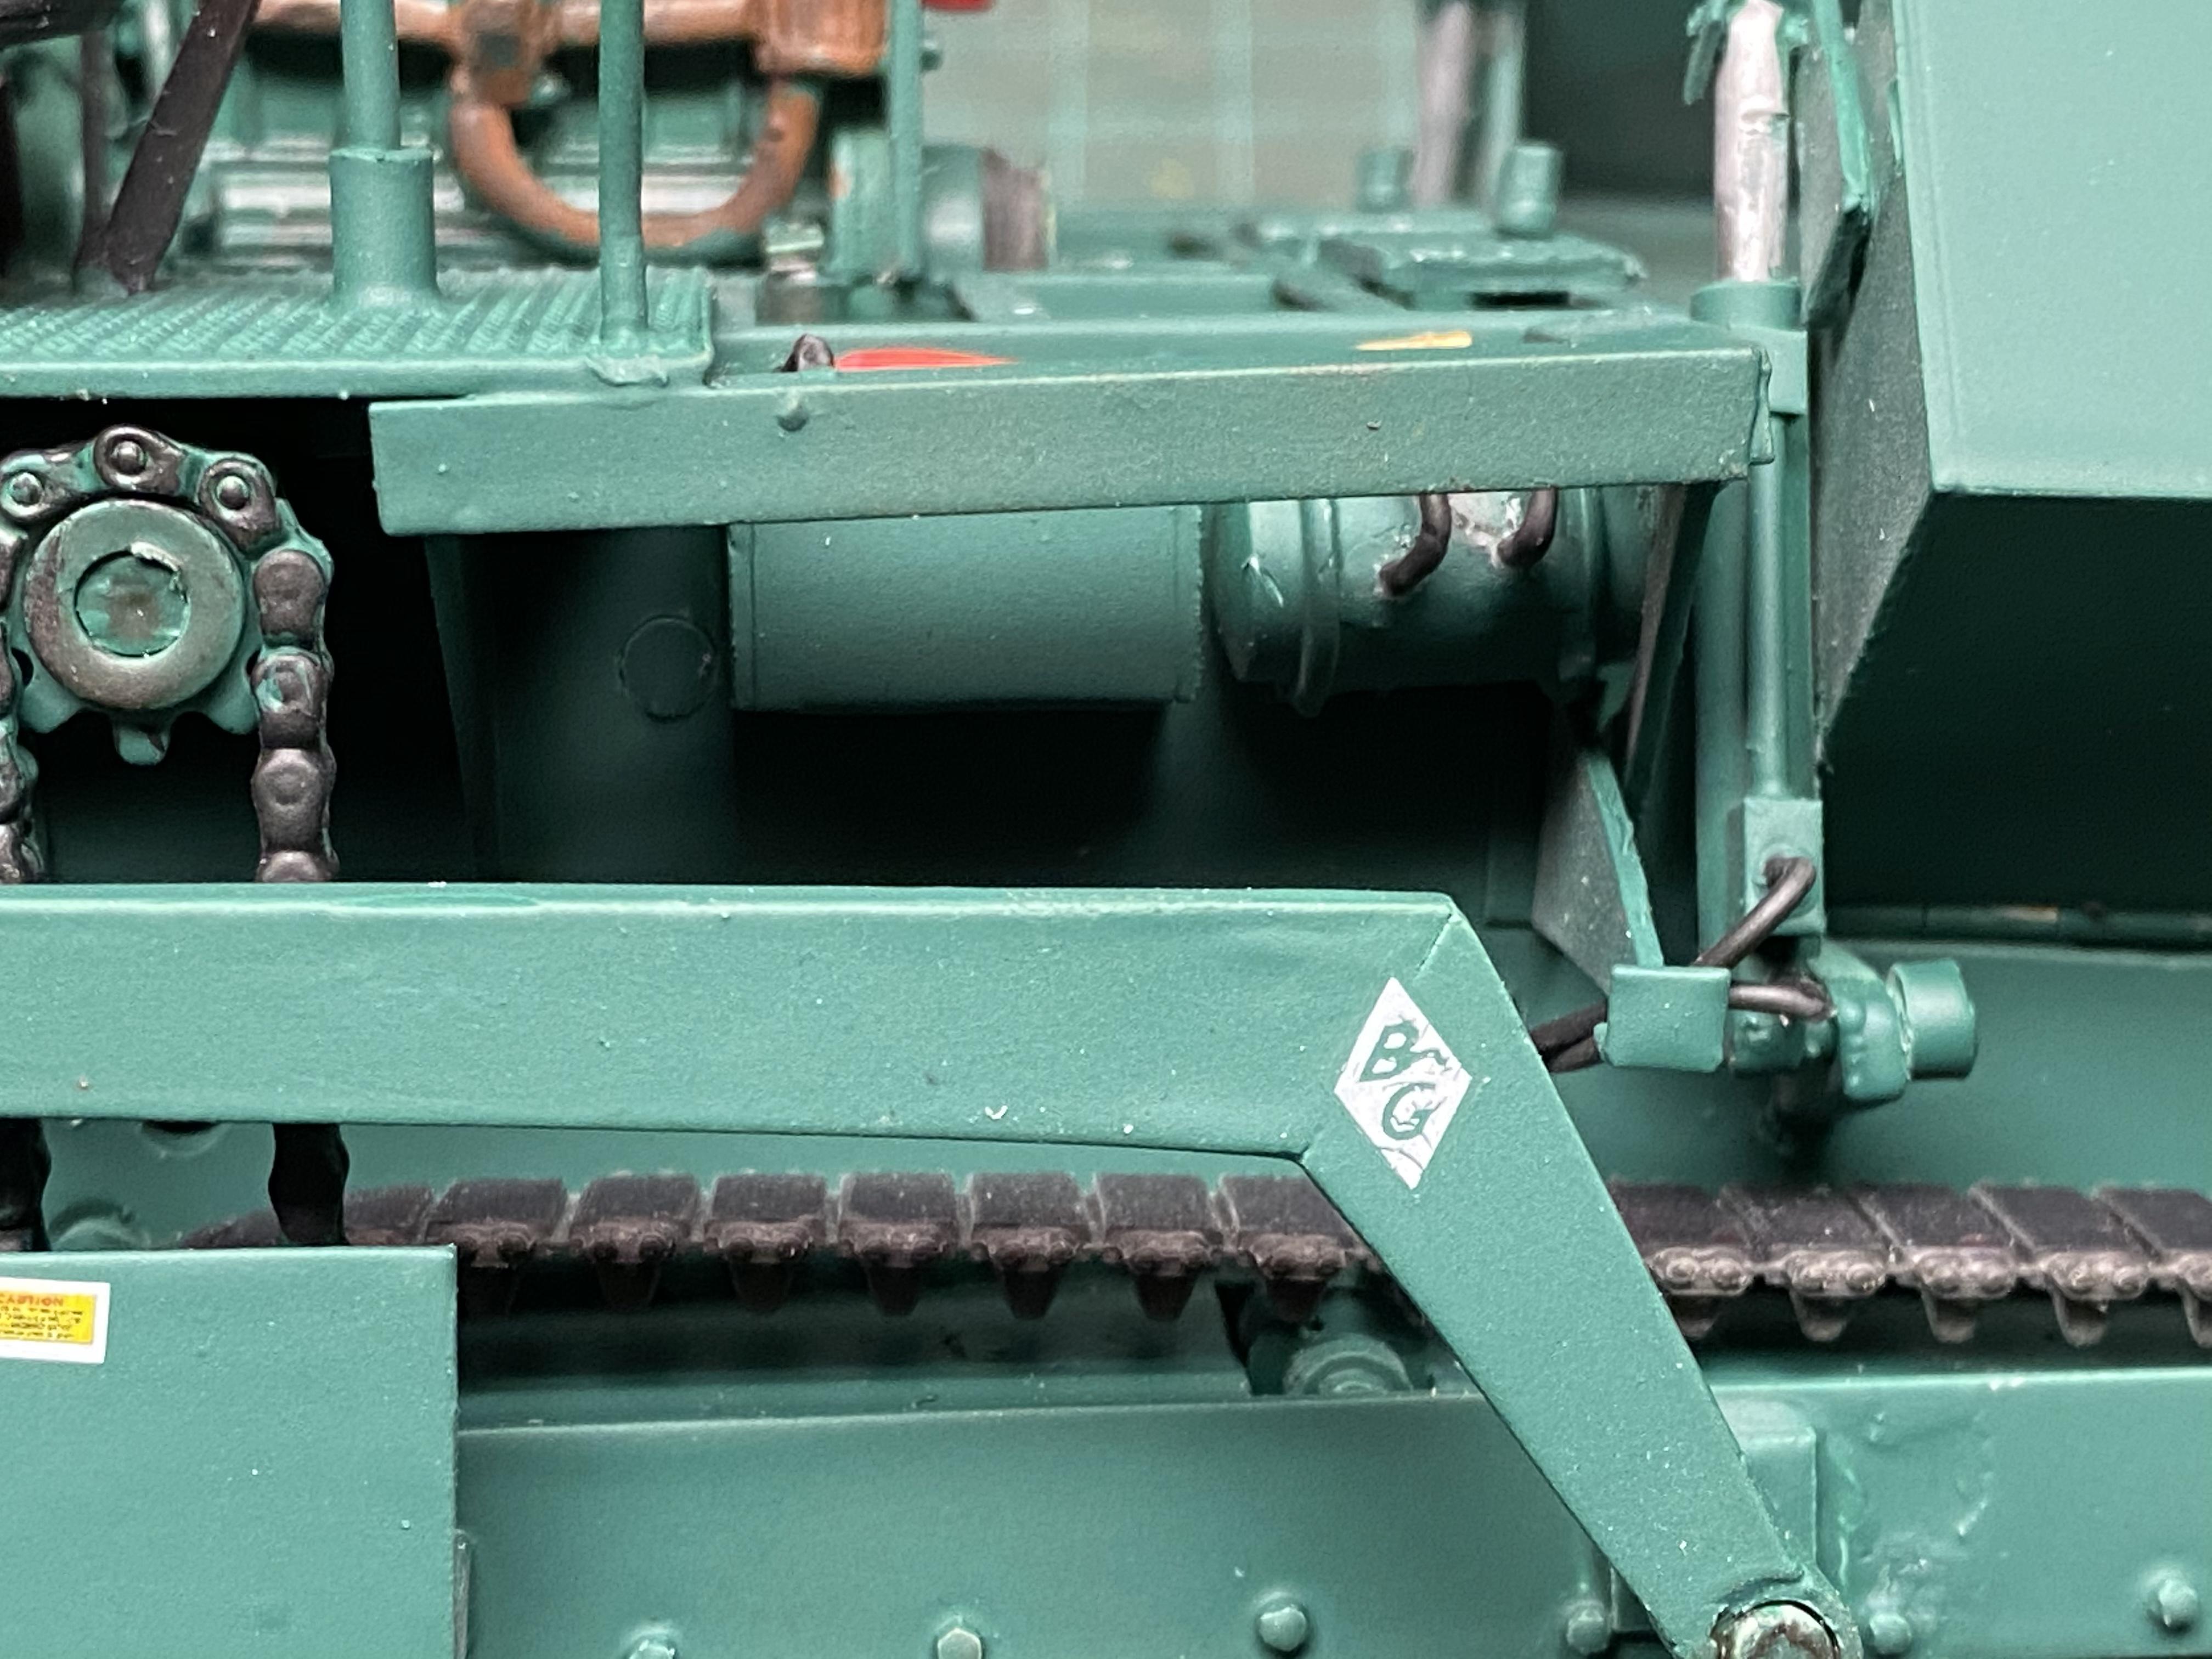
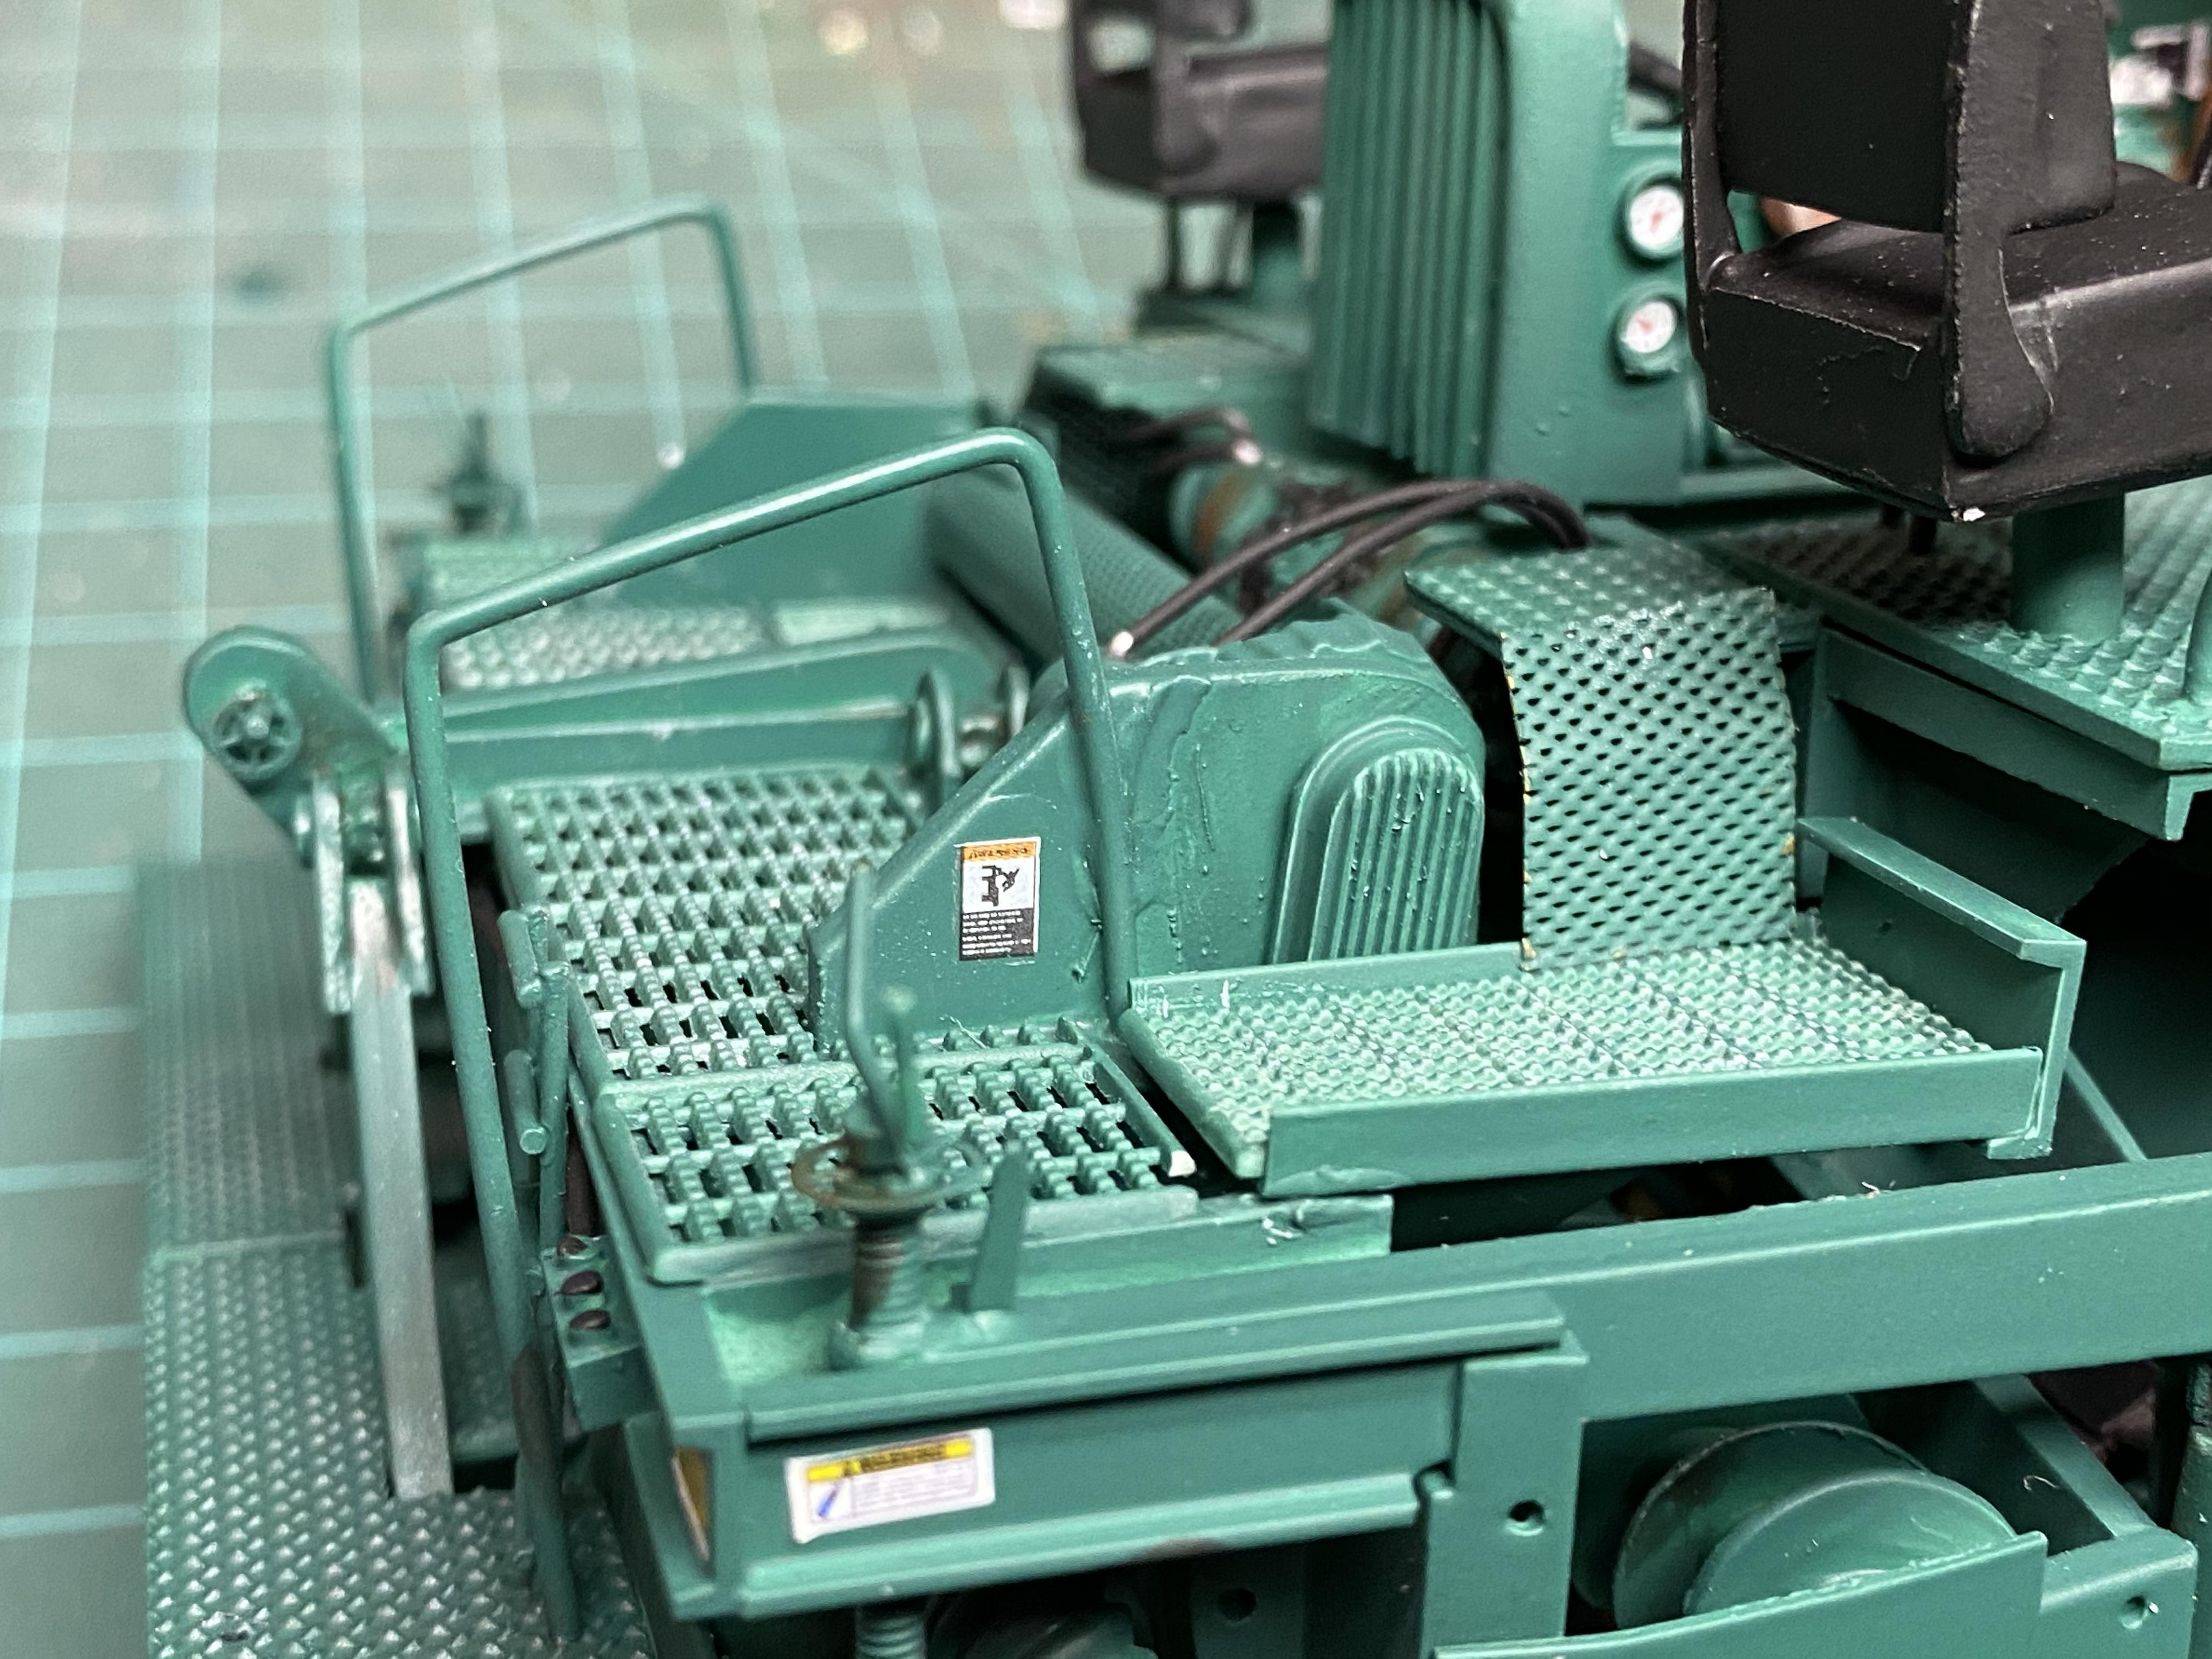
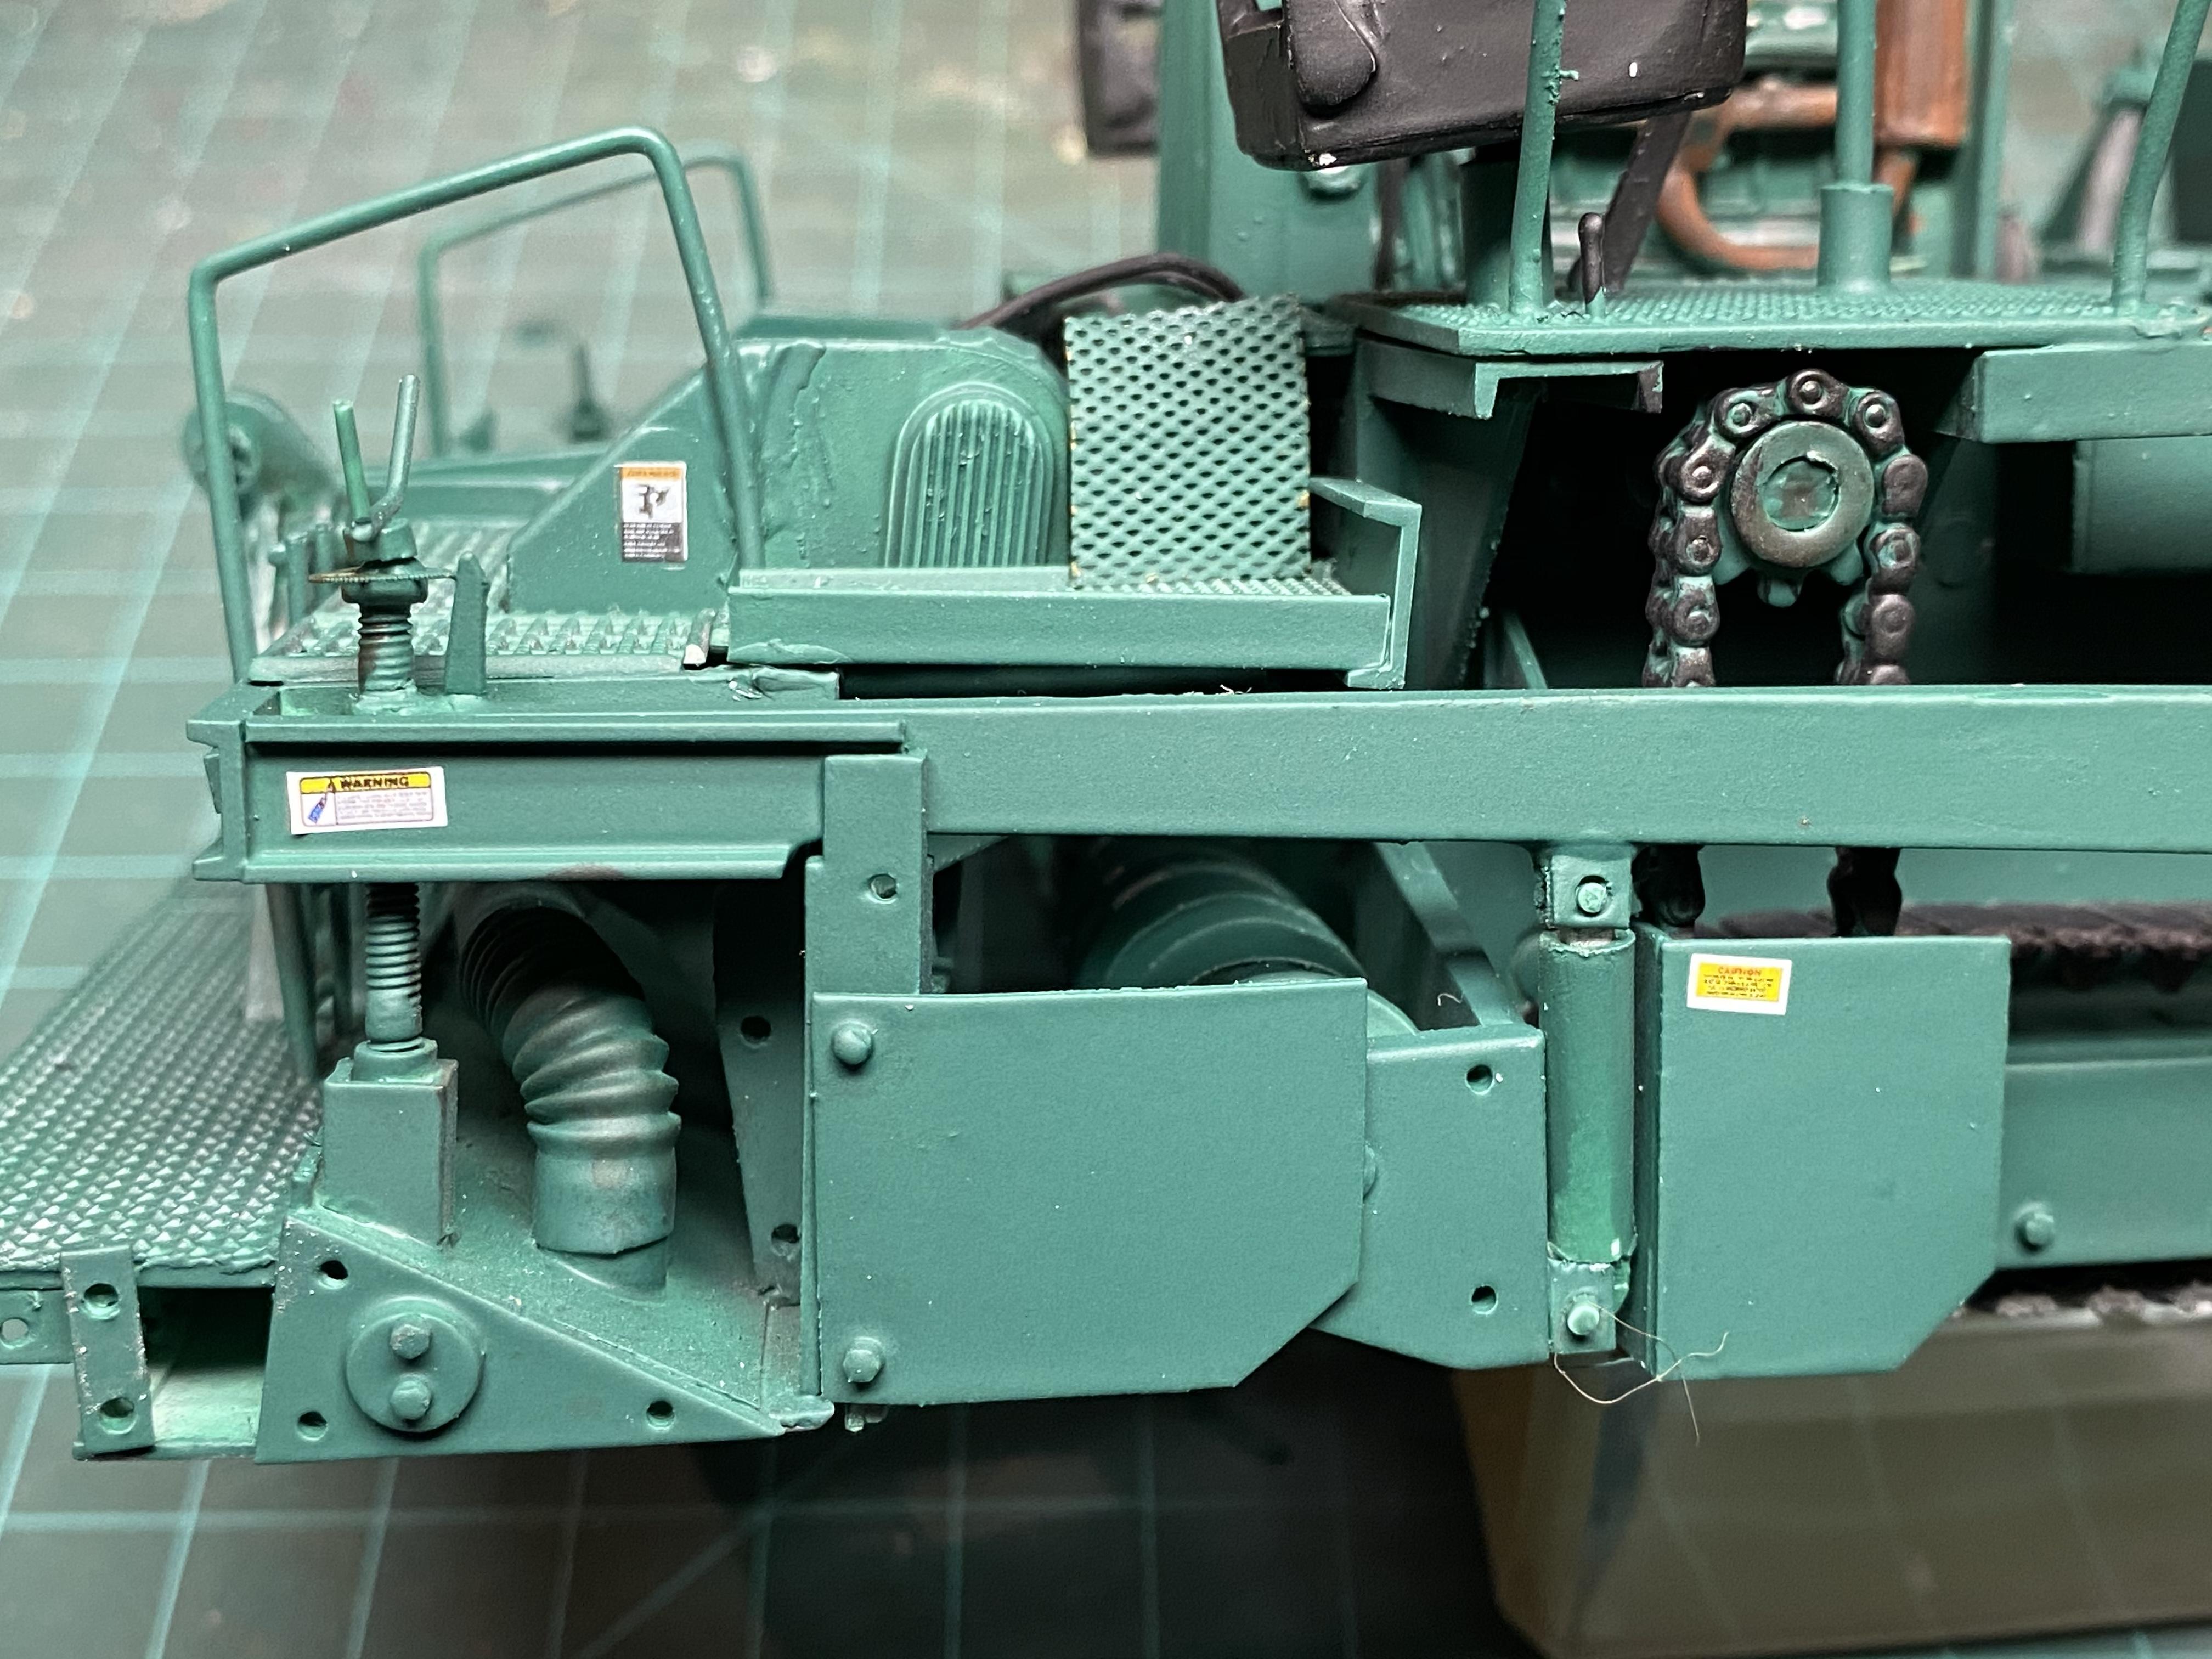
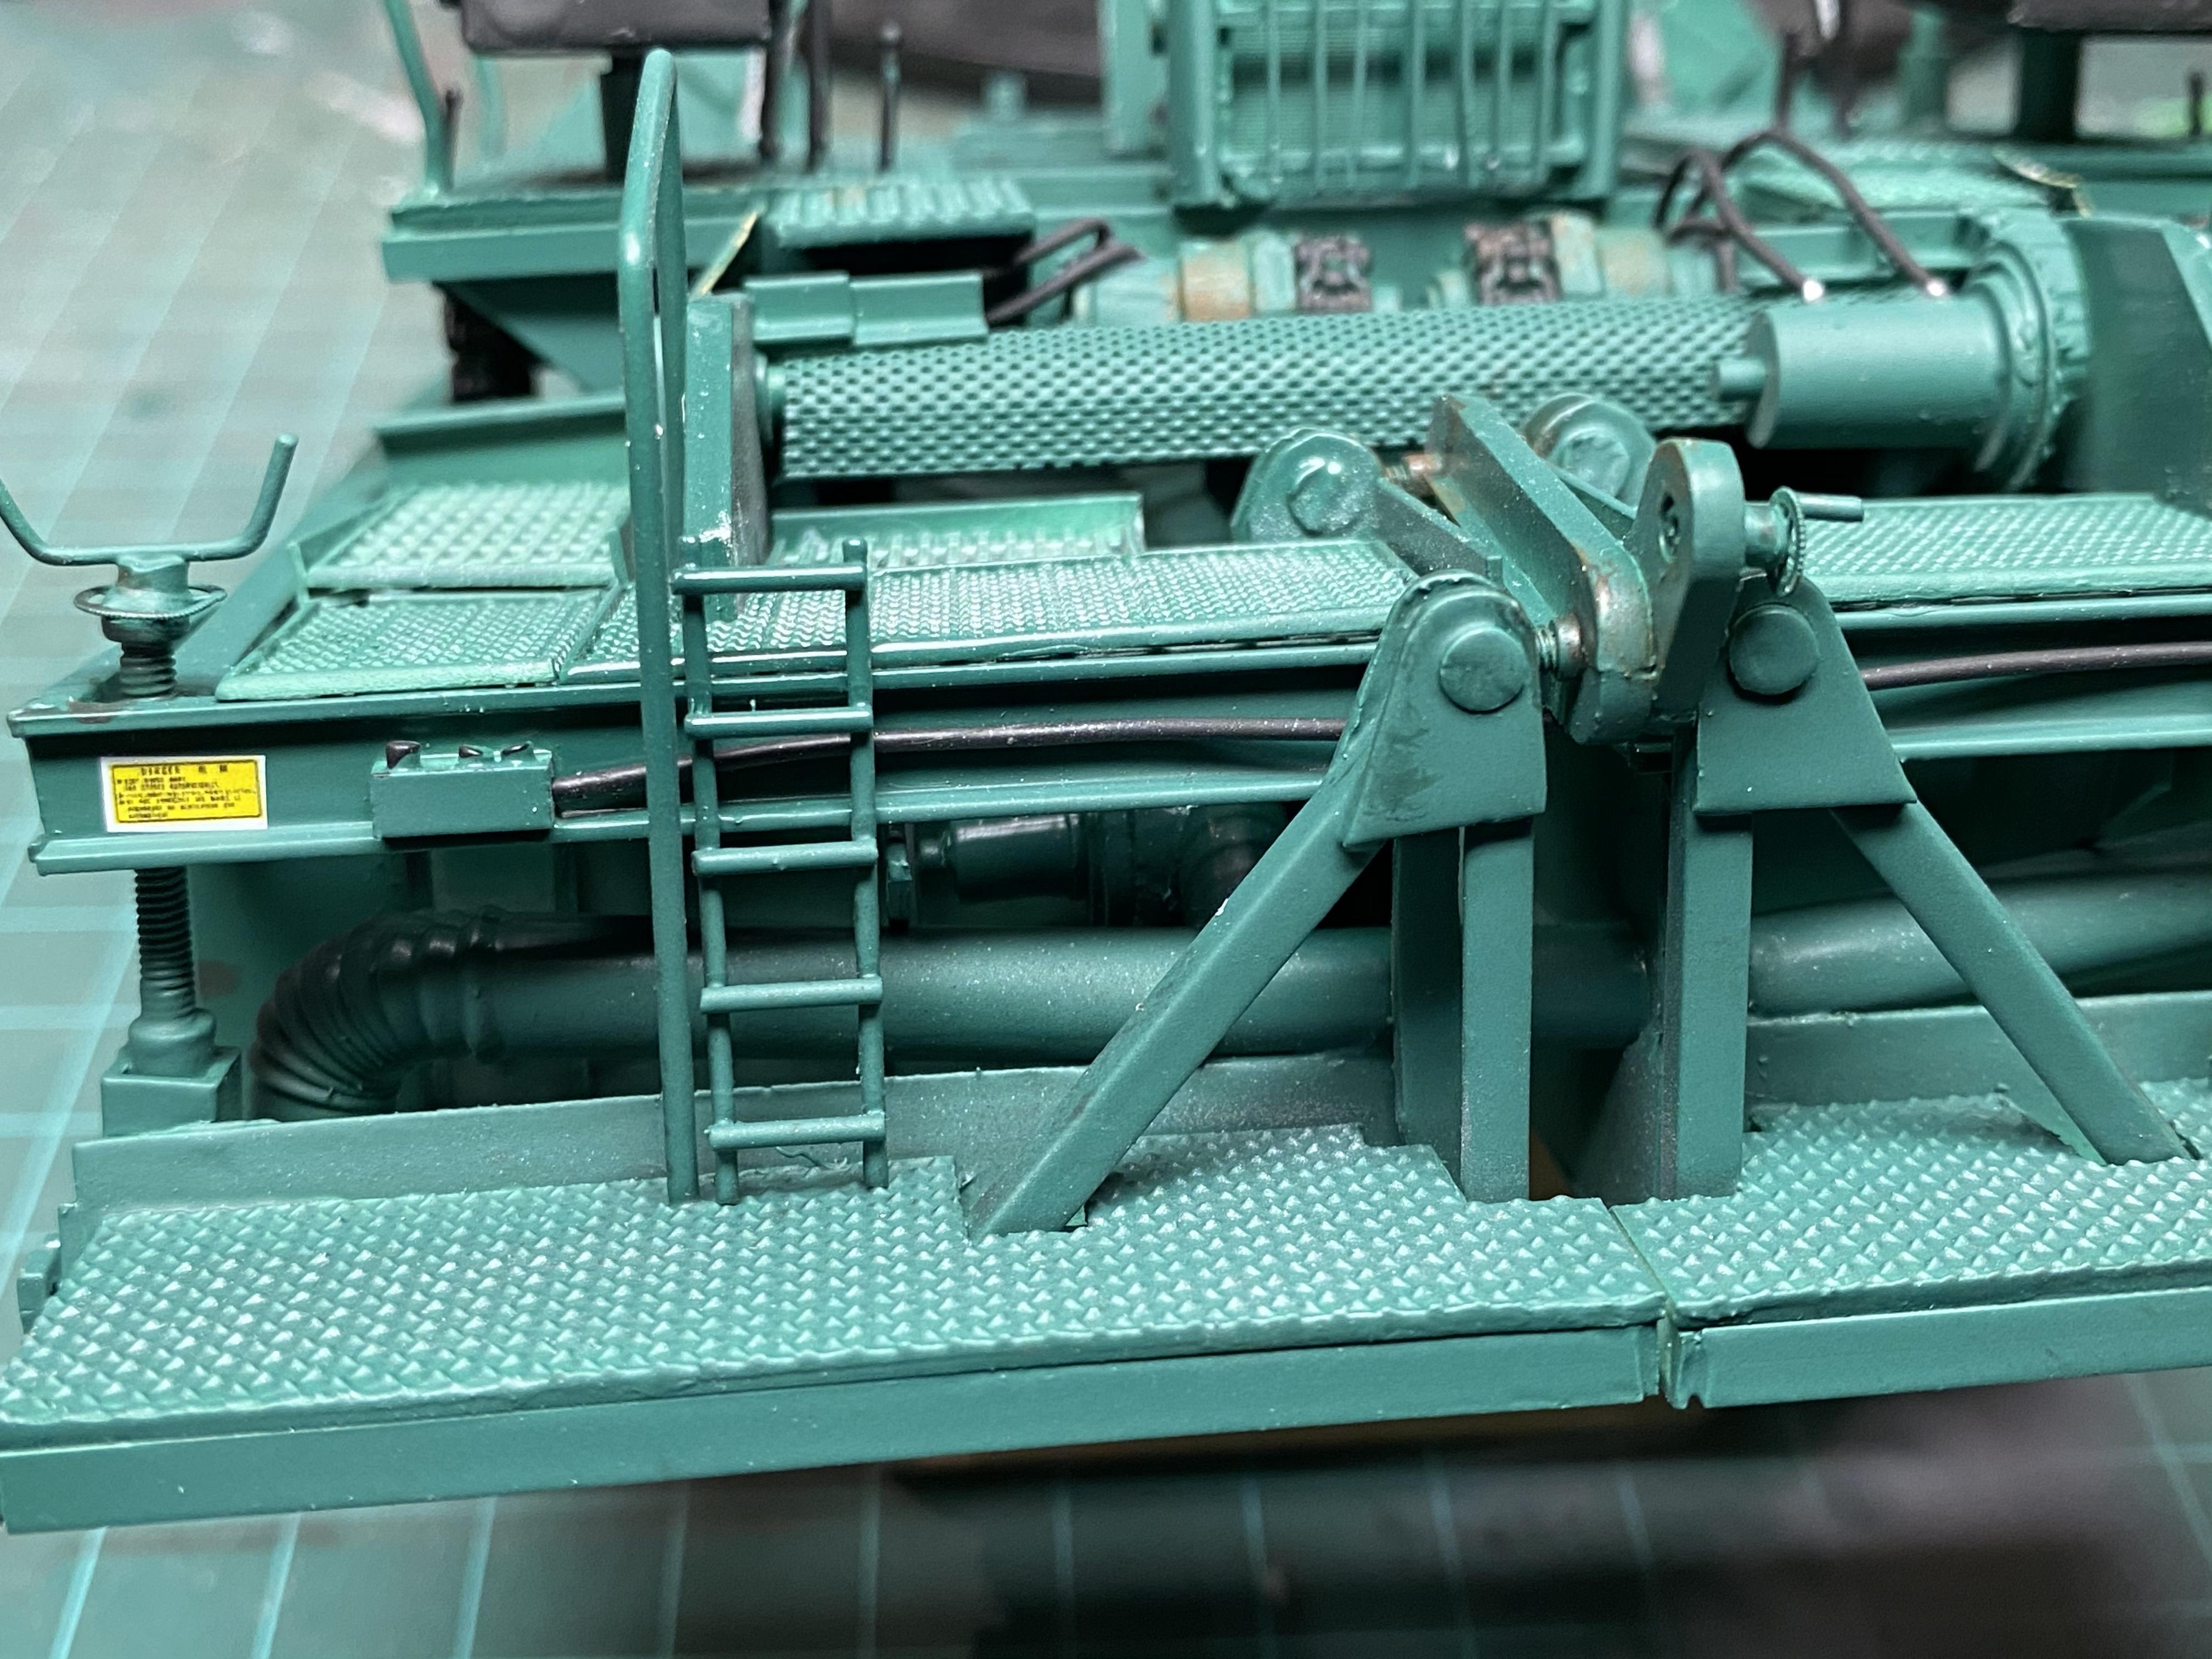
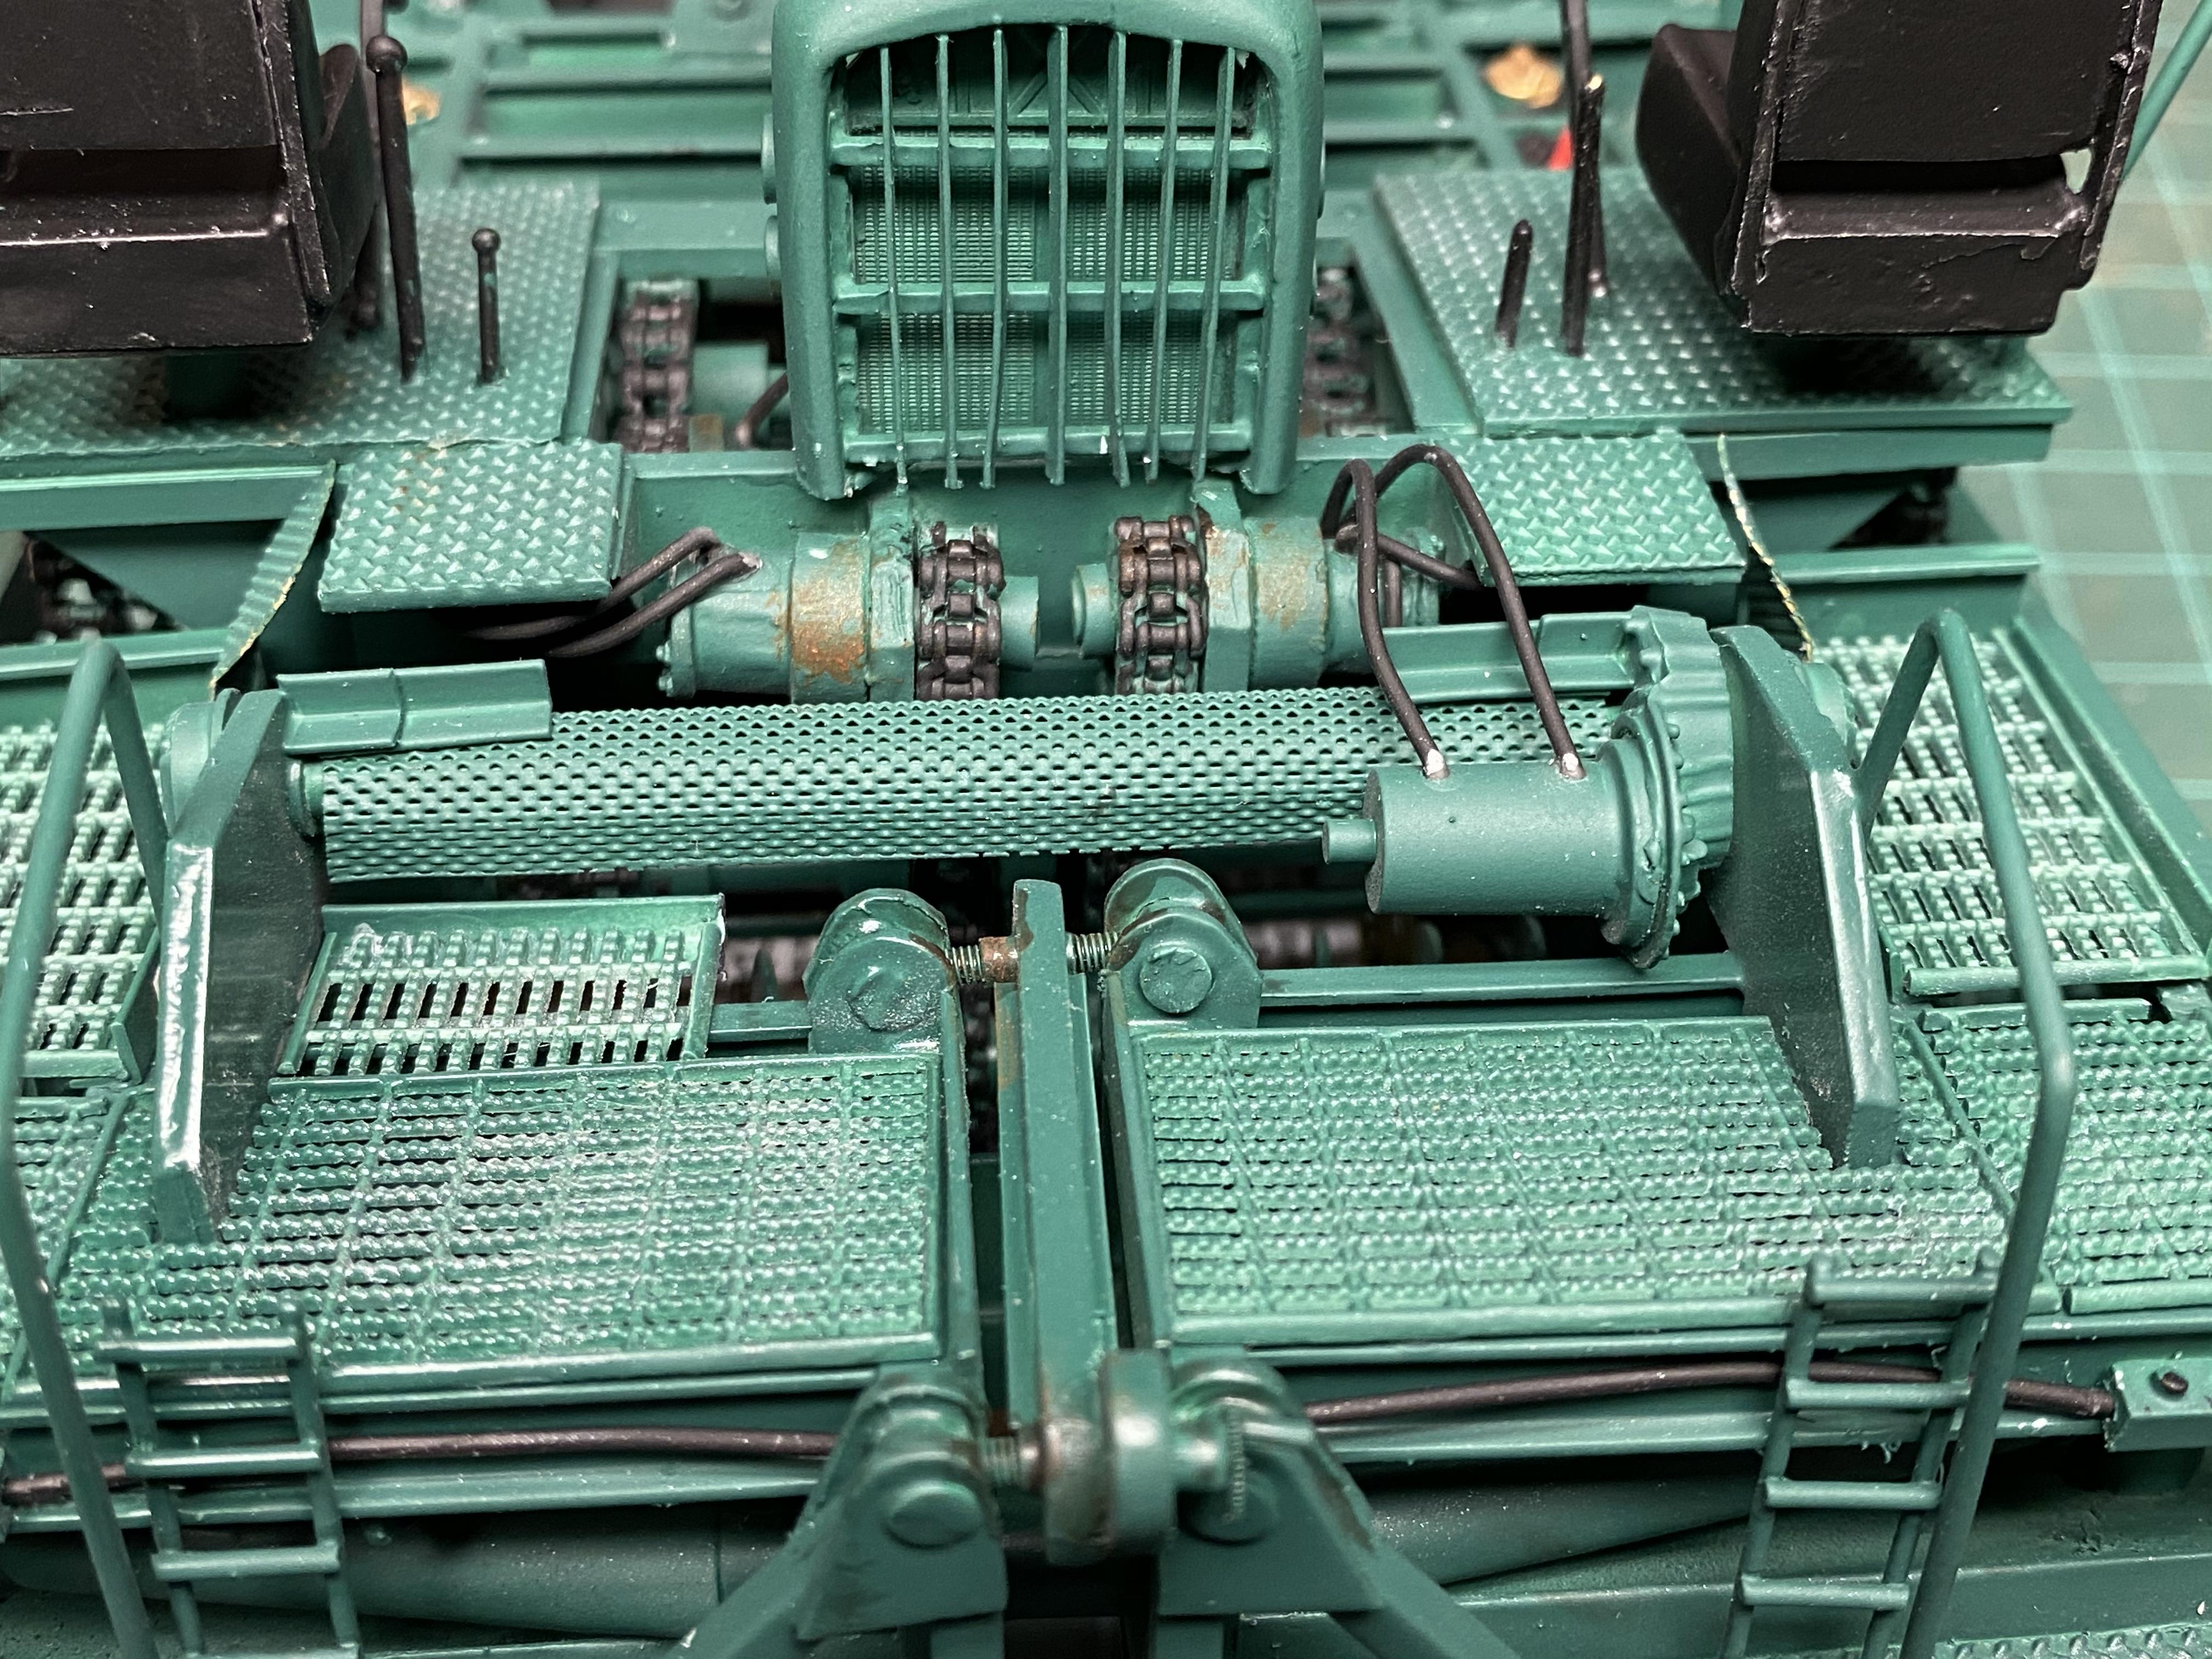
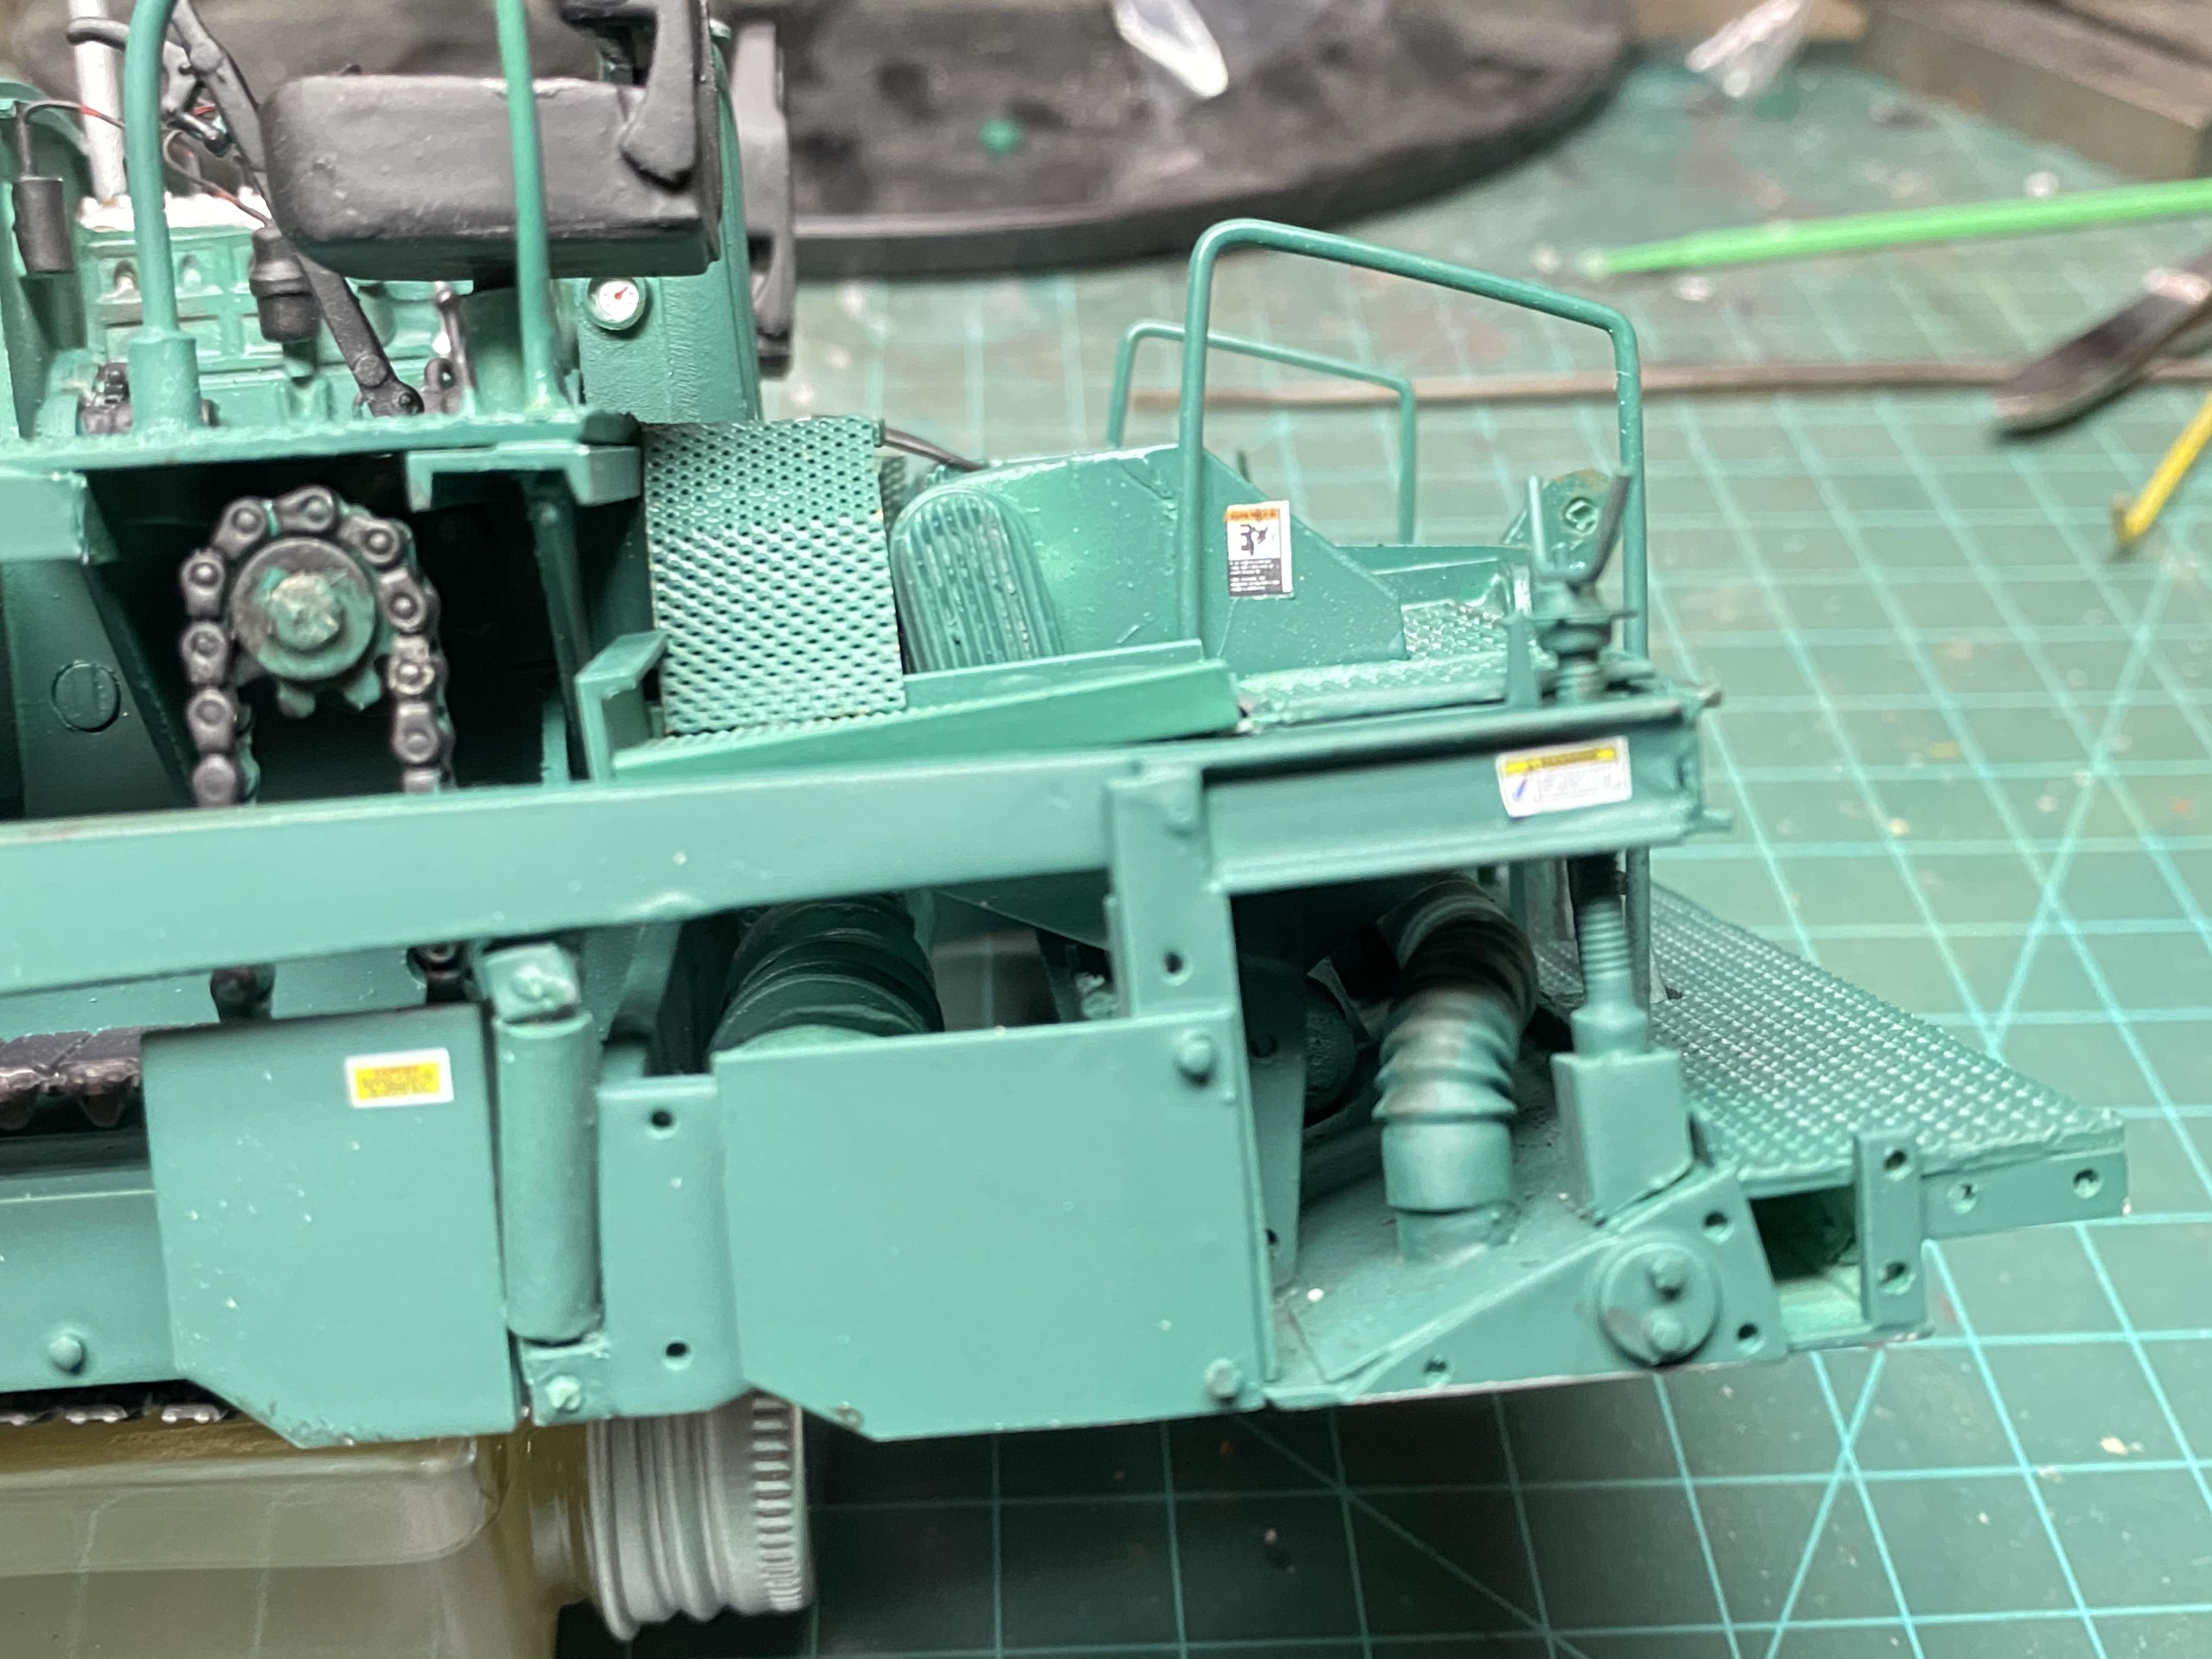
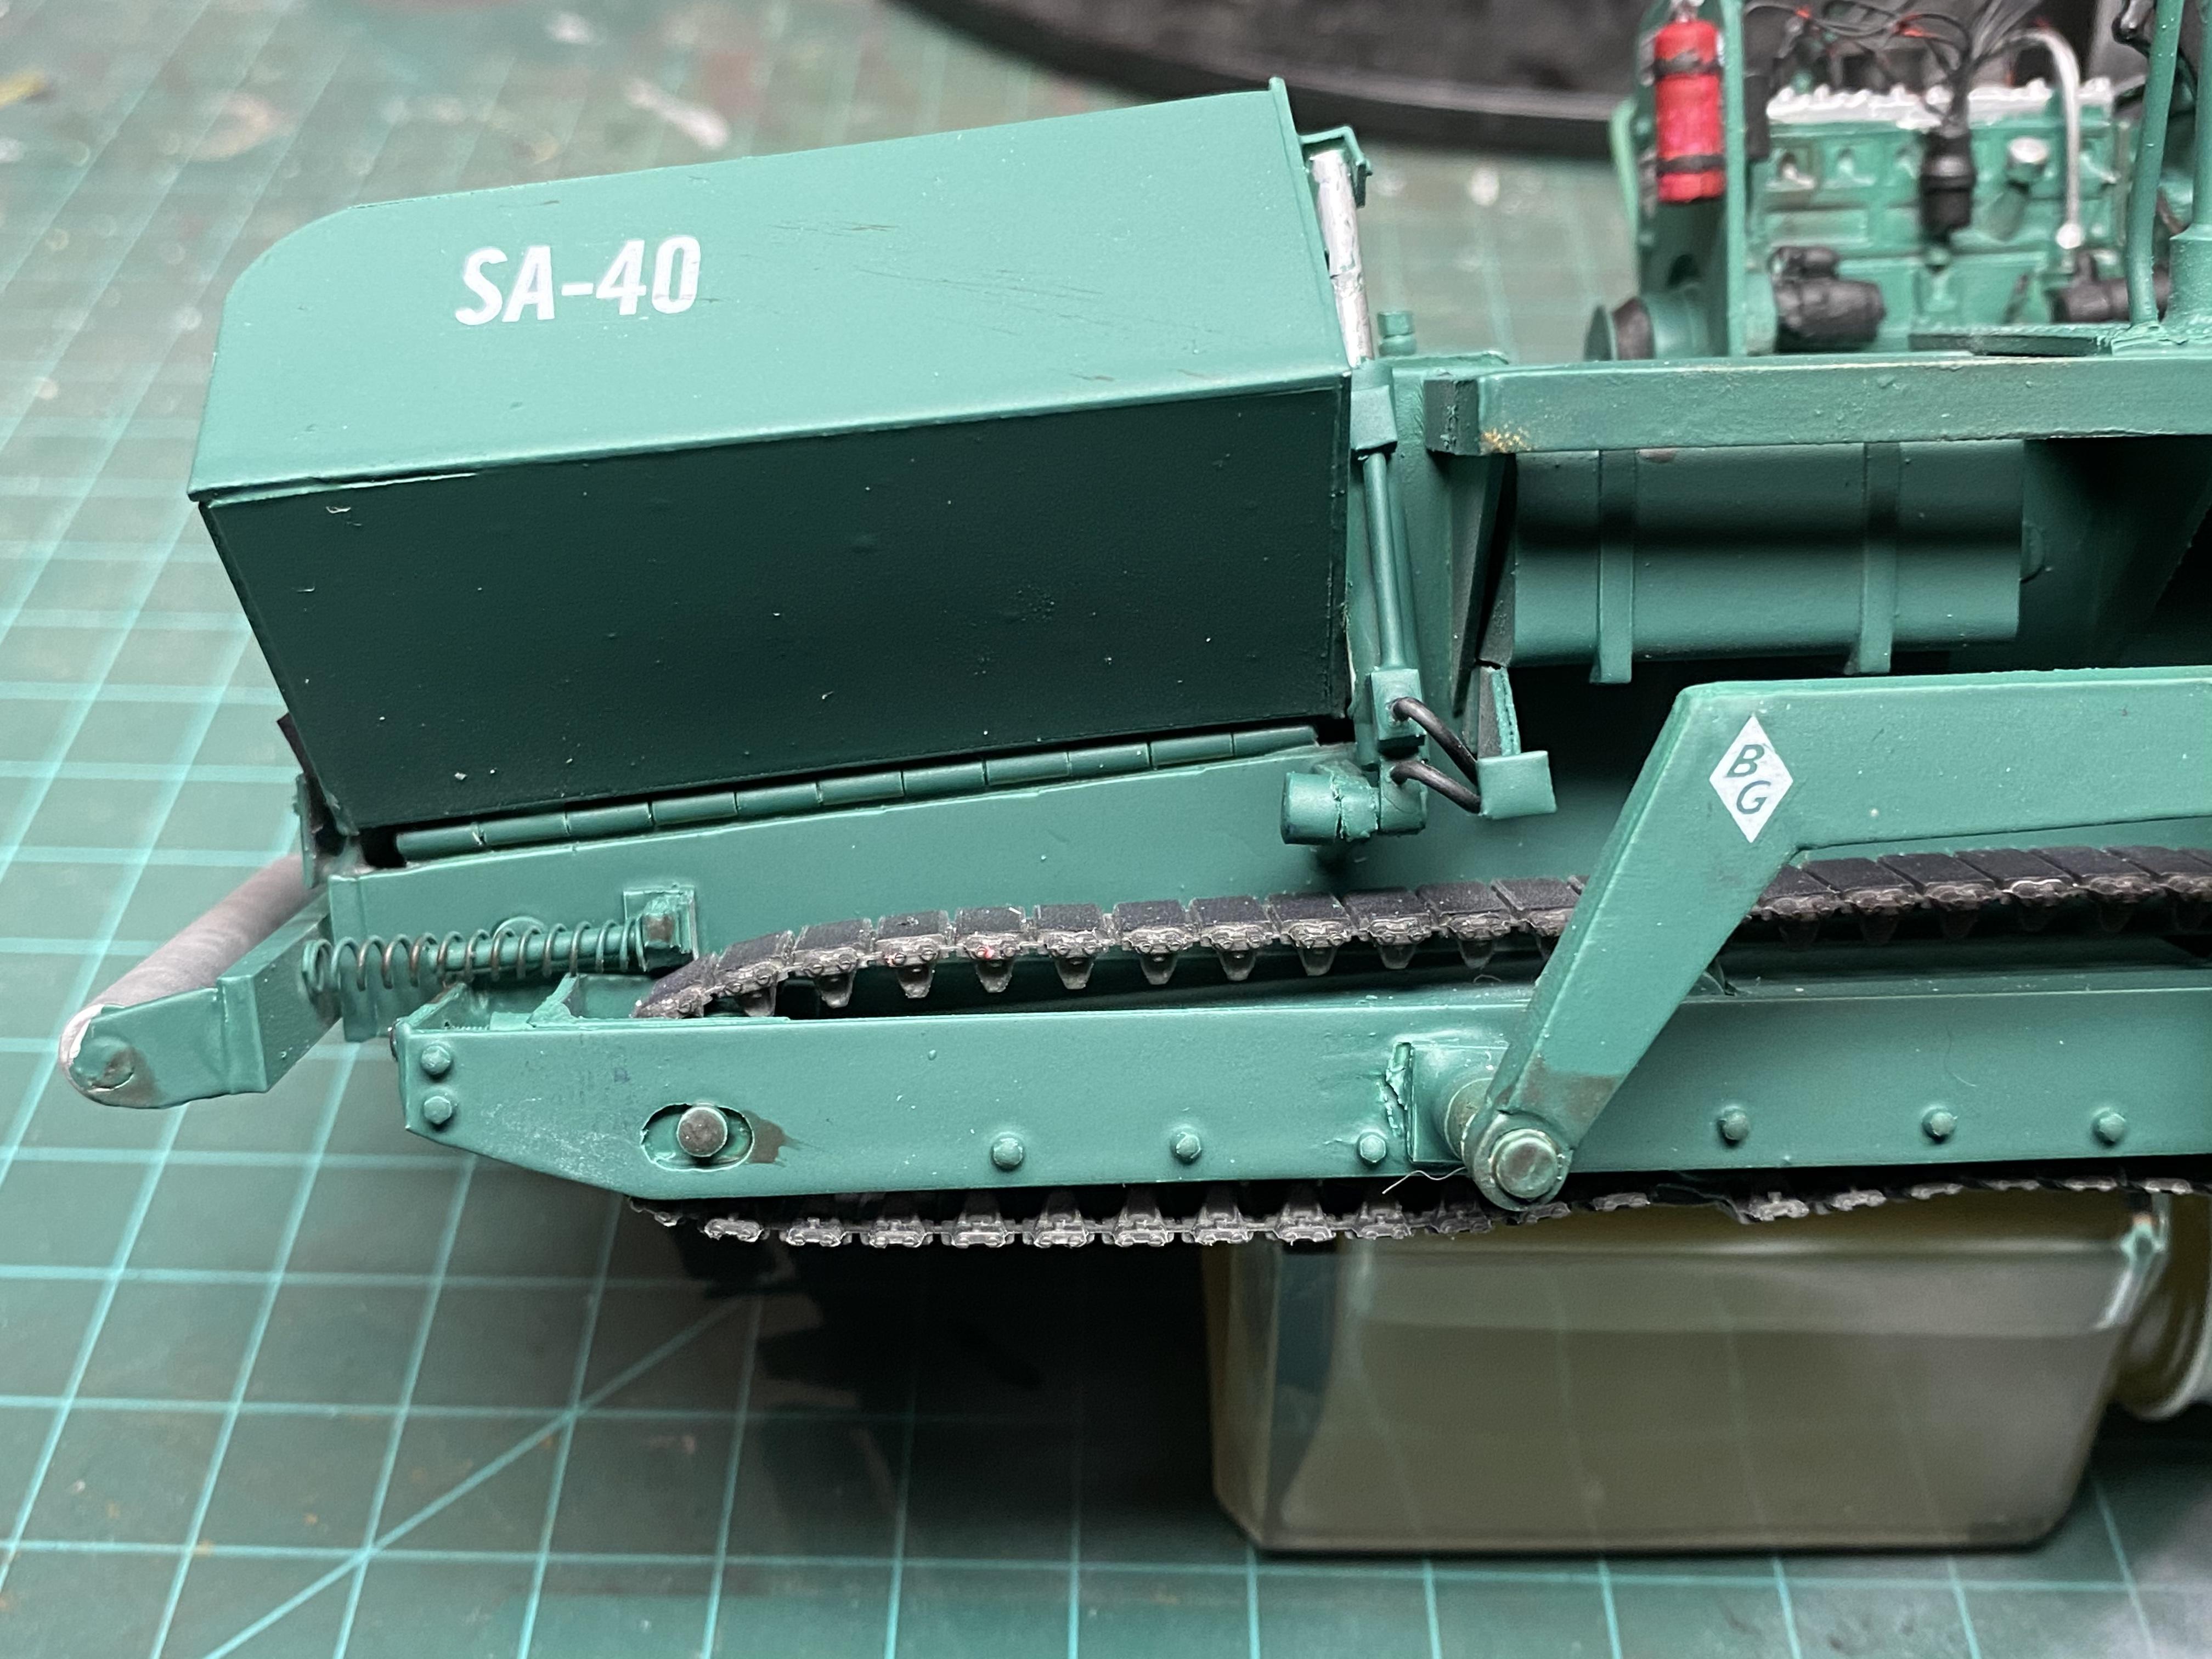
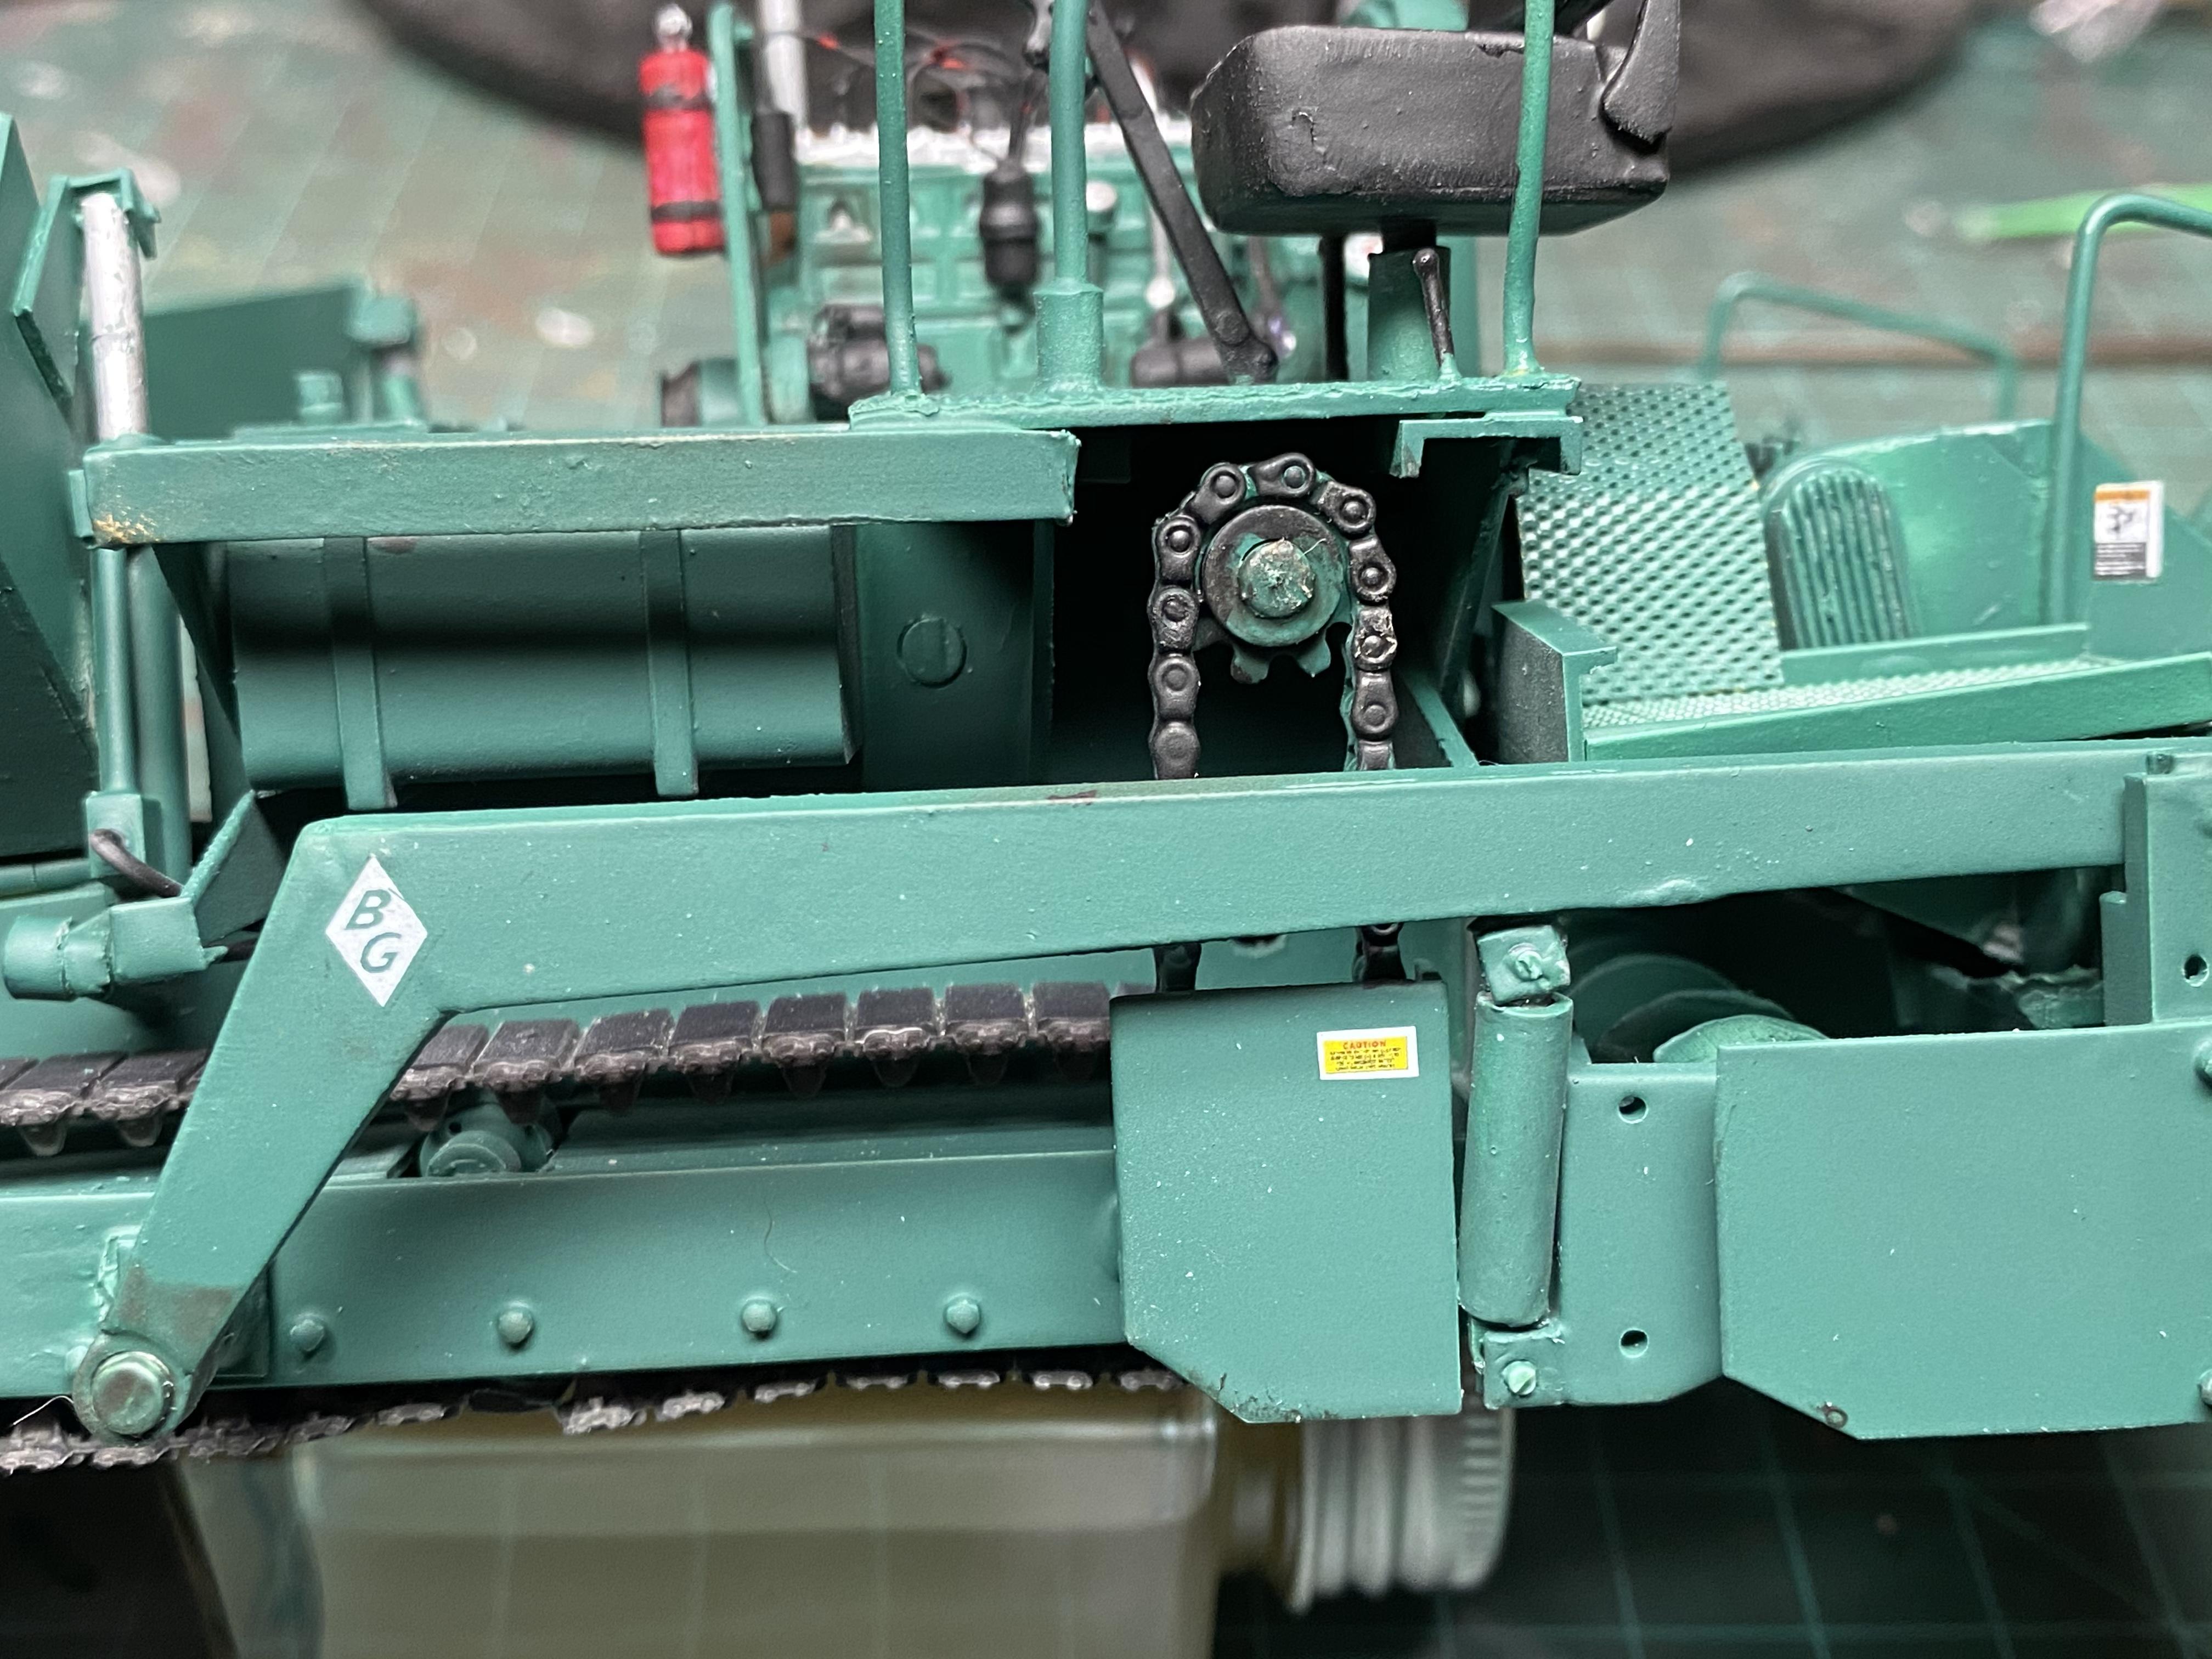
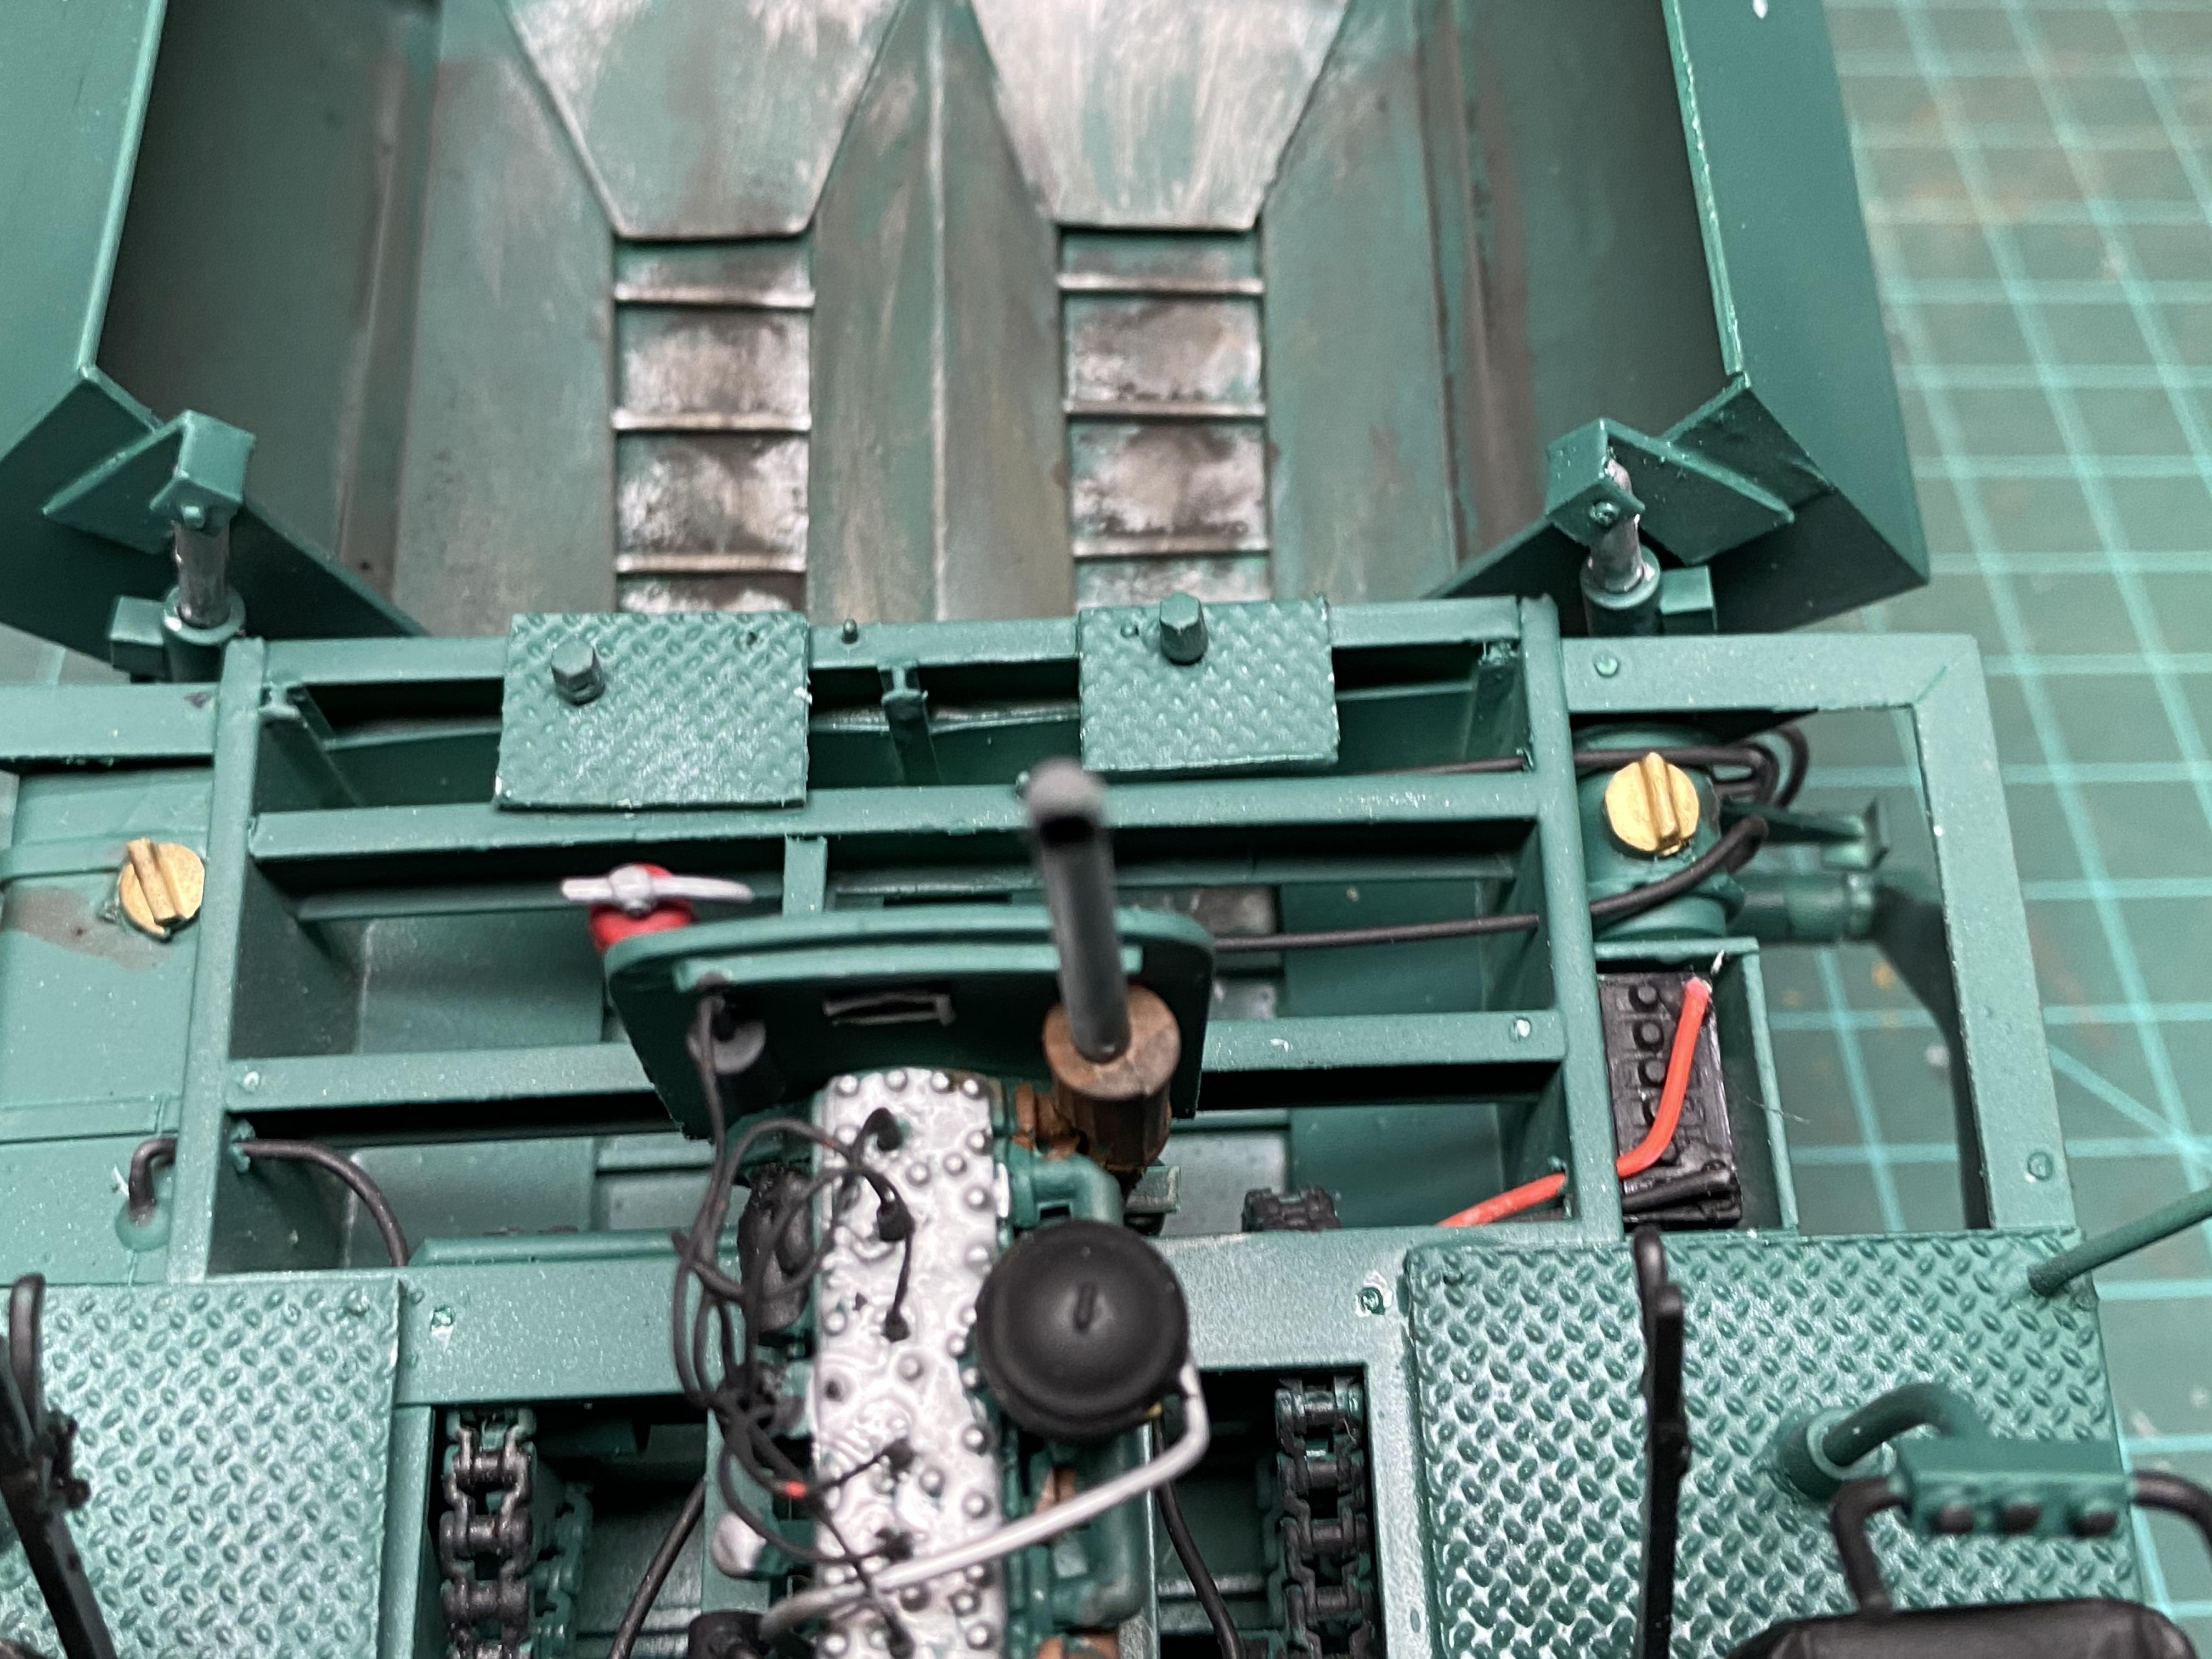
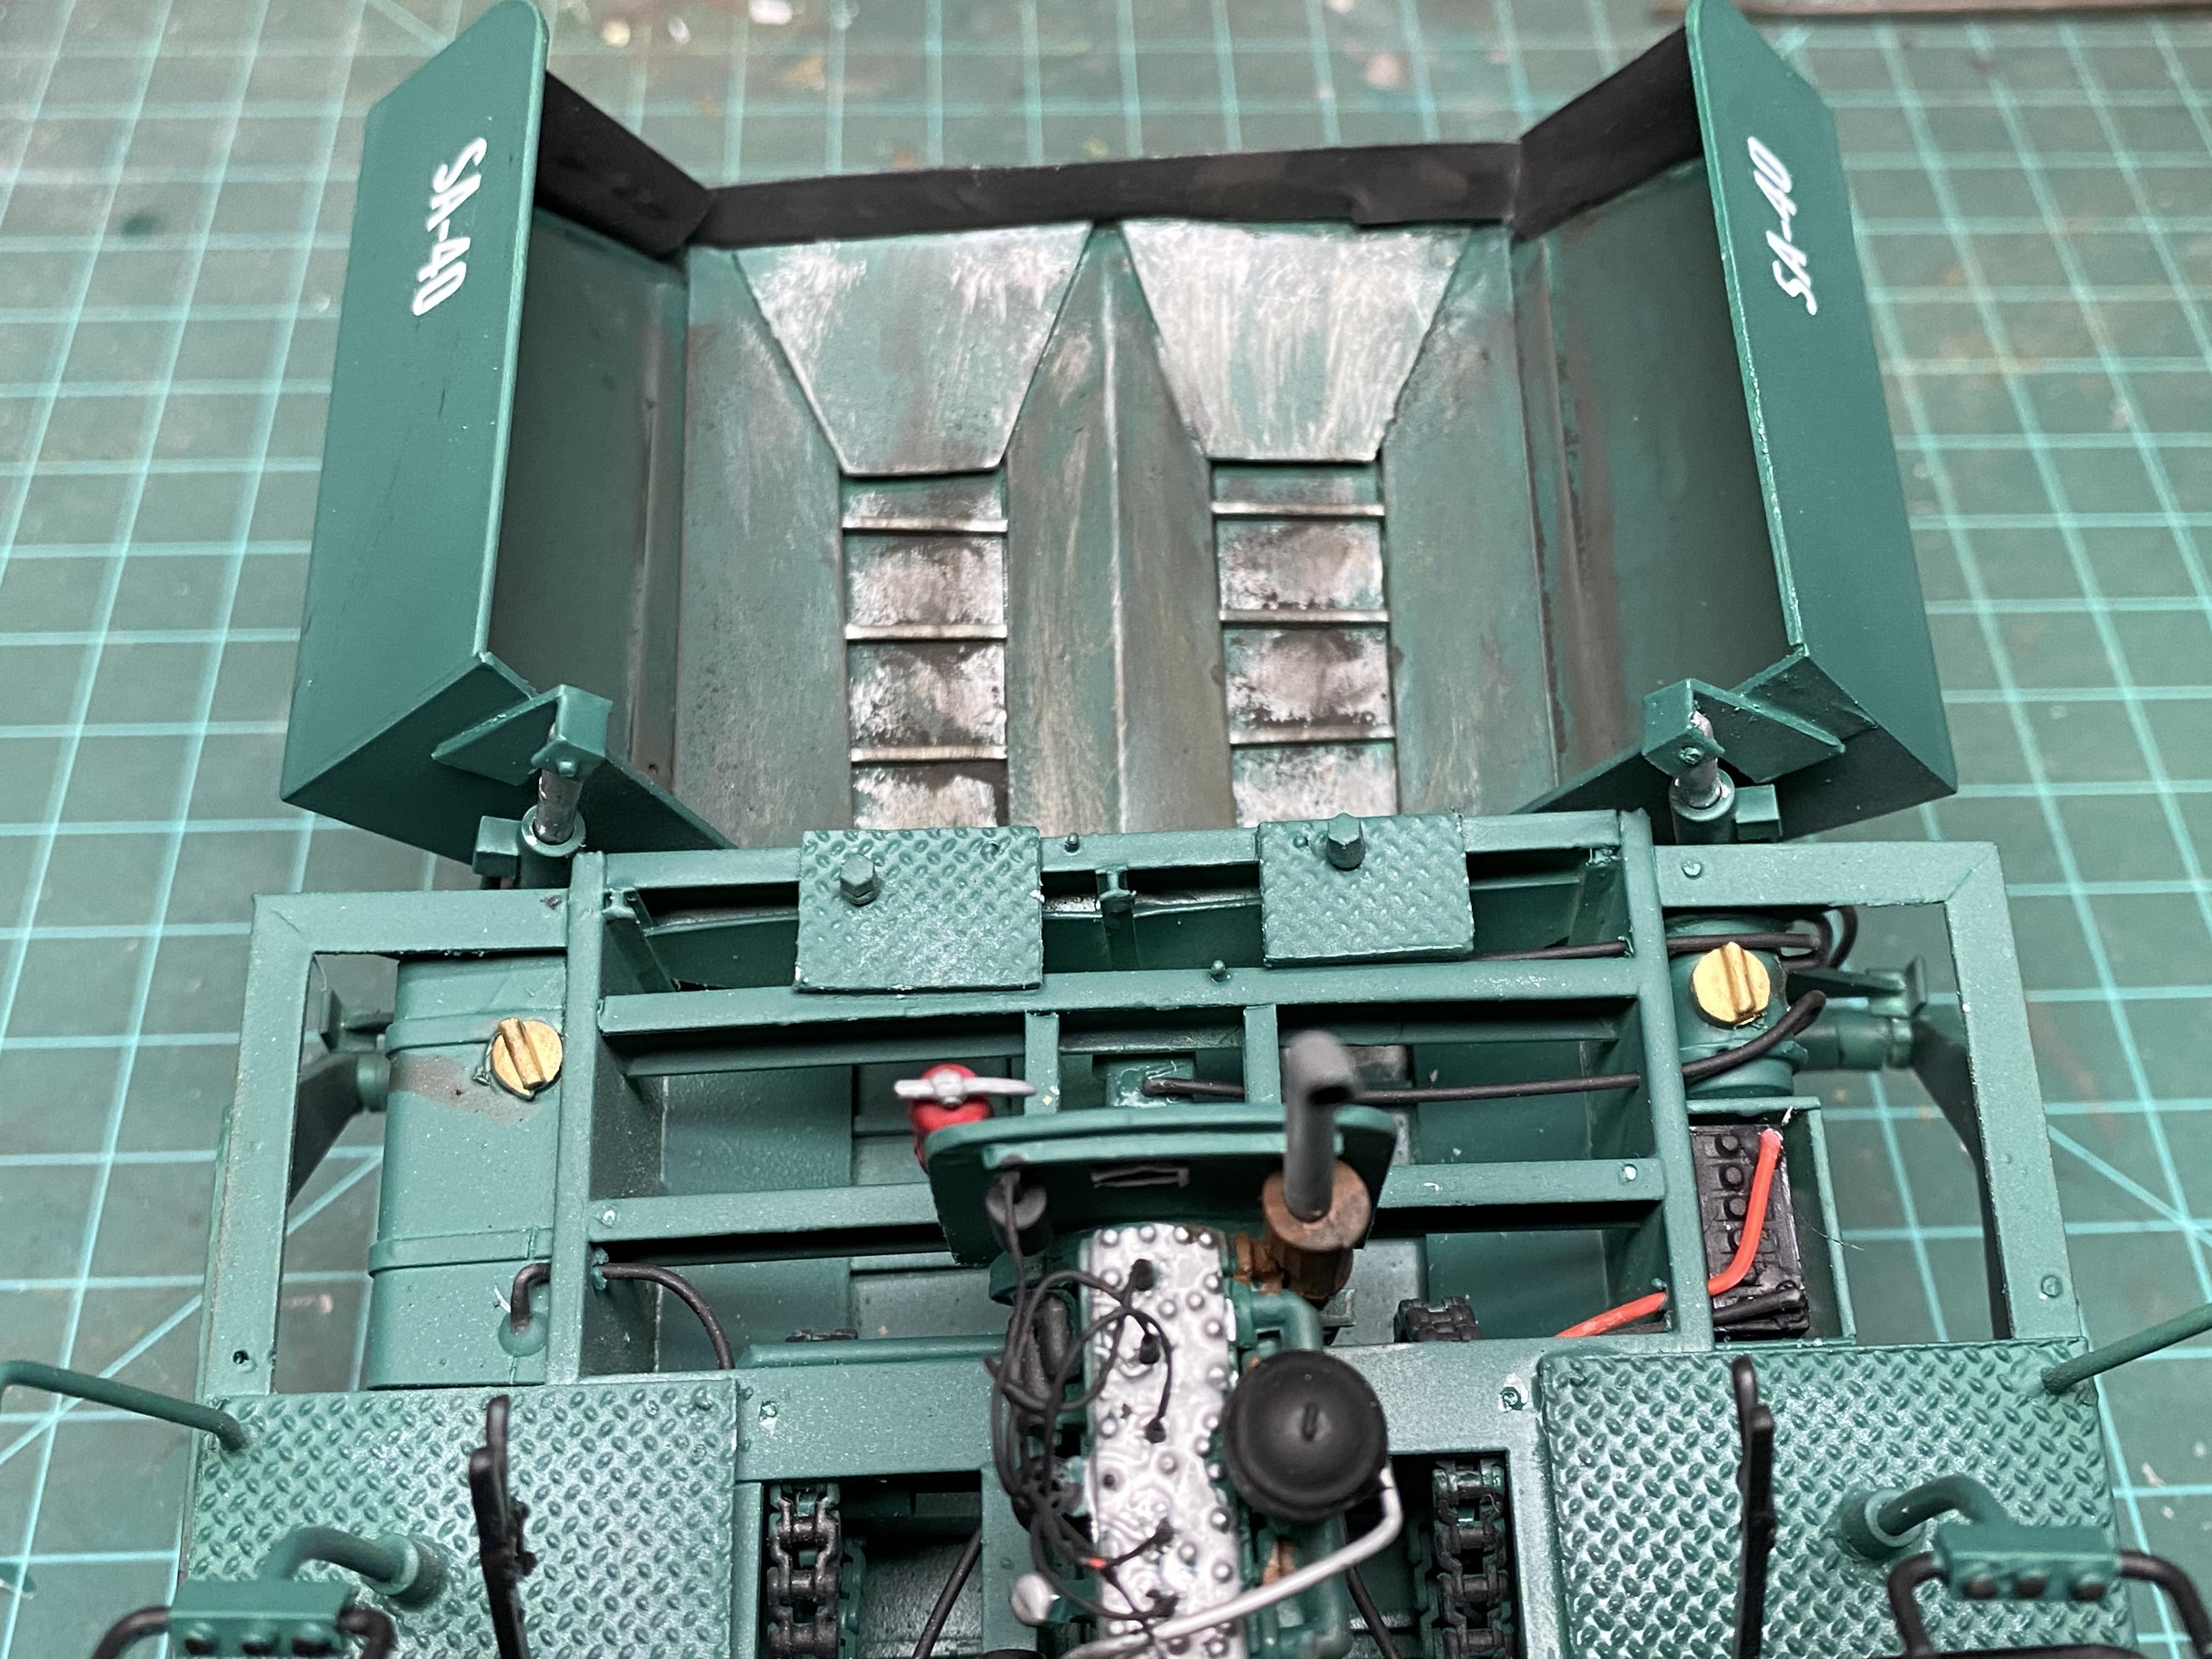
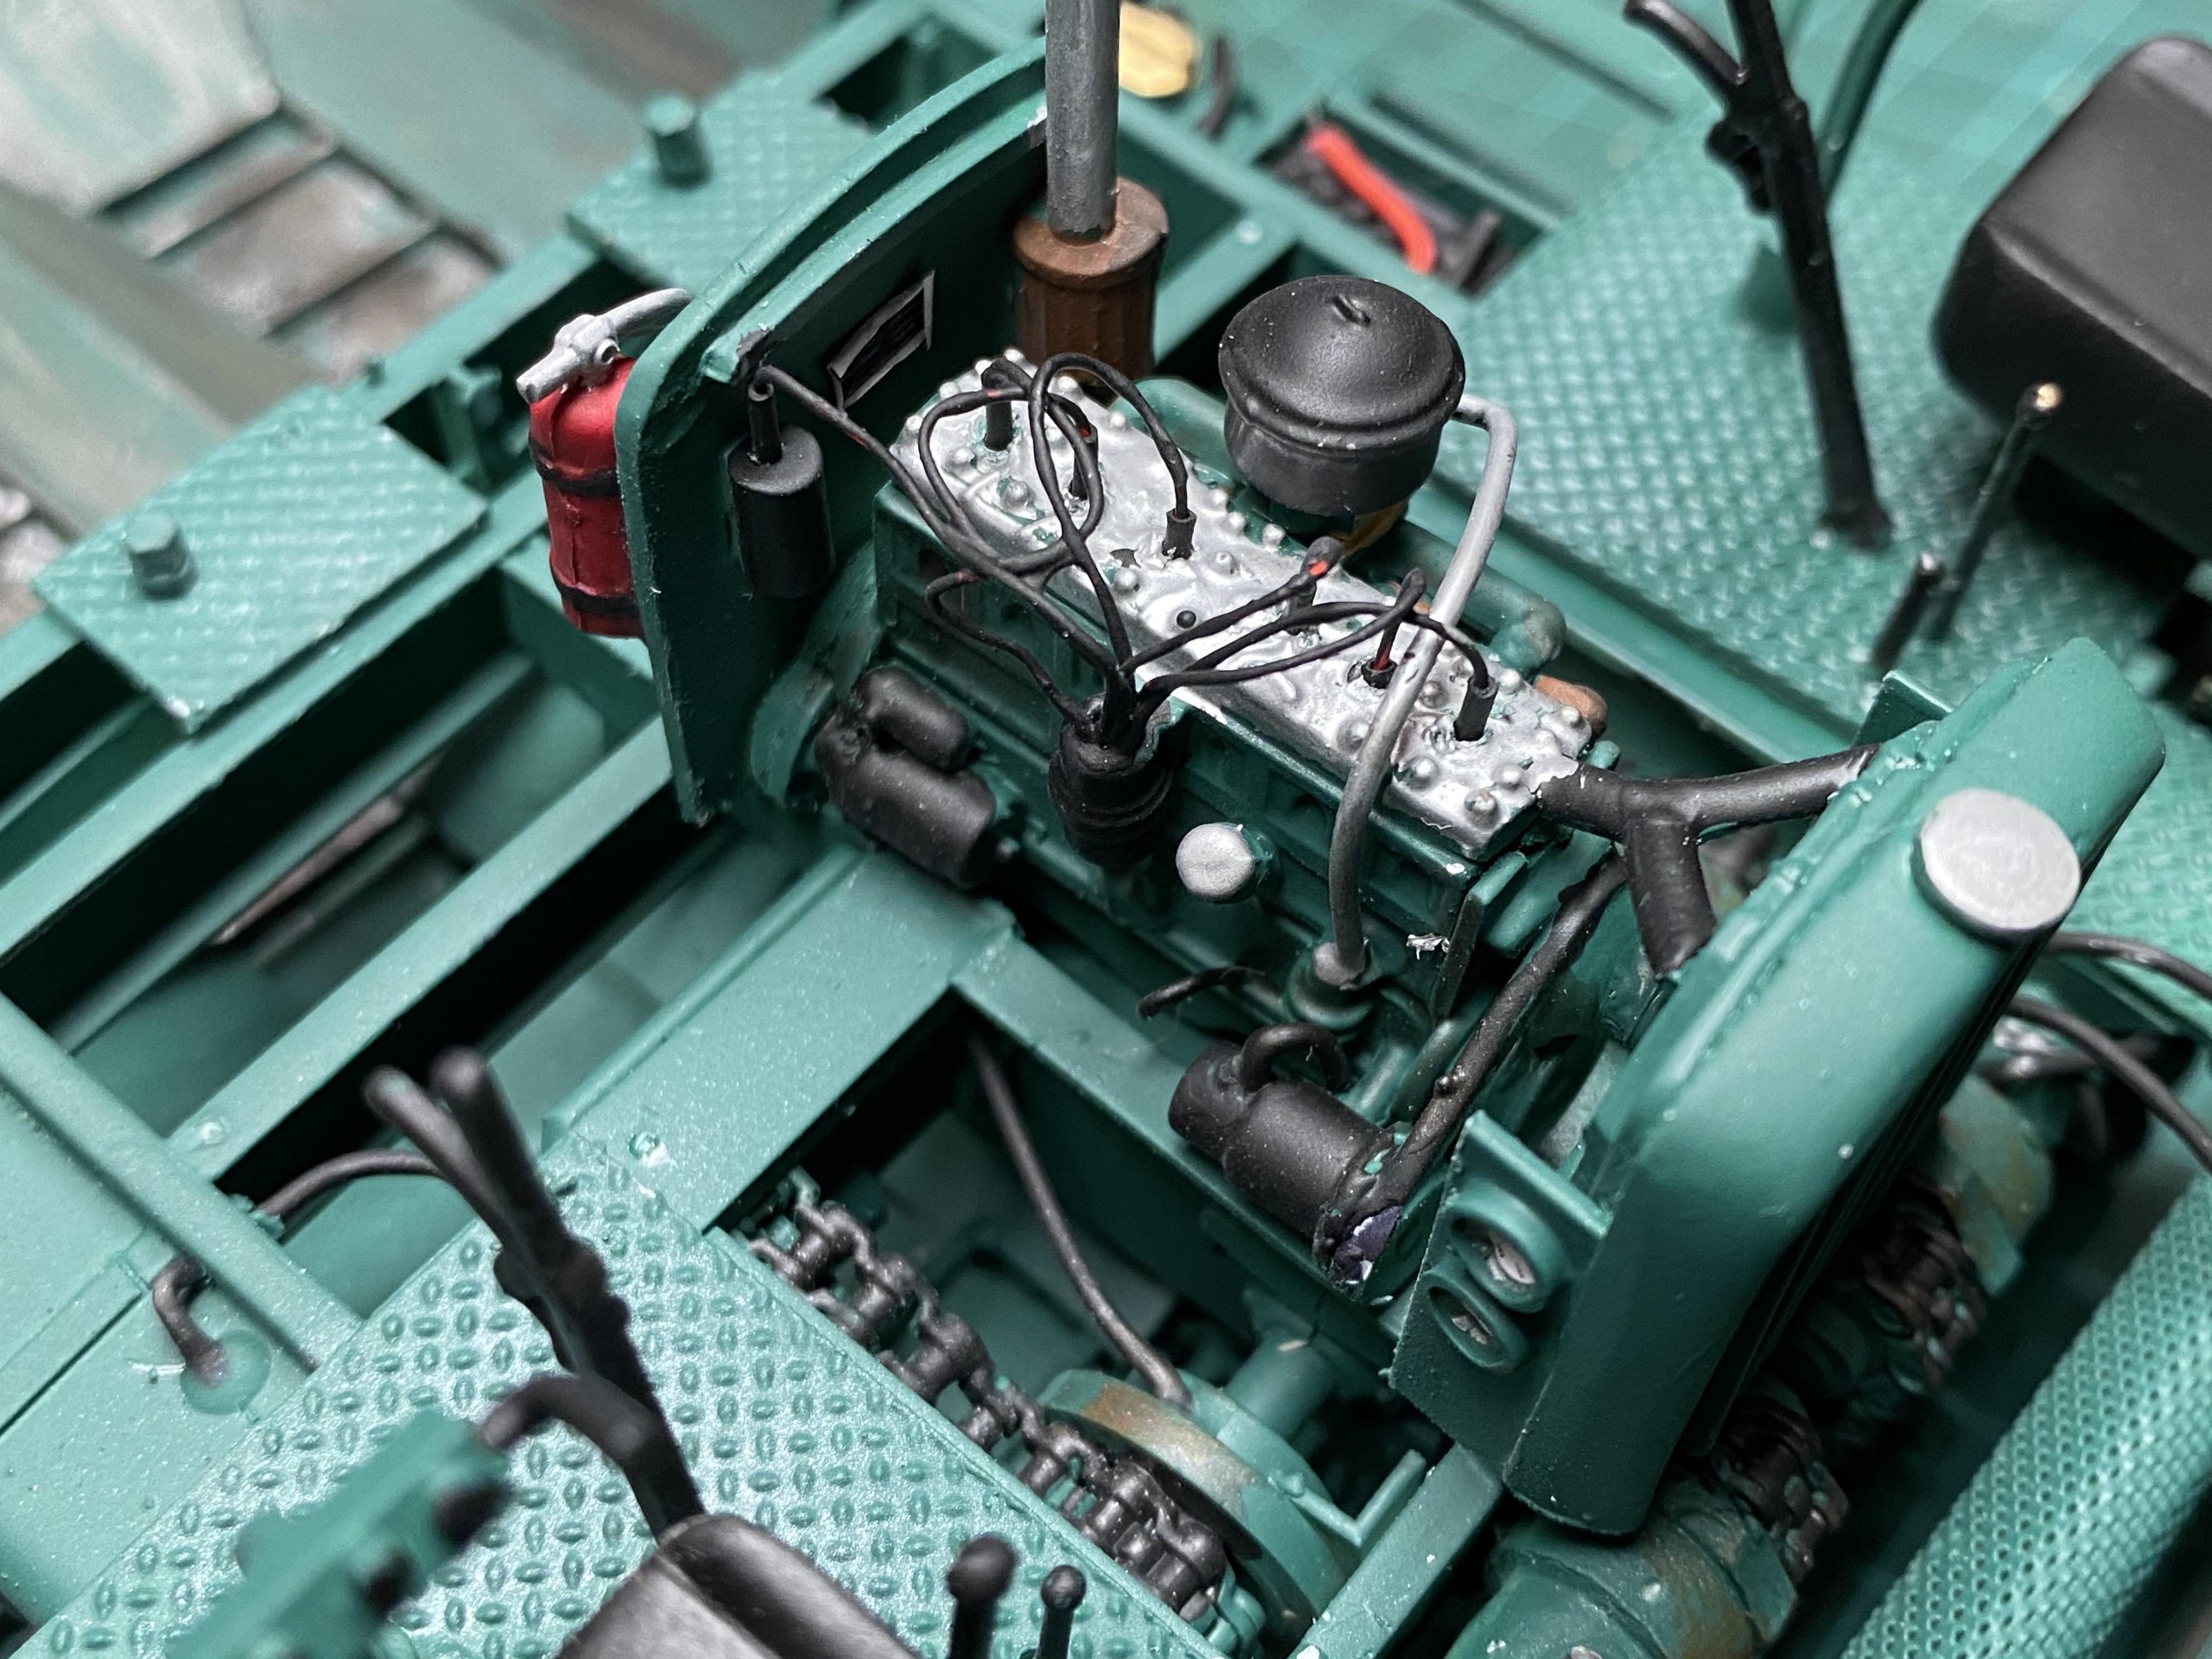
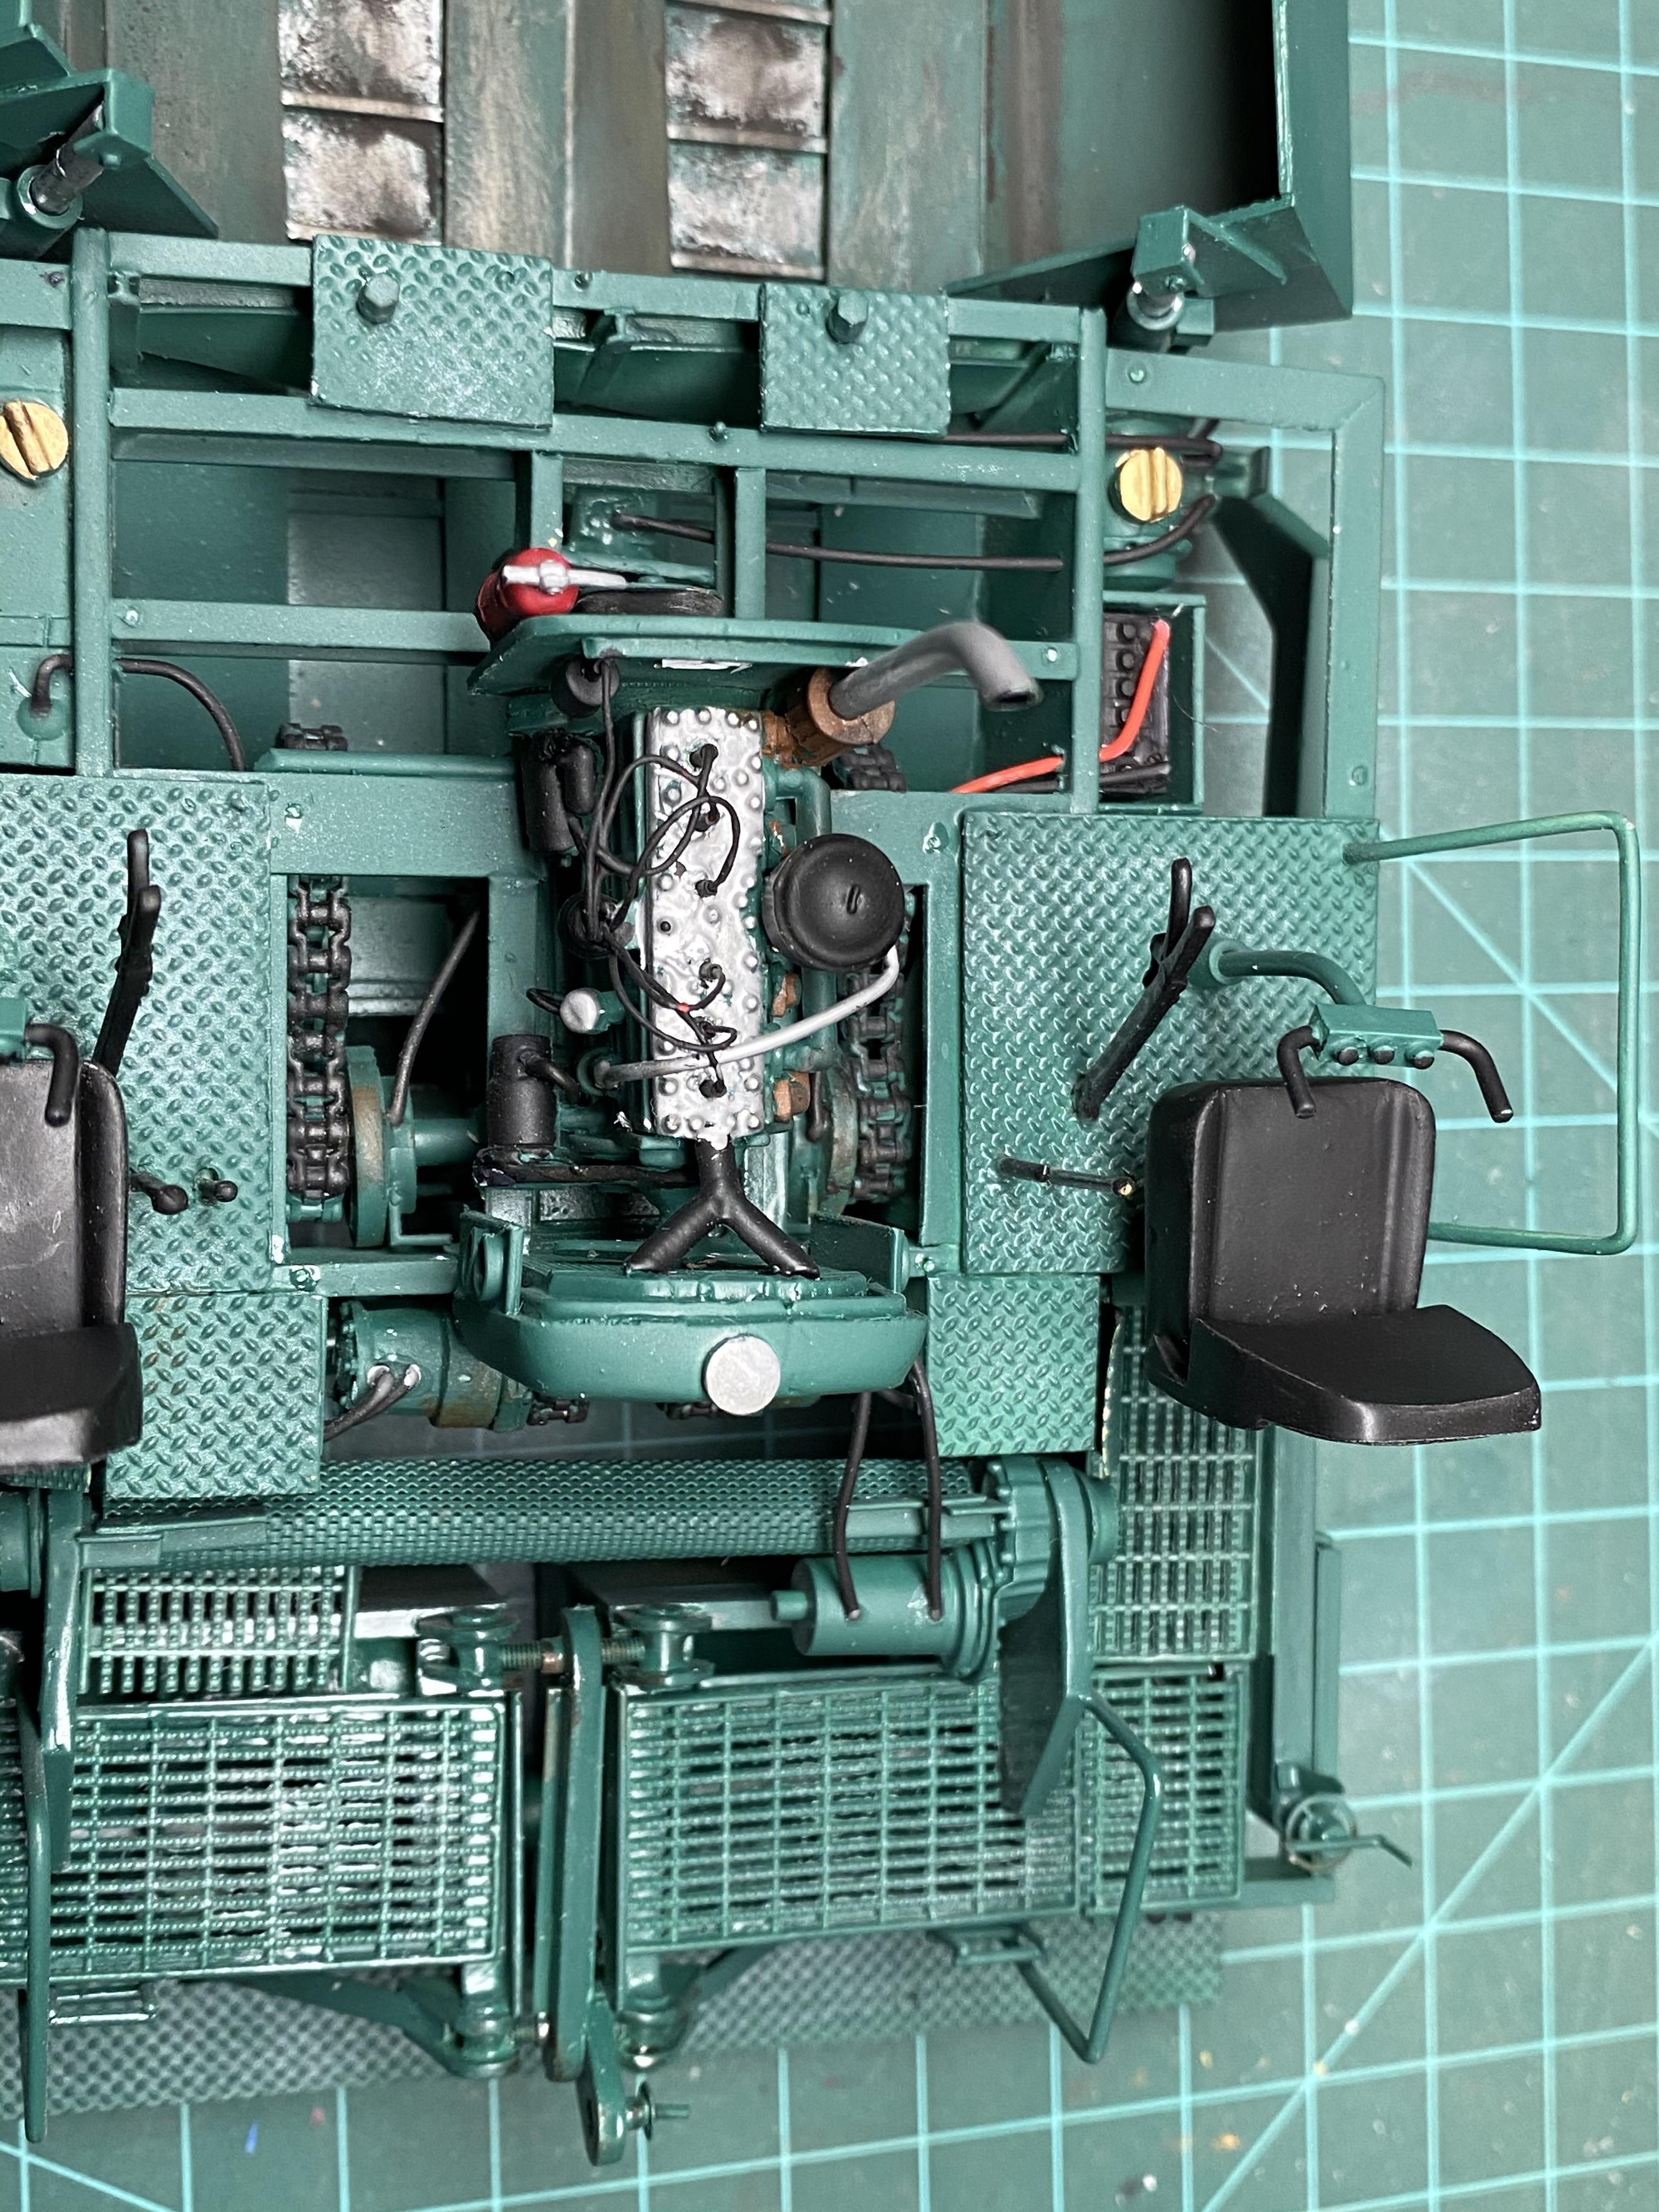
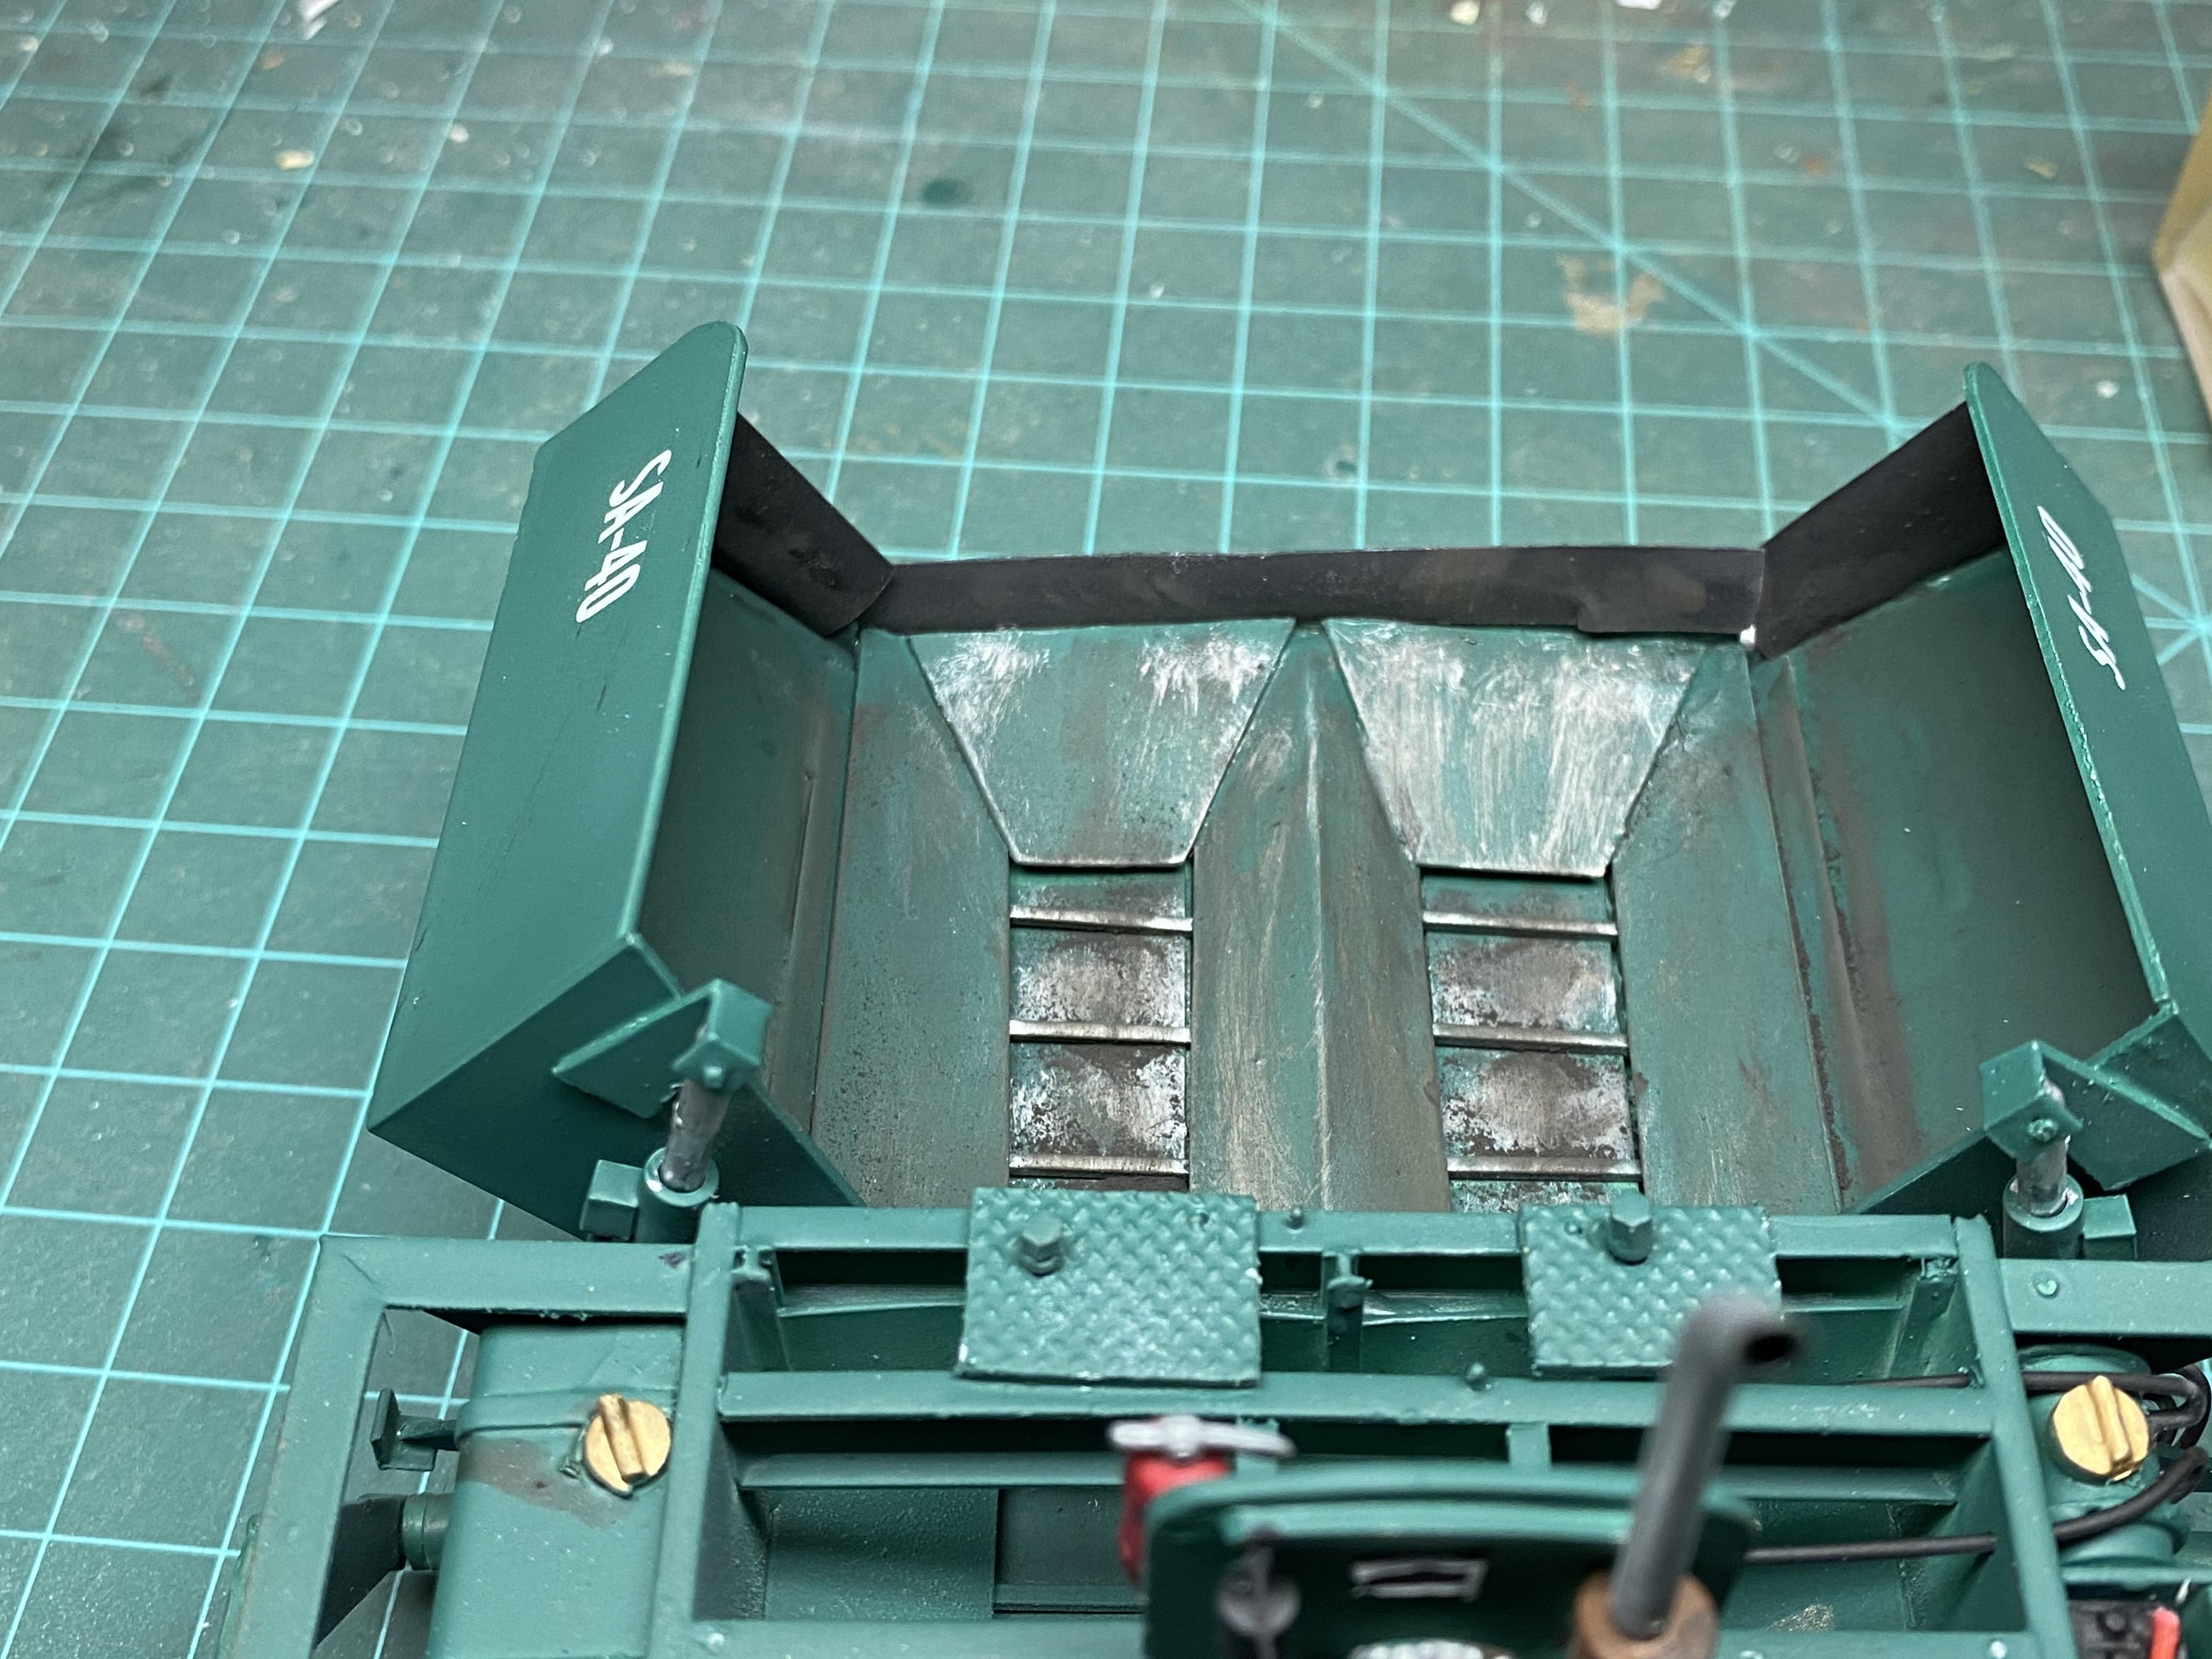
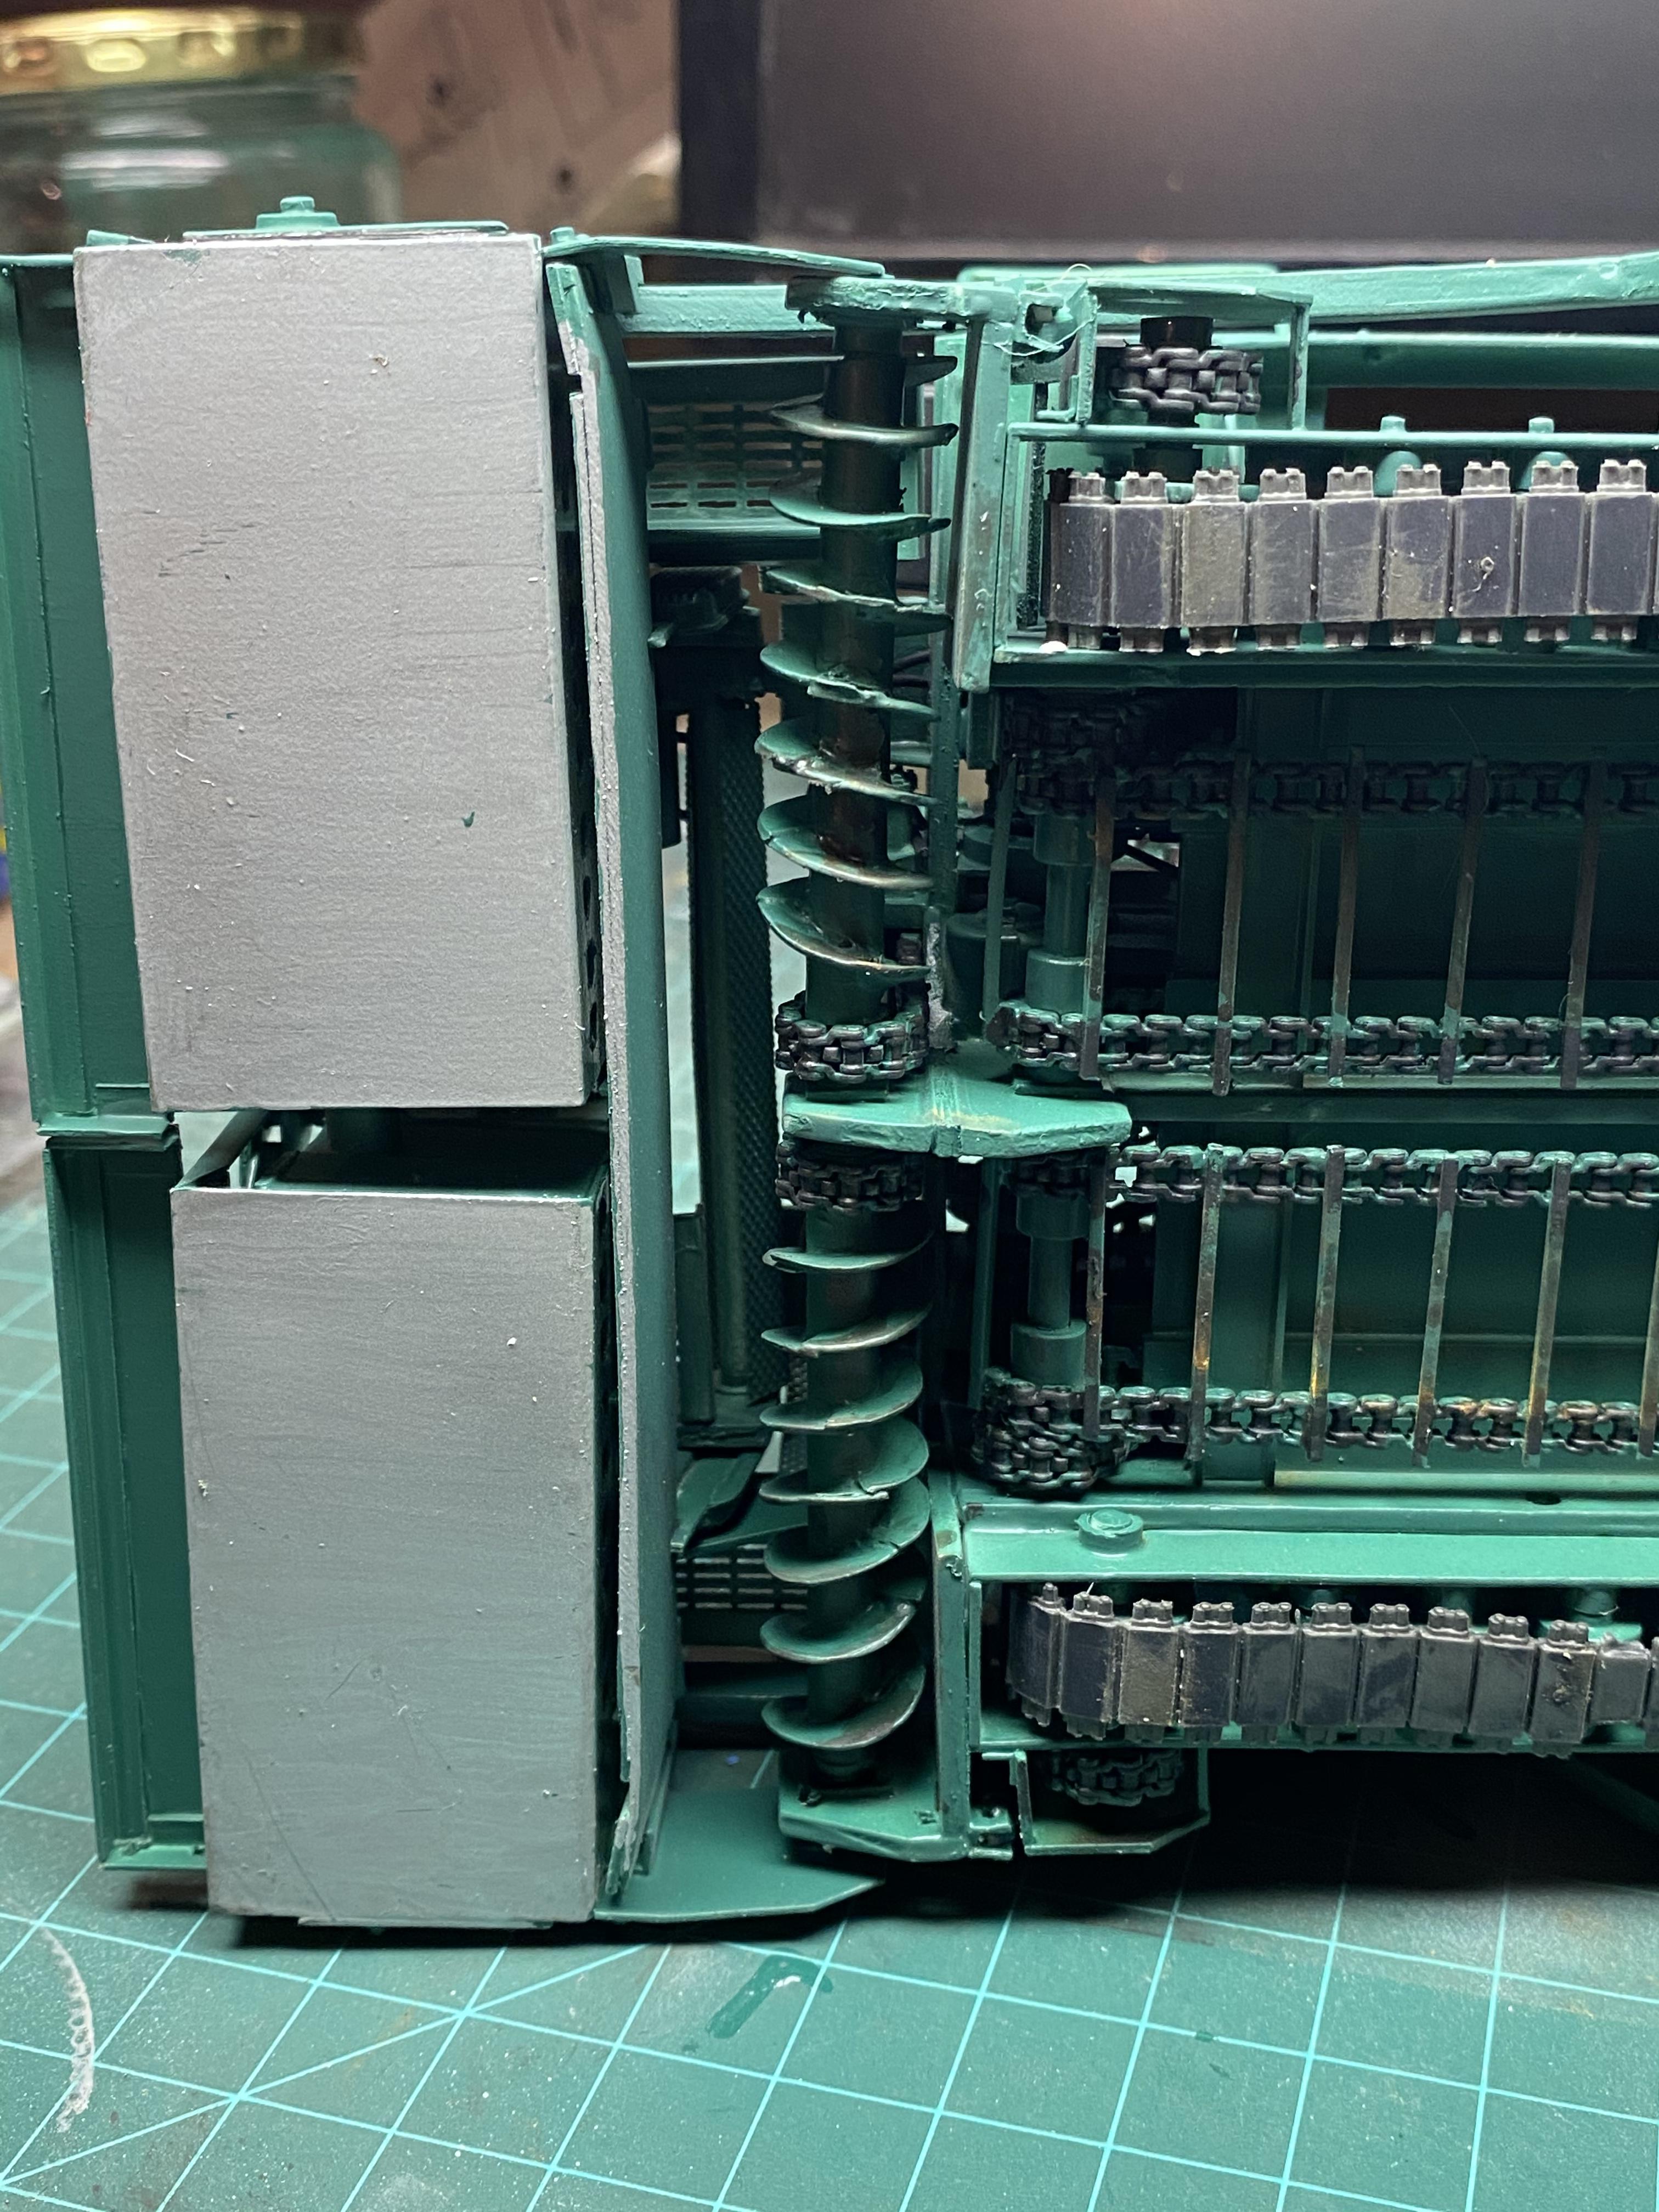
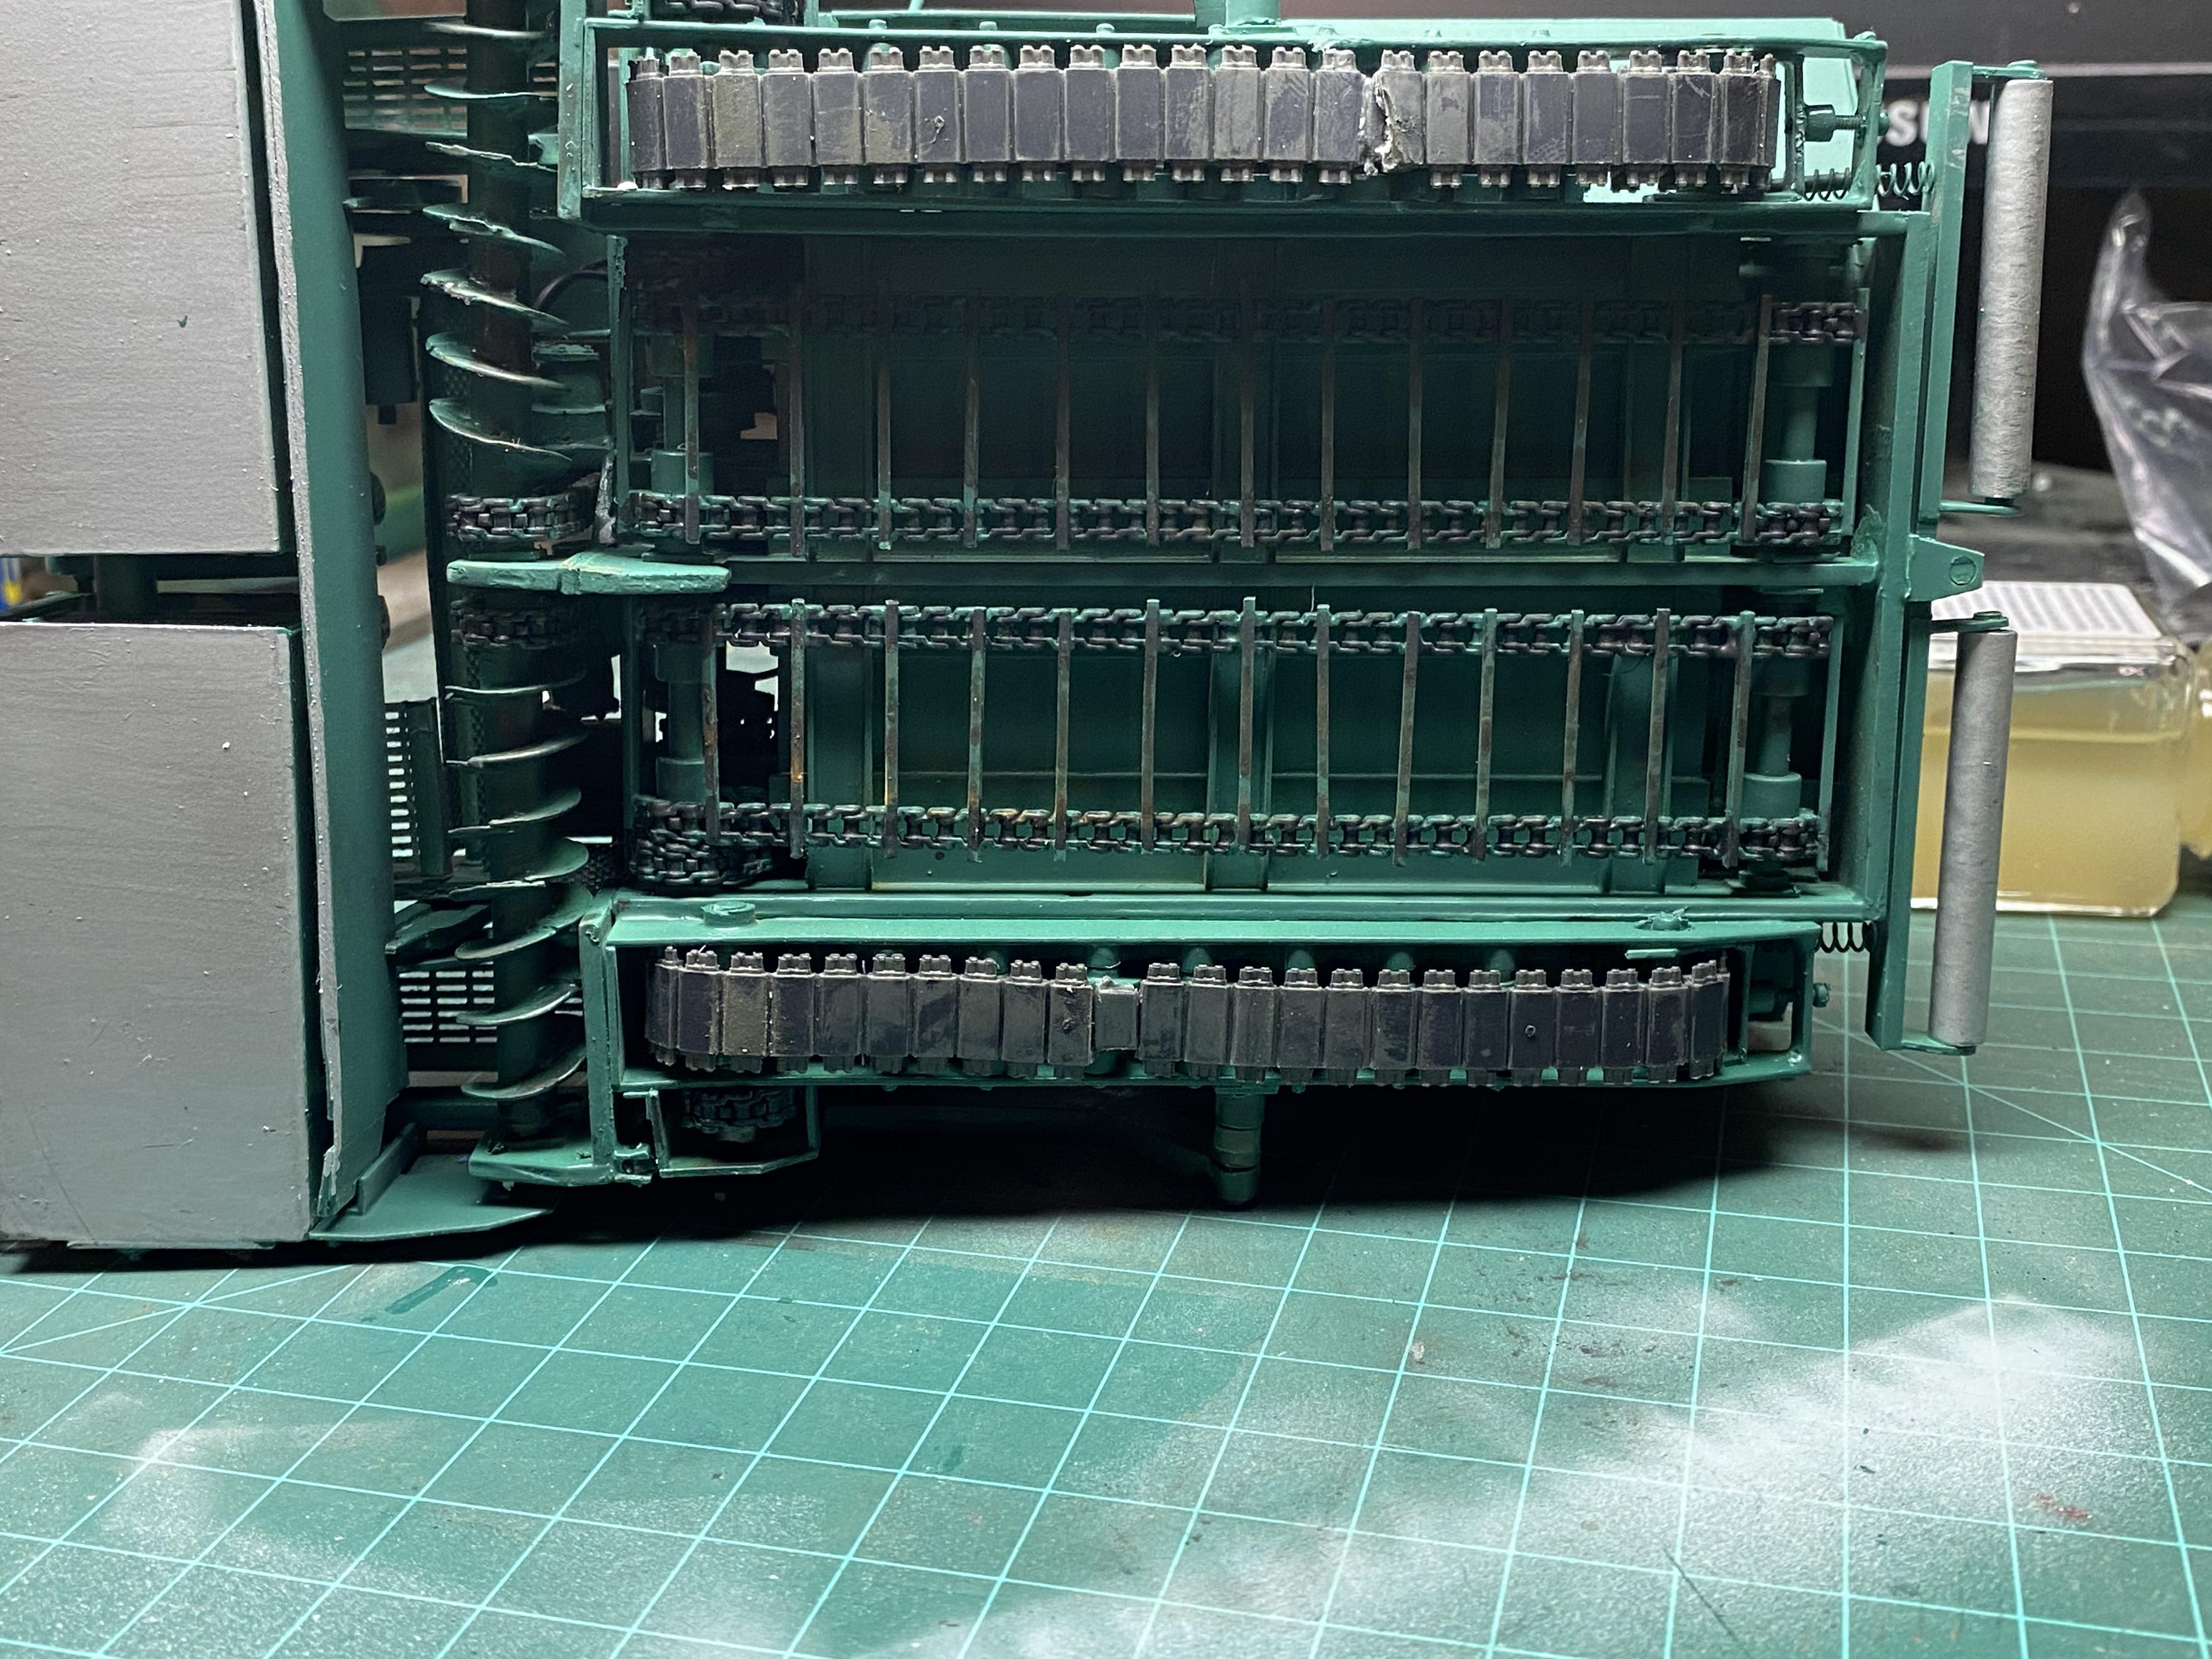
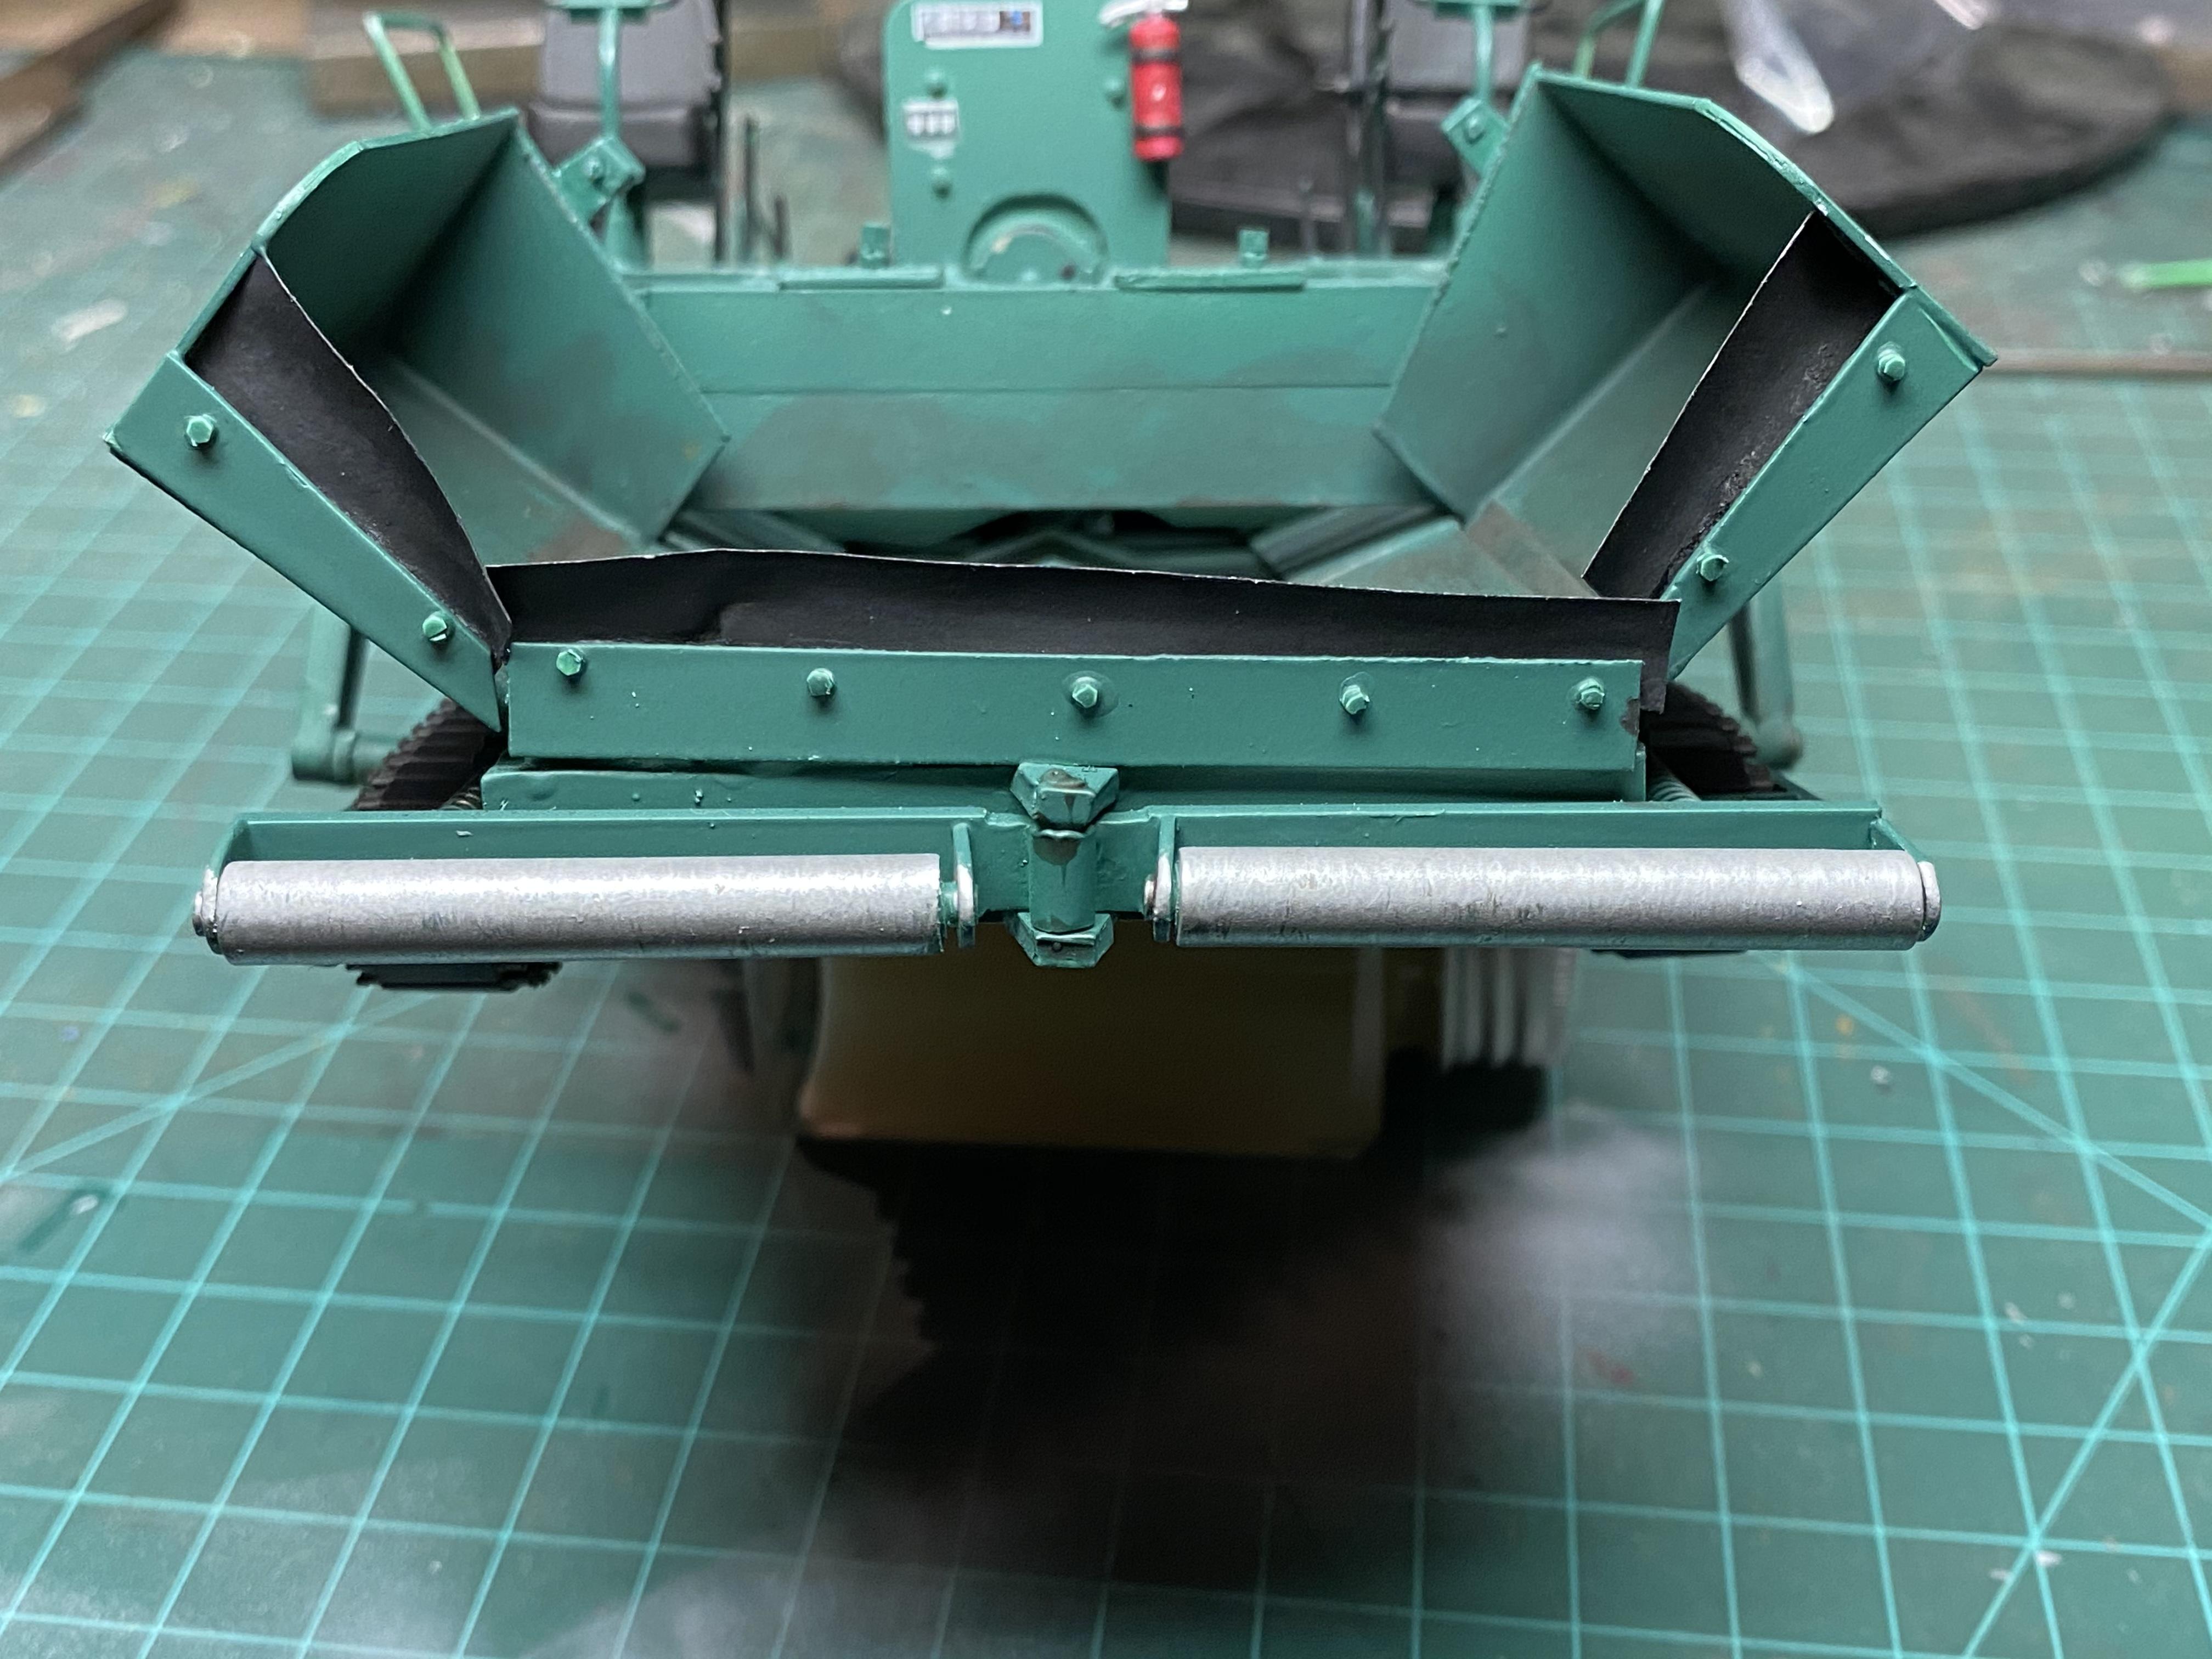
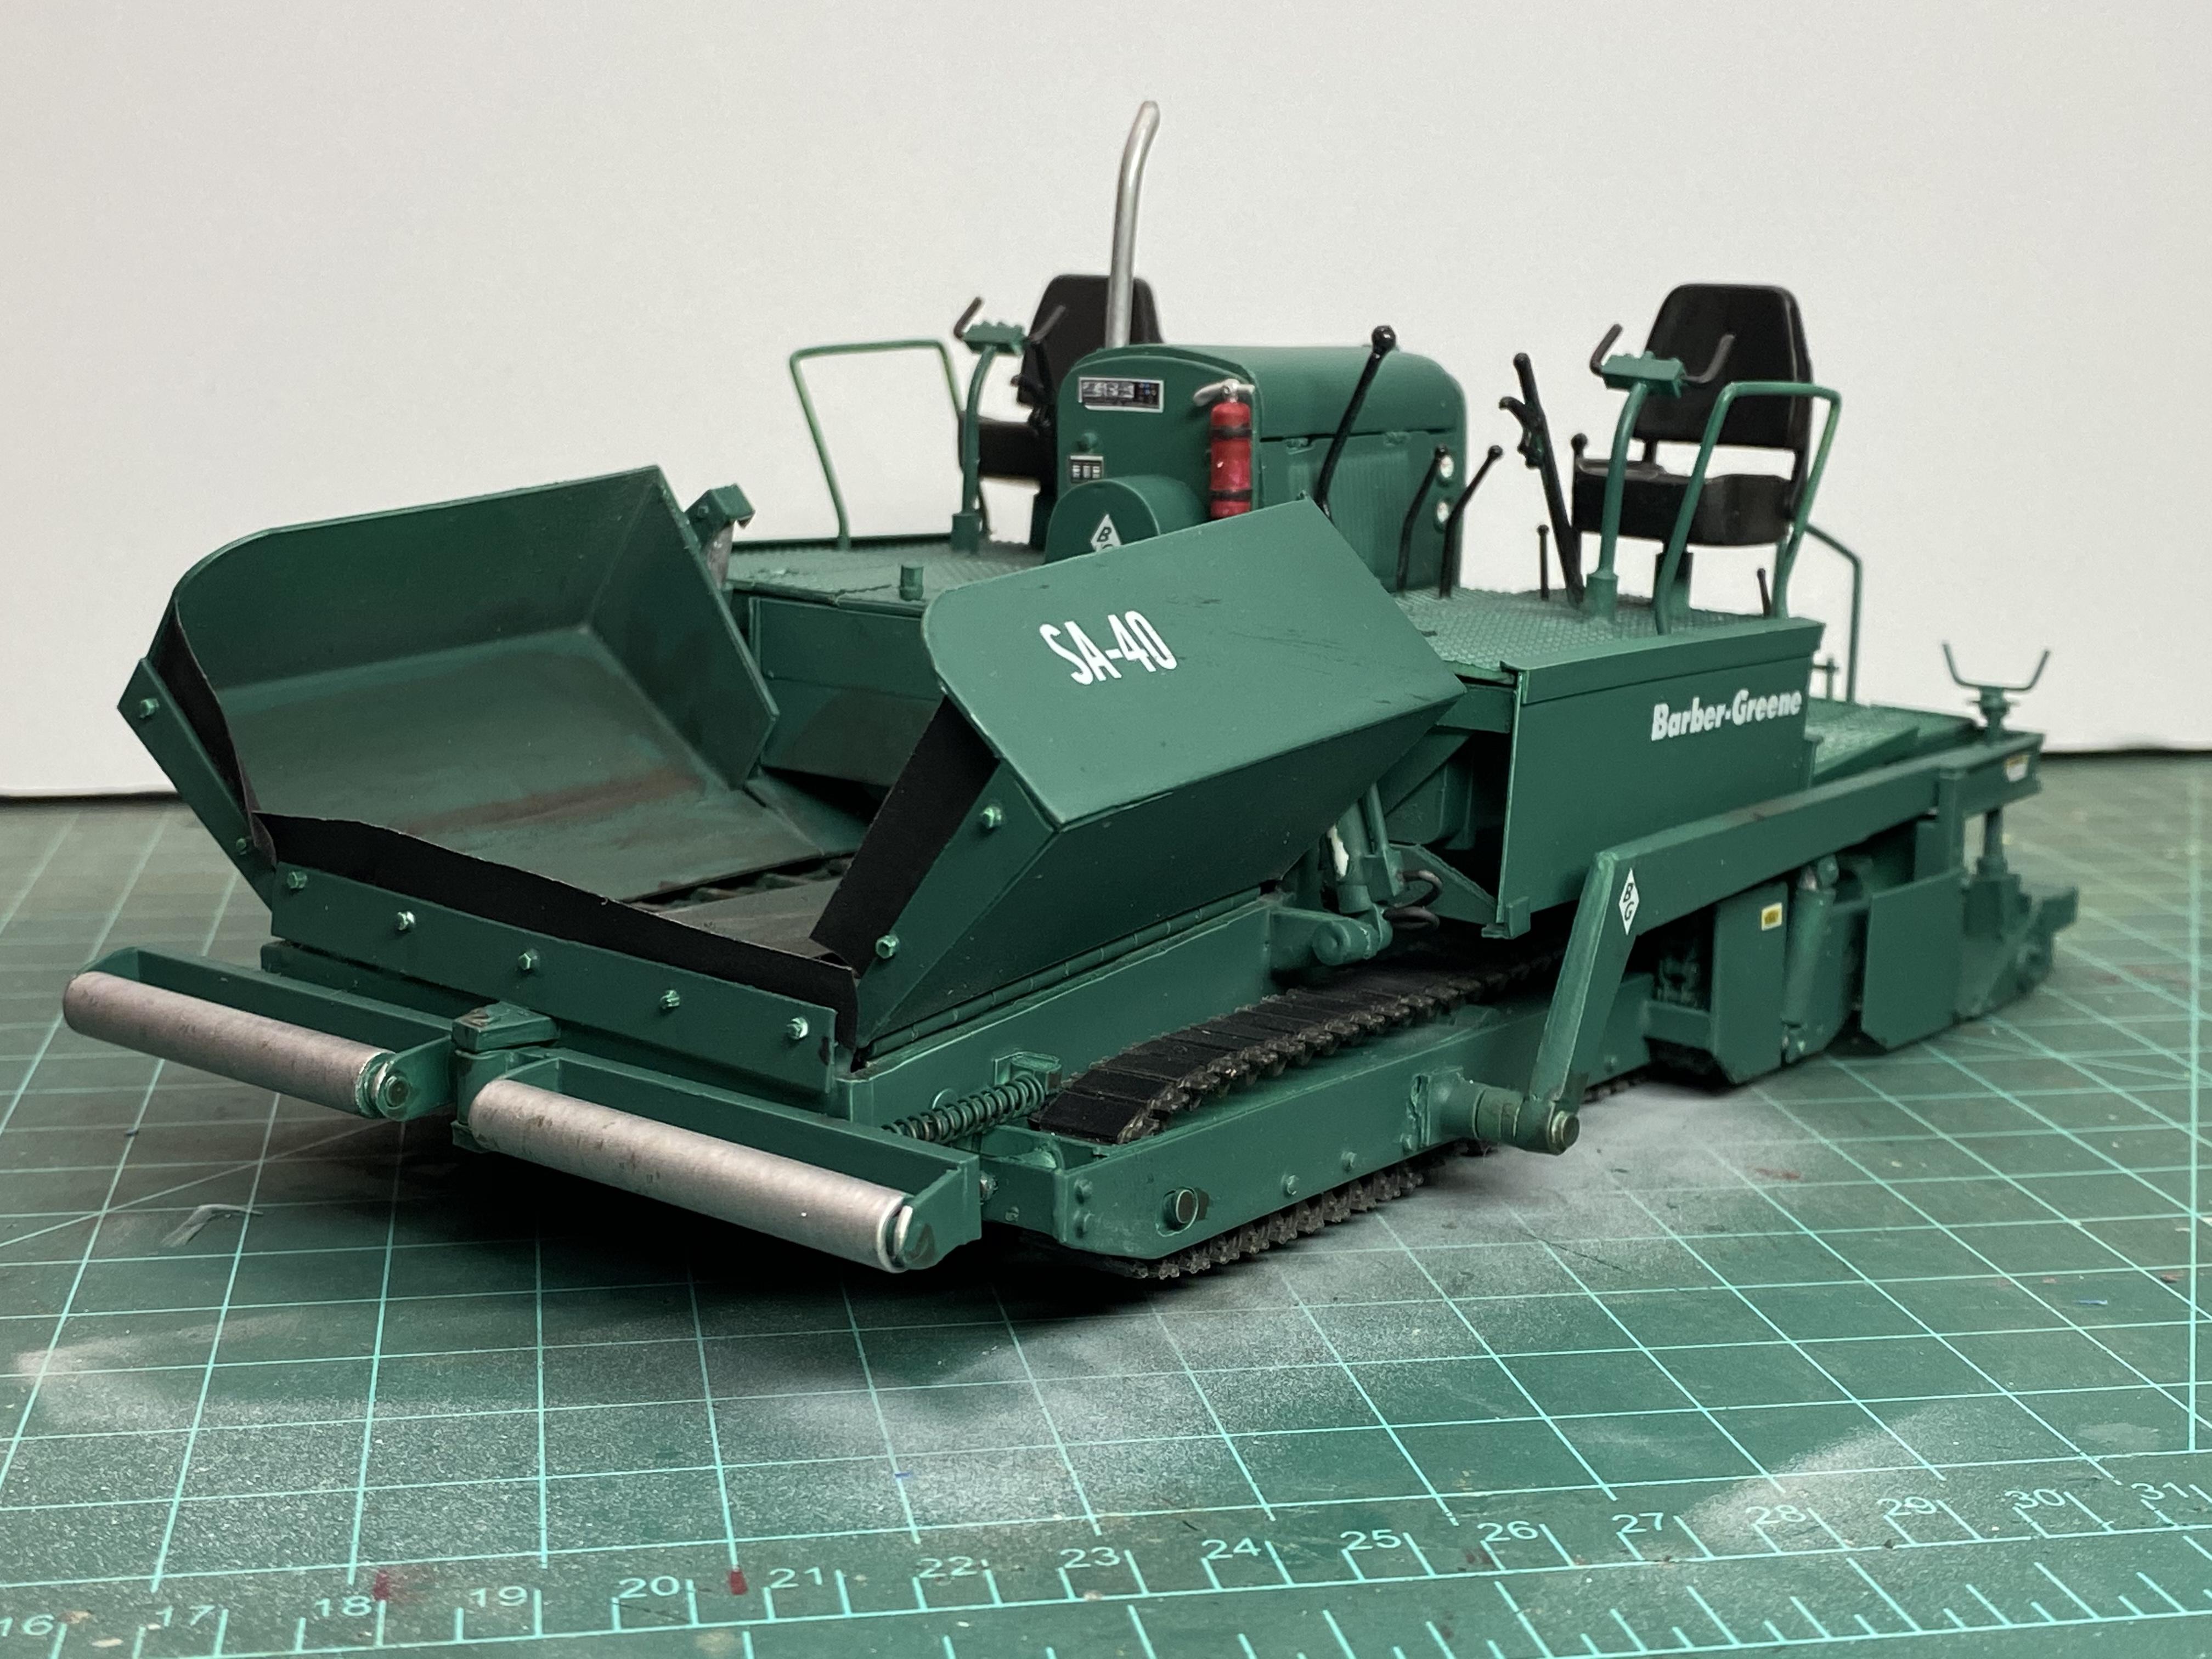
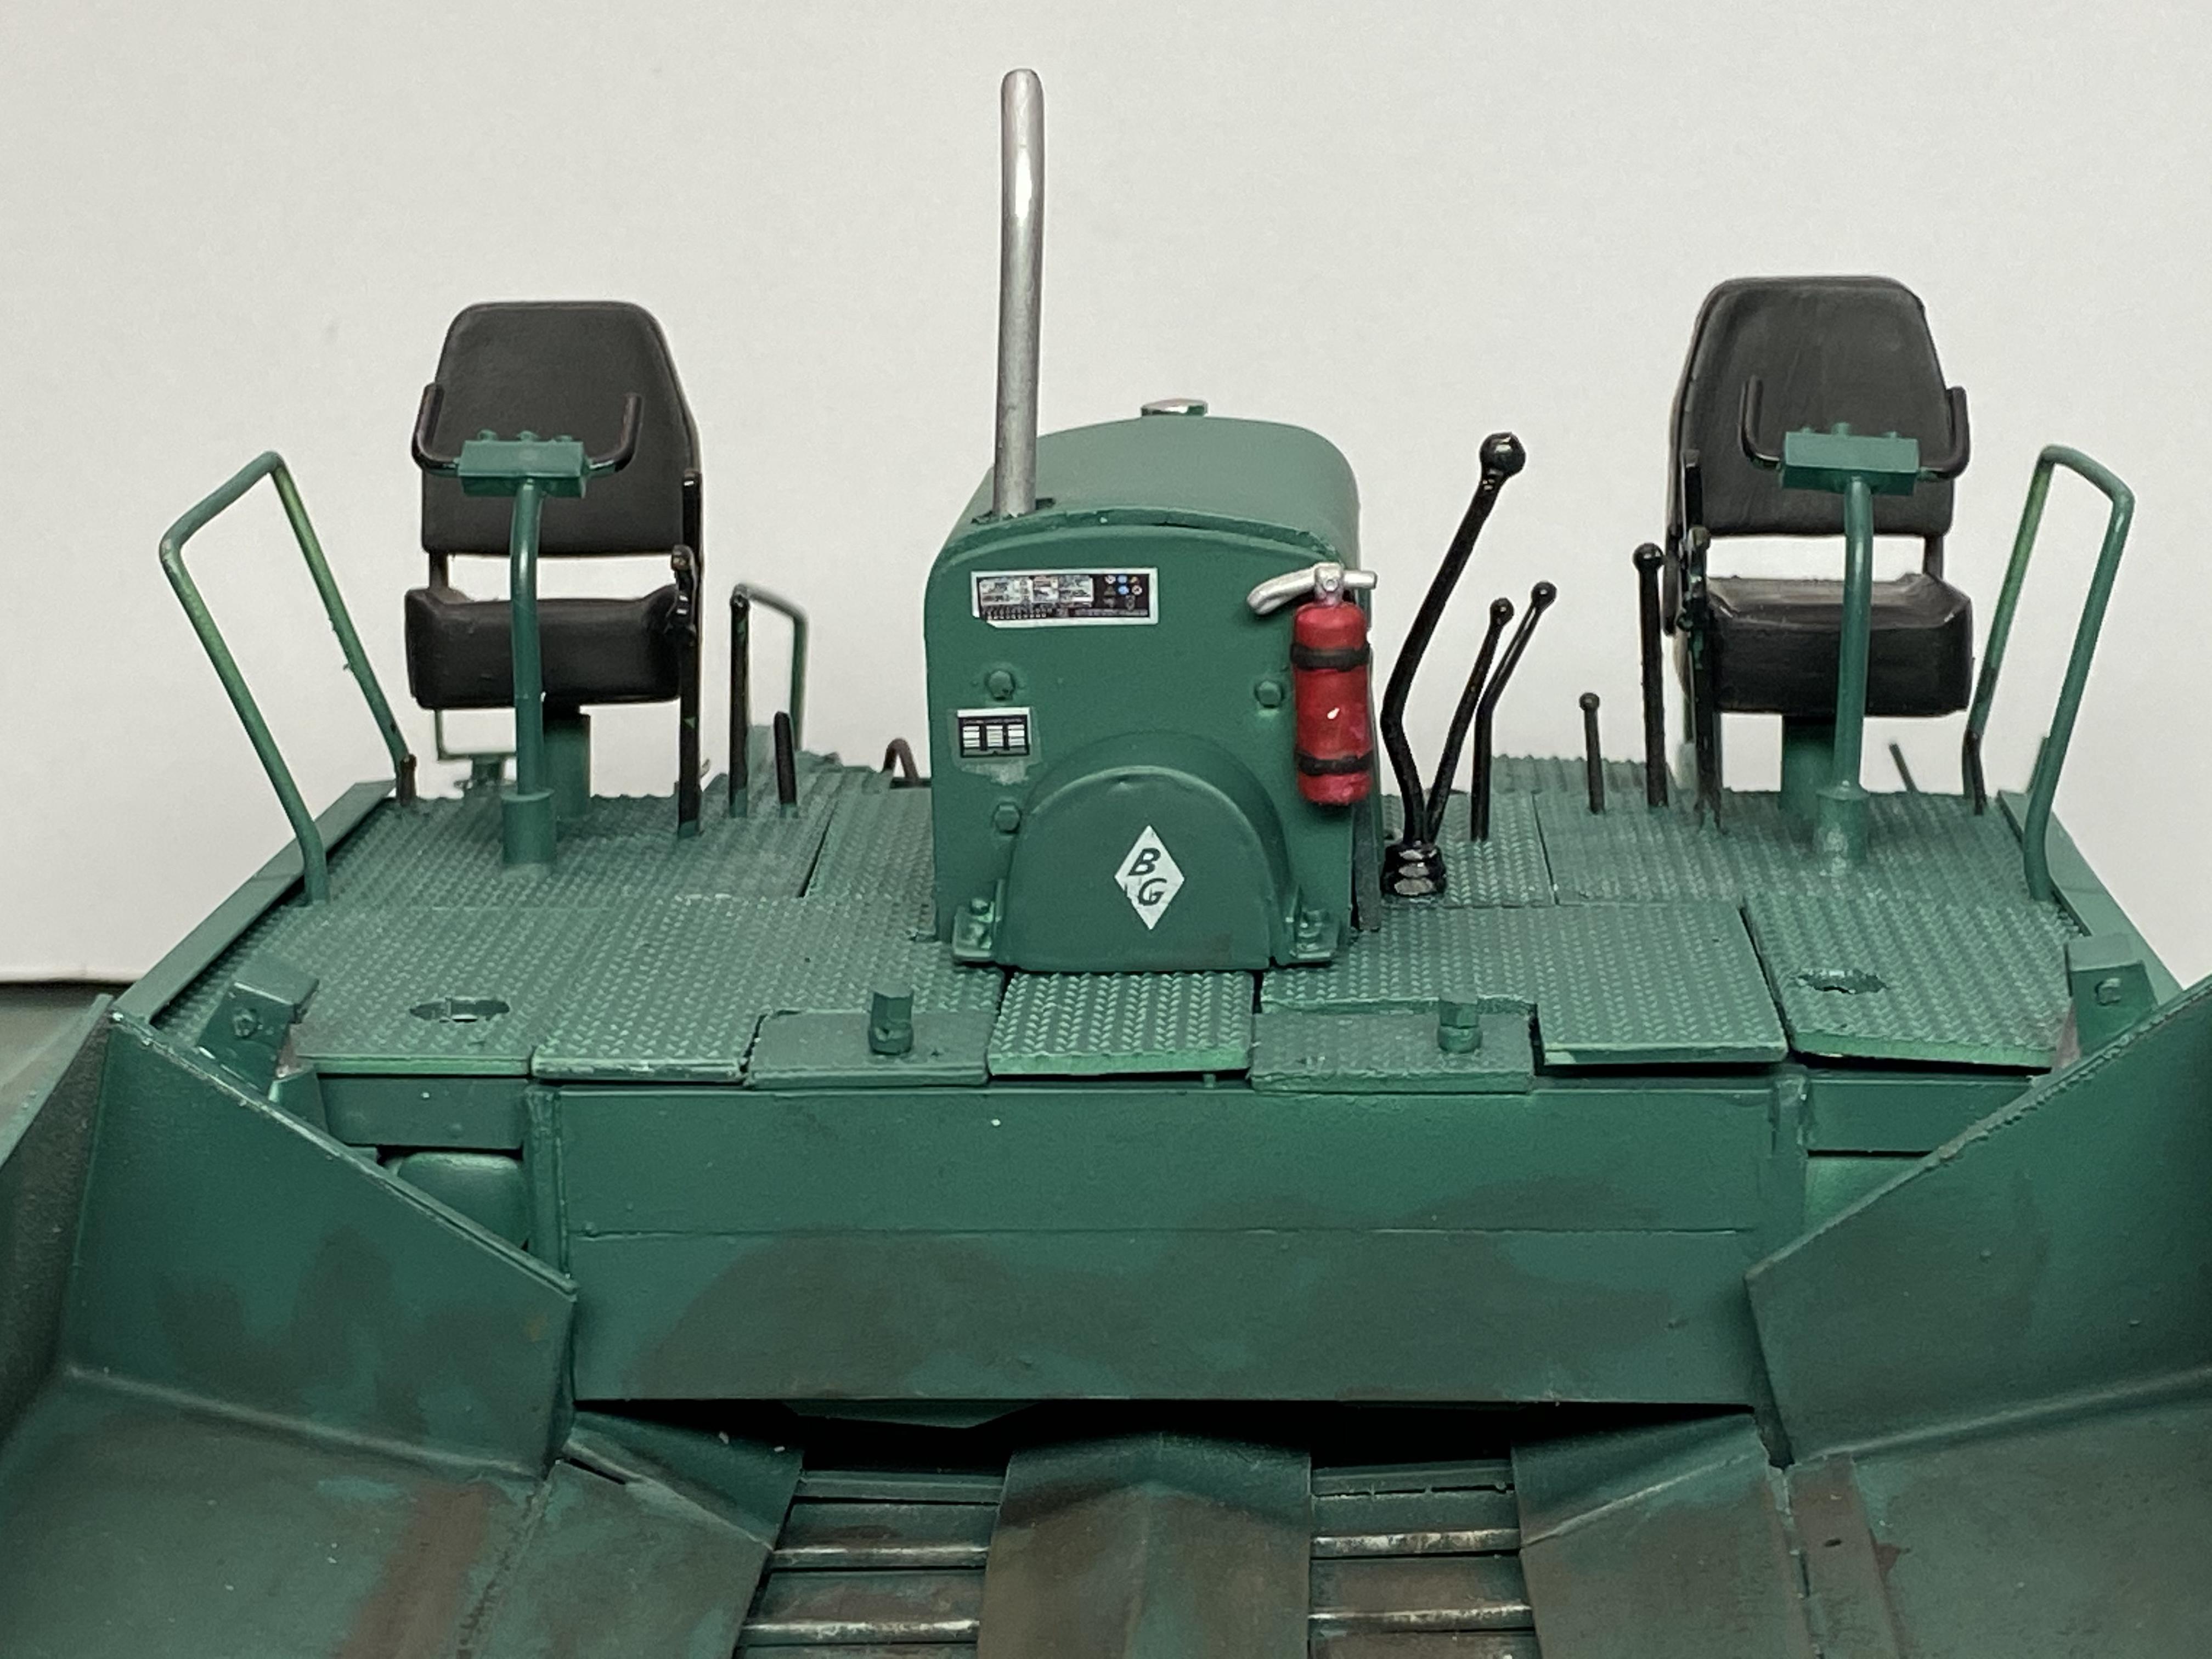
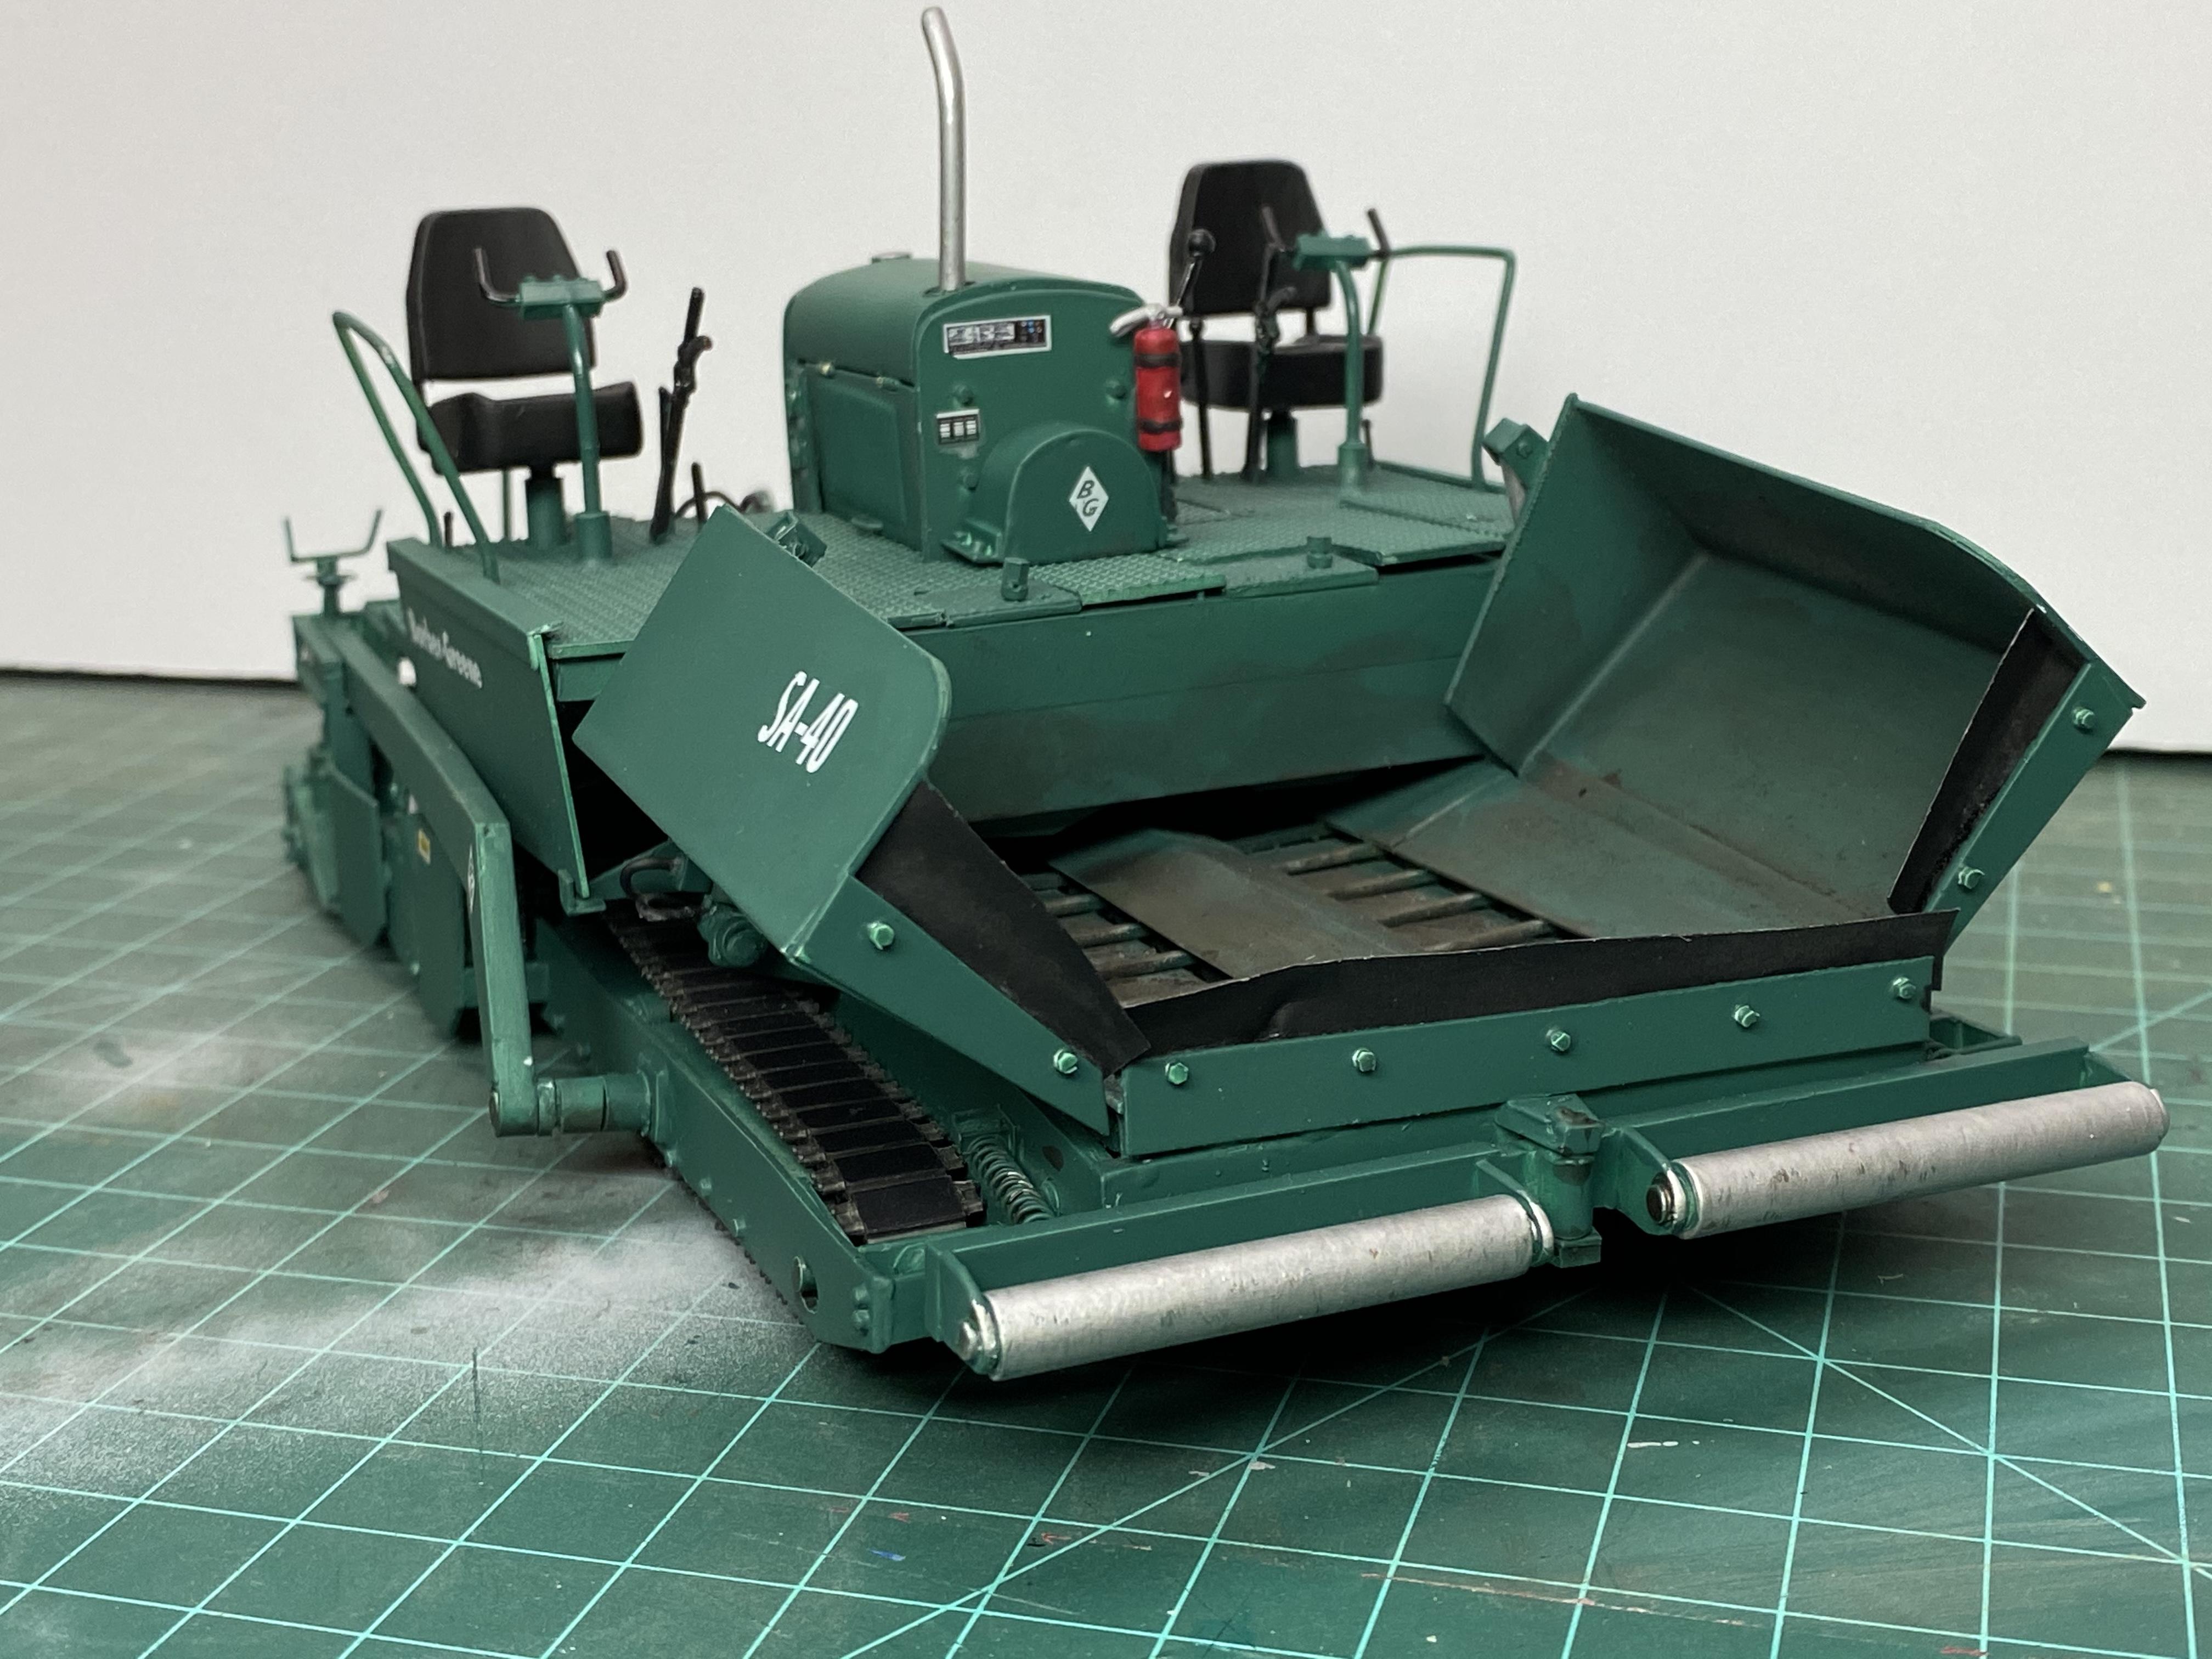
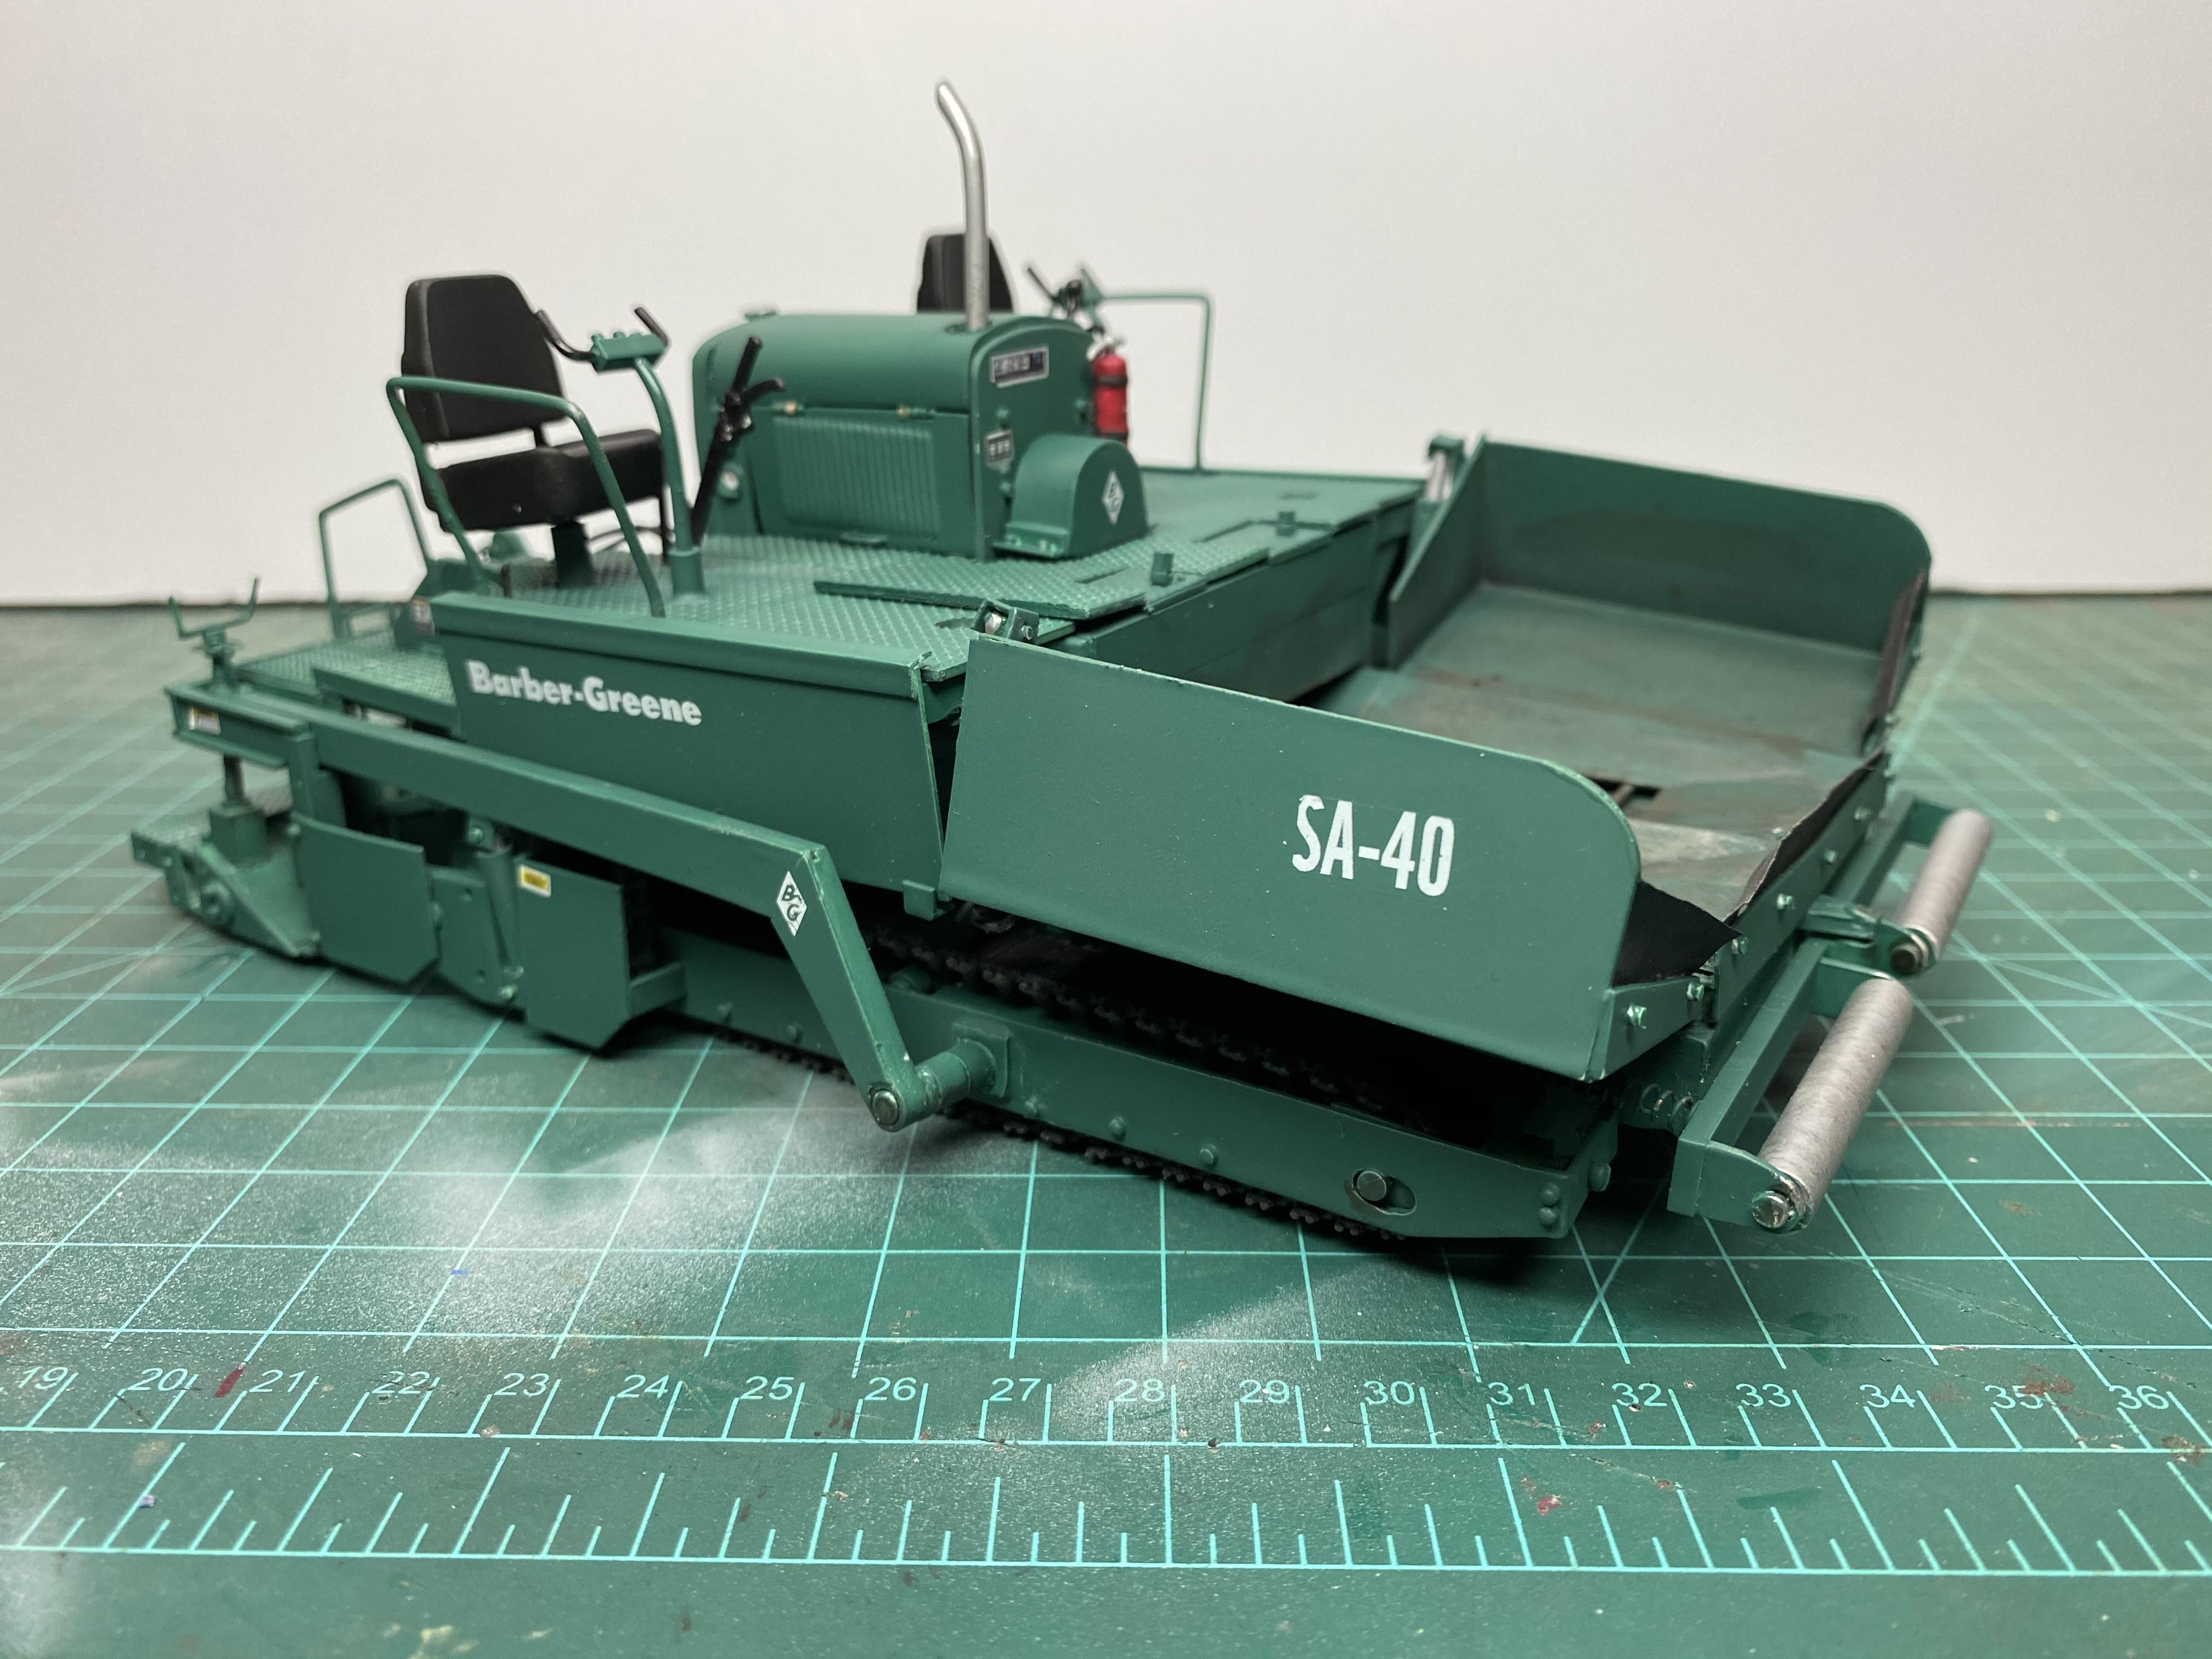
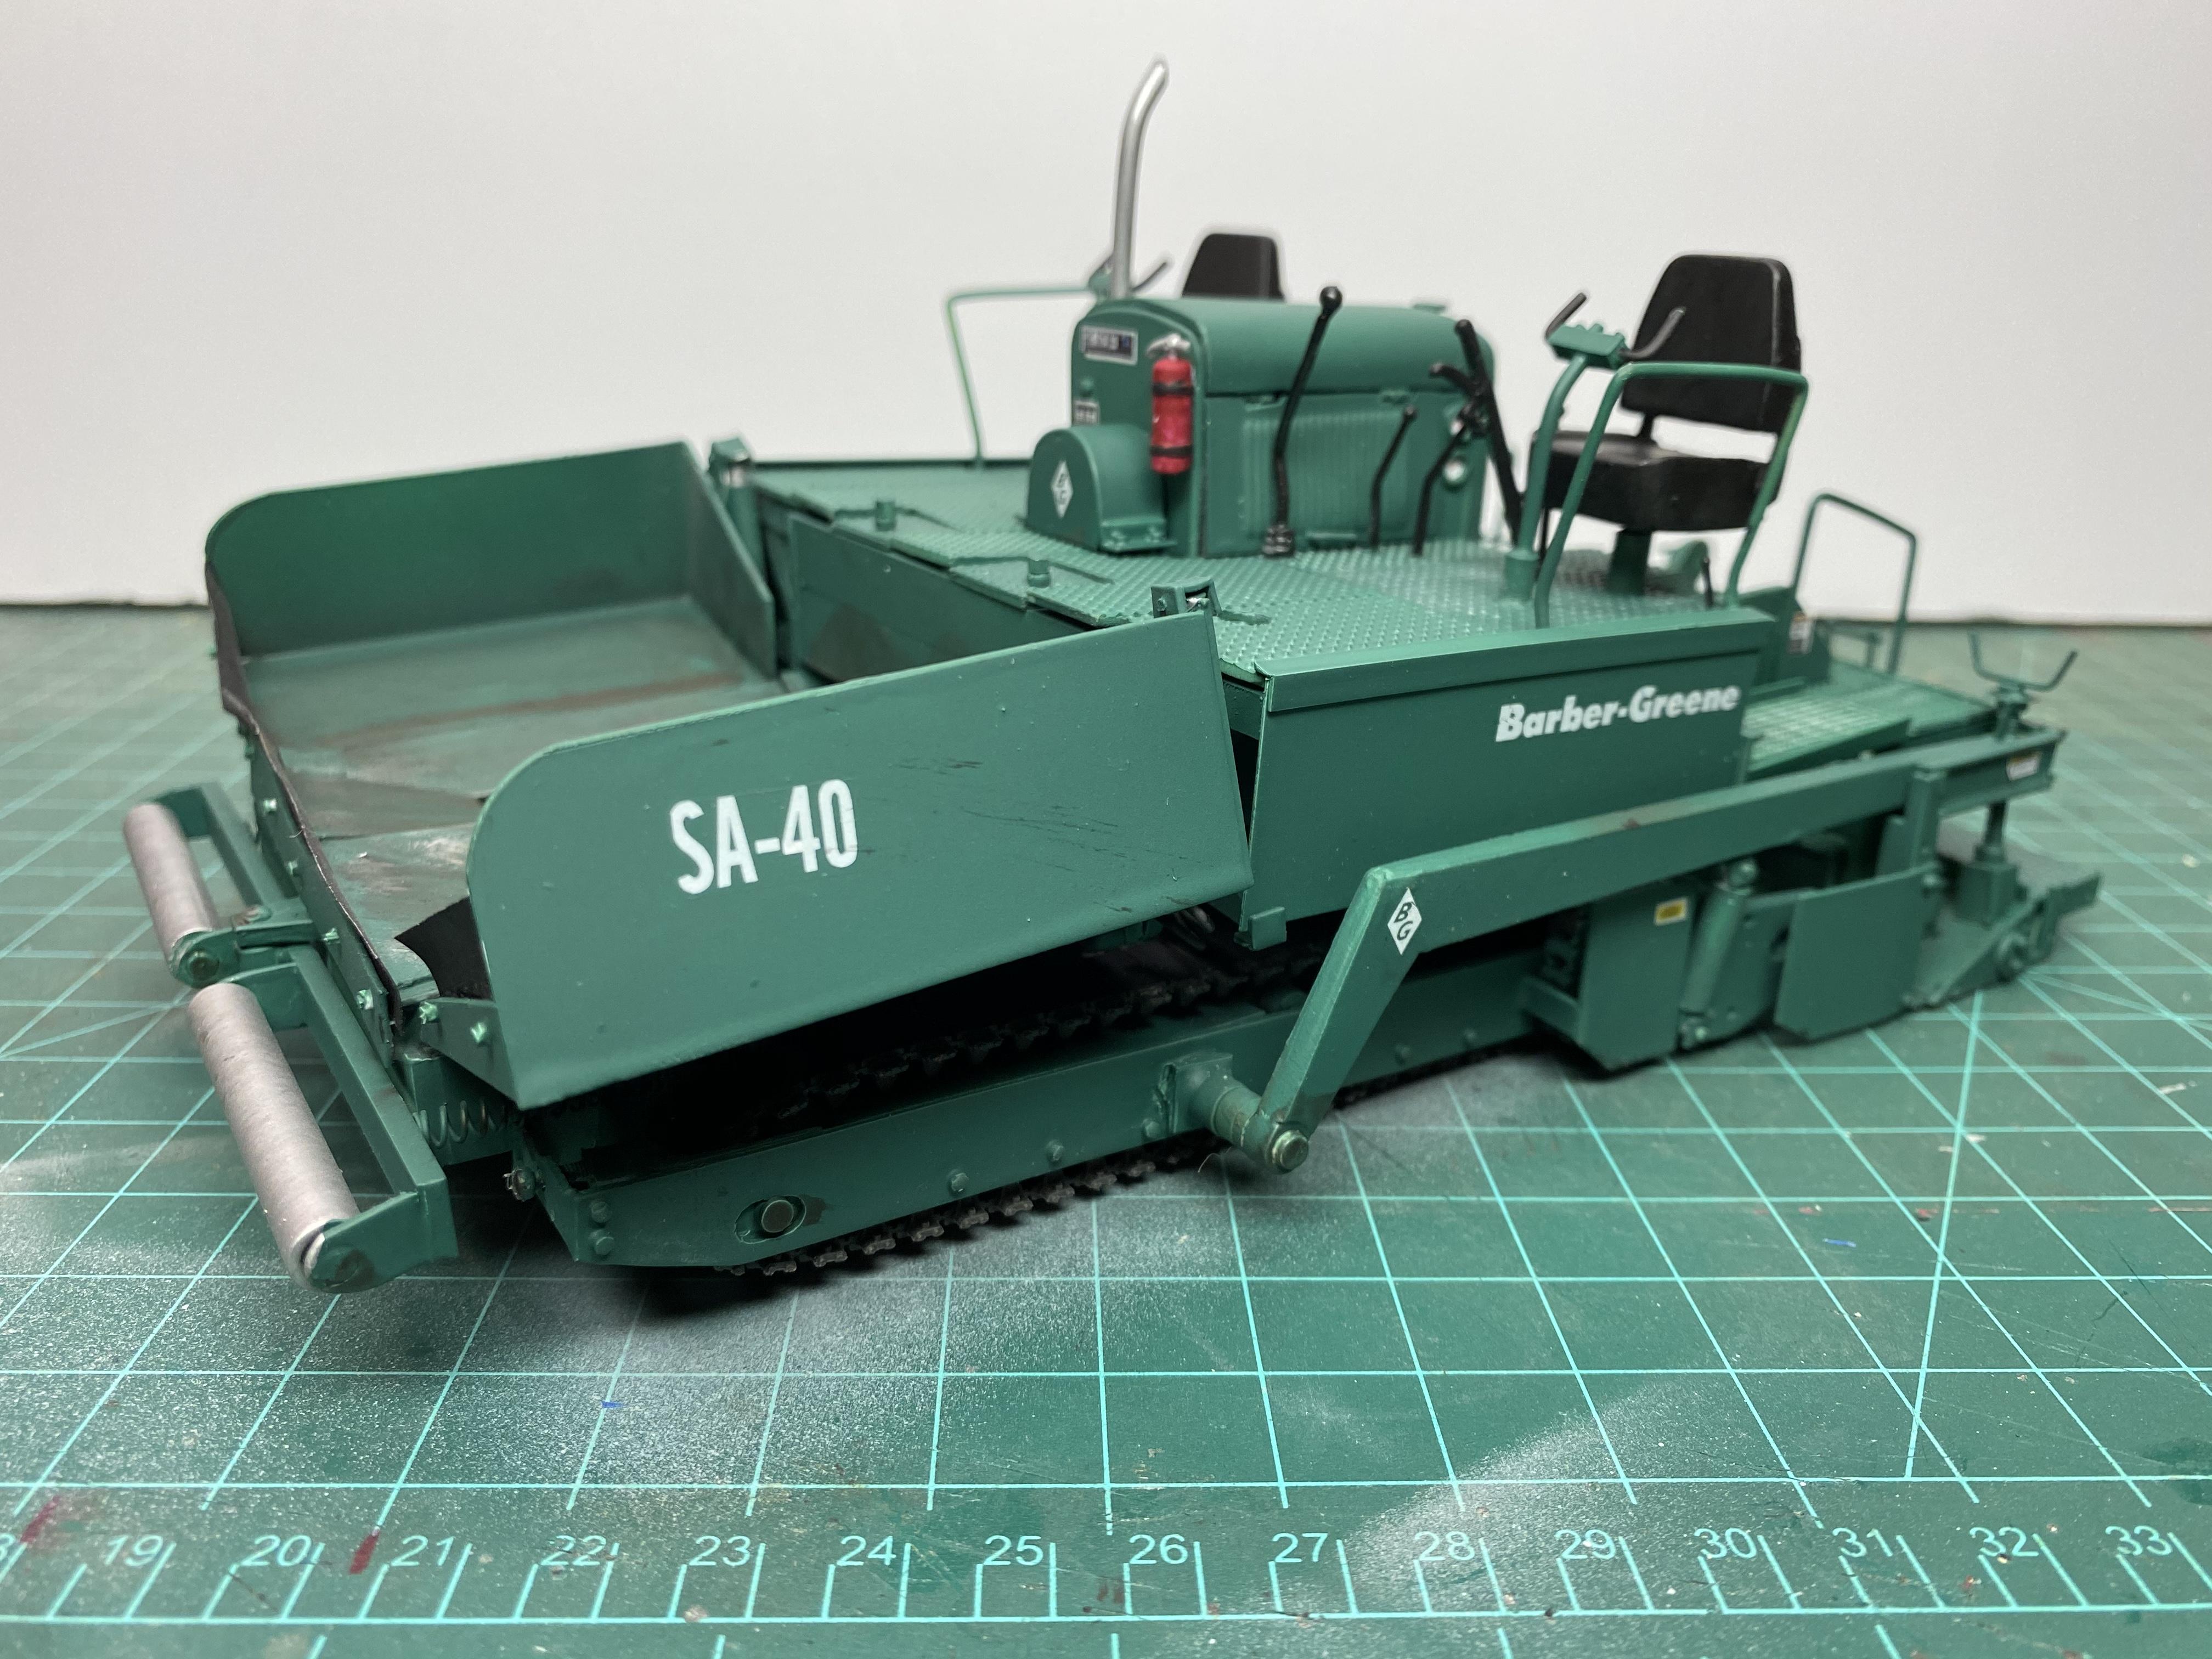
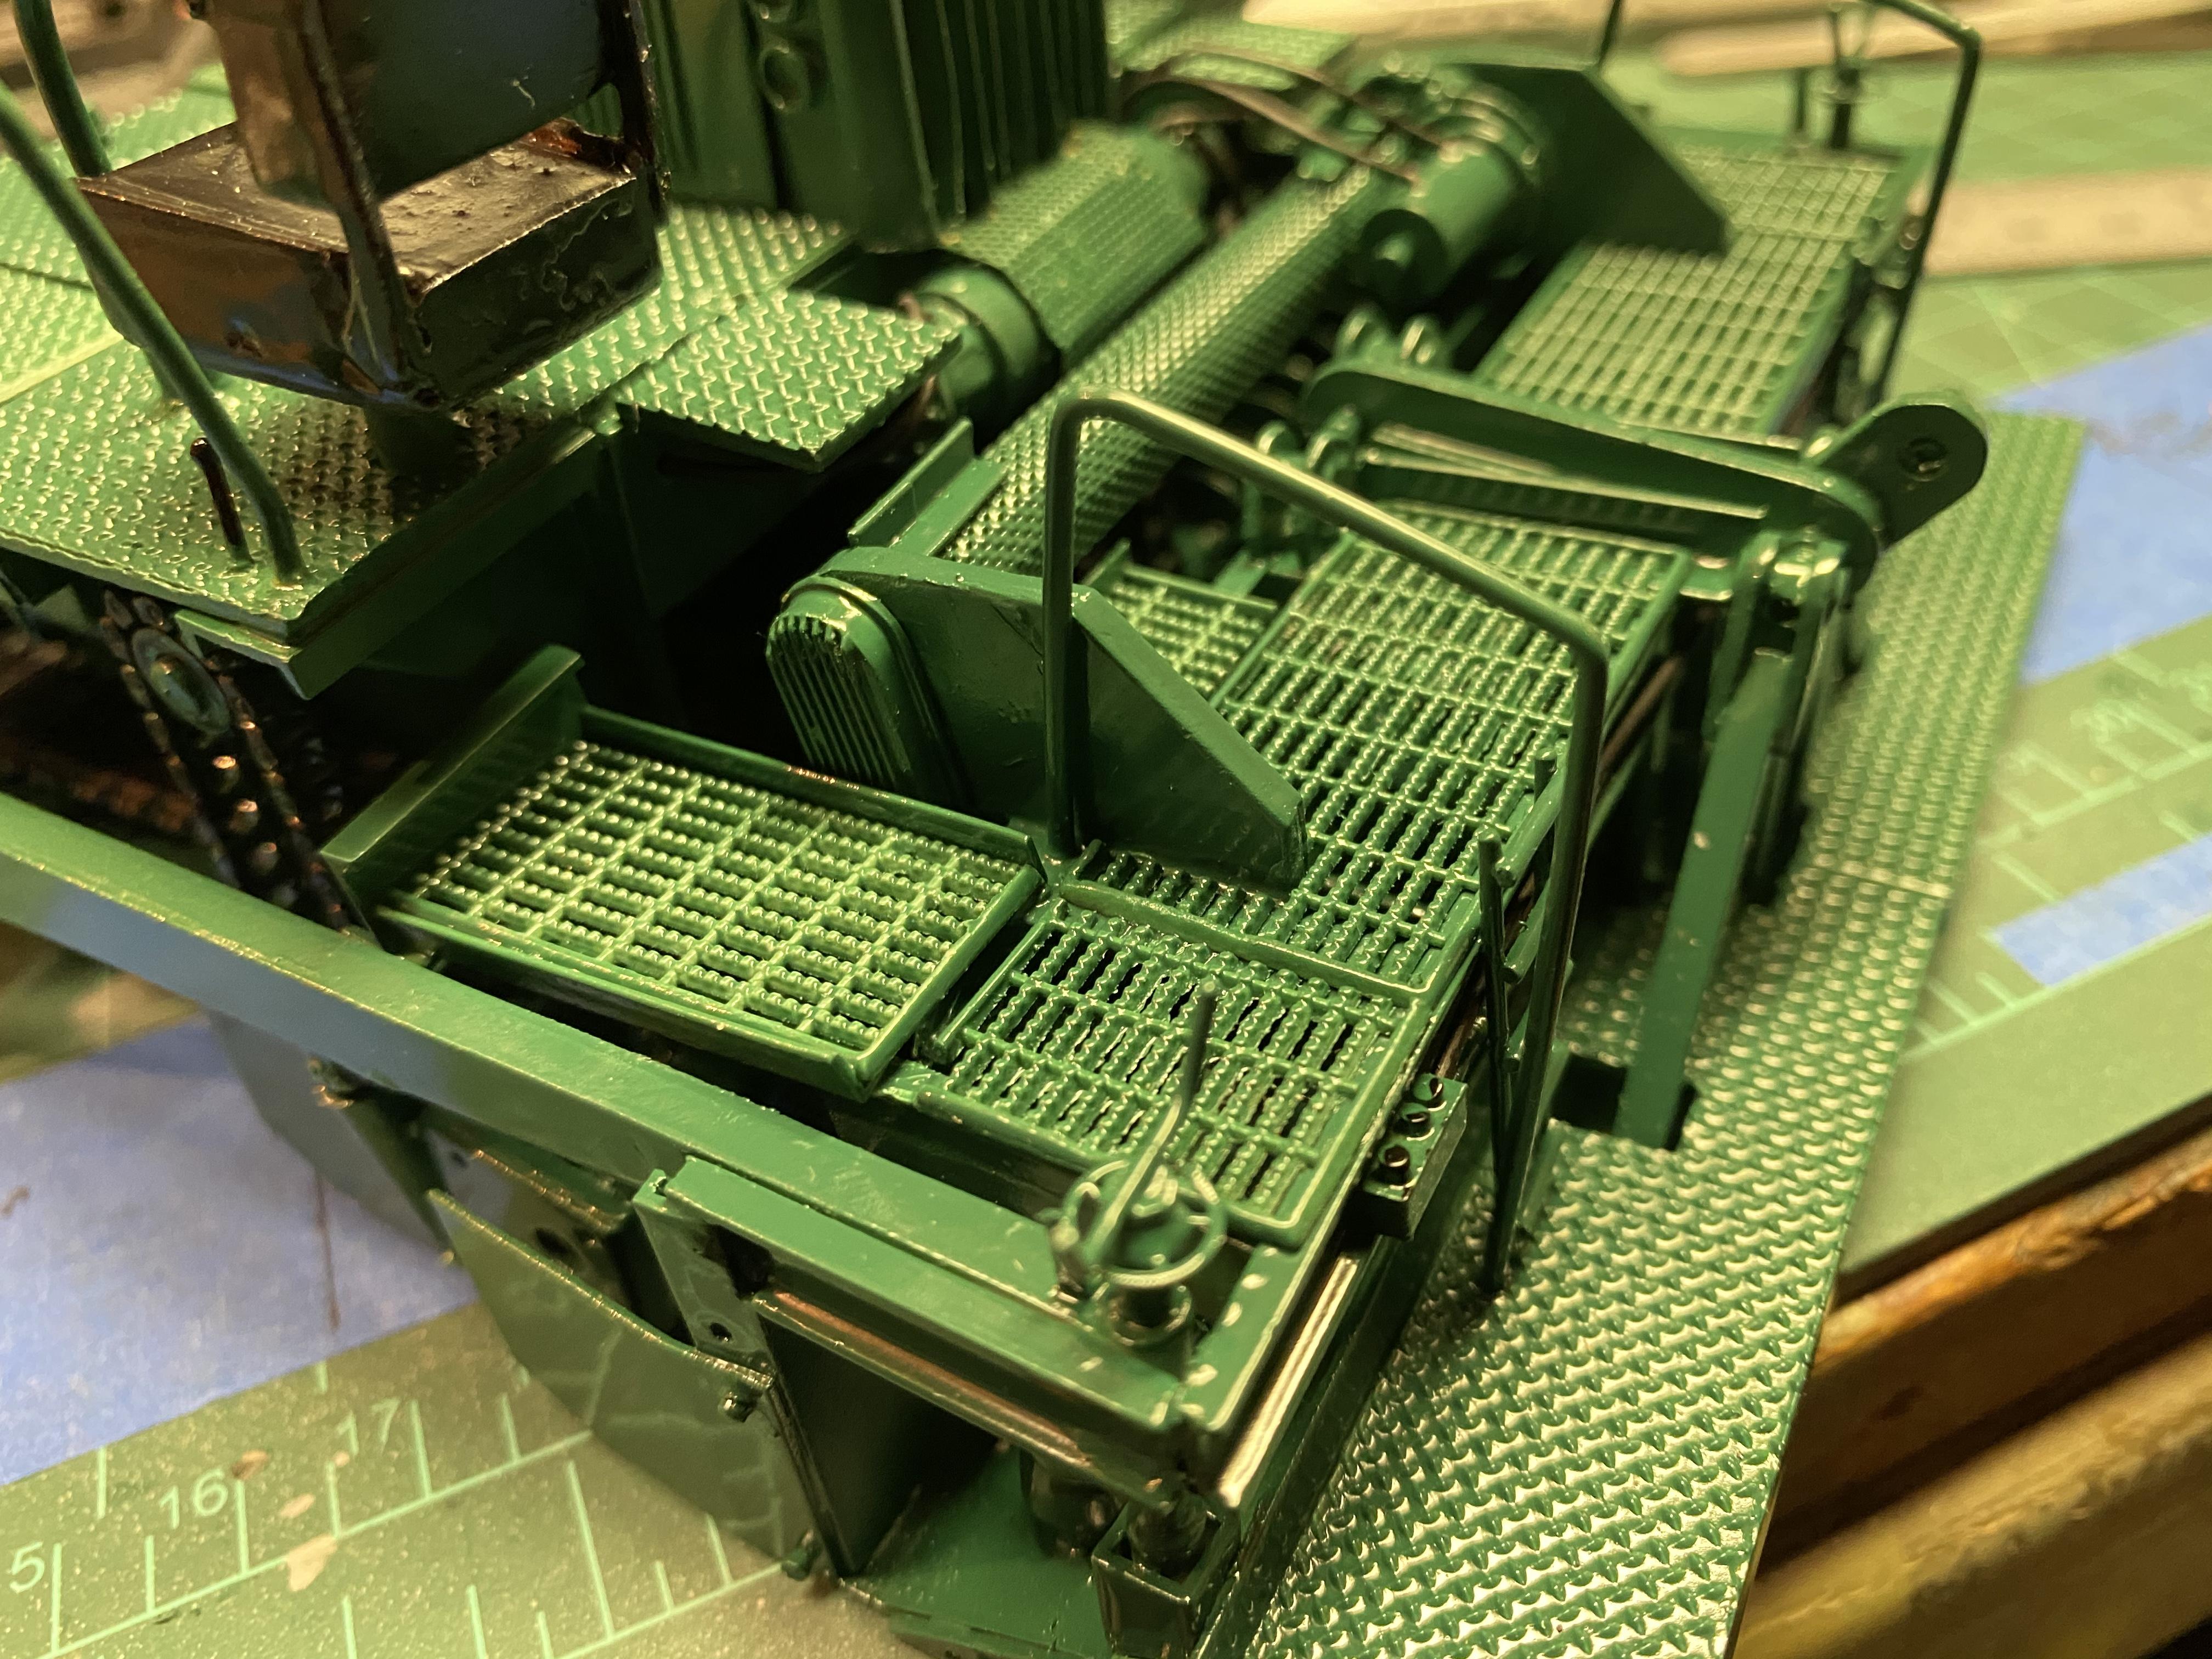
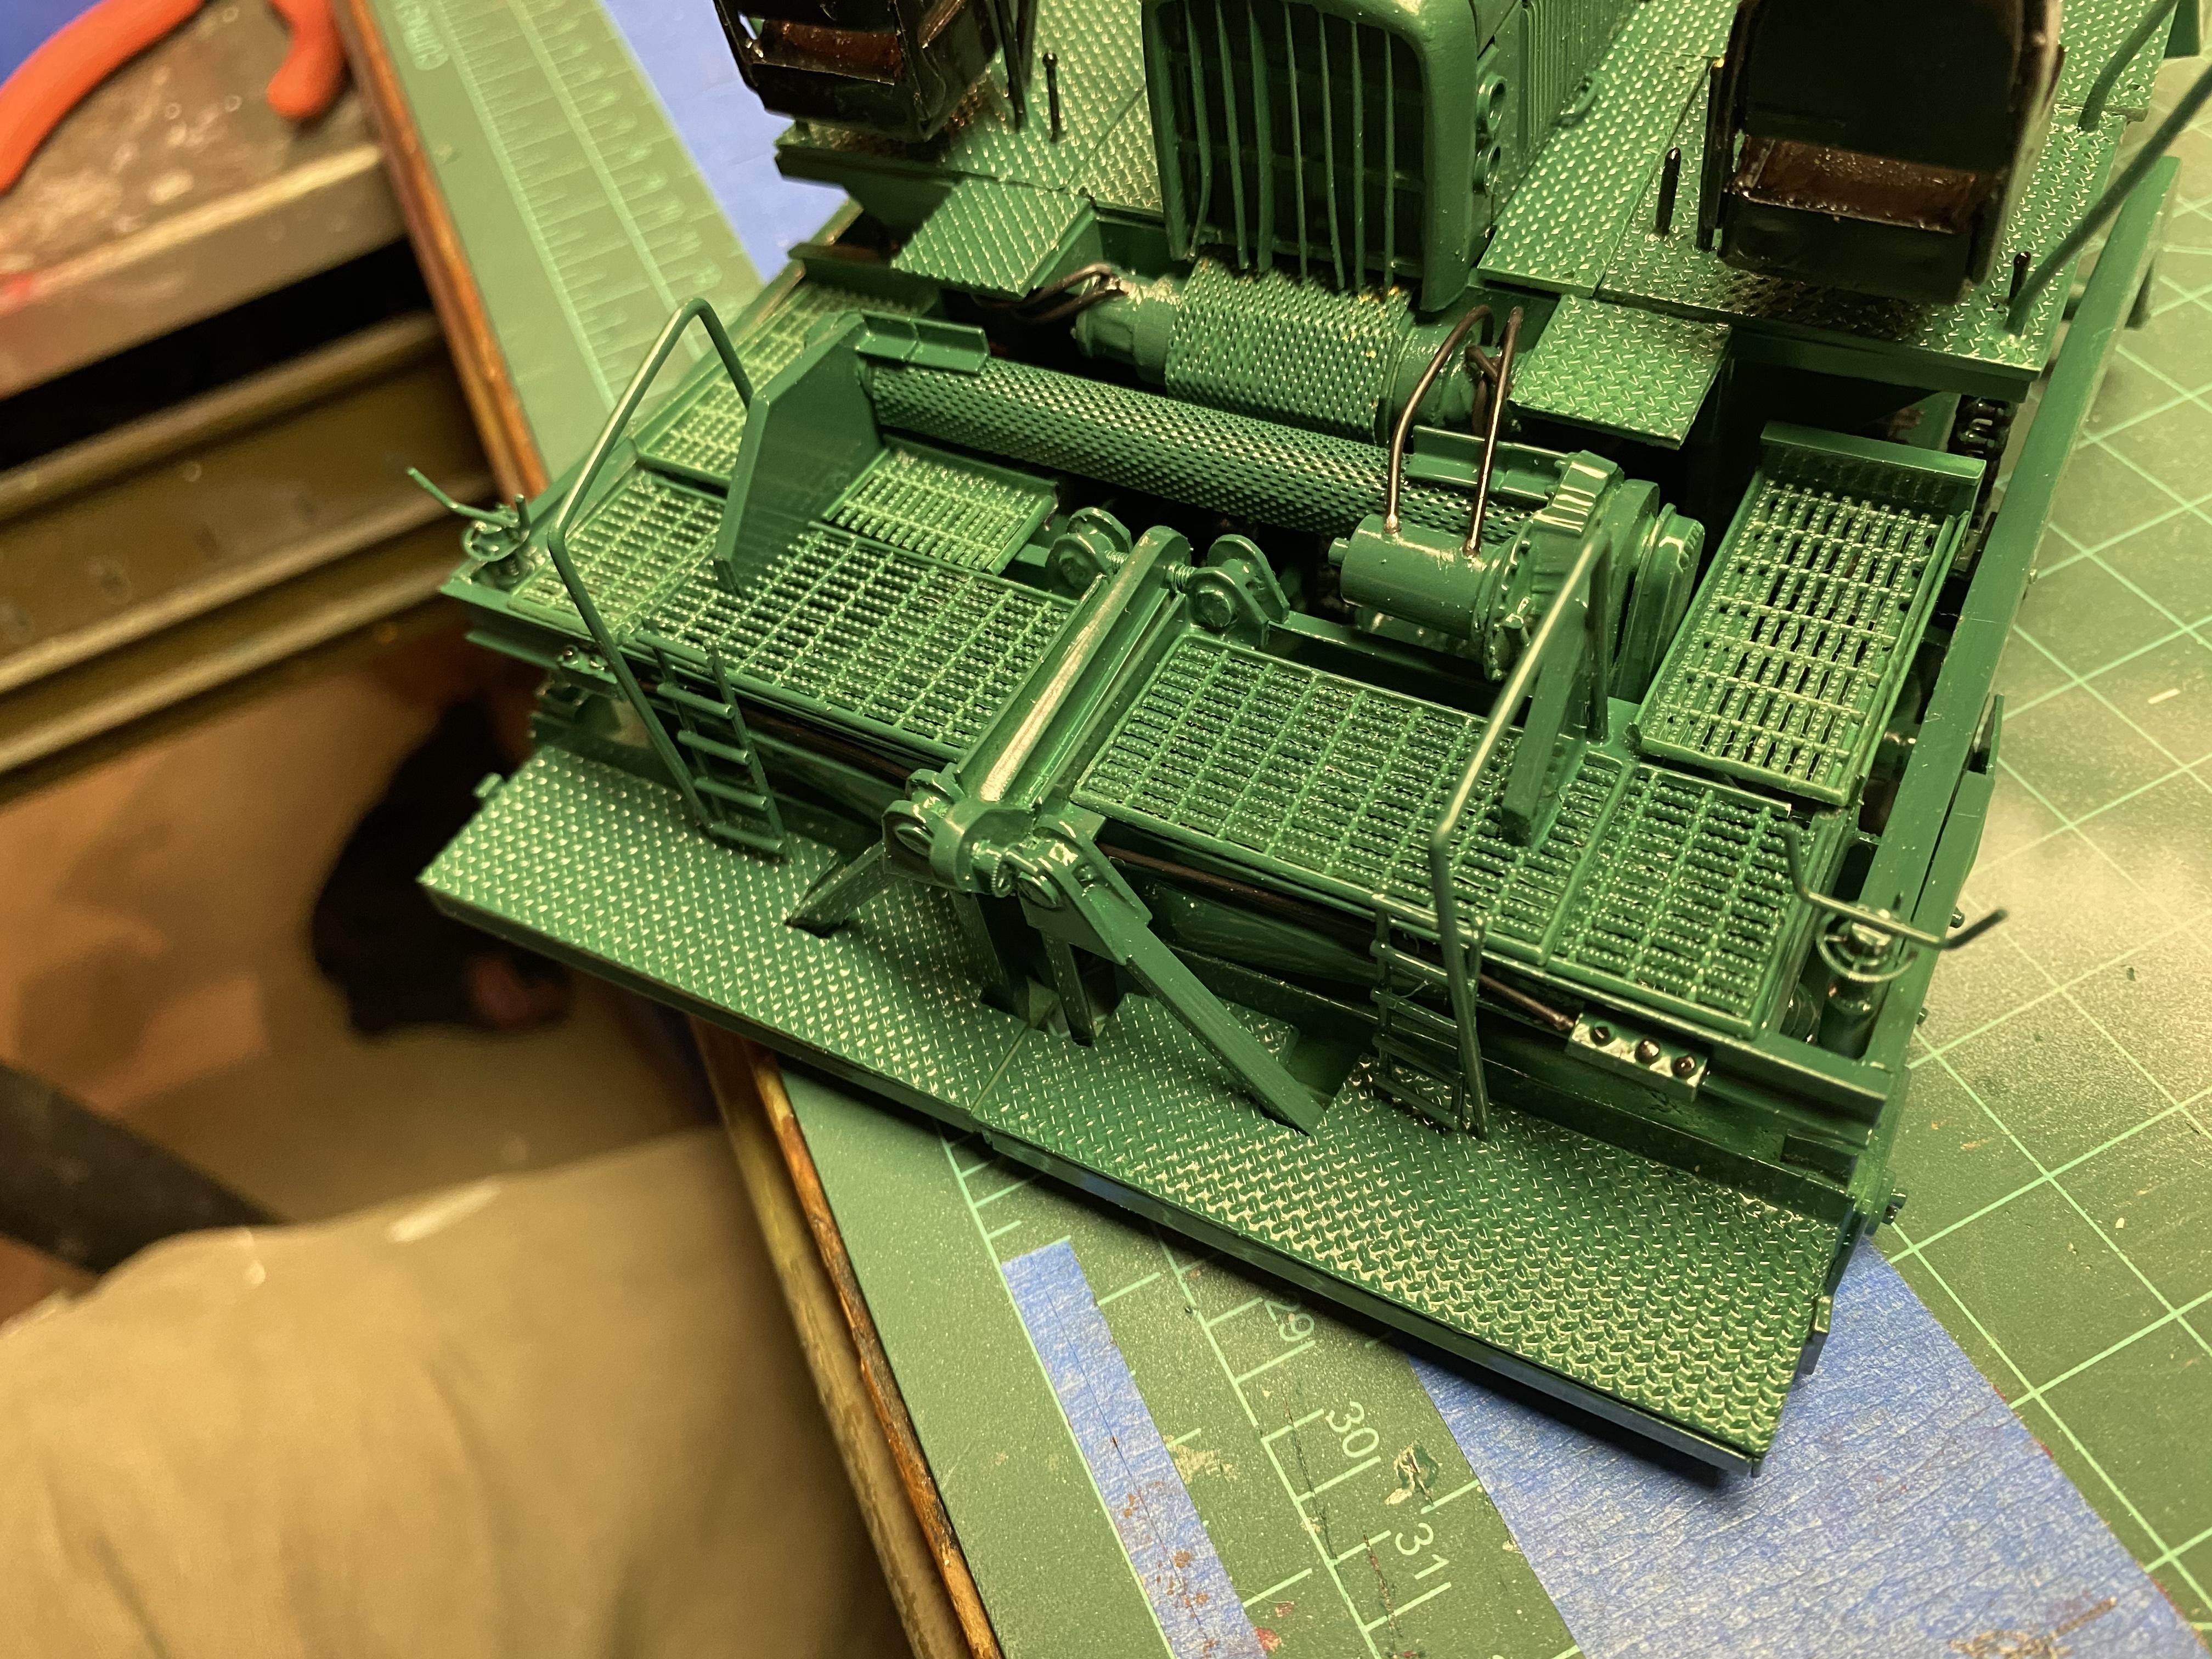
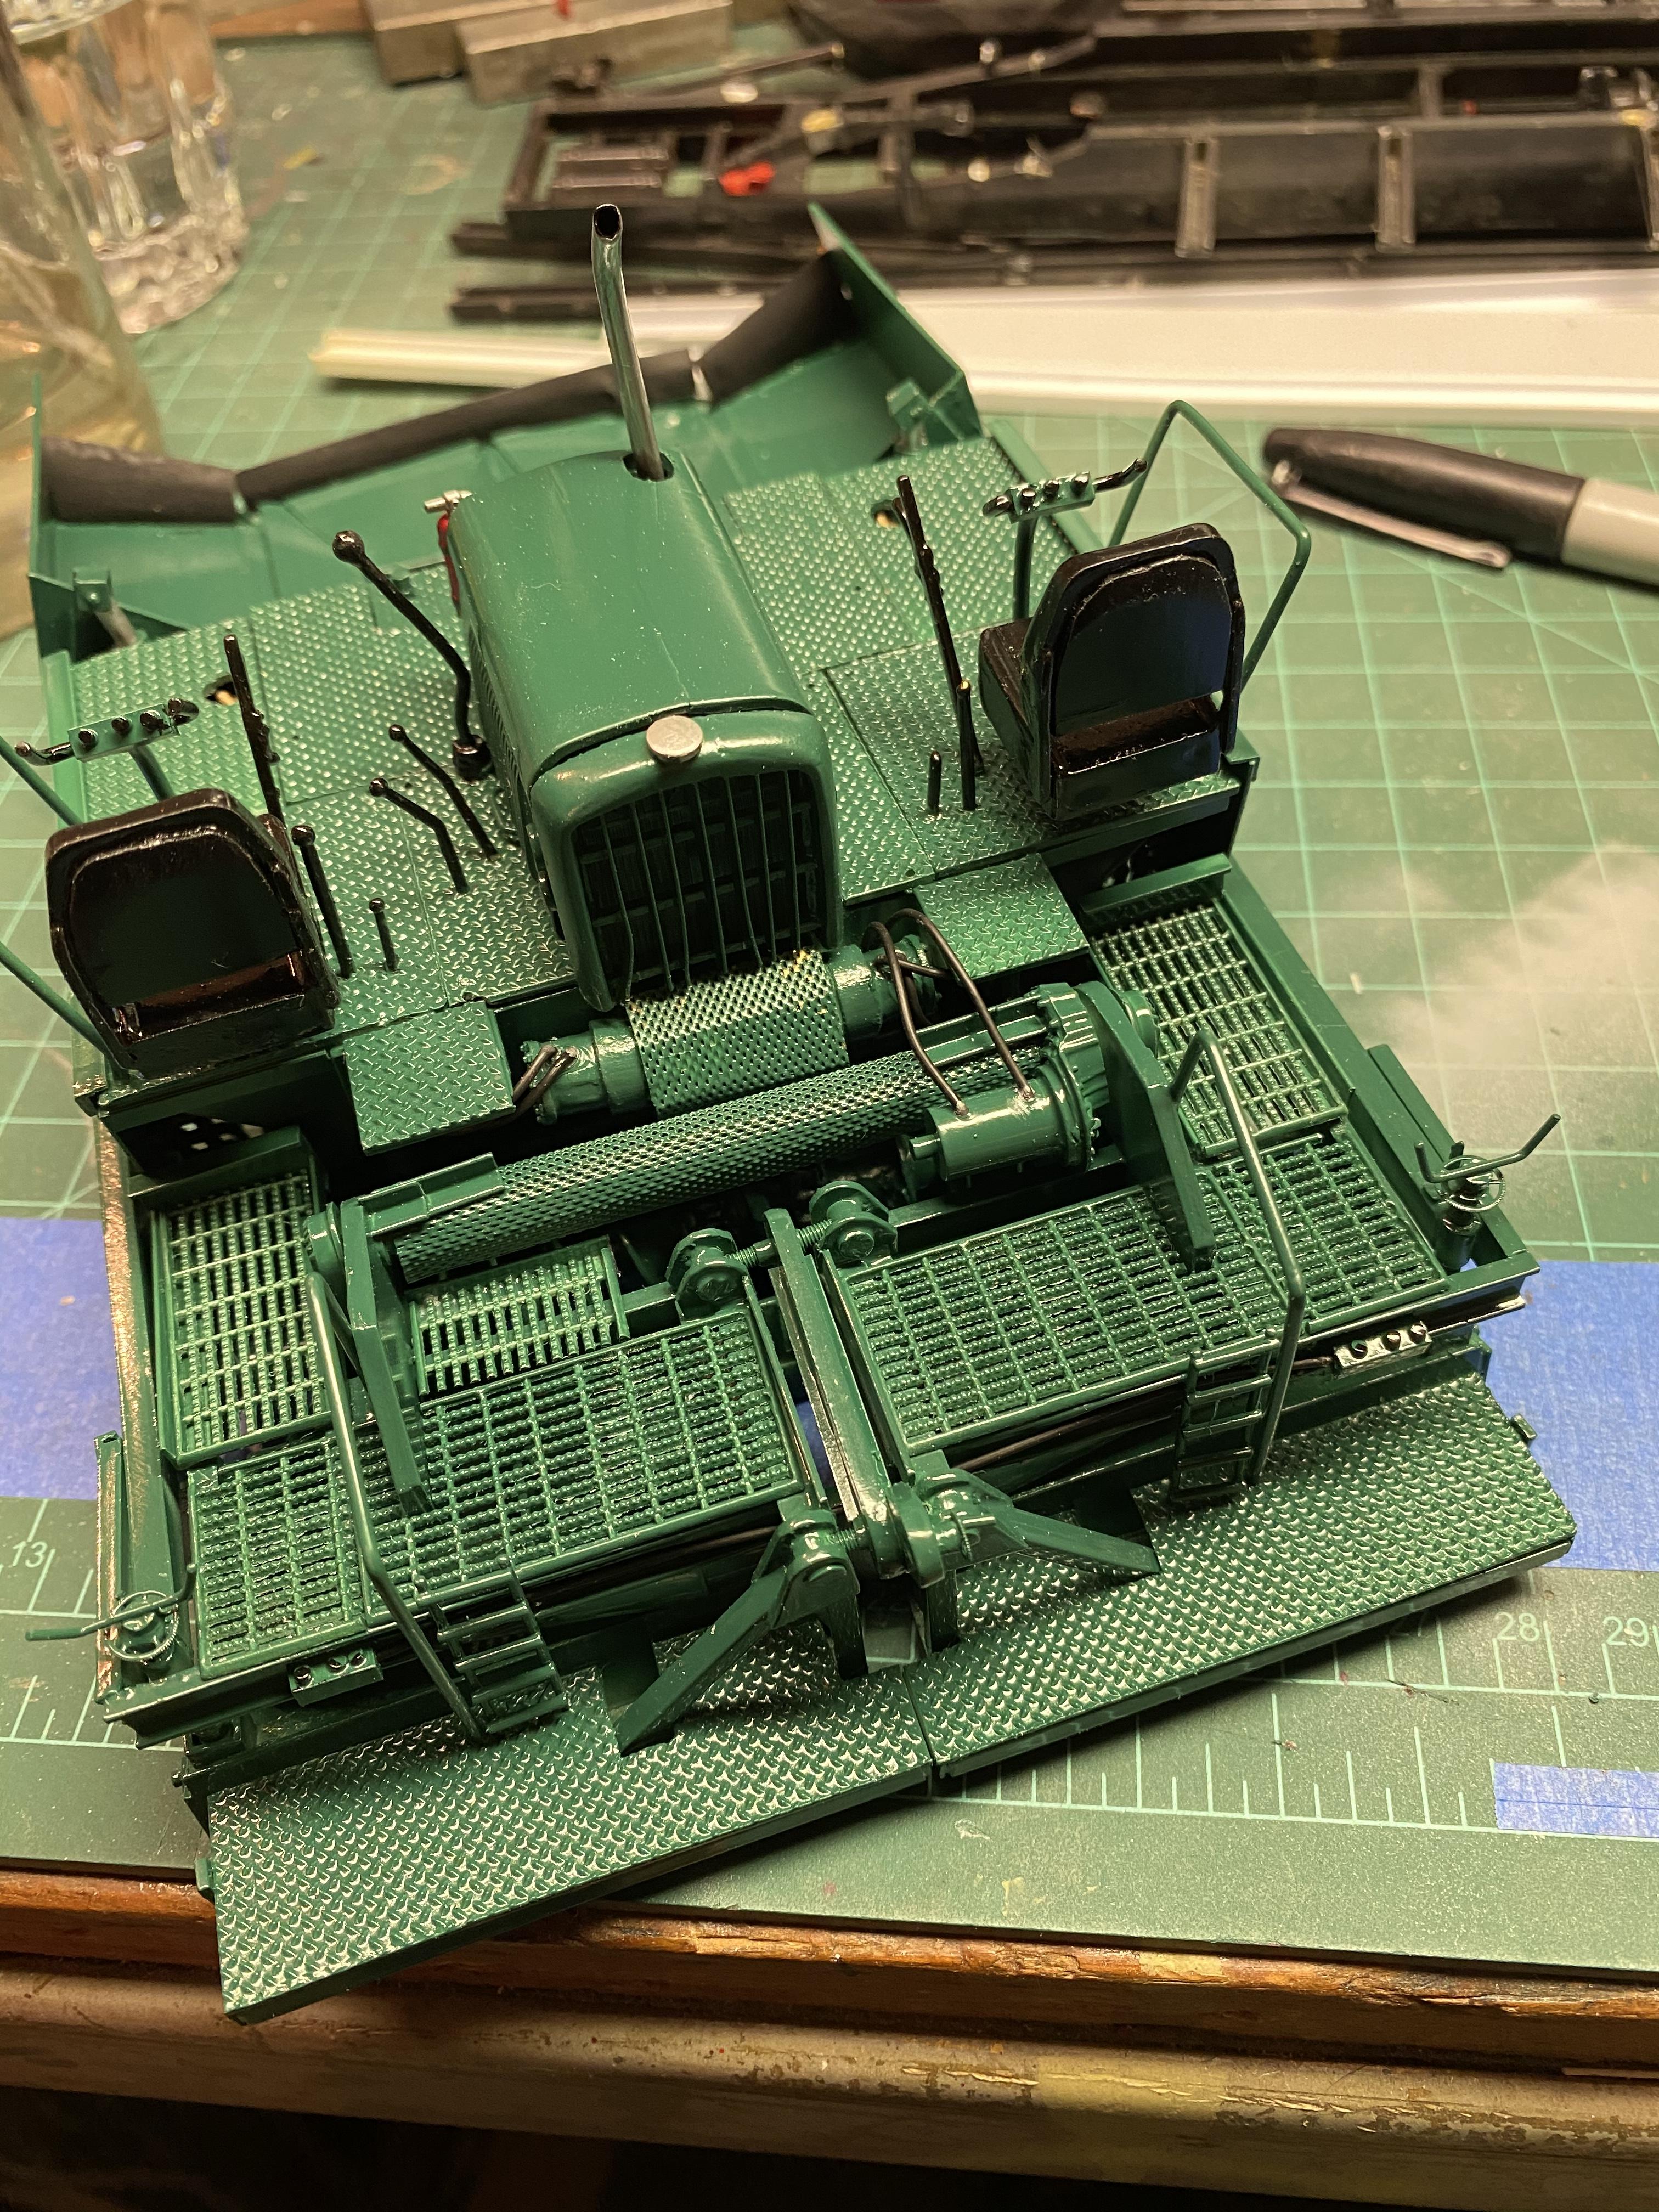
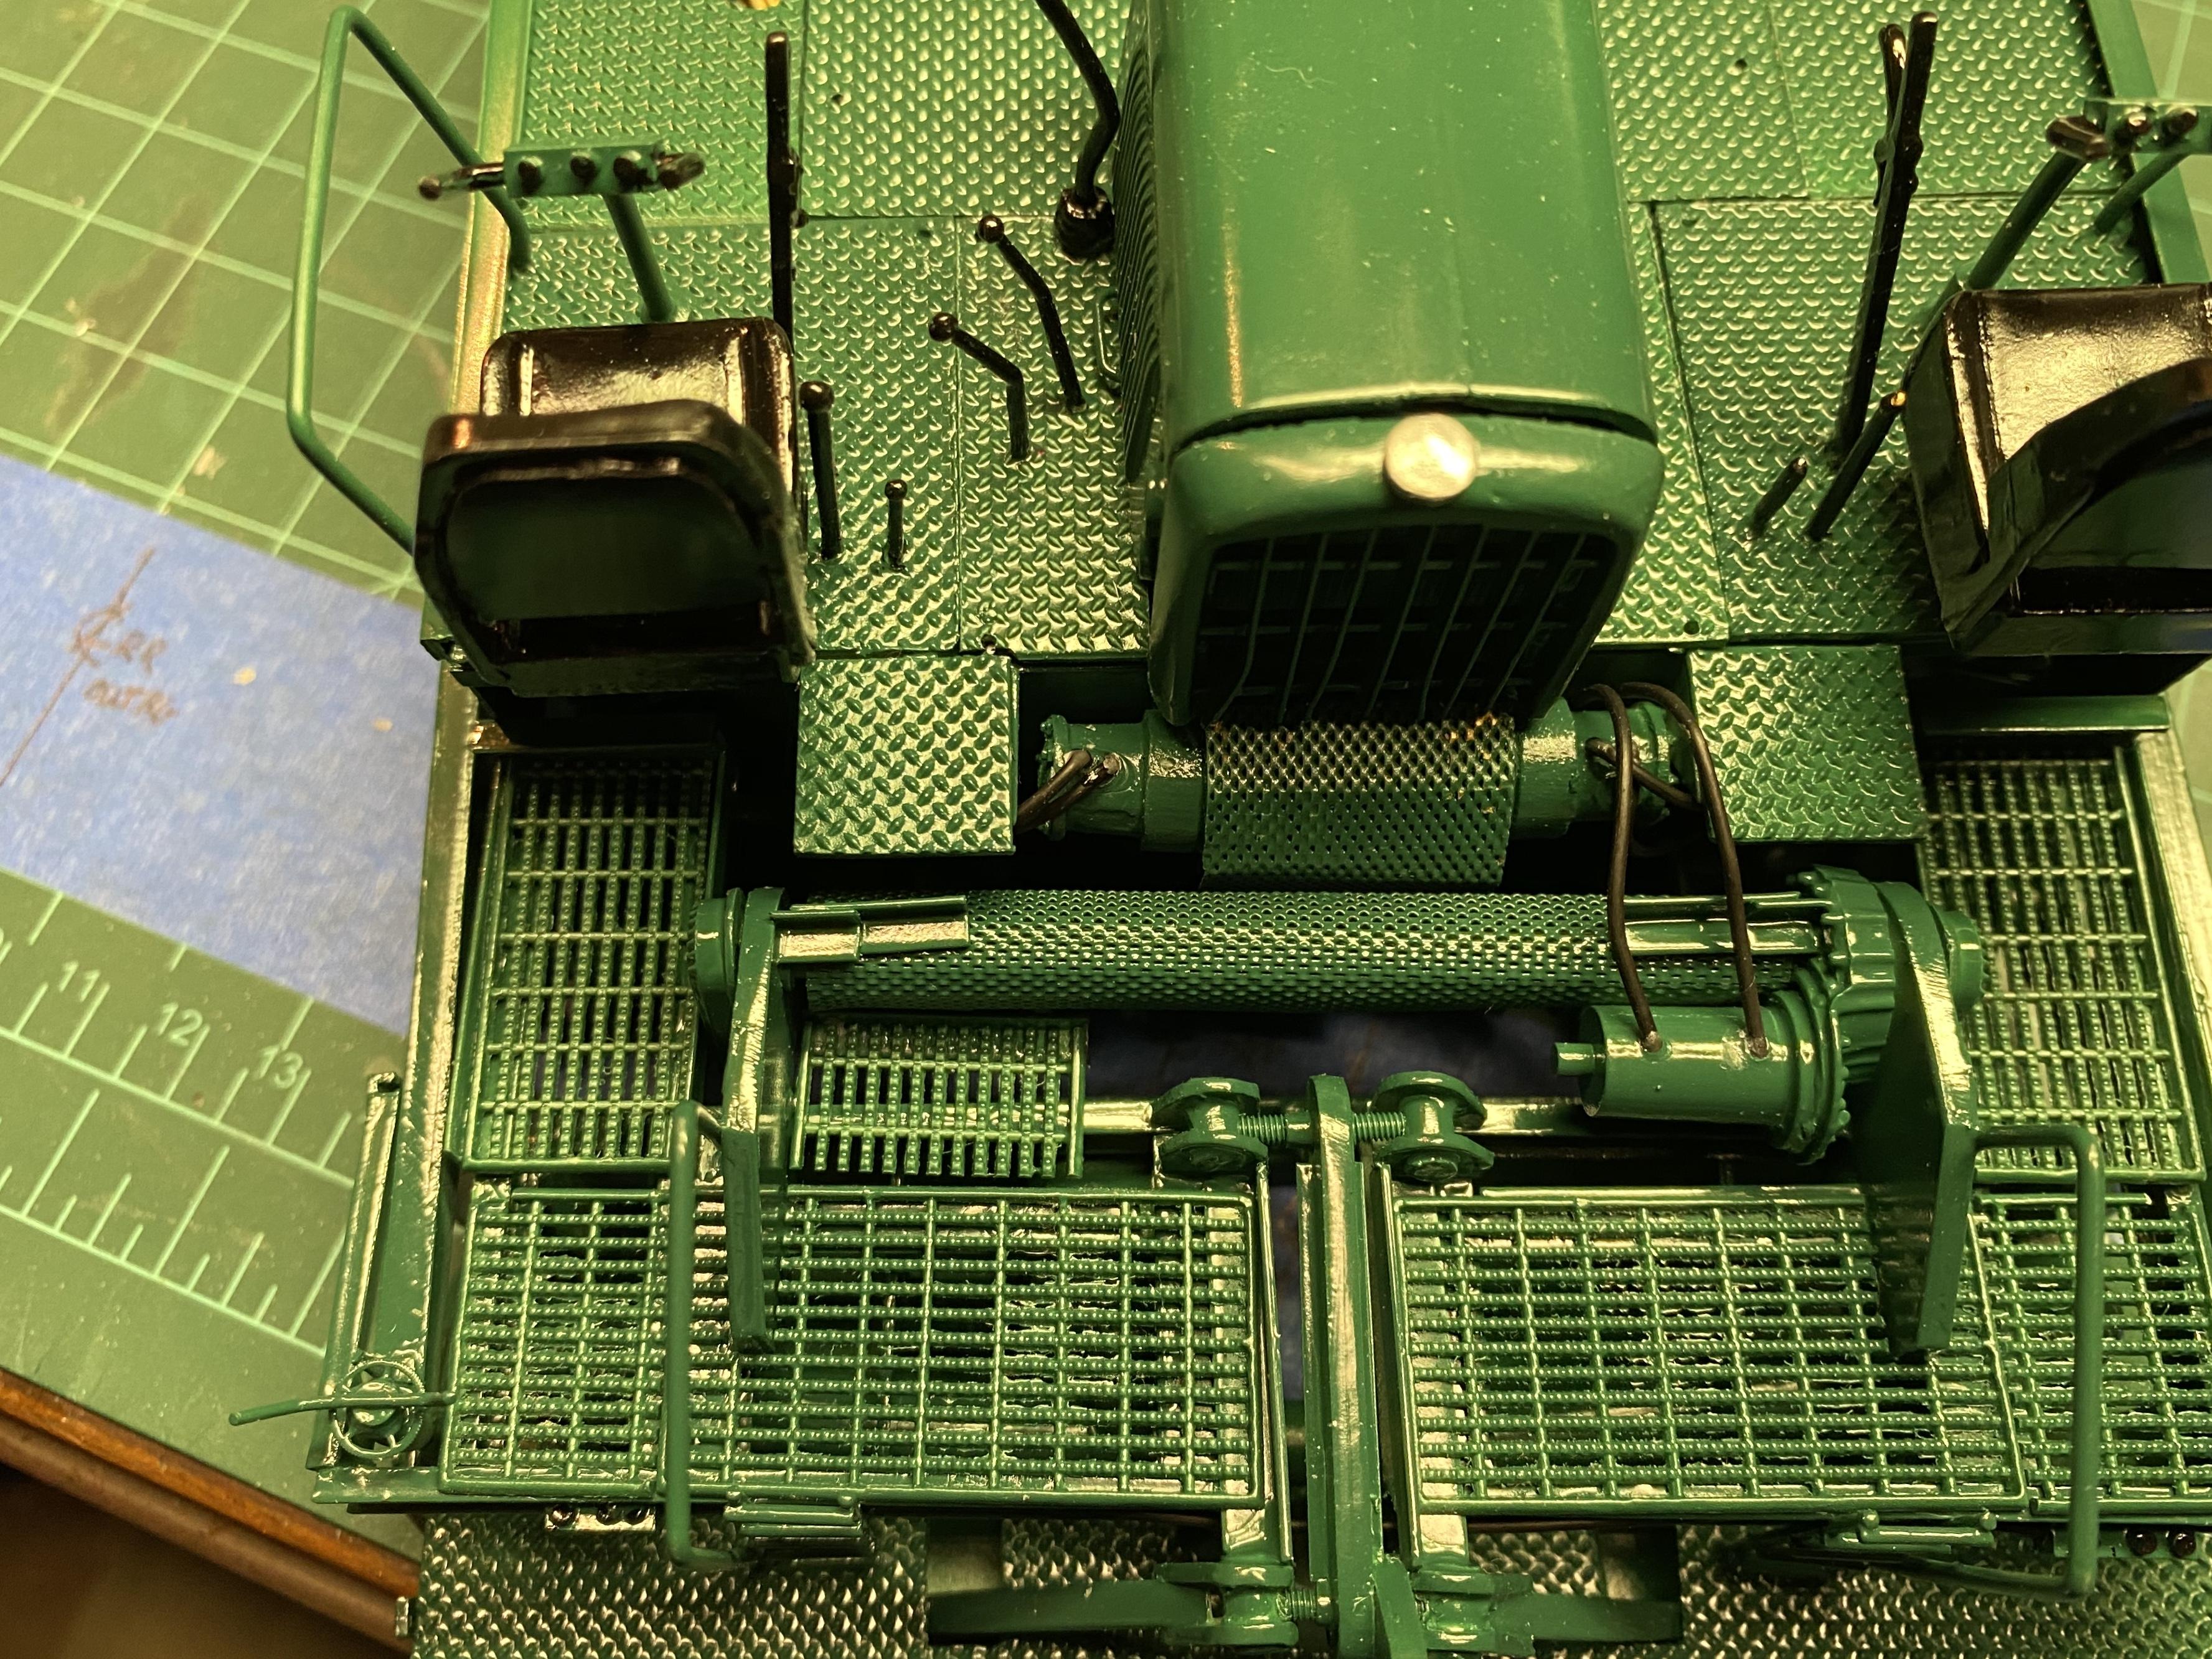
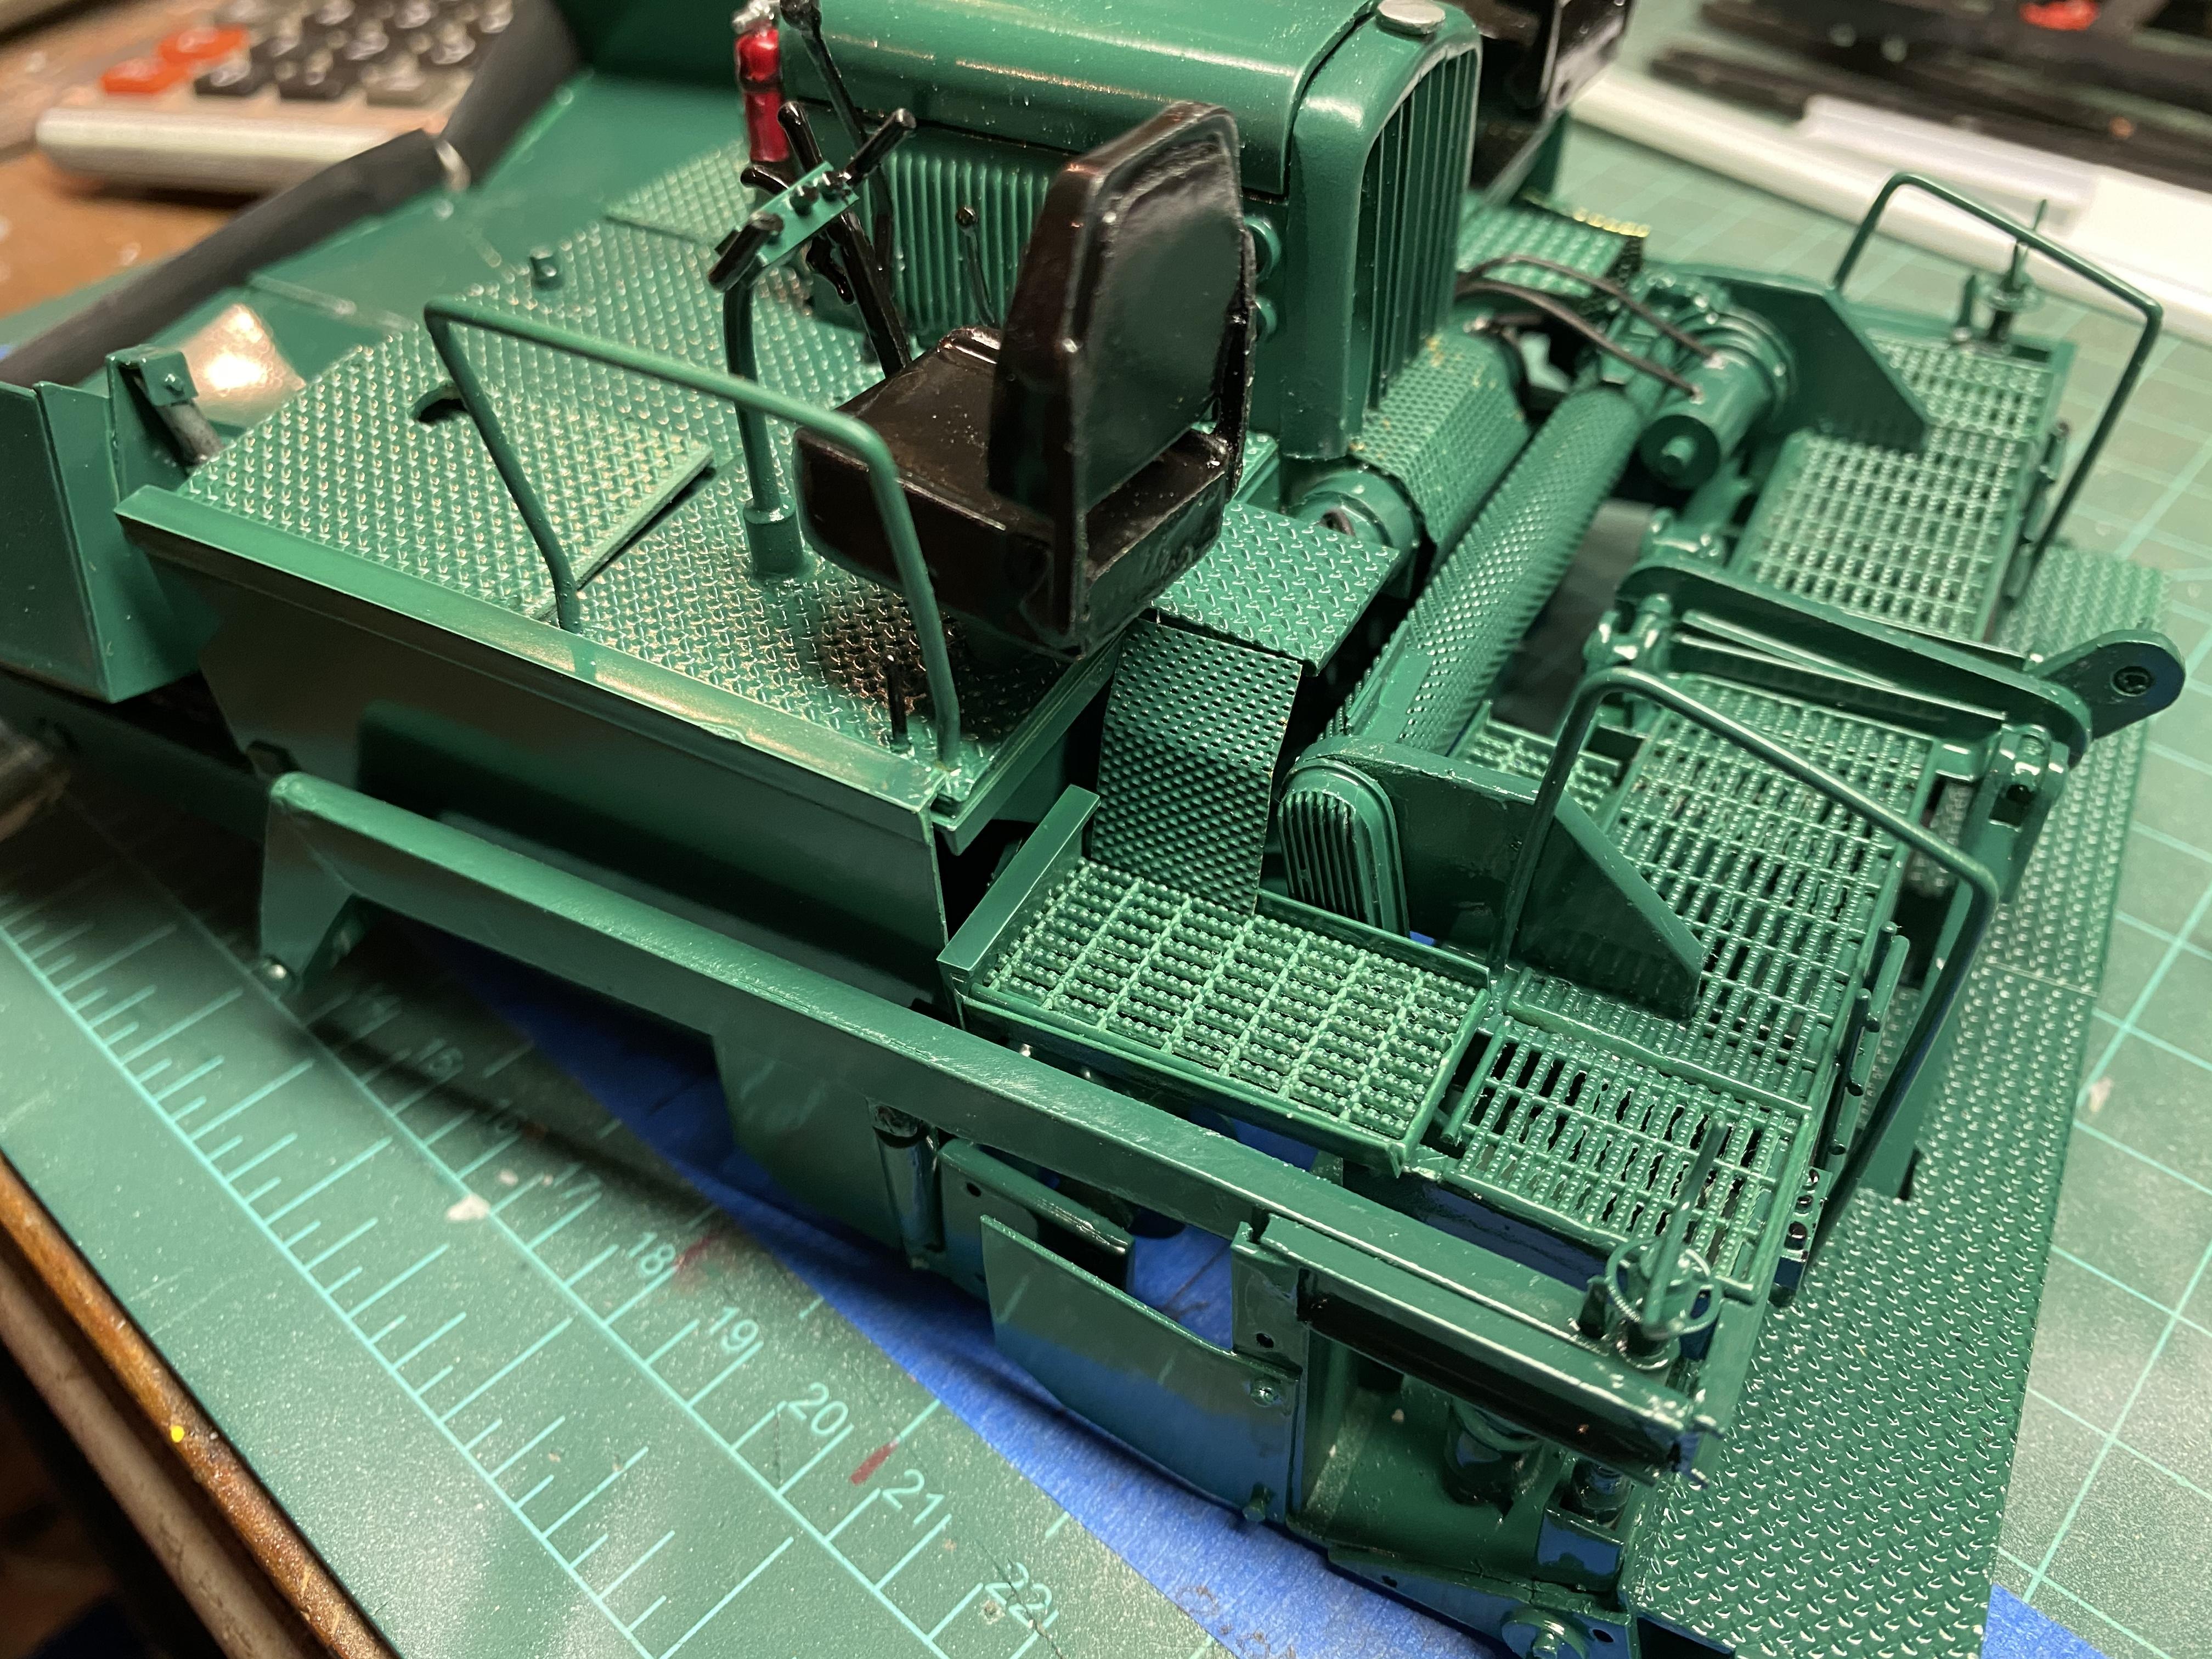
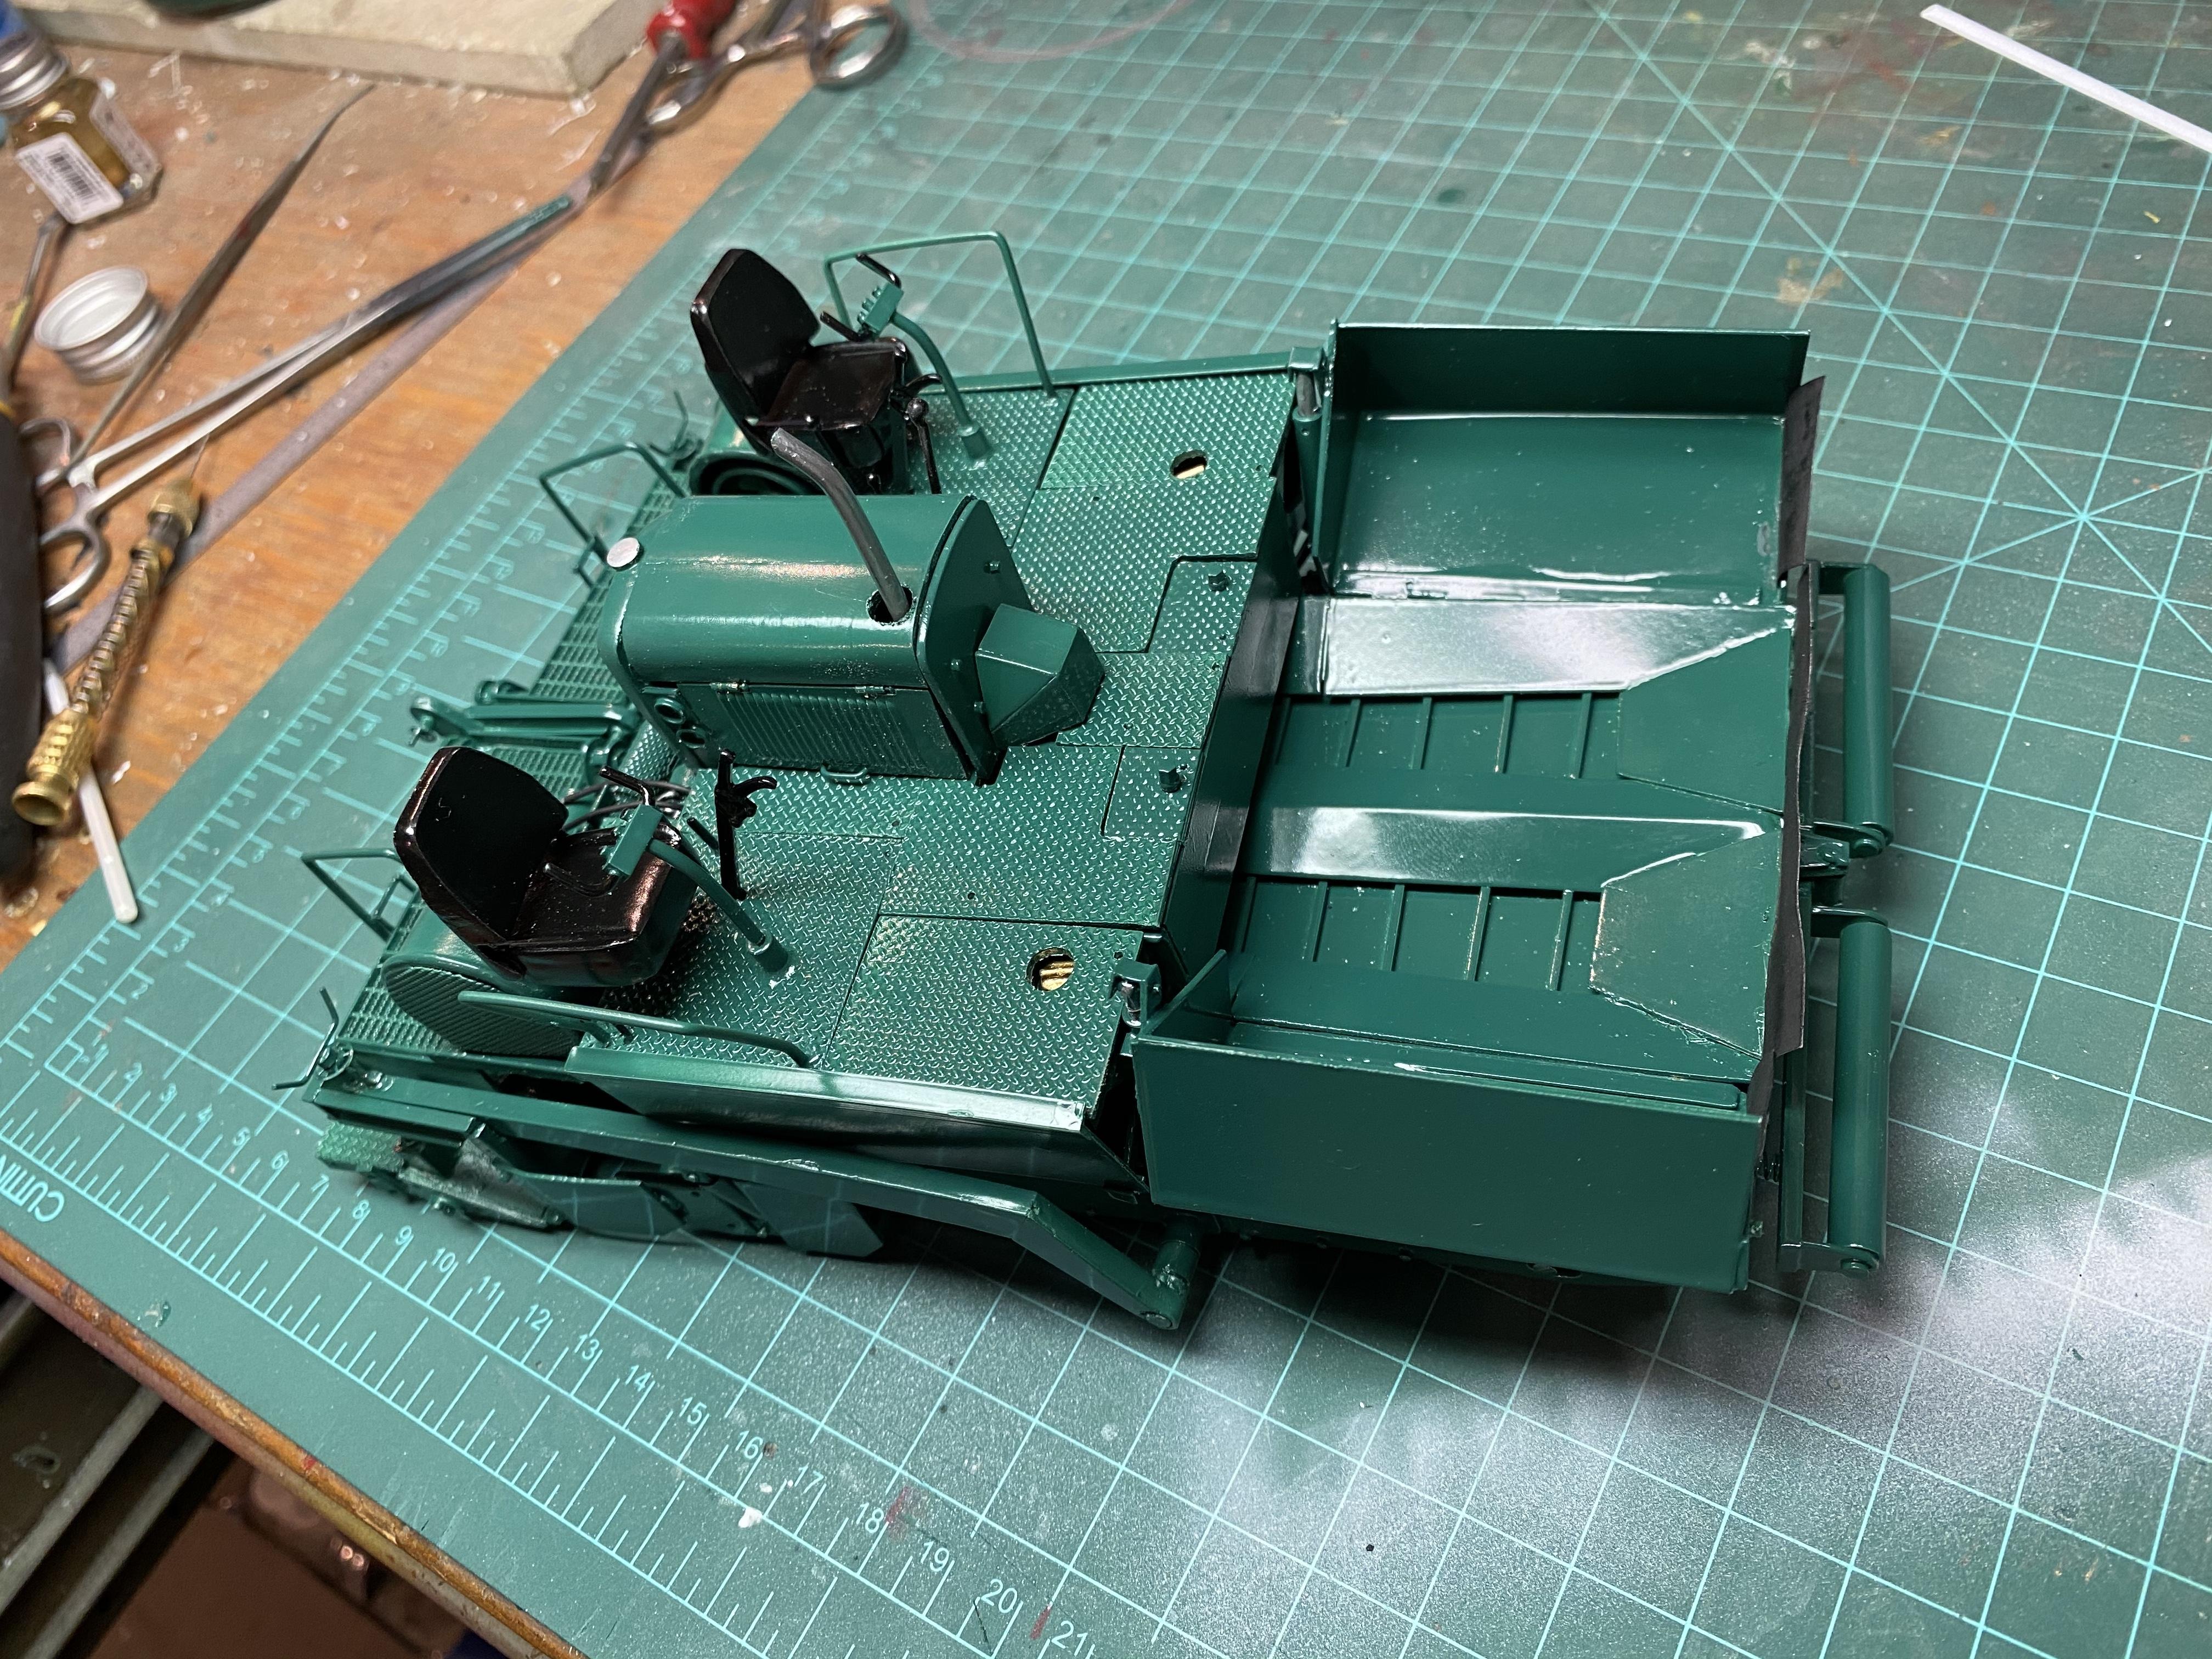
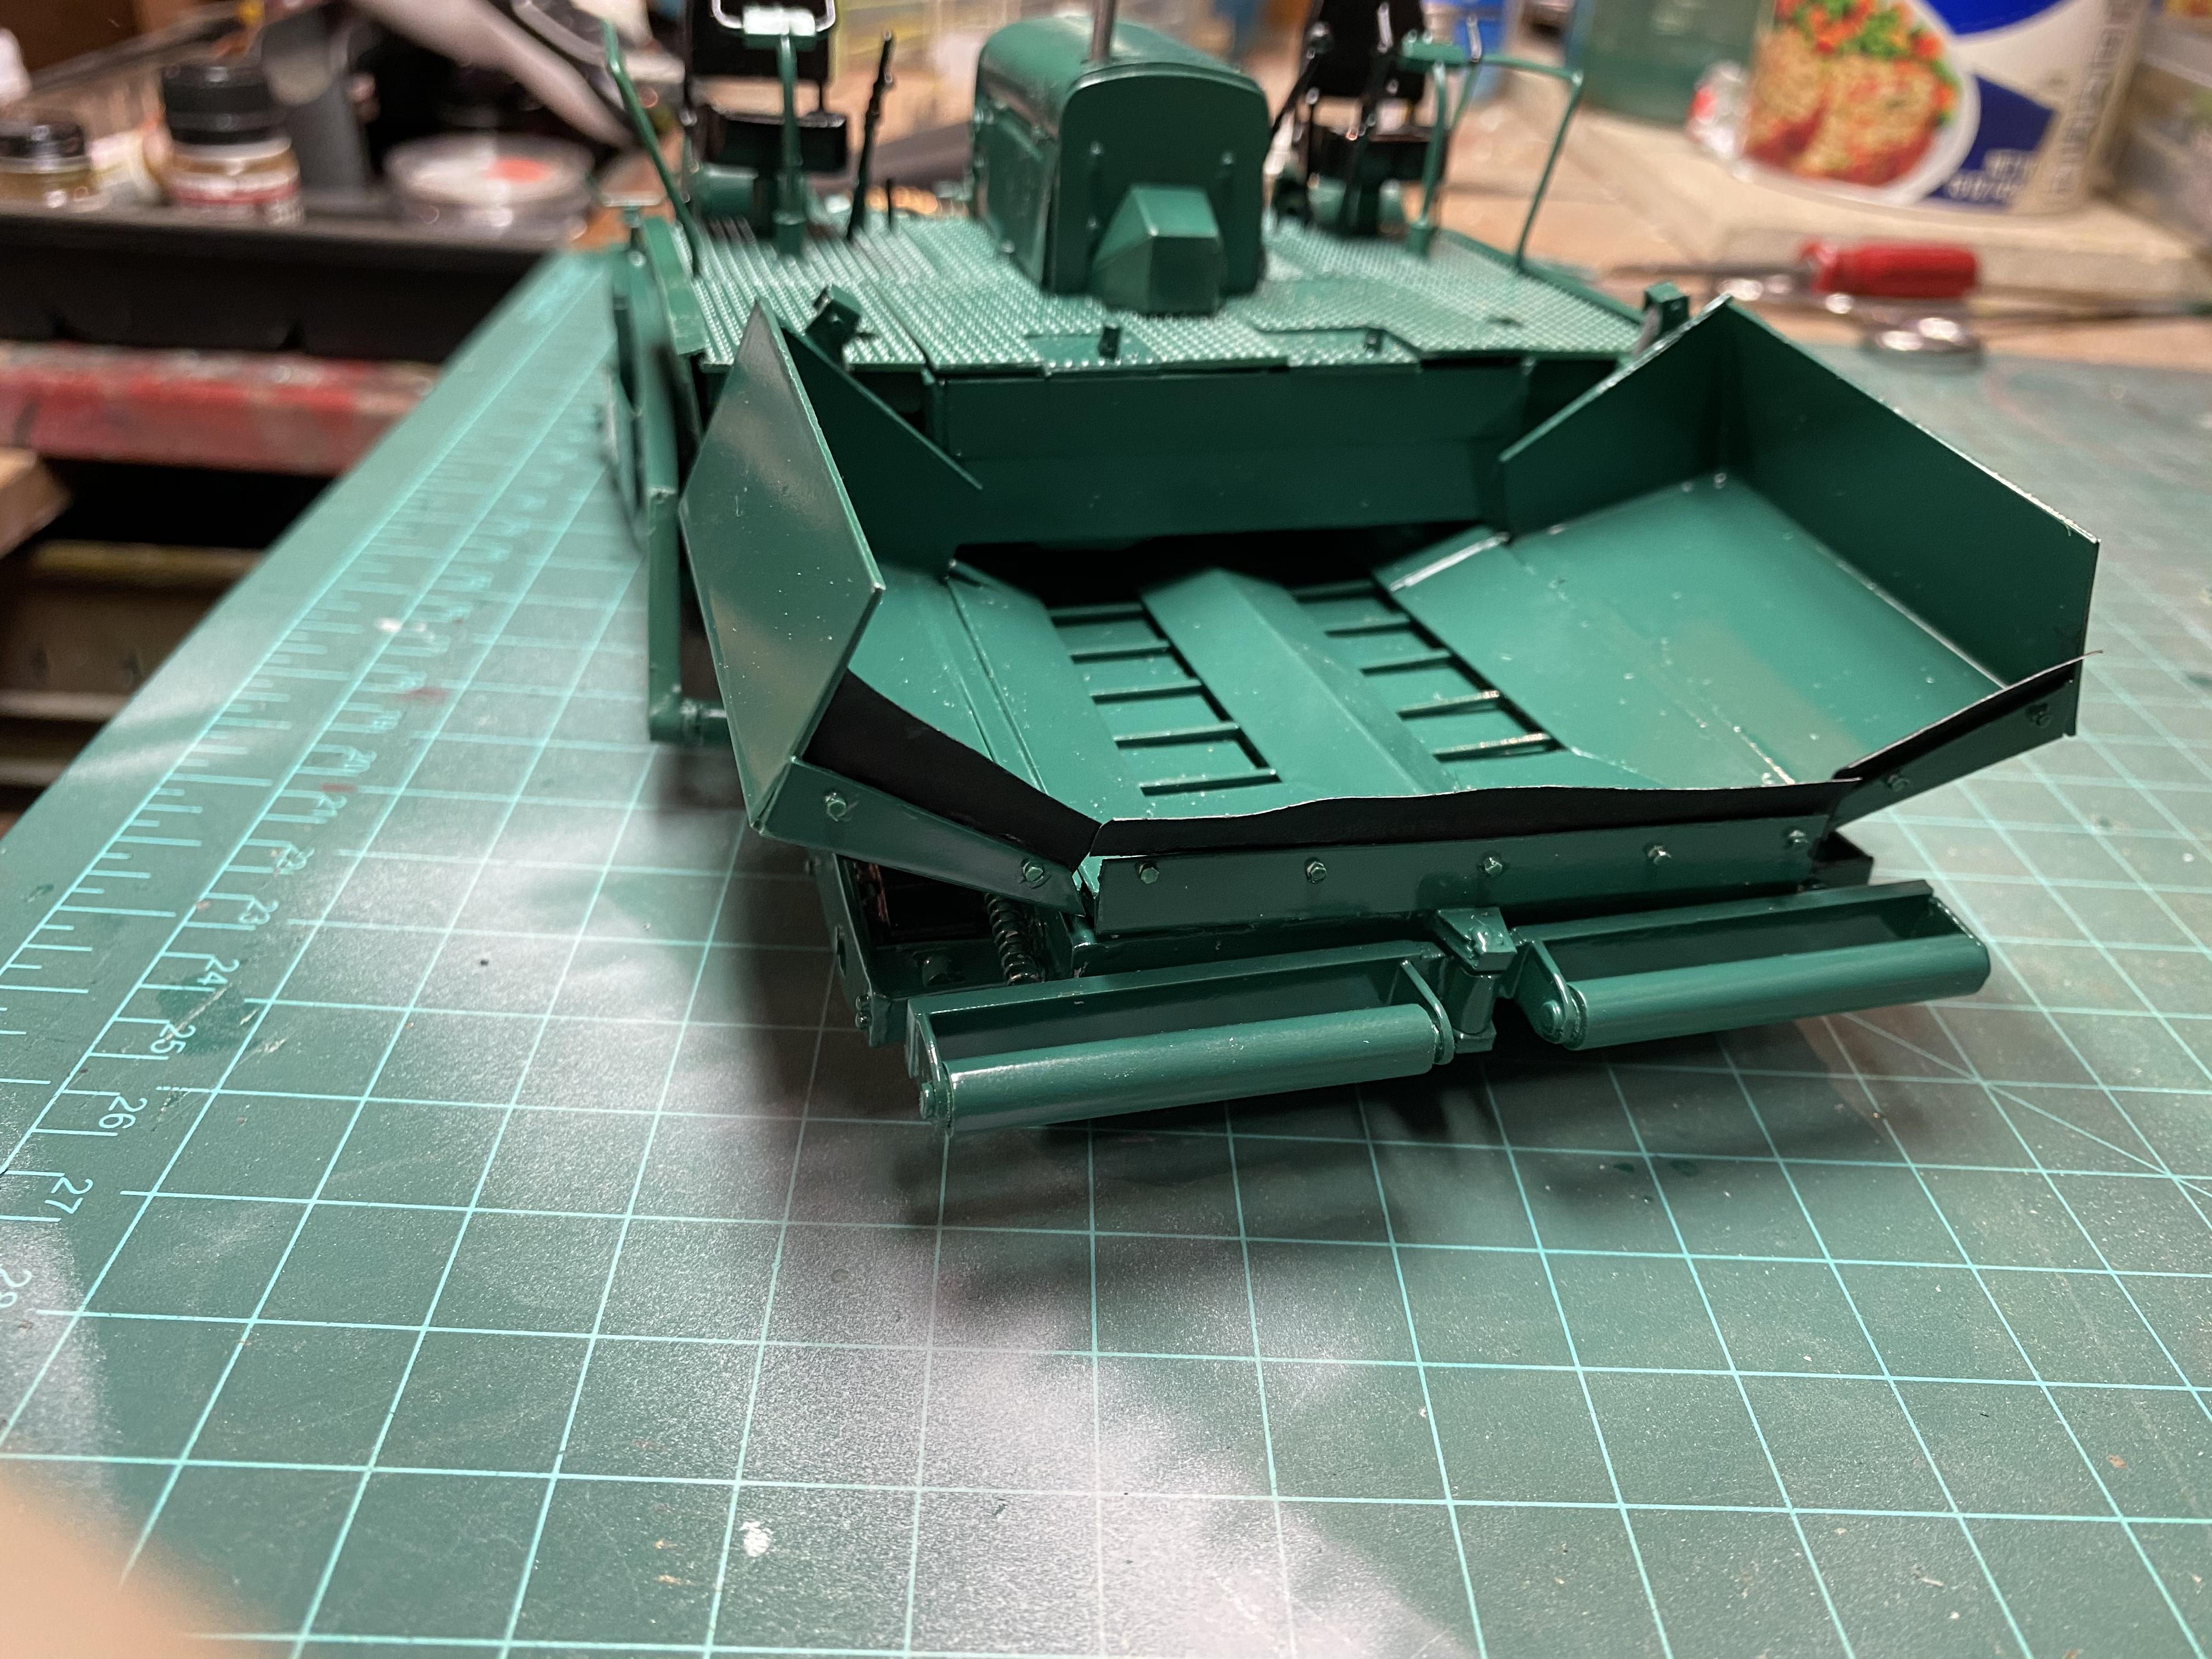
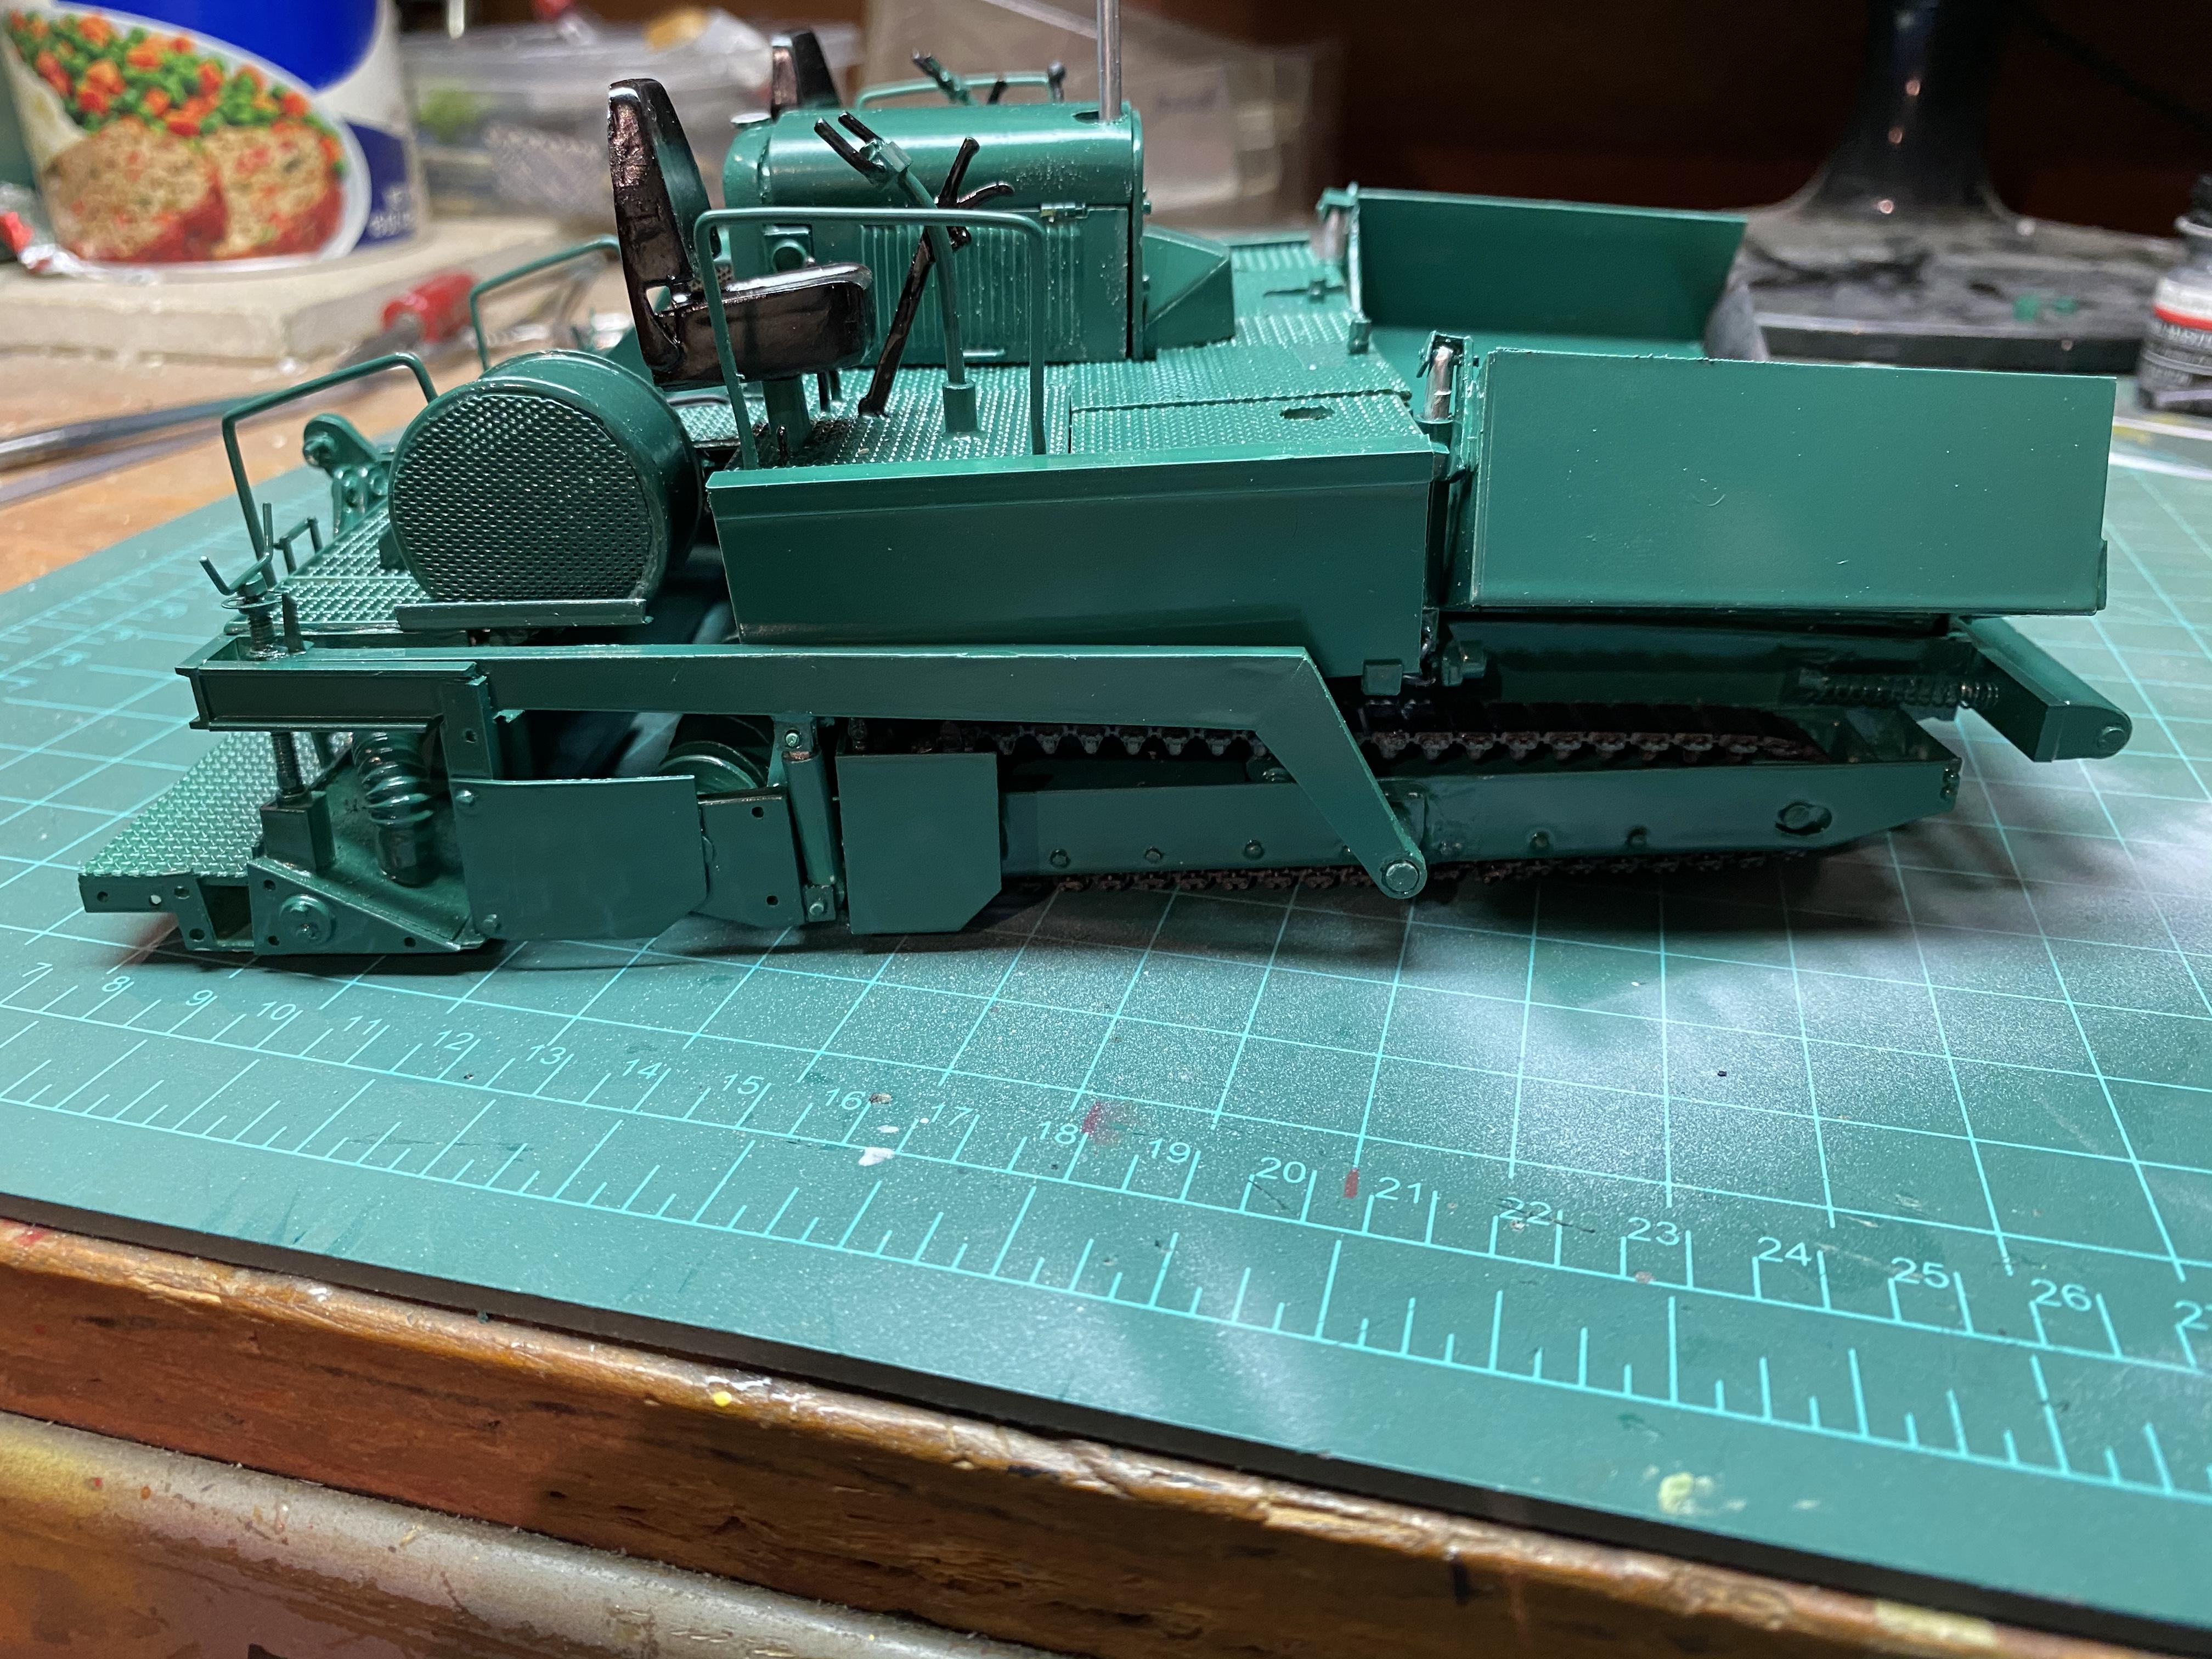
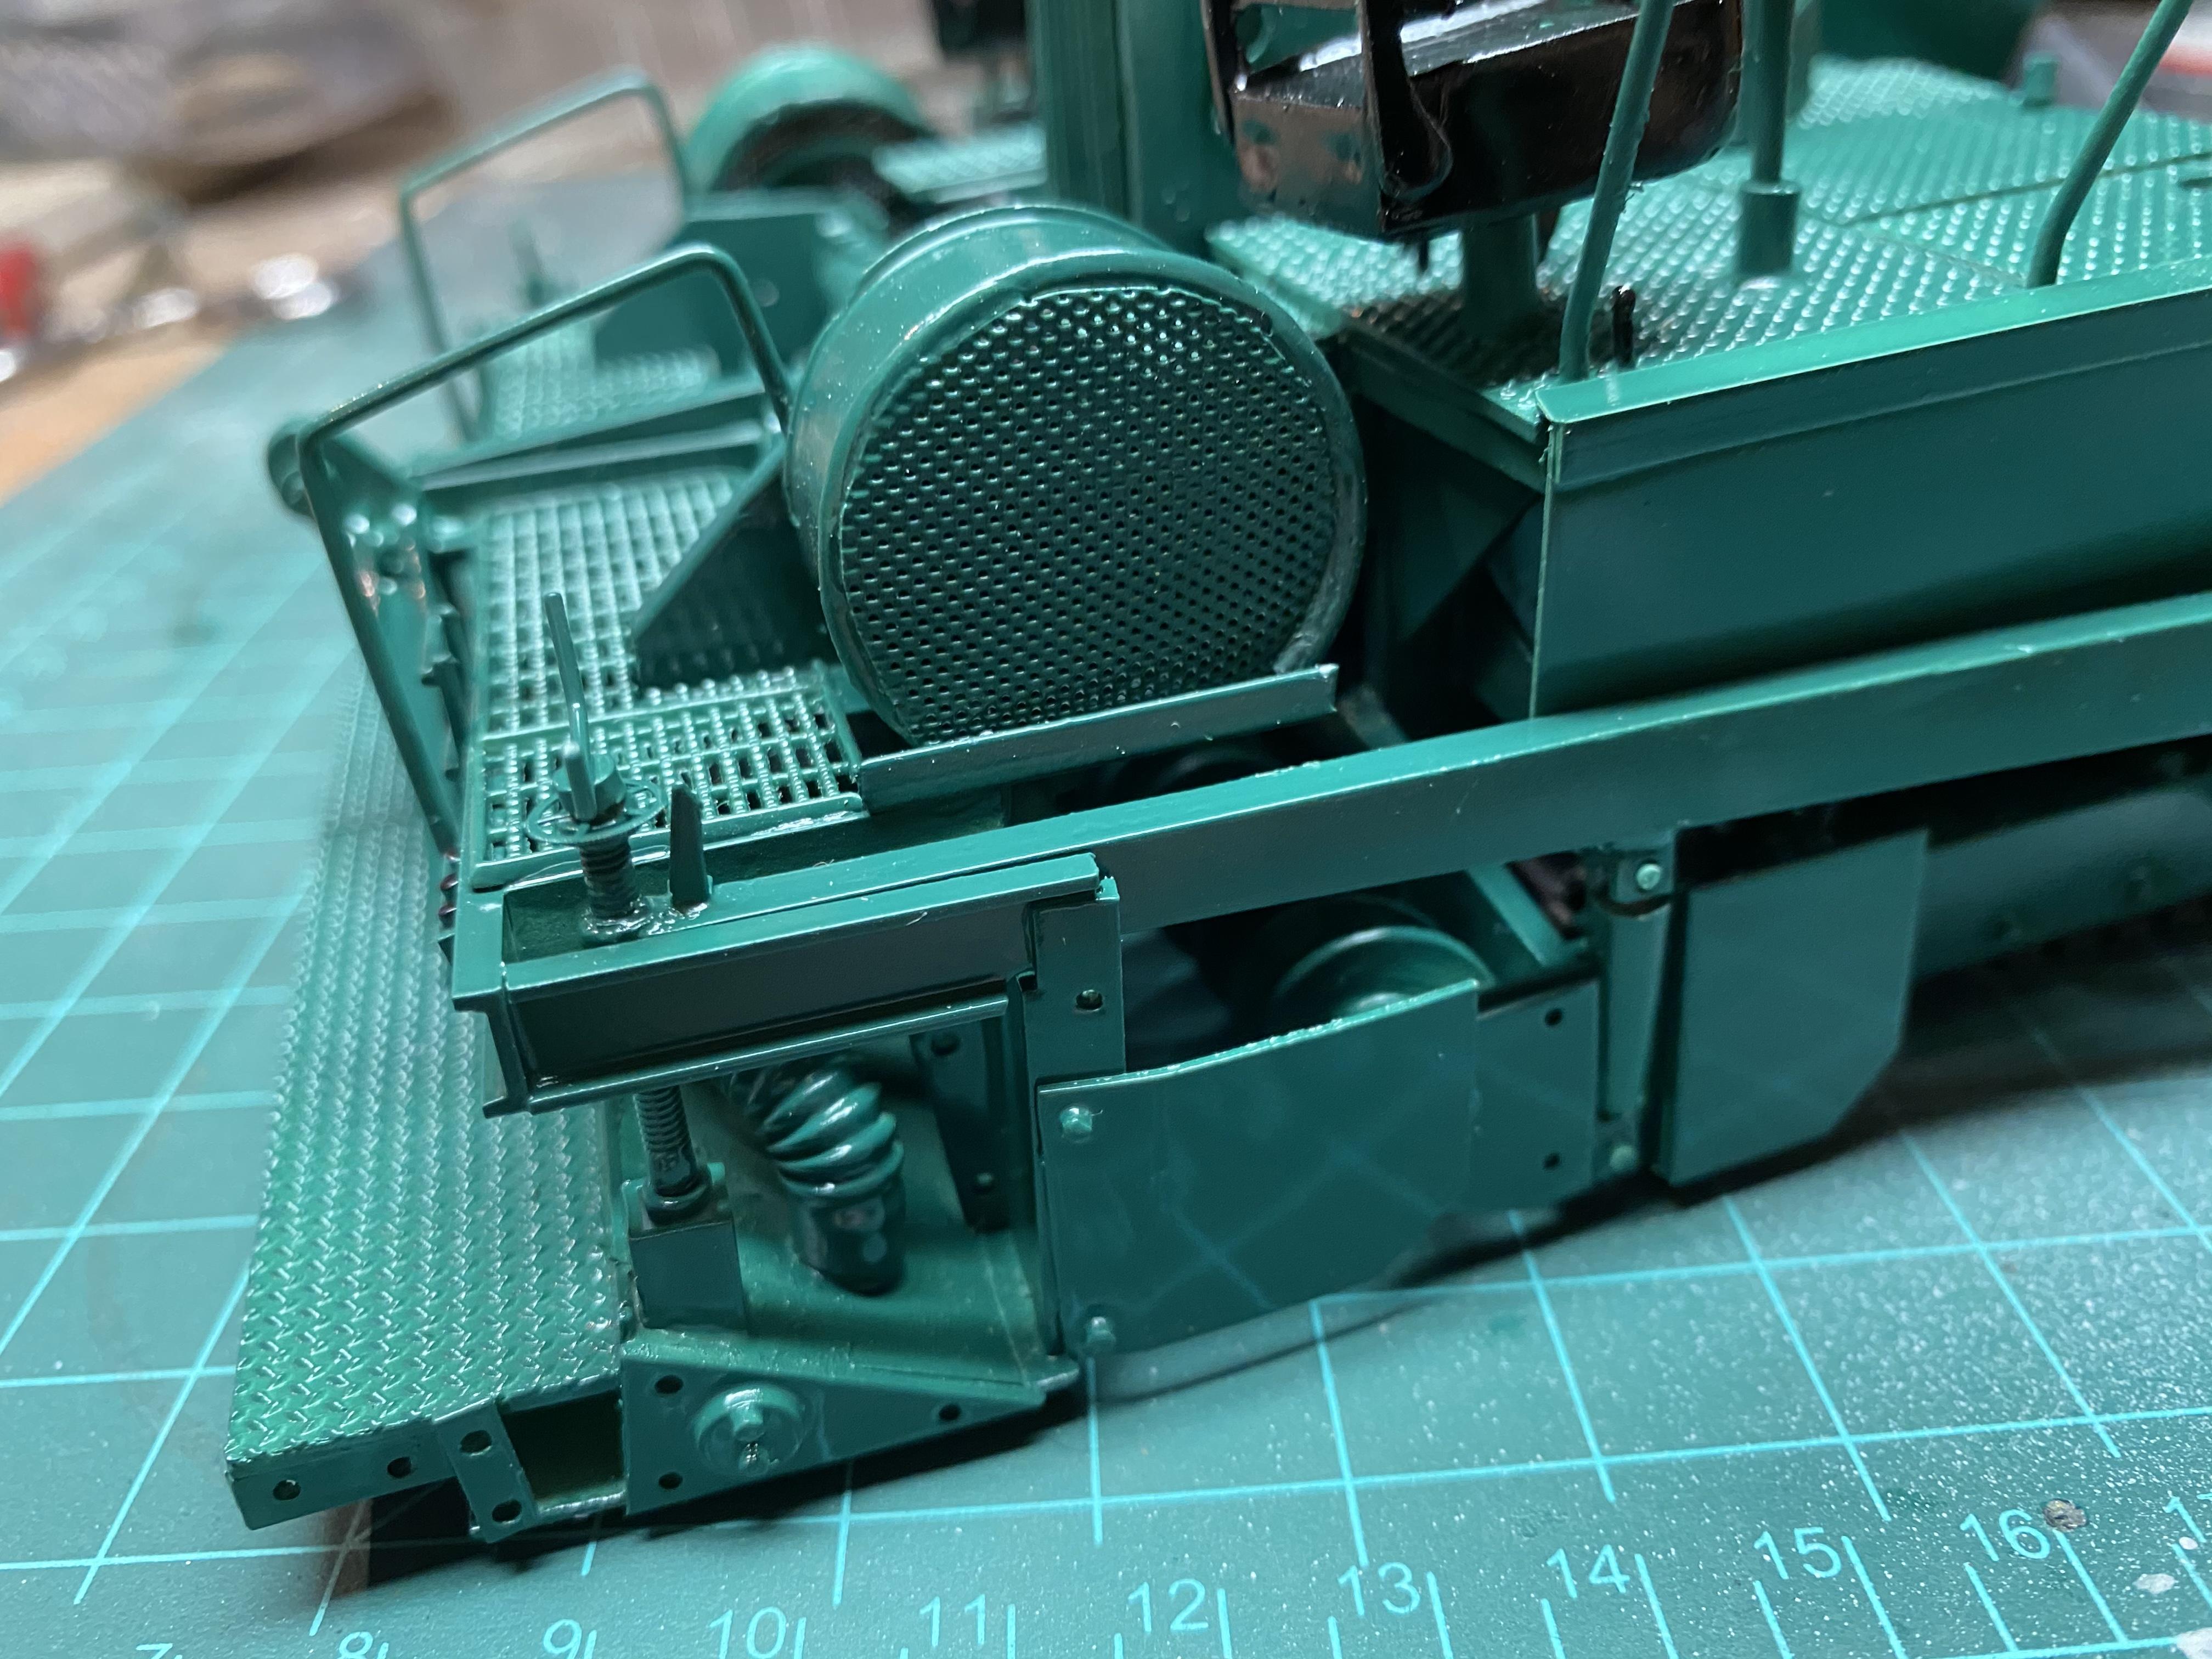
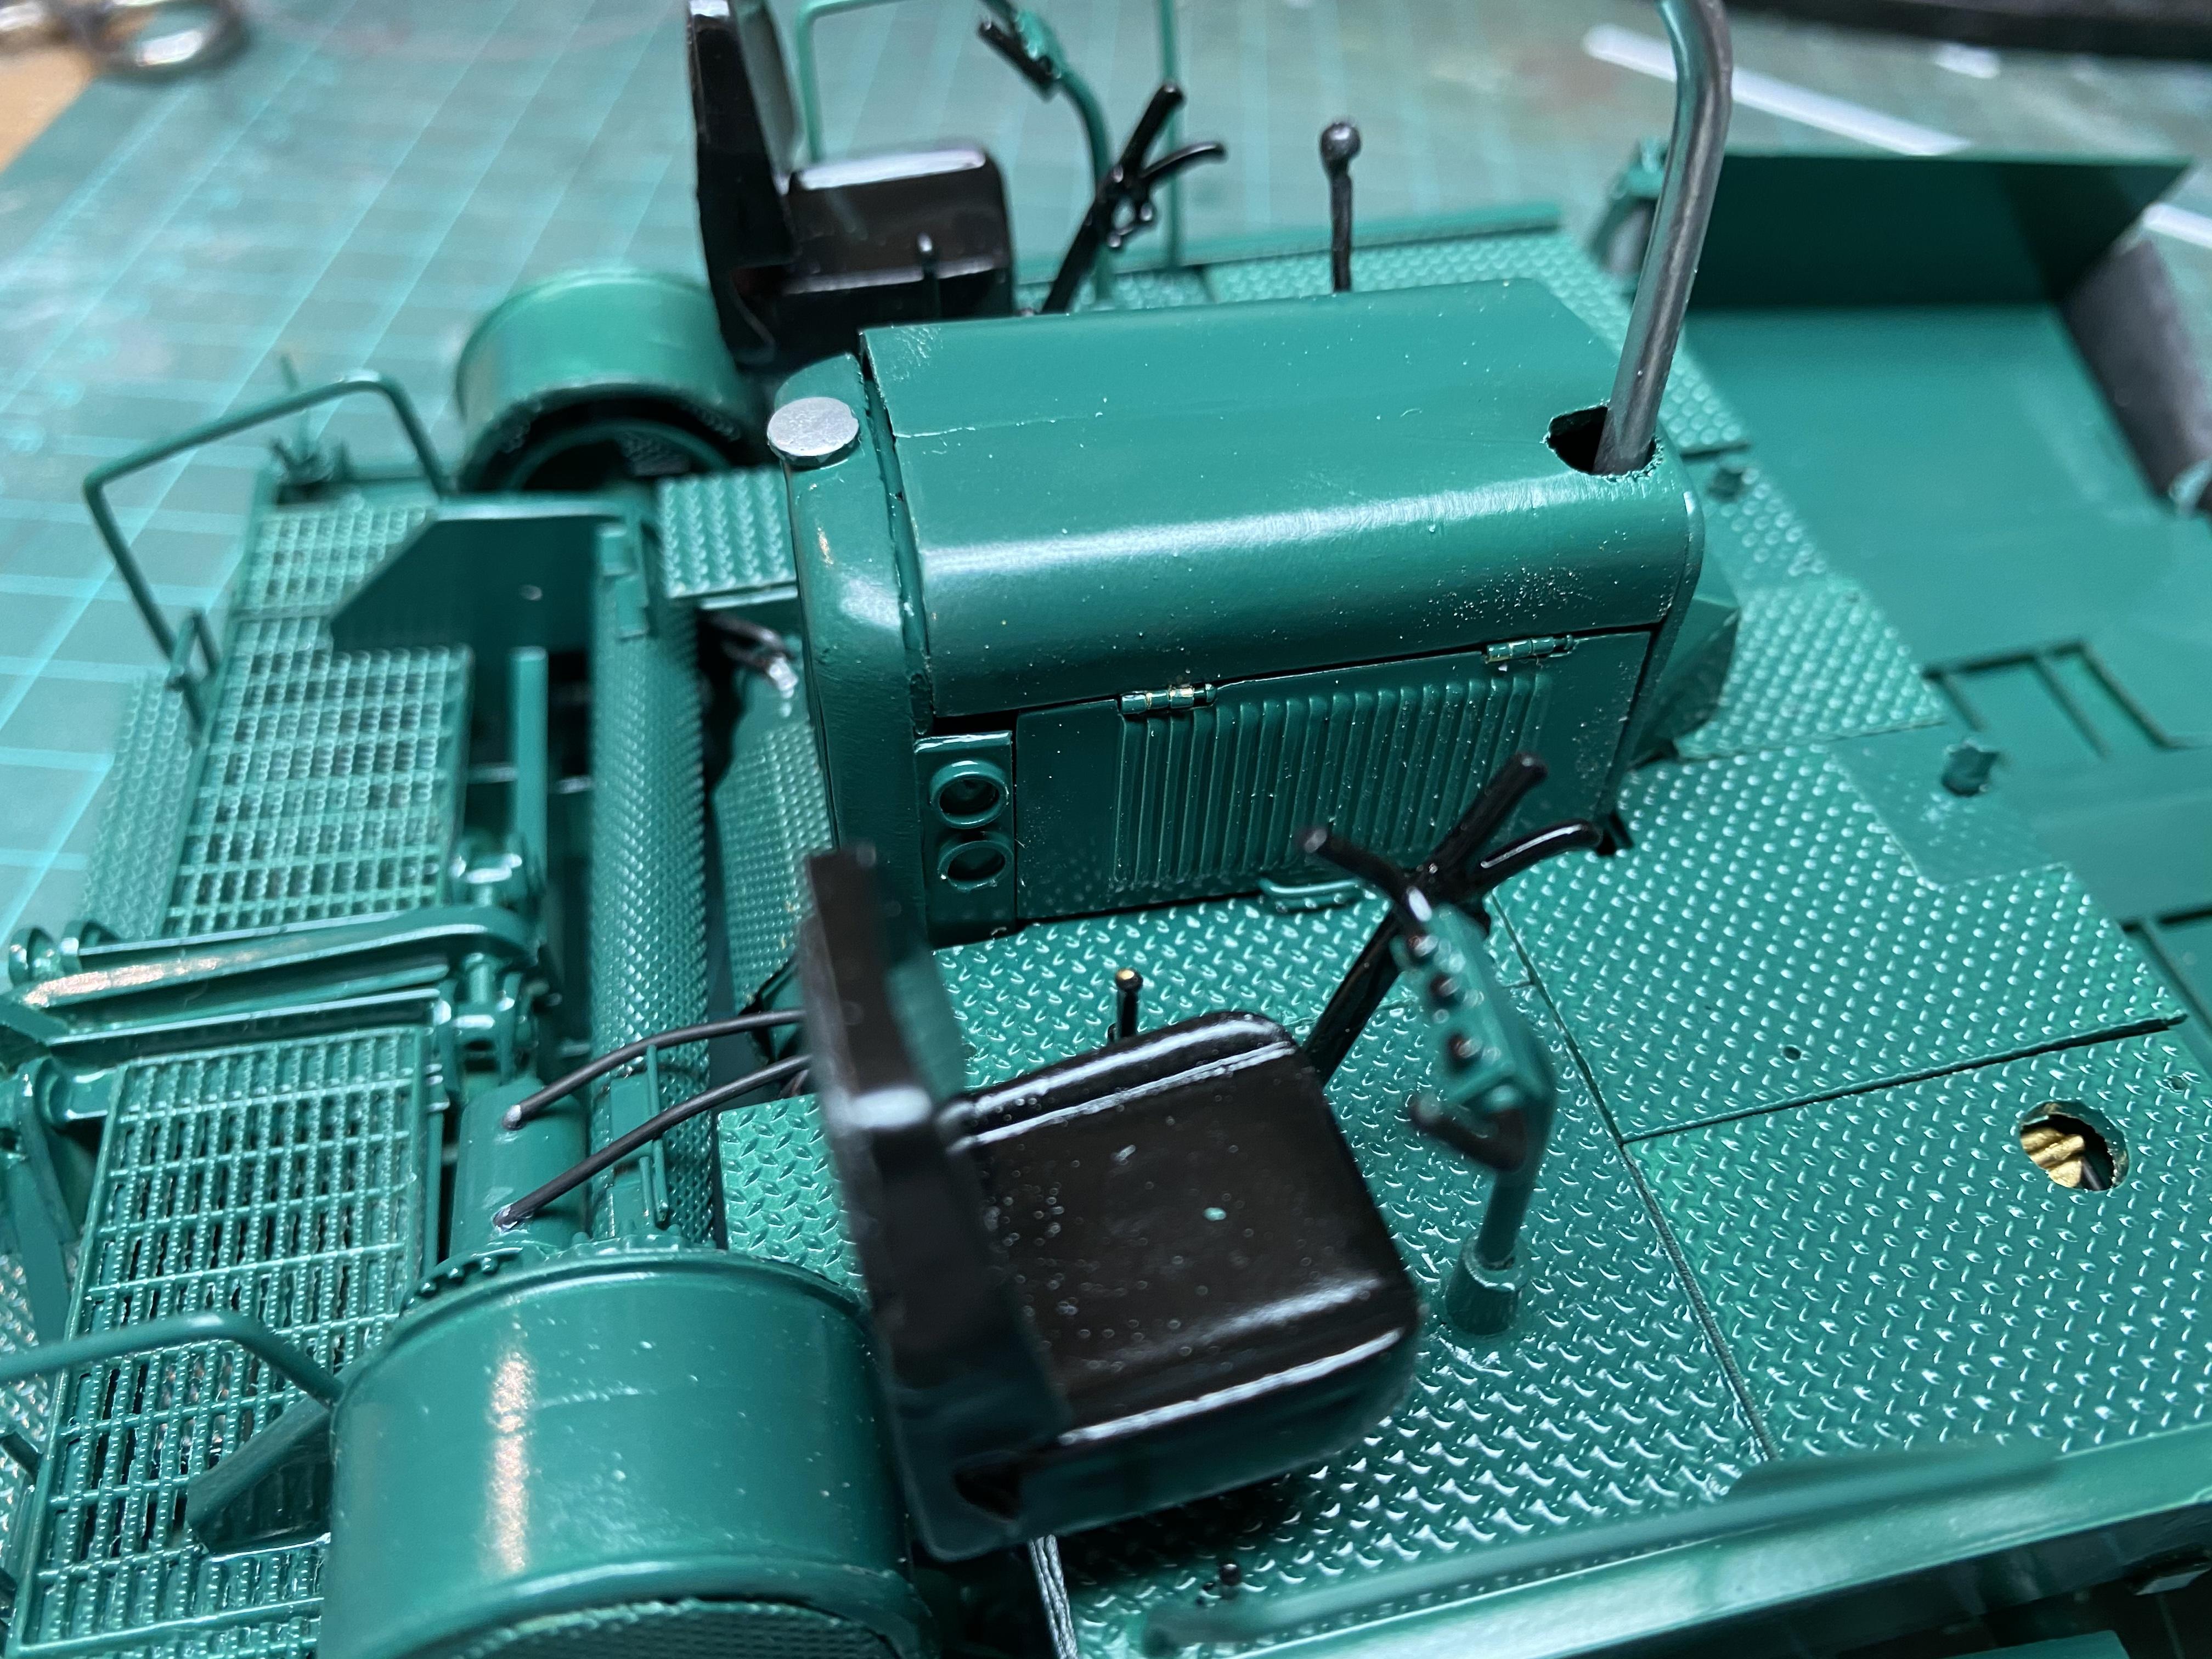
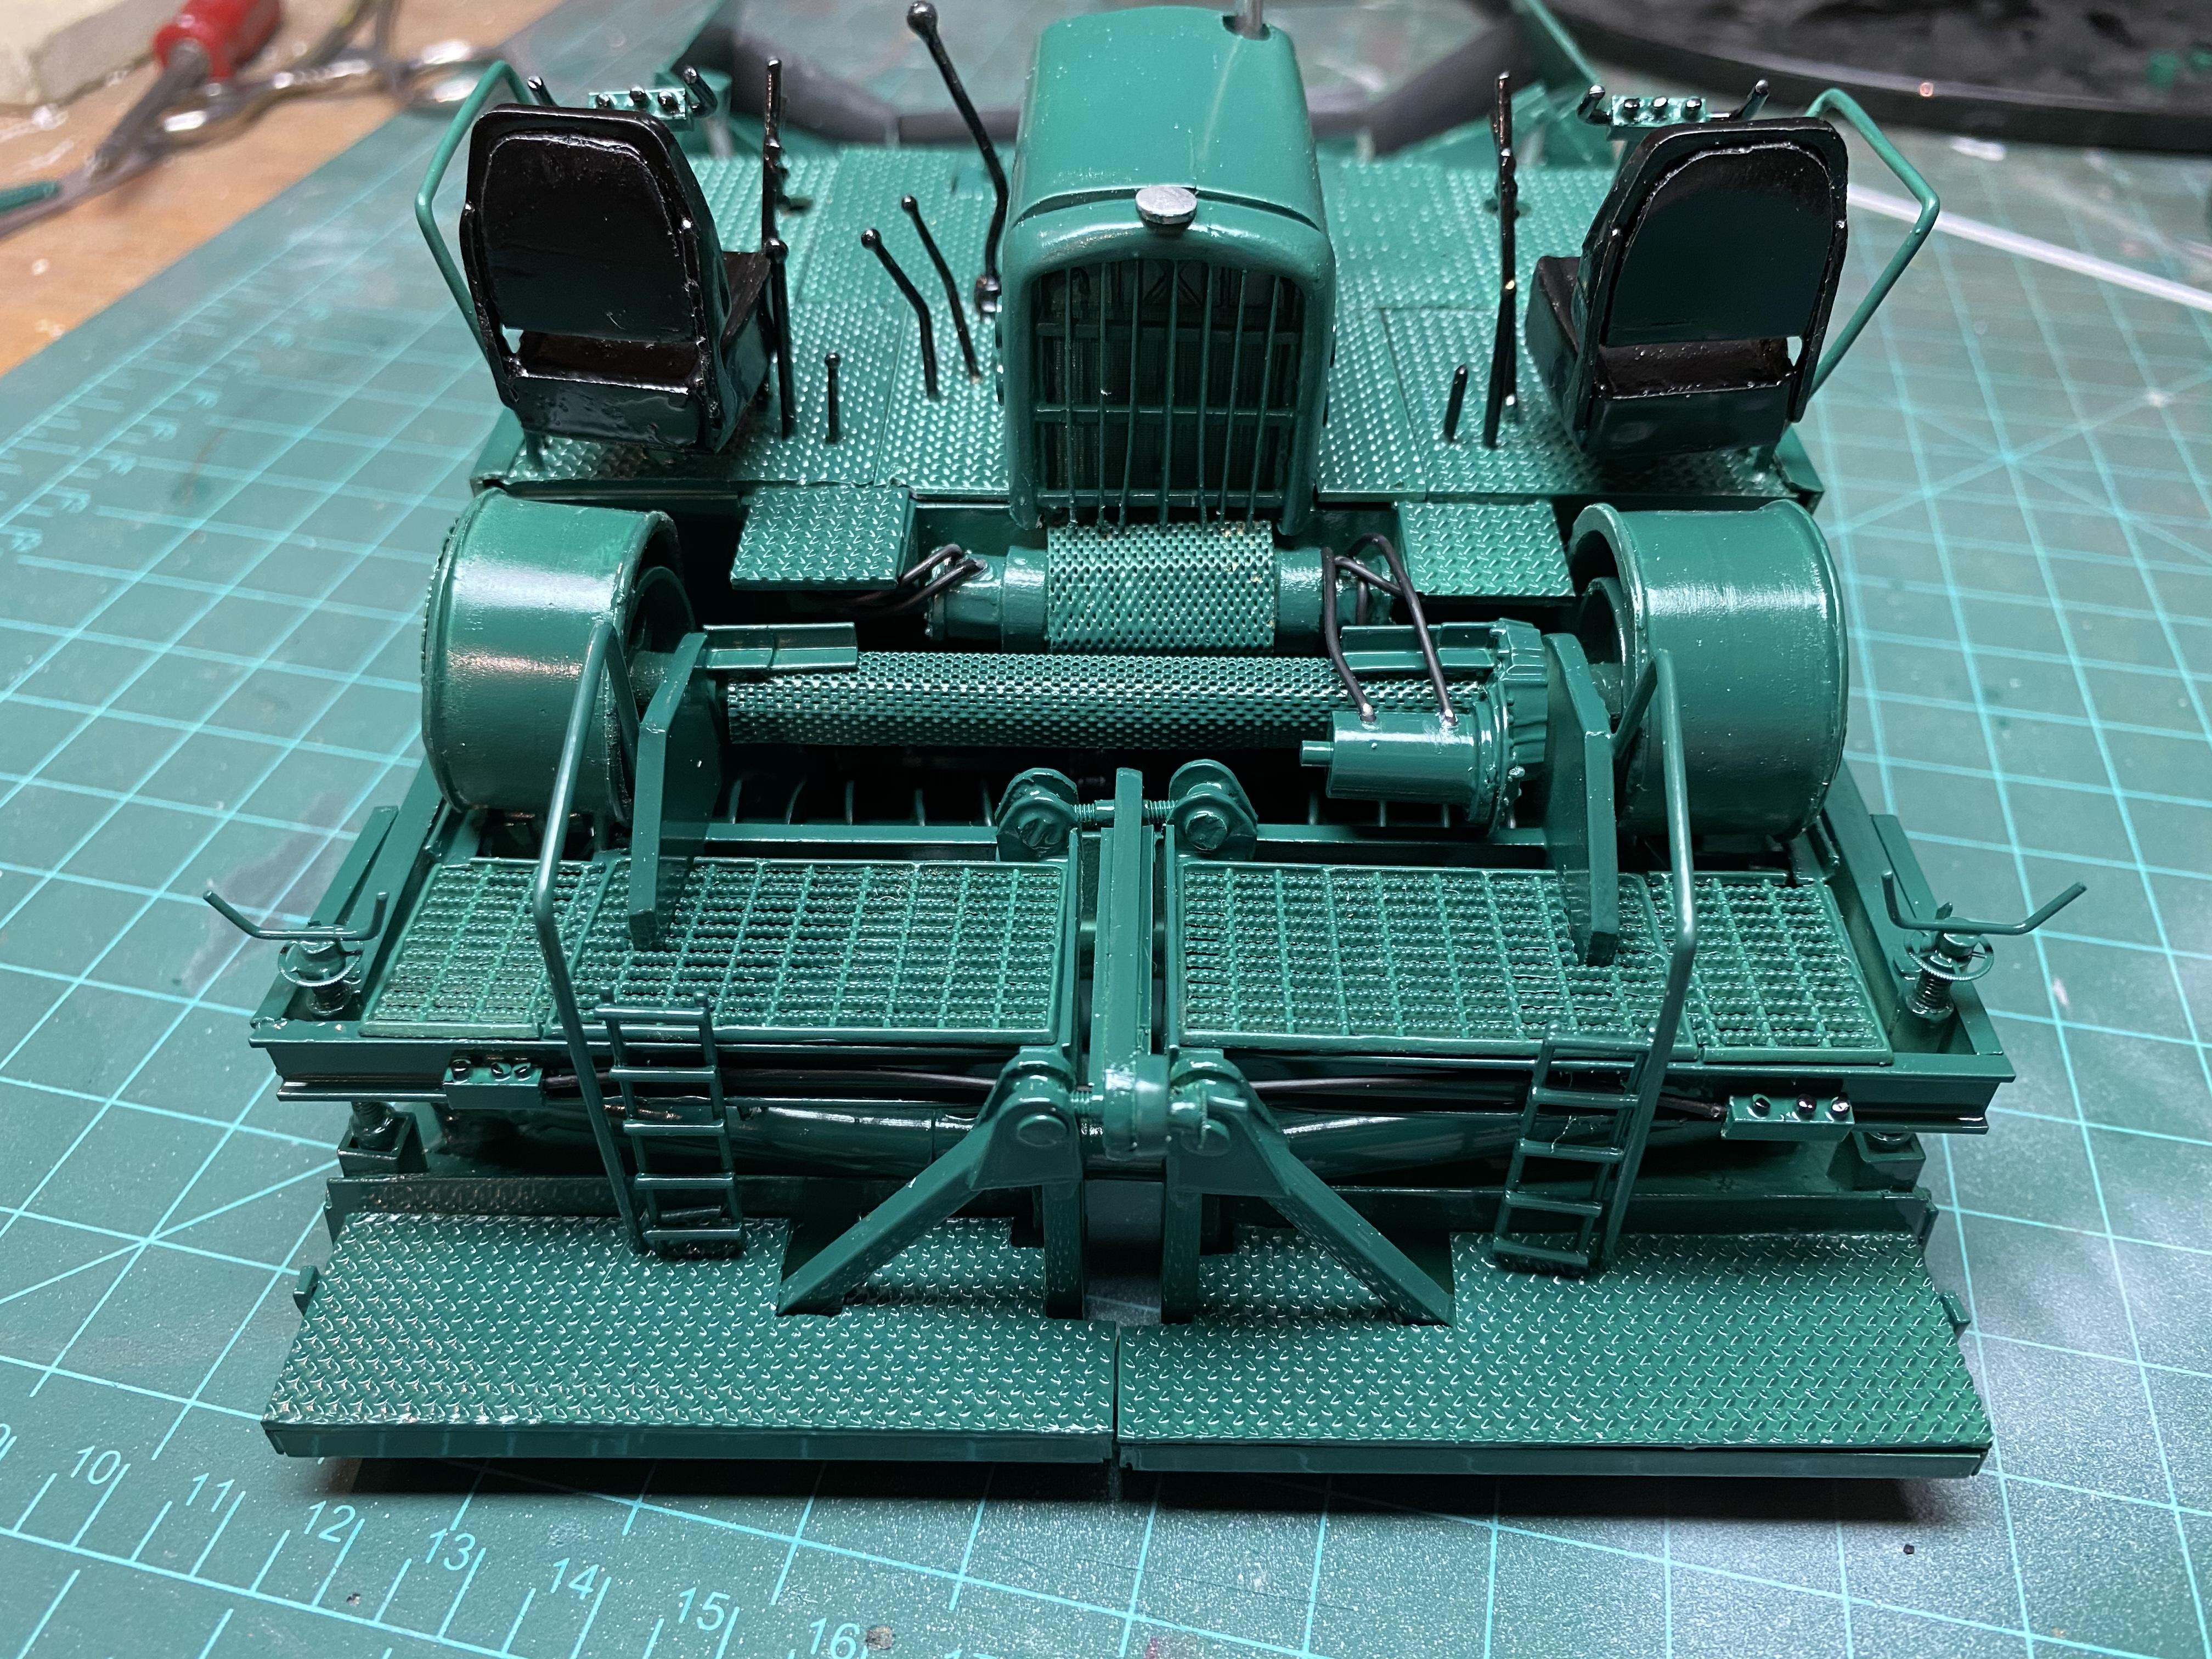
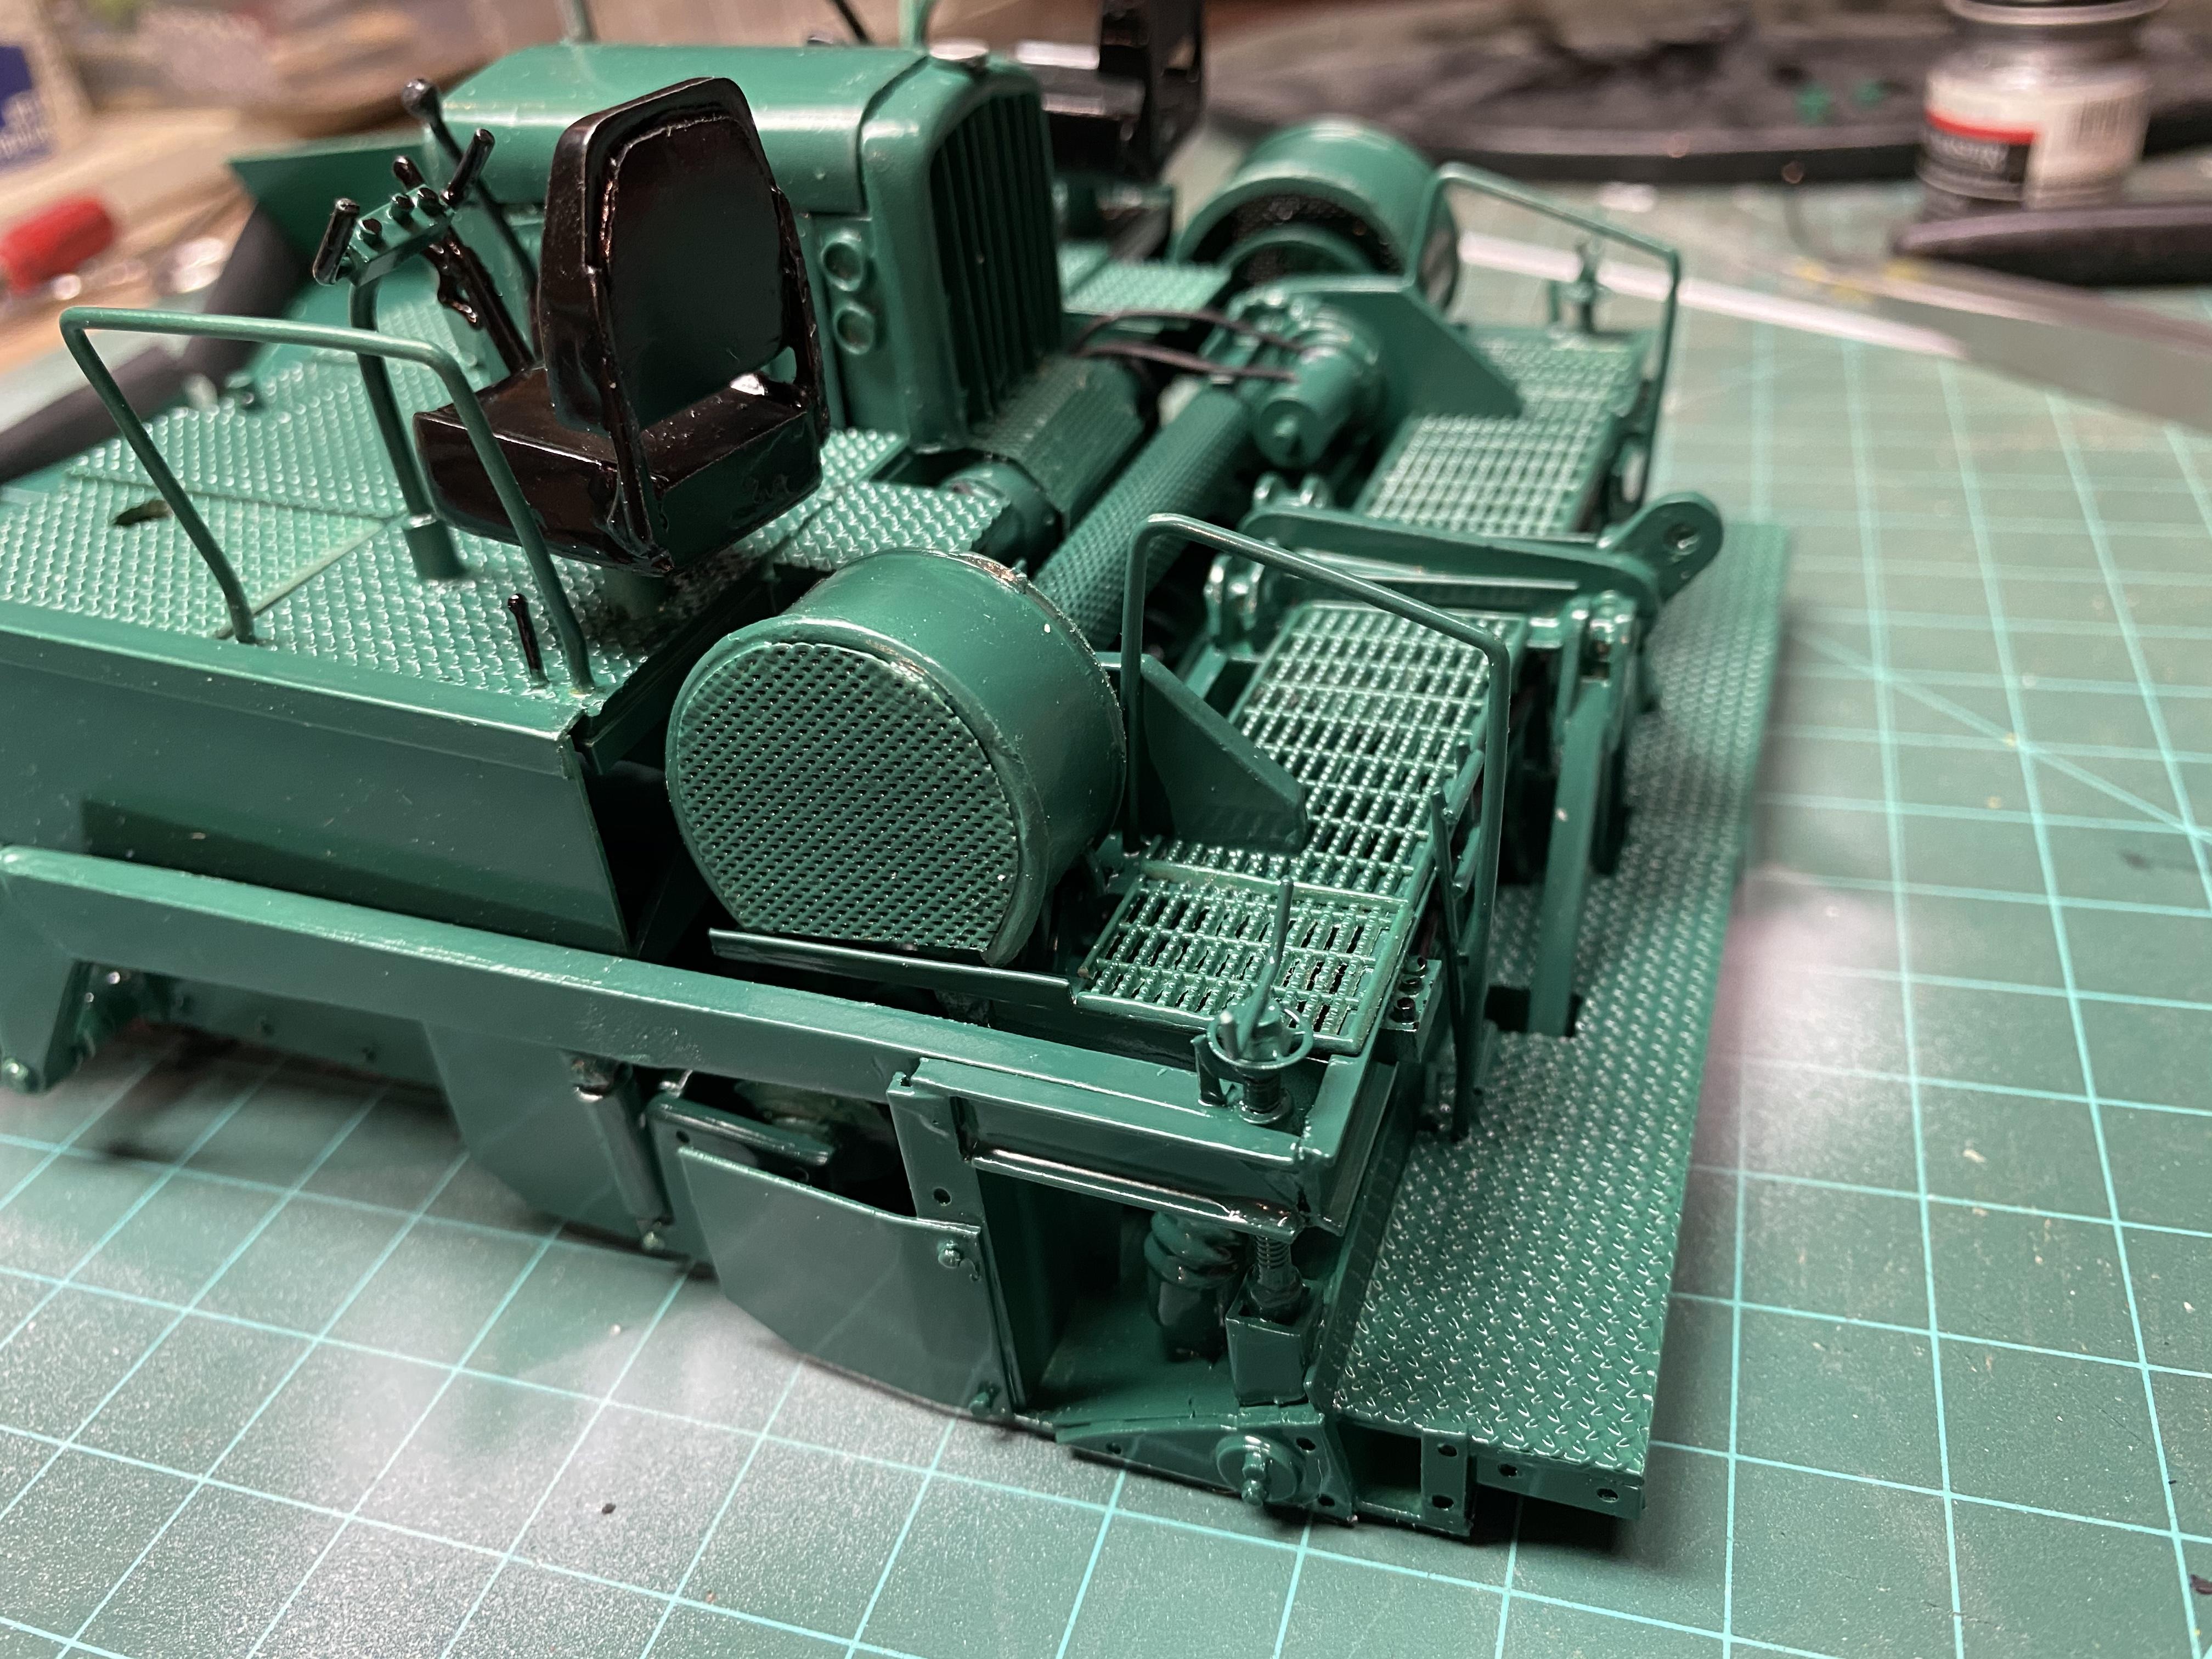
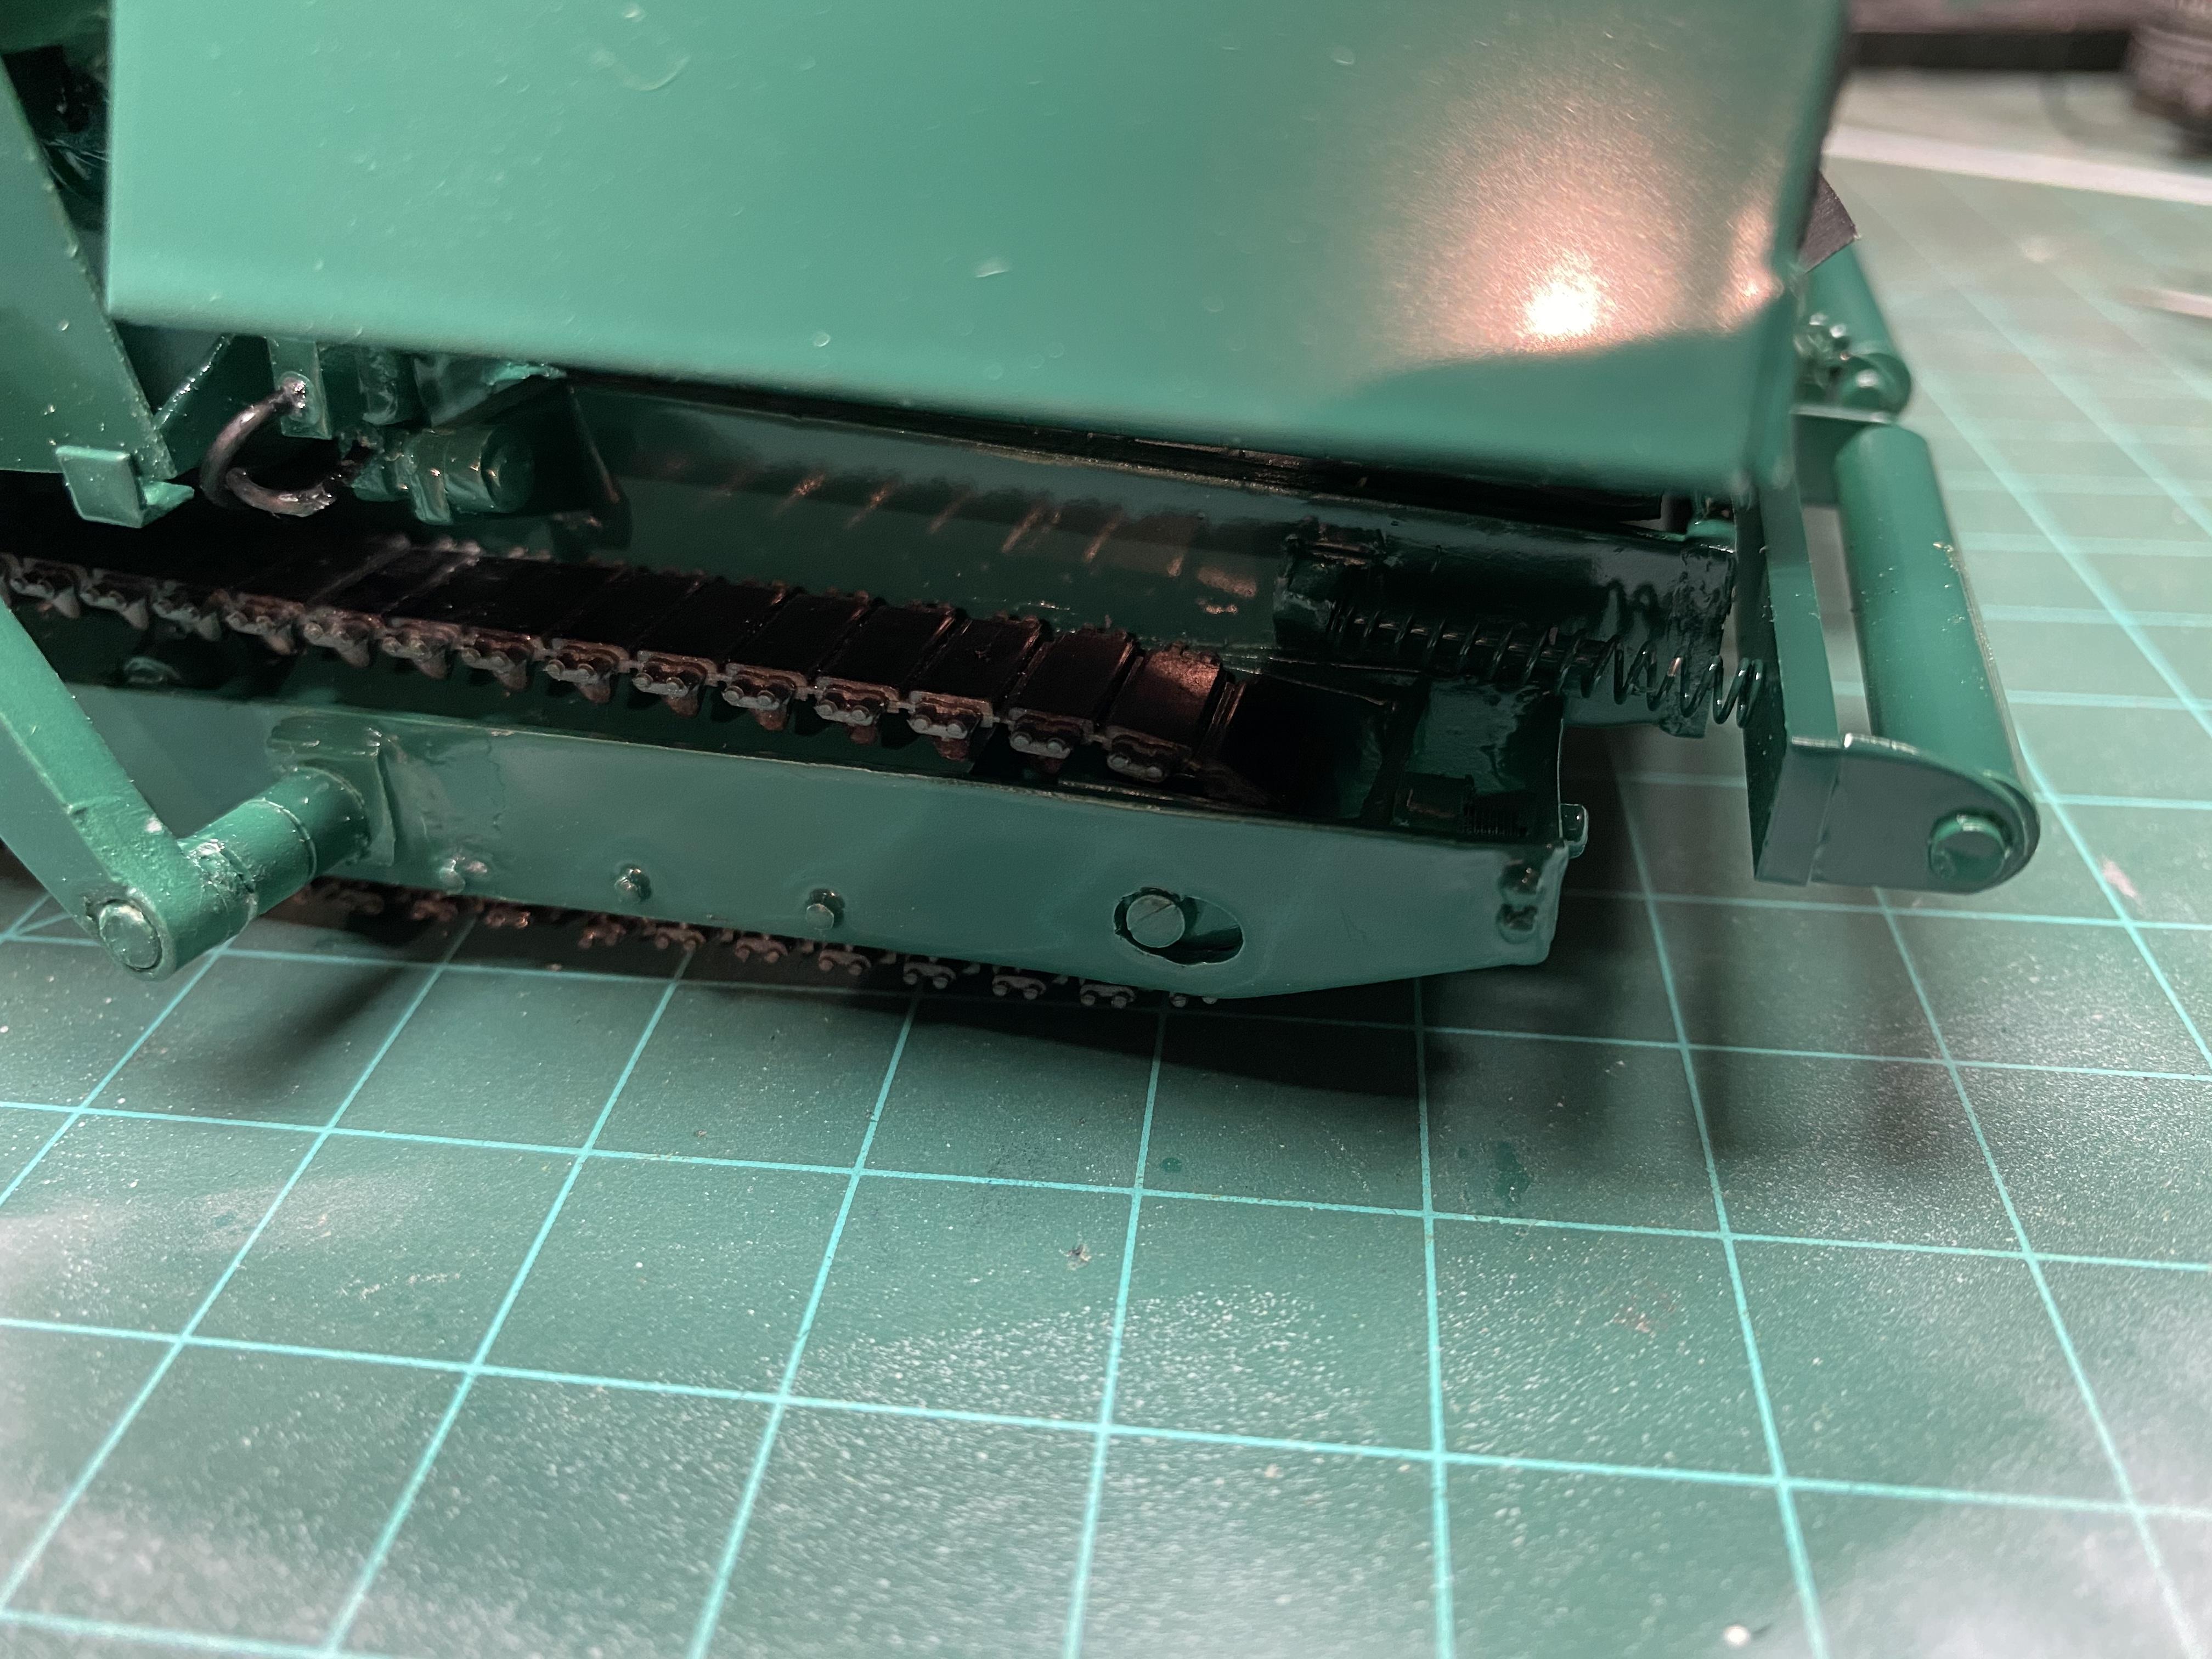
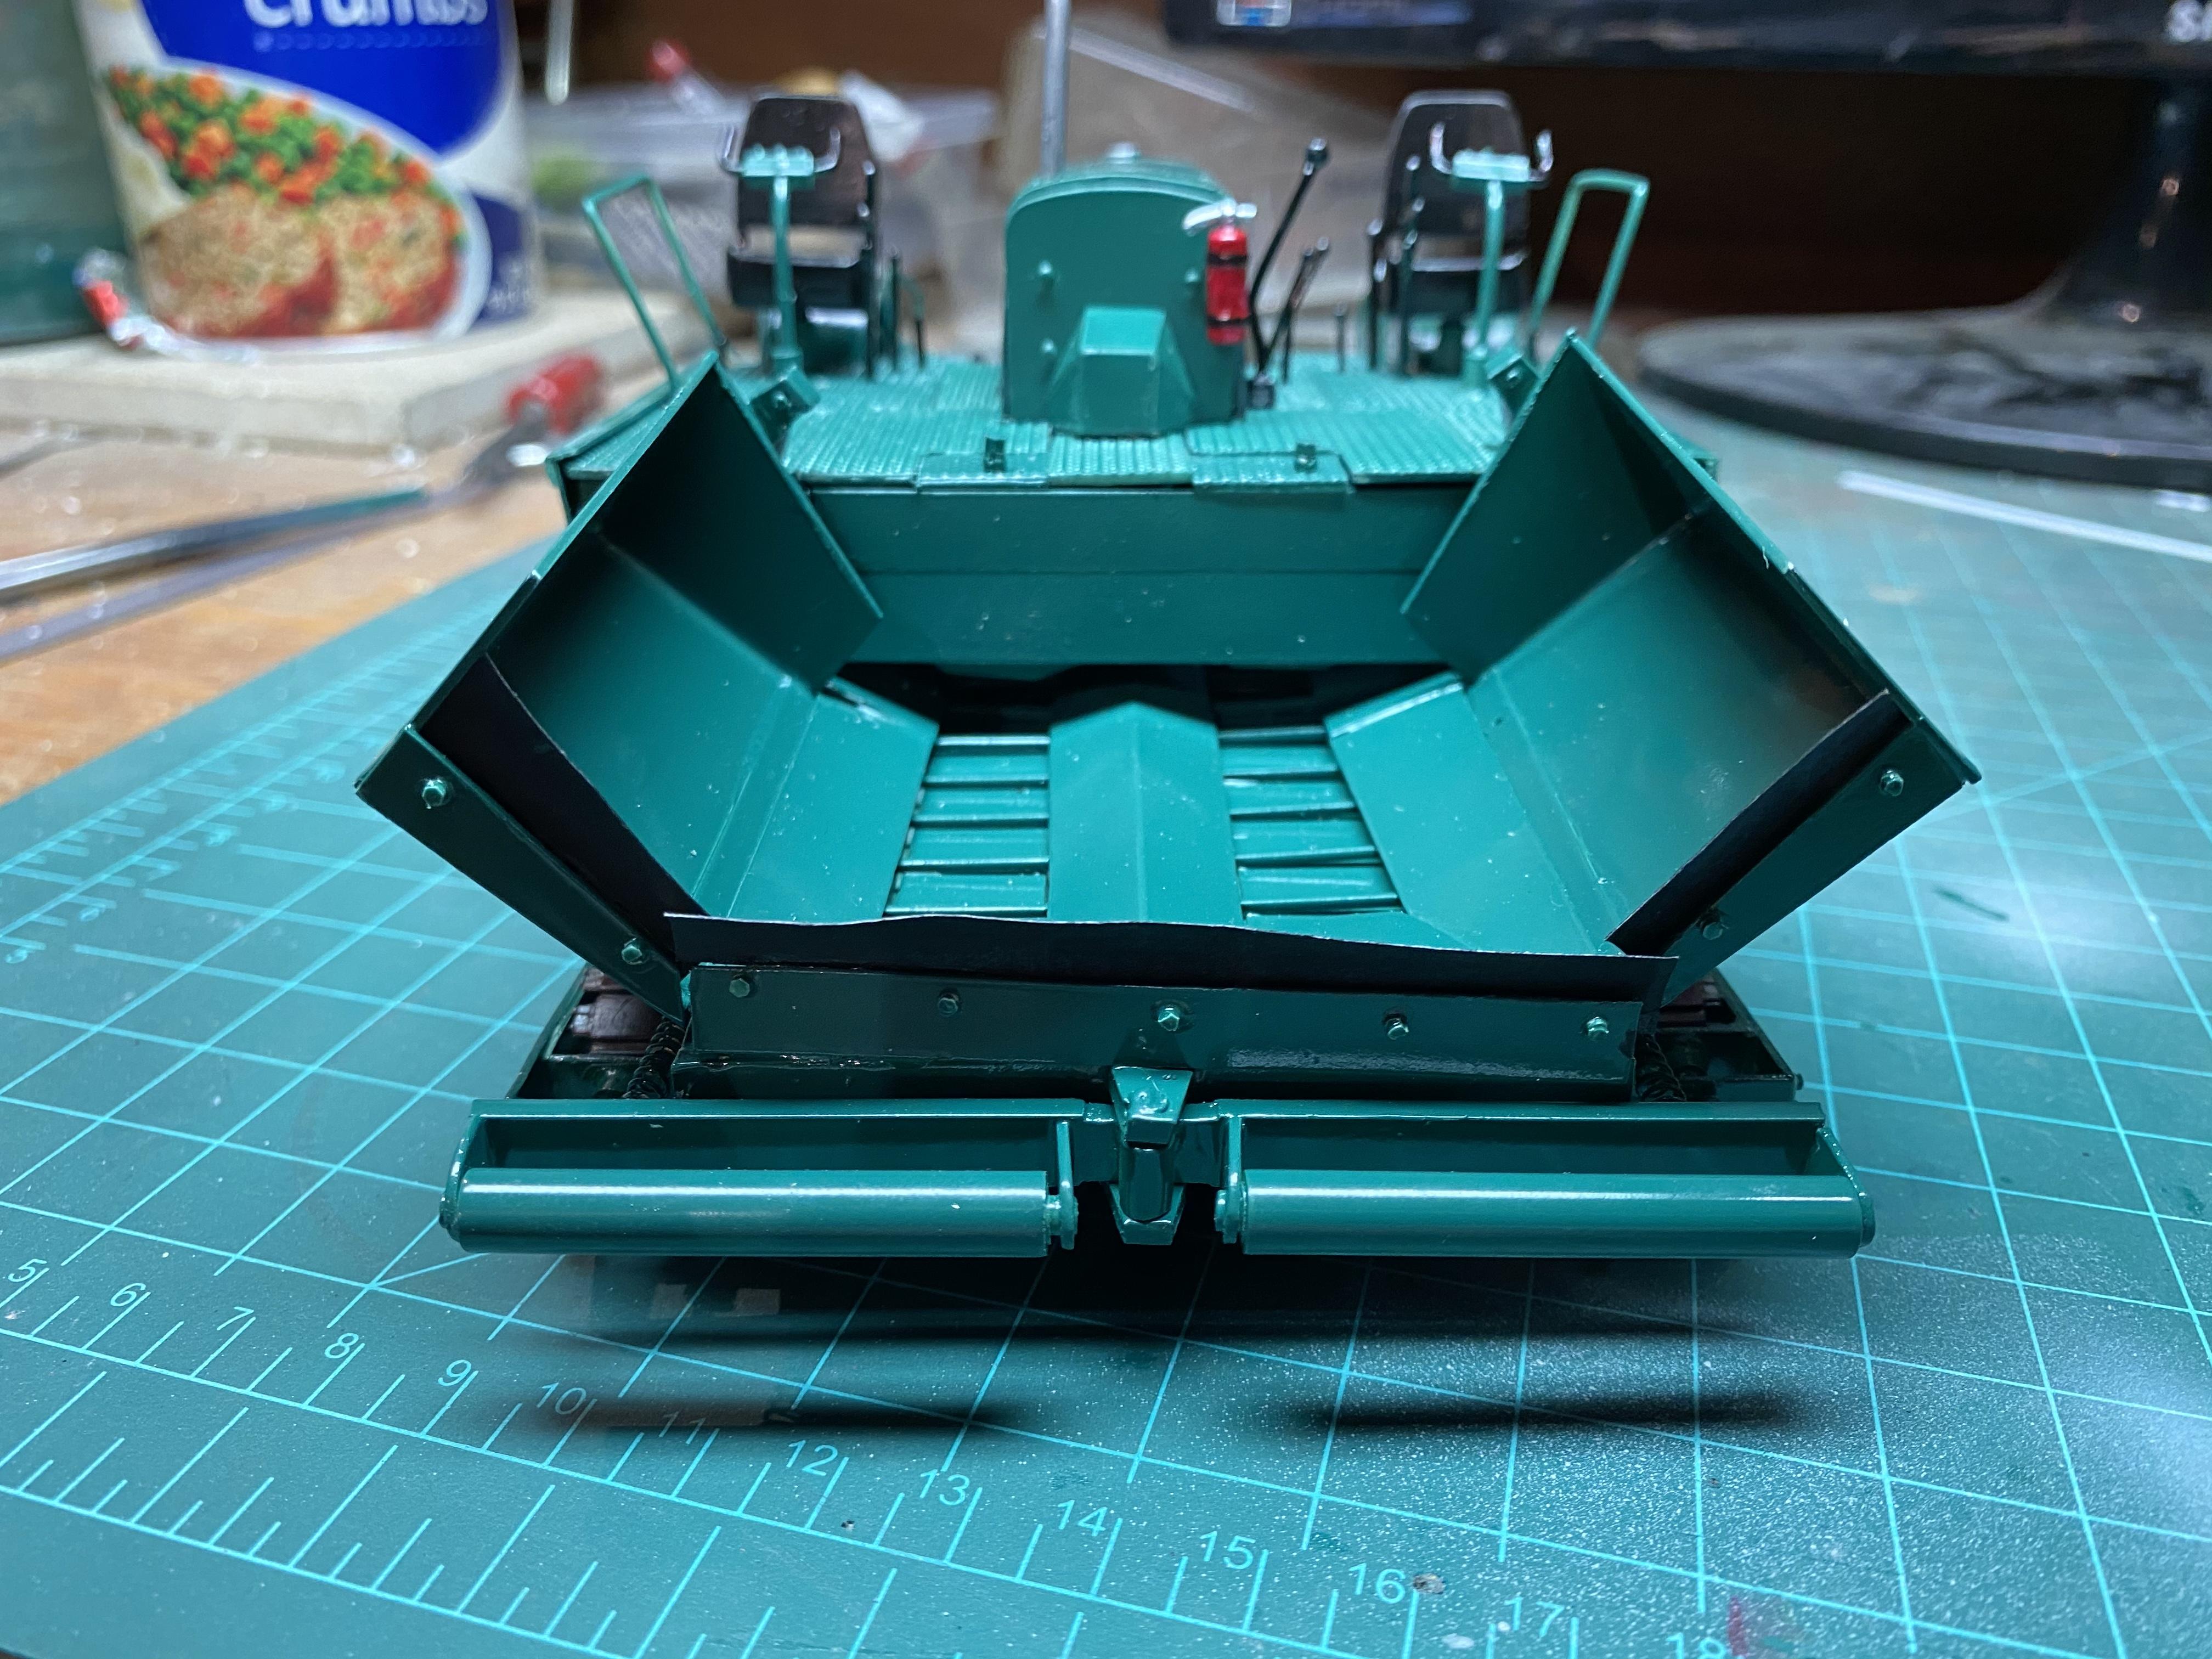
Finally completed the Barber-Greene SA-40 paver. I usually just do a paint shop fresh looking build, but this time, decided, at the urging of some friends, to do some light weathering. So, I just did a little bit, to represent a machine that is well maintained and only has a little use since it’s last serious cleaning and touchup. Guess ya gotta push the limits of your skills to get better! This build hides a LOT of it’s detail inside of itself. All of the drivetrain is operational, from the main belt drive, through the main transmission, to the clutches, the dropdown gearboxes, the jackshafts, crawler drive, track tensioners, push rollers, hopper feeder gates, feed conveyor drive, tamper drive, feed auger drive, screed crown and level adjustments, and it is all done with tiny roller chains and sprockets, screws, and multiple moving parts. All of the hydraulic cylinders work, and ALL of this is invisible! I equate this to the aircraft modeler who puts loads of detail into an airplane fuselage and buttons it all up never to be seen again! Yeah, but the builder knows it’s there, and that’s why I spent so much time on the innards! I also want to thank all of my fellow builders for their advice, encouragement and help, especially Charlie Rowley, for his constant inspiration; Hermann Kersten, for the great tip on making rubber flaps; and Pete Wisniewski for the absolutely incredible decals! If you want to see the innards as they developed, check out the build on the "On the workbench" pages. Thanks to all for coming along on the ride!

-
Truck Mirror Brackets
redneckrigger replied to Chariots of Fire's topic in Tips, Tricks, and Tutorials
Great tutorial, Charlie........................can't wait to give it a try! -
Hope you are doing better. Stay safe!
-
BRBO IHC 2070
redneckrigger replied to redneckrigger's topic in WIP: Model Trucks: Big Rigs and Heavy Equipment
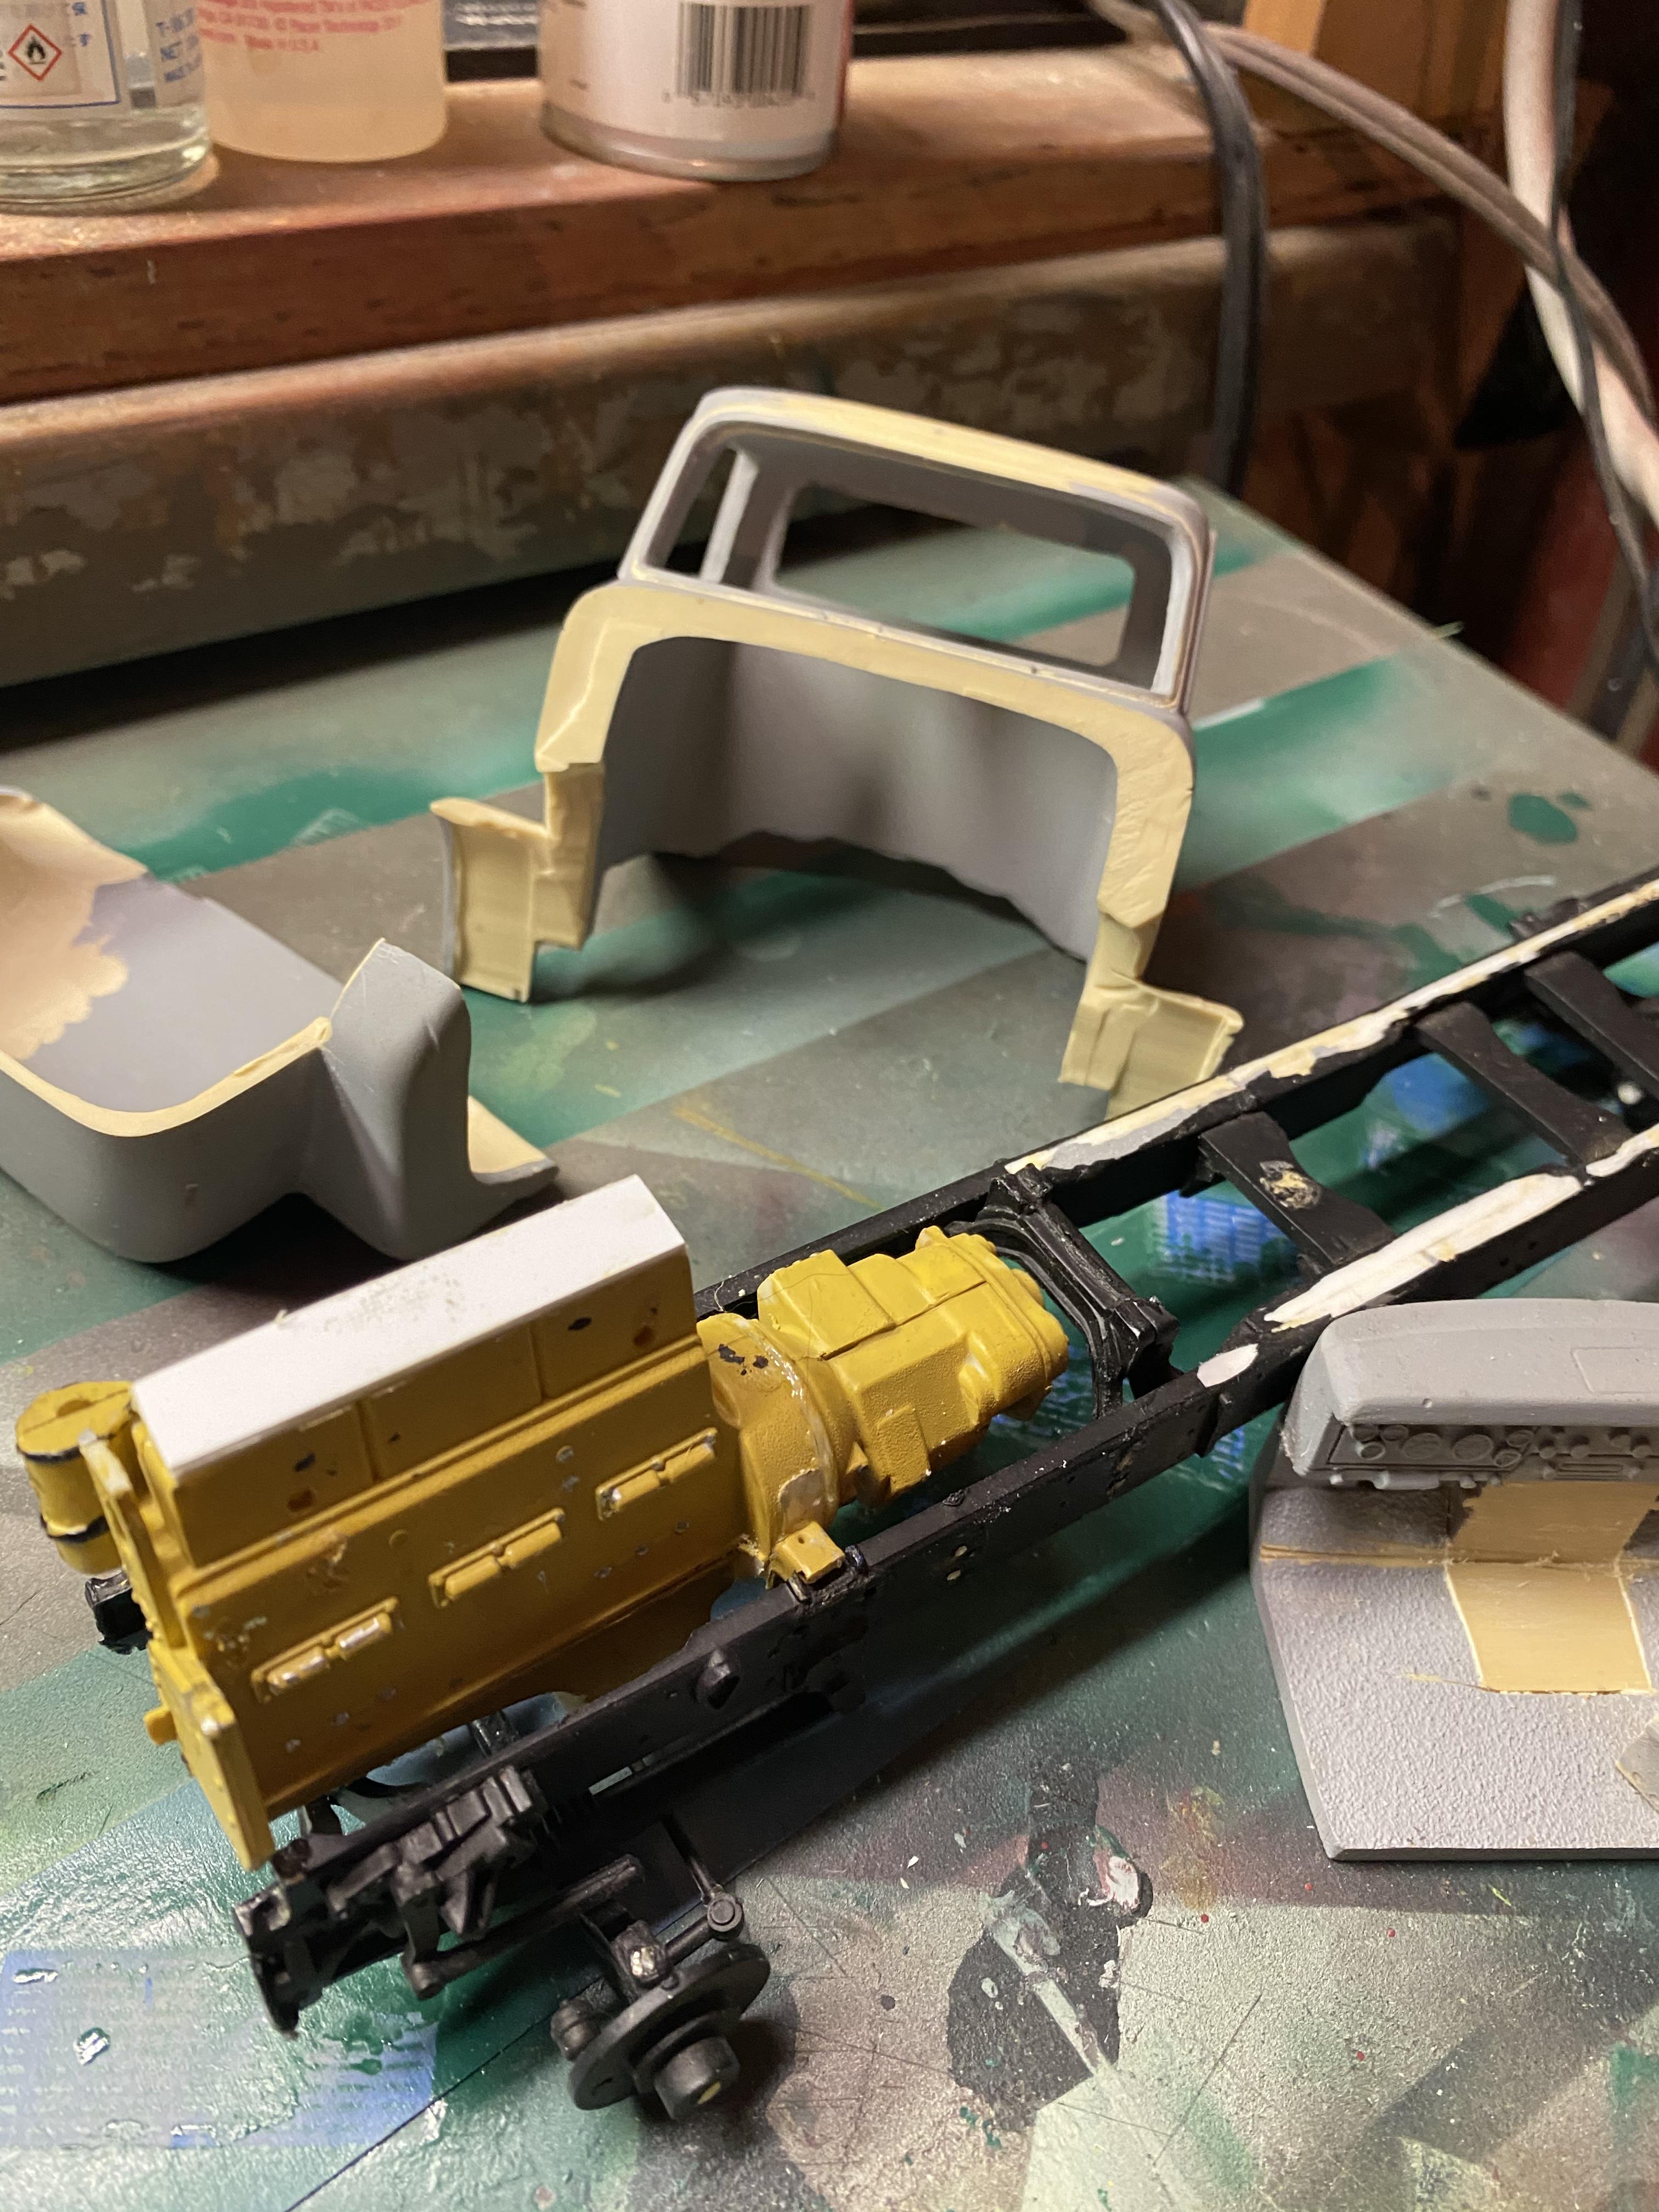
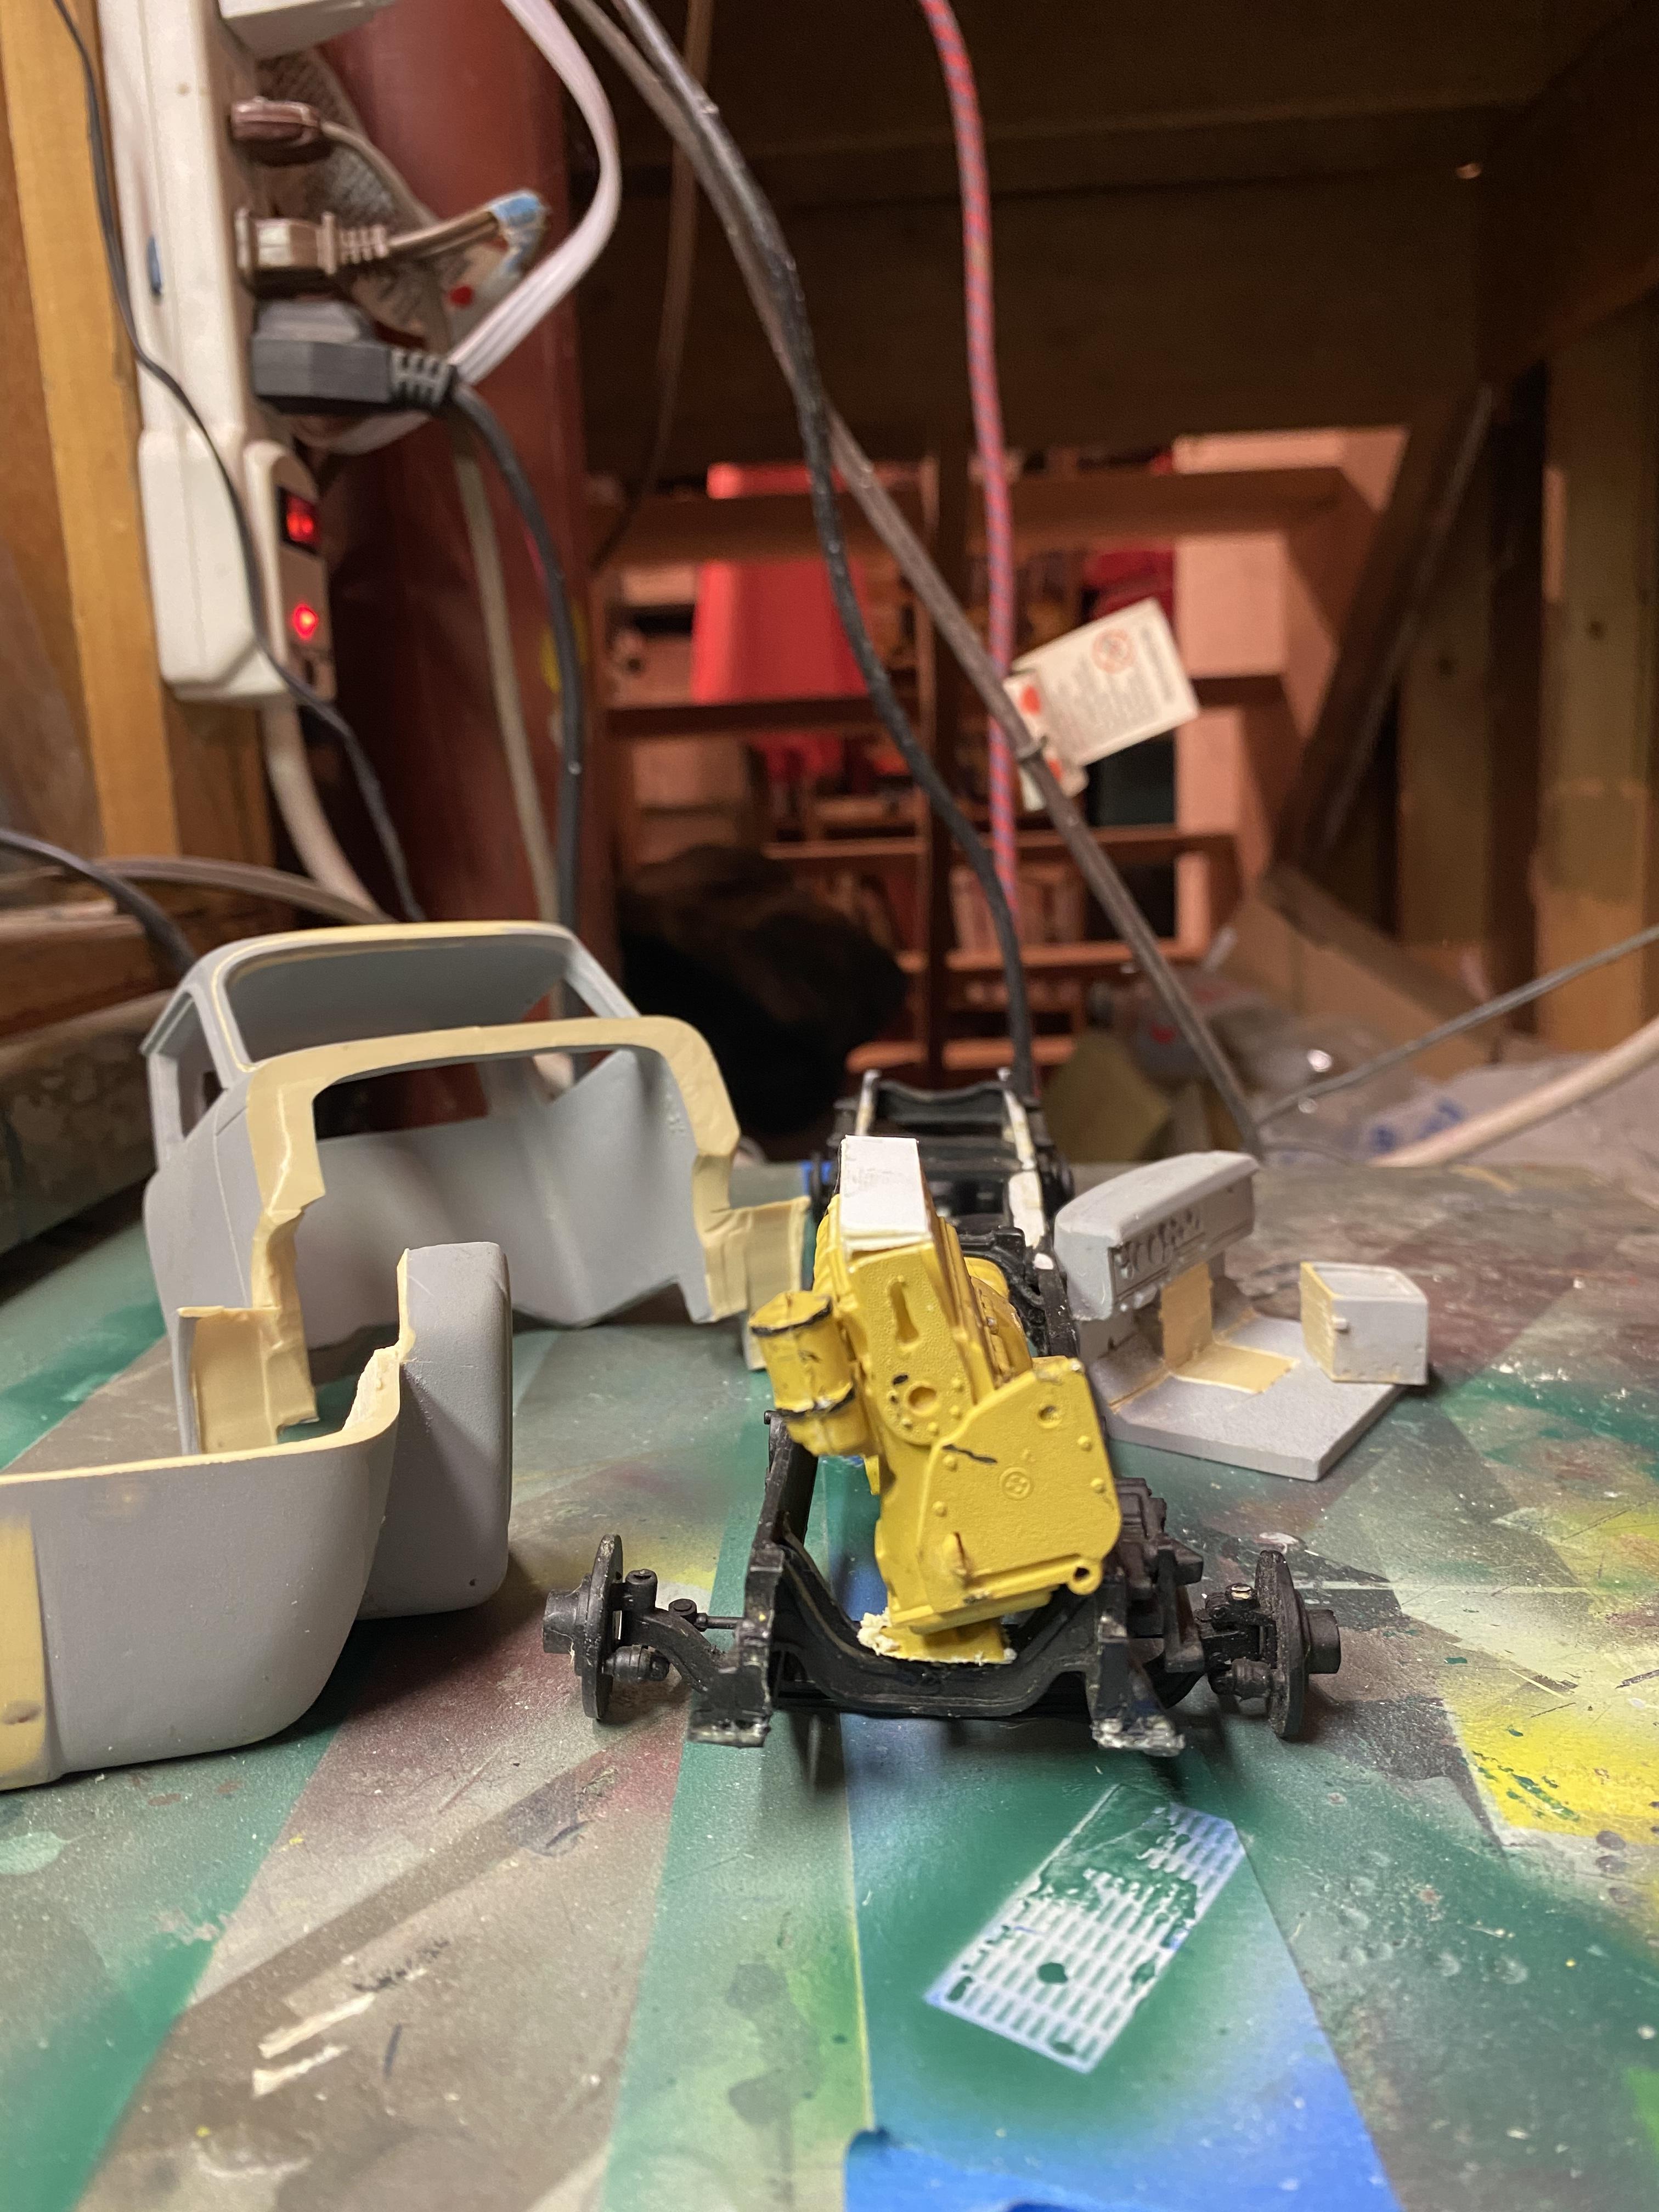
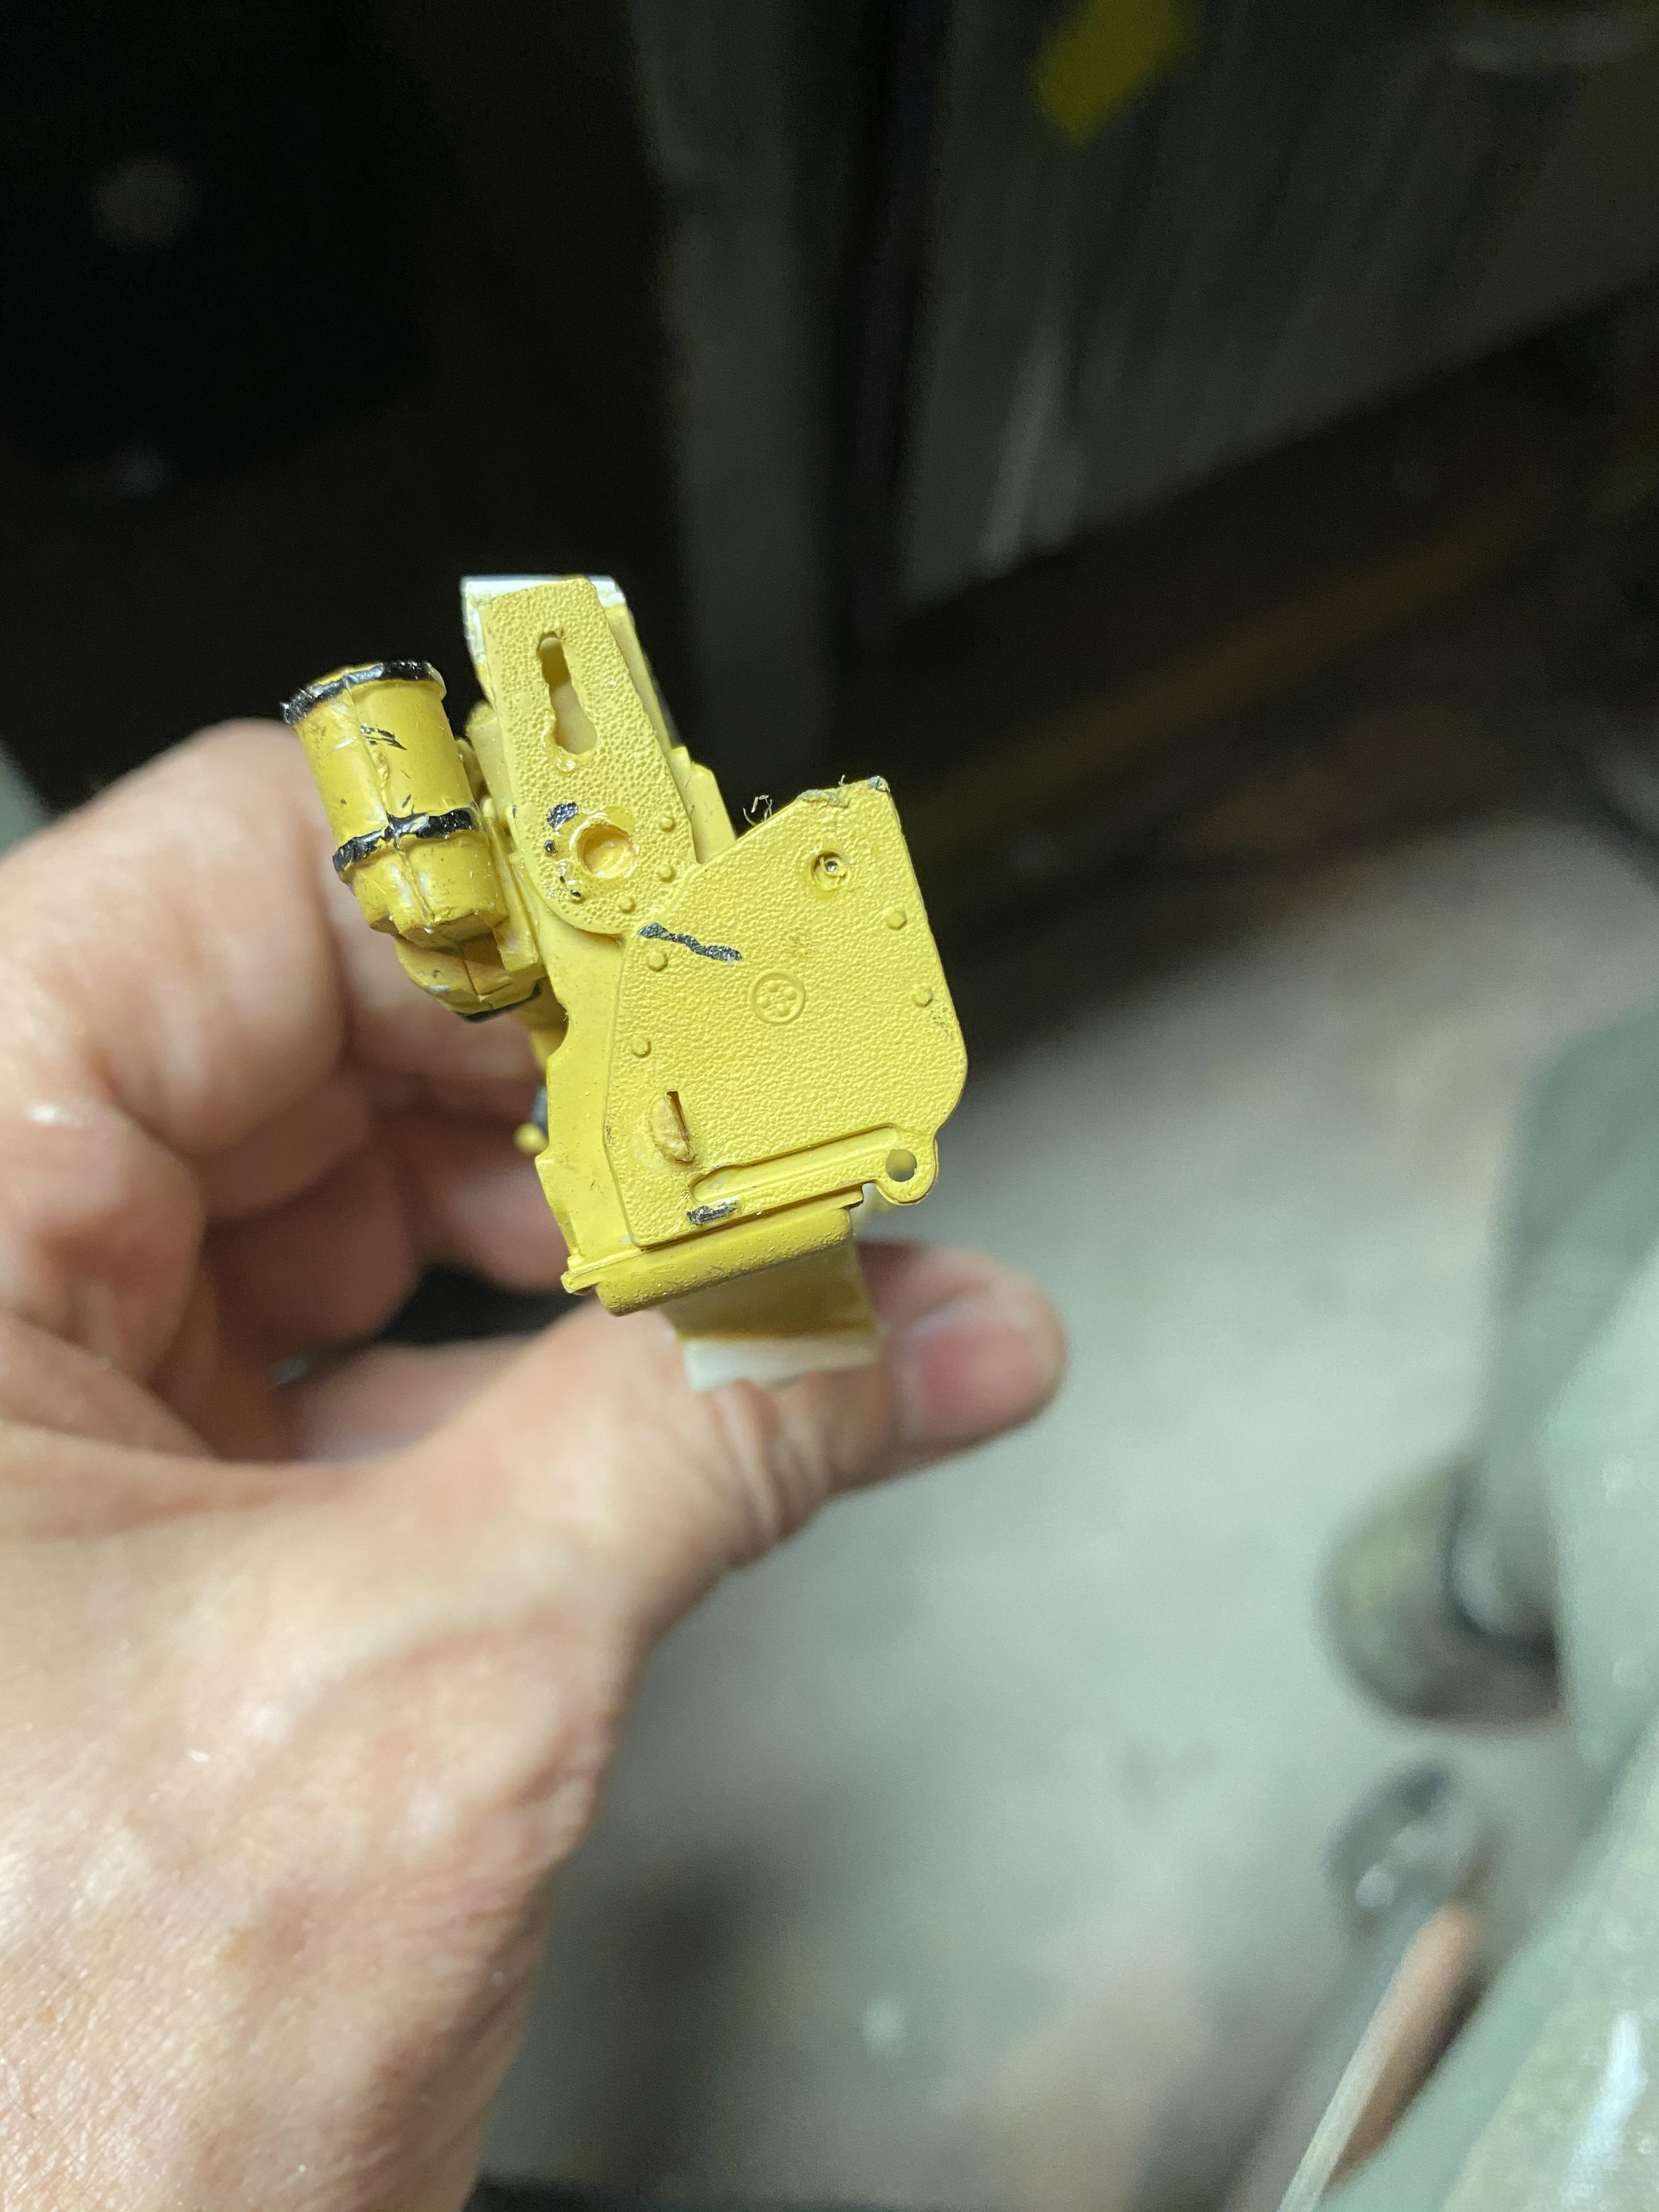
Well, while waiting for parts to arrive for the crane, figured I’d give this some time. So, I thinned out the hood, and cut the gasket outline around the windshield and rear window openings. I also cut the doghouse out of the interior tub, and will cut the floor and hollow it out to give clearance to the rear of the Cummins engine. As the engine is tilted to the right in this model in order to get room to tuck it under the dash, I modified the oil pan and the rocker covers, and rhe transmission and engine mounts to reflect the tilt. I have decided to build this as a single axle dump truck, as the paver crew put in a request for a smaller truck for those tight areas.
-
The Beast...KW winch truck
redneckrigger replied to gotnitro?'s topic in WIP: Model Trucks: Big Rigs and Heavy Equipment
VERY nice work, Jeff! Looking great so far. Love those KFS tires too! -
Got the preview samples of Peteski's decals.................holy COW! Peteski, you are an artist! I can't wait to see them on the old girl! THANK YOU!!!!
-
Absolutely, just like when you, Charlie, share your tips and techniques and help a fellow builder out. This is totally what paying it forward is about!!! Thank you Peter!
-
I find myself without words!!! (Something that hardly EVER happens!) So if anyone wants to gauge the value of this hobby, the people and brotherhood that partake of it, and this forum, this right here does it! Priceless, and at a time when so many are in dire straits and being affected by the pandemic. I will take you up on your offer, and will owe you many times in return! Thank you SO much! Tom Decker
-
Autocar Dump Truck Isolation Build
redneckrigger replied to Oldmopars's topic in Model Trucks: Big Rigs and Heavy Equipment
That is one beautiful dump truck! I love the dented body, looks perfect. And THAT is one reason why this forum is so valuable.............................for offering the ability to learn new techniques from fellow members! Awesome job! -
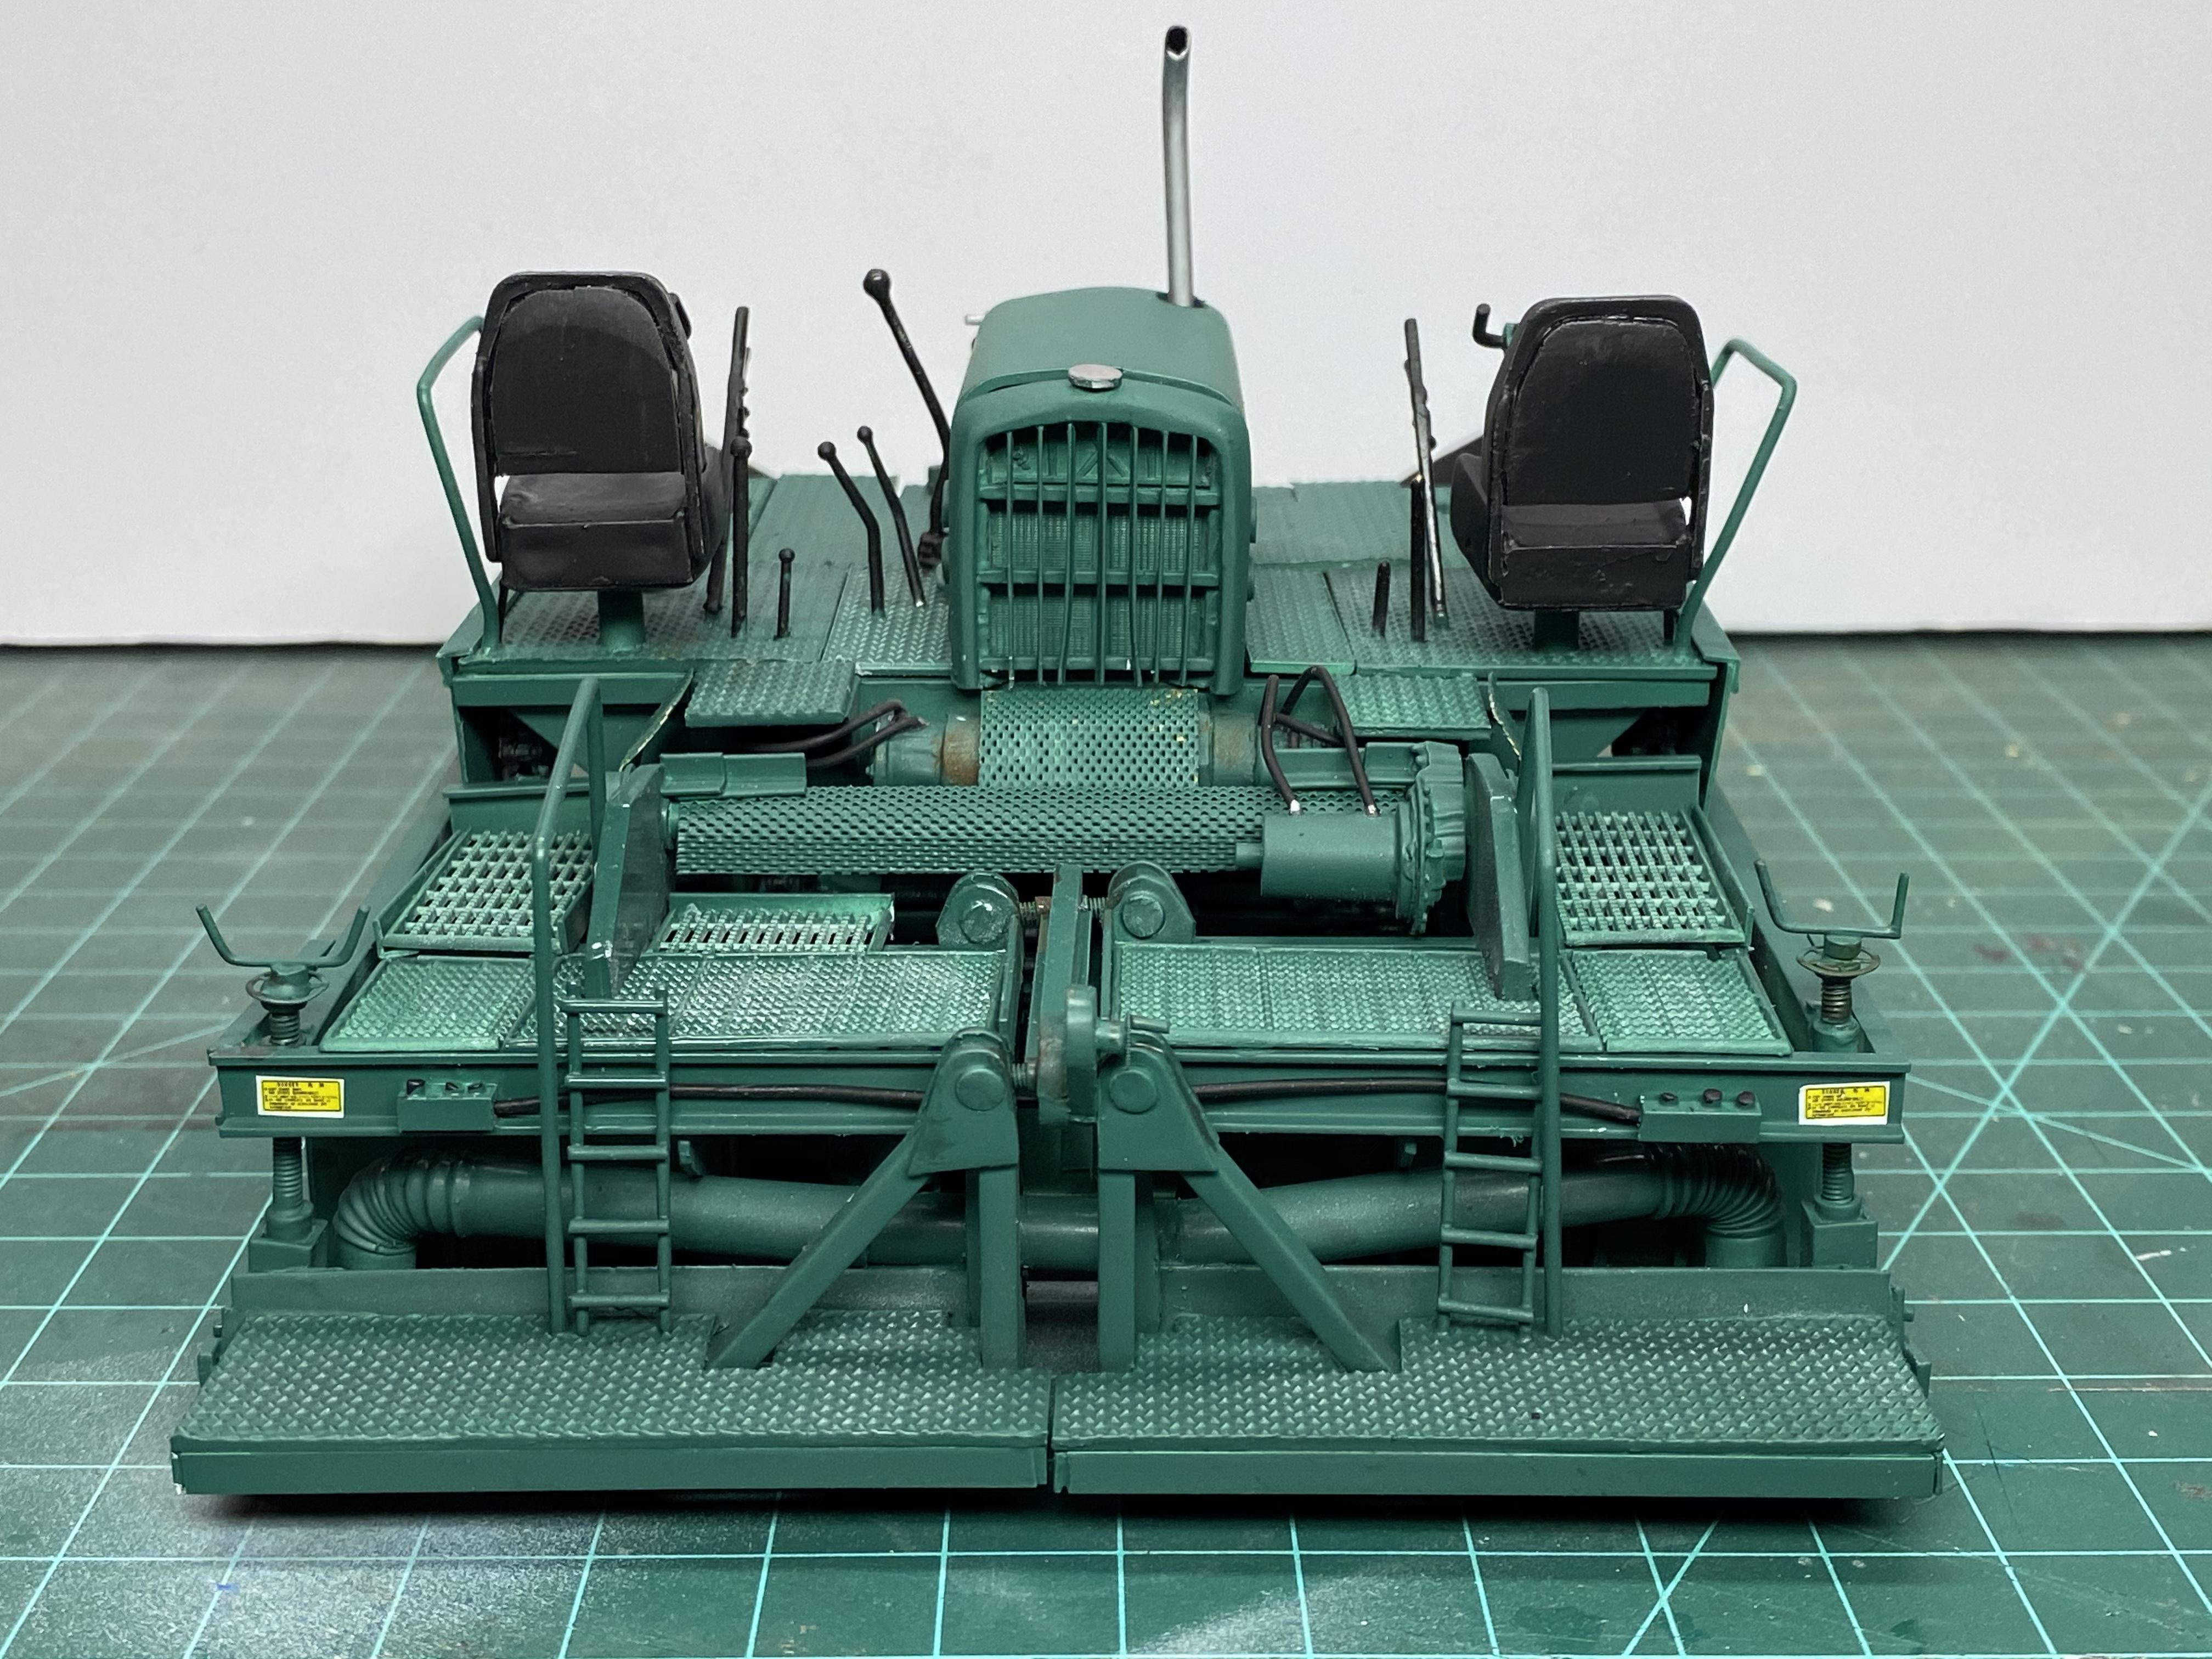
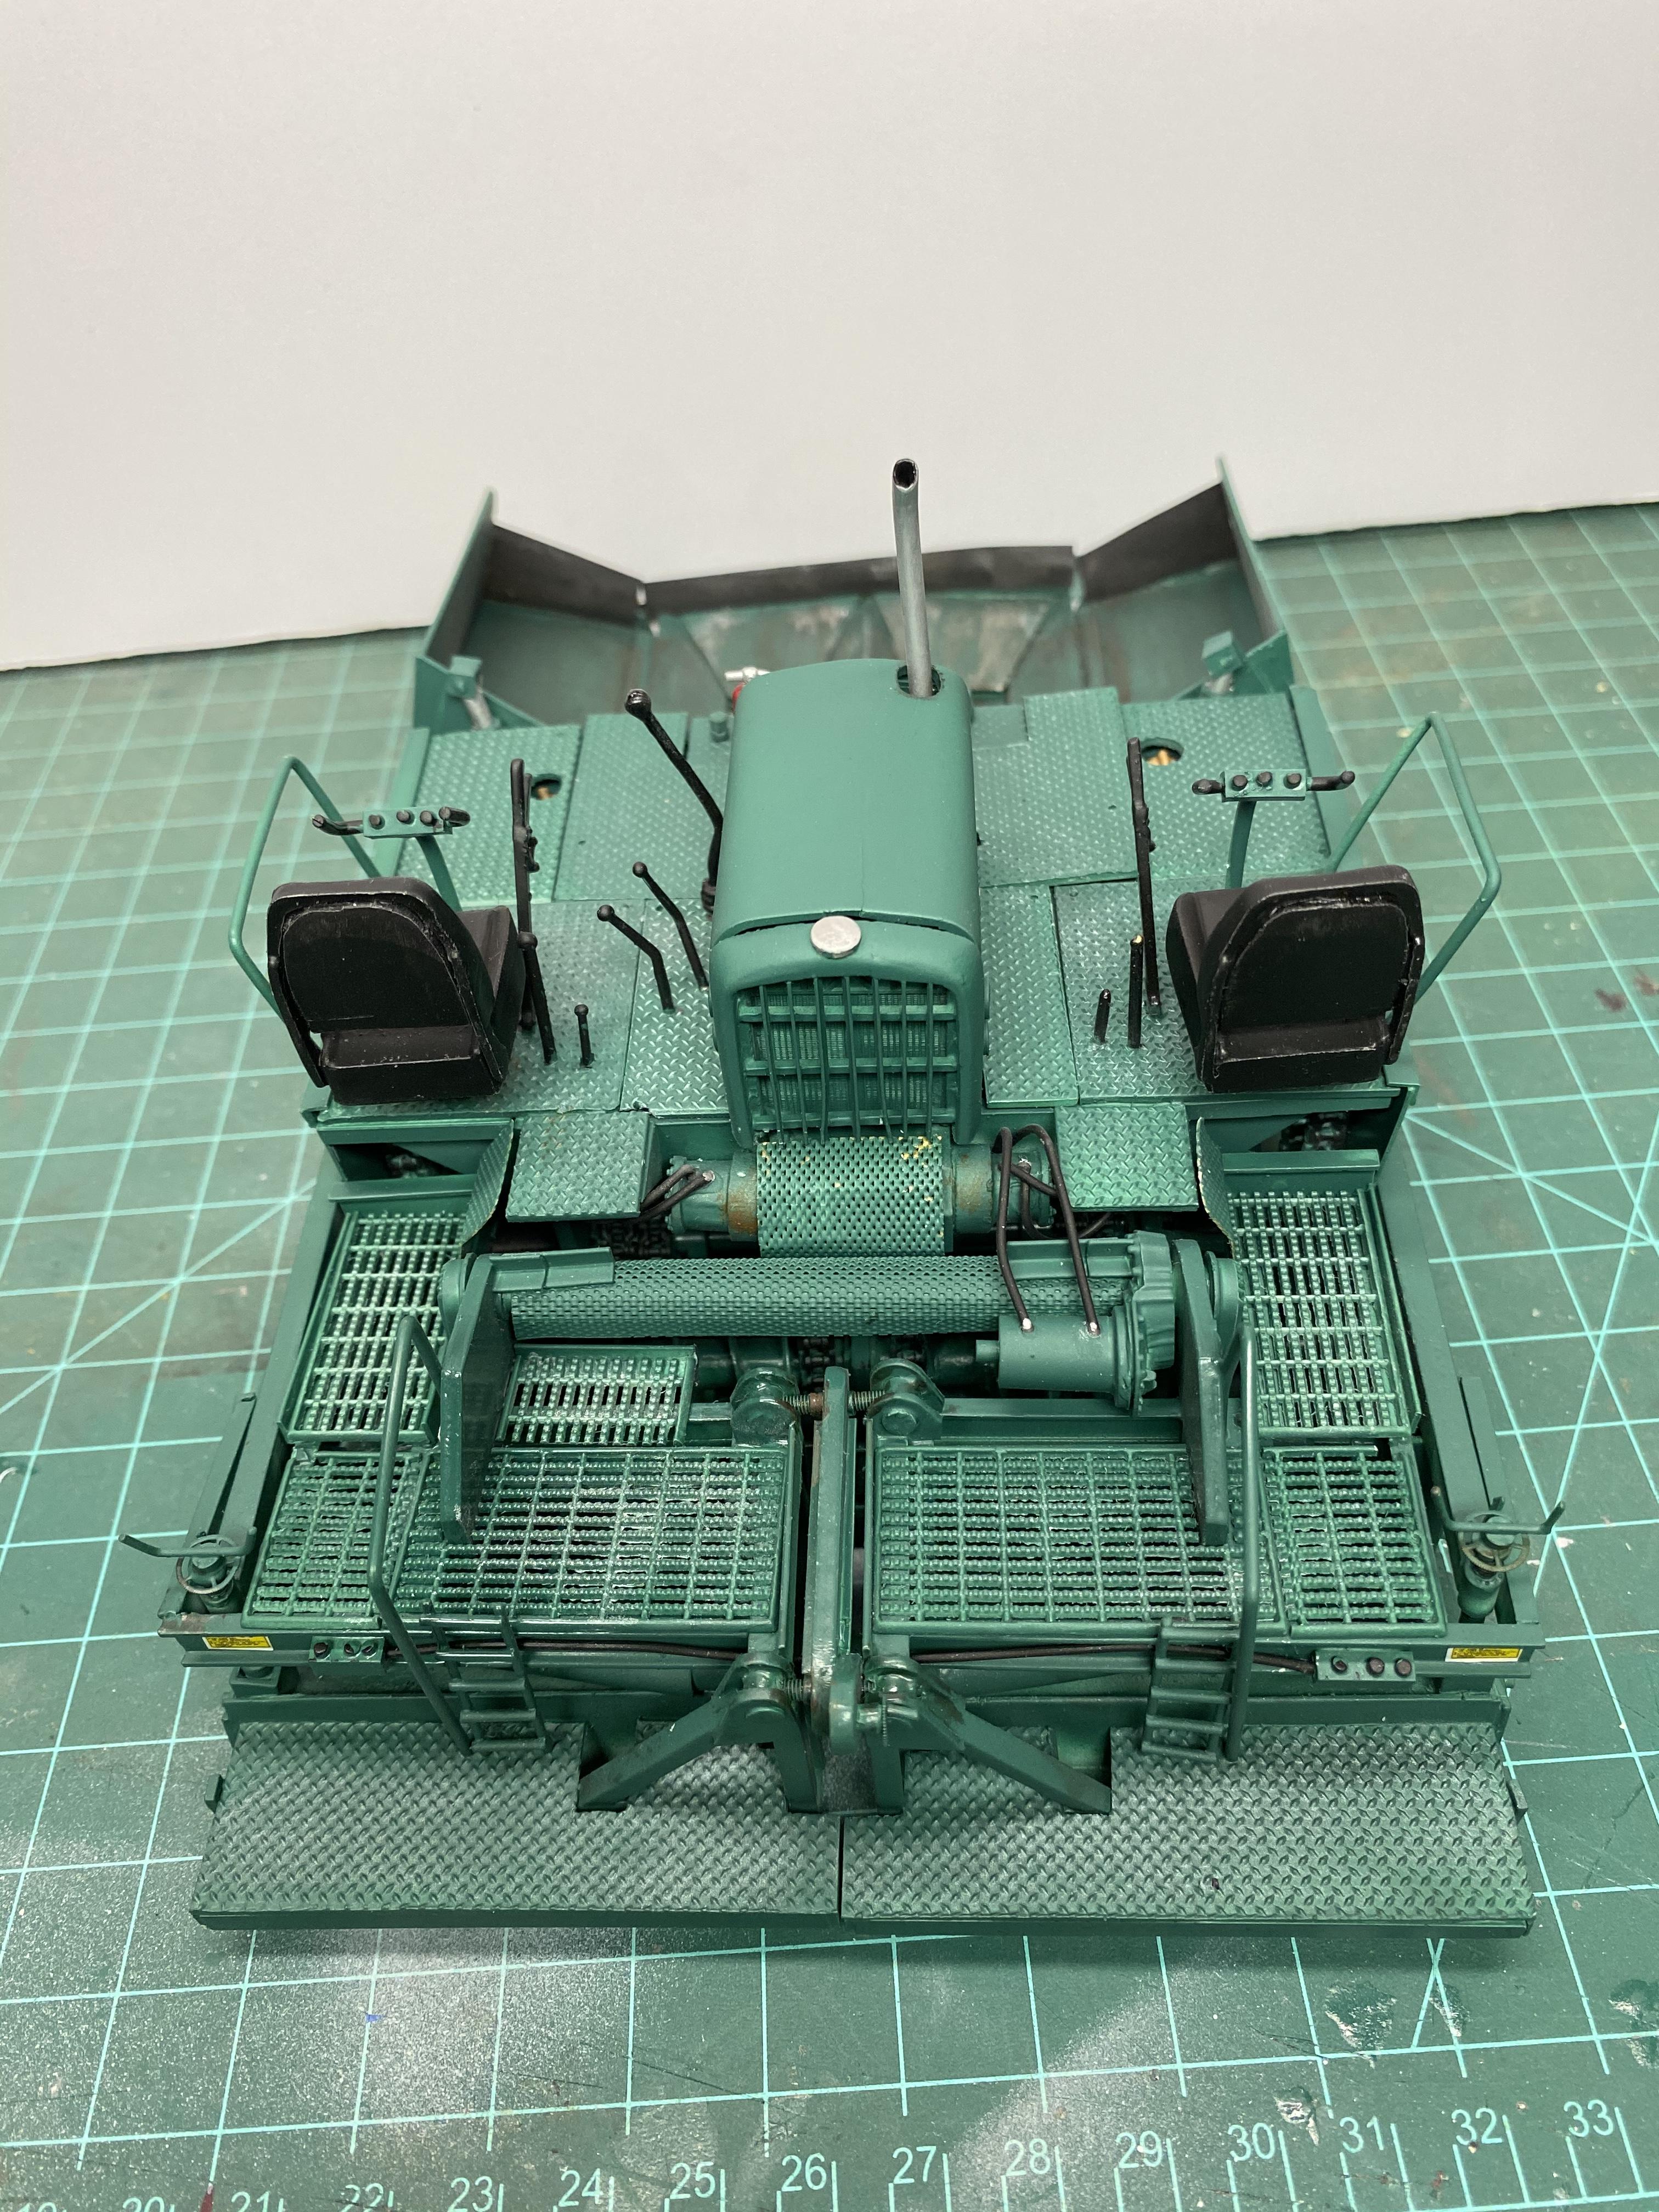
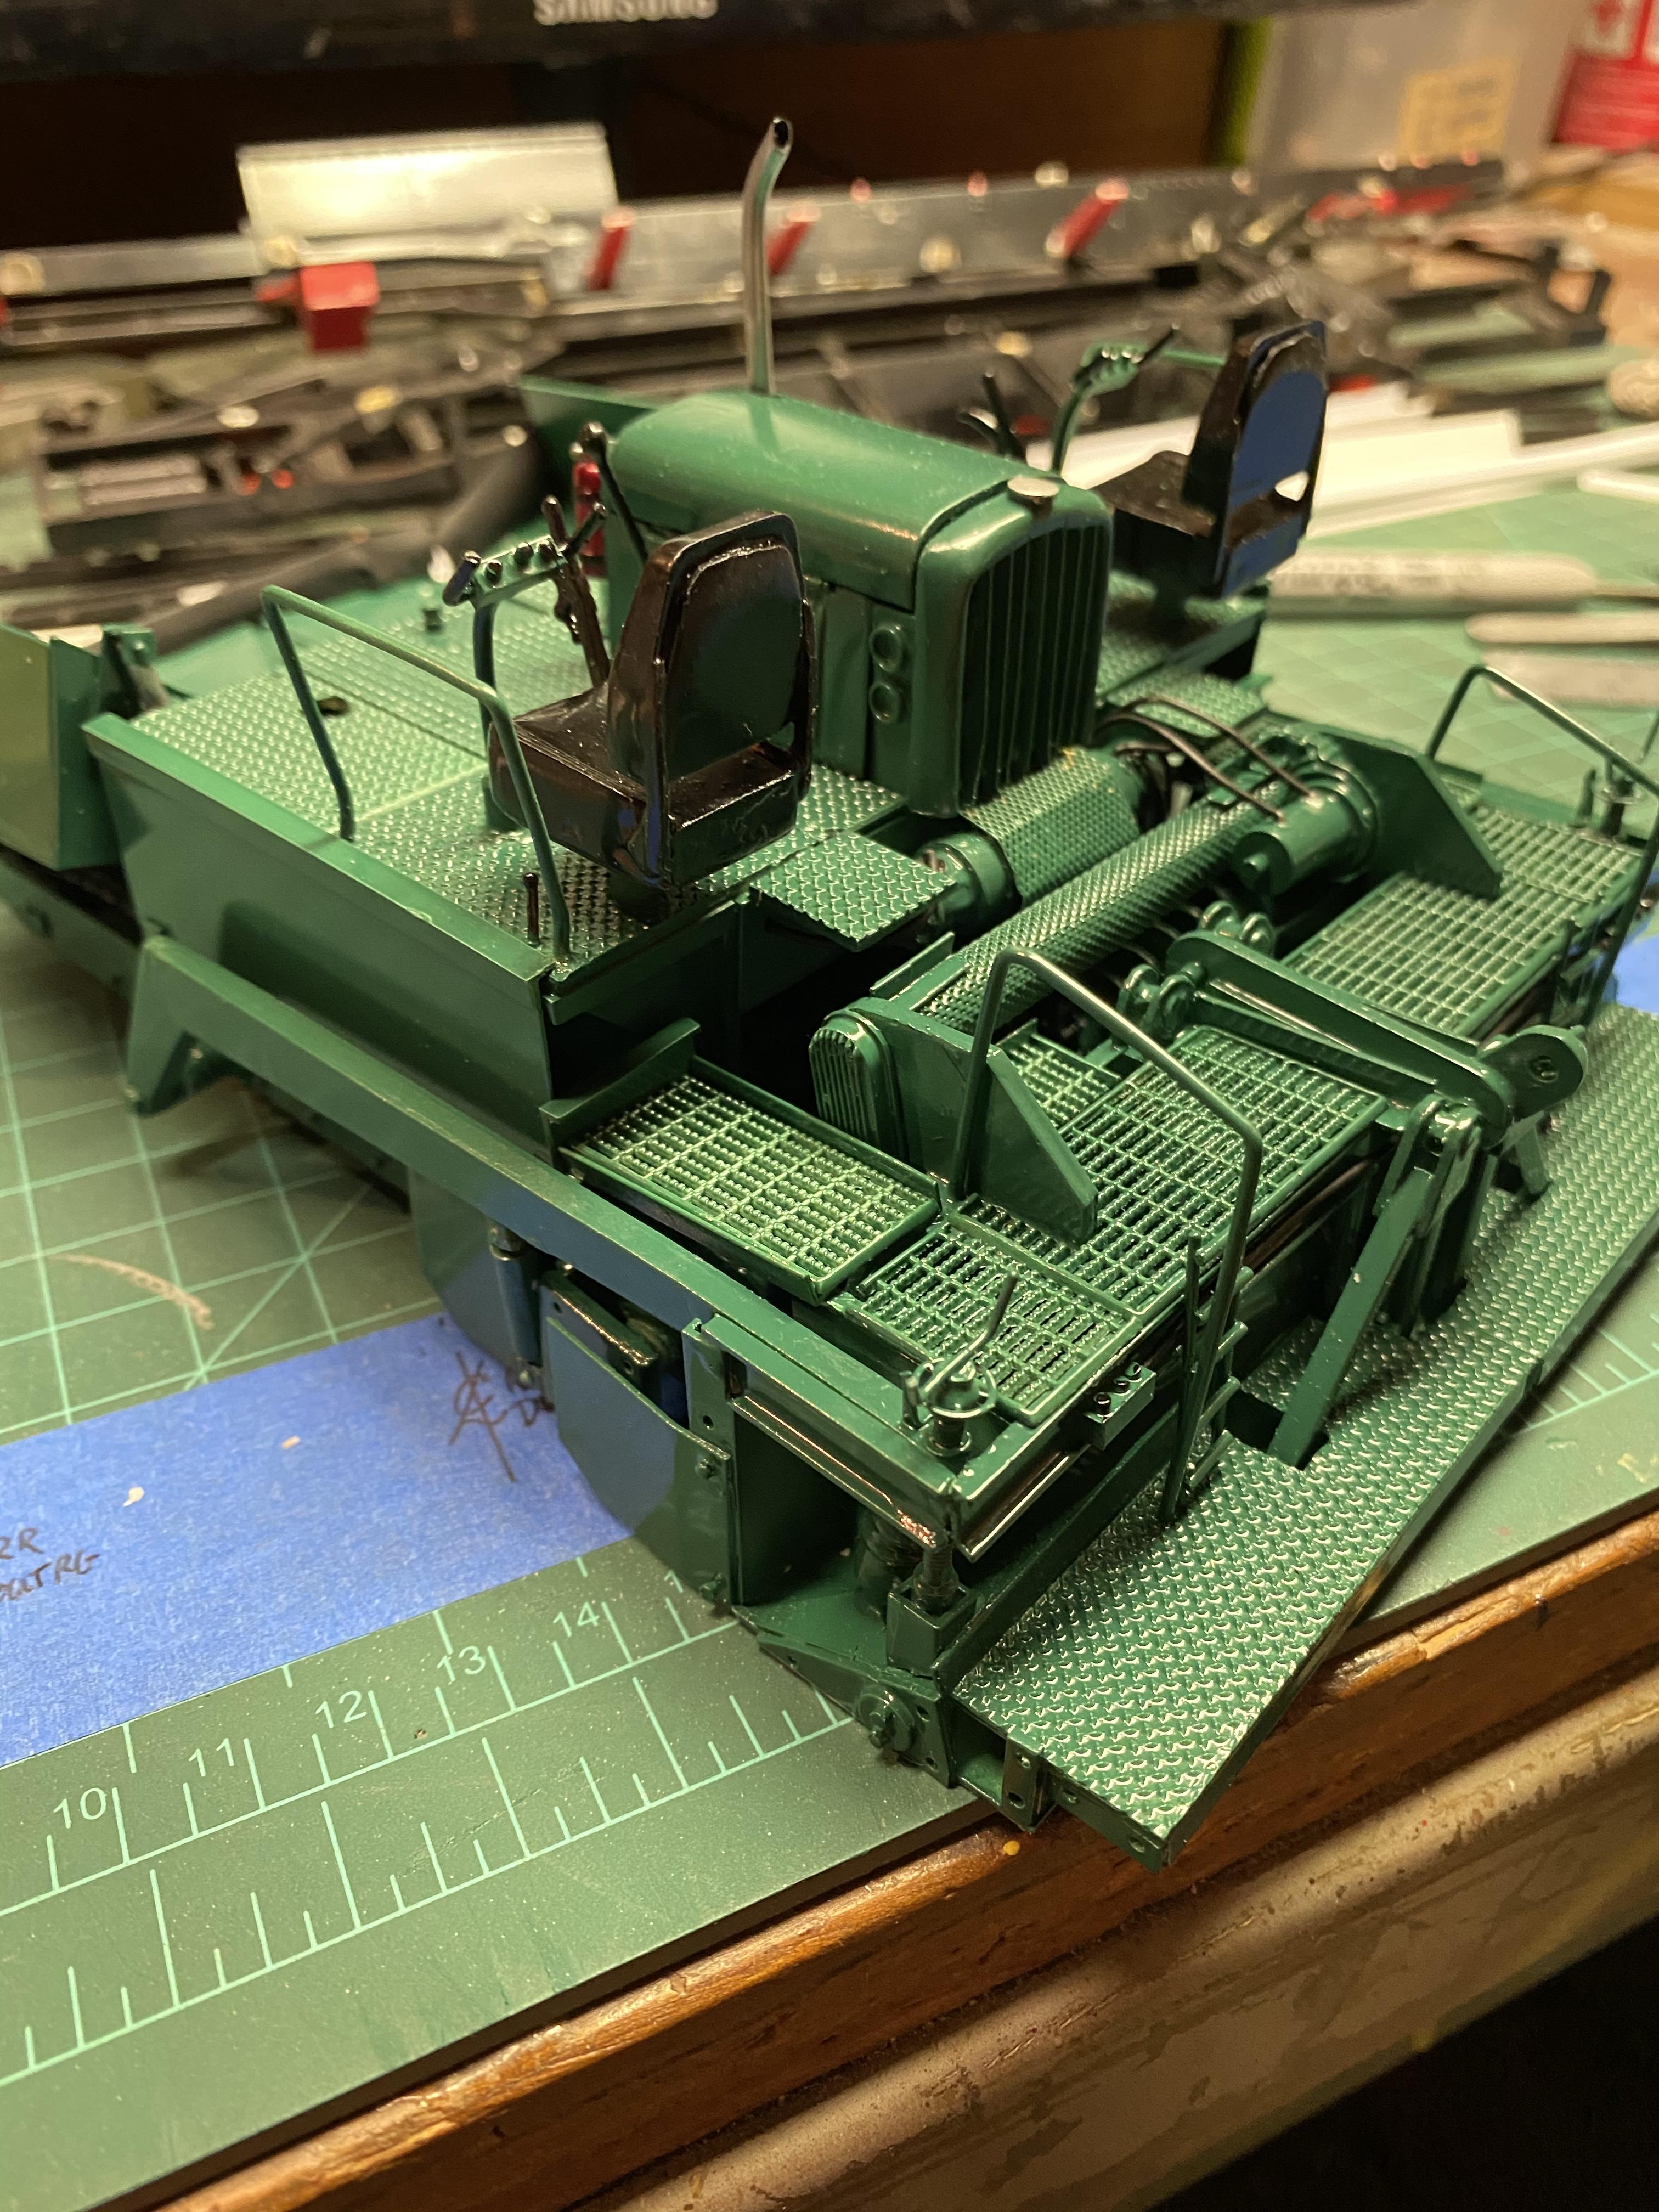
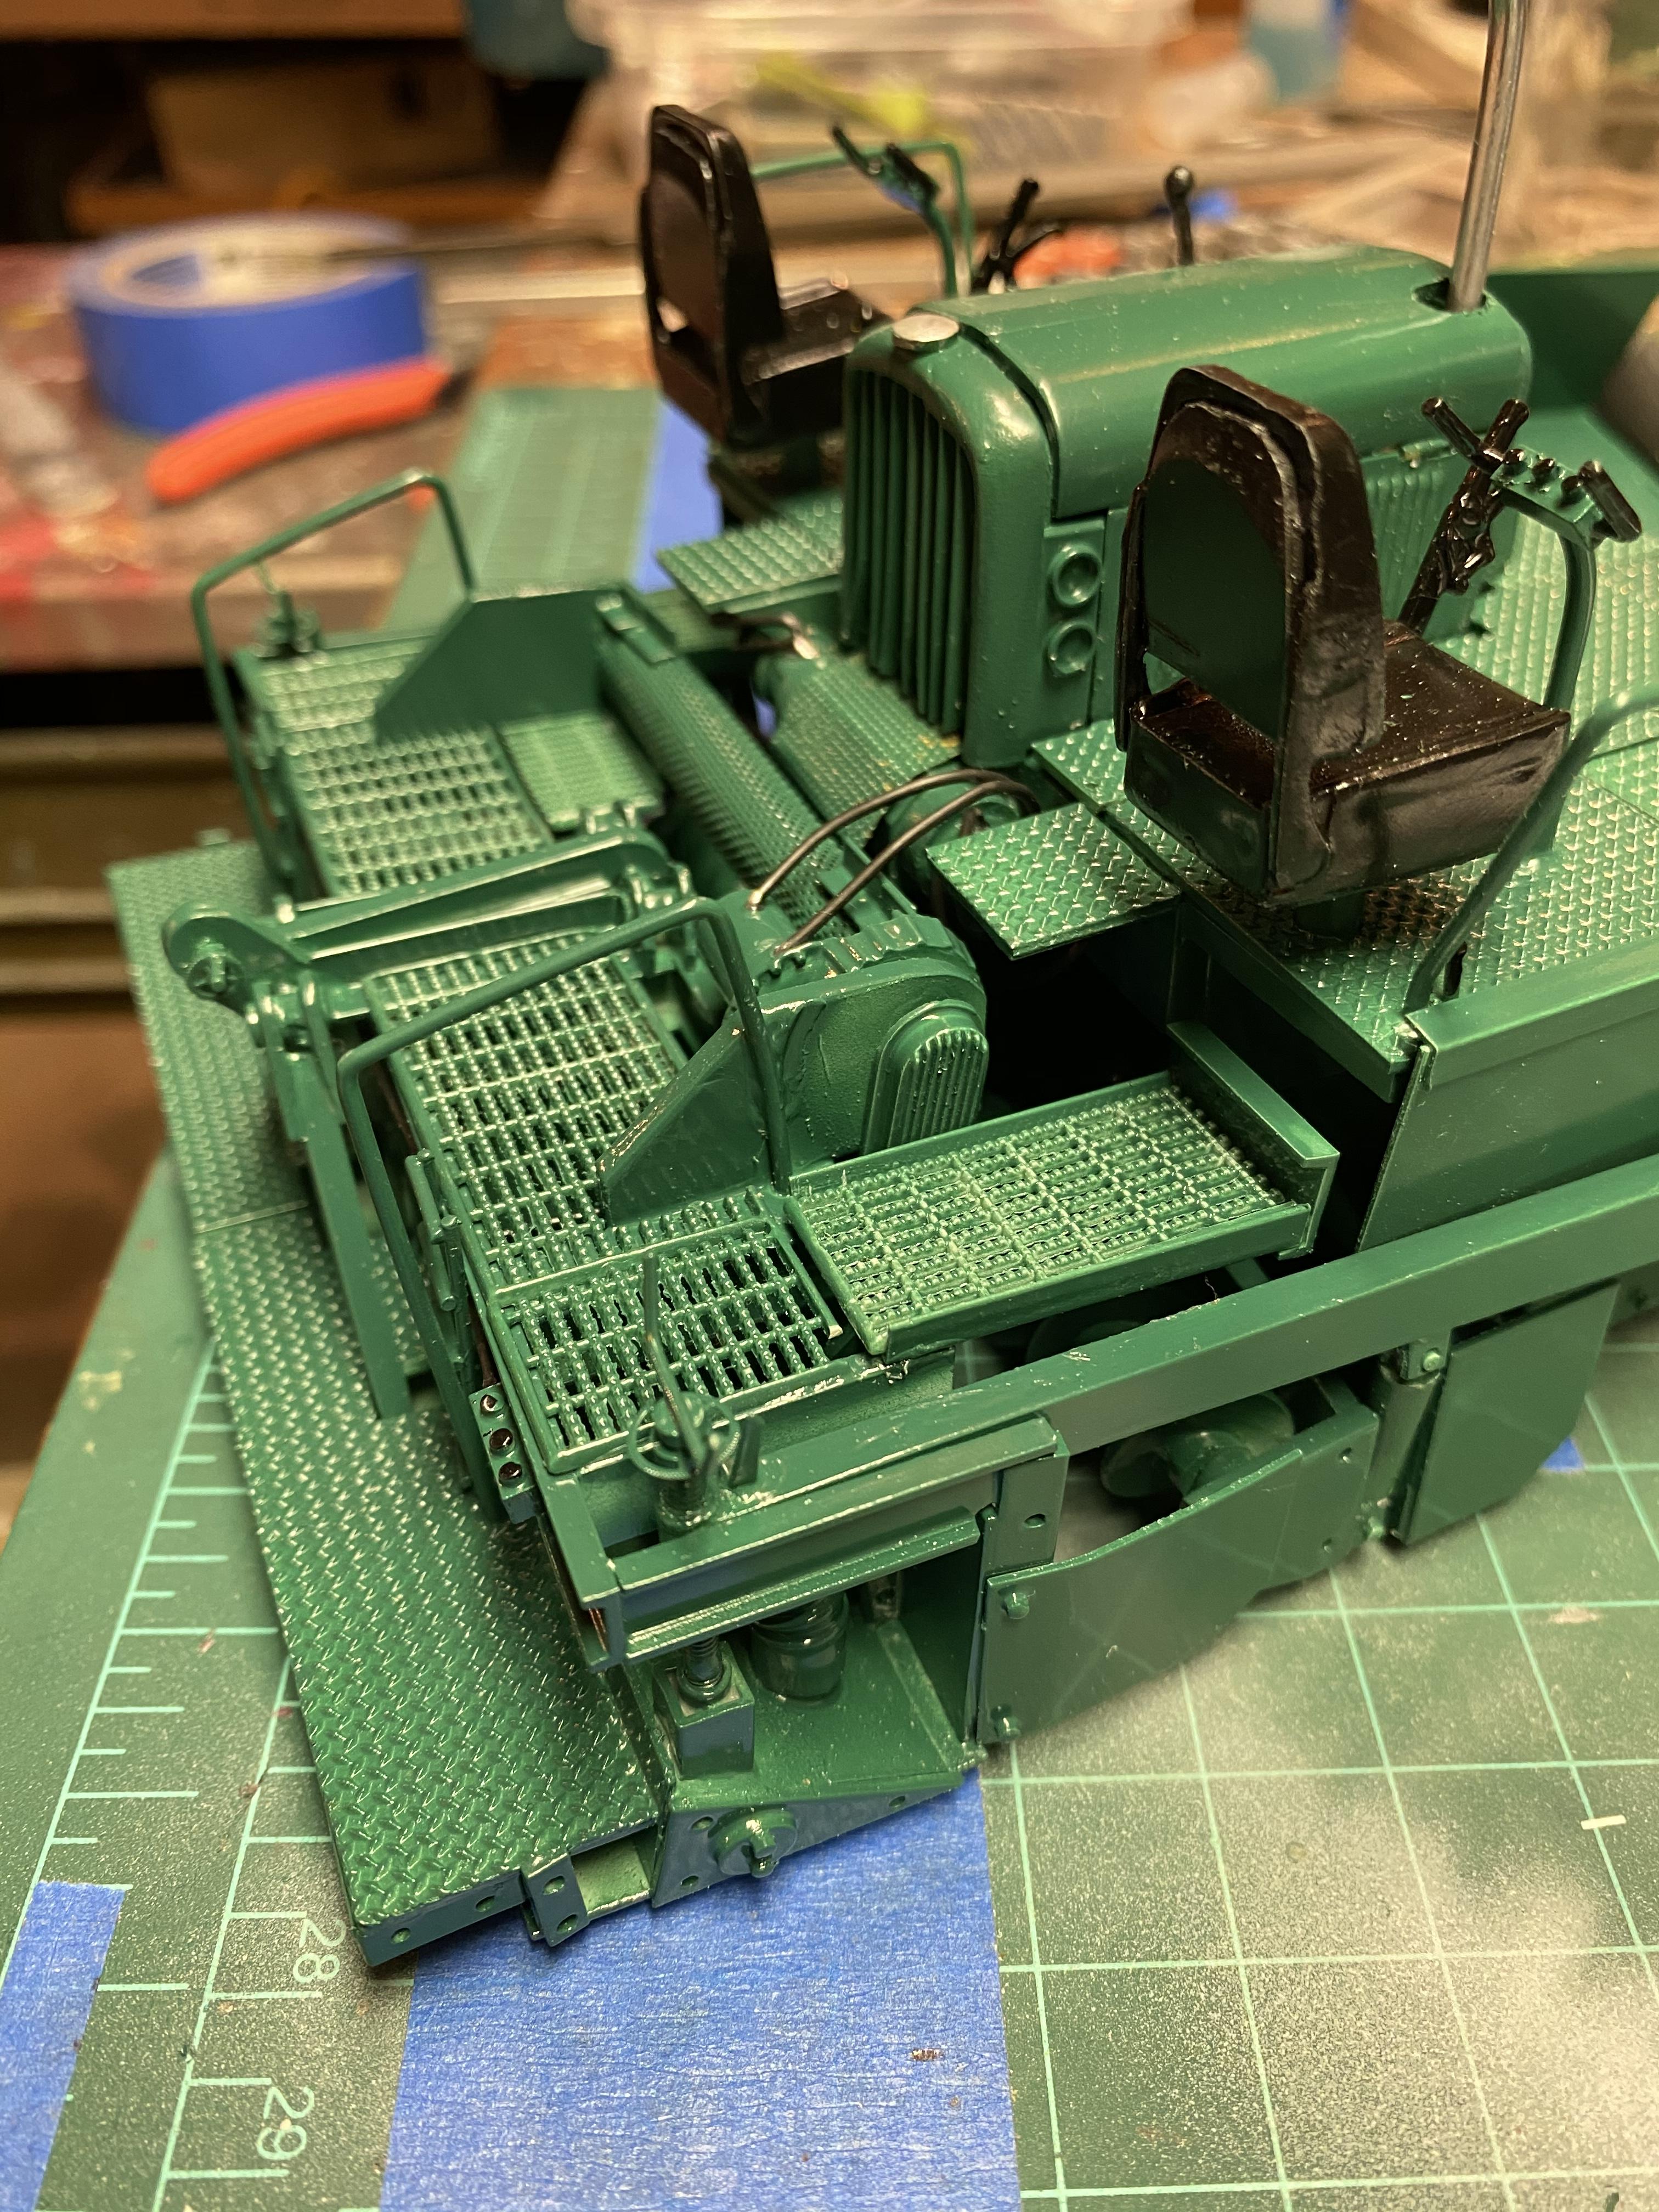
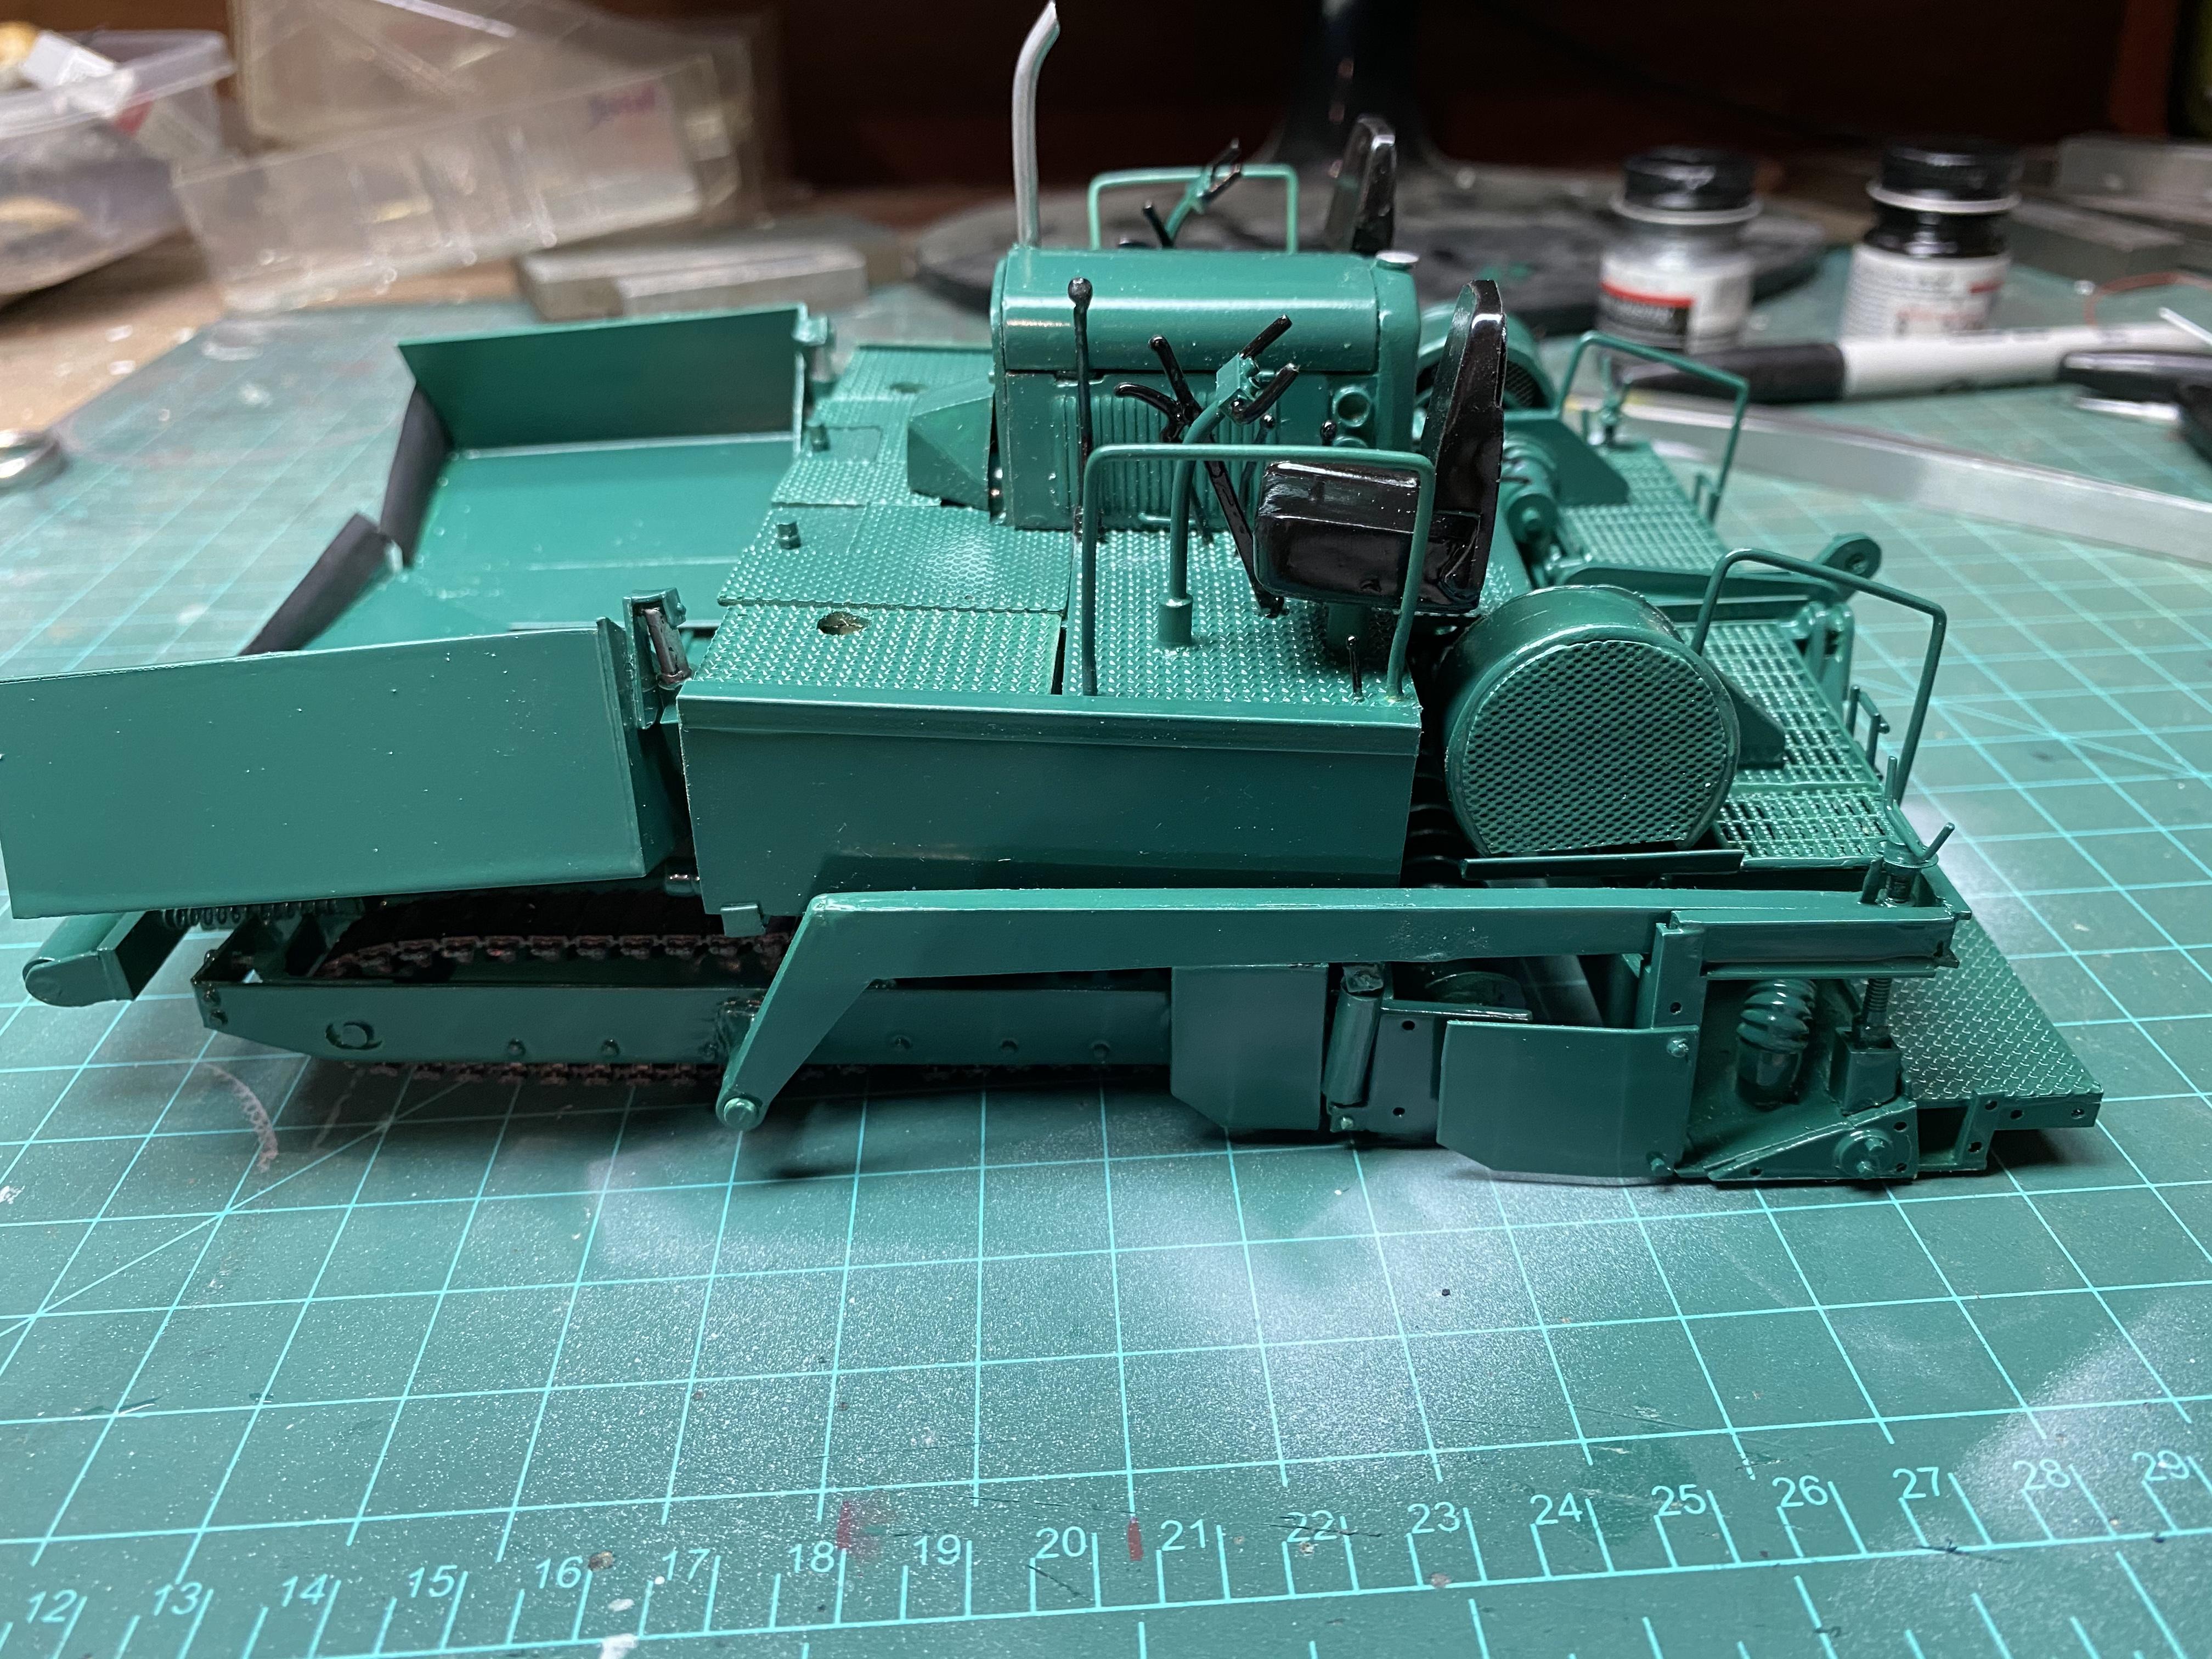
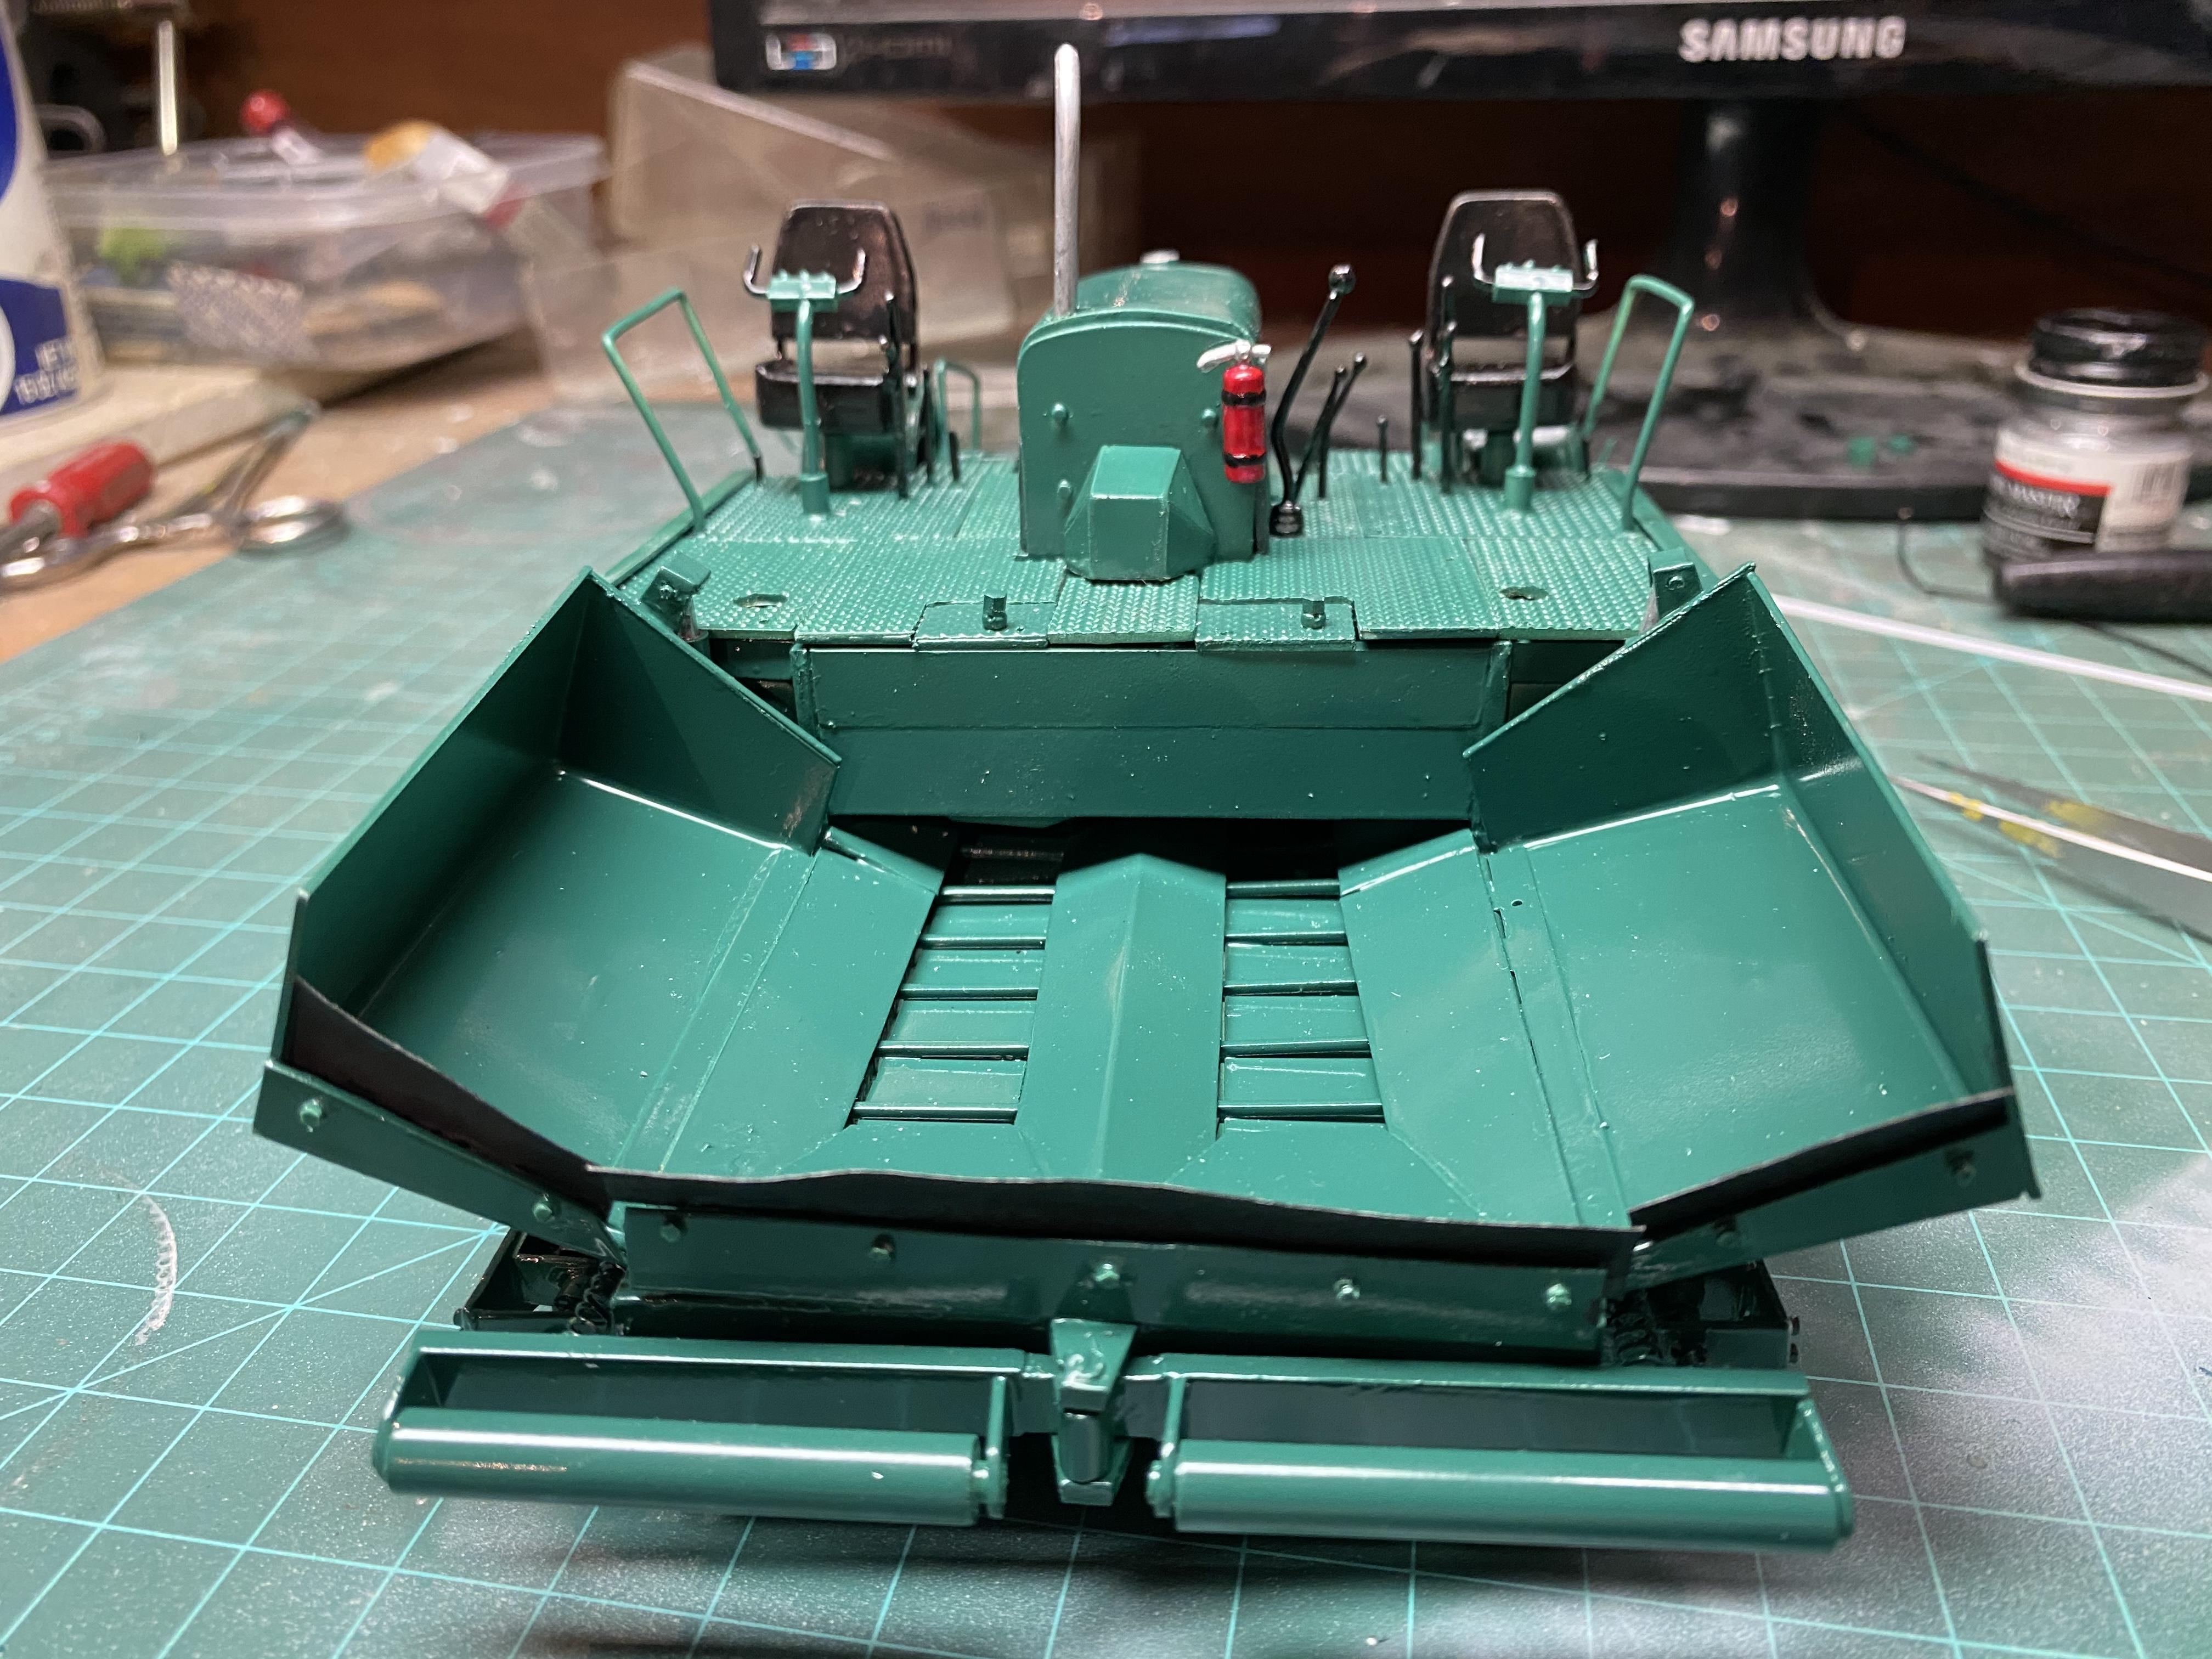
Well the decals came in and just were not making me happy, as they were too large a letter size. I am only using model railroad letters as it is just the simple name of Barber-Greene going on the machine. So, I ordered a smaller size. Of course, with lots of time now waiting for the new decals to arrive, sitting here just looking at this got my OCD going, and I decided to fix one aspect that bothered me before I decal it and dull cote the whole thing. The tamper eccentric drive was just too much out of scale. It just looked wrong. So........out came the wrenches and torches and the mechanics reworked it today, while social distancing themselves, as today’s paving job got cancelled as being non-essential. Got a new set of eccentric cranks and guards installed along with some more screed operator’s platform sections. Looks MUCH better now. Lemonade from lemons!
-
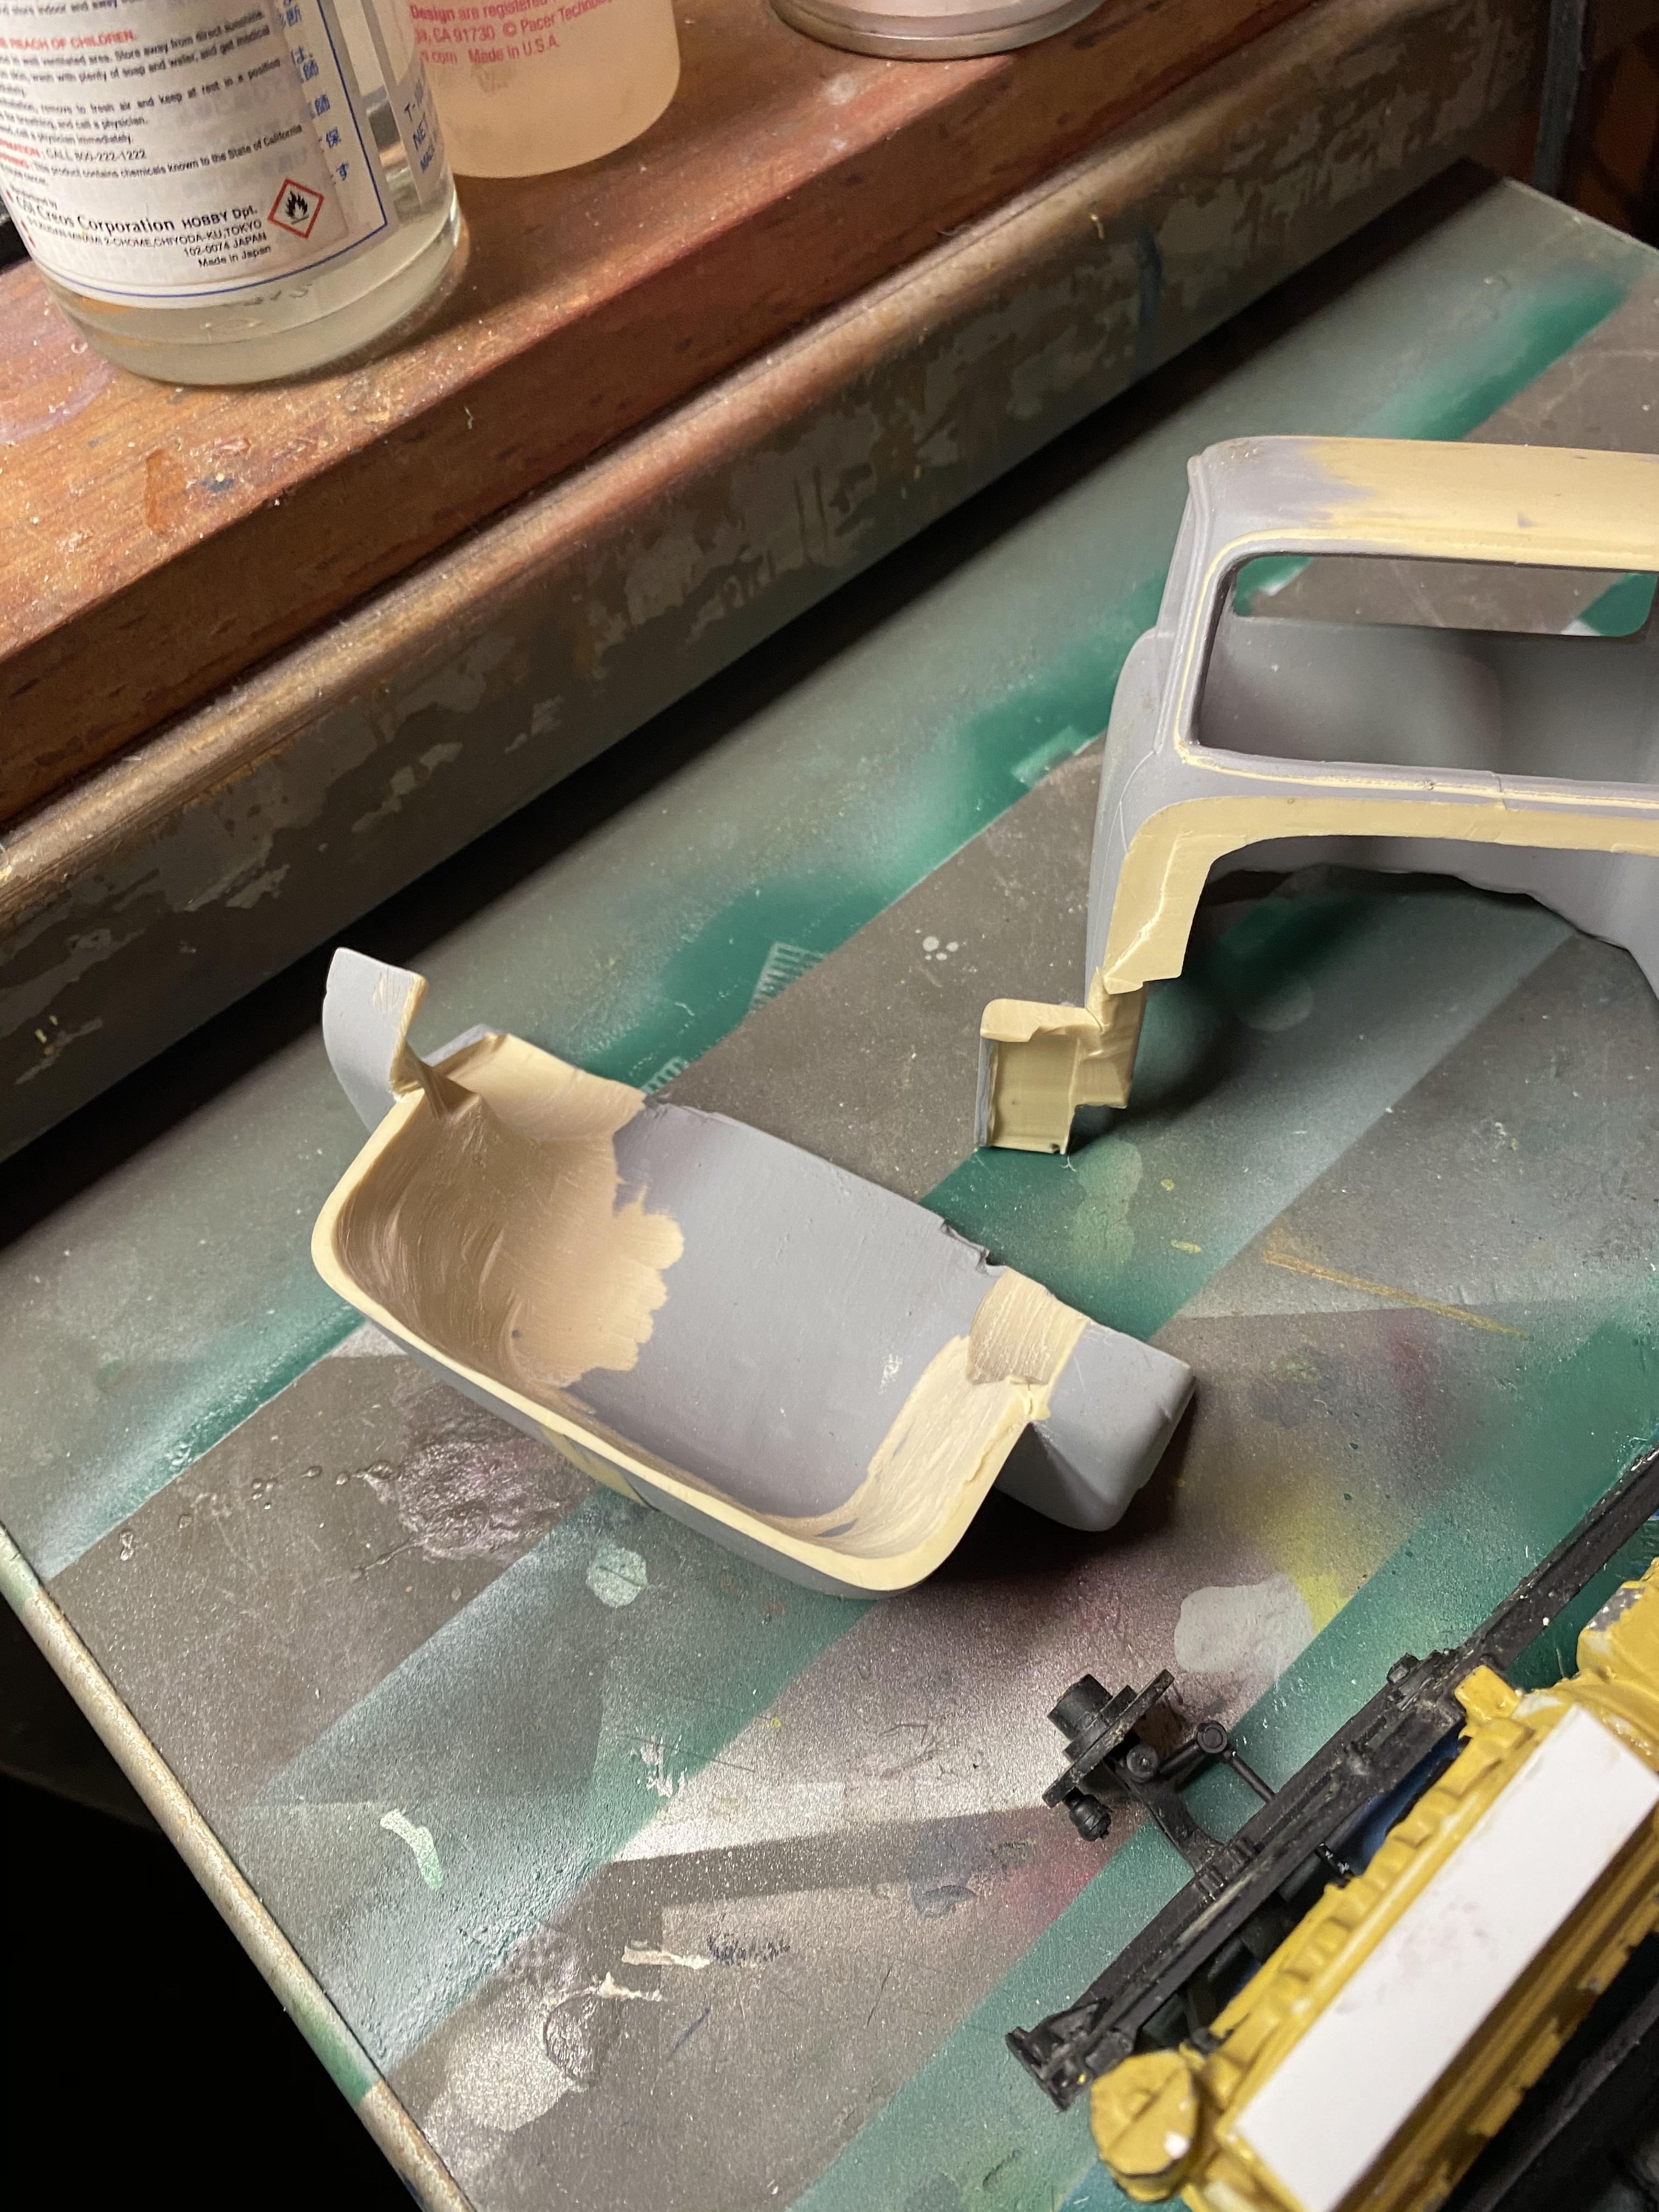
Dang! That’s a fender for my 1946 Chevy 1 1/2 ton truck. I only WISH it were so easy Charlie!
-
No don't think so, not old school enough! But a far more ambitious project is under way!
-
Funny you say that Charlie! There are two skills I have not ever tried yet........ resin casting and soldering brass. May be reaching out to you for advice! Started gathering parts today!
-
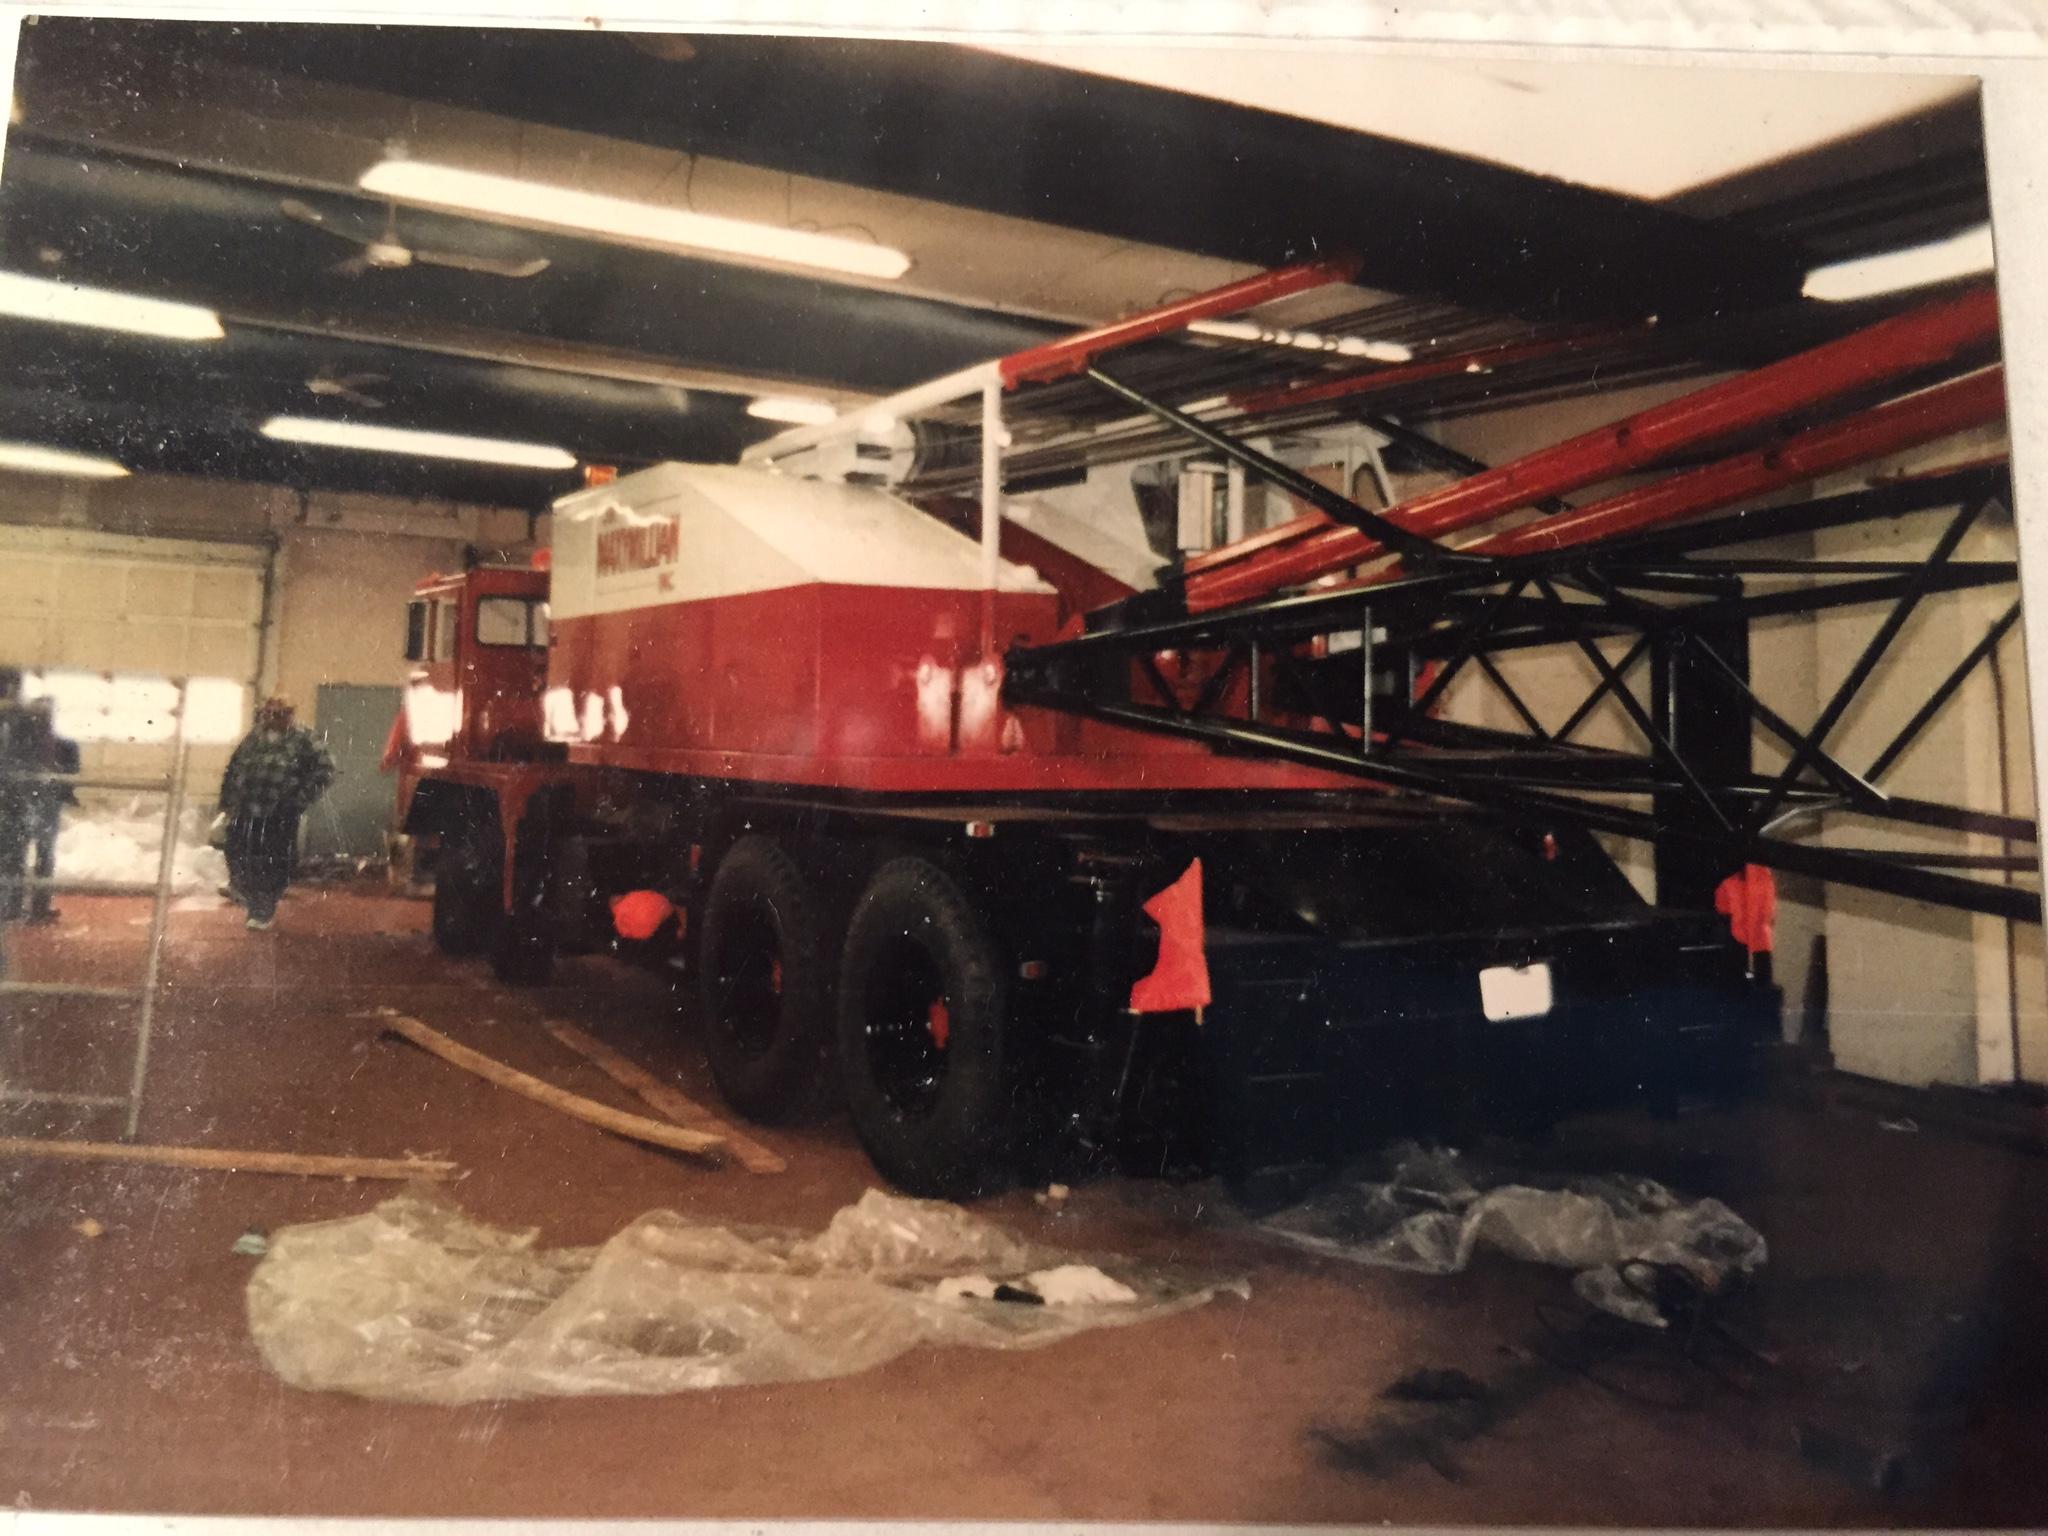
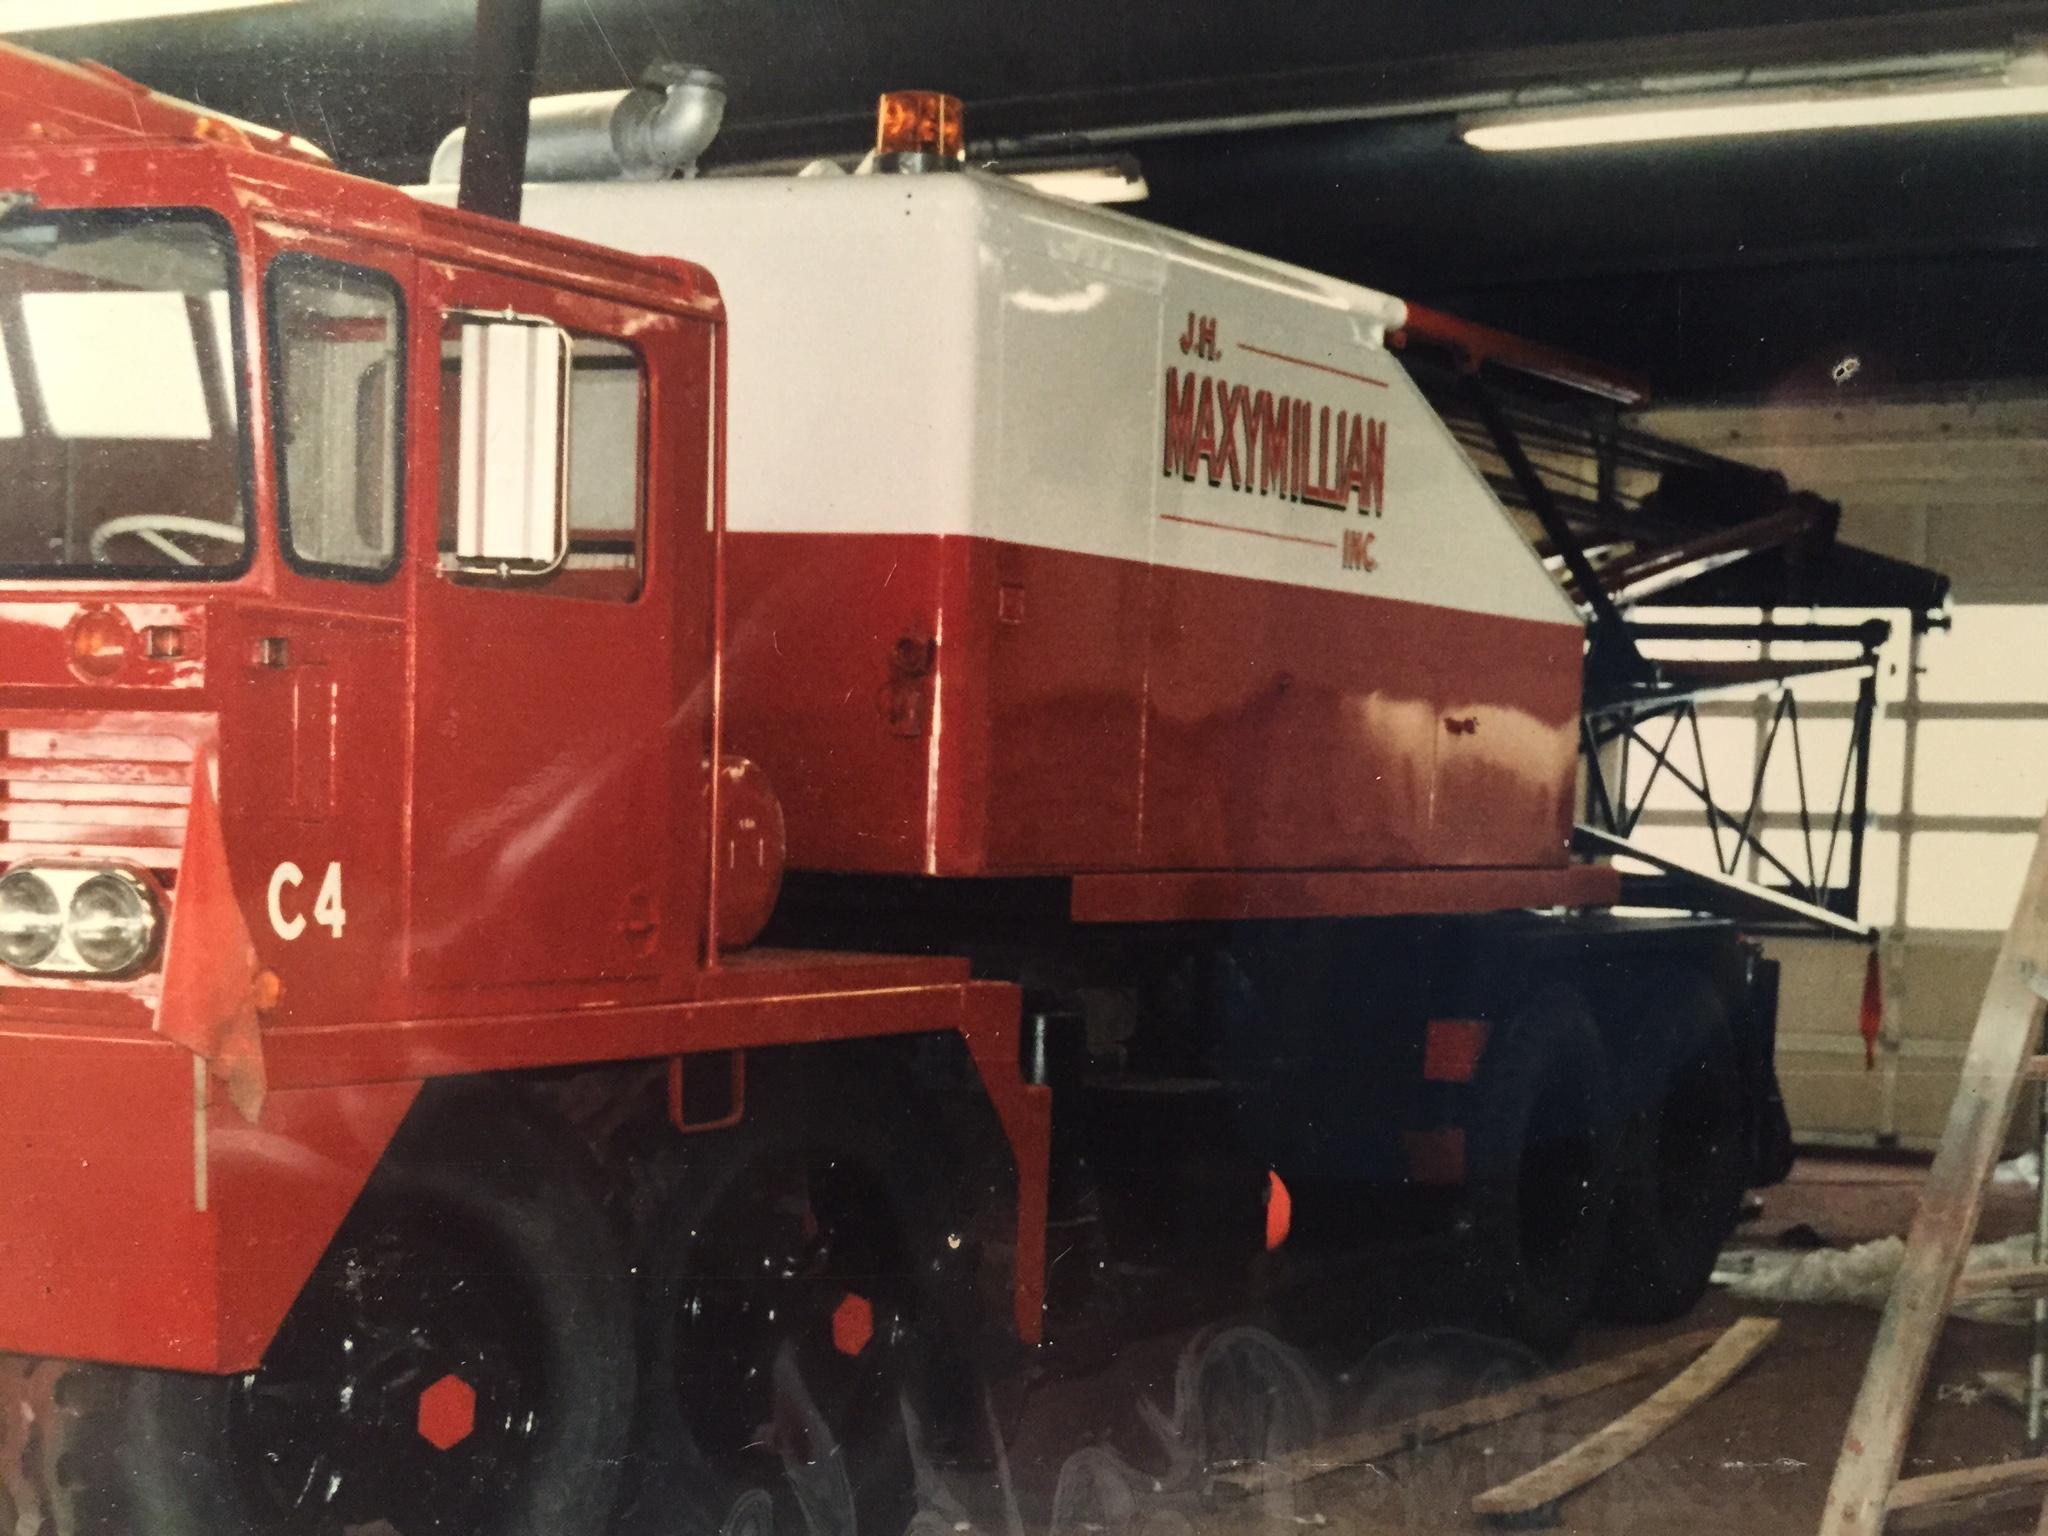
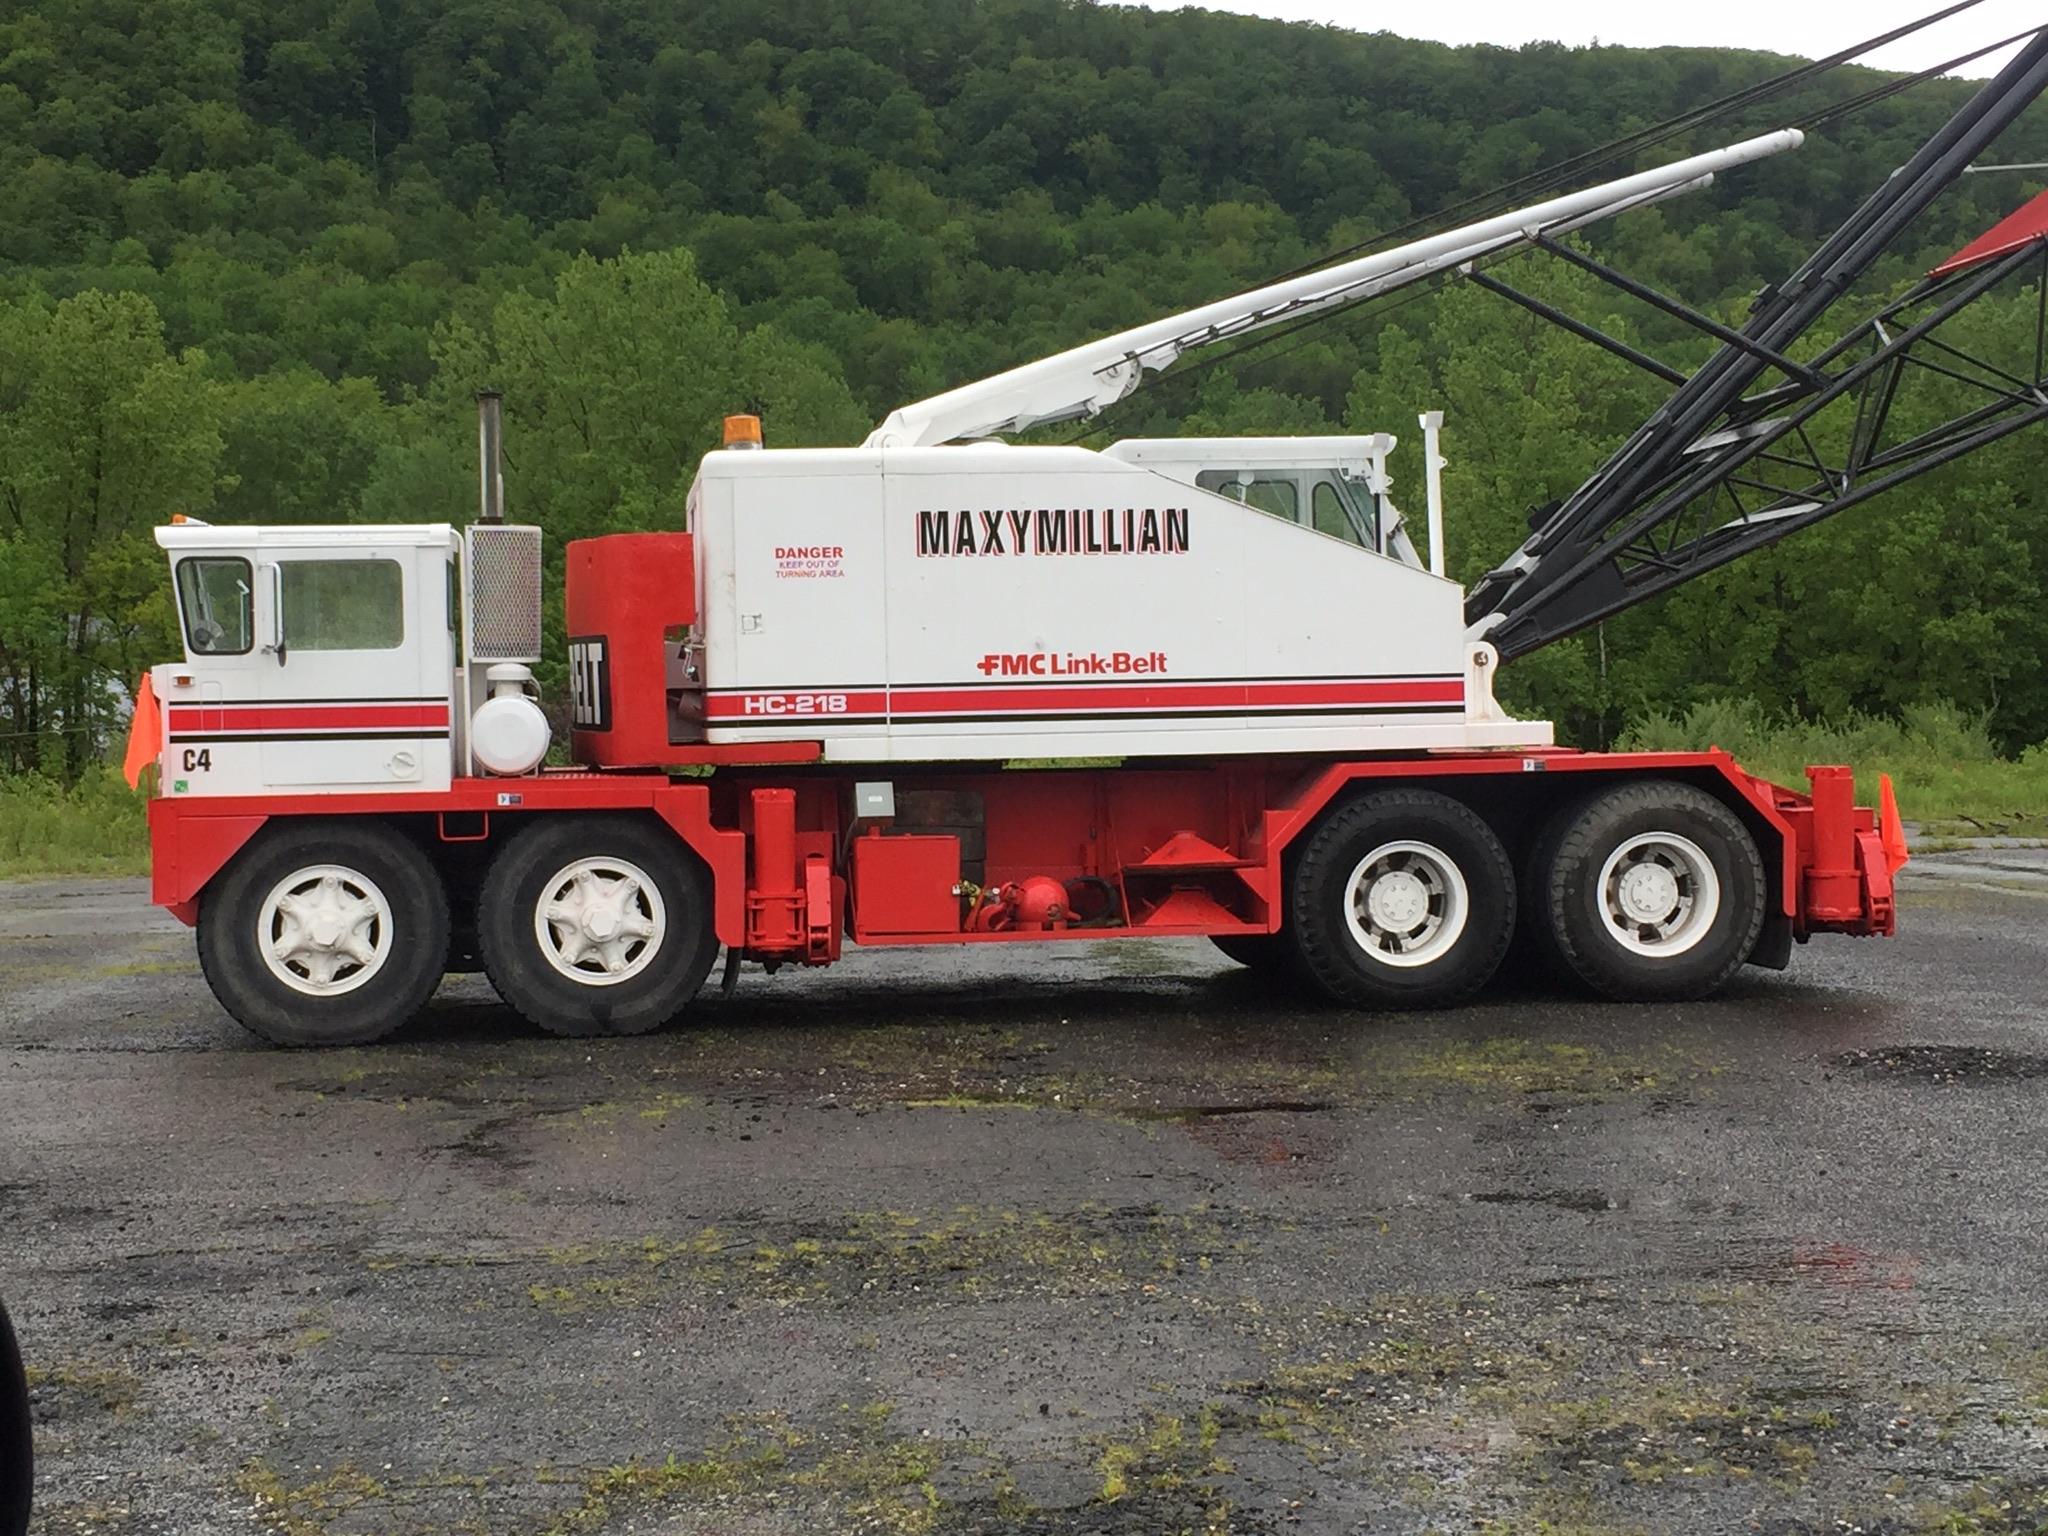
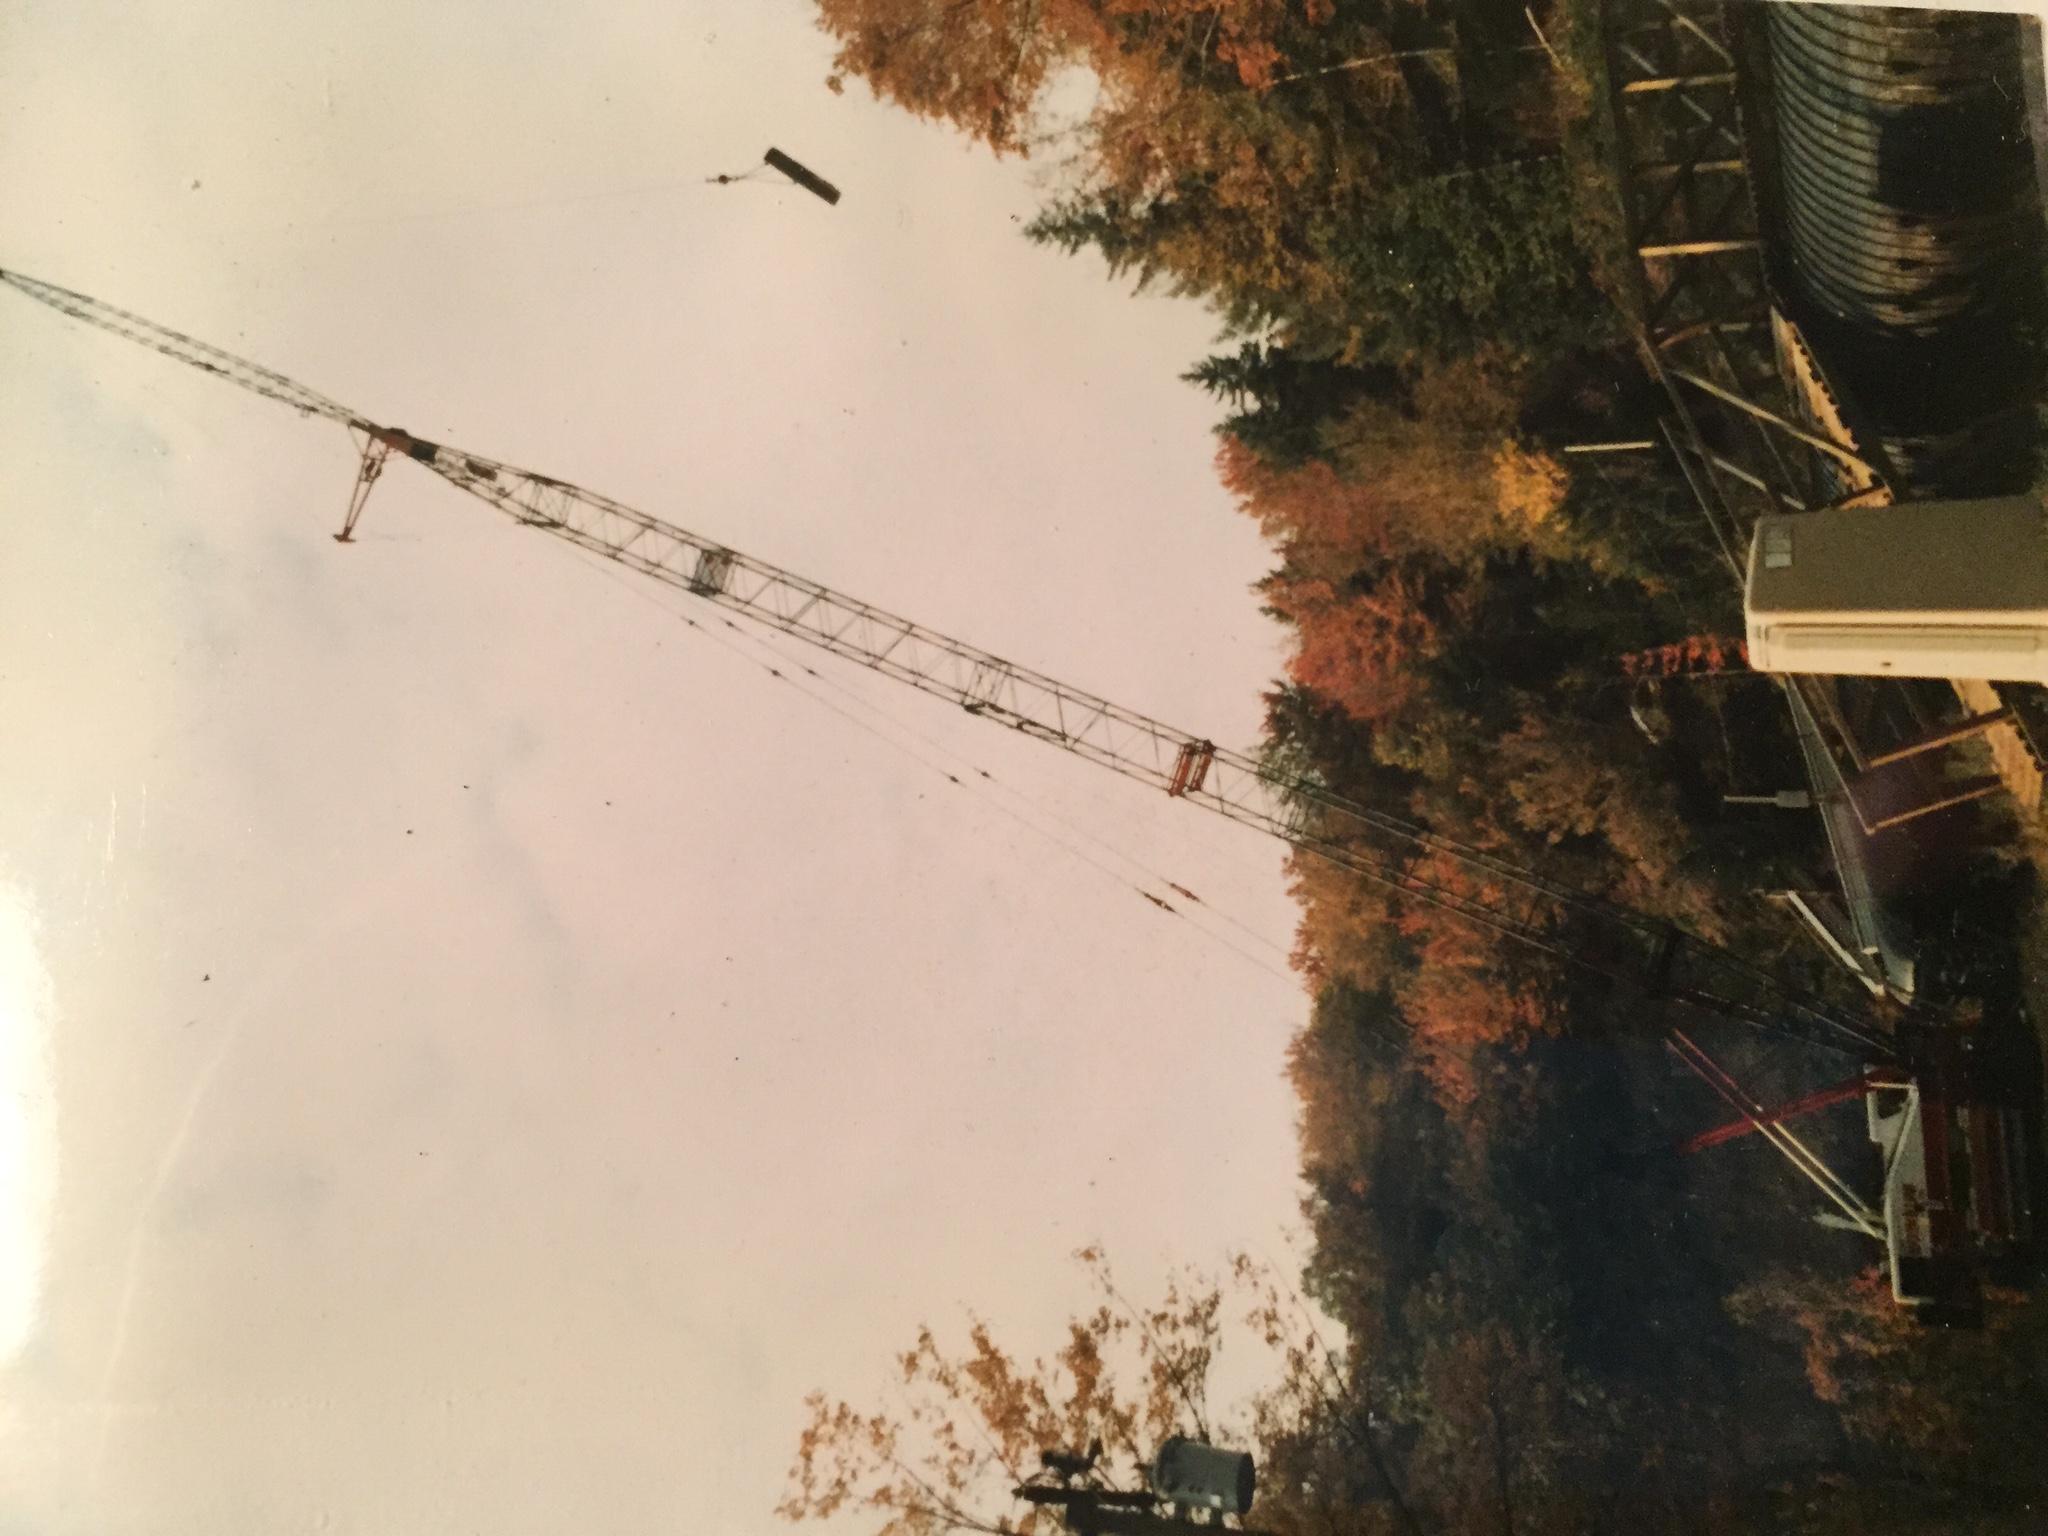
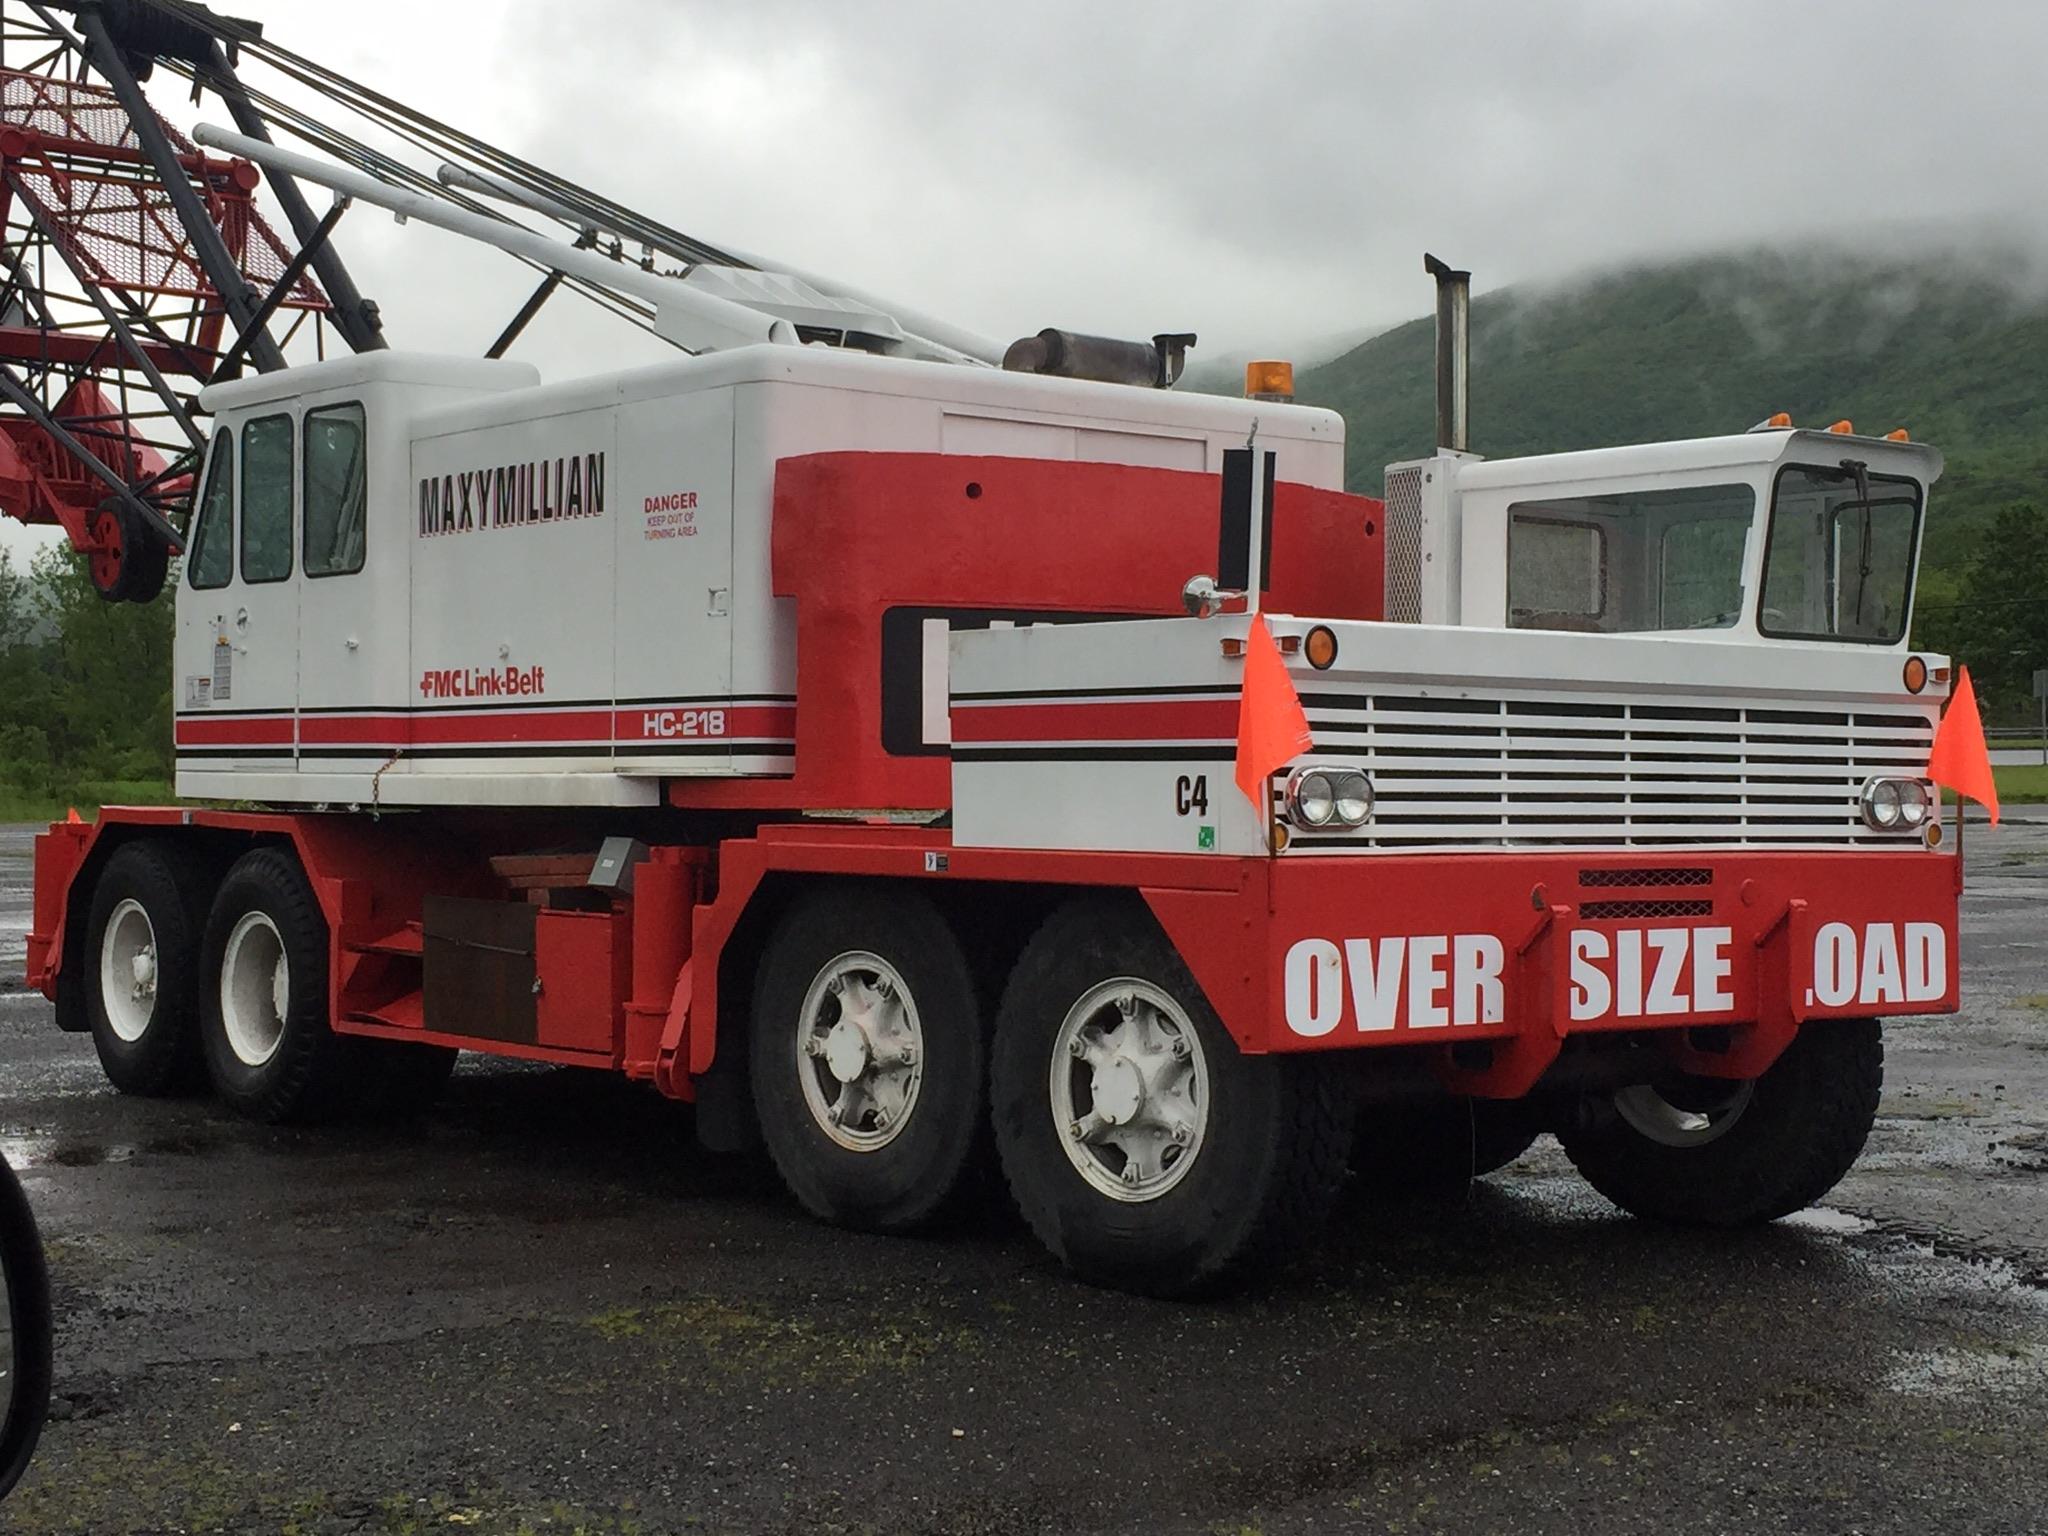
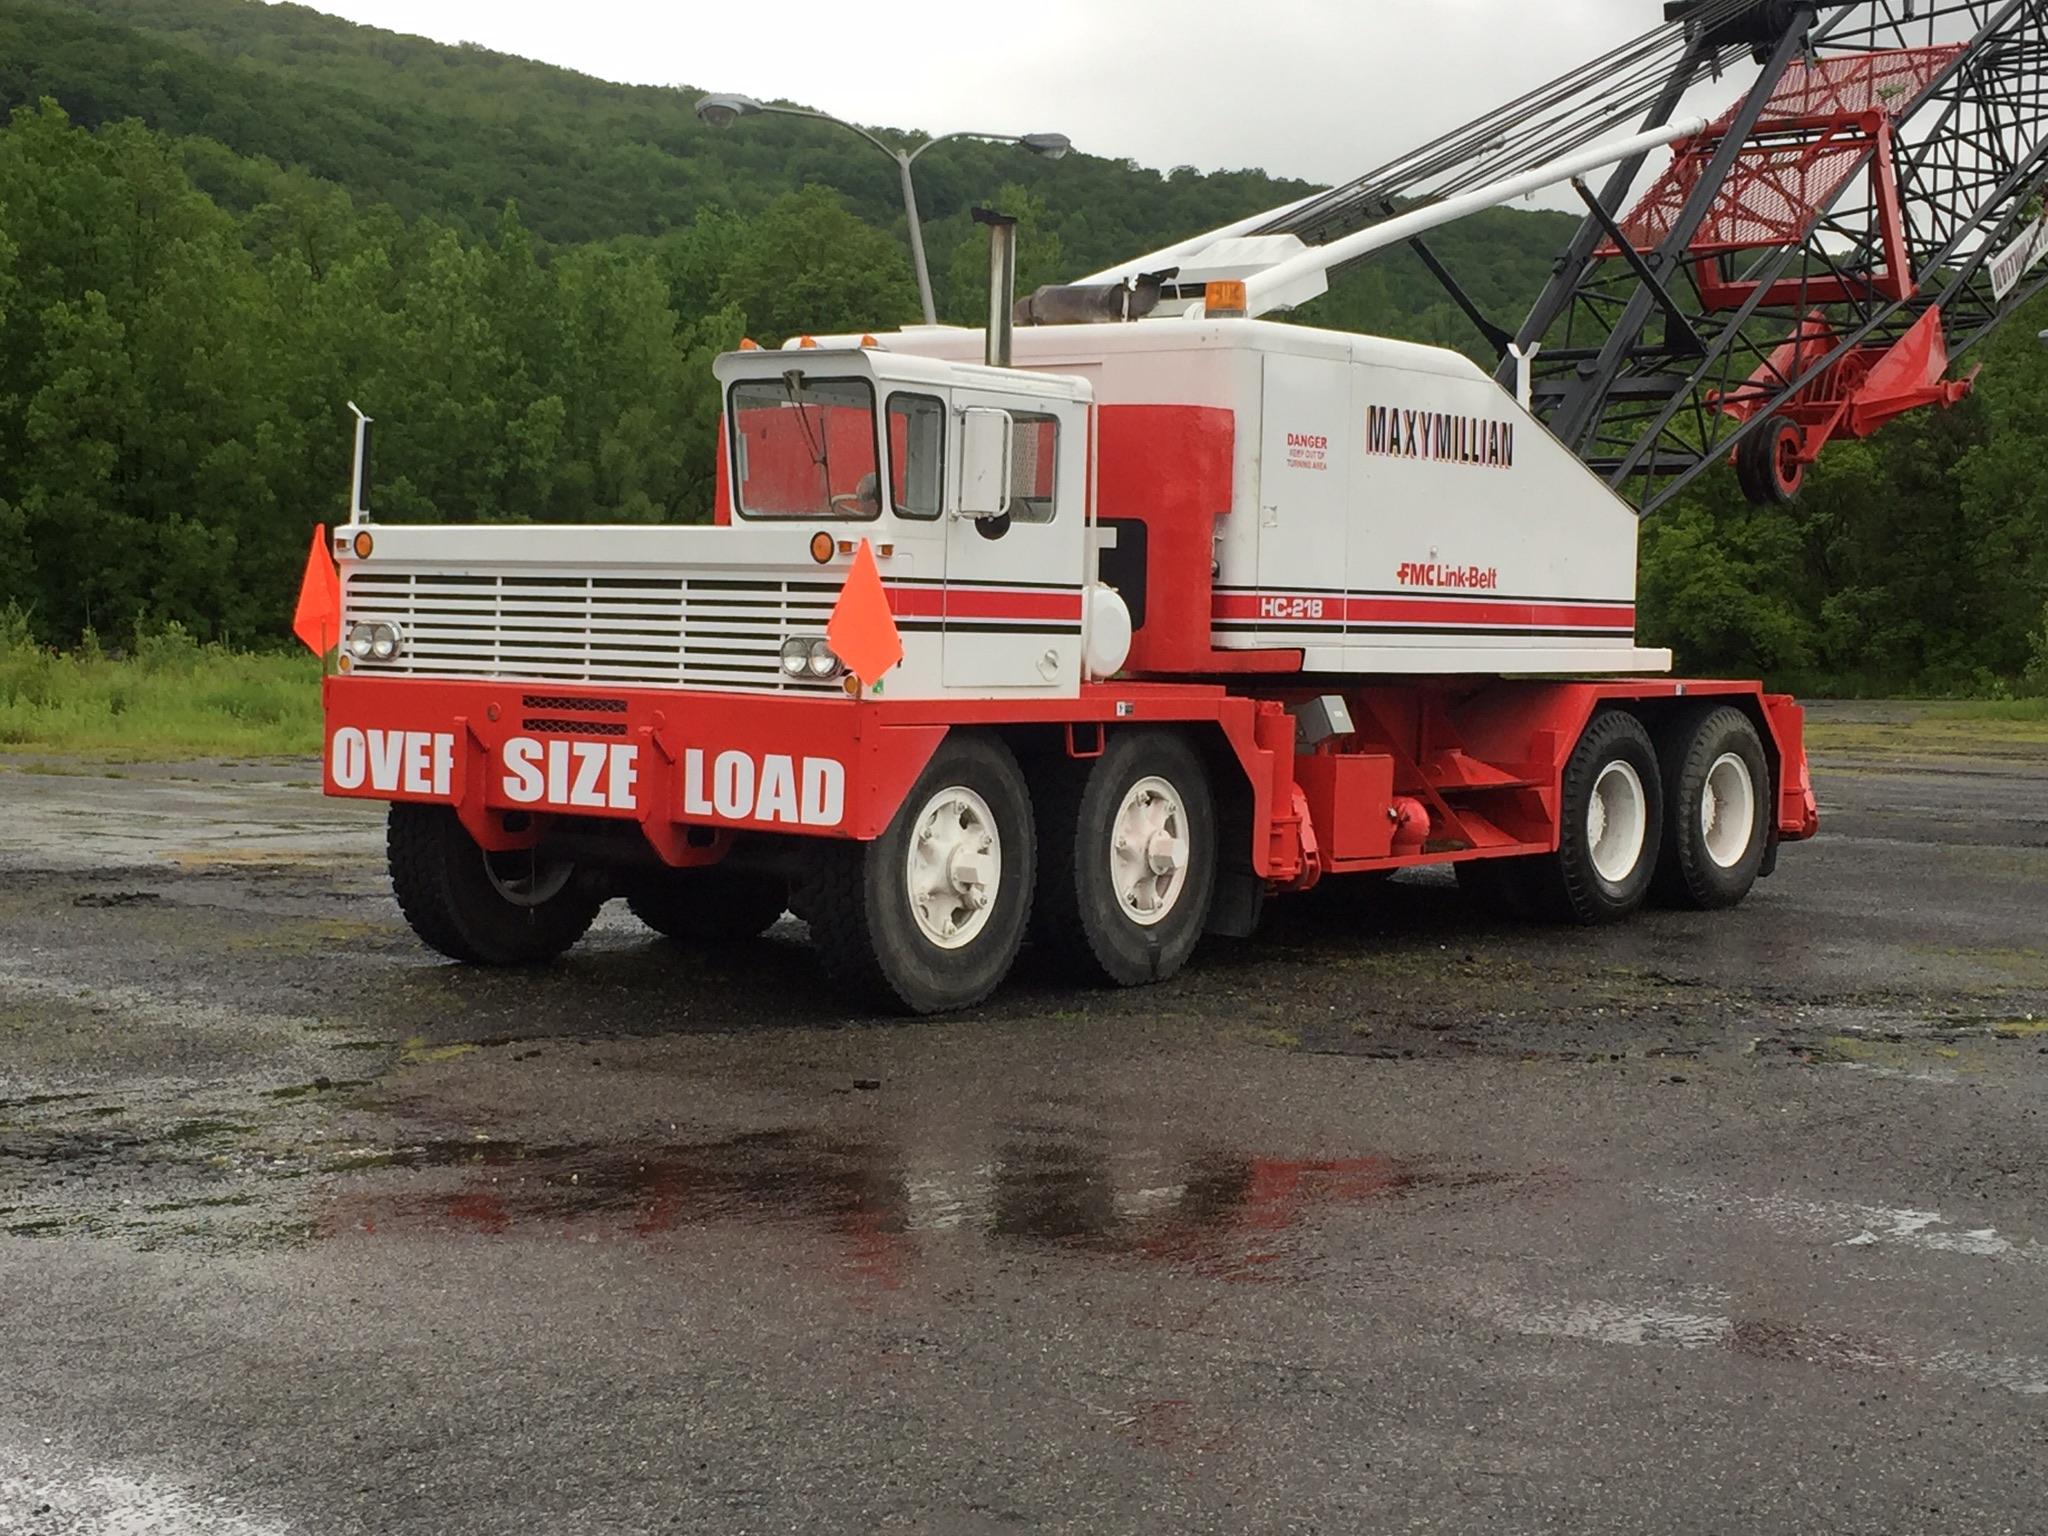
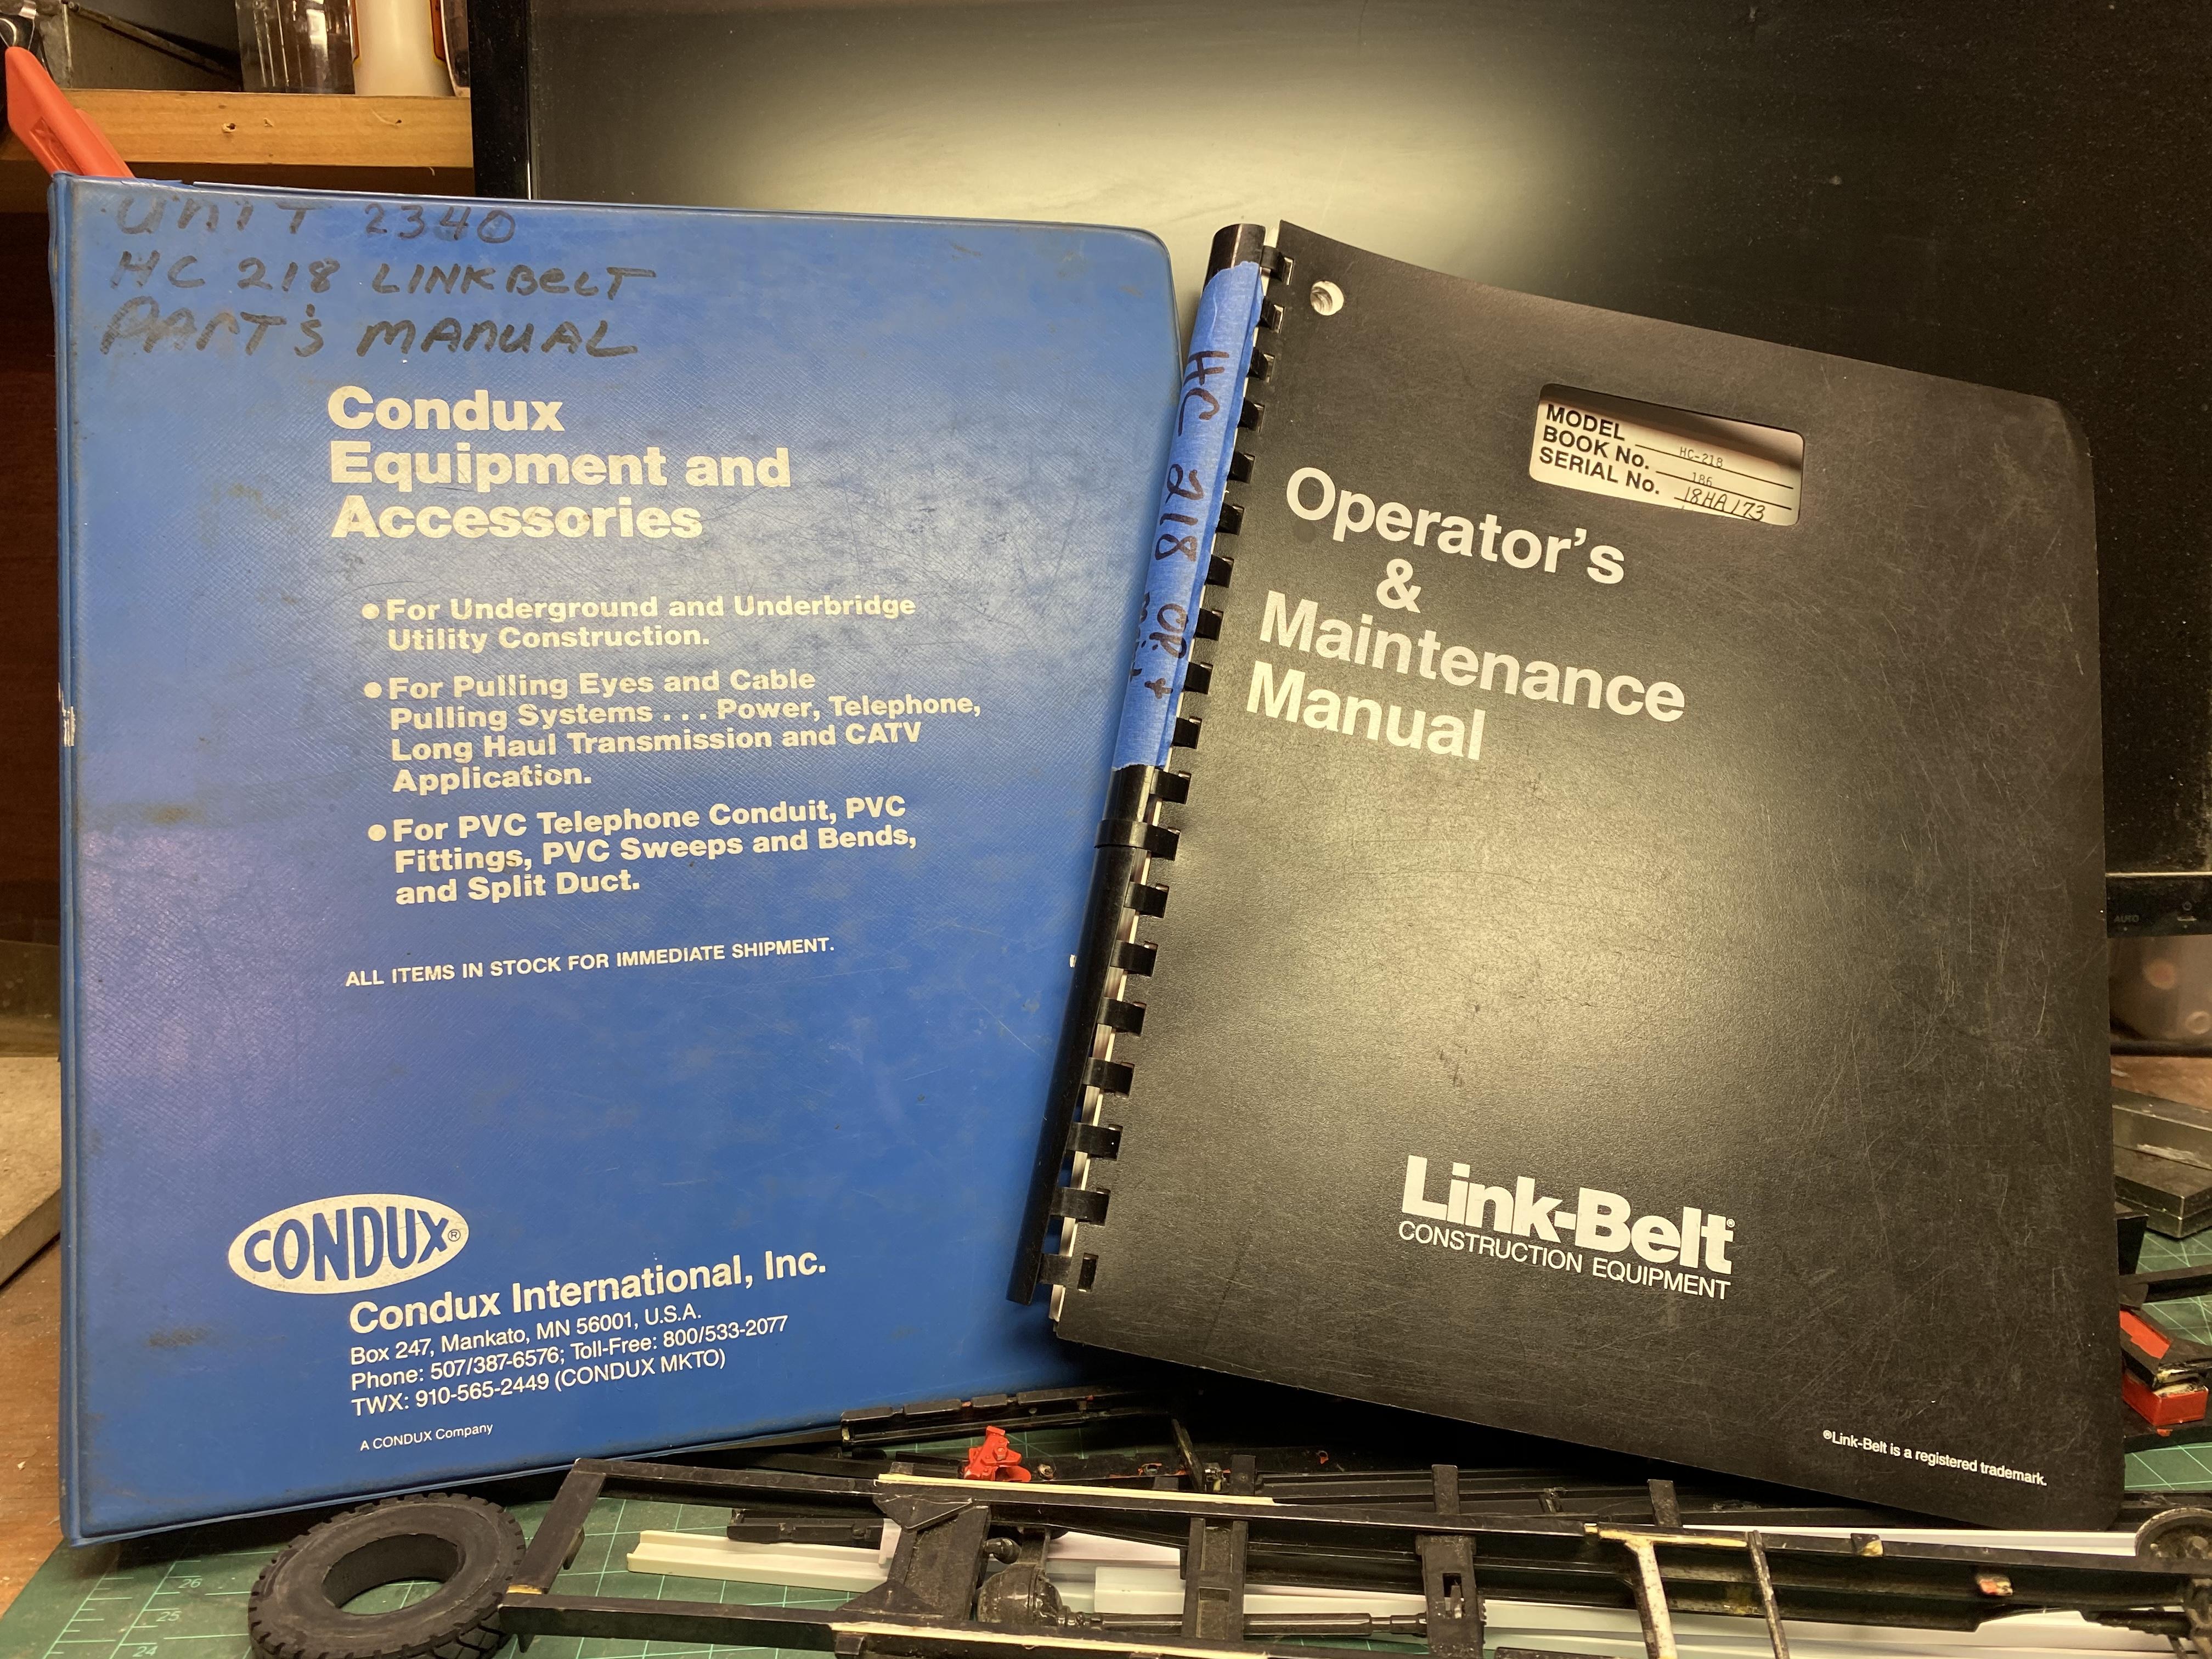
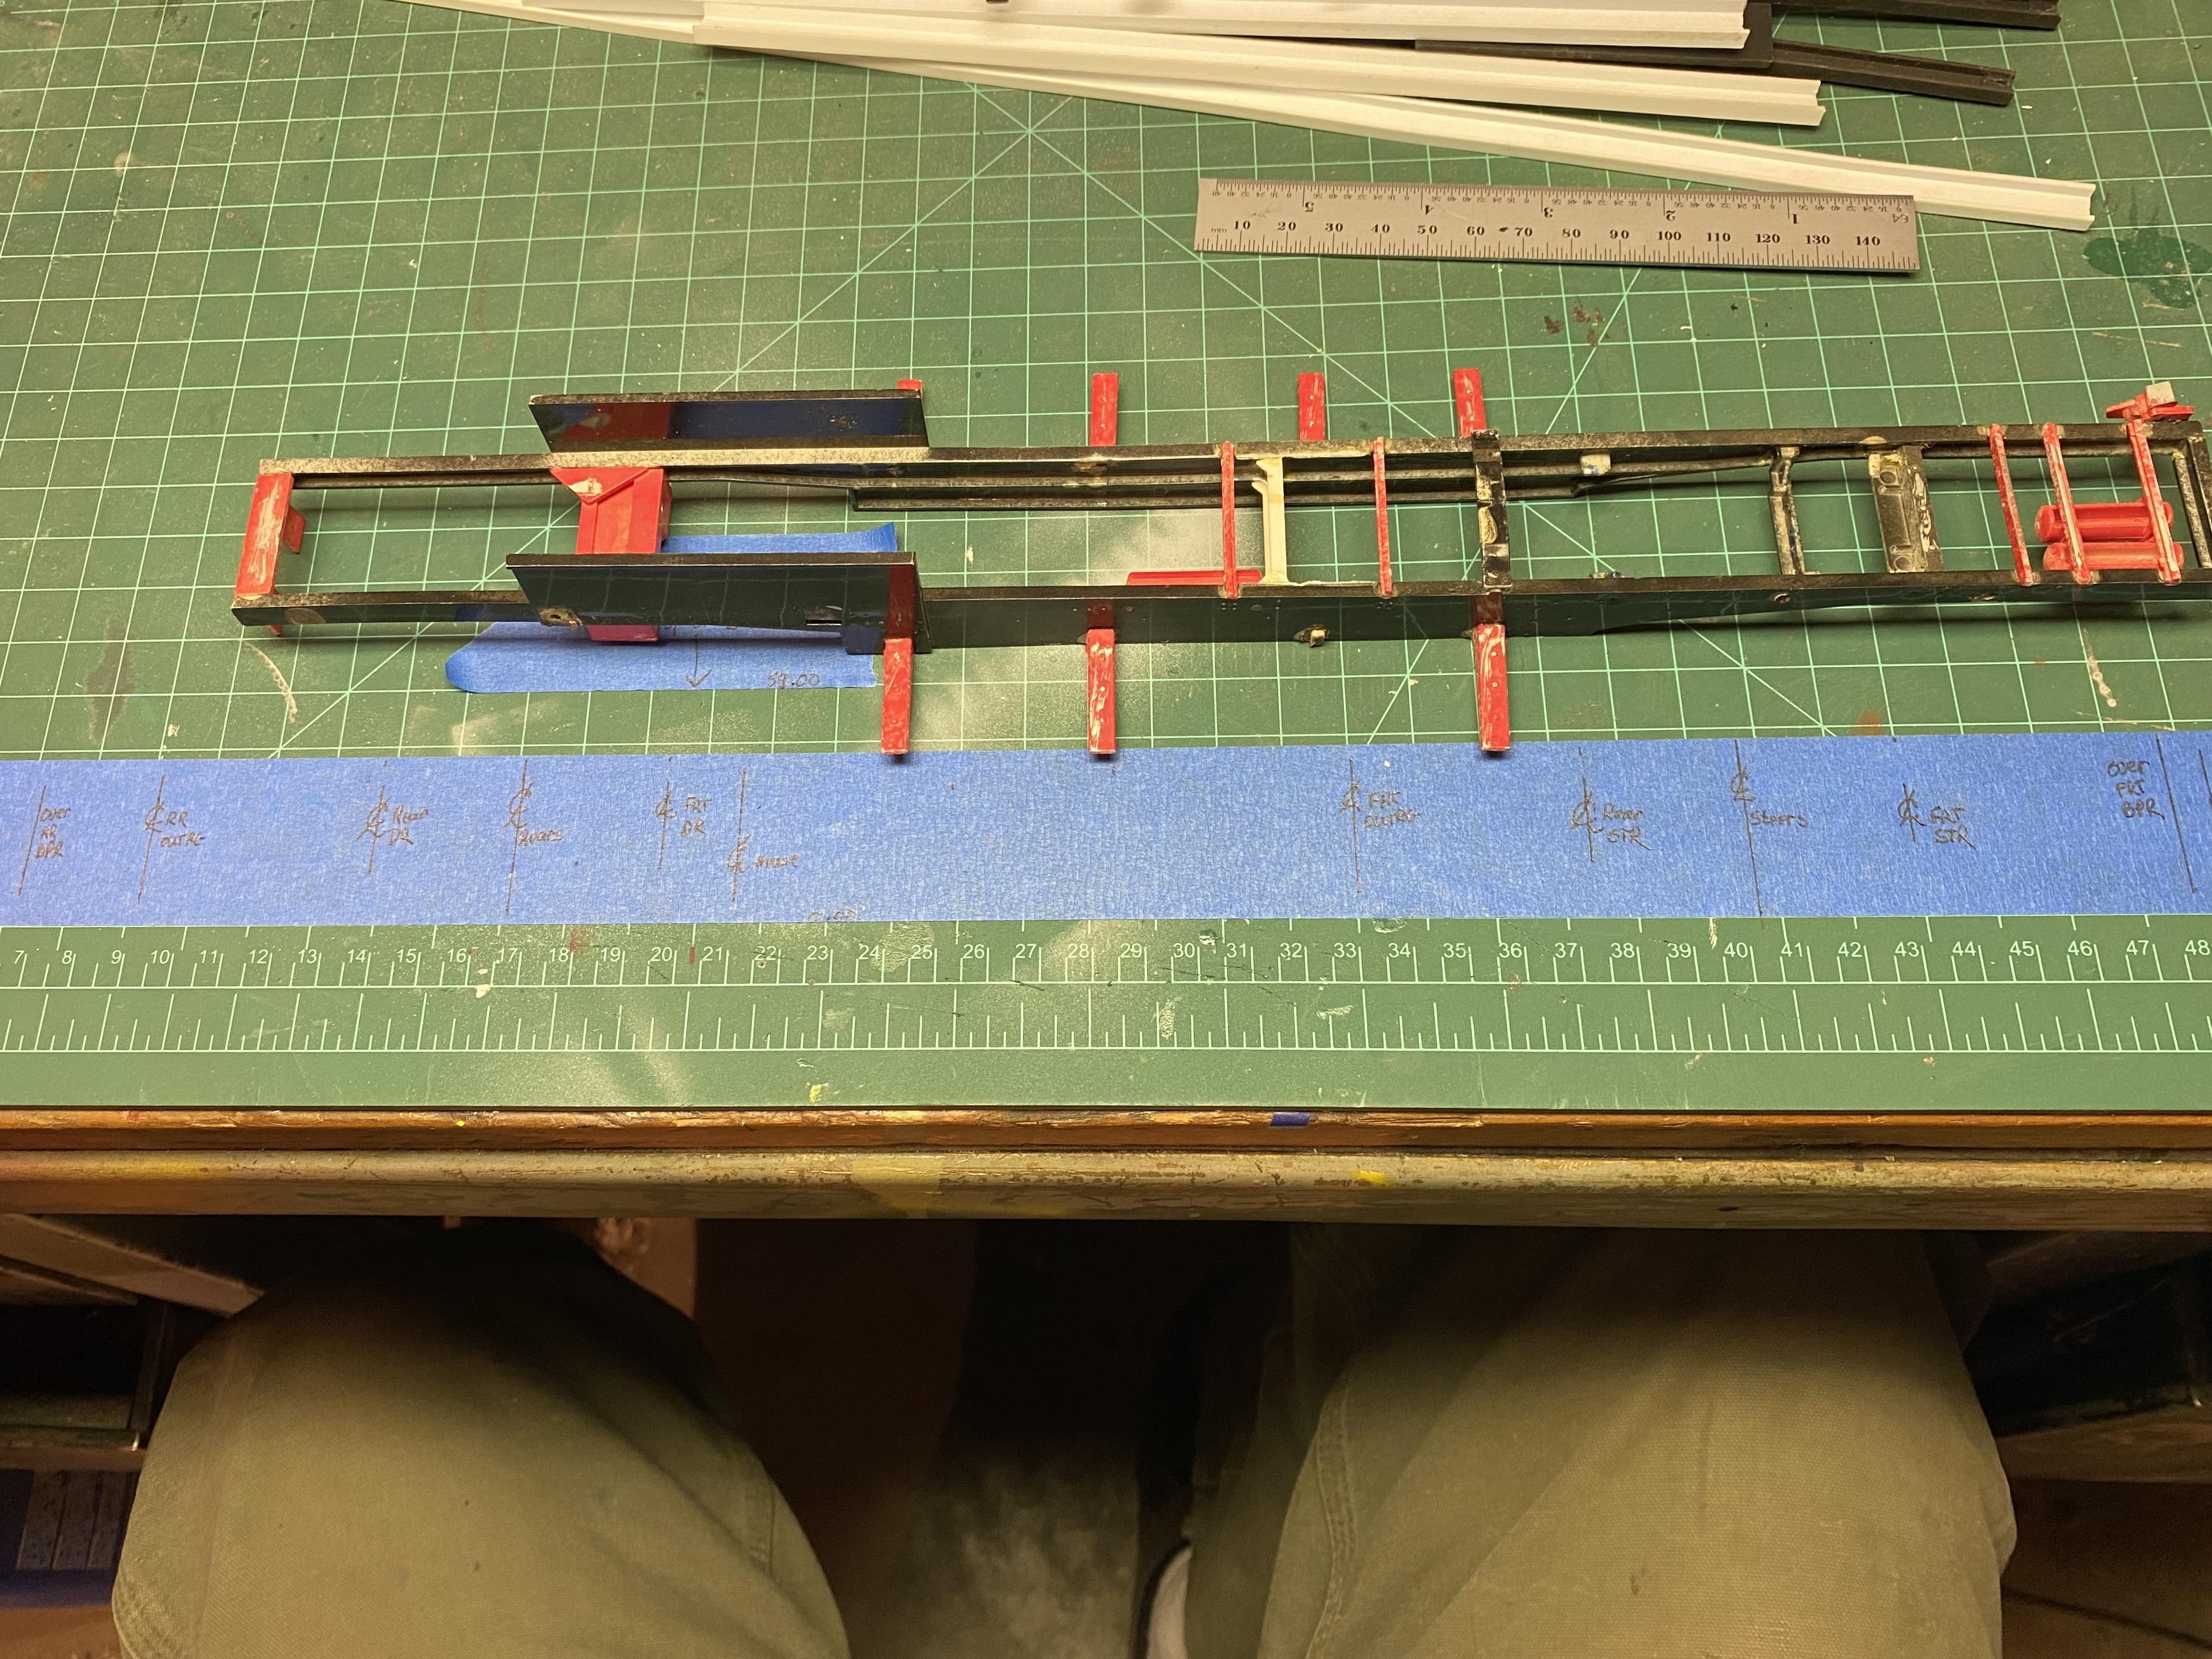
So........having all but finished my paver build, it’s time to start the next project. Years ago I worked for a large general contractor. Actually, all of my builds are based upon equipment we had there and were on my jobs. This HC-218 is an 82 ton capacity, and had, if memory serves correctly, 210’ of boom and 30’ of jib on it. This was powered by an 8V-71 on the truck and had Cummins upper power. That old girl earned her keep back in the late 80’s when I was there and is still doing so to this day. And, as usual, step one is getting reference materials. I obtained a parts manual and operator’s and maintenance manual to start. I plan on starting with a frame from an American LaFrance ladder truck, which will undergo a lot of alteration to accept the dual drive and dual steer arrangement and get super reinforcement done to it. My plan is to make this with approximately 100’ of boom which will be plenty! This thing is going to be huge! The length of the truck will be 33’ 4” in scale alone, and 10’ 6” wide. Attached are some photos of the crane we had. The red cab photos are of it’s first, and original paint job. The white cab is an updated Link-Belt color scheme that I painted it in just before I left there. In the wintertime I ran the paint and weld shop and this old girl got done up by me 3 times. That is why I tend to favor paint shop fresh jobs!!! I hope you enjoy the journey through this one, its gonna be a heck of a ride!! Hang on!
-
All paint and details are done.....rubber flaps made from paper, AWESOME suggestion on that! Thank you Hermann Kersten! Only thing left is decals and light weathering. Picking up decals tomorrow at Post Office. Guess it’s time to get going on gathering parts for the next build!
-
The tires are from the John Deere 310 backhoe kit. The wheels are from resin caster Mark Savage from many years ago.