Chariots of Fire
-
Posts
2,782 -
Joined
-
Last visited
Content Type
Profiles
Forums
Events
Gallery
Everything posted by Chariots of Fire
-

Finish before resin casting
Chariots of Fire replied to NOBLNG's topic in Model Building Questions and Answers
Agree with what has been said. Don't forget to put a release agent on if you are doing a two part mold. Wouldn't hurt to do the master either to be sure that nothing sticks in the process. -
RM Mack w snowblower....
Chariots of Fire replied to gotnitro?'s topic in WIP: Model Trucks: Big Rigs and Heavy Equipment
That's a lot of great work, Jeff. makes that Mack cab look pretty insignificant. Three tiers of springs on the back end? Or is what appears to be springs on the bottom like radius rods that keep the axle where it should be? What kind of load were they carrying weight wise? -
BRBO 21 Autocar
Chariots of Fire replied to signguy2108's topic in WIP: Model Trucks: Big Rigs and Heavy Equipment
Why is it that the most handsome trucks are old? Nothing these days come close to the classic looks and ruggedness of these rigs.? -
Tim Bongard, who some of you may know used a phrase many years ago. He called it Imagineering. That's what it takes in this miniature world of ours. Creating something small to look like something much bigger and employing out-of-the-box ideas and methods to get it done. I've learned much over the years and it has been a fun trip. Tom has somewhat of an advantage in this department as he is familiar with a lot of different kinds of equipment and has some really good sources to work from. Keep it up Tom!!
-
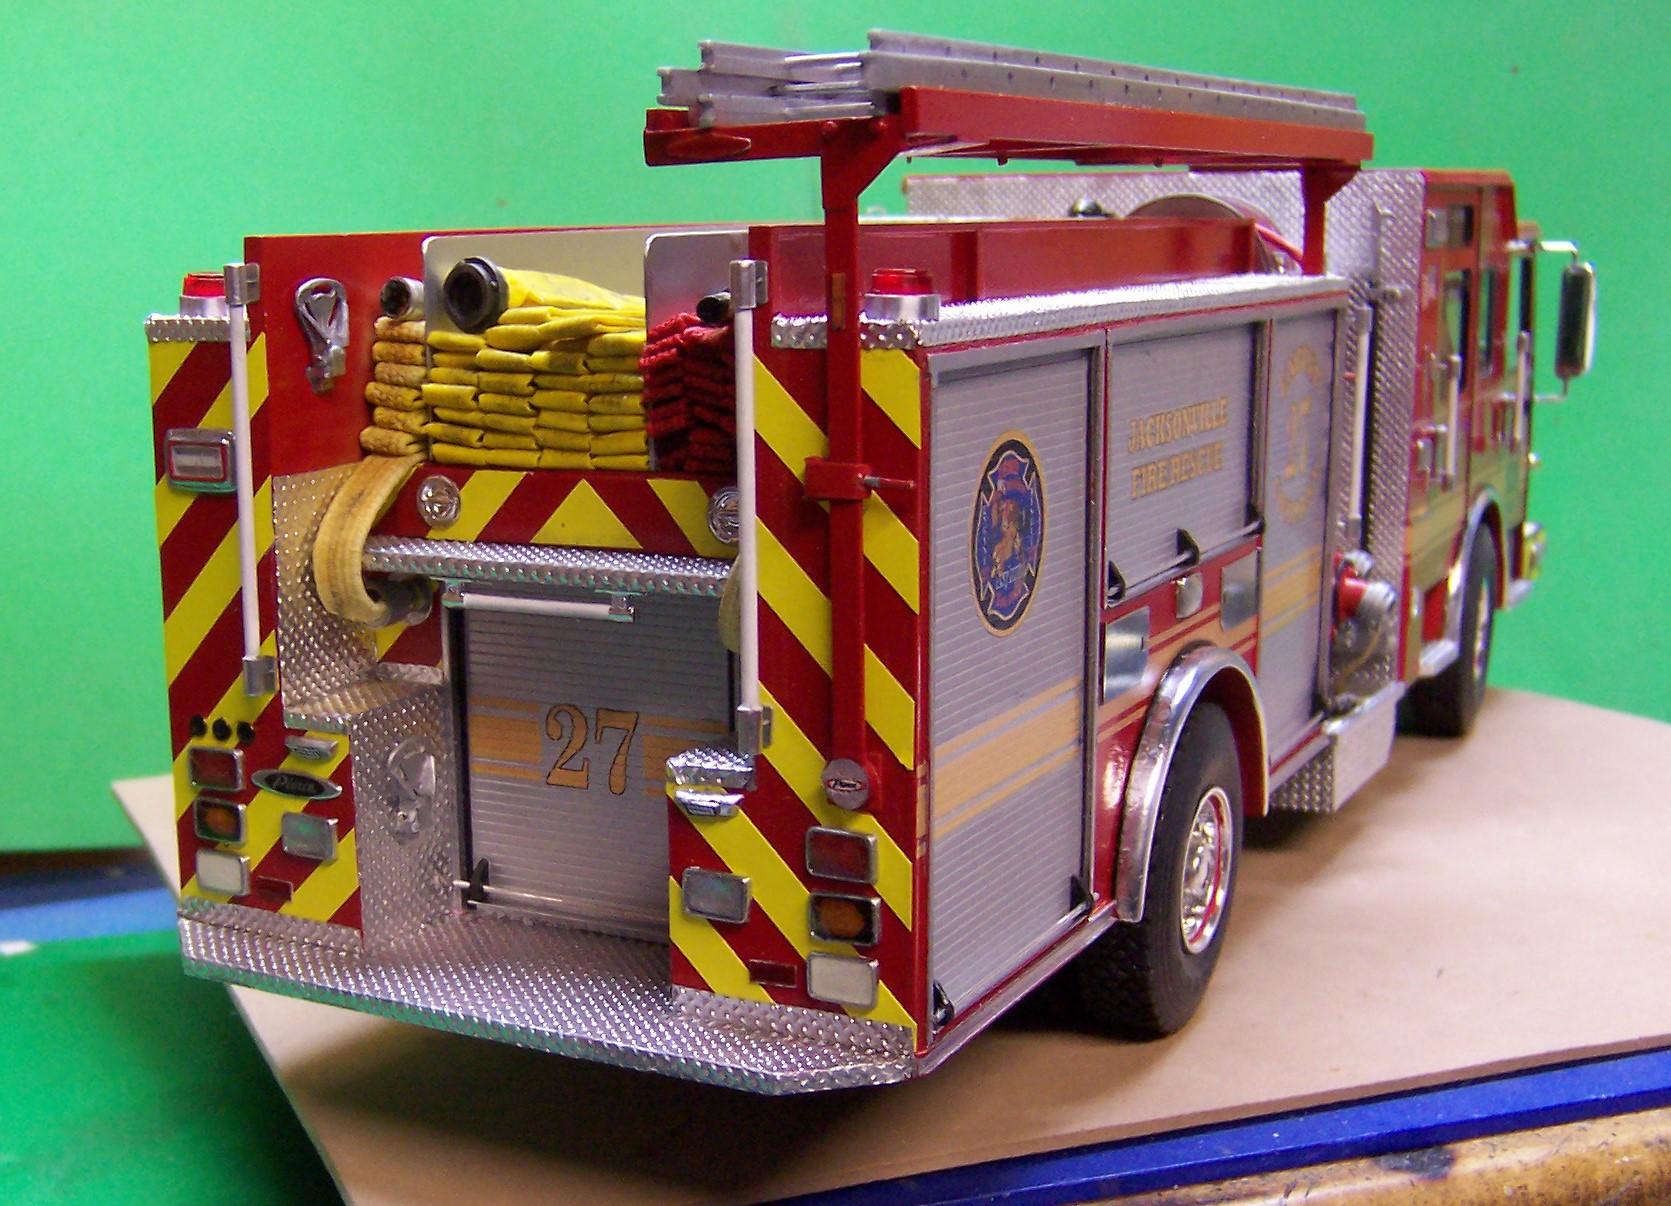
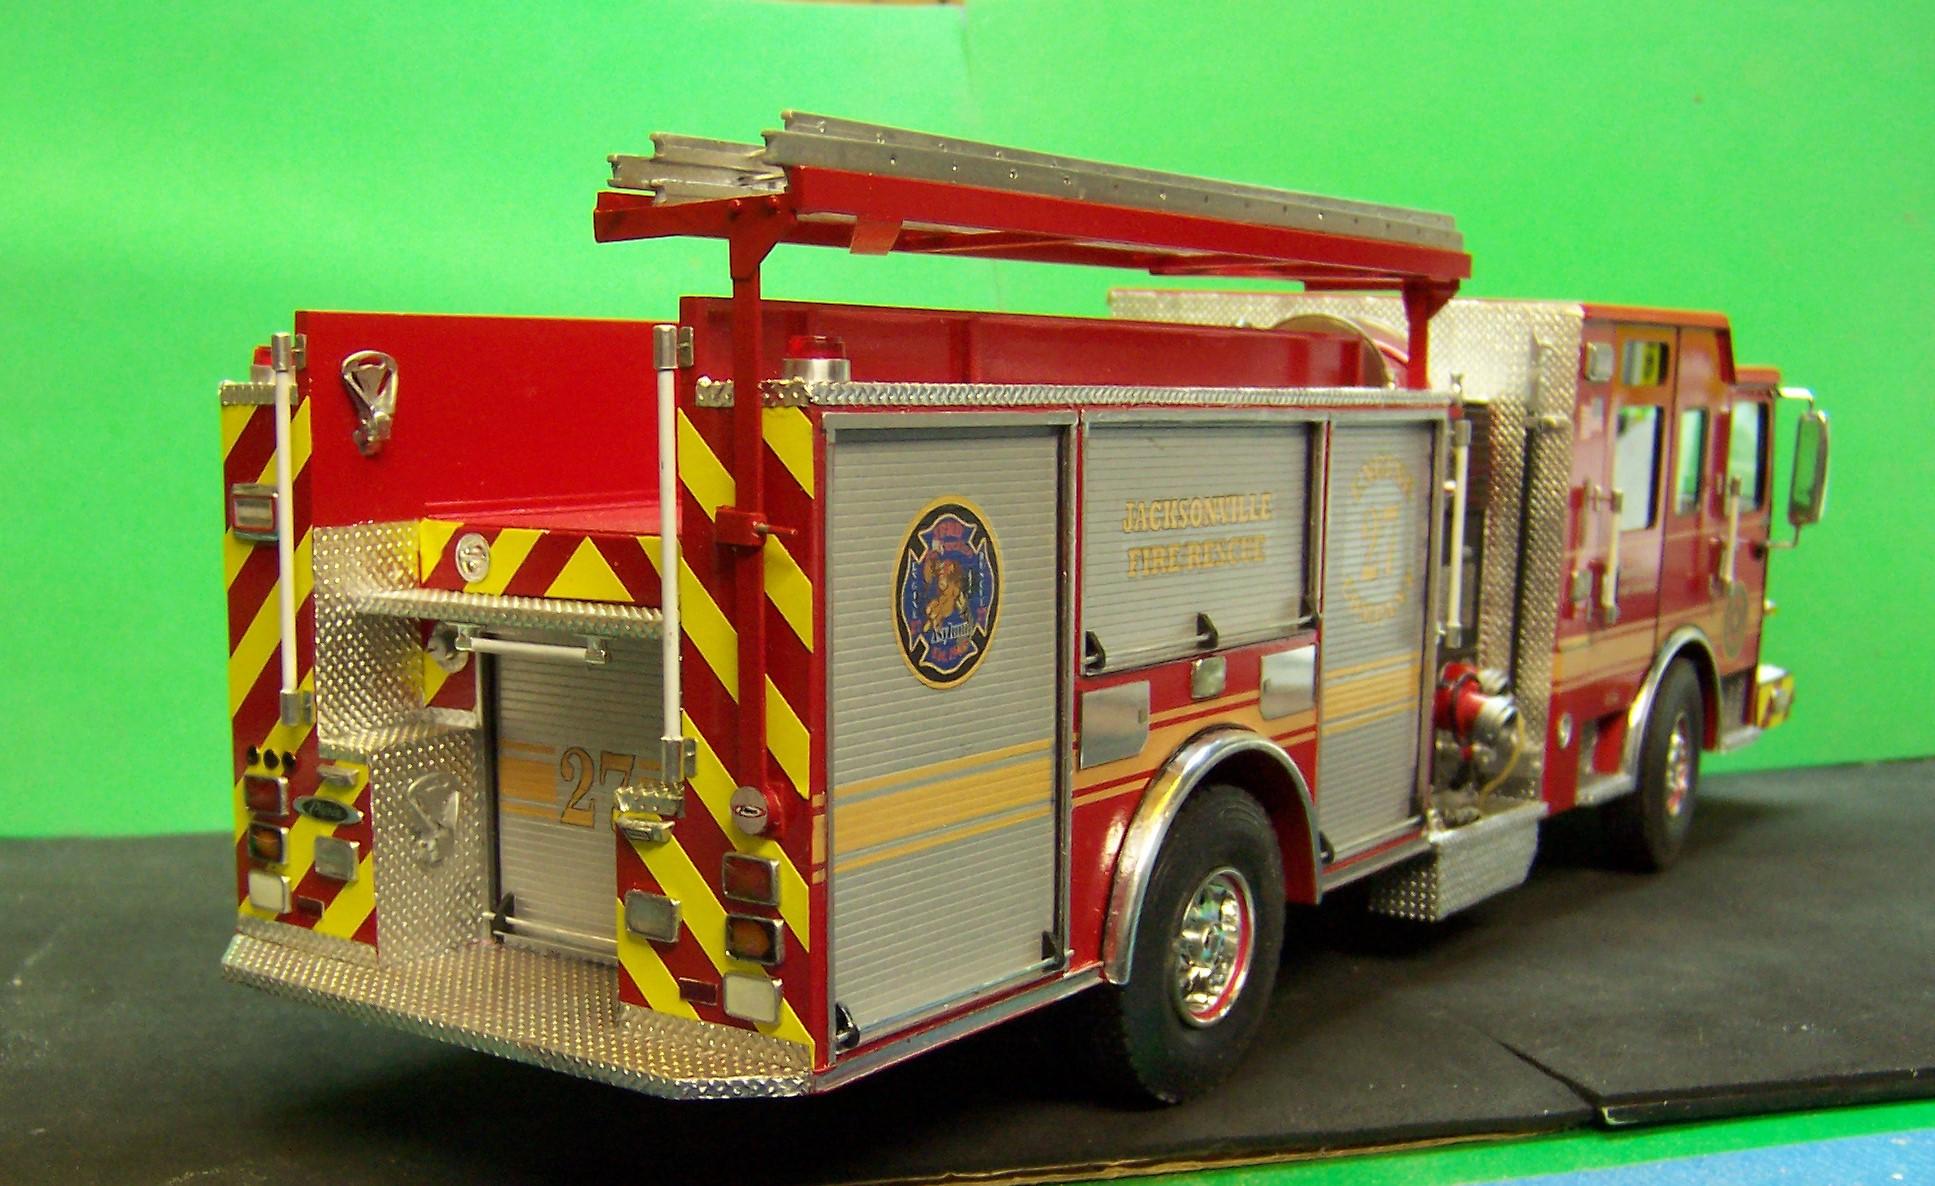
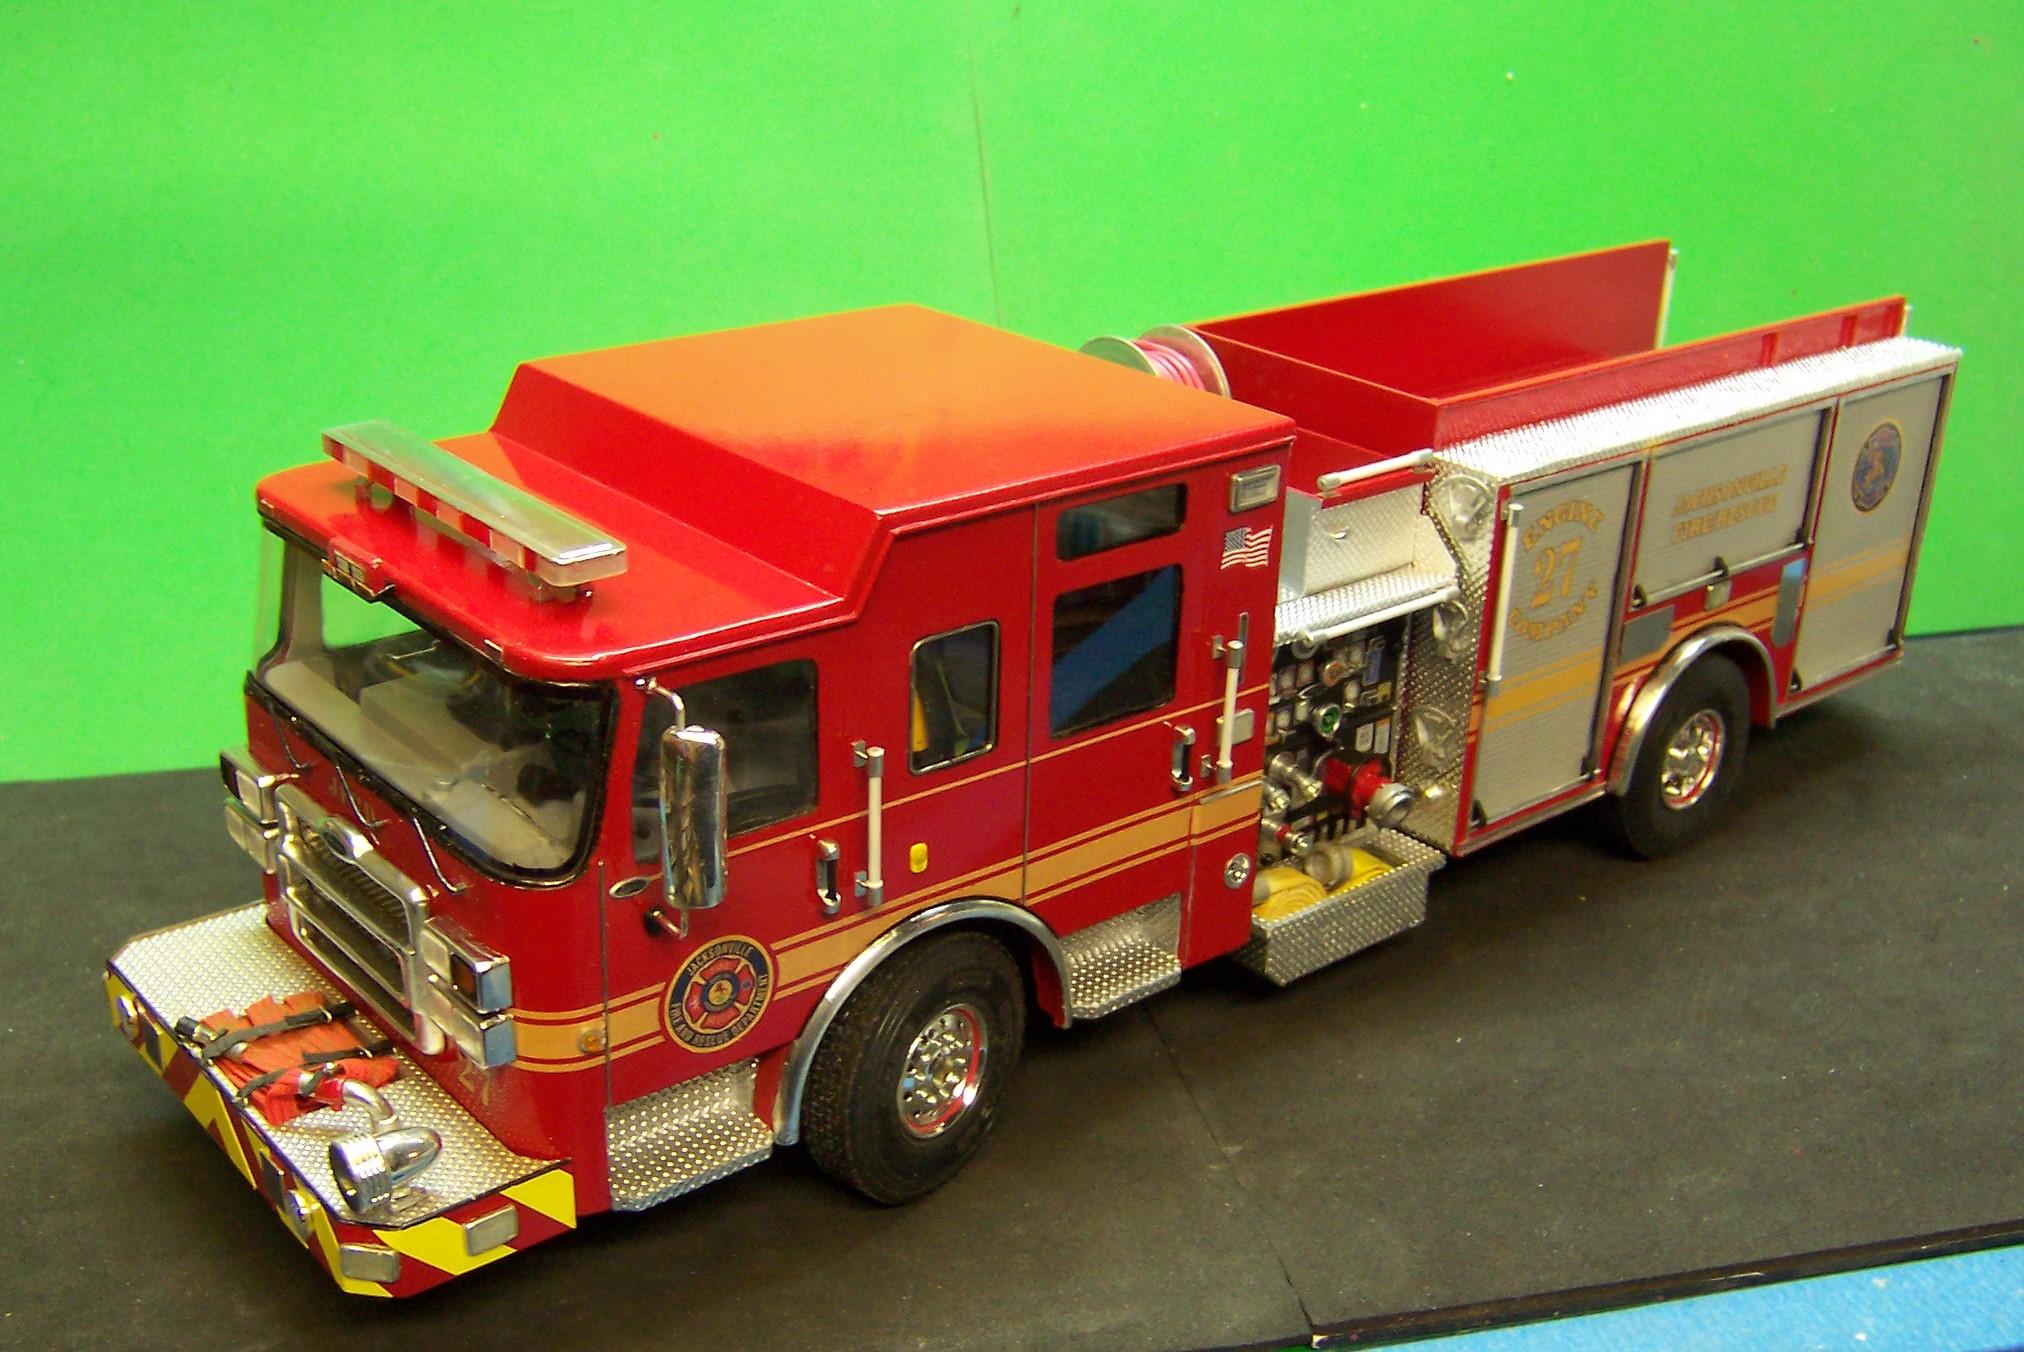
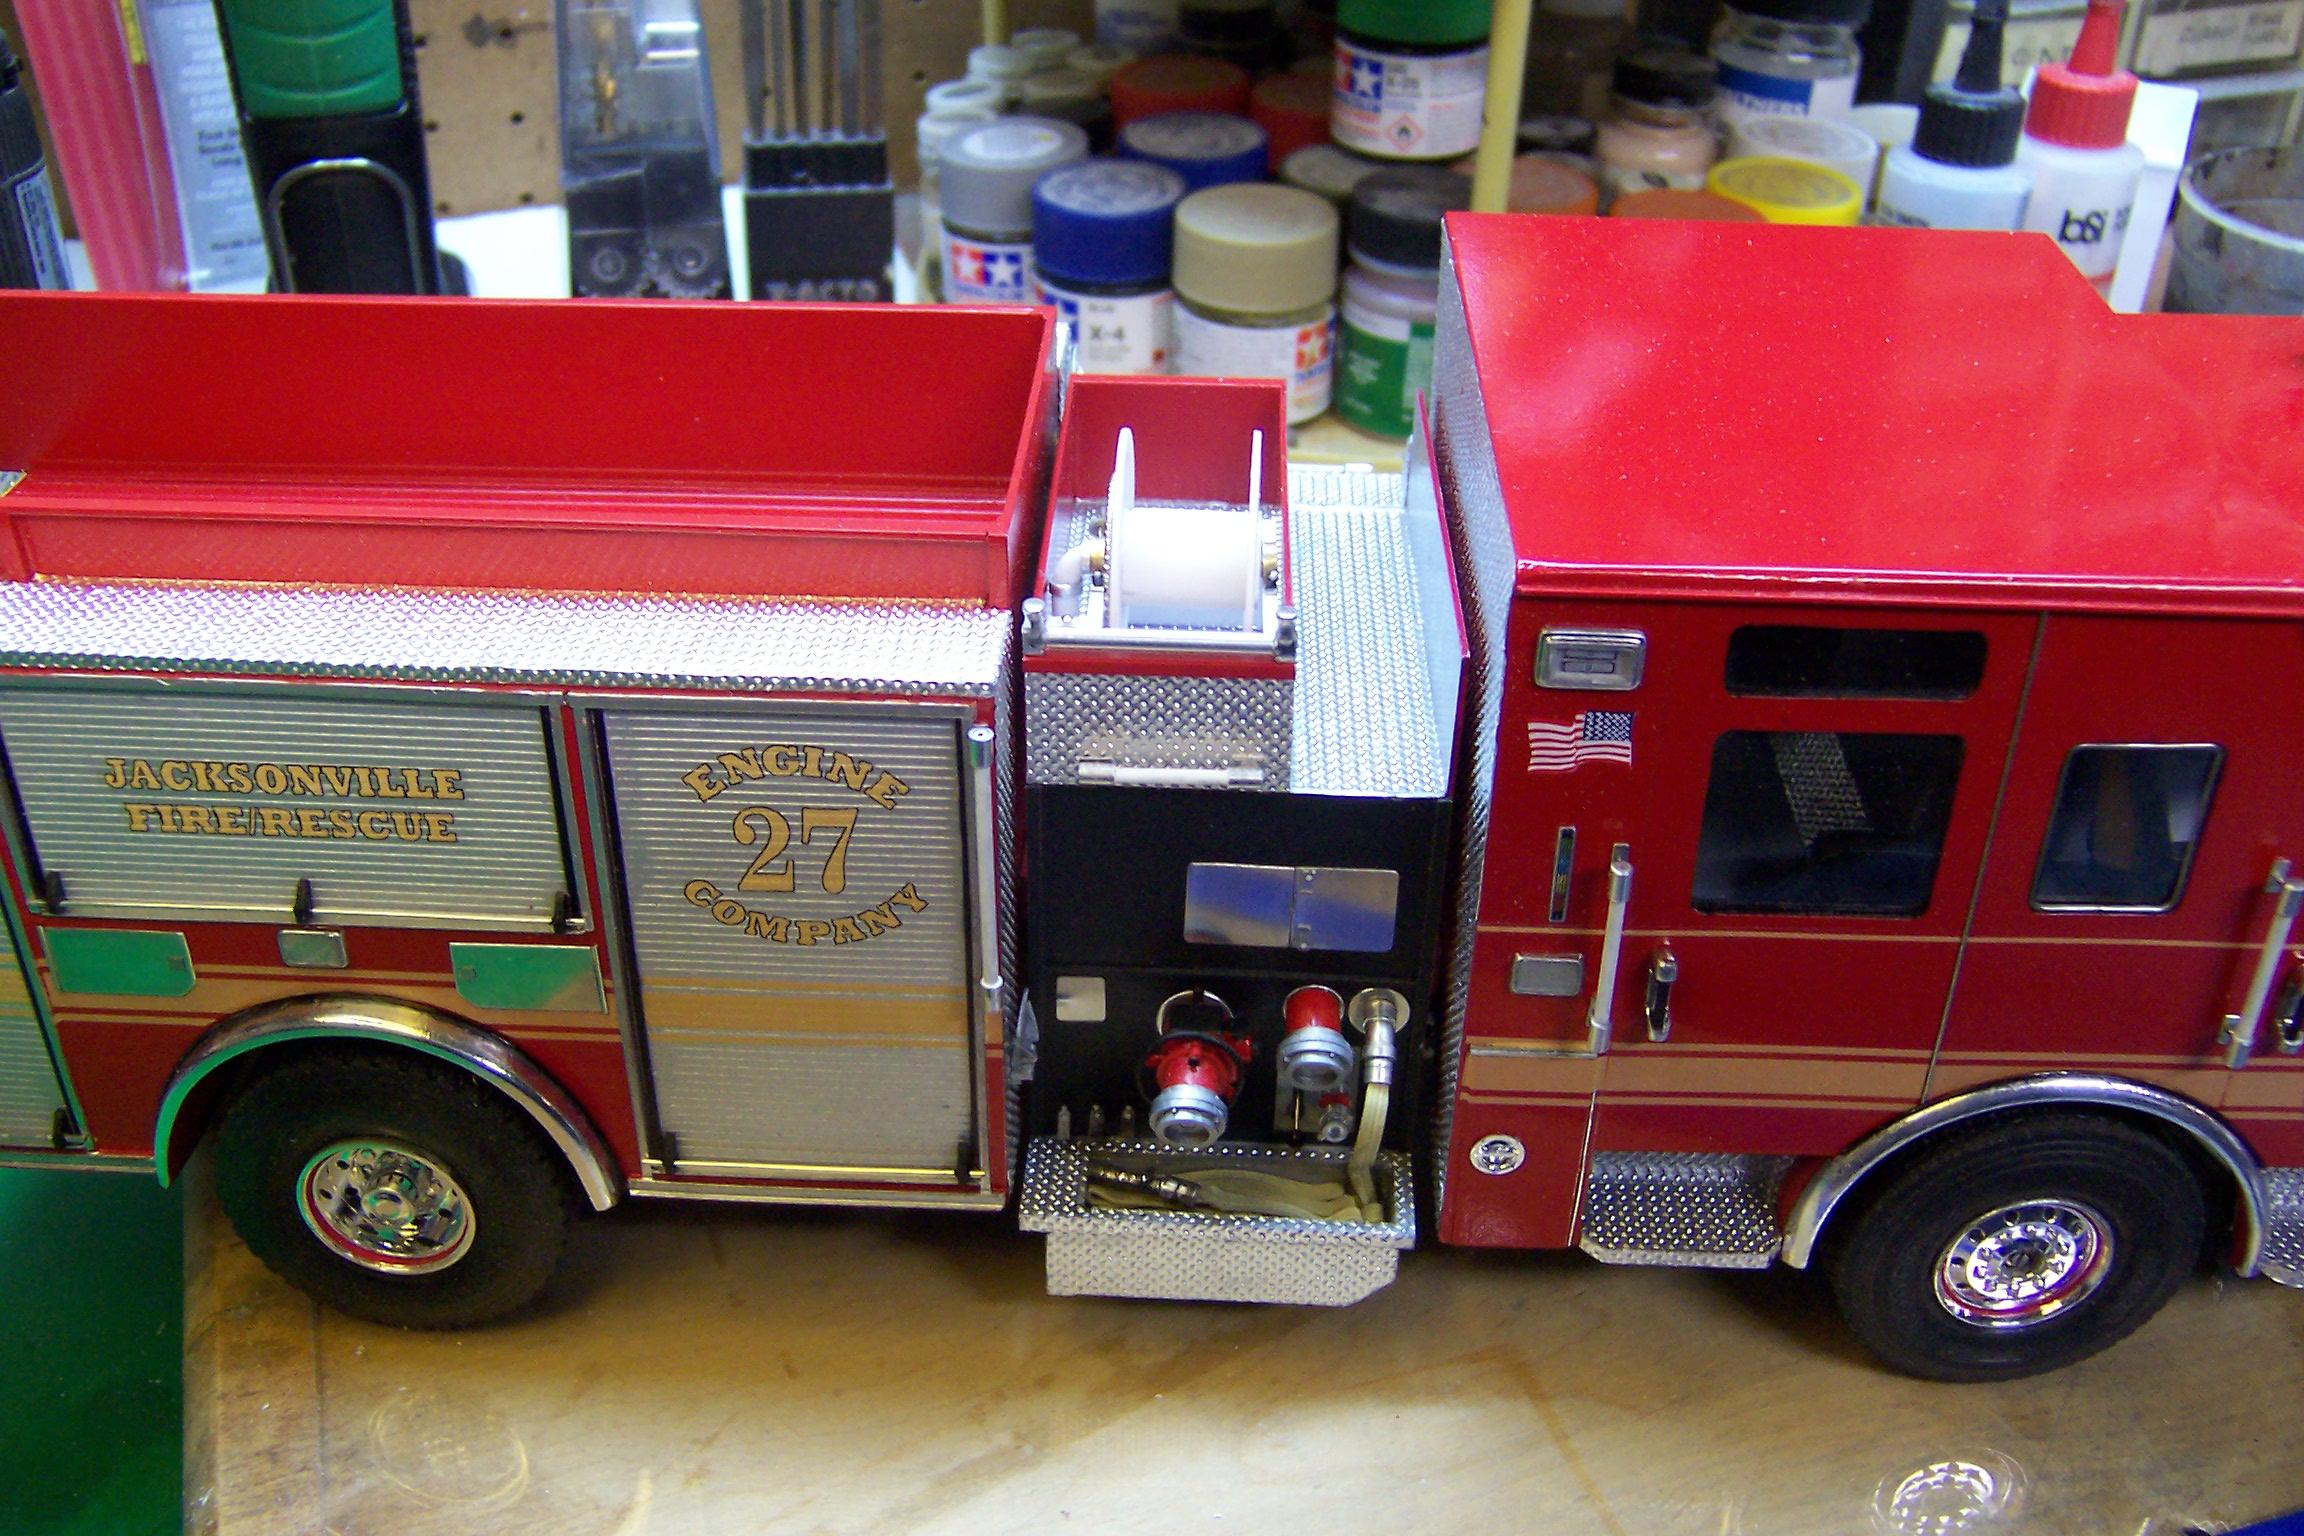
The hose bed is full. Scotch brand yellow duct tape was used for the LDH supply line. 3/4" strips folded in thirds and then laid in the bed the same as the others with short sections out front and then layers to the front of the bed on top. Same with the line on the left.

-
Craftsmanship, my man, Craftsmanship! Love it!?️
-
American LaFrance 700
Chariots of Fire replied to cargostar's topic in WIP: Model Trucks: Big Rigs and Heavy Equipment
To answer Jeff Robinson's question: The open cab concept is a carry over from the days of horse and wagon and with the idea that it would be faster for the crew to get in place. It was also thought that there would be no visual hinderance to spotting apparatus at the fire ground. It was popular in many departments up until the time of the riots of the 1970's when many departments, especially in the larger cities ended up retrofitting many open cab apparatus with all sorts of things ranging from plywood to sheet metal to fiberglass. To continue on the safety theme it became SOP via NFPA guidelines to have all firefighters seated and in an enclosed area. Hence the closed cab and four door apparatus that you see today. The fire service over the years had been very traditional and not particularly open to some innovation but that has all changed. What you see today is also a reflection of European influence on design and safety. And thank you, Greg for posting the how to on making a 700 cab. I'm saving that info!? I didn't mean to steal Greg's thunder. I completely missed his answer No. 2 above!! We're essentially on the same page. -
Monogram 1926 Mack
Chariots of Fire replied to Straightliner59's topic in WIP: Model Trucks: Big Rigs and Heavy Equipment
I think the chains need to be a bit darker to reflect the oil that gets dripped on them every day. There are little canisters above the drive sprockets that drip oil onto the chain as it rotates. I do like the worn but serviceable look everywhere else. Looks great. -
That's pretty cool work! The diagrams certainly were a great help in getting things in proportion but the actual work you put in is fantastic.
-
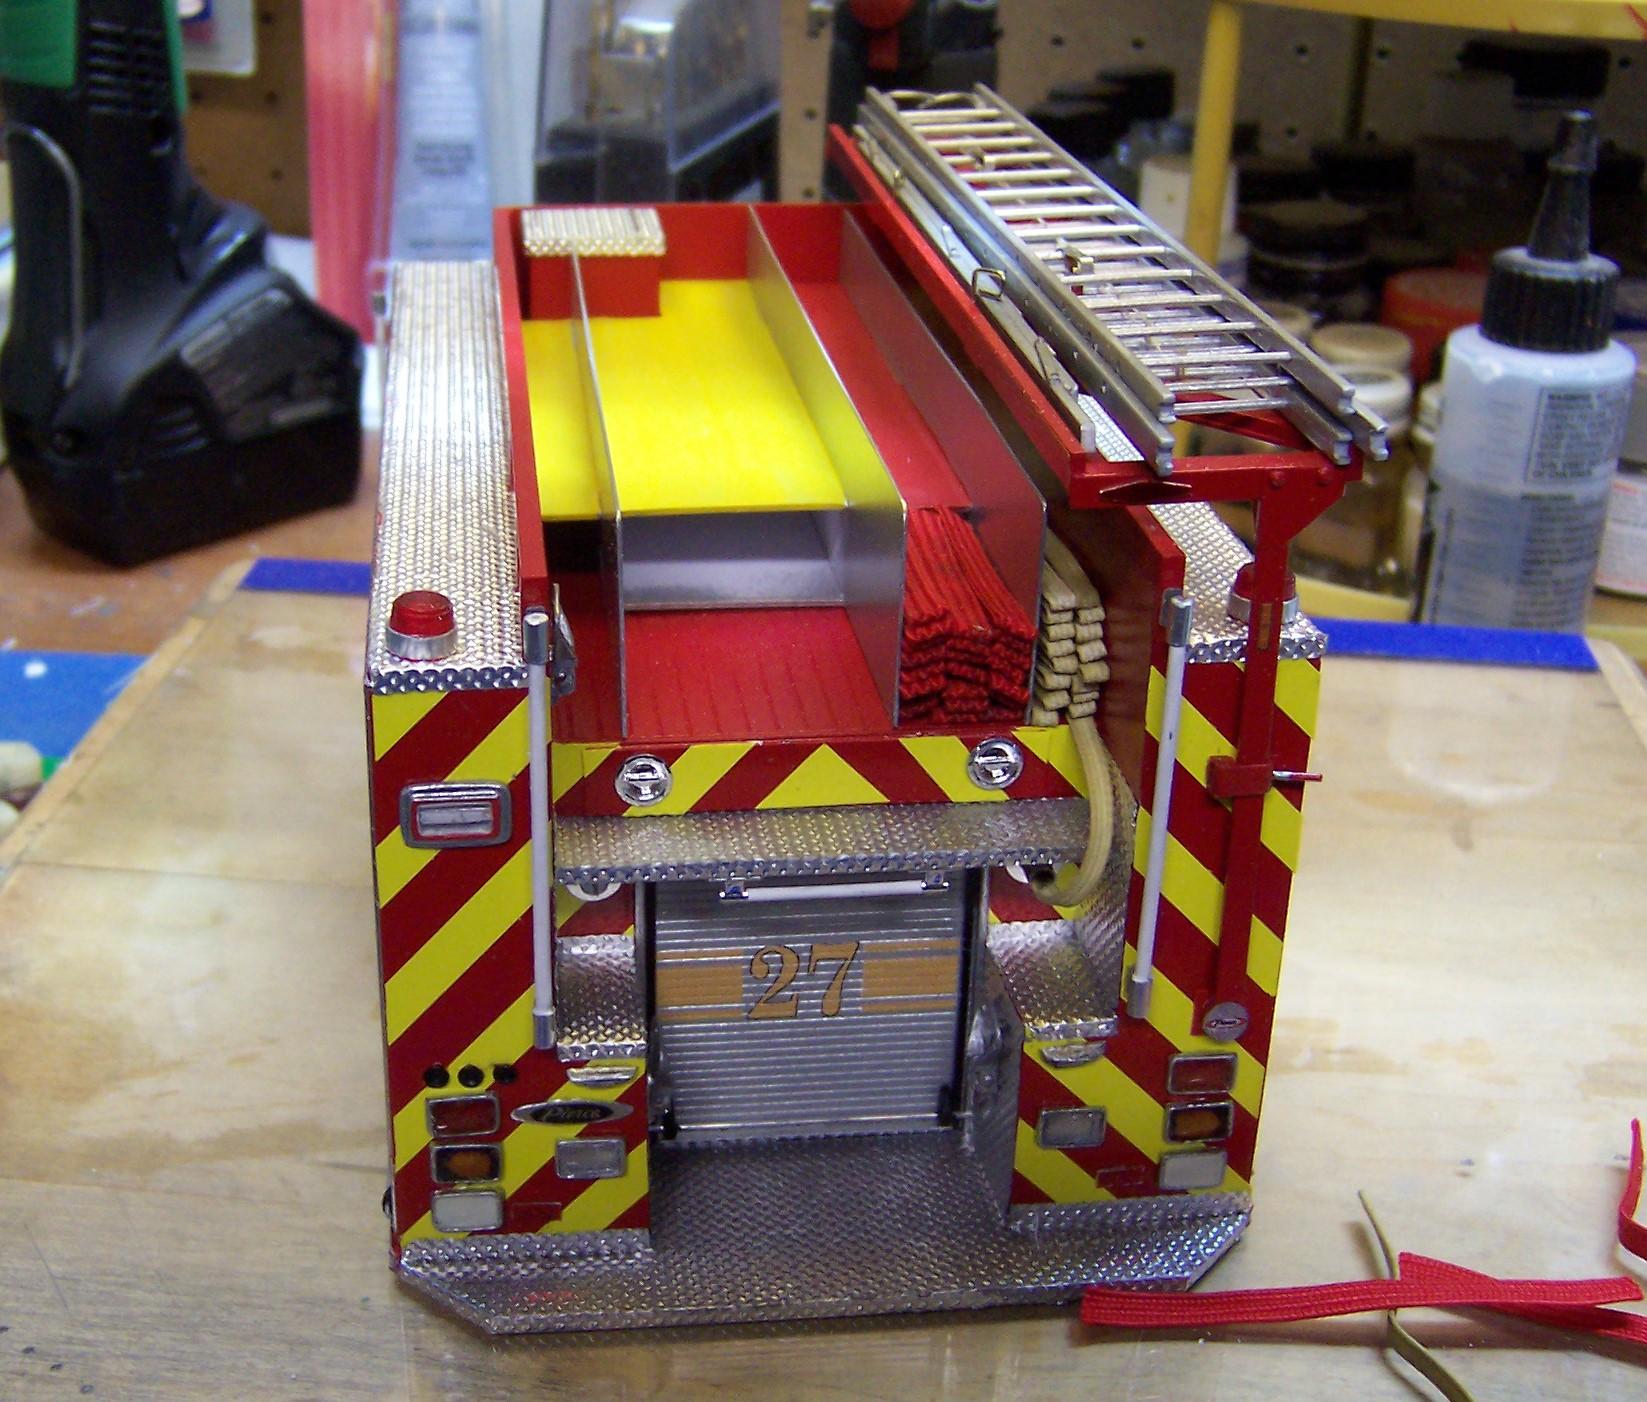
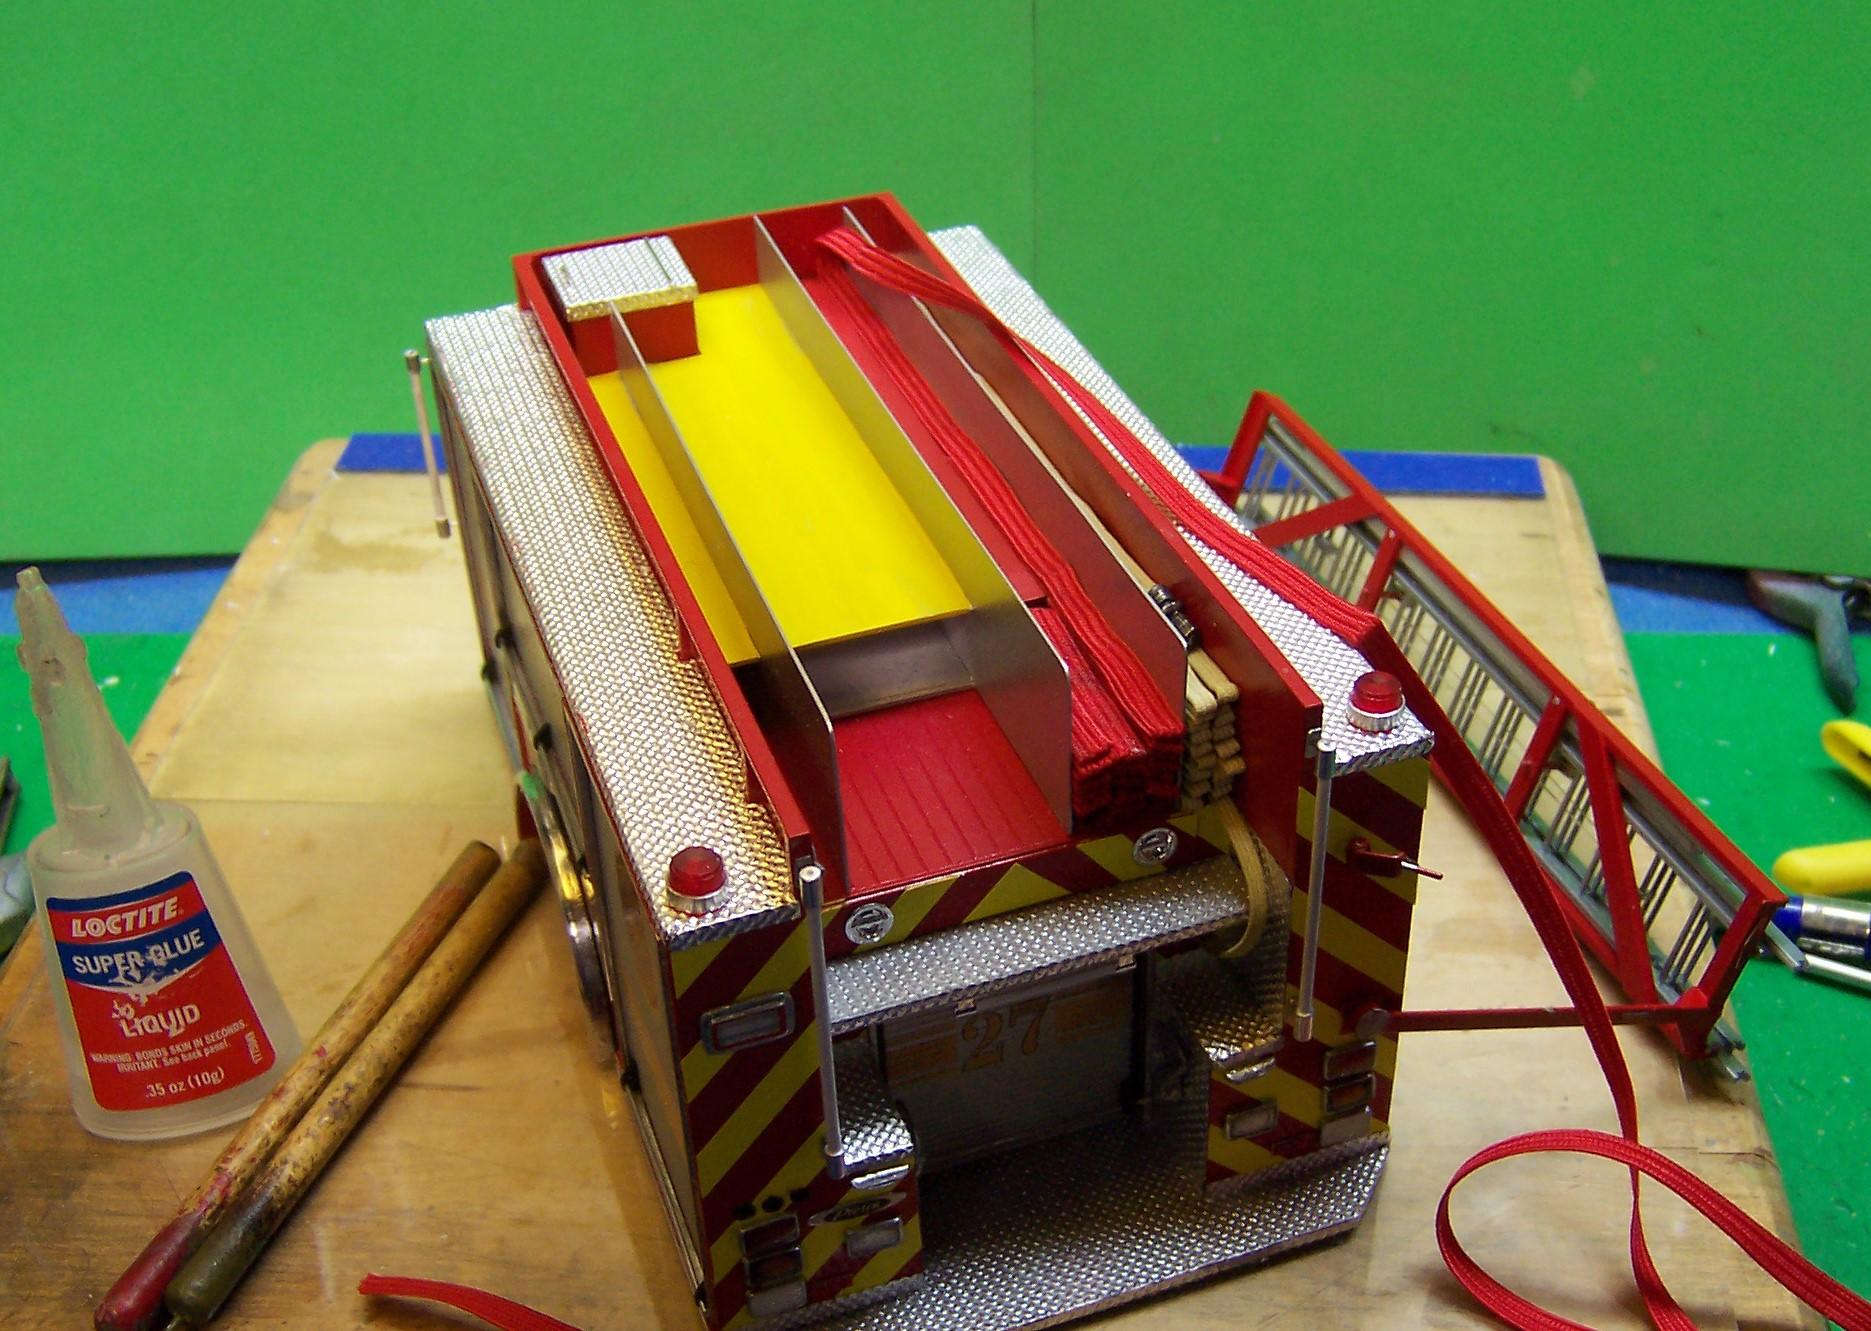
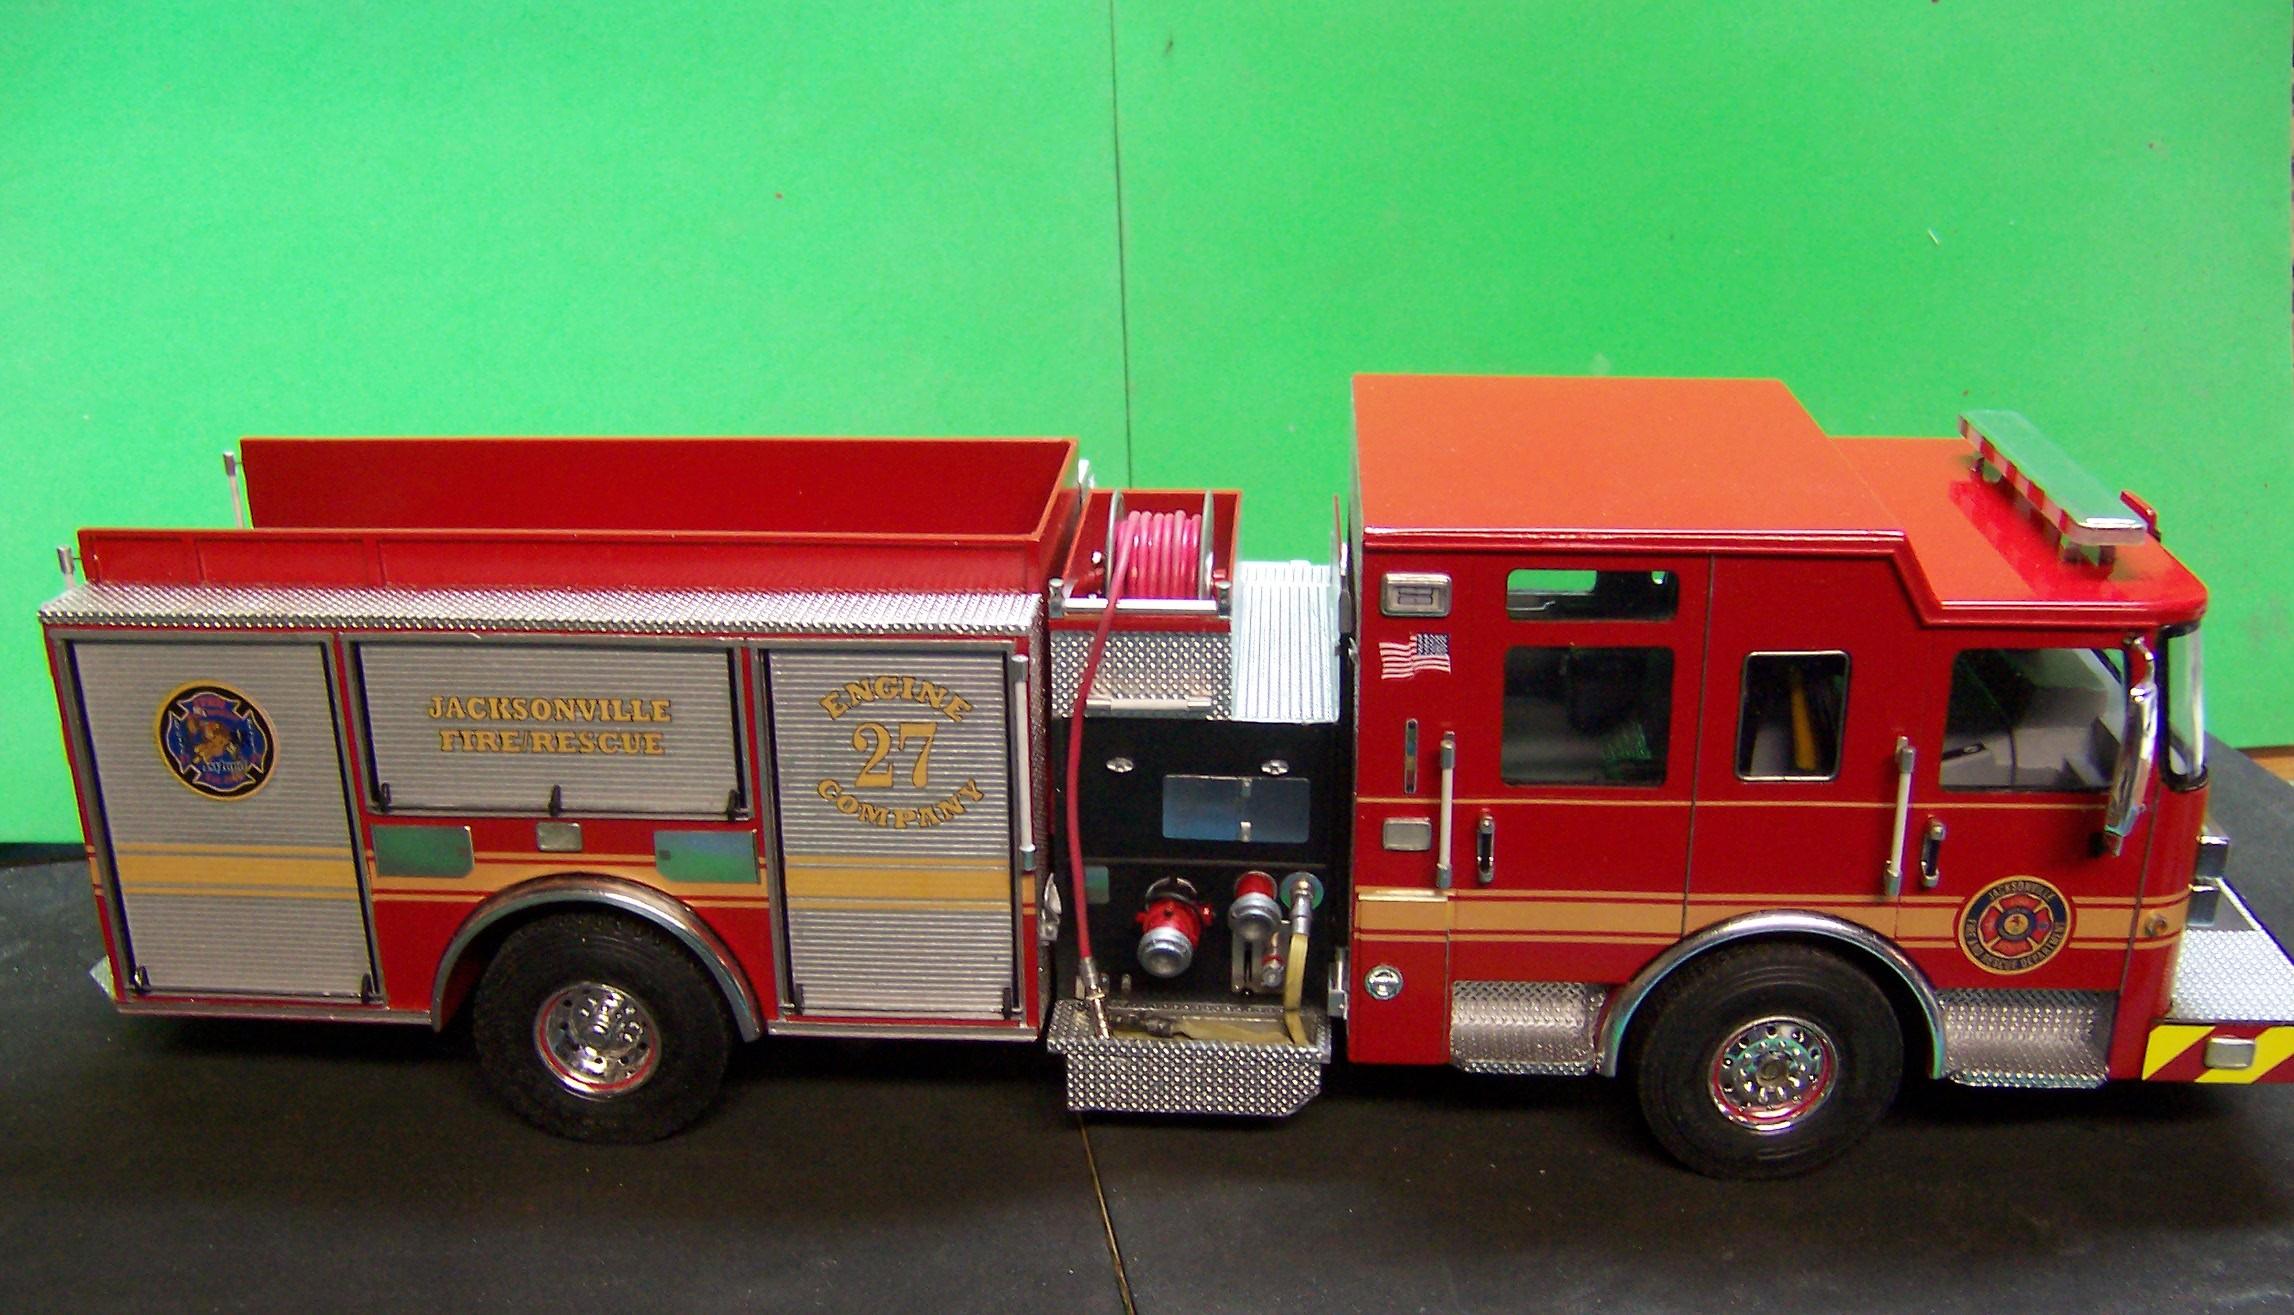
With the ladder rack done the next job was to begin filling the hose bed. I like sewing elastic, some fancy middy striping and 3M tape to make the hose. The small hose in the right side of the bed has been stained with watered down acrylic tan. The red hose is just like it comes in the package. I made a shelf to put in the hose bed to cut down on the amount of material that is needed to fill it. It's cheating, I know but when it's done we won't tell anyone else! A look at the hose bed with the shelf in place, painted the same color as the hose to disguise the shelf just in case some of it shows through. I make it a point to cover it completely so the paint is just a precaution. Short pieces of hose have been placed in front of the shelf. The next layers will extend the full length of the bed for 2-3 layers. That was done on the light tan attack line to the right. The first layer is started. Additional layers will be glued in place with the CA. Care has to be taken not to smear the hose bed dividers with glue. I had to lower the ladder rack to get these two parts of the hose load in place. The first two hose loads are done. The hose was dusted with some Doc O'Brien's weathering powder to give it a dirtied look. (Grungy gray). Next up will be the large diameter supply line made of 3M yellow tape.
-
RM Mack w snowblower....
Chariots of Fire replied to gotnitro?'s topic in WIP: Model Trucks: Big Rigs and Heavy Equipment
Keep up the good work, Jeff! Let it be a good carryover into the new year! -
American LaFrance 700
Chariots of Fire replied to cargostar's topic in WIP: Model Trucks: Big Rigs and Heavy Equipment
It's hard to make that conversion because the shape of the cab is so much different. Not only does the very front have a slant to it but the sides taper in as well. Dave is right. A hard one to master. Hope you find the drawings. -
Holmes 750 twin-boom wrecker
Chariots of Fire replied to landman's topic in WIP: Model Trucks: Big Rigs and Heavy Equipment
Hey, Pat. What kind of aluminum rod are you using? I know there are different kinds; some good for turning and some not so good. -
Work on the hydraulic ladder rack has been completed. Next is to add the brackets that secure the ladders in place. The vertical pieces the gusset plate and the end pieces are soldered brass strip stock. The rack itself is plastic strip stock. The small end clamps can be opened so that the ladder rack can be rotated down. The round base plate is pinned to the body with a bolt and nut in the inside. 2 Whelan led warning lights are on the top rear of the body, both sides.
-
?? That's two thumbs up! Looking real good!
-
For unto us a child is born; for unto is a Son is given. ? Halleluiah!
-
Got a bit more done. I'll let you guys figure out what's been added.?
-
Holmes 750 twin-boom wrecker
Chariots of Fire replied to landman's topic in WIP: Model Trucks: Big Rigs and Heavy Equipment
I'll have to dig out that Phil Jensen book. I have it around some place. Makes me want to get out my IH Loadstar and do the wrecker version! I see Greg dug out some old stuff too! Thanks, Greg! -
That's pretty much it, Aaron. The bigger shops use a lot of jigs to get things squared up and uniform. This one you show reminds my of one that was not too far away that did a lot of brush truck building as well. Early on the guy who did most of the fabrication for the bar work used a piece of chalk to outline it on the floor where he was working! And that's how the bars got put together.?
-
You're not supposed to know about that, Brian! Who leaked it??
-
The hose reel is painted and is now installed.
-
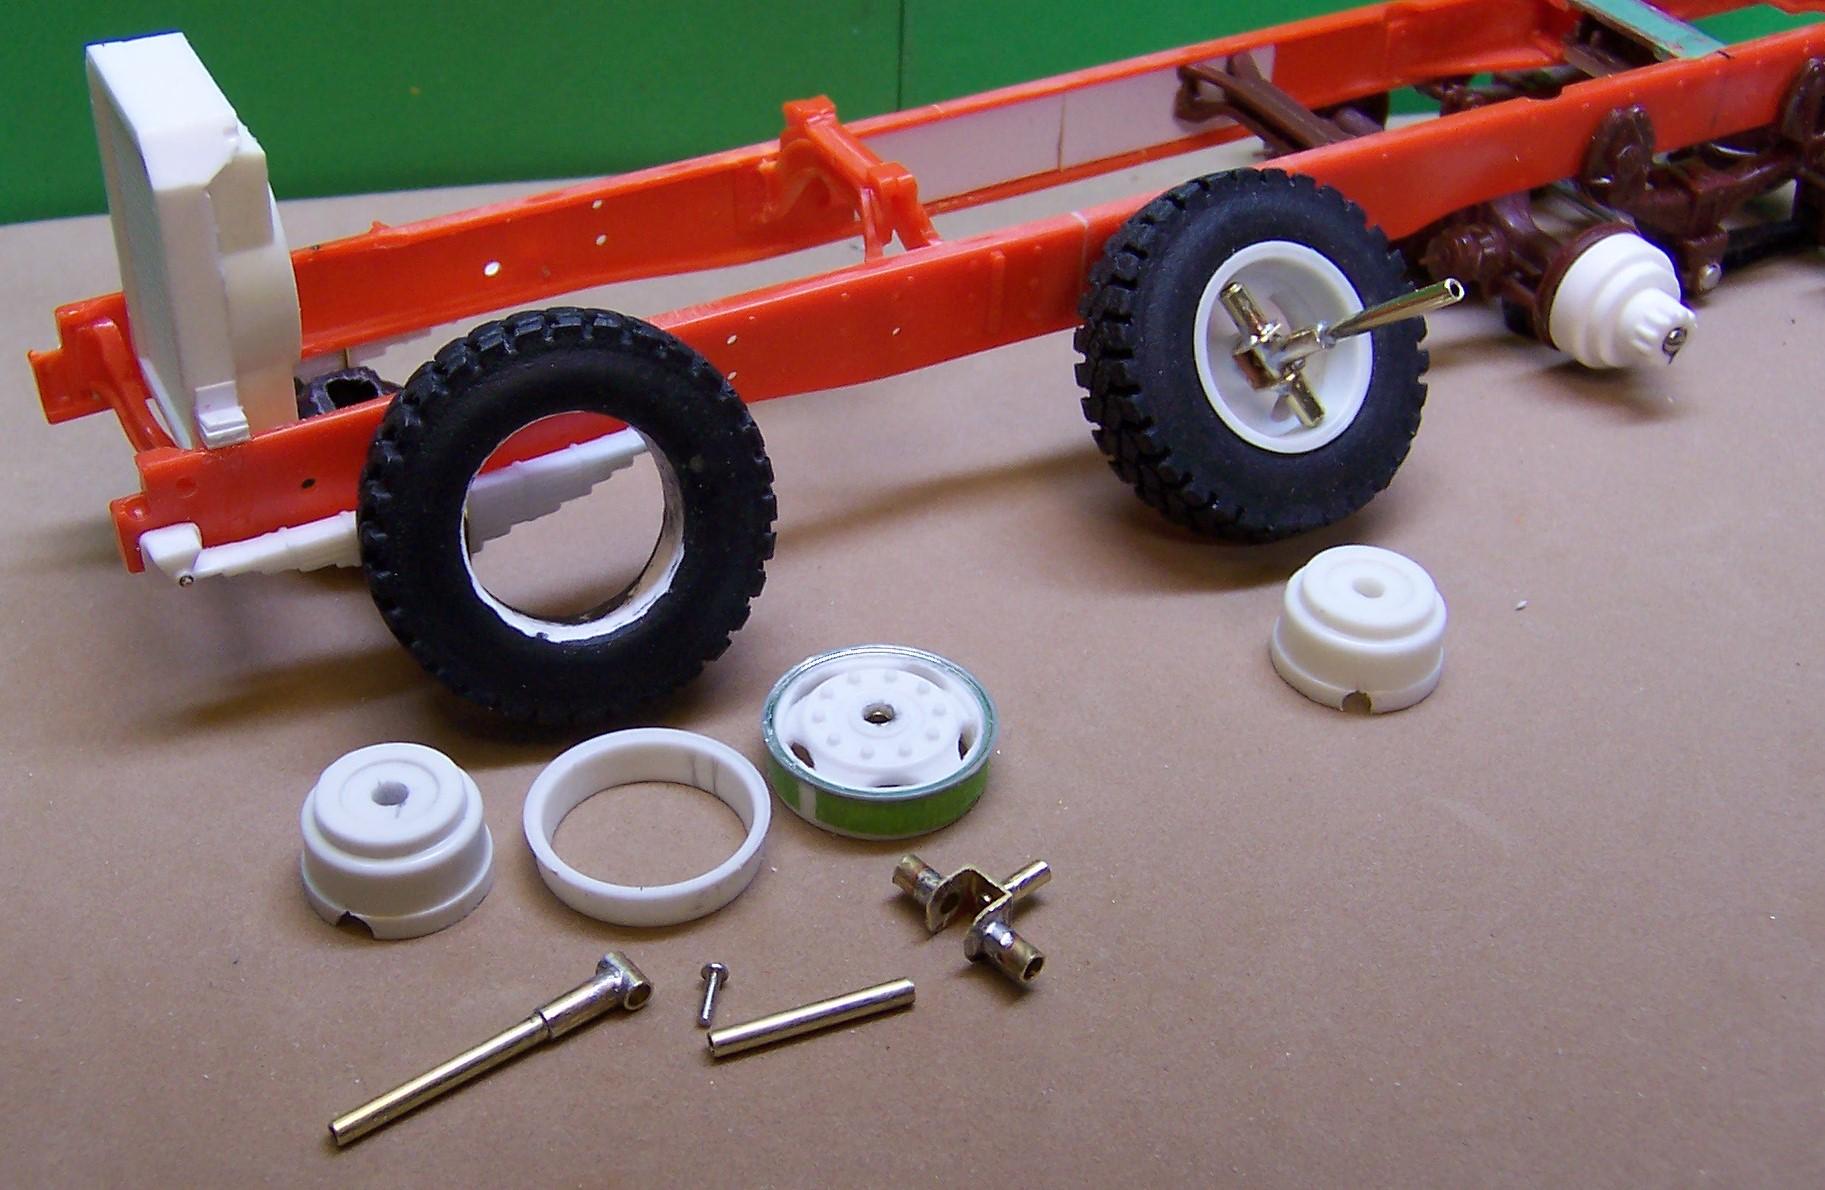
Here's an example of brass steering knuckles. The long end fits into a tube that is within the axle. Makes the whole thing quite strong.
-
Tom: Carry over the brass idea to your steering knuckles. Strength will be needed there too.
-
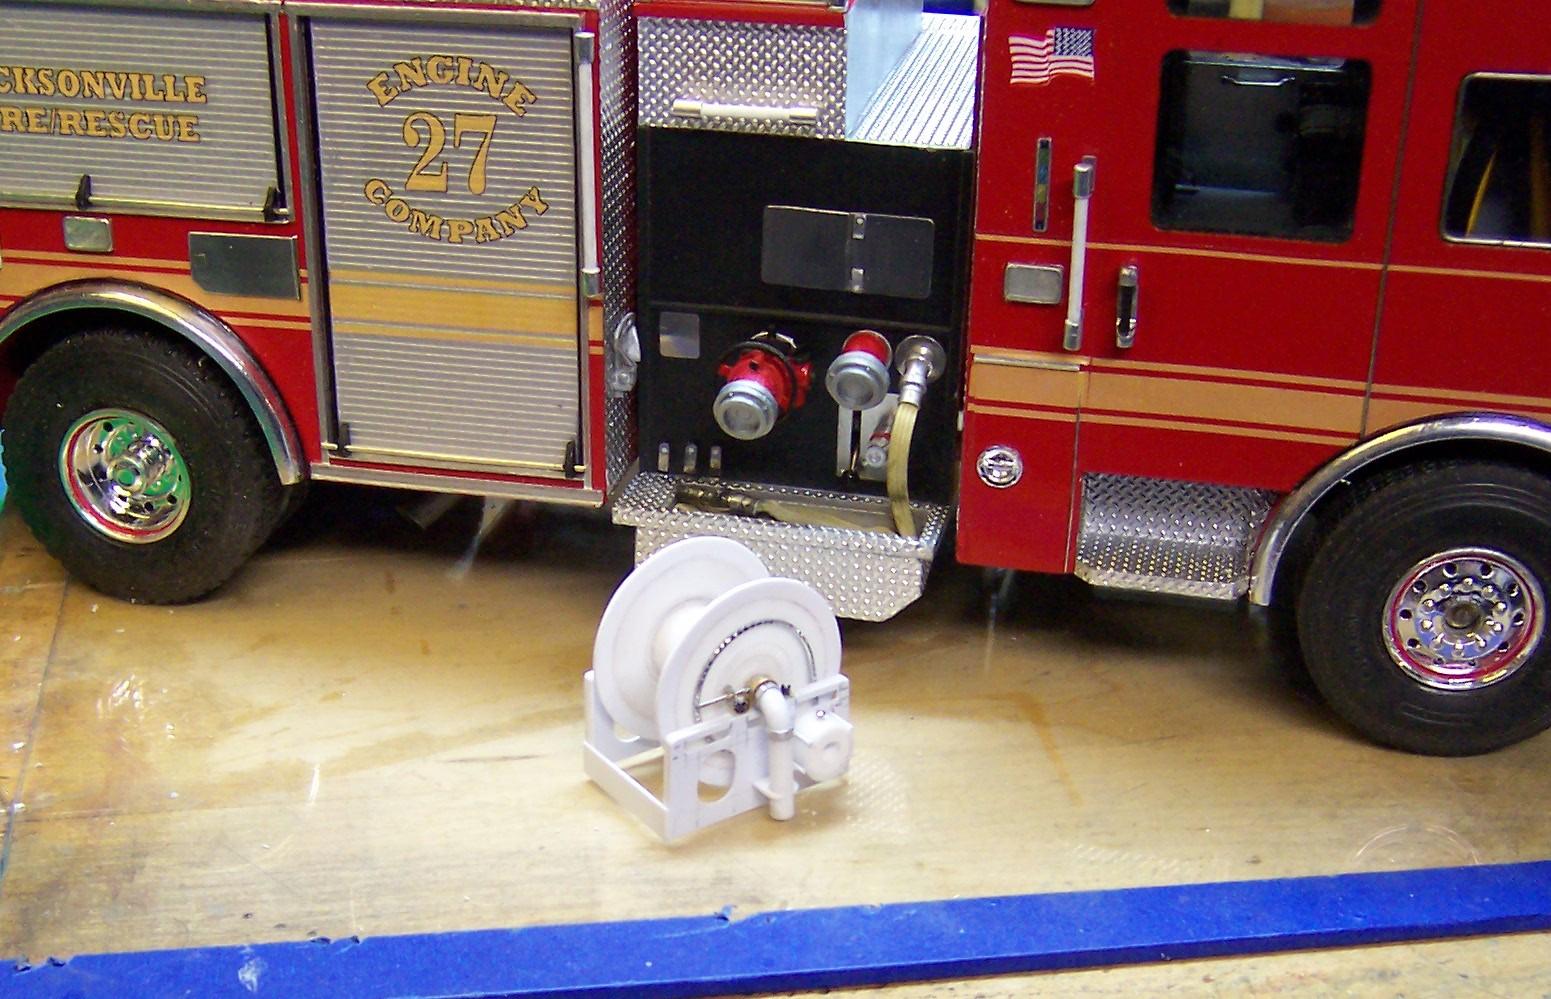
This is how the real ones are built; modules at a time. Then it's like plug and play, connecting all of the components with the appropriate wiring, etc. Been working on the booster hose reel for the top deck. I found a nice diagram for Hannay reels on line and it gave all of the specific dimensions that I needed. I scanned the diagram and scaled it down to 1/25 size. Unfortunately the diagram does not follow consistent dimensions with what is in the table. So I had to stretch and squeeze here and there but it was sufficient to get the reel done. And here's where it will ultimately go when painted and the hose is added.
-
RM Mack w snowblower....
Chariots of Fire replied to gotnitro?'s topic in WIP: Model Trucks: Big Rigs and Heavy Equipment
Great work, Jeff. With all those doodads, squirrels and thing-a-ma-jigs going in there are there any widgets???