Chariots of Fire
-
Posts
2,802 -
Joined
-
Last visited
Content Type
Profiles
Forums
Events
Gallery
Everything posted by Chariots of Fire
-
 More to go, Bob. Got the brake lines in place along with the main canister and master cylinder. Working on the gas tank shape and details to put it in place. Will have to move the drive shaft from the transfer case toward the rear differential down a bit to get it fit into position. I think it will improve the look as well.
 -
It's pretty rugged once everything is in place. I do a lot of it with pins in addition to the glue so things don't have a tendency to come off during handling.
-
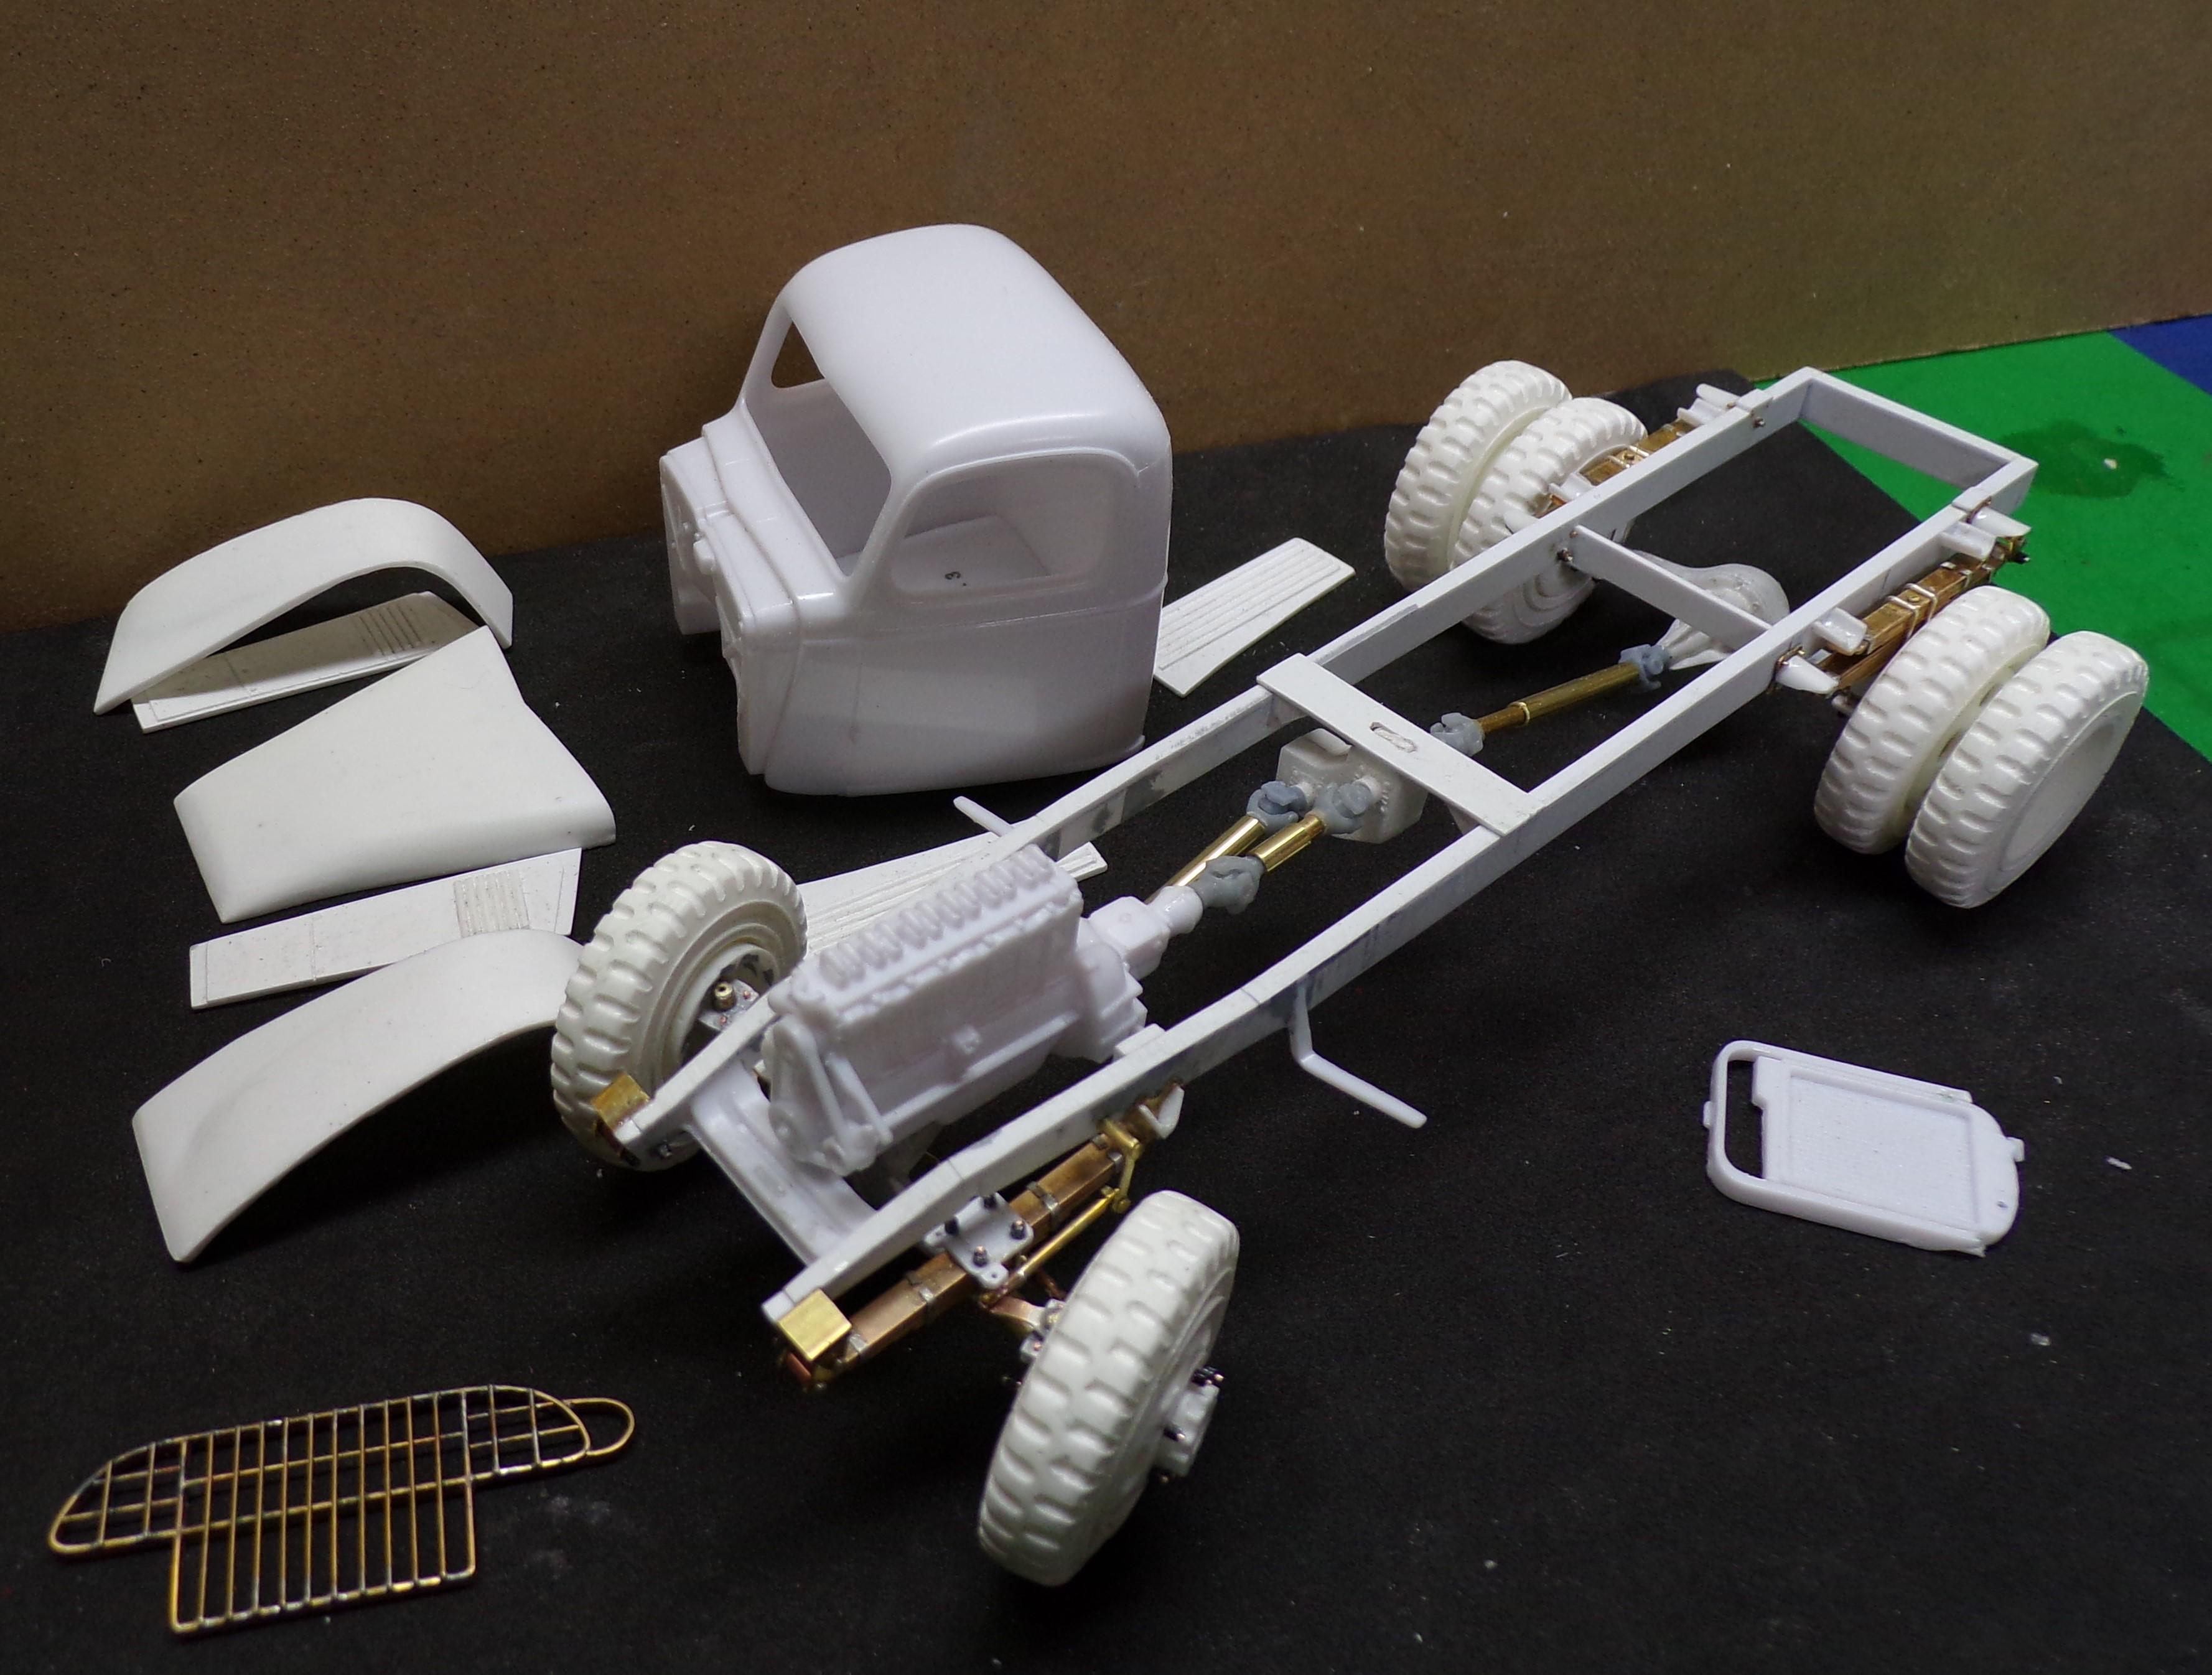
Much of the hard stuff chassis work is done now. Wheels are mounted on the axles but can be removed for painting. 3D printed U-joint ends were mated with brass tubing and attached. The one connecting the transmission to the transfer case is loose for final fitting. The front axle steers. The tie rod was made of 1/16" tubing and smaller solid brass rod. As with the other builds, the wheels were drilled for 6 lug nuts using wire and hex beads. Much more realistic than the cast in place ones that can sometimes be difficult to cast without bubbles or holes. Locking rims for the tires need to be cast as well for the rear tire set.

-
Blue Rig Completed
Chariots of Fire replied to Chariots of Fire's topic in Model Trucks: Big Rigs and Heavy Equipment
Not sayin' 😎 -
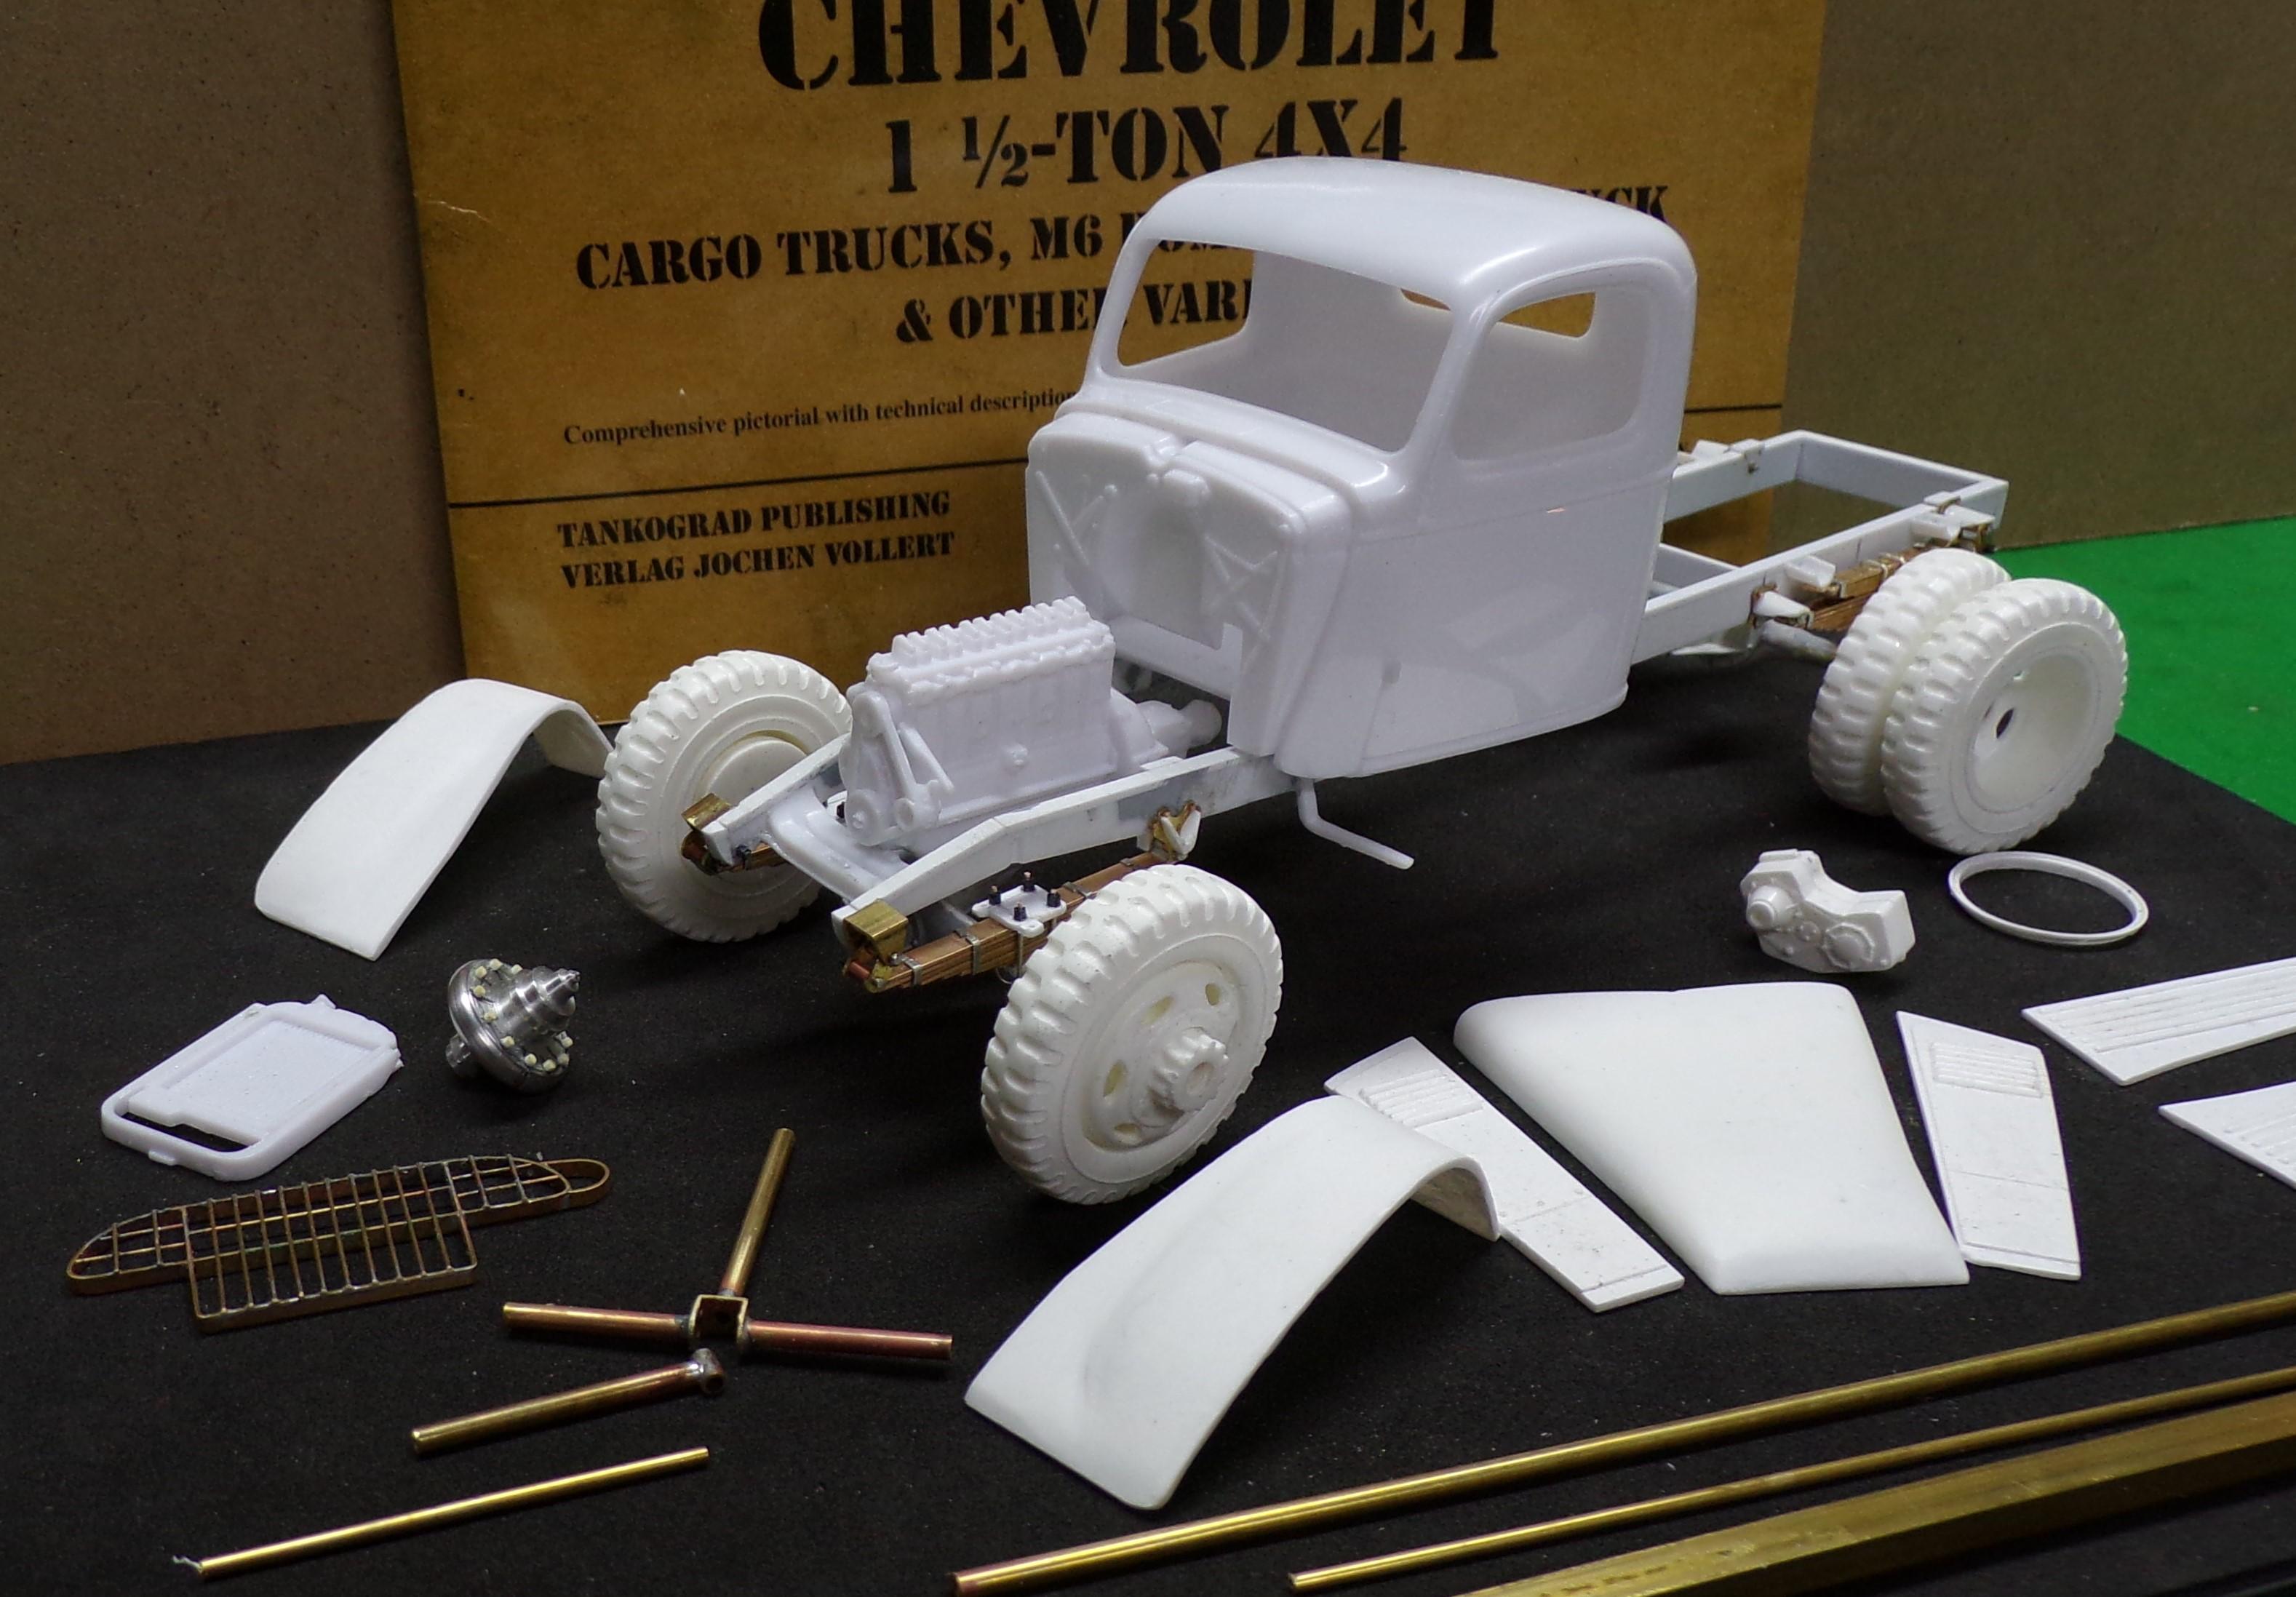
So far I have built two of these World War II fire pumpers that were done by several fire apparatus manufacturers on Chevy 1.5 ton chassis. The first went to a Vet in Hawaii while the second one went to a friend of his in Belgium who also happens to have a full size one that is restored. This time around the build is for my shelf to compliment some of the other WW II rigs that are there. Here's the start of the build. I got one more Revell '41 Chevy kit (the cab and engine are identical to what was used to produce the Class 325) and began casting more of the parts that I had done for the other two projects. The reconfigured hood fits the kit cowl and has separate side pieces. Tires and wheels are resin castings as well. The frame has been altered from the pickup frame in the kit utilizing the front end and straightening the rear portion. I also reinforced it to make it slightly deeper using Evergreen strip stock. Springs are made of brass strip stock soldered together at the ends. Separate hangers were made for each spring. Clips for the springs are made of flattened solder wire. Now I am working on the axles to get the proper tread width for the front and back. Then the wheels can be secured to each axle. In the photos are also the grill guard, made of strip brass and brass wire soldered together. The parts next to the grill are the components of the steering knuckles for the front axle. They are made of brass channel and tube stock, again soldered together. Both are now made up and will show in a couple of future photos. The aluminum turning is the master for the Barton American pump that will be mounted on the front of the truck. The mold is ready for a pour so that the pump can be built up.
-
Dodge L-700 stake bed
Chariots of Fire replied to Sam I Am's topic in WIP: Model Trucks: Big Rigs and Heavy Equipment
Good rig for a lumber yard. I have a couple of those L-700's. Make sure the cab sits straight on the chassis. It was one of the little quirks in the mounting process. -
I typically download to a file on the computer. Then while in MCF hit the "choose files" button down below and then select the photo to insert. Comes up every time.
-
Where are you taking the photo from, a camera, documents file??
-
Mack B-61 Dump Body
Chariots of Fire replied to Scott Eriksen's topic in WIP: Model Trucks: Big Rigs and Heavy Equipment
With a Maxim built aerial ladder! -
Mack B-61 Dump Body
Chariots of Fire replied to Scott Eriksen's topic in WIP: Model Trucks: Big Rigs and Heavy Equipment
OH, Yeah! Boston had a bunch of them. Glad to see that the back of the cab is not indented like what was done for the tractors. -
Mack B-61 Dump Body
Chariots of Fire replied to Scott Eriksen's topic in WIP: Model Trucks: Big Rigs and Heavy Equipment
Much obliged! -
Mack B-61 Dump Body
Chariots of Fire replied to Scott Eriksen's topic in WIP: Model Trucks: Big Rigs and Heavy Equipment
Scott: Where did the B61 cab come from?? -
Superglue on windshield
Chariots of Fire replied to rossfox's topic in Model Building Questions and Answers
Try two part epoxy. That works on windshields as well and does not fog. Takes a while to set though. -
resin casting and molds
Chariots of Fire replied to Paul Payne's topic in Model Building Questions and Answers
My casting is for really simple parts so vacuum or pressure casting has no place in my process. The 300 series casting resin works just fine and allows enough time to get it into position before it sets. The only issue is to be sure that bubbles are removed from small areas at the beginning of the pour. Since I'm not doing large quantities of anything, the simpler the better!!😉 -
Blue Rig Completed
Chariots of Fire replied to Chariots of Fire's topic in Model Trucks: Big Rigs and Heavy Equipment
Thanks, Warren. Into rehab now and getting some range of motion back. Amazing how stiff you can get over a short period of time! -
Blue Rig Completed
Chariots of Fire replied to Chariots of Fire's topic in Model Trucks: Big Rigs and Heavy Equipment
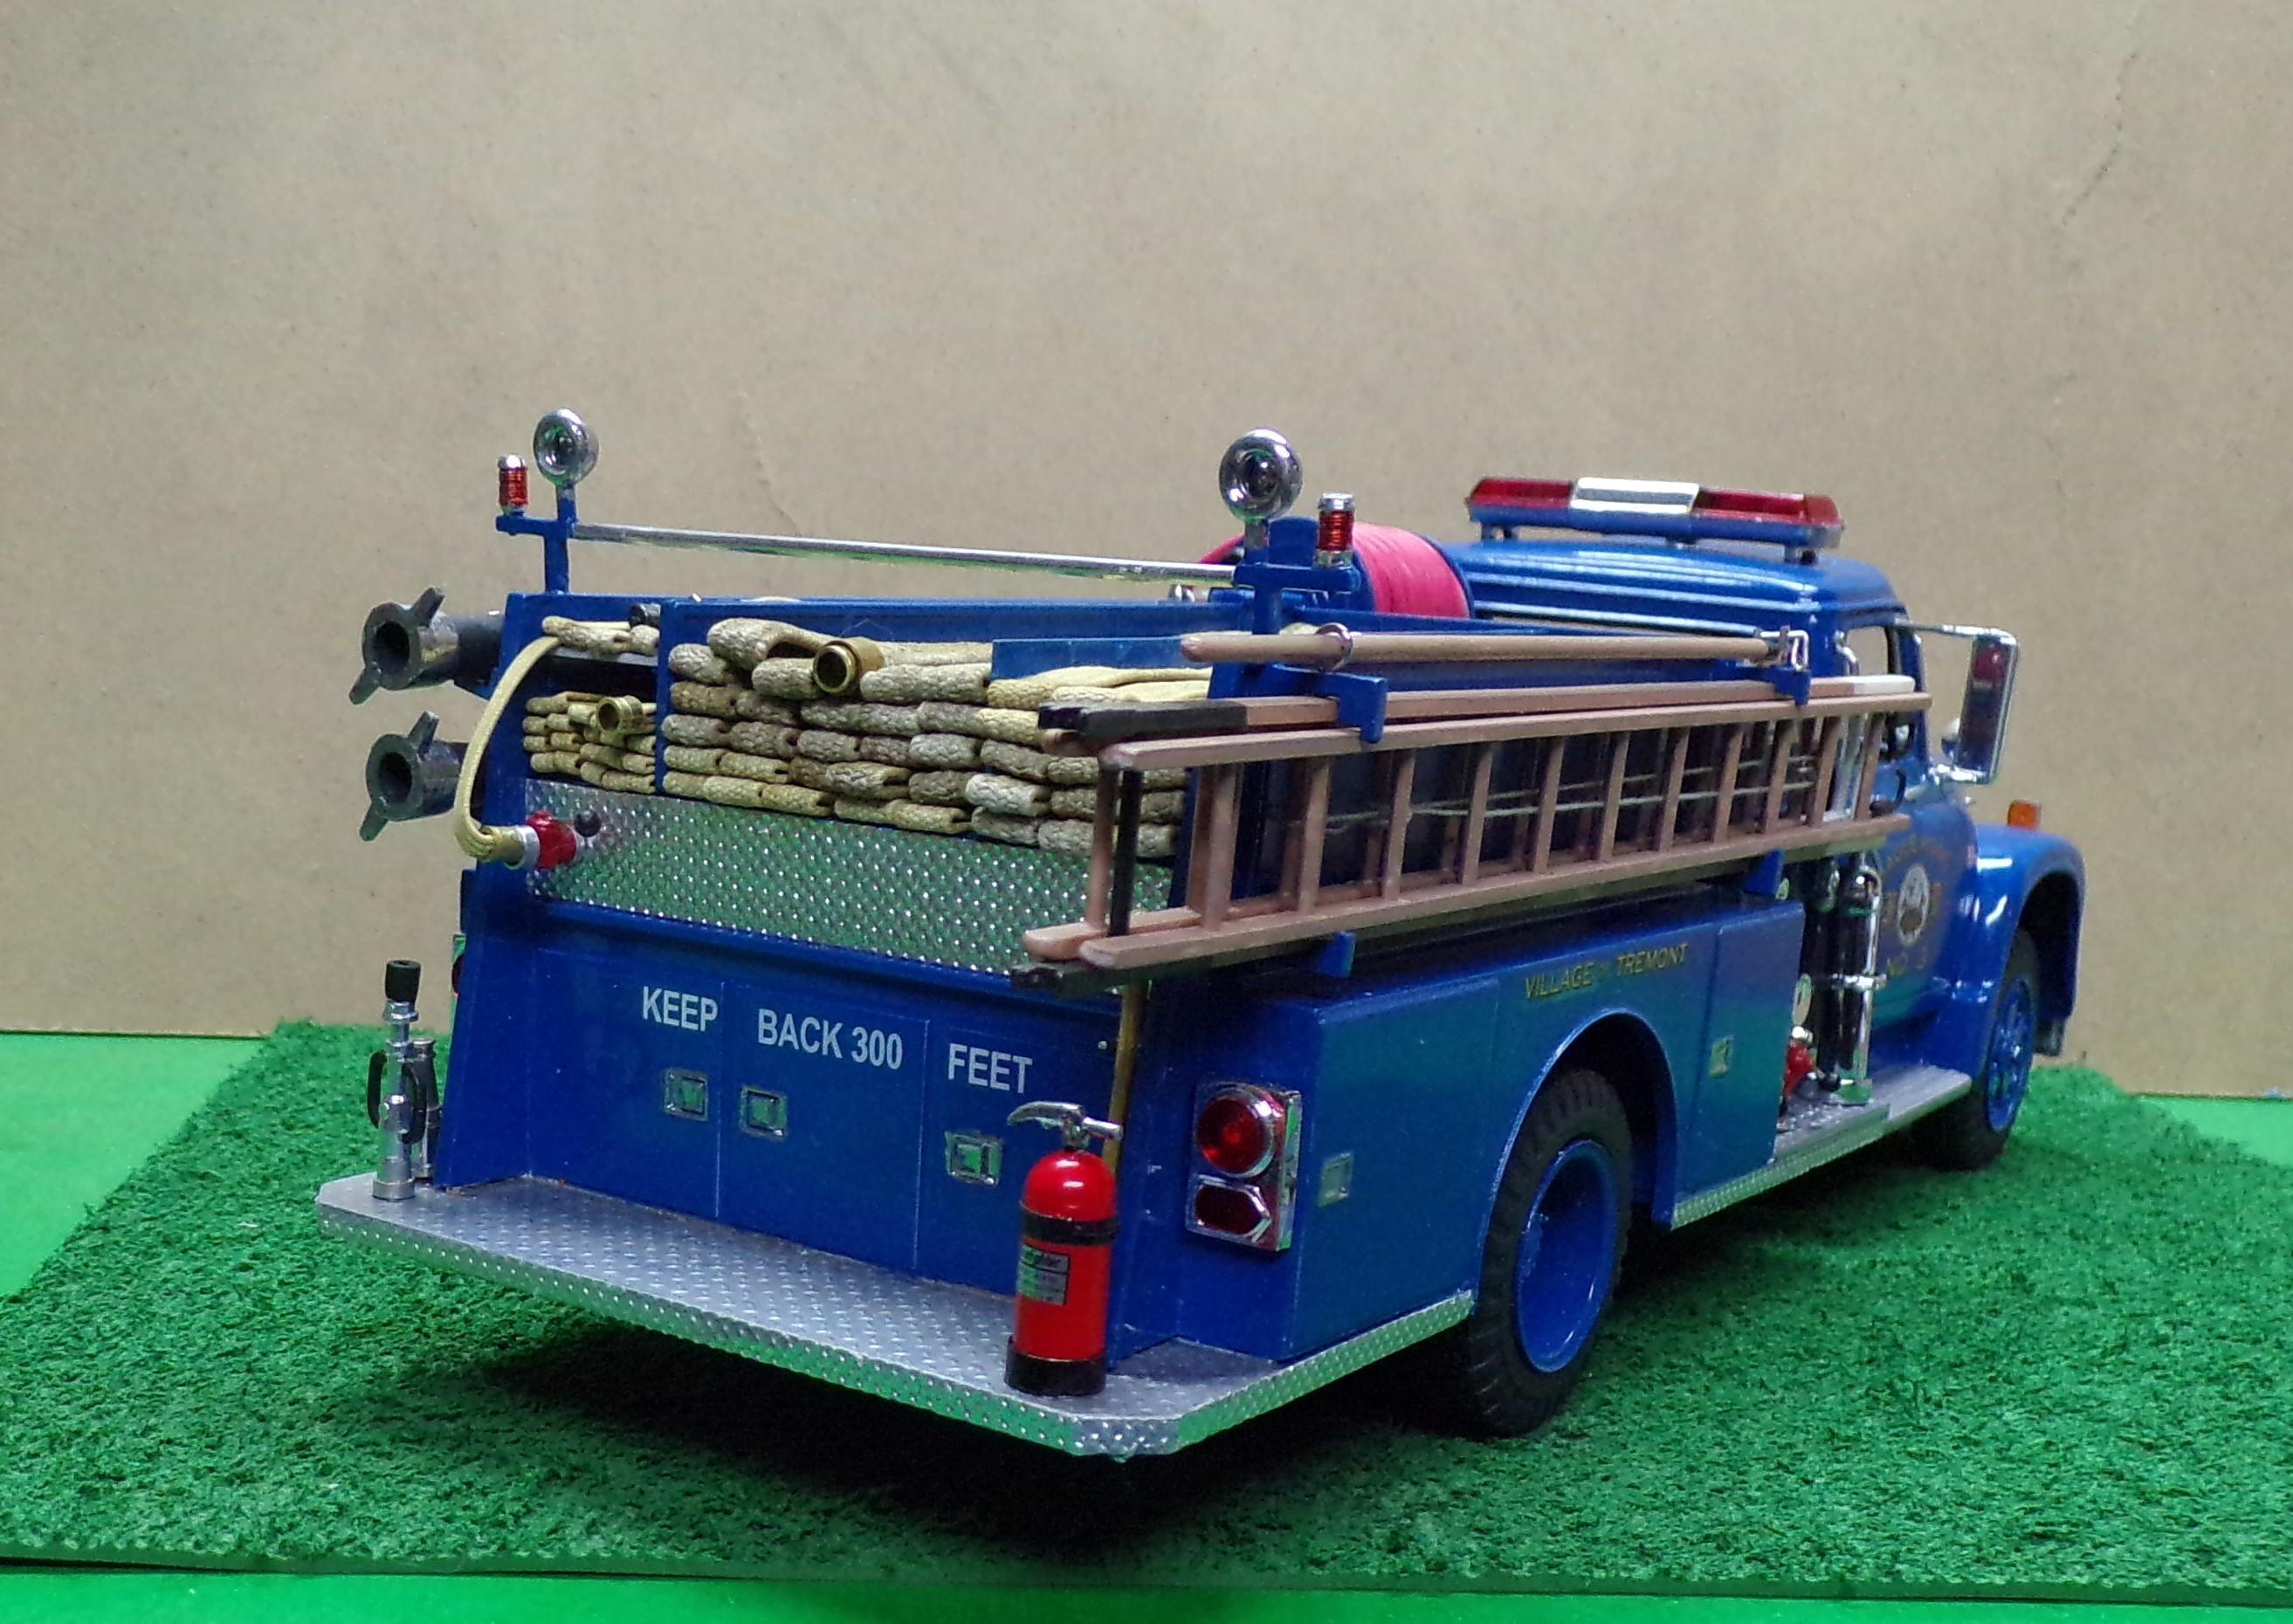
Hi, Brian. I used dark yellow acrylic by Tamiya to stain the elastic for the hose. It's almost a brown color but it's just right for the old cotton jacket working and supply lines of the day. It has to be done before putting the elastic into the hose bed because it tends to swell with the water and acrylic. Once it dries it's ok to work with. -
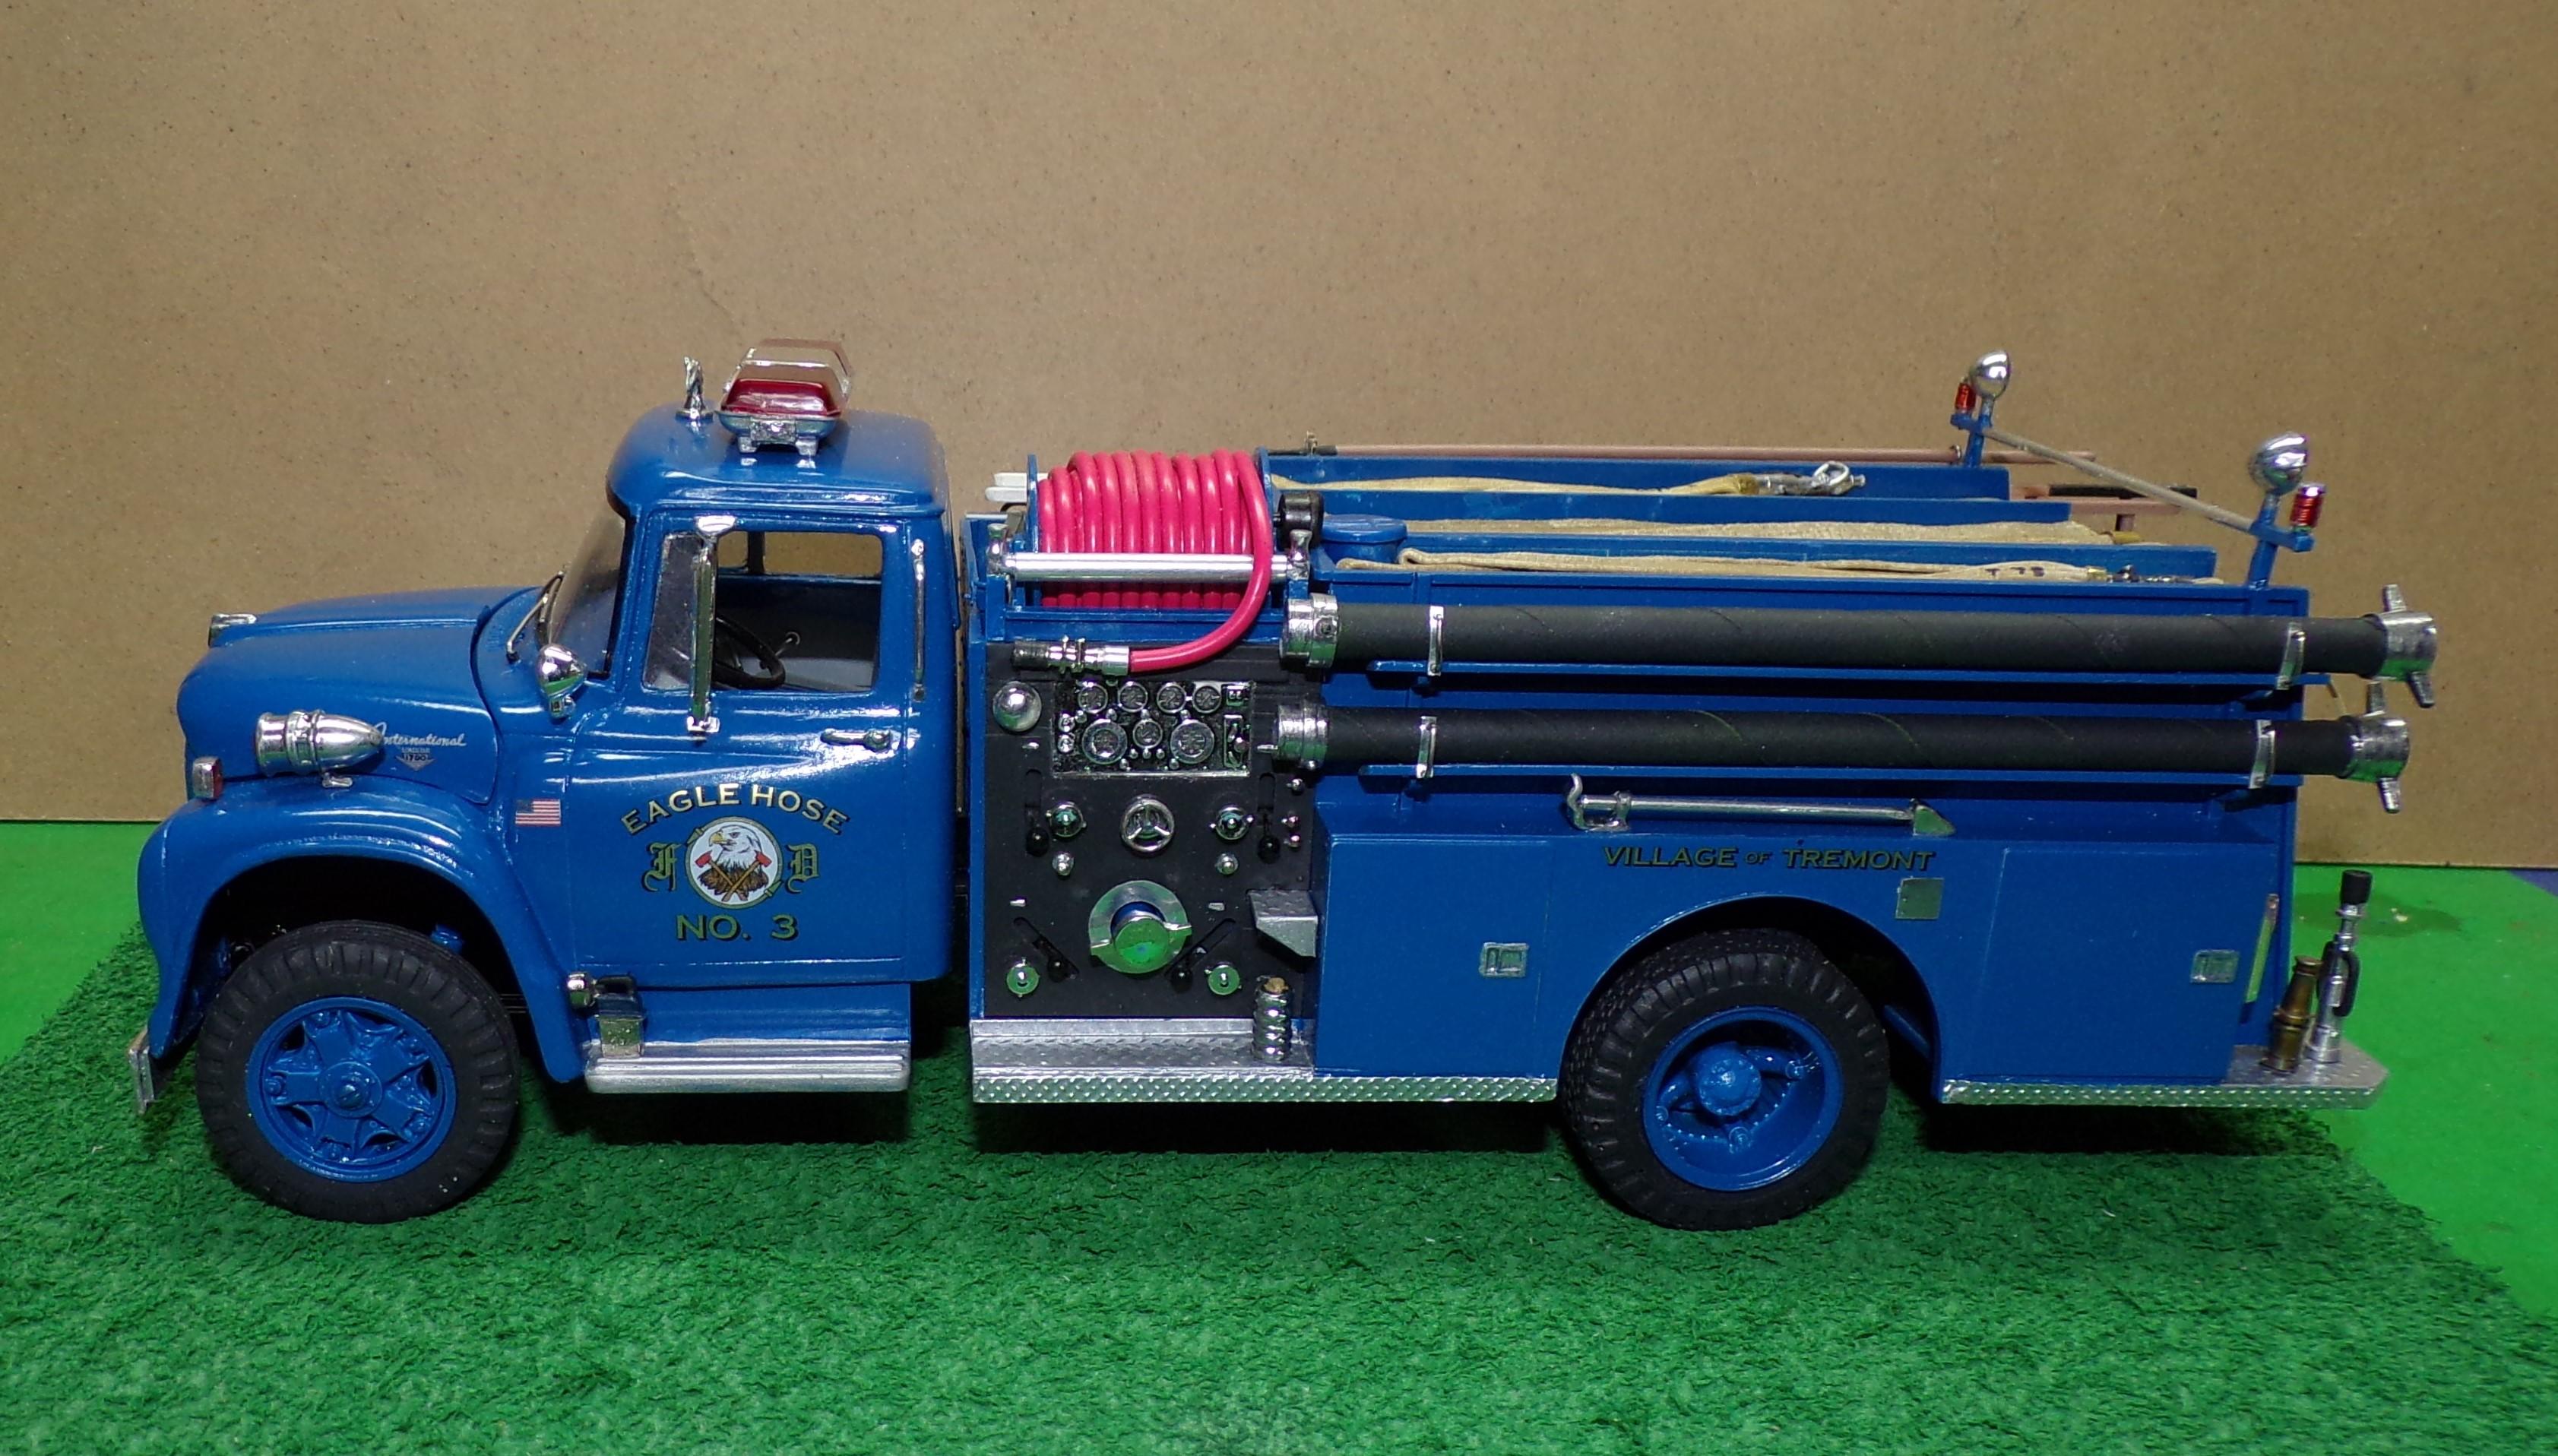
Now that my arm has begun to heal to the point where I can pick things up and move them around some I was able to get the hose load finished, spot lights filled in with clear resin and do up the decals. It is now ready to join the other blue rig, the 1957 Reo Gold Comet. This one is Eagle Hose No. 3
- 19 replies
-
- 11
-

-
Nicely done! The 1:1 version was captured in miniature form for sure!👍
-
ALF Industrial Pumper
Chariots of Fire replied to Firebuilder's topic in WIP: Model Trucks: Big Rigs and Heavy Equipment
Try securing the gage decals with a drop of Testors clear gloss. They will stay in place just fine -
resin casting and molds
Chariots of Fire replied to Paul Payne's topic in Model Building Questions and Answers
With all of that, I will stick to simple two part molds and keep life simple!!!😎 -
resin casting and molds
Chariots of Fire replied to Paul Payne's topic in Model Building Questions and Answers
Pressure casting should be reserved for making the mold so that the RTV is forced into every crevice and the bubbles are forced out. Vacuum casting in essence collapses the mold pieces in on themselves assuring a clean casting. Tom Coolidge who did my '66 DODGE W300 used a pressure pot. The results were amazing. -
resin casting and molds
Chariots of Fire replied to Paul Payne's topic in Model Building Questions and Answers
I tried this method once with mixed results. The biggest problem is suspending the master perfectly level so that the parting line is not running across the tire tread. Doing an initial pour and then a second pour to essentially rest the tire on eliminates this problem because the RTV seeks its own level and remains a flat surface. It is an extra step but the results I think are better. -
Build of IH Pumper
Chariots of Fire replied to Chariots of Fire's topic in WIP: Model Trucks: Big Rigs and Heavy Equipment
Thanks, guys. I hope so too! -
Build of IH Pumper
Chariots of Fire replied to Chariots of Fire's topic in WIP: Model Trucks: Big Rigs and Heavy Equipment
Hi, All. It will be a while before I can resume this build. Broke right arm last Thursday. In sling for 6-8 wks.🤩 -
ALF Industrial Pumper
Chariots of Fire replied to Firebuilder's topic in WIP: Model Trucks: Big Rigs and Heavy Equipment
BIG FIRE! BIG WATER!