Warren D
-
Posts
1,839 -
Joined
-
Last visited
Content Type
Profiles
Forums
Events
Gallery
Everything posted by Warren D
-
DWA Trucking KW
Warren D replied to Warren D's topic in WIP: Model Trucks: Big Rigs and Heavy Equipment
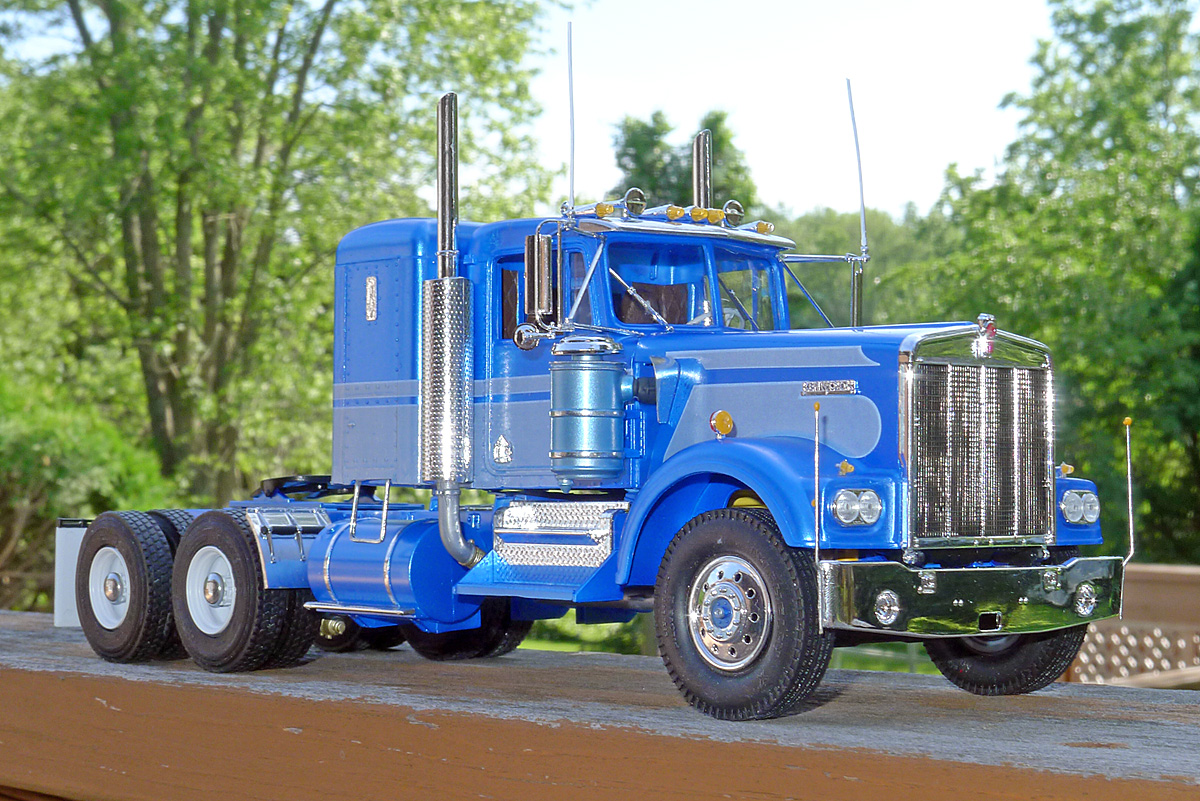
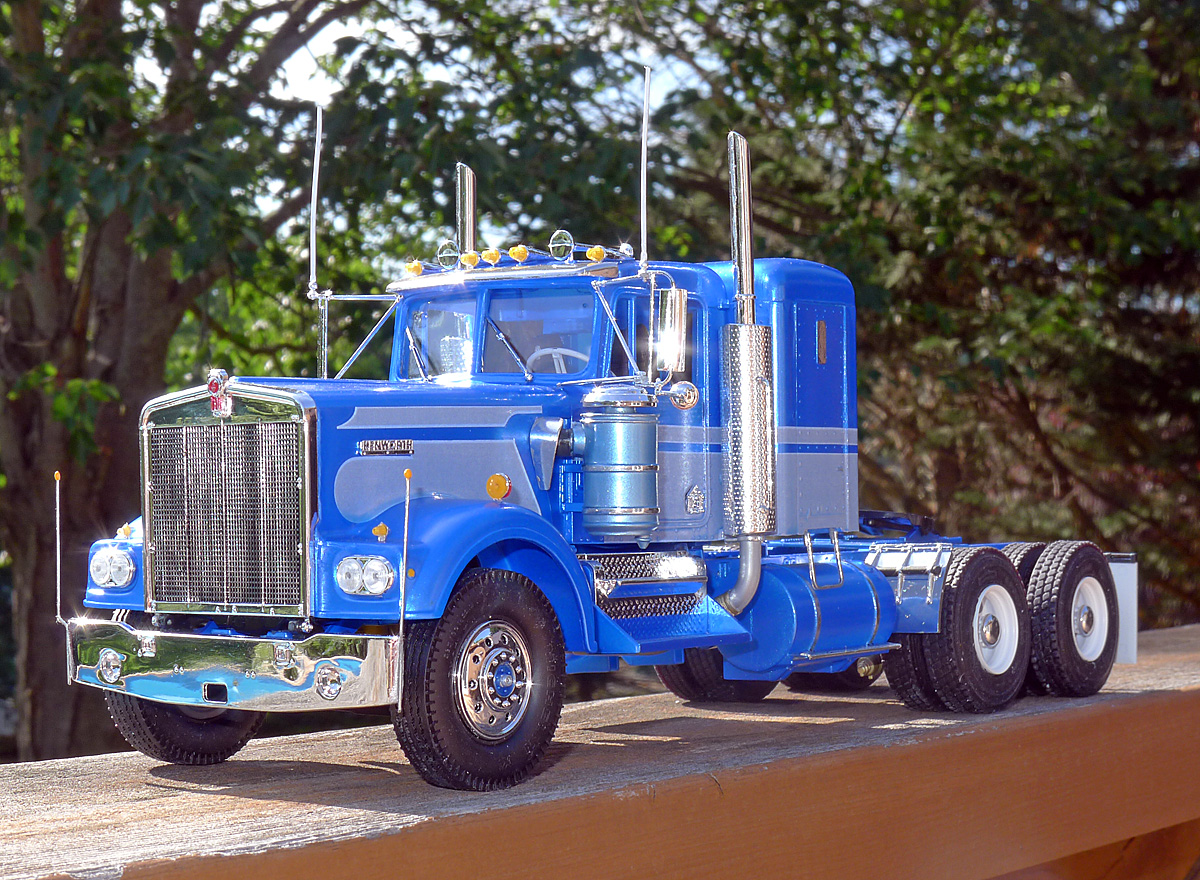
This one is done, the second attempt to come: -
I'm done, but not happy. As I went to apply the decals to the hood (I had the cab/sleeper done already) I found the mistake.....the Revell KW has a long hood, the prototype DWA Trucking KW has a shorter nose. No going back without a complete re-build which I think would take more time than starting over. I chose the Revell KW because it had battery boxes on each side and the bumper was closer. I'll be doing an AMT KW, already have most of the parts on order. Anyway, my experiment to get the silver-blue stripes is as close as I can get. The decals aren't a true silver. The air cleaner cans came out perfect, but those were base coated with silver paint and top coated with the same blue tint clear as over the decals. I don't think I'm up to masking and shooting the stripes, this paint isn't very good at sticking to the model, it sticks better to the tape, even the low tack stuff. Anyway, I used a sleeper from the AMT kit and if it had a short hood, I'd be satisfied. The first shot is the real one.

-
Baby Moons for Big Rigs
Warren D replied to Warren D's topic in Truck Aftermarket / Resin / 3D Printed
Got the STS order today. Not bad, about 9-10 days. -
DWA Trucking KW
Warren D replied to Warren D's topic in WIP: Model Trucks: Big Rigs and Heavy Equipment
I just realized the Revell kit has a longer hood than the AMT. I used the Revell kit as it had passenger side bat box and tank unlike the AMT. Too late, I'll have to make do. Eventually, I'll use the AMT kit, will need more decals, wheels, tires, etc. -
Waiting for parts for other builds (including my 2021 BRBO) I started this build. I've planned this for a while and it will have it's issues. The decals are only available in silver while the truck is silver-blue. I have a plan so we'll see how that works out. kit is the Revell KW but I recycled the sleeper from an old built up AMT KW (so old it has the torsion bar suspension!). I had to shorten the frame 3/4". Chassis is about complete along with the interior. Waiting for the paint to cure before starting the decals. Rear wheels are 2-hole from Jamie along with the drive tires. The real one: https://pbase.com/baywing/image/164335161.jpg Progress:
-
Baby Moons for Big Rigs
Warren D replied to Warren D's topic in Truck Aftermarket / Resin / 3D Printed
Thanks Jim, PM sent! -
1968 Dodge D800
Warren D replied to DRIPTROIT 71's topic in Model Trucks: Big Rigs and Heavy Equipment
Good job! -
Baby Moons for Big Rigs
Warren D replied to Warren D's topic in Truck Aftermarket / Resin / 3D Printed
I've had better experiences but a lot depends on where in Canada. I think it'll work, I have about 3 weeks left, just don't have time to order from Australia which can take 6 weeks or more. I have a plan B I could go to if time gets critical. The good thing is these parts can be put on anytime, nothing else depends on them being in place. It's a tight build anyway, been busy with other things in life and I'm quite behind where I wanted to be. Rain all this weekend will help this build but puts me behind in other areas. I could use a couple extra days each weekend or maybe 2-4 extra hours each day..... -
Baby Moons for Big Rigs
Warren D replied to Warren D's topic in Truck Aftermarket / Resin / 3D Printed
Thanks, that should work! -
Baby Moons for Big Rigs
Warren D replied to Warren D's topic in Truck Aftermarket / Resin / 3D Printed
Don't recall any Hobby Lobby's but I think there is a Michael's somewhere around here. Thanks. -
I'm looking for the "baby moon" chrome caps for the rear hubs on tractors. I'd prefer a source in the US and a stock item, I have a deadline and don't have time to wait 6 weeks. Thanks
-
Excellent!
-
1962 Peterbilt 351
Warren D replied to leafsprings's topic in Model Trucks: Big Rigs and Heavy Equipment
Looks good! -
nice looking build!
-
Short Hood Diamond Reo Searchlight
Warren D replied to Warren D's topic in Model Trucks: Big Rigs and Heavy Equipment
Thanks Thank you Thanks, I have to confess the photos were just quick shots, I didn't feel like setting up the lights etc. The sun was coming in thru the slider which is covered with a sheet of plastic for the winter. The flash on the camera bounced off the wrinkles. Thanks -
Short Hood Diamond Reo Searchlight
Warren D replied to Warren D's topic in Model Trucks: Big Rigs and Heavy Equipment
Thanks, GE was one of the builders of searchlights in WW2. Most, if not all, of the searchlights used in the 60's and 70's were military surplus. I recall the same thing, maybe that's what prompted this build! Thanks! Thanks, for a moment I thought about putting a real bulb in there.....darn squirrels almost got me on that one! Thanks, I remember Dad taking us for a ride in the car to find the searchlight. Thanks! -
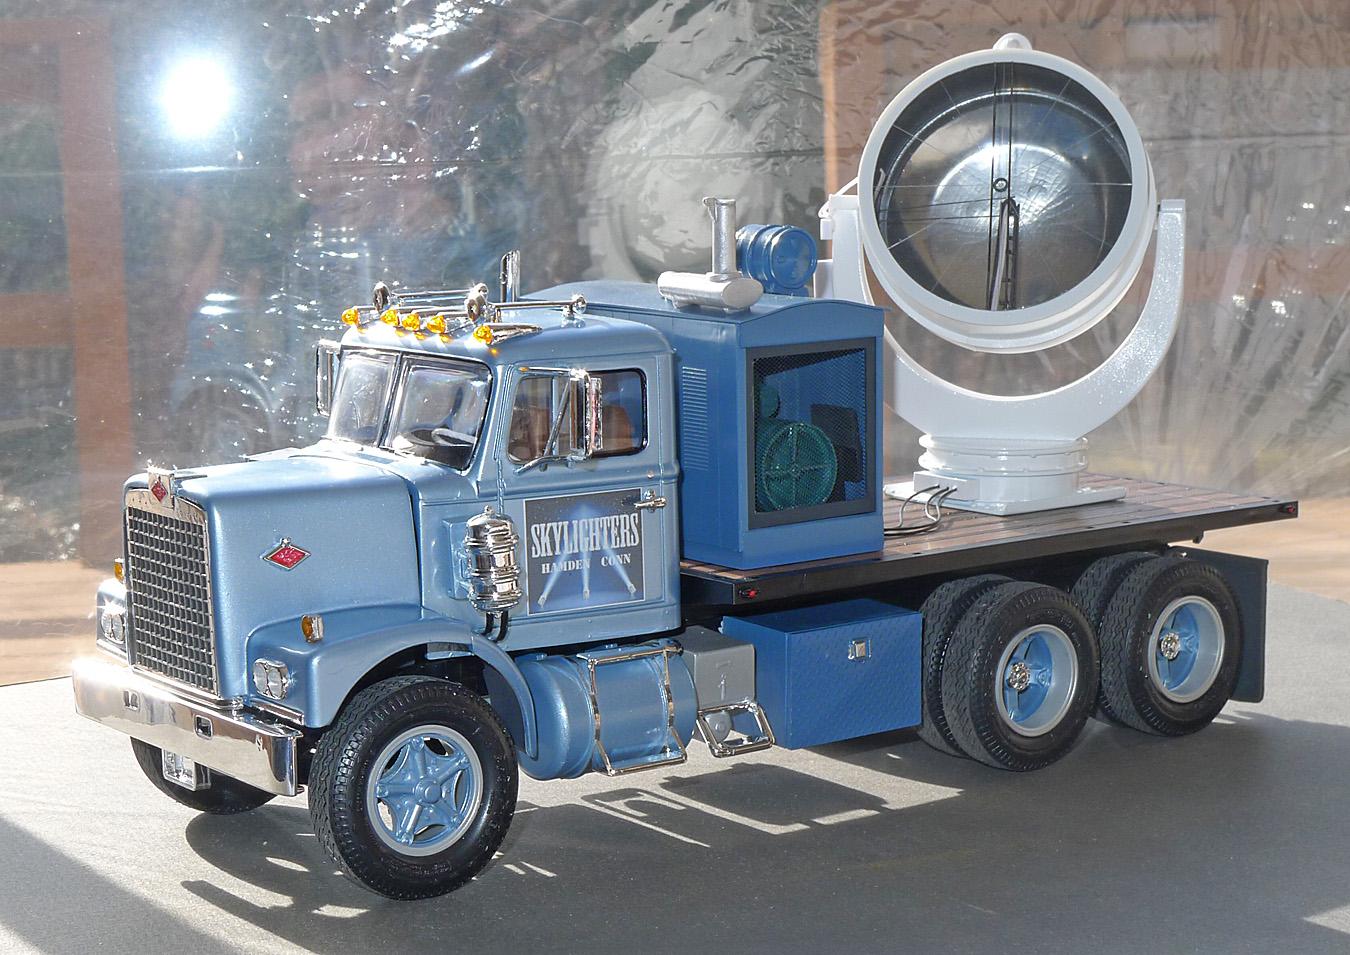
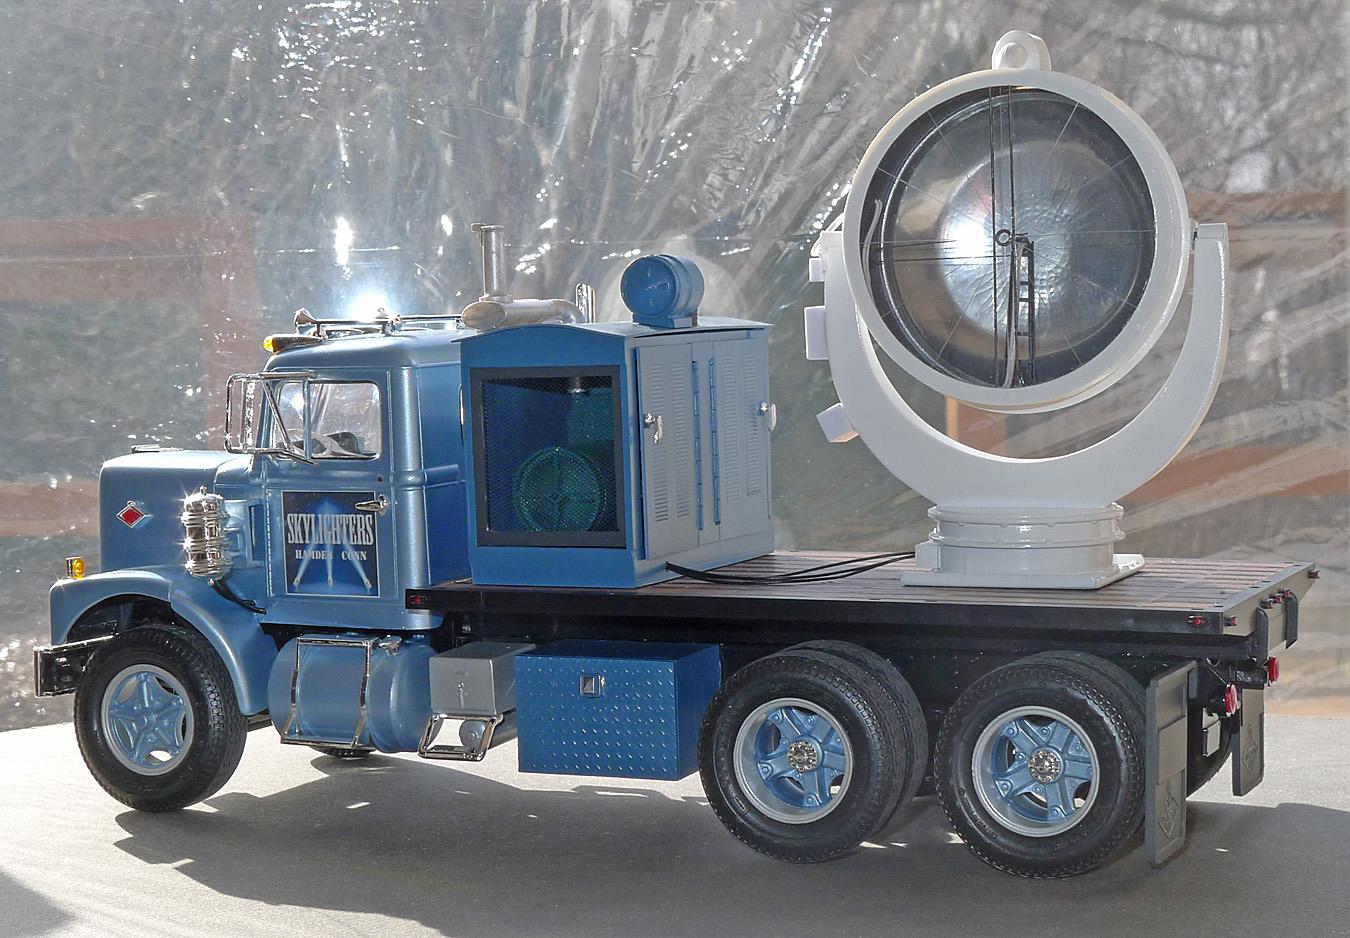
Calling this one done:
-
Calling this one done.....for now. AMT kit with AITM short hood and flatbed from the AMT Ford Stake truck kit. Generator is a 4-71 Detroit from Gary Wallace, enclosure from scratch. Searchlight from a variety of household items on a base from Auslowe.
-
Depends on what glue they used. I'd try soaking in water first, I use white glue for clear parts and it will dissolve in water eventually. After that, I usually soak in Super Clean though I confess that I've never soaked clear parts. If you try it, I'd find some clear parts in the spares bin and try them first. Failing that, soak in water and put it in the freezer while still wet. If a little water gets behind, it'll expand when it freezes and pop the part off. You always run the risk the part might break before the bond, especially if tube solvent glue was used. I used solvent glue in a tube 40 years ago and find it's quite brittle now. Scoring with a hobby knife can also help.
-
Here you go: https://pbase.com/baywing/image/169664128 https://pbase.com/baywing/image/169366518 https://pbase.com/baywing/image/169366527
-
B.R.B.O. 2021 Ford T8000 Dump
Warren D replied to DRIPTROIT 71's topic in Model Trucks: Big Rigs and Heavy Equipment
Nice looking old Ford! -
Brbo 2021 Brockway 361 mixer tribute
Warren D replied to gotnitro?'s topic in WIP: Model Trucks: Big Rigs and Heavy Equipment
This is going to be great! -
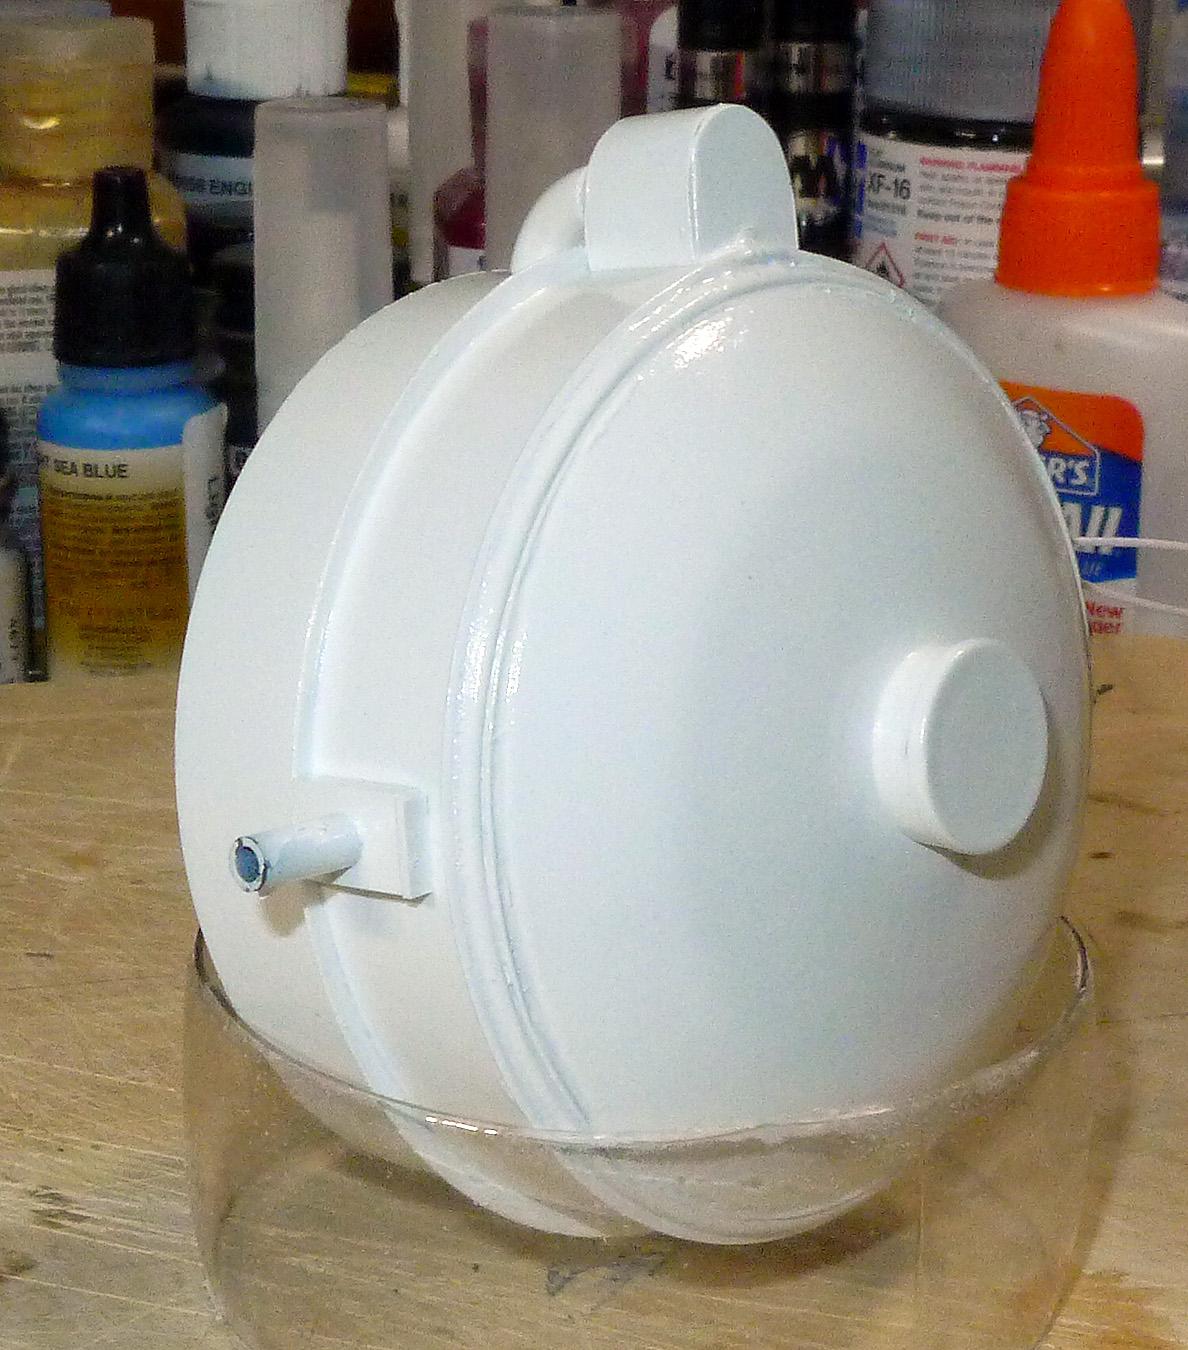
Barrel of the light is just about done. The biggest step to come is the yoke that supports it and sits on the base. Still thinking of ideas on how to make the parts.
-
International CO4070 Car Transporter
Warren D replied to dragstueck's topic in Model Trucks: Big Rigs and Heavy Equipment
Very well done! -
MPC 35 ft. frameless end dump
Warren D replied to Doug 1061's topic in Model Trucks: Big Rigs and Heavy Equipment
Good job with the seam, can't even see a hint of it. I agree with your statement, I don't like the look of that short dump trailer with 3 axles.