Warren D
-
Posts
1,839 -
Joined
-
Last visited
Content Type
Profiles
Forums
Events
Gallery
Everything posted by Warren D
-
1948 Sterling Dump is done
Warren D replied to Chariots of Fire's topic in Model Trucks: Big Rigs and Heavy Equipment
Great work. Something about it looks familiar, I think I've seen the 12":1', I just can't place it. -
Brockway 359 6 Wheel Dump
Warren D replied to Warren D's topic in WIP: Model Trucks: Big Rigs and Heavy Equipment
It's been a loong time but life just gets in the way. No work for at least the last 2 months but the time away has helped me solve a couple of problems. Dump body is complete, cab has been painted. I think I finally have the chassis figured out. Photo is the most recent mock up.
-
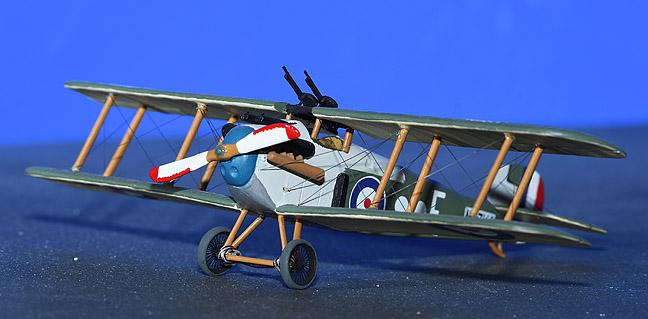
An old build from the mid-1990's, based on a Pegasus kit with engine details, wire wheels, bungee cord suspension, wing wires and other details added. Colors are that of the one that was flying at Old Rhinebeck Aerodrome at the time. The real one had the wheels sitting the same way. 1/72 scale
-
I think there are regional problems with specific carriers. In my area, USPS, FedEx and Amazon are all running about normal while UPS seems to let packages sit in the trailers for an extra 24 hrs just prior to delivery.
-
I've ordered from them before so I know the usual routine. This has gone far beyond the norm so I'm trying to get a feel for any other experiences and trying not to bother Renee unnecessarily. I'm trying to determine the point where the order might be lost vs on a slow boat from half way around the world.
-
No doubt international shipments are messed up. I see on AITM's website that he has suspended overseas shipments for the duration. I may ask them for a ship date, hate to bother them as I'm sure many others are asking similar questions. One Aus model site is suggesting that folks ask for (and pay extra) Fed Ex as it seems to be moving packages better.
-
Just wondering if anyone in the USA has received an order from them in the last few months? I placed an order in early April and end of May they said it had shipped. I know their postal system had issues prior to the pandemic so I'm sure it's worse. I'm not saying anything negative about Auslowe, they are great people, I'm just wondering at what point I consider the package lost in transit. If you did get an order, I'd appreciate the order date and delivery date (approximates are fine +/- week). Thanks
-
Cattleman's Classic Cabover
Warren D replied to ReduitRetro's topic in Model Trucks: Big Rigs and Heavy Equipment
Great looking build! -
Transtar II Log Truck
Warren D replied to DRIPTROIT 71's topic in Model Trucks: Big Rigs and Heavy Equipment
First cab over logger I've seen. Looks good! -
Pete 378 ‘long haul’
Warren D replied to tbill's topic in Model Trucks: Big Rigs and Heavy Equipment
Nice clean build! -
Nice looking rig!
-
1976 Kenworth VIT 200 Bicentennial (W900)
Warren D replied to steve1970's topic in Model Trucks: Big Rigs and Heavy Equipment
Sweet looking build! -
Barber-Greene SA-40 Paver Complete
Warren D replied to redneckrigger's topic in Model Trucks: Big Rigs and Heavy Equipment
Amazing level of detail, I'm in awe. -
Brockway 359 6 Wheel Dump
Warren D posted a topic in WIP: Model Trucks: Big Rigs and Heavy Equipment
Starting my next project inspired by the attached photo. I heard this little gem coming about a half mile before I saw it, yep, had a Deeetroit. Cab and dump body by AITM, I decided to use the Freightliner COE SD/DD kit for it's short frame. Turns out that the short SD frame is too short and the DD frame is too long. Being it was easier to shorten the long frame, that's the plan. I was thinking it would be an easy build but it's already proven to be challenging. This one will have a 6-71N from Gary Wallace under the hood, and I have wheels and tires coming from AITM that should come close to the ones in the photo. -
IH CO 4070B Johnson
Warren D replied to DRIPTROIT 71's topic in Model Trucks: Big Rigs and Heavy Equipment
Looks great! -
Looks great! Welcome!
-
GMC Mason Dump
Warren D replied to Warren D's topic in Model Trucks: Pickups, Vans, SUVs, Light Commercial
Thanks everyone. Don't know what happened with the mirrors, followed the instructions and pic on the box but....don't want to try to pull them off and risk pulling the paint. I have a couple of ideas to get them straighter..... -
GMC Mason Dump
Warren D replied to Warren D's topic in WIP: Model Trucks: Pickups, Vans, SUVs, Light Commercial
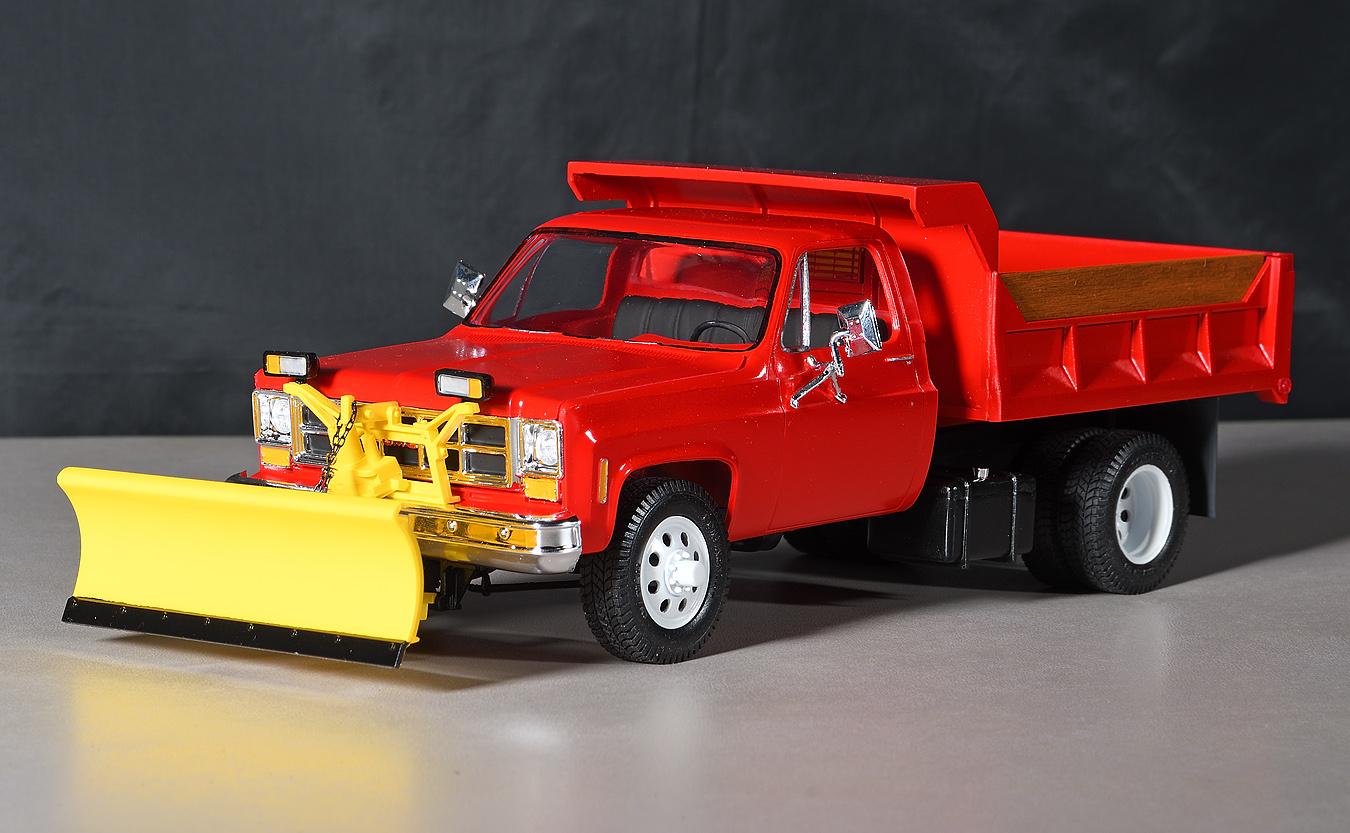
Calling it done: -
Calling this one done. I saw many of these growing up, all the contractors had at least one, didn't matter how big the company was. This is a Revell 1/24 GMC pickup with plow. The rear of the chassis was scratch built for the dump body. Dump body is from Scenes Unlimited, great casting but...I should have removed a little off the back of the body as the tailgate with paint wouldn't shut. Fit is just a little too tight. Wheels and tires also from S.U. , 19.5" dually kit. Hitch is likewise from S.U., tanks are from the lindberg Dodge, gas on the left and hydraulic on the right. Trailer and Bobcat are diecast. I finally found the red I want, Testor's Aztek Acrylic. Pics are a tad orange on the laptop, my calibrated monitor is red.
-
GMC Mason Dump
Warren D replied to Warren D's topic in WIP: Model Trucks: Pickups, Vans, SUVs, Light Commercial
Not sure why the paint looks like BLAH_BLAH_BLAH_BLAH, too much noise in the pics..... -
GMC Mason Dump
Warren D replied to Warren D's topic in WIP: Model Trucks: Pickups, Vans, SUVs, Light Commercial
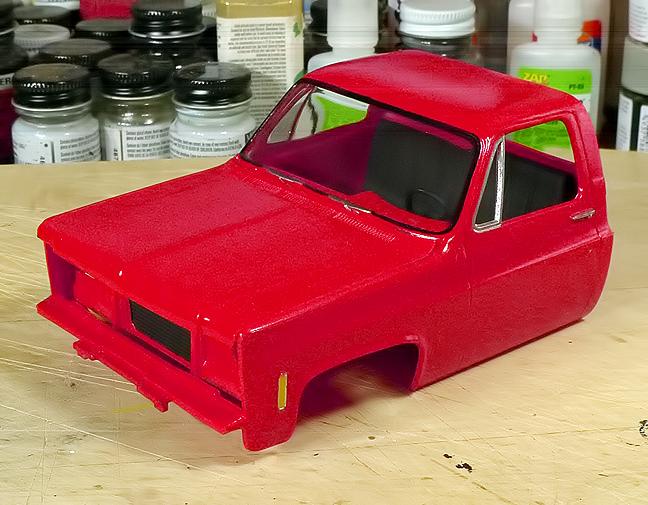
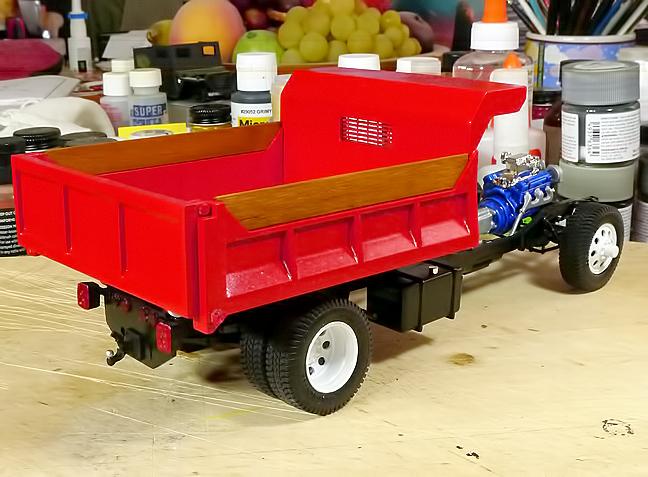
Paint is on, will have to try a different camera/lighting, can't get the reds right. Chassis is almost complete, used the fuel tank from the Lindberg Dodge, cut the other one down for a hydro tank on the right side. Need mudflaps and some bits. Grille is almost done, then on the cab and cab to chassis. Mirrors and the plow and I think it's done. Tires and wheels from Scenes Unlimited.
-
GMC Mason Dump
Warren D replied to Warren D's topic in WIP: Model Trucks: Pickups, Vans, SUVs, Light Commercial
I should note that the pickup is a Revell 1/24 scale while the dump body is 1/25 scale. I often encounter difficulties when mixing scaless, such as the Mack B815 logger build where the trruck was 1/25 and the KFS front drive axle was 1/24 and had to be narrowed quite a bit to get it to fit. In this case, if the dump body is a little small that's ok as the look is what I am after. -
GMC Mason Dump
Warren D replied to Warren D's topic in WIP: Model Trucks: Pickups, Vans, SUVs, Light Commercial
Mods pleas move this to WIP, OOps! -
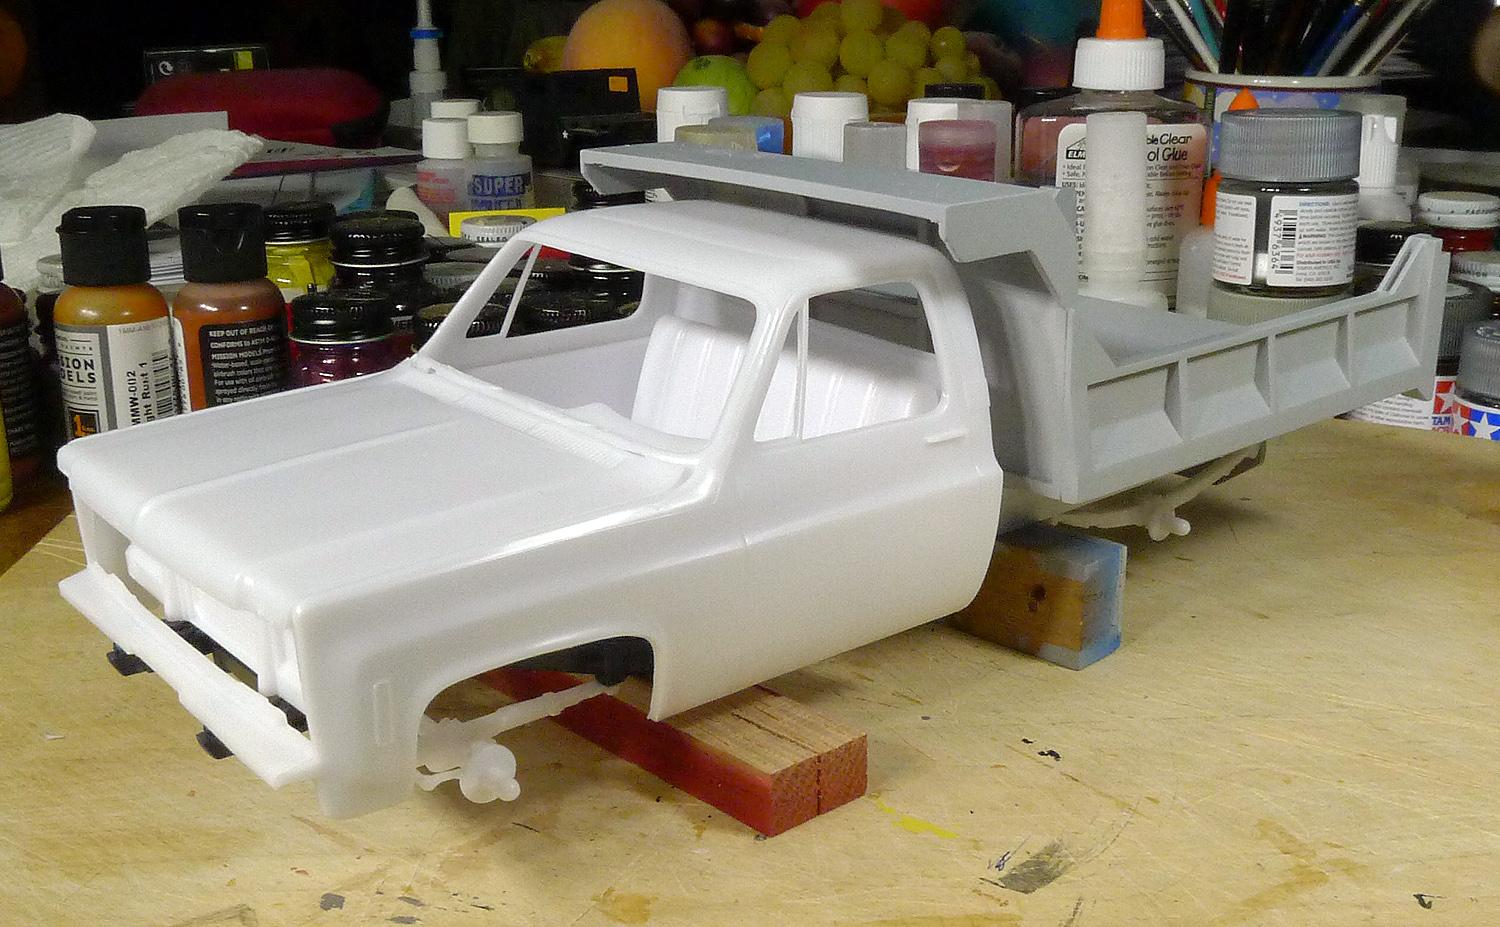
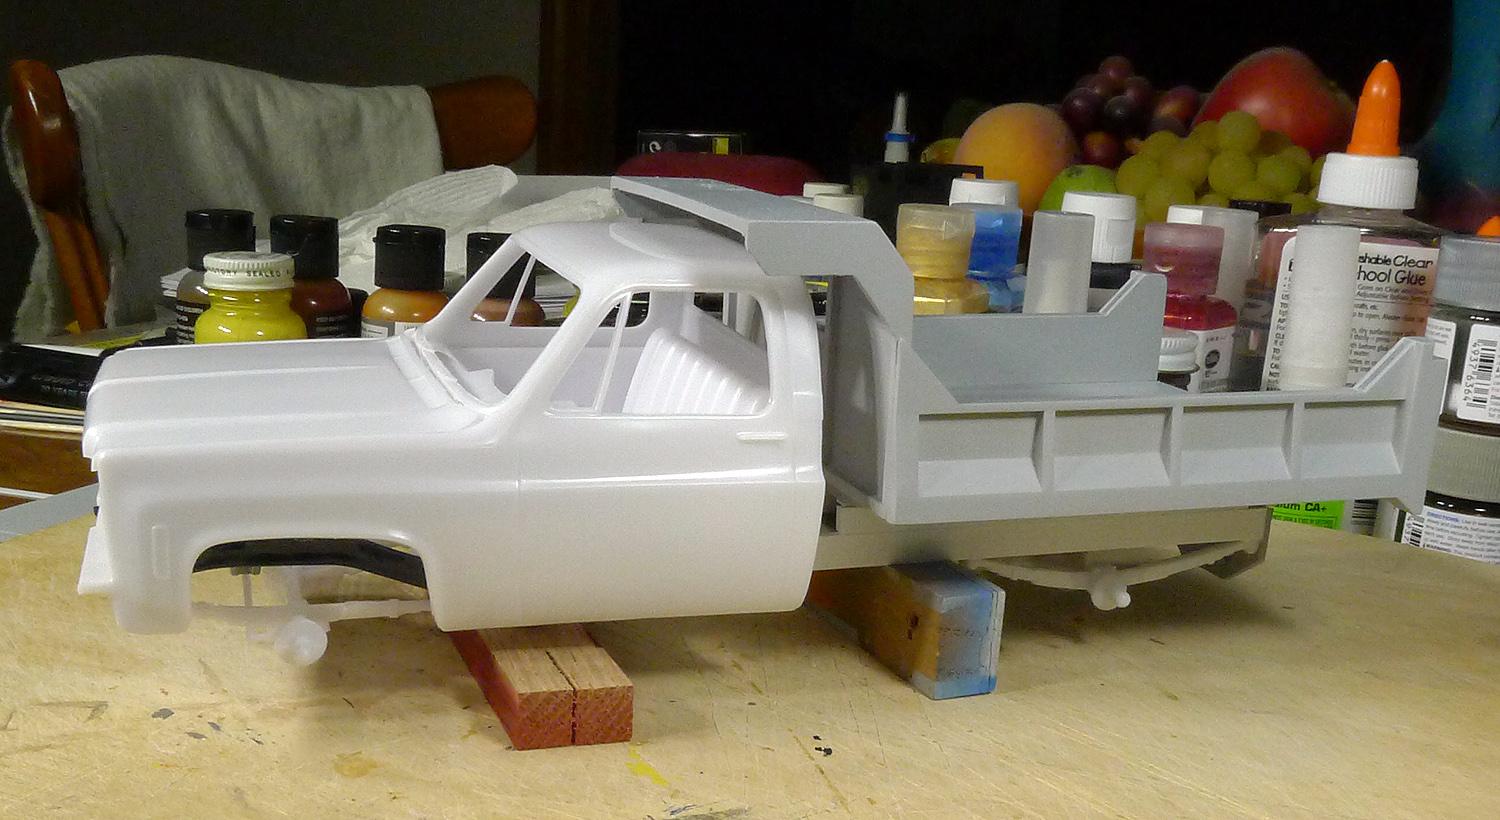
I'll put this here as it really isn't a big rig. This build is a GMC Mason Dump, typical of the small dump trucks used by masons (duh!), landscapers and contractors. I chose an older GMC, a Revell short bed pickup truck kit with a plow. I'll use the plow on this build. The dump body is from Scenes Unlimited, as are the wheels and tires. The resin cast dump body is one of the best castings I've seen, almost no flash and parts fit together like a glove. No tweaking needed. Wheels and tires are larger than the stock pickup kit and the back features duallies. The pick up chassis needed to get longer so everything back of the cab was removed and a straight c channel frame built from scratch. Rear axle from the kit needed to be narrowed to accomodate the dualies. Exhaust pipes dump in front of the rears as most of them do. I still need to figure out a fuel tank, the molded on saddle tanks were the first to go.
-
For the rubber flaps, what about a heavy weight plastic garbage bag?