Hoffman
-
Posts
422 -
Joined
-
Last visited
Content Type
Profiles
Forums
Events
Gallery
Everything posted by Hoffman
-
Skip and Kenn, whatever happened to this great SSK/710SS coupe project?
-
Very nice, Terry! It looks quite convincing. Love the interior colors. Well done!
-

51 studebaker made into small rear window coupe
Hoffman replied to damodelguy az's topic in Model Cars
That is Cool! -
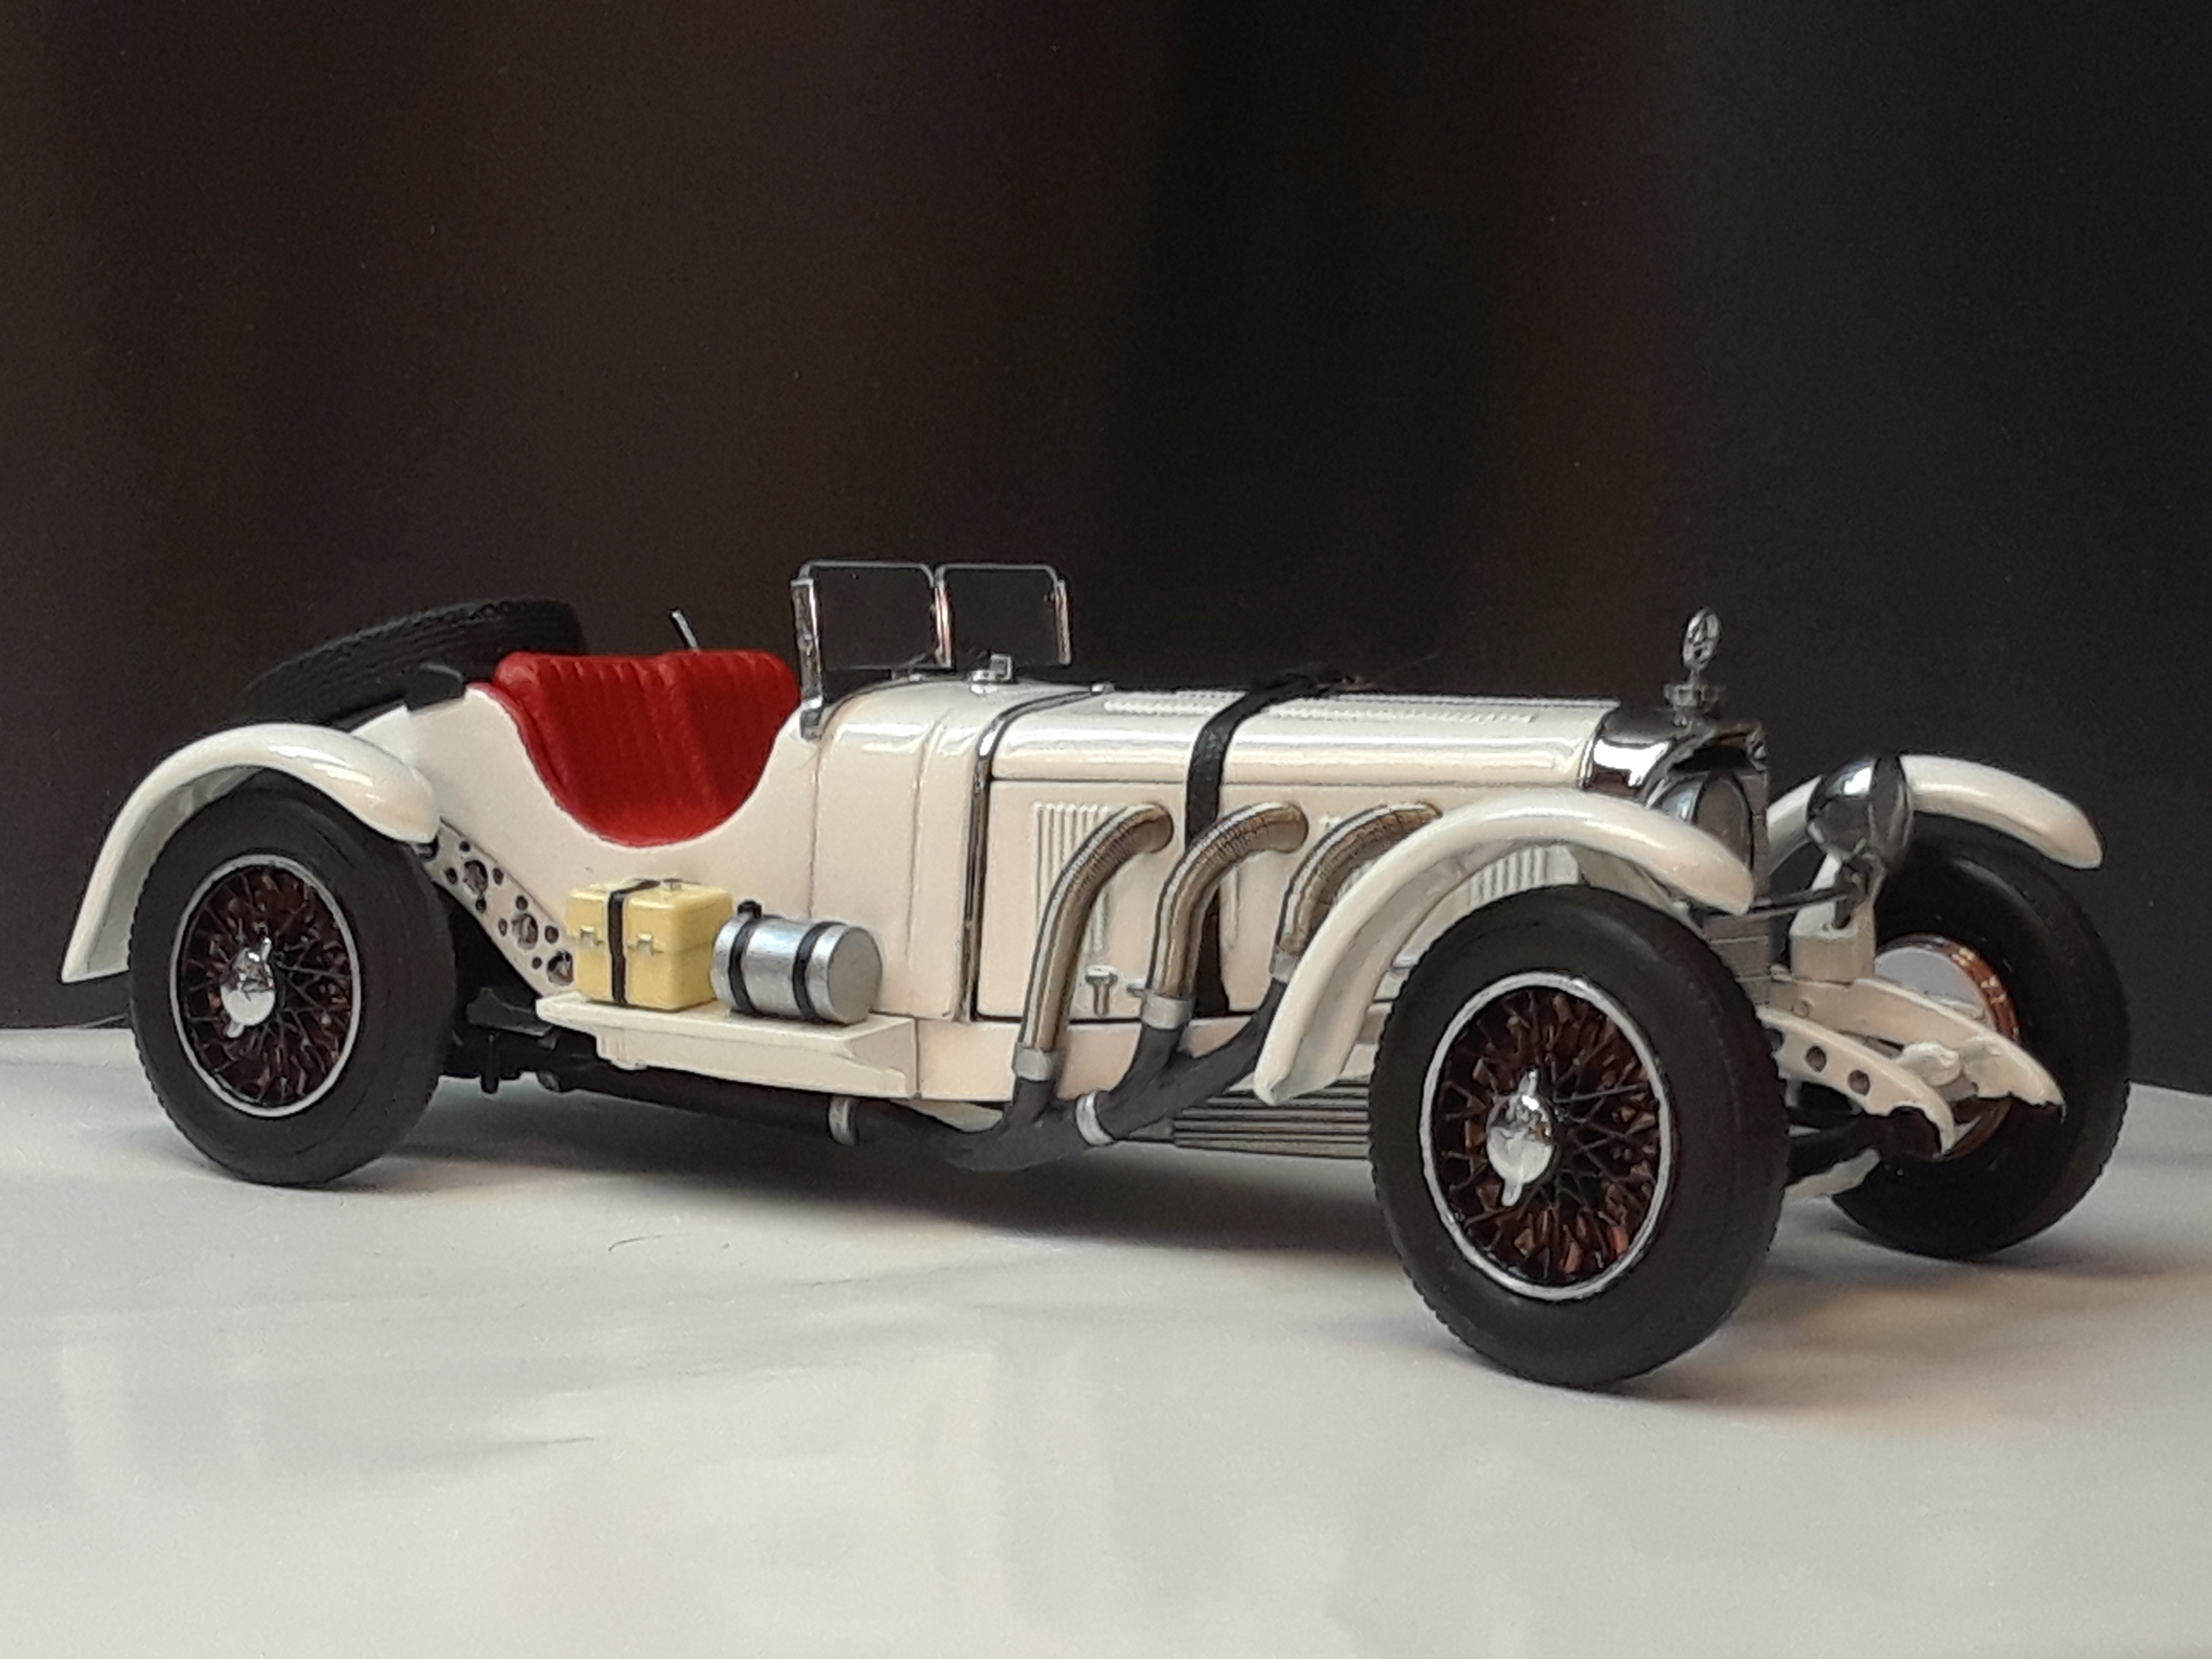
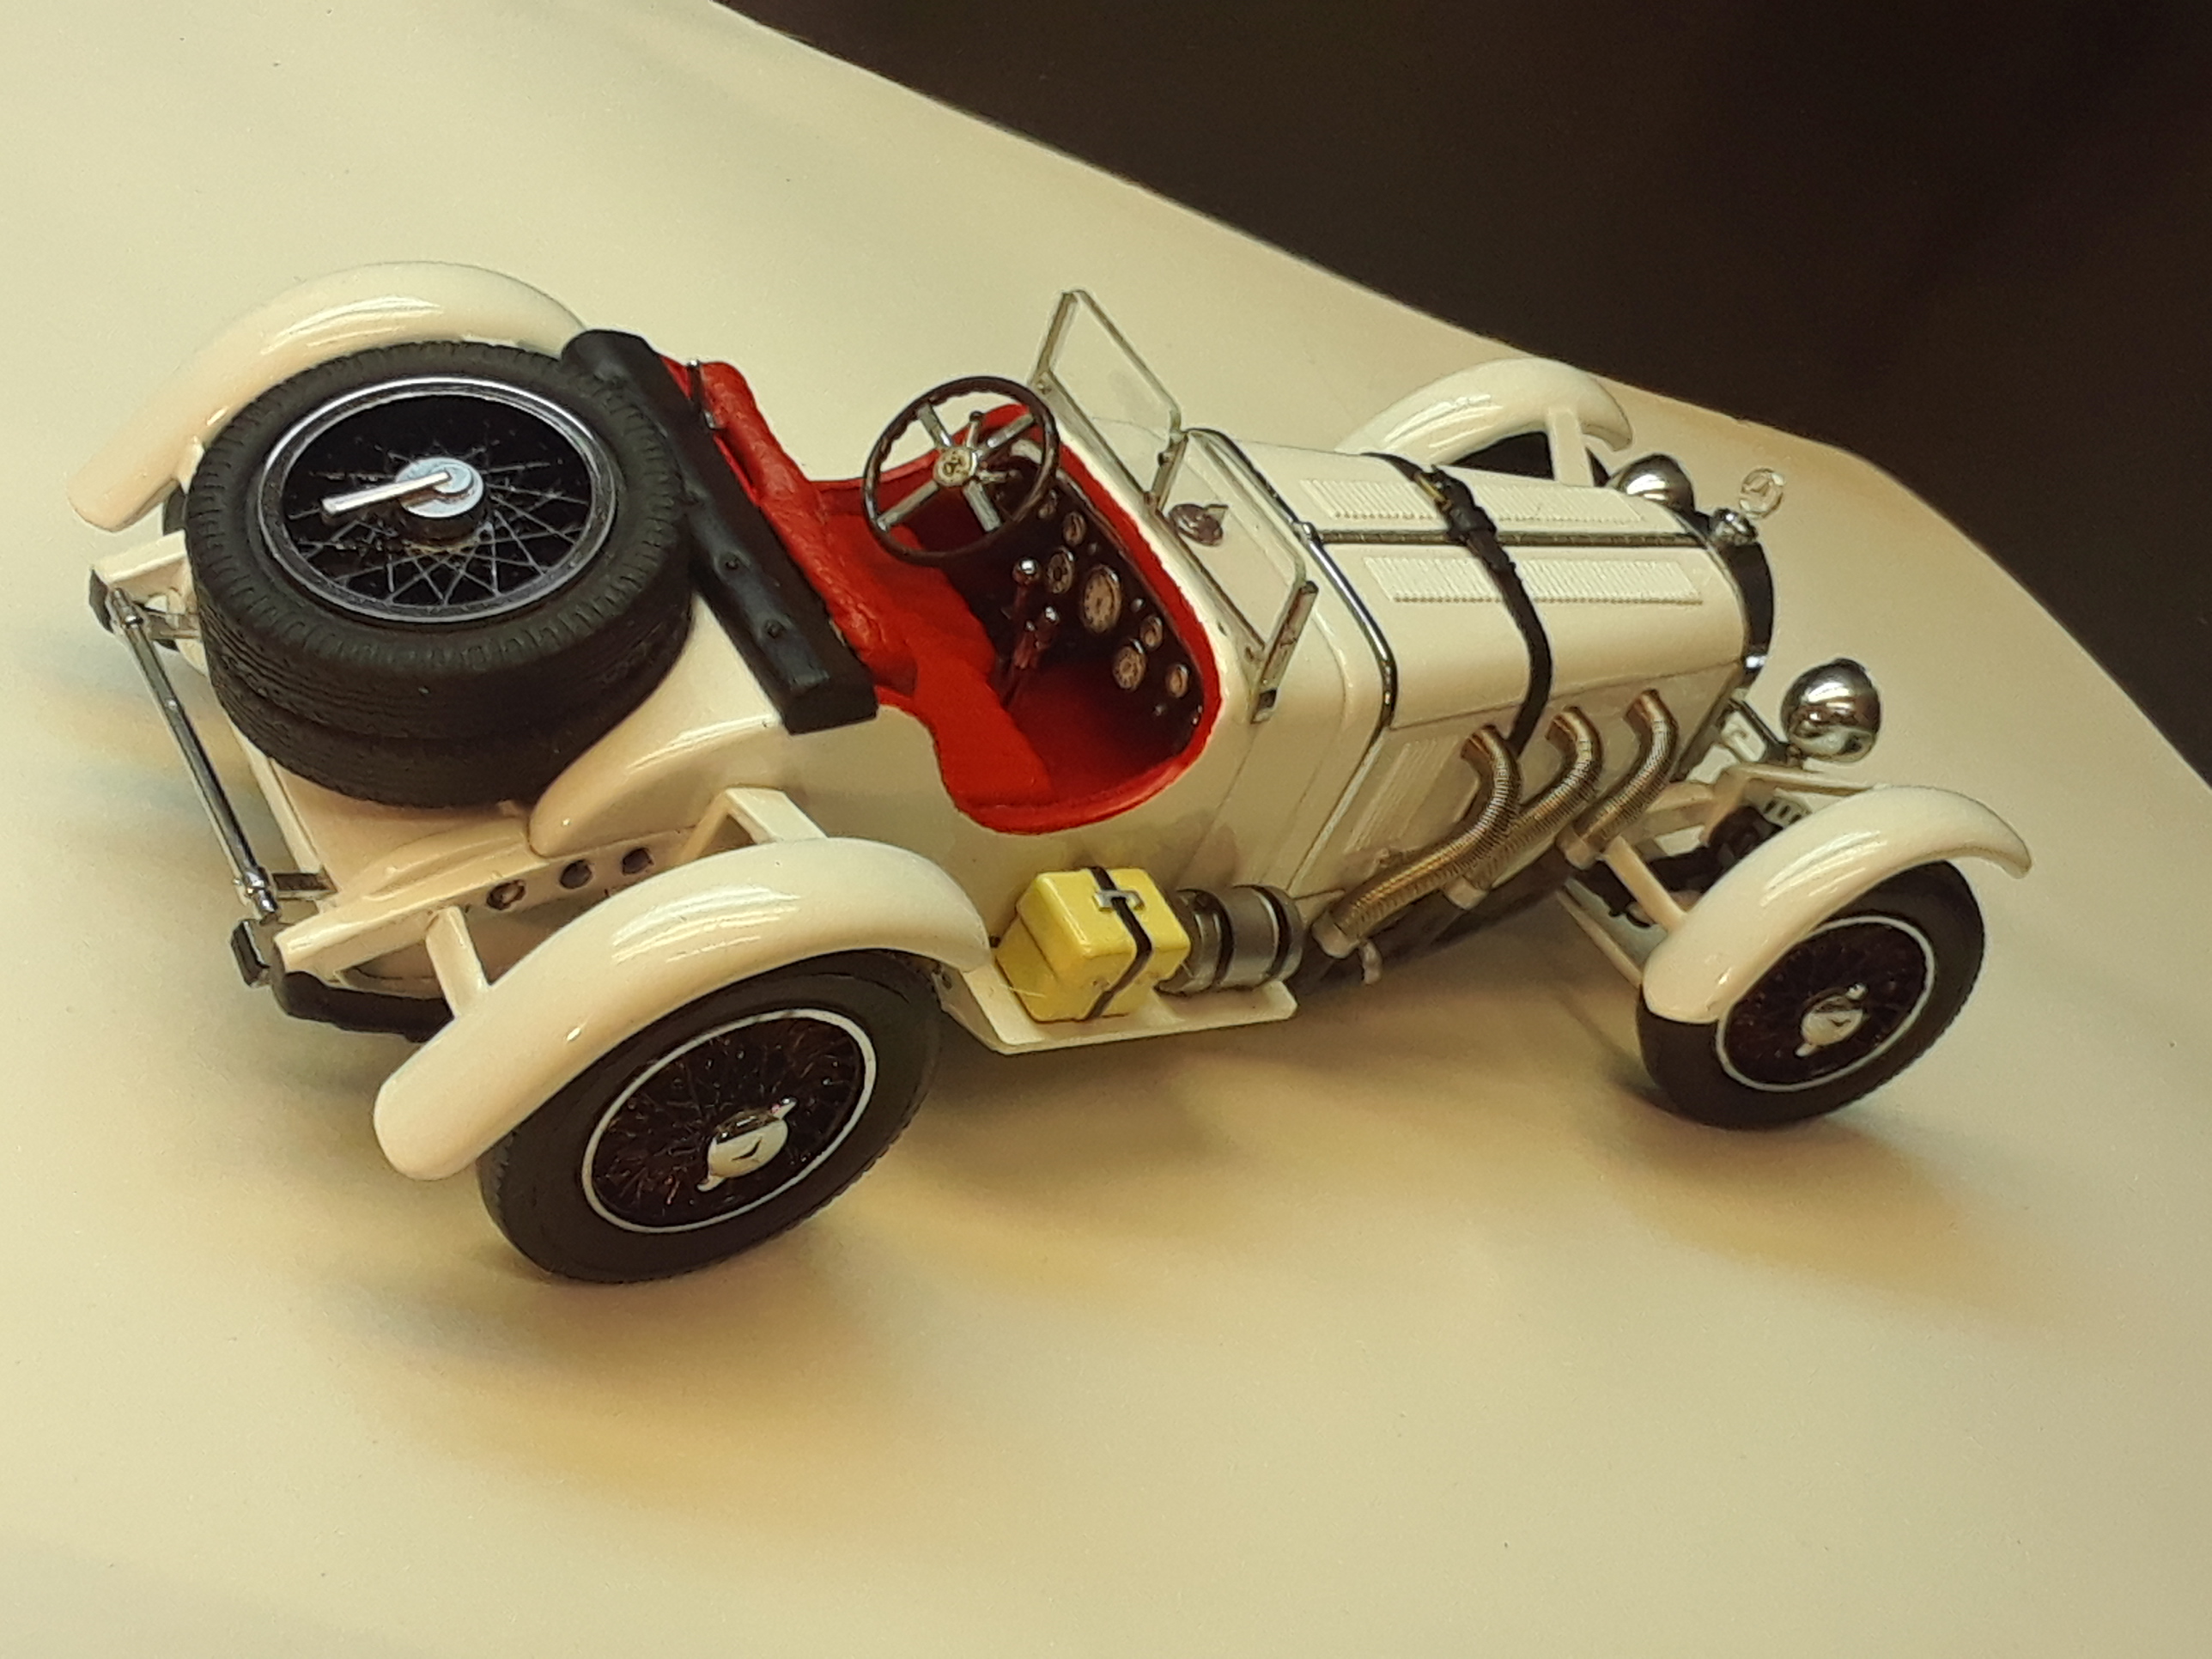
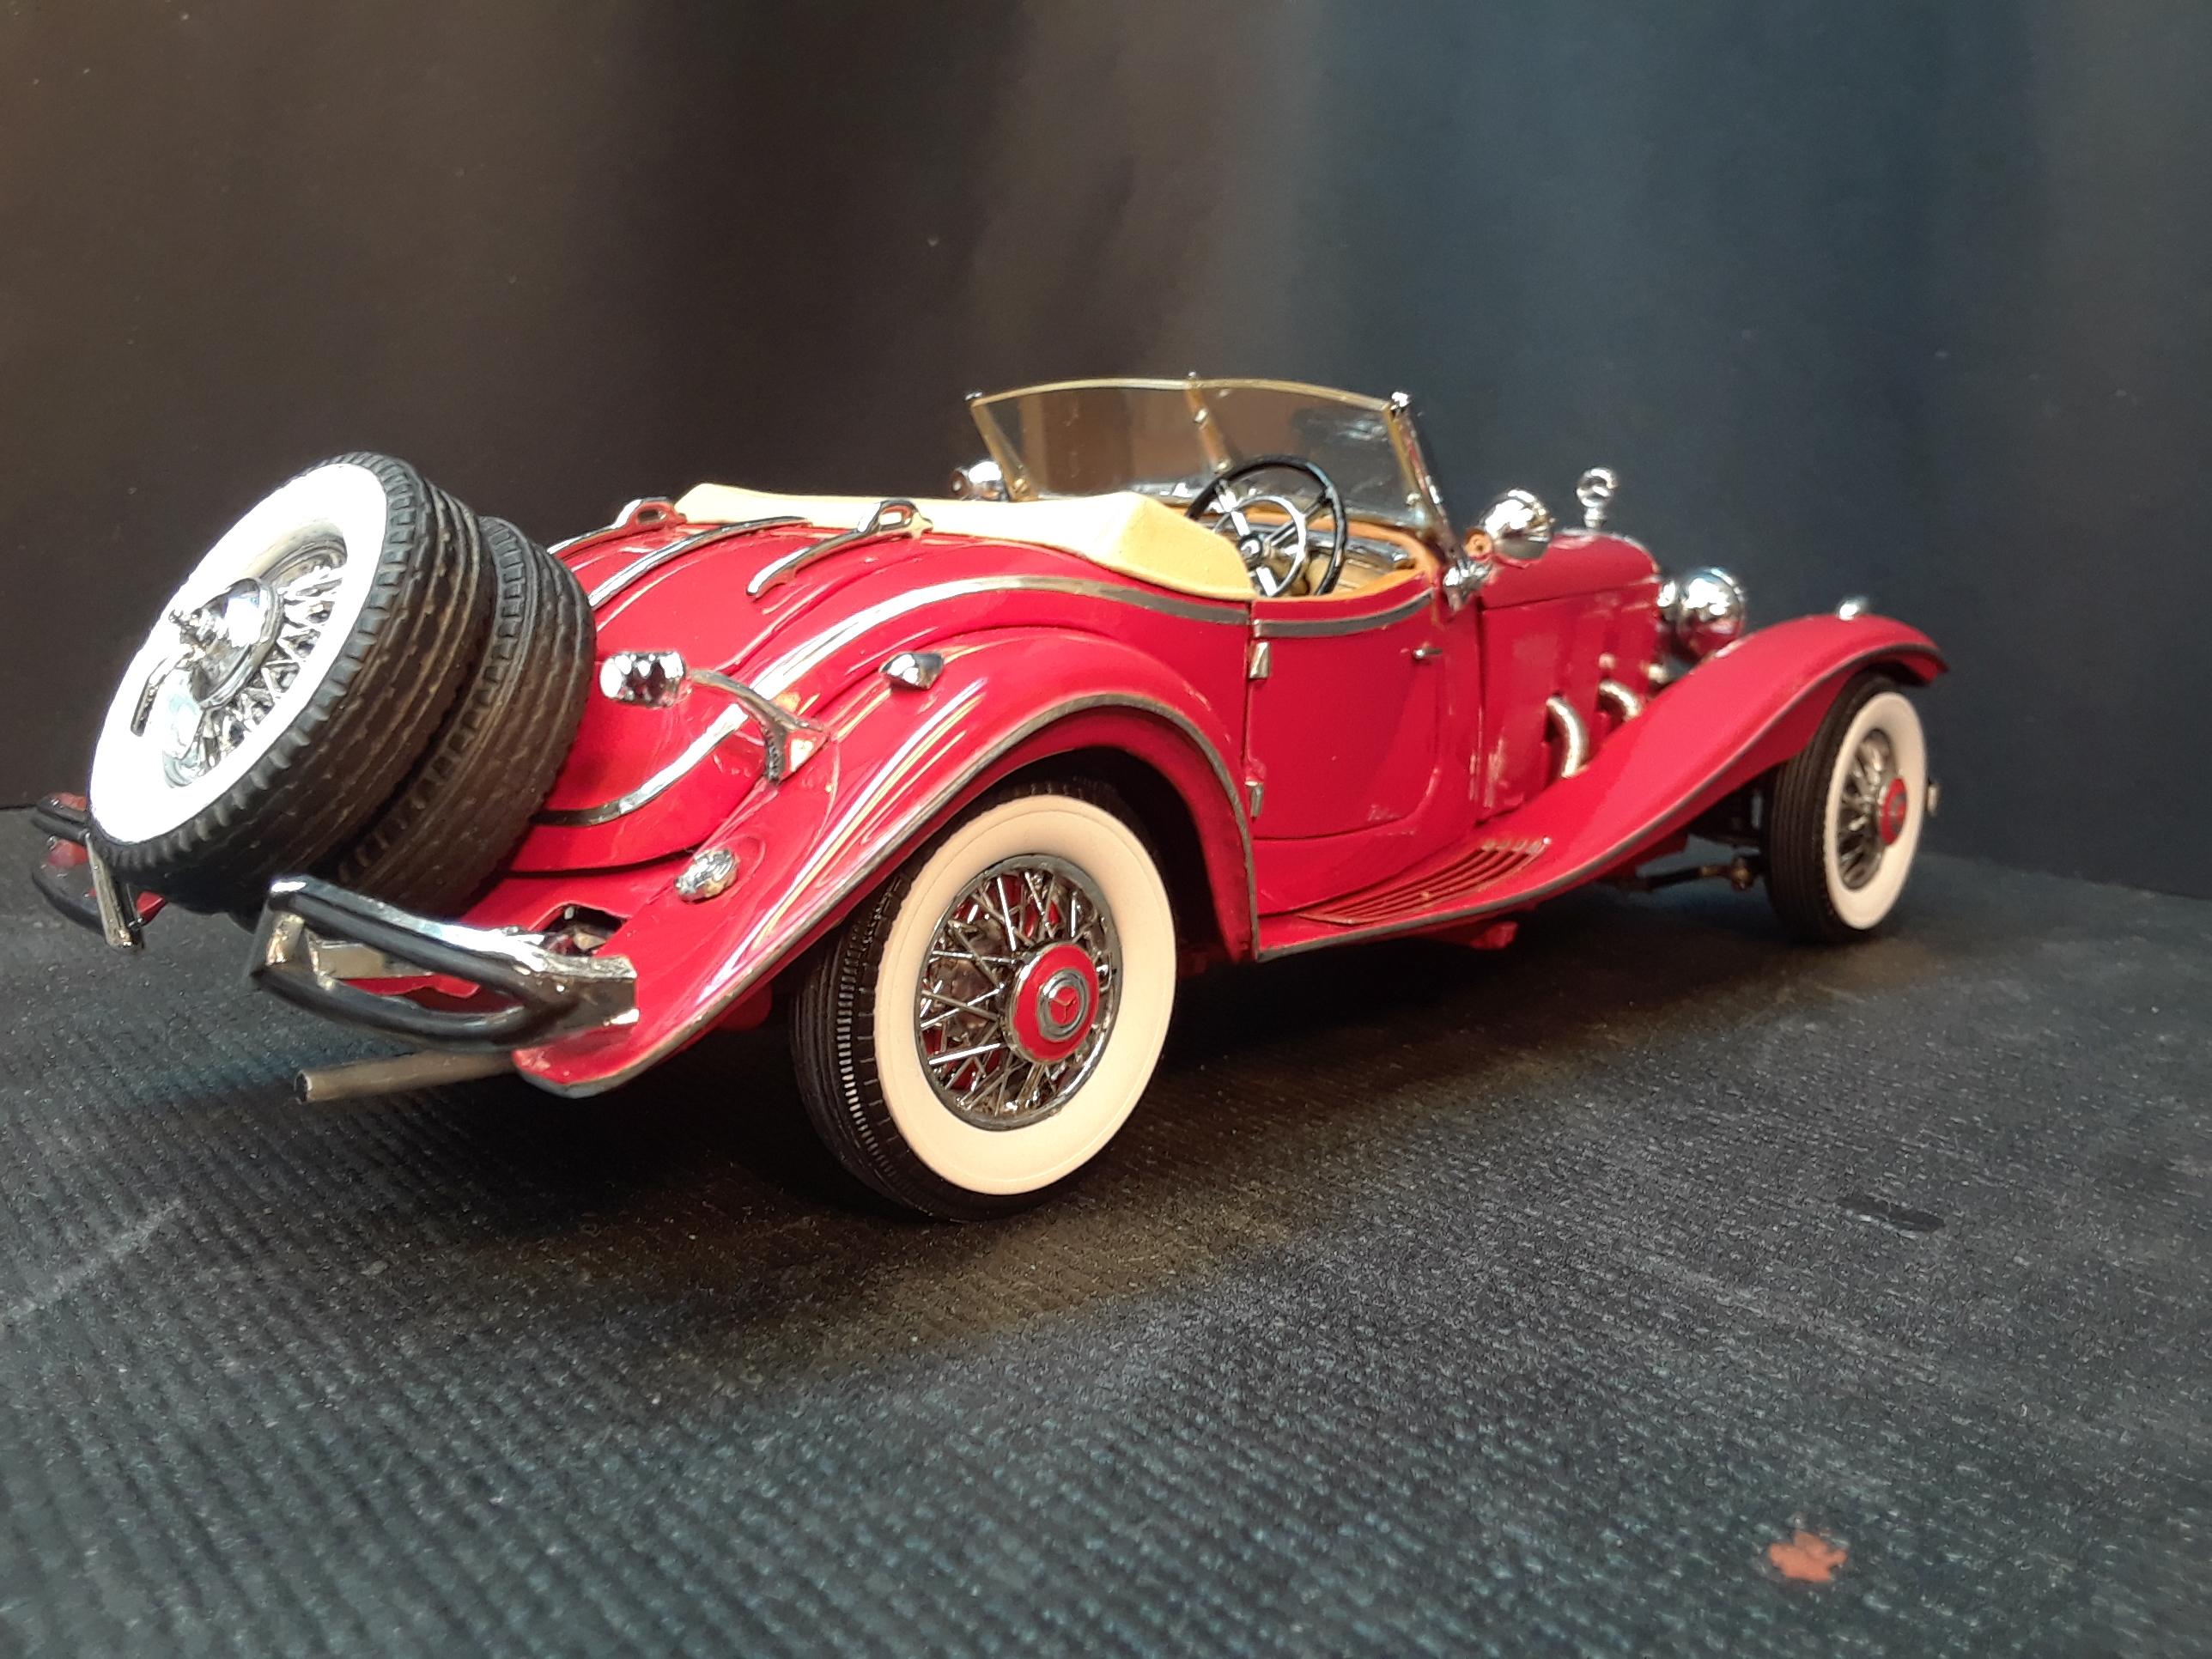
Guys, thank you for the compliments. I must apologize though. I should have posted this in the Diecast section. I don't mean to misrepresent the work here. This was just a fun, quick rebuild before I got back to serious body work on a plastic kit project. Following are photos of what a full size MB SSKL looks like, and what a Franklin Mint version looks like, typically on ebay for like $20. ?

-
This is an FM re-work to make it look more like the full size car and less like a toy. The biggest change are the wheels and tires from the Lindberg SSK kit. They feature carefully painted black spokes, molotow chrome locking rings at the outer edge, and copper brake drums behind the spokes. I kept the FM spares on the back, but painted the spokes black to match. The interior came with a black seat and red carpet. I painted the seat and sides of the cockpit red to match. The front axle and brake backing plates were repainted from black to white, and the edges of the drums painted copper. The outer rims on the back side of the wheels are from AMT '27 T wheels, just the rims with the spokes cut out. I used some black and gray artist acrylics to represent shadows in the lightning holes in the chassis, making them more three dimensional. That's about it. Enjoy!
-
Looks excellent, Dennis! Reminds me of a Steve Stanford rendering. Very cool.
-
Madliner: a 60 Starliner & Alternomad custom mash-up
Hoffman replied to Claude Thibodeau's topic in Model Cars
Claude, that combination works really, really well together! Great job. ? -
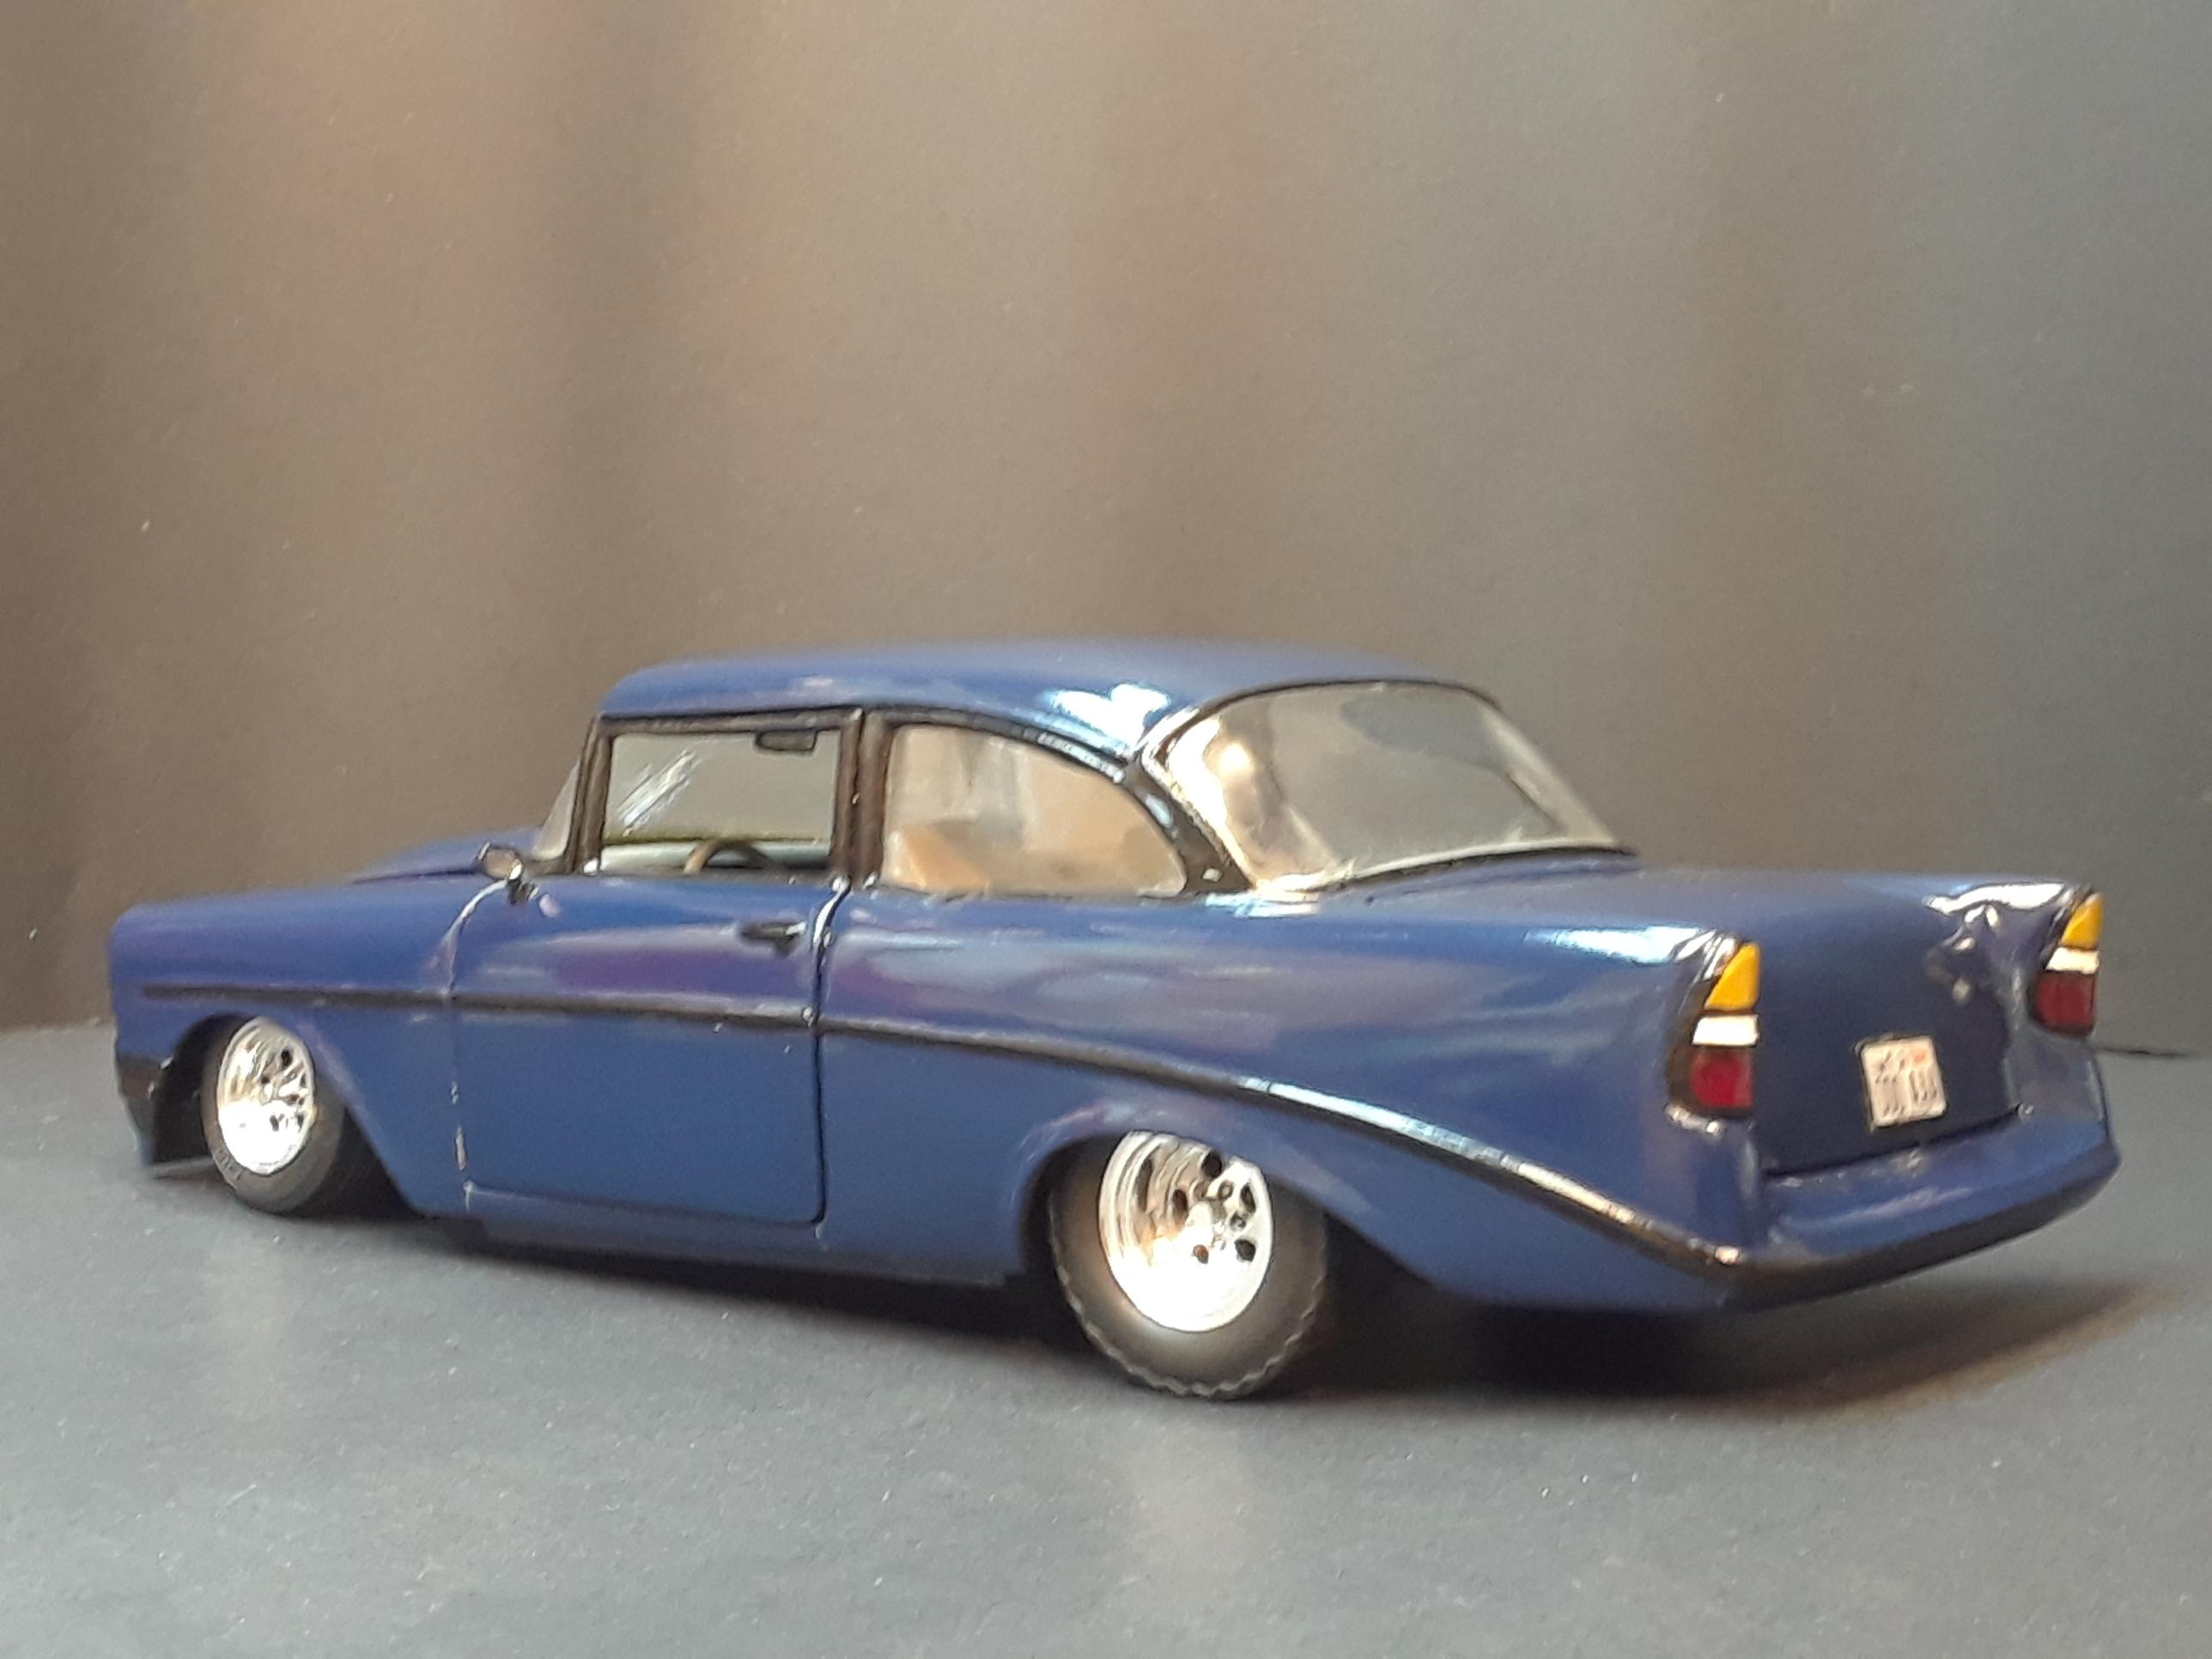
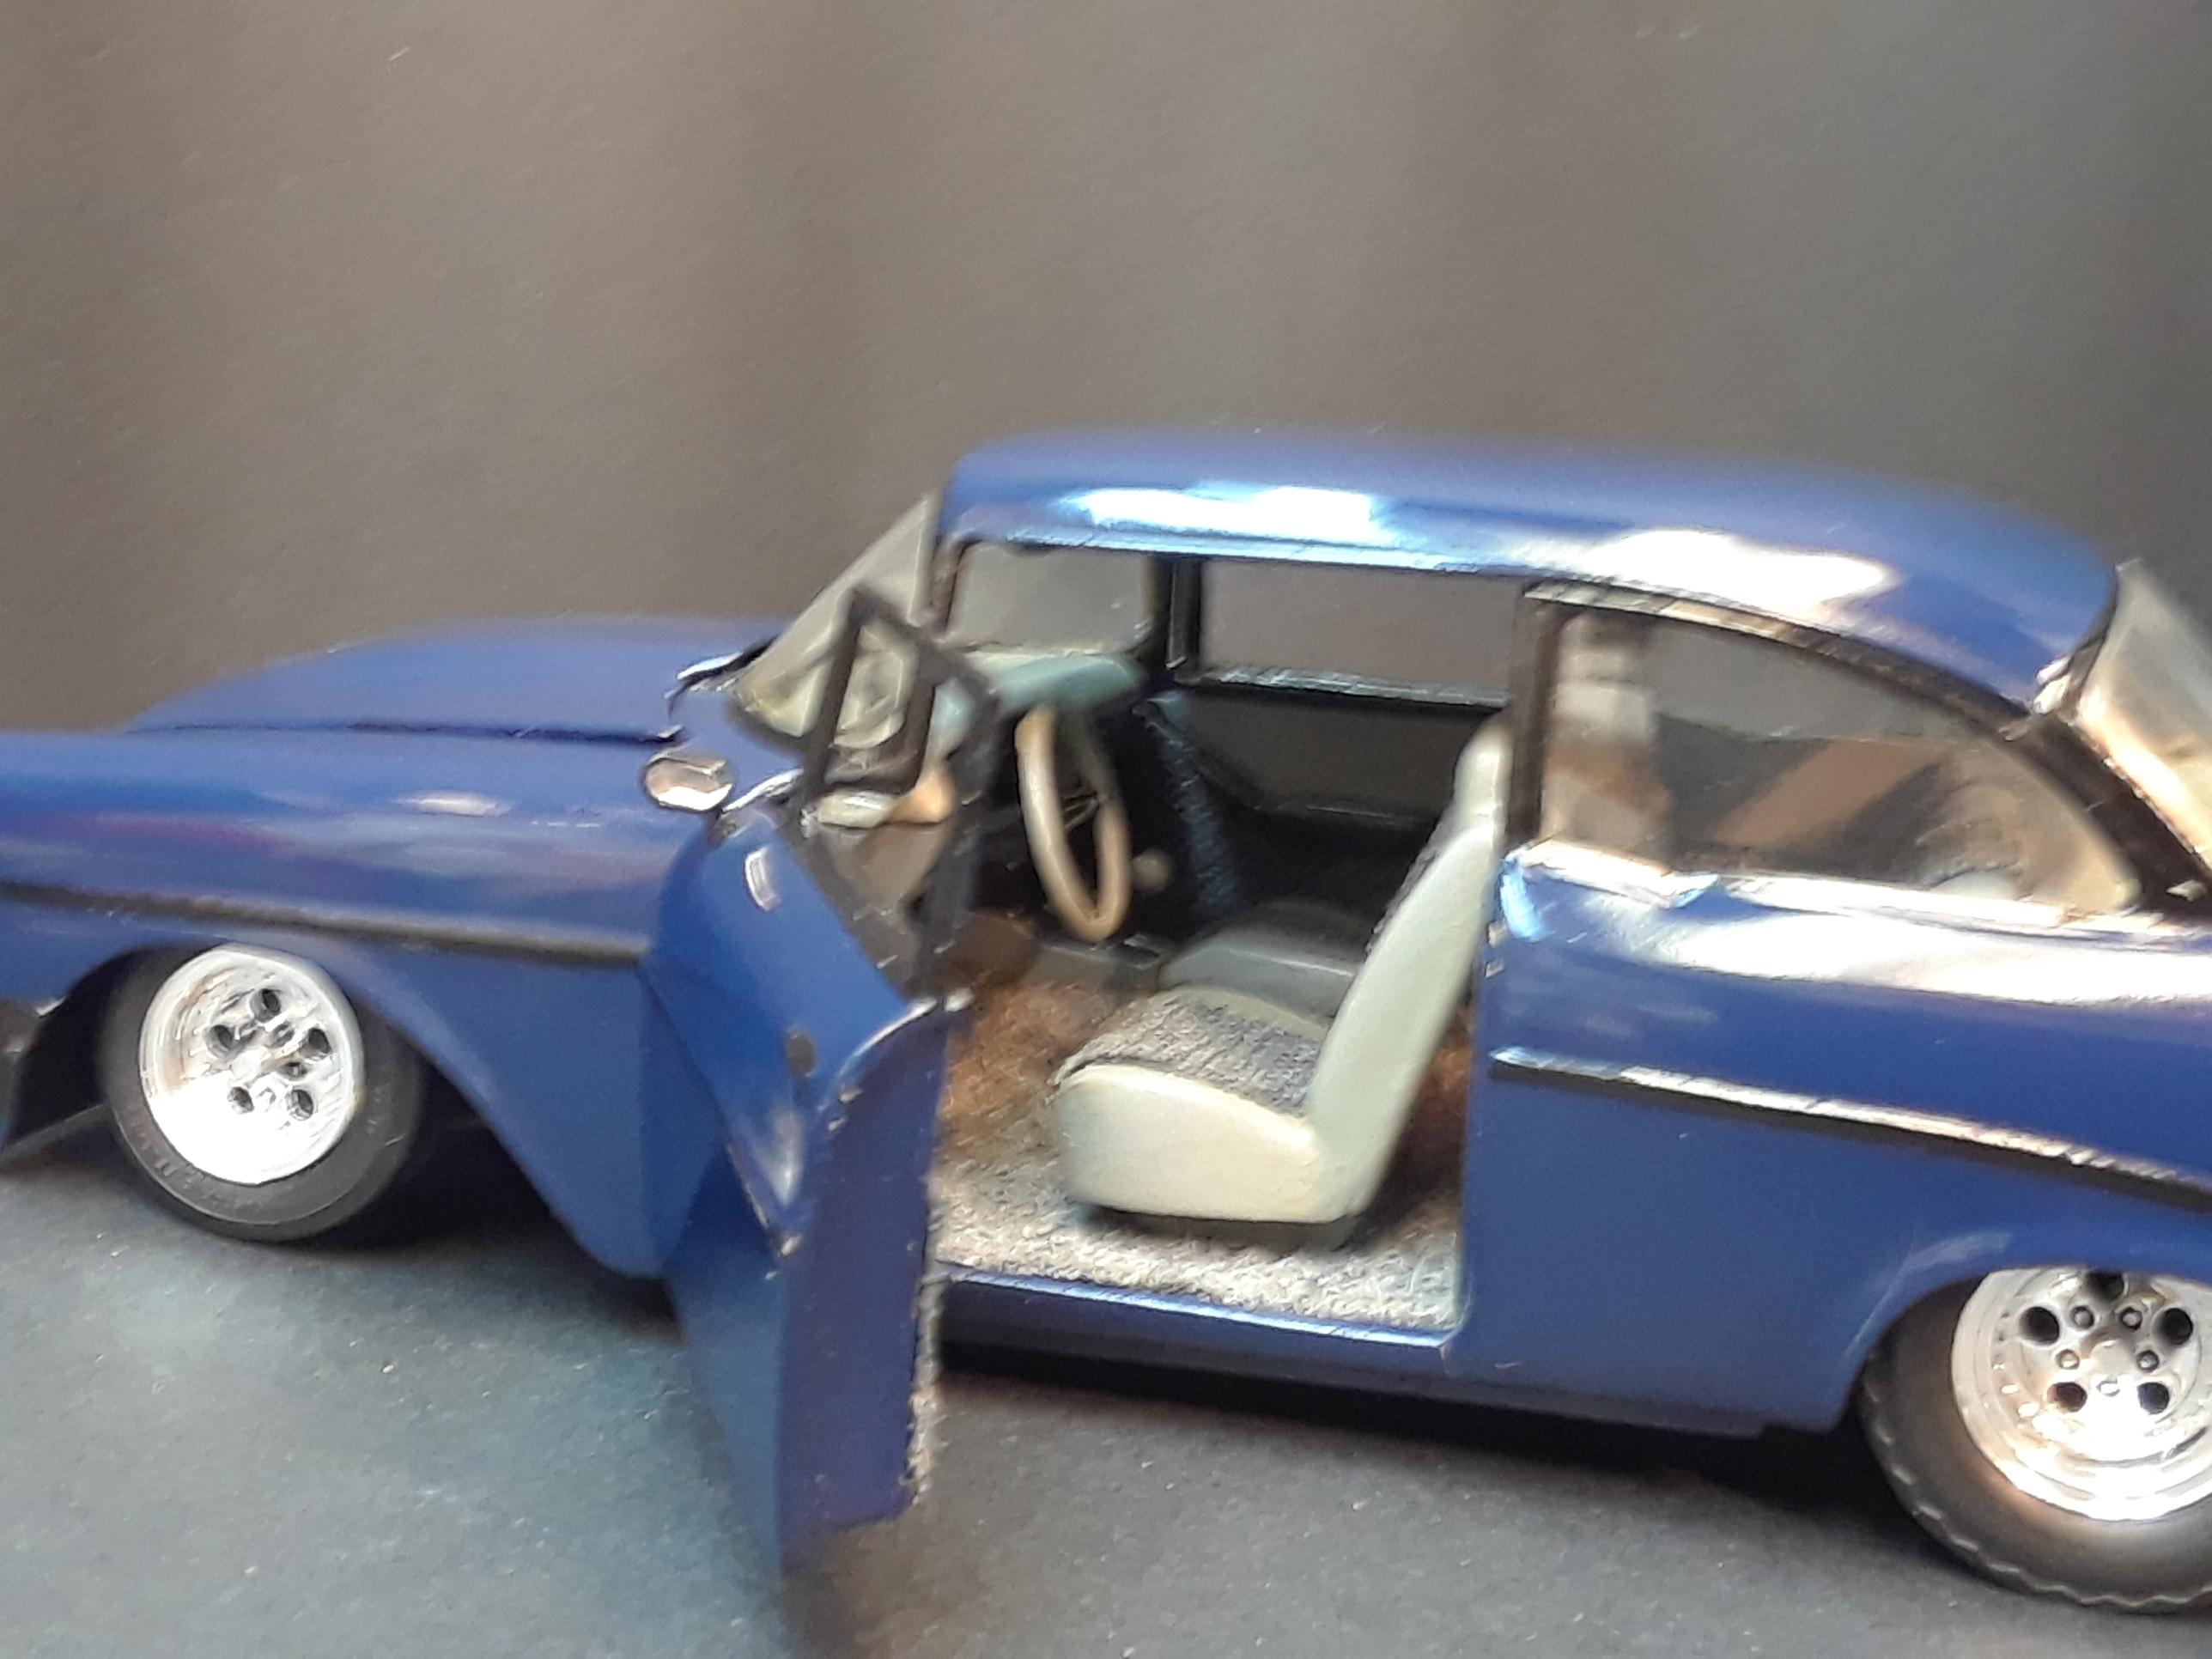
When I Was Young & Dumb: Building the Unbuildable '56 Chevy!
Hoffman replied to John Goschke's topic in Model Cars
Testors jade green metalflake! Cool! I had built one similar to this, then rebuilt it in the 80's, using just the body. I've always meant to get back to it and build a nice stocker like the beautiful version built by John.
-
Outstanding!!!! ?
-
Beautiful work, Larry! Looks great. ?
-
Larry, super helpful tips on the fender beading. Thanks! https://www.albionhobbies.com/product-ranges/albion-alloys-precision-metals/
-
Larry, that really turned out great! The fender beading is a nice touch. How did you attach it without glue showing over the paint? I've been wanting to do this on another model. I've been contemplating gluing the wire down, painting over it, then scraping the paint off the wire. Not sure that's the best approach. What was your technique?
-
Randy, you made my day!! ? Thank you so much, and Happy New Year!
-
Oh, and I agree about the dull finish on the fender chrome. I bet it was bright when new, but dulling over time right under the clear. I went over mine with a Molotow pen.
-
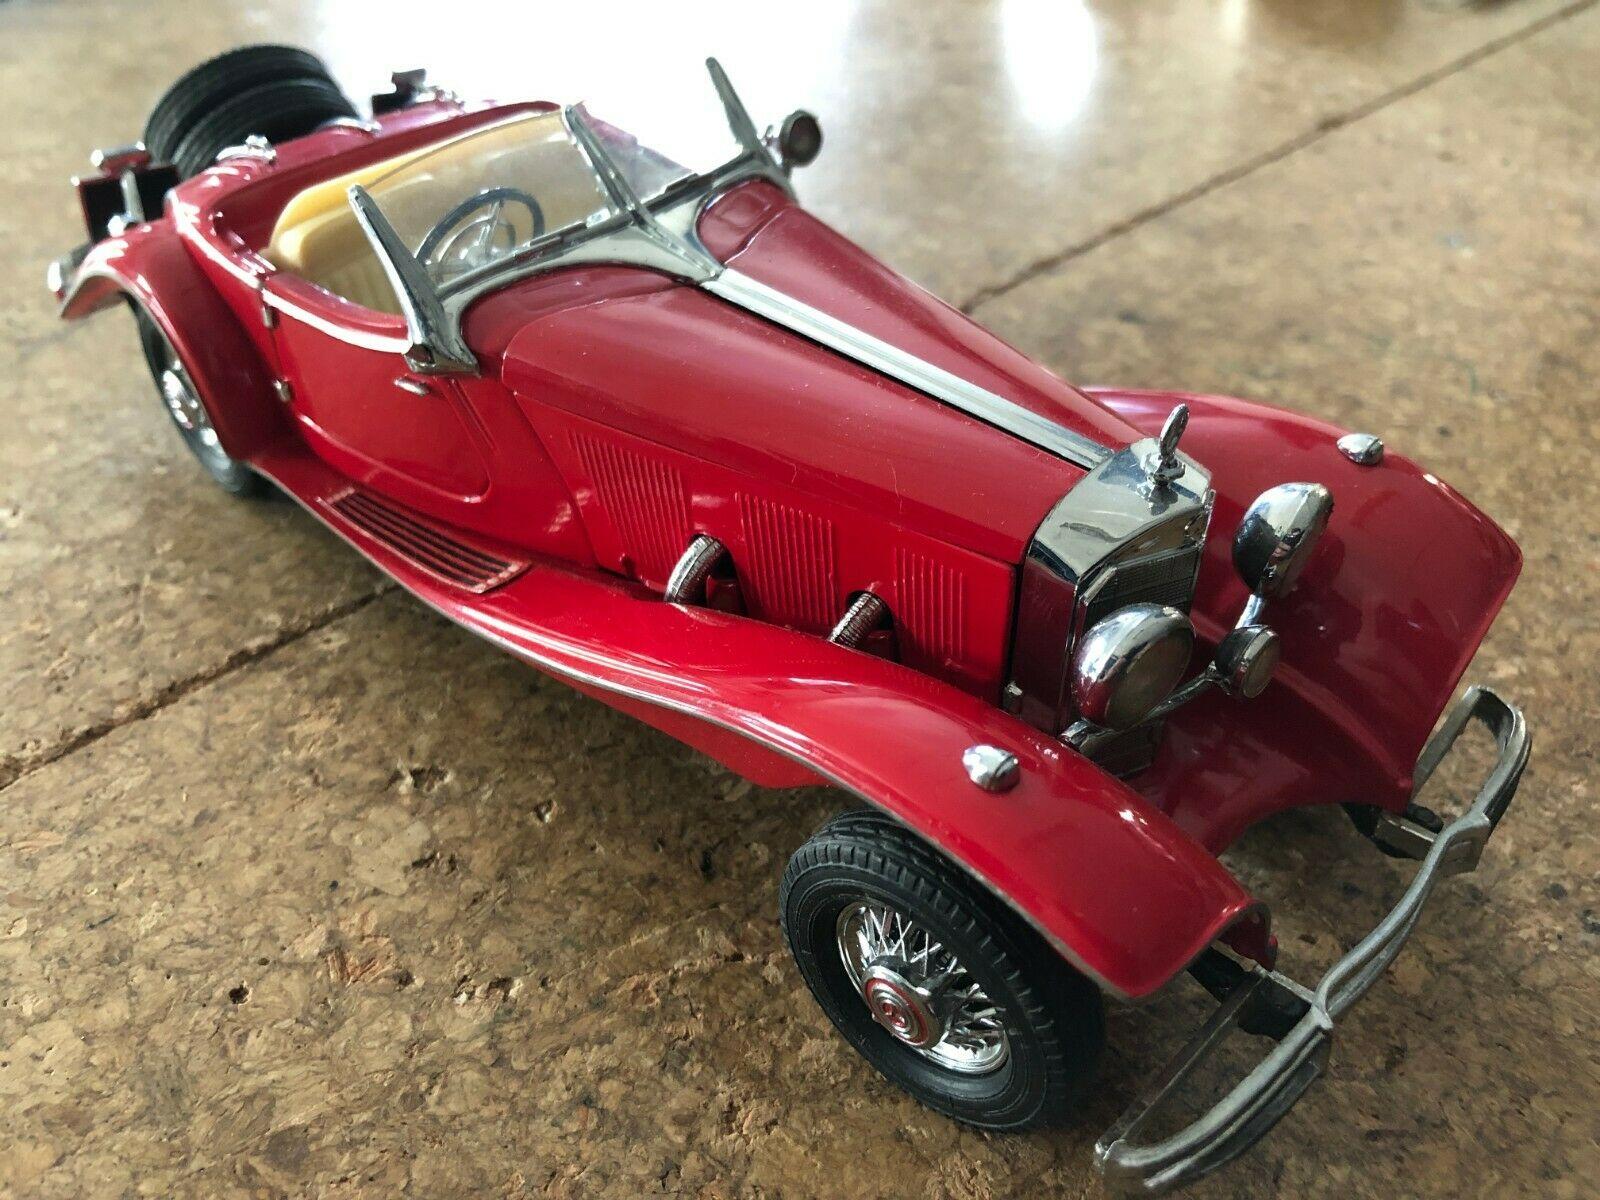
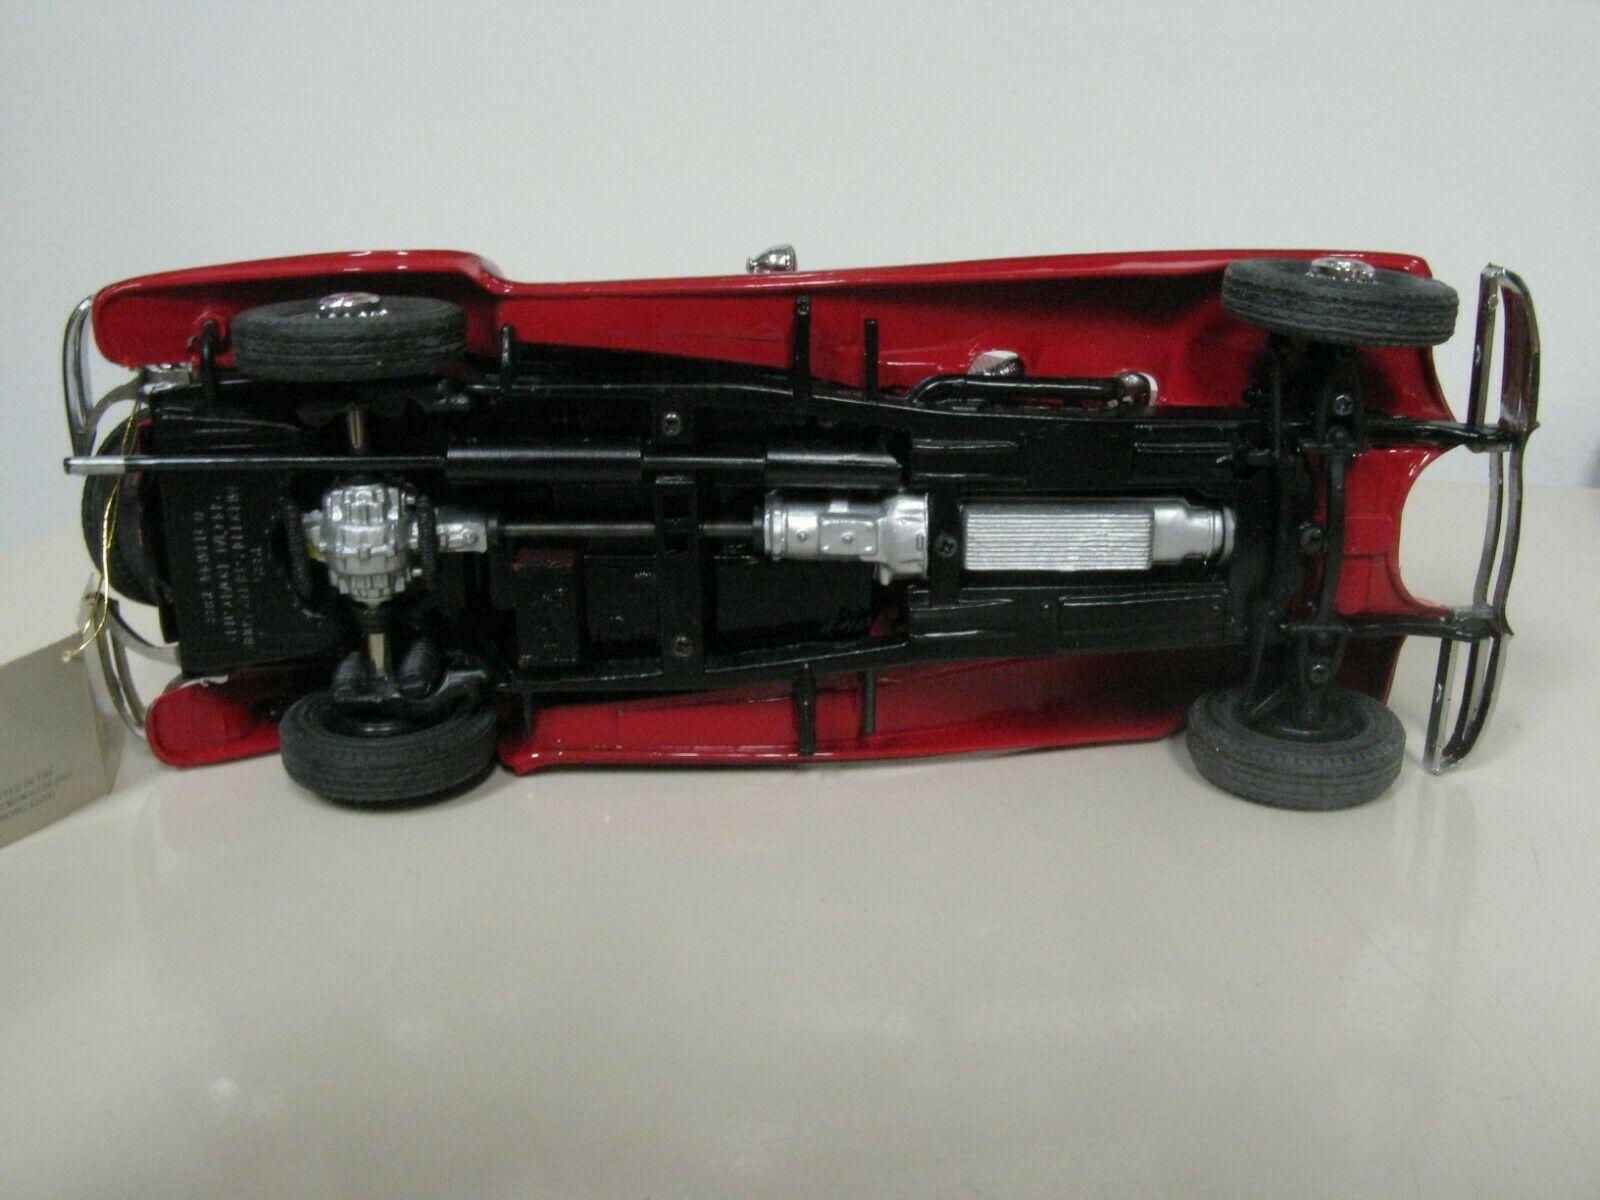
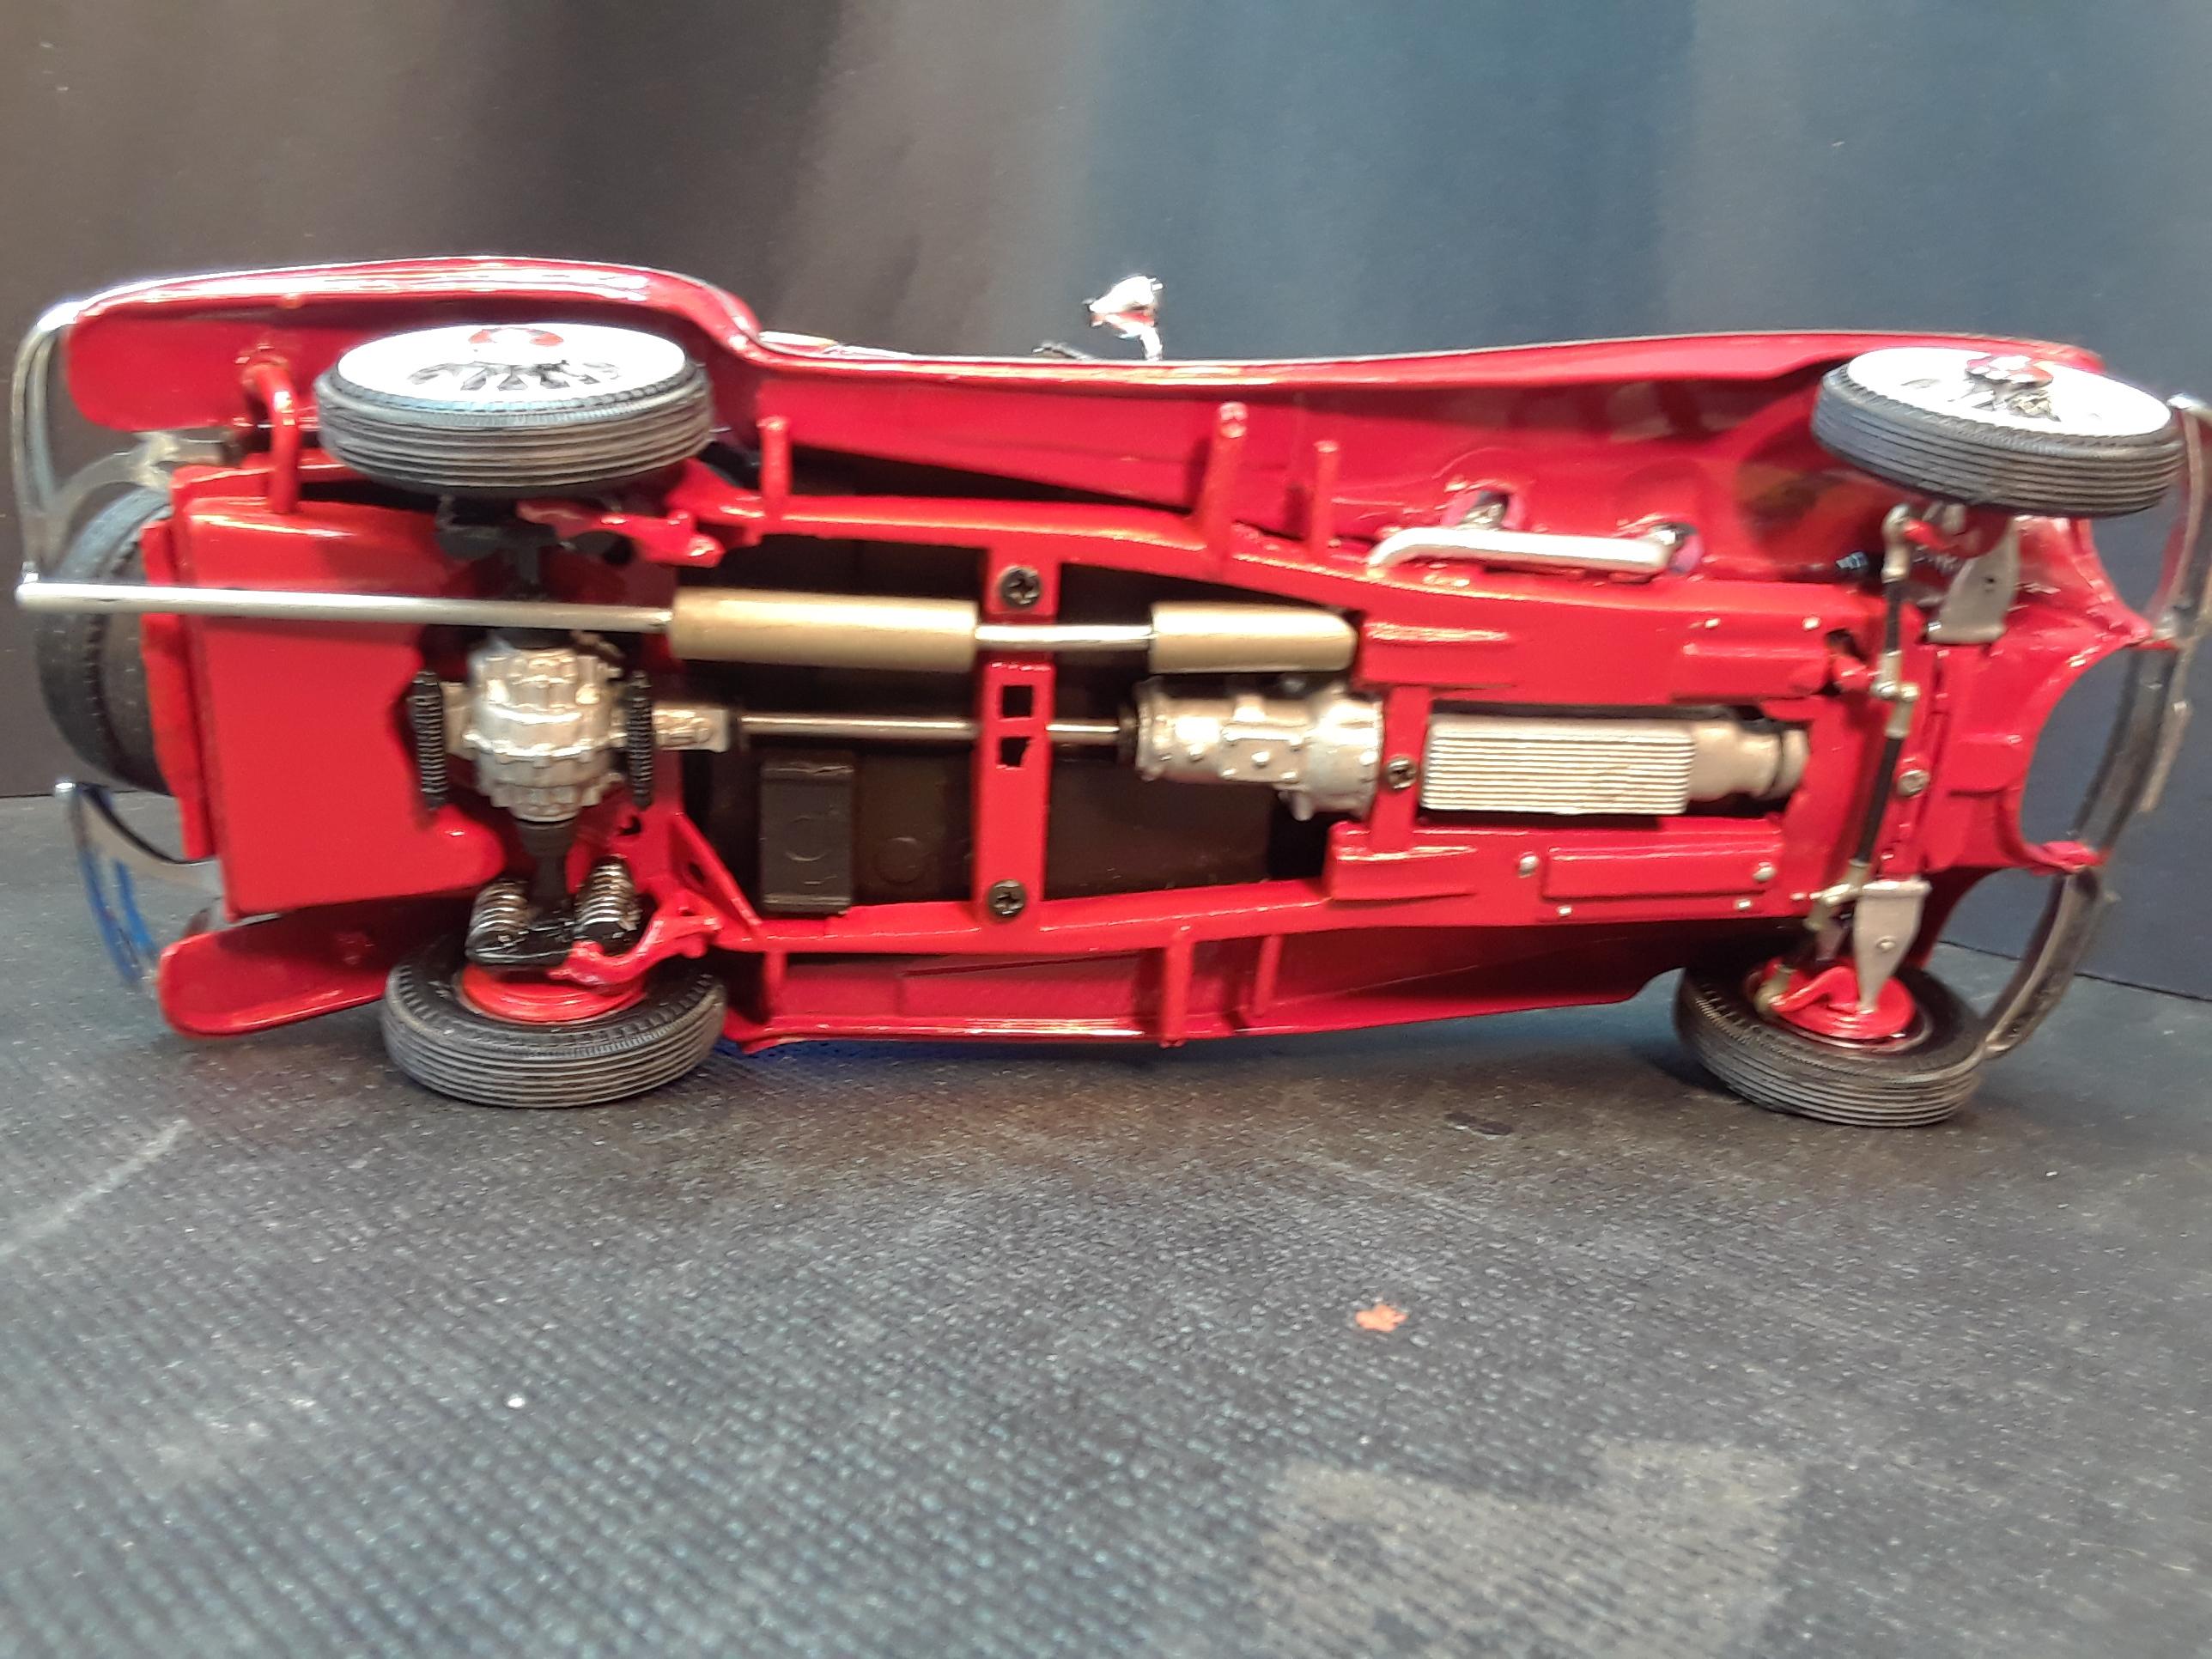
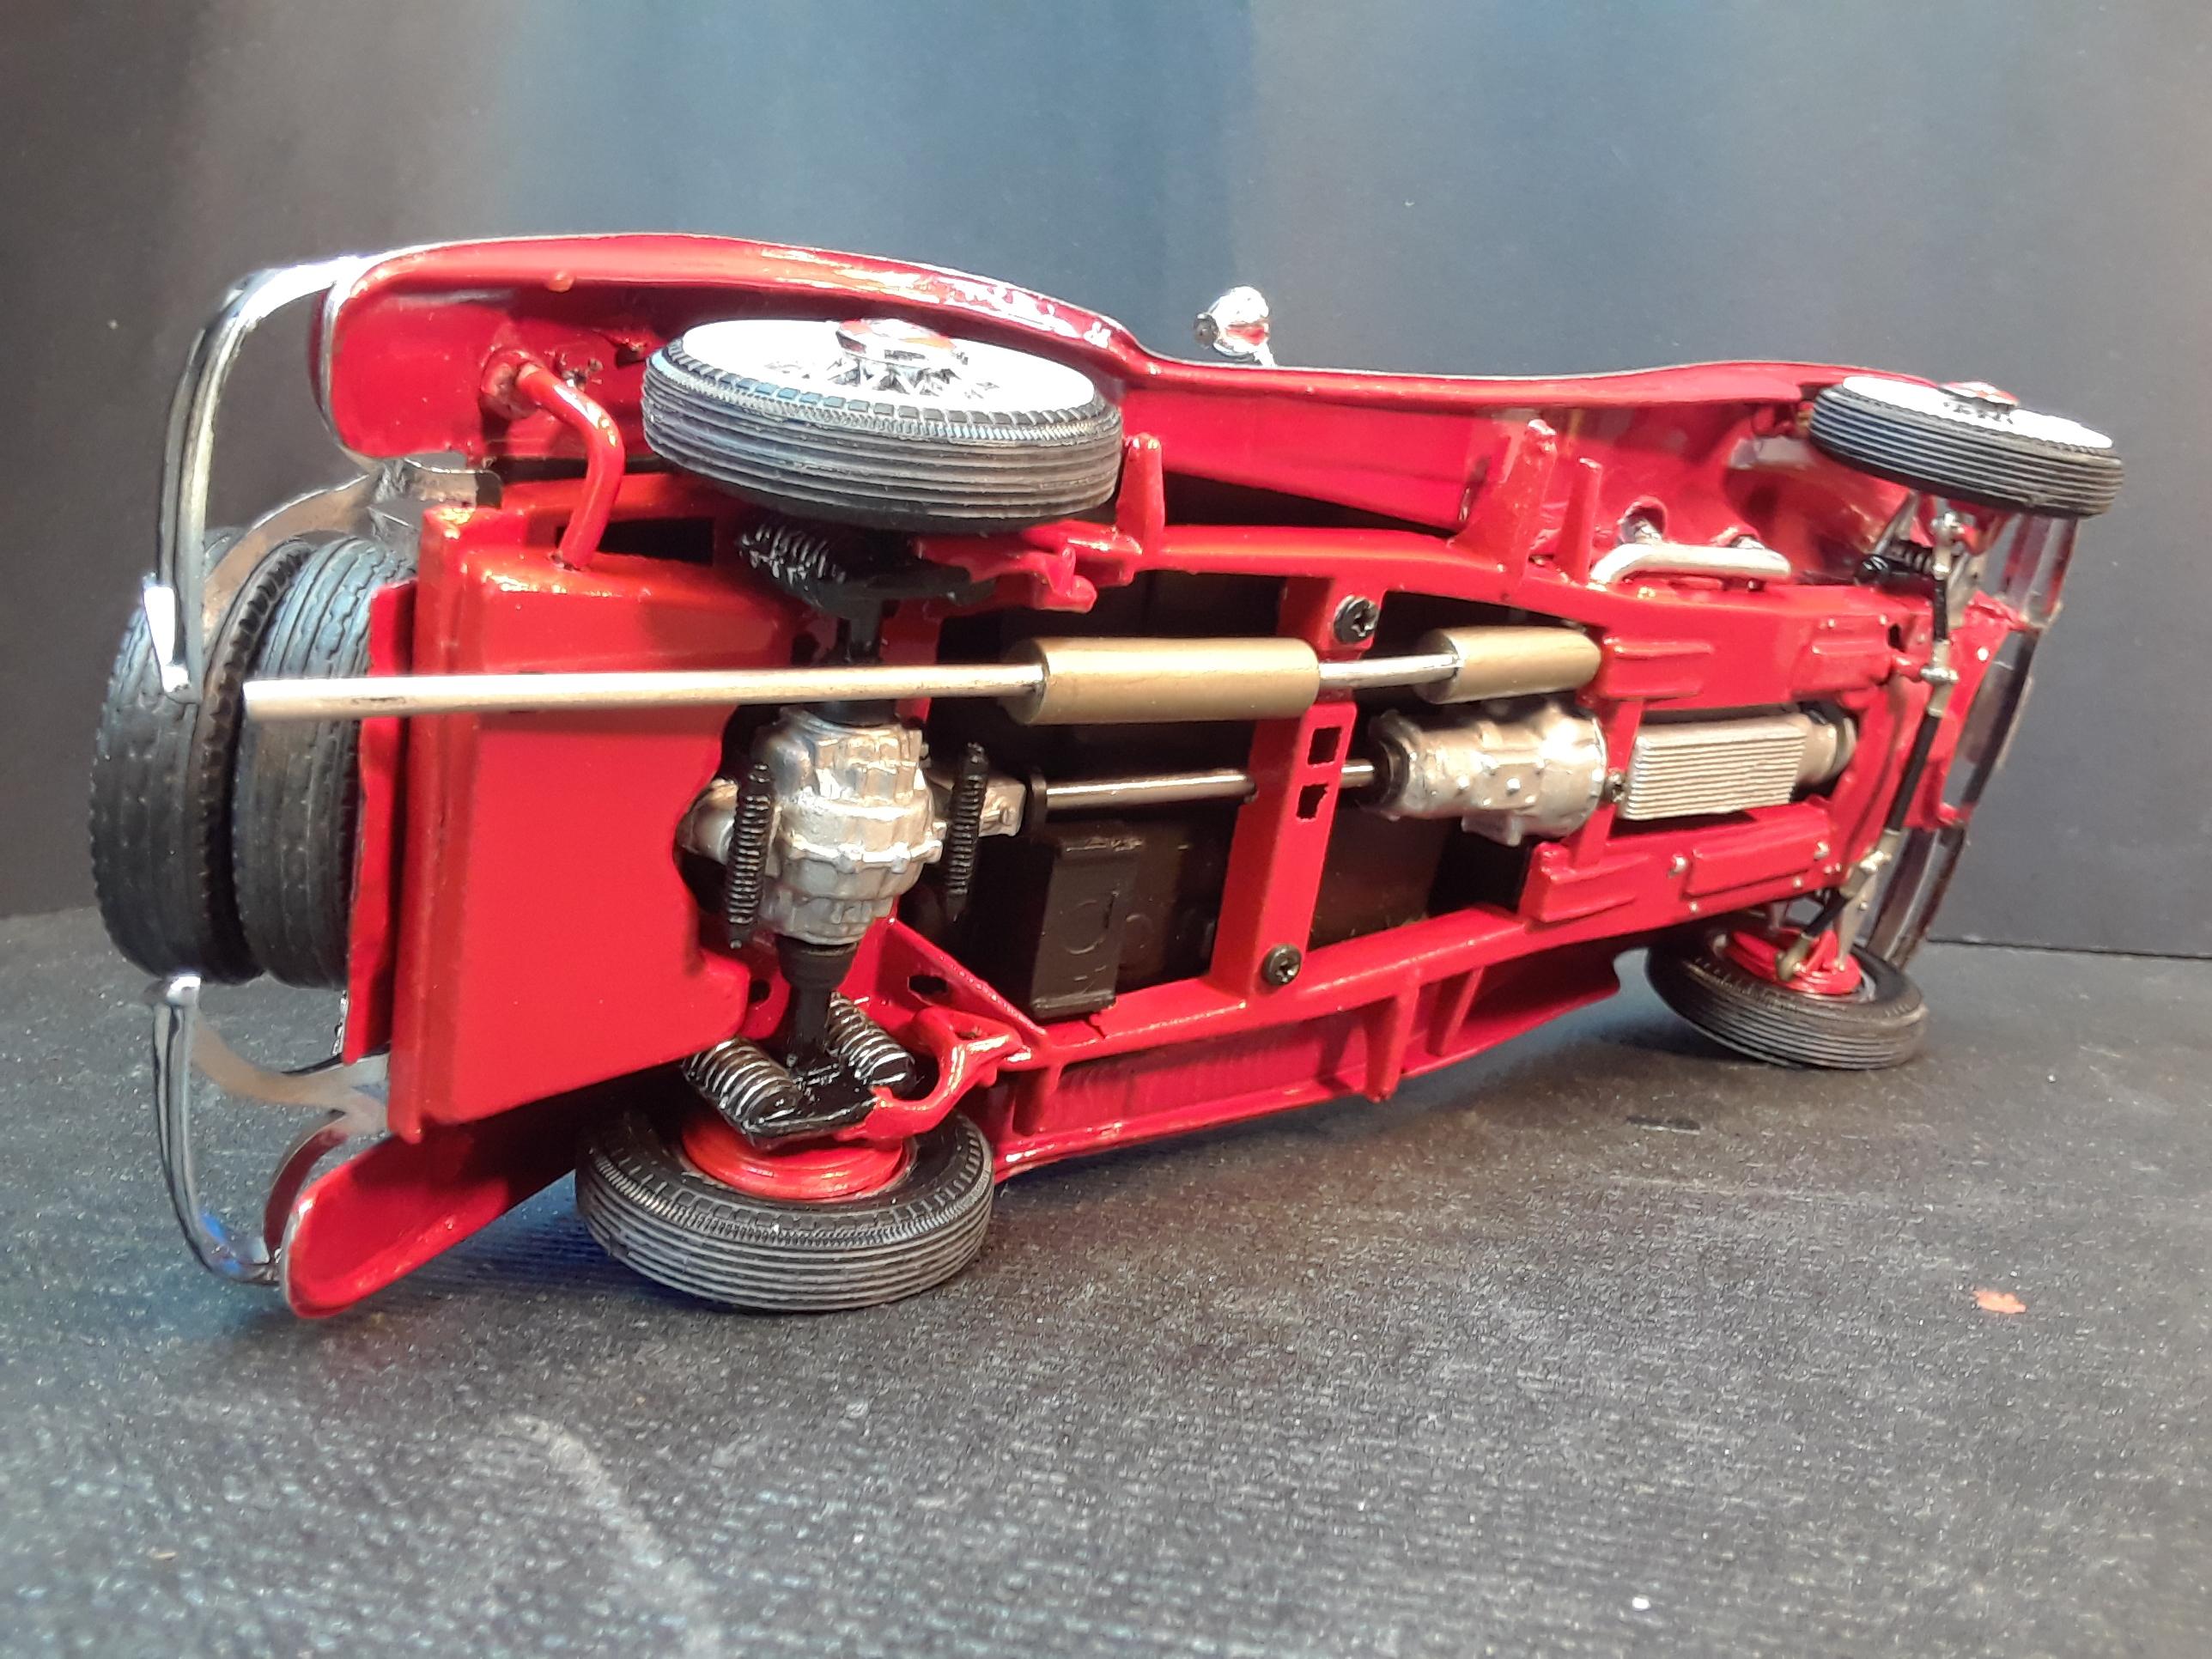
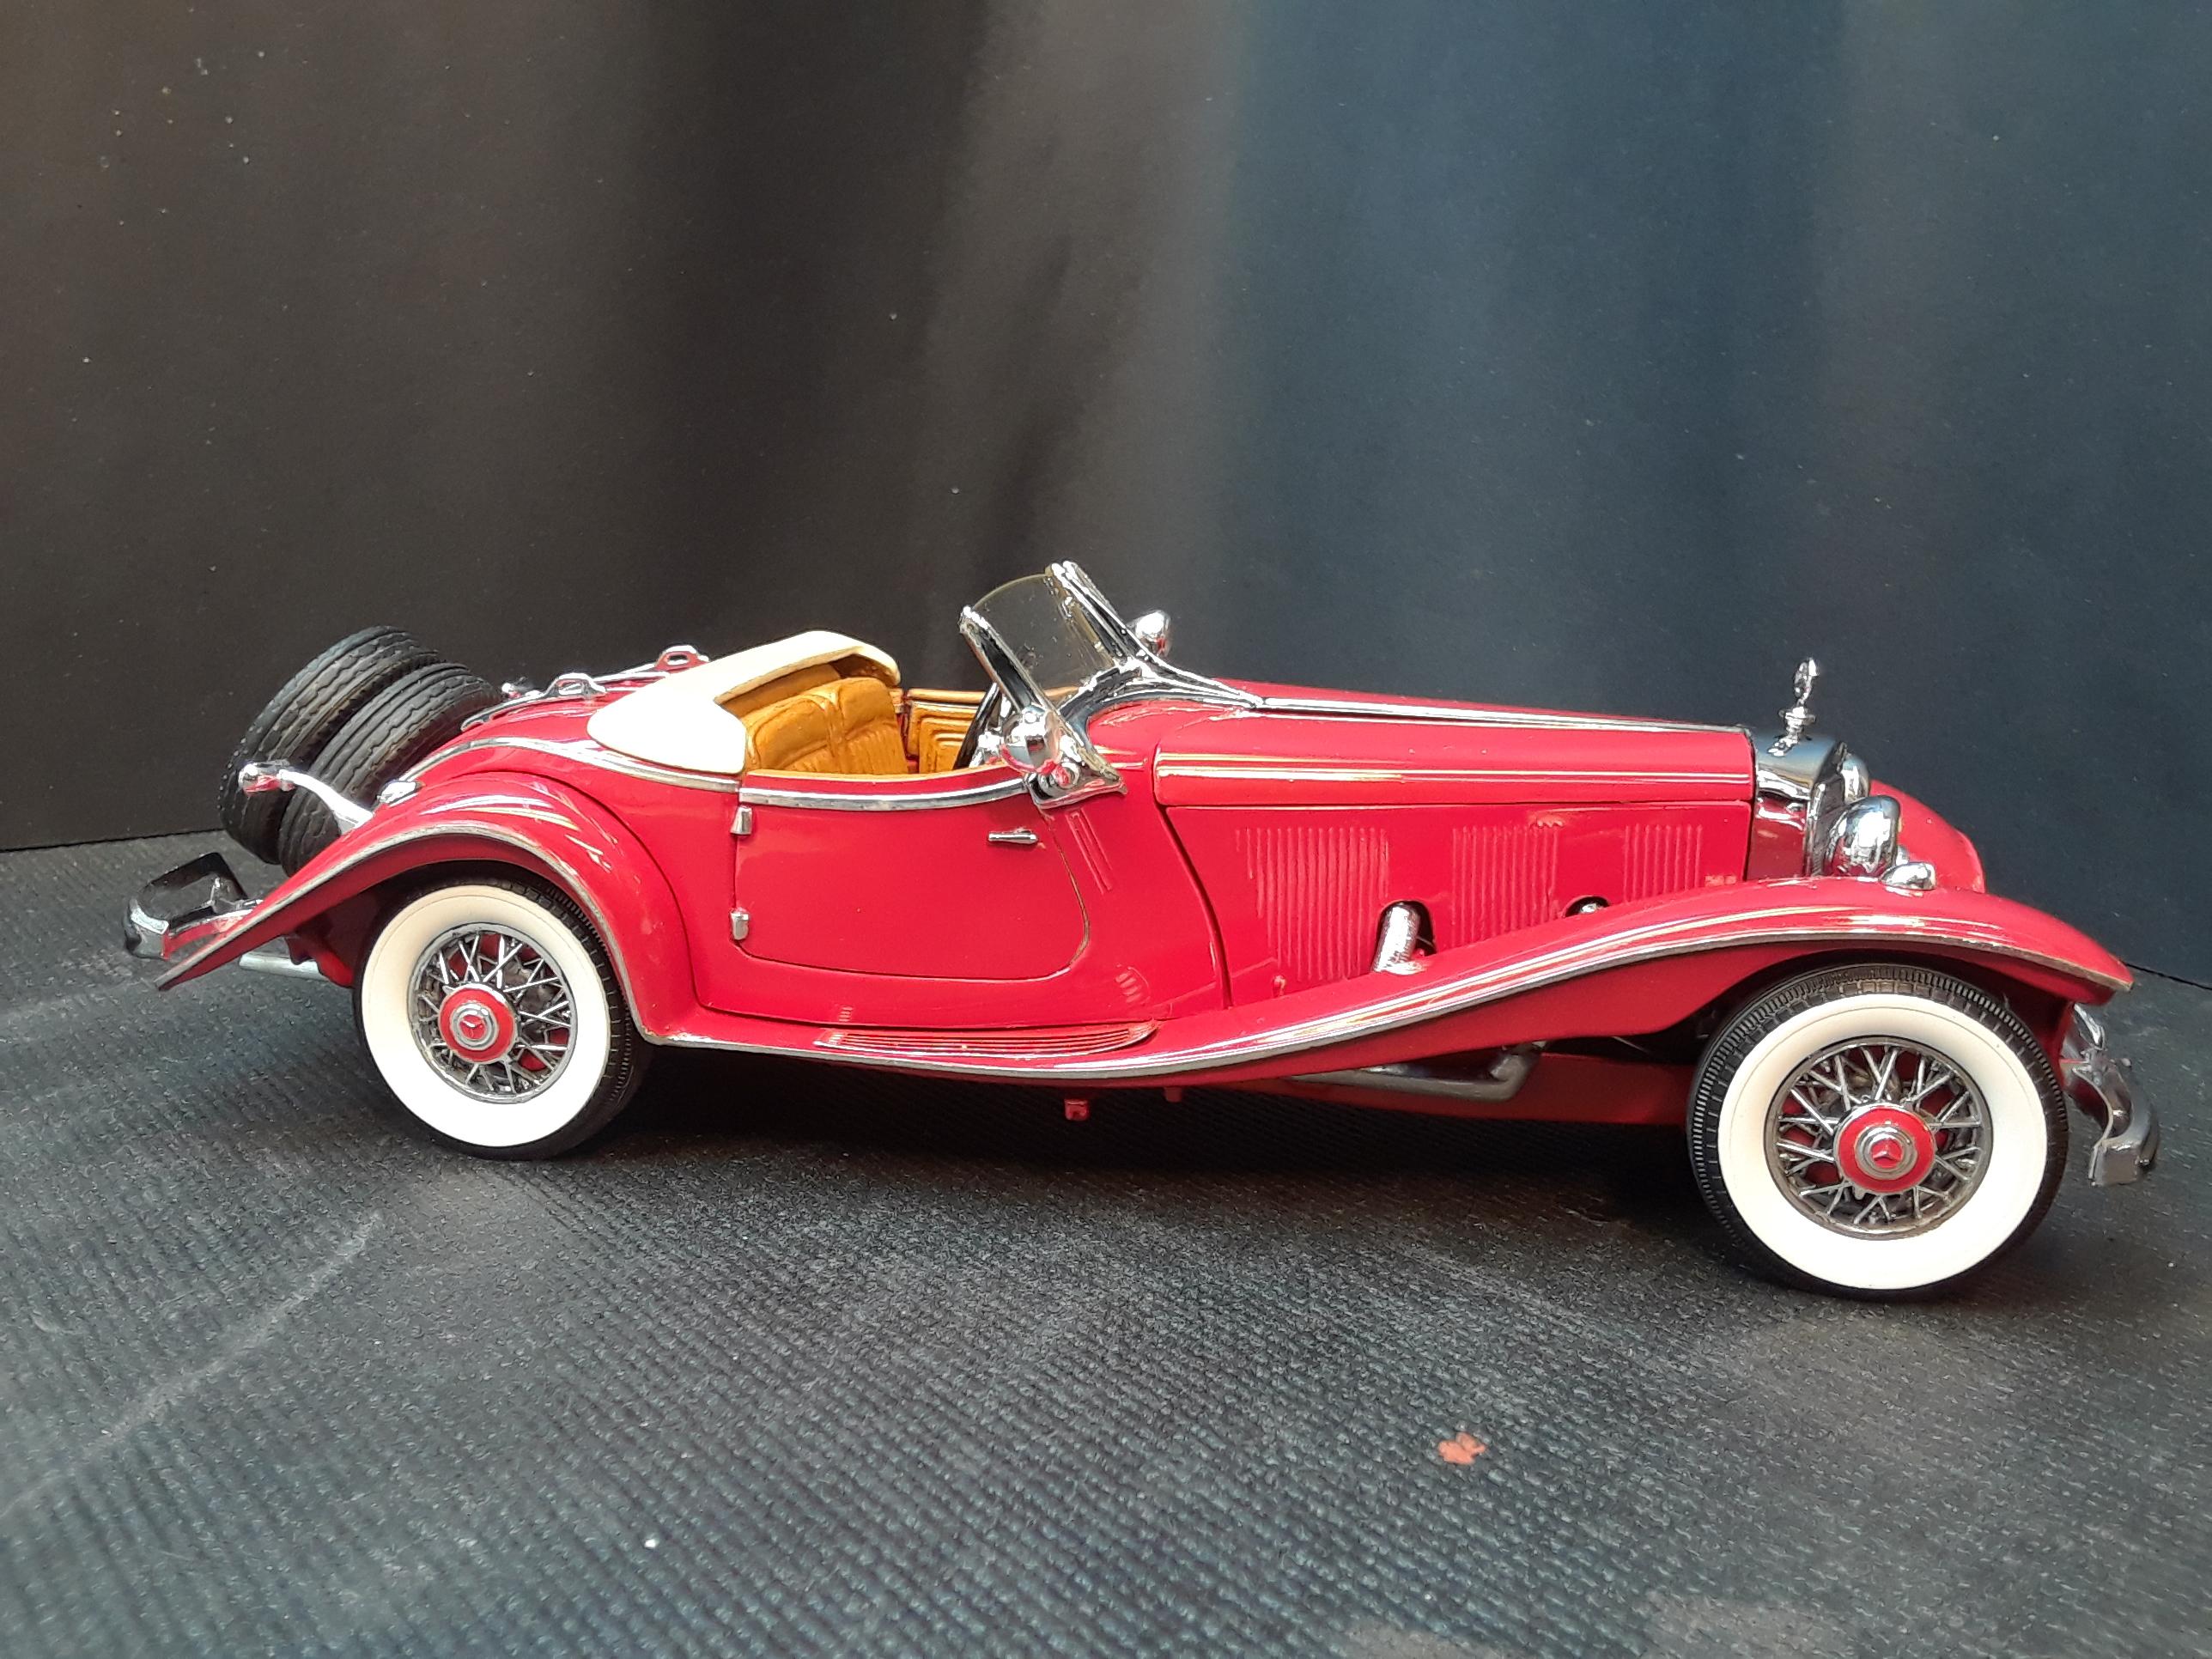
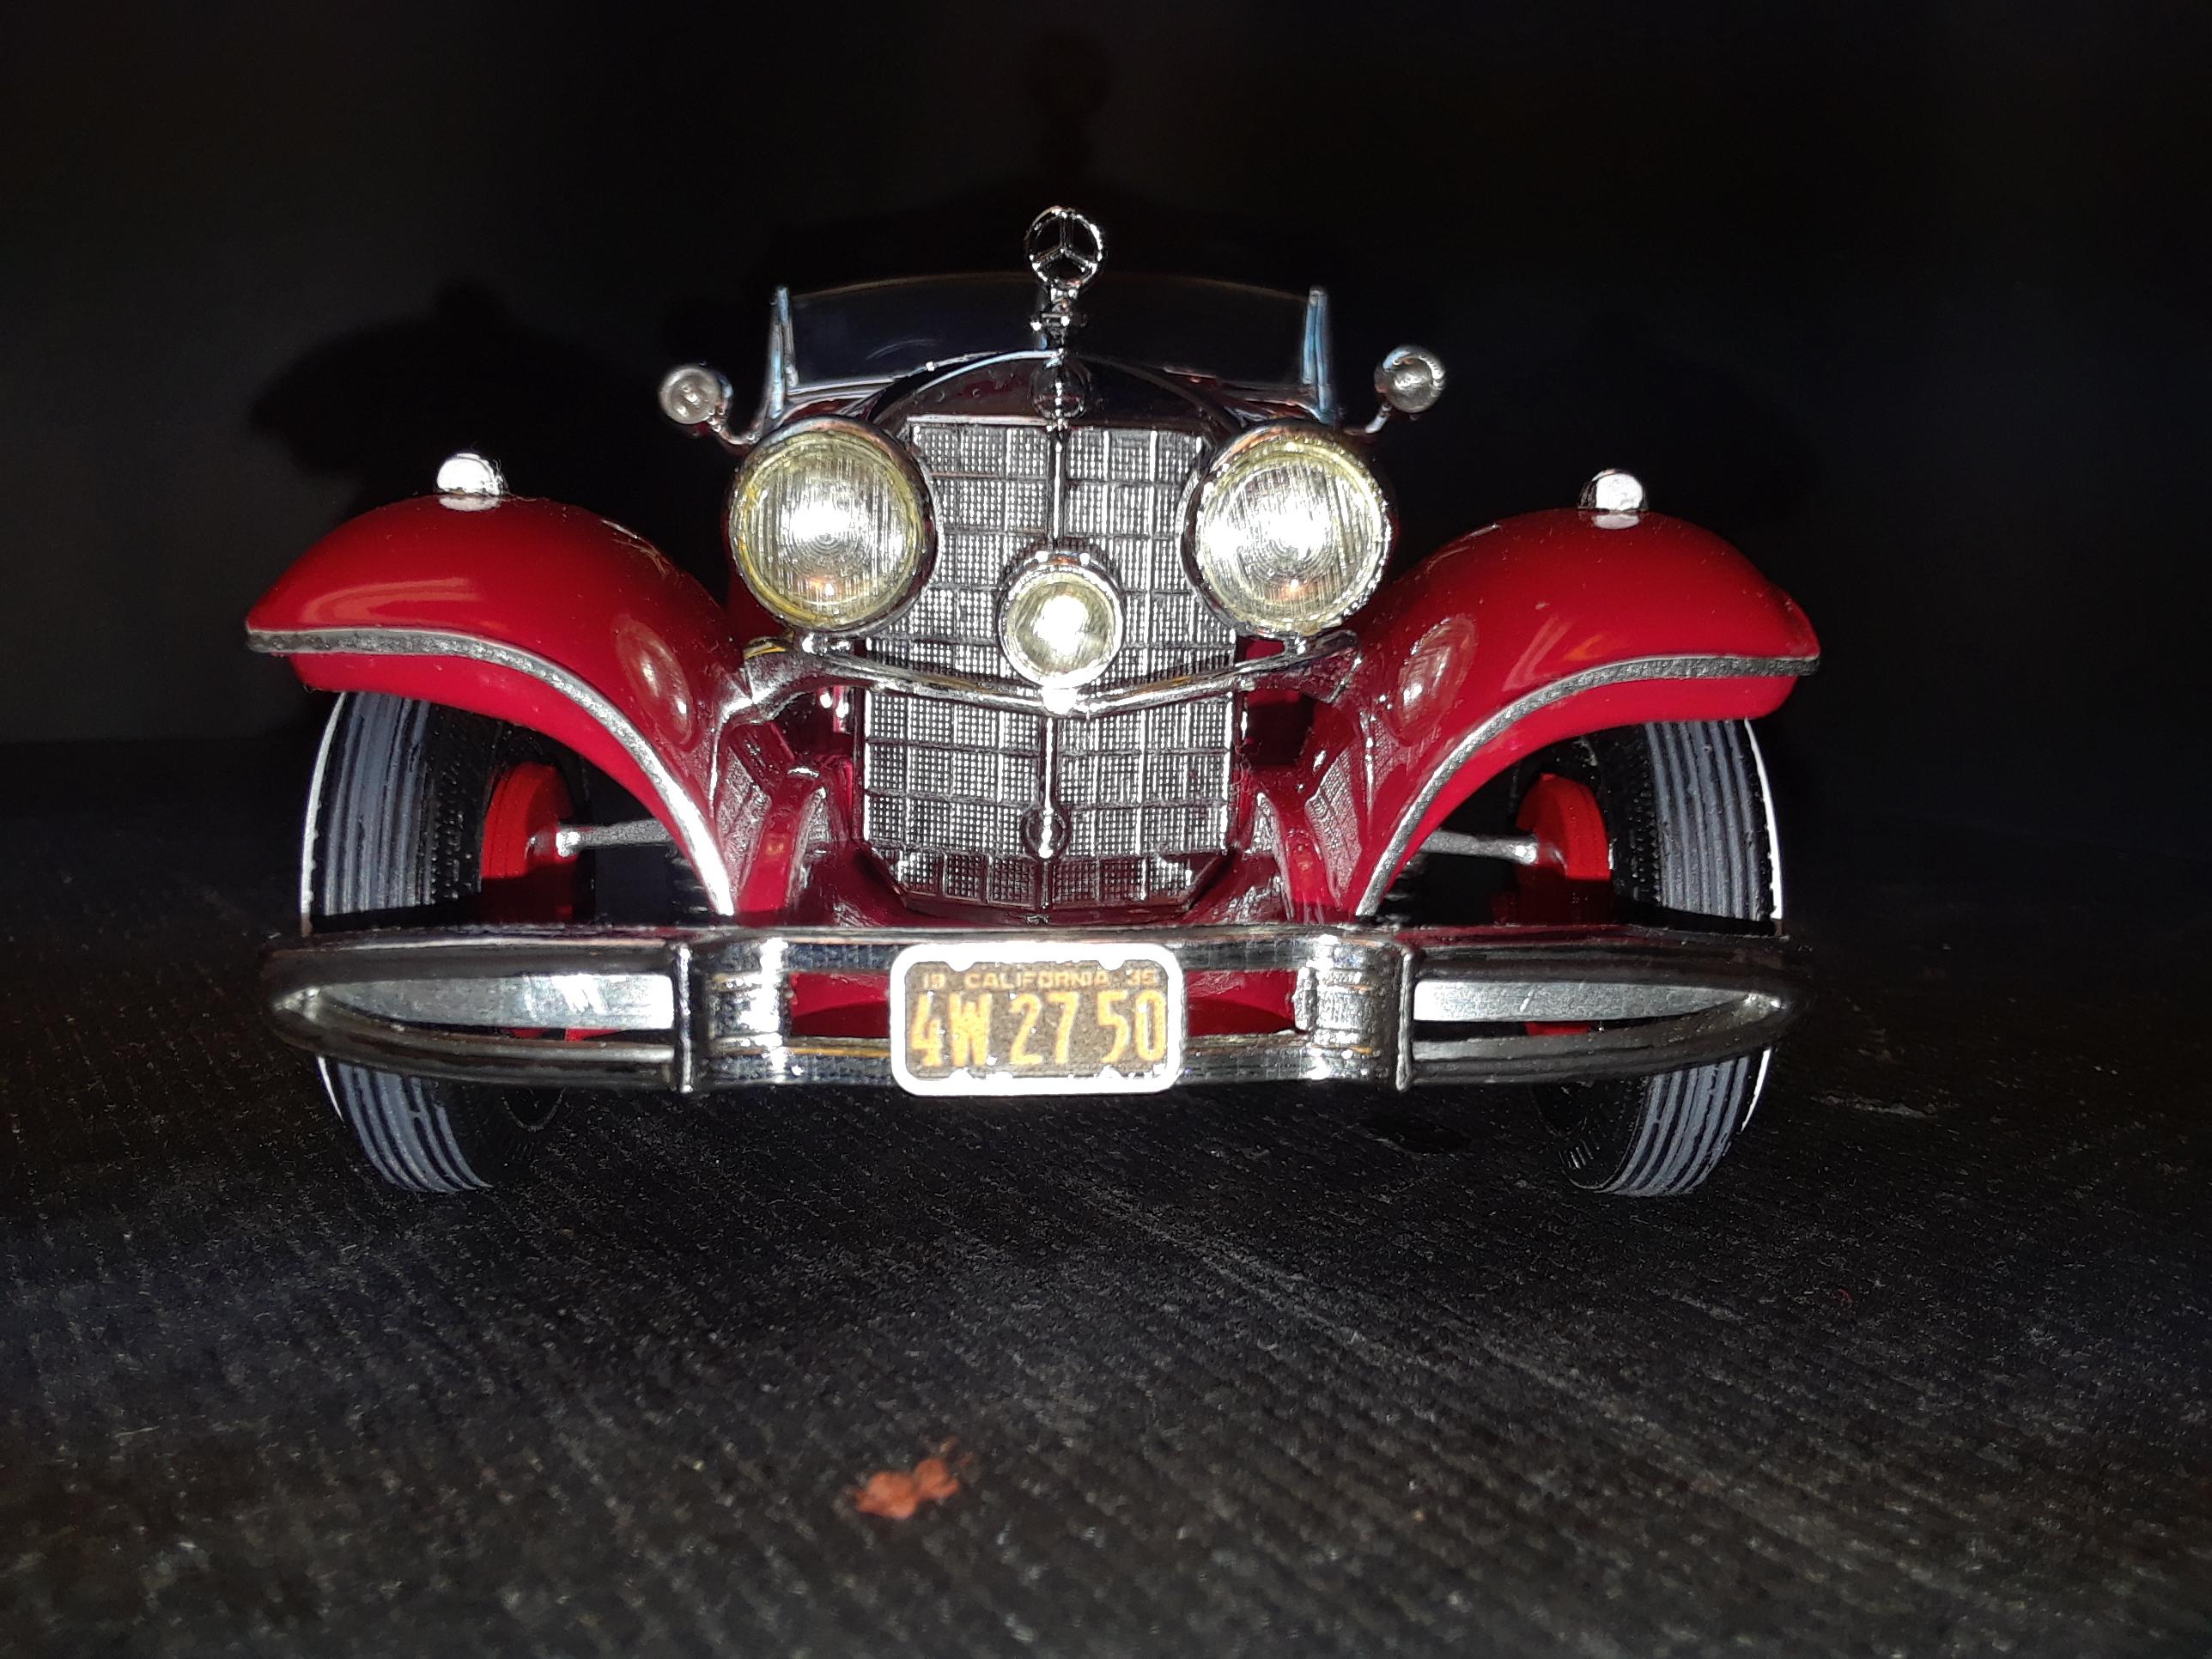
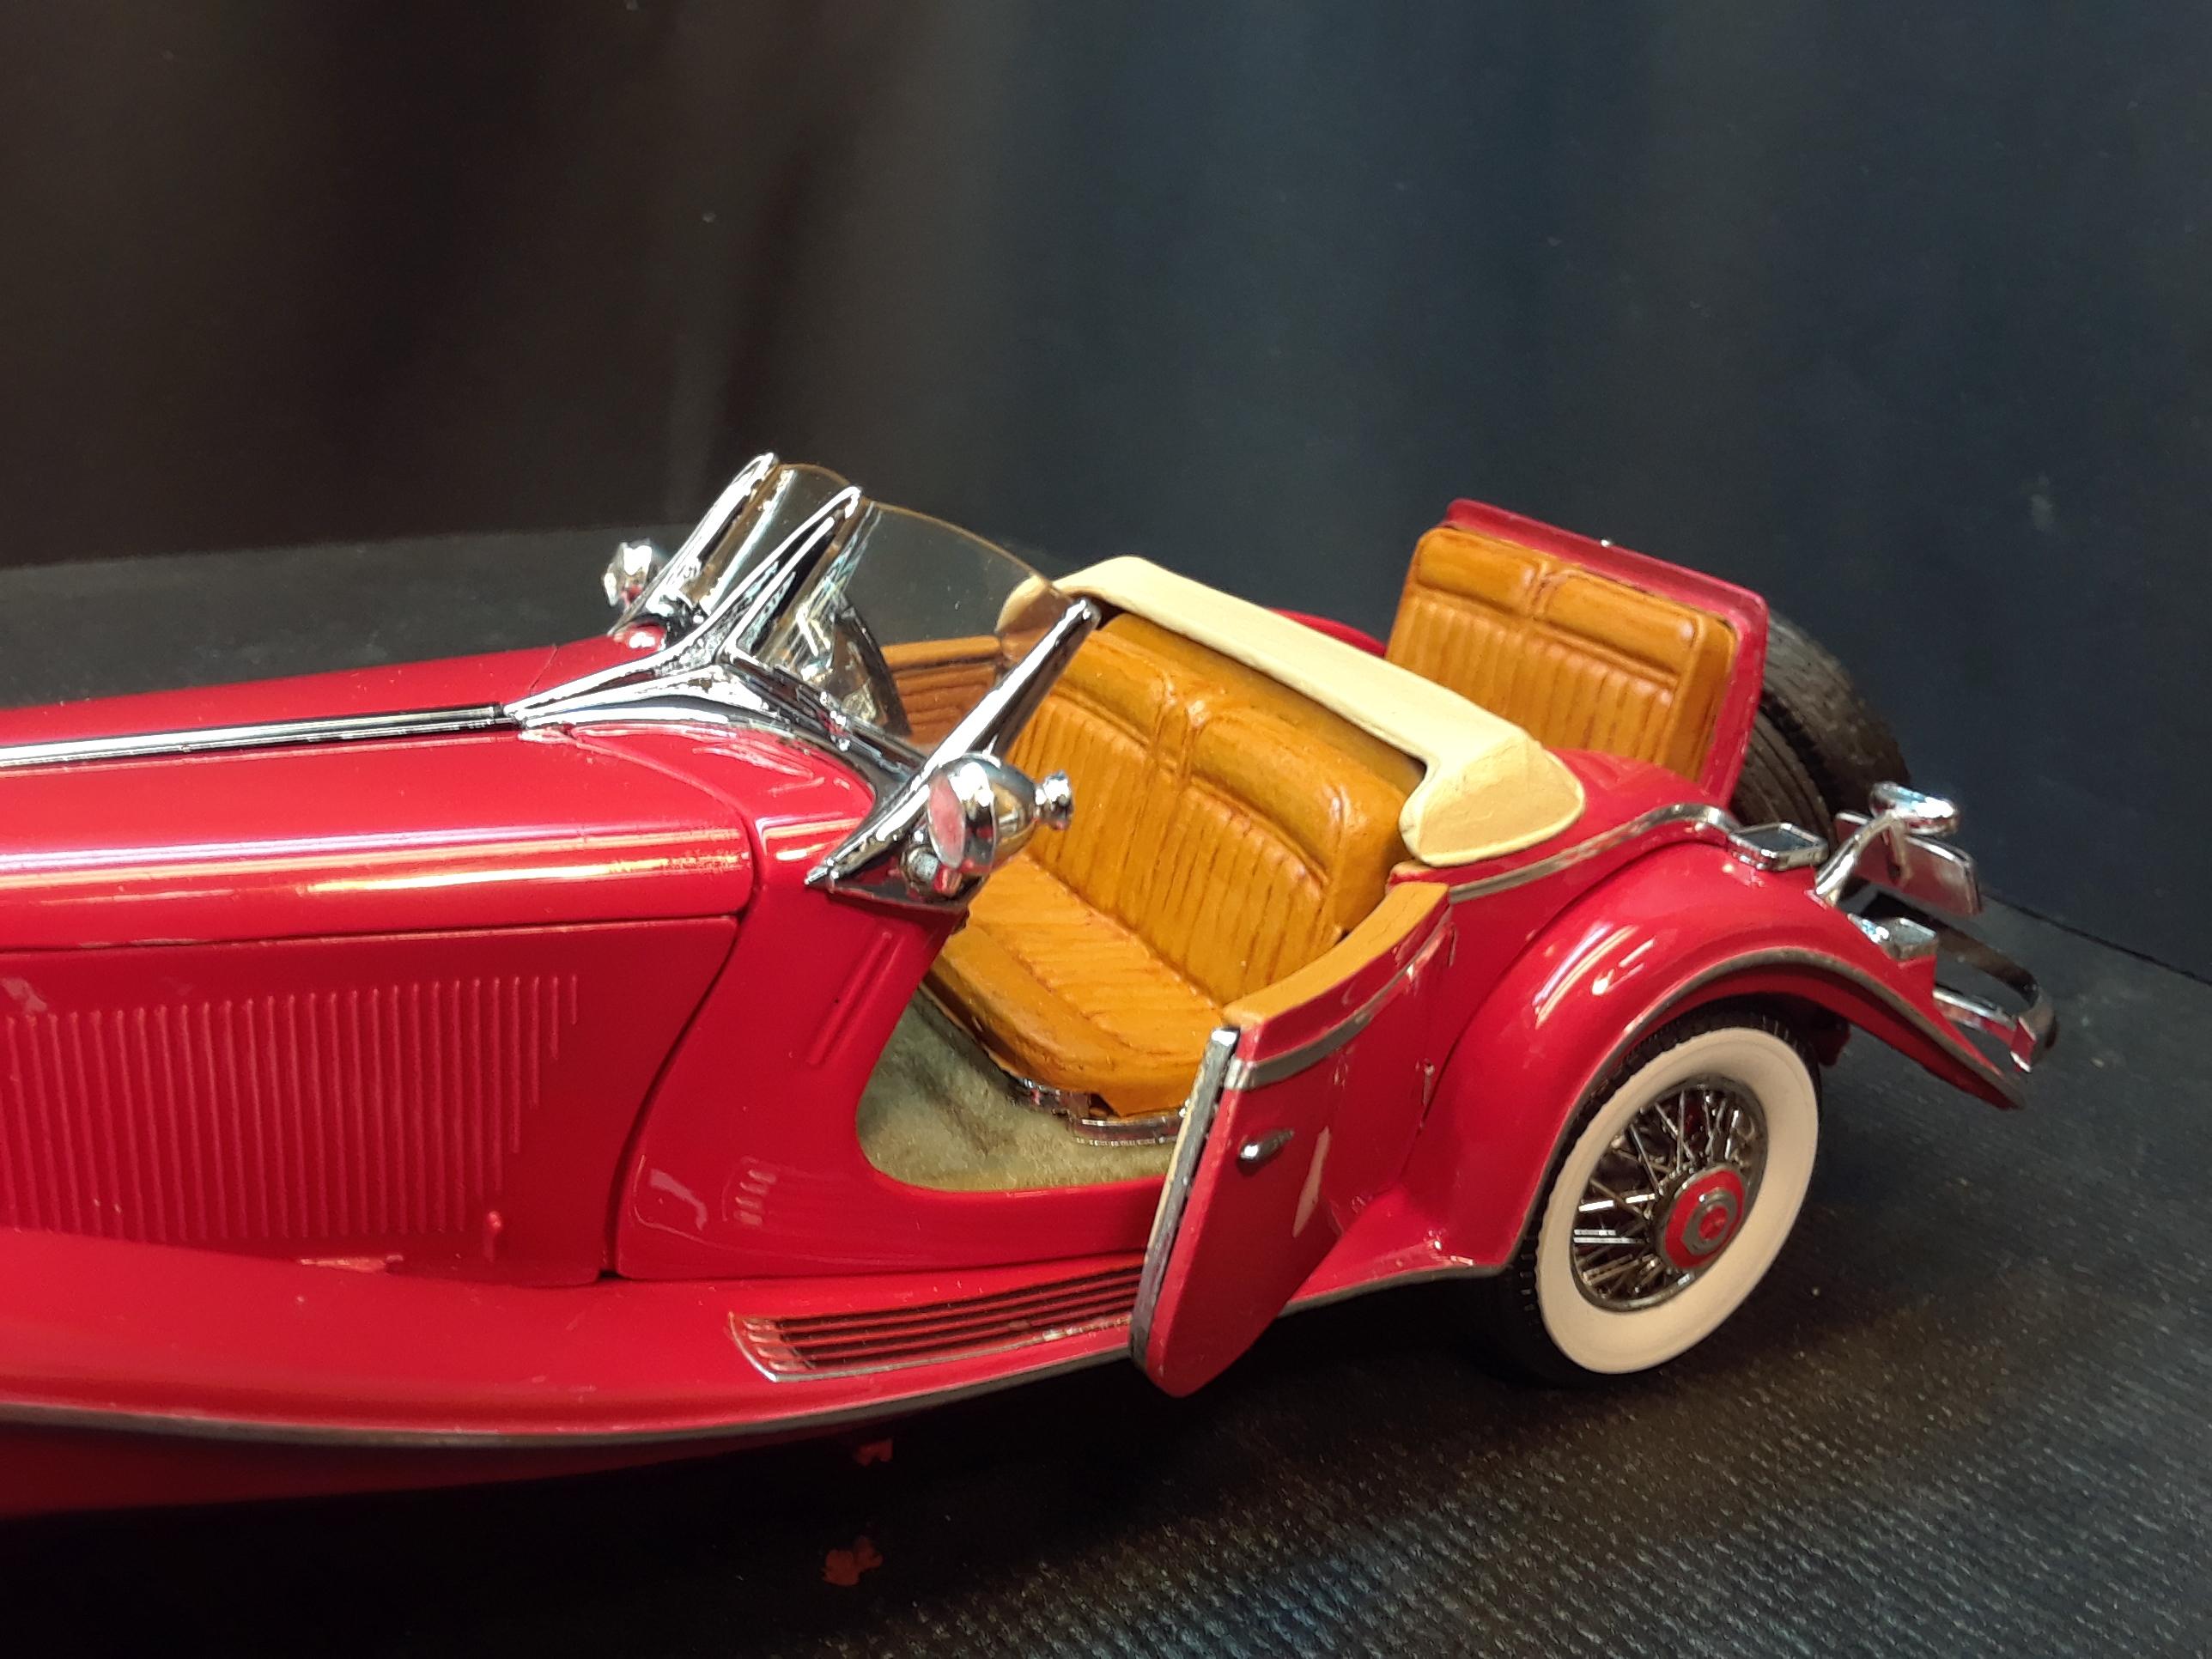
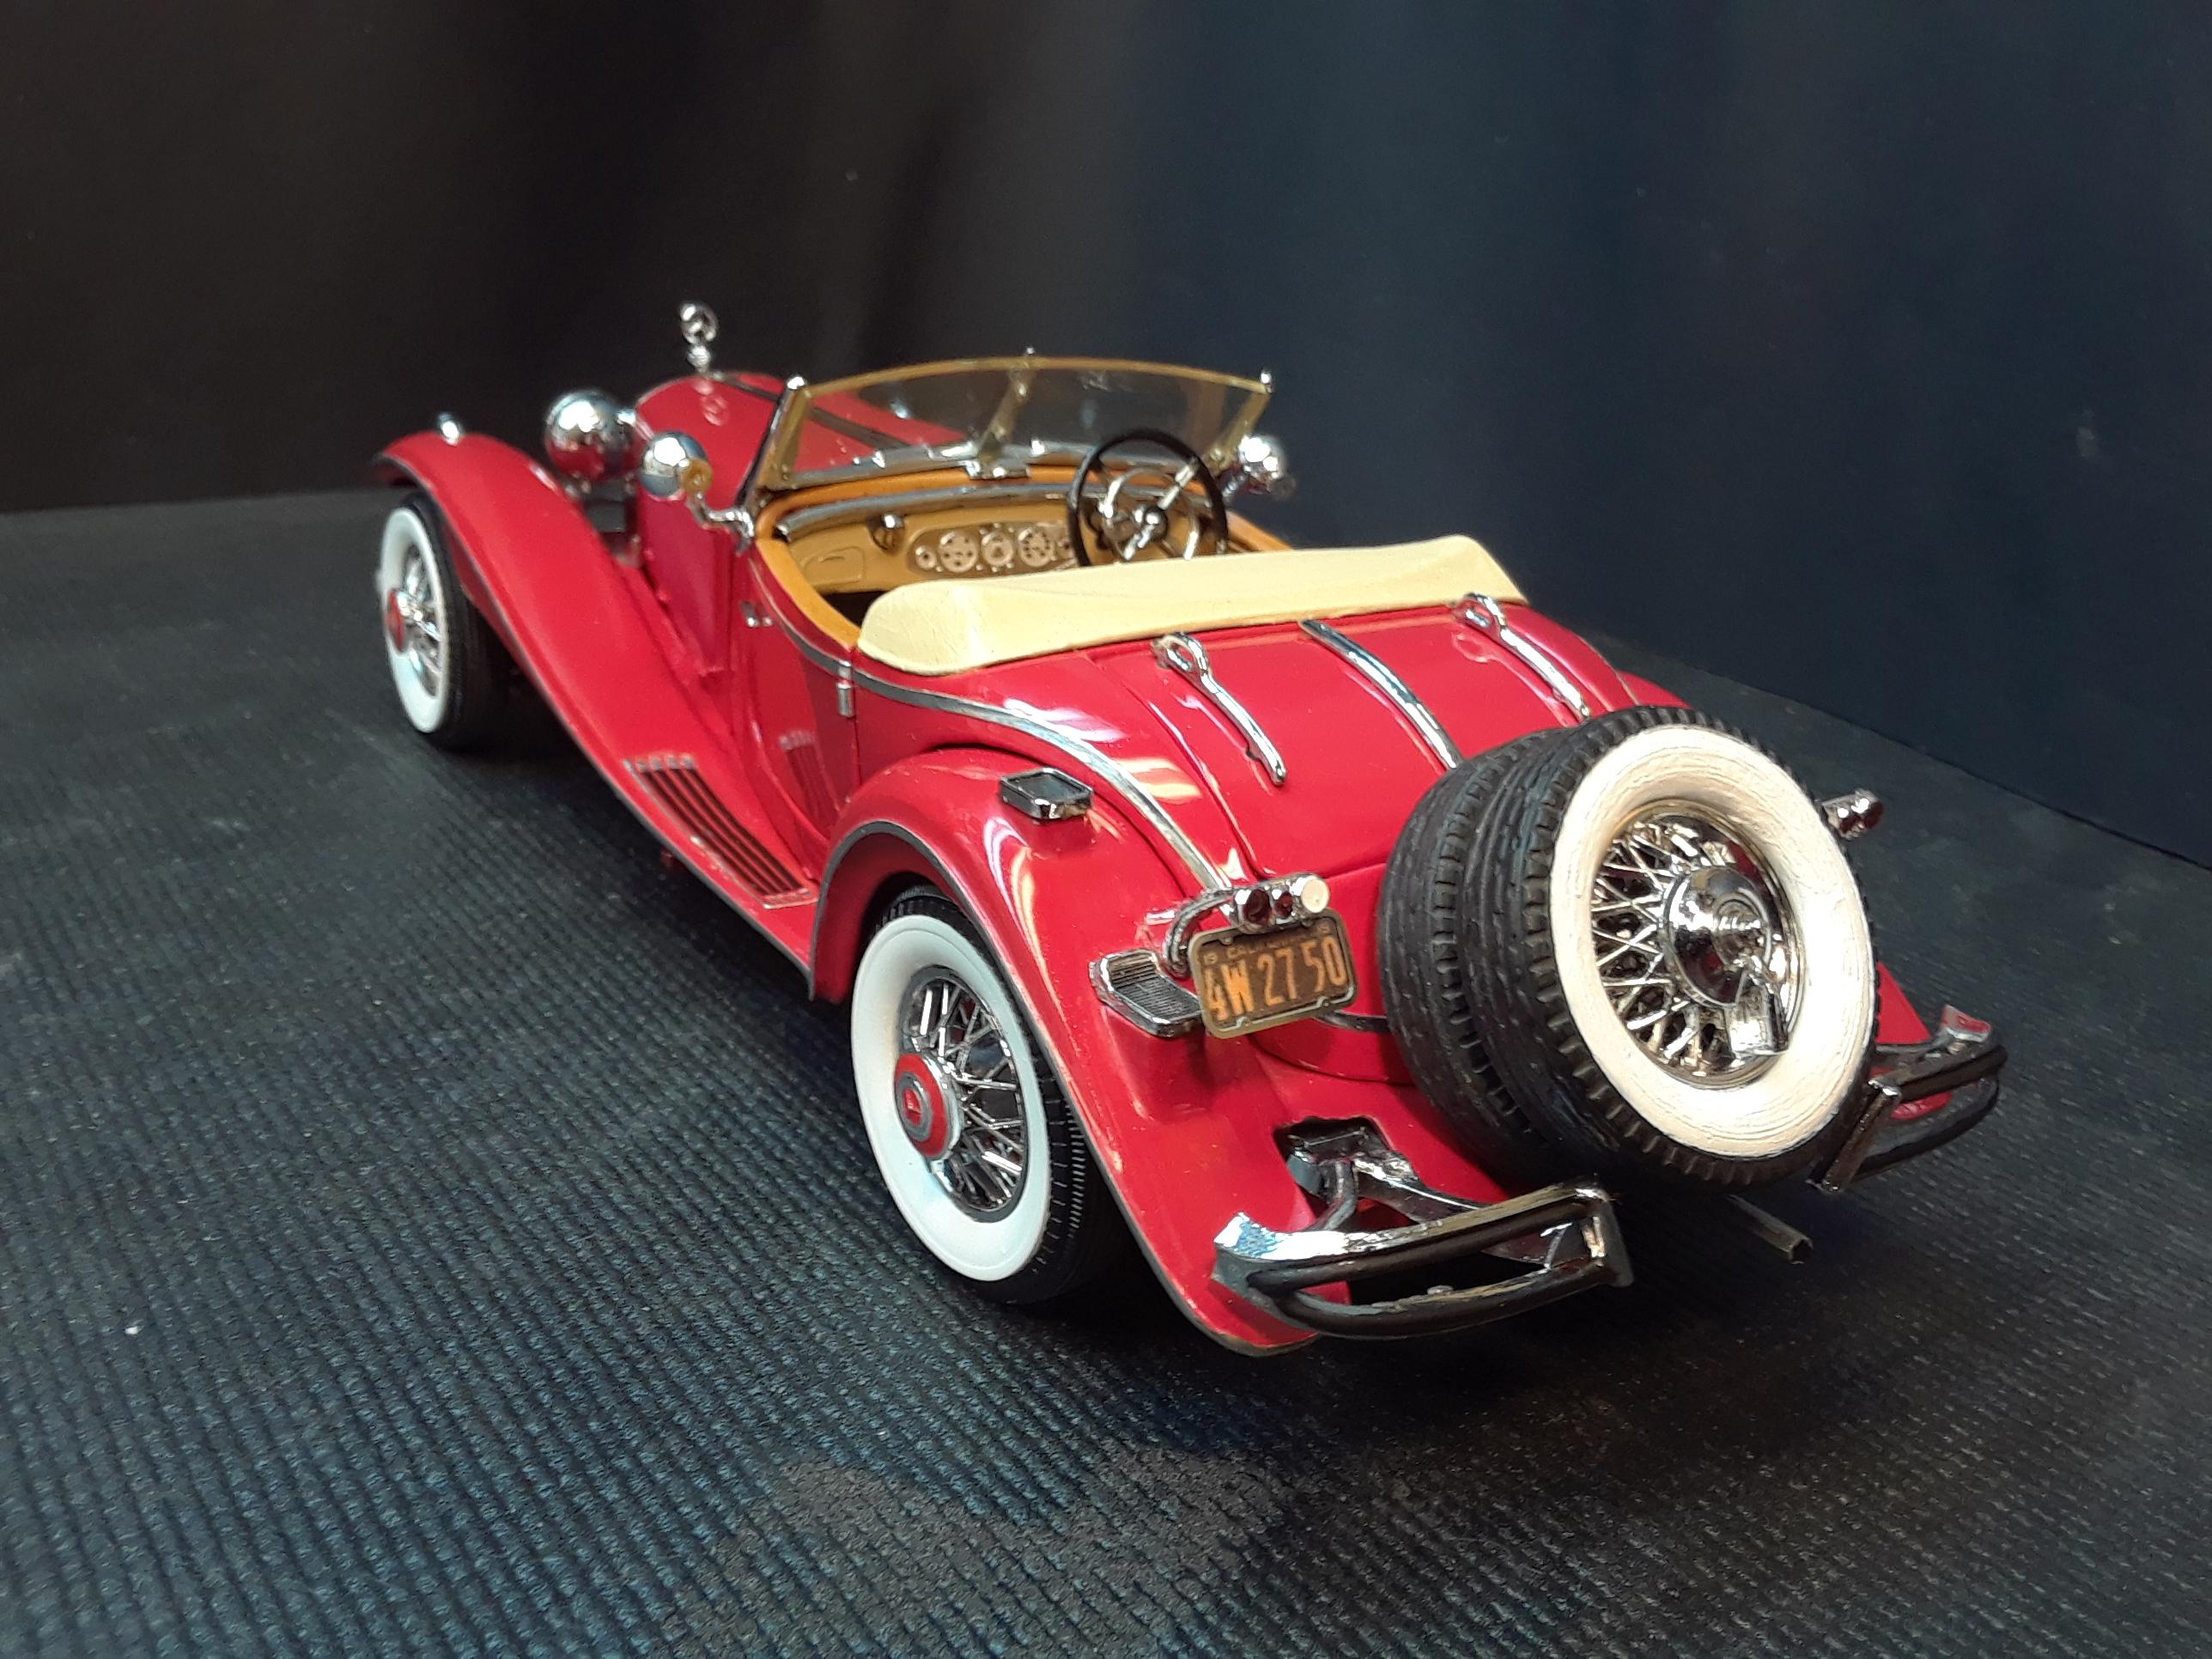
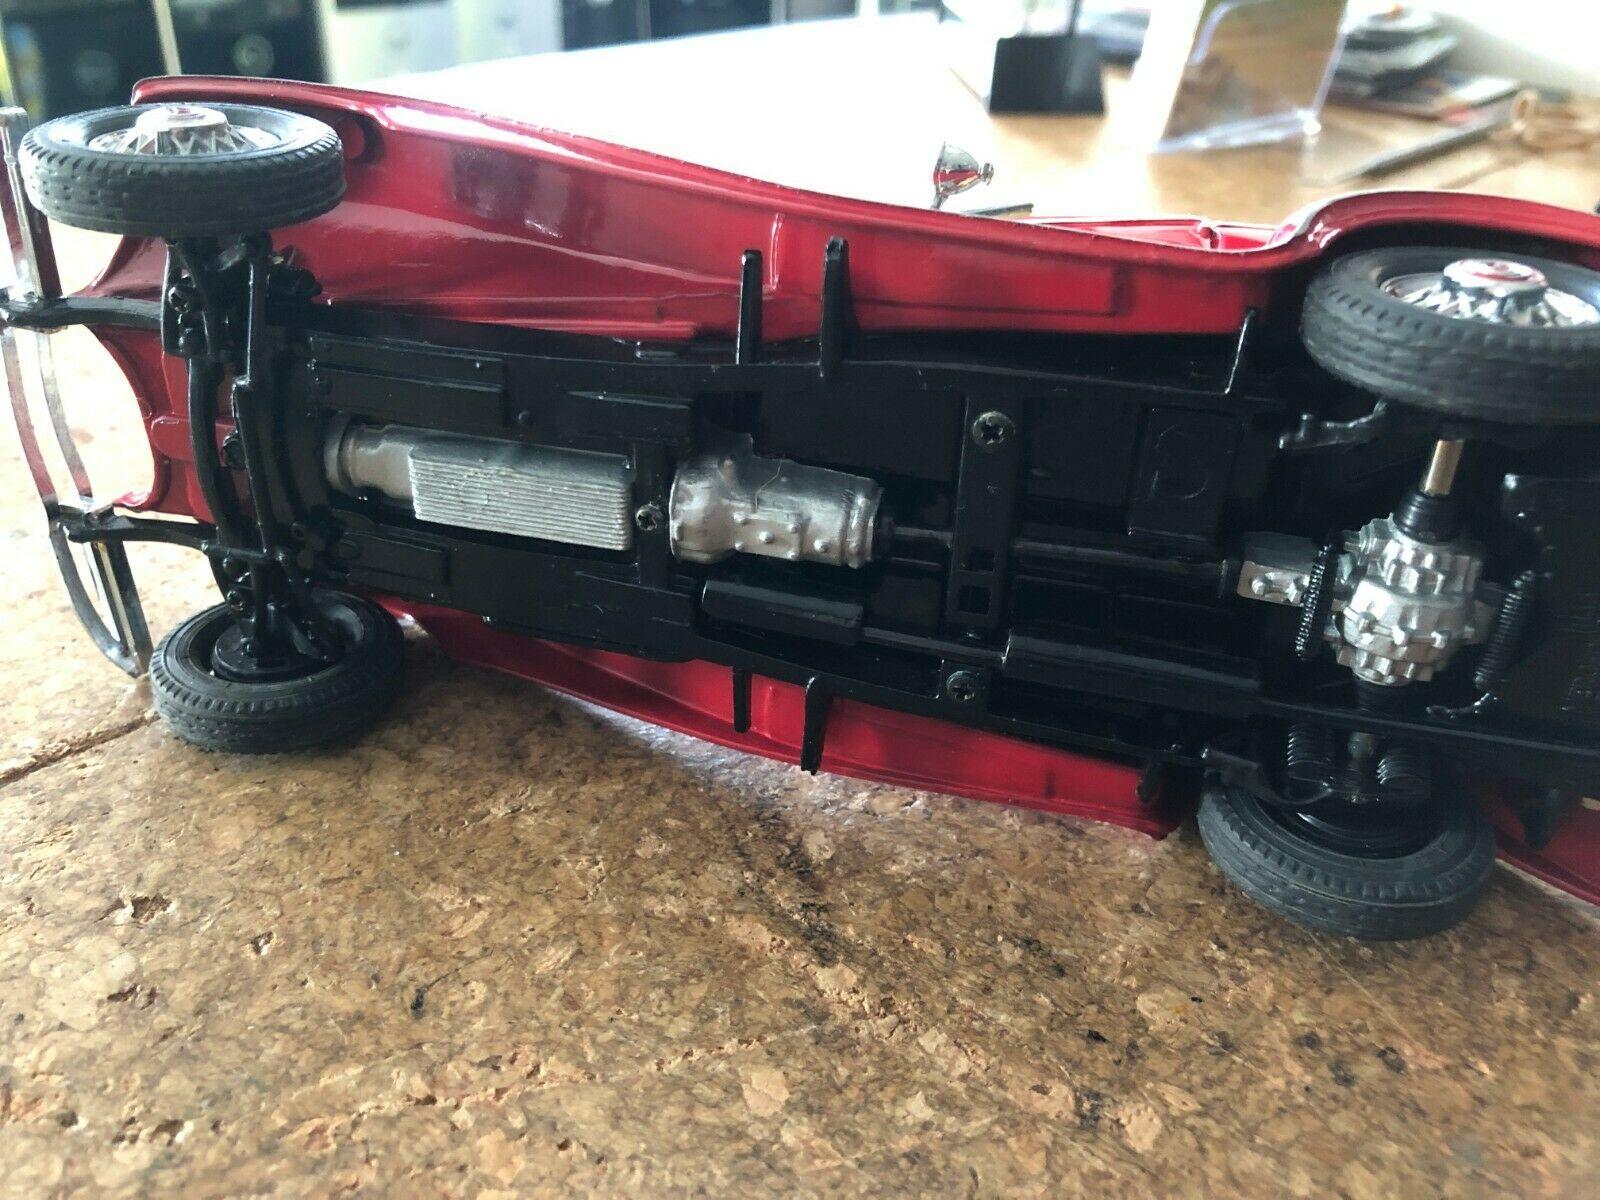
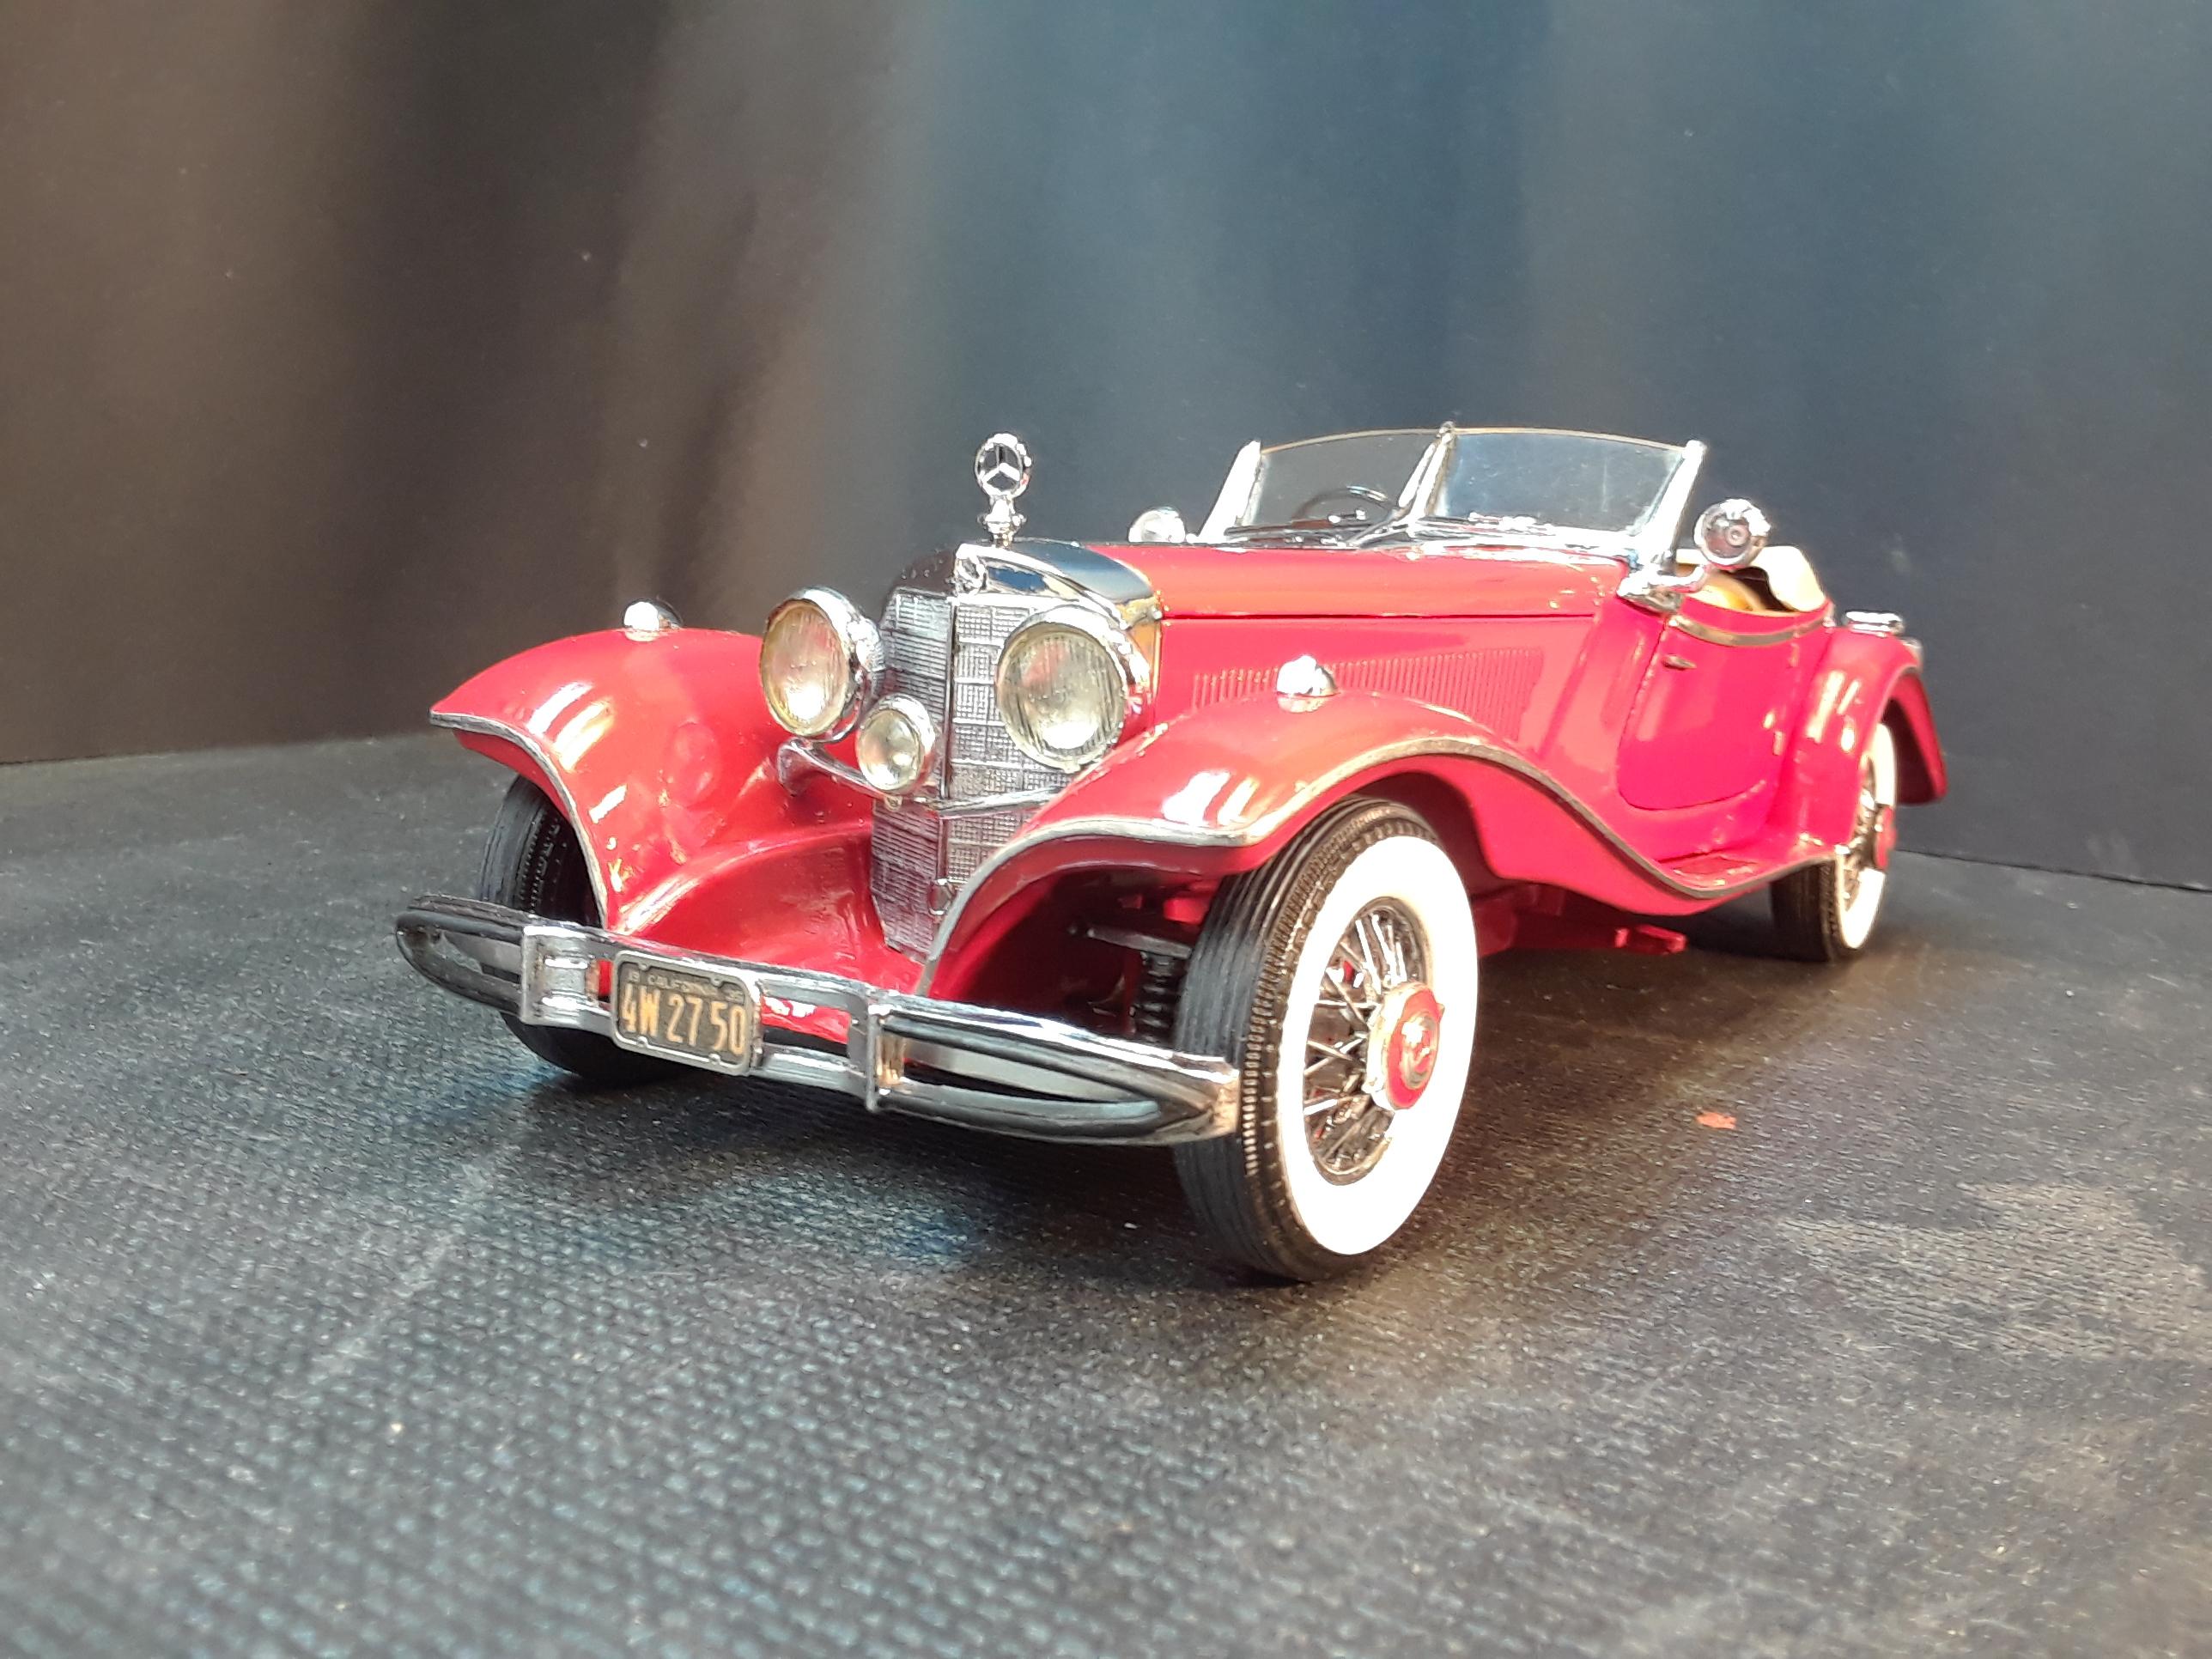
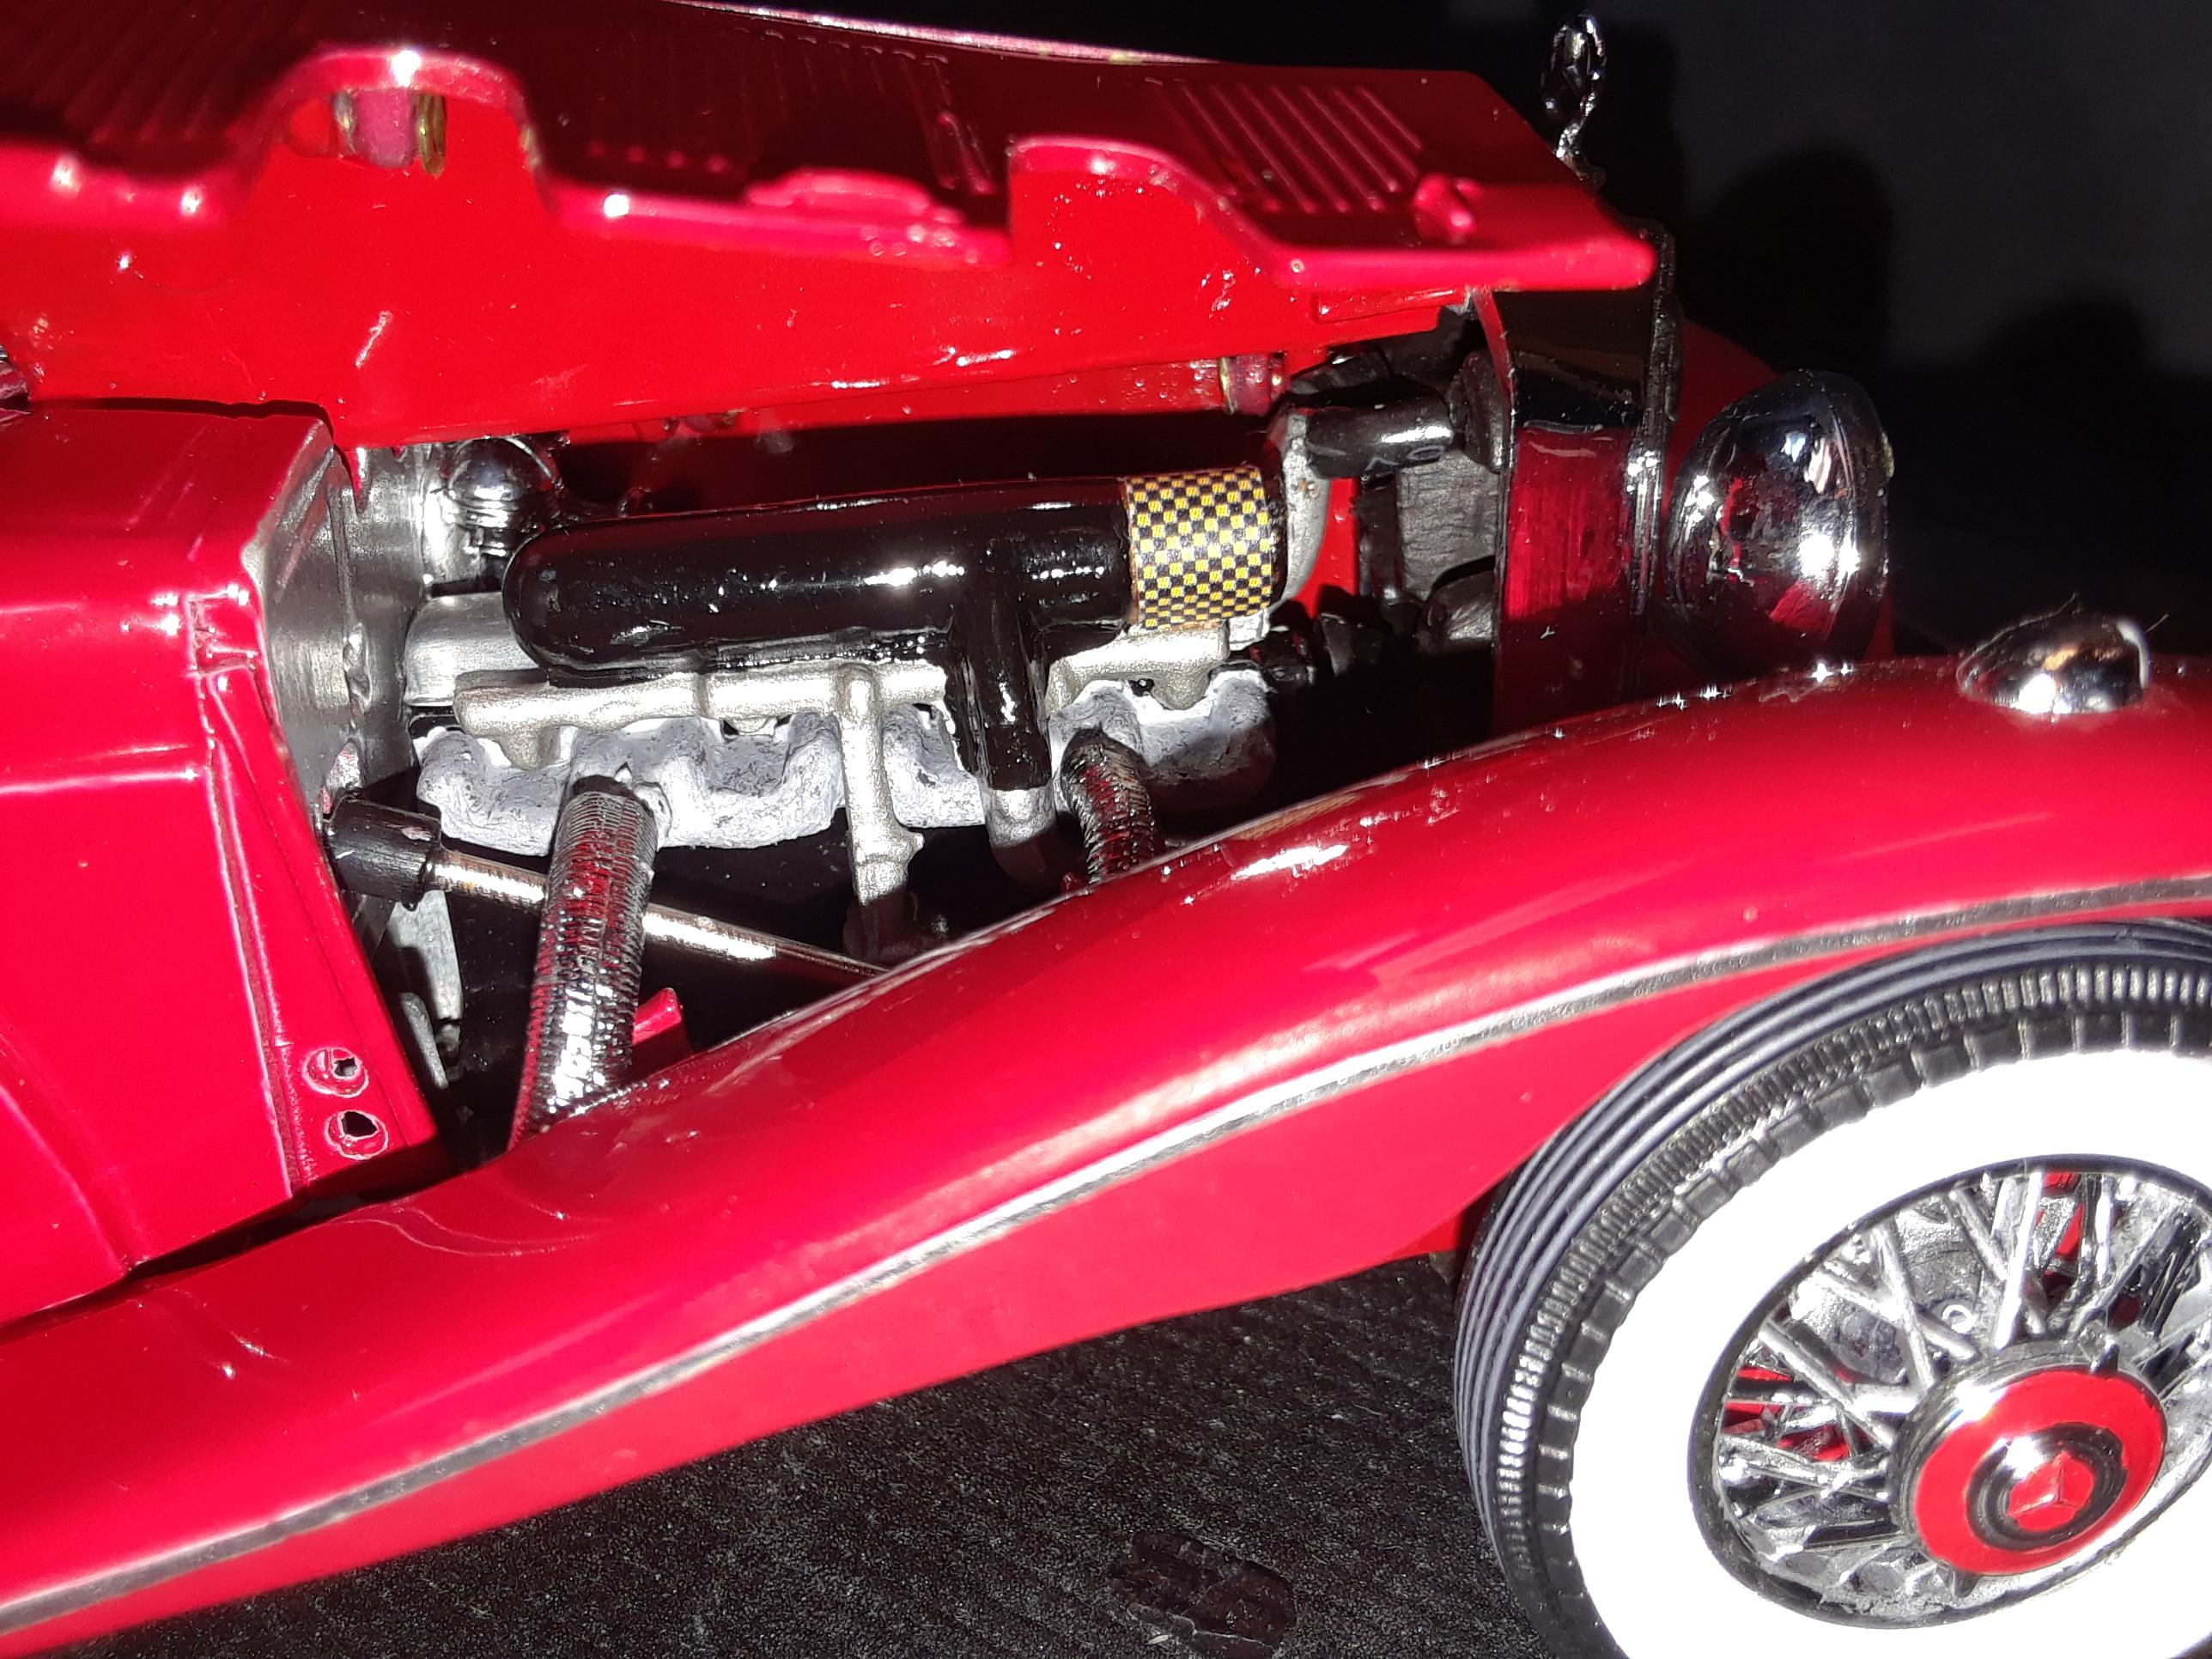
Randy, I like what you did with this. I finished doing more of the same. I thought the front end sat too high, track too wide, and wheels too far back. So, I grafted in front suspension from a Monogram 540K. I adapted the better FM steering linkage to that suspension. I did paint the spare tires white, like you, but I replaced the other four wheels with Monograms instead. I wanted to be able to see the red painted brake drums through the spokes. I used artist acrylic oils to repaint the interior. Mine was missing the top boot and one spot light, so I adapted pieces from the Johan 500K kit. Their tail lights are better, so used them too. The front bumper brackets on the FM diecast were too clunky and put the bumper hanging out too far, so I made replacements from aluminum strip and pulled the bumper in closer. The chassis on the full size car I was looking at was body matching red, so I did that too. See what you think.
-
Thank you guys, glad you like it! So, what you're looking at isn't so much a build as a rebuild, from humble beginnings; FM diecast. I needed a break from heavy body work on some other projects. Here's what I did with this one, just for fun: 1) Grafted in Monogram 540K front suspension to lower the front, moving the axle line slightly forward and narrowing the track a little bit in the process, so the wheels are where they should be in the fenders. 2. Replaced the FM wheels and tires with Monogram parts, cleaning up the spokes with Molotow chrome and painting the treads with gray acrylic craft paint. 3. Cleaned up the chassis, sanding off the FM advertising from the gas tank, repainted the chassis in red like the full size car, detail painted everything. The Monogram wheels are nice in letting the red brake drums show through. 4. Repainted the interior using artist acrylic oils to represent leather, instead of as-cast butter yellow plastic. 5. detail painted the engine compartment, added an air filter mesh. 6. Adapted a Johan top boot, replaced clunky FM spotlights and tail lights with delicate, more accurate Johan pieces. 7. The front bumper sat way too far forward, so I cut off the bumper brackets and made thinner, more realistic brackets from aluminum strip, and pulled the bumper in closer to the front tires, like the full size car. 8. Printed up some 1935 California license plates and called it good.
-
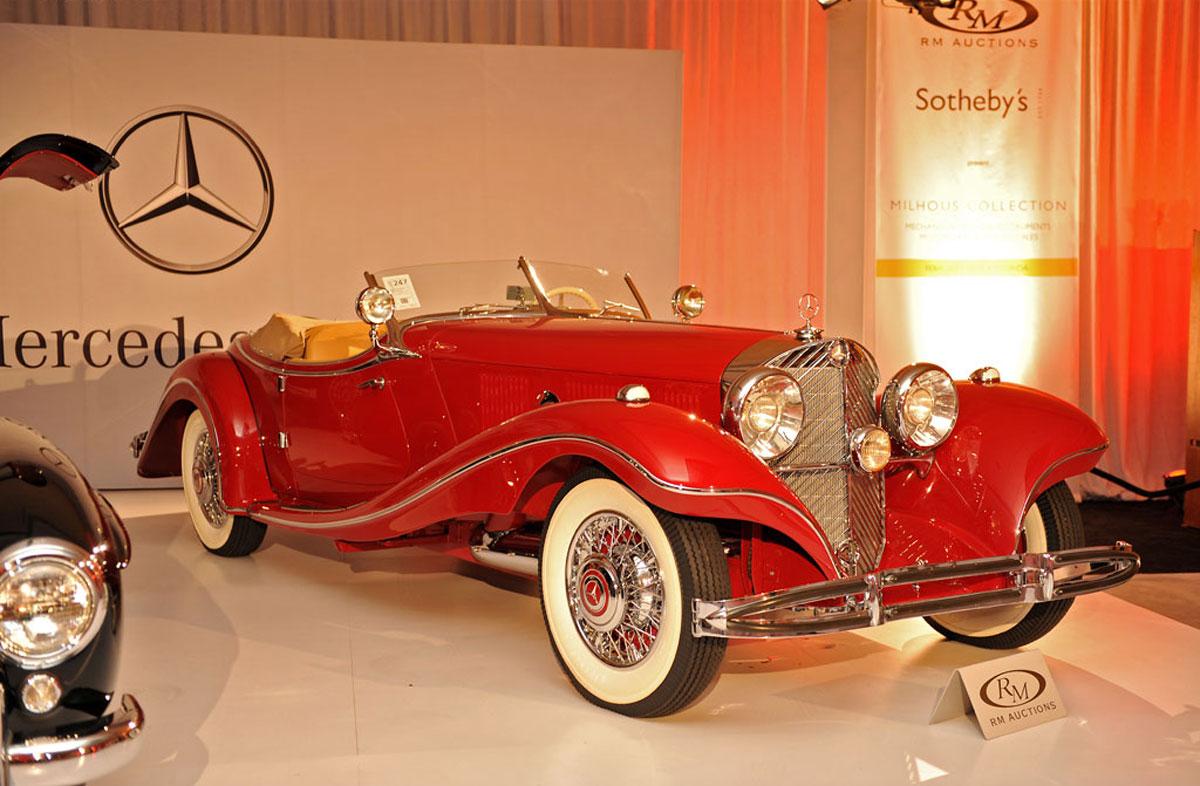
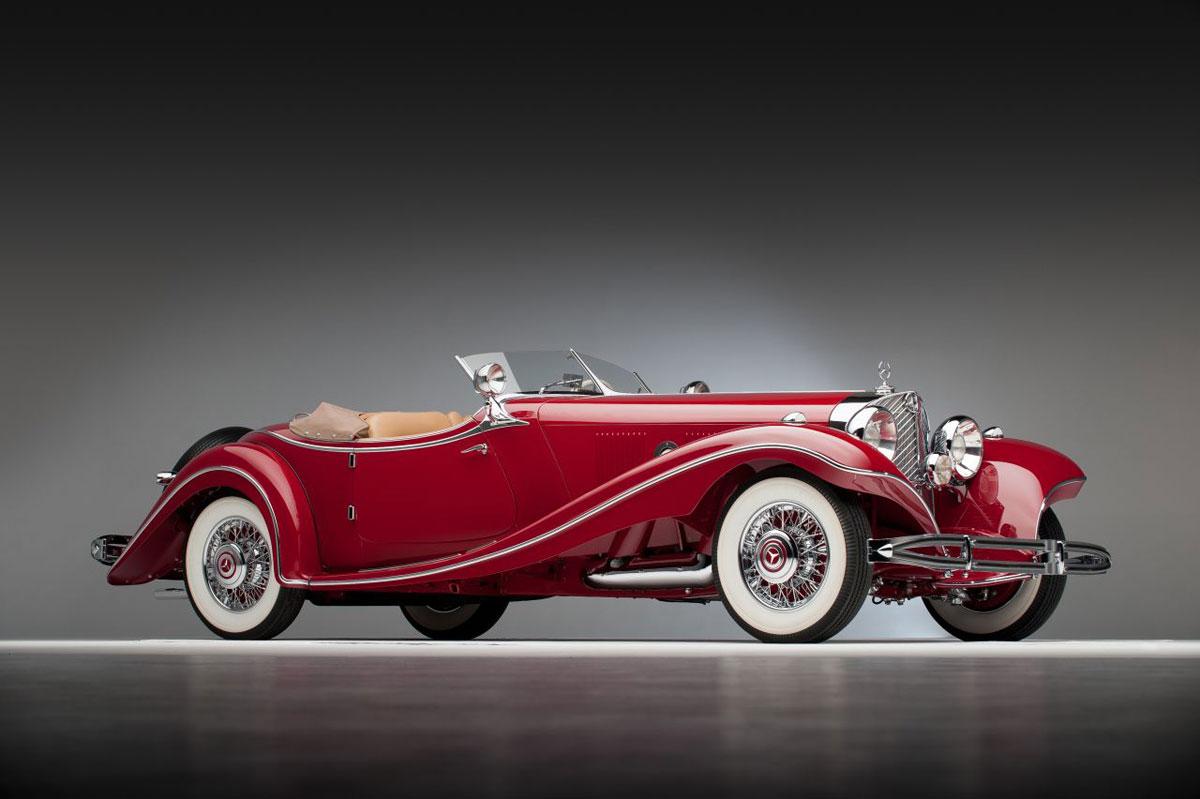
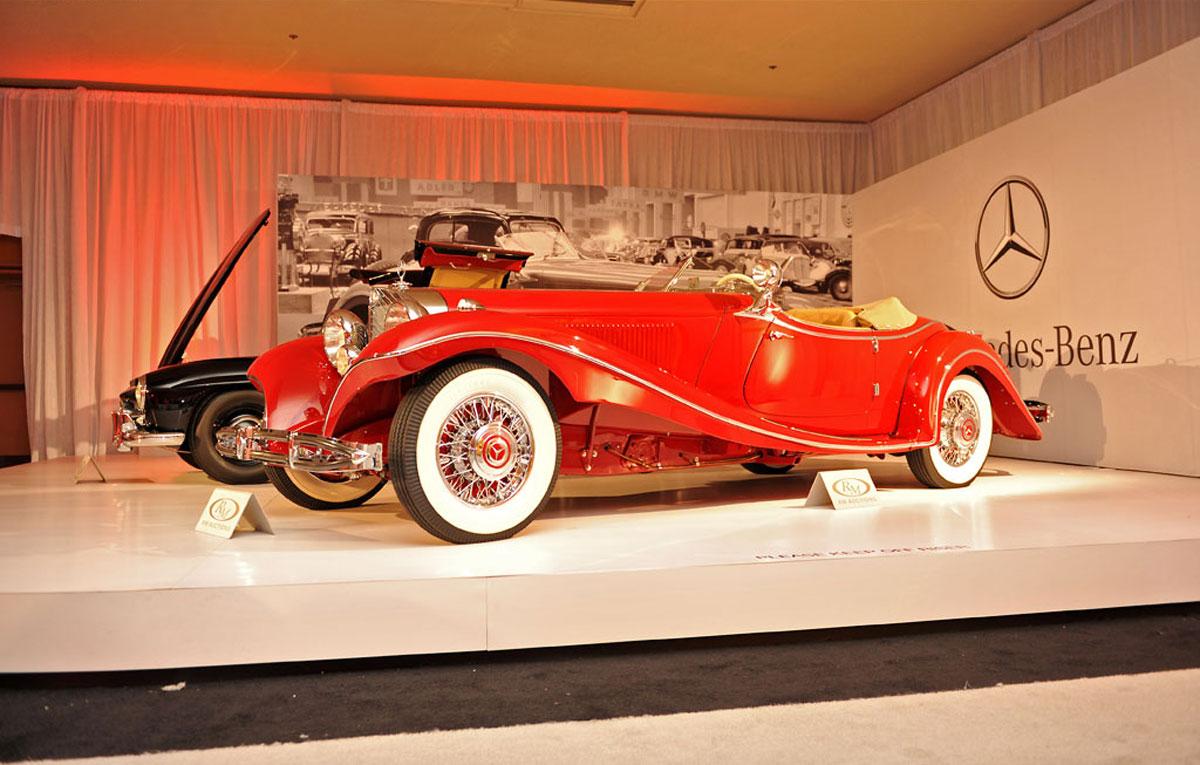
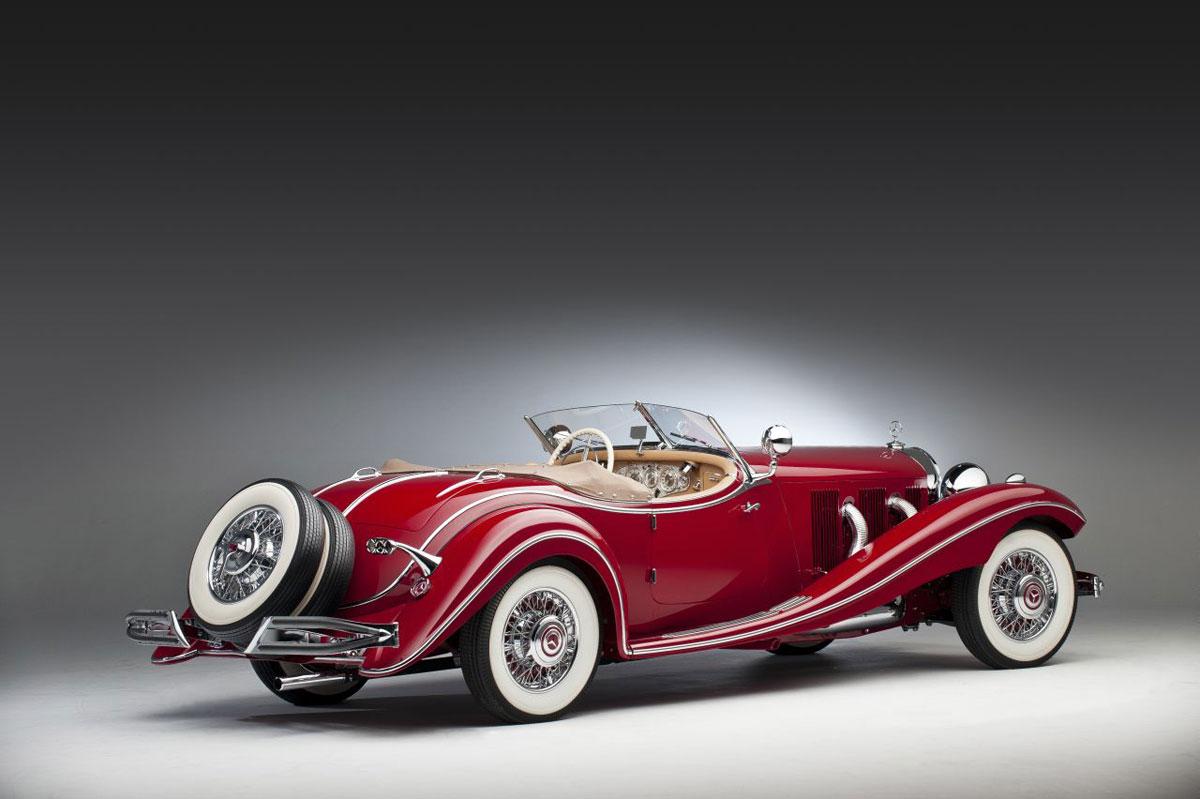
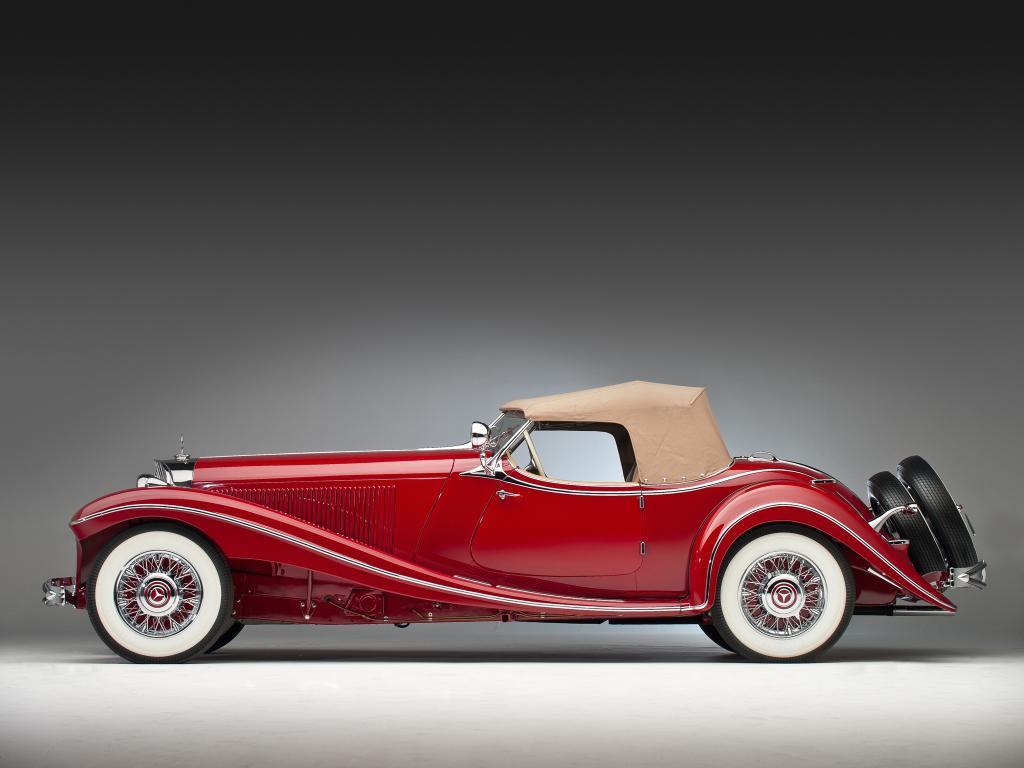
1935 Mercedes-Benz 500K Special Roadster, full size car for inspiration...
-
This is a simple Franklin Mint rebuild, enhanced with kit parts. I needed a break and slump buster from heavy body work on some other projects. Taking inspiration from one of the perfectly restored full size cars, I changed some things on the model to make it more accurate. 1. Grafted in Monogram 540K front suspension to lower the front, moving the axle line slightly forward and narrowing the track a little bit. 2. Replaced the FM wheels and tires with Monogram parts. 3. Cleaned up the chassis, sanding off the FM advertising from the gas tank, repainted the chassis in red, detail painted everything. 4. Repainted the interior using artist acrylic oils to represent leather, instead of as-cast butter yellow plastic. 5. detail painted the engine compartment, added an air filter mesh. 6. Adapted a Johan top boot, replaced clunky FM spotlights and tail lights with delicate, more accurate Johan pieces. 7. Printed up some 1935 California license plates and called it good.
-
John, you gotta check this out!
-
Another One From The Archives: "Big Fat Fannie"....
Hoffman replied to NitroMarty's topic in Drag Racing
Very cool, Marty! -TIM- -
'29 Ford pickup street rod
Hoffman replied to Can-Con's topic in Model Trucks: Pickups, Vans, SUVs, Light Commercial
Great job! Very clean build. The engine looks great. Love the plug wire boots on the plugs and distributor. They really make it look like 1-1. -TIM- -
Ford T 1914 Firetruck
Hoffman replied to harti20's topic in Model Trucks: Pickups, Vans, SUVs, Light Commercial
Urs, your work is fantastic! The upholstered seat and shoe-string fire hose are great additions, very authentic looking. Your weathering is phenomenal. Great job! -TIM- -
1969 Charger R/T SE in factory code T5 Copper Metallic
Hoffman replied to tim boyd's topic in Model Cars
Excellent!! I really like the accurate engine compartment details, and the chassis. The over spray on the floor pan looks very convincing. Plus, it just reminds what a cool looking car the 68/69 Chargers are. -
Tim, you are so cool!! Thank you, Sir! ? Michael, your pickup is looking great! Looking forward to the next installment. Loving this thread too, as Tim Boyd's work has been an inspiration to so many of us over the years. I always liked the apple-green '29 RPU really well, one of my favorites.
-
Agreed, that Buttera suspension is great, and the Revell scale version has found it's way under many, many models over the years, no doubt.....